HOLIDAY DONATION DRIVE - SUPPORT MSW - DO YOUR PART TO KEEP THIS GREAT FORUM GOING! (Only 72 donations so far out of 49,000 members - Can we at least get 100? C'mon guys!)
×


Bryan Woods
-
Posts
551 -
Joined
-
Last visited
Content Type
Profiles
Forums
Gallery
Events
Everything posted by Bryan Woods
-
 Keel glued, not much there to clamp. Here’s what I came up with. For all the on lookers if you see something I’m doing that may slow, hinder or produce unsightly results:-) please comment and bring it to my attention. I claim to know little, but desire to learn much:-) Thanks for the help and encouragement:-)
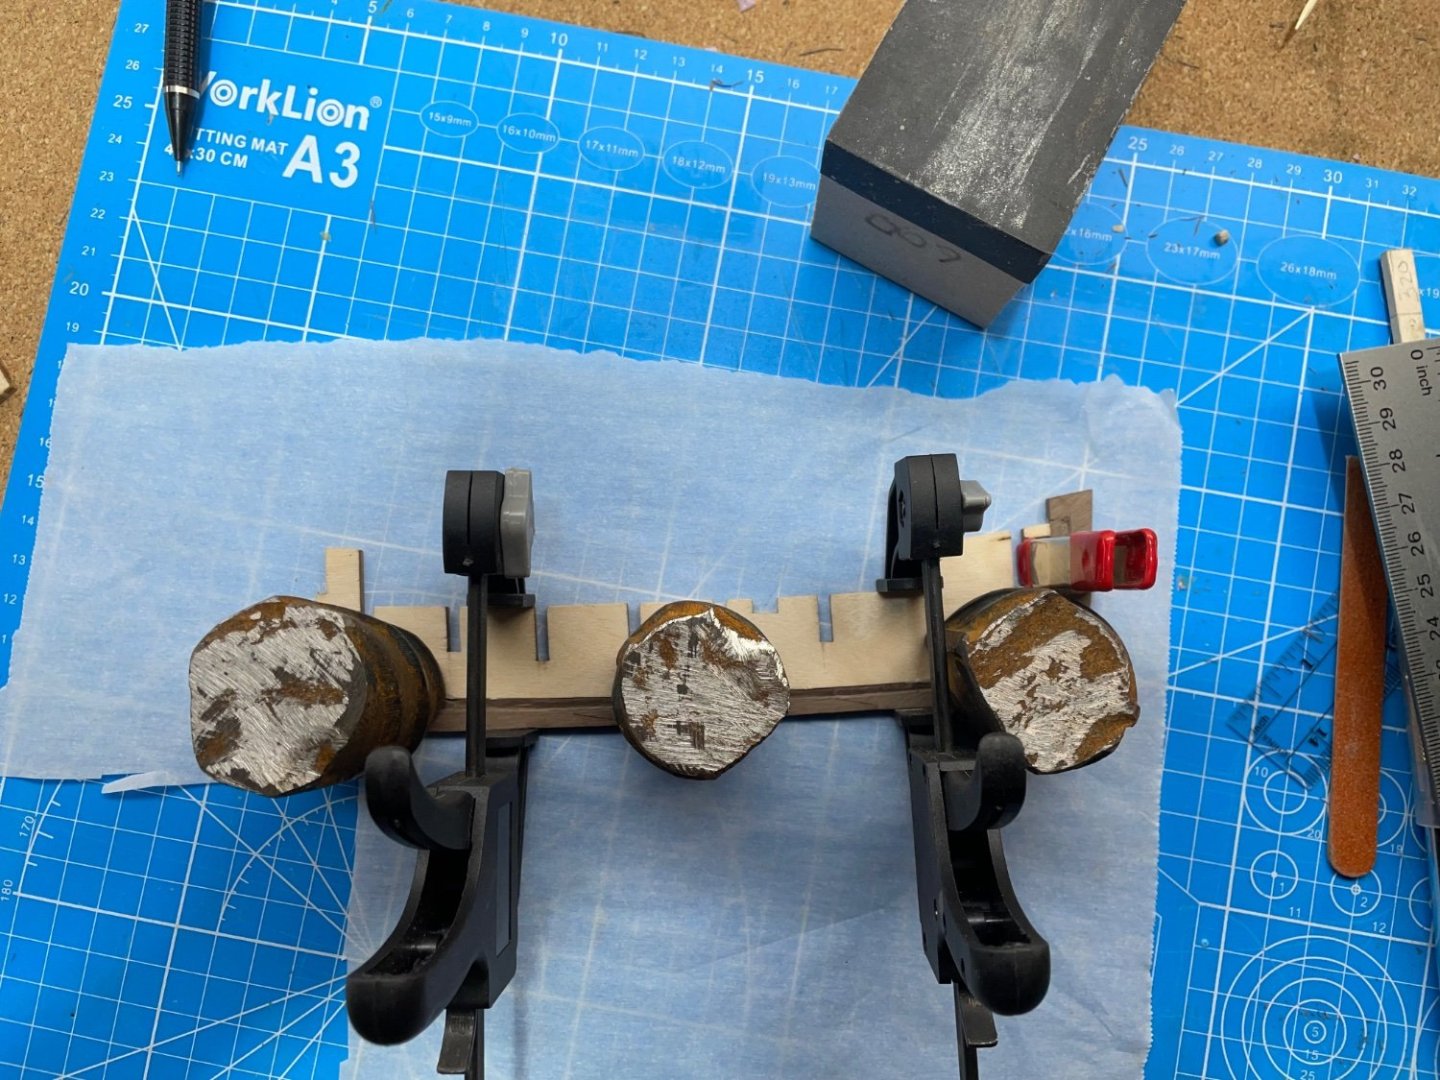
-
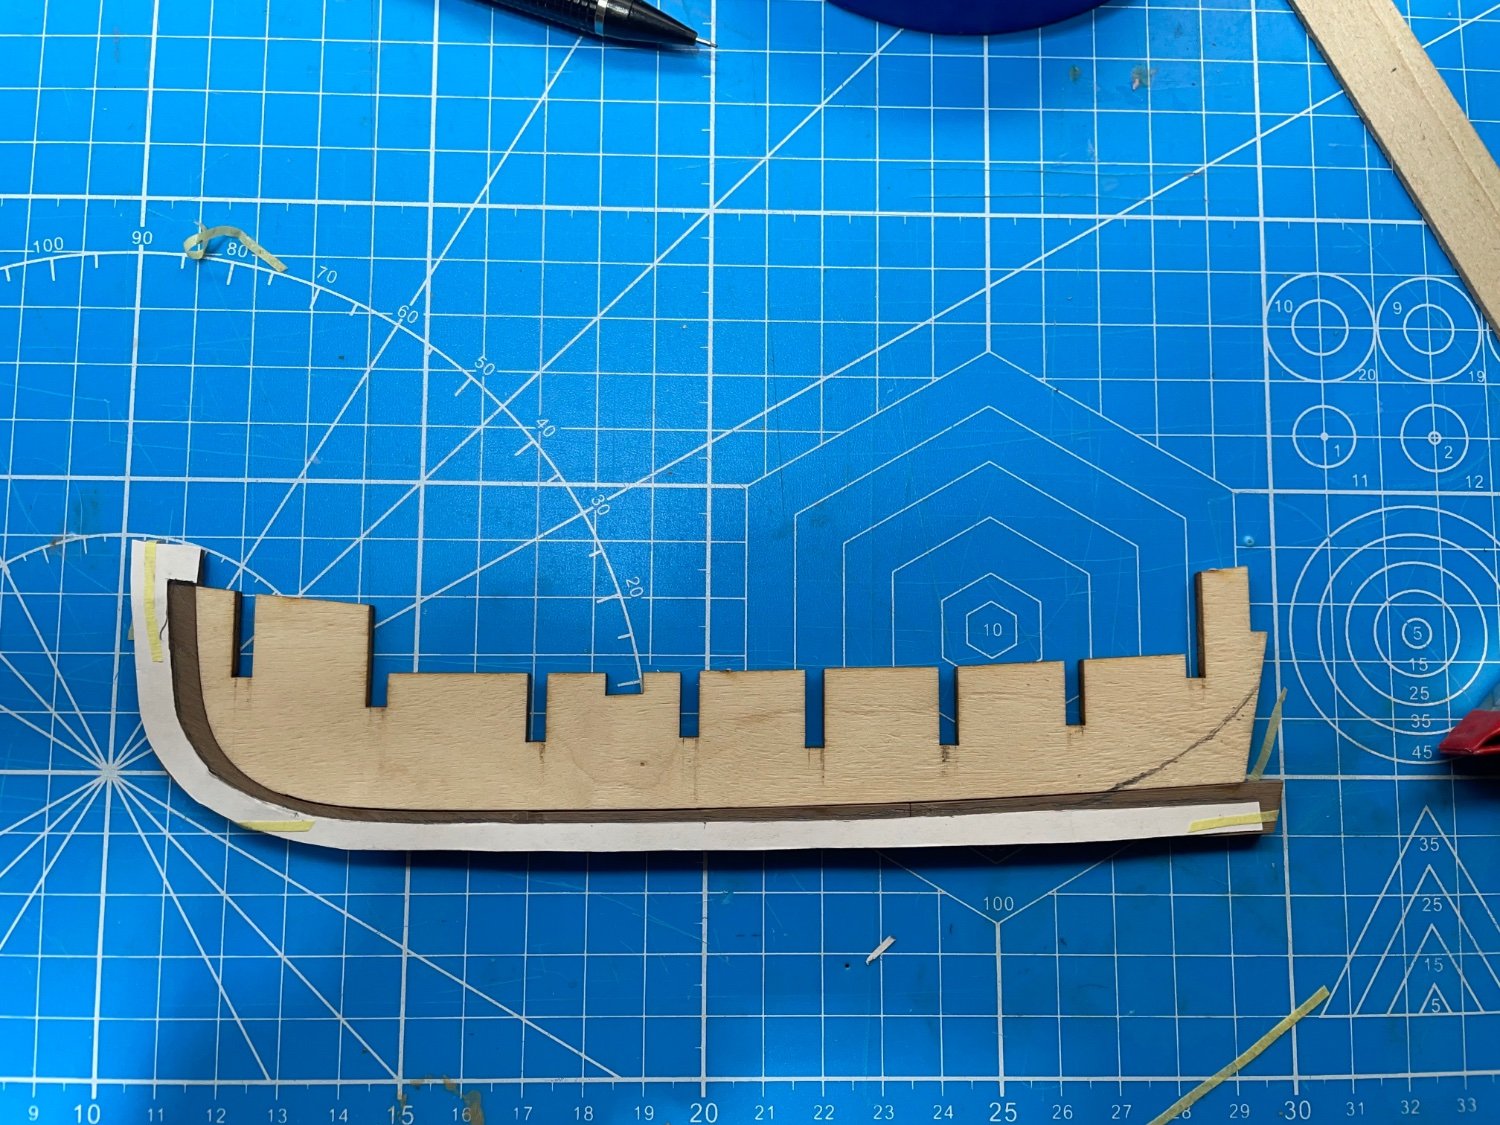
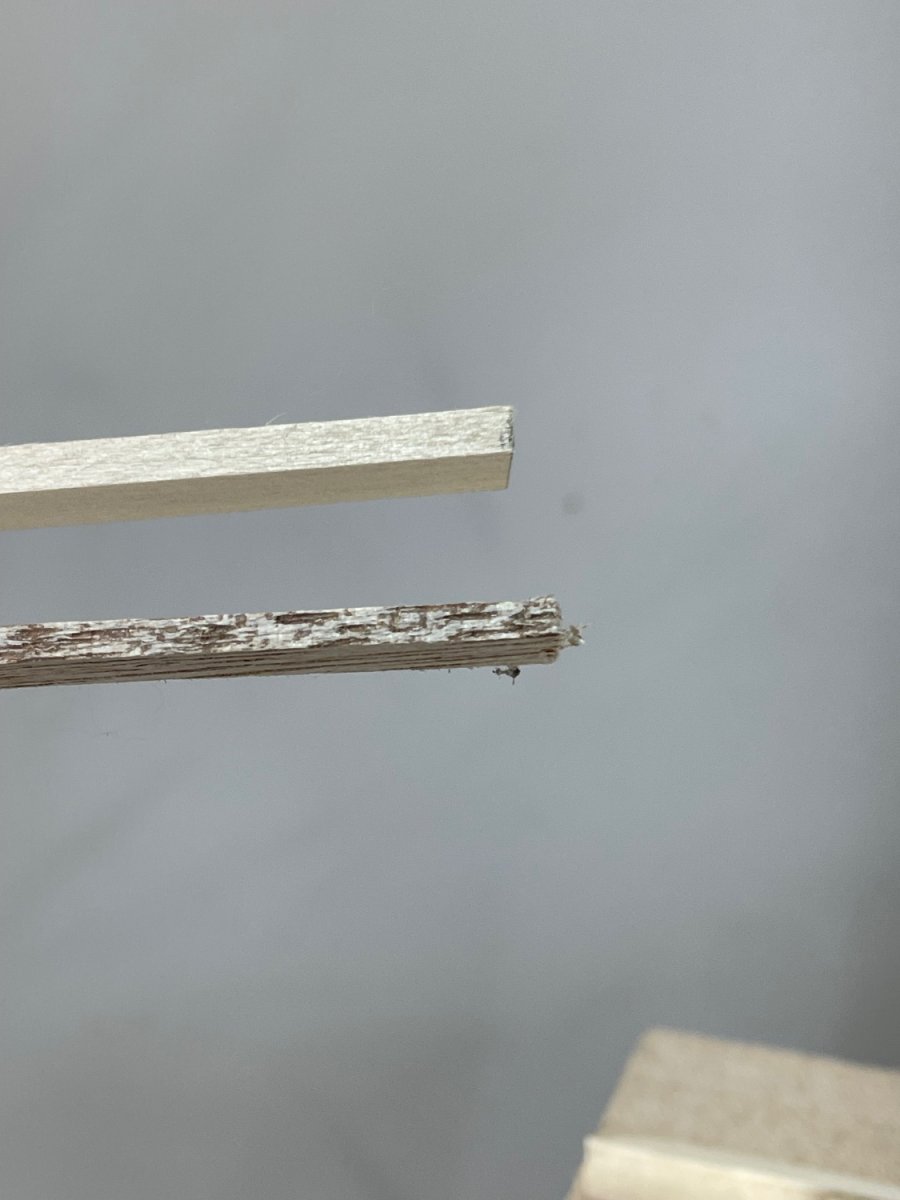
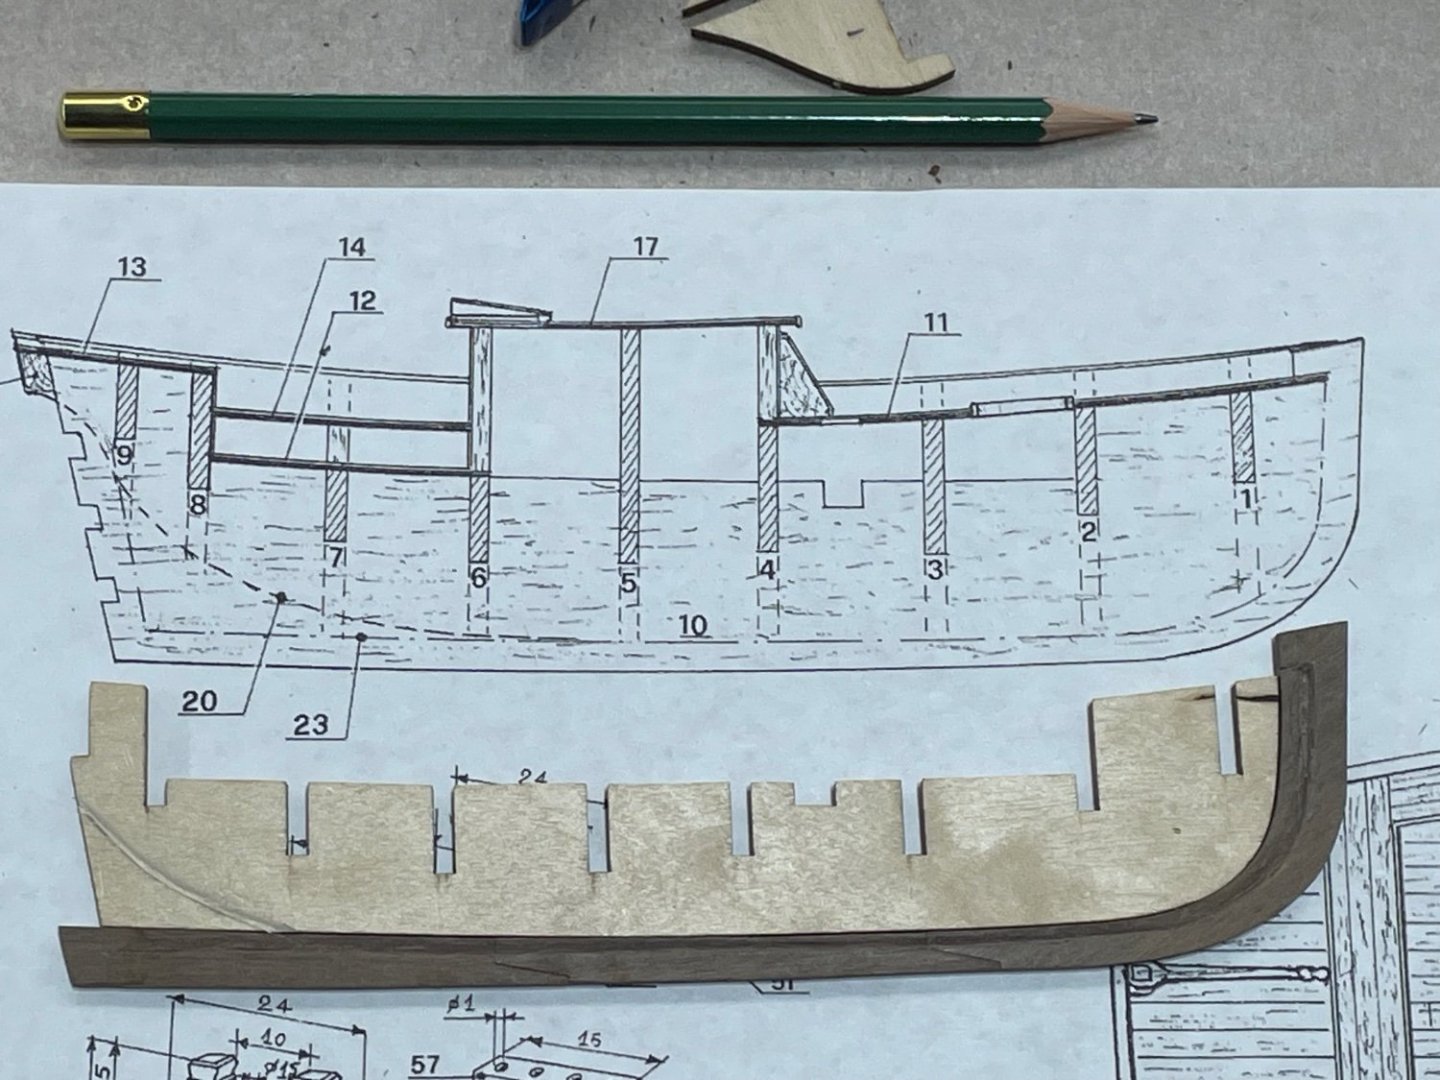
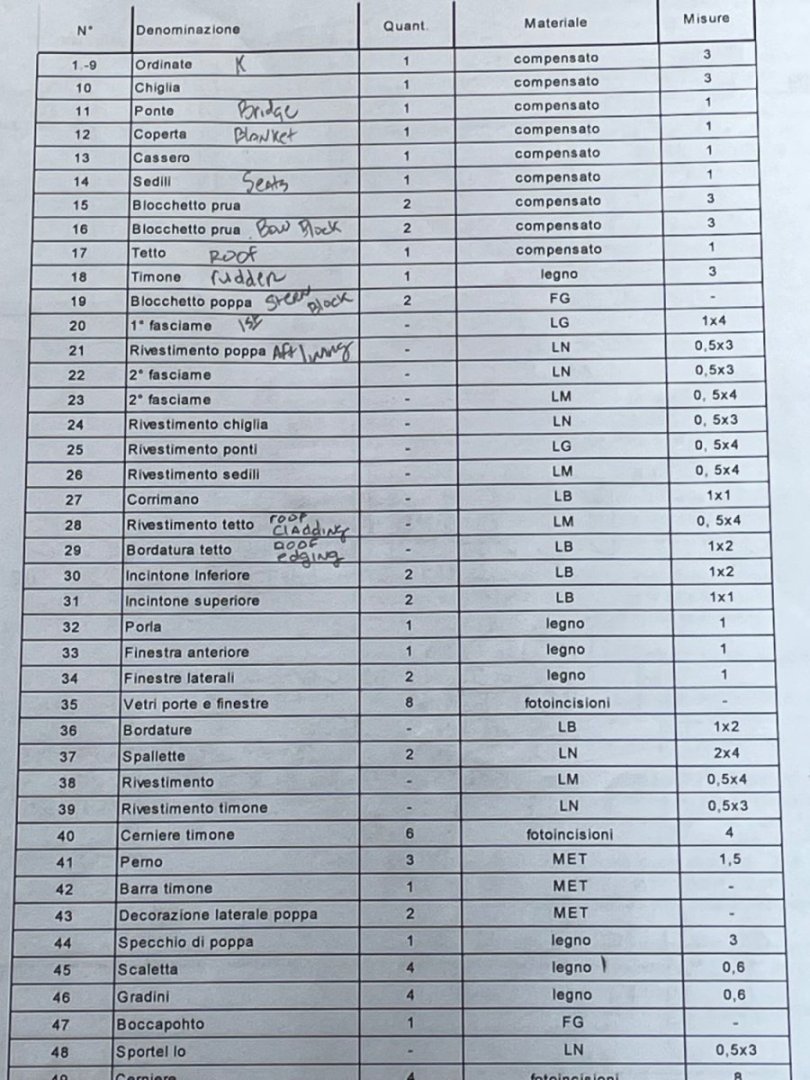
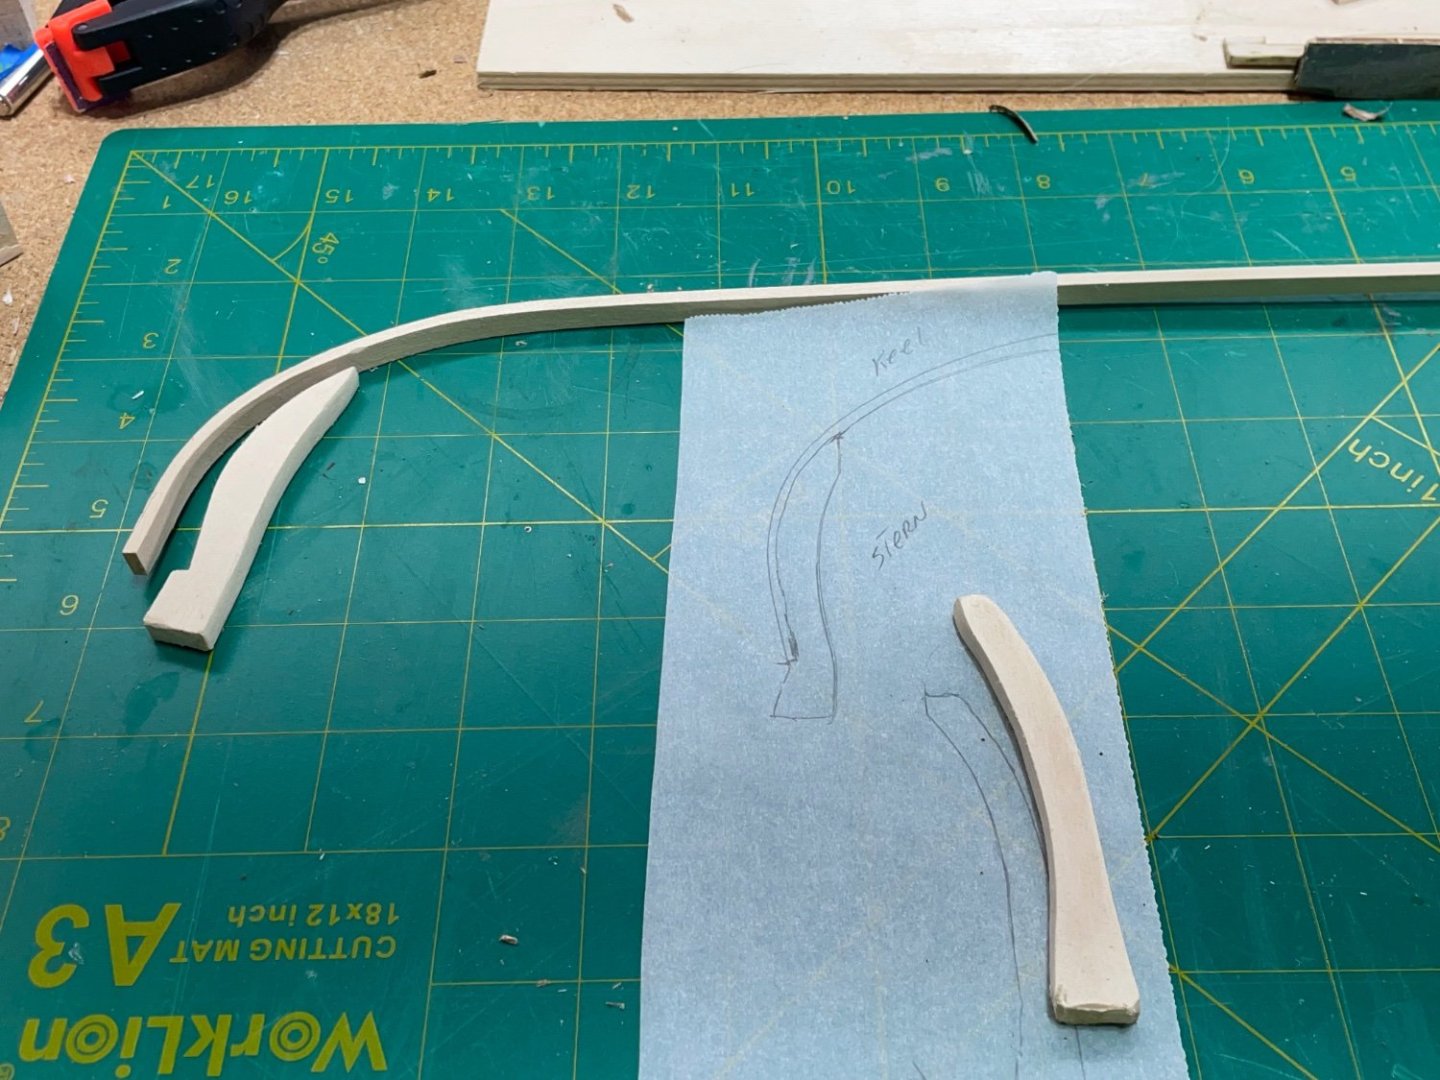
I finished cutting in the gains on the keel. This build, has me thinking like a chess player. Trying to look ahead 3 or 4 steps to prepare. I hope I don’t wear out the wood putting it together, only to take it back apart. I’m thinking next will be to glue the keel. Then more putting together and taking apart. I do have a spear time project. I need to translate the Italian parts list to English, so I can see where all the different kinds of timber are supposed to go.
-
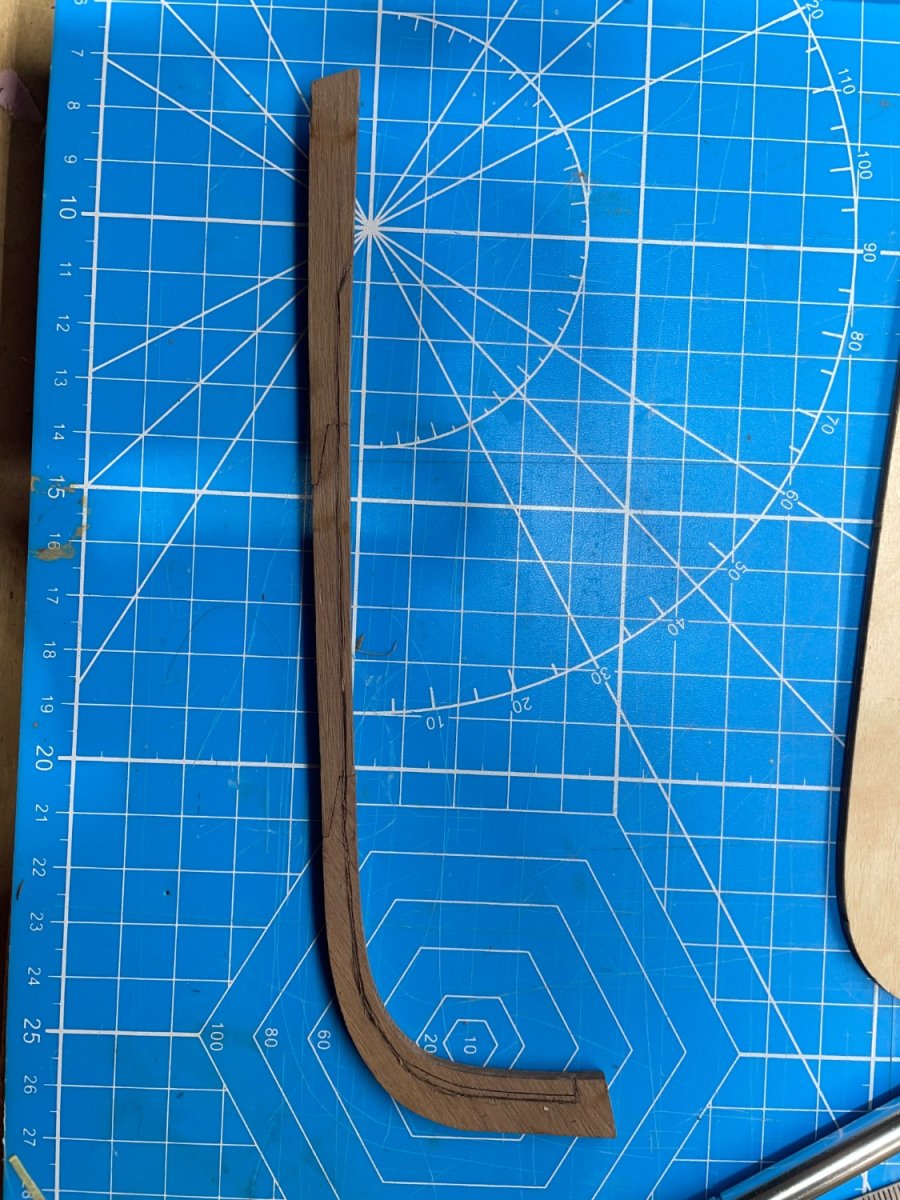
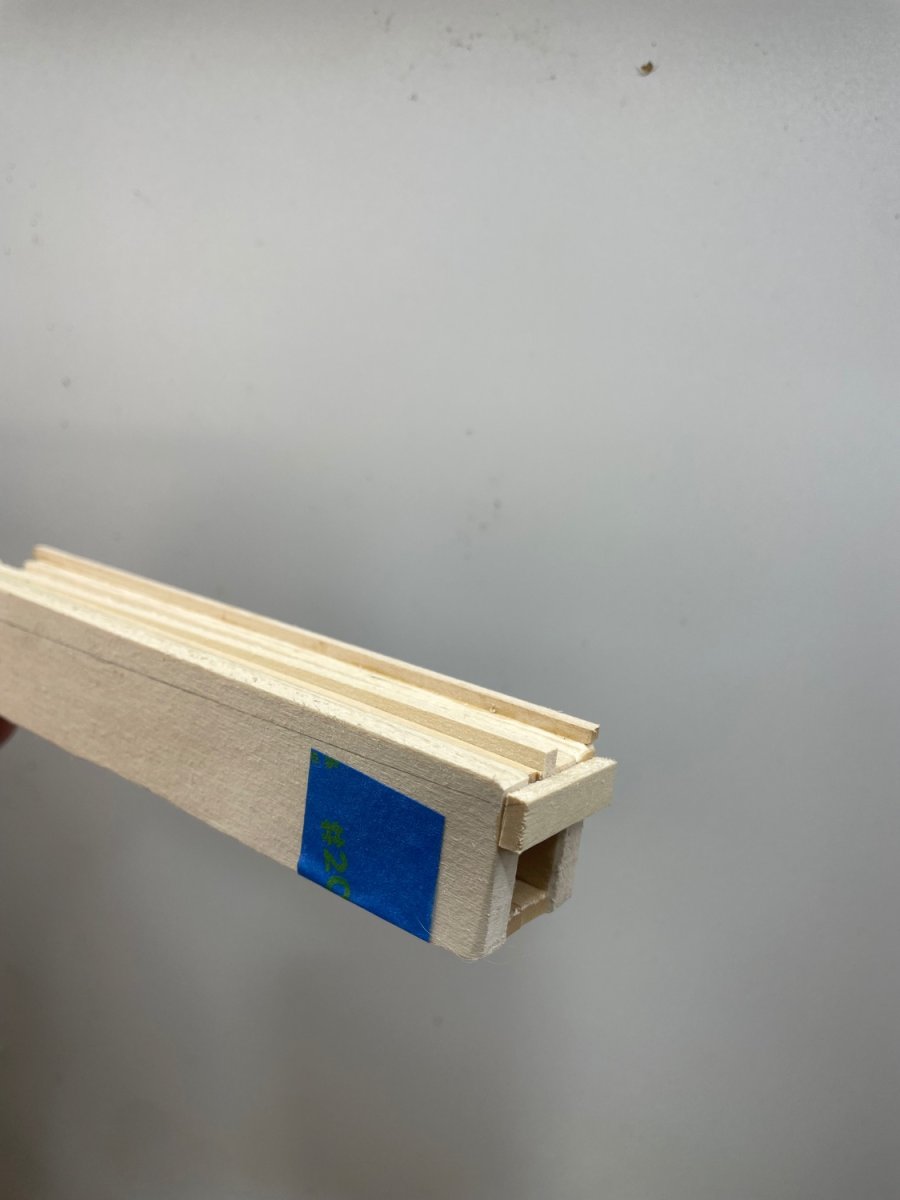
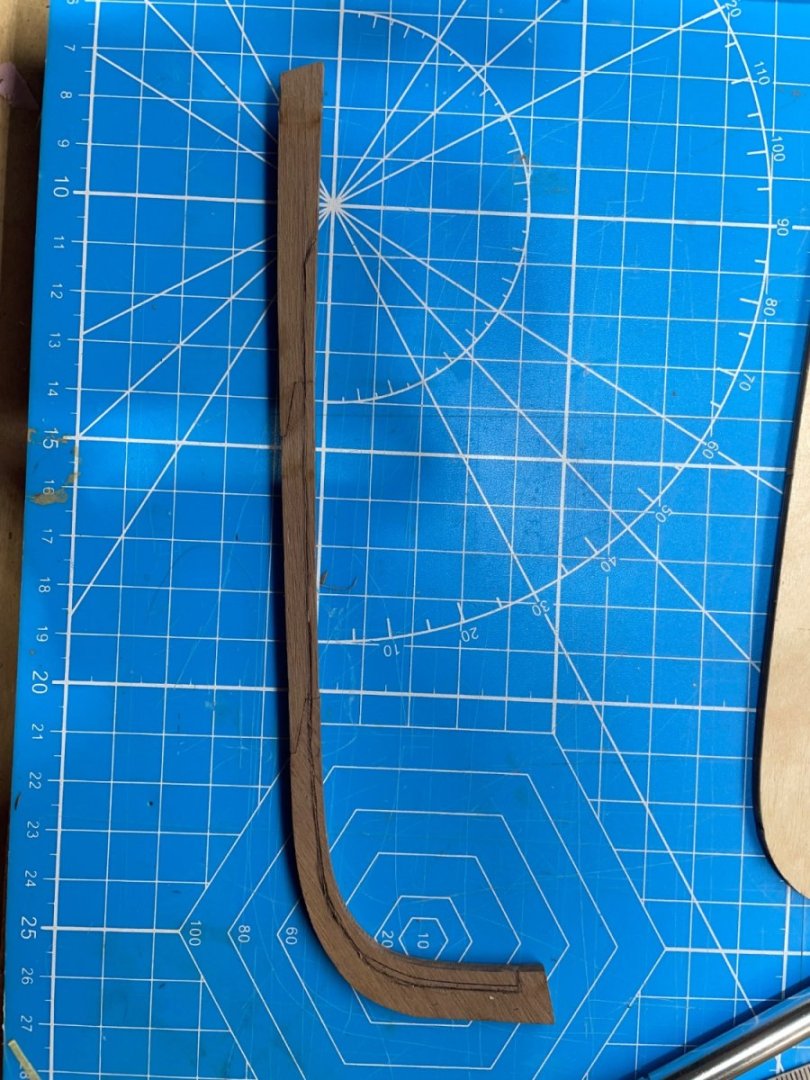
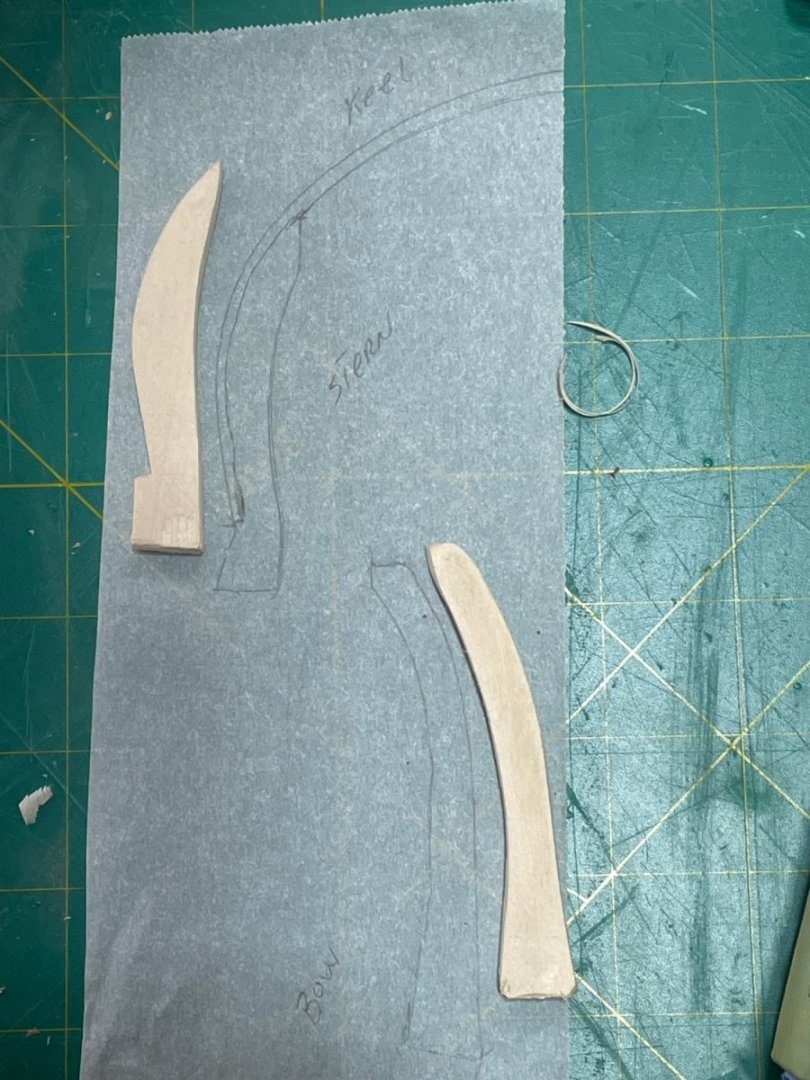
I glued the keel together then overlaid it with a template for the gain on the keel. So far I haven’t got the nerve up to cut it out 🙂 but I did scribe it.

-
Wow, what a great job! And a first build!👏
-
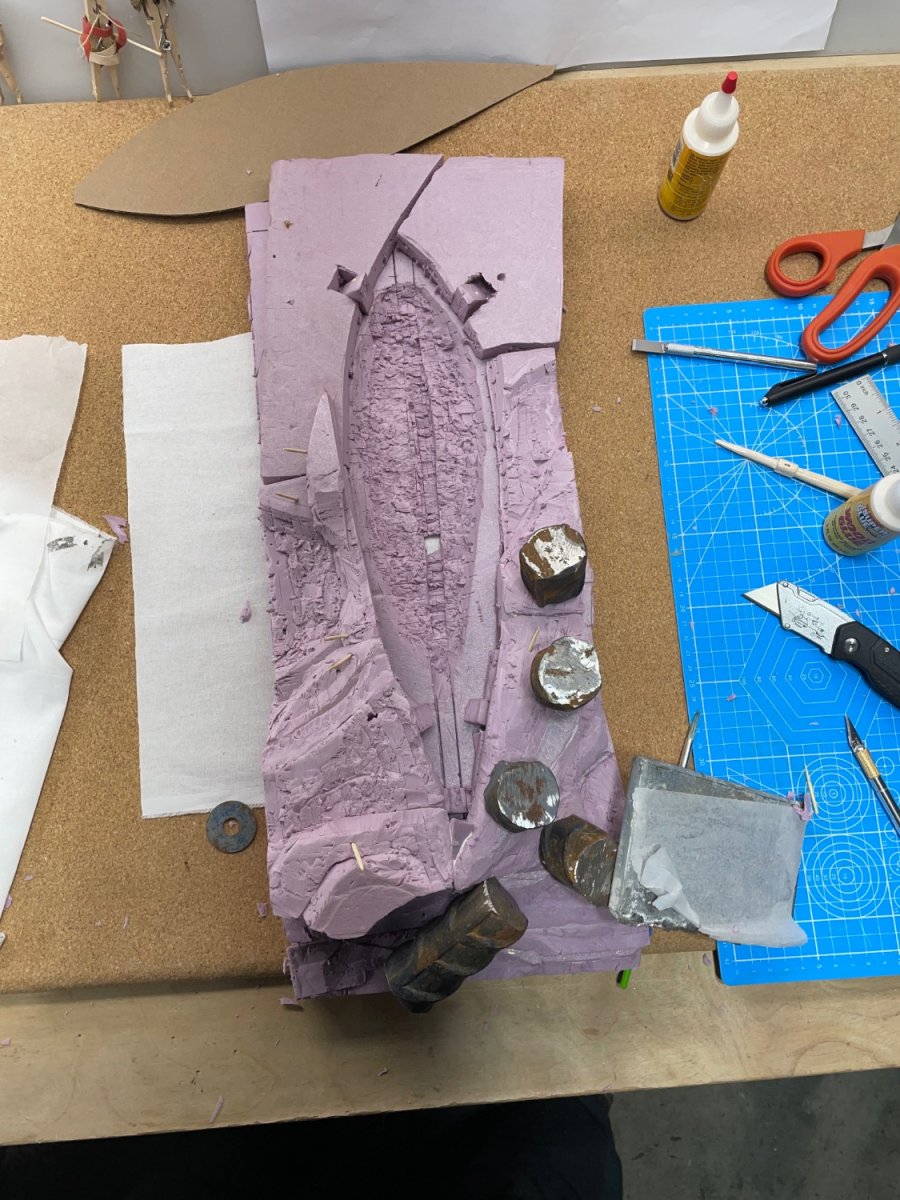
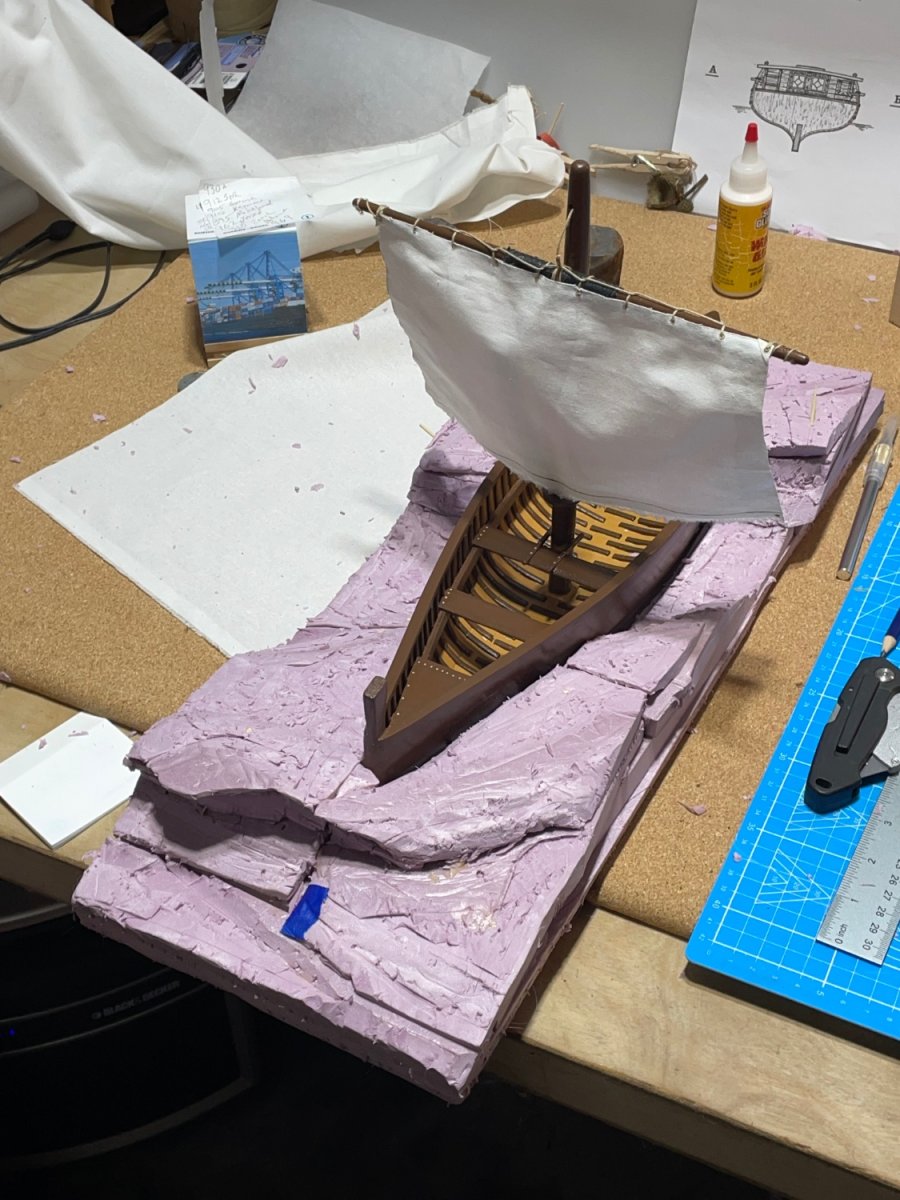
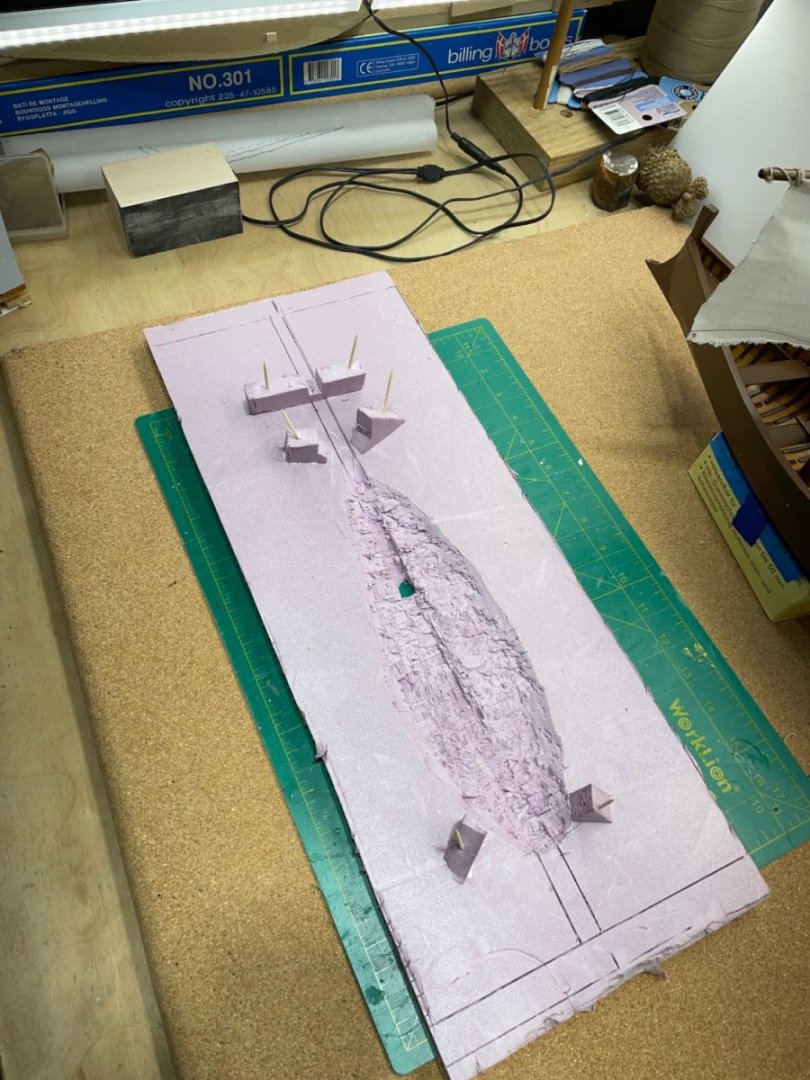
While I’m at a stand still on the Gretel build, I focused on the stand for the Galilean boat. I used 1/2” polystyrene board and attempted to build them up to look like waves. Next I plan on making up some homemade paper clay to cover it.


- 134 replies
-
- 6
-

-
- sea of galilee boat
- SE Miller
- (and 1 more)
-
If I can’t get a good start soon on the Gretel, I may put it aside and start with you:-)
- 24 replies
-
- 1
-
-
- Ships boat
- Ships of Pavel Nikitin
- (and 1 more)
-
If you are working on a build log that you think may be helpful to me, please leave a link:-) I’ve only found a few logs of this build, I think only one of the newest kit. Thanks, your help is appreciated:-)
-
I think small utility boats are the best fit for me. Your boat is looking great! It makes me want to start the shallop kit by Pavel Nikitin.
- 24 replies
-
- 1
-
-
- Ships boat
- Ships of Pavel Nikitin
- (and 1 more)
-
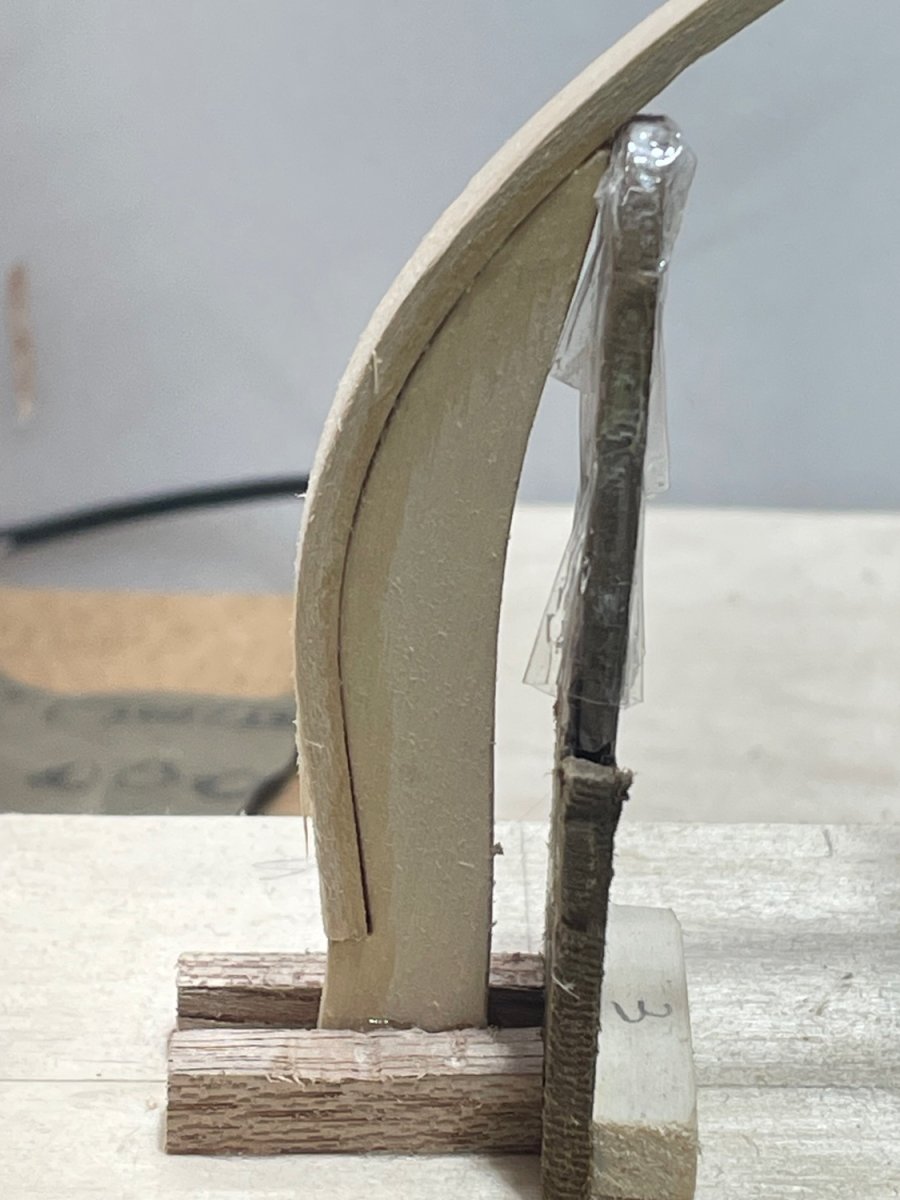
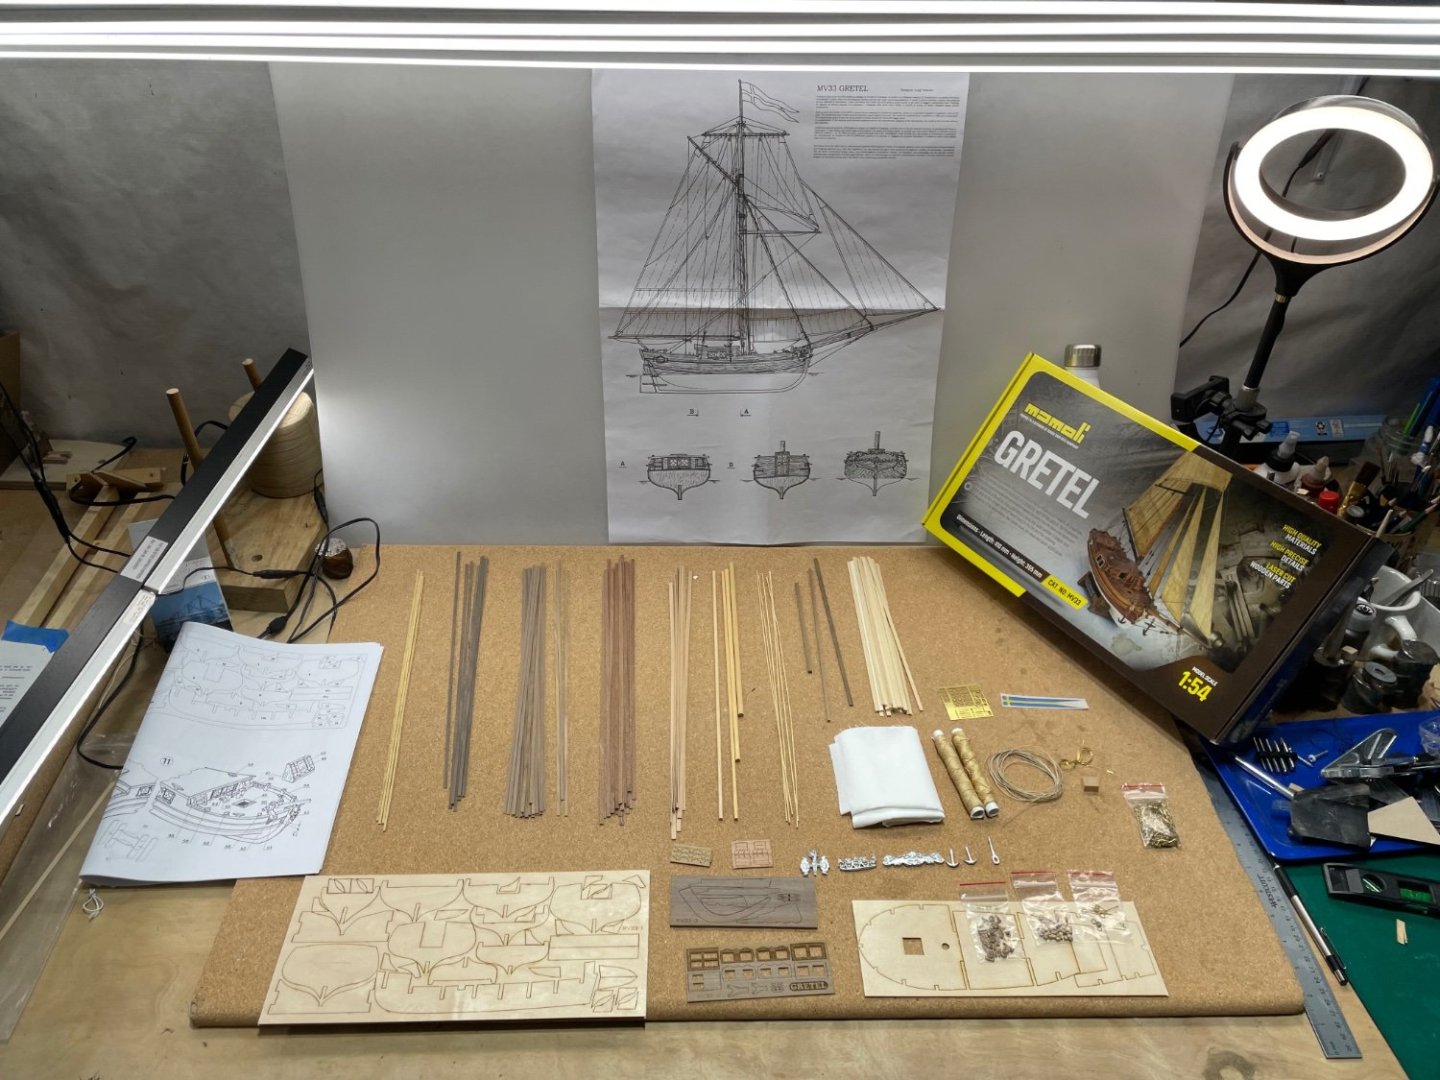
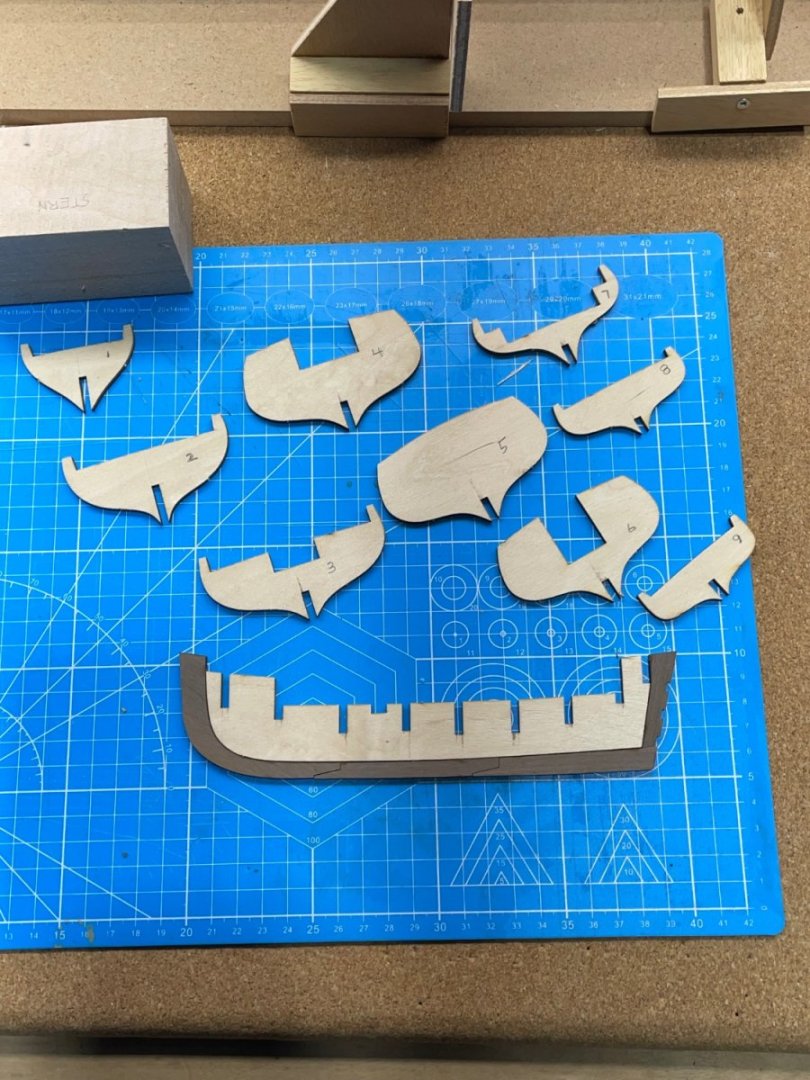
Hello ship builders, I chose this kit before I had any experience at all. I may not have enough yet. This build log is going to be more for me to get through the build instead of being helpful to another builder that probably knows way more than me. I encourage all comments, tips advice that will help me out. The first thing, Do I need to cut the rabbet and Bearing line before the stem and keel are glued to the spine? I’ll be trying to figure it out so I don’t start all wrong:-)
- 80 replies
-
- 11
-
-
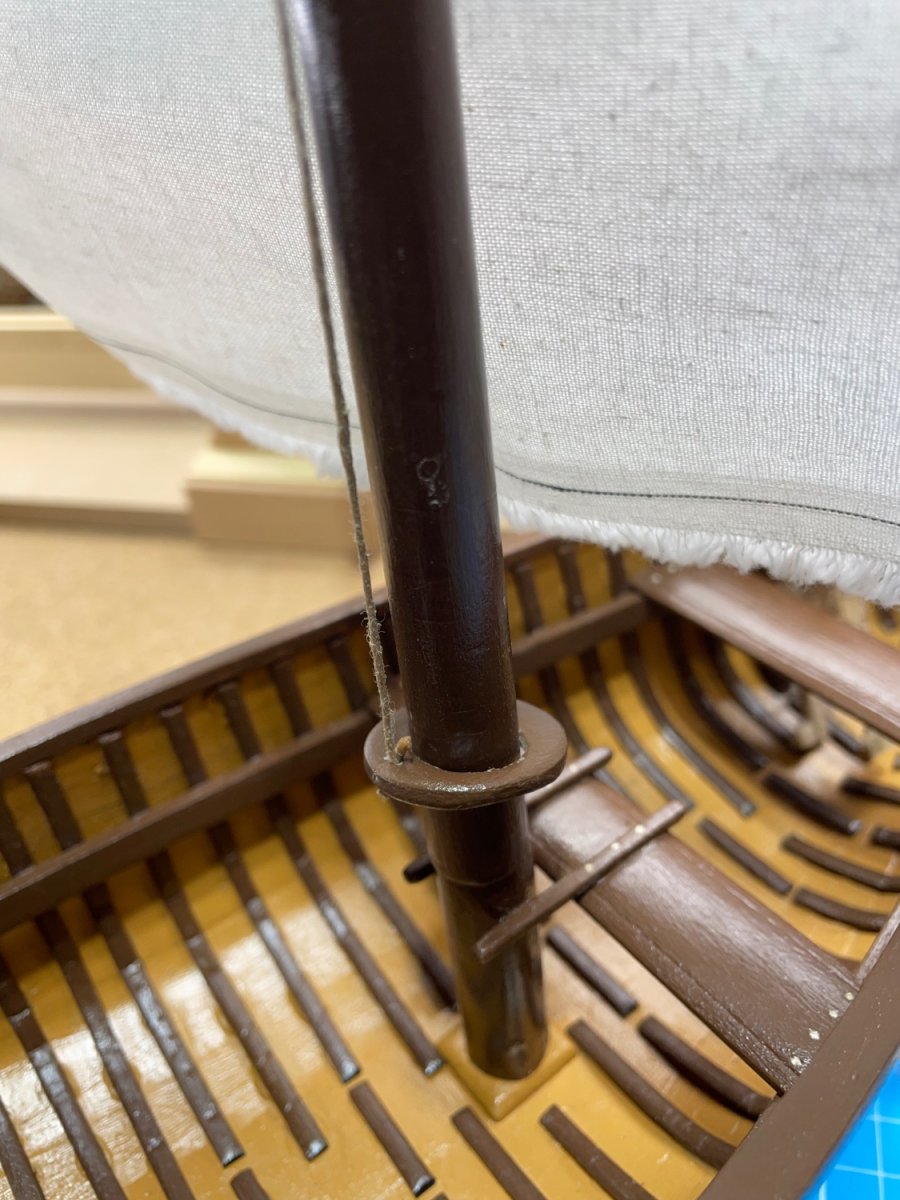
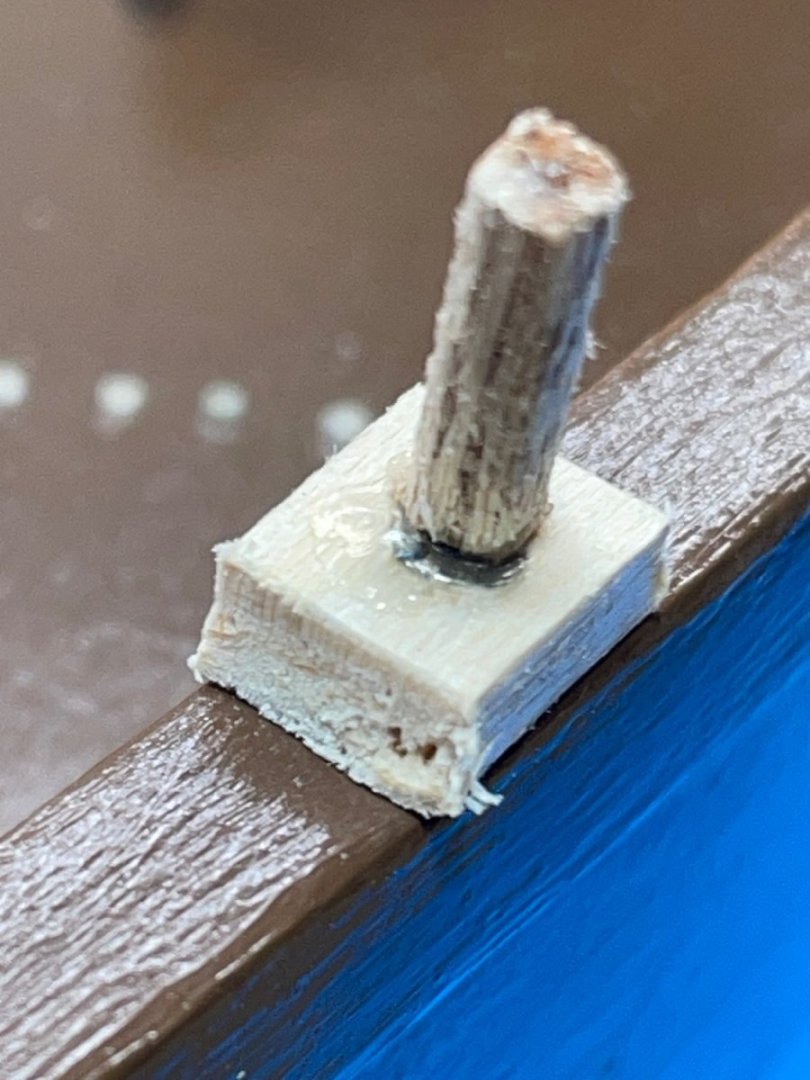
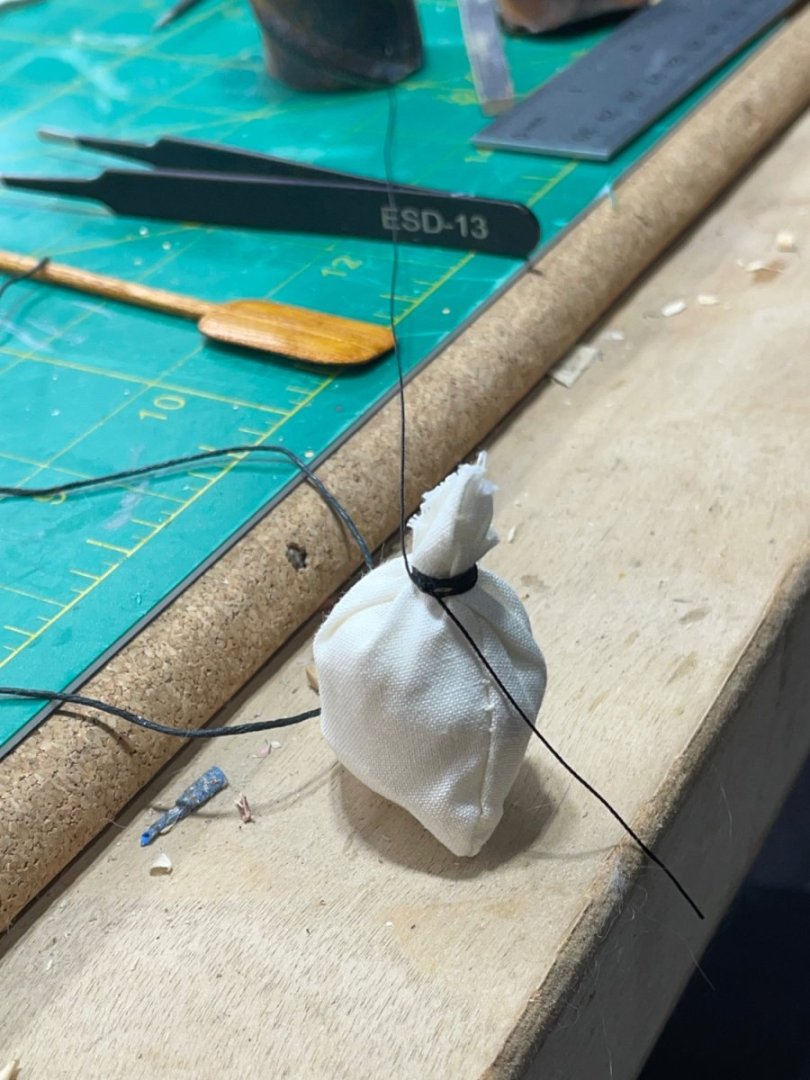
After I had studied the boat with the mast installed, I realized it was the weakest point. Also when held as a handle, it become a fierce Tomahawk:-) I cut the mast off just above the thwart and embedded magnets in both parts. At the time I haven’t made up a clear plan and embedded magnets in the yard and top of the mast. After coiling thread around the embedded magnet in the yard, the slightest touch would release it. I then just glued another on top of the thread. with the mast held together with not so massive magnets, you had to pull straight down. My grandkids are 5,4,2 years old, so I decided to carve a wooden washer that slides up and down the mast. It also acts as a brake when resting on a diagonal. Now the magnets in the yard make it a two handed process:-) Oh well, they’ll learn:-) Another ideal I had and started but rescheduled until the kids are more familiar with it was attaching the halyard and sheets to the stern. I cut 1/4” squares and drilled a 3mm hole for the magnet and covered it with the rigging pin. I still have to drill into the cap rail to install the magnets. I faced two of the magnets north and two south so I could be sure they were connected correctly. The next will be a substantial type stand so the boat can be removed but stable when playing with the sail. It may be a while for that because mainly, it’s not a boat:-) Here is a short clip of the hoisting of the sail. IMG_1462.mov I’m not for sure how the kids will like it, but I love it, and can’t stop playing with it, so I start my next build:-)


- 134 replies
-
- 3
-

-
-
- sea of galilee boat
- SE Miller
- (and 1 more)
-
Bob, you set the standard pretty high for newbie’s like me:-) Maybe one day I’ll get there!
- 254 replies
-
- 6
-
-
- Victory Models
- Pegasus
- (and 3 more)
-
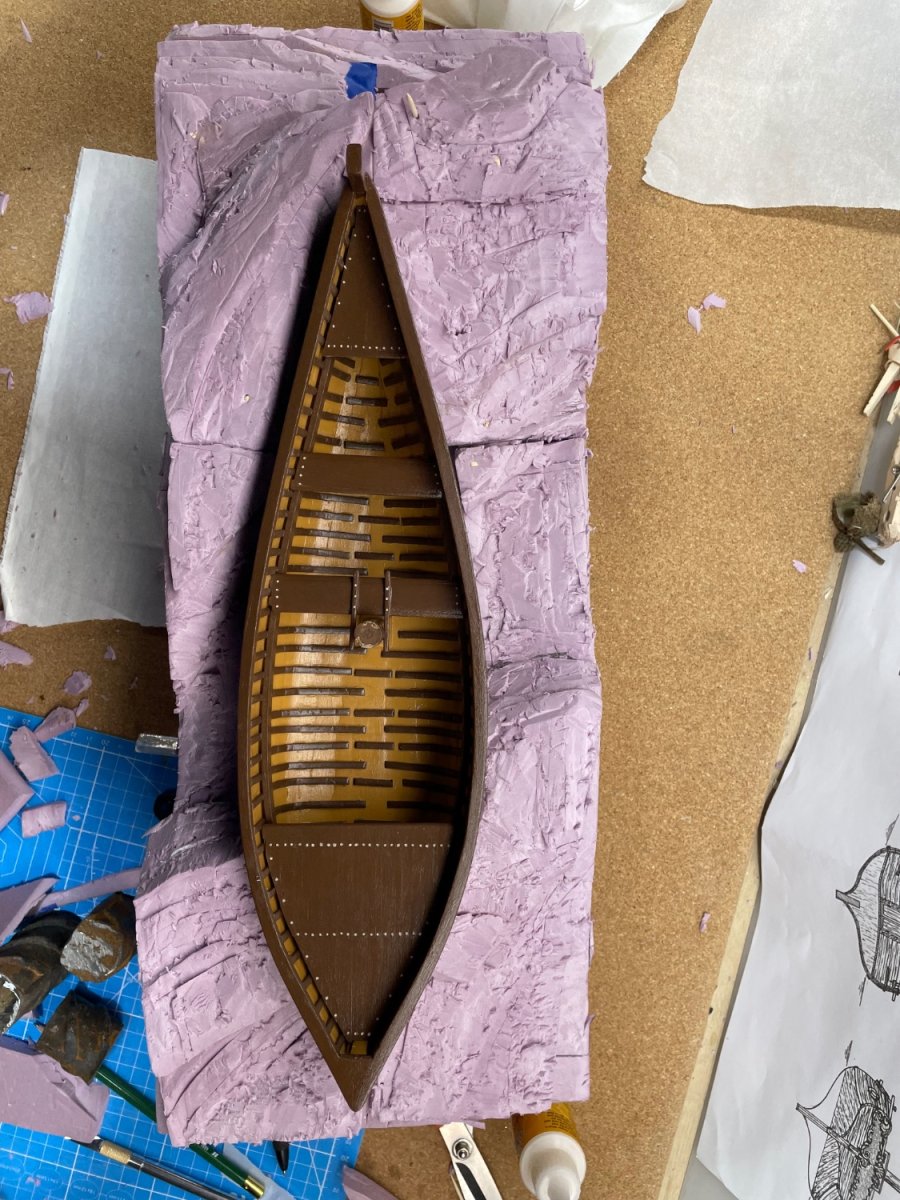
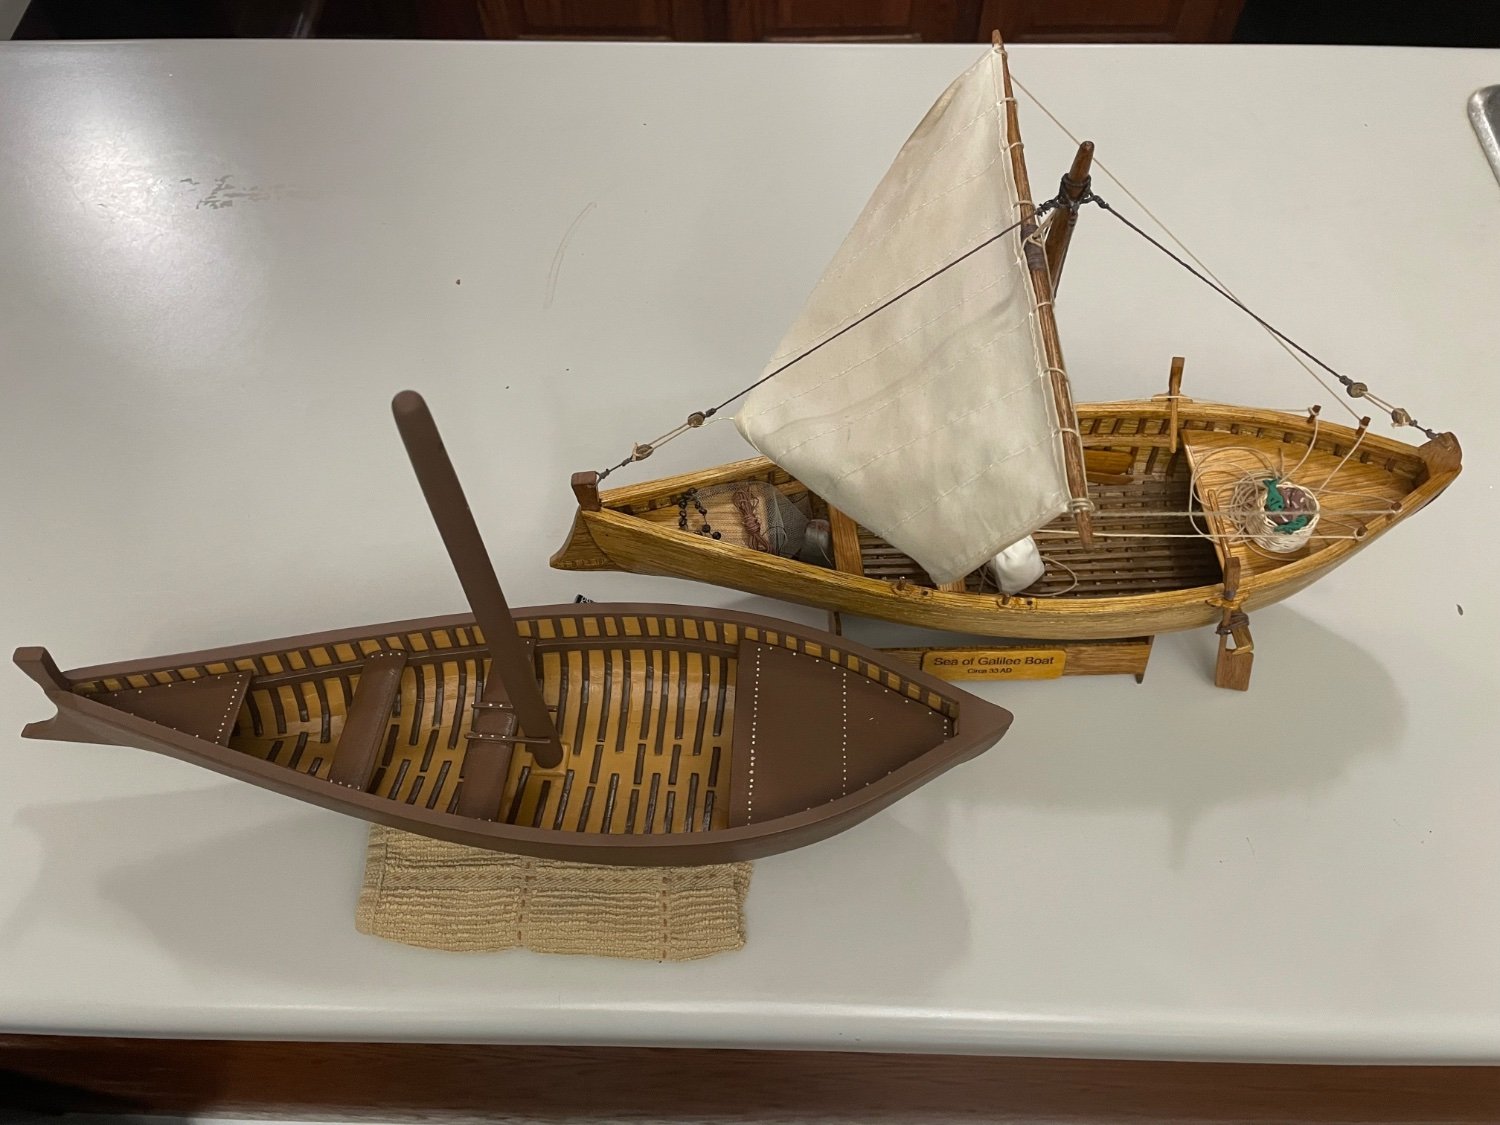
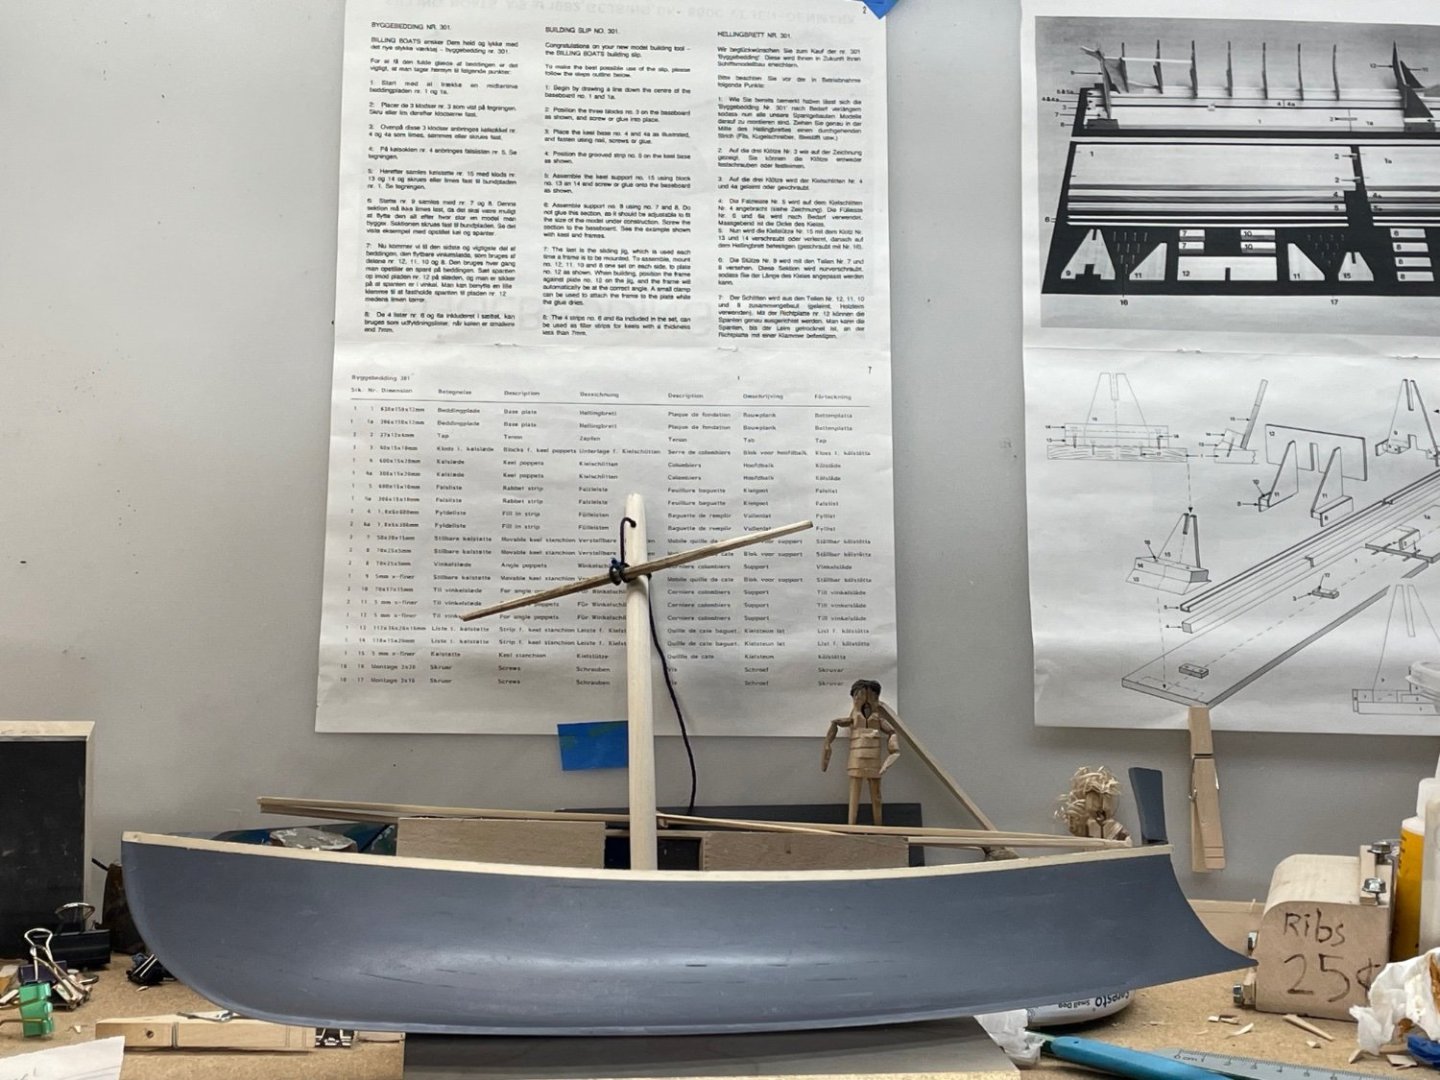
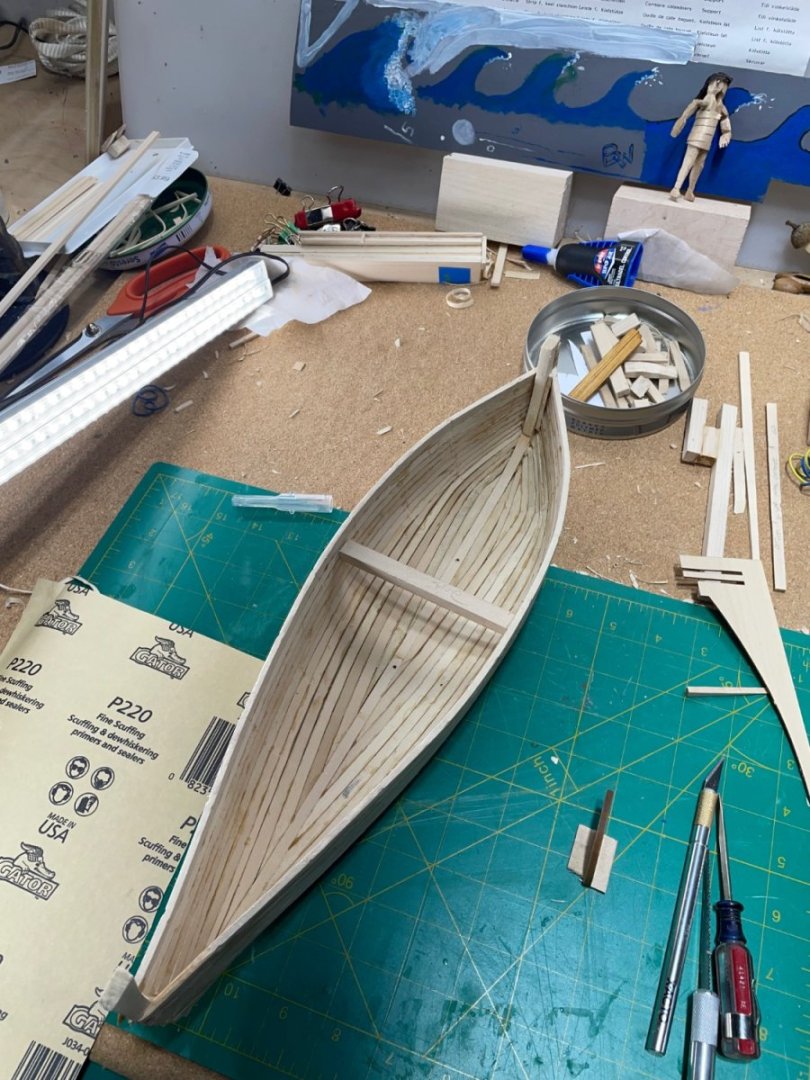
Decks, thwarts and cap rails completed. The mast is just fitted in for now. Still unsure how much I’m leaving off. Trying to think of all the things that will be in the way of the little hands, that will be holding, inspecting and maybe imaging sailing in it:-) Here’s a comparison photo of the mahogany kit and the basswood using the kit supplied strongback.


- 134 replies
-
- 5
-
-
- sea of galilee boat
- SE Miller
- (and 1 more)
-
If you would like to look on the bright side, your wording was easy for me to understand and really helpful in my long journey of understanding and learning this great hobby:-) So thank you!
-
Great job Bob! When things are over my head, I find myself checking out your tools, work bench setup and anything you have laying around:-)
- 254 replies
-
- 4
-
-
- Victory Models
- Pegasus
- (and 3 more)
-
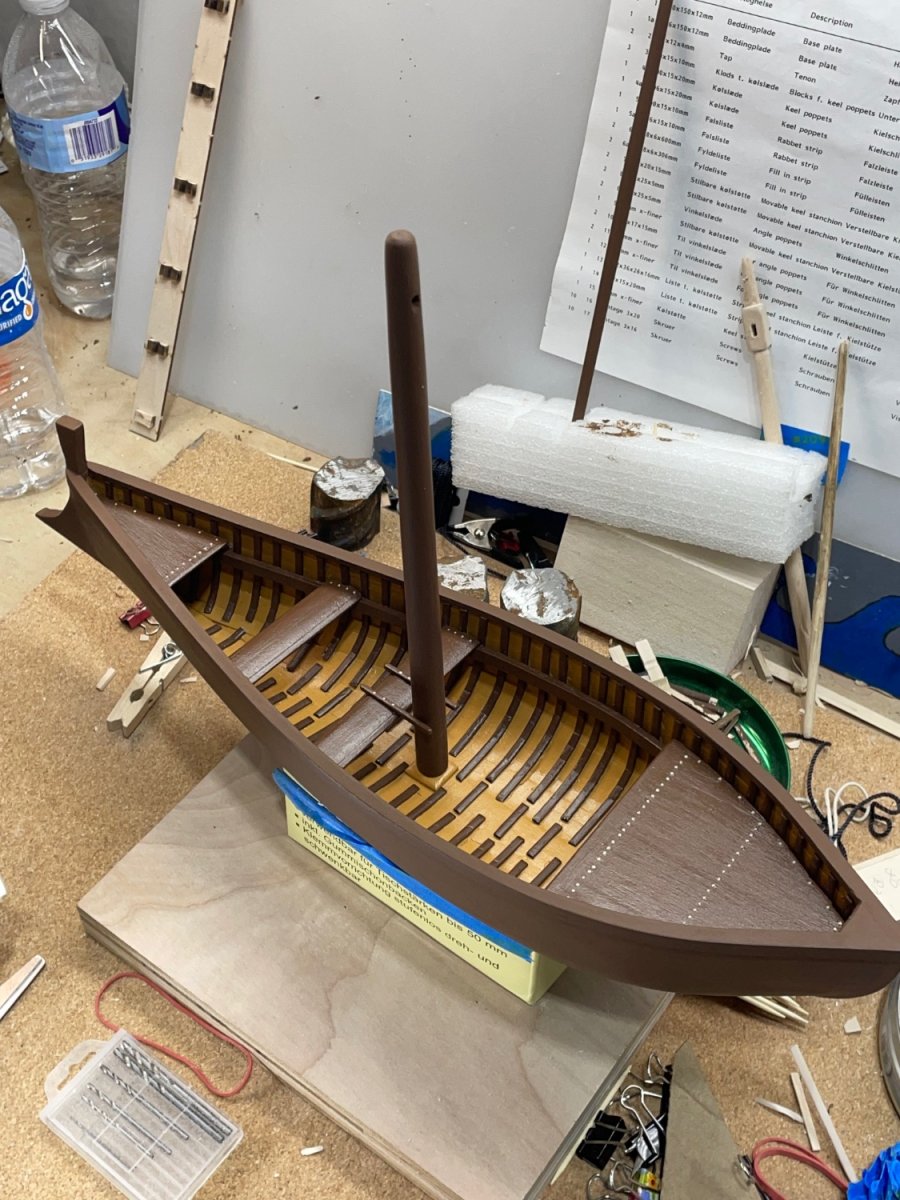
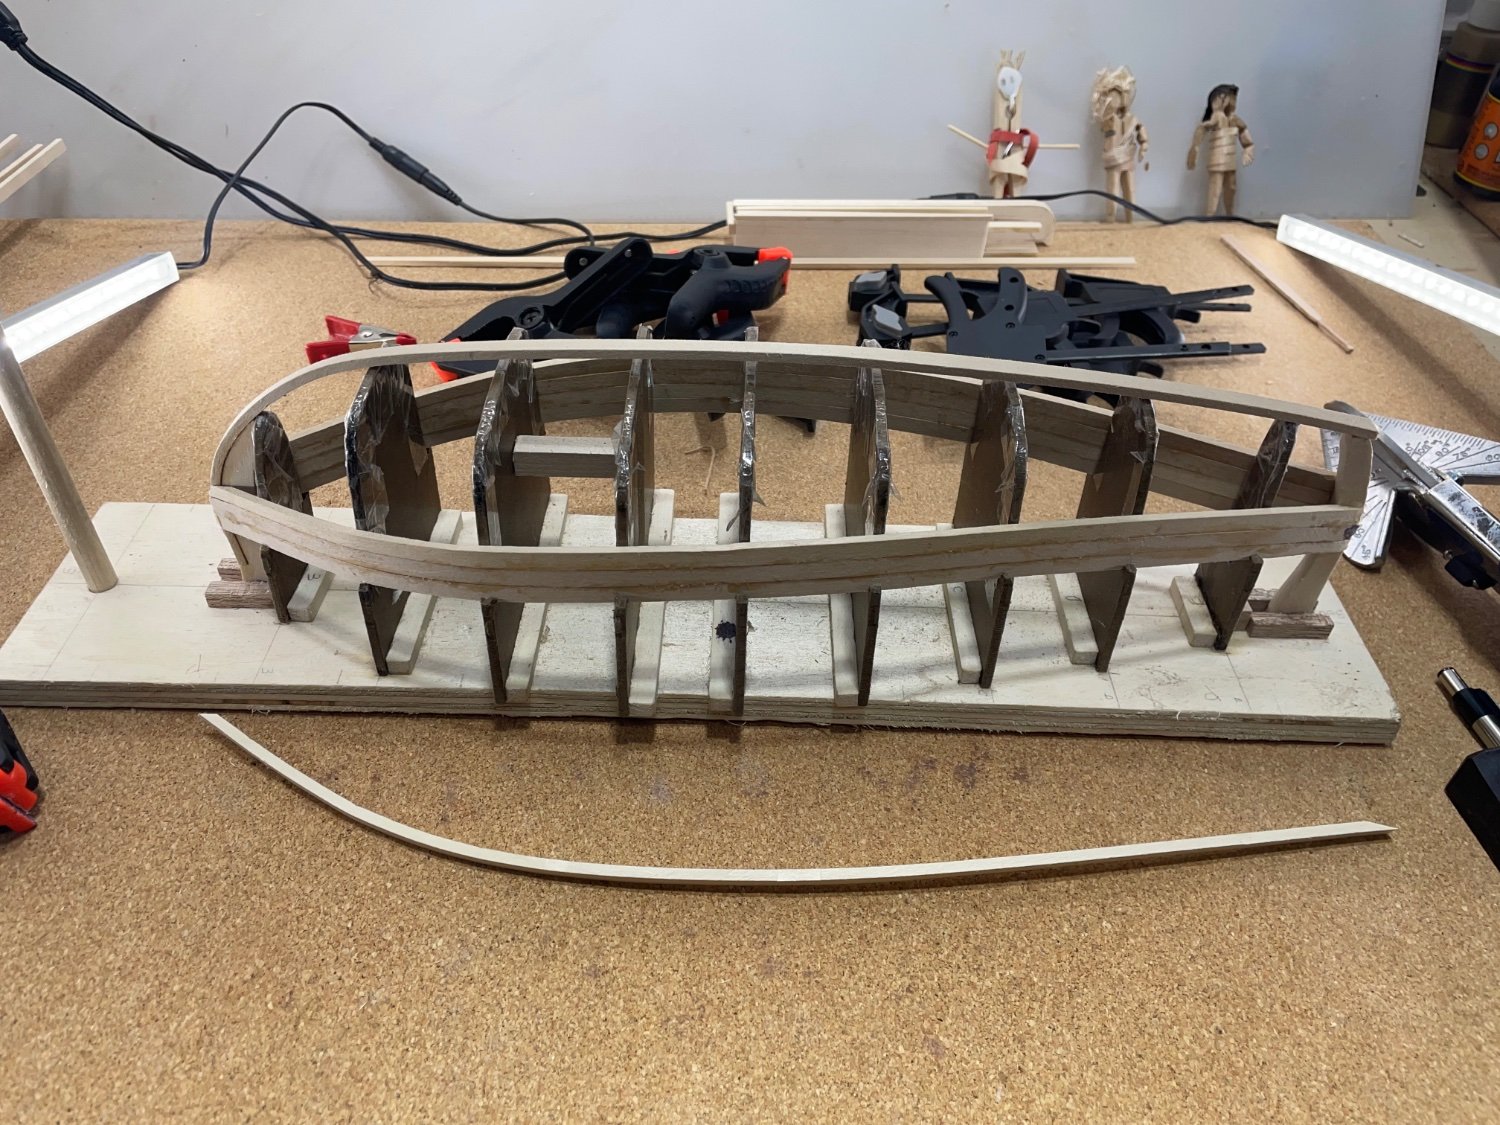
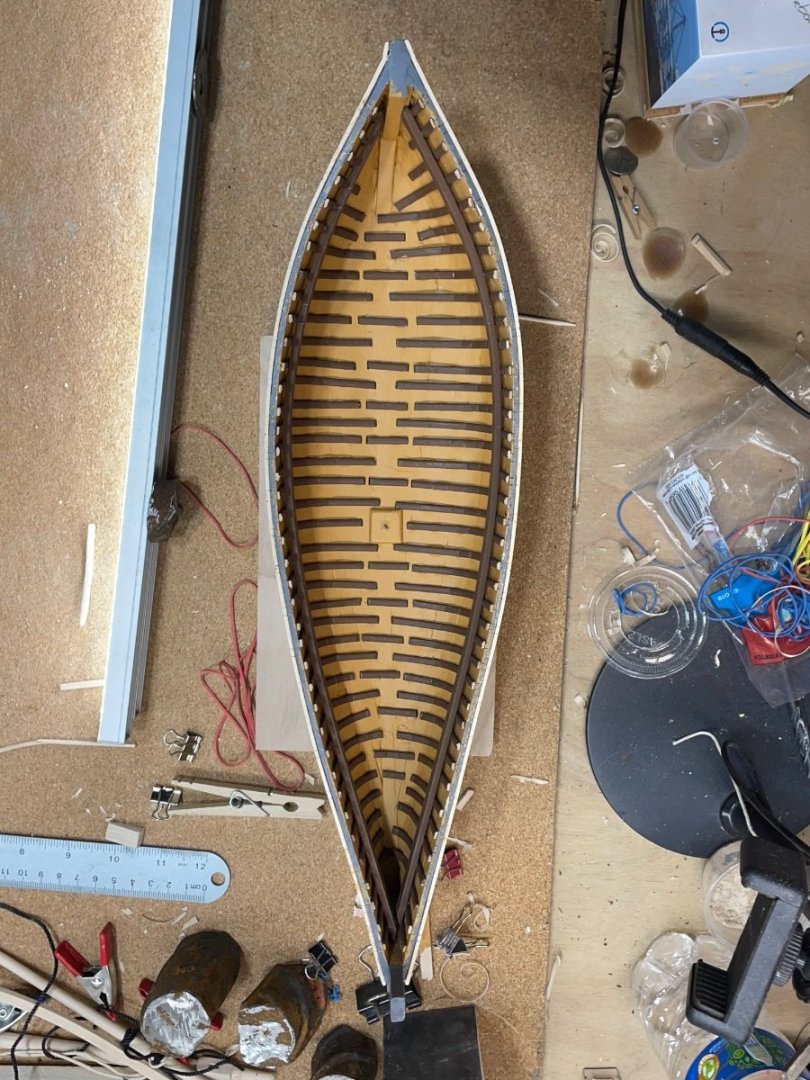
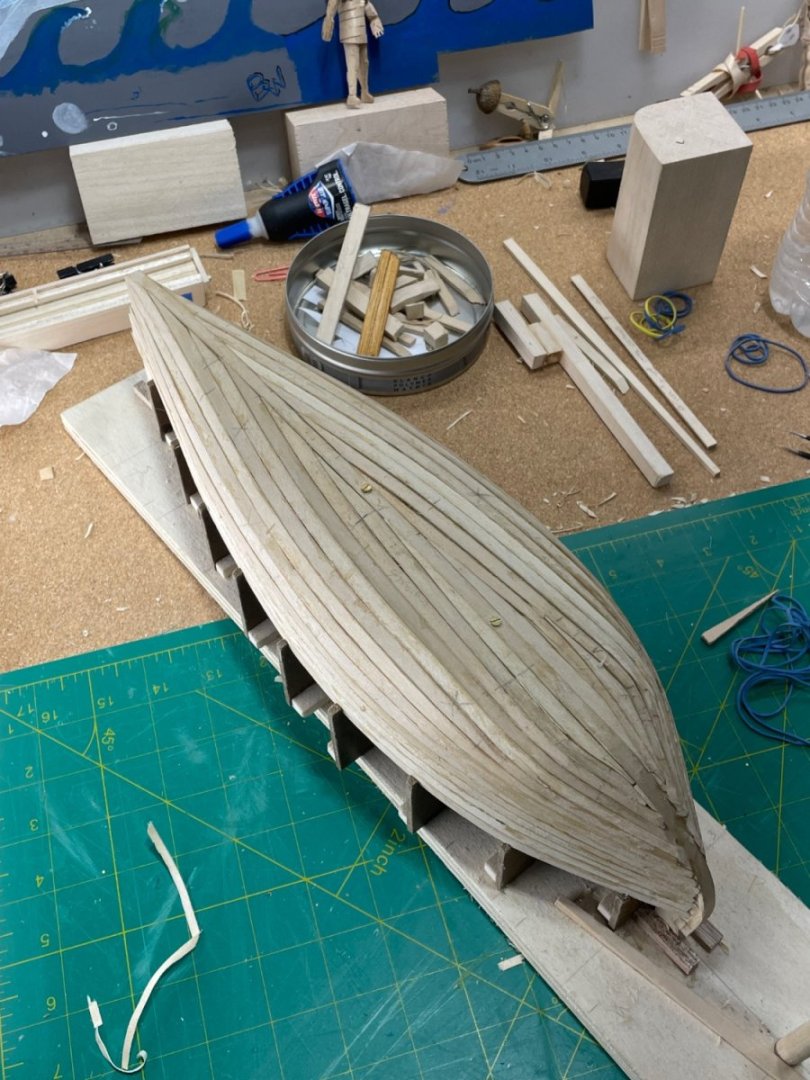
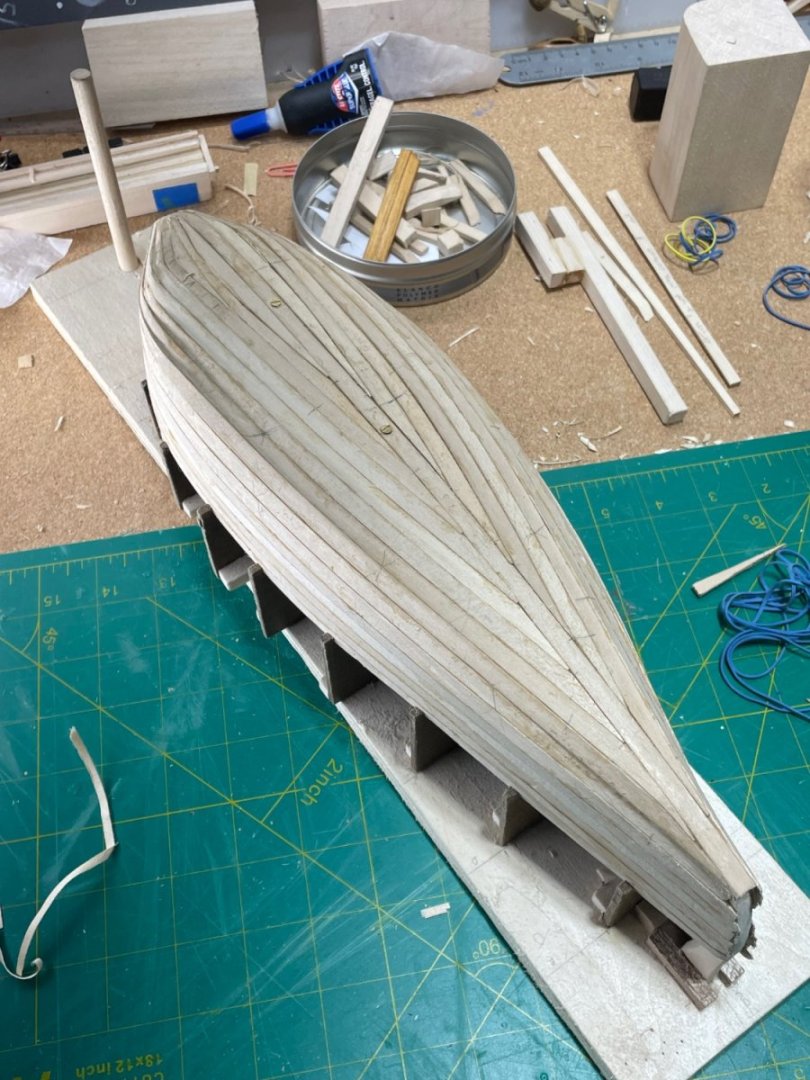
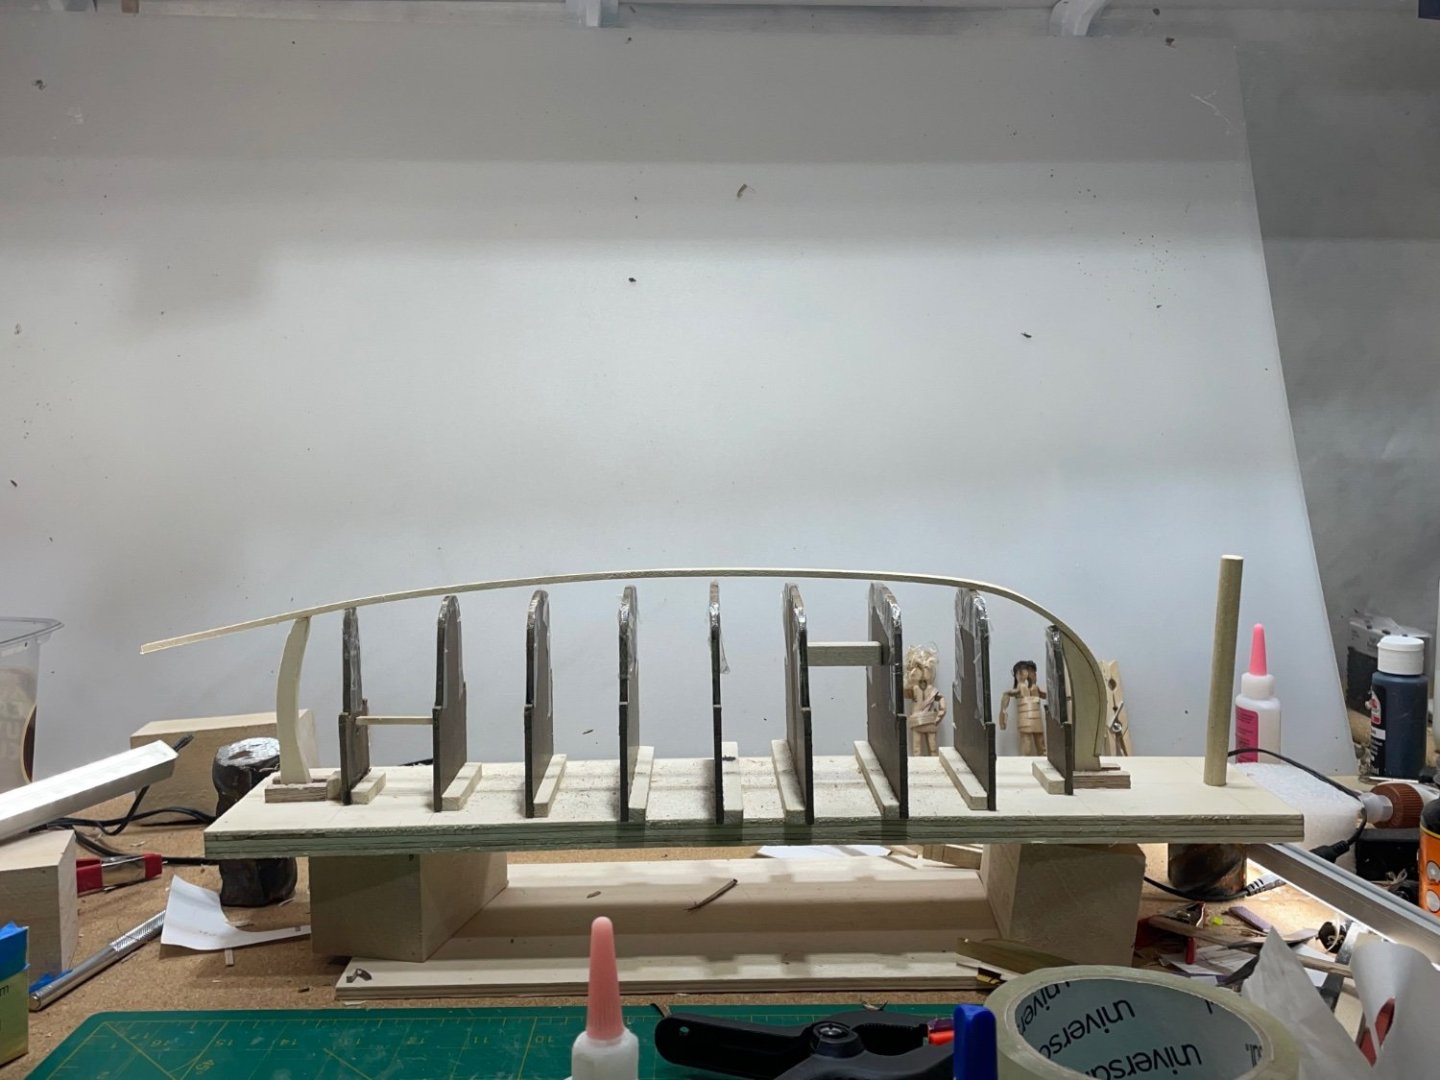
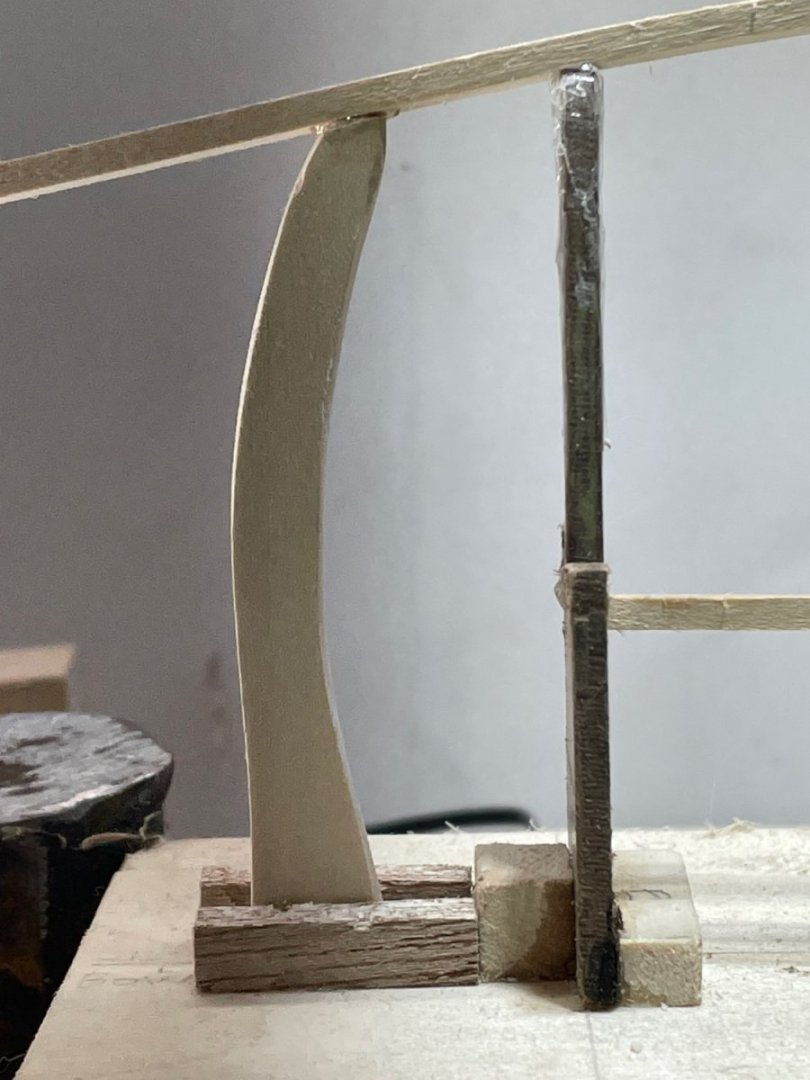
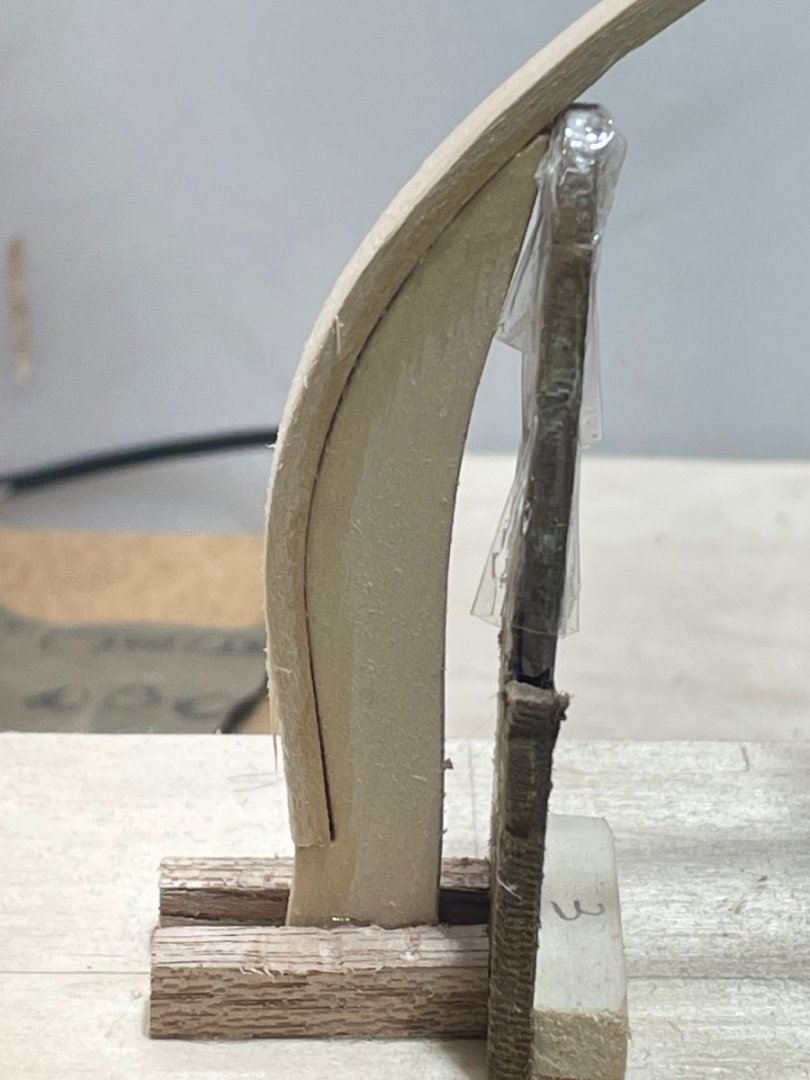
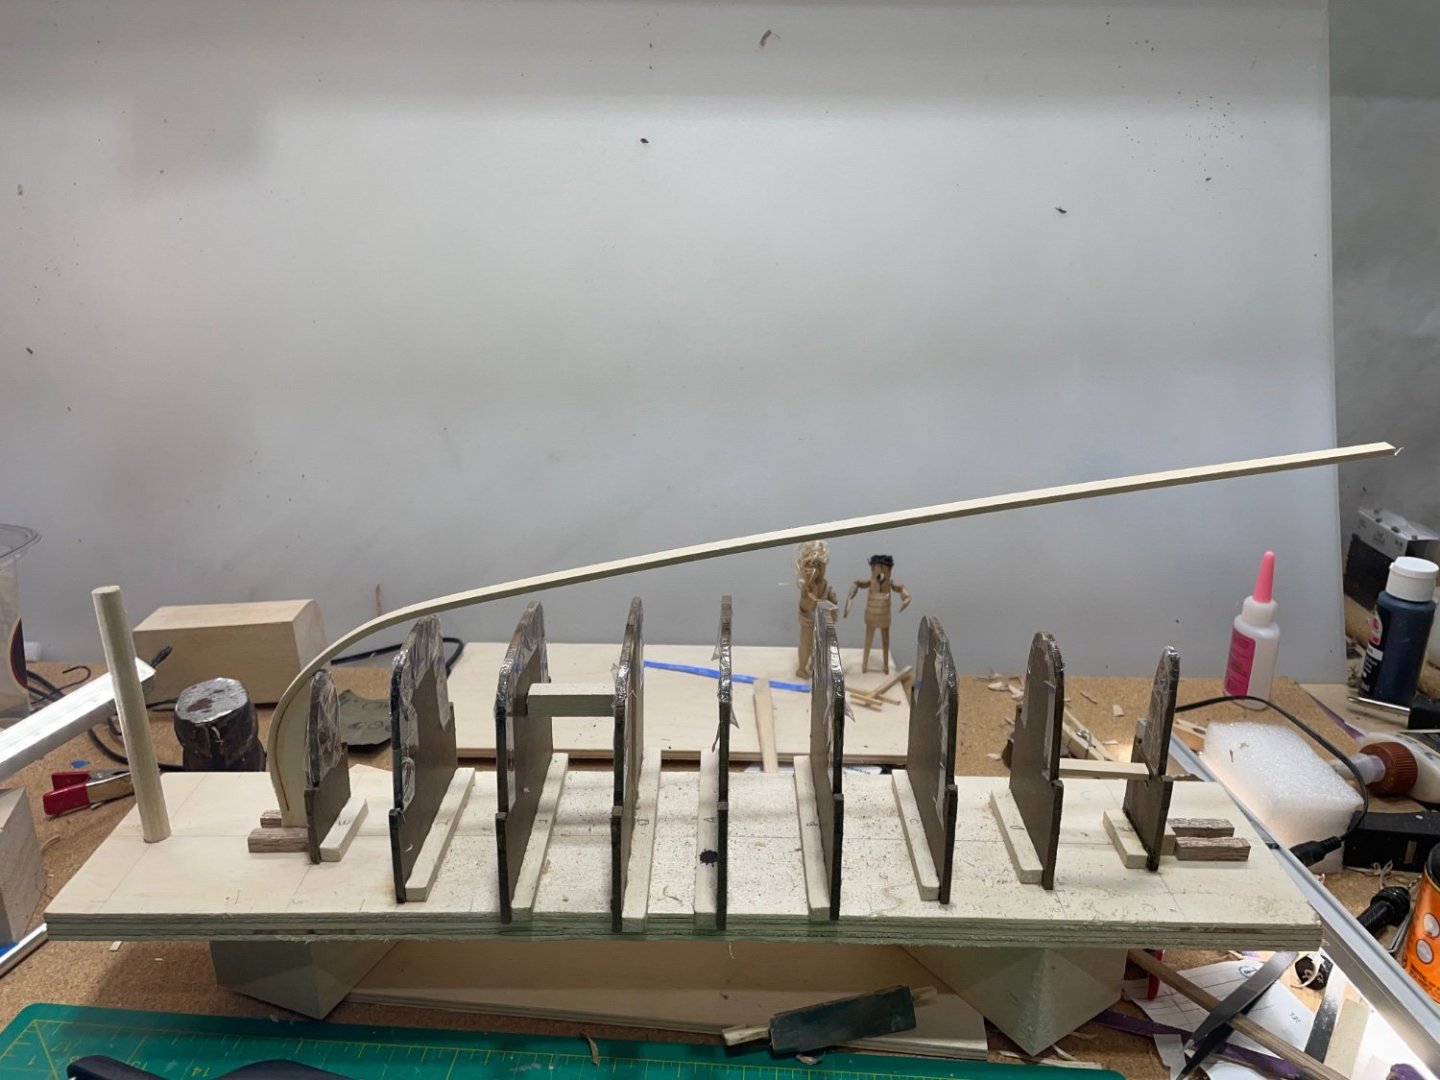
I’ve done quite a bit of work in the last week. The dreaded ribs on this model not only had to be bent, but painted also. I started about a month ago bending then painting and dozens at a time. Having and big pile of them ready, made the process feel less monotonous. I usually only glued less than that, during a sitting. Then the stringers went on easily. Next will be both decks and thwarts. I’ve been thinking of how I’m going to bend the cap rails. They’ll be next.
- 134 replies
-
- 4
-
-
- sea of galilee boat
- SE Miller
- (and 1 more)
-
I did get the cut water and false keel installed. I’m getting ready to prime it next.

- 134 replies
-
- 5
-
-
- sea of galilee boat
- SE Miller
- (and 1 more)
-
Thanks for the advice! This one I have decided to leave off all the rigging and small detail. I plan on the sail being furled, and the boat to be handled by little children’s hands:-)
- 134 replies
-
- 4
-
-
- sea of galilee boat
- SE Miller
- (and 1 more)
-
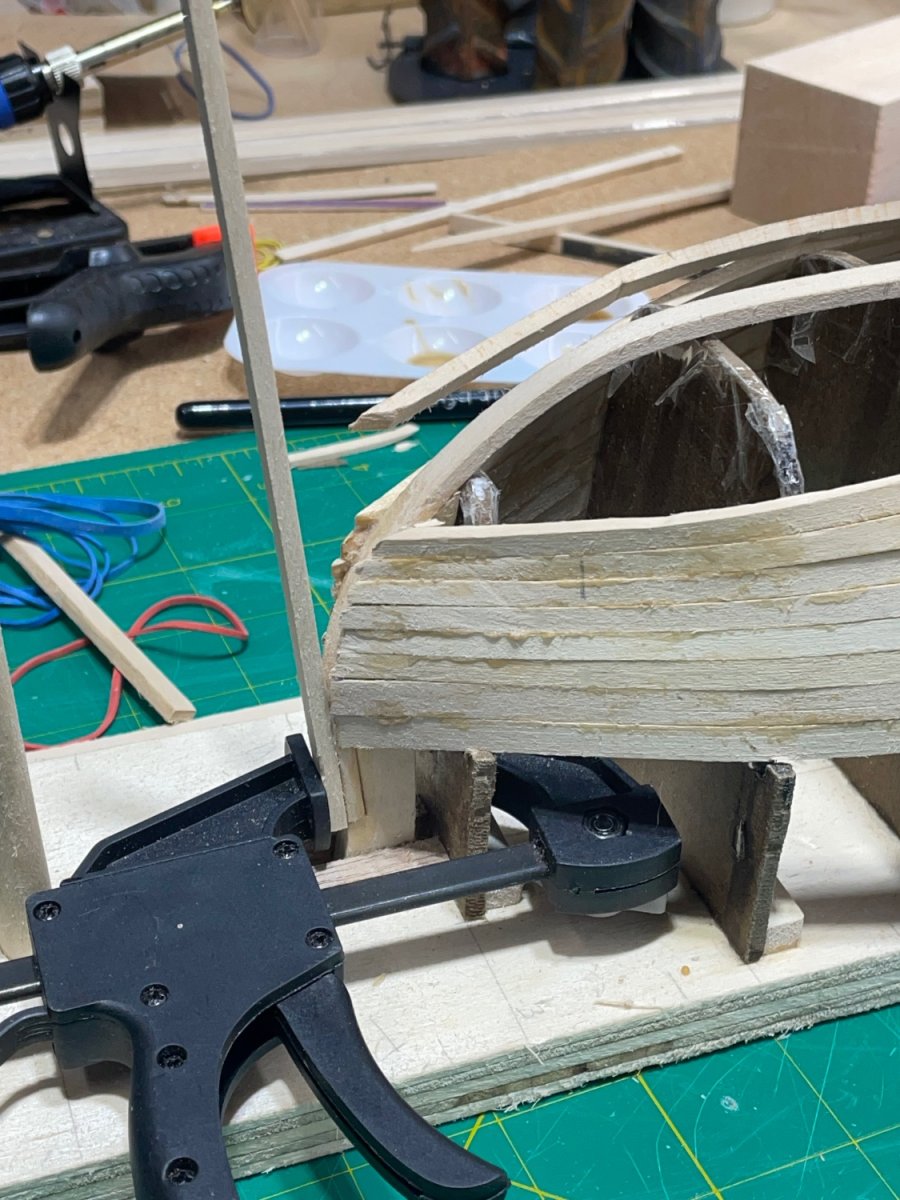
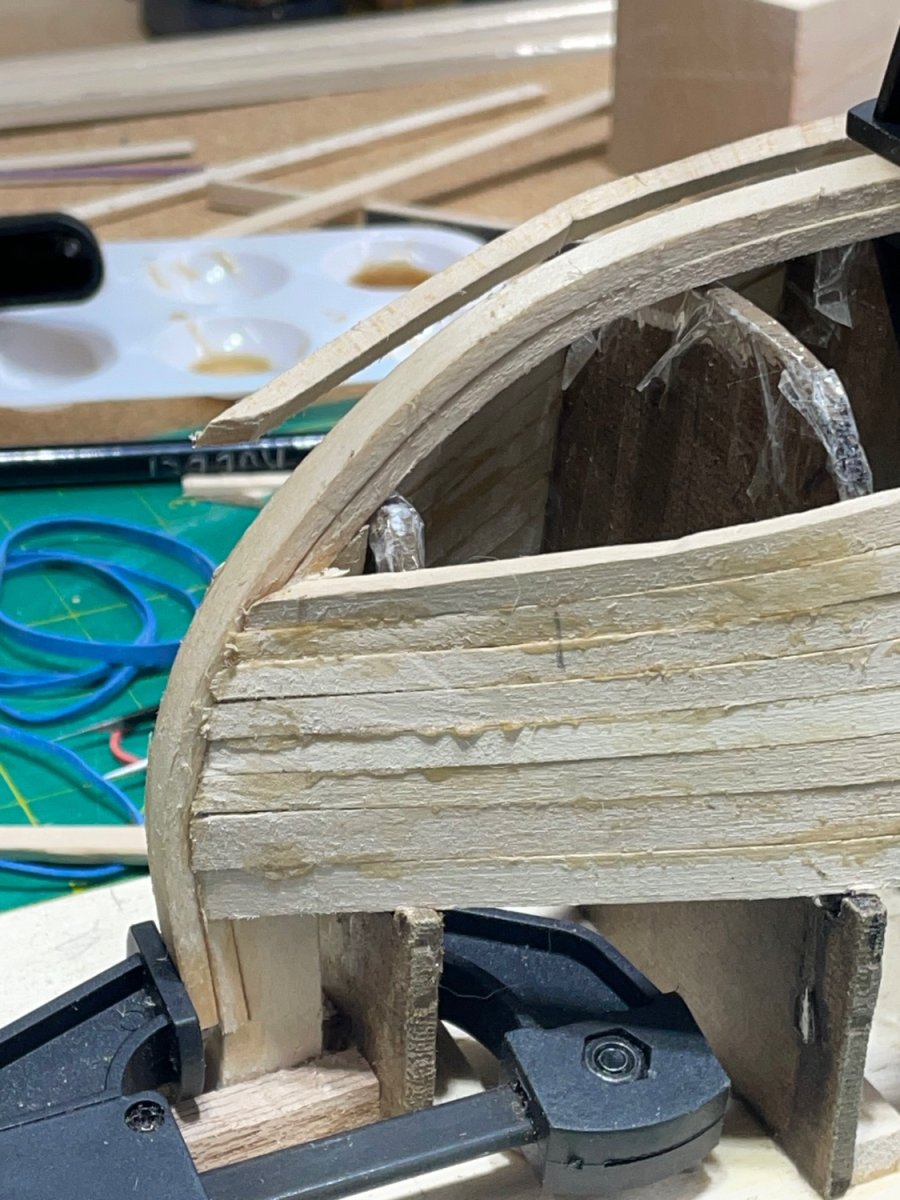
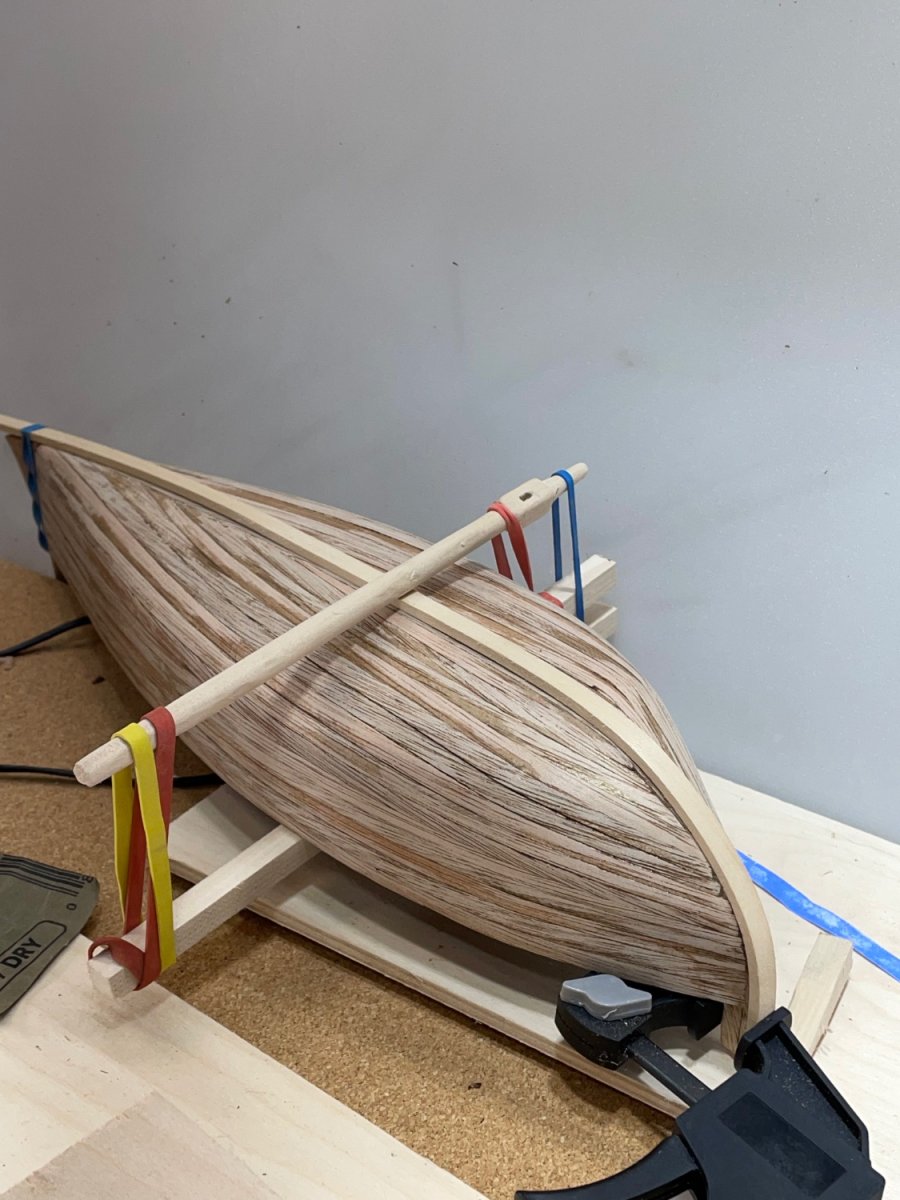
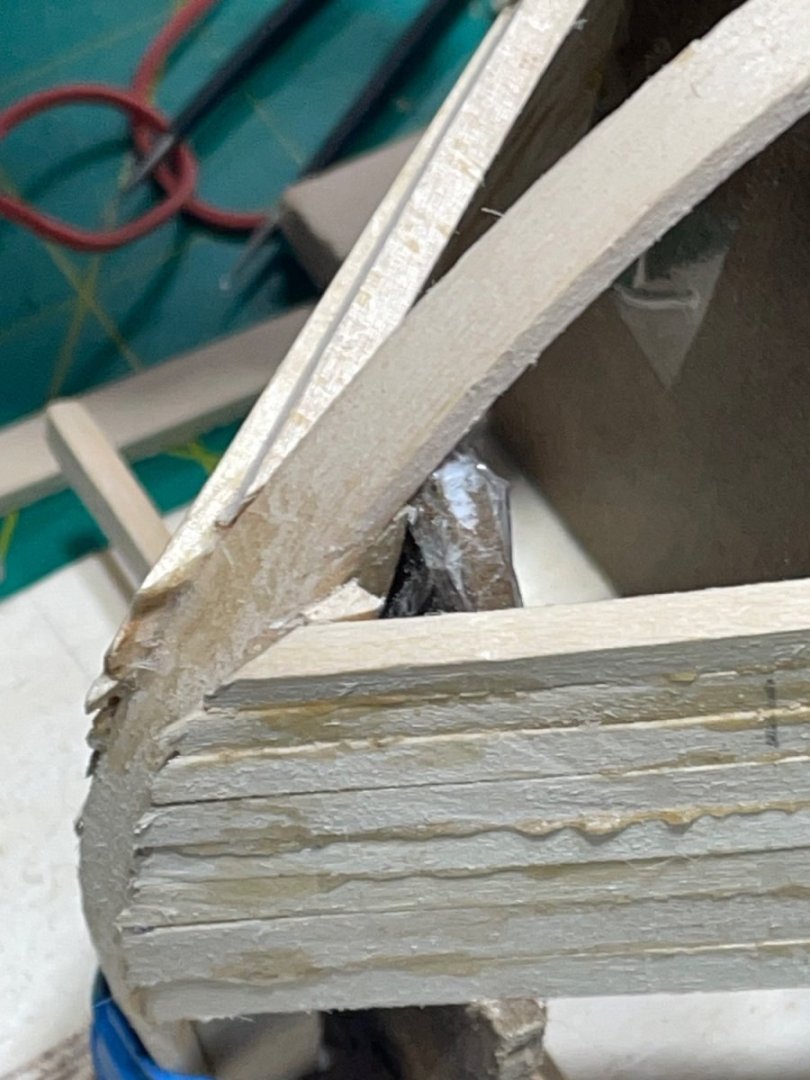
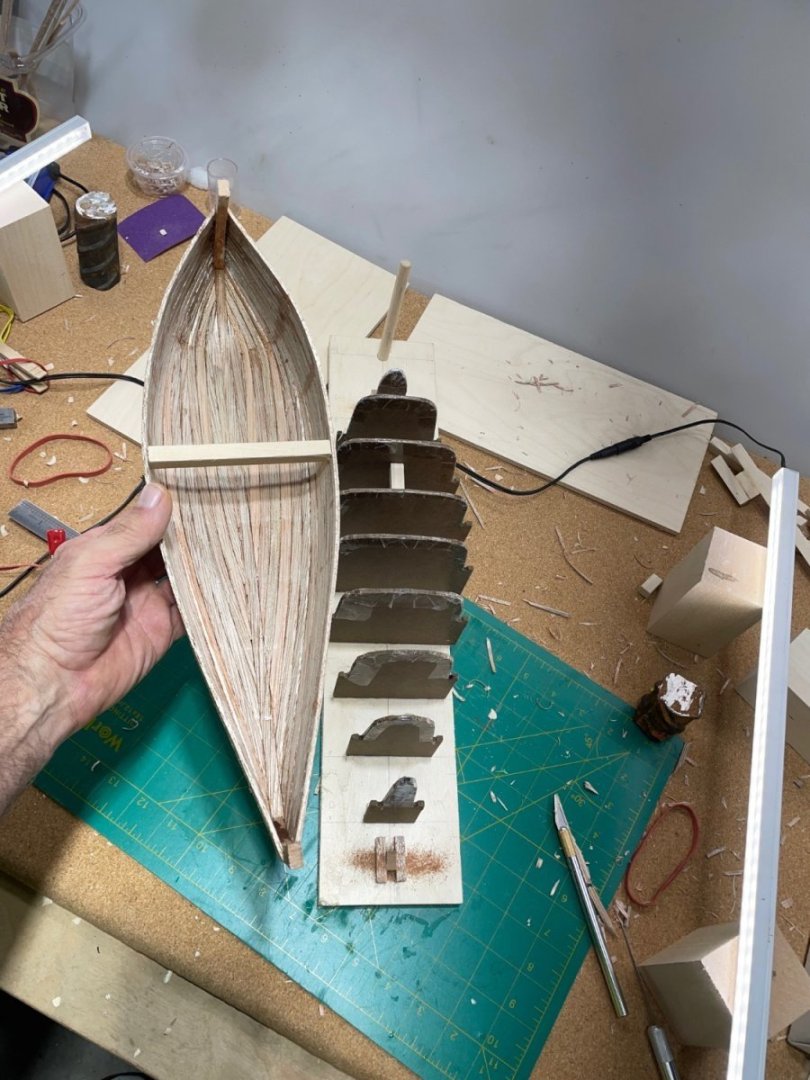
Update on the “ hands on “ Galilean boat. Planking completed with few major problems:-) It has been a great learning experience. As I hoped, the edges of the planks were more defined and easier for me to see, how much and what parts of the planks needed believed. Here is a plank that is drying I tried several different ways of believing. I haven’t decided on a certain way. Back while I was still working on the first boat, I placed the stern a little two close to the frame. When I got to plank 10 the bend from the stern to the frame was to tight. I glued another plank to the stern to give me more area to glue. I only glued a piece about 5 inches long. I had to use a little wood putty but it worked:-) Next up more putty, sanding , break water and false keel.


- 134 replies
-
- 5
-
-
- sea of galilee boat
- SE Miller
- (and 1 more)
-
Hey Commodore, I think it will work fine. I’ve had a lot worse issues. Besides, all of us that are keeping up with your build, will be be the only ones that even know:-)
-
Thank you:-) The next one on my shelf I believe is a step up in skill. This one is fresh on my mind and is going to be relaxing:-)
- 134 replies
-
- 1
-
-
- sea of galilee boat
- SE Miller
- (and 1 more)
-
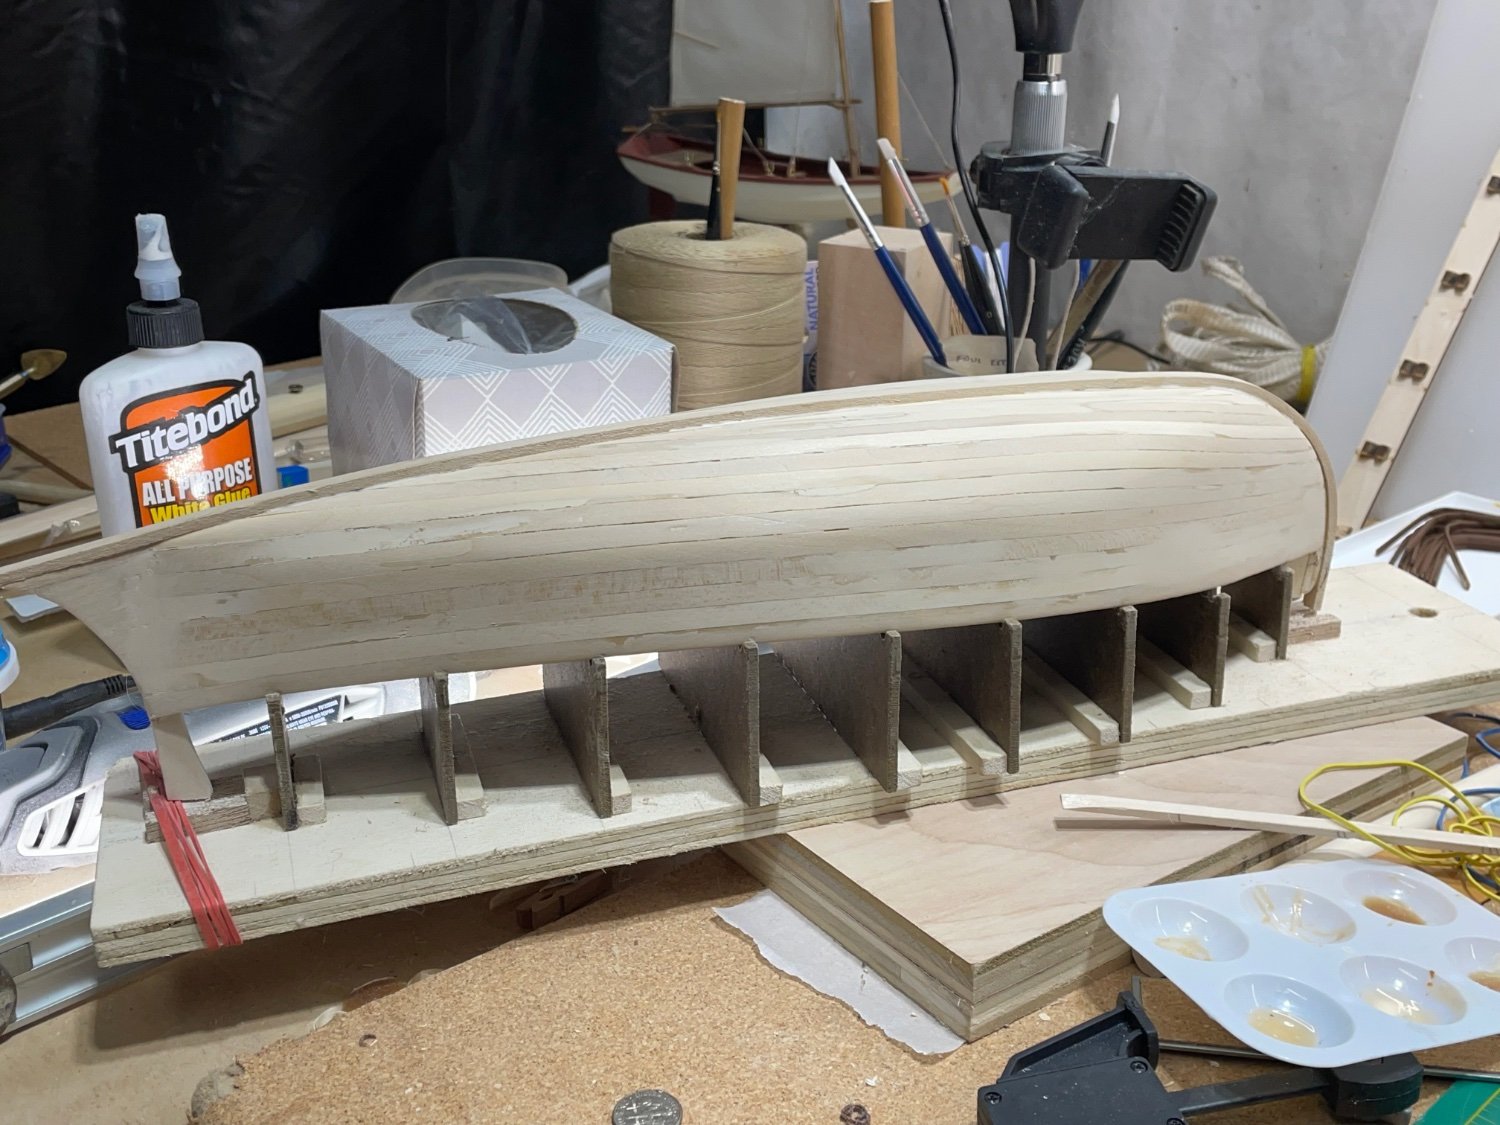
Going back about a month ago, I had the foresight from reading other members logs. That the strong back may have to be sacrificed when removing the hull. I not only covered the frame with packing tape, but also wiggled each frame free from a fresh CA bond. That would allow me to continue making hulls. I think repetition teaches. It definitely keeps me in a comfort zone:-) I’m using wood glue between the planks and CA where the ends of the planks meet the bow and stern. There are differences between the mahogany and the basswood. I’m hoping the square edges on the planks, will help me see and learn how to bevel the planks as it transitions from the side to the bottom of the hull. Before I started the first build, I traced the bow and stern pieces. Right before I was getting ready to fit the false keel, I thought it was a great time to bent the keel for the next. After it had dried I glued it to the stern, then to the strong back so I didn’t lose the bend during the primary build. The first two planks were not tapered. Te next planks are tapered four and a half inches from the stern end. I glued together a jig to do these. The first eight planks go on easy, I’m on the fifth one now. I soak the planks in warm water and they bend around the strong back easily. I let them completely dry for a day usually. There won’t be much to post until I get several more planks on. That will give me time to read up on some other logs here.


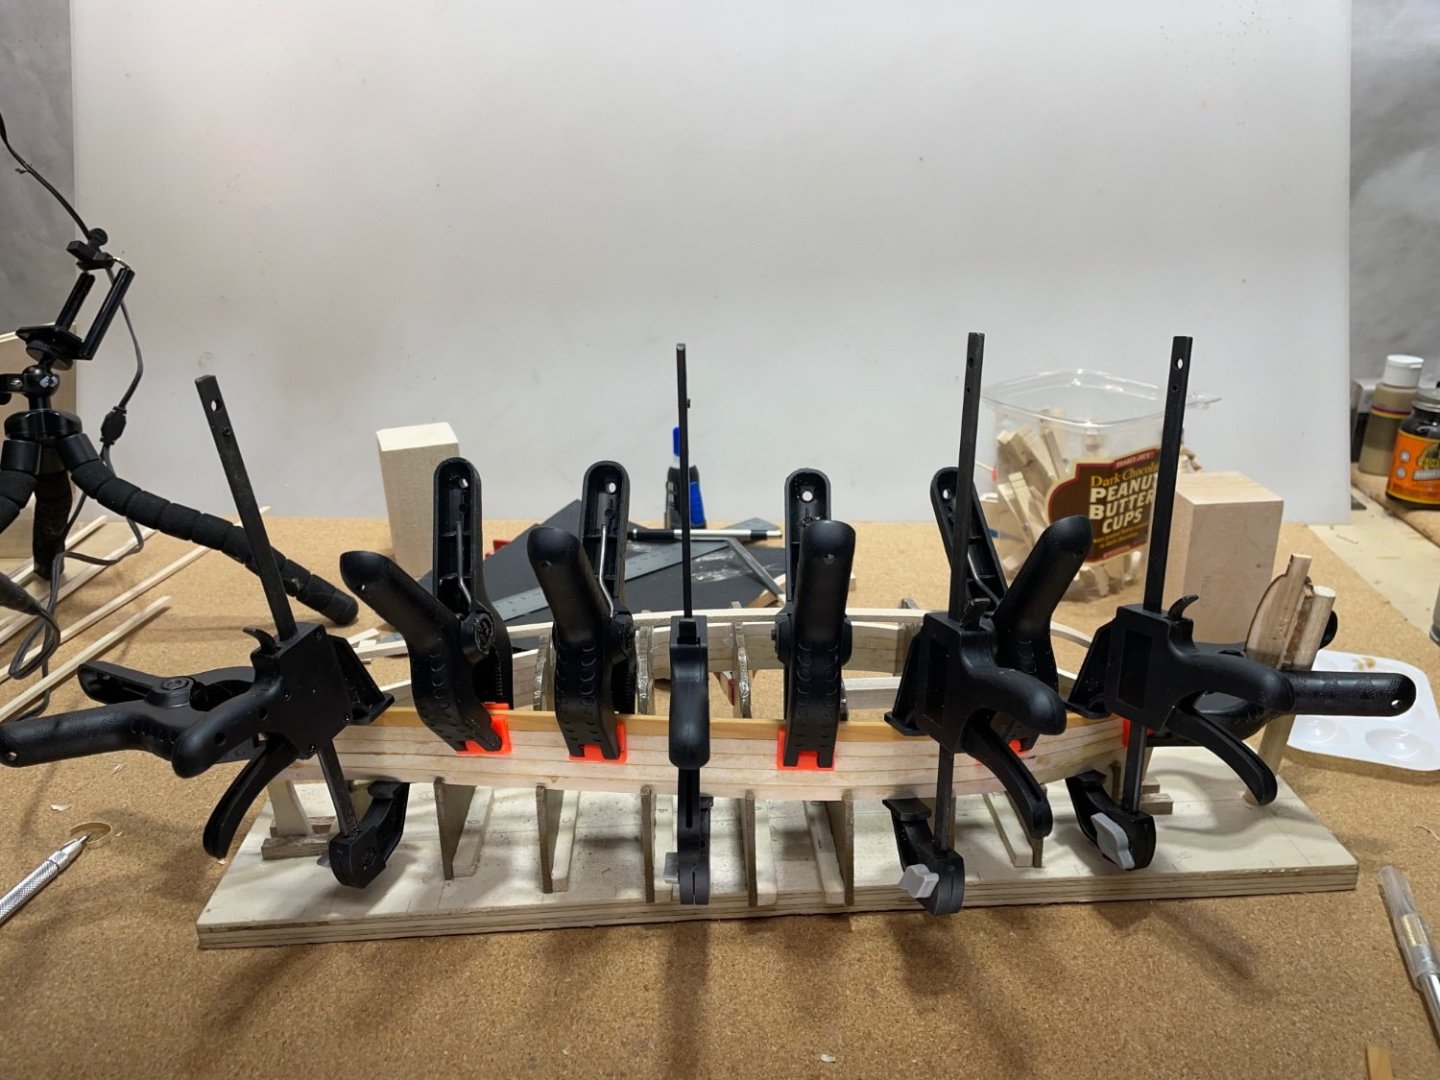


- 134 replies
-
- 3
-
-
- sea of galilee boat
- SE Miller
- (and 1 more)
-
I think you’ve done an excellent job, Commodore! The kit designer may have allowed a bit more space for the gains. You did so good you gained timber:-)
-
Hey Bob, I really appreciate your interest and encouragement! The kit that’s in the closet is a Mamoli Gretel, but I would like to continue on this same log with the basswood model, using the same Scott Miller strongback. That is, if it’s ok with the administrators. I’ve got 4 planks on each side completed. I need a run for more timber. I plan on painting this one fun colors for kids, and leave off breakables. Maybe beef up the mast and rigging:-)
-
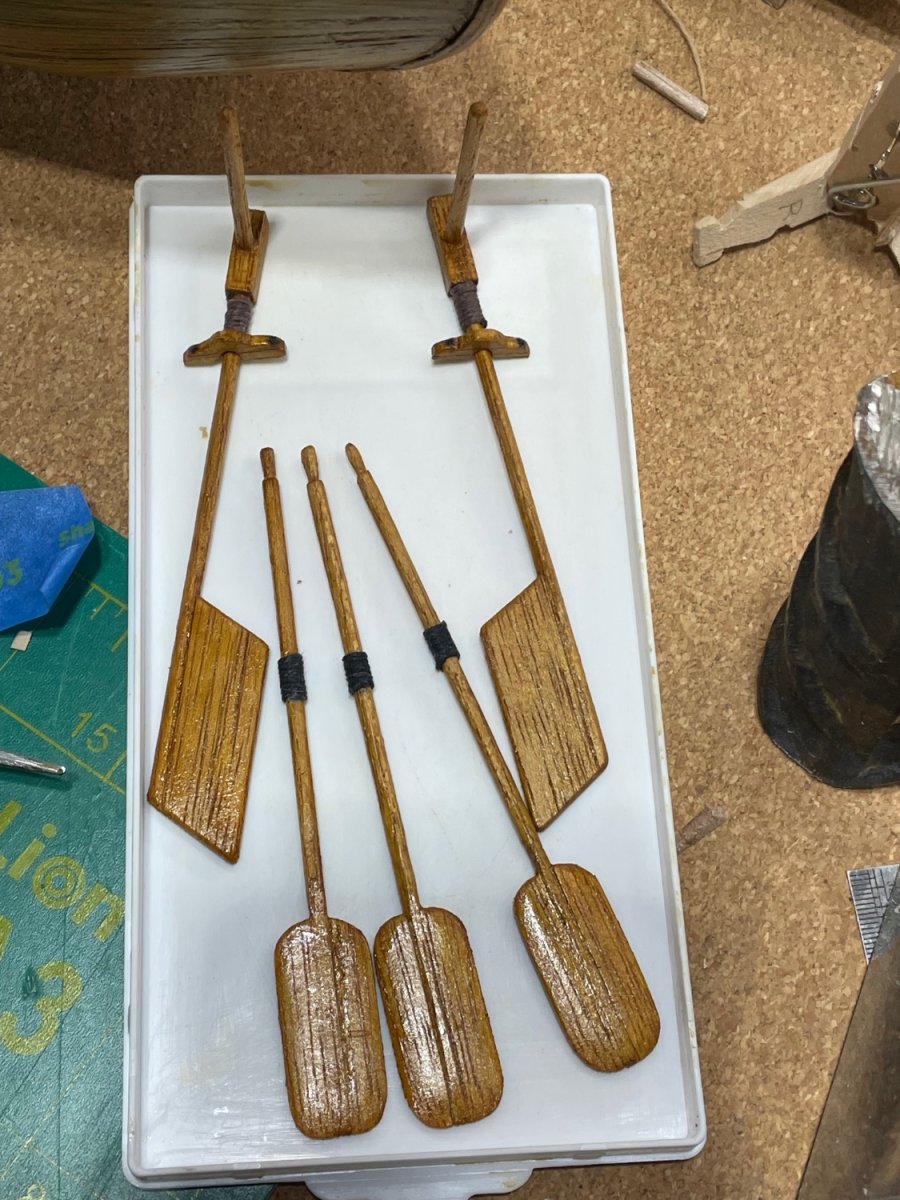
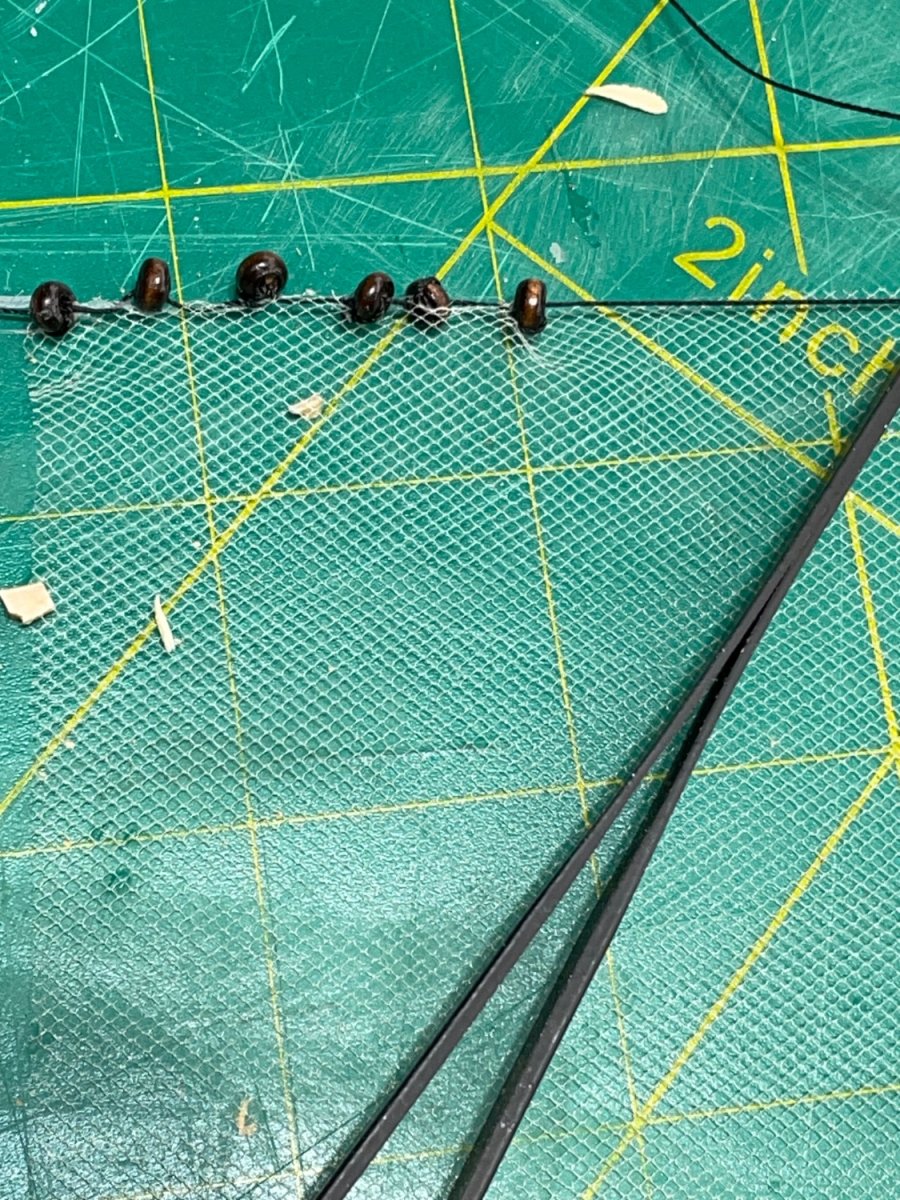
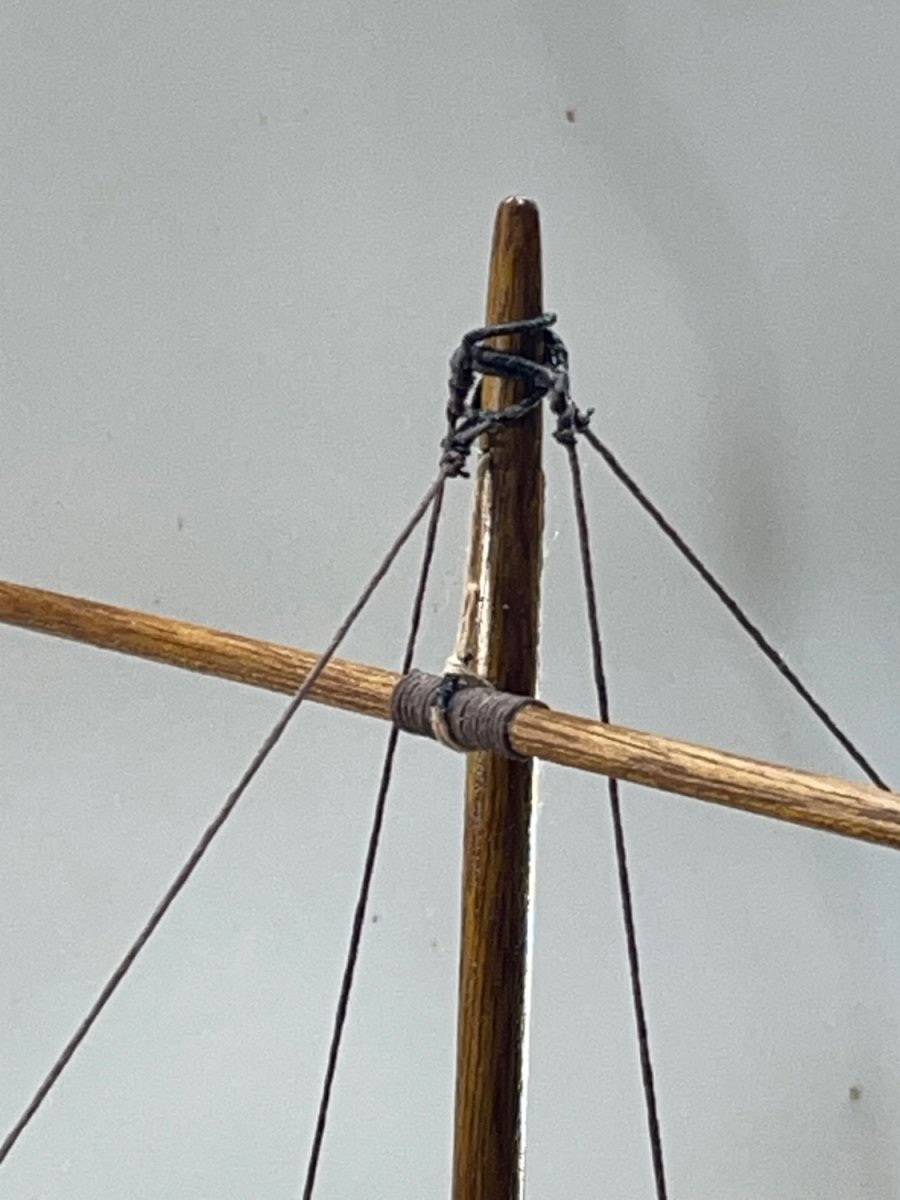
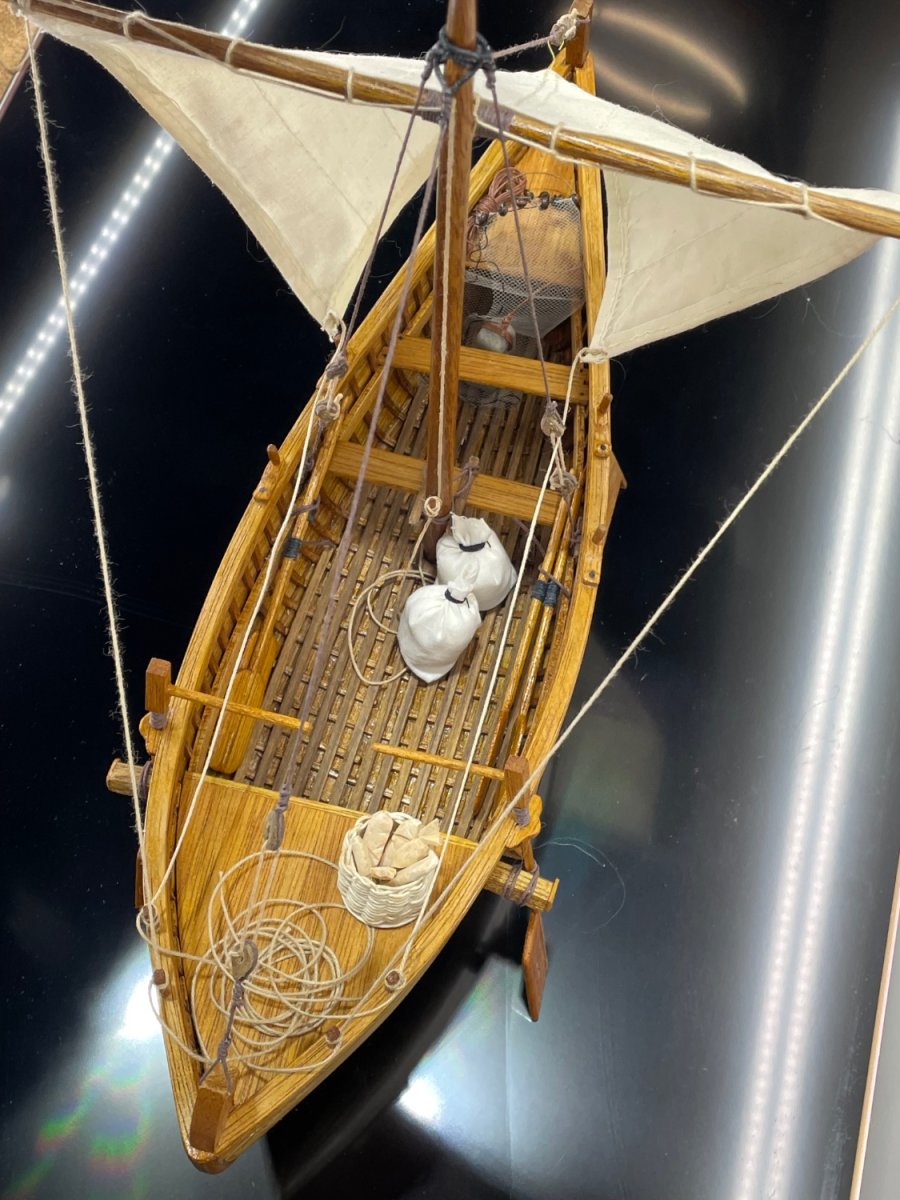
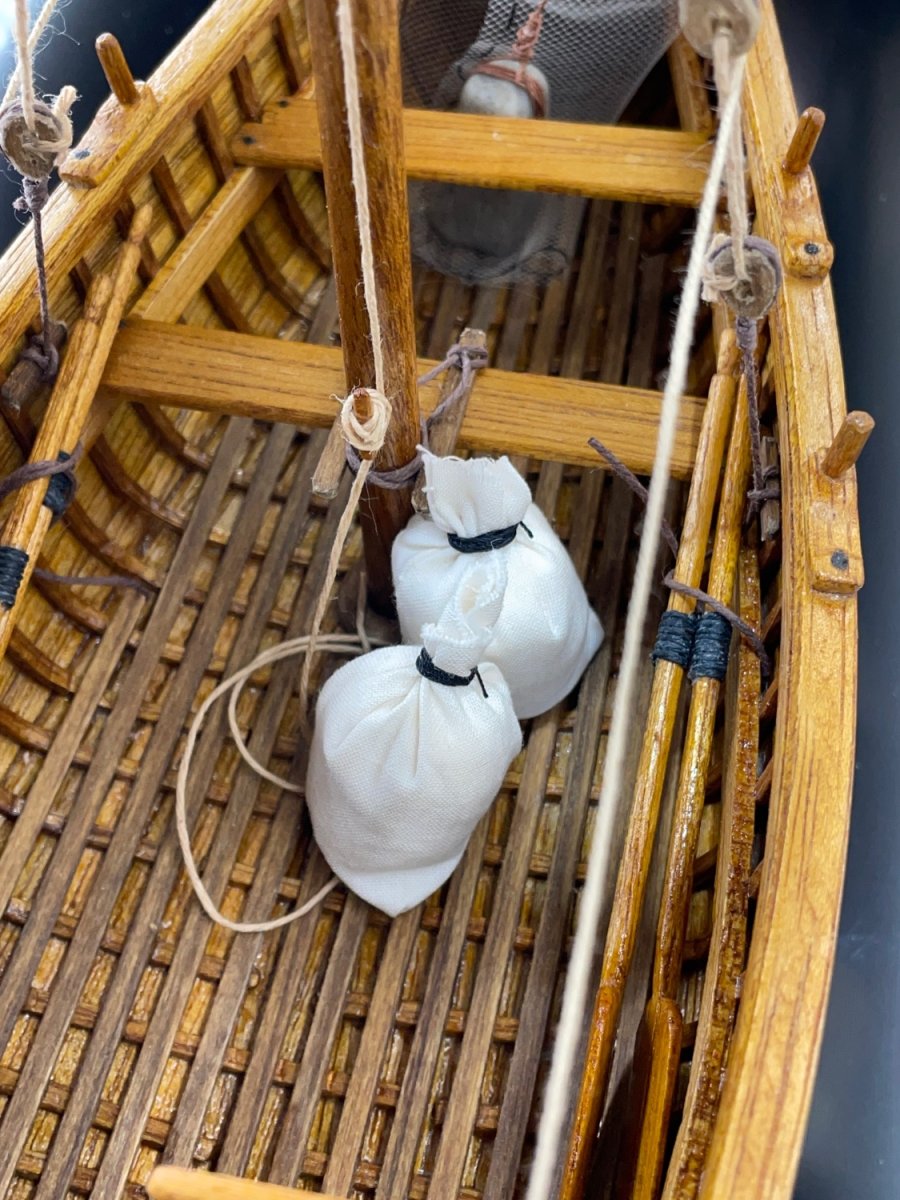
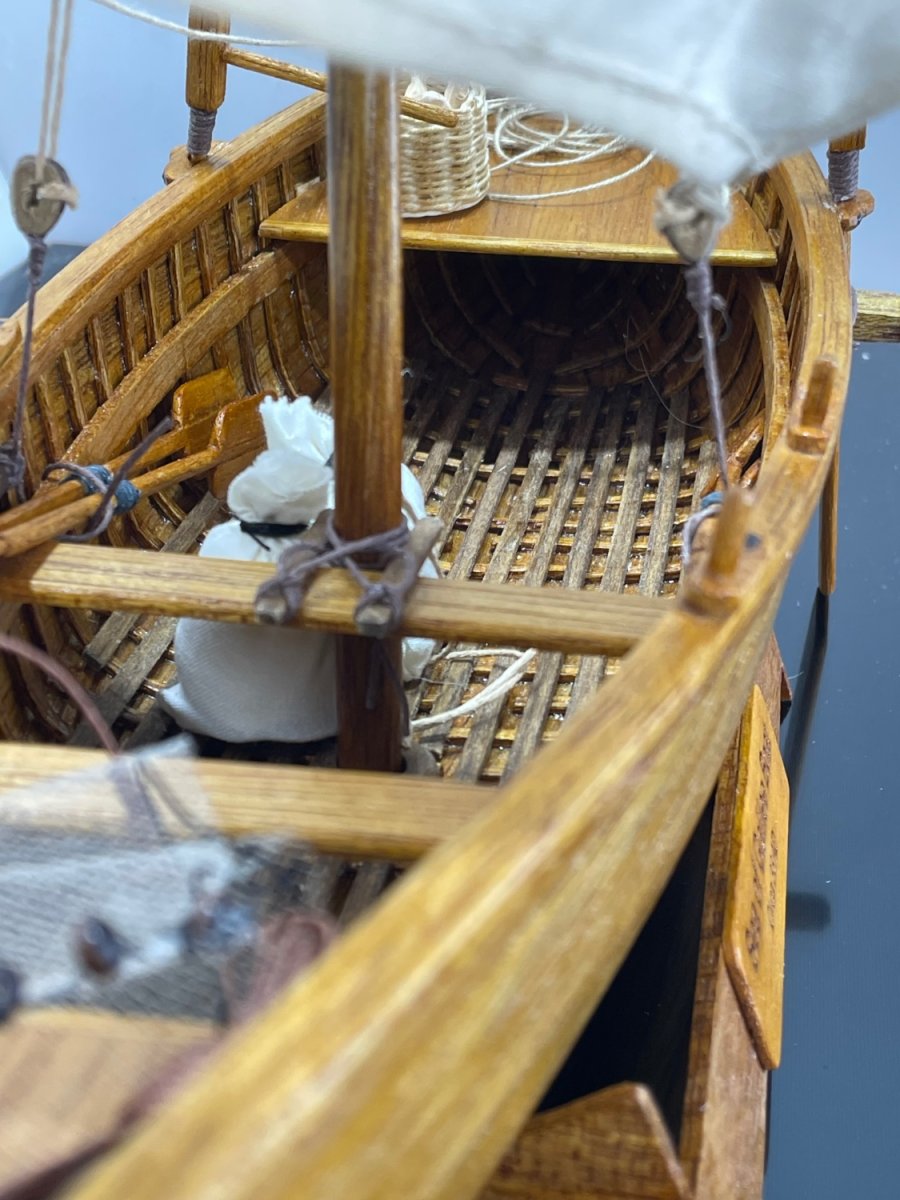
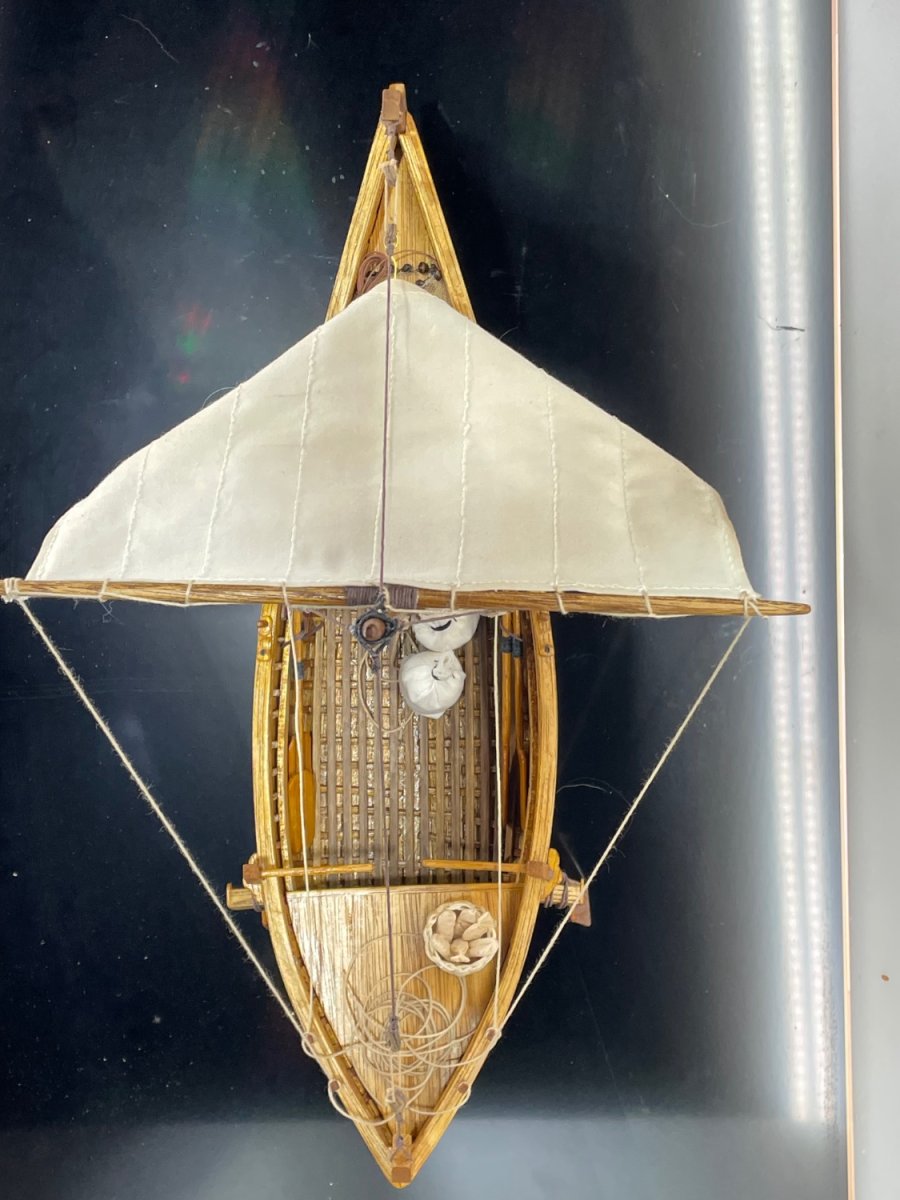
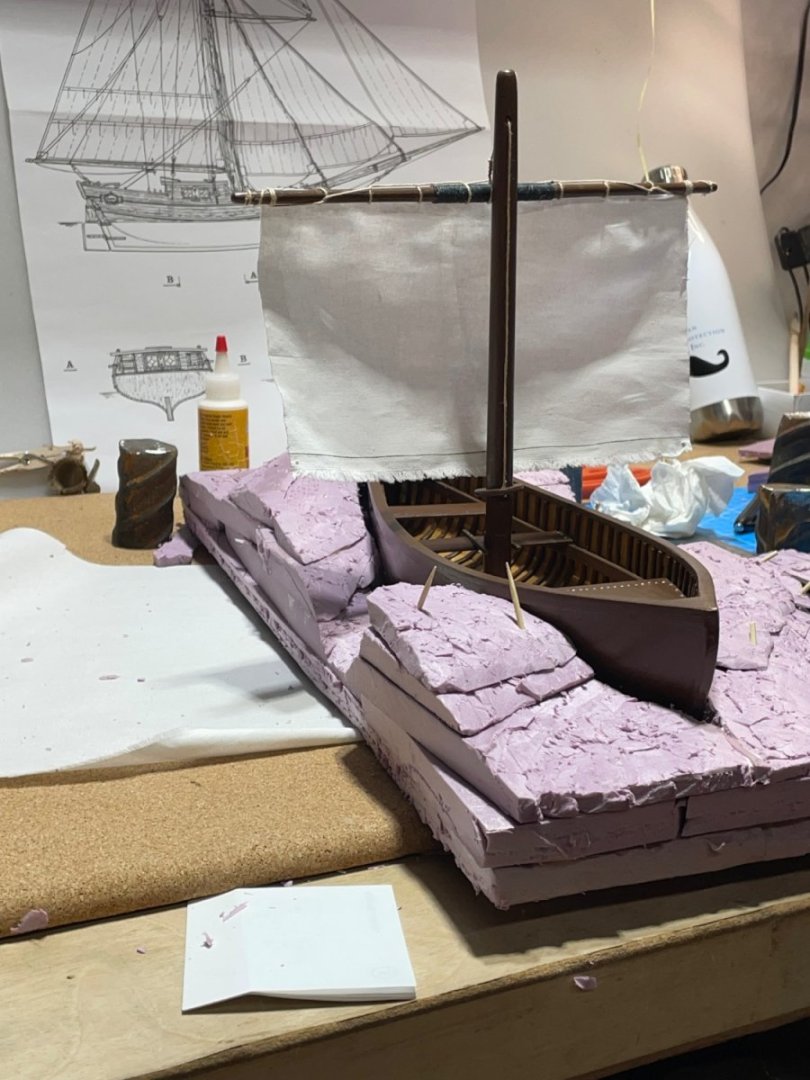
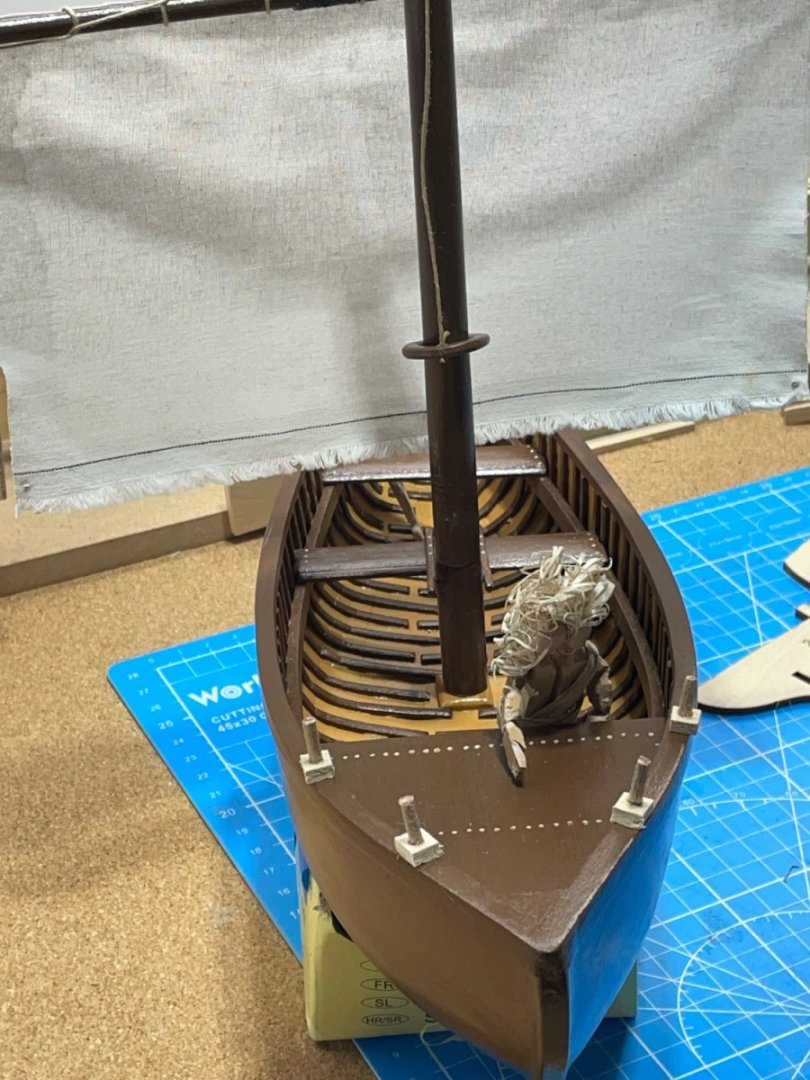
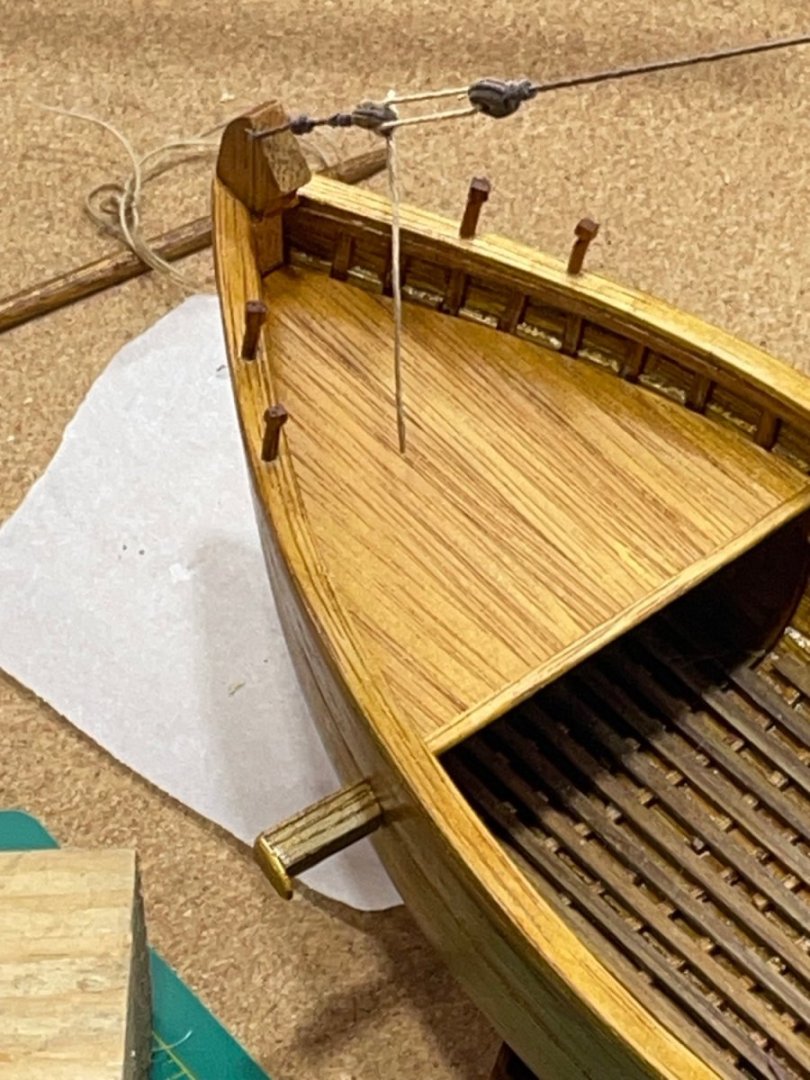
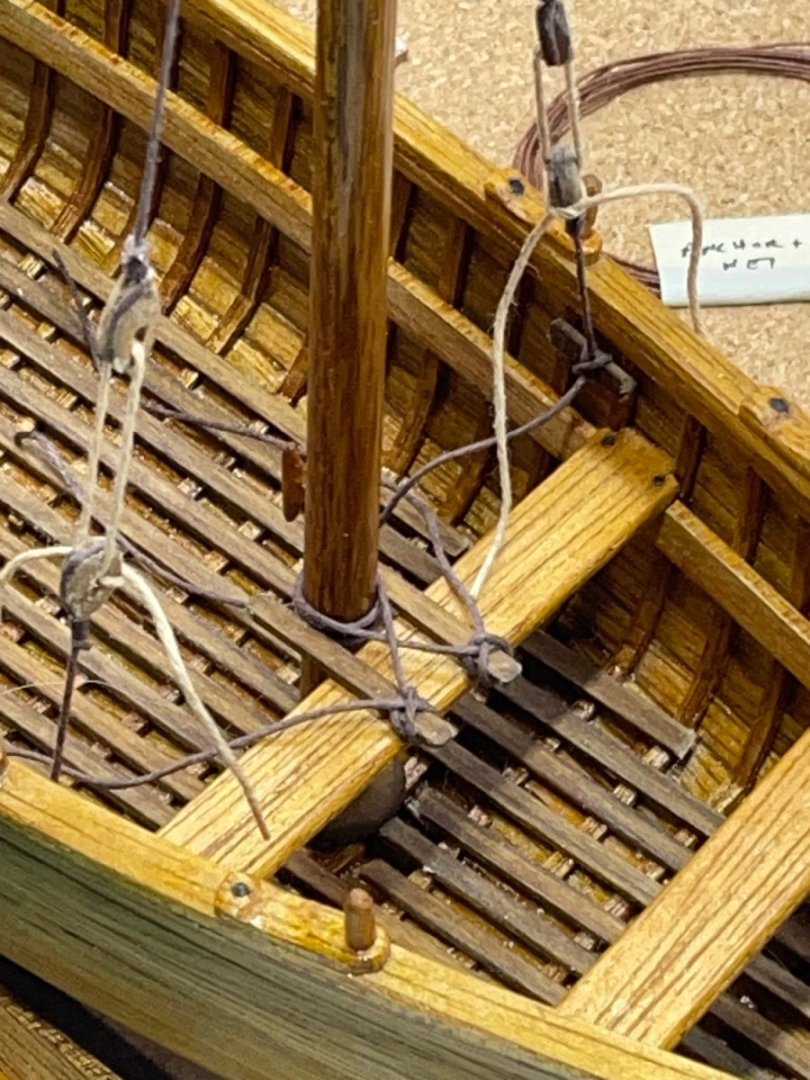
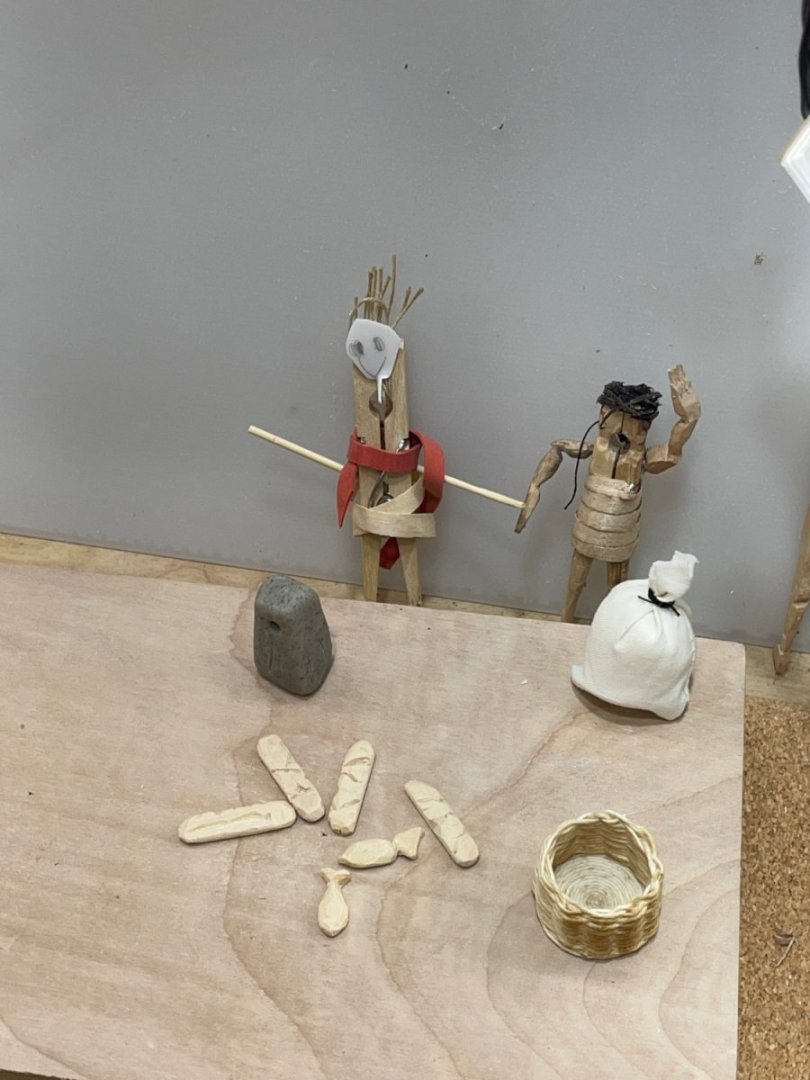
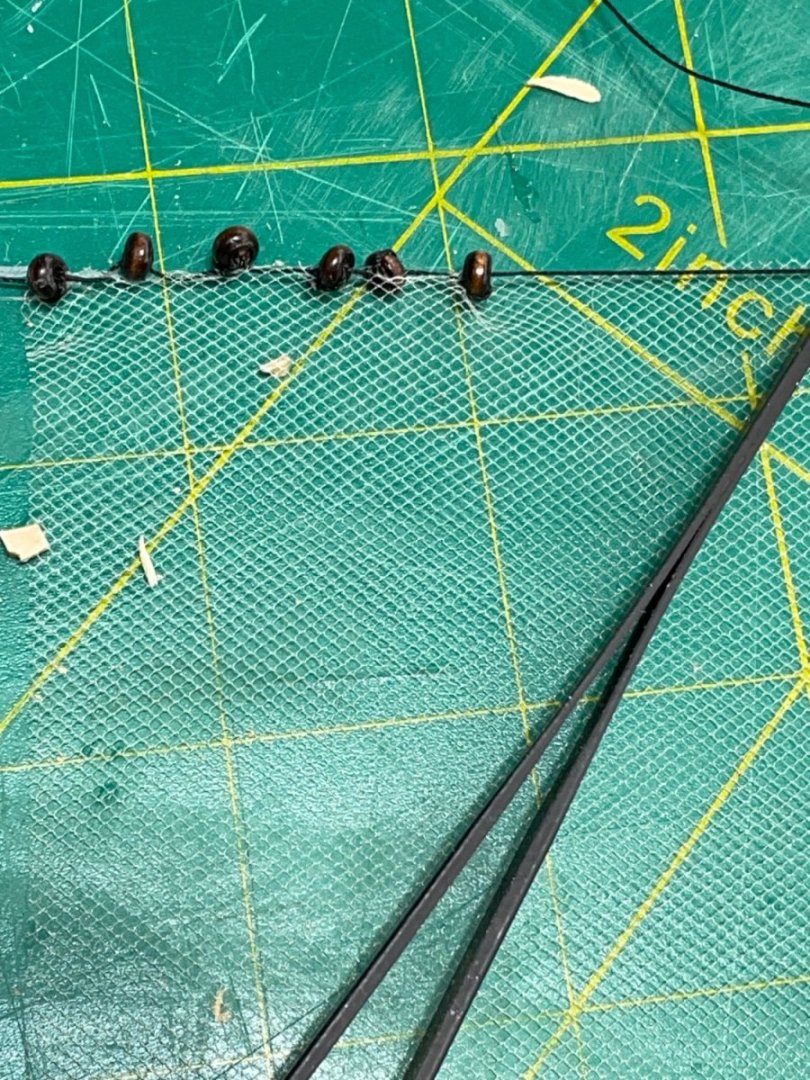
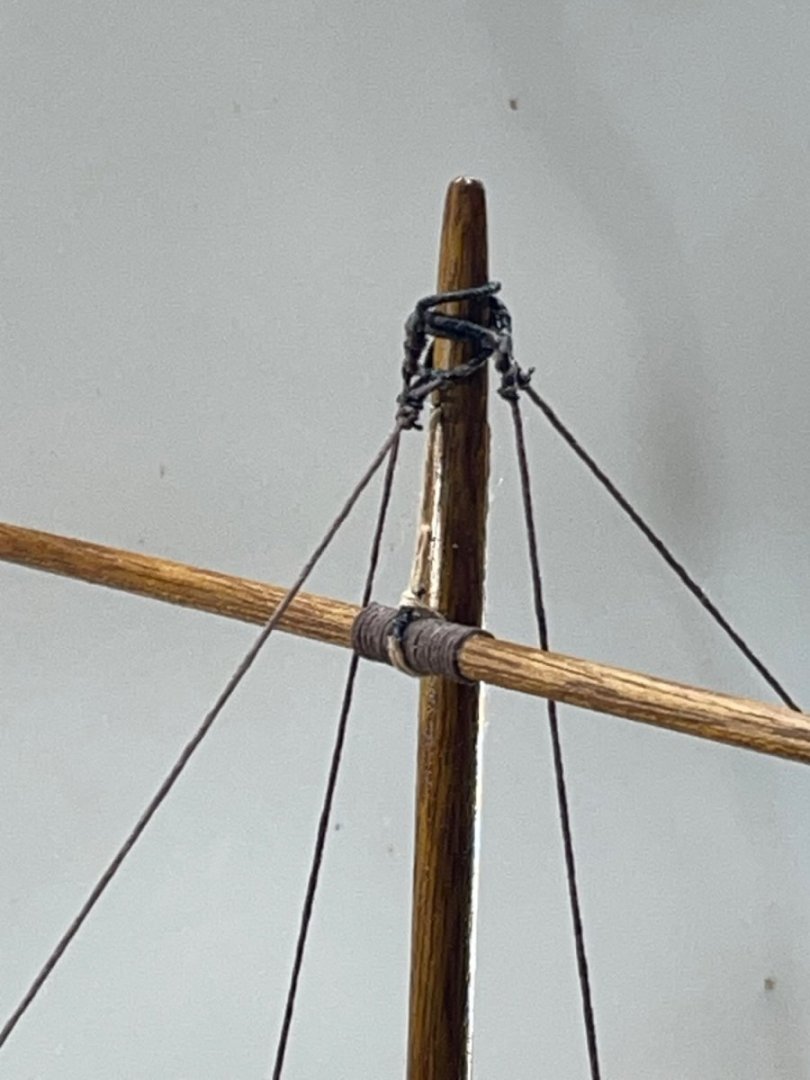
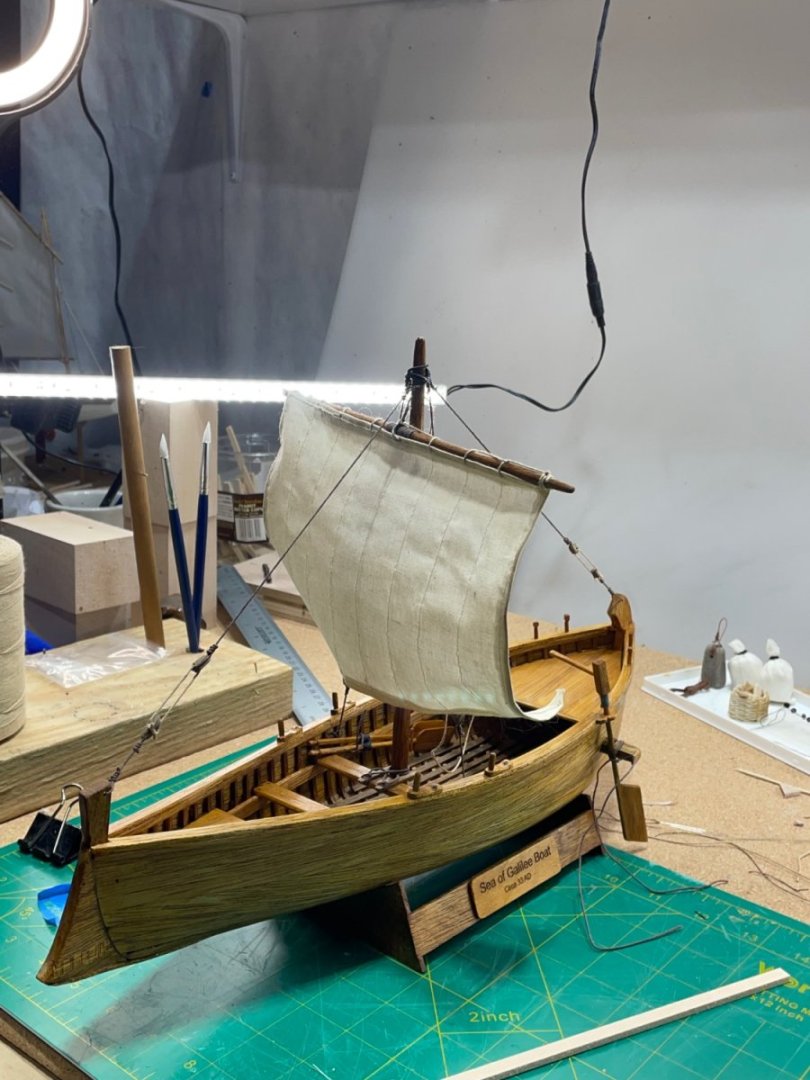
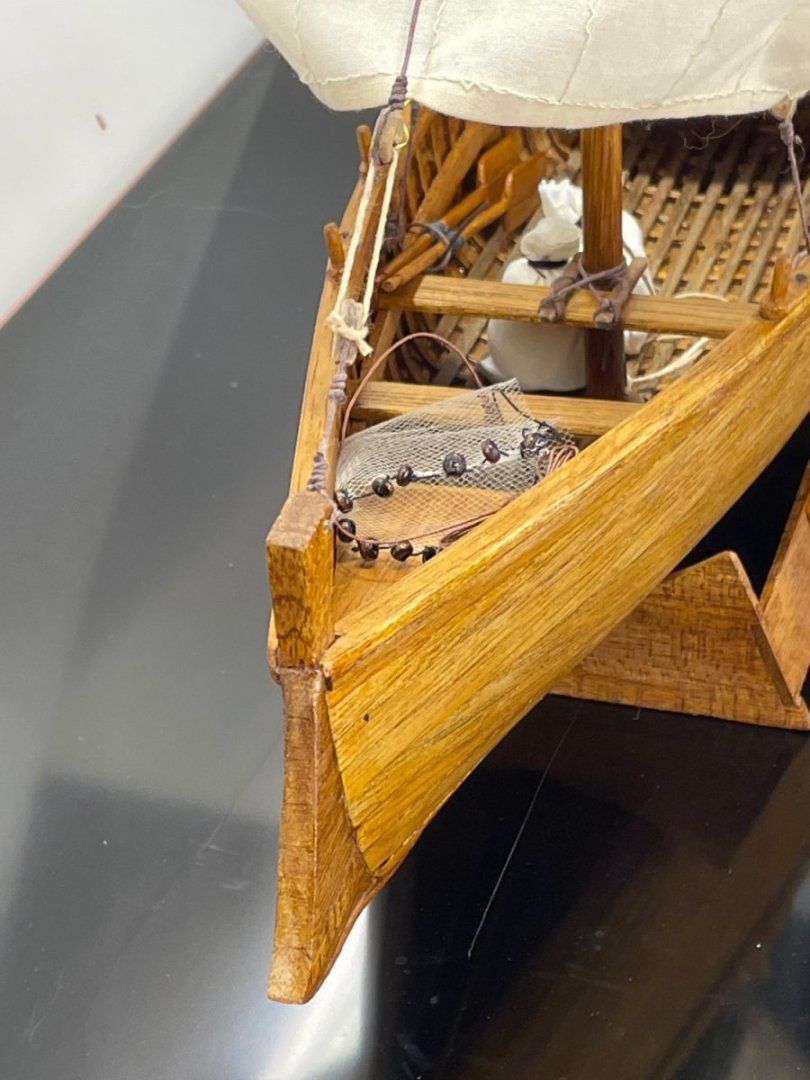
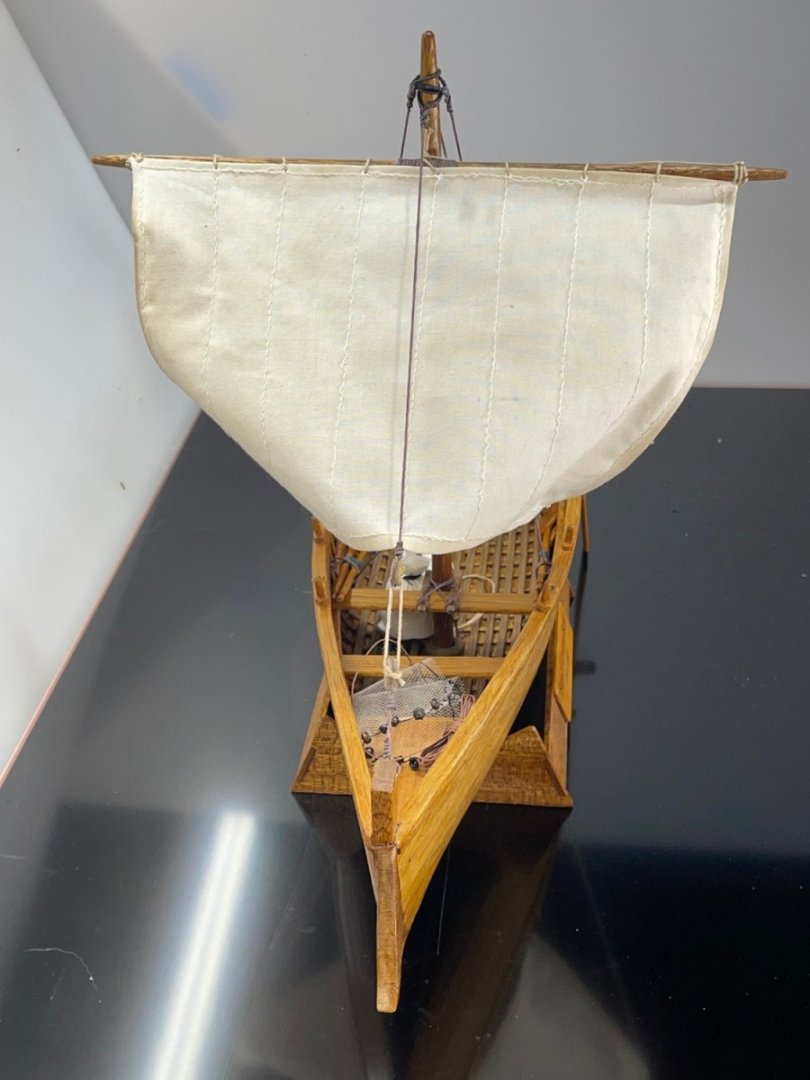
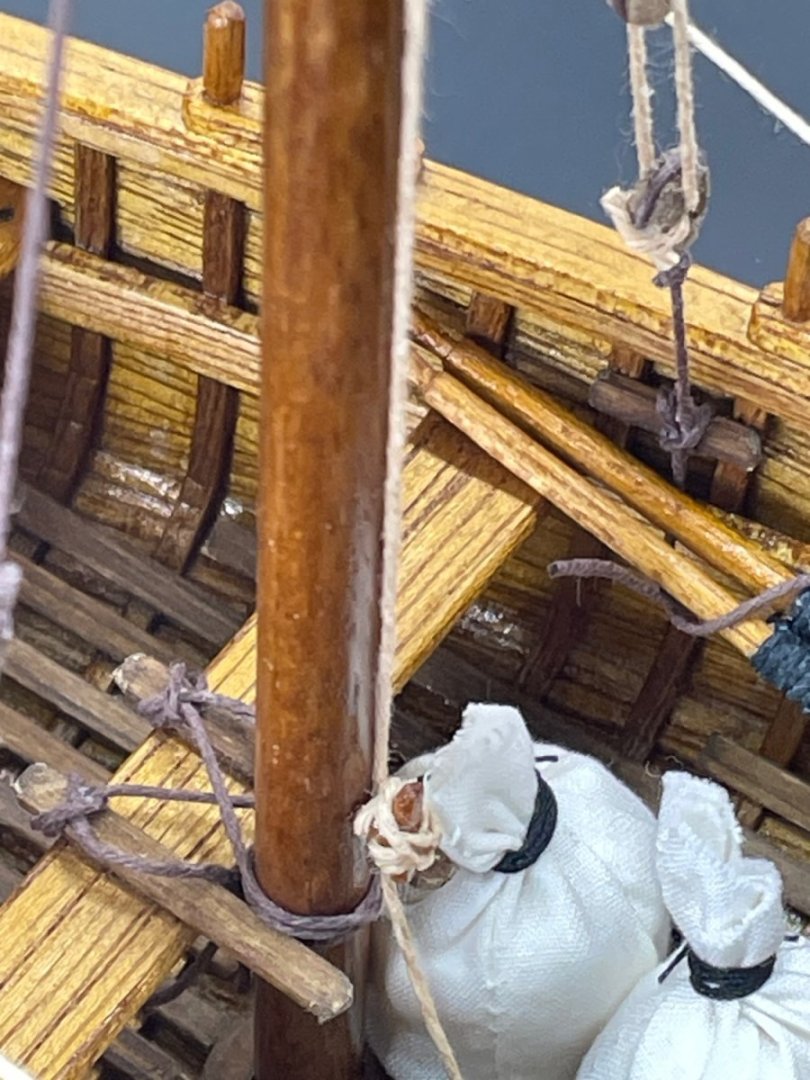
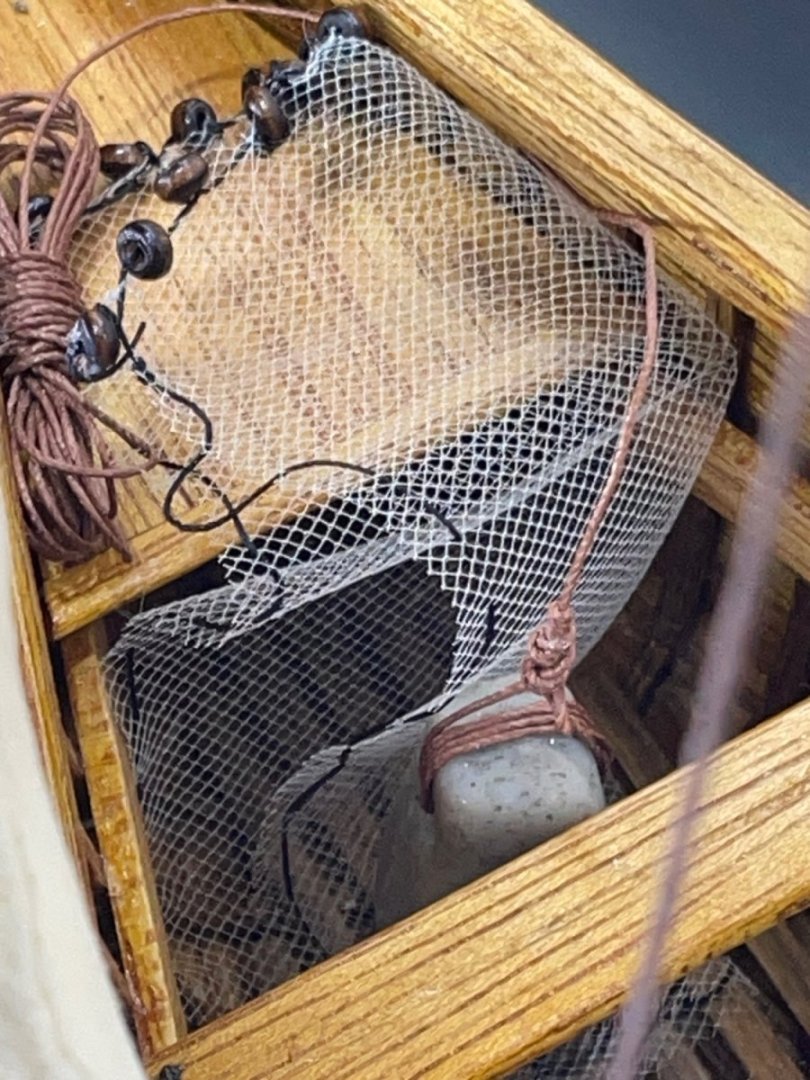
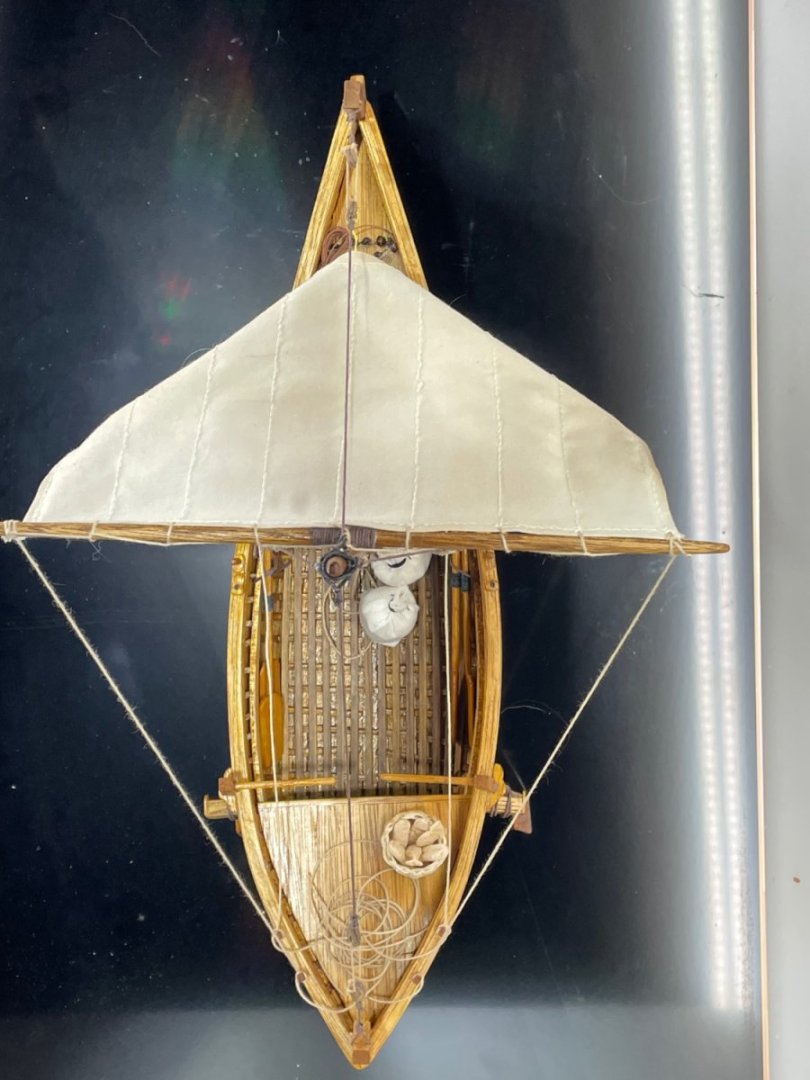
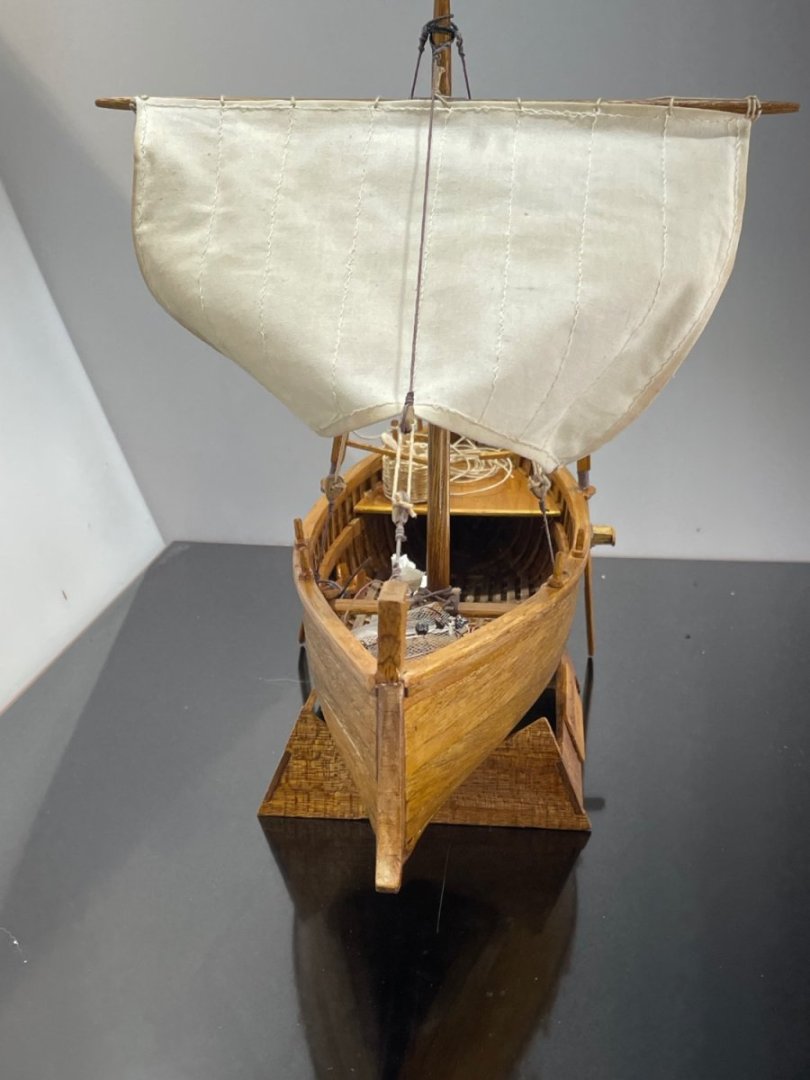
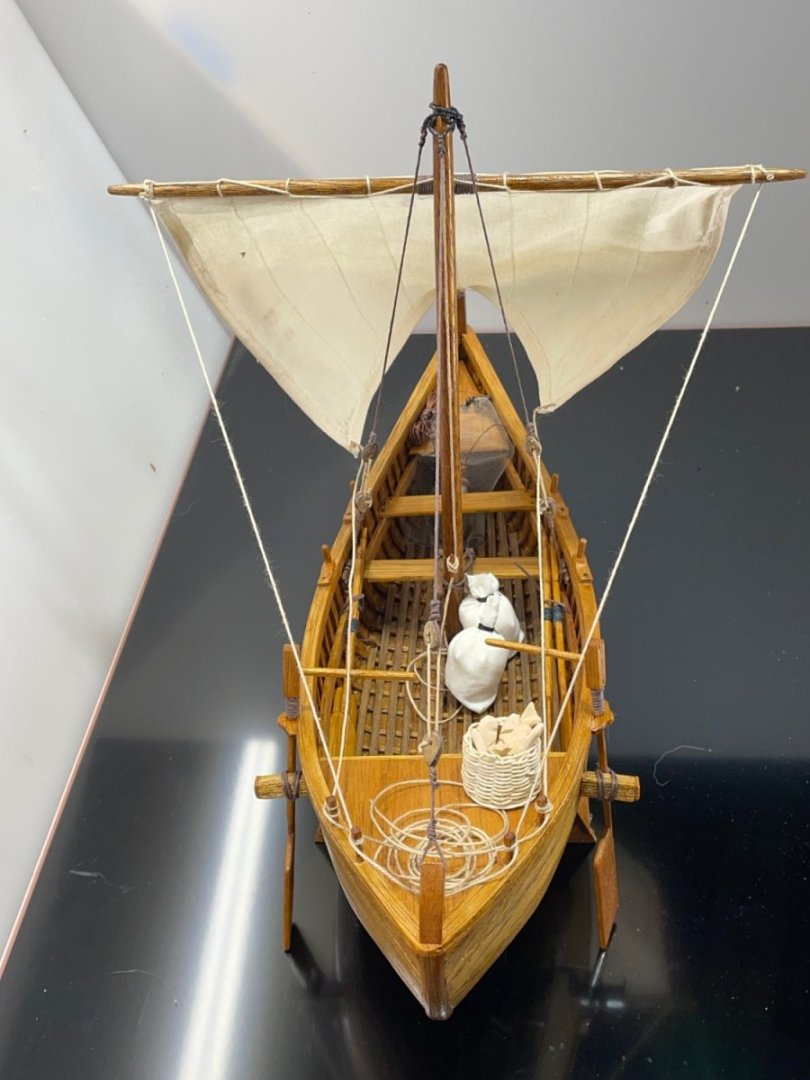
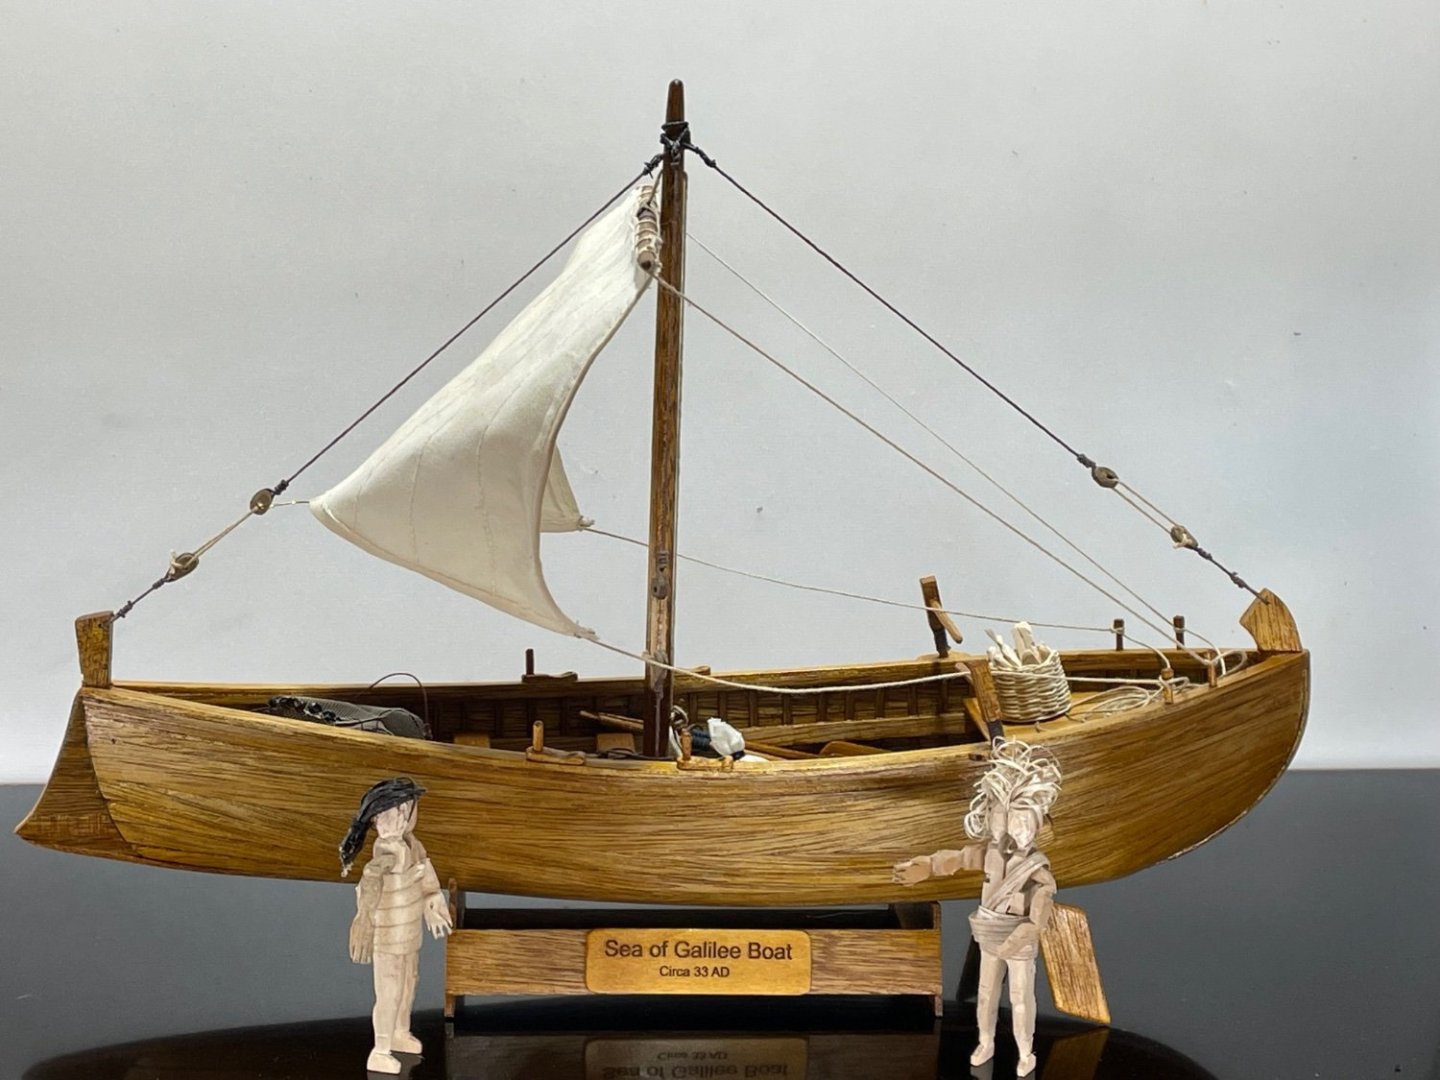
The last few days have been trouble free and productive. I decided to take care of the small things first:-) I drilled and installed the four rigging pins at the stern deck. then I made the quarter rudders and oars. Stuffed the pillars. Wove my first basket:-) I used smaller cord then what came with the kit. It turned out great, so I carved out five loafs and two fishes:-) The fifth loaf was do later. My granddaughter was over, and wanted to make her own figure:-) Then came the hardest part of the build! The fishing net. I think the holes in the net were smaller than the thread. The excitement builds as I prepare the yard. Meanwhile I soaked the sail in my favorite coffee. After the sail was raised, I set back and imagined how I was going simulate wind. By far this has been the most rewarding build, out of the grand total of four:-) It went so good I’ve already started another out of basswood, and plan on building it sturdy enough so kids can handle it. If I could learn to paint pretty quick, I’d paint waves all over the hull:-) Here’s a bunch of shots I took this morning. The next task that’s at hand, is finding Peter, Andrew and their boat a permanent home:-) Thanks for all the input, advice, encouragement and compliments.


- 134 replies
-
- 7
-
-
-
- sea of galilee boat
- SE Miller
- (and 1 more)