Der Alte Rentner
-
Posts
618 -
Joined
-
Last visited


-
 mtbediz reacted to a post in a topic:
USS Constitution by Der Alte Rentner - Model Shipways - 1/76
mtbediz reacted to a post in a topic:
USS Constitution by Der Alte Rentner - Model Shipways - 1/76
-
PaddyO reacted to a post in a topic:
USS Constitution by Der Alte Rentner - Model Shipways - 1/76
-
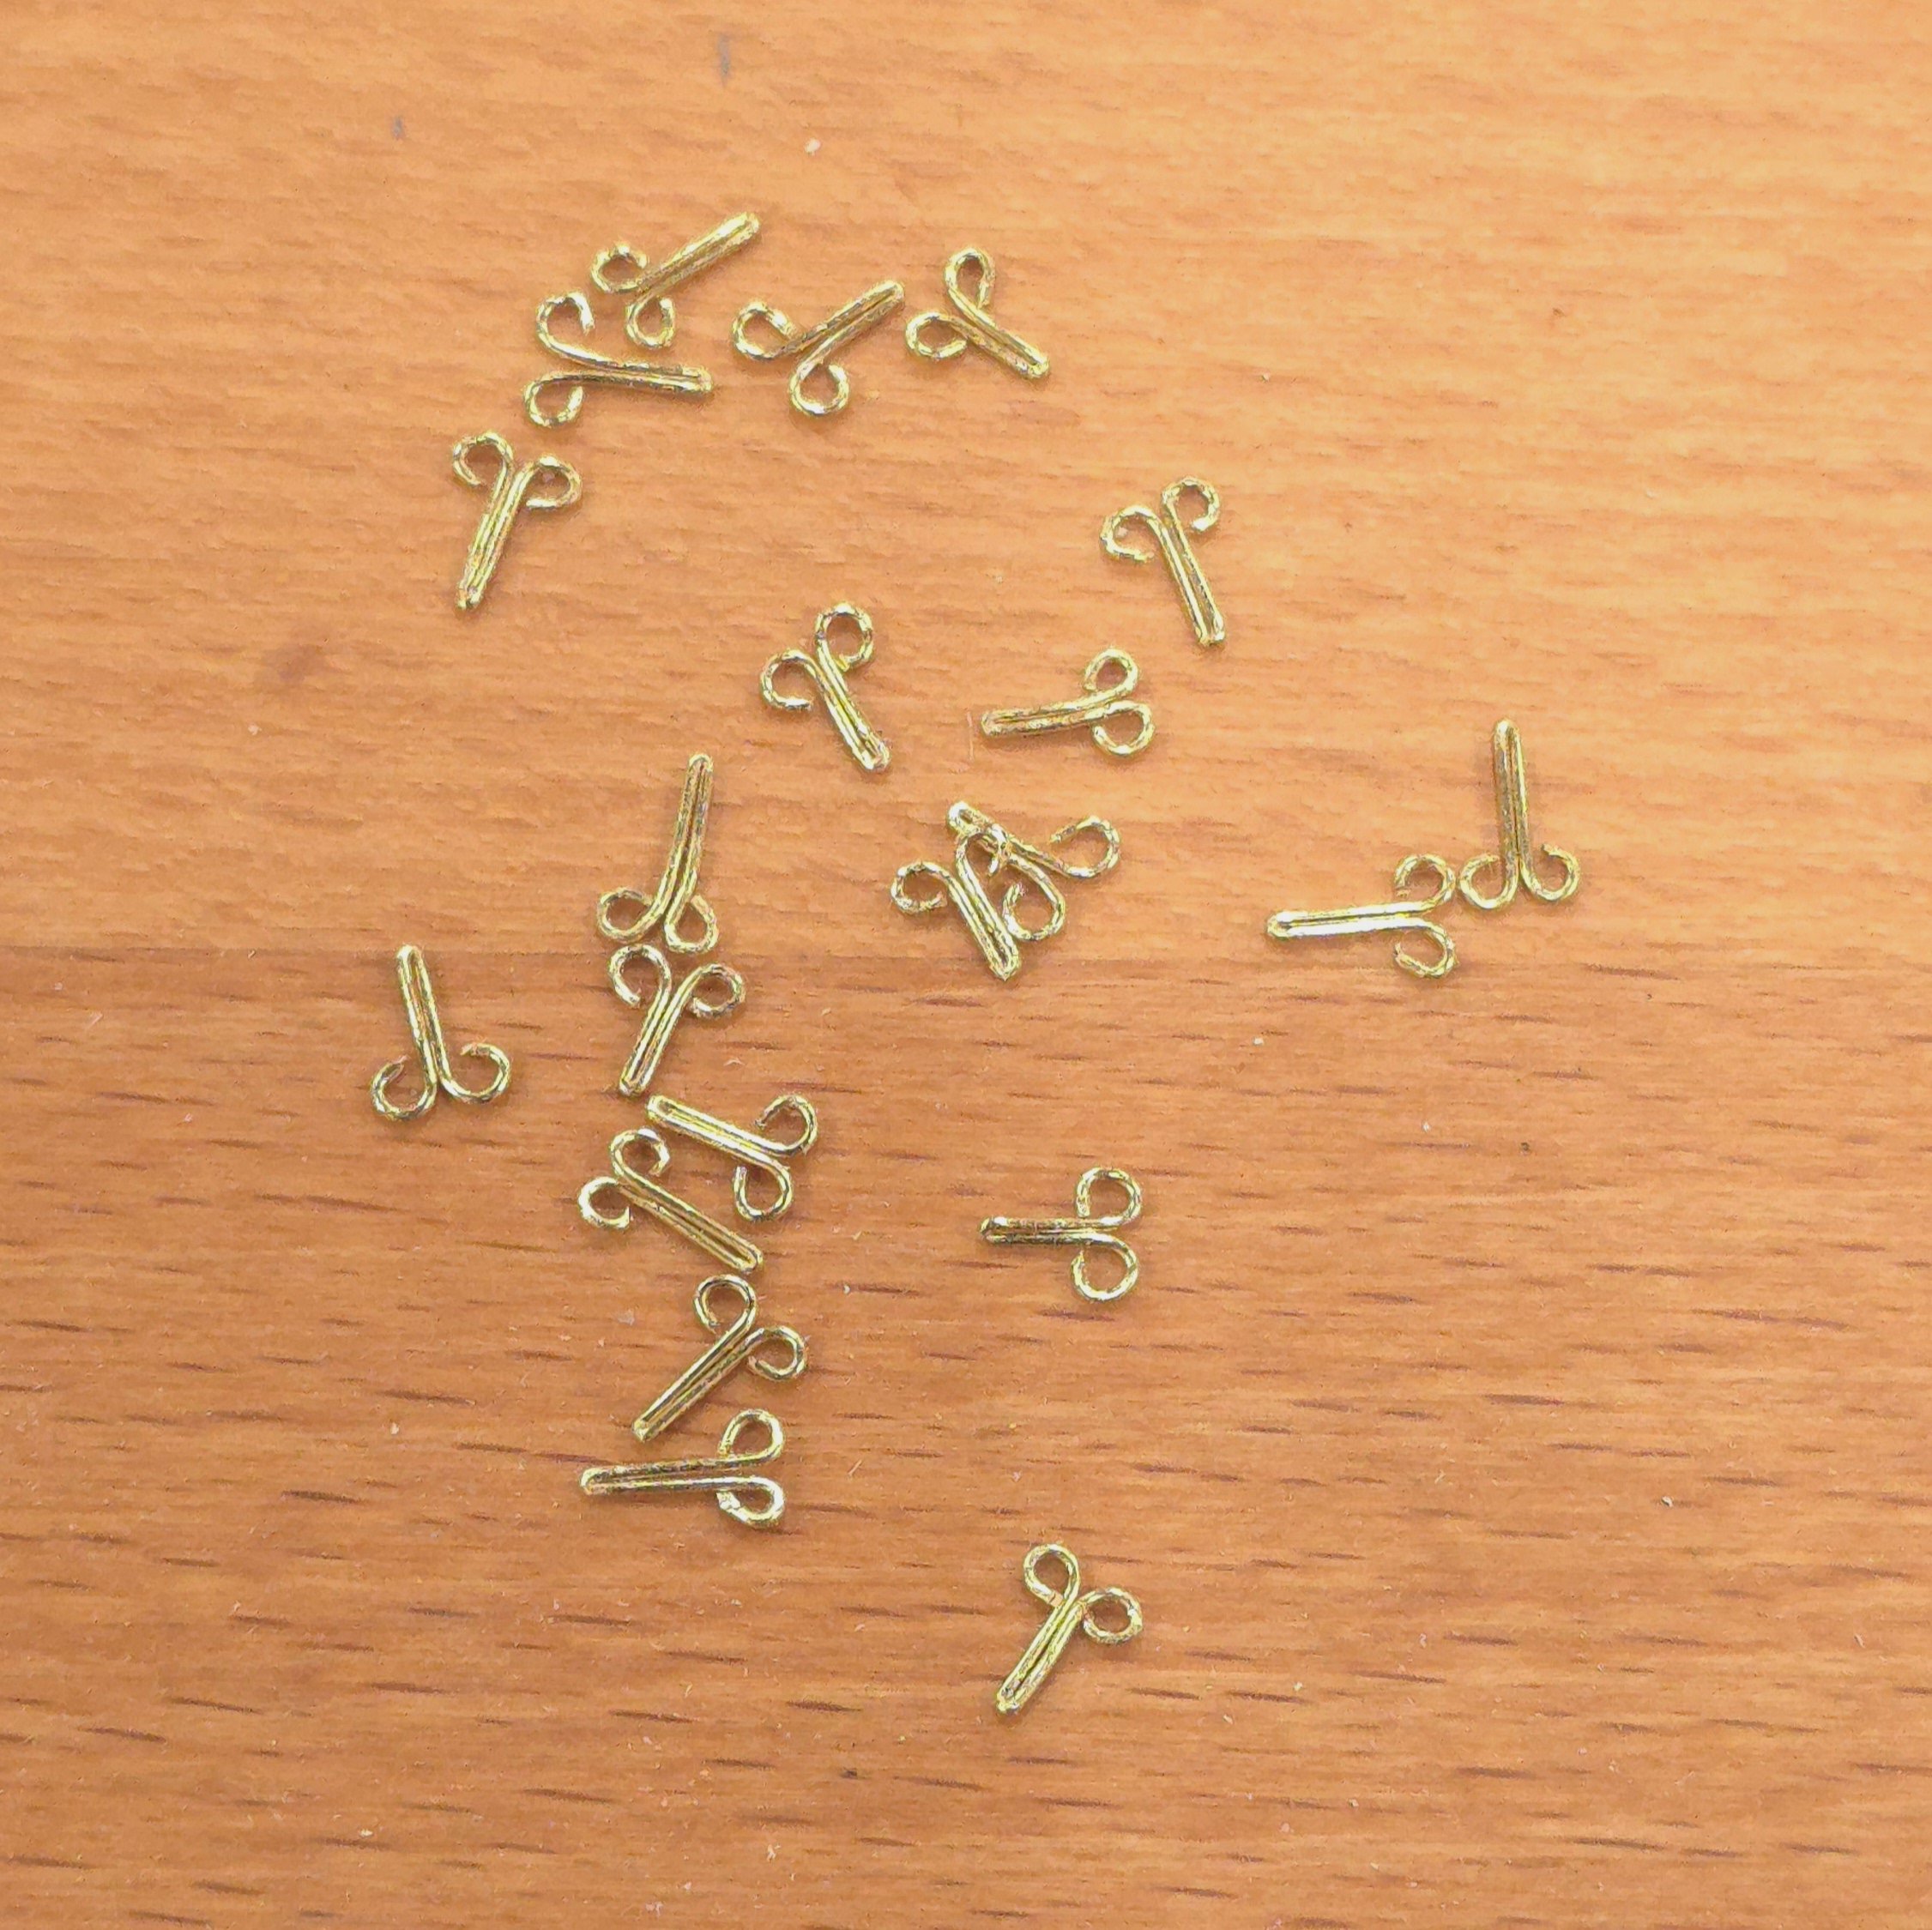
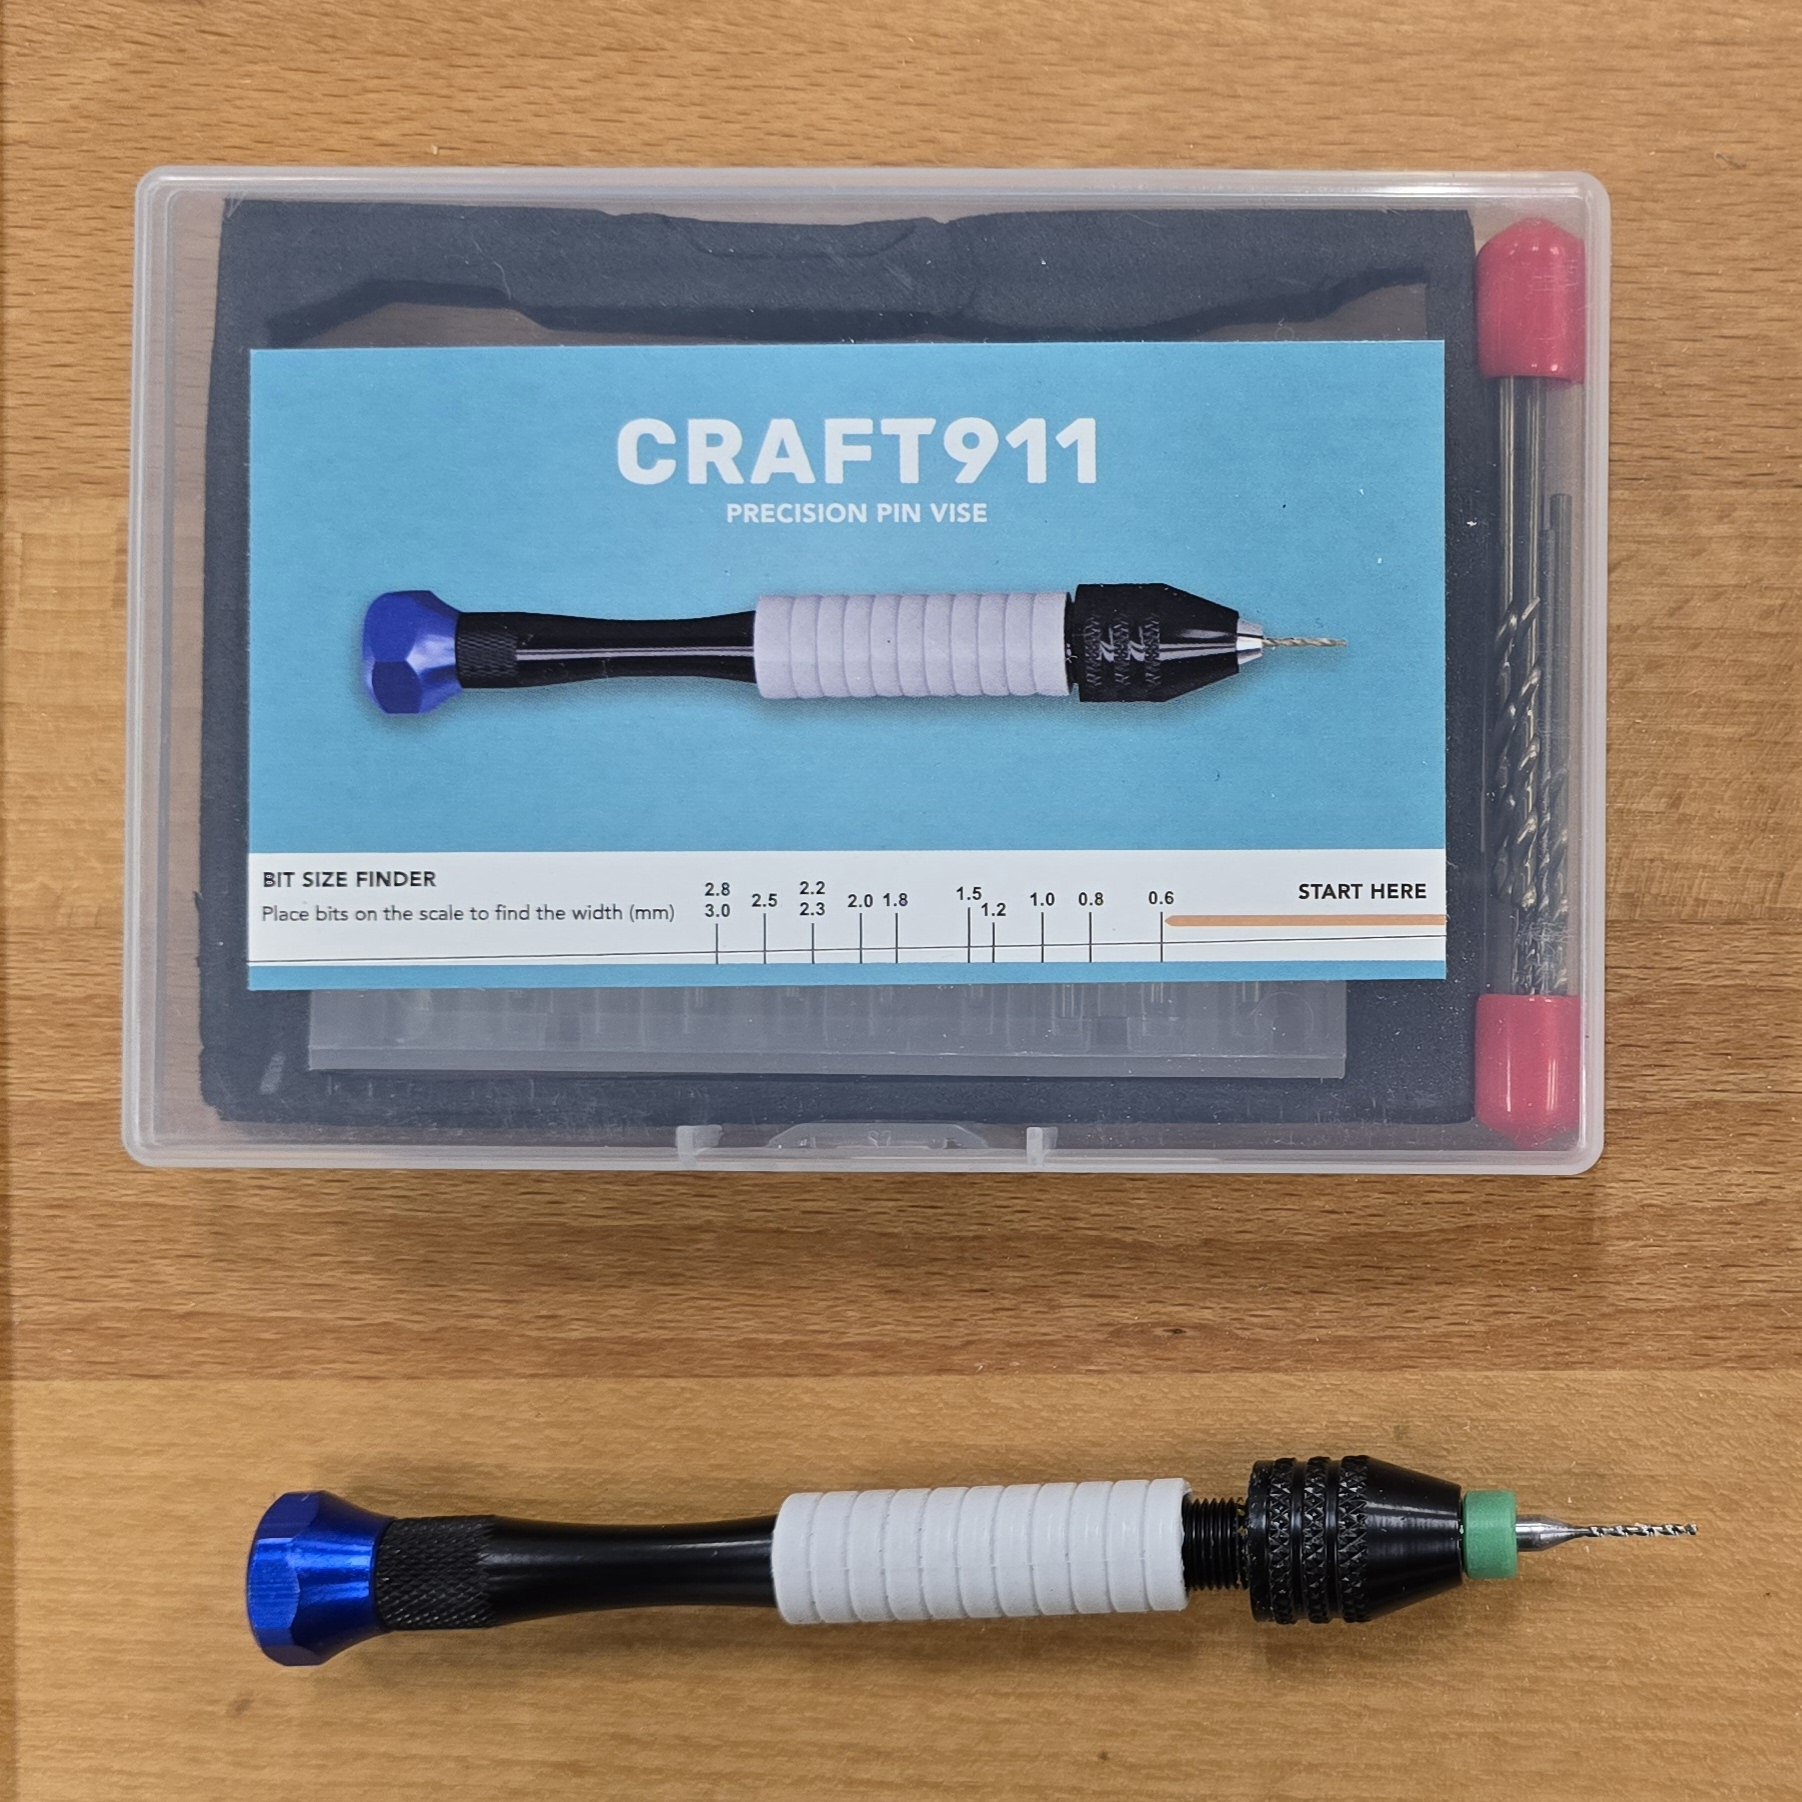
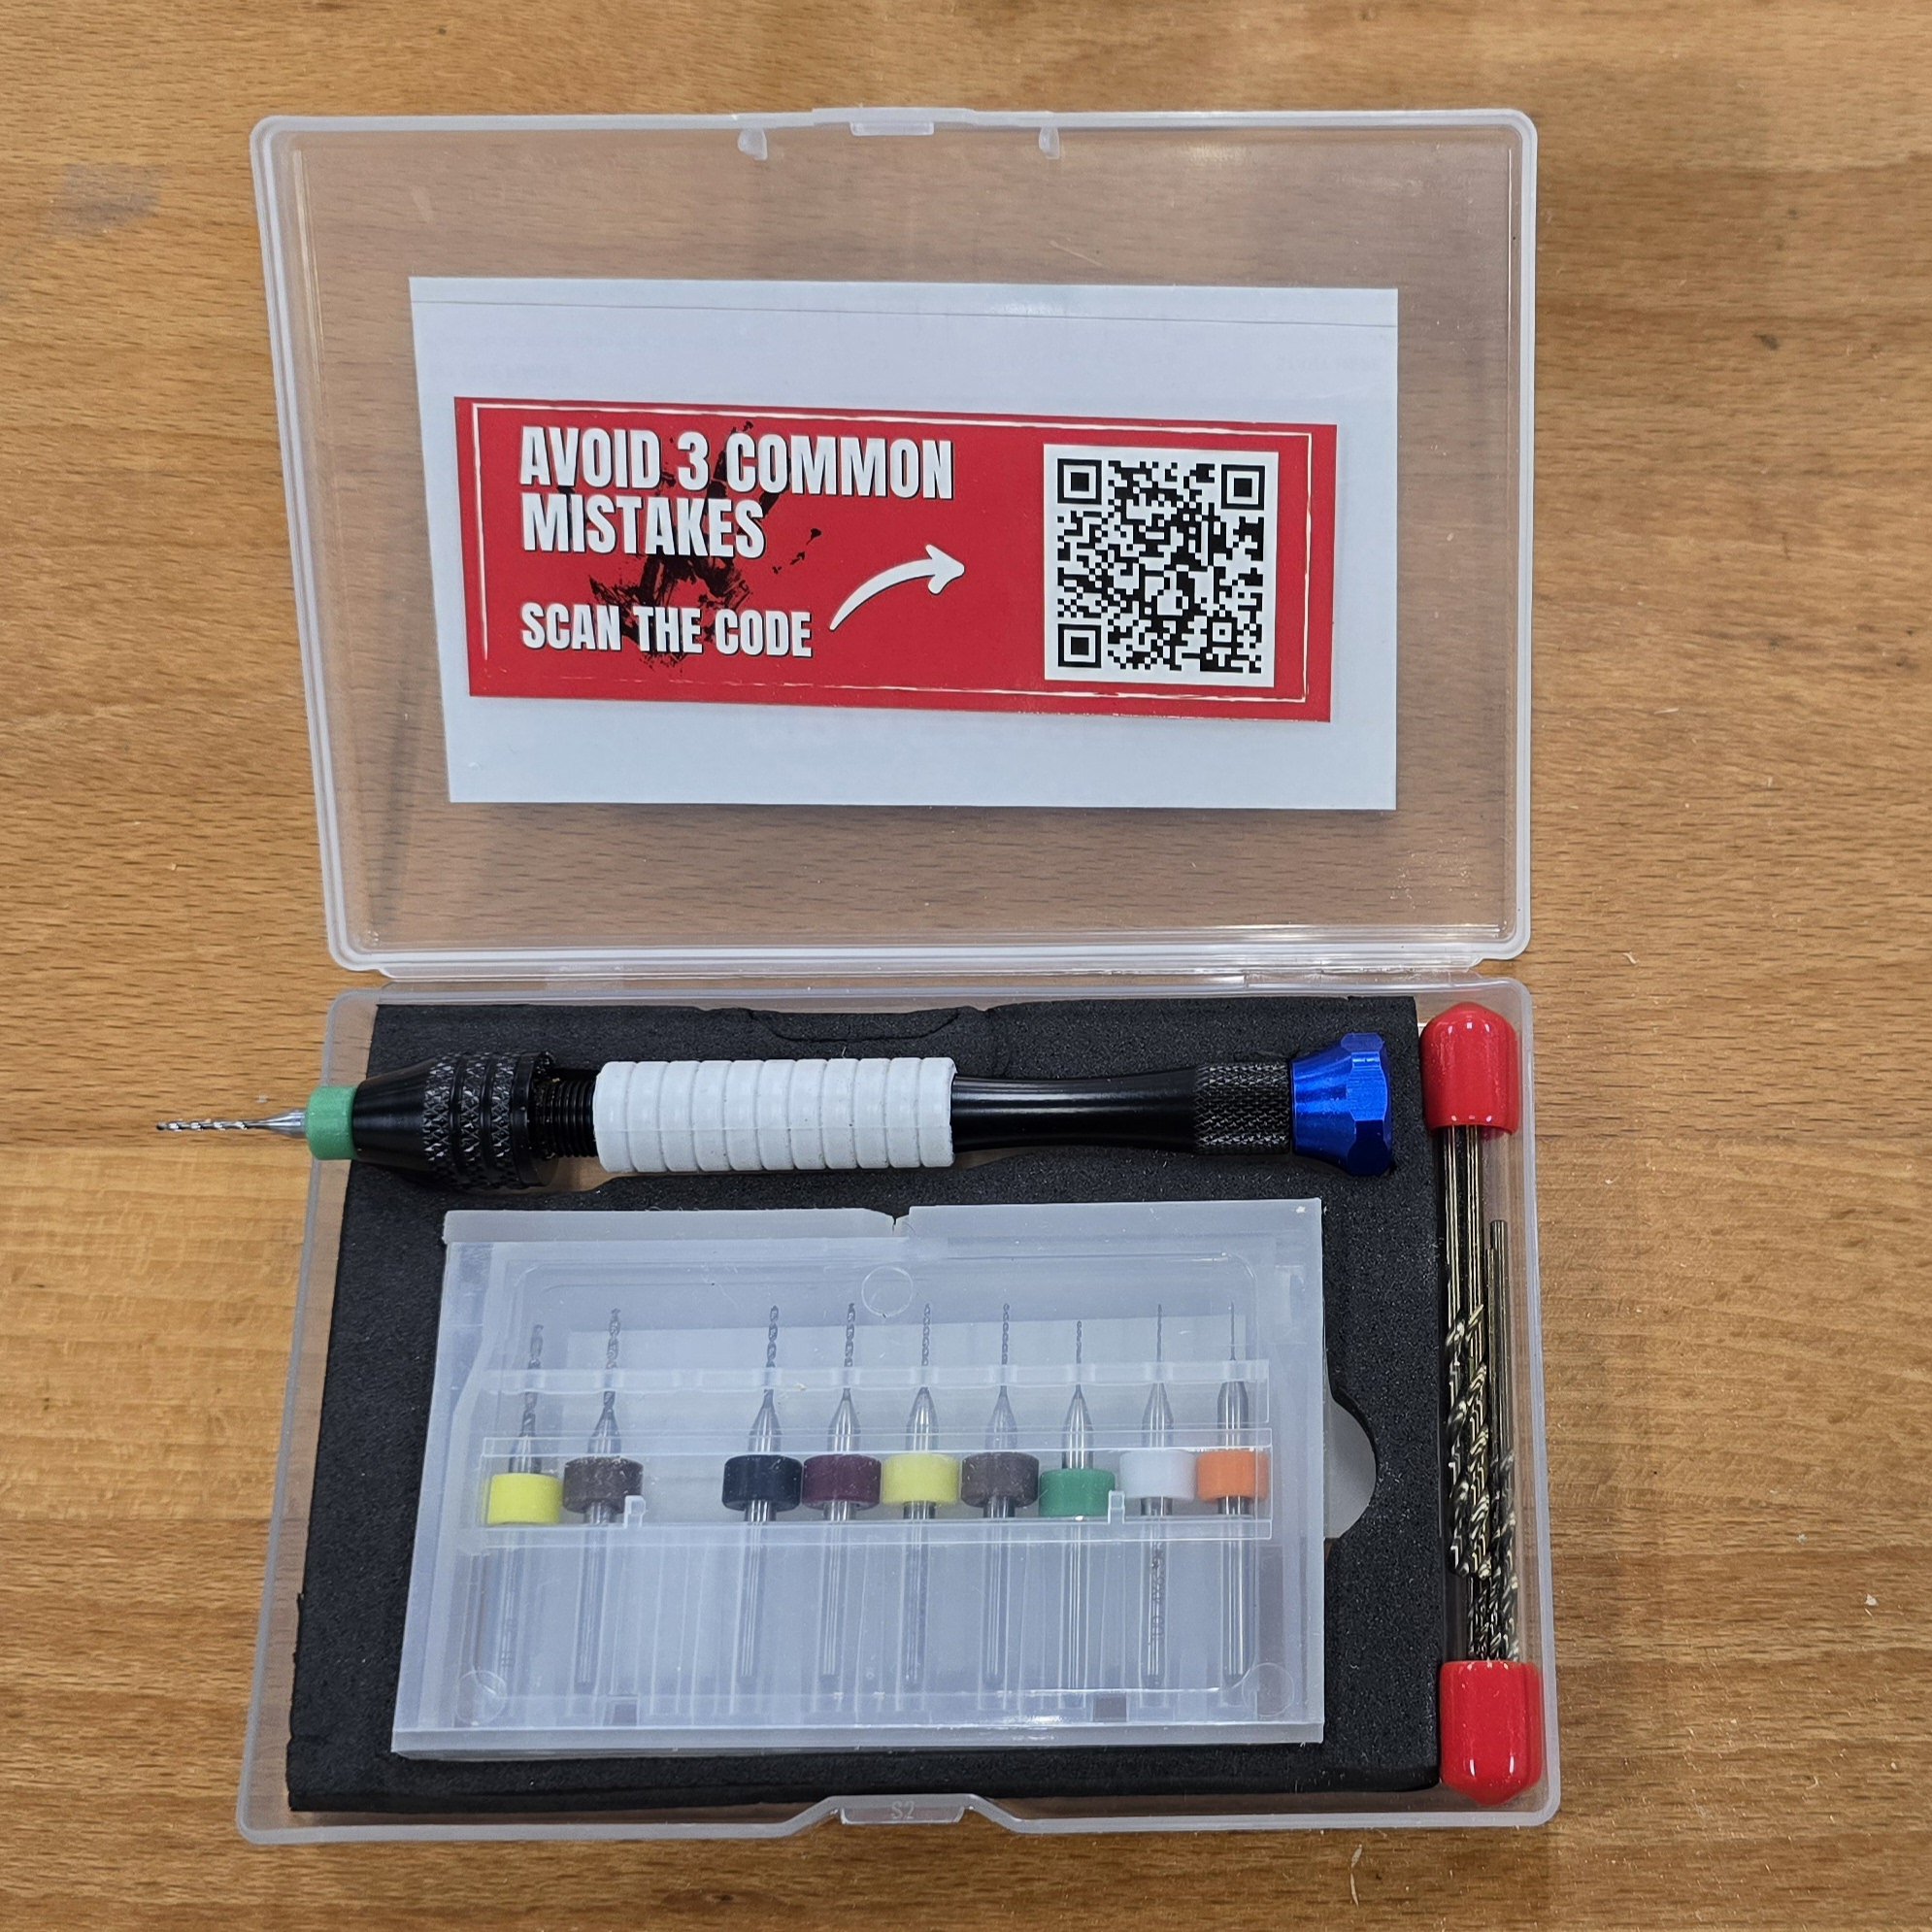
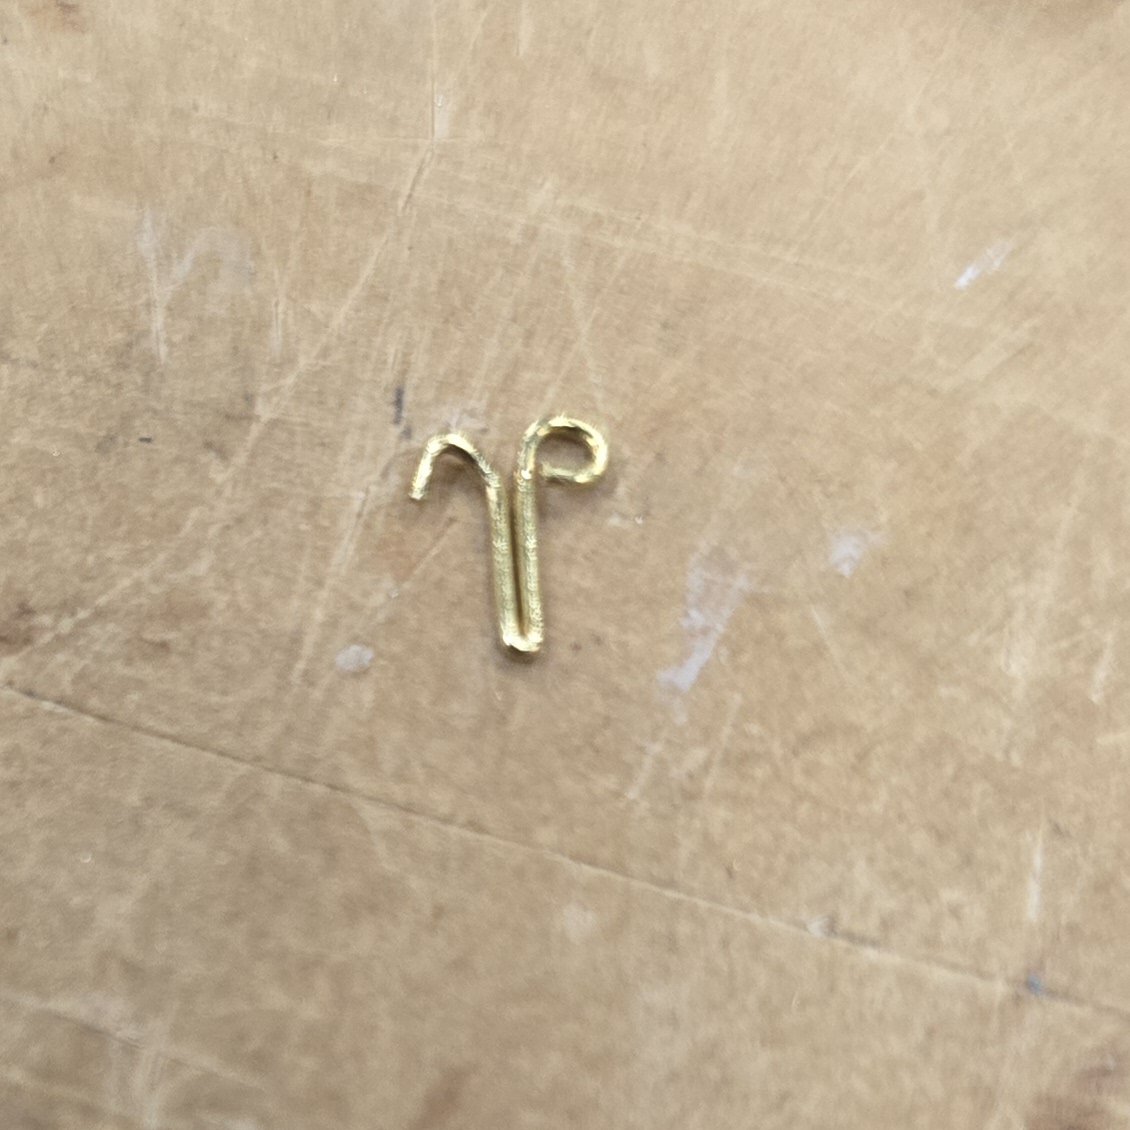
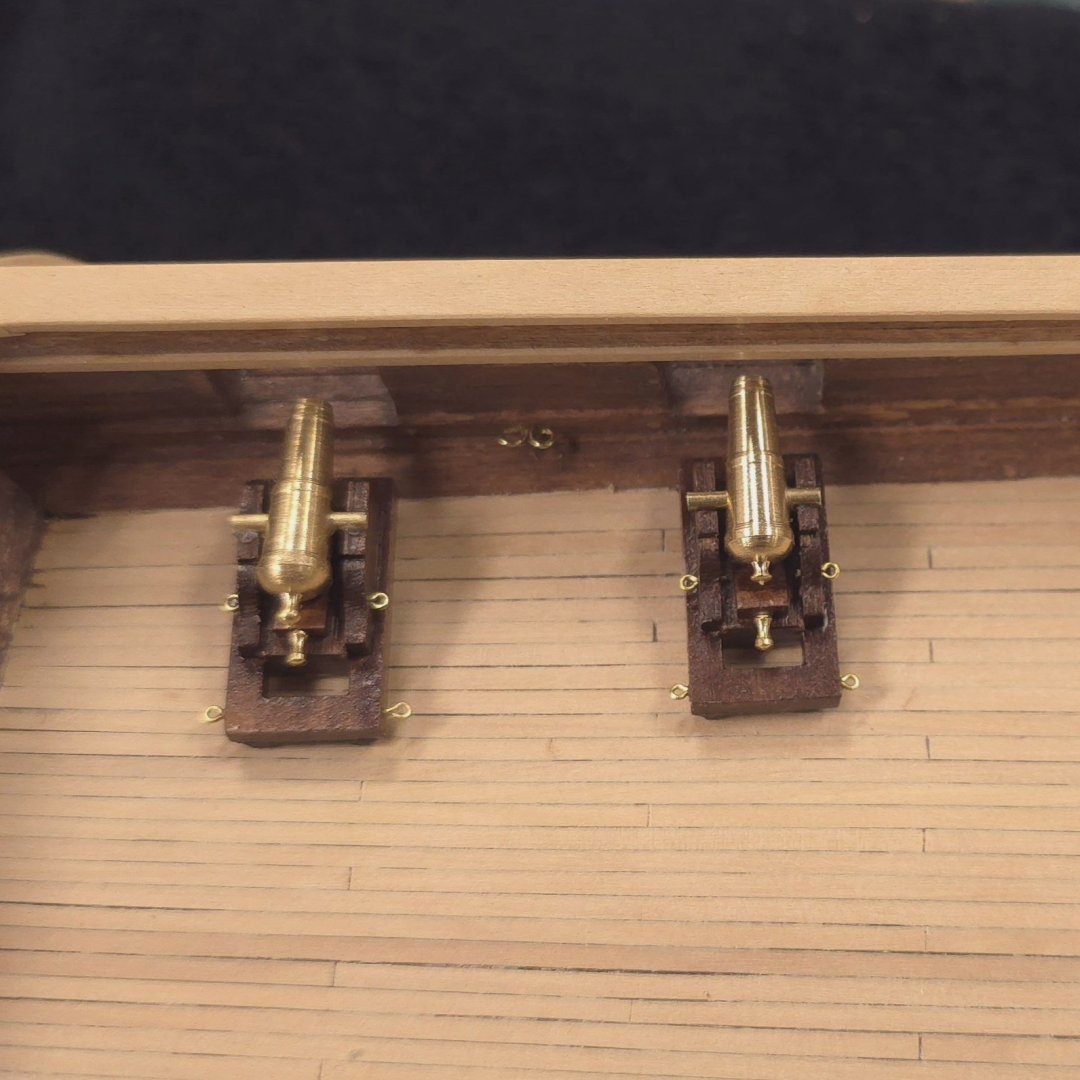
 Not much to show by way of progress. But here's the latest round of photos. The double eyebolts are finished and installed. To drill the holes in the plank sheer for the eyebolts, I upgraded to a much more ergonomic pin vise/drill. The one I had worked, but I didn't have drills in the sizes I needed to drill the slightly larger than 1mm (I actually needed 1.2 mm) holes I needed for the eyebolts. This Craft911 kit included a very nice assortment of drills, and for the smaller diameters, these had larger shanks that made it easy to clamp down on the bits. Furthermore, these bits were nice and sharp, and the light grey area on the shaft was a soft slip resistant comfortable grip, making use of the pin vice a pleasure. Highly recommended!
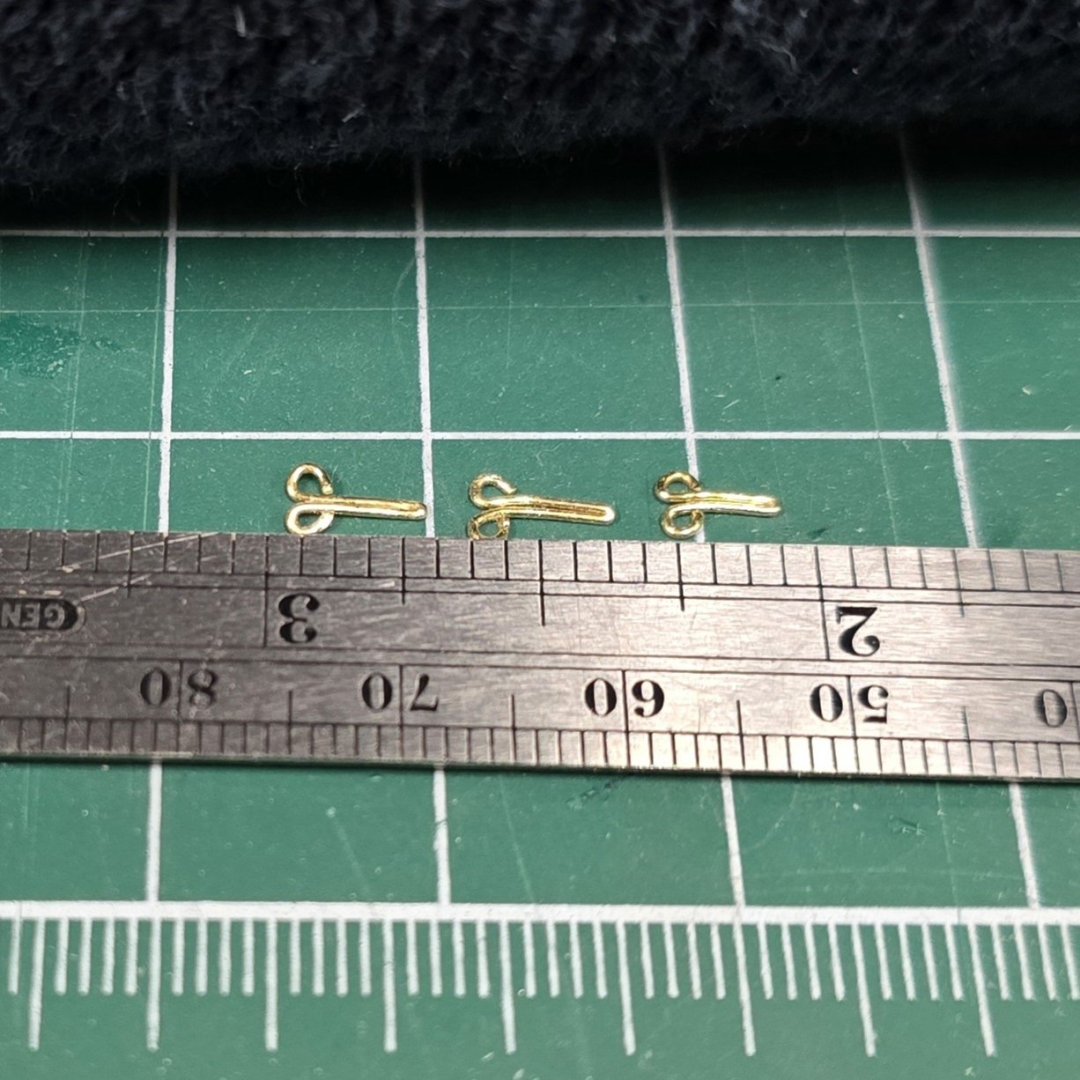


-
Geoff, Since you're past all but the rigging, you're the best person to ask this. How many of the kit supplied eyebolts did you have left over after construction? I'm asking because I want to make those hooks used in the carronade tackle out of those eyebolts. Since I have yet to hear from Model Shipways on a year old request for parts (with one follow up email in the interim), I'm not holding out hope to get additional eyebolts from them. Bob hunt made it sound like there are way more eyebolts in the kit than one will need. I'll need to make what, 40 plus hooks for that rigging? No rush, since I'm done with the carronades and double eyebolt installation until I'm finished with the hull. I'll get back to that on Monday.
-
USS Constitution by mtbediz - 1:76
Der Alte Rentner replied to mtbediz's topic in - Build logs for subjects built 1751 - 1800
Tech support to the rescue. In Windows, press and holds these three keys to get to a utility that let's you select as much or as little of what you want in a screen shot: Then use your mouse to surround the part of the screen you want to capture. That puts the image into the clipboard. Merely paste it into your post - like I just did. Google Screen Shot using Windows, Shift and S keys to get at Youtube videos that explain how to use this awesome feature.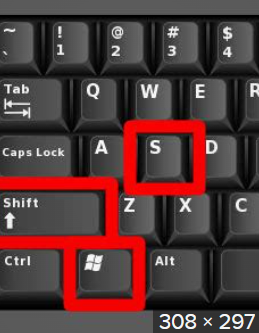
-
 Der Alte Rentner reacted to a post in a topic:
San Martin by Pfälzer - OcCre - 1:90
Der Alte Rentner reacted to a post in a topic:
San Martin by Pfälzer - OcCre - 1:90
-
USS Constitution by mtbediz - 1:76
Der Alte Rentner replied to mtbediz's topic in - Build logs for subjects built 1751 - 1800
Jon, I just purchased that accessory for the Proxxon mill. It's the Dividing Attachment for MICRO Mill MF 70 and MICRO Compound Table KT 70. I wish that I'd had that earlier in the build, but once I see a tool I think I'll use (and I saw this before in Mustafa's build log), I must have it. Mine arrived last week, and I can't wait to use it. In the box of cool tools I got from Quentin, there was a drawplate. Next time I'm in the shipyard, I'll see if I can't produce some really thin dowel with it. I'm dubious, but if Mustafa thinks it can work, I'm game. He can do anything! And Mustafa, You never cease to amaze. -
BETAQDAVE reacted to a post in a topic:
USS Constitution by mtbediz - 1:76
-
Stevenleehills reacted to a post in a topic:
USS Constitution by mtbediz - 1:76
-
GGibson reacted to a post in a topic:
USS Constitution by mtbediz - 1:76
-
Knocklouder reacted to a post in a topic:
San Martin by Pfälzer - OcCre - 1:90
-
mtbediz reacted to a post in a topic:
USS Constitution by mtbediz - 1:76
-
Der Alte Rentner reacted to a post in a topic:
USS Constitution by mtbediz - 1:76
-
USS Constitution by mtbediz - 1:76
Der Alte Rentner replied to mtbediz's topic in - Build logs for subjects built 1751 - 1800
Oooh! I have to get me one of those. P.S. Does anyone know what exactly triggers a new page here at MSW? -
Ich freue mich darauf, die Segel gerichtet zu sehen. Viel Erfolg!
-
mtbediz reacted to a post in a topic:
USS Constitution by Der Alte Rentner - Model Shipways - 1/76
-
 mtbediz reacted to a post in a topic:
USS Constitution by mtbediz - 1:76
mtbediz reacted to a post in a topic:
USS Constitution by mtbediz - 1:76
-
Stevenleehills reacted to a post in a topic:
USS Constitution by mtbediz - 1:76
-
USS Constitution by mtbediz - 1:76
Der Alte Rentner replied to mtbediz's topic in - Build logs for subjects built 1751 - 1800
Makes sense, if you didn't have a hole saw or forstner bit in the diameter of the inside circle. Since you're already done, I won't bother digging out the photos of the process I used to create a perfectly round base for my poker chip tray using (you guessed it) a fixture and drum sander. It's always interesting to see how people come up with different solutions for the same problem. Kudos to your skill in obtaining a perfectly round wheel with the disk sander. -
Der Alte Rentner reacted to a post in a topic:
USS Constitution by mtbediz - 1:76
-
Der Alte Rentner reacted to a post in a topic:
USS Constitution by mtbediz - 1:76
-
Der Alte Rentner reacted to a post in a topic:
USS Constitution by Der Alte Rentner - Model Shipways - 1/76
-
 Der Alte Rentner reacted to a post in a topic:
USS Constitution by mtbediz - 1:76
Der Alte Rentner reacted to a post in a topic:
USS Constitution by mtbediz - 1:76
-
Jon, I don't intend to paint over or otherwise color any brass components. I'm going with the Constructo kit color scheme (see Hipexec build). So, fiddling with solder or covering mistakes with paint won't work for me. As you can see above, Mustafa showed me an easier way to deal with these eye bolts than my method. I lucked out in that a friend gifted me a very small pair of round needle nose pliers that I did not remember I had until today. These pliers will make short work of the hooks I'll need for rigging the carronades as well. Thanks for chiming in, 😎👍
-
USS Constitution by mtbediz - 1:76
Der Alte Rentner replied to mtbediz's topic in - Build logs for subjects built 1751 - 1800
The tool you used in the second photo, is that a hole saw? -
Der Alte Rentner reacted to a post in a topic:
USS Constitution by mtbediz - 1:76
-
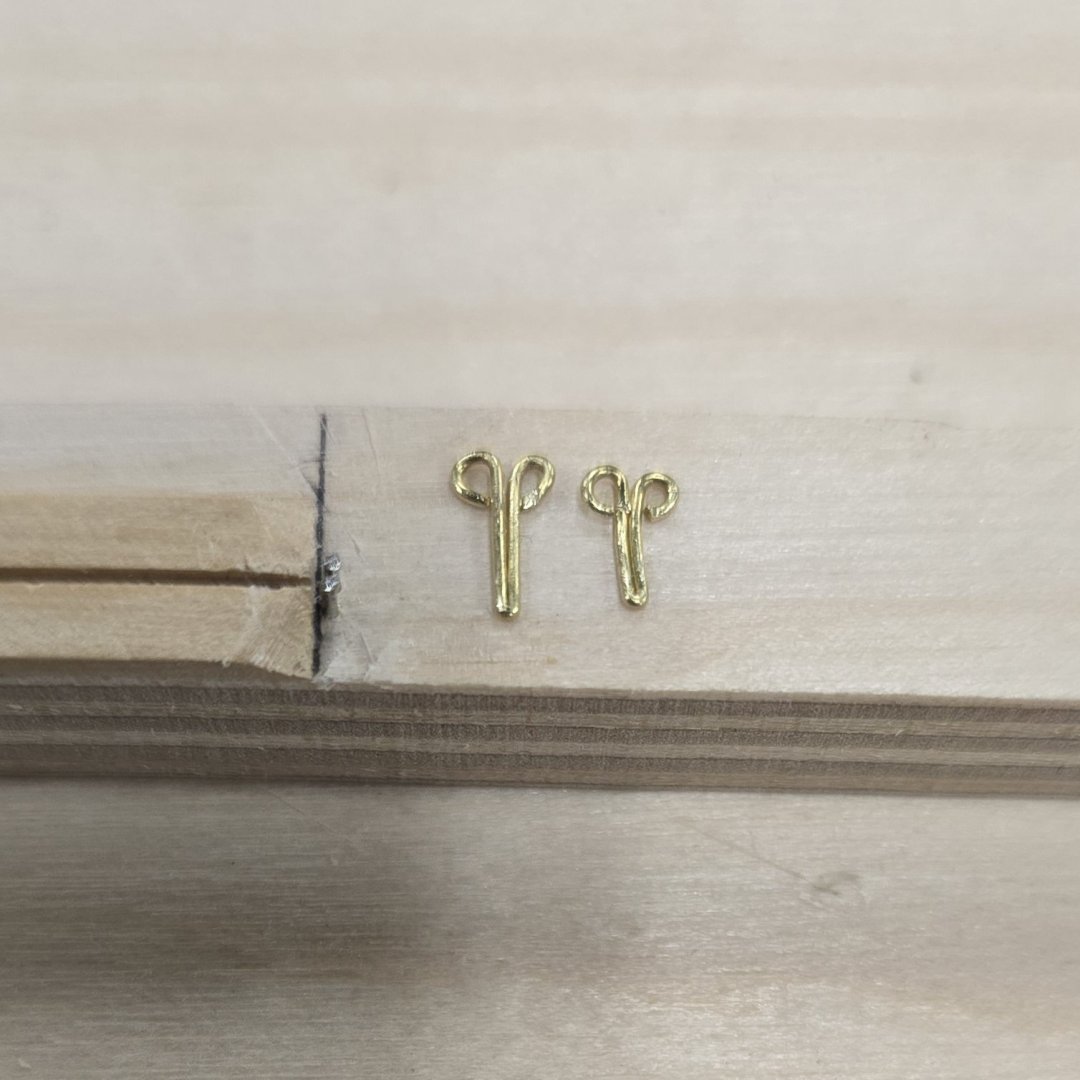
It wasn't until I found a pair of very narrow needle nose pliers that I could use your method. Even after finding a pair, I was afraid the loop would be too large. It turns out that by not completing the loop, then squeezing it closed, that I could get fairly small eye bolts. Thanks for sharing those photos. Your method is a whole lot easier than trying to find a way to clip excess material off the ends of my loops. 😎👍
-
Der Alte Rentner reacted to a post in a topic:
USS Constitution by mtbediz - 1:76
-
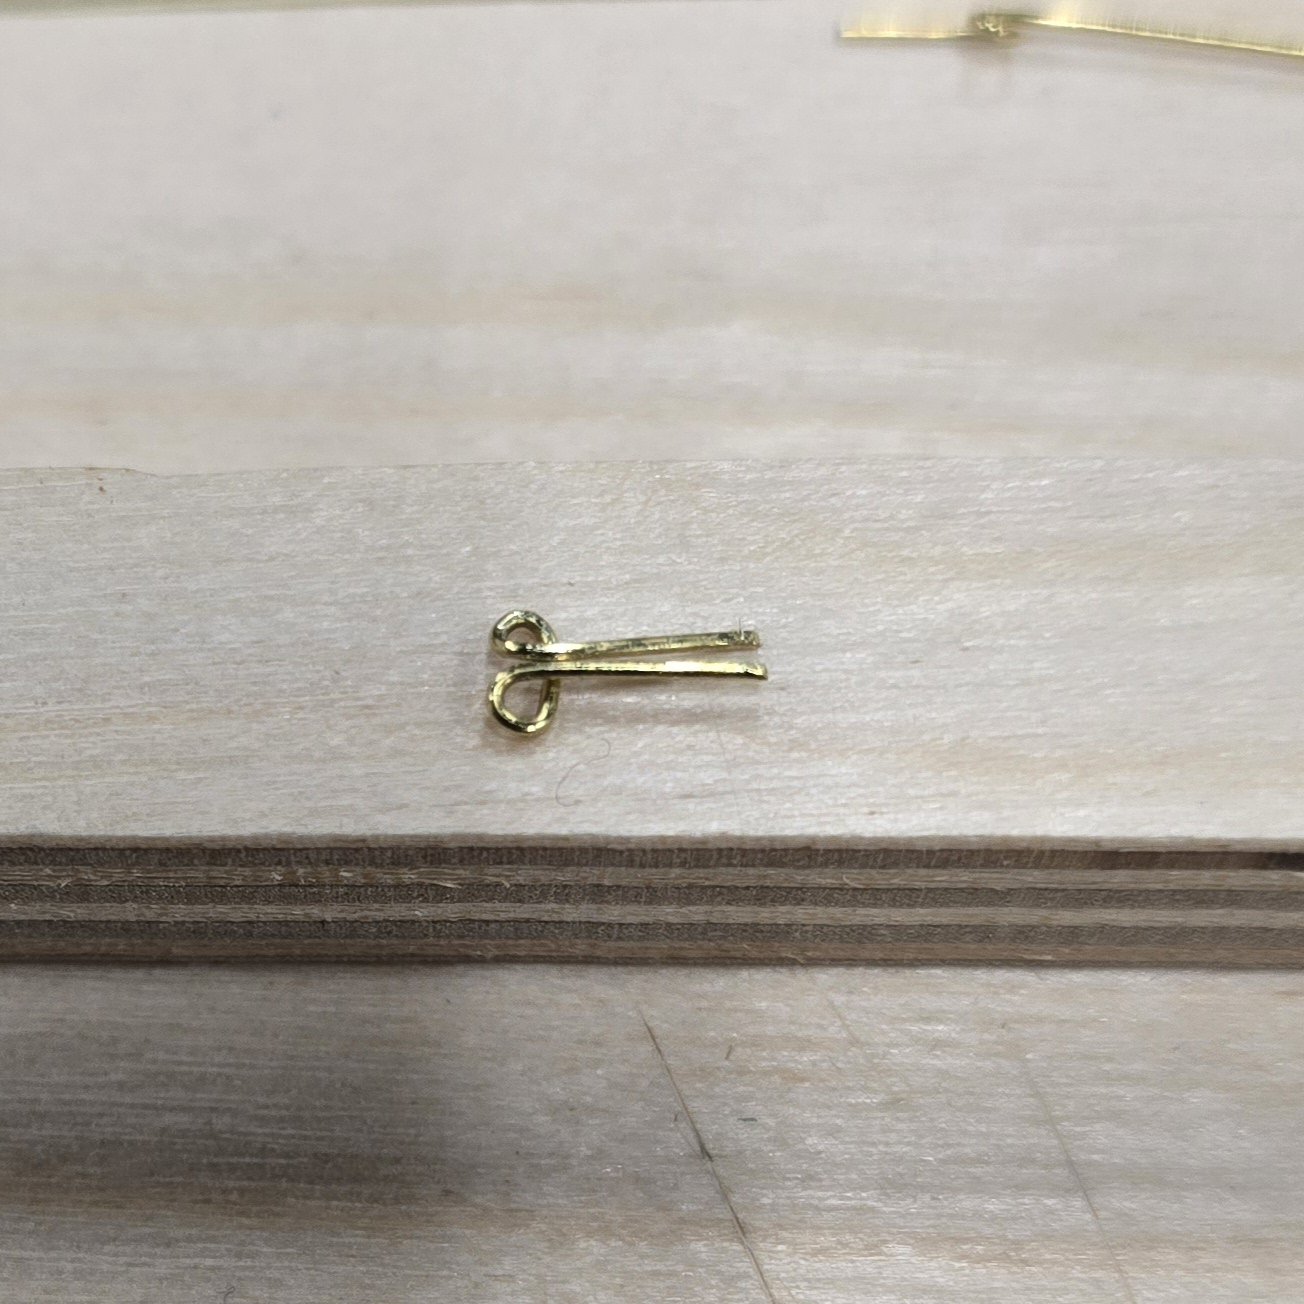
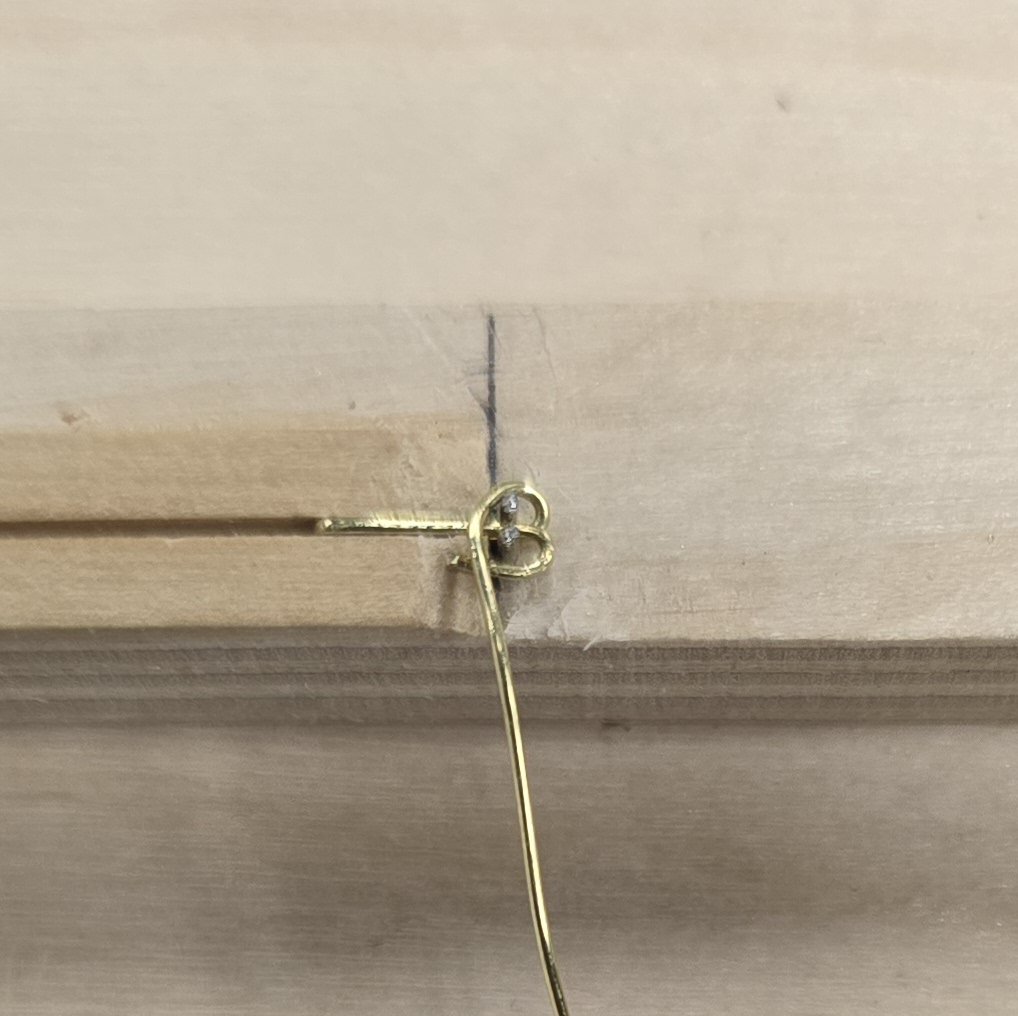
Man-oh-man, is this tedious work. I figured out a way to mimic Mustafa's results. After 4 hours in the shipyard today, strategizing and developing this technique, I'm exhausted. I think it might be easier just to get more of the single eye bolts, bend them slightly and plug them into one hole. The practicum's method of building these out of styrene doesn't seem to be any more practical. I'm going to go home and sit in my sunroom, read a book, and put this on a back burner for now. I thought I was on to something clever with my first experiment. Then realized I'd have a hard time compressing the ends to squeeze them into a single hole. Not only that, but I was not happy with the overlapping straight parts. Doesn't really look like an eye bolt. Second try, without using a jig/ fixture. Close, but no cigar. The solution? Well, sort of.. I have to cut excess brass wire to close the loops on the eyes. A lot of fiddling with tiny stuff using big fingers. Time consuming, but doable. The process is, fold the wire over itself, tuck the fold into the slot in the fixture, twist the wire around the pins at the end of the slot, remove and cut away excess brass, tweak, fiddle, curse, pray, and hopefully produce the above.


-
USS Constitution by mtbediz - 1:76
Der Alte Rentner replied to mtbediz's topic in - Build logs for subjects built 1751 - 1800
This morning I spent a solid hour trying to fabricate a single double eye bolt. I'm ready to start considering using two single eyeballs and just shoving them into a 1 mm hole. I know you've shown the pictures of the finished product above, but can you tell me what tools you used to make your double eye bolts?
-
As confirmed by Marcus and Jon, I'm going with bridle port.
-
Der Alte Rentner reacted to a post in a topic:
USS Constitution by The Bitter End - Model Shipways - 1:76
-
Der Alte Rentner reacted to a post in a topic:
San Martin by Pfälzer - OcCre - 1:90
-
Are you referring to the red painted port cover all the way forward? Or the natural wood finished one just aft of that?
-
USS Constitution by mtbediz - 1:76
Der Alte Rentner replied to mtbediz's topic in - Build logs for subjects built 1751 - 1800
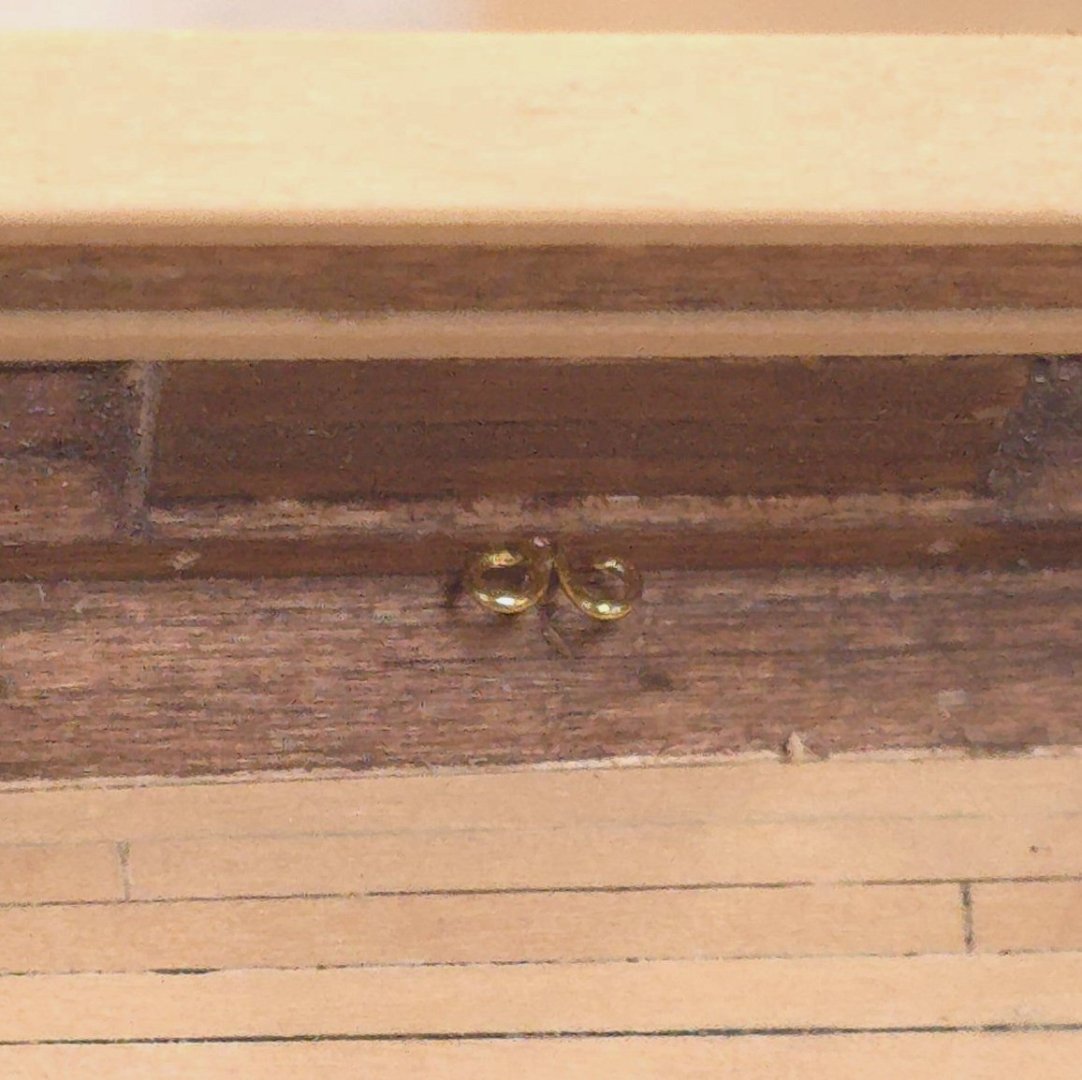
While zooming in really closely to examine the junctions of the canopies, I took another look at your carronades and noticed the unrigged pair of eyebolts. I'm happy to see the example and fully intend to follow in your footstep, when I get that far.