Der Alte Rentner
-
Posts
948 -
Joined
-
Last visited
Content Type
Profiles
Forums
Gallery
Events
Everything posted by Der Alte Rentner
-
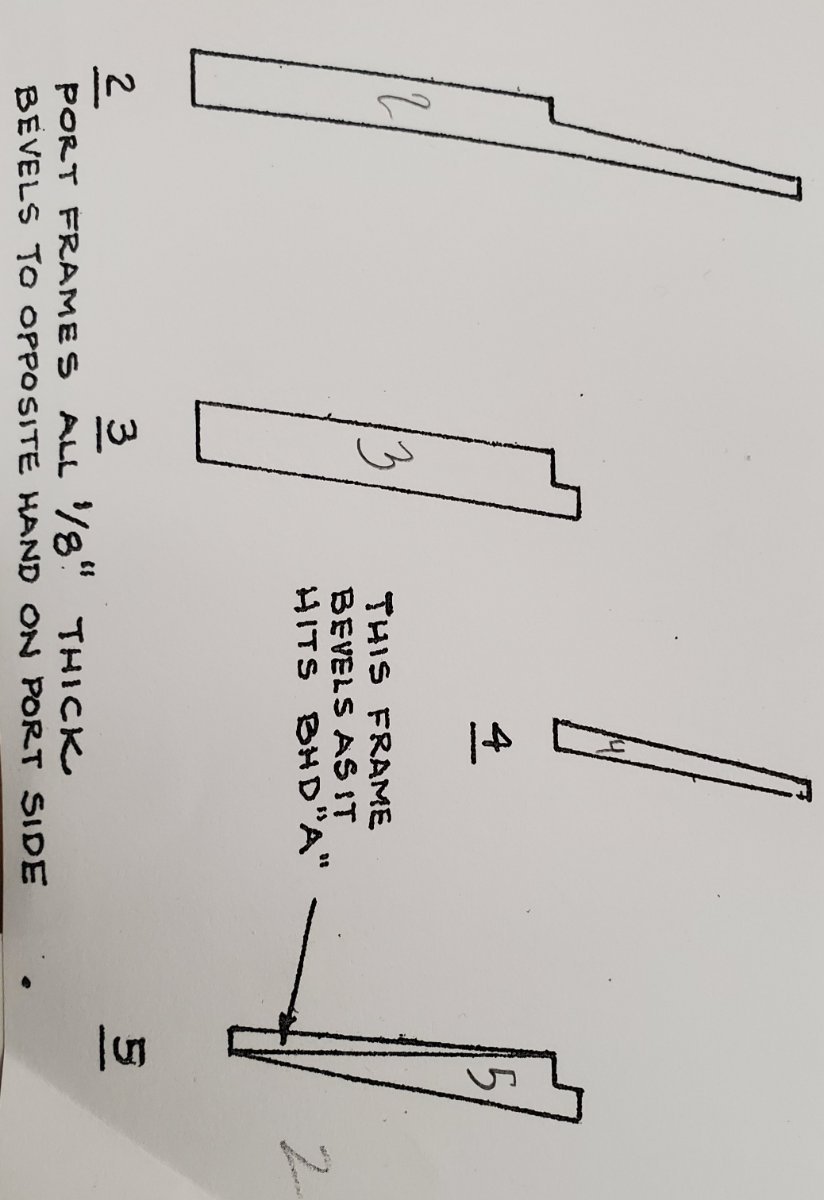
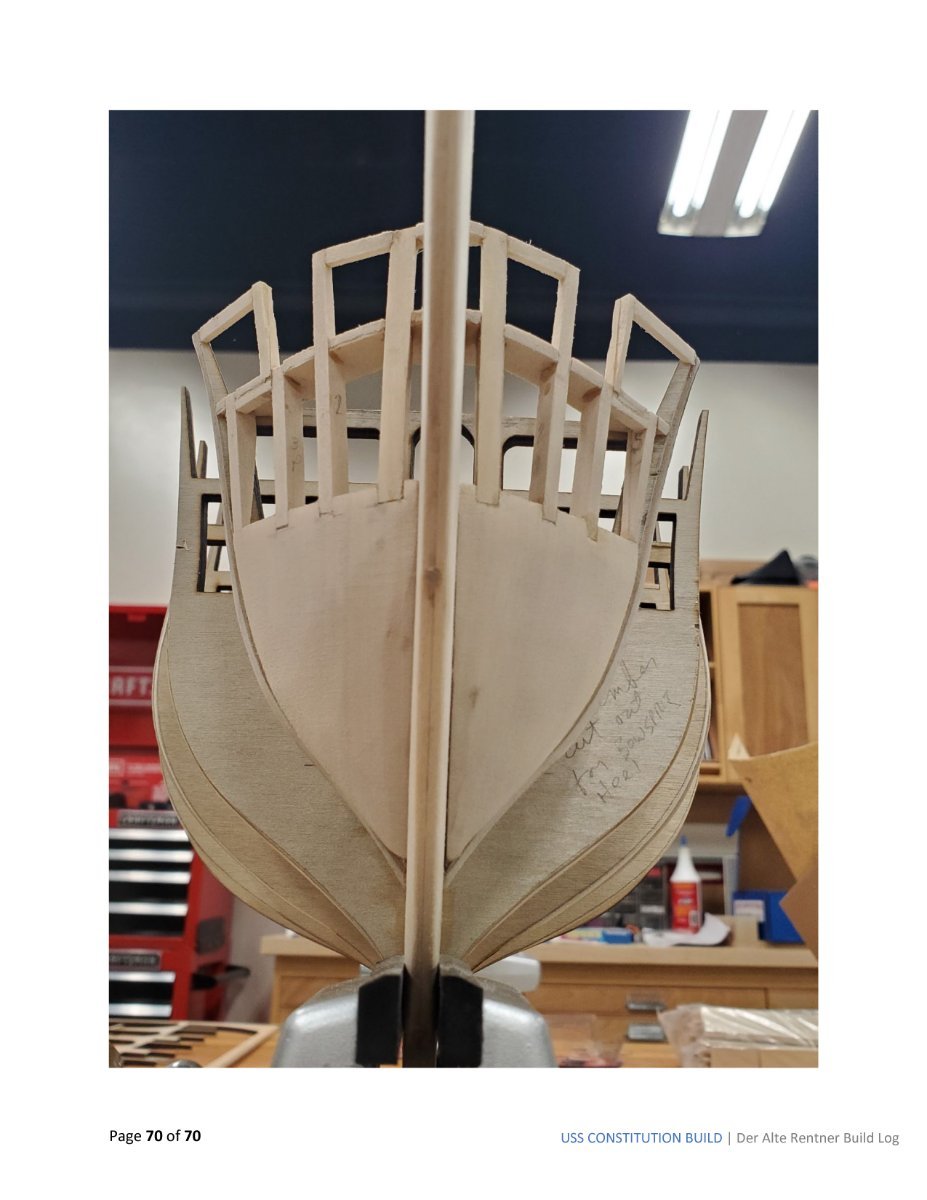
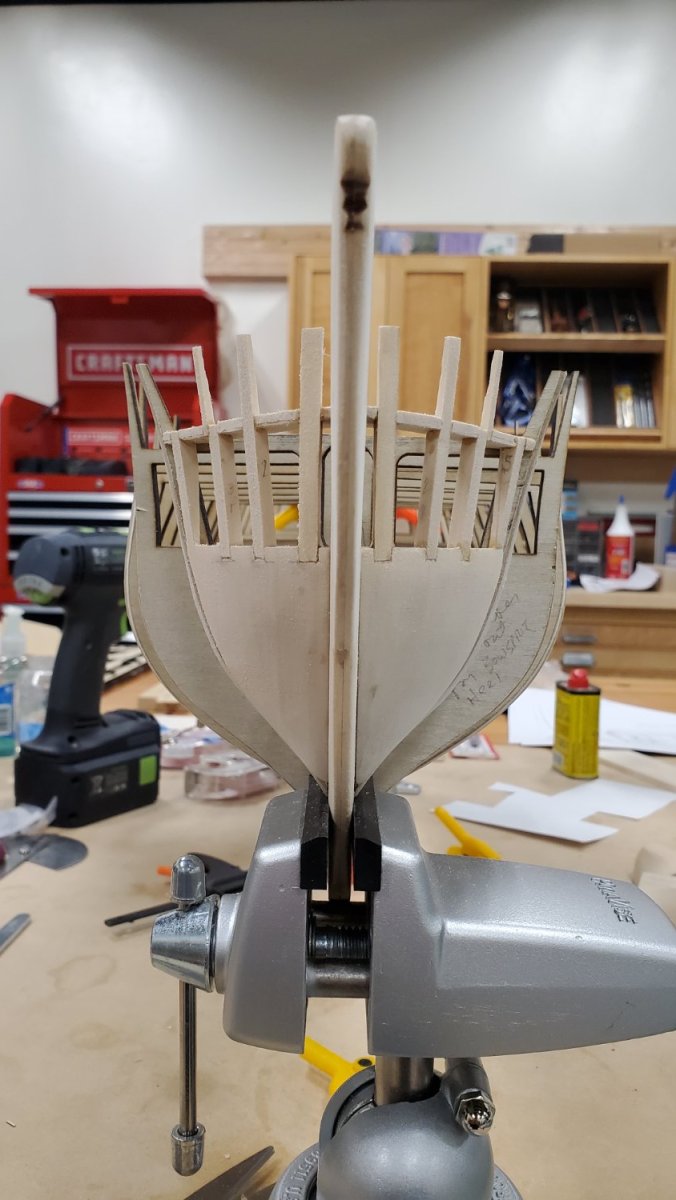
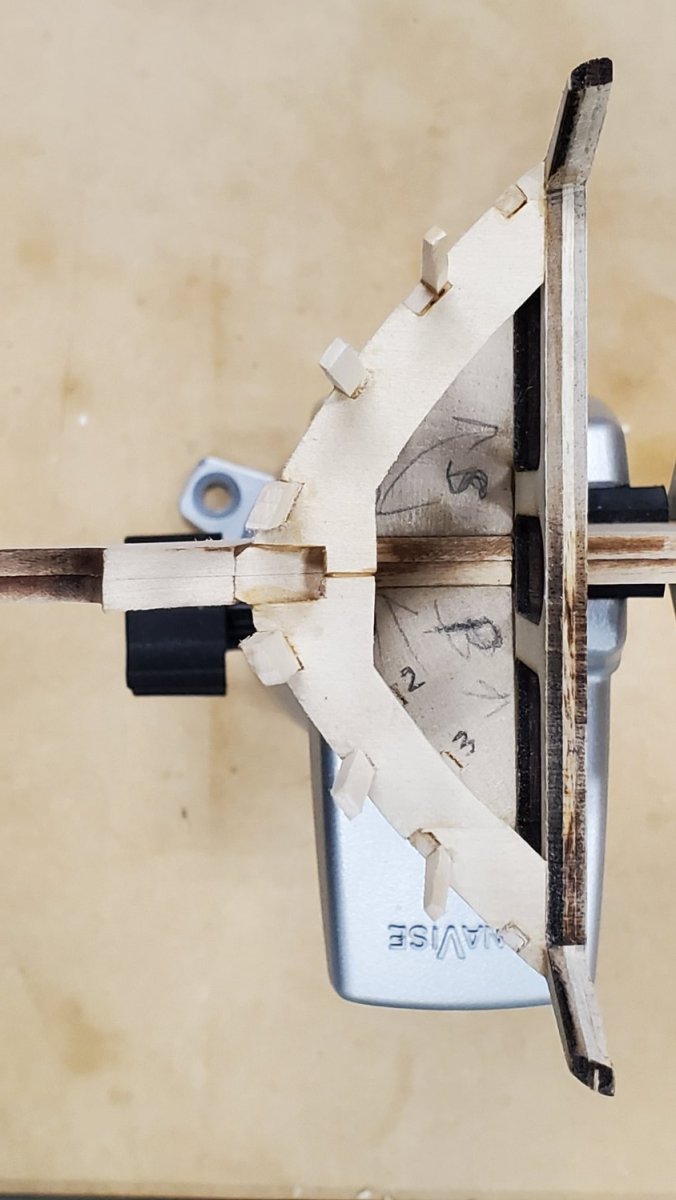
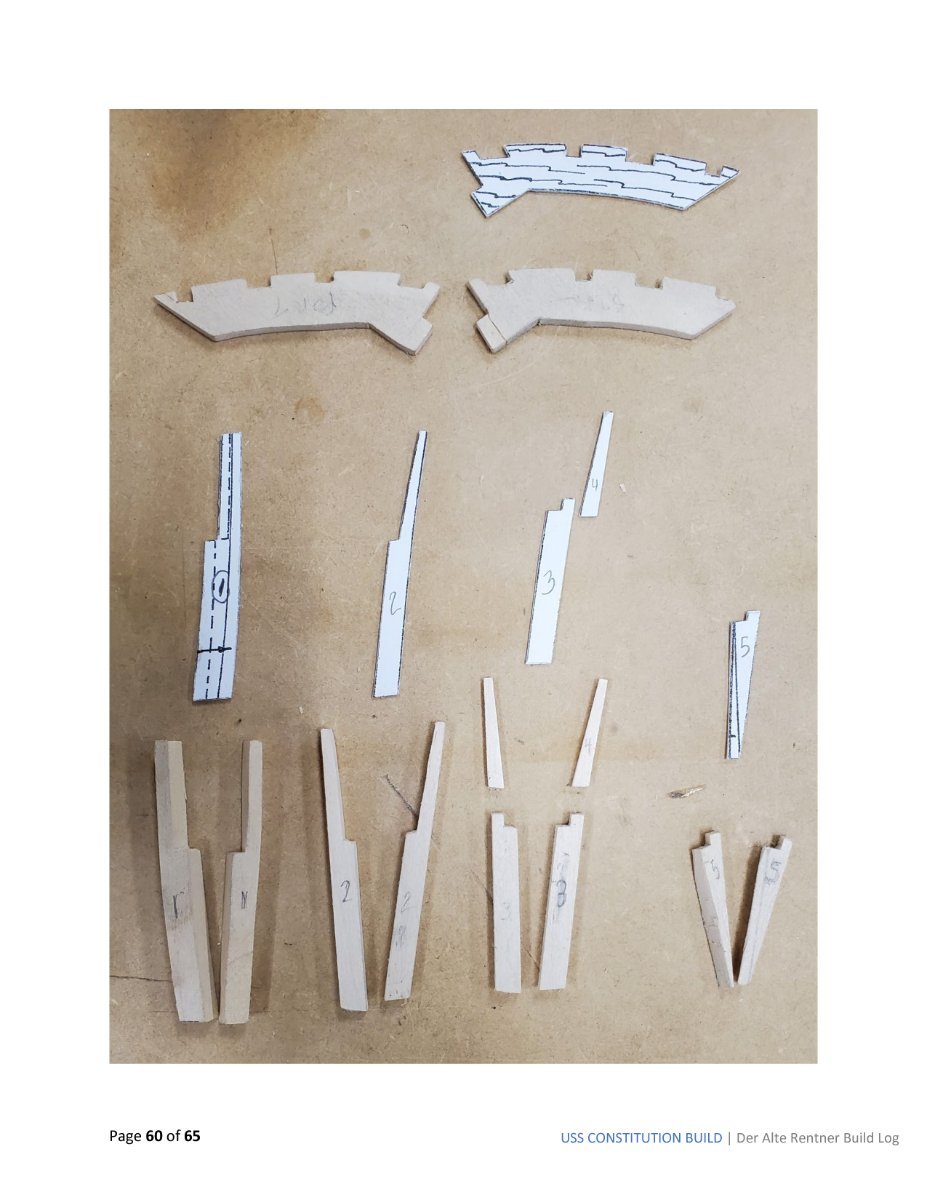
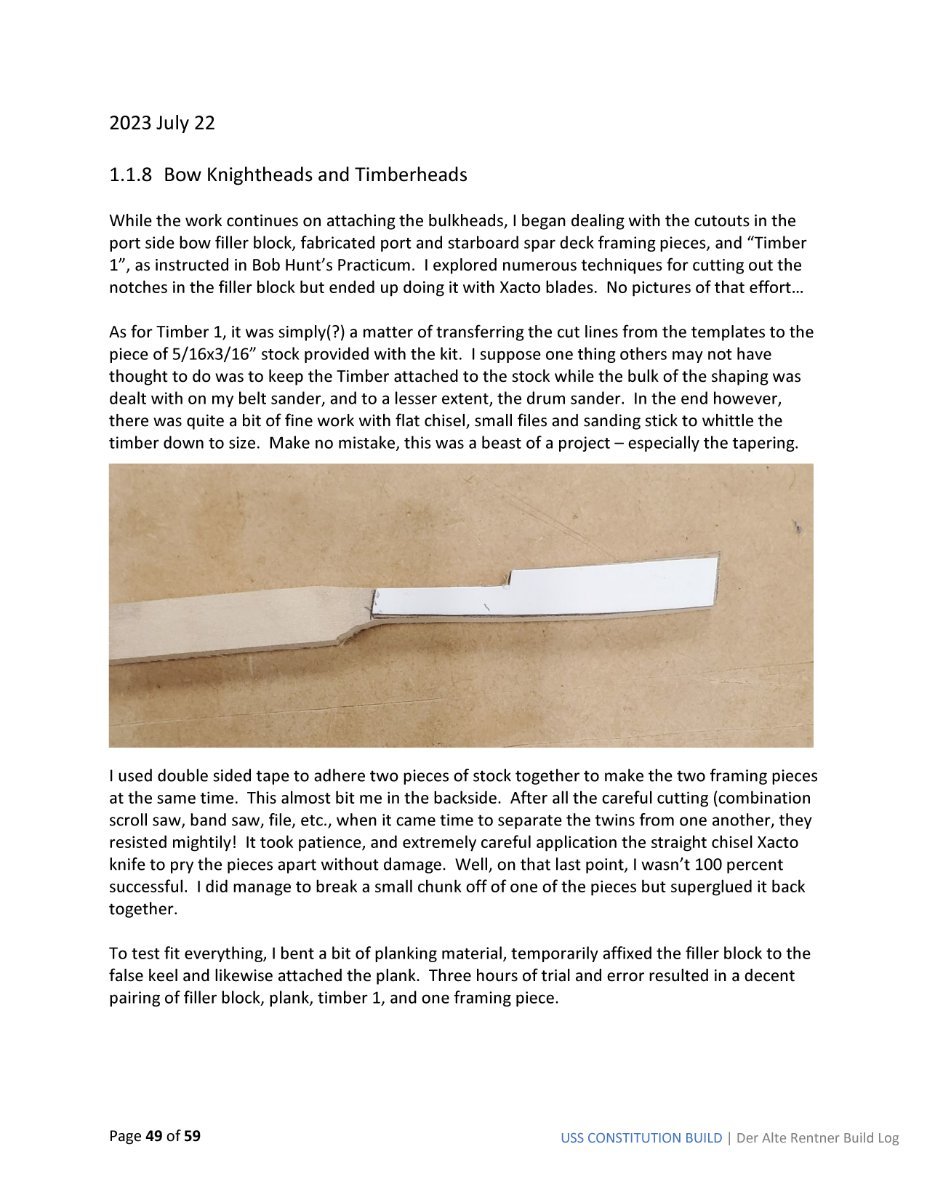
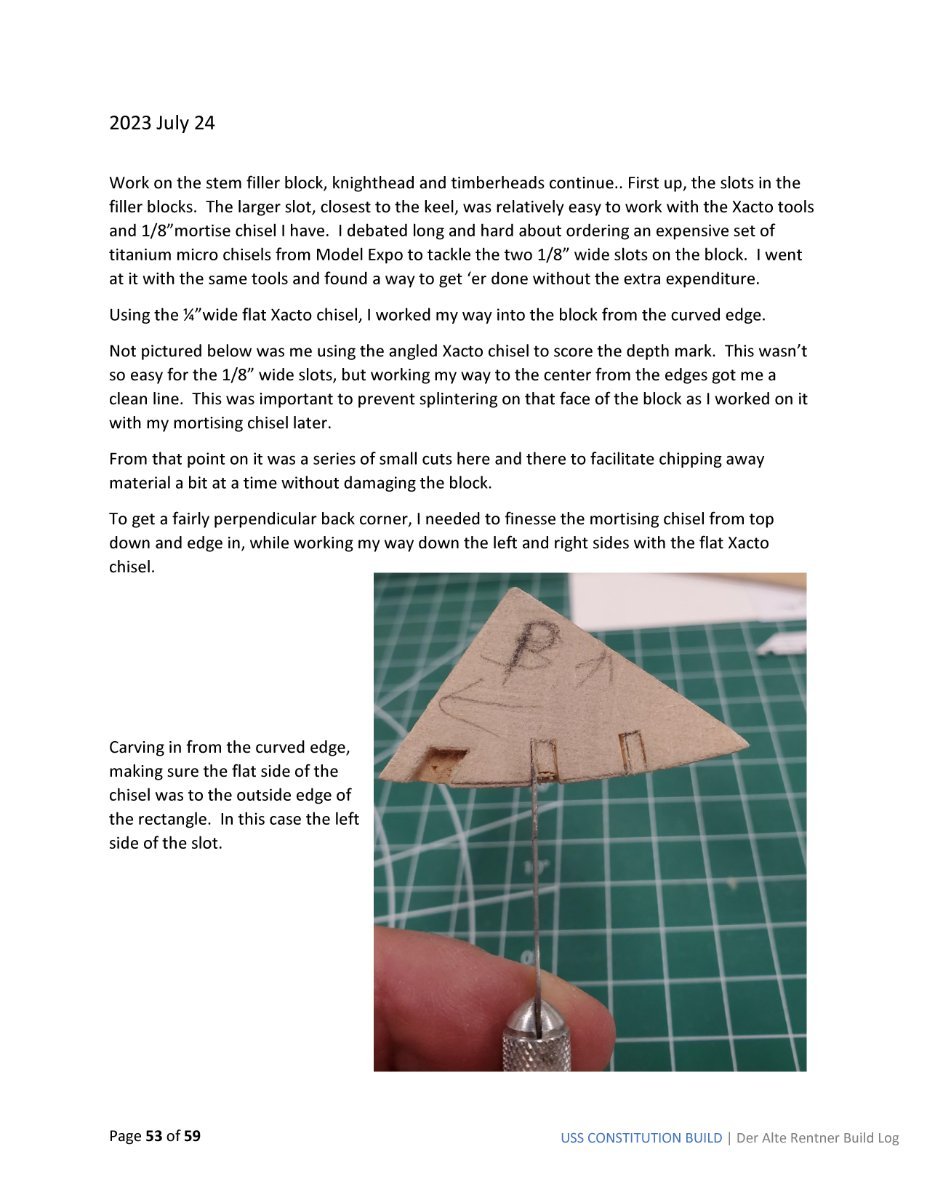
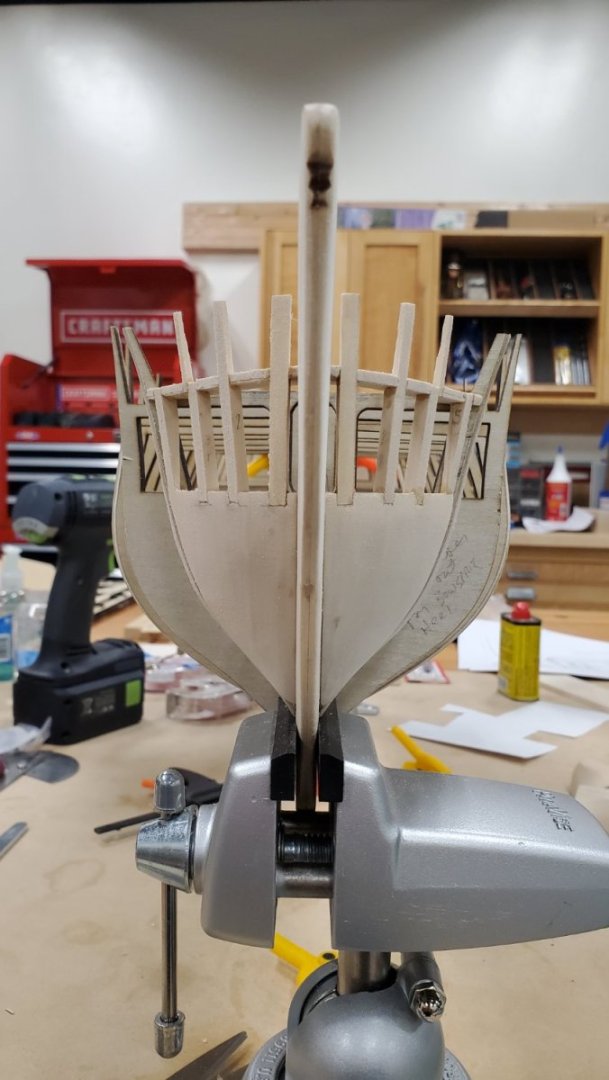
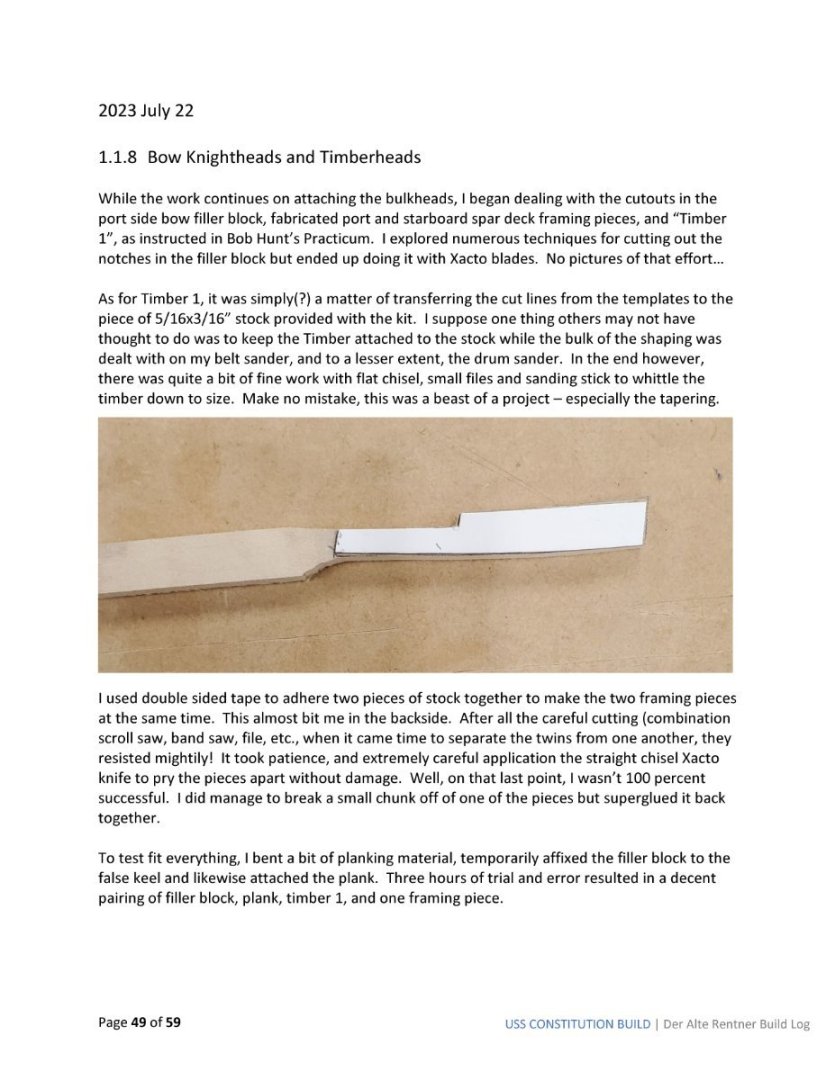
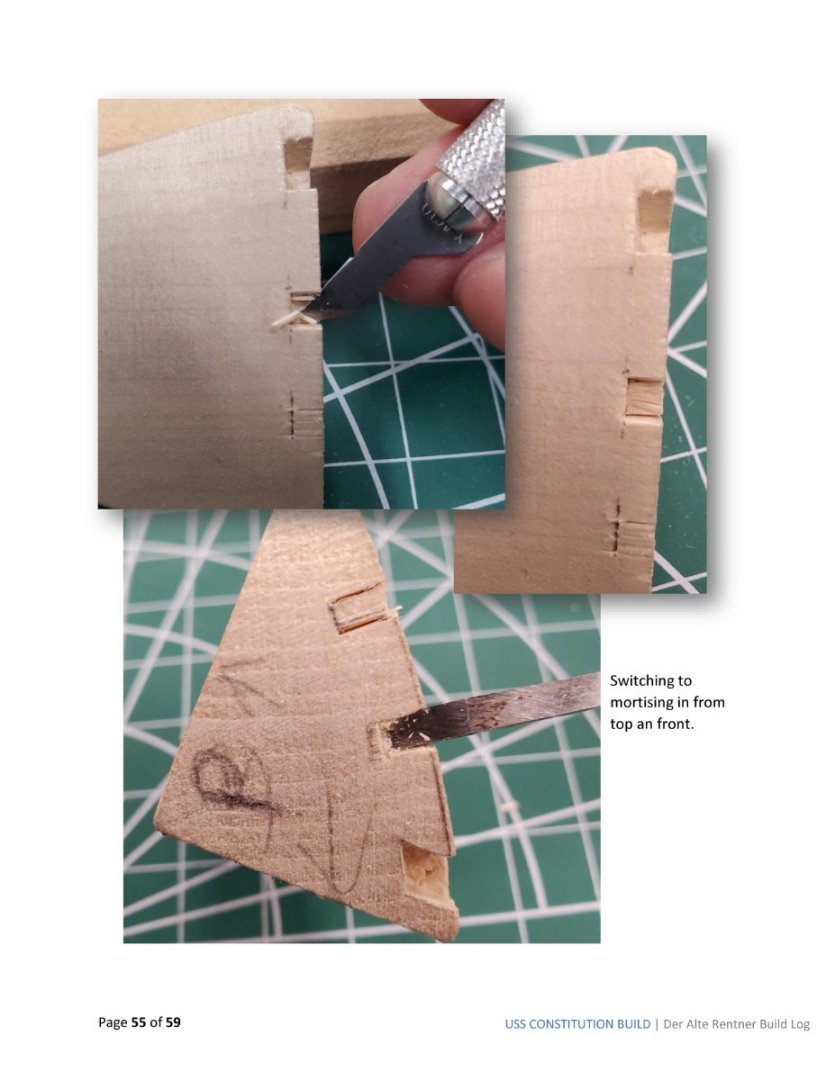
 There are no premade parts for the knighthead or timbers 2 through 5. You have to make all of them from scratch,
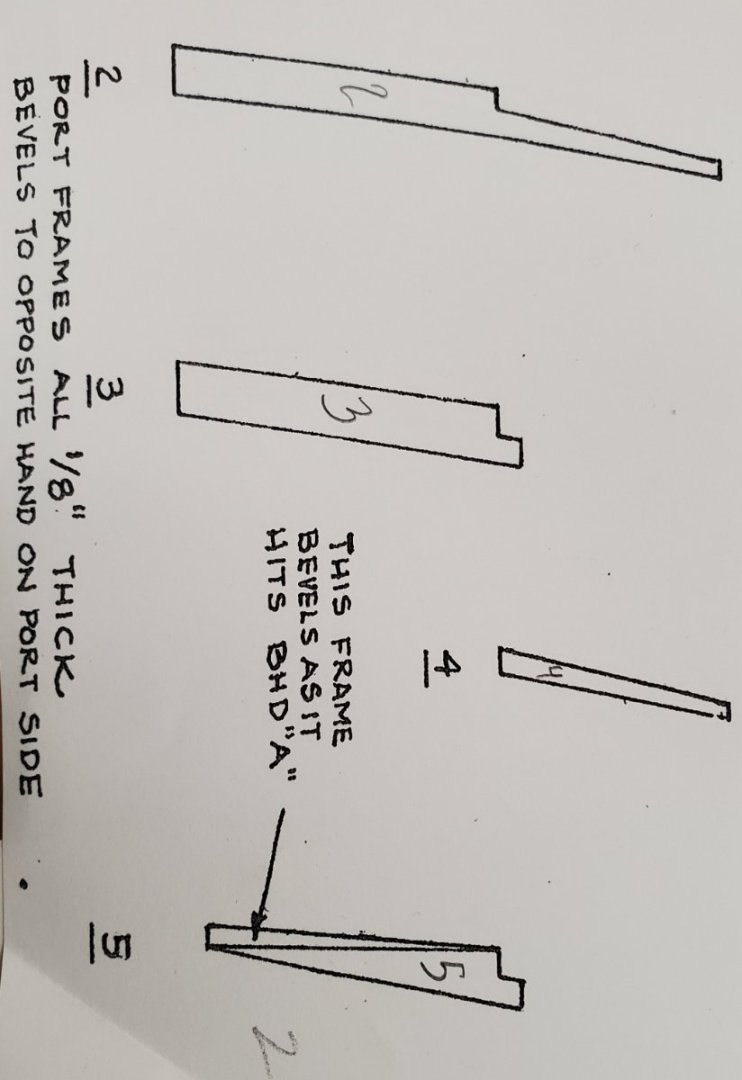
-
Yikes, are going to try to cut out the notches with the bow filler blocks already glued into the hull? That will be fun indeed! Here's something I thought about doing myself, though didn't, but will suggest as a possible plan B. It doesn't seem entirely necessary to carve out the notches in the filler blocks, except maybe to keep the orientation of the timbers on track. You could try making the timbers (and knighthead) 1/8" shorter at the bottom and just gluing these directly to the top of the blocks. As for the orientation? this can still be achieved by use of the notches in the spar deck framing pieces. It's just a thought. I'm really curious to hear about how you dealt with the notches. As for going back several times. Take a look at my build log for proof that you are not alone in this. I made the starboard stern filler block no less than 4 times...
-
Sjors, I was looking at your pictures of the bow framing. Did you leave out frame #4? This frame extends up from where frame #3 ends and sits outboard of frame #3 in the same slot. You are working from the kit, yes? Do your plans not show these frames?

-
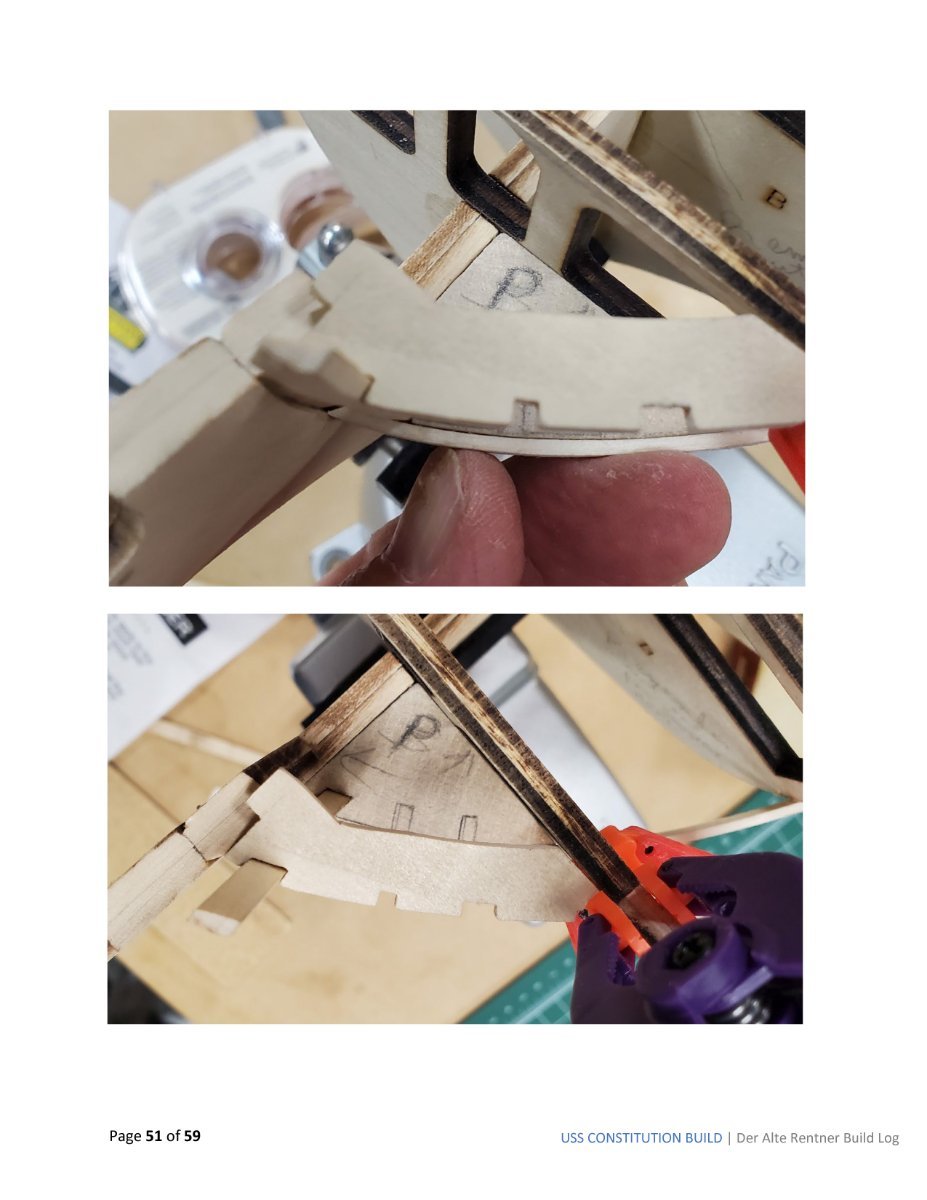
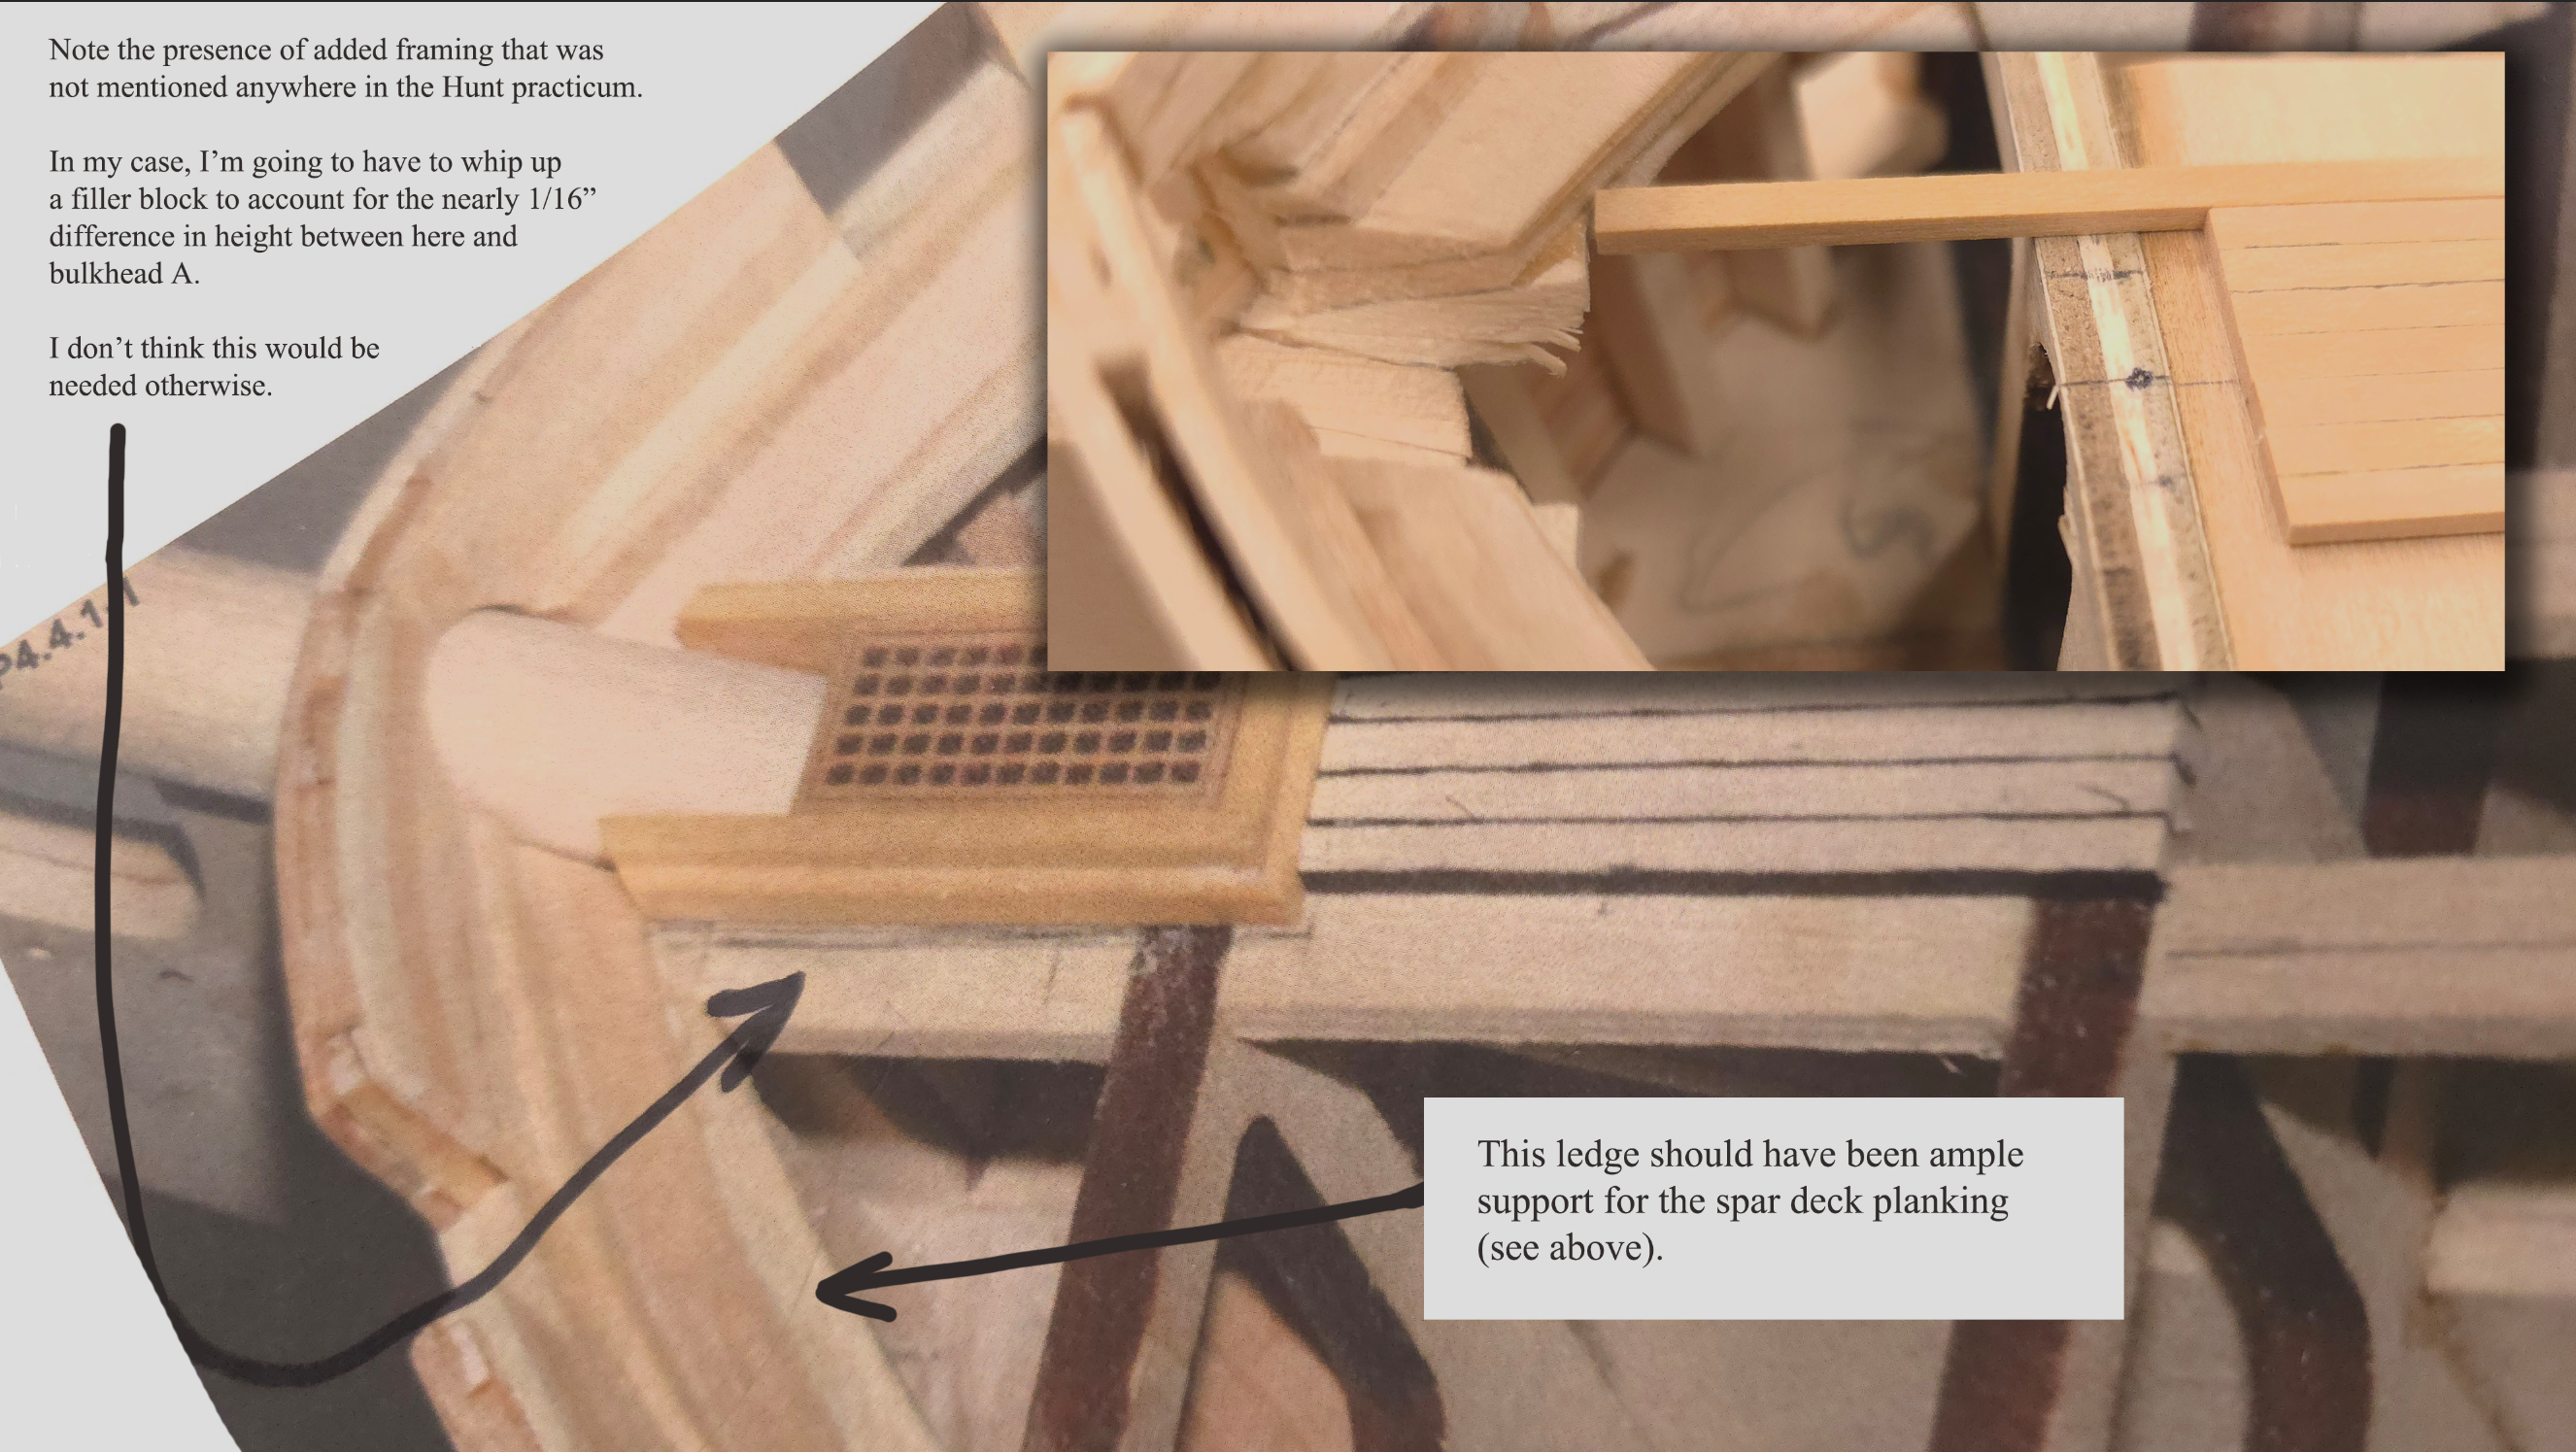
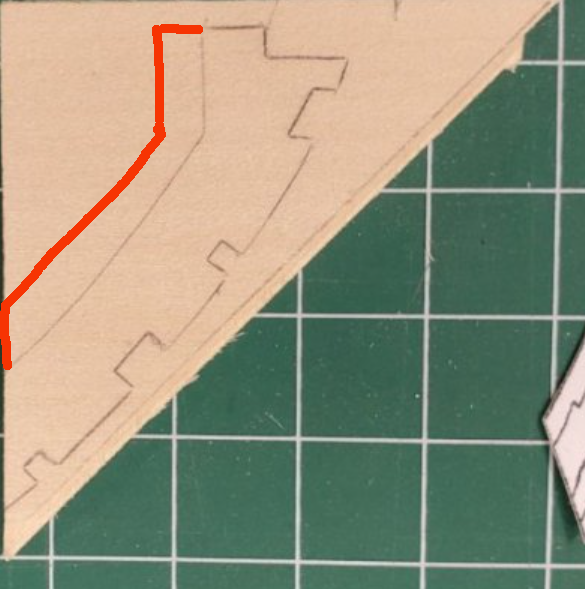
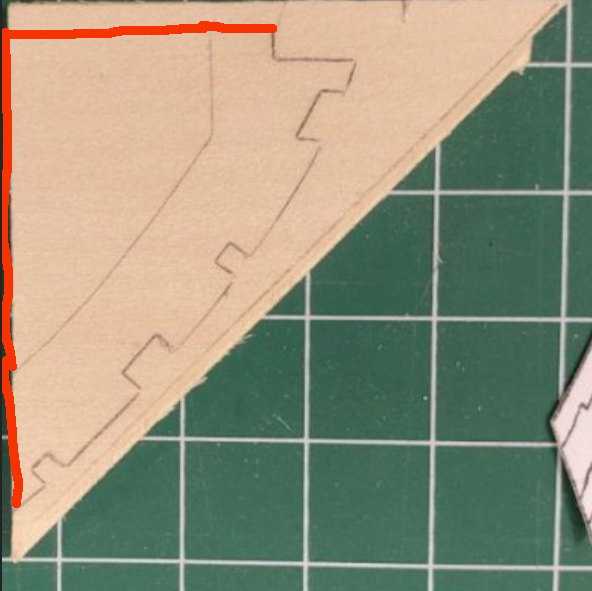
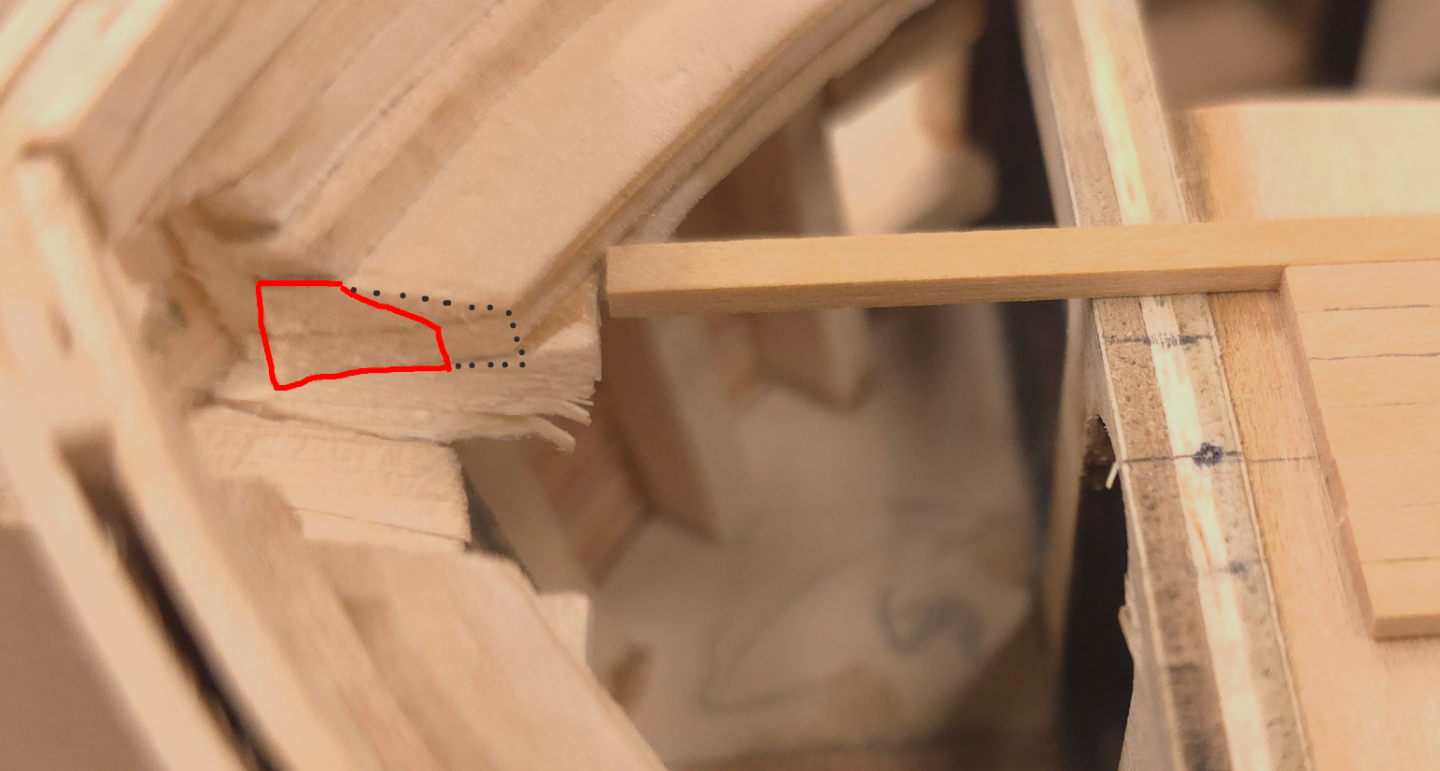
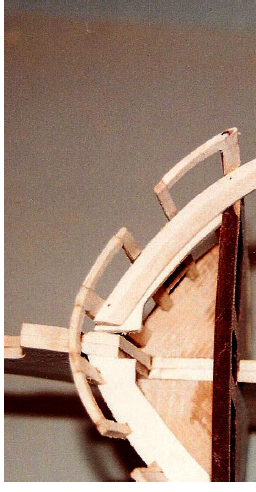
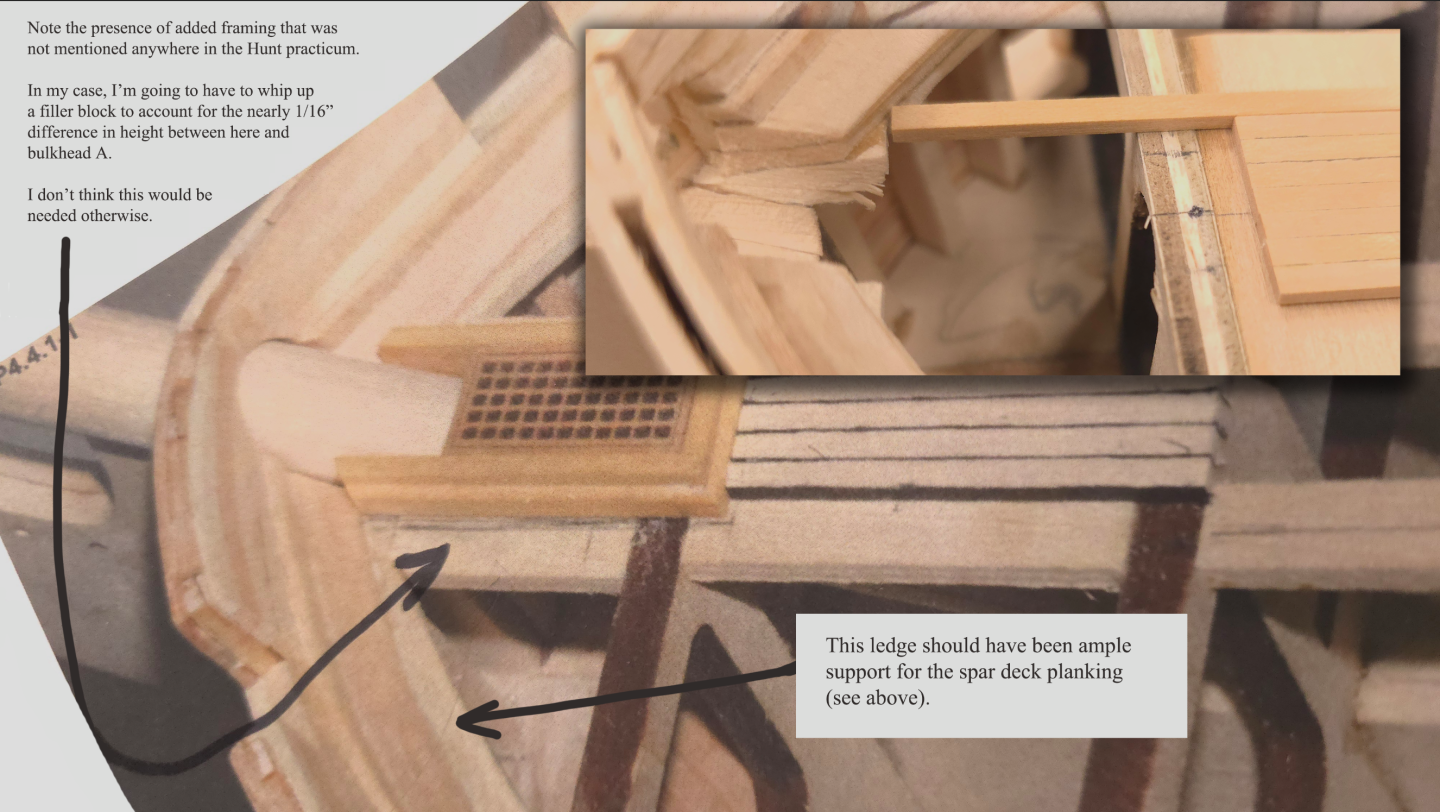
June 23, 2024 update and caveat! I'm currently working on Hunt's chapter 4 and beginning the process of planking the spar deck. A detail that perhaps should have been obvious here, in the construction of the bow framework, should be mentioned. The height of the spar deck framing piece should probably be the same as the height of bulkhead A. Perhaps another way to phrase this is, the top surface of the spar deck framing piece should probably be flush with the top surface of bulkhead A. Also, I suggest making the aft end of this piece at least an eight of an inch wider. In fact, I think I would advice just squaring this off thusly: This way, when you do have to run planks between bulkhead A and this spar deck framing piece, you won't have to add additional framing between bulkhead A and the arched cutout. At the very least, make sure that your waterway does not completely cover the aft end of this piece. When you fabricate your water way, look carefully at the plans. I believe I erred using the dimensions spelled out by Hunt, resulting in too wide a section, especially at the bow where it meets the bowsprit. Here's what I'm dealing with. I believe following the plan will result in the profile suggested in the red. So, adjust your water way construction accordingly. That is not to say I didn't screw up by not noticing the difference between Hunt's construction and mine. Here's Hunt's structure as shown in Chapter 2: Note there's still a ledge to support the spar deck planking, whereas, mine is buried under the waterway.


-
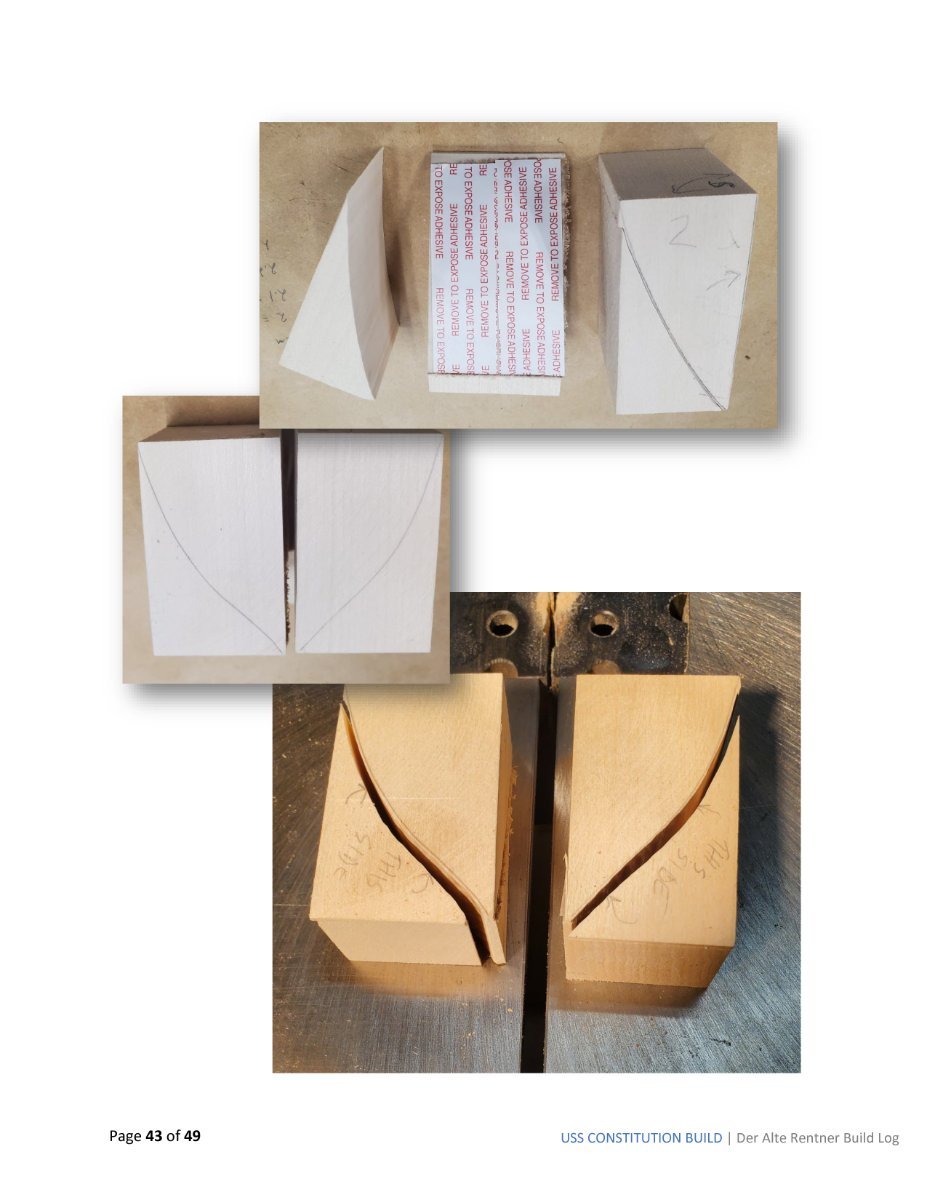
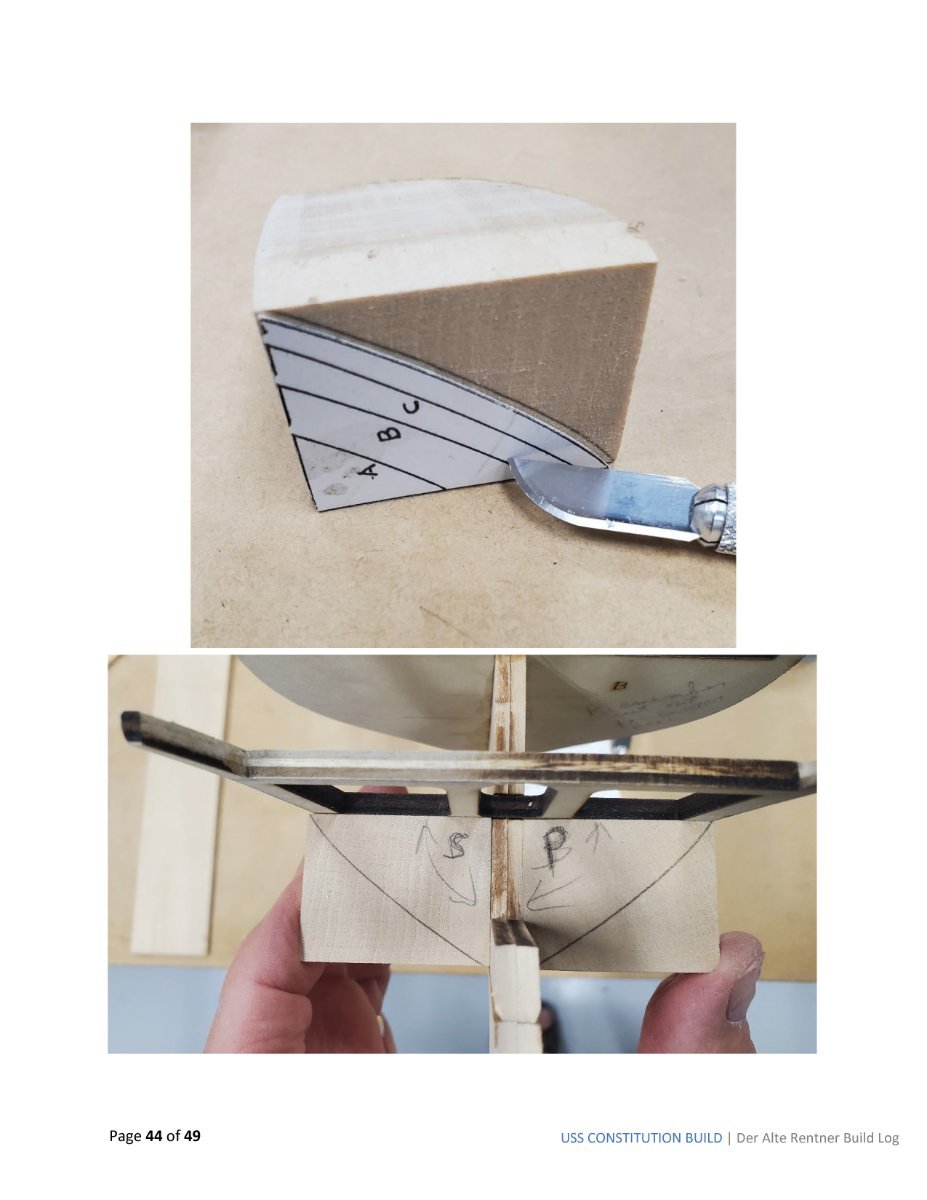
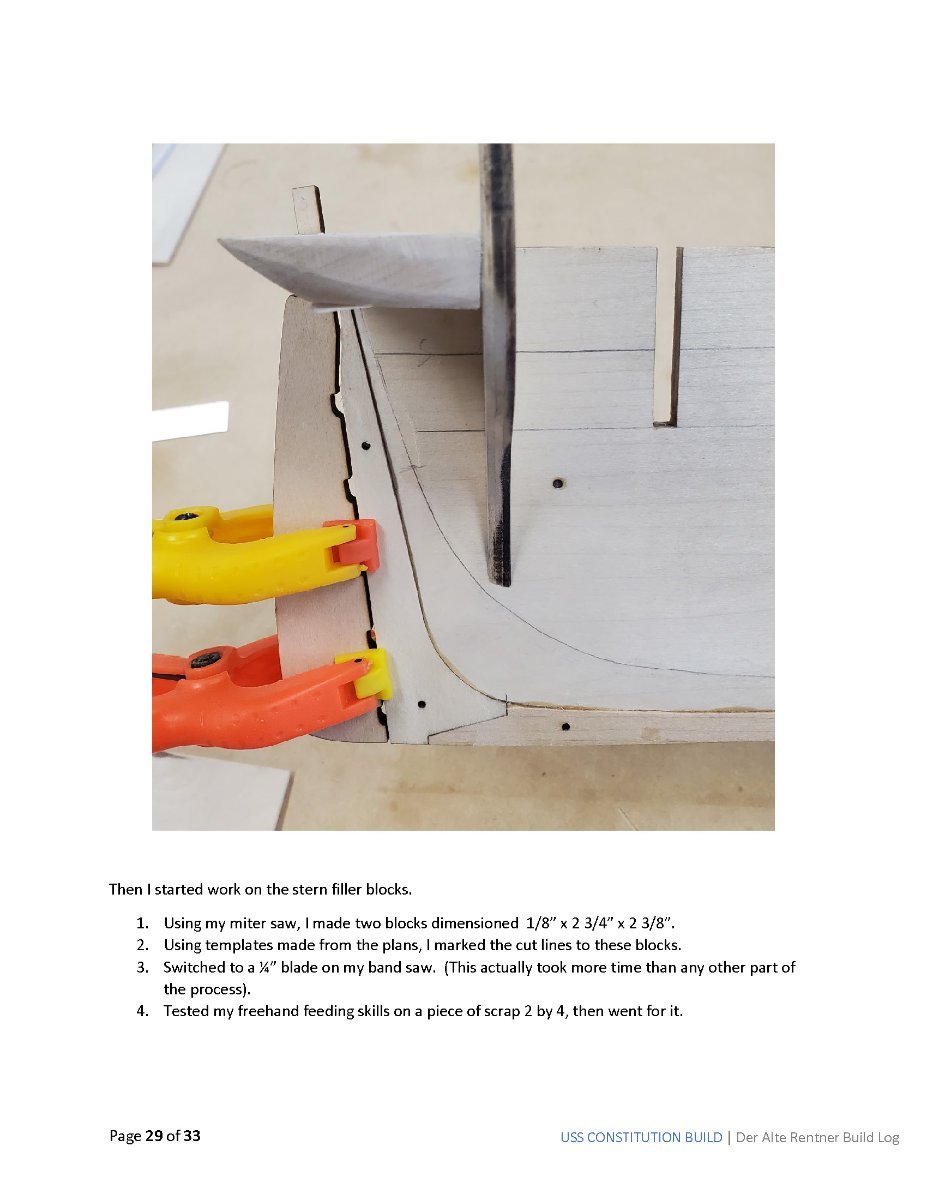
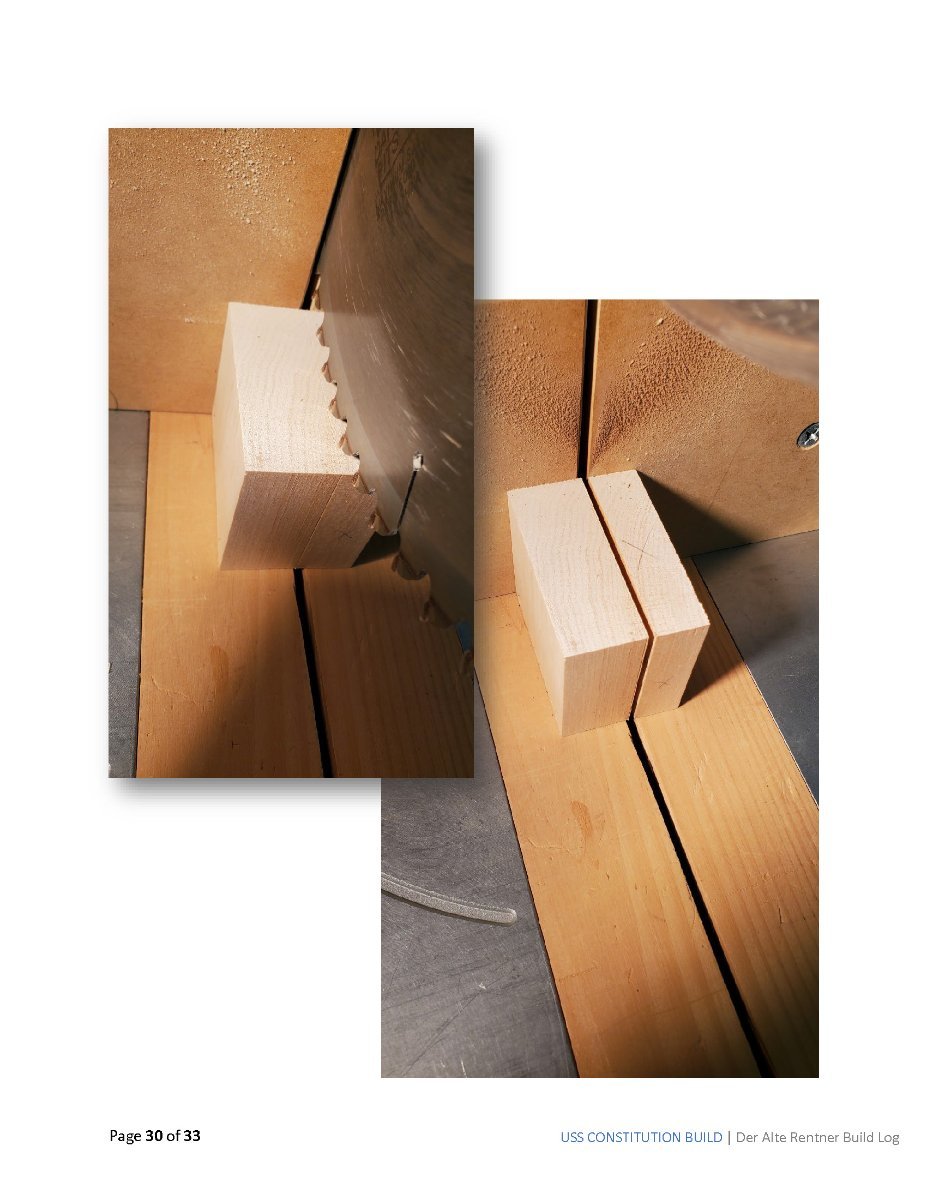
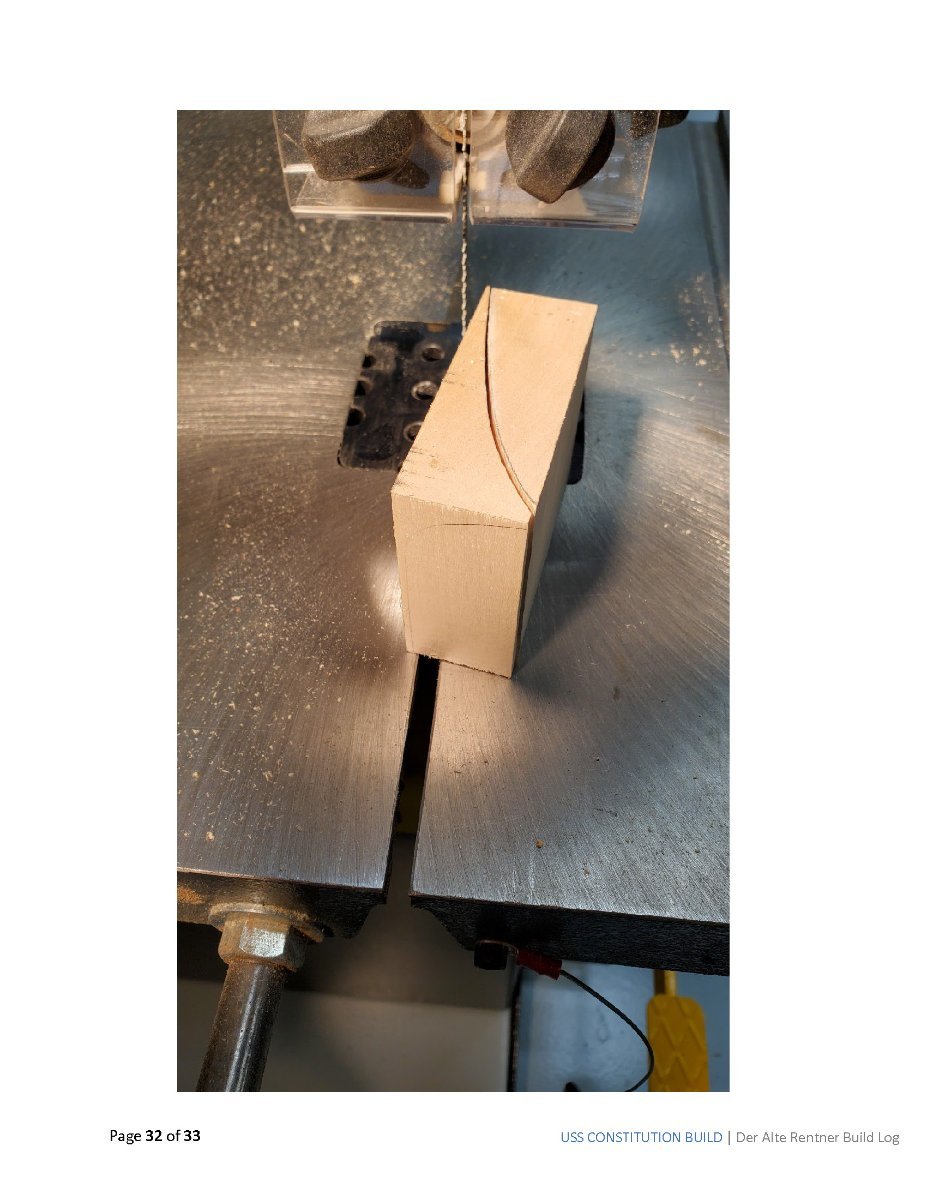
I wouldn't glue in the transom just yet... Temporarily affix it with double sided tape while you're tweaking the shape of the stern blocks. You'll be using double sided tape to make your next cuts on the blocks anyway. If you're happy with the result of your shaping, glue away. I found the shaping of these pieces difficult and tedious. If you use the templates as a guide (see my build log) or Chapter one of the Bob Hunt Practicum, you'll get pretty close to the correct shape. I have a feeling that you and I will be applying a bit of putty and doing some detail sanding about the time the planking phase rolls around.
-
Congrats on a gorgeous build! No disrespect intended, but I hope I don't follow in your 17-year old footsteps. (I'll settle for any number less that 7). Just curious about the painting aspects of the project. I'm a looooong way from getting to that point in my Constitution build, but before I put any kind of finish on any of the wood, I want to know as much as possible about the best ways to go about the process. I've done some research at MSW and found the discussion area on the subject of Painting, Finishing and Weathering Products and Techniques. I'm still working my way through that, as well as Bob Hunt's Practicum on the Constitution. Bob Hunt uses water-based poly, but the discussion section at MSW seems to frown on the use of water-based finishes all together. So, may I ask? What techniques and products did you use on the FLY? I've been a woodworker hobbyist for decades and have only rarely veered from using oil base paints/finishes. Thanks Der Alte (aka Peter) P.S. Having seen the natural finish on the Constructo kit by Hipexec, if I do a decent job on the planking, I may opt for the natural finish and not paint at all.
- 69 replies
-
- 2
-

-
- fly
- victory models
- (and 2 more)
-
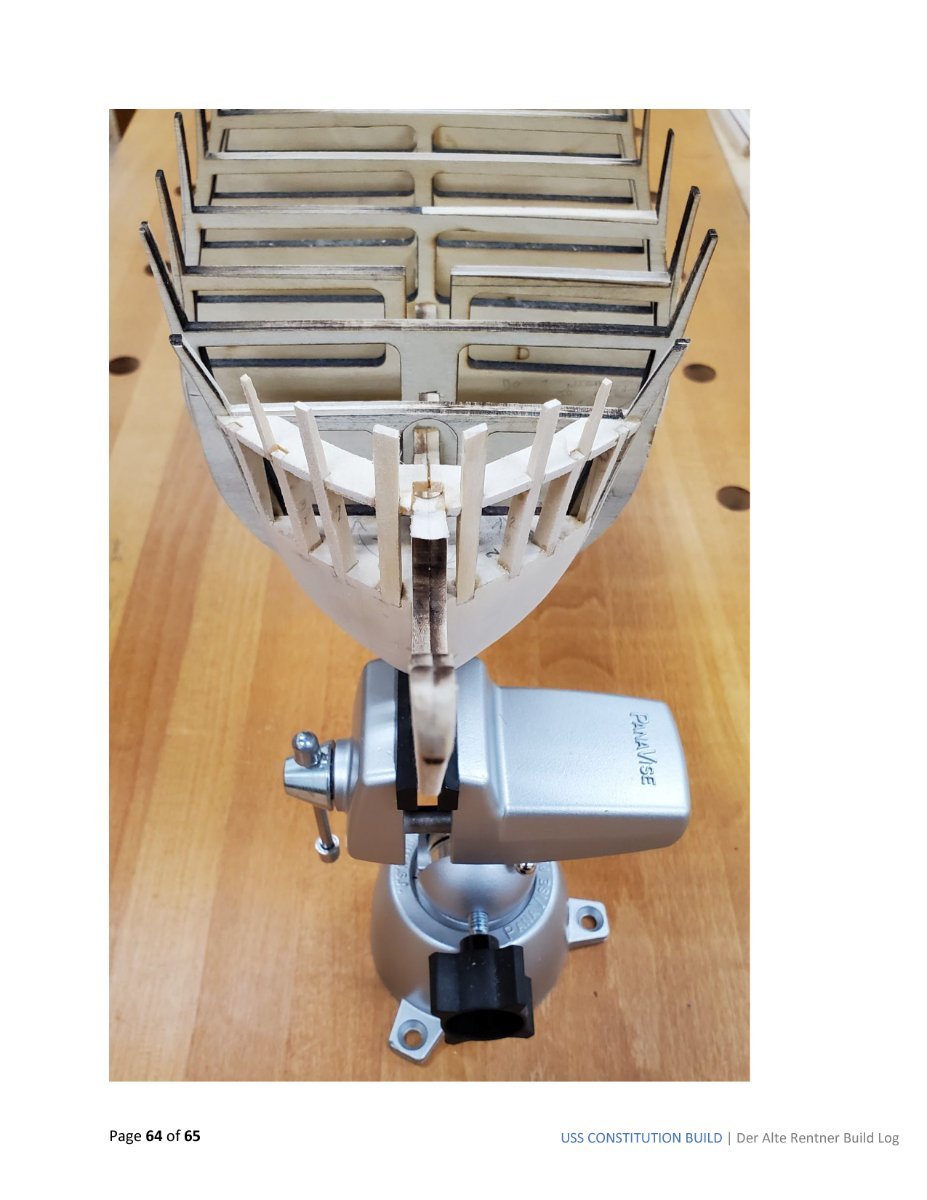
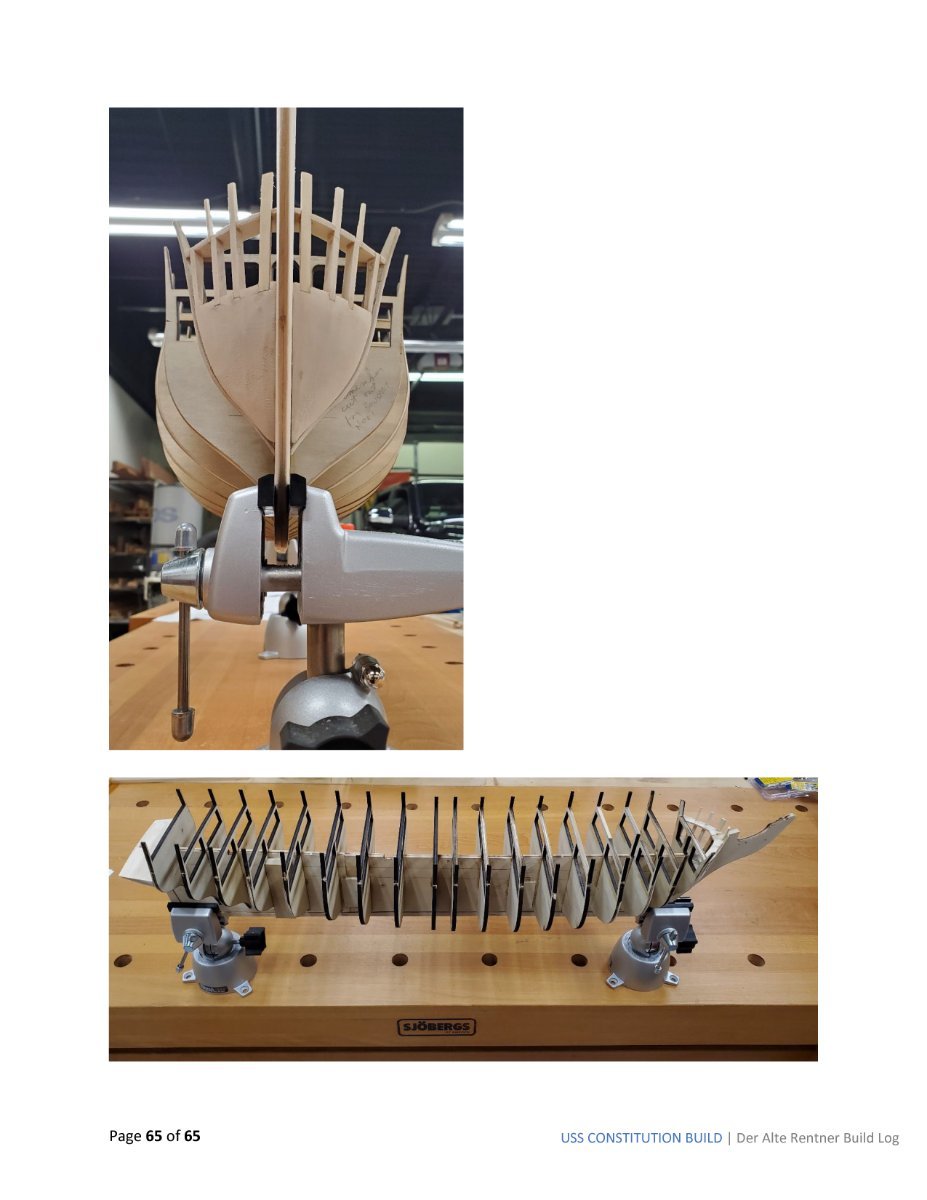
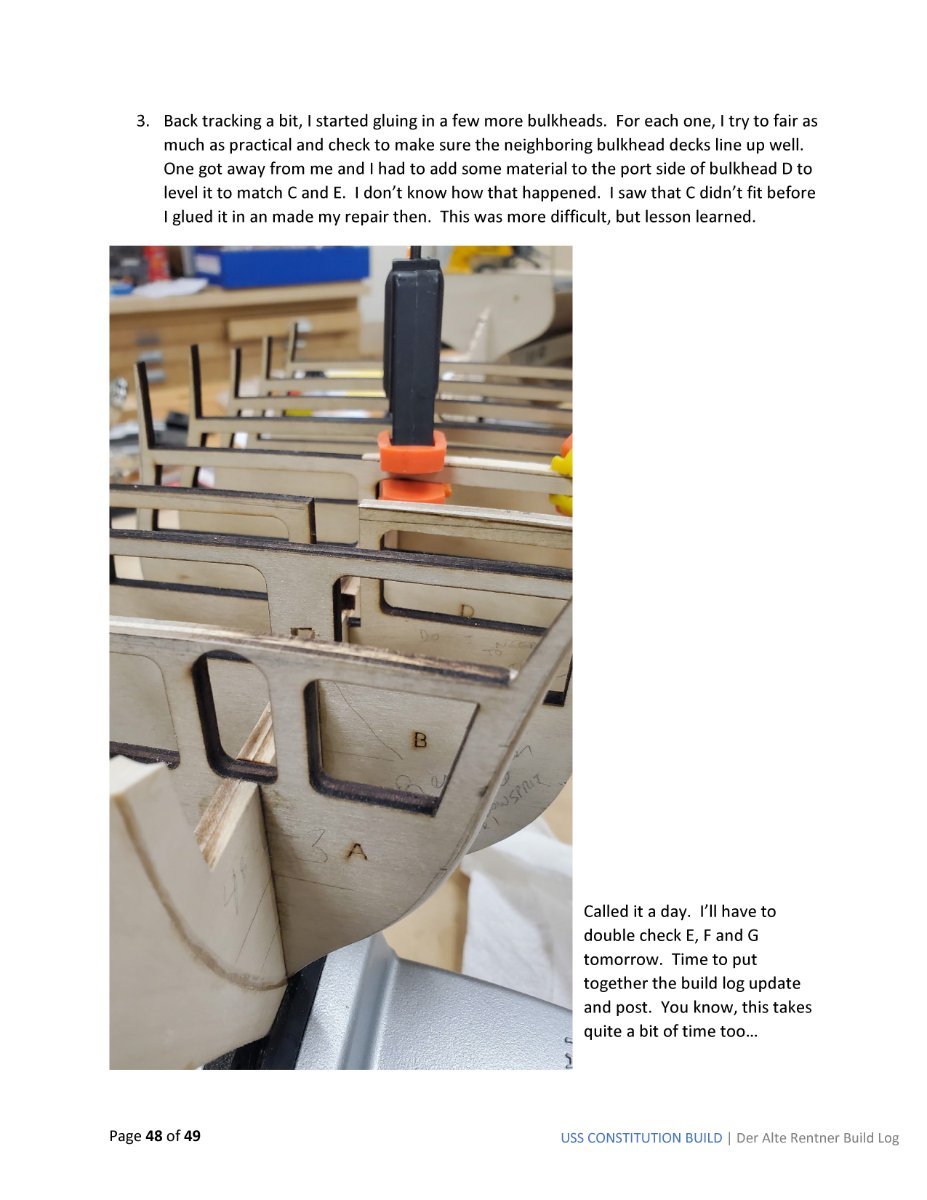
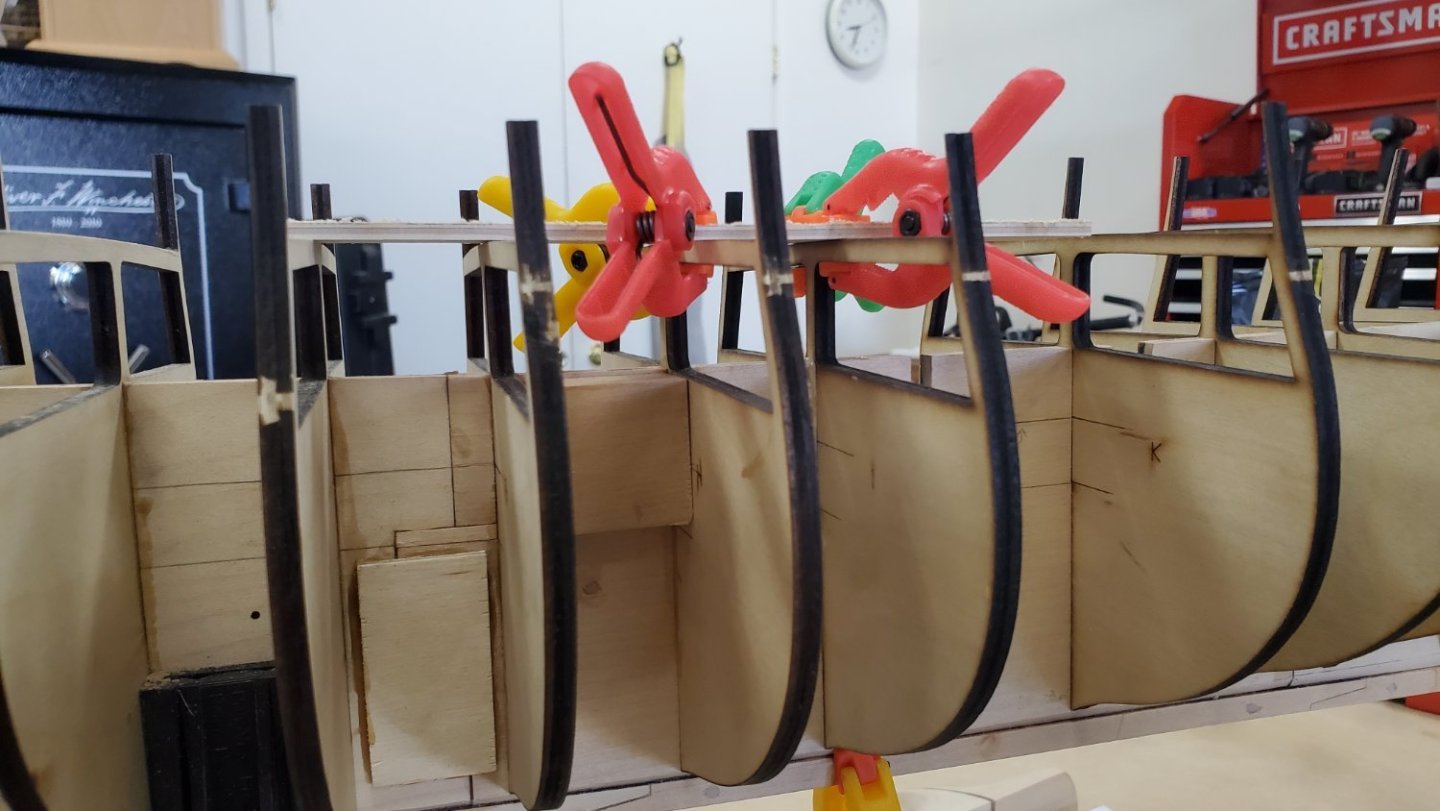
I'm still putting together the build log for my next post, but given that I just replied to woodartist about the problem I dealt with retroactively above with a method to prevent the same mistake going forward, I'm adding this bit of detail now. I clamp a piece of wood to the top of the newly added bulkhead and also to the previously added bulkhead. The slat forces the deck into alignment with neighboring bulkhead segments. Though not pictured here, I do check the distance between bulkheads to make sure they are parallel to one another. In this case they were spot on and needed no tweaking. If they are not parallel, I clamp a block to the bulkhead and to the false keel to make sure the bulkhead and spine are perpendicular.
-
P.S. One advantage of uploading photos directly to the site, vs my technique of uploading jpg files of my personal build log in pdf format, is that one can zoom in quite nicely. I just noticed that the stick I used to keep the deck aligned when adding bulkhead H to the false keel is one of my sandpaper sticks - 100 grit side facing up.
-
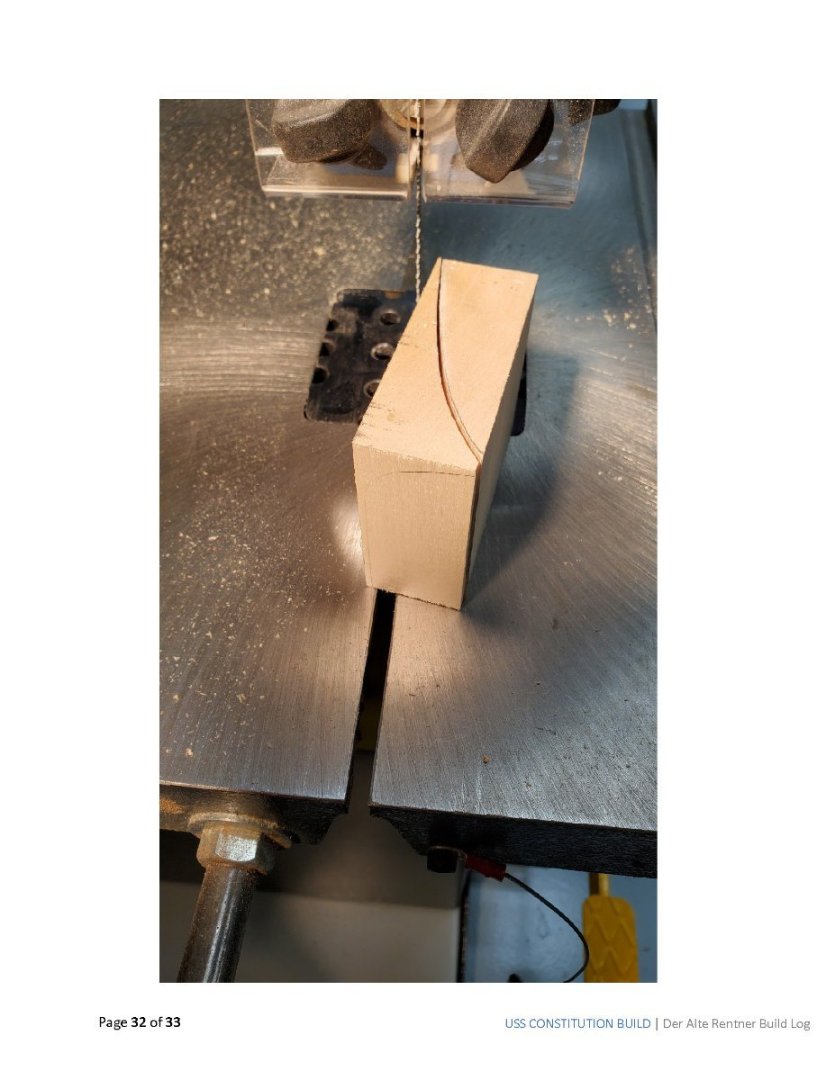
Had I spent some time on my own build log yesterday, I might have saved you some grief. Here's my solution to deck faces aligning. As for how to fix bulkhead O. I think cutting it out is fraught with risk. Make yourself a sandpaper file (glue some 80 or 100 grit sandpaper onto a stick), and work down the high deck area. You may have to glue a strip of basswood onto the edges of the bulkhead, but since those edges will likely be faired soon, you might get lucky and not have to do anything. Check how the edges of bulkheads N, O and P line up. If you do need to add material now, you don't have to be too fussy. The edges will be sanded down anyway, so use glue and pins to attach wood strips and sand away when it comes time to fair the bulkheads. Coincidentally, I left off with bulkhead N myself yesterday. I'm using Titebond wood glue instead of messing around with 5-minute epoxy - man what a pain it is to make that stuff and use it quickly enough to make adjustments. With the technique below, I haven't had to worry about reference marks. I do check the distances between the last bulkhead attached and the one I'm just gluing in. If the bulkheads aren't parallel, I adjust the set of the new bulkhead by clamping a perfectly rectangular block (with beveled edge to avoid having the block glued to either component) against the spine and the bulkhead. So far, I have had to do very little of that. It'll be a few days before I post again. While the bulkhead assembly creeps along, I'm working on making those bow knightheads and timberheads. Now T H O S E are a headache!

-
I've noticed the same thing and therefore am checking as many sources as I can going forward. The Practicum is a great leg up over going at Conny with nothing other than the plans provided with the kit and the build logs here by such as yourself provide broader perspective as well as inspiration. Thanks Der Alte (aka Peter)
- 1,348 replies
-
- 1
-
-
- constitution
- model shipways
- (and 1 more)
-
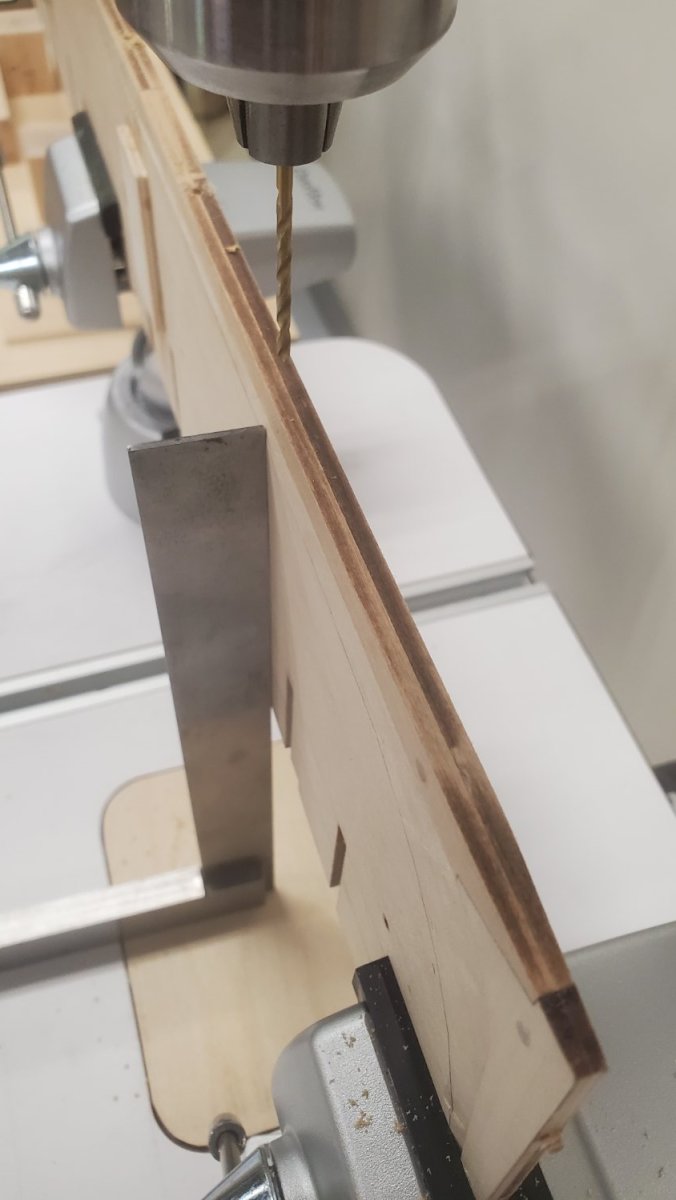
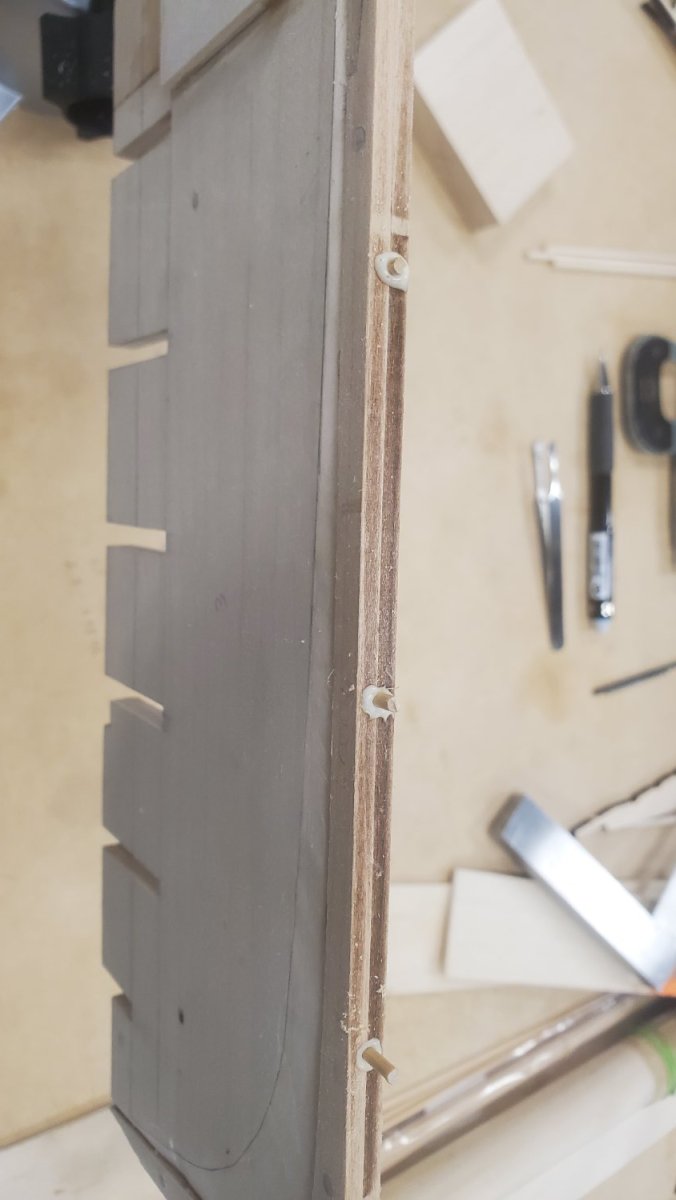
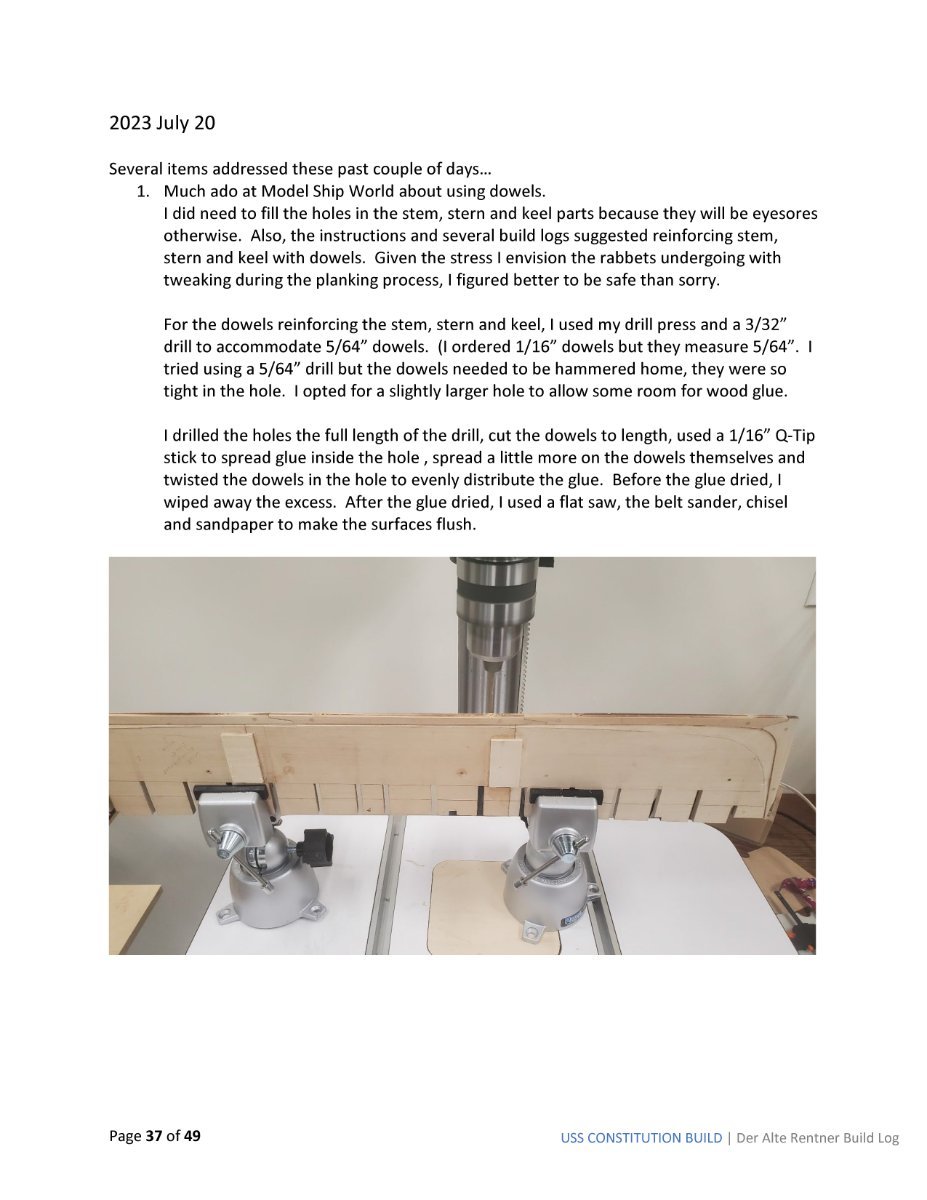
Our woodworking shops must be outfitted with different tools. I too just finished this dowelling task, but went a different route. I used my drill press, and for a couple of holes. I actually used a hand drill.. I'm following your build too now. (I think I'll leave the small boat building for last however).


-
Sjors, I did a little research here at Model Ship World and found a discussion on the use of wood filler. Someone recommended Goodfilla Wood Filler. So, I went to their website and read some FAQs. See below for a question about how to more-or-less fill larger spaces. (lay it on 1/4" at a time). Since you're planning on planking first, you have the luxury of filling the gaps a little at a time over the course of many weeks. This seems like the easiest way to get the job done. From Goodfilla FAQs (FREQUENTLY ASKED QUESTIONS – GoodFilla😞 Q: Can you use this to mold new pieces for repair on furniture as you would with Bondo? Would I add wood glue for increased strength? A: We would recommend our powdered "Filla-In-a-Bag" mixed with wood glue and water mixed to a clay-like consistency. If using a solid mold, add wood filler incrementally in 1/4" layers allowing each layer to dry before adding the next. Pouring GoodFilla into a mold is not ideal since the filler dries via evaporation and needs air to dry.
-
Sjors, I agree, the redo will not be easy. If you can securely clamp the frame (perhaps between the two bulkheads closest to the stern), you might try drilling a bunch of holes to remove the bulk of the filler block material then, using a good, sharp, flat chisel, you can scrape away the rest. This is soft wood and is fairly easily worked. Just be careful not to drill through the bulkhead or false keel. That's what I would do. I don't know how thickly you can apply wood putty, but that could be a plan B. Add a little at a time and let it dry until you work up enough to fill the space. Once the planks are in, I doubt it matters what's underneath. Good luck. Der Alte Rentner (aka Peter)
-
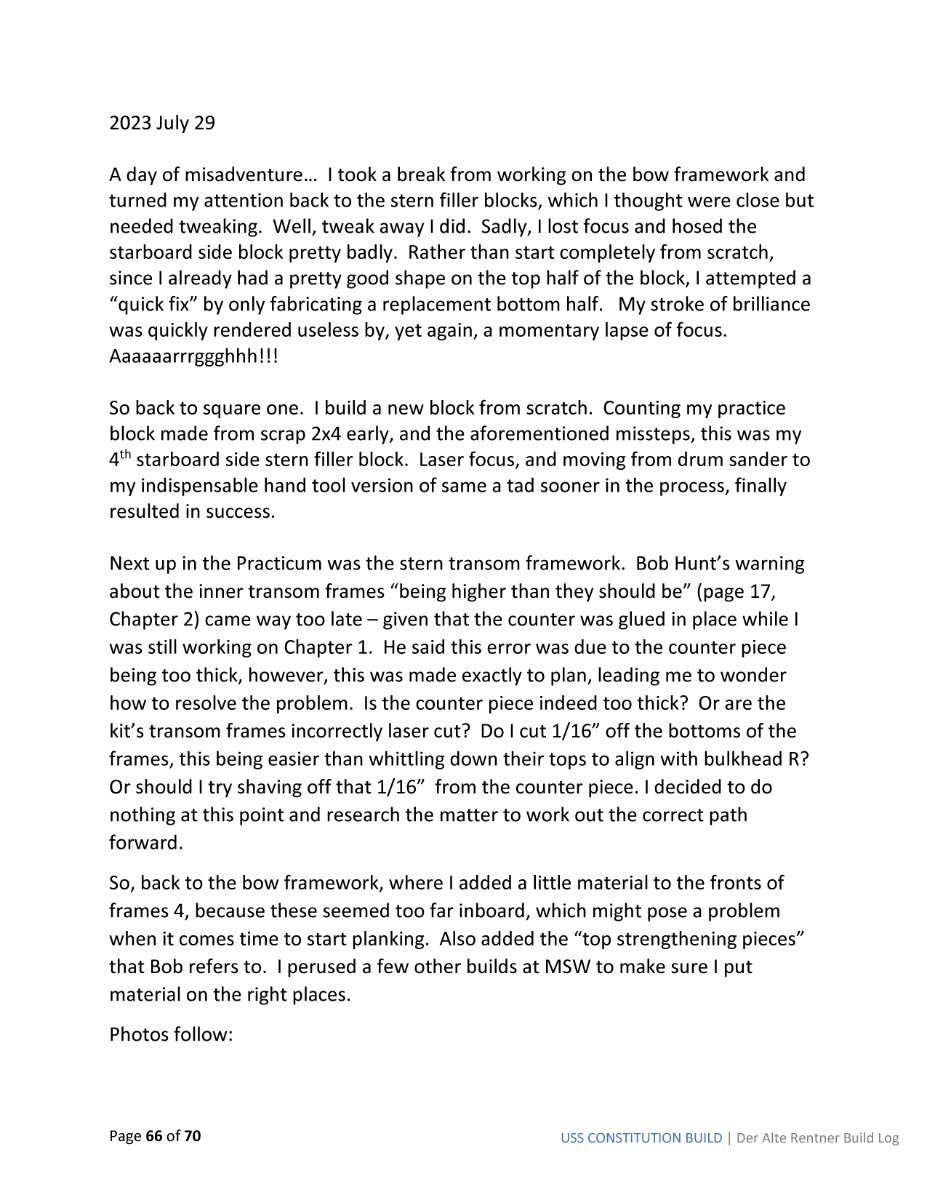
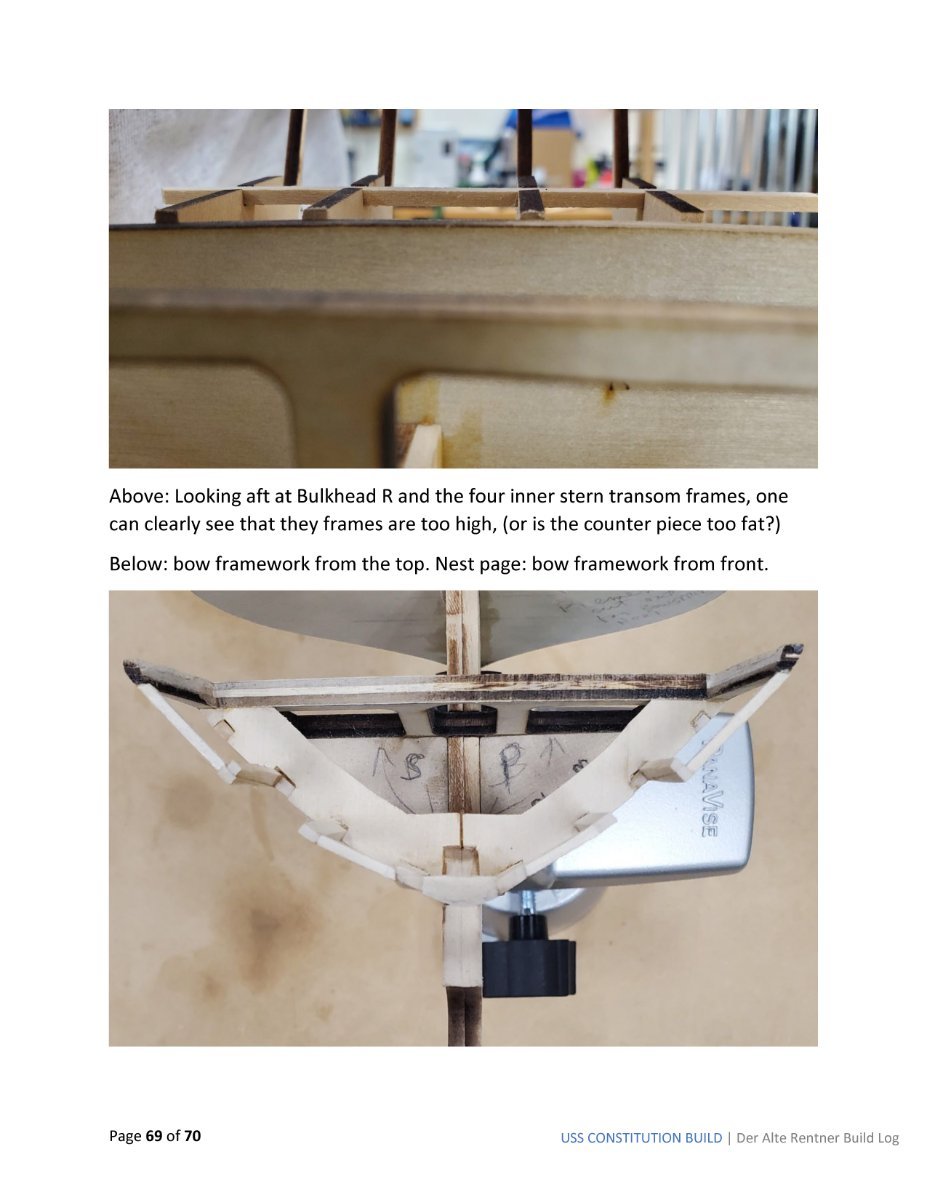
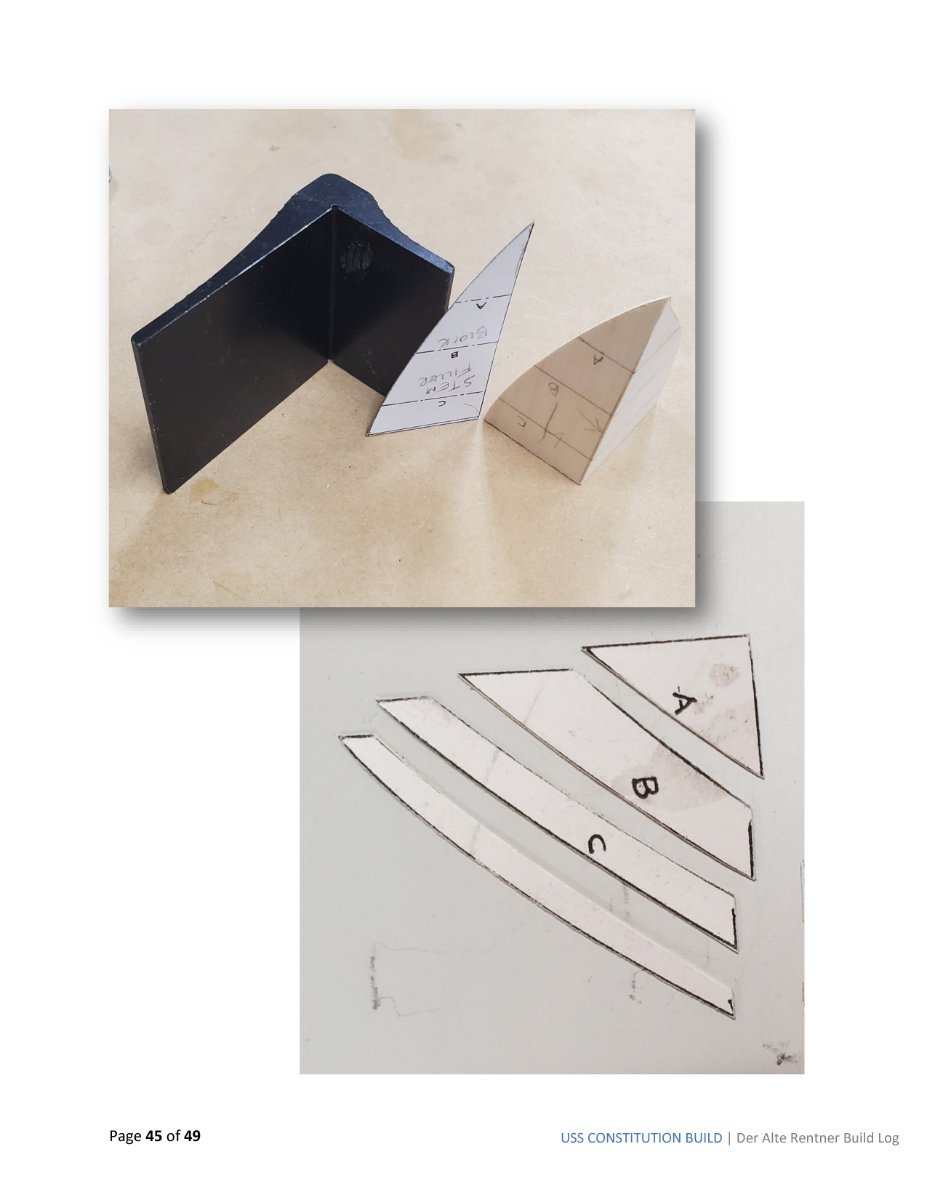
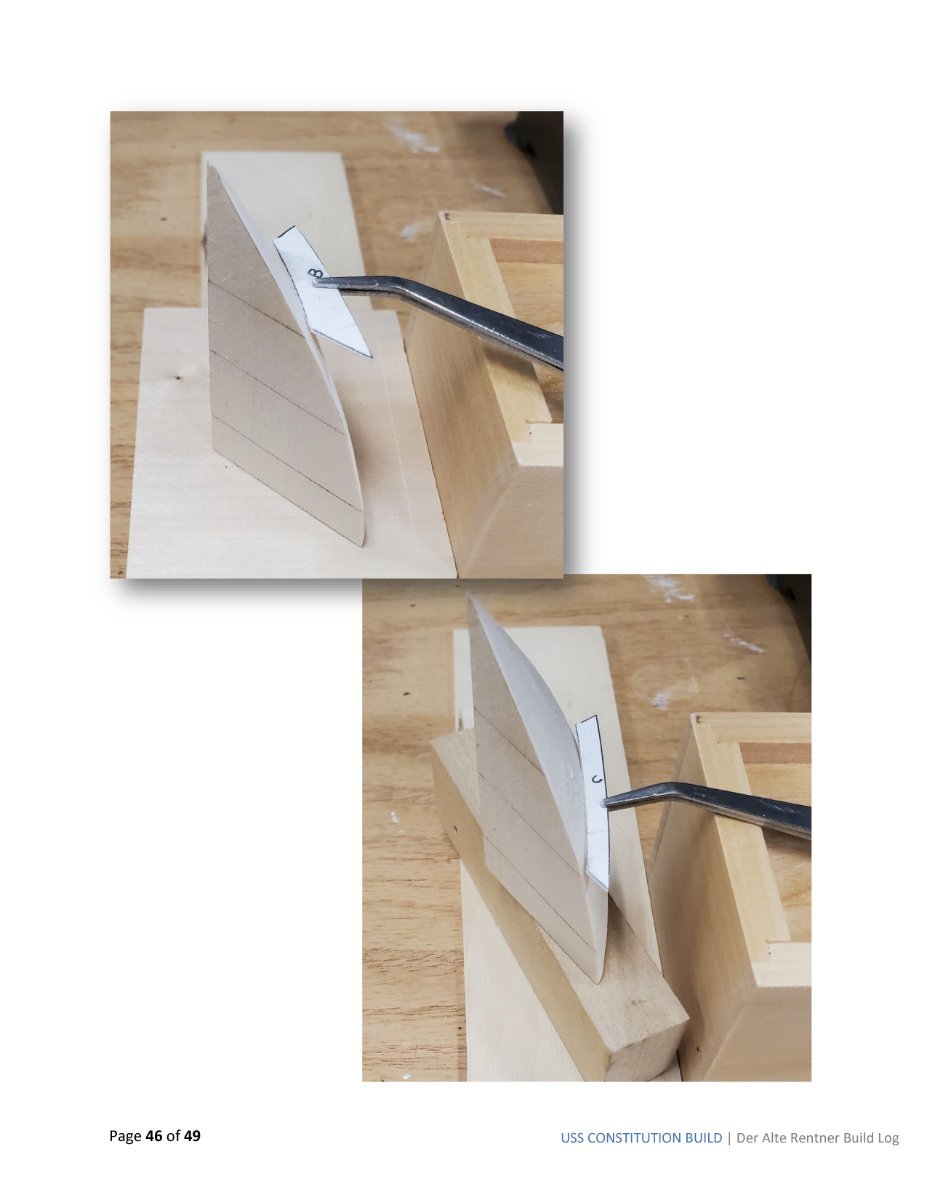
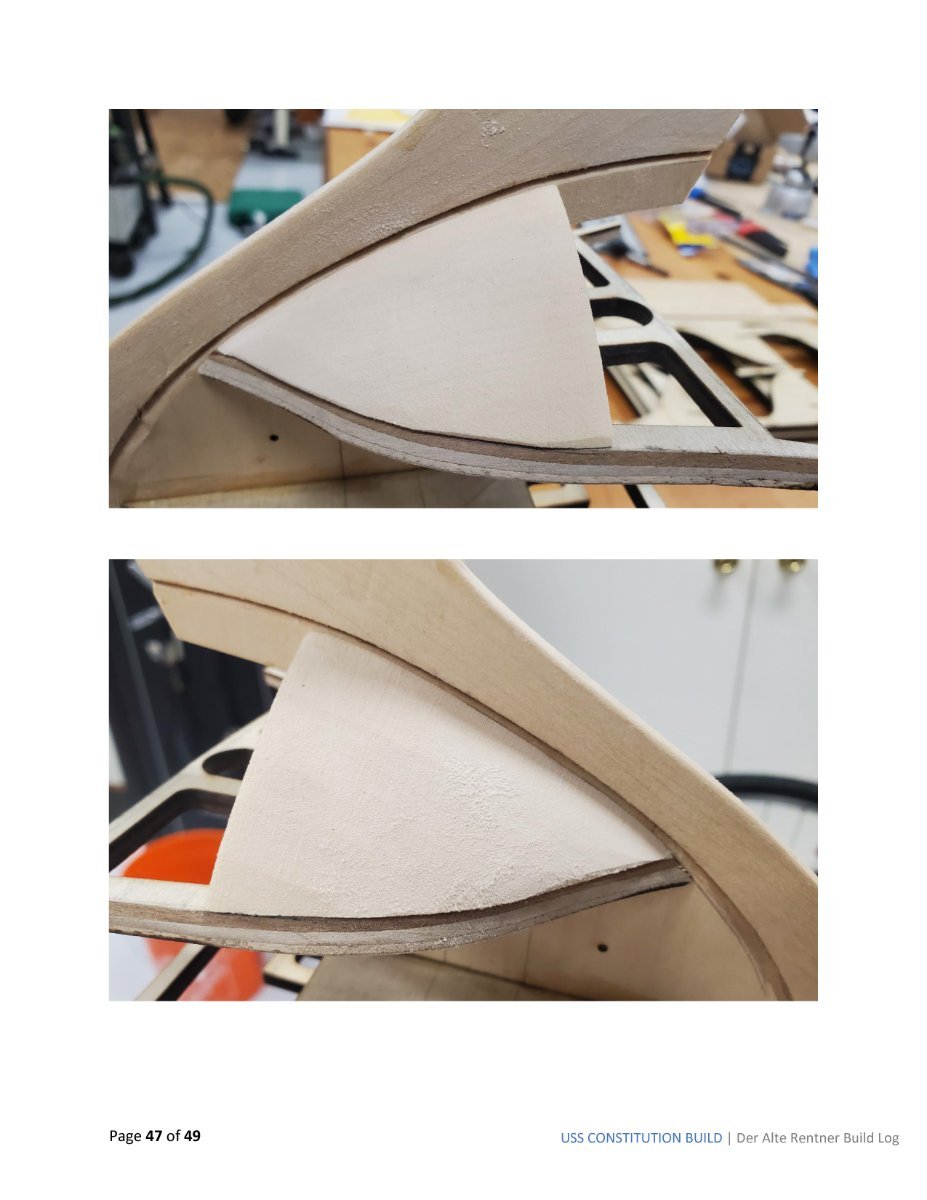
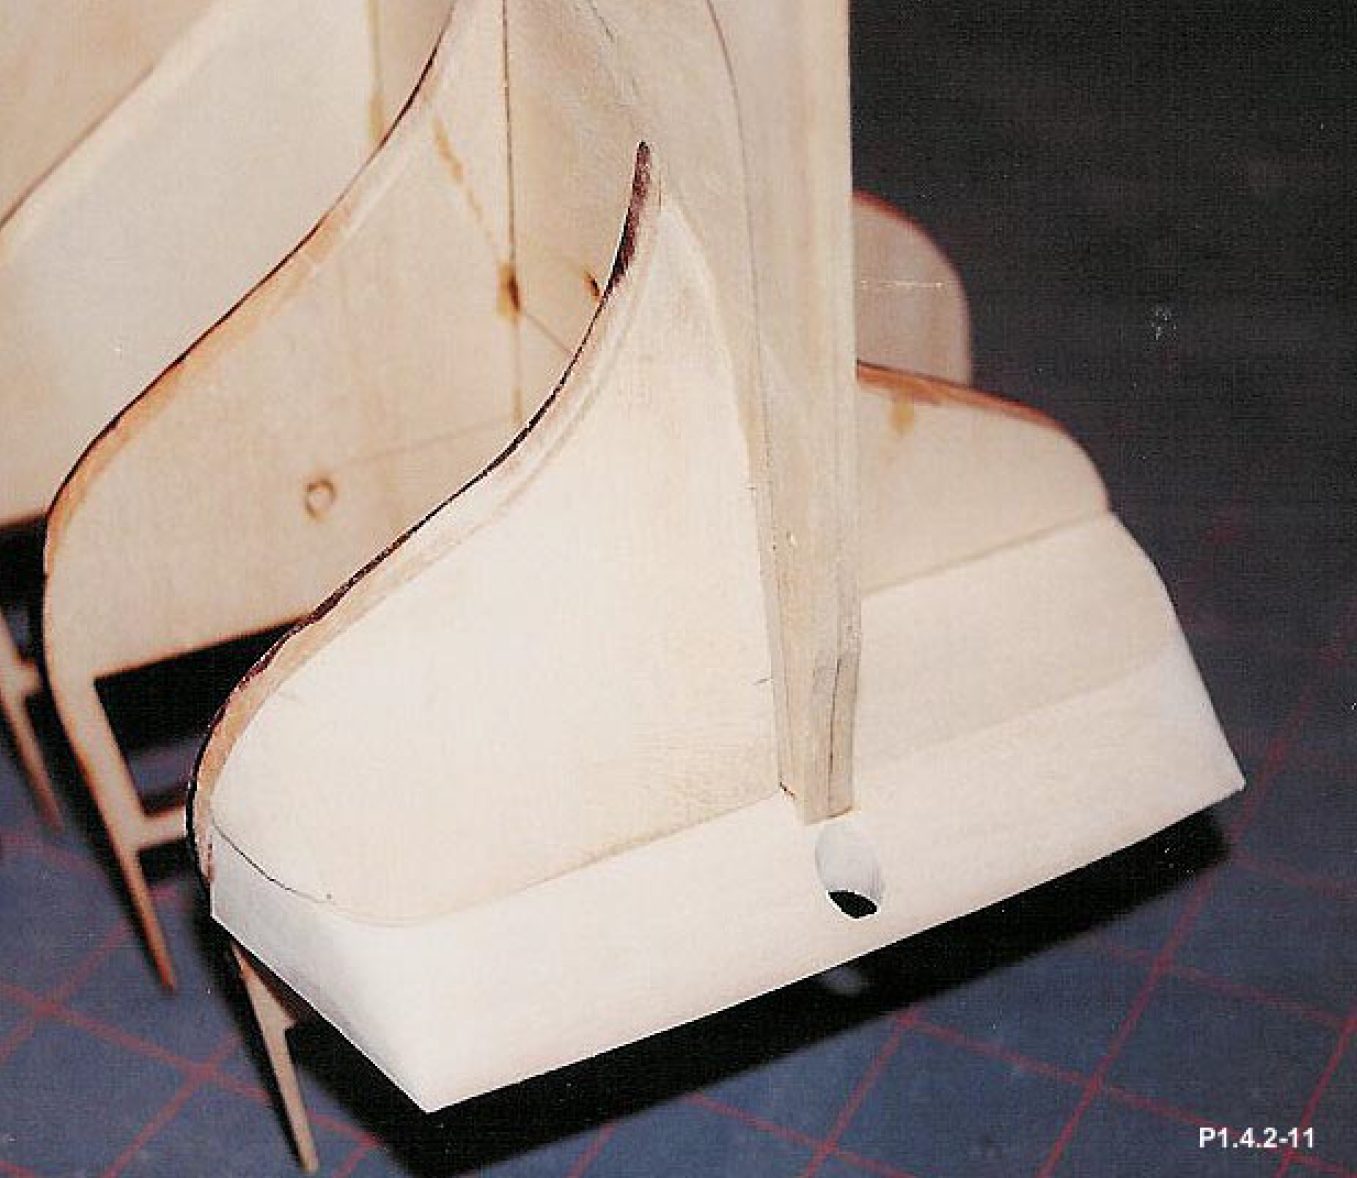
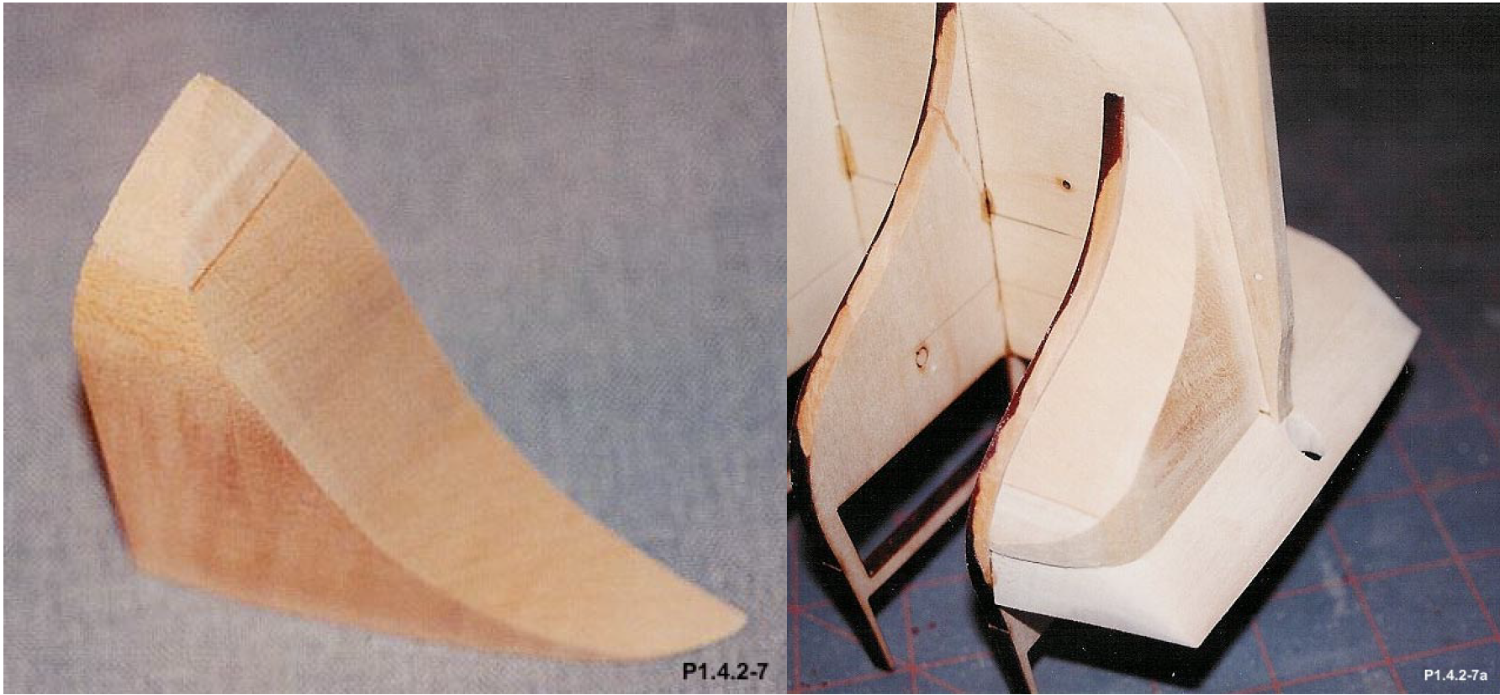
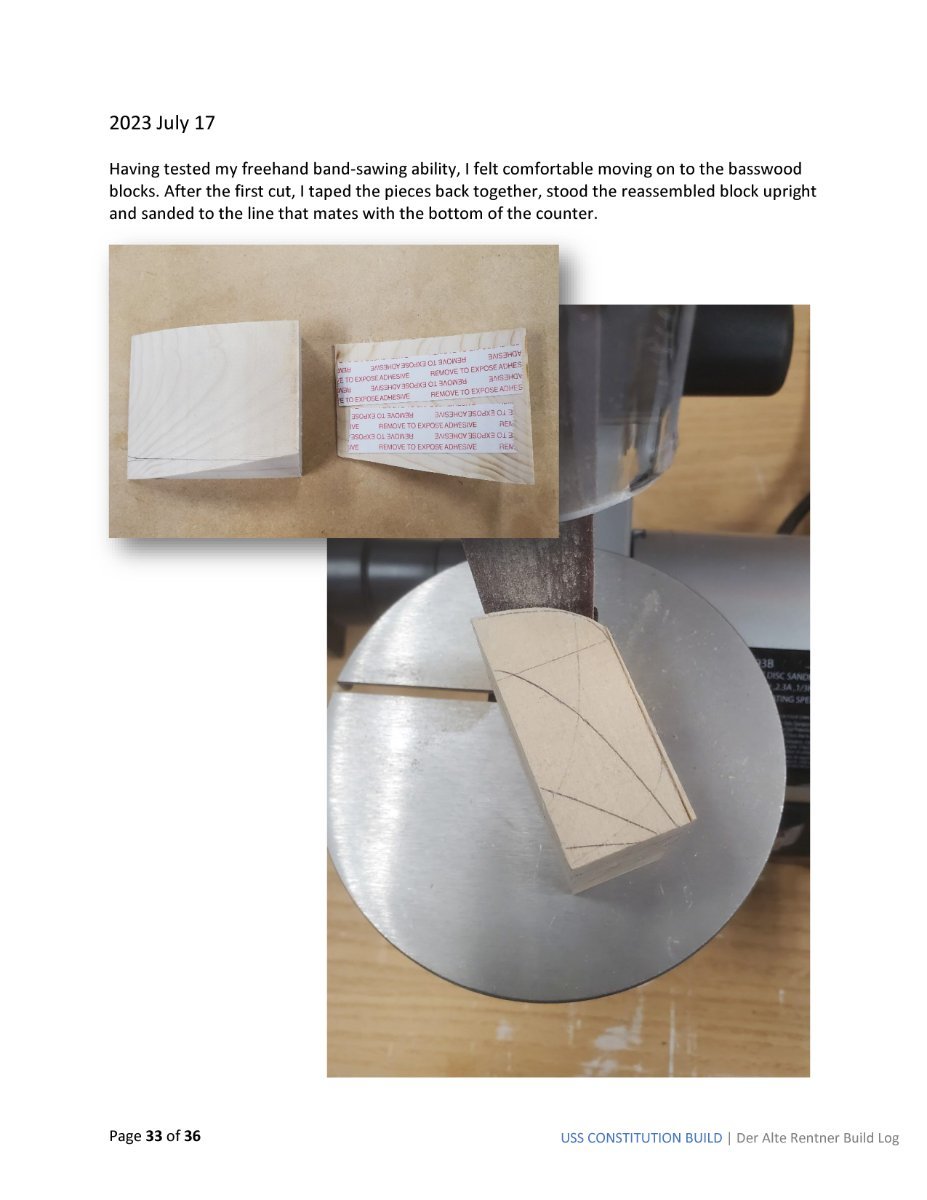
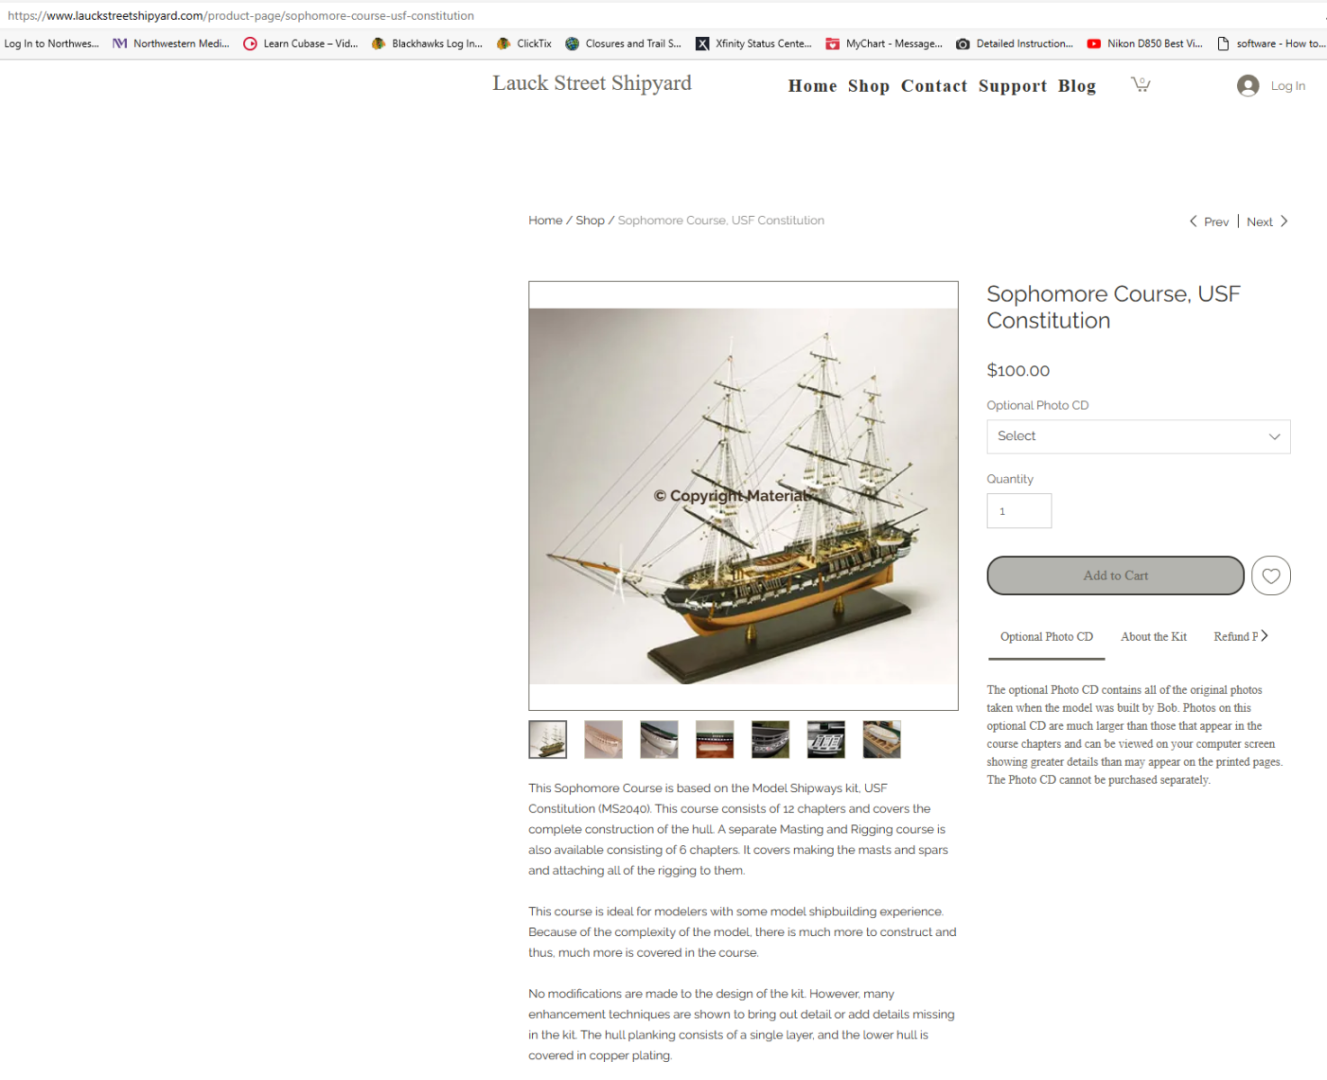
The photos above are from Chapter 1 of Bob Hunt's Practicum on the Model Shipways USS Constitution. I noticed your stern filler blocks didn't mate well with the bottom of the counter and bulkhead R. The first two photos are very similar to the ones I just posted to my build log, but I didn't get a picture of the more-or-less finished product like Bob's P1.4.2-11. For what it's worth, shaping these fillers after getting close with the bandsaw cuts etc. is waaaaay out of my wheelhouse. I didn't post it to my log, but I had to make no less than three starboard side fillers before I got close to figuring out the best technique. The drum sander is a labor-saving tool vs carving with a curved Xacto blade (Geez! How does anyone do that well? Kudos to you Bob!!), but care is required to avoid sanding away too much material in the wrong places. Mustafa is correct, much of this is scratch build work. I think at this point in the build, it's not good to try for perfection, because when it comes to fairing the bulkheads and planking later, you can fine tune the shapes. I studied the portion of the Practicum dealing with planking the counter and lower counter in Chapter 6 of the Practicum before deciding to leave my filler blocks alone at this point. I'm pretty sure I'll be whittling away at these when I get to that point in the build. And I might be exploring the characteristics of wood putty and Bondo too. Thanks Bob for the up-close details of the build in Chapter 6. By the way, I do recommend you purchase the Practicum - available at Sophomore Course, USF Constitution|US|Lauck Street Shipyard (Don't go crazy and purchase the Photo CD. All of those photos are in the chapters of the Practicum.)
-
Holey Moley, are there a lot of typos in my build log document! I'll endeavor to avoid them in future. Sorry about that... I plan to post roughly every week, as long as there's progress to report. Catch ya next week. and Chris, thanks for the clarification.
-
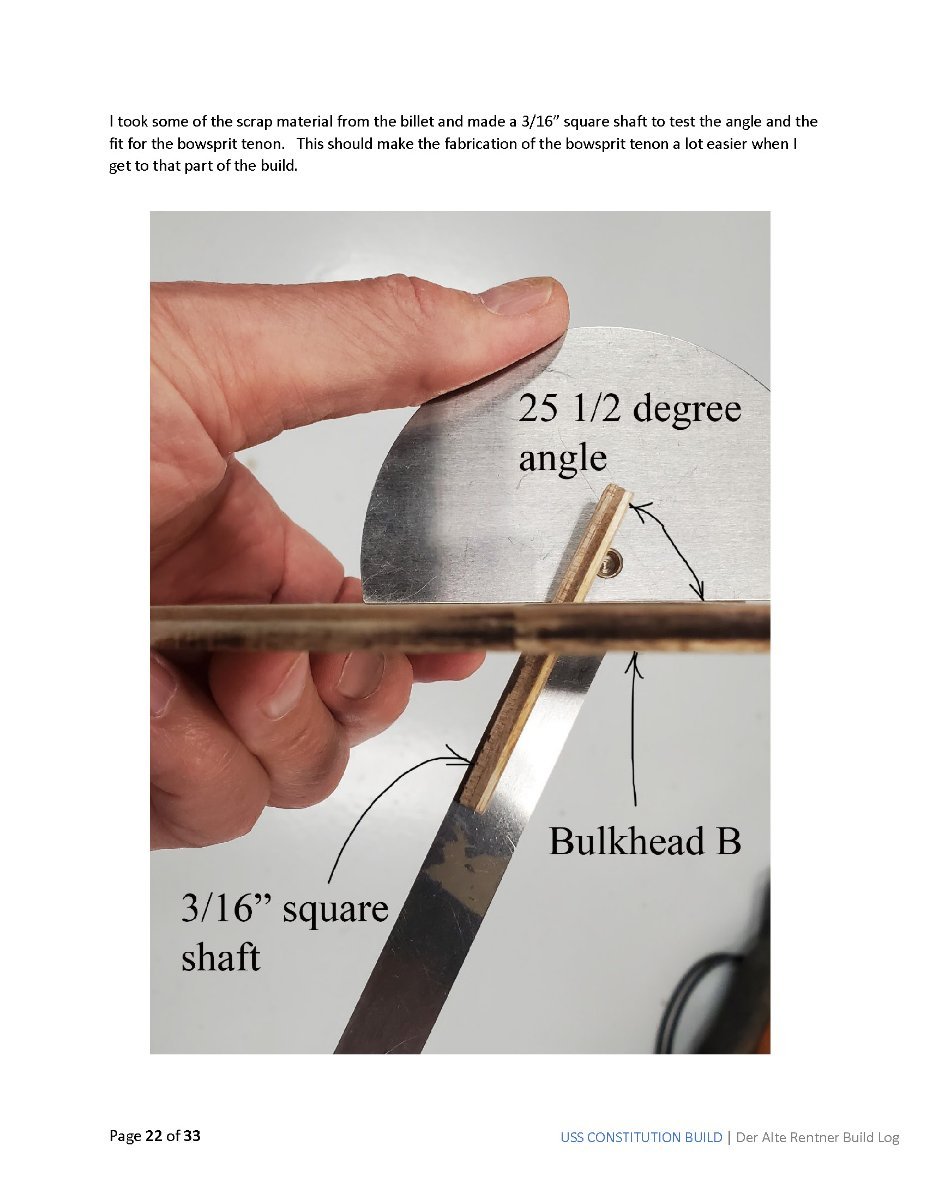
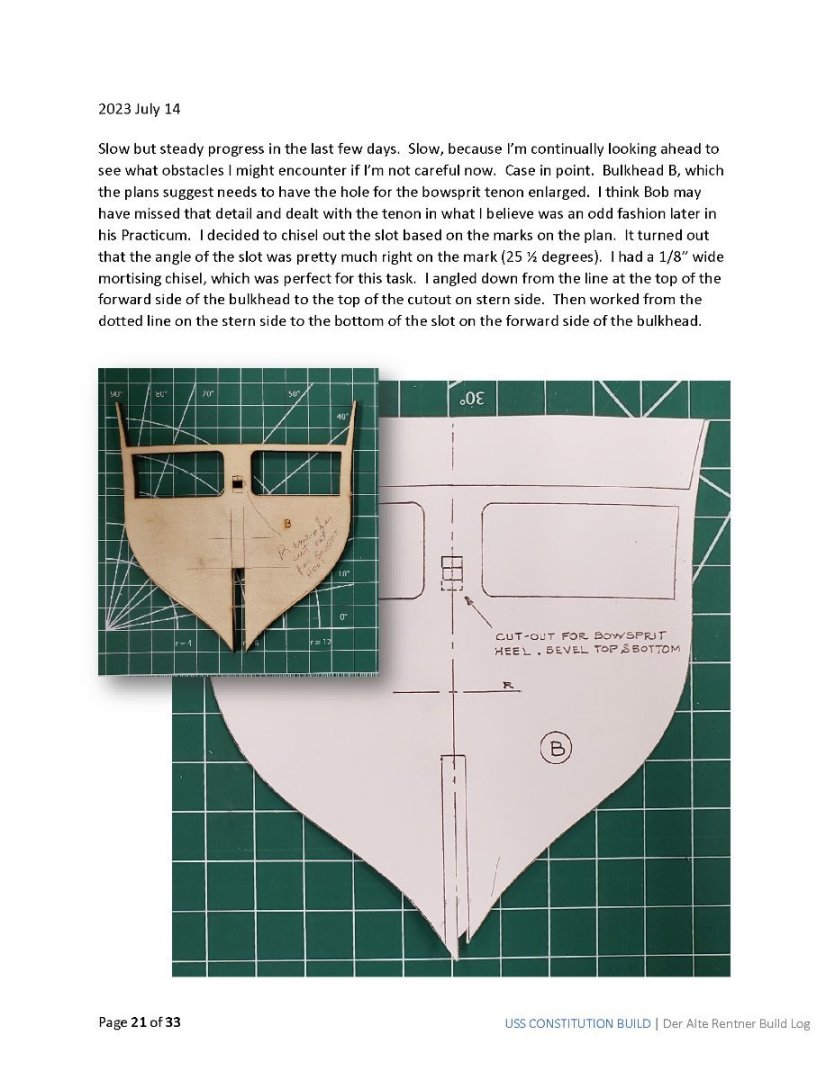
Having more cents than sense, I purchased all the materials from Bob Hunt. So far, so good. Chapter 2 came in handy to guide me through what to do with bulkhead B and the Stem (preparing for Bowsprit tenon and installation). I have been poring over the build logs here, and mine is underway as well. Thanks for sound advice. Best Der Alte
- 1,348 replies
-
- 1
-
-
- constitution
- model shipways
- (and 1 more)
-
Seems like I'm on my own.. Oh well, The build continues.


-
Greetings bthoe. I don't know how I missed your build until now, but I searched MSW for "bowsprit tenon" and that led me to your build log. Sorry about the bloodshed... I'm just starting out myself and have added your build to my watchlist. I see you haven't posted since Thanksgiving last year. Hope you're just collecting pictures to post soon.