SiriusVoyager
-
Posts
502 -
Joined
-
Last visited
Content Type
Profiles
Forums
Gallery
Events
Everything posted by SiriusVoyager
-
 Very nice! Thank your for taking the time to make a post hoc build log.
 -
Very cool custom base to hide the electronics. The Italian flag makes for great accent mark.
-
Thanks @JacquesCousteau! That is a good idea on scribing the planks if needed. I definitely was going to experiment to try and match the color first, but I may not have even thought about the paint filling in the small gaps between planks. I concur about them being just slightly visible from photos.
- 21 replies
-
- 1
-

-
- Cala Esmeralda
- Santa Eulalia
- (and 1 more)
-
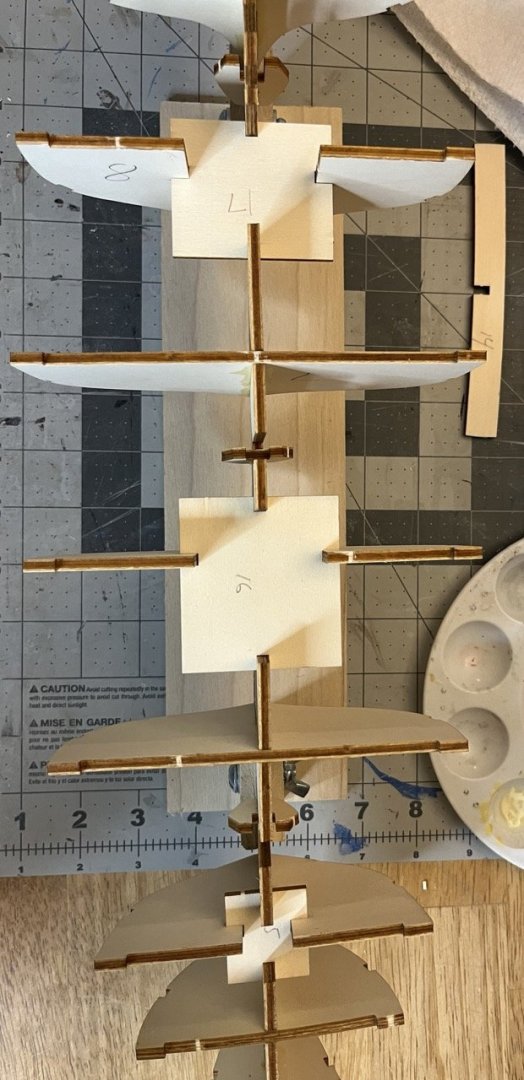
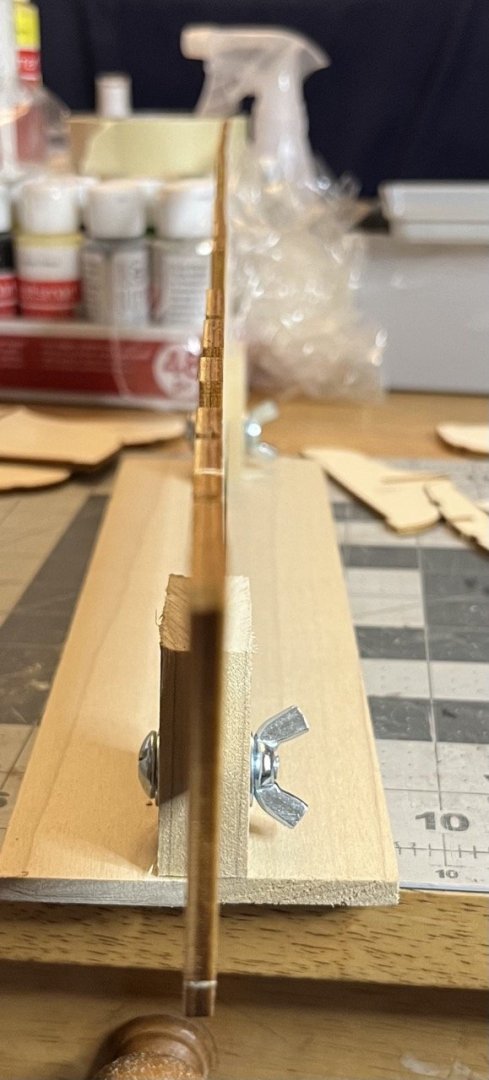
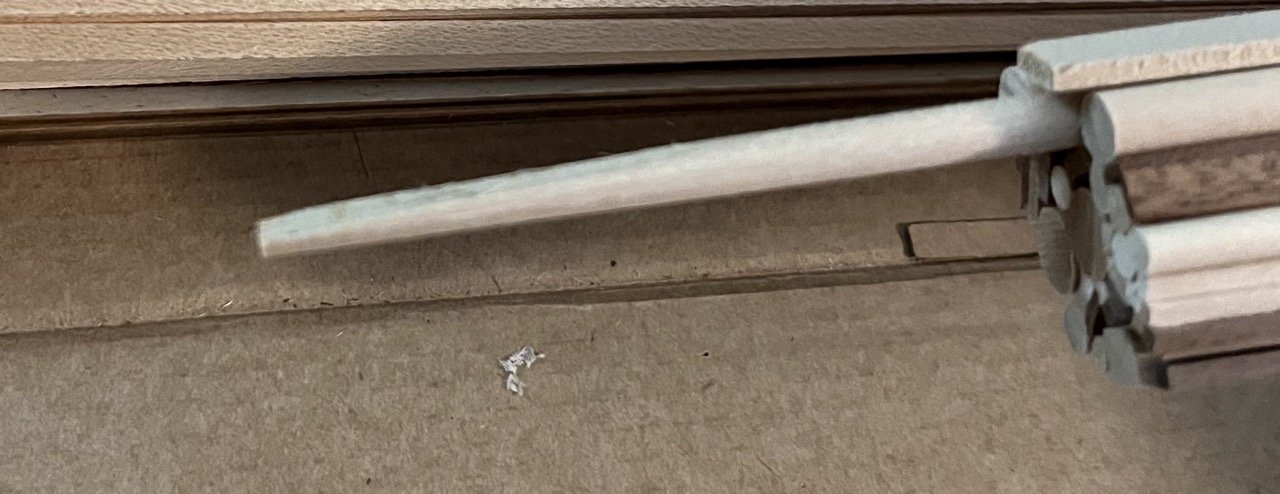
The Santa Eulalia has two stacked octagons for the wedges, while the kit supplied a simple ring. Since I will be painting the deck and the wedges are painted, I will be adding them to the deck now. The supplied ring is on the left, next to the first layer of octagon that I made for each mast. I used scrap wood sanded at 67.5 angles and glued them together. It was tricky to do using the Ultimation sander with repeater because they were almost too small. Making the second octagon with the even smaller pieces was basically not possible on the repeater due to the small size. I also attempted to cut the small pieces using a miter box and razor saw. It sort of worked, but the razor saw was too much for the small pieces and it looked rough. I then decided that I could simply sand down the included rings and it worked quite well. I centered the ring on crossing lines of my work mat and marked 8 even edges to help keep things aligned. I then sanded each edge little by little keeping everything even, It resulted in a pretty good octagon. They were a bit too tall so I sanded them down to about half their original height. The Base octagon was a bit too wide so I sanded it down as well, which was pretty simple since it already had its shape. I used the mast to make sure each was centered. All three glued into place. I applied a thin coat of sanding sealer. I left an edge around the sides of the deck where the bulwark will overlap. 4:45/14:35


- 21 replies
-
- 3
-
-
- Cala Esmeralda
- Santa Eulalia
- (and 1 more)
-
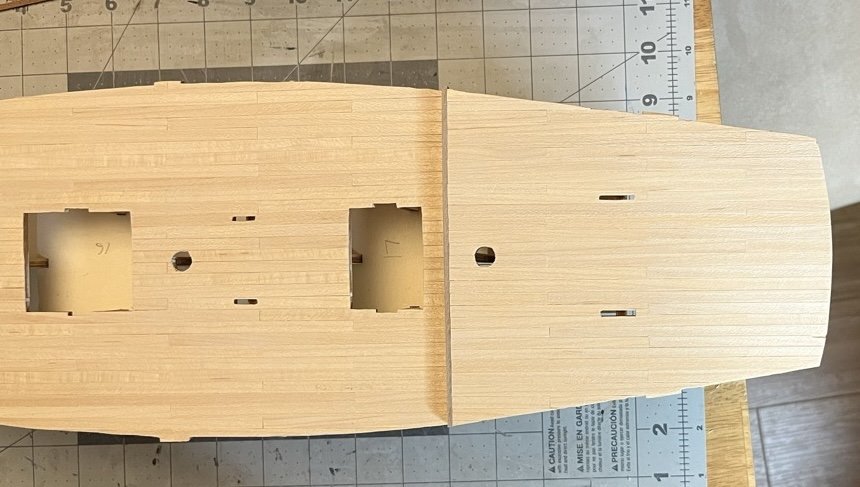
A strip of walnut lines the small ledge between the main deck and the slightly raised stern deck. The strip of wood used for structural support and the edge of the sub deck didn't line up so a bit of careful trimming was necessary. Frame piece in place. It had to be bent a little to match the camber of the deck. The instructions call for placing the stern deck planking prior to the frame piece, but I wanted the frame piece in place to provide an edge for the planks to butt up against. Deck planking completed. 3:50/9:50


- 21 replies
-
- 3
-
-
- Cala Esmeralda
- Santa Eulalia
- (and 1 more)
-
Those are some great models! Welcome to MSW!
-
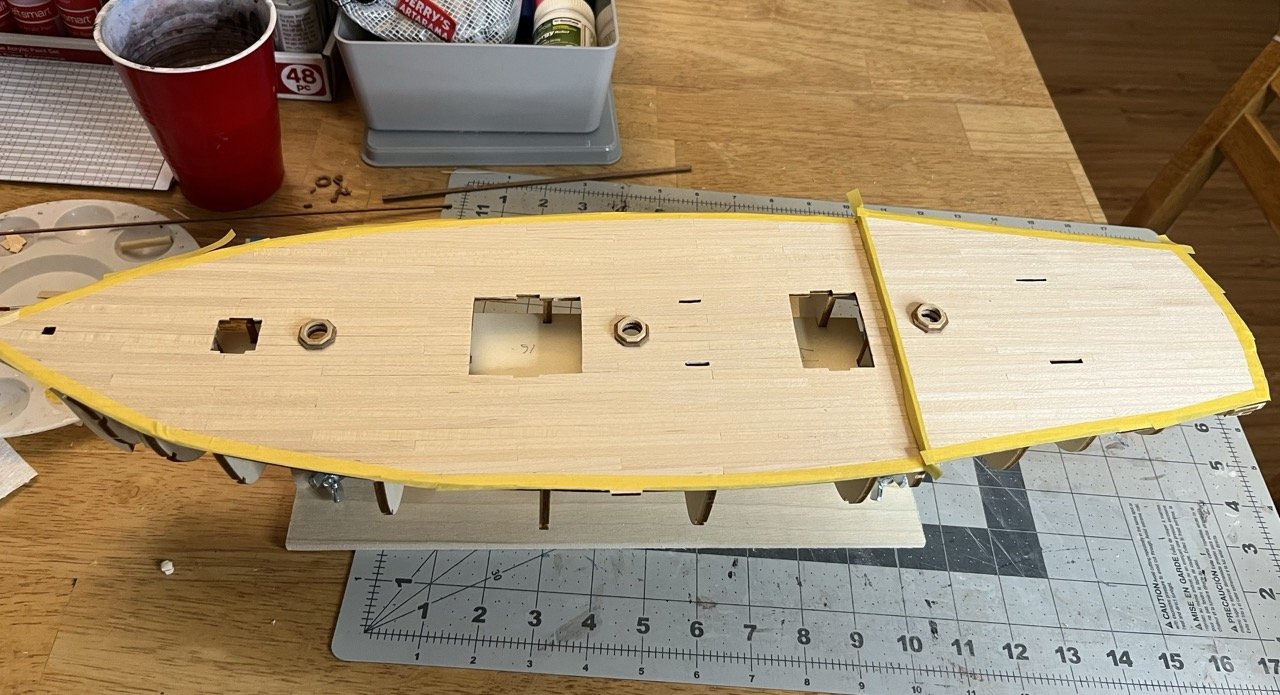
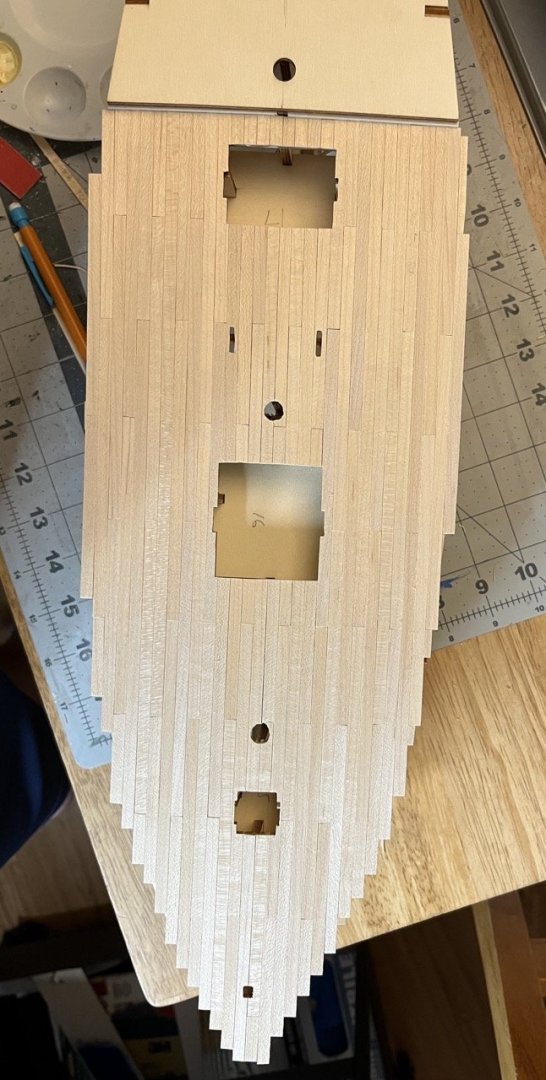
After thinking about it some more, I have decided to paint the deck after all. I think when I am done and doing side by side comparisons, I will appreciate that I attempted to match the actual ship. I think the deck color can be made with a simple mix of yellow ochre and raw sienna, but that will take a bit of testing. Because of that I have stopped drawing the caulking between the planks. I have kept cutting them to size to that everything is consistent in appearance. I have finished the laying the planking on the main deck. It just needs some trimming along the edges. This is where I got to when I realized that I didn't leave the mast holes. Fortunately it was easy to access them from below. The optical illusion of the planks fanning out towards the bow is a bit trippy. 1:15/ 6:00


- 21 replies
-
- 7
-
-
- Cala Esmeralda
- Santa Eulalia
- (and 1 more)
-
The next kit I buy will be a Kolderstok. I have been enjoying watching the fantastic job you have been doing on this and your previous build.
-
Work area pictures only
SiriusVoyager replied to Johnny Mike's topic in Modeling tools and Workshop Equipment
I'm currently using my dining room table as my work area. The two rolling carts from Ikea have been great. They make it pretty easy to clean up the work area and turn it back into a dining space pretty easily. That ring light provides pretty good illumination.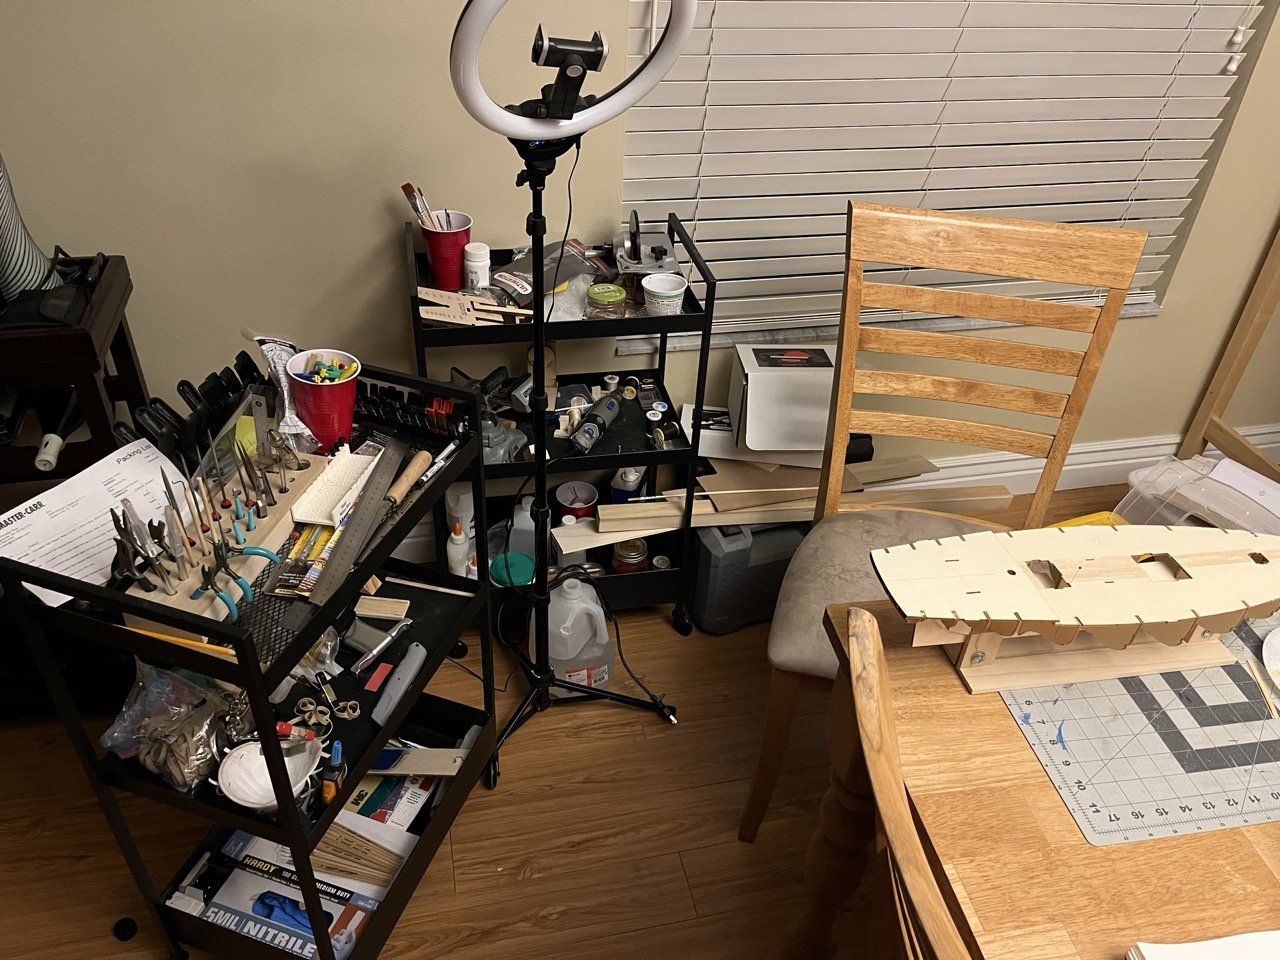
- 52 replies
-
- 14
-
-
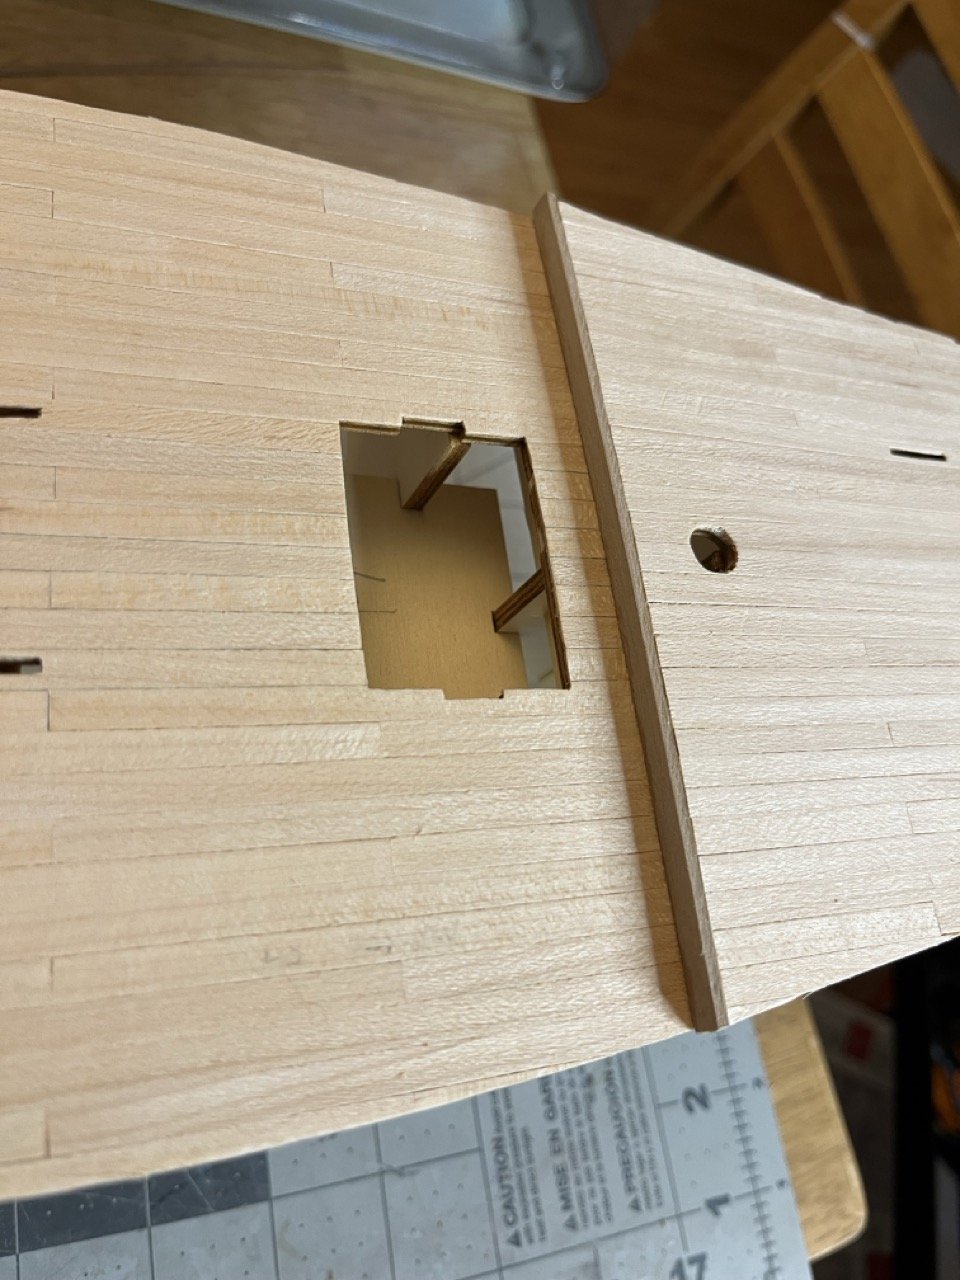
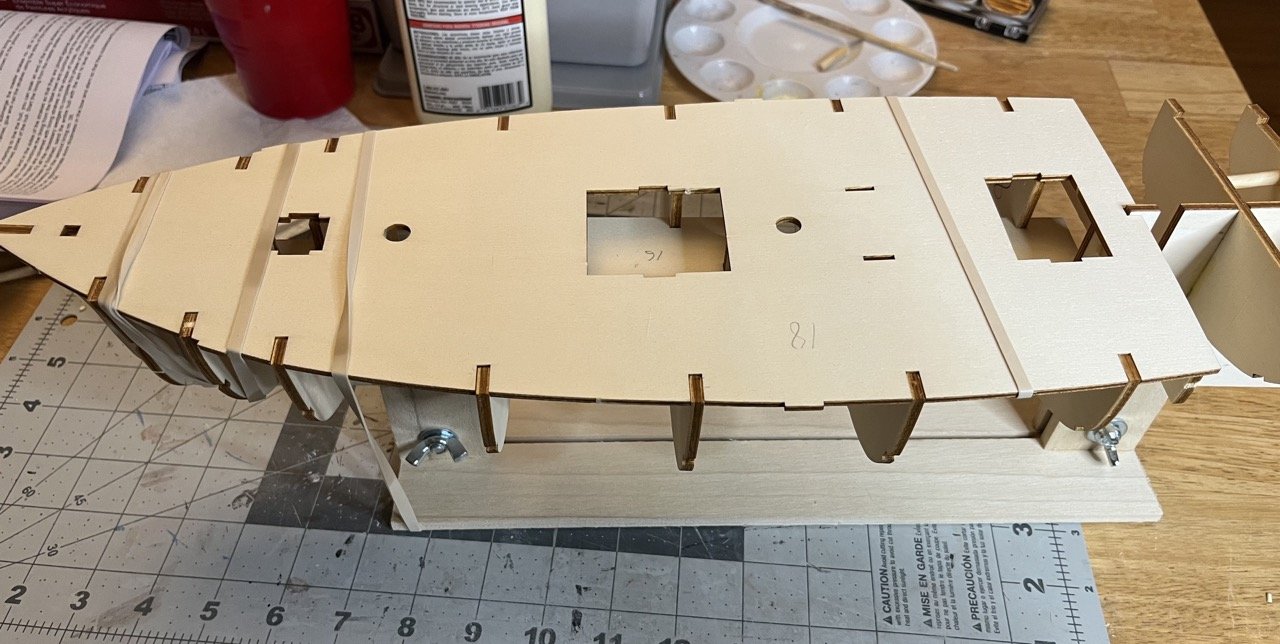
I started planking the main deck. My plan for now is to not paint it, though I can always change my mind in the next few days should I decide to. I decided to use 120mm (6 meter) planks with a 132 pattern (which is just a 321 pattern). Removing some of the strips showed that quite a few of them are not straight. This is going to make planking a bit more challenging. I am making the caulking using pencil on the edge of the strip, but only on one edge per seam so that it isn't too dark. The instructions make it look like the deck should be fully planked, then have all of the deck openings cut out. I started that way, which was fine to get the proper spacing, but I think it is much easier to cut the planks to go around the openings. I cut them just slightly long, then trimmed and sanded them to the edge. The small slot opening will be tricky to carve out. I laid the plank slightly off center to mark the approximate location of the opening, then carefully cut it out. Note the pin above to hold the plank straight. 2:30/4:45


- 21 replies
-
- 7
-
-
- Cala Esmeralda
- Santa Eulalia
- (and 1 more)
-
Thanks Bob. I do have that document. It spells out deck planking in a pretty straightforward manner.
- 21 replies
-
- 1
-
-
- Cala Esmeralda
- Santa Eulalia
- (and 1 more)
-
I have a decision to make before I proceed with the deck planking. The plans for the Santa Eulalia and the original plans for the Carmen Flores do not give any indication to the length of the deck planks. They simply show one single plank the length of the deck. In addition, the Santa Eulalia has her deck painted. I prefer the look of an unpainted deck and this is at least the third deck that has been installed on the ship. I therefore do not know how authentic this deck is to the original (though I am not modeling the original ship). I also do not believe that I could recreate the deck paint color, nor consistently mix that color to cover the entire deck. Painting the deck would make the model the closest look to the actual ship. It is just paint though, and to me, not the essence of the vessel (Pailebots hulls were generally painted white, so in that case, it would be part of the essence of the ship.) So the decision now is to simply lay full length strips and paint it, or decide on a plank length and plank the deck how I would aesthetically prefer it. If anyone cares to share their opinion, please do.


- 21 replies
-
- 1
-
-
- Cala Esmeralda
- Santa Eulalia
- (and 1 more)
-
The forward bulkhead looks ok. The second and third from the bow and stern are mostly what I am thinking of. Ideally there should be no char on it though. It will increase the surface area for the planks to adhere to and will help ensure that the hull has the proper shape. The glue should hold better on bare wood than on char marks as well.
-
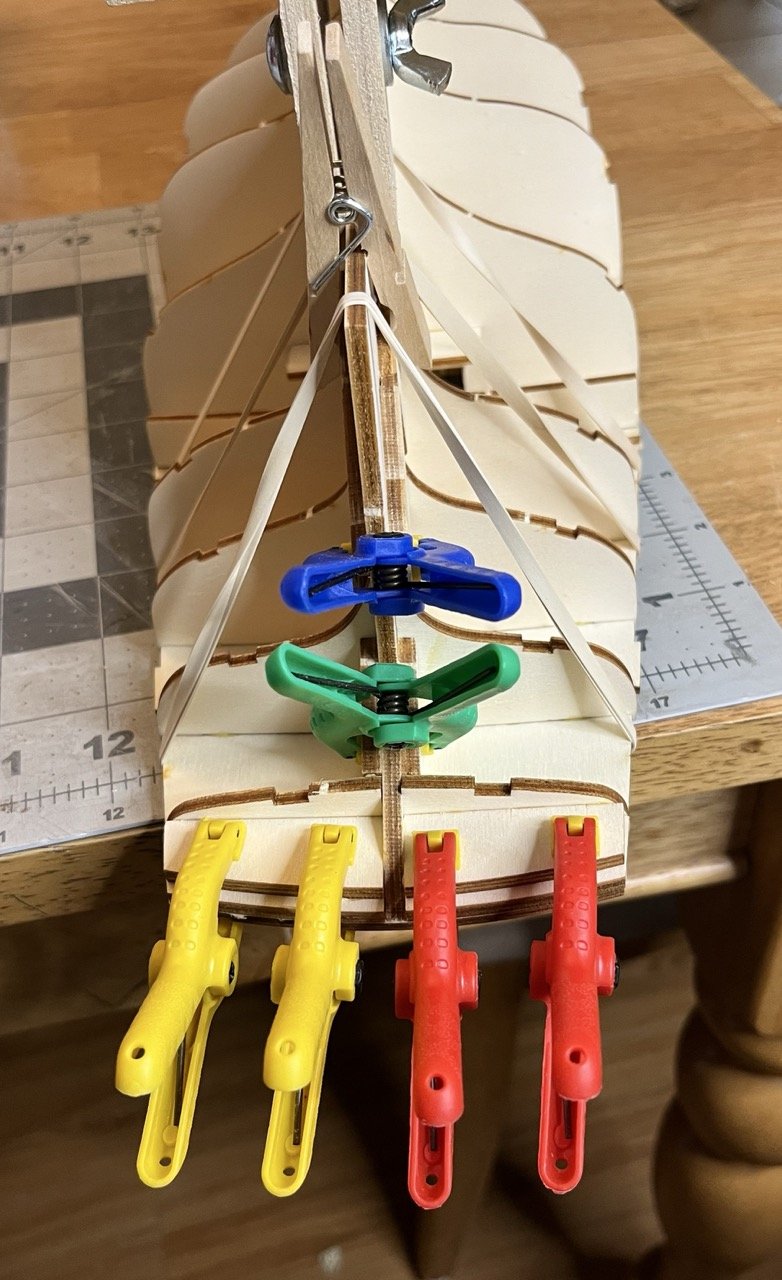
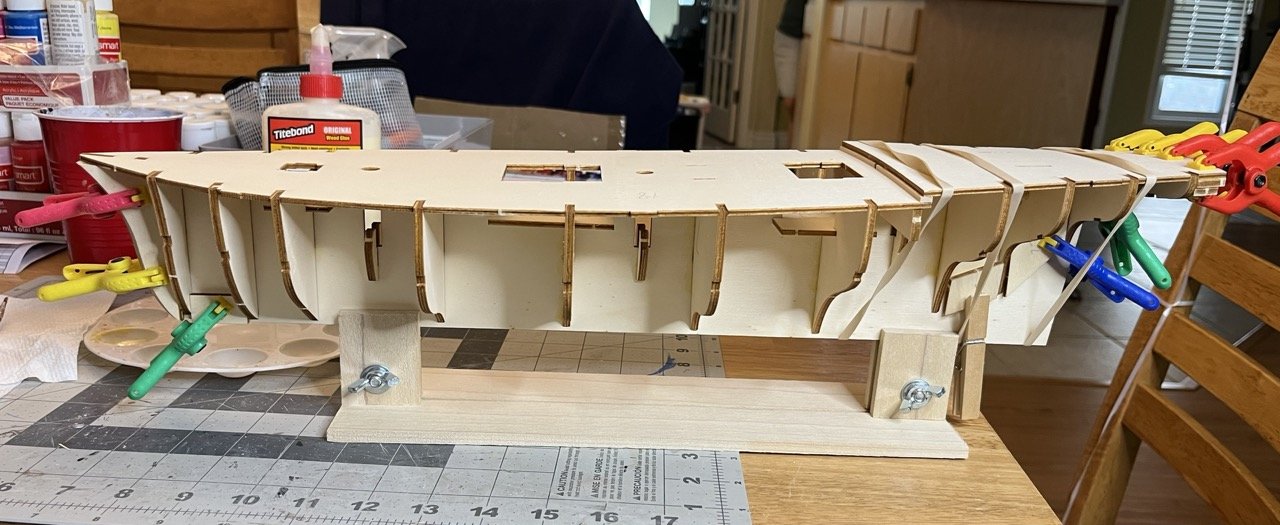
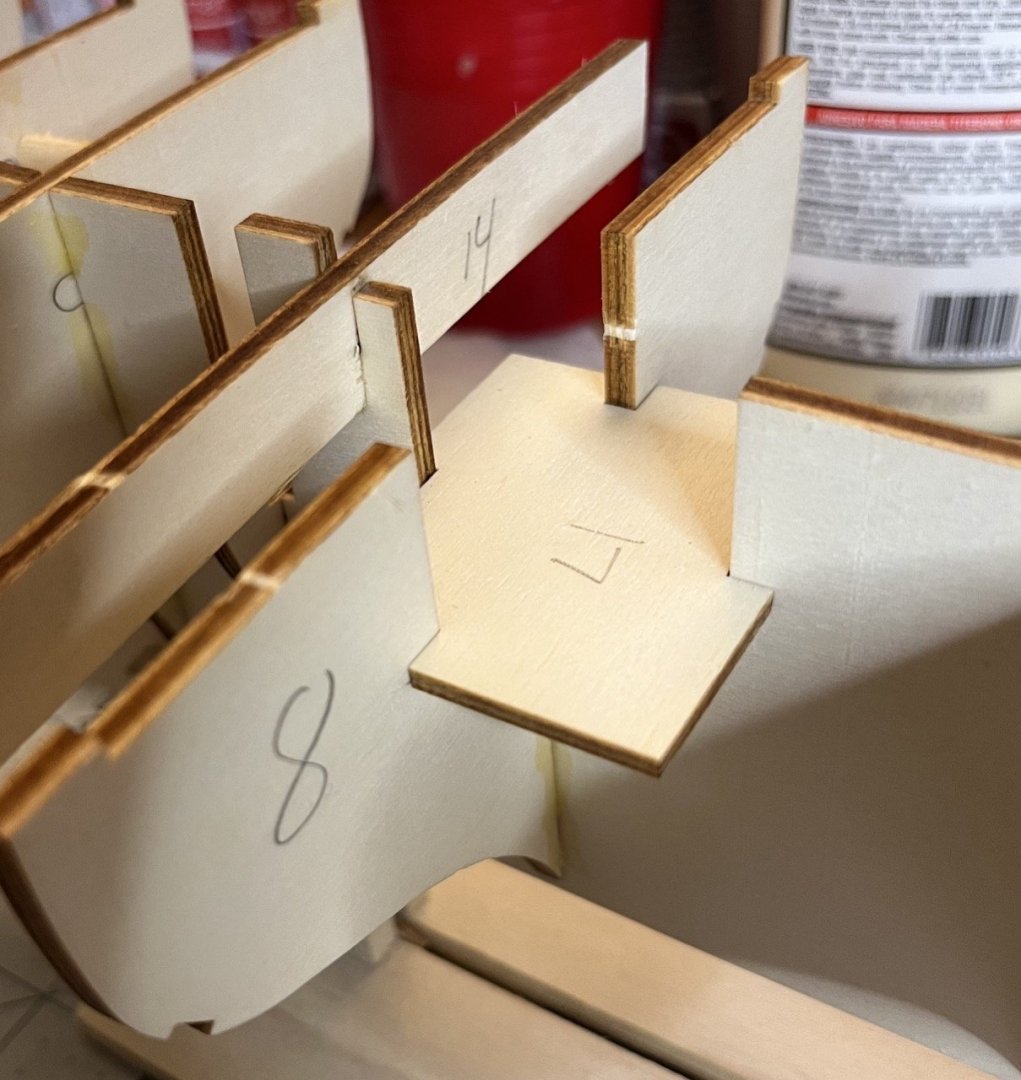
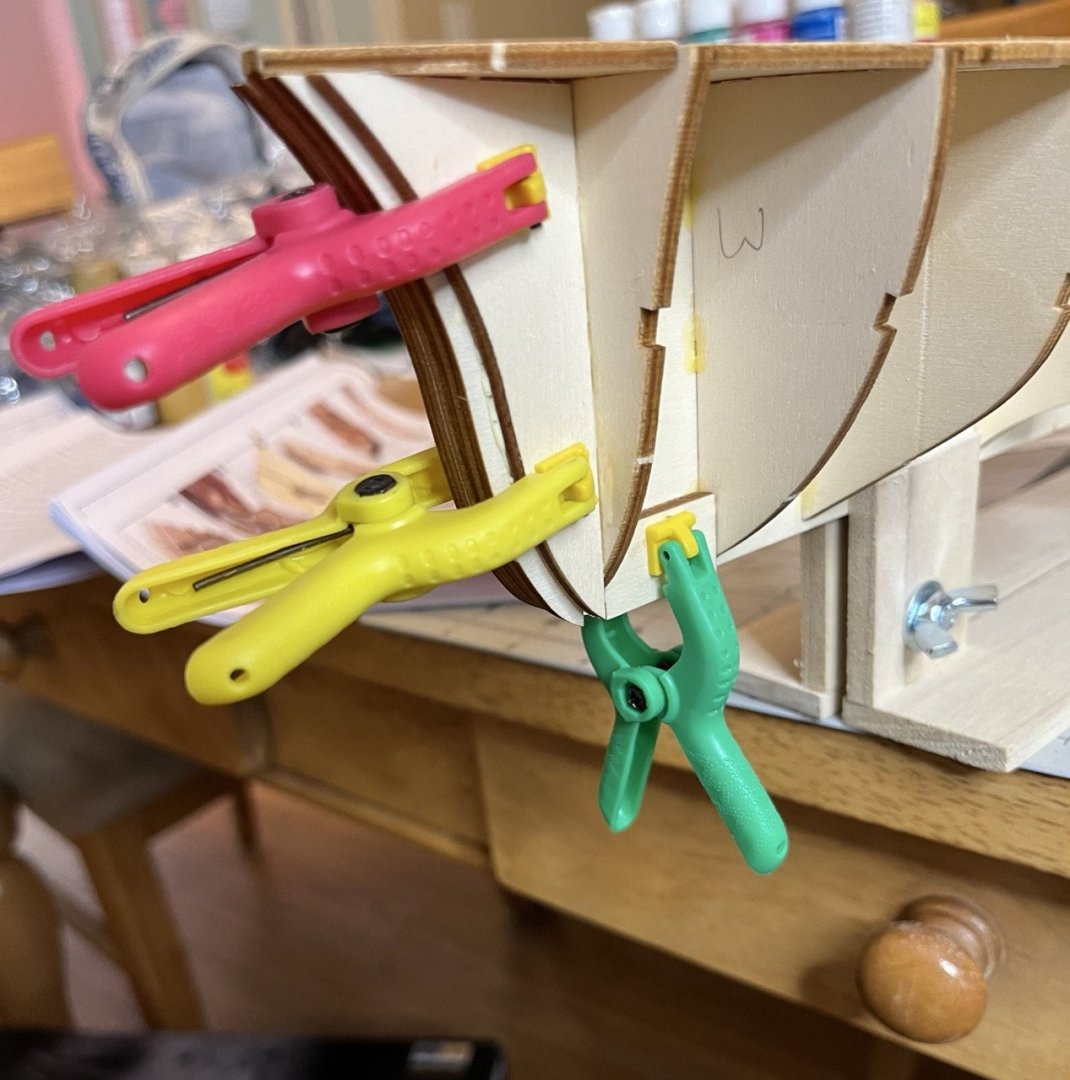
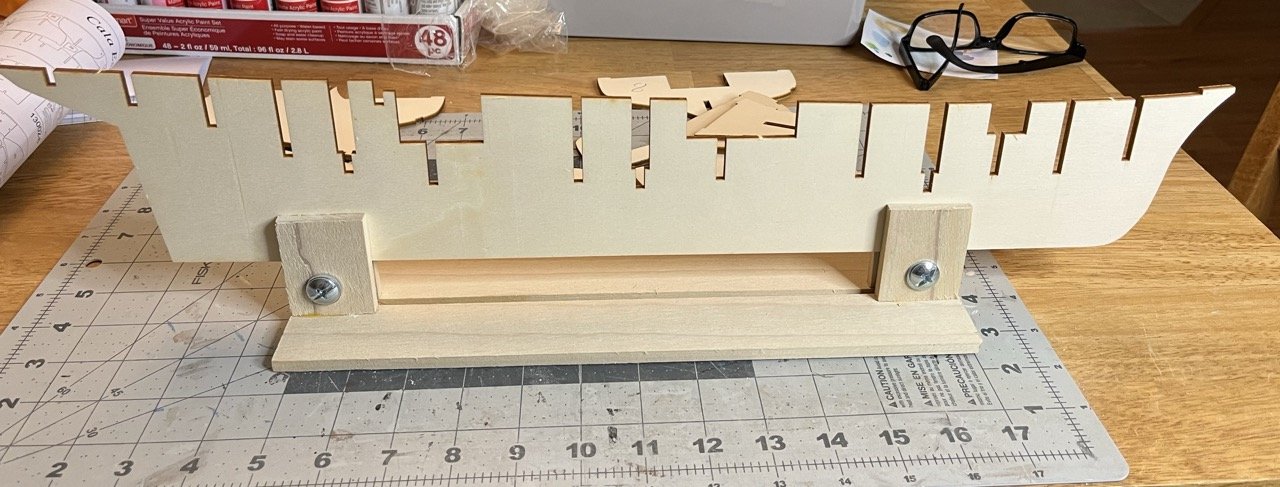
Three recessed decks installed as well as supports for the mast. They fit nice and snug. The photo below is the dry fit test. Because of the snug fit, I applied the glue without fully removing the deck pieces. The main sub deck is next. It took a bit of work to get it in place. The fit of the tabs was quite tight and a little filing was needed in a couple of spots. Once it place I used rubber bands to help it hold to the camber of the bulkheads. The stern sub deck was a bit more tricky, but still went in pretty well. The main deck had a bit of camber already in it. The stern sub deck was flat so getting the sides down took a little bit of force. The snug fit to between the tabs of the bulkheads and the deck helped to hold it in place. The last step for this update is adding pieces to help with faring for the hull planking. It looks very bent or crooked, but it is just the camera angle. 1:00/2:15


- 21 replies
-
- 3
-
-
- Cala Esmeralda
- Santa Eulalia
- (and 1 more)
-
The second layer looks good! Remember, your eyes are inches away from all of the work that you are doing, so you will notice everything little thing that almost no one else will notice. Nice job working through that first layer.
-
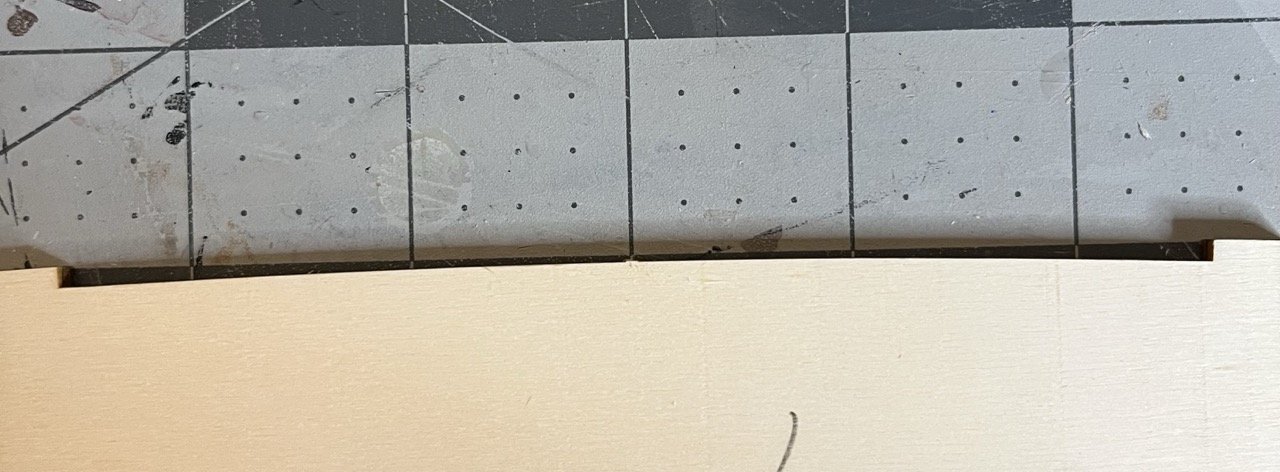
For a first planking, it's not bad. The main issue I see is that the bulkheads should be fared to the point that there is no char left. Beyond that, most other issues will be resolved with sanding, wood filler and the second layer planking. When you get to the areas where there is more curvature in the hull, make sure to bevel the edges of the planks to help them fit better.
-
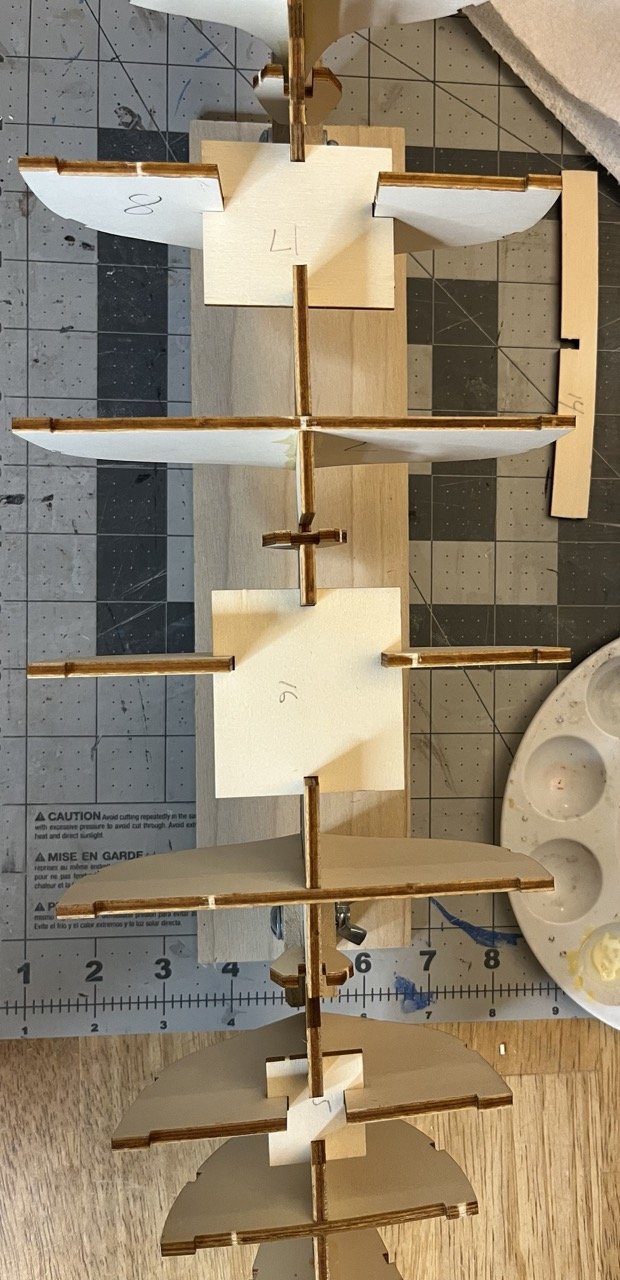
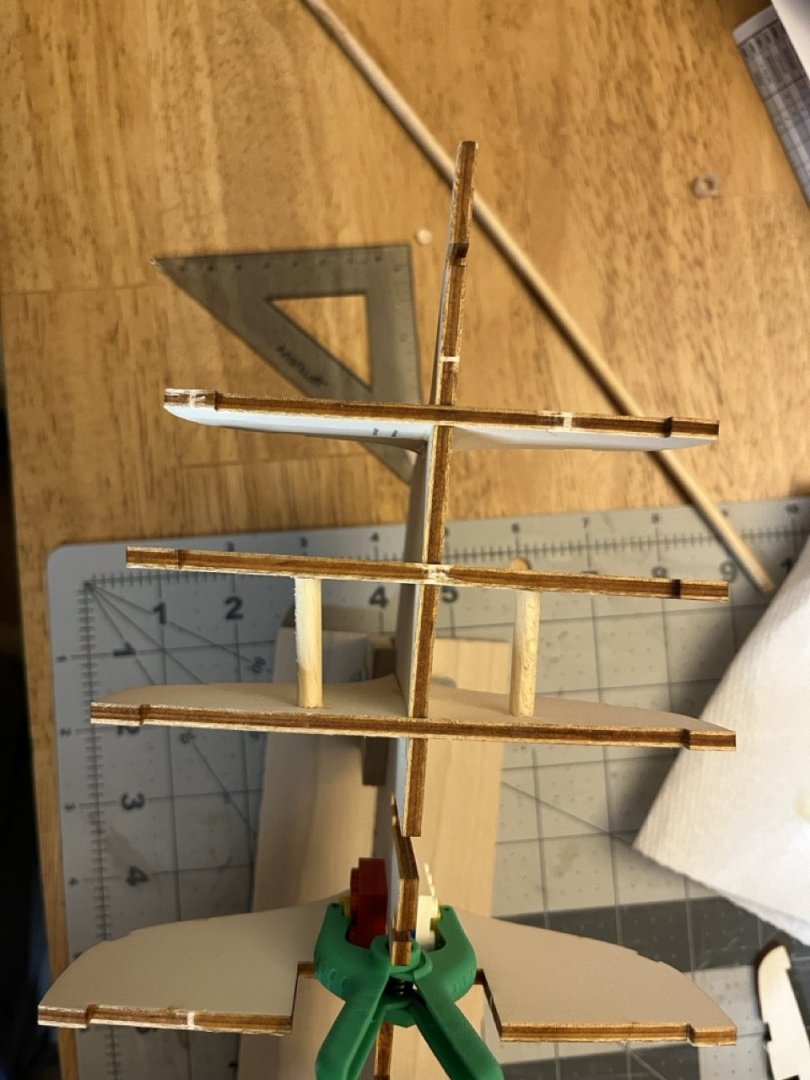
The actual build is underway. I made a small holder to make it easier to work on and to help keep things straight. Overall the false keel looks pretty good. I did find a slight bend in the stern that I didn't notice until I was finishing up the bulkheads. Looking back at this picture, I can see the bend in there. I didn't notice it at first. It is difficult to notice from above. I added shoring between bulkheads 9 and 10. I will wait to add bulkhead 12 and shore up the other bulkheads until I add the stern sub deck to make sure everything lines up properly. In the past I tried to remove all of the char before placing bulkheads. This time I removed no char and everything fit so much better. Frames 6, 7 and 8 were a few degrees off square so a little filing was in order on those three. The other bulkheads fit quite well. As a side note, I have seen complaints about how Occre won't put any chamber in their decks. This one appears to have a slight chamber. I'm going to try to keep a running total of the estimated time working on the model at the bottom of each post. Time will tell if I remember to keep track. 1:15

- 21 replies
-
- 7
-
-
- Cala Esmeralda
- Santa Eulalia
- (and 1 more)
-
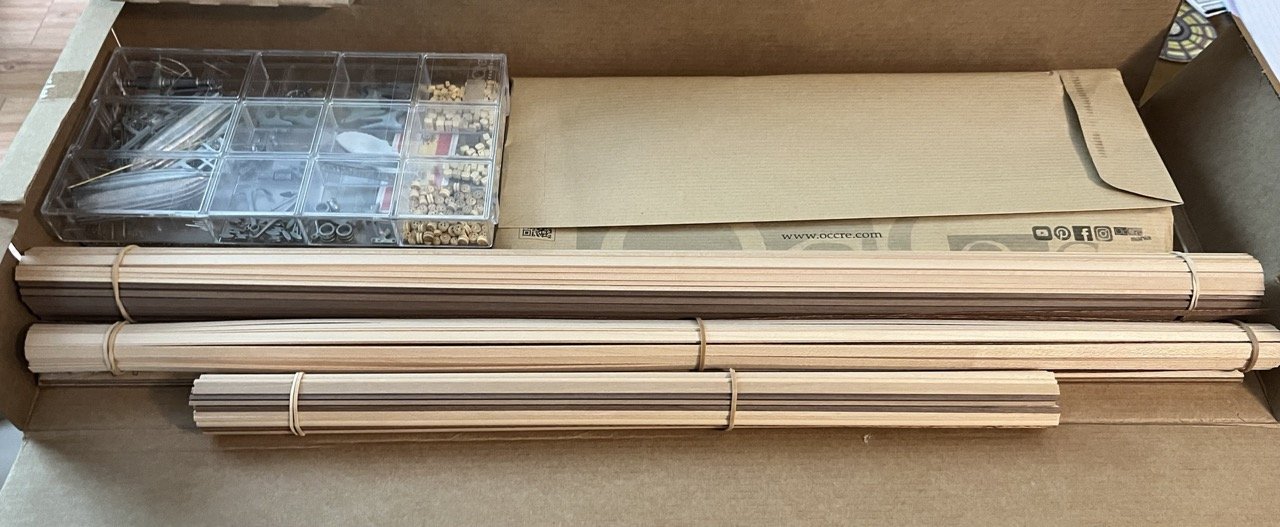
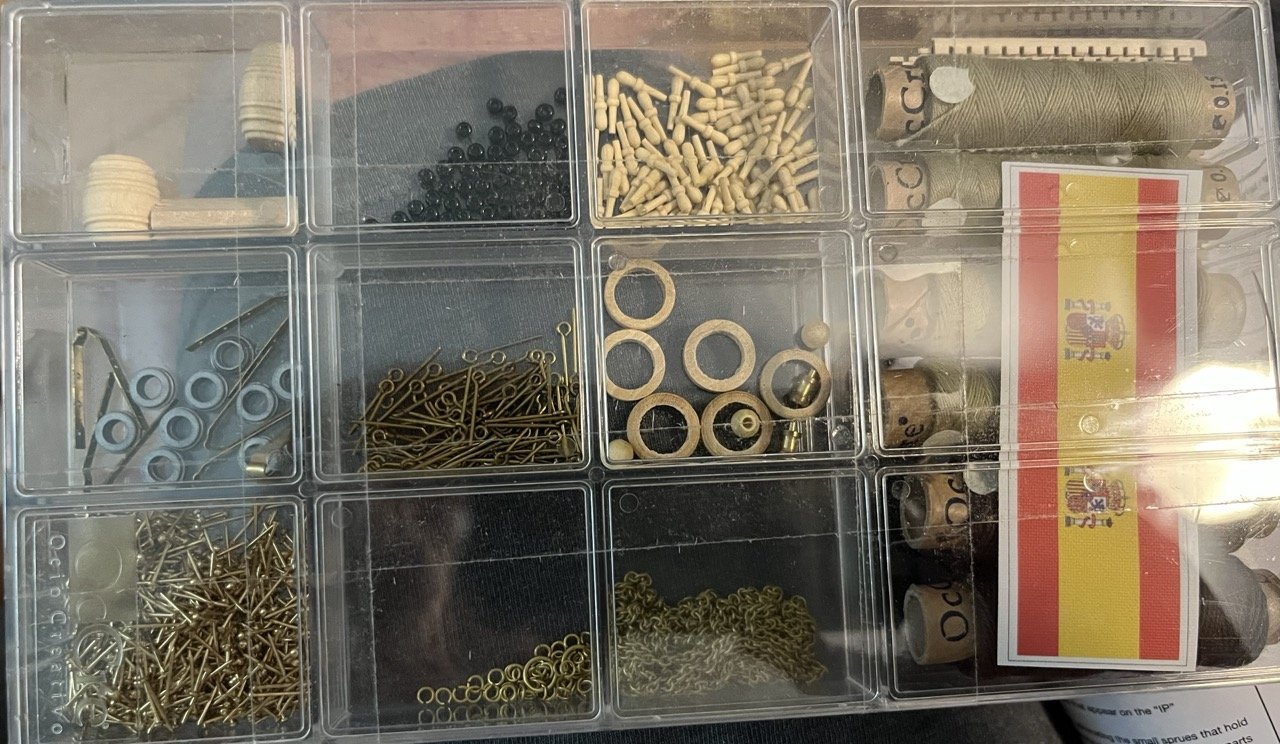
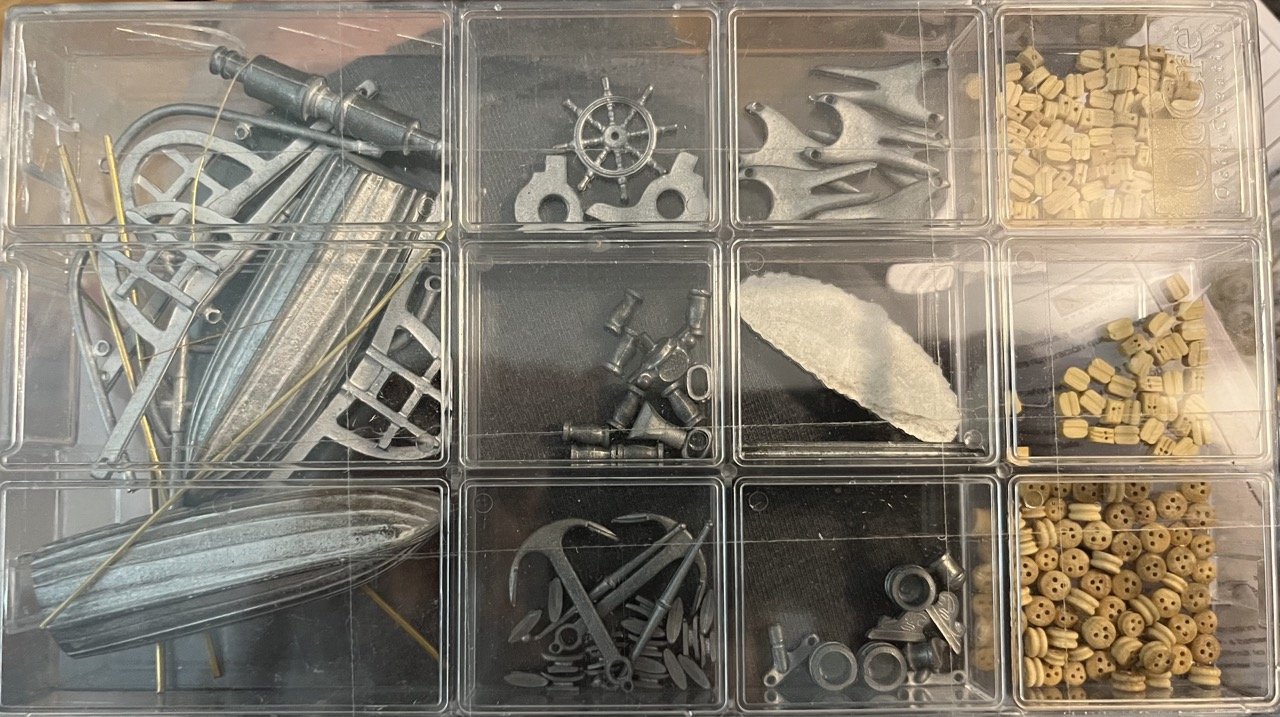
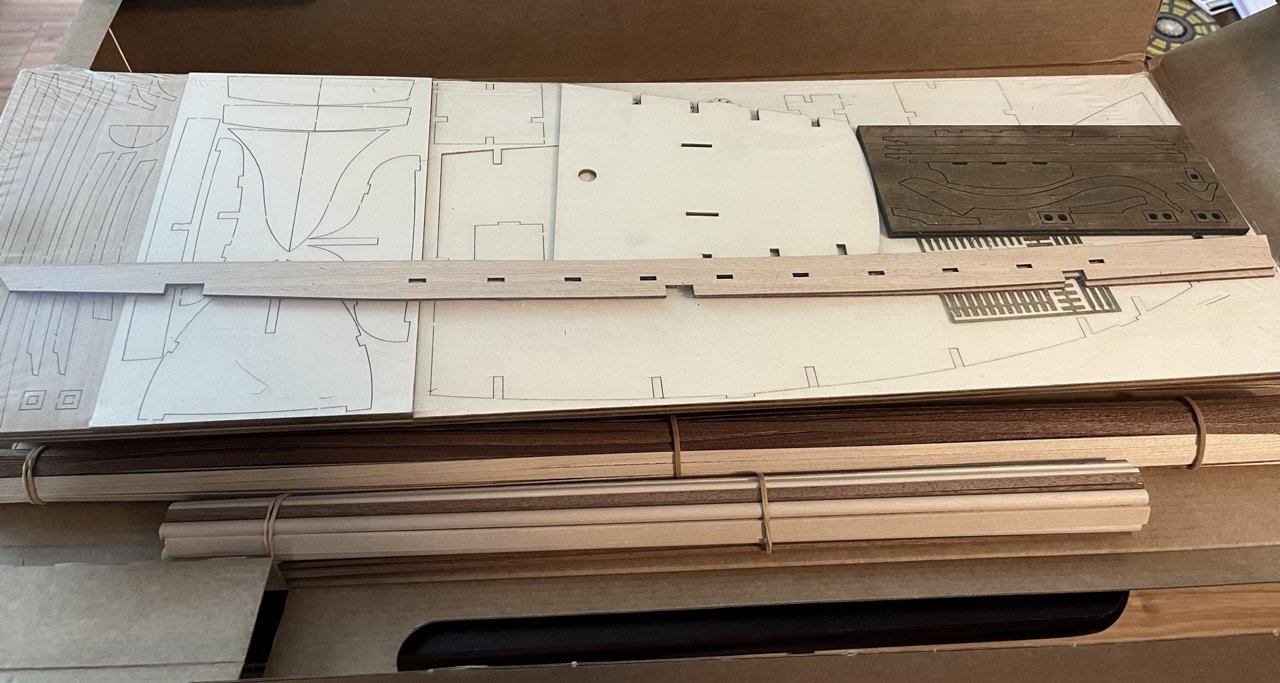
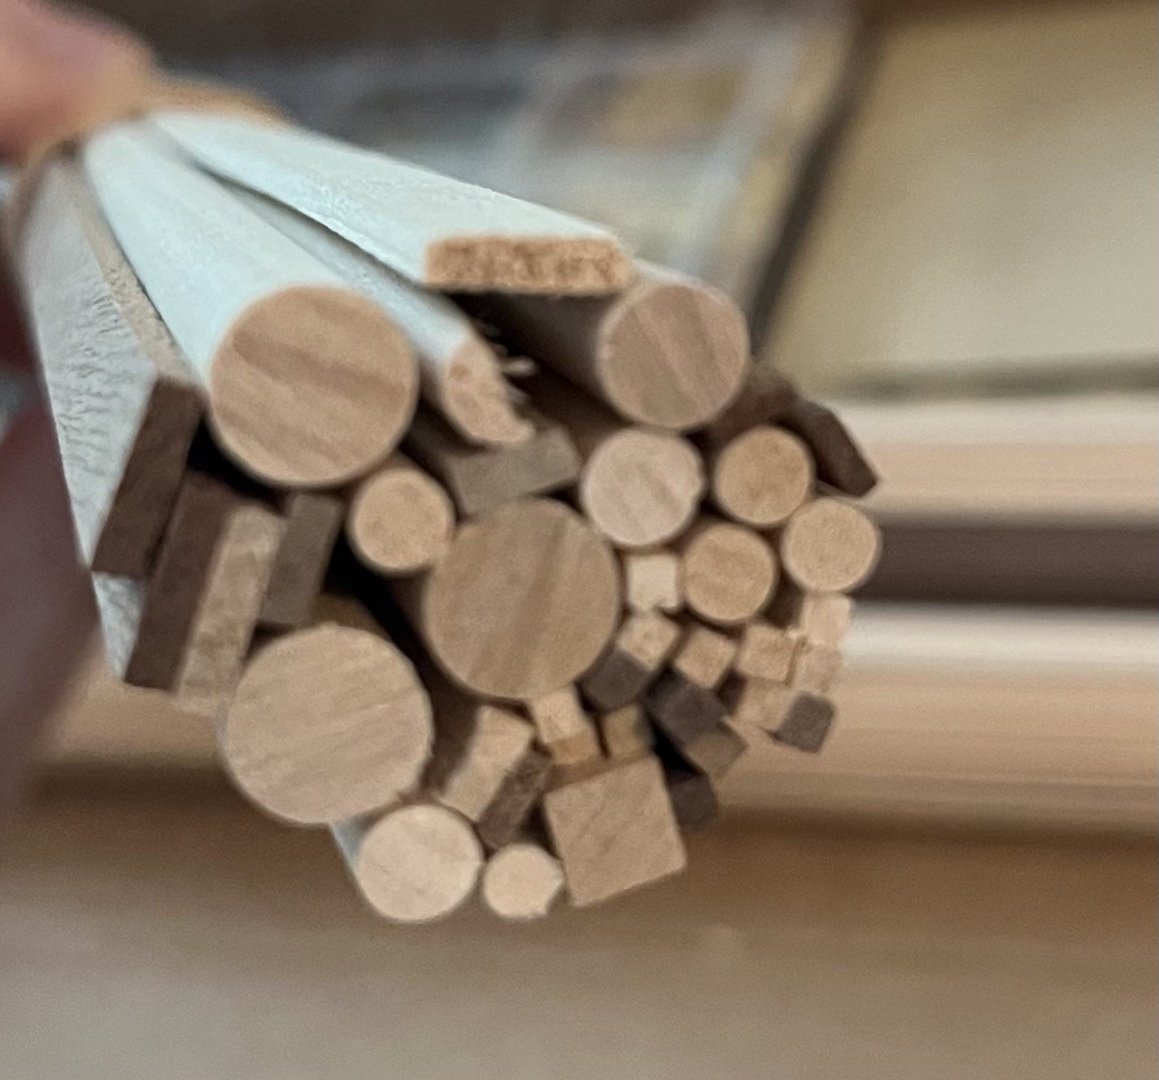
The way that the inventory is done on these kits is to list the part as needed in order based on the instructions. It can make it quite difficult to determine just exactly how many of each part there should be. I didn't find any significant parts that seemed missing. There were a few damaged pieces, but nothing that I would need to have Occre replace as far as I can tell. Something definitely damaged the box in transit or in storage. The plastic cases were broken as in the corners as well. Some of these metal pieces I may choose not to use. I may make the boom forks, boats and windless out of scrap wood. The end of one small wood strip is damaged, no big deal though. This one dowel is a bit messed up. Looks like a quality control oversight. It is easily replaced if it proves to be a problem.
- 21 replies
-
- 6
-
-
- Cala Esmeralda
- Santa Eulalia
- (and 1 more)
-
Welcome to MSW!
-
Welcome to MSW!
-
Introduction of Russ MIlland
SiriusVoyager replied to Russ MIlland's topic in New member Introductions
Welcome to MSW! -
That may be true but fire and alcohol don’t mix well. If I have to toss a jar out every once in a while, so be it.
-
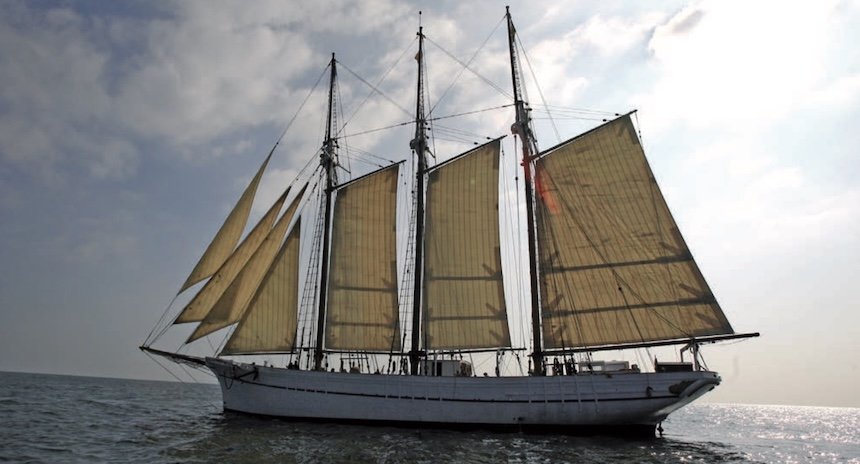
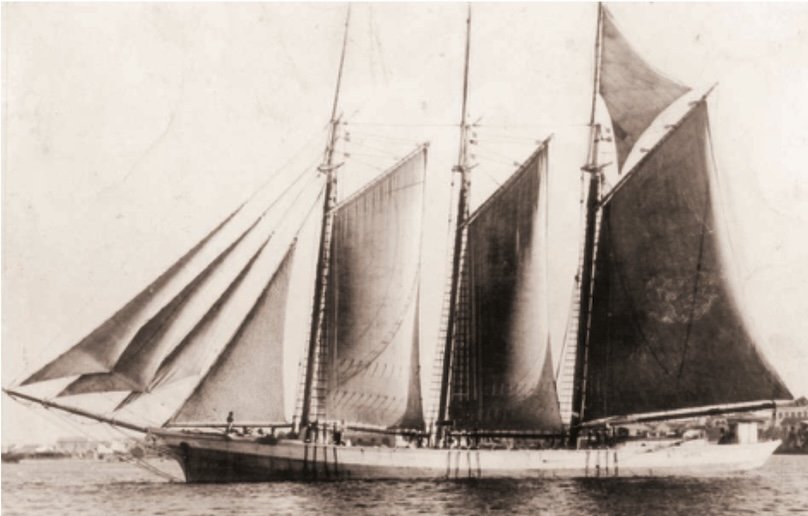
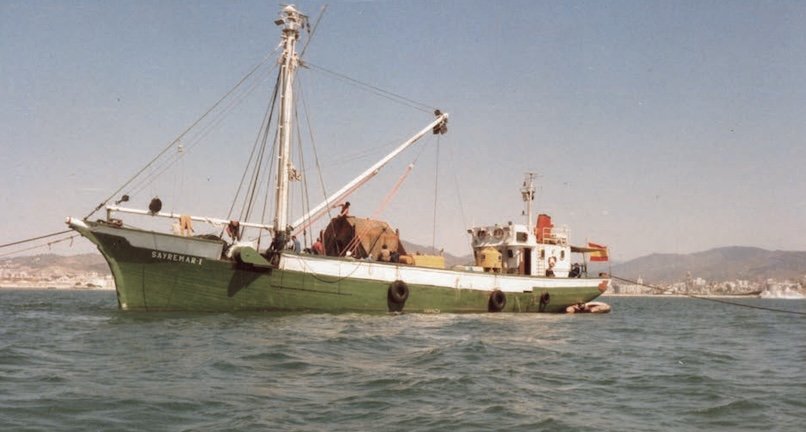
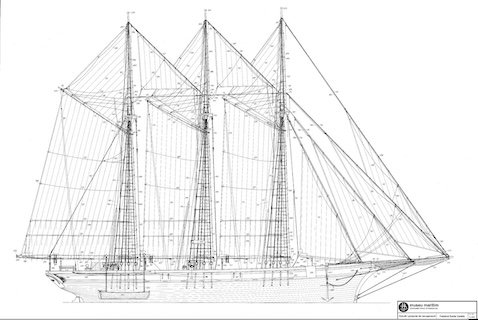
I purchased this kit a while ago because it was on clearance knowing nothing about it. It turns out the kit had been discontinued. The only reference to it on the Occre website are the instructions that are available to download. I am excited about this build because this will be my first ship (my previous models have been smaller boats and a cross section) and also because it will be a model of a specific vessel. Upon doing some research into the vessel I discovered that there is no Cala Esmeralda. I did find however, that the kit was very heavily inspired by the ship currently named Santa Eulalia, which is a working vessel at the Barcelona Maritime Museum. I am not sure why the kit has been slightly changed and renamed. Maybe royalties or copyright? In any event, the Barcelona Maritime museum has a very nice 245 page booklet available for Download on this page. The history of the vessel is quite interesting, having undergone numerous name changes and configurations since its launch in 1919 as the Carmen Flores. Originally launched as a three mast schooner, primarily to carry cargo, in the 1920's it was converted to a two mast schooner and an engine was added. It was later converted into an underwater construction vessel with no sails and renamed the Sayremar Uno. It was almost unrecognizable as the same vessel. In 1997 the vessel was purchased by the Barcelona Maritime Museum with the intention of restoring it to its original from at launch with the exception of modern safety and practicality features necessary for an active ship. 5 years later the ship was restored, renamed and had its maiden voyage as the Santa Eulalia. More information about the history can be found in the link above. All photos (except for my photo of the Occre box) are credited to the Barcelona Maritime Museum booklet available for free to download also from the link above. As far as the build goes, there are definitely some differences between the model and the actual ship. One of the most notable (though not readily visible from the box) is that the Occre kit is shown with two square topsails on the forward mast. There is no indication that I can see that the actual vessel ever had square sails. The kit has gaff topsails on each mast, but no staysails. The line line drawings for the Santa Eulalia show both gaff topsails and staysails, however I cannot find an image of her with anything but the main sails being flown. I suspect this is to simplify the operation of a ship crewed by museum staff and volunteers. Obviously I will not add the square sales, but I will have to decide how I want to go about with the other topsails. One other thing of note that I found is that the scale isn't quite right. The kit says that it is a 1:58 scale. I have found that it is closer to a 1:50 scale with the actual vessel. Other difference will be noted at the time of the build, but I can already tell that the chains and deadeyes will be slightly different and the painting of the ship is clearly different. My next step will be to do an inventory of the kit.

- 21 replies
-
- 7
-
-
- Cala Esmeralda
- Santa Eulalia
- (and 1 more)