SiriusVoyager
-
Posts
502 -
Joined
-
Last visited
Content Type
Profiles
Forums
Gallery
Events
Everything posted by SiriusVoyager
-

Hello with first question on my first build
SiriusVoyager replied to Ratdude's topic in New member Introductions
Welcome to MSW! -
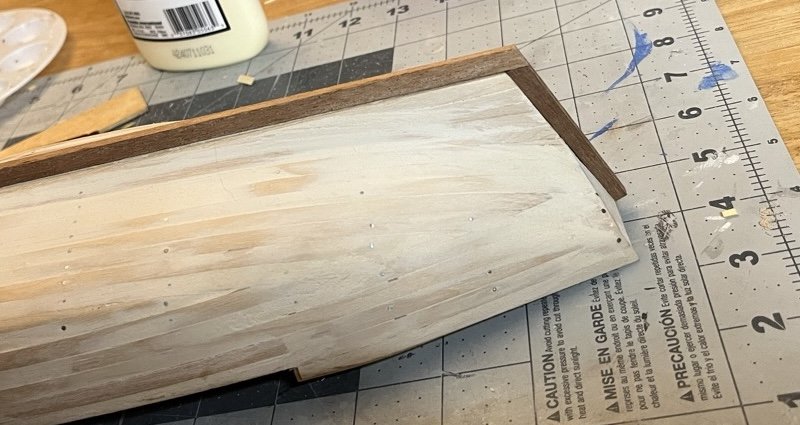
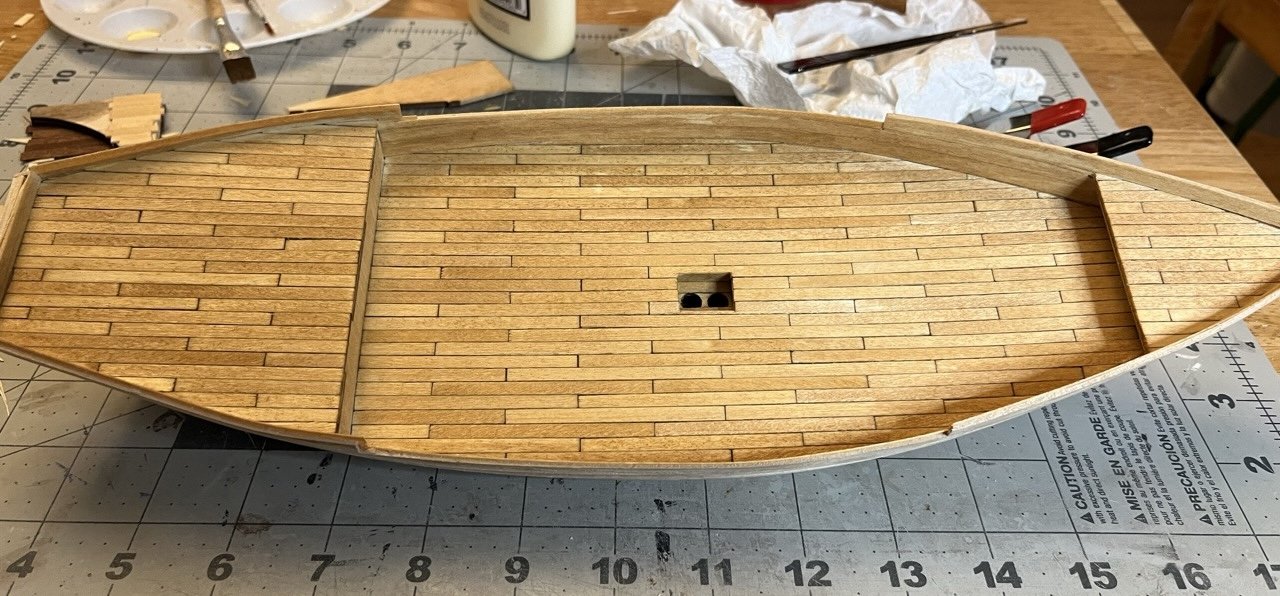
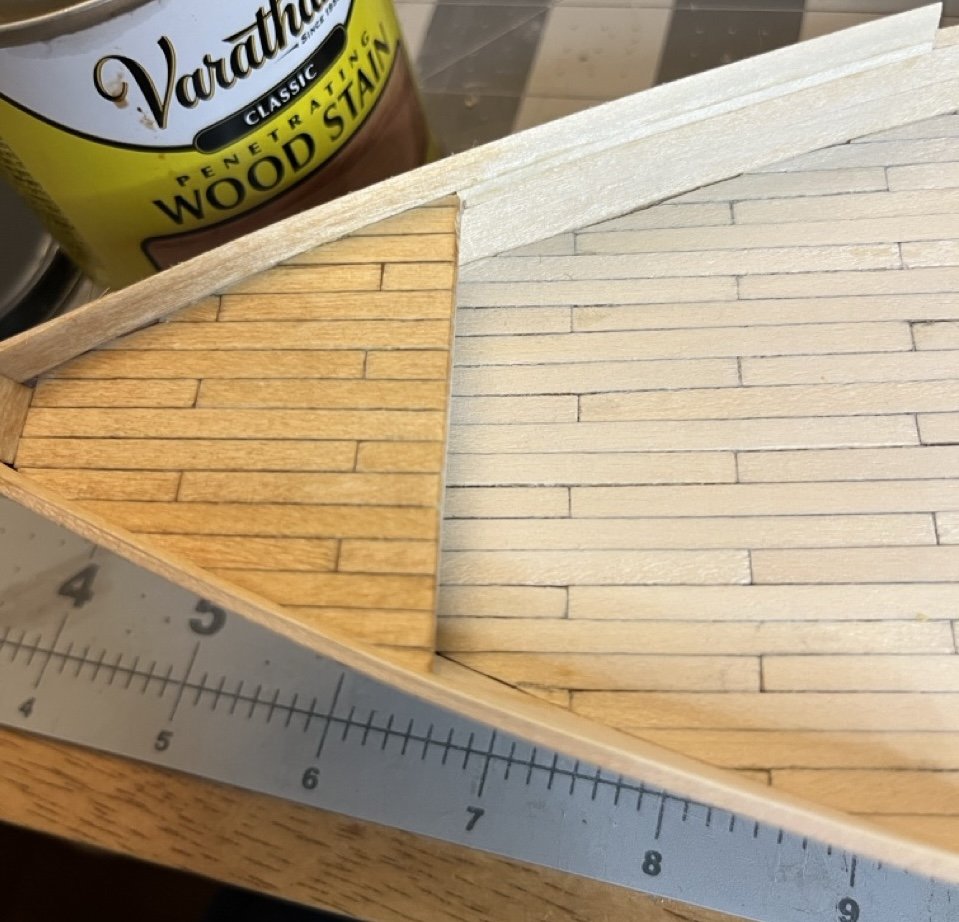
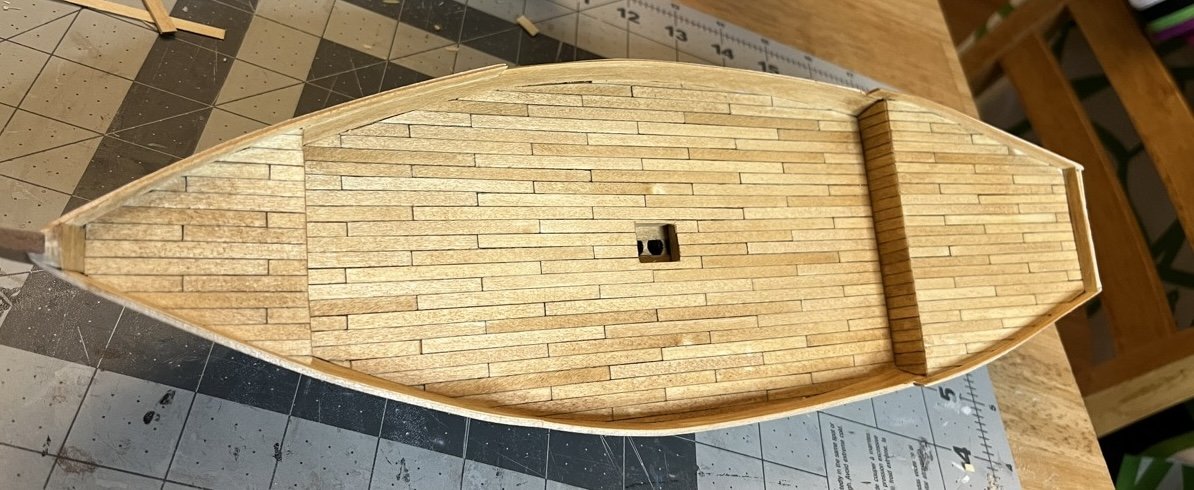
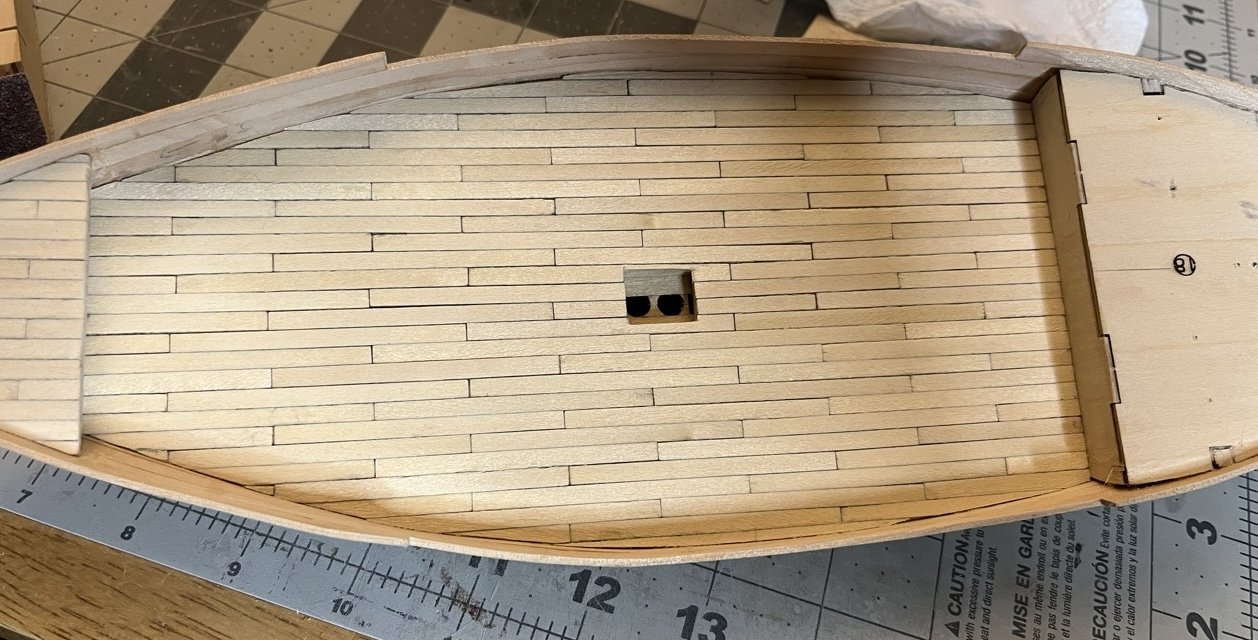
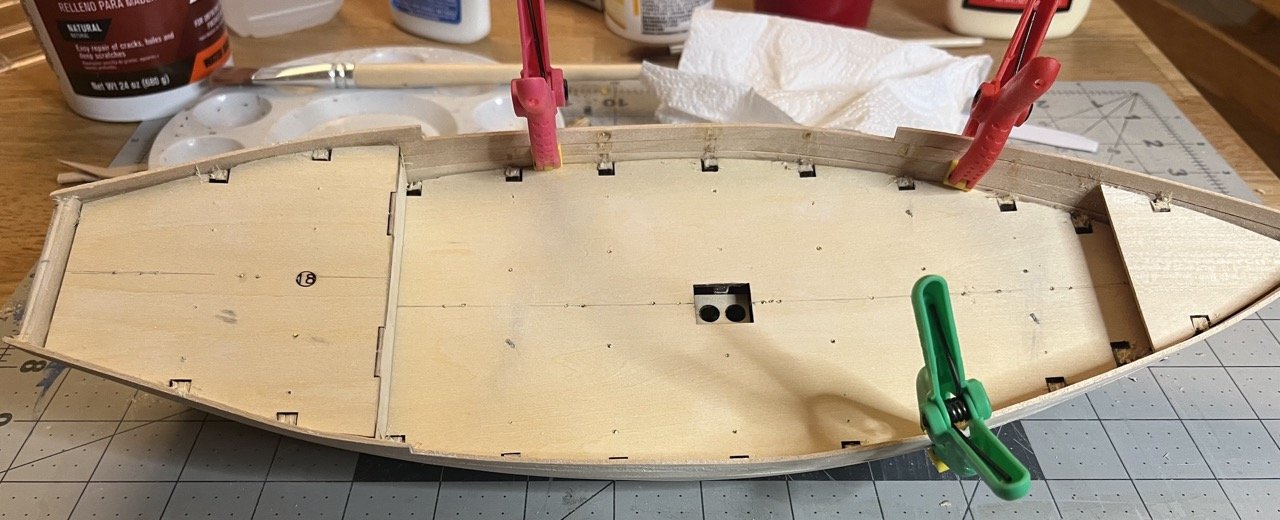
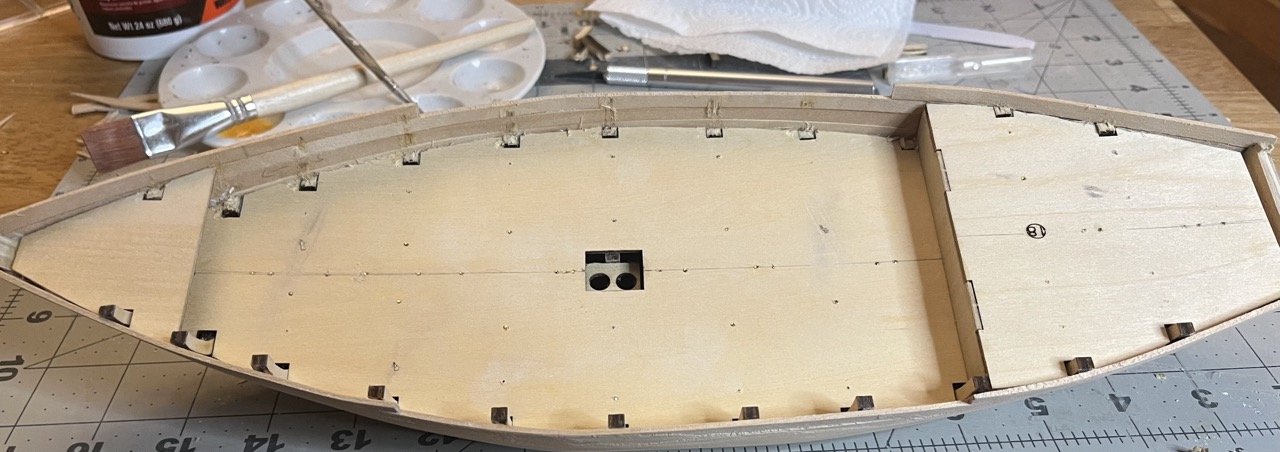
Finished planking the deck (almost). Apparently I forgot to take a photo of the competed and sanded deck. I am a bit disappointed with out the planking came out. Part of it is my own work, part of it is uneven strip width and cut, and part of it is how soft the wood is and how easily splinters peel off. I decided to stain the deck using Varathane Ipswich pine stain. Here is the stained forecastle compared to the unstained main deck. The entire deck stained. I think it looks much better with the stain. It was shortly after this that I realized that I hadn't finished the deck. The bulkhead between the main deck and the poop deck (would that be a poop deck on a dhow?) needs to be planked. Deck planking is now finished. Time to start planking the hull. Keel, stem and sternpost installed. I appreciate that AL kits attach the keel before the second layer planking so that small gaps between the planking and the keel parts can be covered.

- 65 replies
-
- 5
-

-
- sultan
- Artesania Latina
- (and 2 more)
-
Nice work so far! This is quite the interesting build.
-
Lots of time spent working, but only a small update. The main deck is planked and the aft deck planking started. I learned one lesson while planking. When cutting the planks, I cut a bunch of 60mm planks to have them ready to go. It turns out that the planks aren't quite the same width. The better option would be to cut planks for one row from the same strip of wood. This is to ensure an even width on each row.

- 65 replies
-
- 4
-
-
- sultan
- Artesania Latina
- (and 2 more)
-
Welcome to MSW!
-
Welcome to MSW!
-
Welcome to MSW!
-
Welcome to MSW! I hope this experience is a better one
-
Sultan Arab Dhow - Artesanía Latina - 1/60
SiriusVoyager replied to SiriusVoyager's topic in REVIEWS: Model kits
I do have a CD rom drive, but I cannot plug it into my current laptop without a different USB cable. AL does have the instructions available for download on their website, so I have saved them onto my computer and phone. I usually use my phone for instructions while building. I am not sure why my pics wouldn't be showing. They were uploaded to MSW and I can see them just fine.- 4 replies
-
- 2
-
-
- Kit review
- Artesania Latina
- (and 2 more)
-
Thanks for the reminder Rick. I did remember your log mentioning leaving a few of the parts out for proper fitting. Rereading your log, I won’t add any more pieces in that area until the masts go in.
- 65 replies
-
- 1
-
-
- sultan
- Artesania Latina
- (and 2 more)
-
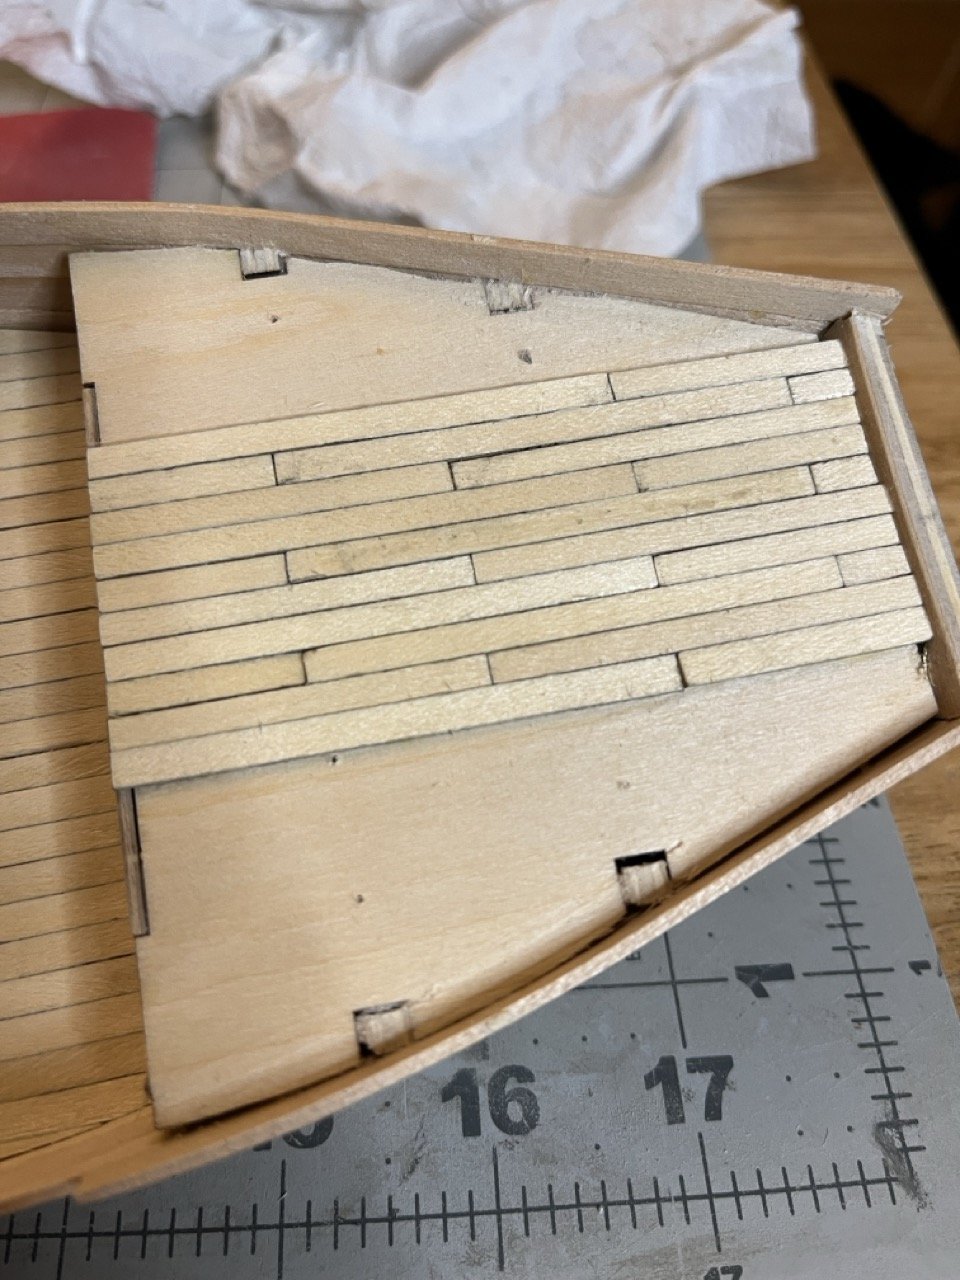
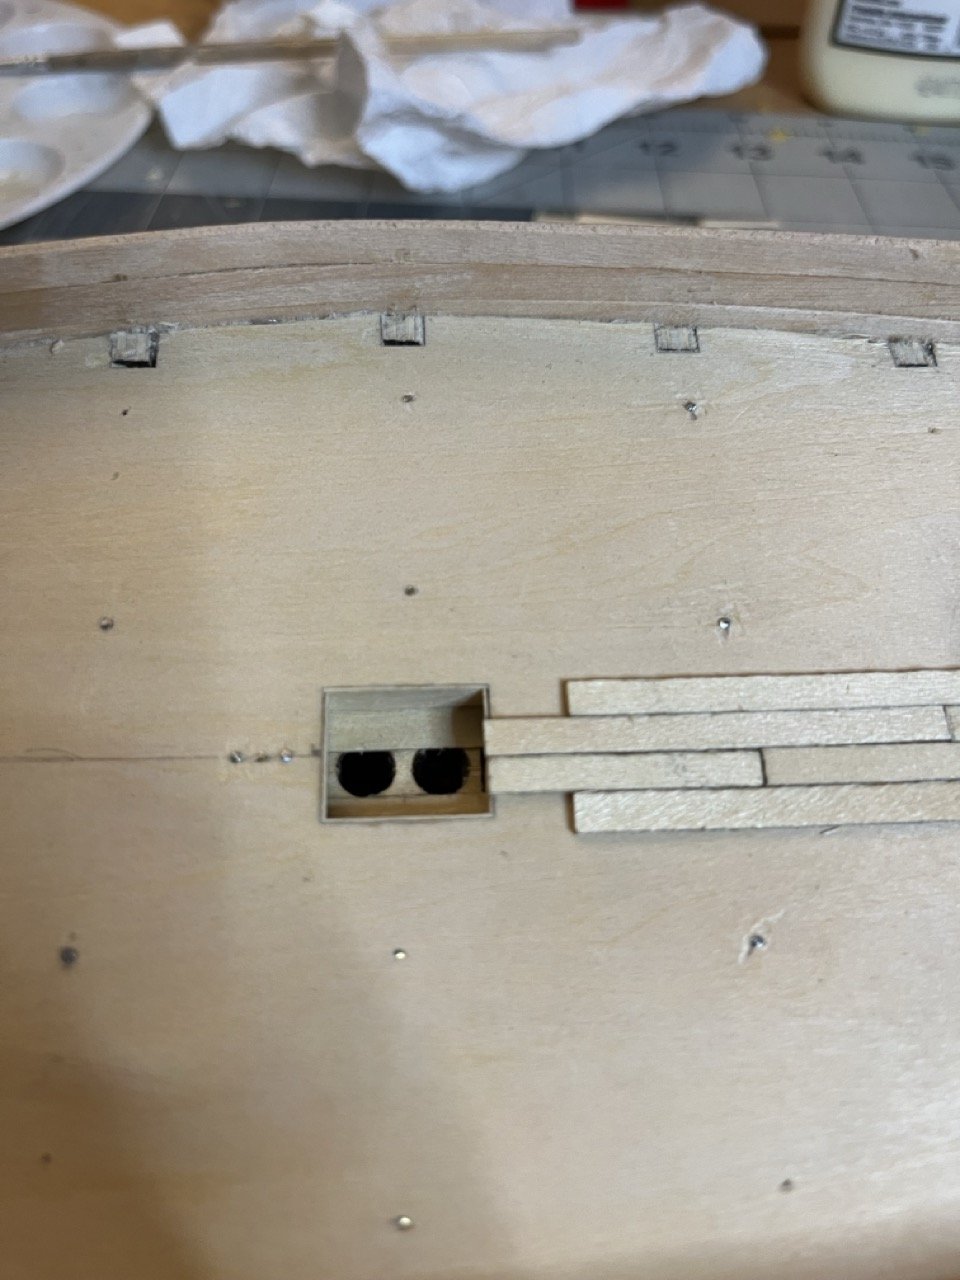
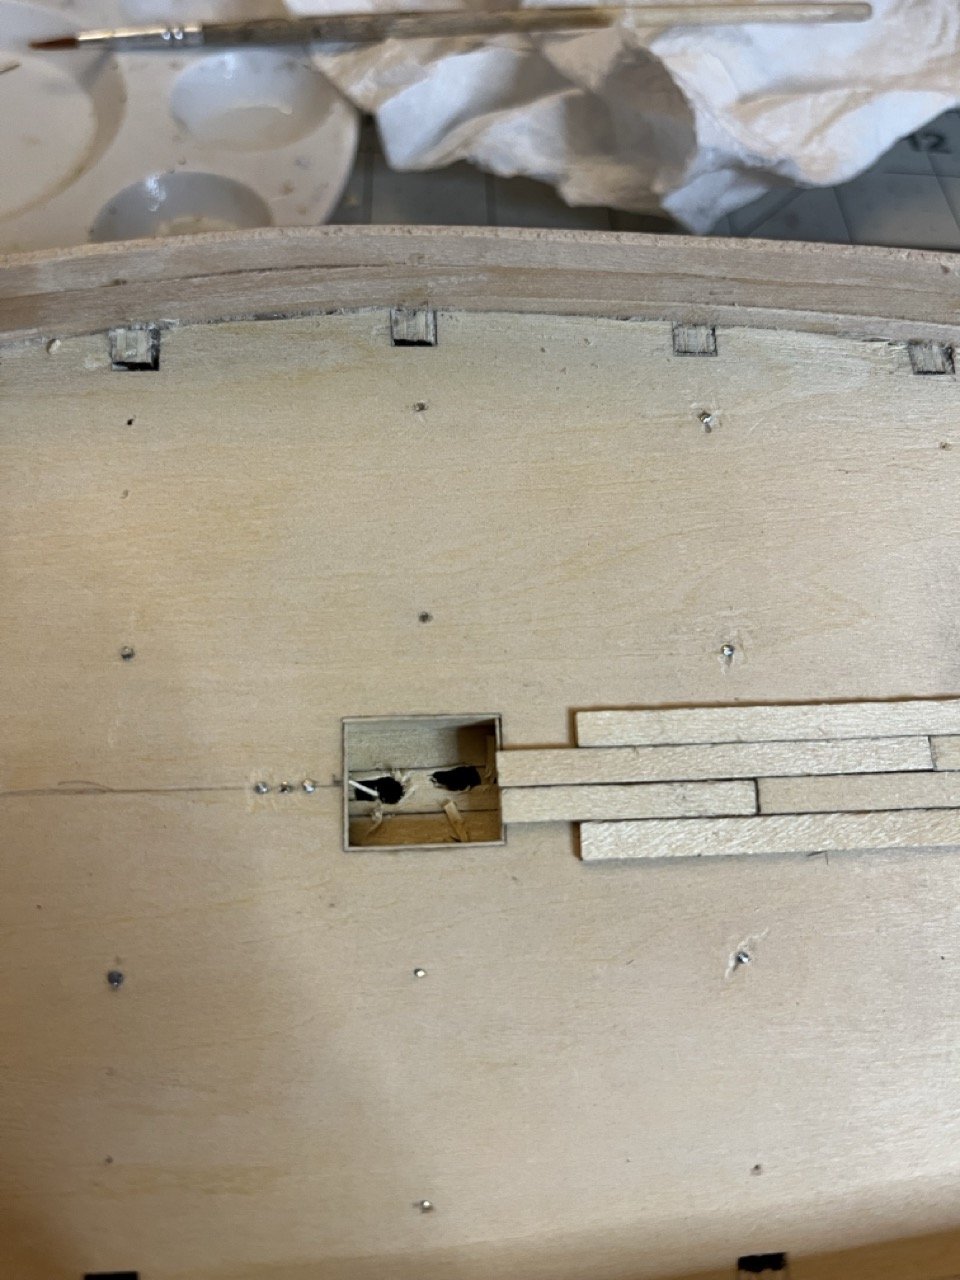
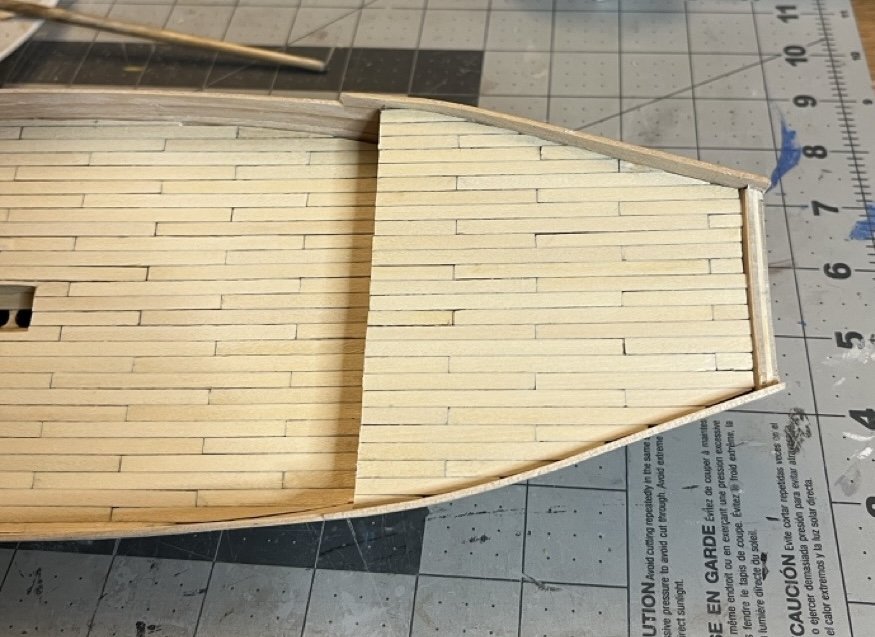
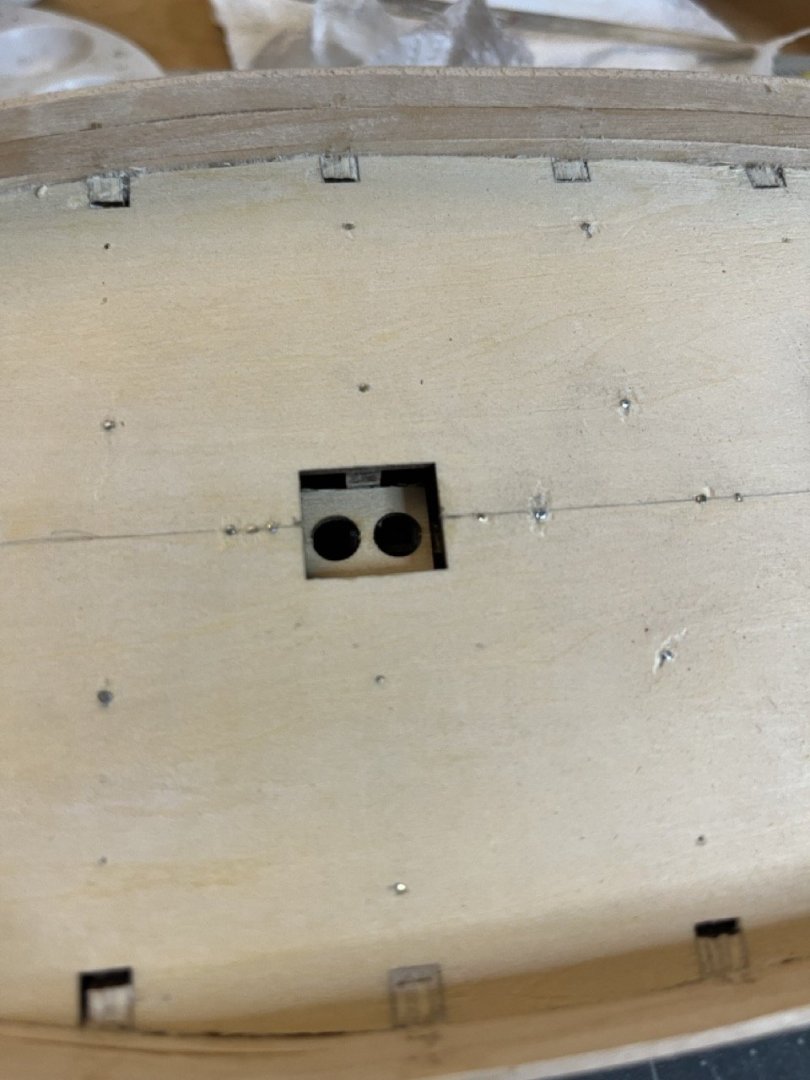
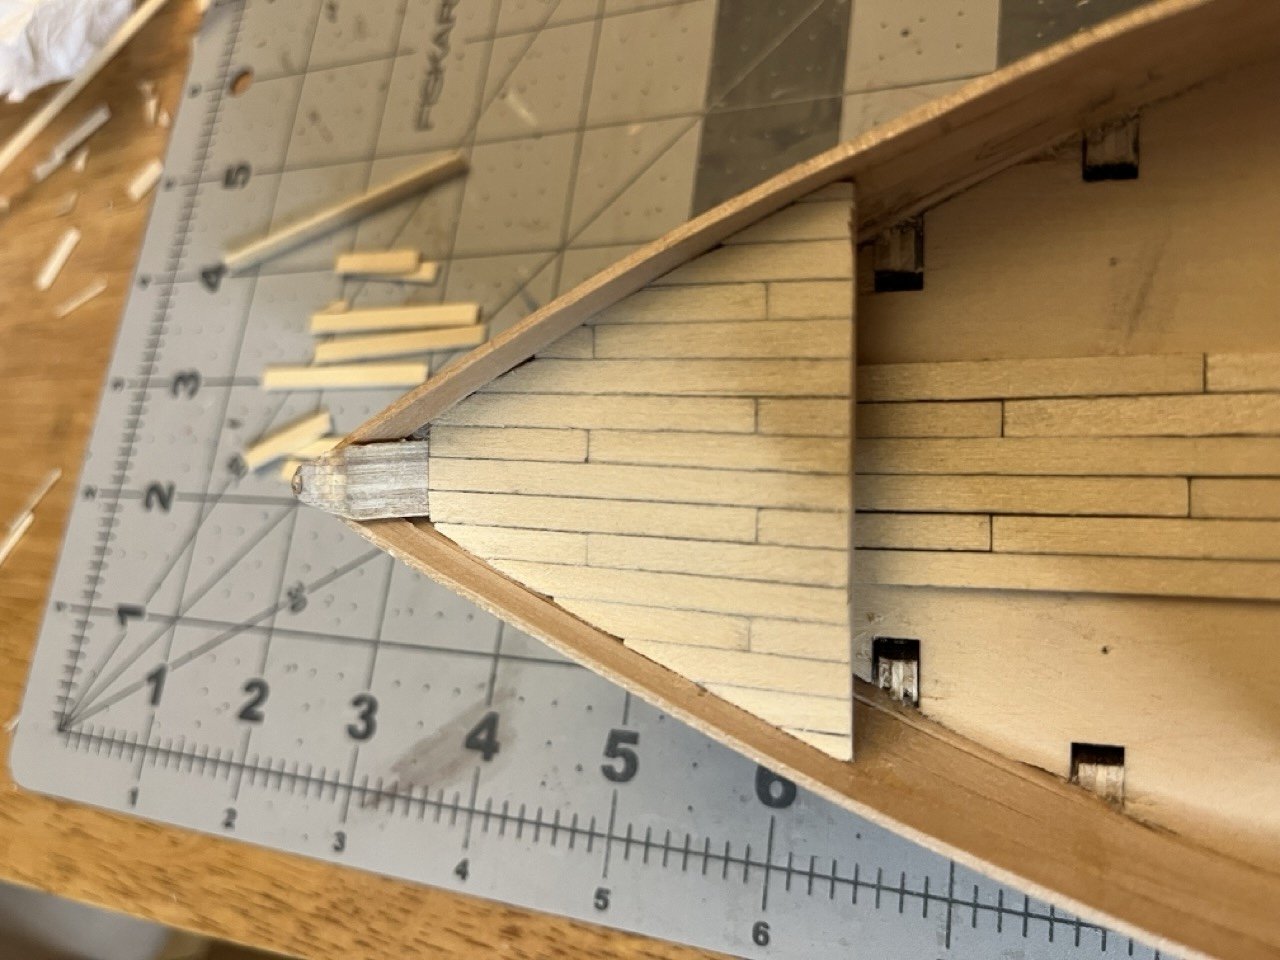
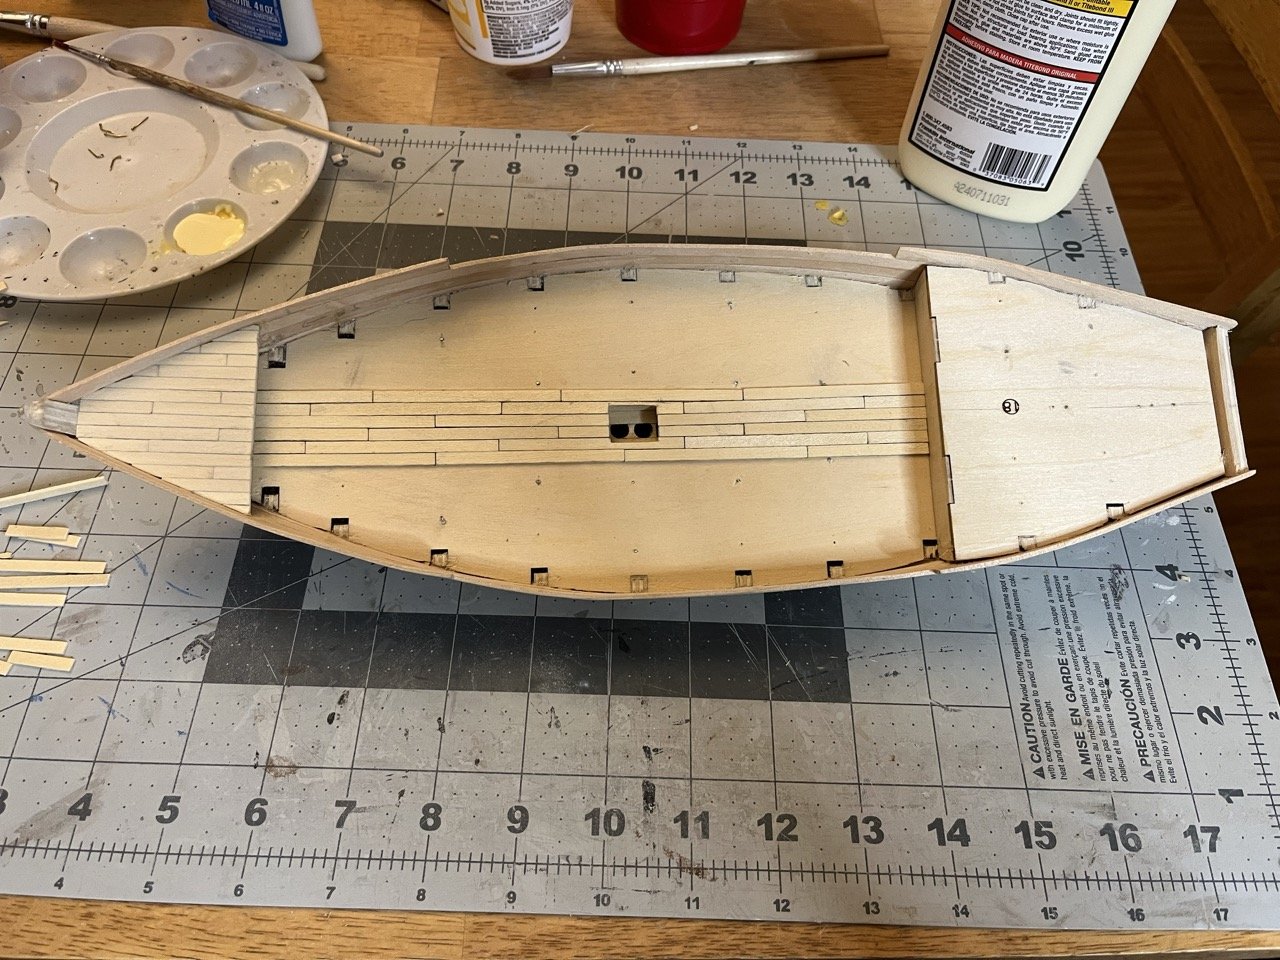
I started placing the deck planks. The instructions call for placing the inboard bulwark second layer planking prior to the deck. I figured it would be easier to adjust the height the top of bulwark planks than to try and get an exact fit on the last deck planks along the edges. I started on the forecastle. I decided to offset every three planks and use the pencil caulking method. The photo below shows how I estimated the angles on the plank edges. It isn't exact because of the curve of the bulwark, so I cut it short and then sanded to fit. The forecastle planked, trimmed and sanded. I'm not sure where the small nick came from, but it will have a batten covering it. I also started to plank the main deck, but first the small drop in the deck for the mast holes needed to be planked. I carefully made every strip the perfect size and glued them in. It looked great, but when I tried to very carefully drill the mast holes out, the soft thin wood fell apart. I removed that strip of wood and will leave it as is for now and deal with it when the time comes to place the masts. Main deck partially planked. I'm not sure why it looks like the planking is much narrower just aft of amidship. I am thinking either inconsistent strip width (could be me or the manufacturer, the wood is very fuzzy) or camera tricks. When I start the next row of planking I will replace that plank if needed.


- 65 replies
-
- 3
-
-
- sultan
- Artesania Latina
- (and 2 more)
-
The pins supplied with the kits are too wide. Apparently it every Shipwright series kit that they assemble has this QA oversight. I replaced the nails with some brass sewing pins that should be available just about anywhere that has sewing supplies.
- 63 replies
-
- 4
-
-
- Norwegian Sailing Pram
- Model Shipways
- (and 2 more)
-
Welcome to MSW!
-
Welcome to MSW!
-
Very nice job so far. I think the paint job looks pretty good. The white is a bit white, but it is a new boat! I think the simplest solution for the nails is to get some brass sewing pins. You can get more than you may ever use for a couple of bucks.
- 39 replies
-
- 1
-
-
- Norwegian Sailing Pram
- Model Shipways
- (and 1 more)
-
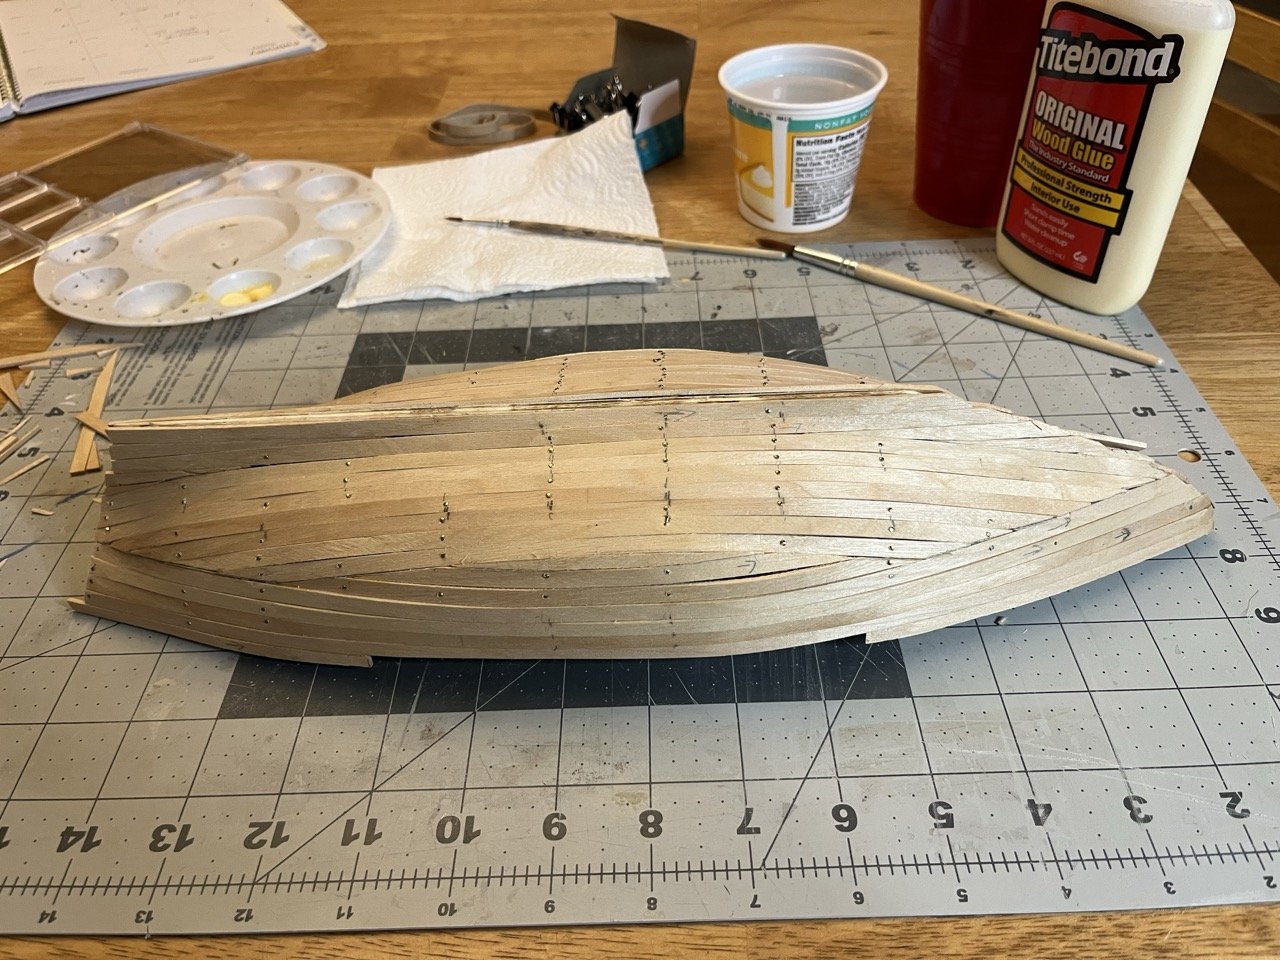
I decided to trim the bulkheads to do the decking first. This is to make staining easier and in case I accidentally damage the bulwark. It will obviously be easier to repair damage to the first layer planking than the outer layer. I think this was a good plan because there were a few small gashes in the planks, and some of the planks did need to be glued together because without the bulkheads, they were not being held in place. I used some dilute white glue to get in between the planks, then wiped down the sides so that the outer layer can be properly glued. As far as trimming down the bulkheads, it went easier than I expected. A little IPA and some time with a blade and they came off the planks fairly easily. The trickiest part was actually cutting the bulkhead extensions. I couldn't get a straight cut and it took a bit of careful cutting to avoid damaging the planks. The next step will be to sand everything down to smooth it out and plank the second layer inboard of the bulwark.
- 65 replies
-
- 5
-
-
- sultan
- Artesania Latina
- (and 2 more)
-
Welcome to MSW!
-
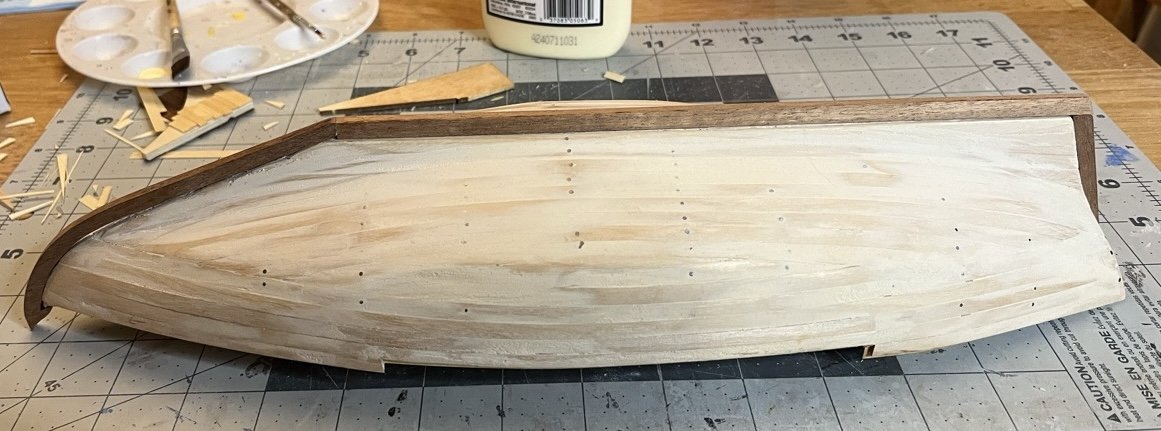
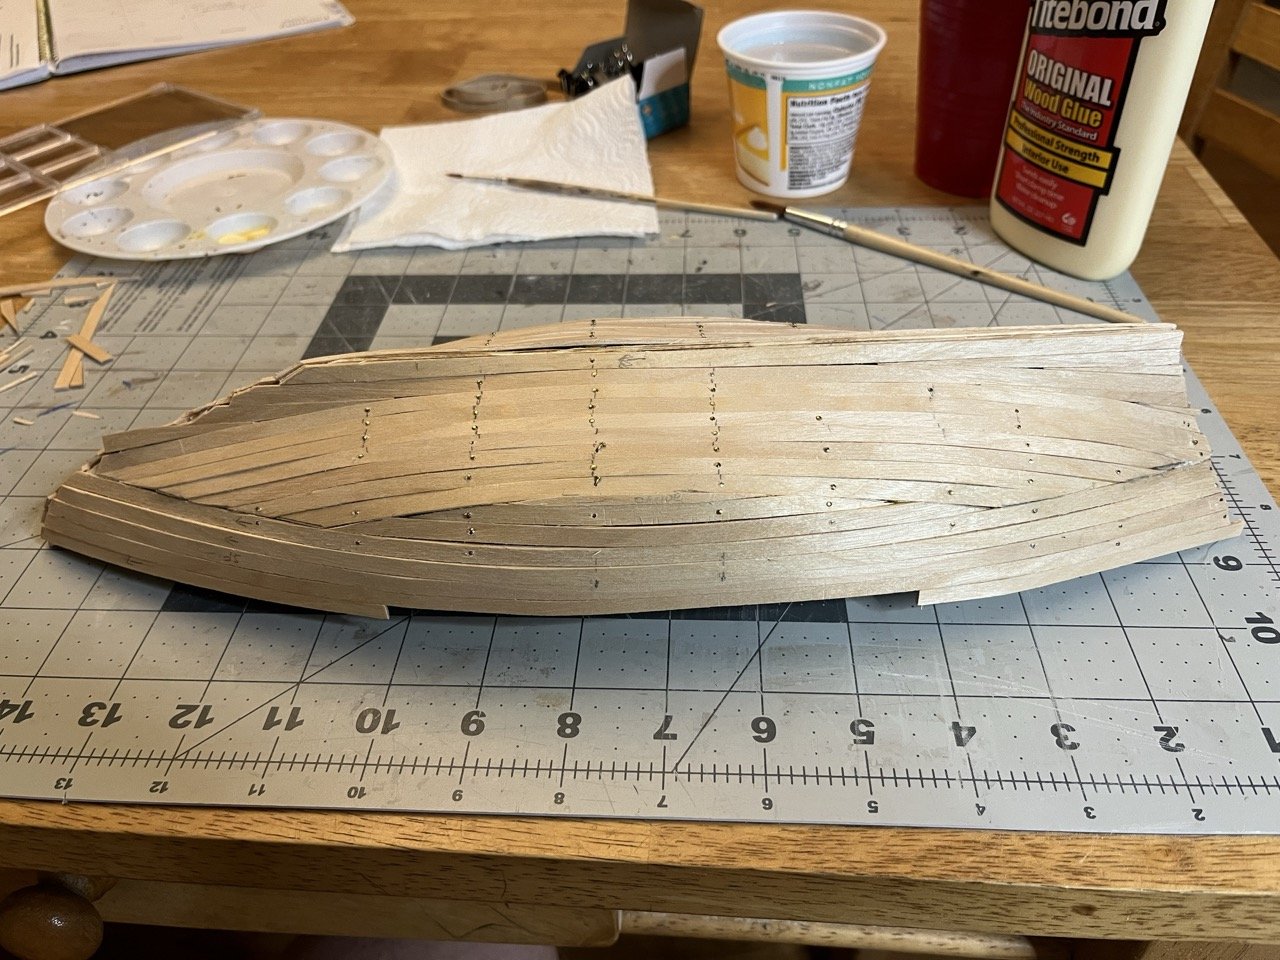
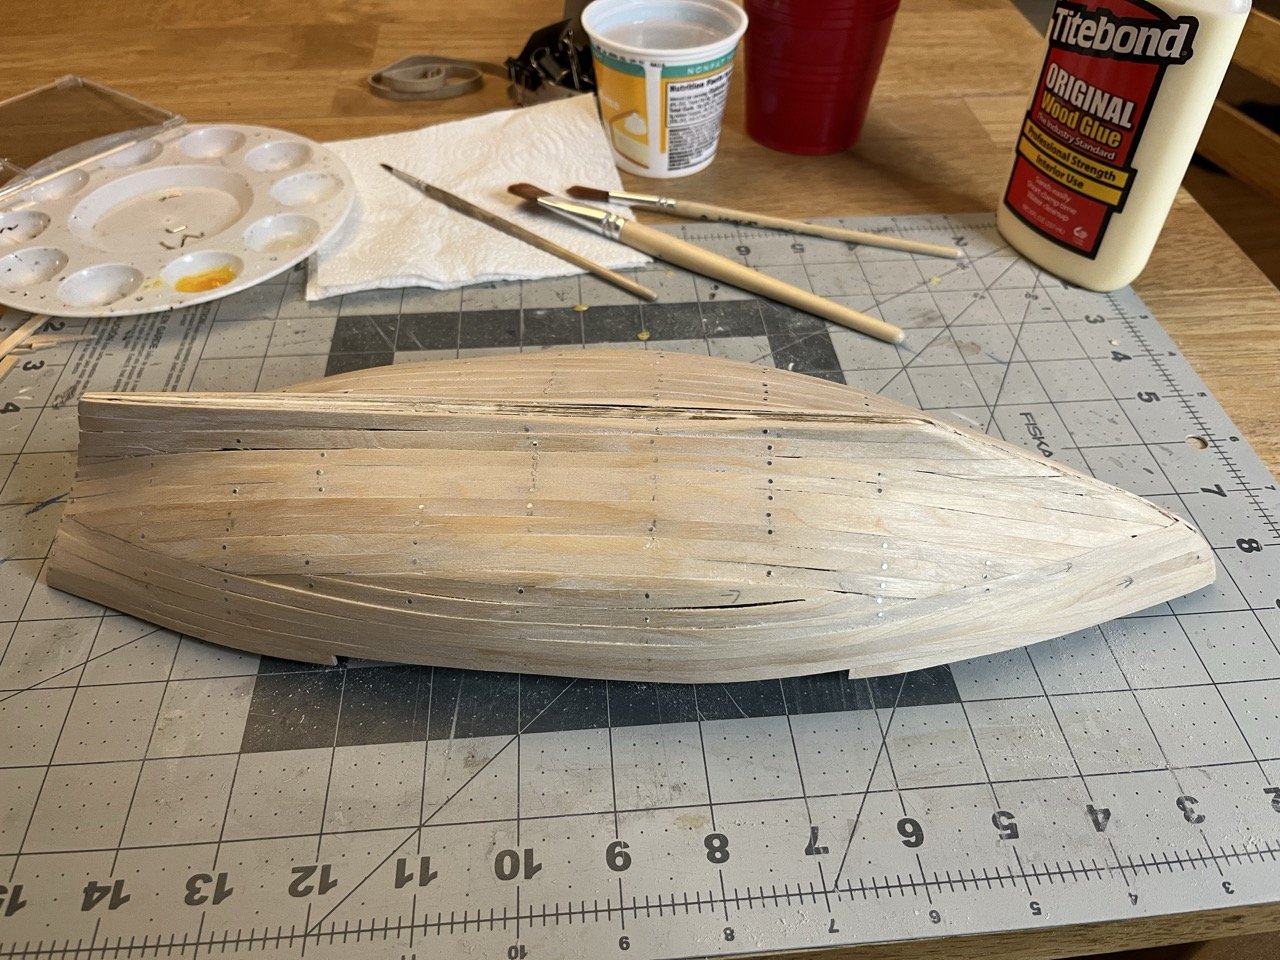
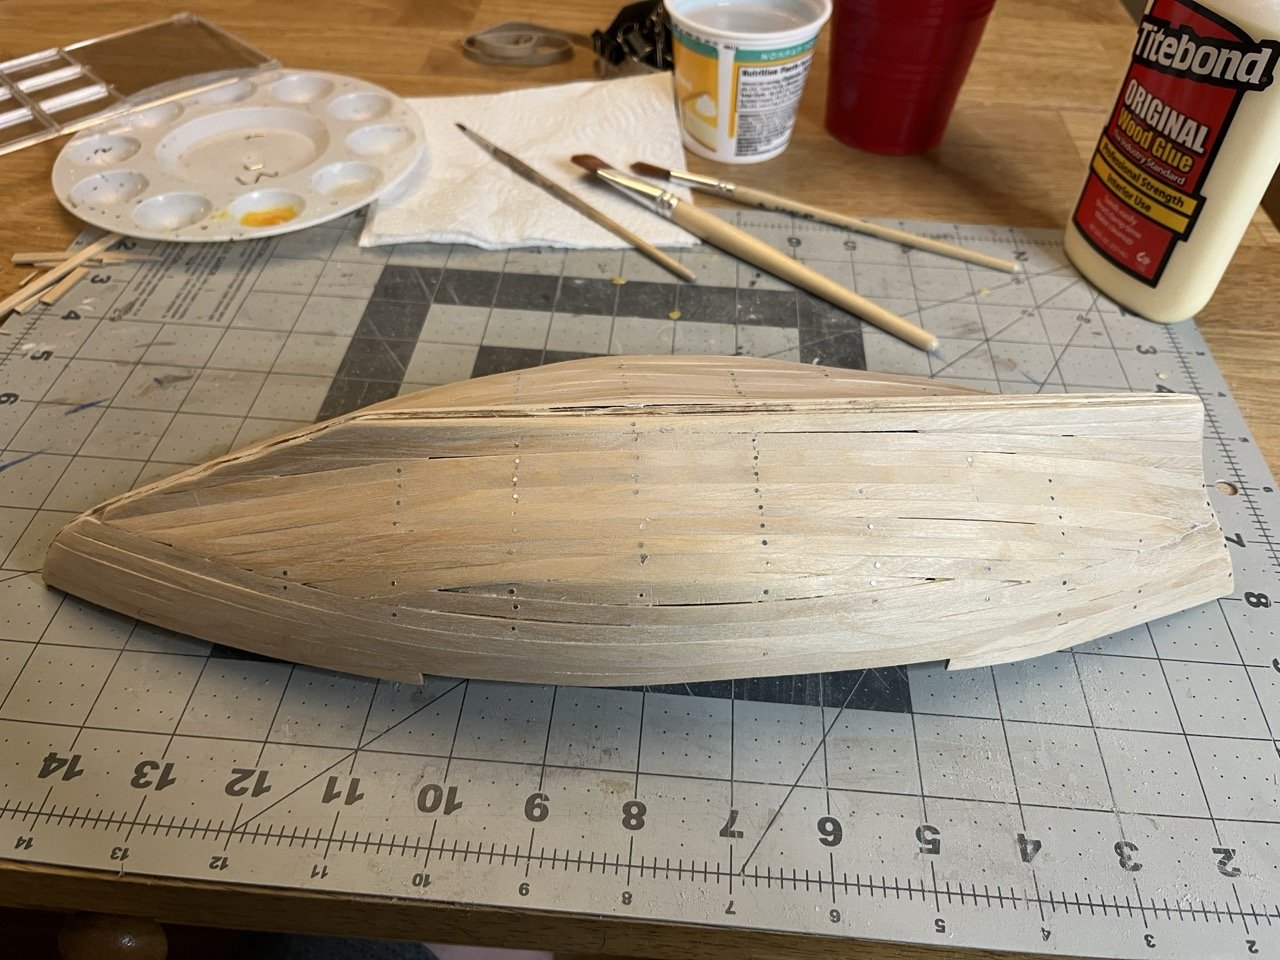
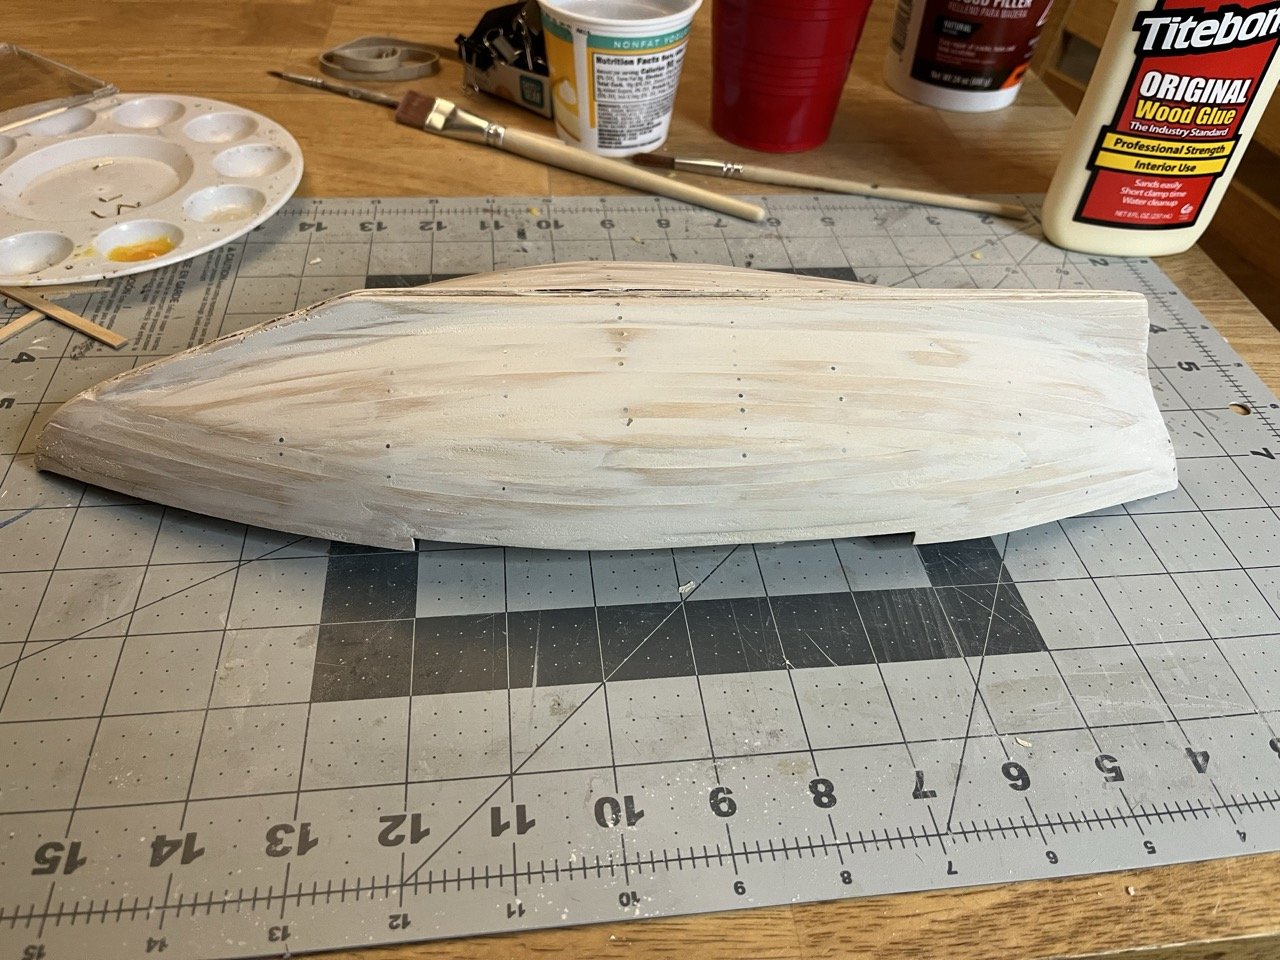
The first layer planking is completed. I was hoping that I wouldn't need to use any wood putty to fill in gaps, and I likely could have gotten away with not using any. In the end, I decided to go ahead and use the putty just to make sure everything is nice and smooth. I didn't expect so much filler to be left after sanding, but that is ok. I will need to decide how I want to proceed next. I want to stain the deck and would prefer to do that prior to the second layer hull planking to avoid any unintentional splashes of stain onto the hull. However, the second layer planking probably adds structure that would help any breaking or deformation of the bulwark when trimming the bulkheads in step 8. I may try removing one piece of bulkhead and see how the bulwark holds up. The prow isn't quite straight but it will be under the keel/stem and will be hidden by the second layer planking.

- 65 replies
-
- 6
-
-
- sultan
- Artesania Latina
- (and 2 more)
-
Thank you for the link and compliment. Fortunately for me the model does have double planking. I should have some updates to the log very soon. I happen to have the song Sultans of Swing loaded onto my phone twice. I'm not sure why but as a result I tend to hear it fairly regularly.
- 65 replies
-
- 2
-
-
- sultan
- Artesania Latina
- (and 2 more)
-
Welcome to MSW!