HOLIDAY DONATION DRIVE - SUPPORT MSW - DO YOUR PART TO KEEP THIS GREAT FORUM GOING! (Only 13 donations so far - C'mon guys!)
×


SiriusVoyager
-
Posts
502 -
Joined
-
Last visited
Content Type
Profiles
Forums
Gallery
Events
Everything posted by SiriusVoyager
-

Hello from the Chesapeake Bay area
SiriusVoyager replied to SaltyScot's topic in New member Introductions
Welcome to MSW! -
New Member Dale Mierzwik of Northern Colorado
SiriusVoyager replied to DaleMierzwik's topic in New member Introductions
Welcome to MSW! -
Welcome to MSW!
-
I like the top right. It looks just a bit aged.
-
Very nice work! She really looks old, weathered and spooky.
-
Nice start. I think you will appreciate the making the planking the deck the way you did in the end. The slight variances in color and cut on each plank will add texture and realism.
-
Very nice work!
-
Welcome to MSW!
-
Welcome to MSW!
-
@wefalck Thanks for the search suggestion. There are some good photos of hull planking. I will be starting at the garboard for the second layer planking and trying my best to make that look authentic since it will be the visible layer.
-
Very nice work! I happened to see the Emma C Berry about two ago while being restored. I would say that your model is currently more put together than the actual boat!
-
Very nice! Good work on the case too.
-
Welcome to MSW!
-
Off to a good start! Make sure that all of those knees are perfectly square, especially that bow transom knee. It will be noticeable if it is not once the hull is planked. (Not saying yours doesn't look square, just offering a tip from my experience).
- 6 replies
-
- 3
-

-

-
- Norwegian Sailing Pram
- Model Expo
- (and 2 more)
-
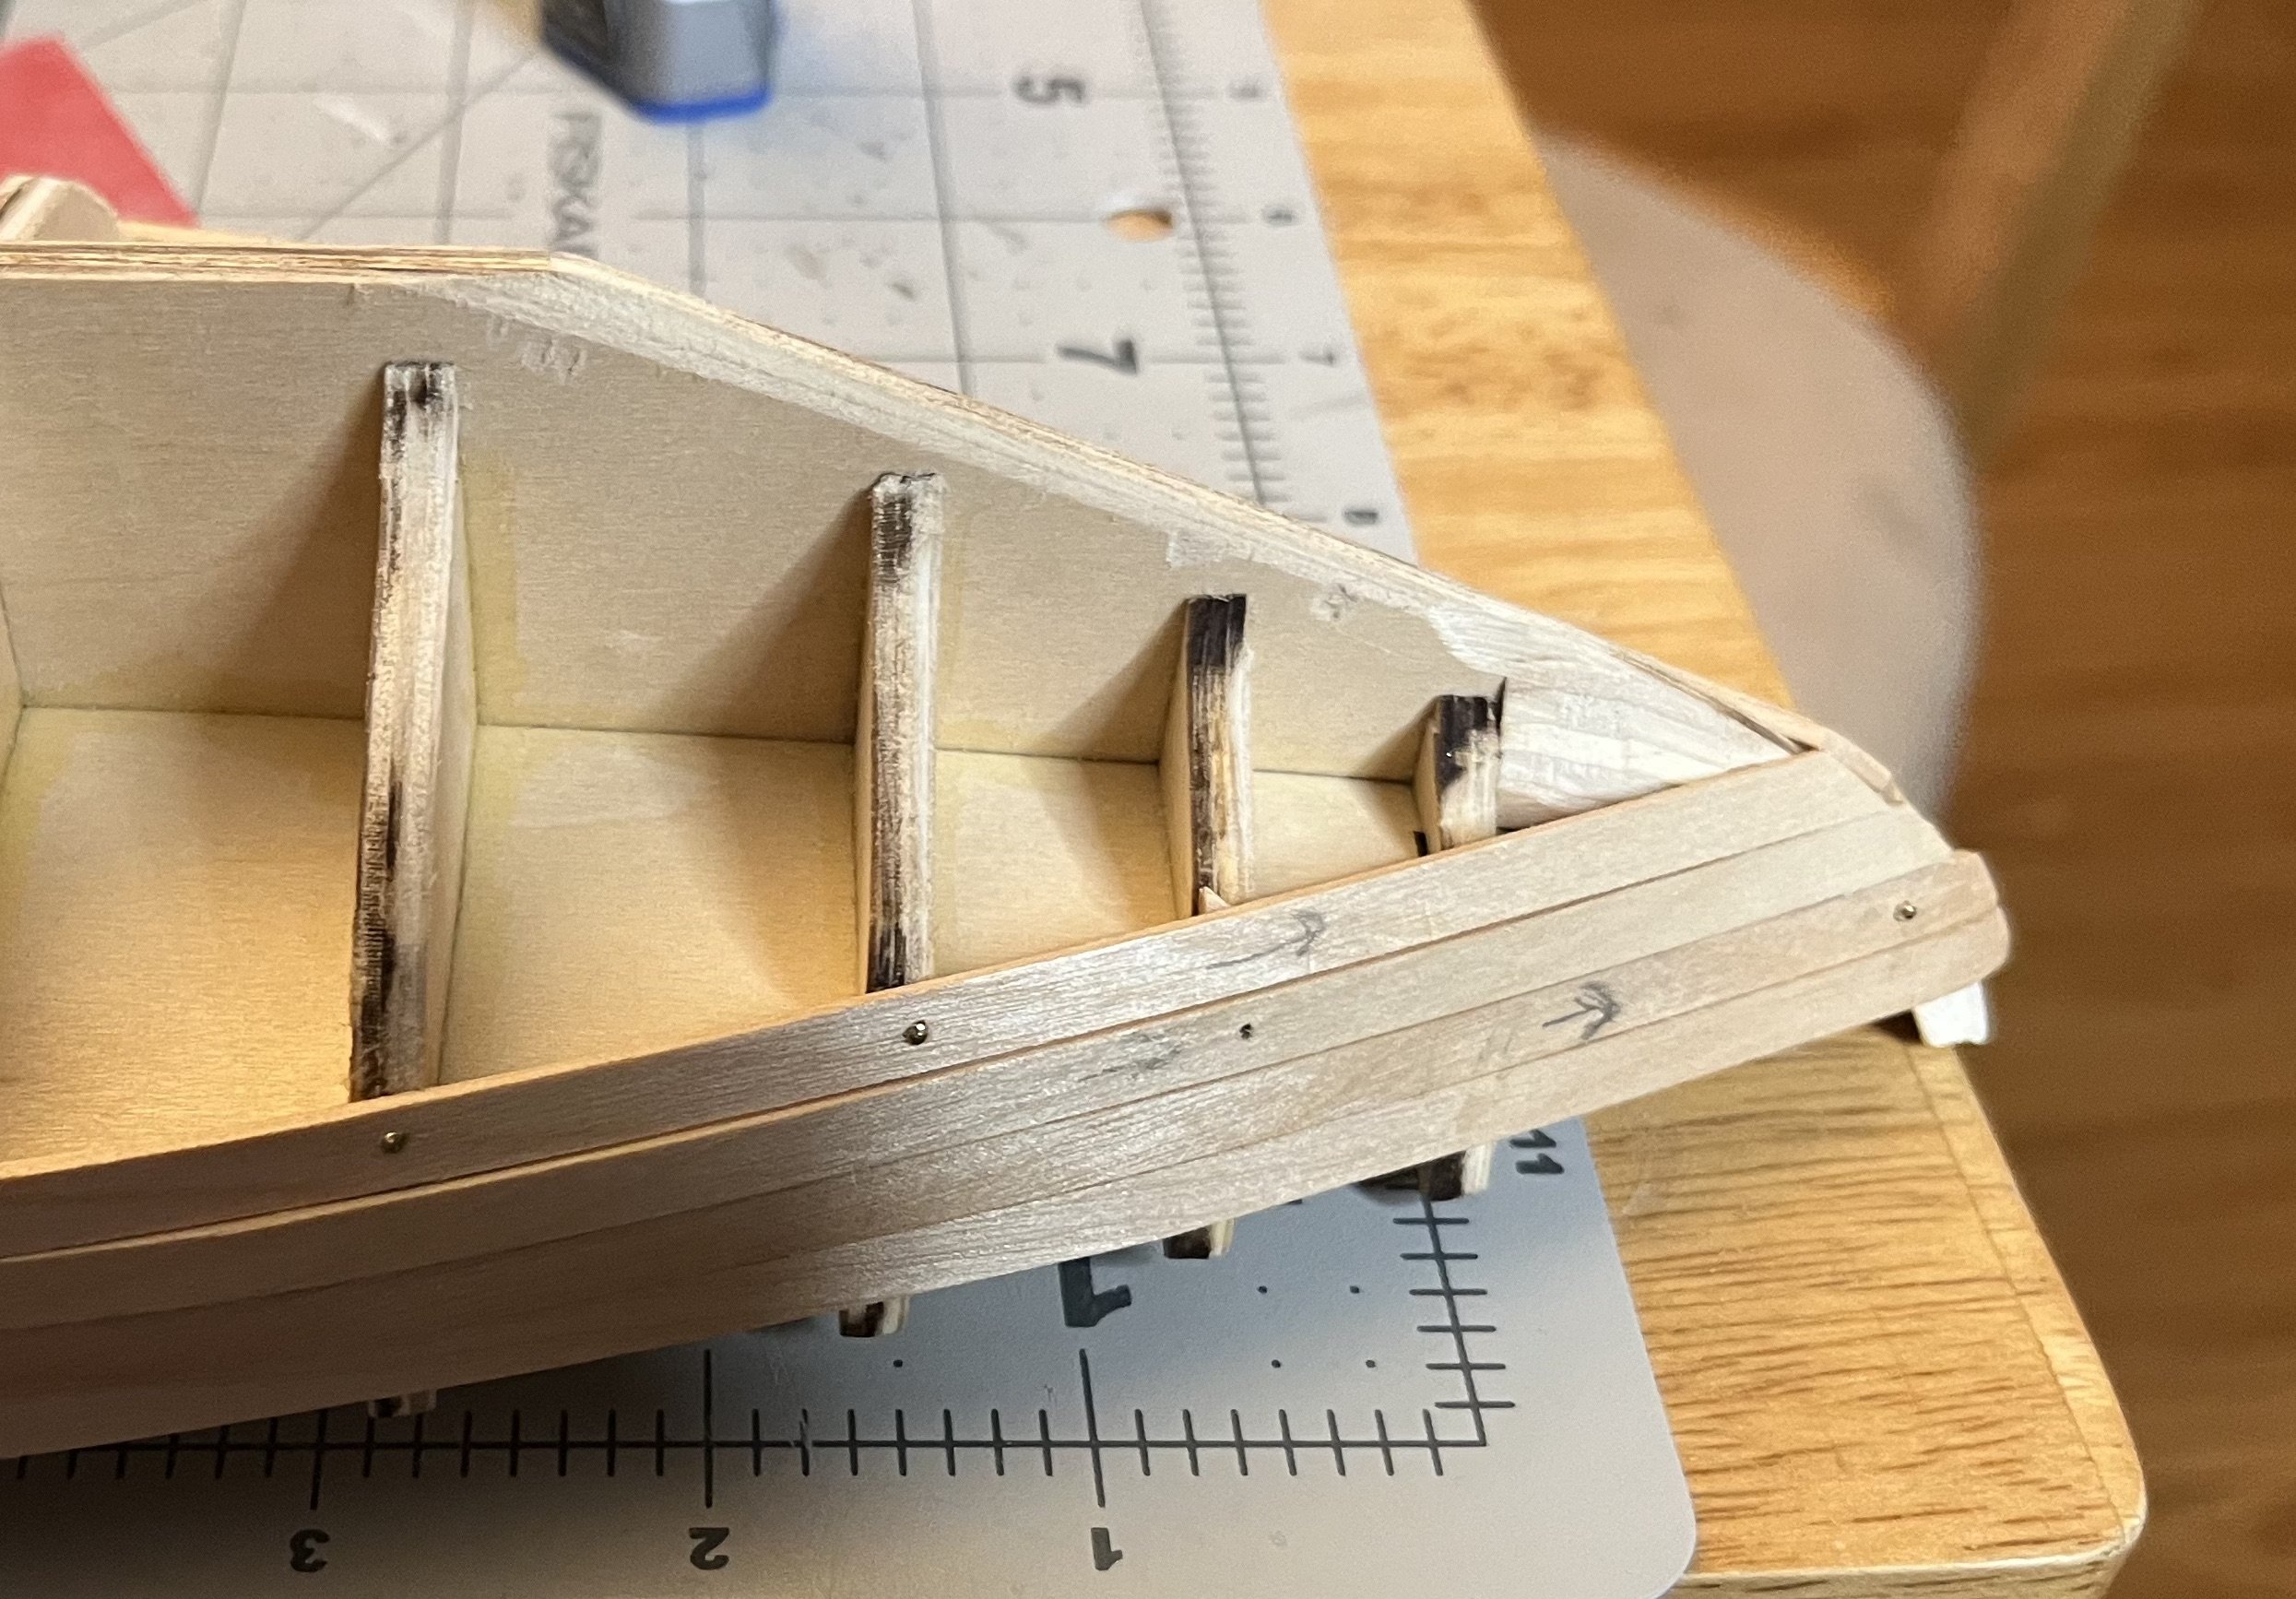
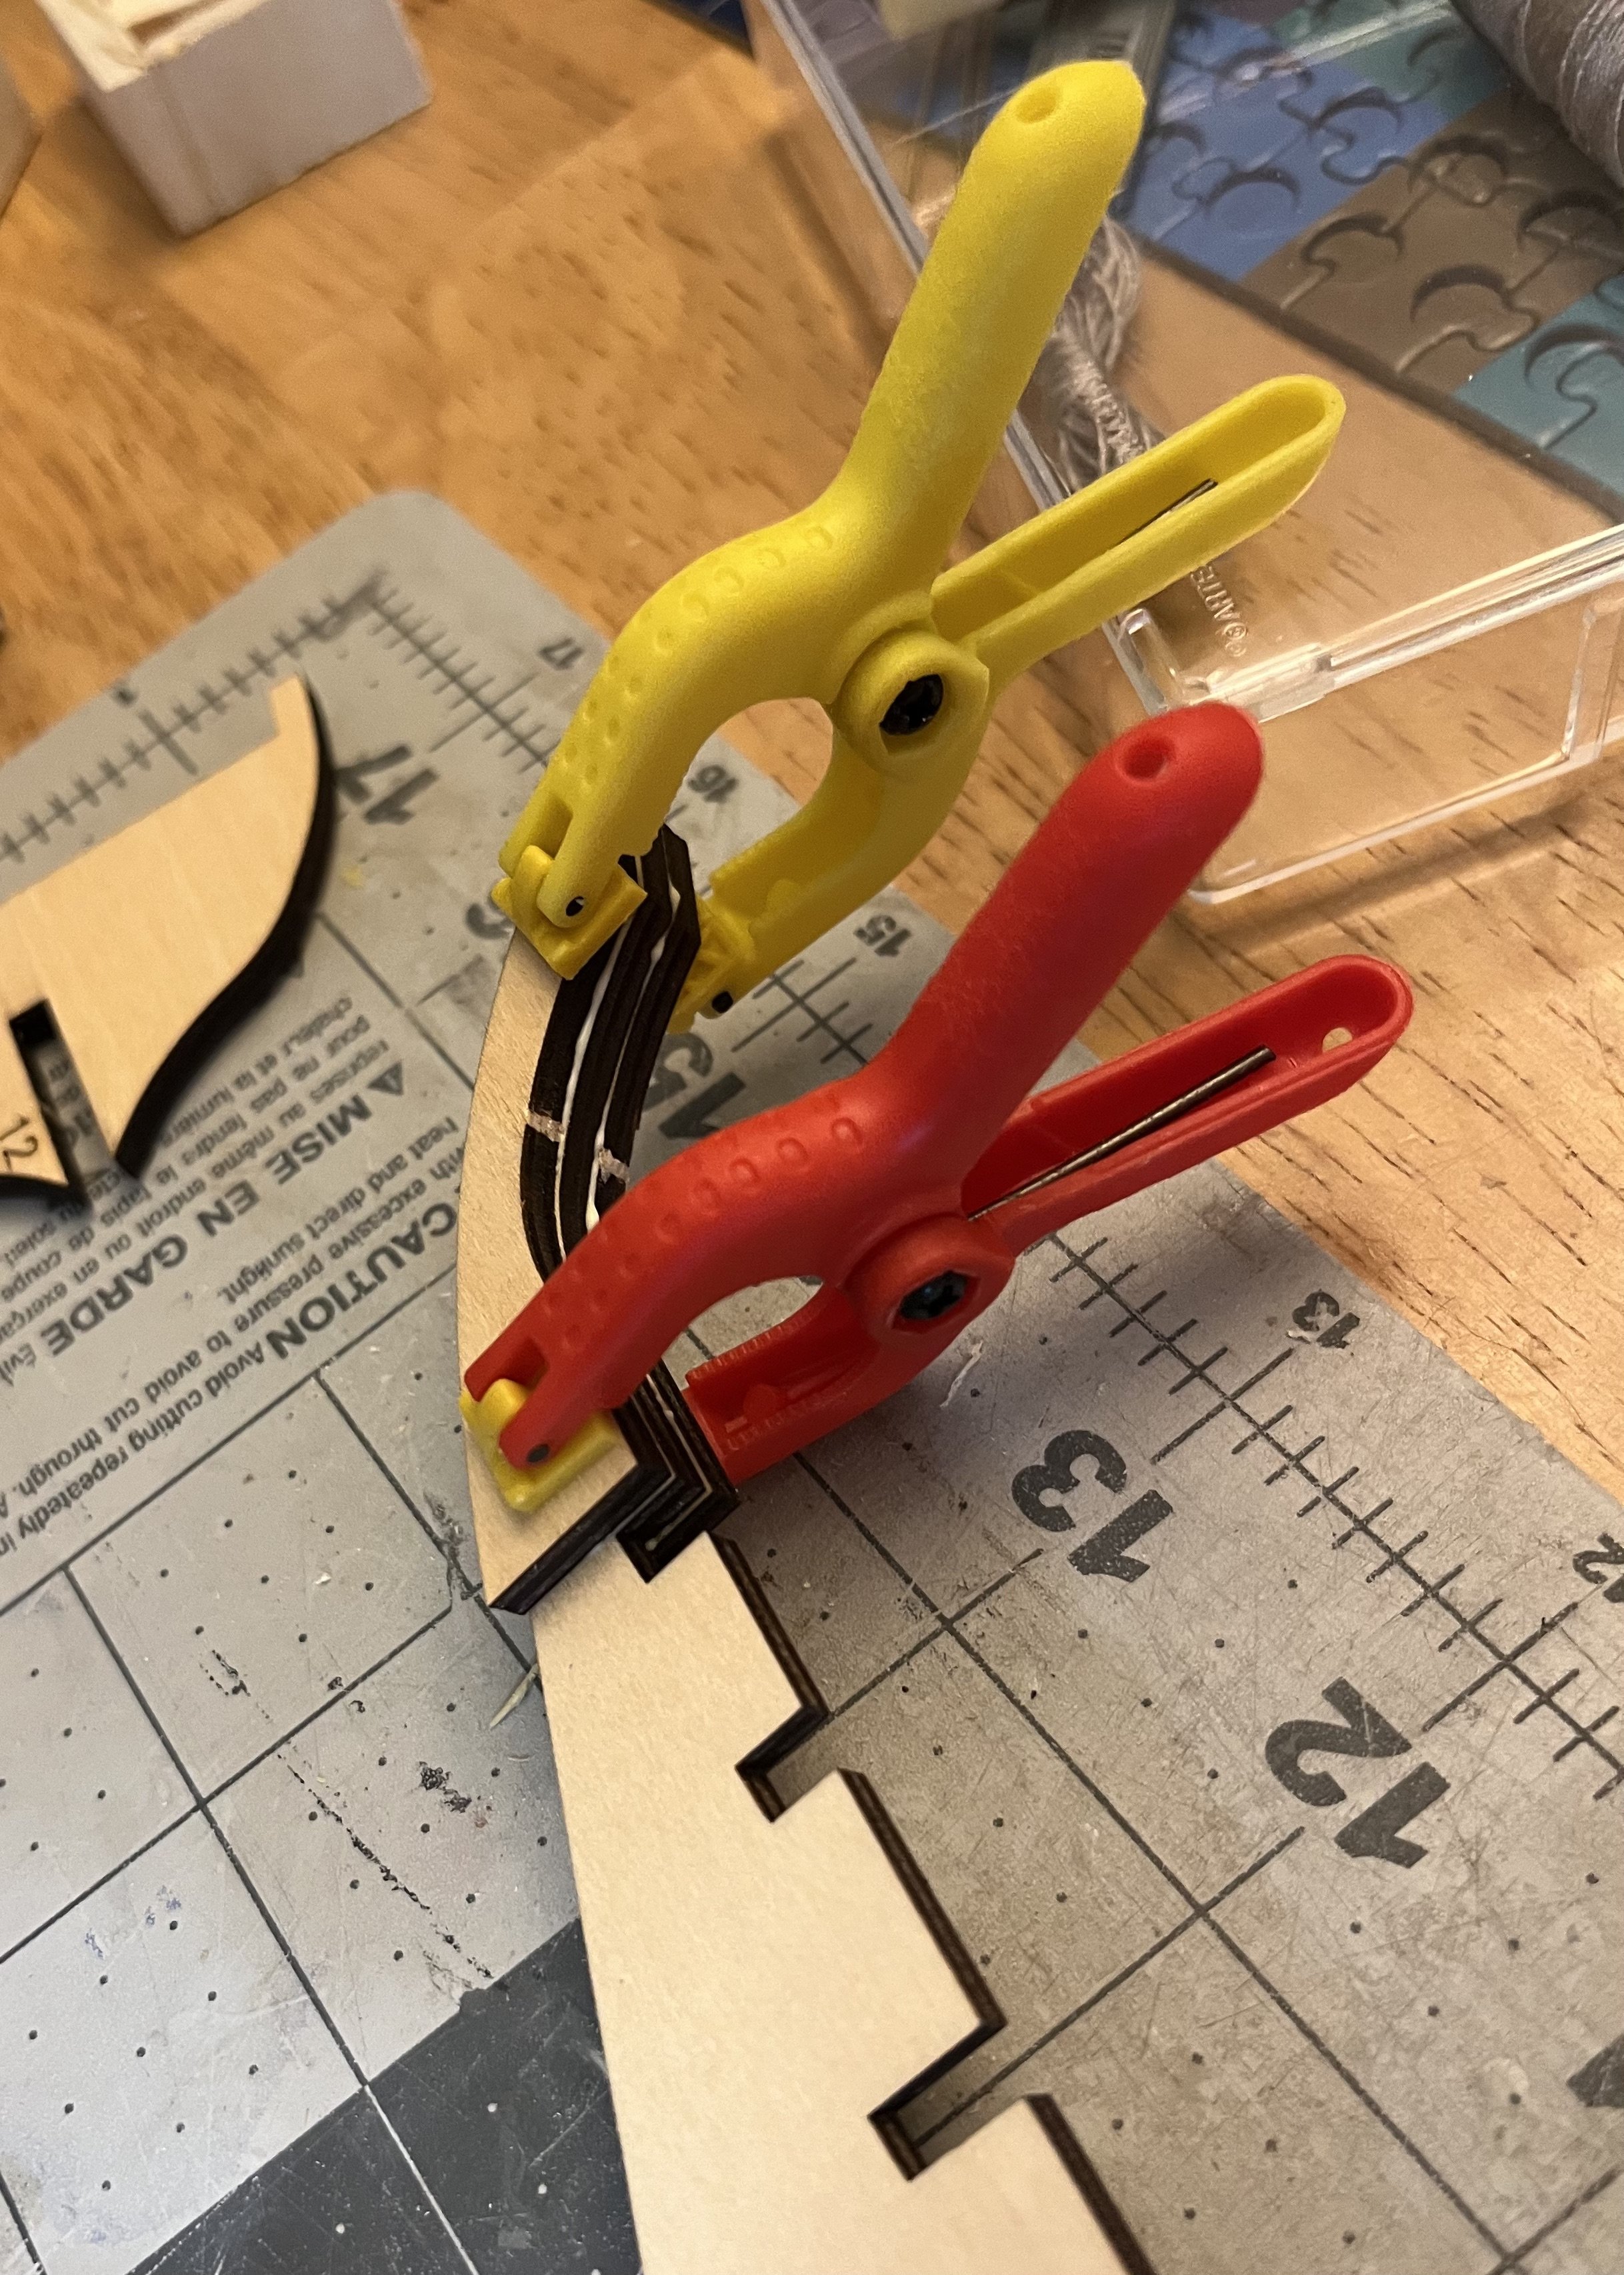
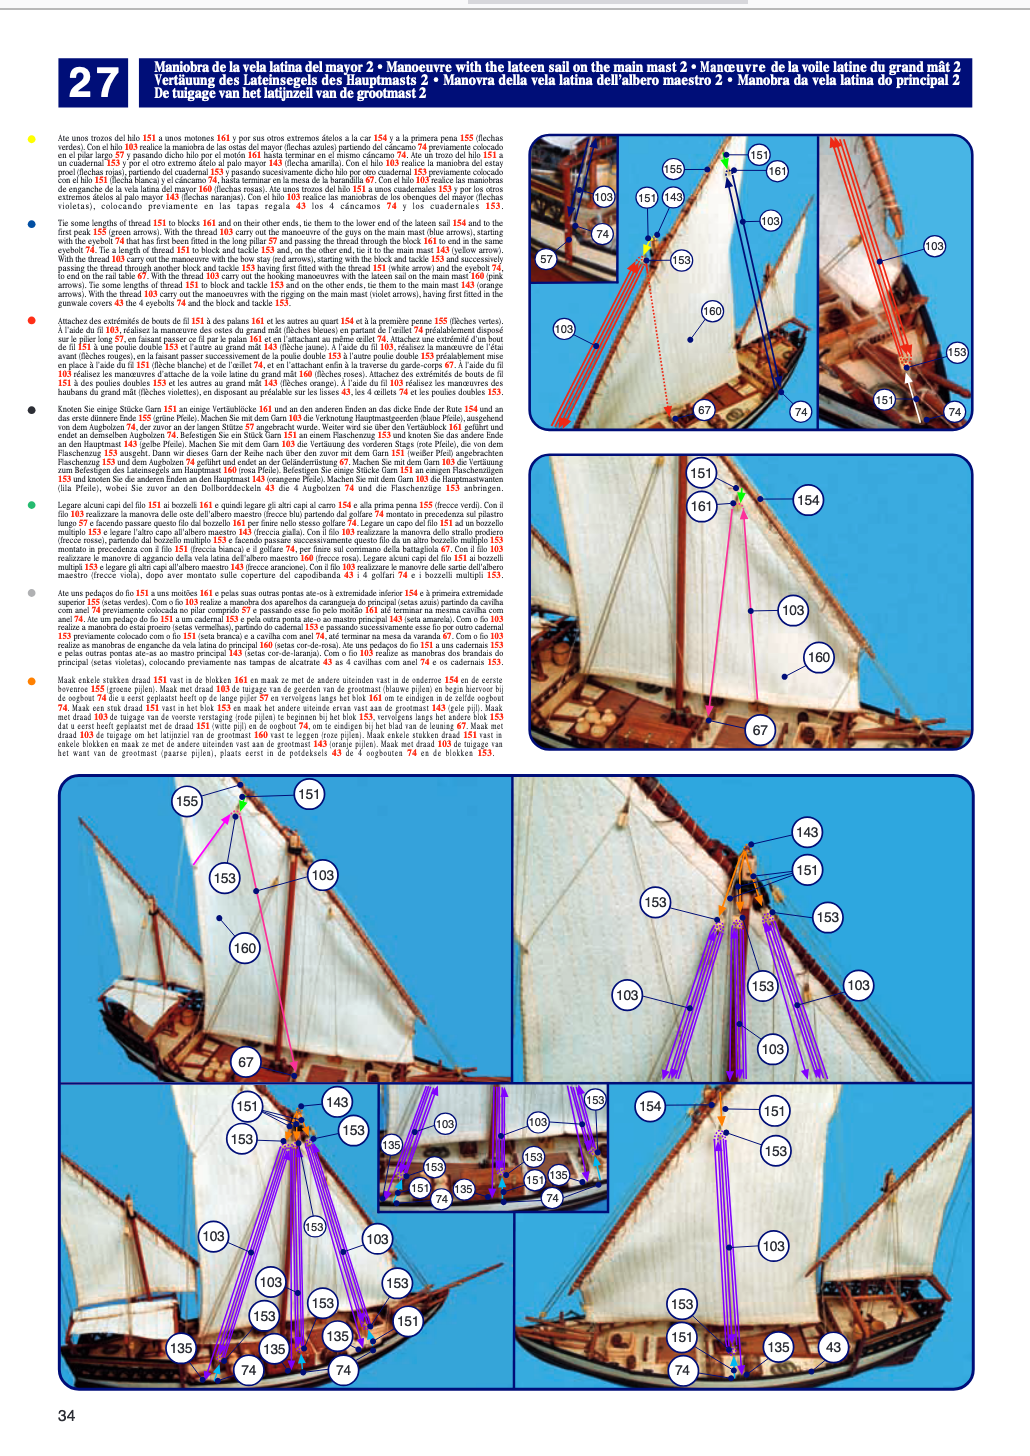
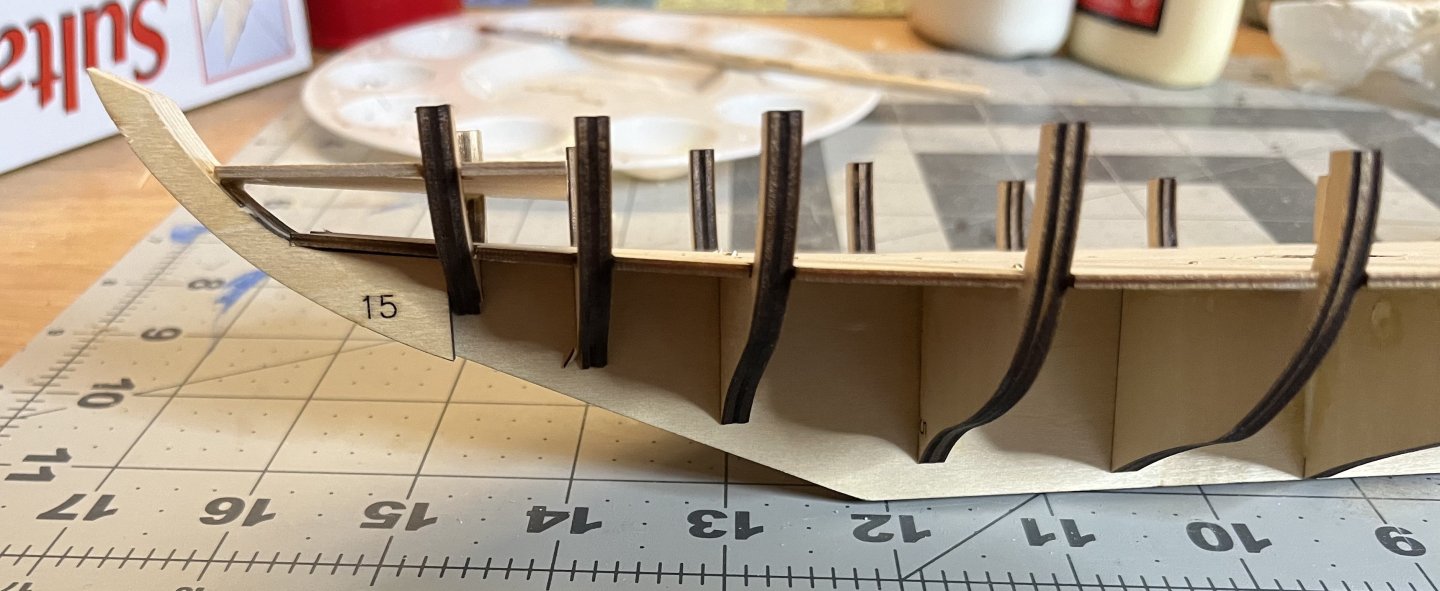
Just your standard first layer planking. I am using a curling Iron to heat the strakes to bend and twist them. It is working fairly well to get the strake to be the general shape of the hull. This is also the first time I have used nails while planking. I am not putting a nail into every bulkhead because it doesn't seem necessary where they fit and conform well. I am putting a nail in where the strips need just a little help to conform to the shape of the hull, mostly in the stern. At this point I will need to start shaping the strakes better to fit without huge gaps. The last strake to go on was a bit tricky because of the amount of lateral bend needed. The one area that is giving me grief is the bow. After the first or second plank, the first bulkhead isn't in contact with the strakes. I could visually tell this would happen from the beginning. The instructions don't really have any information on it and it is pretty obvious that it would be a very odd shape to force the strip to conform to the bulkhead. I am contemplating wedging some scrap wood in there just for some structural support. I have had to do that a little bit with second bulkhead. The instructions don't mention beveling the false keel towards the front, but looking at how the keel attaches, it seems necessary.


- 65 replies
-
- 6
-
-
- sultan
- Artesania Latina
- (and 2 more)
-
Rick, I have definitely taken note of some of the issues that you came across in your build and appreciate your documenting them. I’ll be referencing your log as I go.
- 65 replies
-
- 2
-
-
- sultan
- Artesania Latina
- (and 2 more)
-
Welcome to MSW!
-
Welcome to MSW!
-
Welcome to MSW!
-
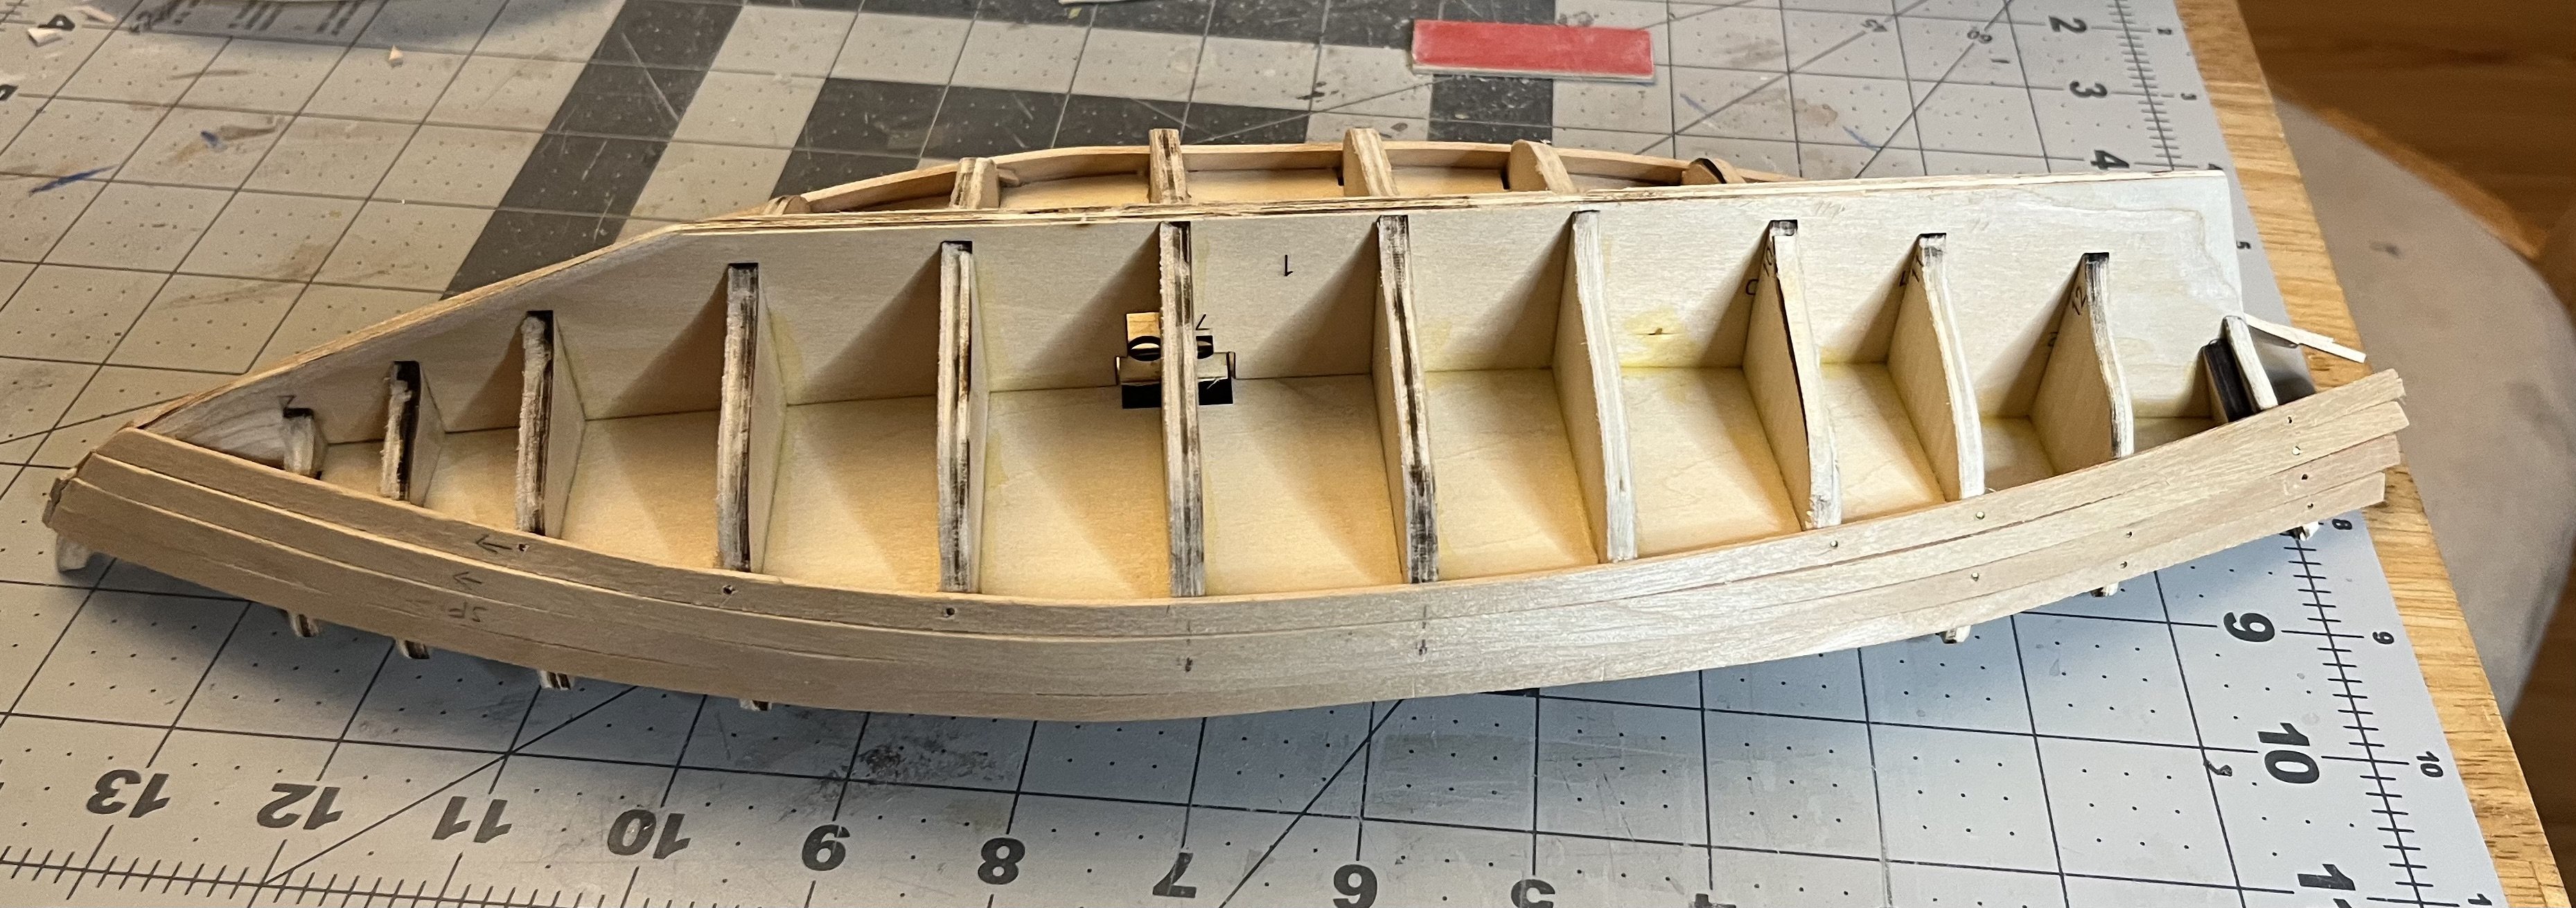
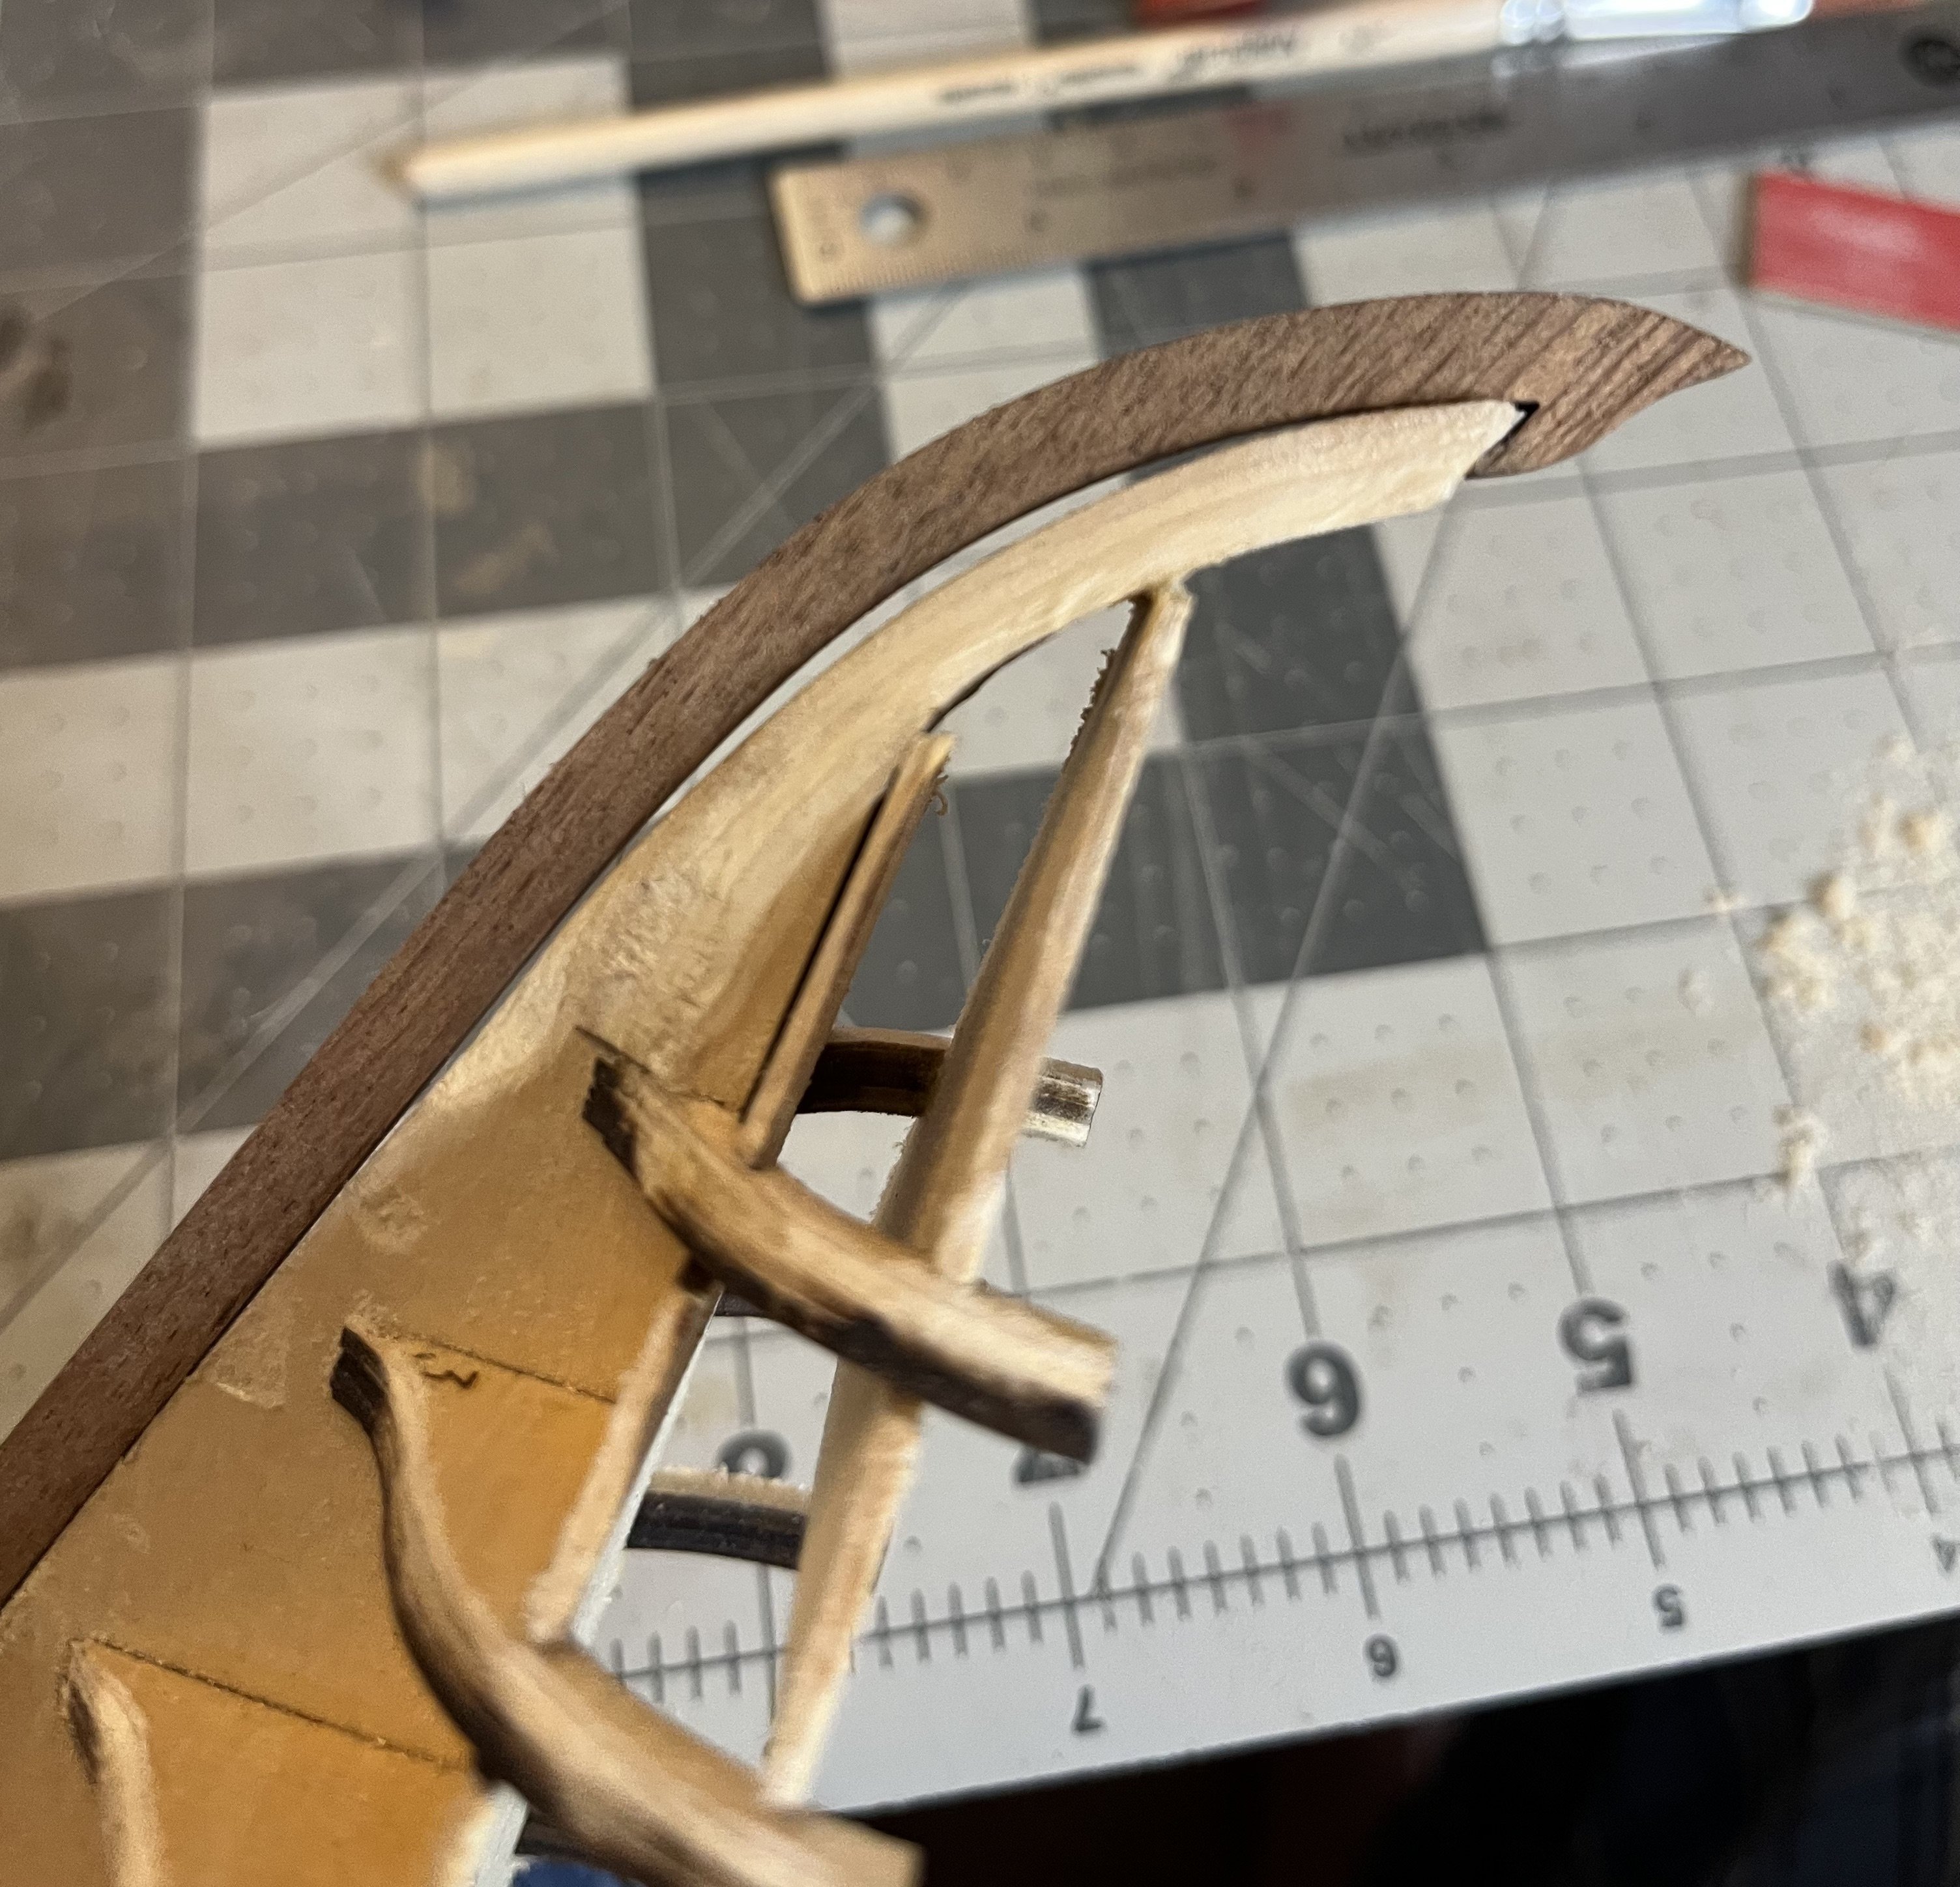
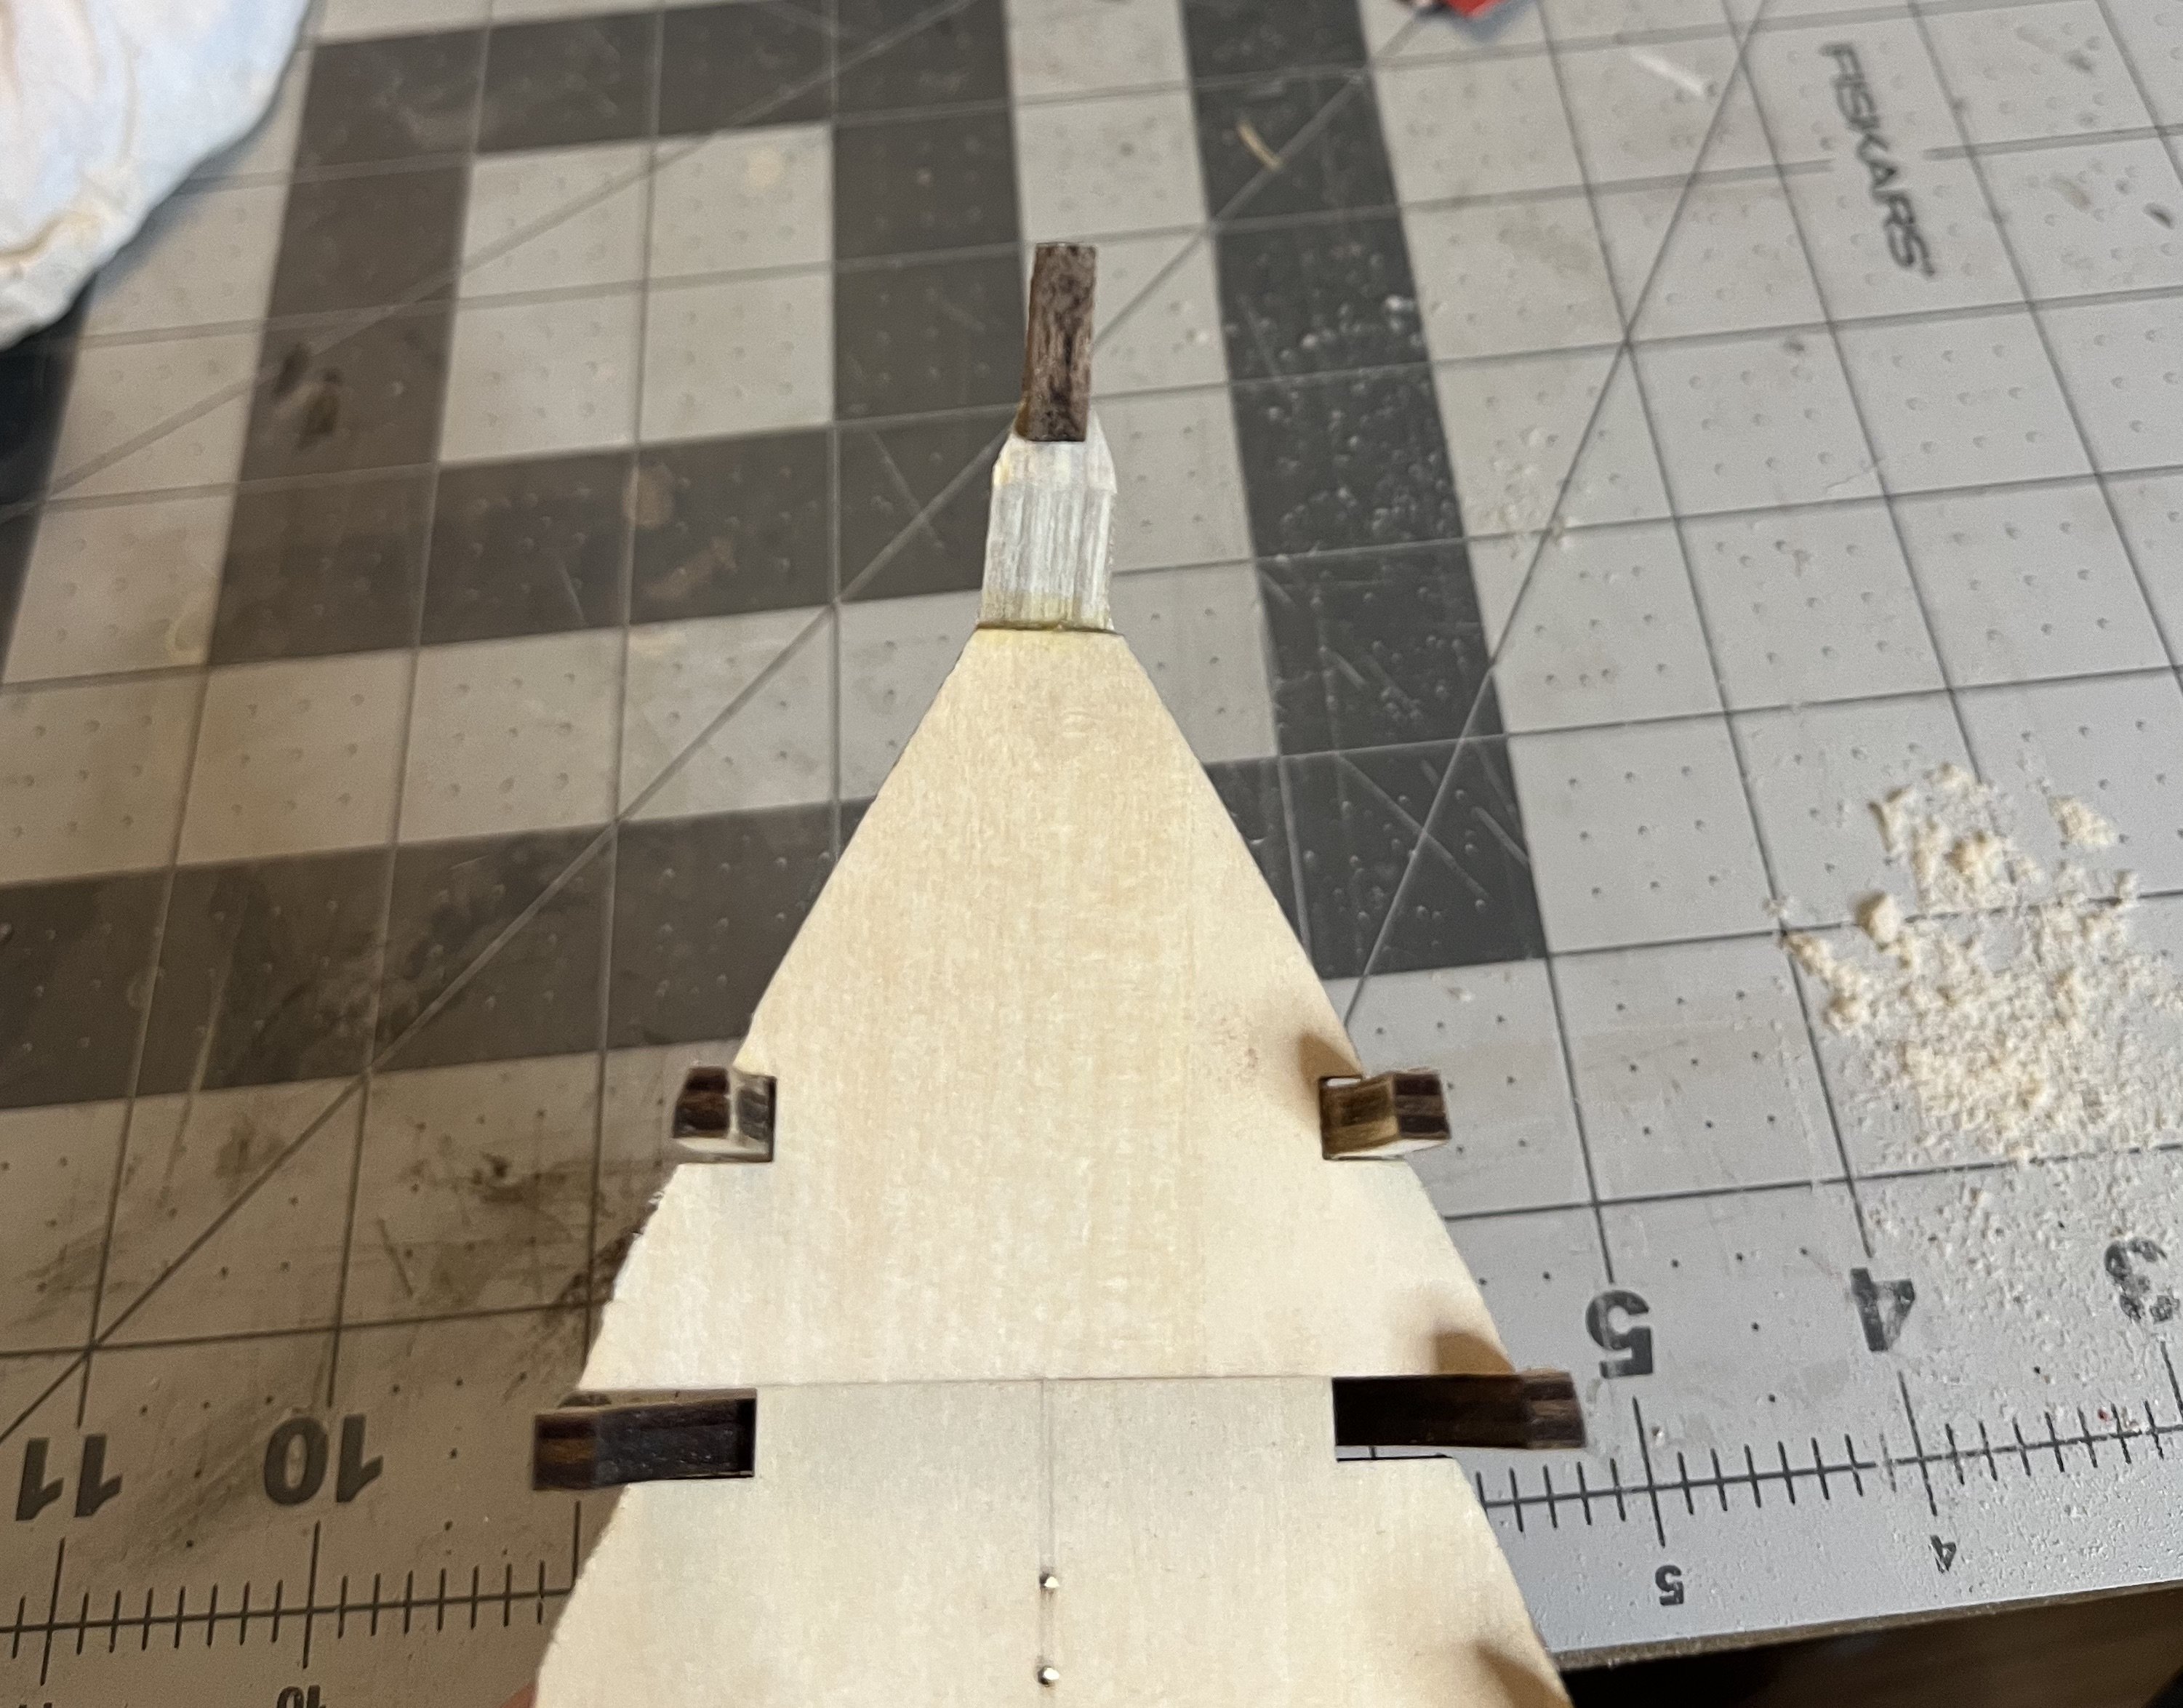
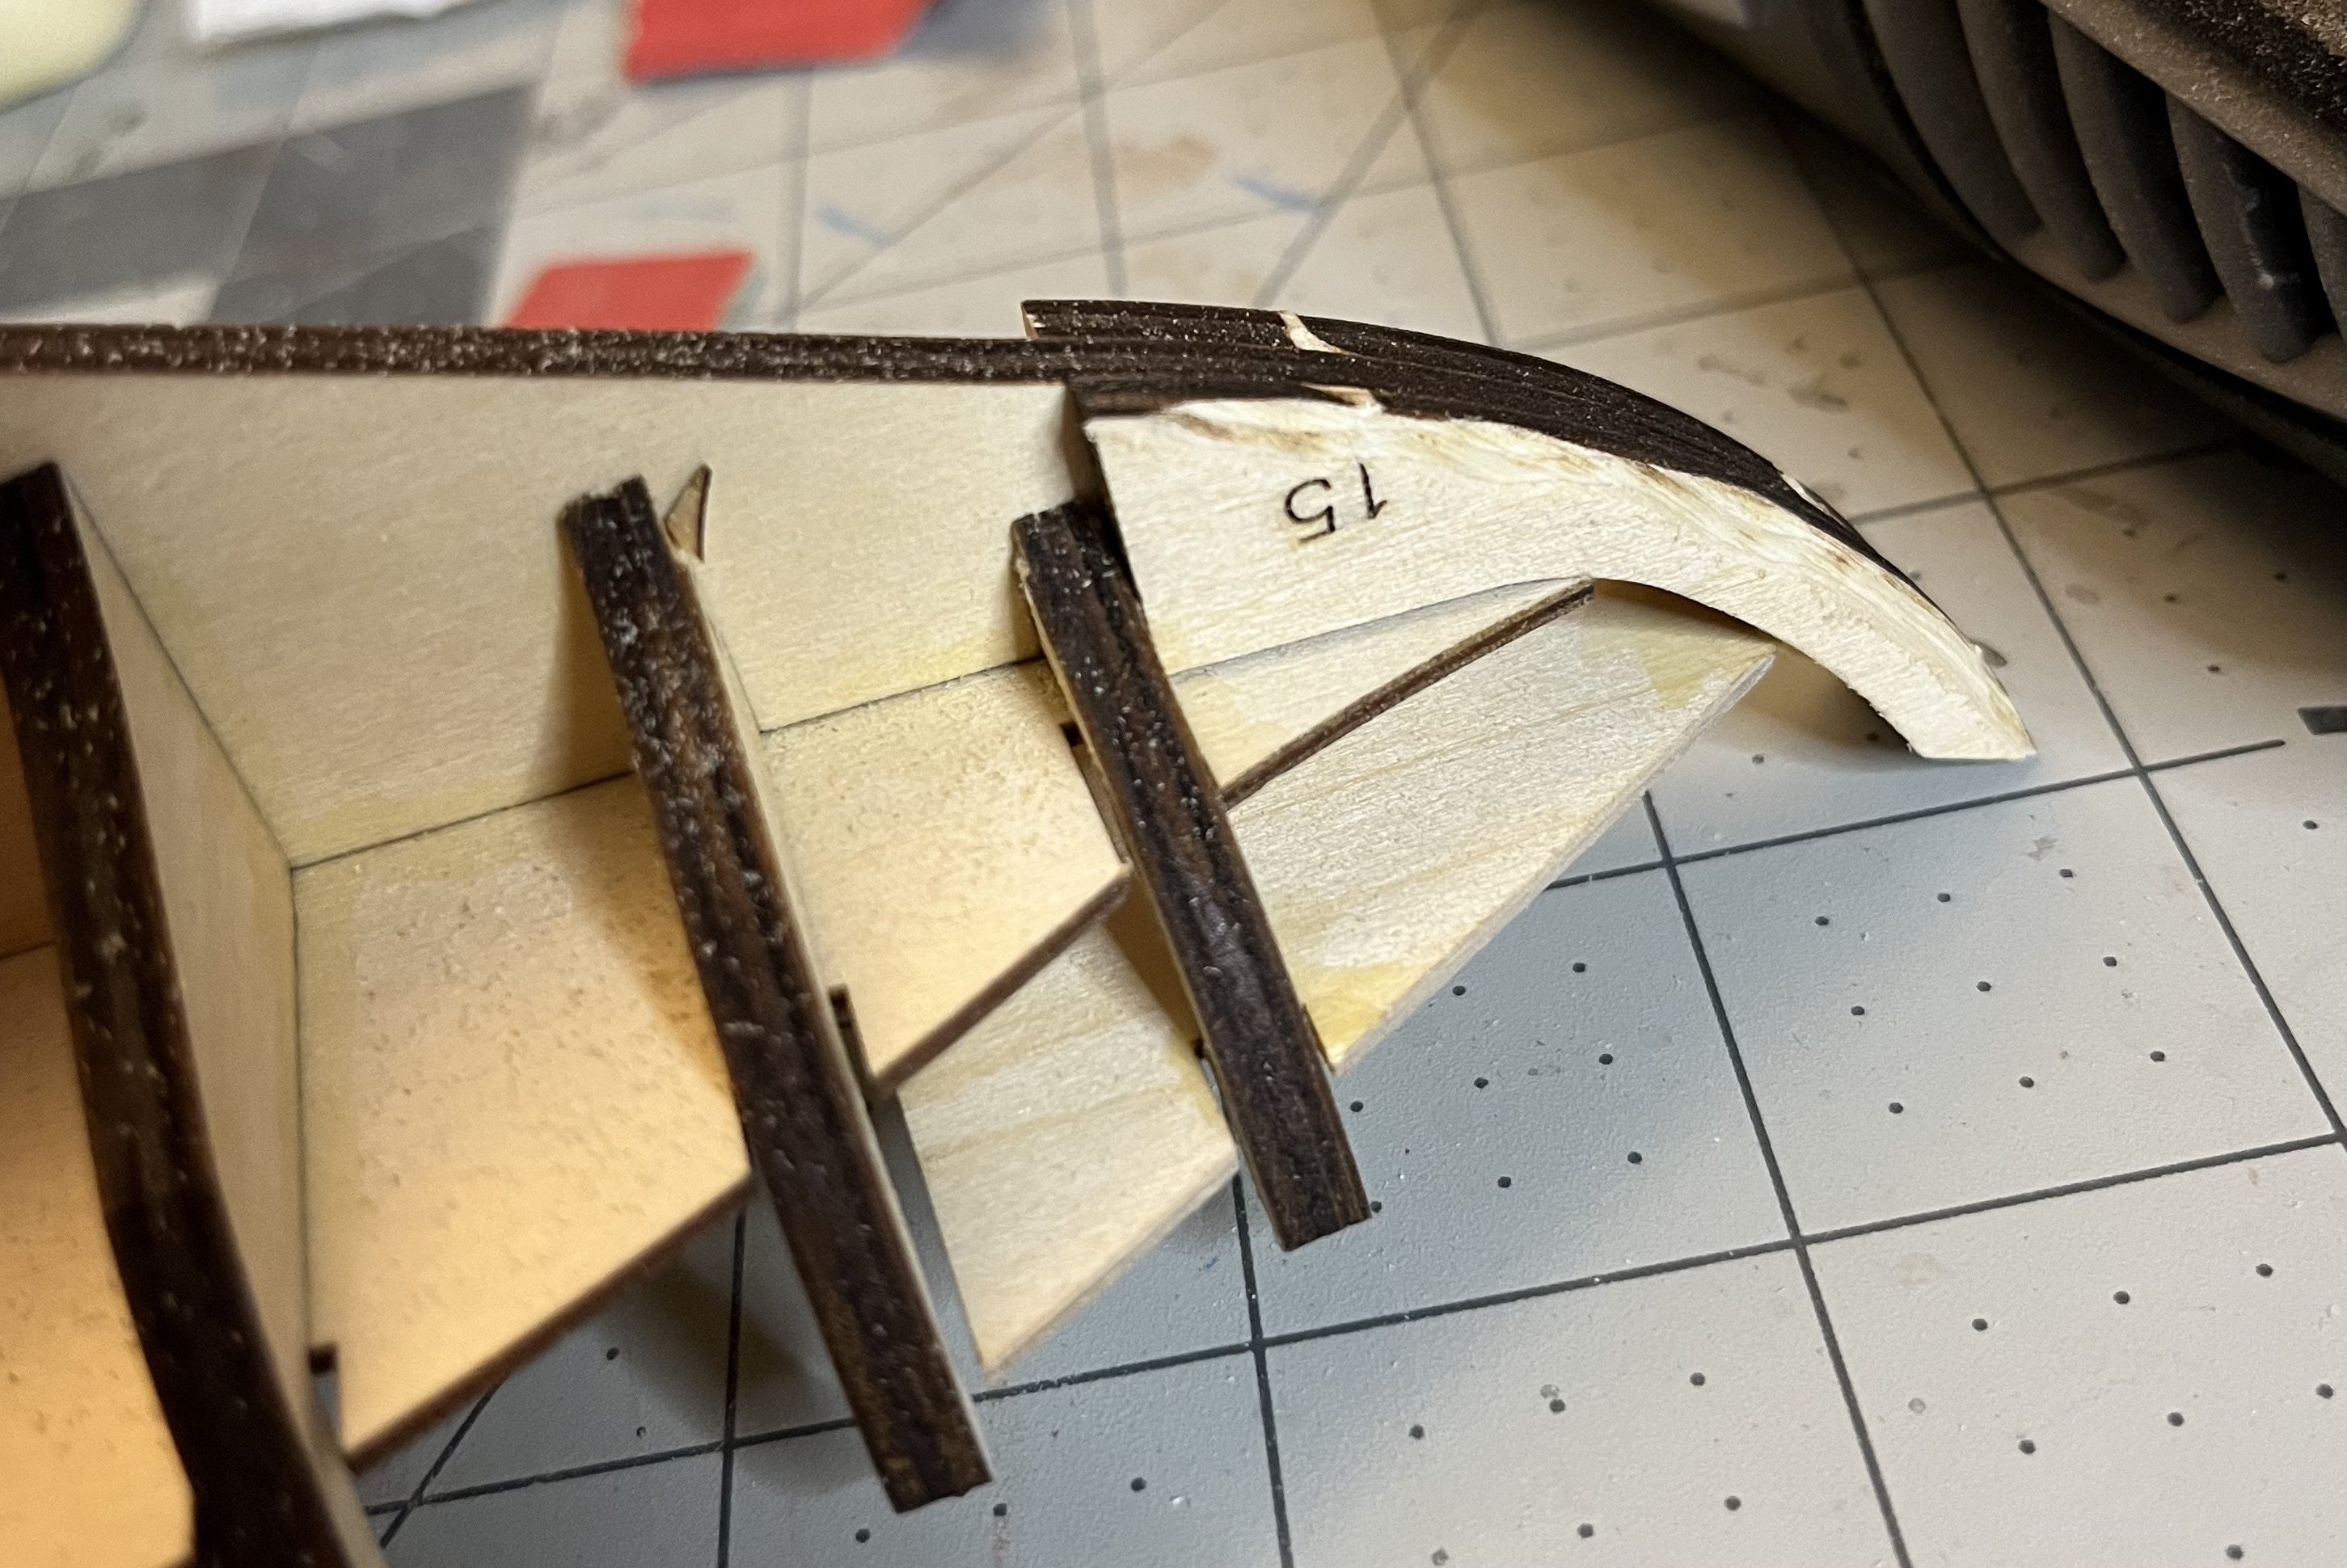
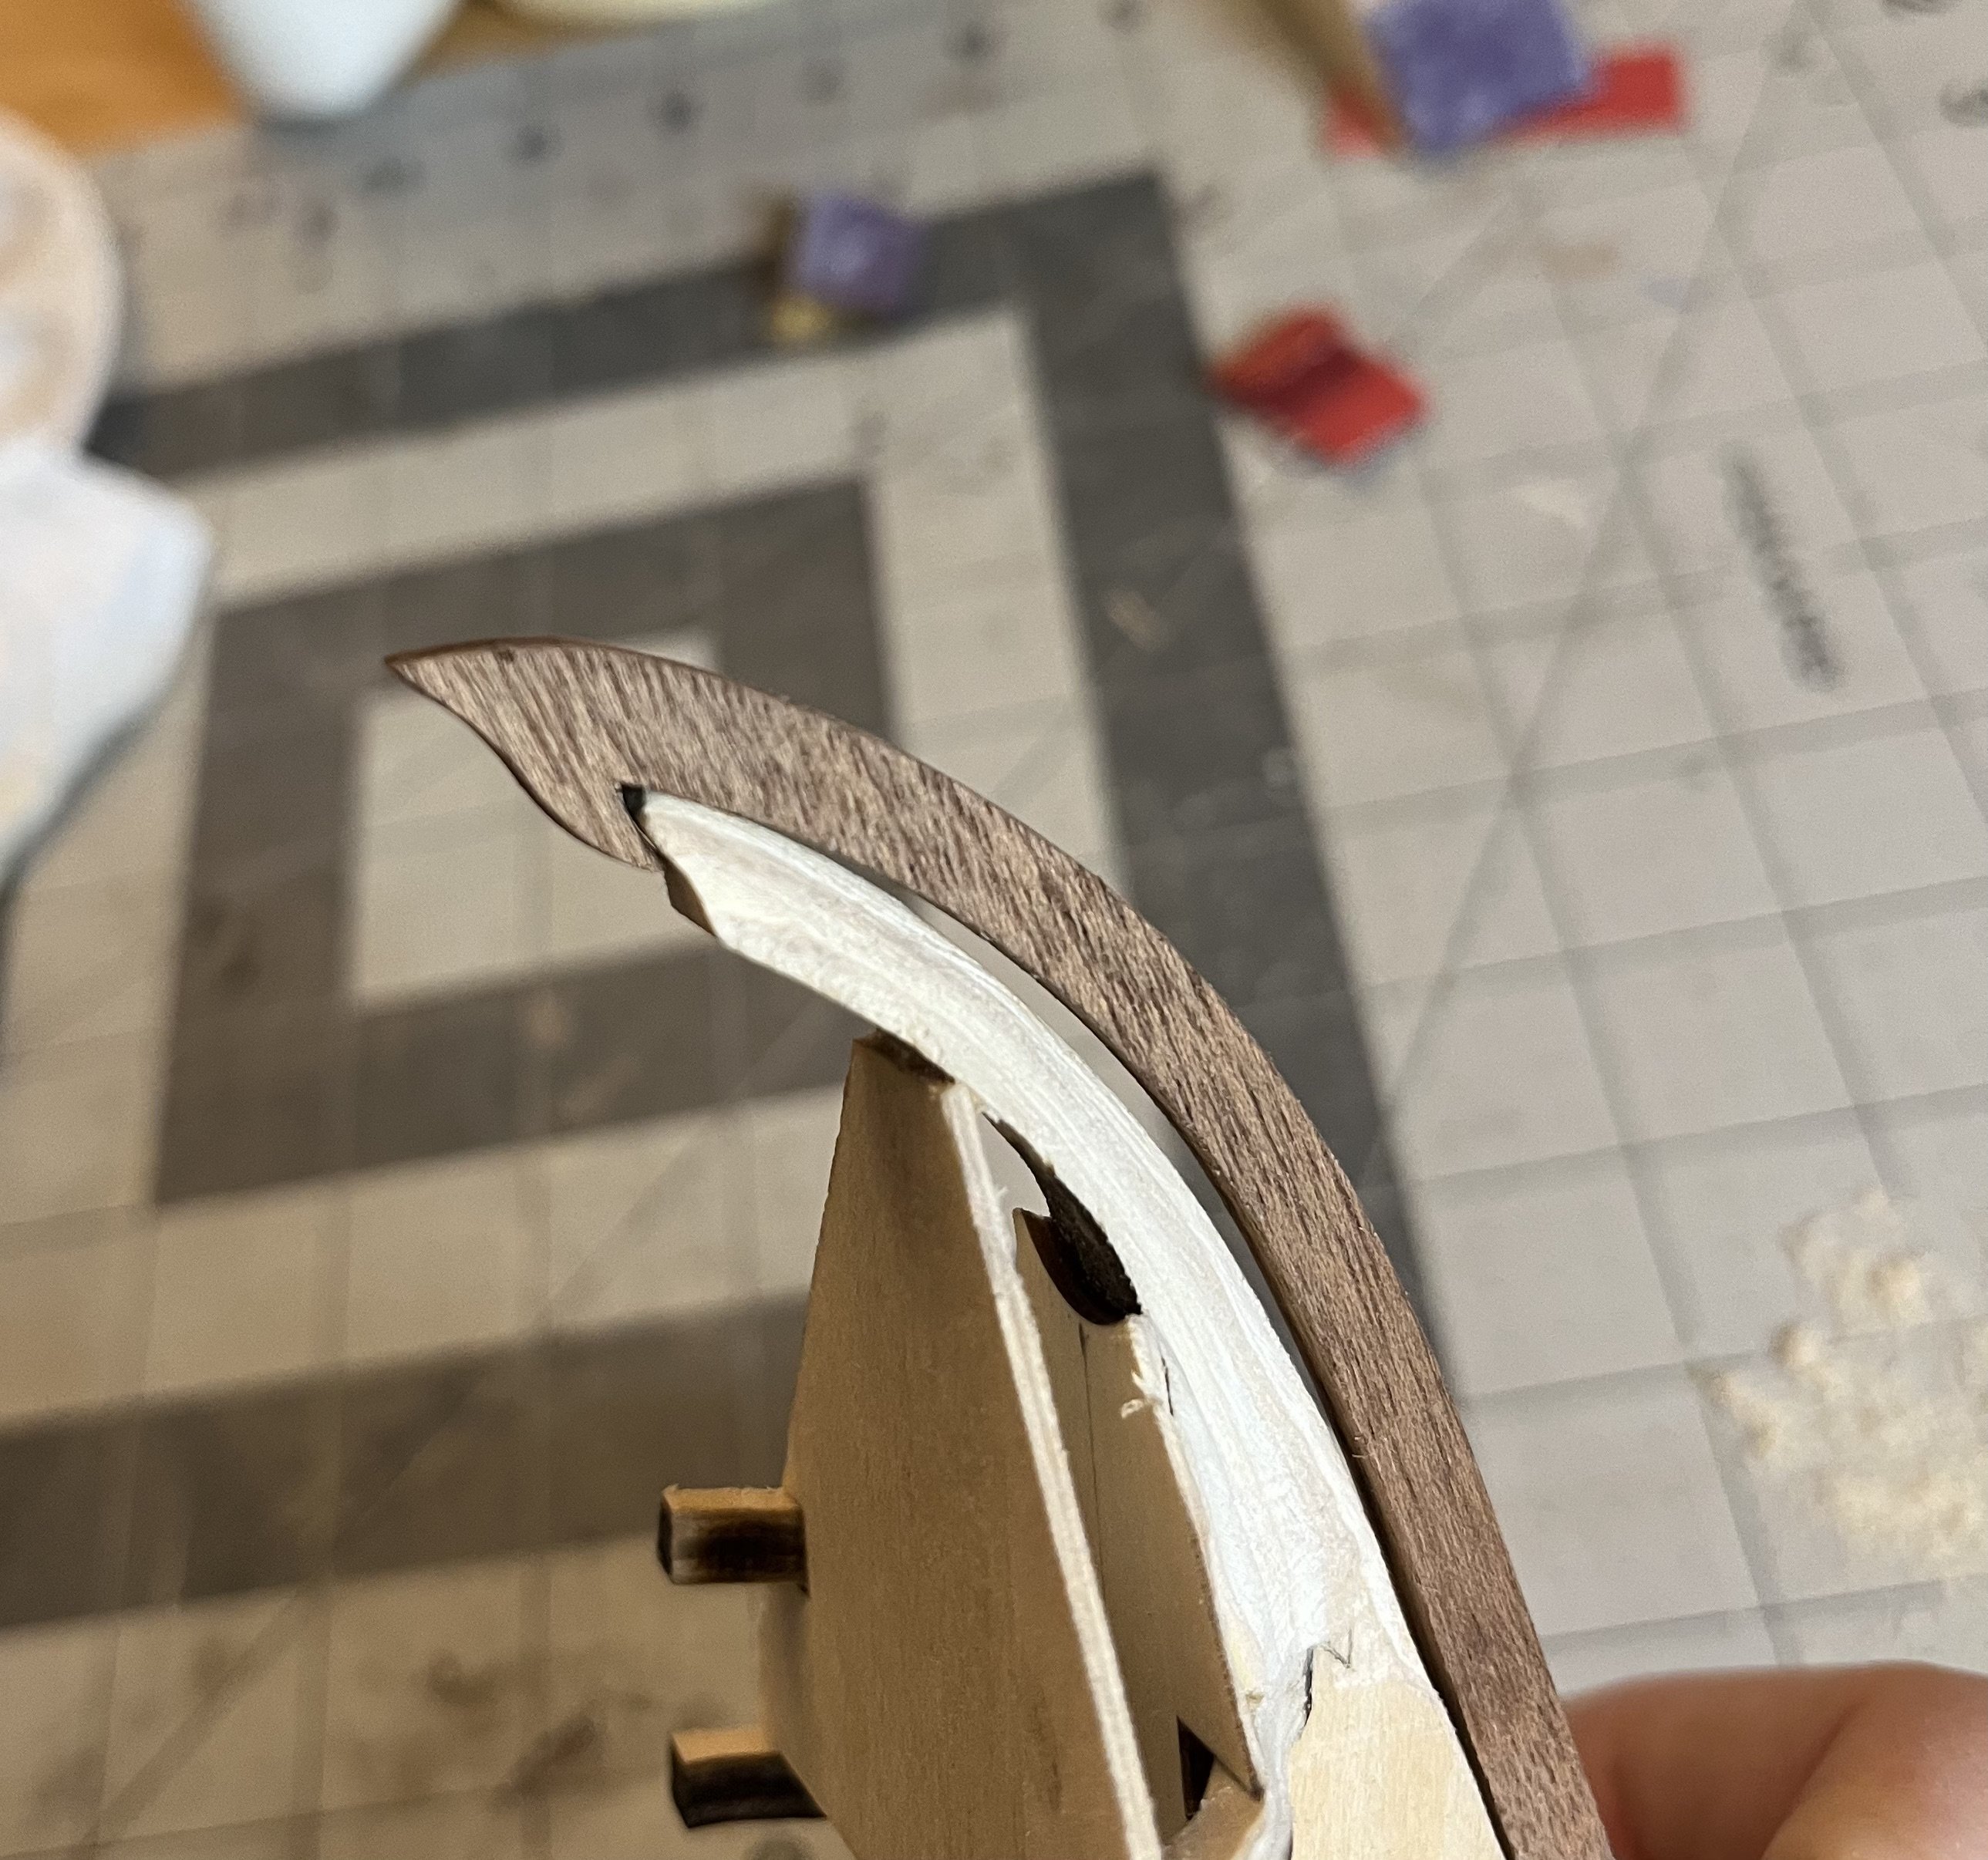
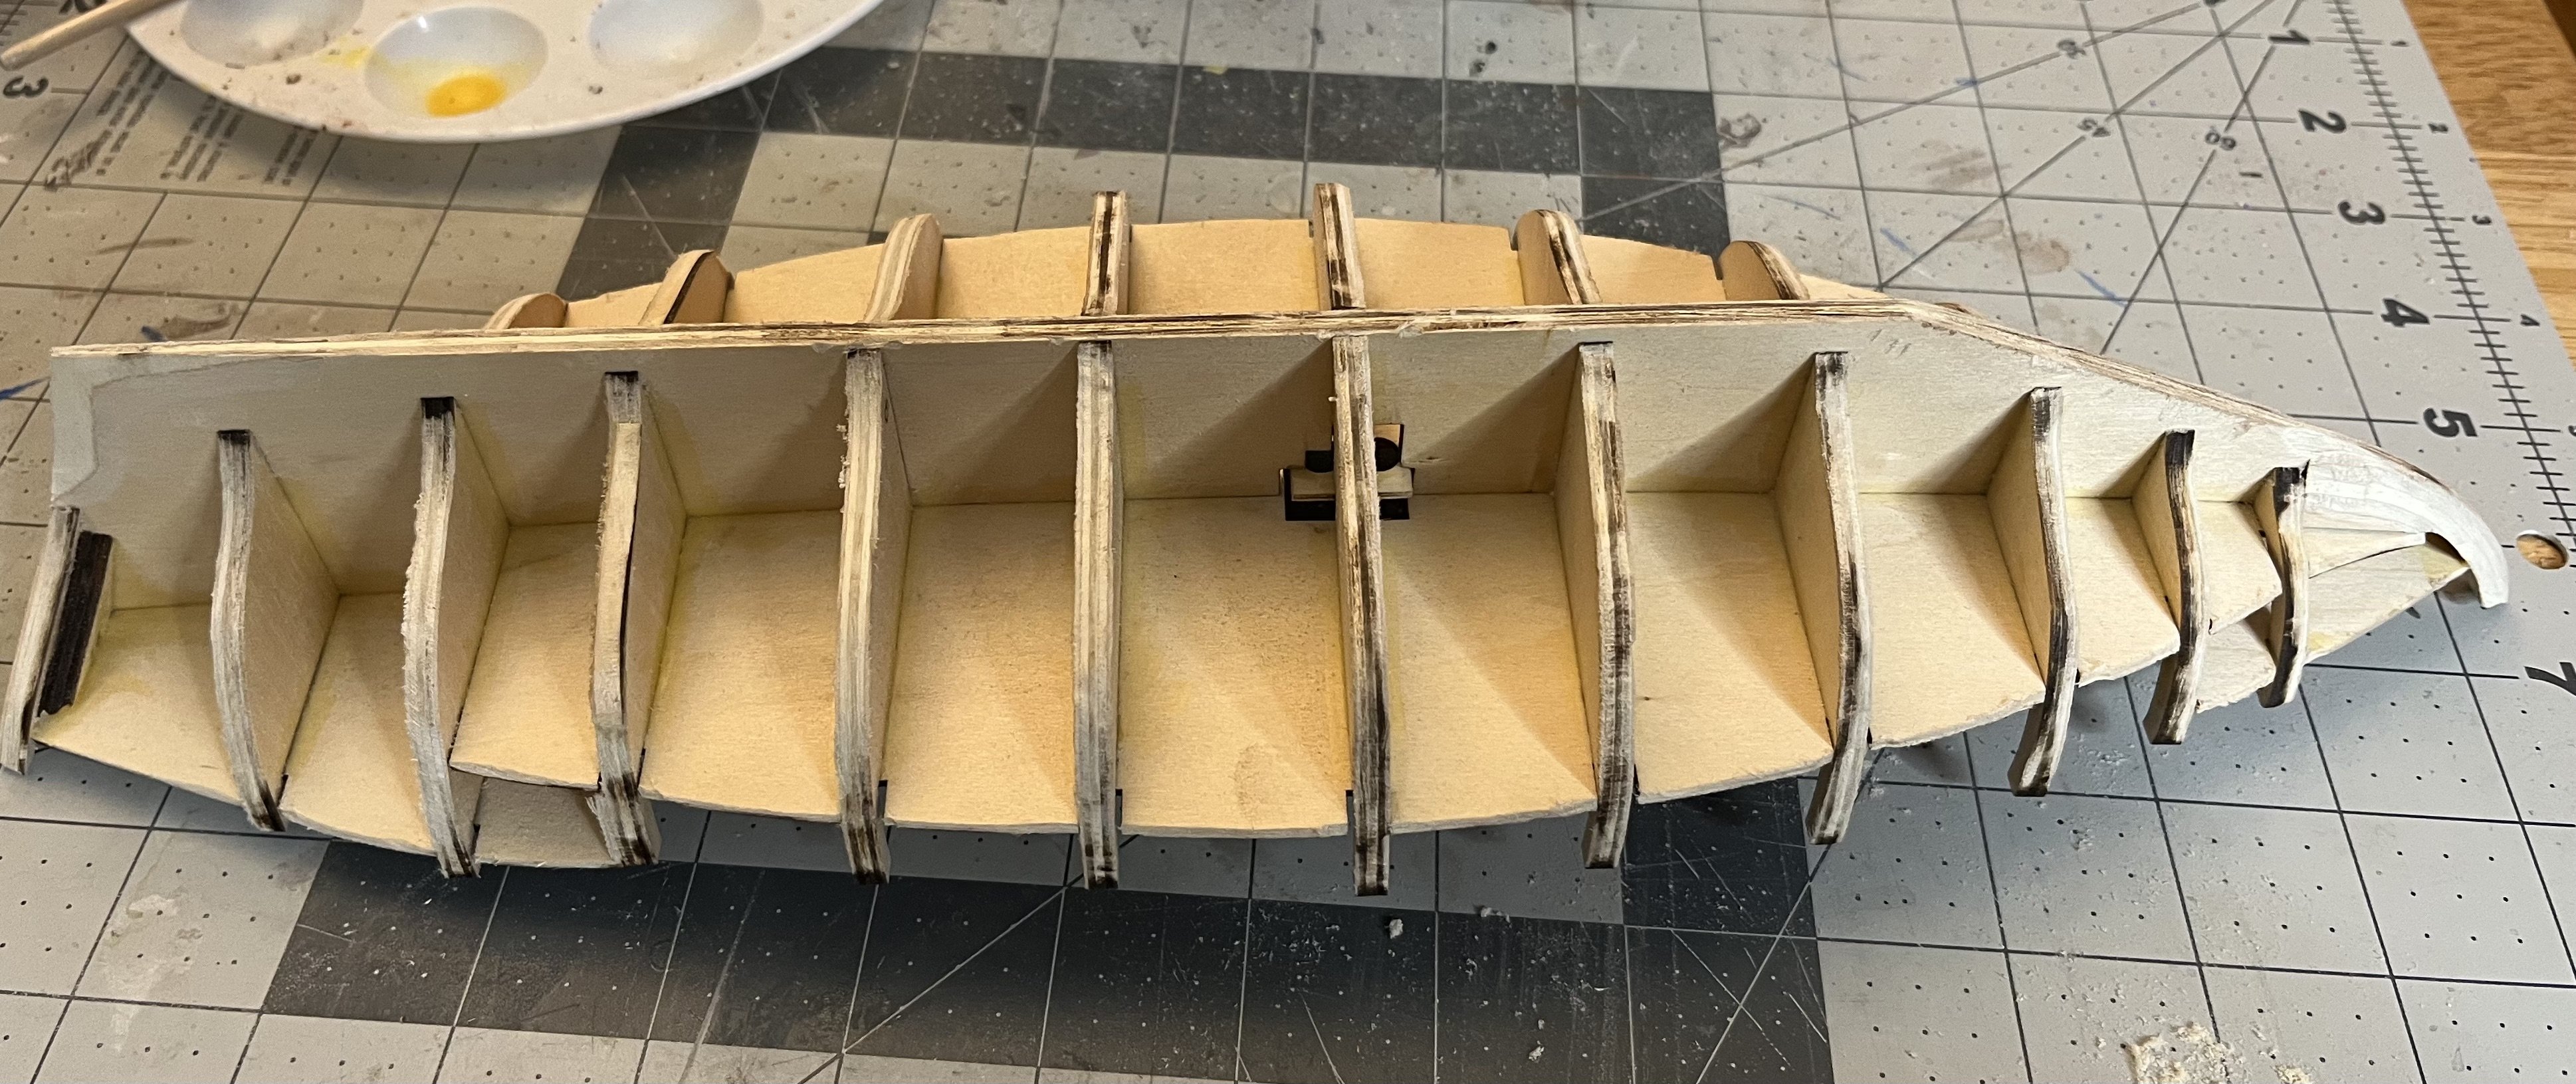
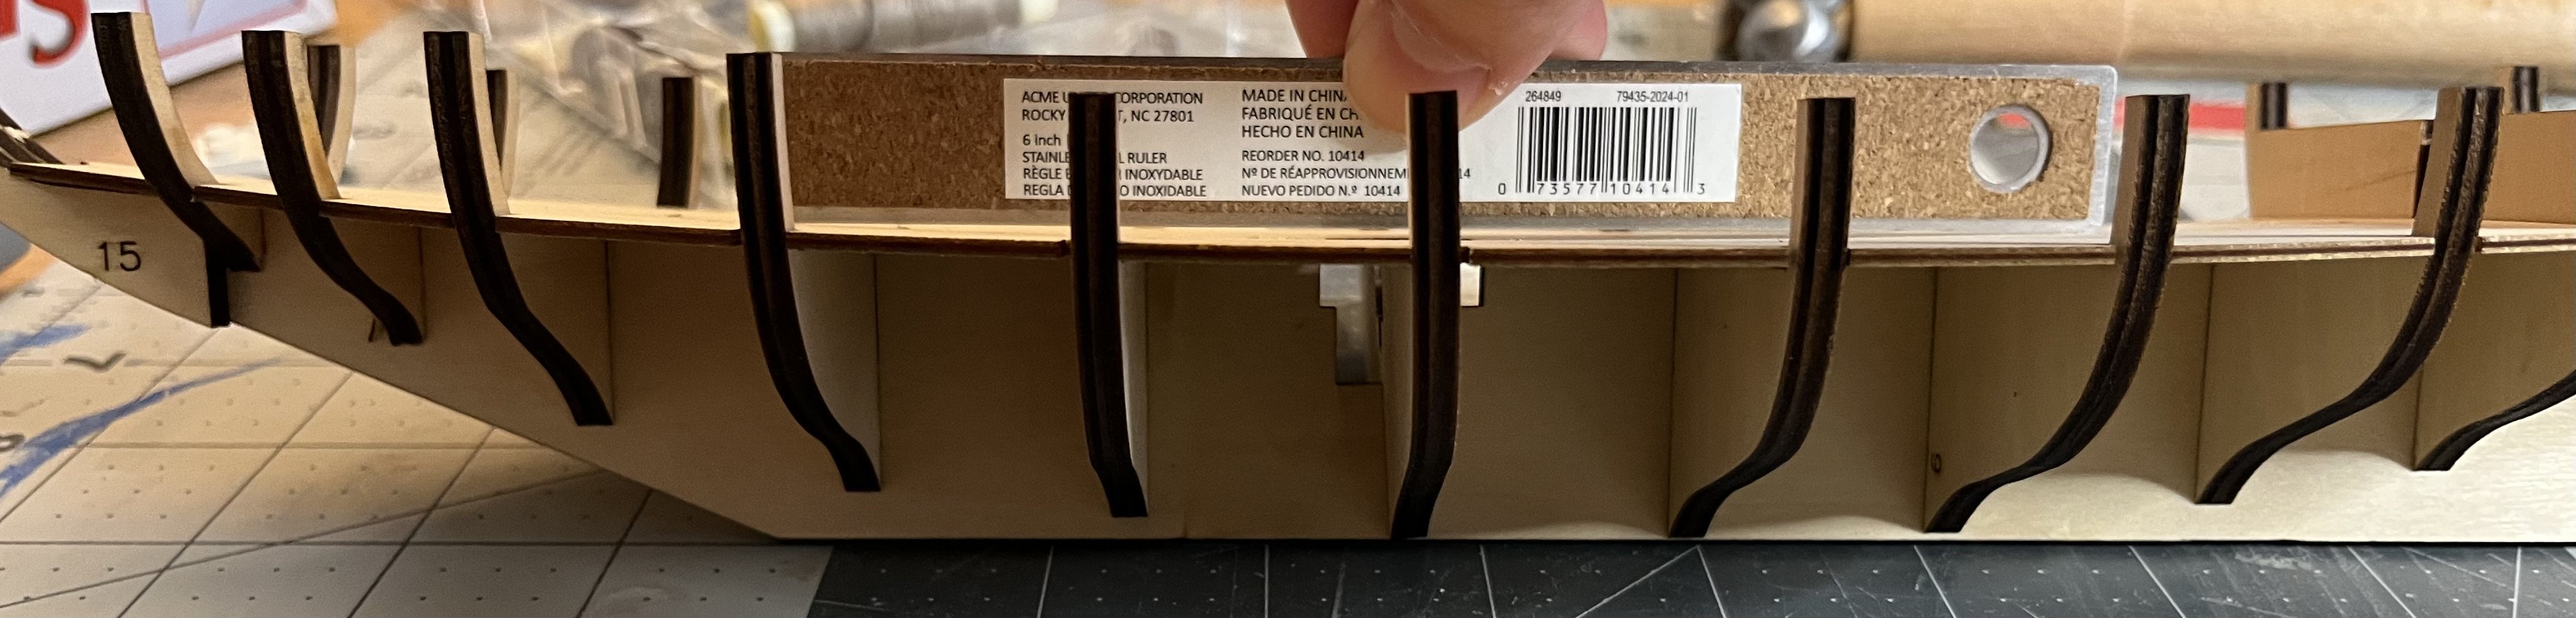
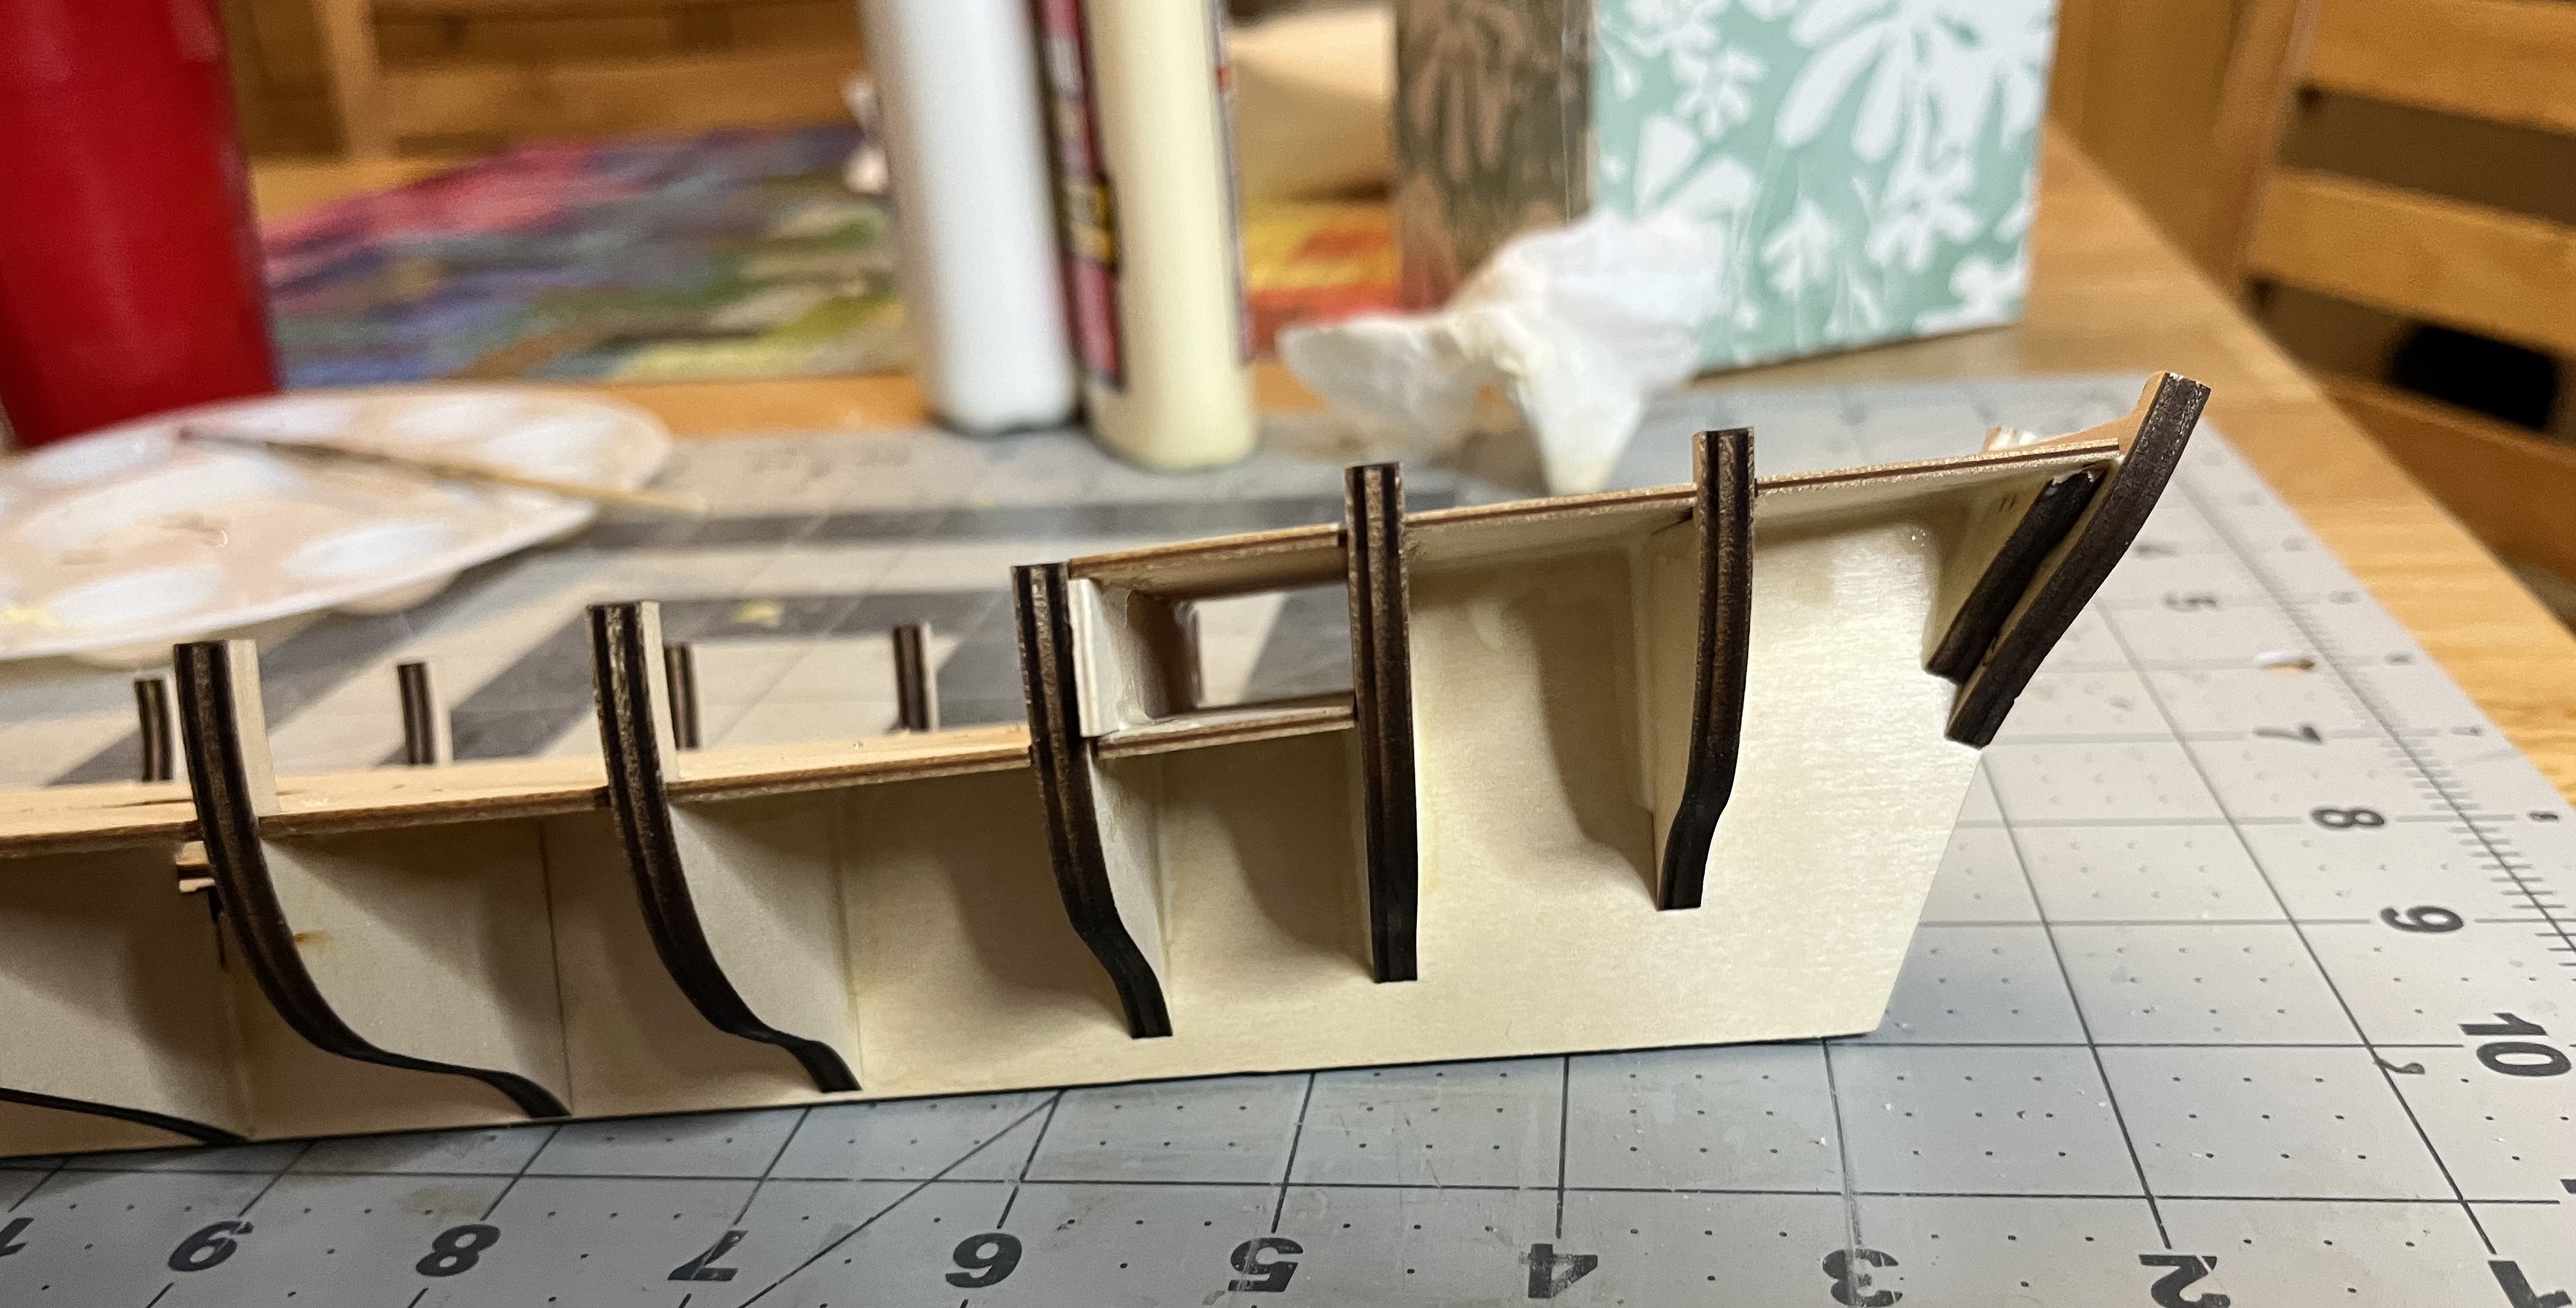
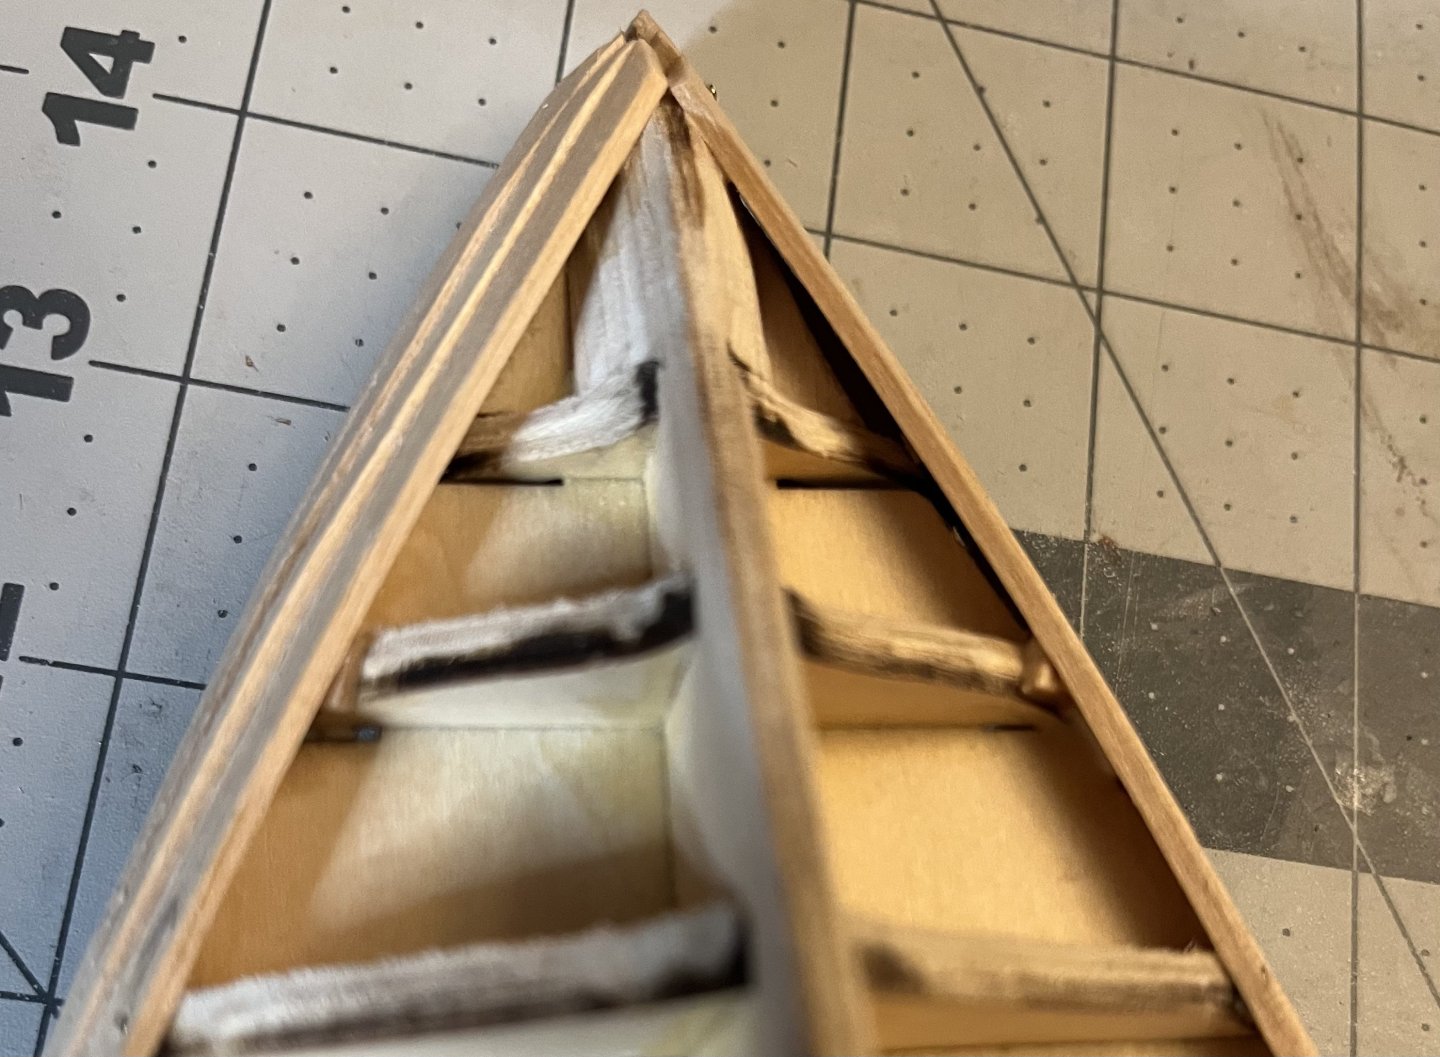
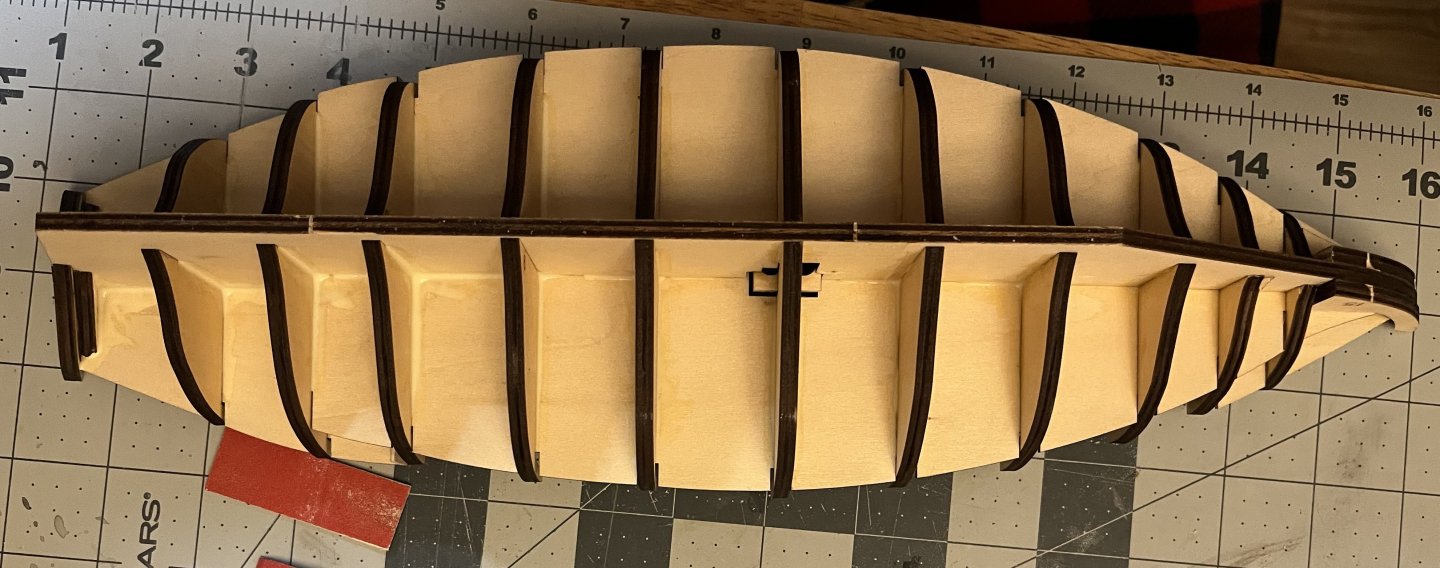
Time to fare the hull. Frame 10 seemed to be a bit short so I bulked it up a bit with some pieces of scrap from the plywood sheets. The shape of the bow is also a bit strange. With the added structure, I'm not exactly sure how much to take off. The bulked up part of the false keel doesn't line up with the forward bulkhead, so I will have to make a educated guess to get the right shape. The false keel and "actual" keel aren't quite the same shape either, so I will need to be careful with the planking to make sure there aren't any gaps. It is also tricky getting the shape of the false keel just right. I took a couple days to check and recheck the faring. I think I got it about as fared as I felt comfortable getting it to, without taking off too much wood. I'll touch it up as needed as I add planks.


- 65 replies
-
- 7
-
-
- sultan
- Artesania Latina
- (and 2 more)
-
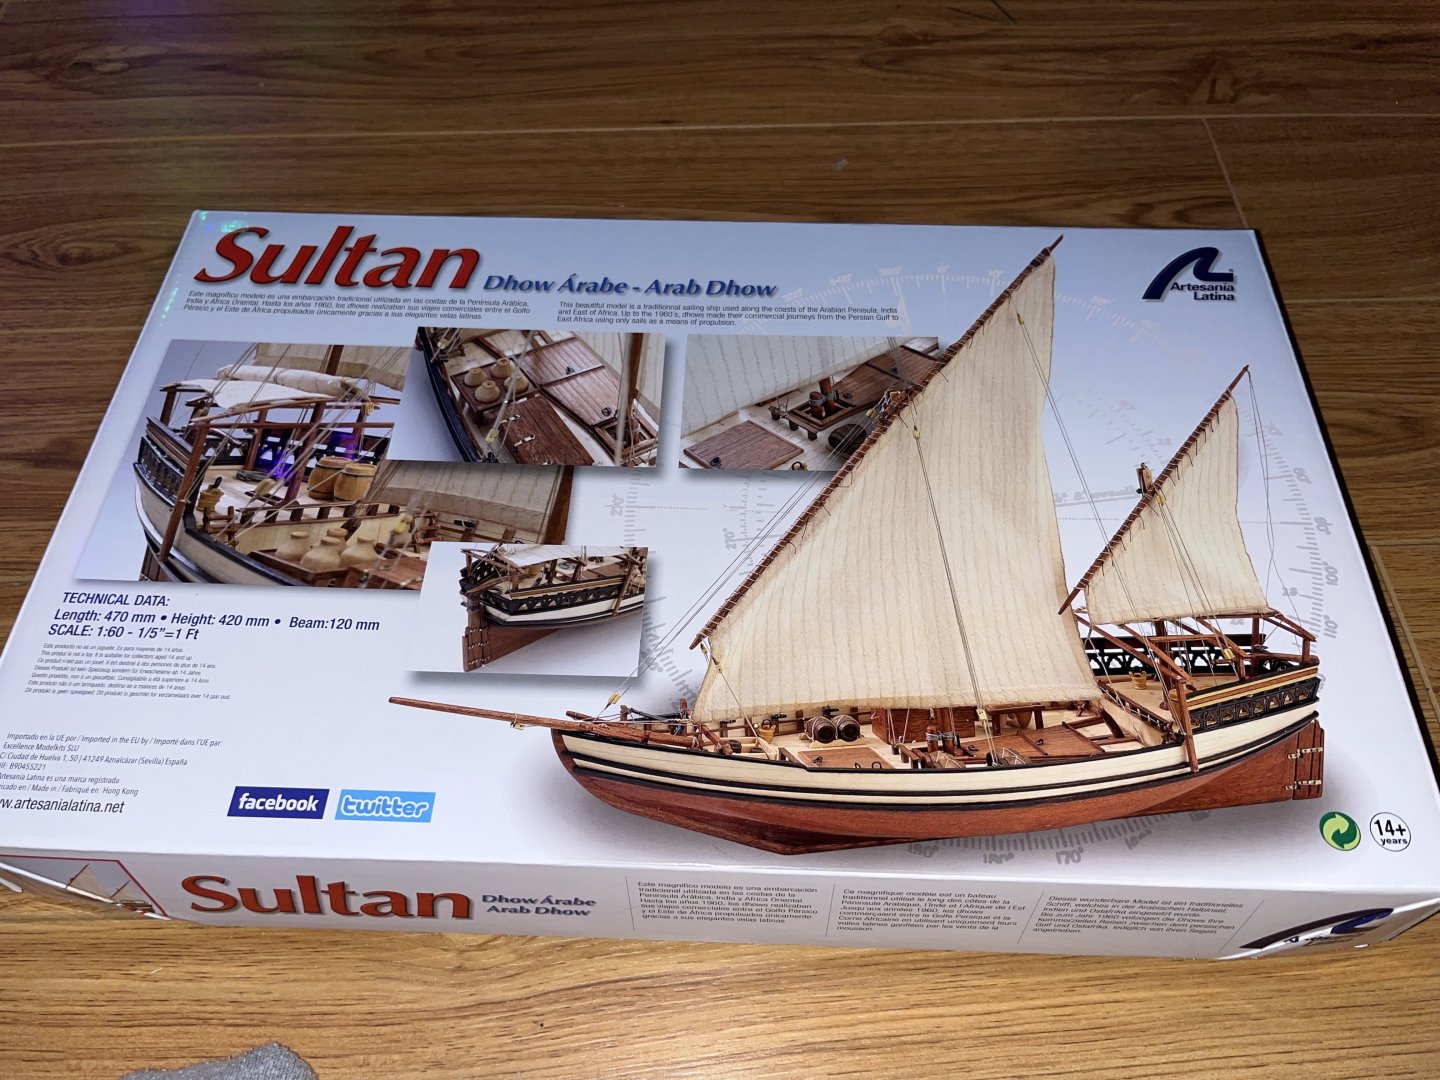
Sultan Arab Dhow - Artesanía Latina - 1/60
SiriusVoyager replied to SiriusVoyager's topic in REVIEWS: Model kits
Thank you for that list of resources. I do enjoy learning the history about what I am building so I will definitely look some of them up.- 4 replies
-
- 2
-
-
- Kit review
- Artesania Latina
- (and 2 more)
-
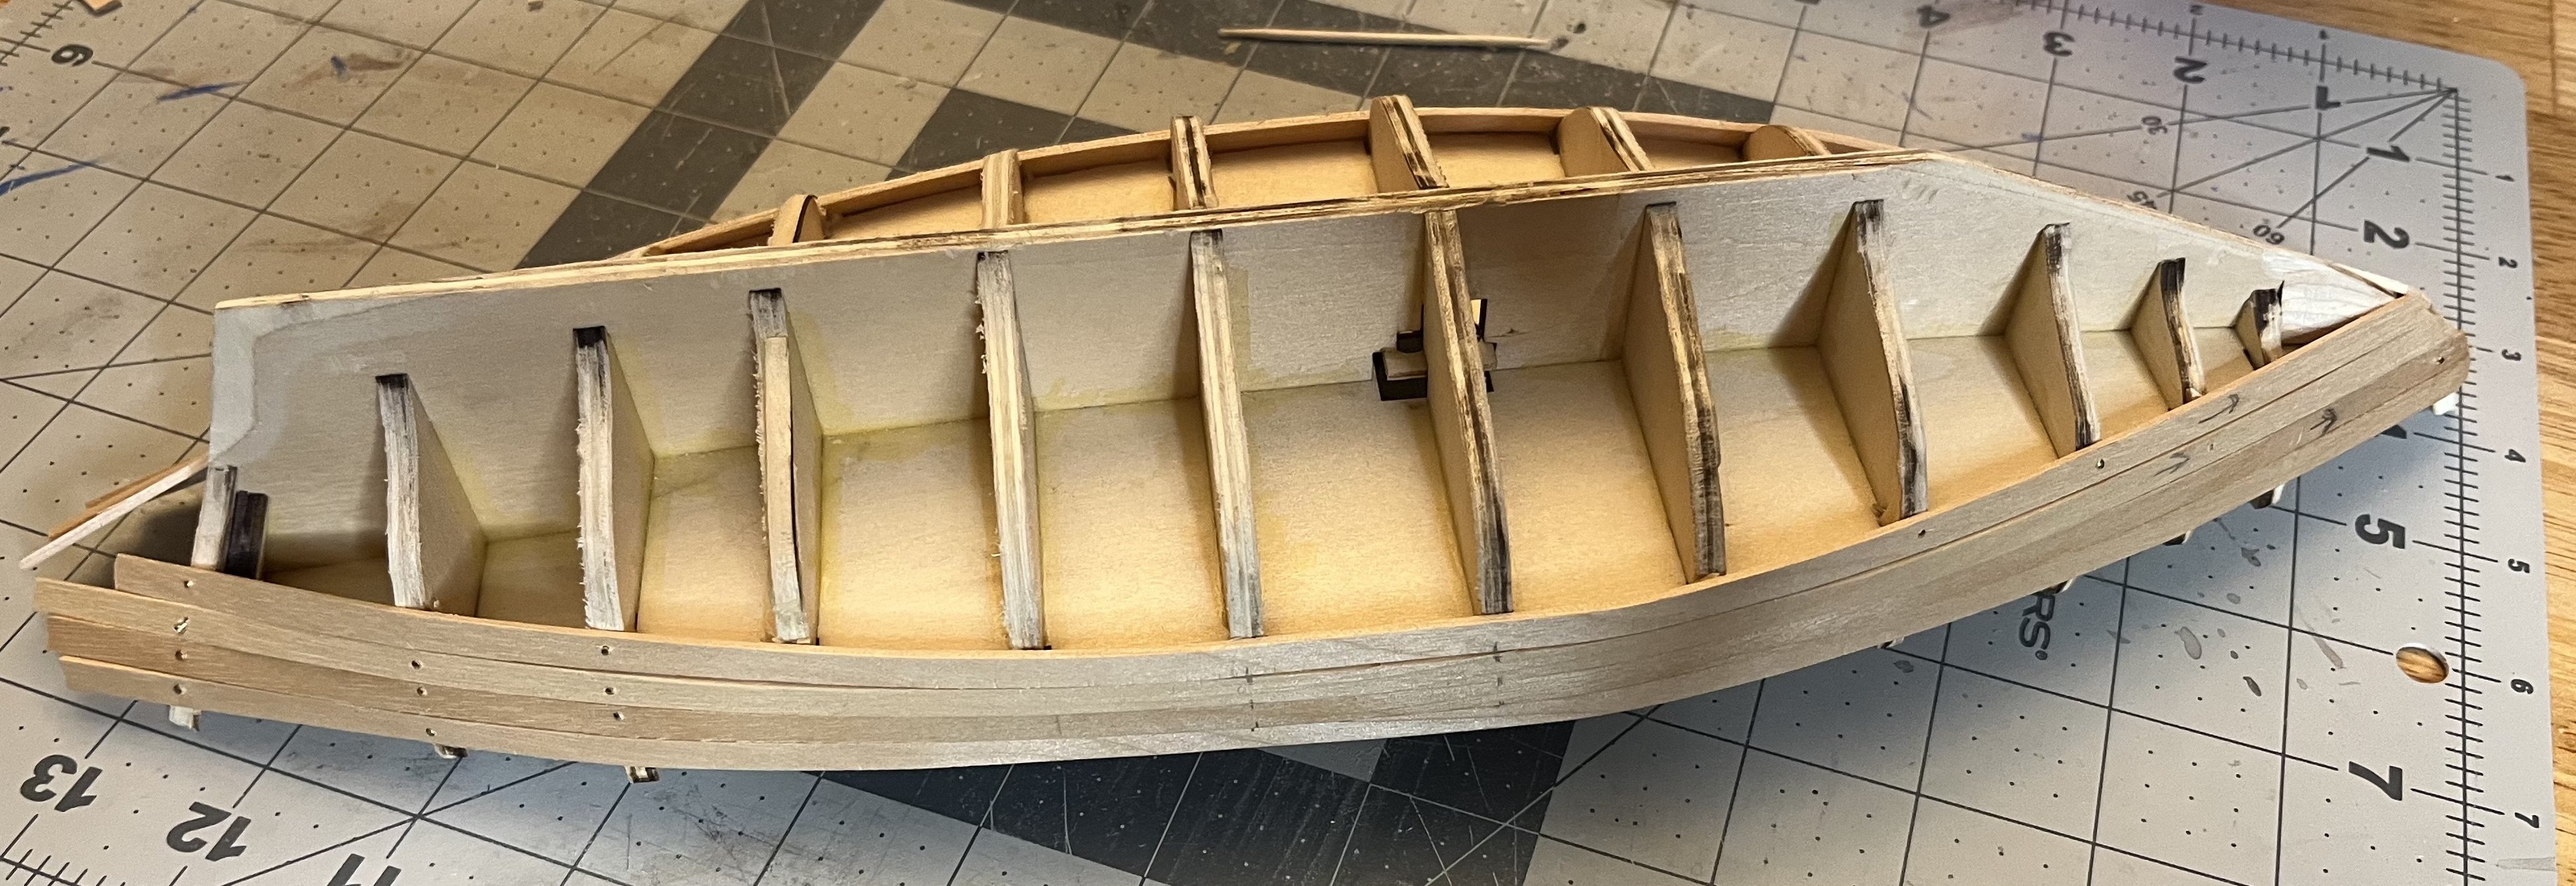
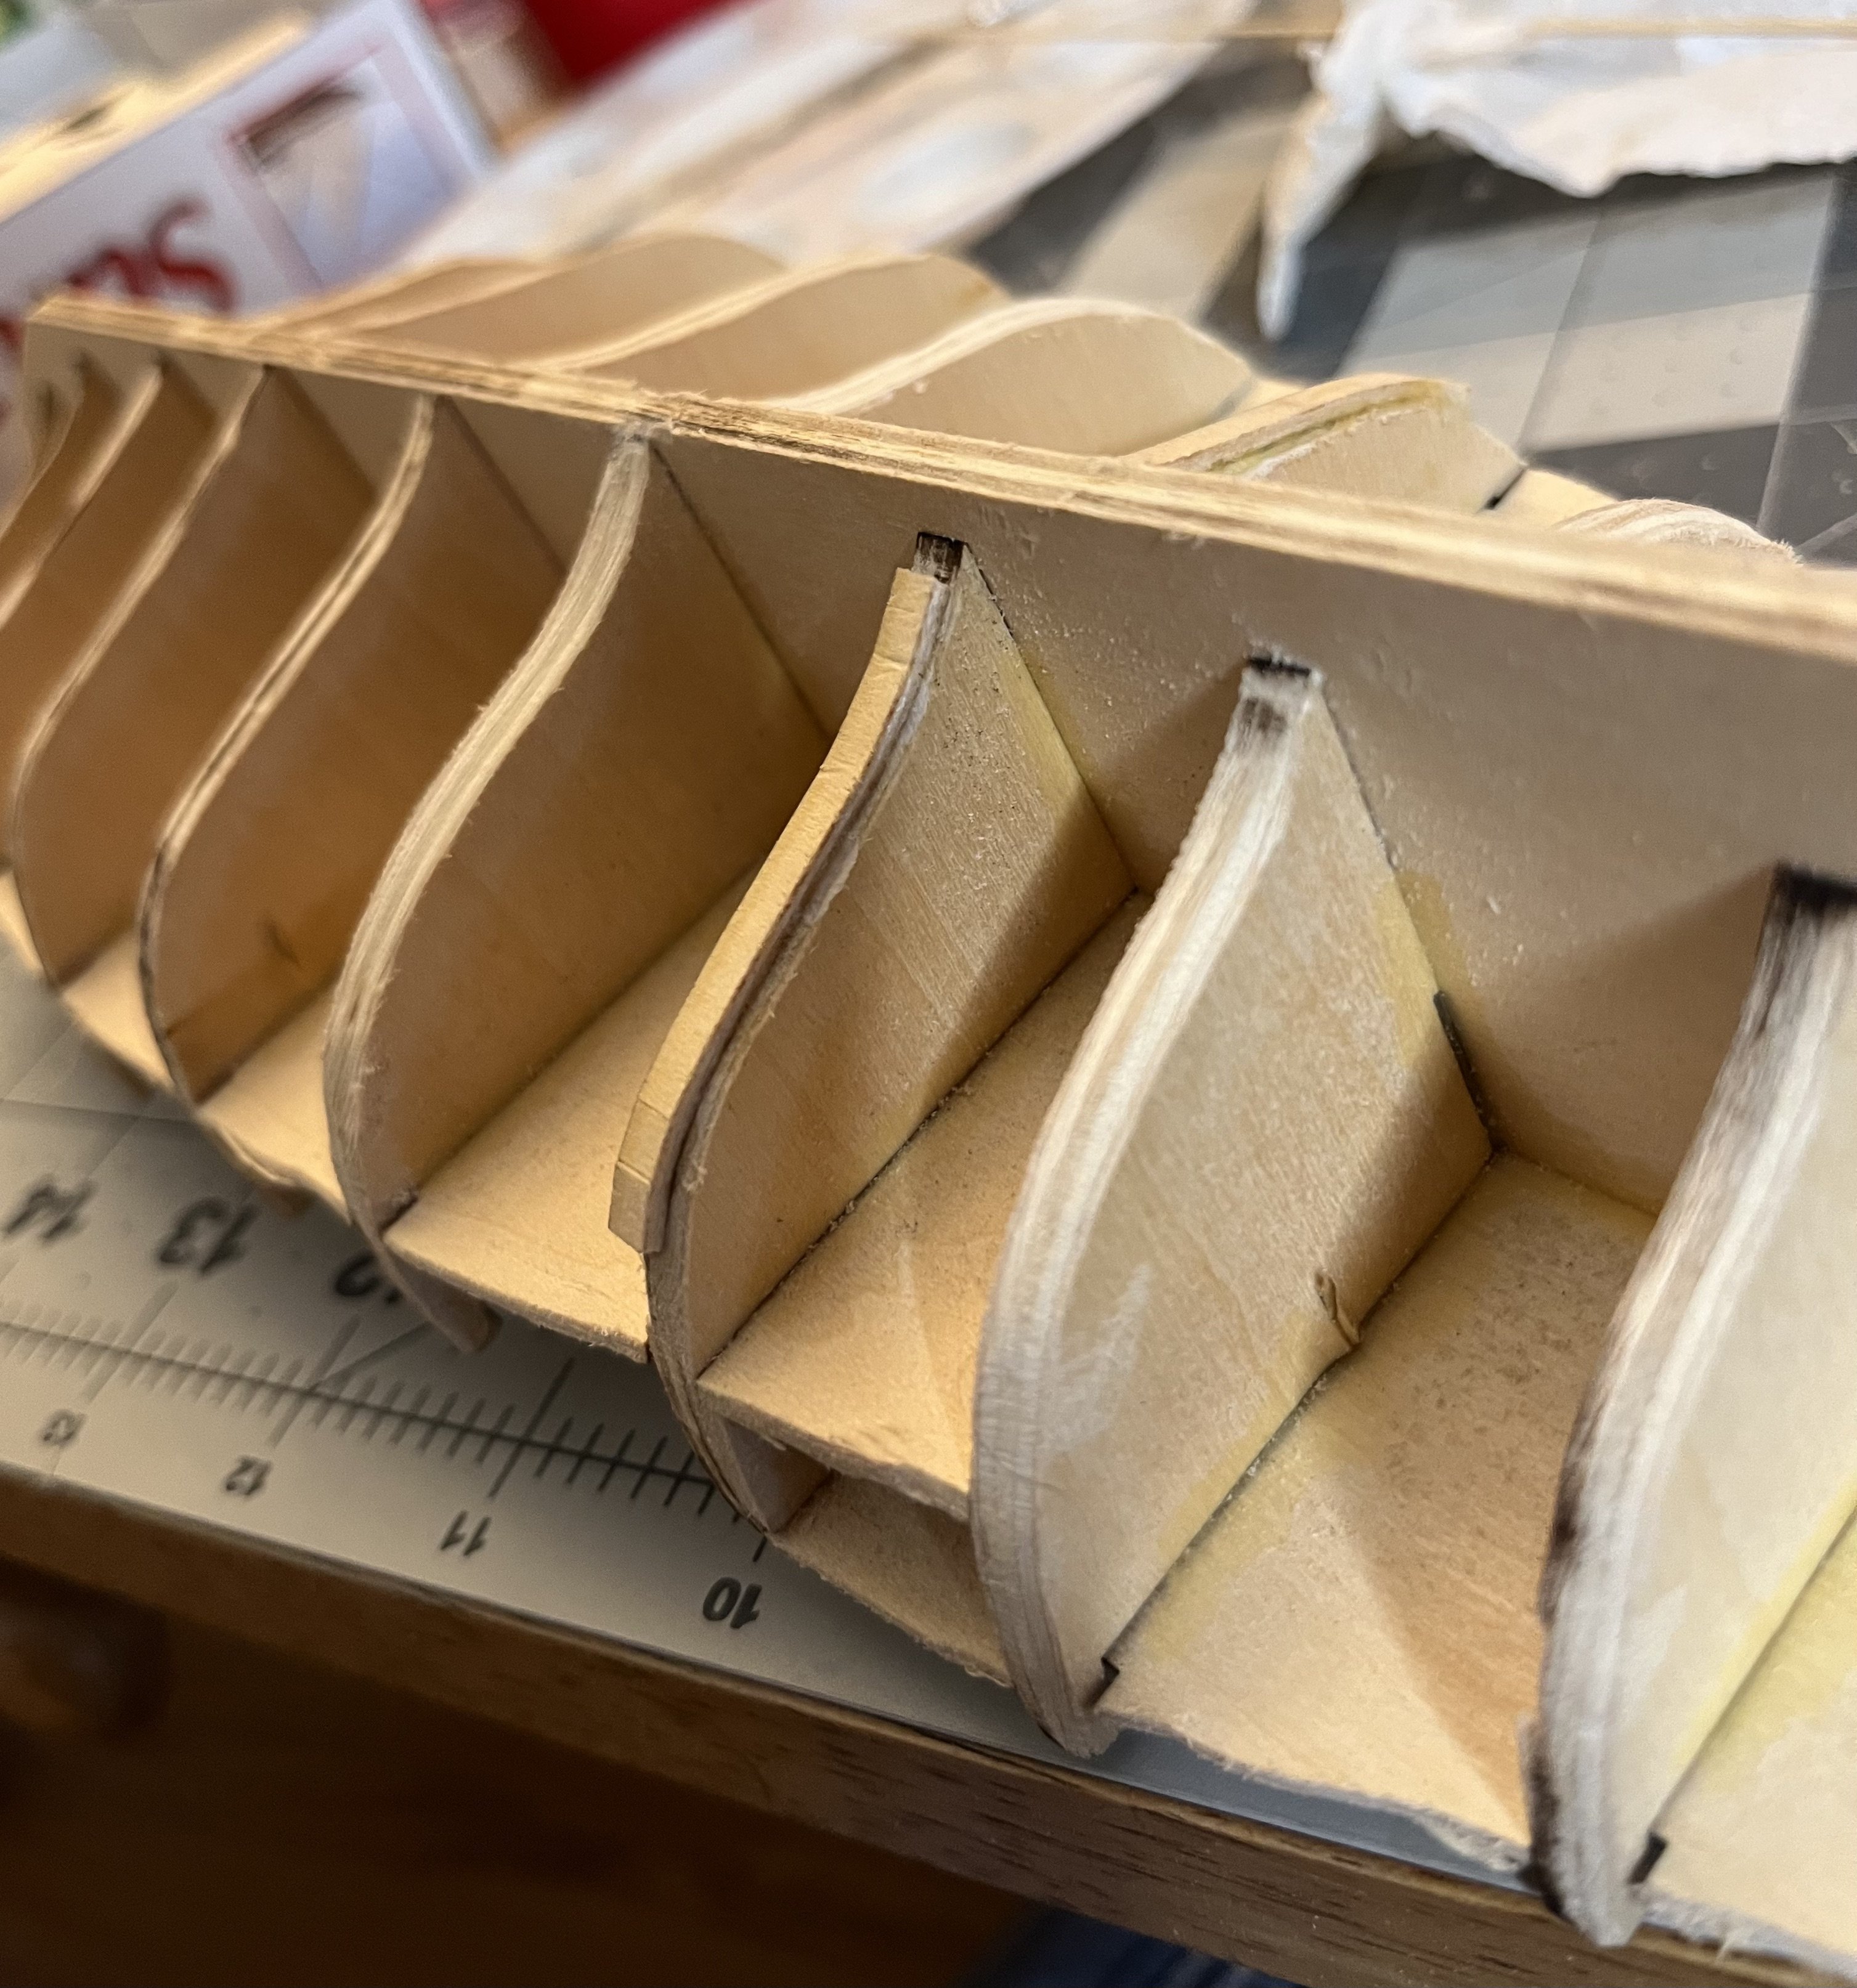
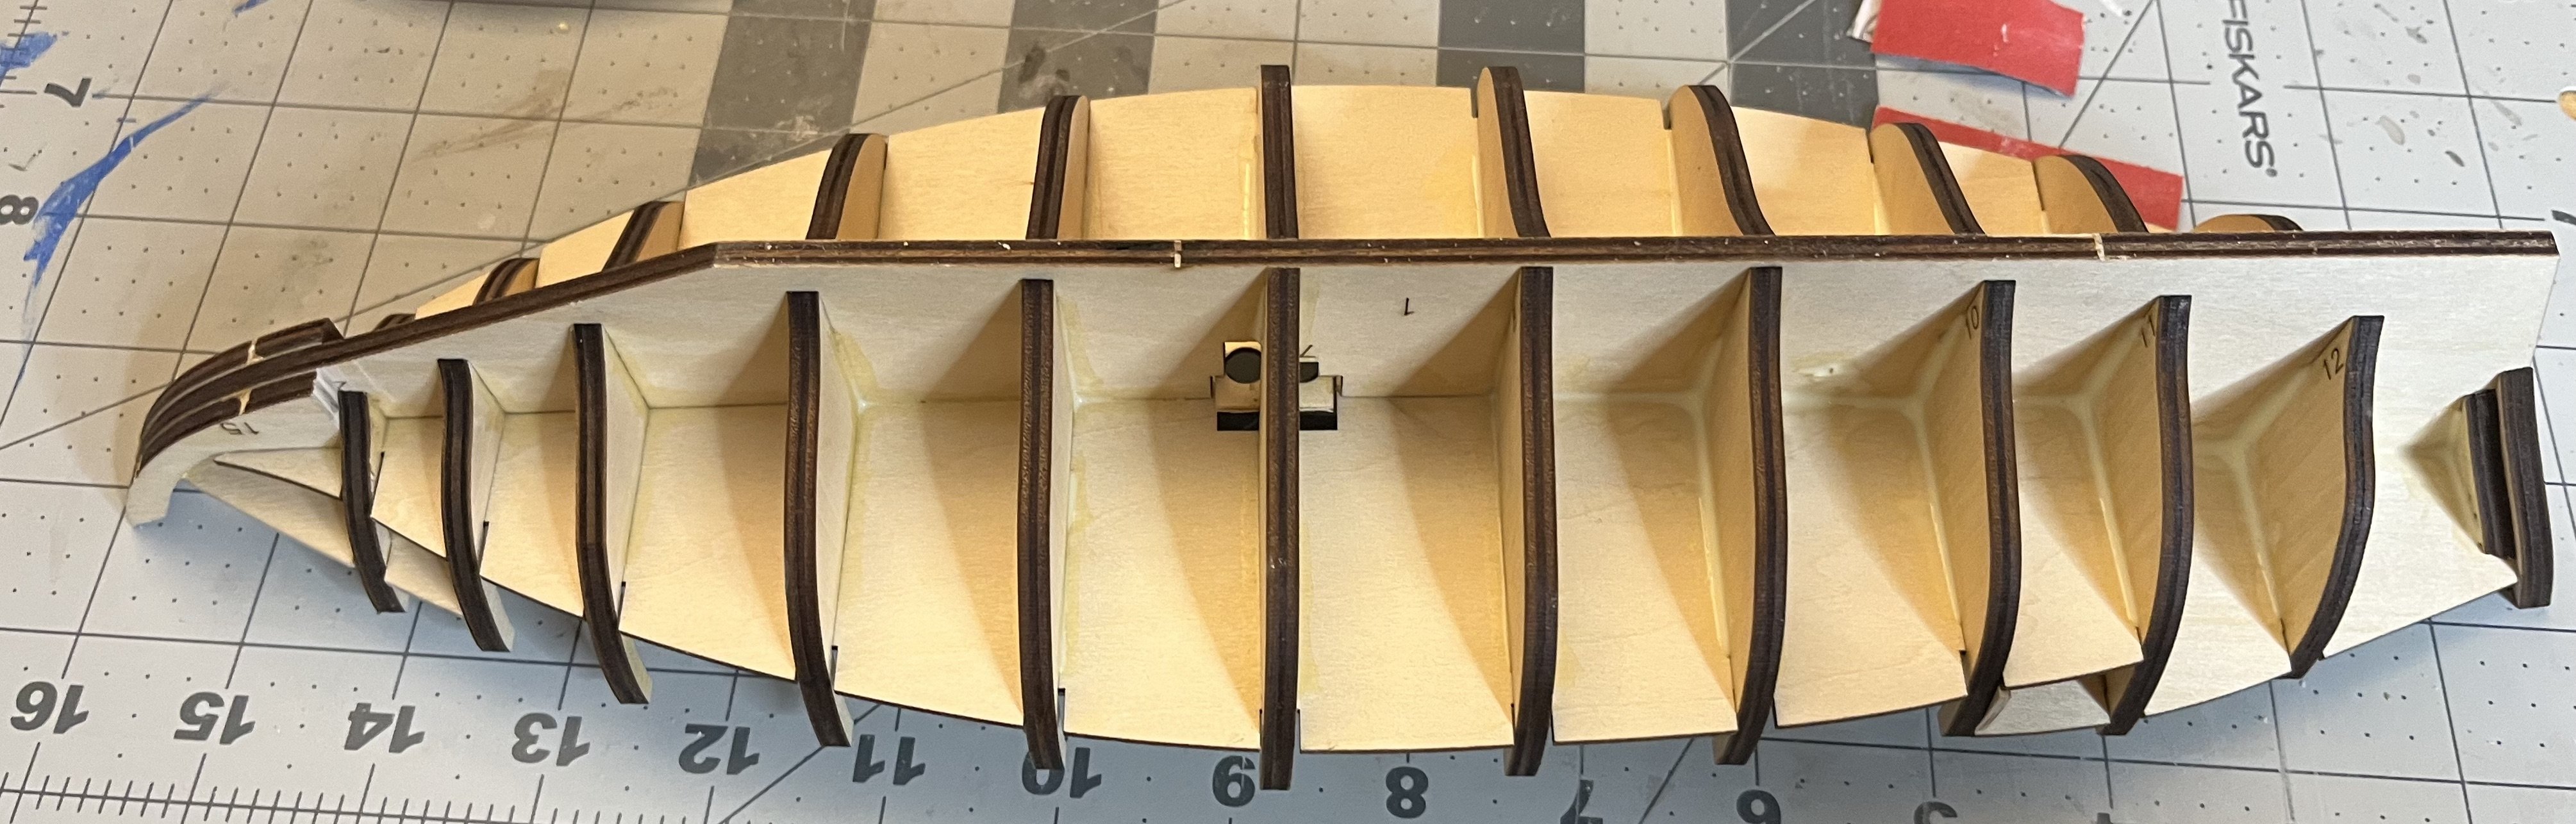
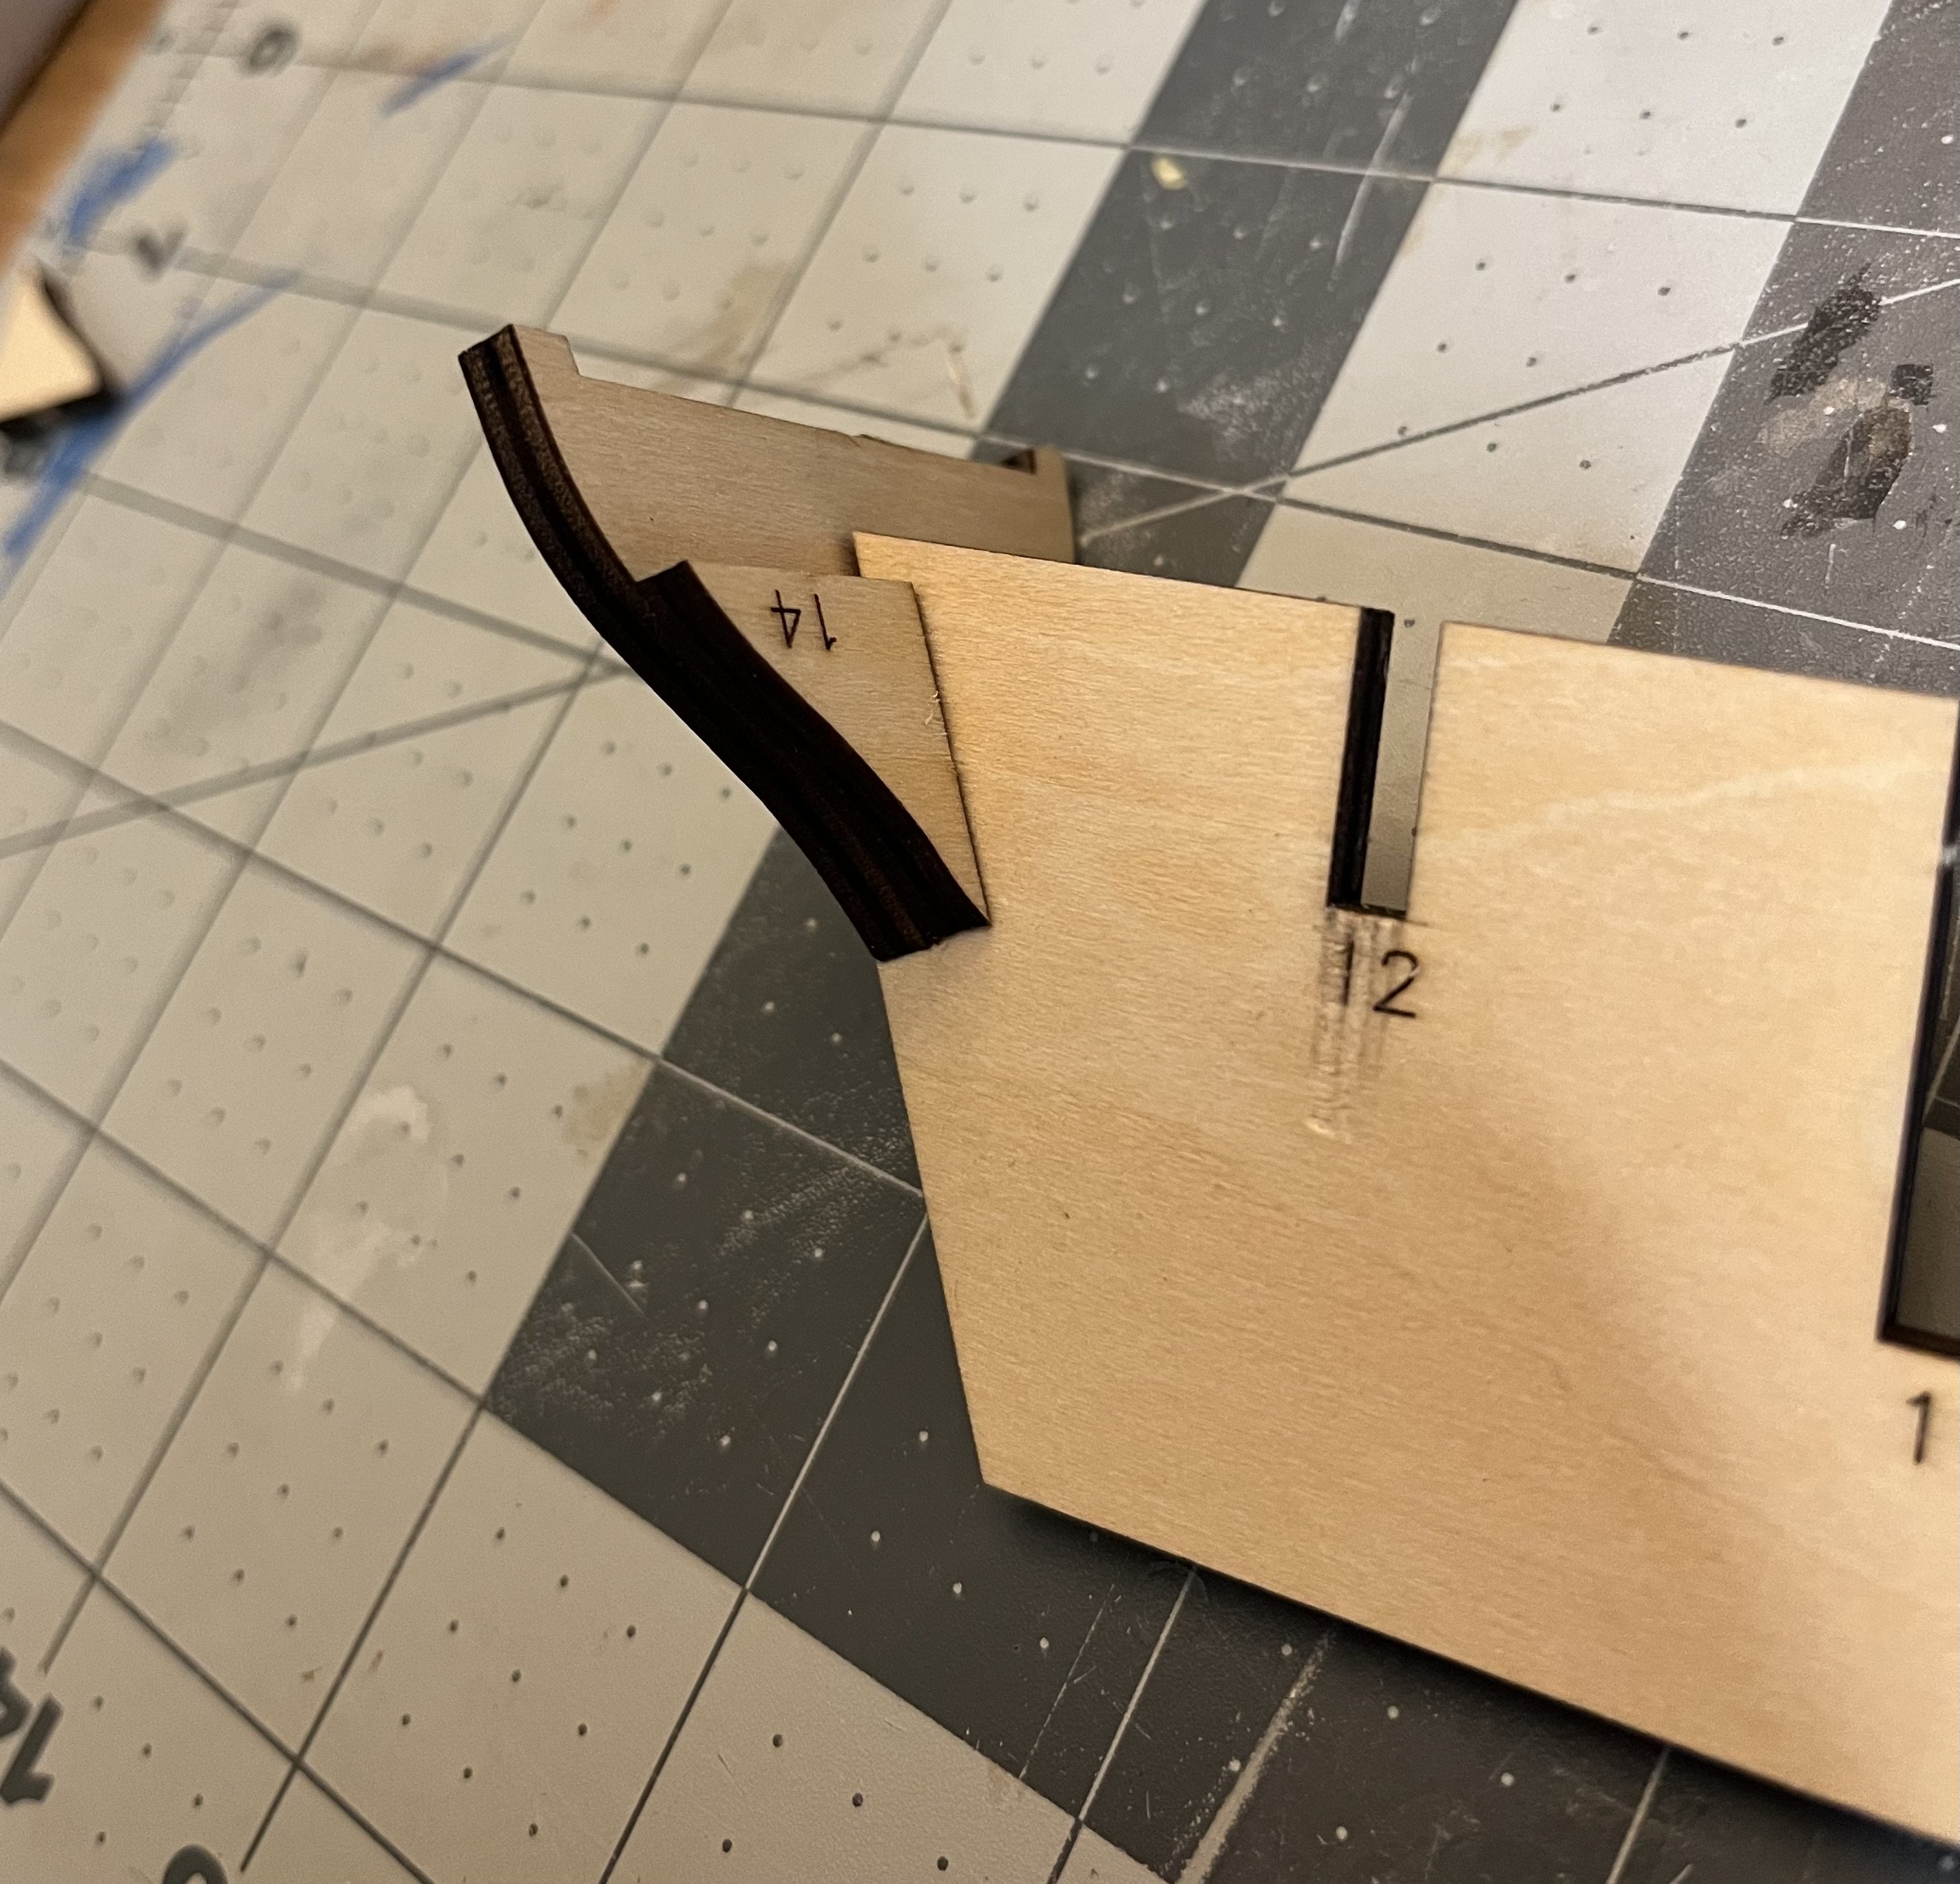
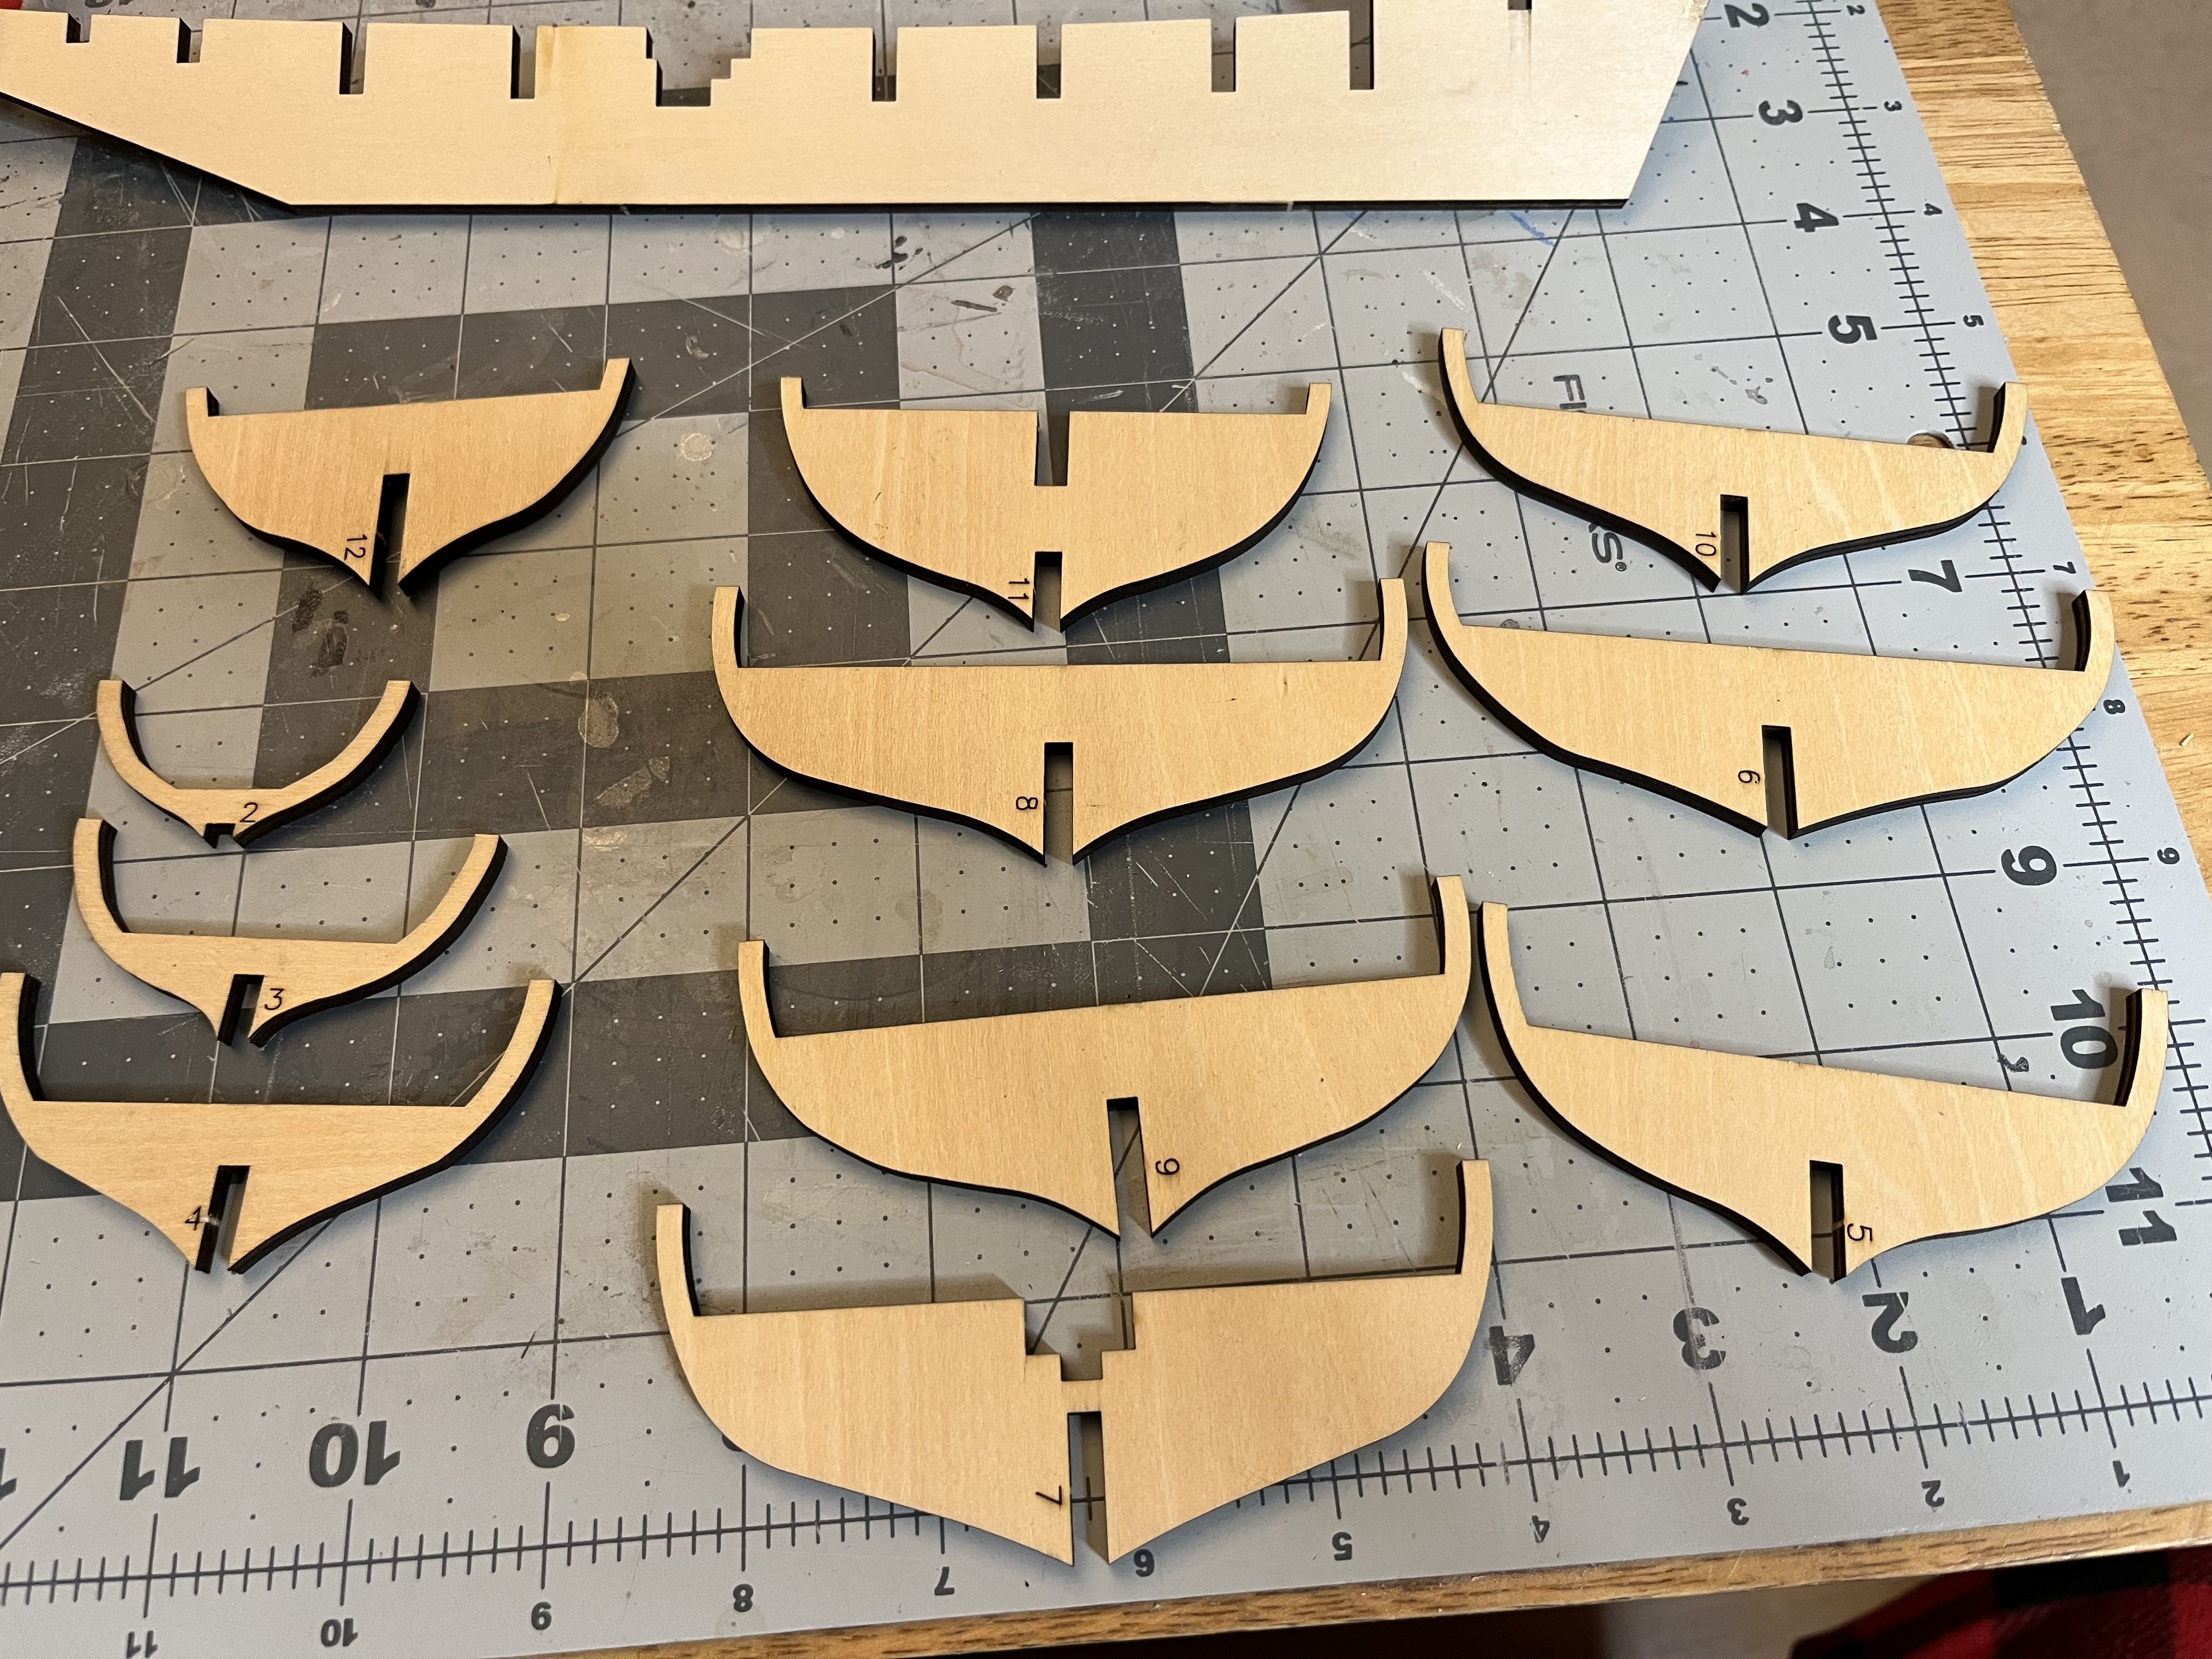
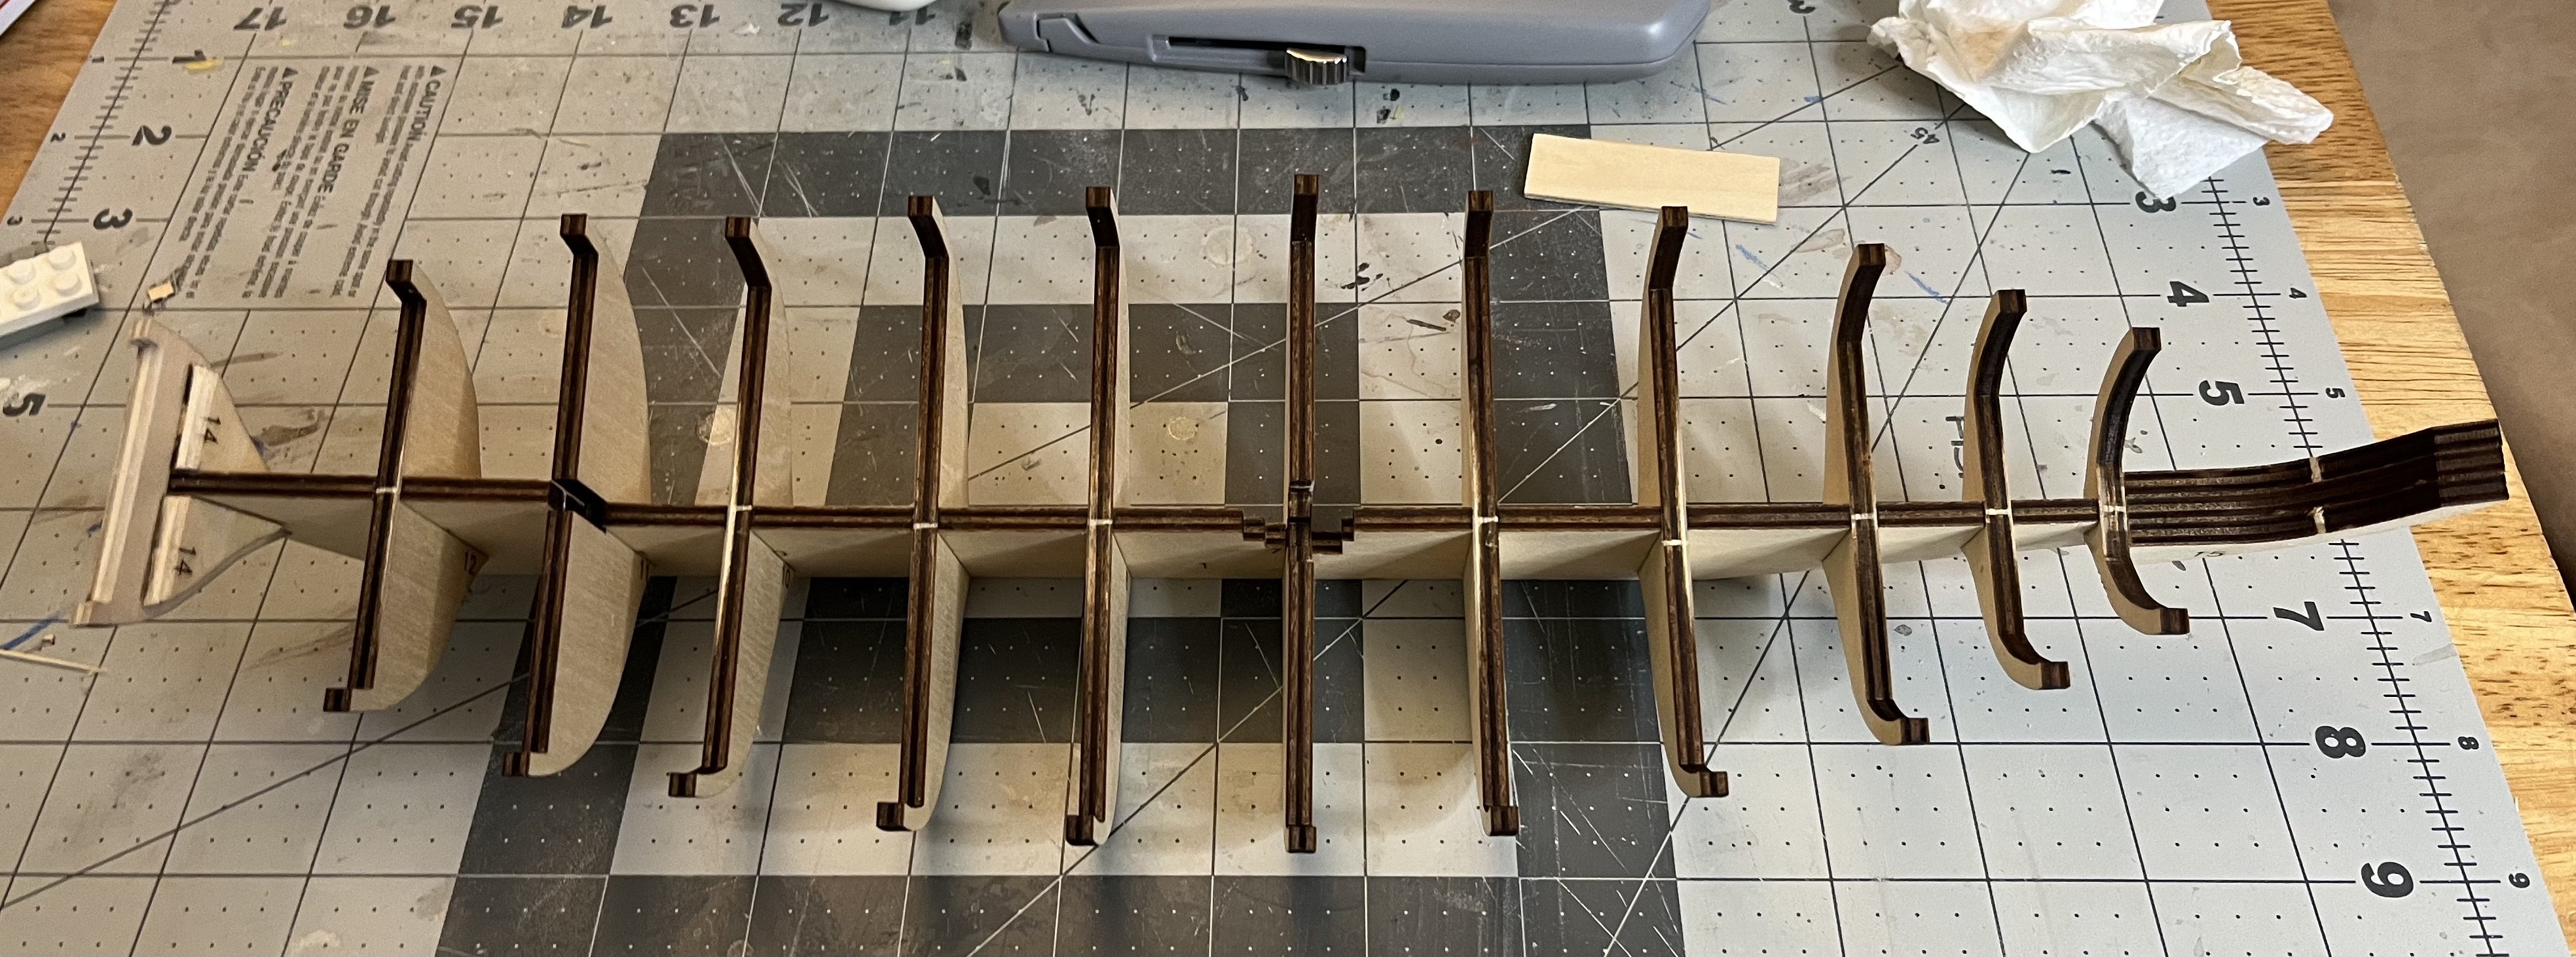
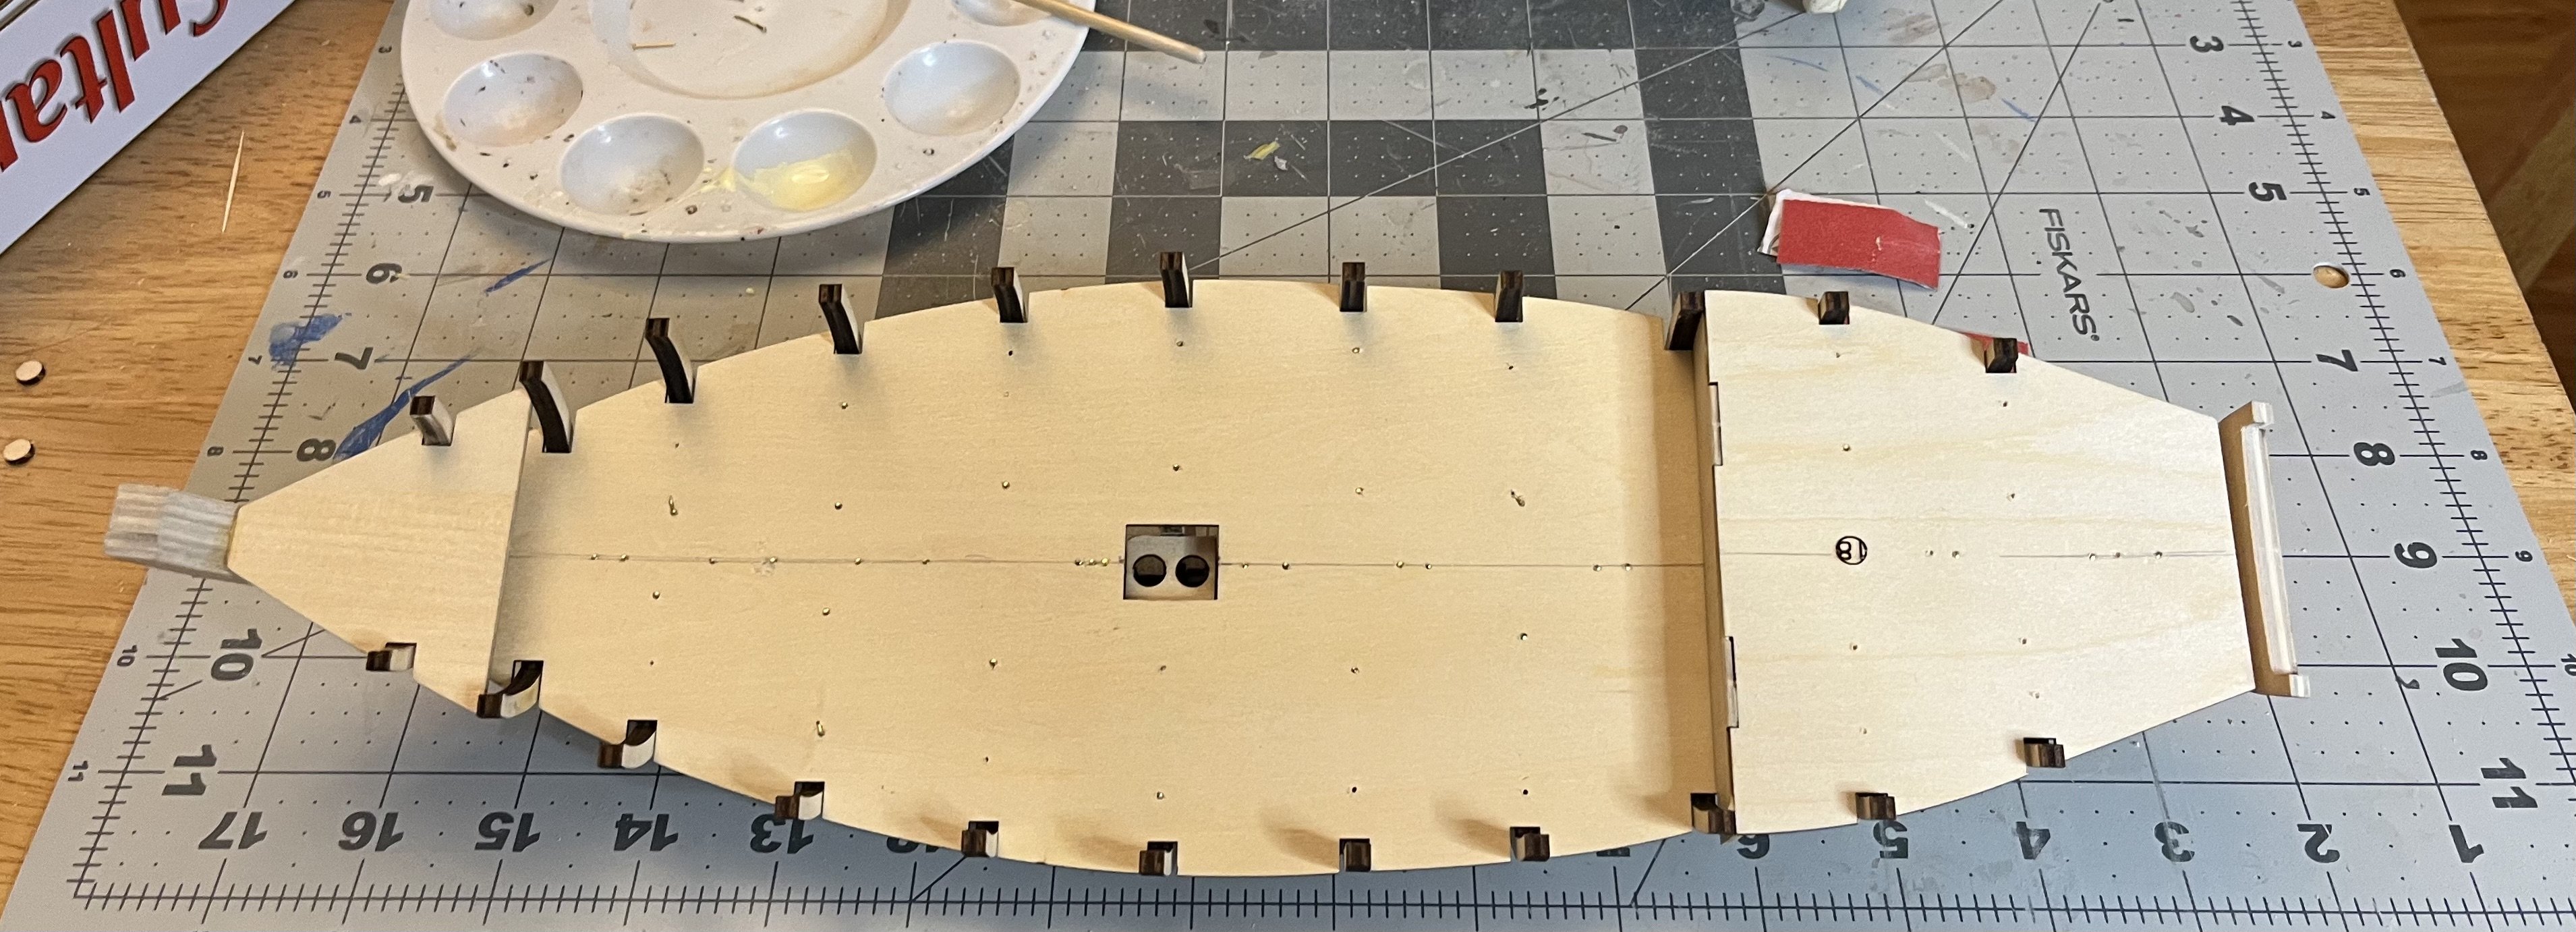
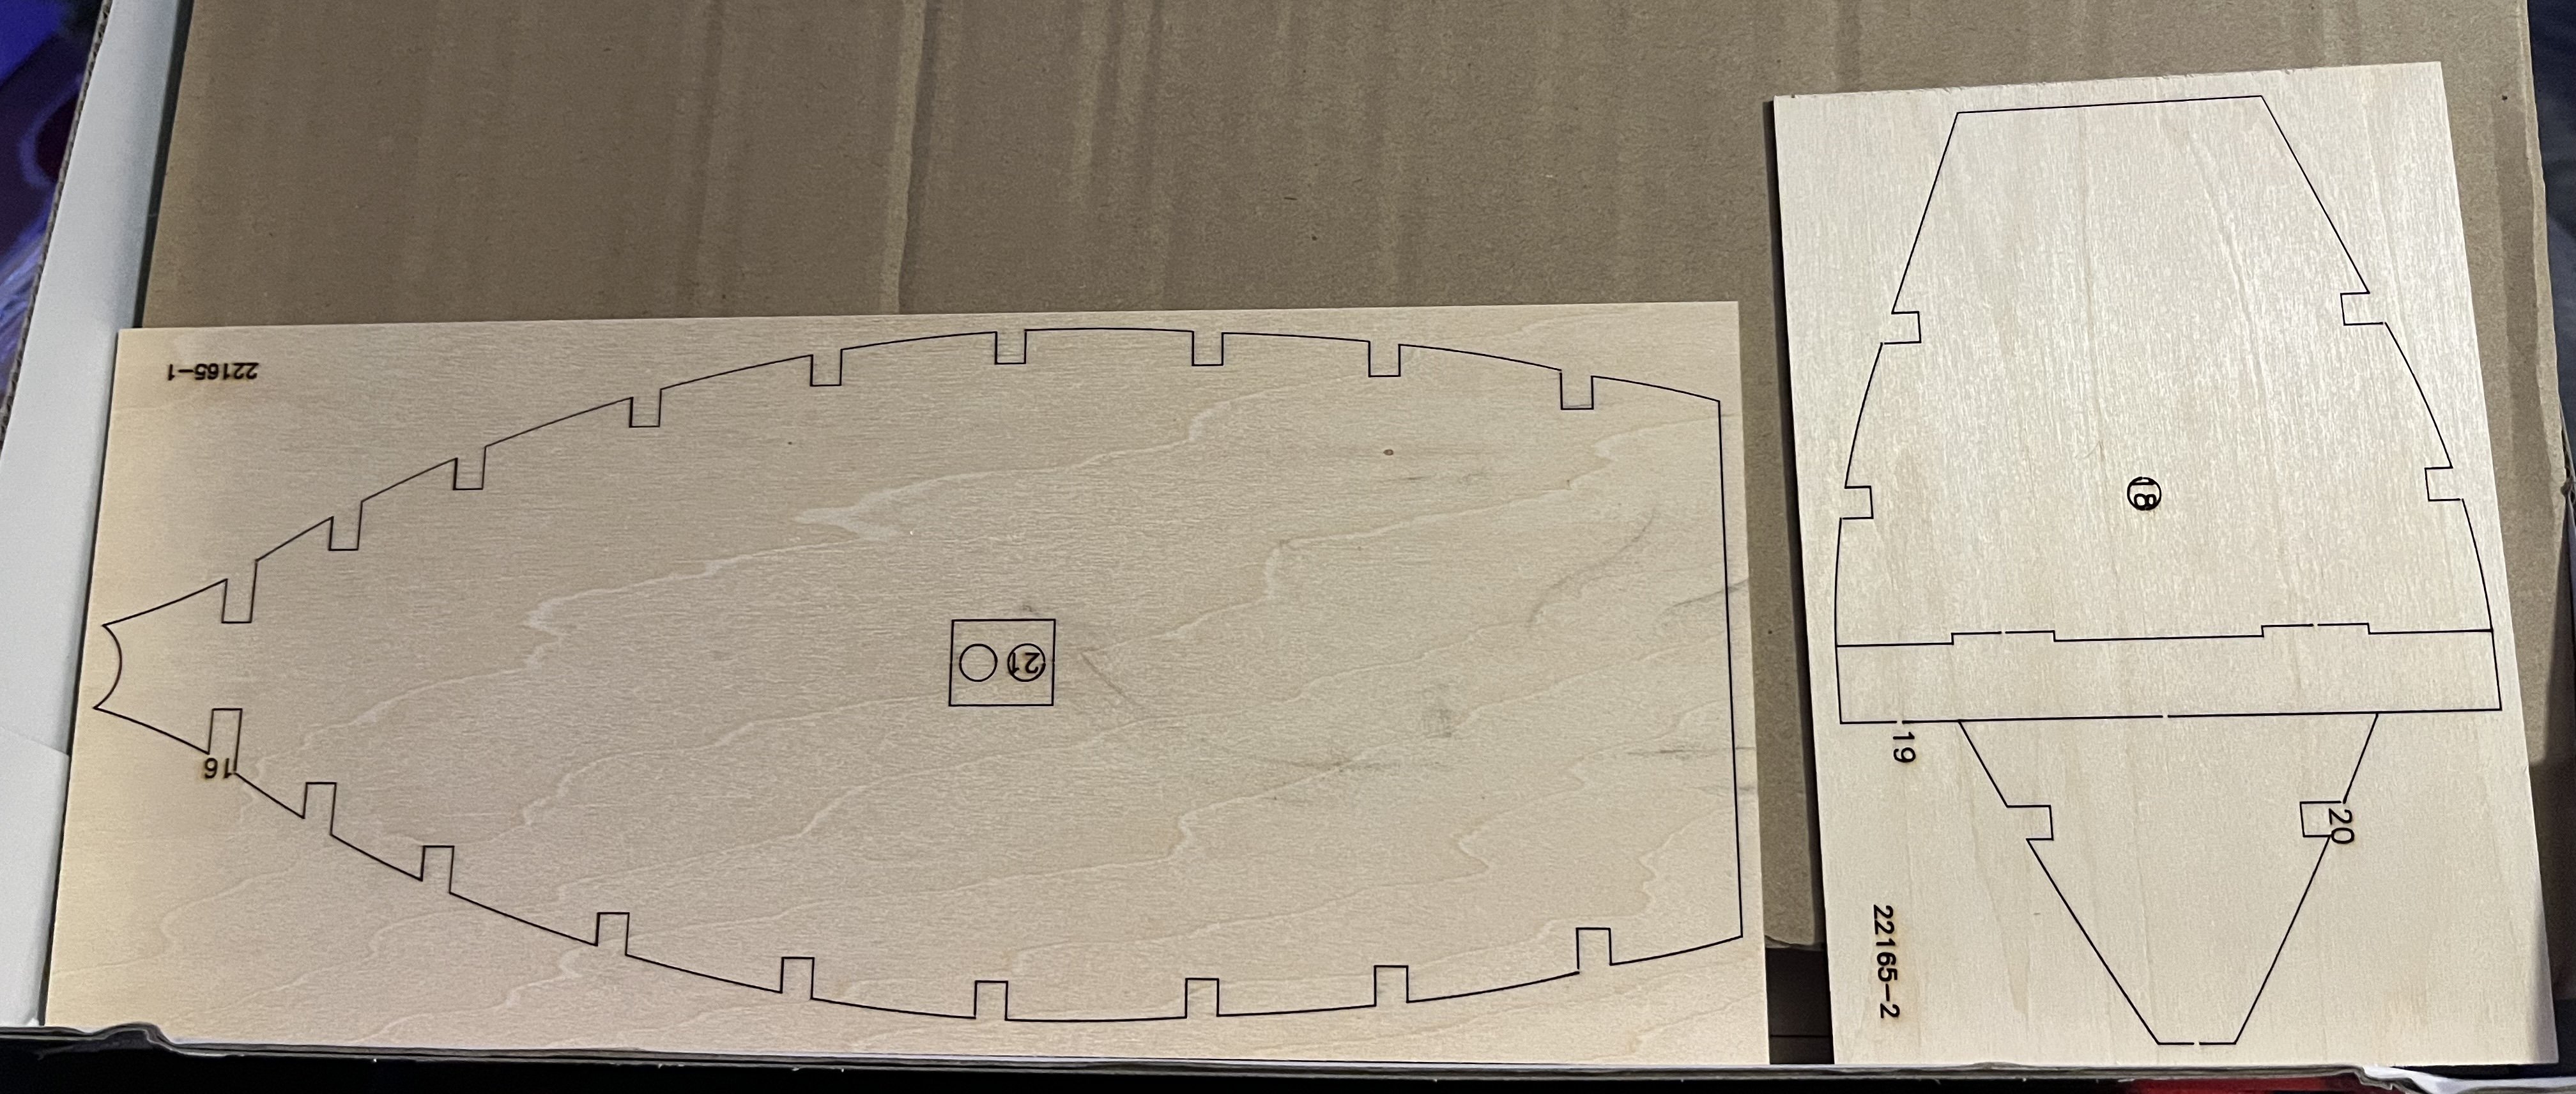
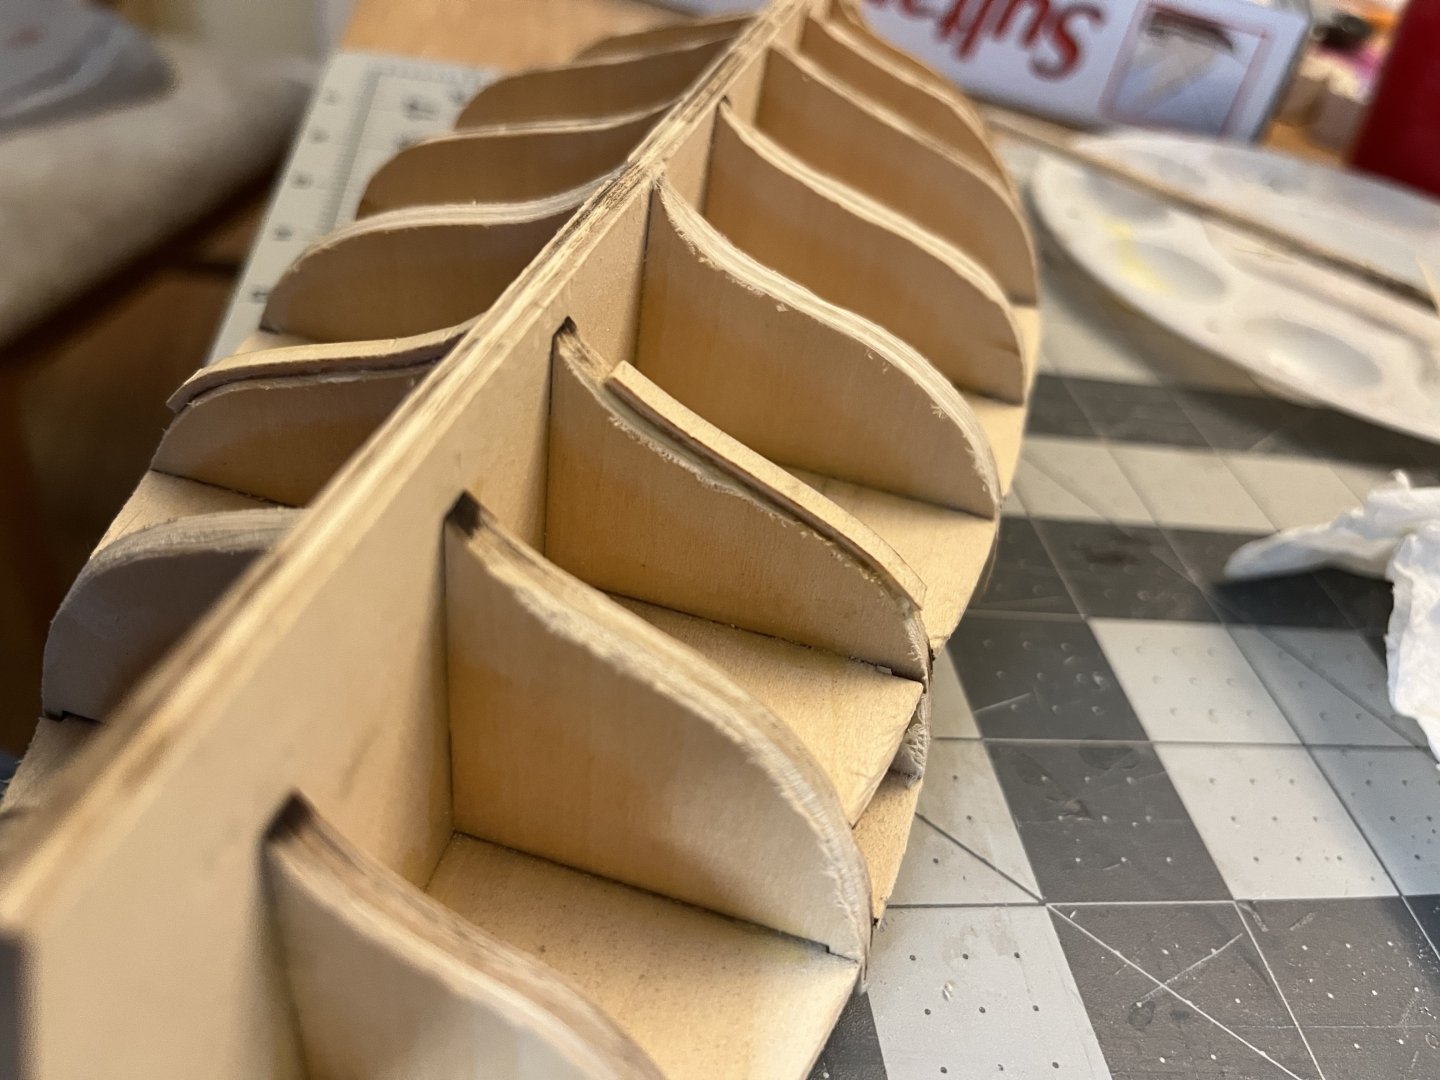
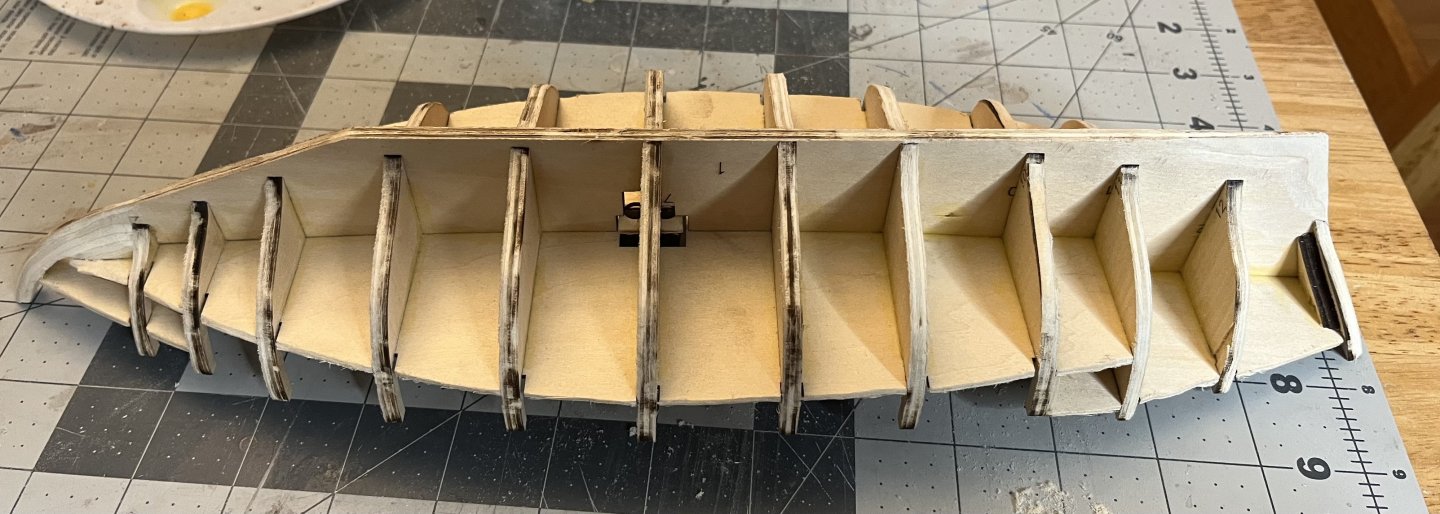
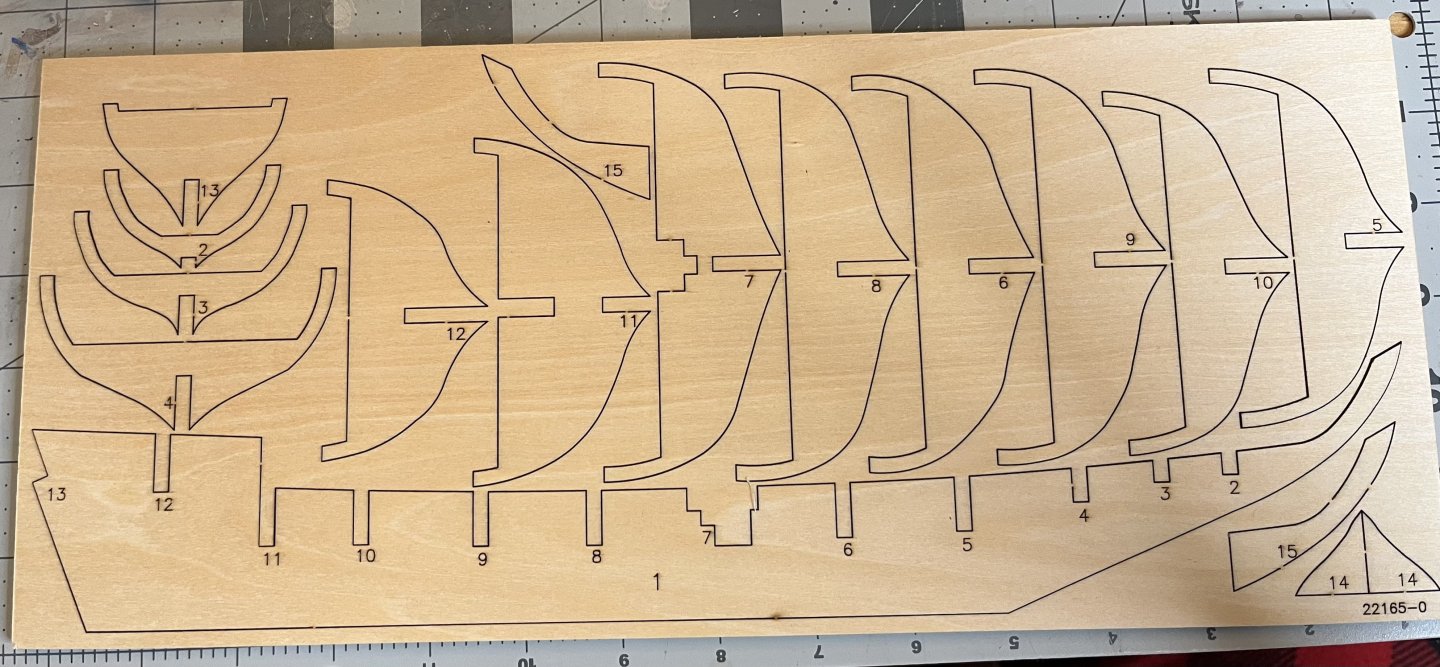
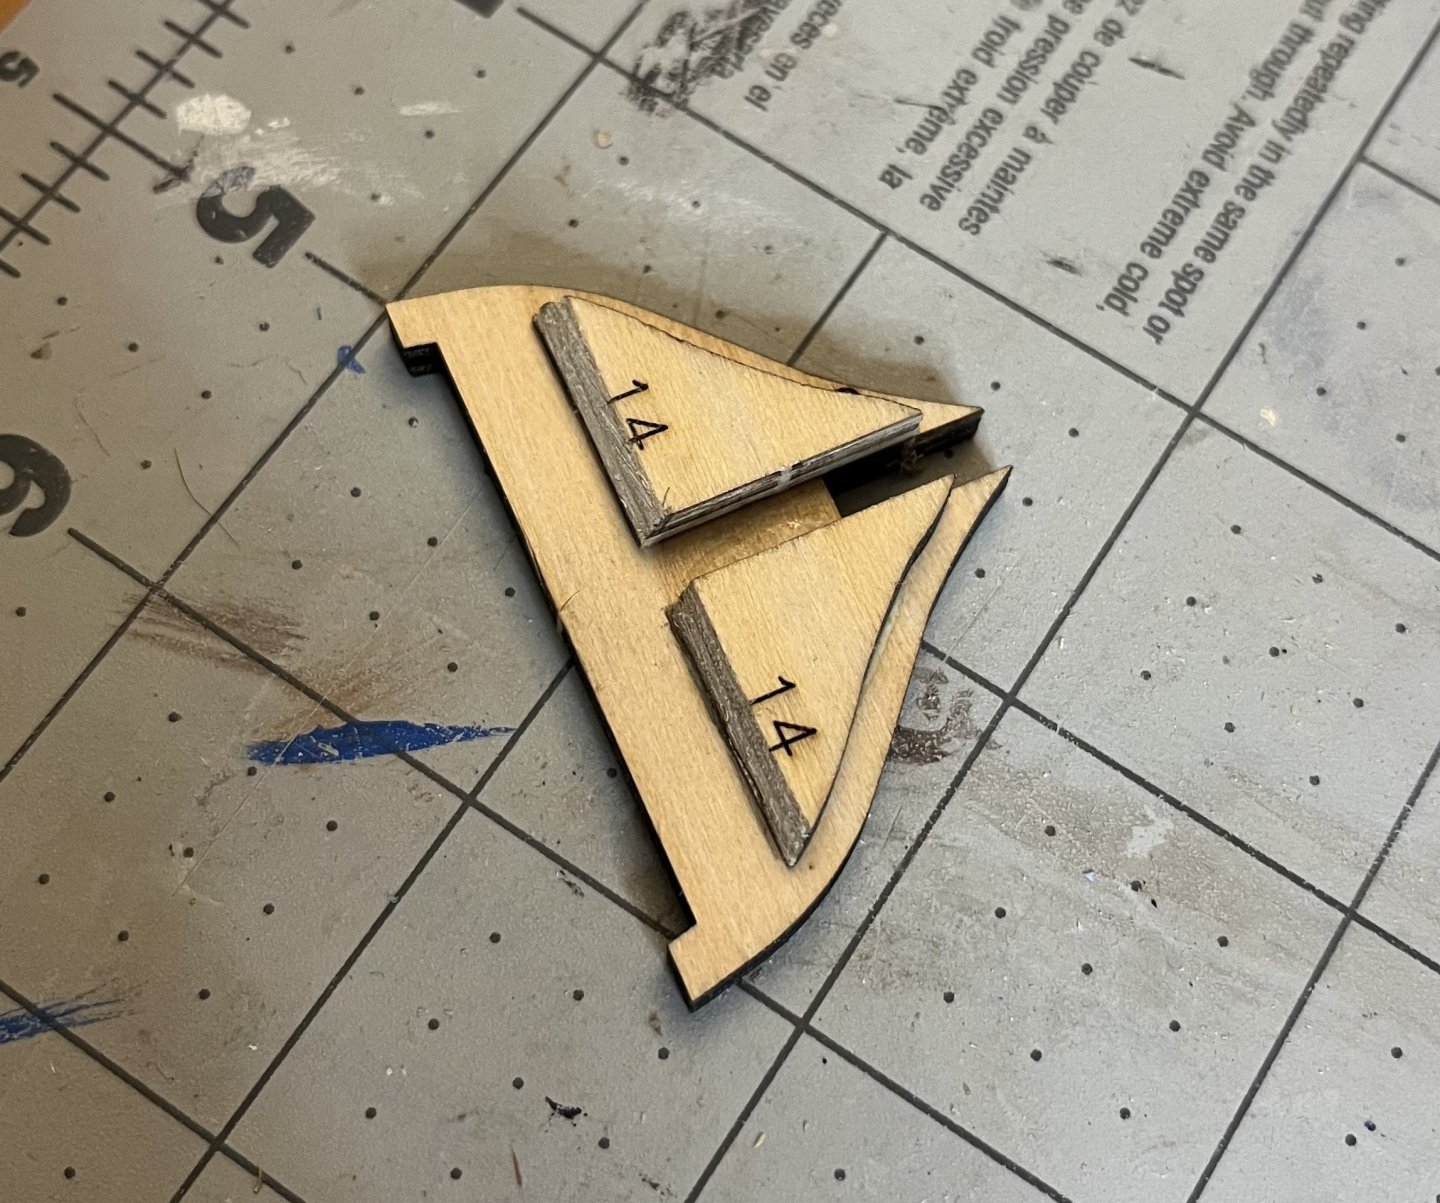
The dhow seems to be quite the important boat historically, however I haven't found a whole lot of information about how dhows are constructed. Most of the information about the dhow is about their importance to trade and the cultures that used them. The range of the dhow extended from the Red Sea to the the Indian subcontinent. According to Wikipedia, Dhows likely originated in India 1400 years ago, but are now more common in the Red Sea with most being built in Yemen. A kit review can be found here. As far and the build, the kit starts in a pretty standard way. The false keel bulkheads seem to be very precise in their shape and cutting. In previous builds I would remove the char from every edge. That resulted in bulkheads that were loose and needed to be carefully aligned. By not removing the char, the bulkheads fit quite well and everything was mostly square. Two bulkheads, 2 and 8 needed a little adjustment to square up. The stern bulkhead, number 13, is supposed to have two support pieces added. As they are shaped, it appears that they should line up with the stern bulkhead's lower edge. The problem with that is that they don't line up with the false keel. I lined up the the support pieces so that the false deck will sit on them and beveled the edges so that they would be level. The instructions in the next steps show that the supports will line up with the bulkhead after faring, so I will see how this lines up. It seems like an excessive amount of wood to remove. Stem supports were also added. Basic deck pieces were added and nailed down. The nails are necessary and useful because there is a slight concavity to the deck. Once the false deck pieces are in place, the instructions call for gluing along every edge to secure everything in place. The next step will be faring the hull after the glue dries.


- 65 replies
-
- 8
-
-
- sultan
- Artesania Latina
- (and 2 more)
-
The Dhow looks great! I’m about to start mine very soon. I appreciate all the pitfalls with the instructions that you have pointed out here.
-
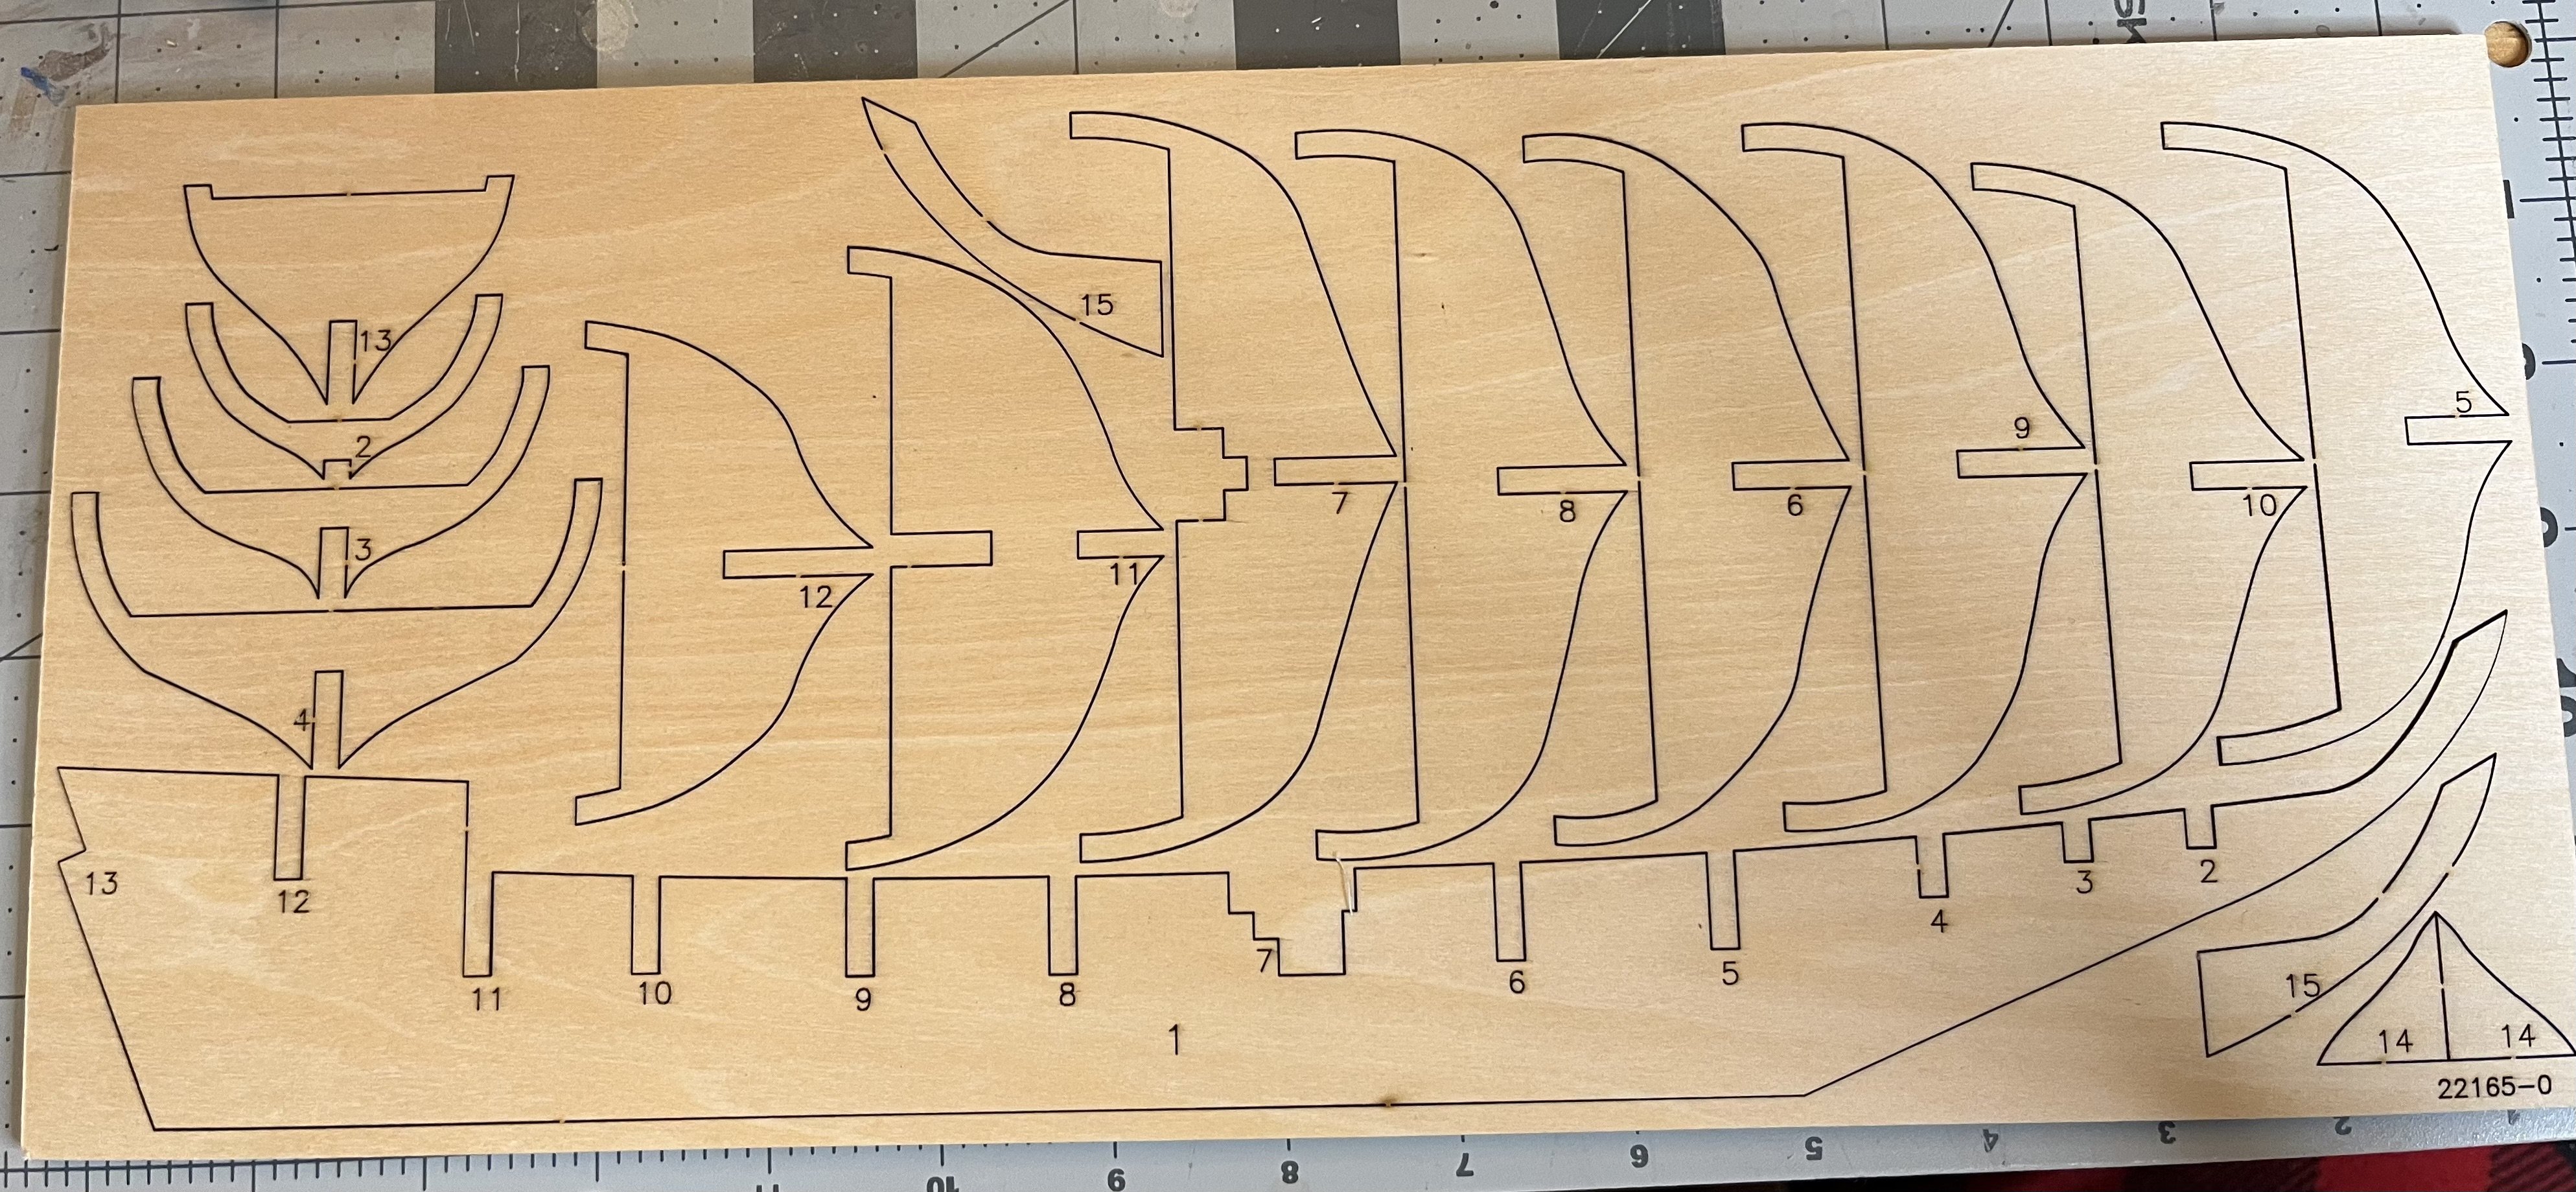
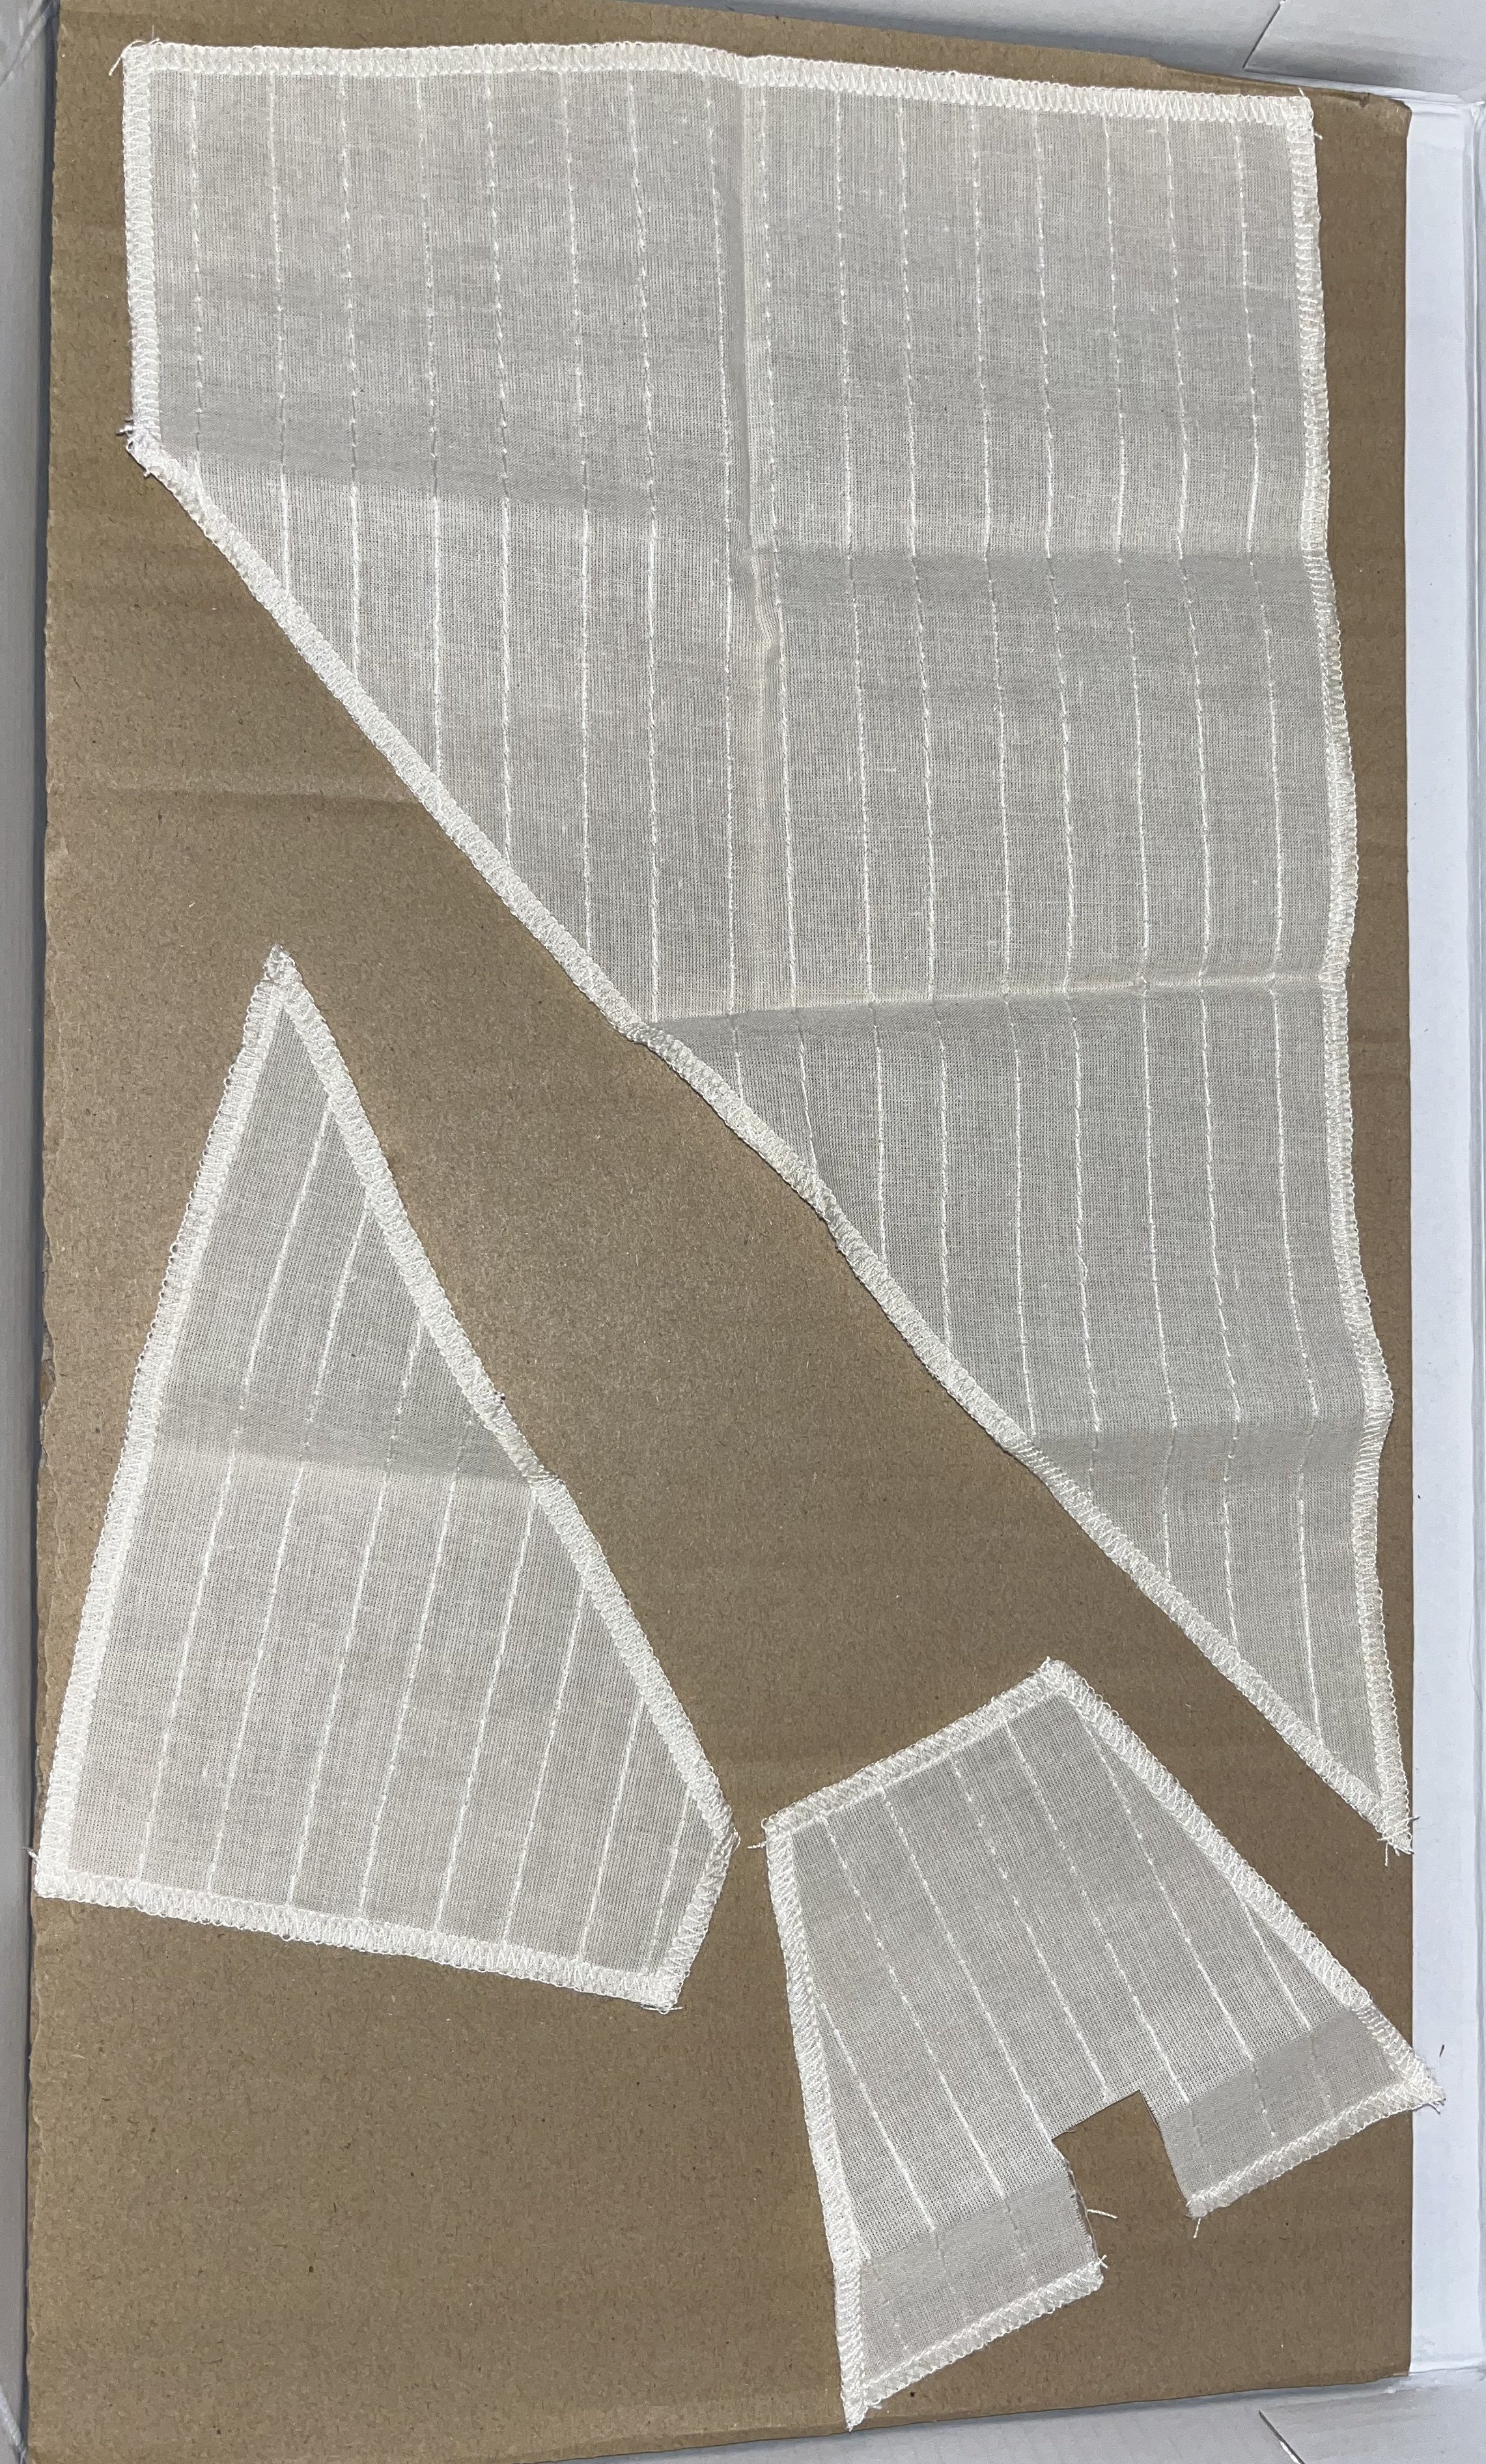
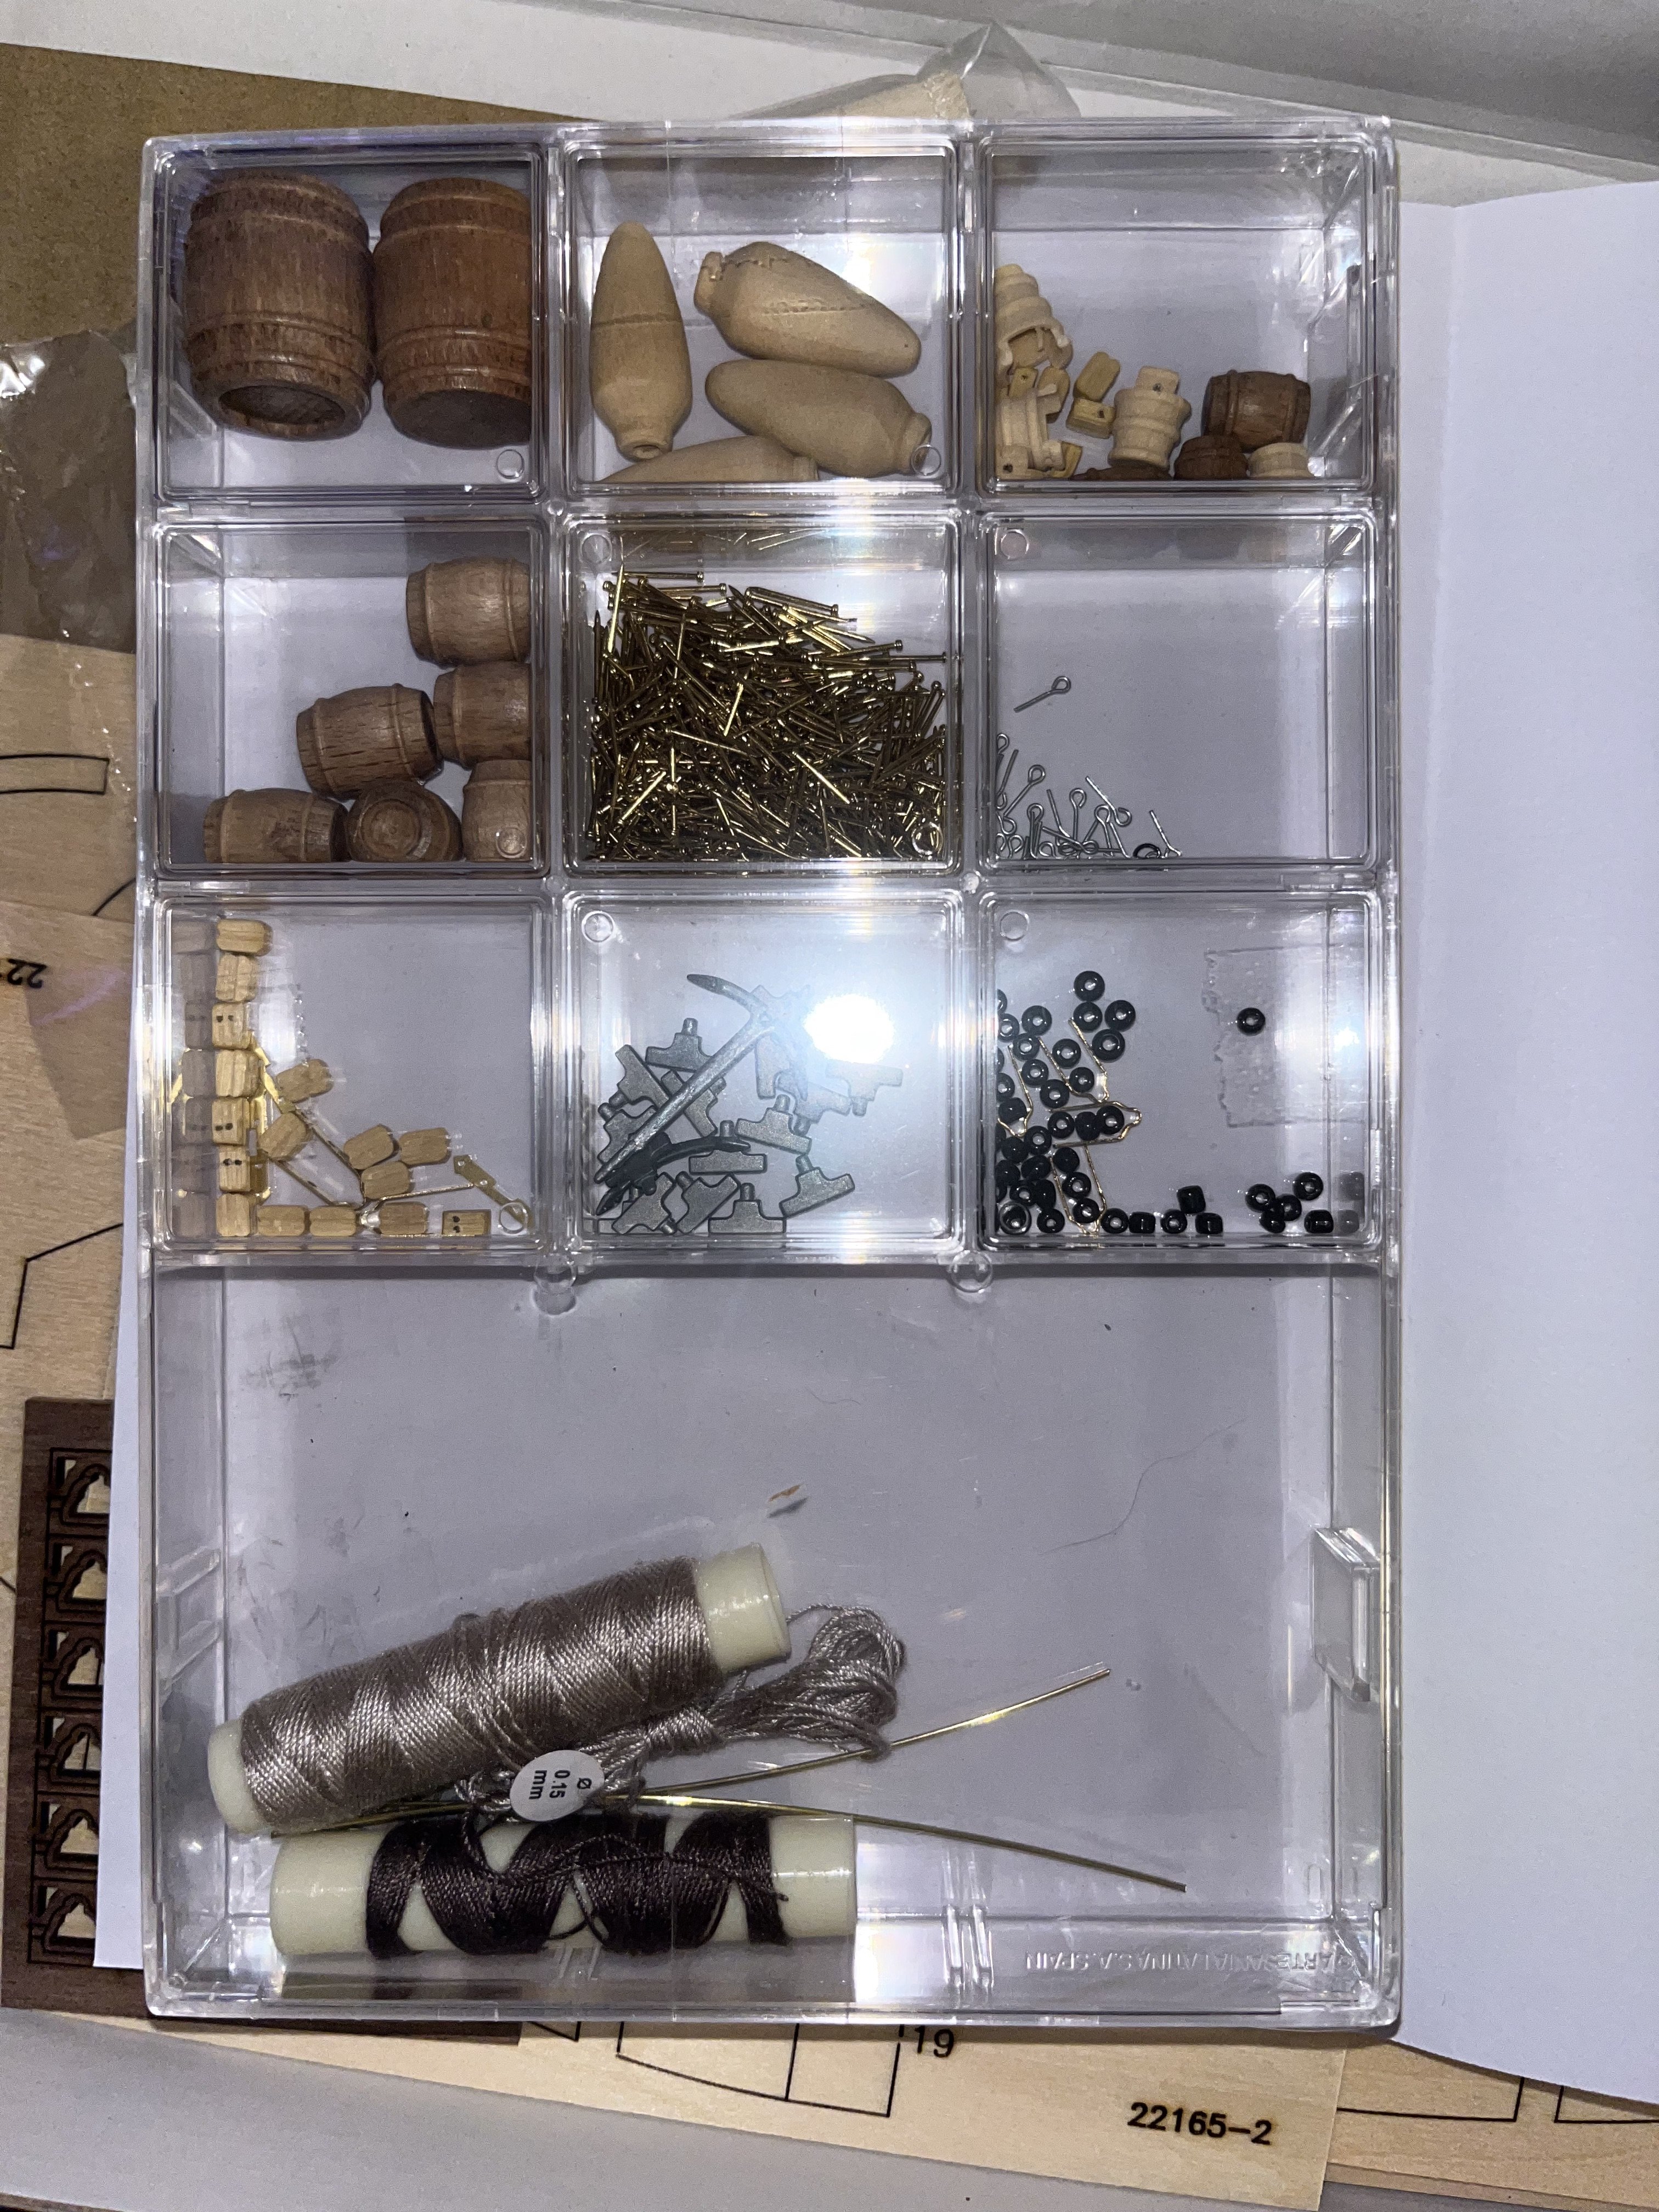
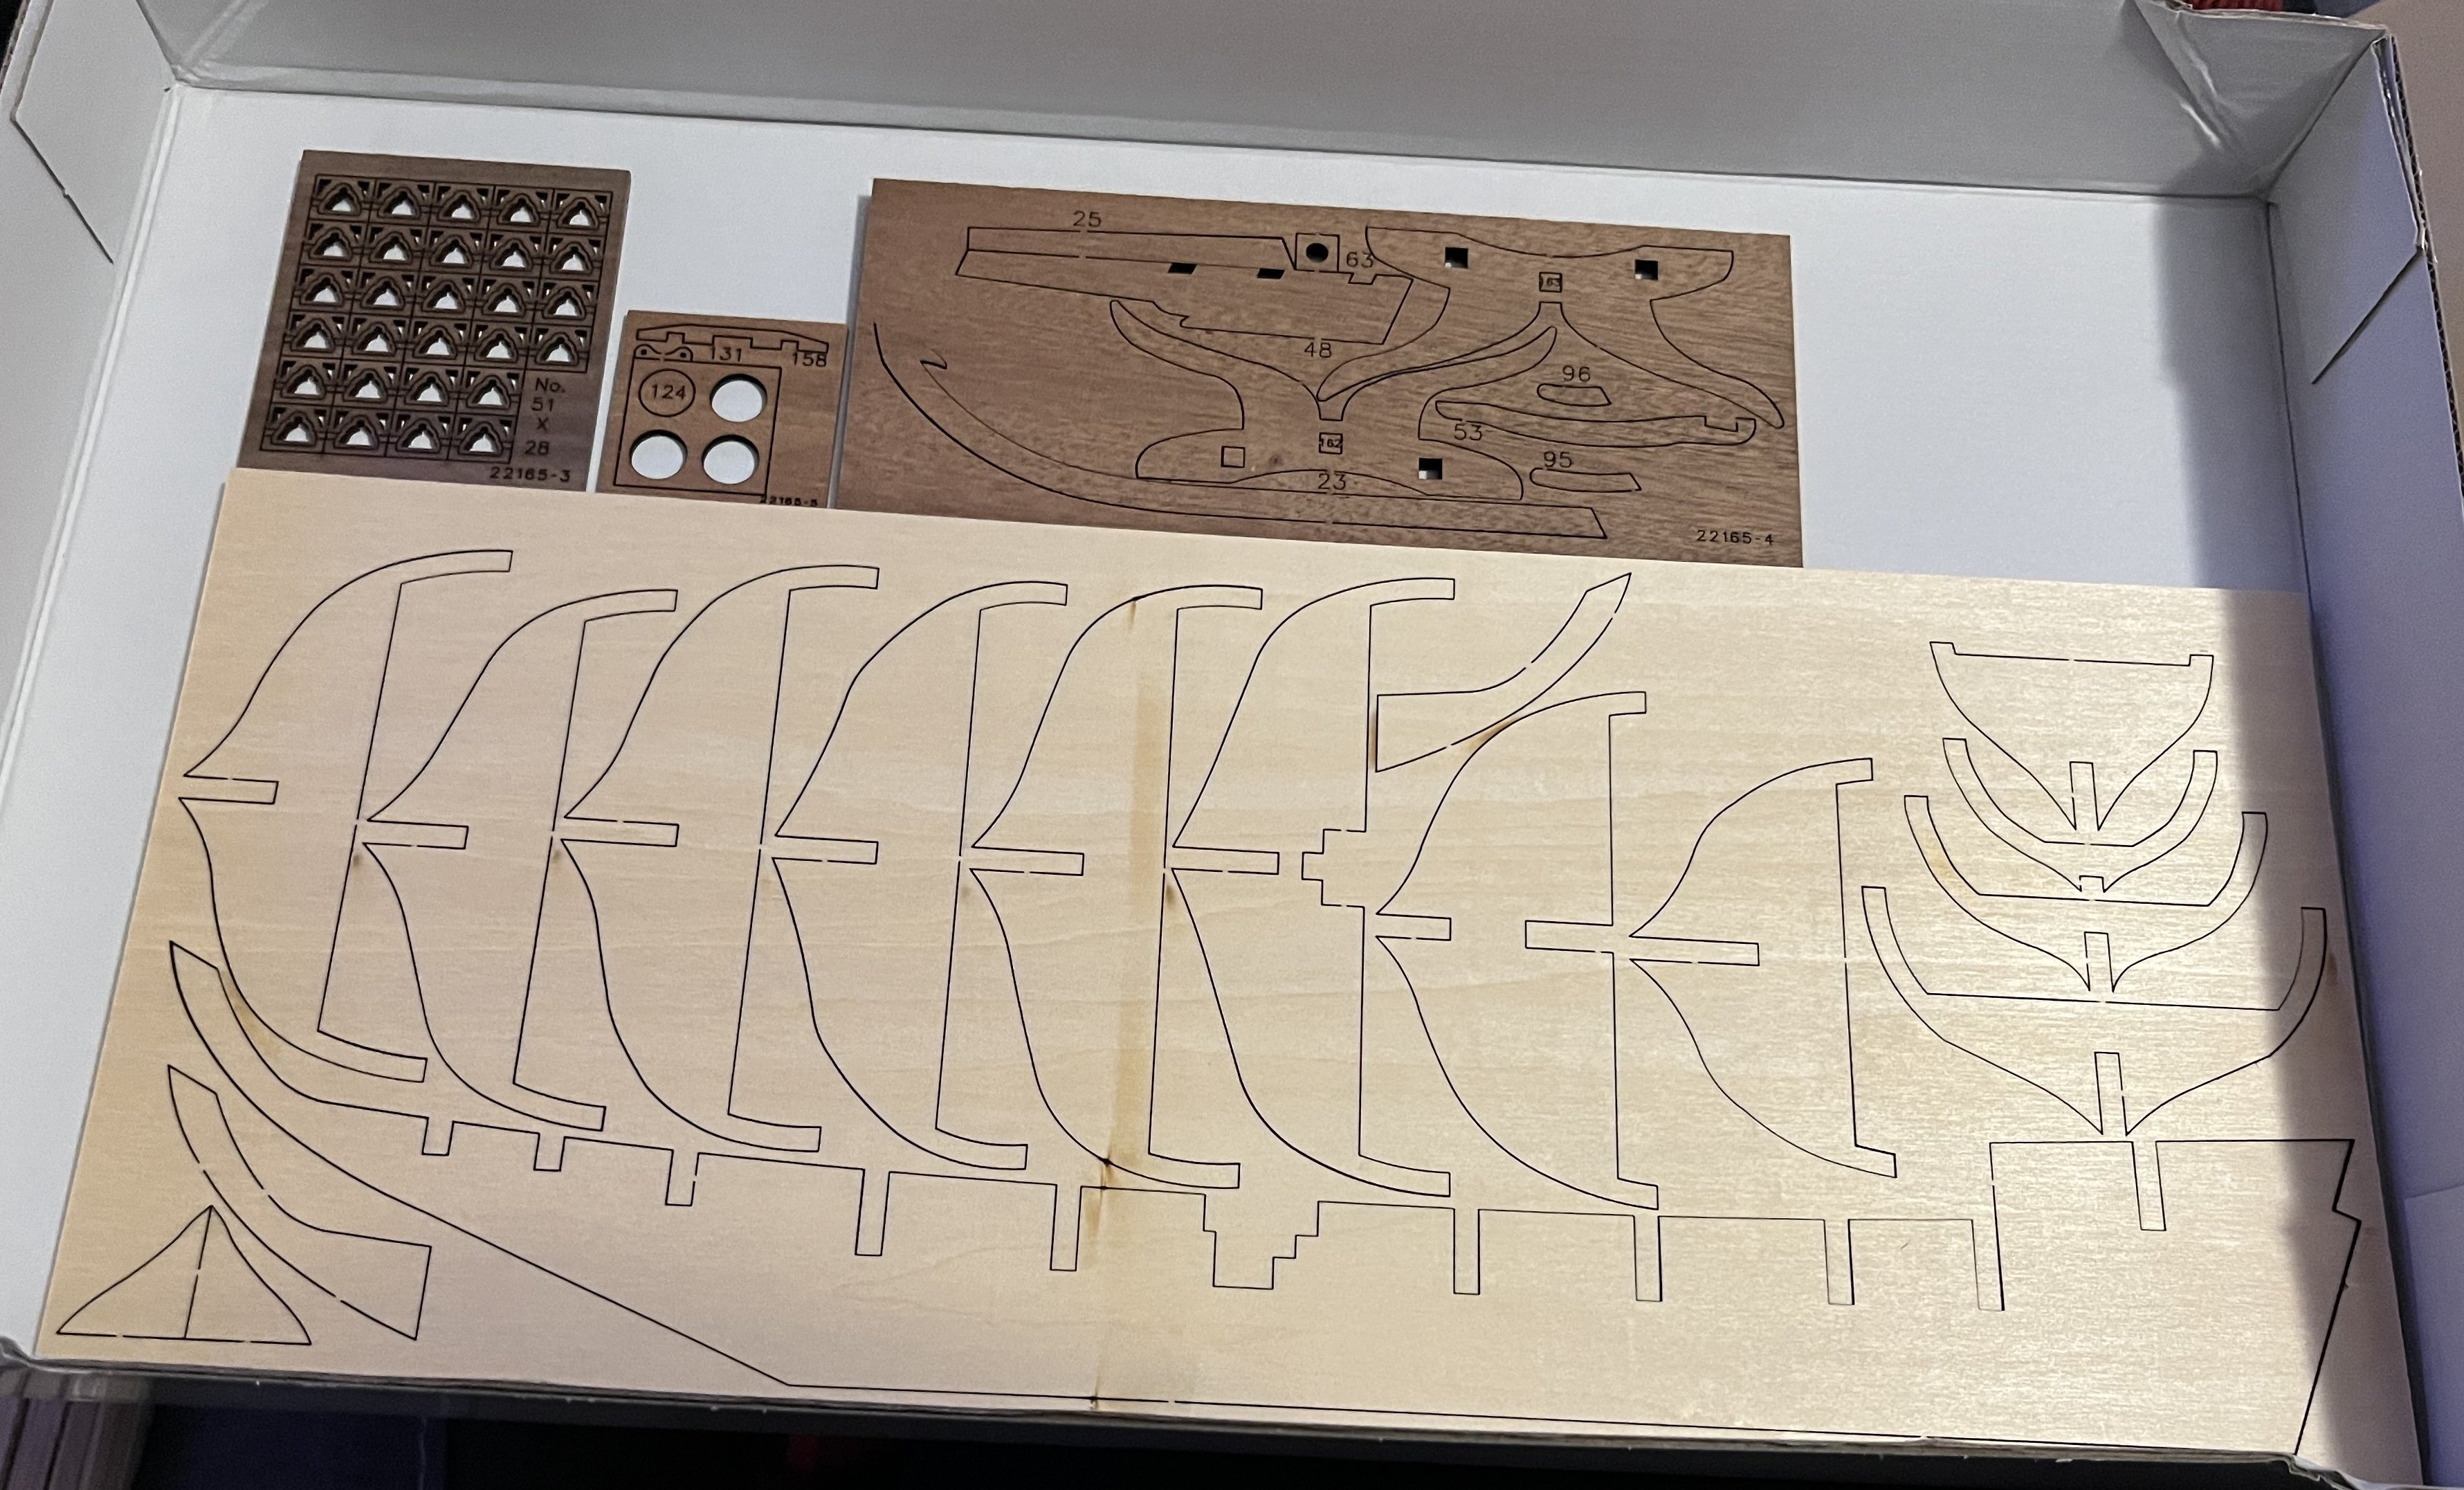
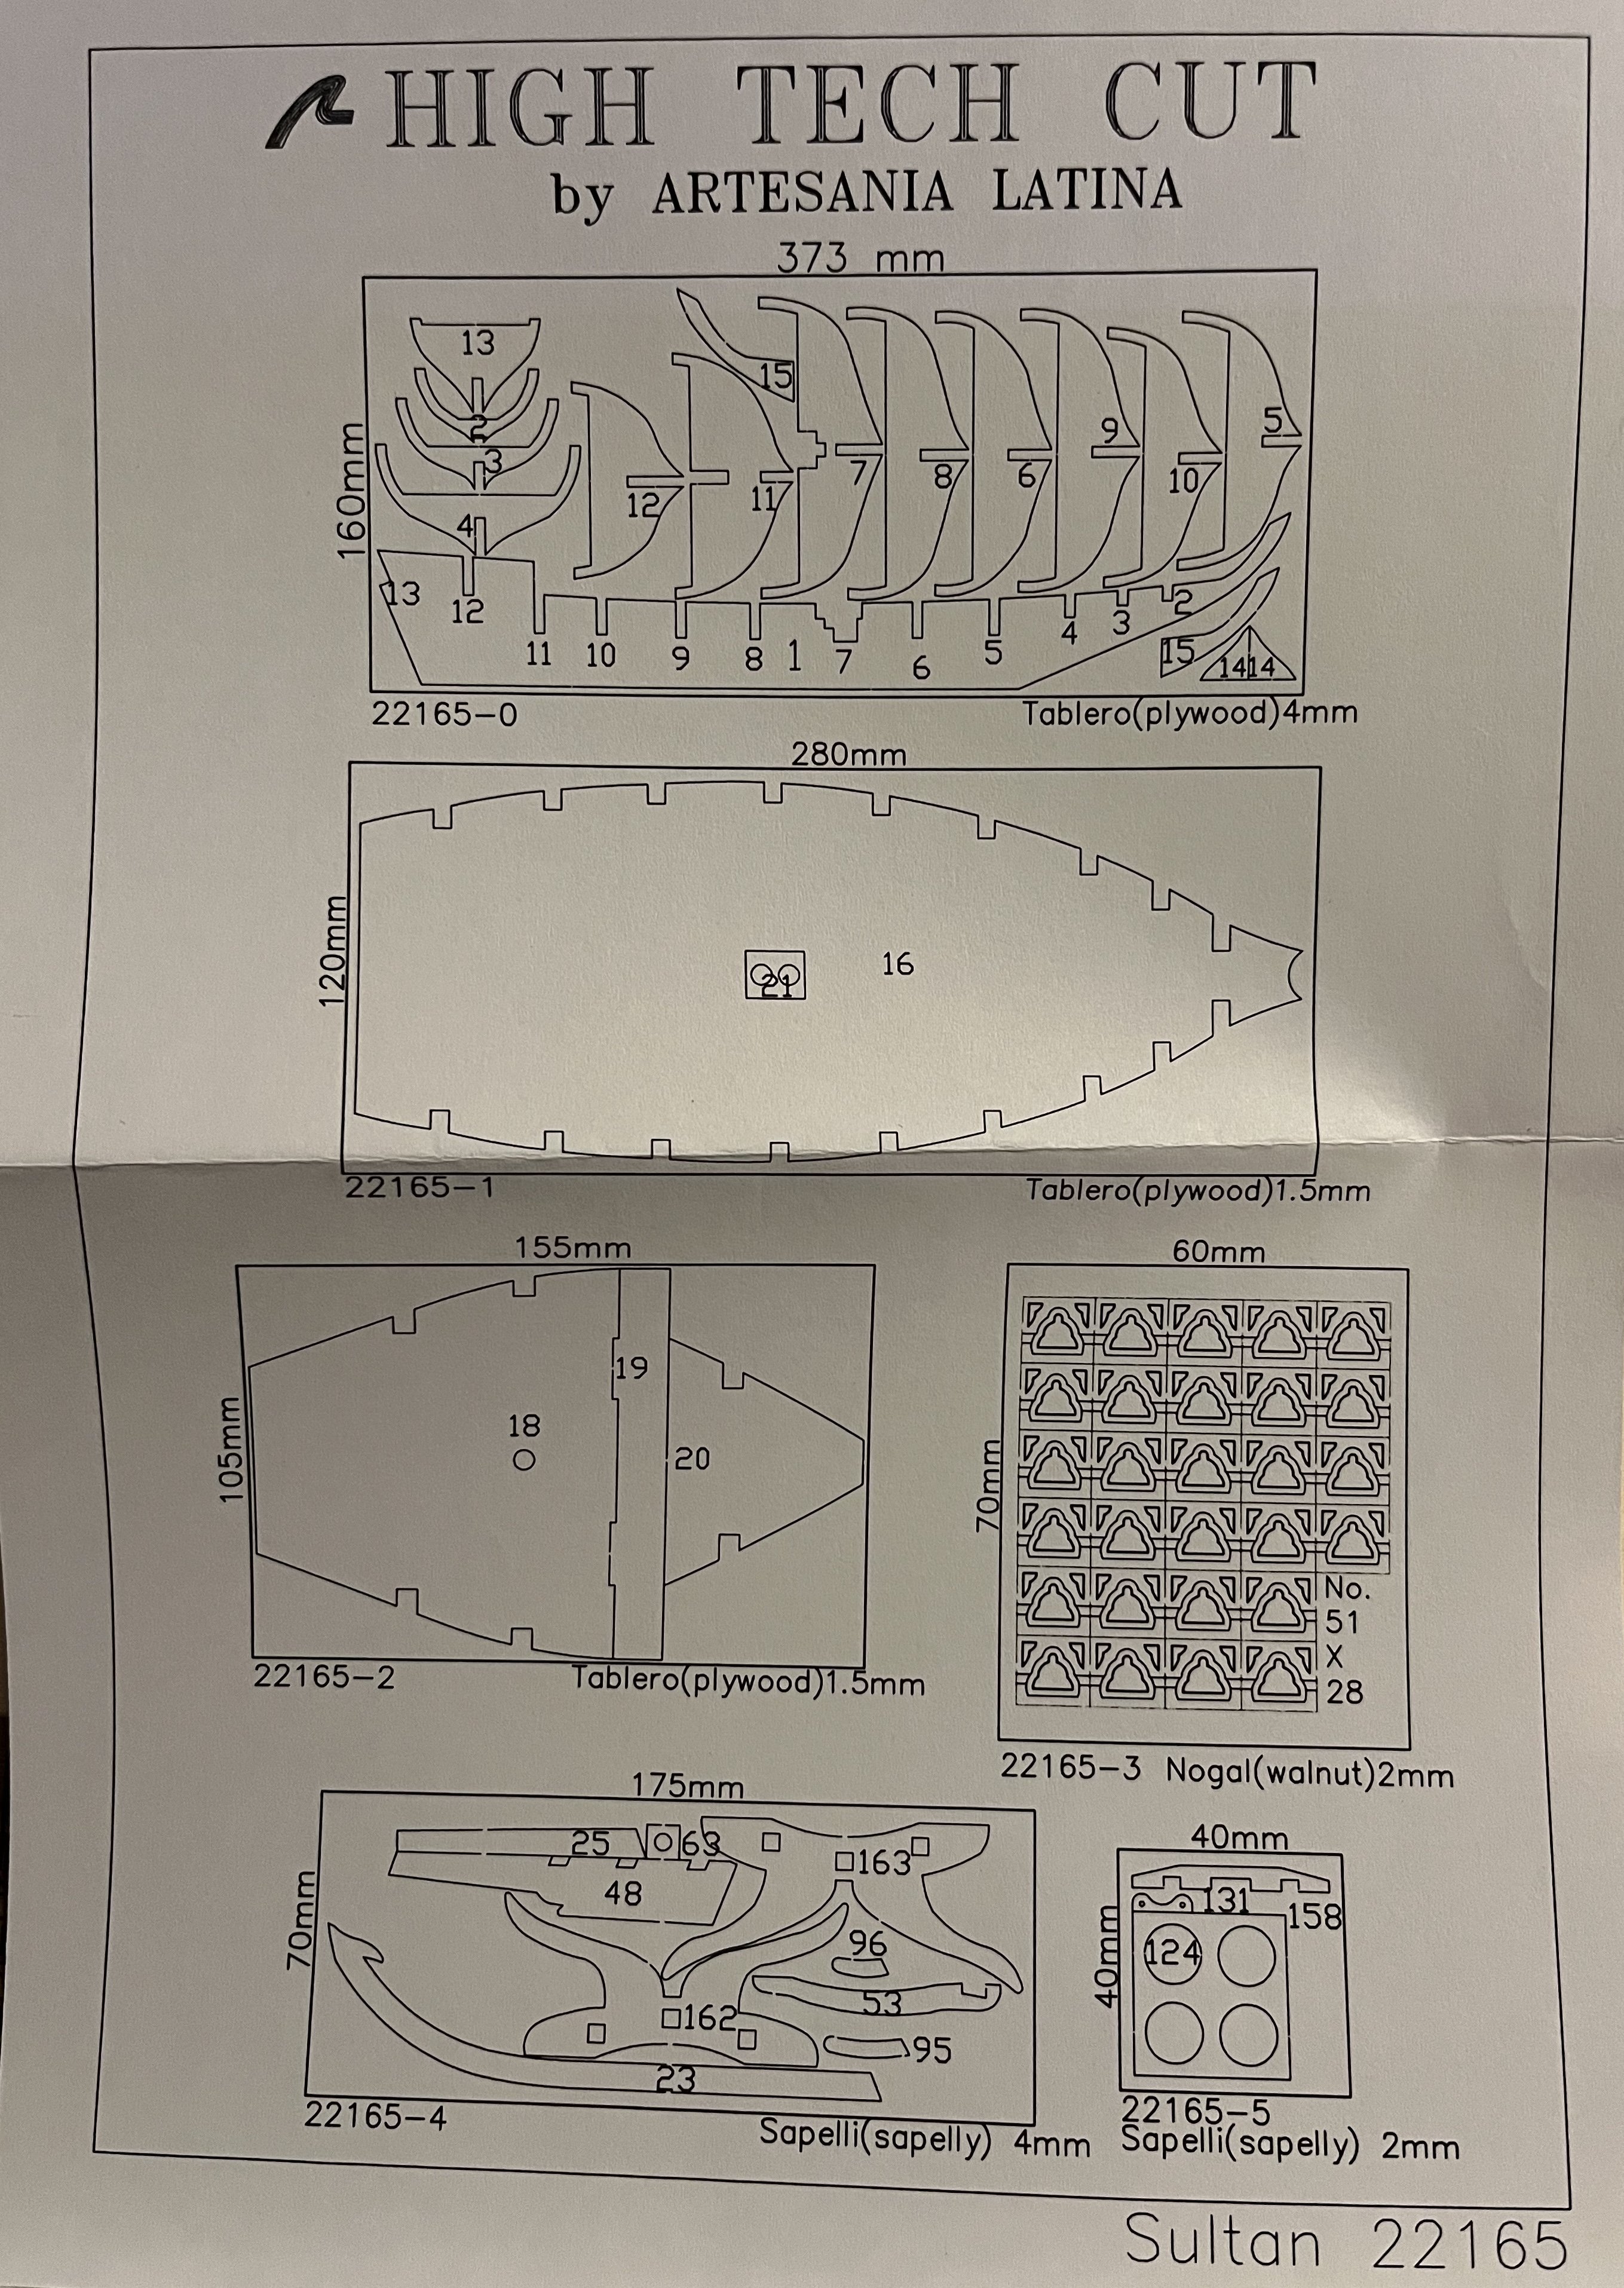
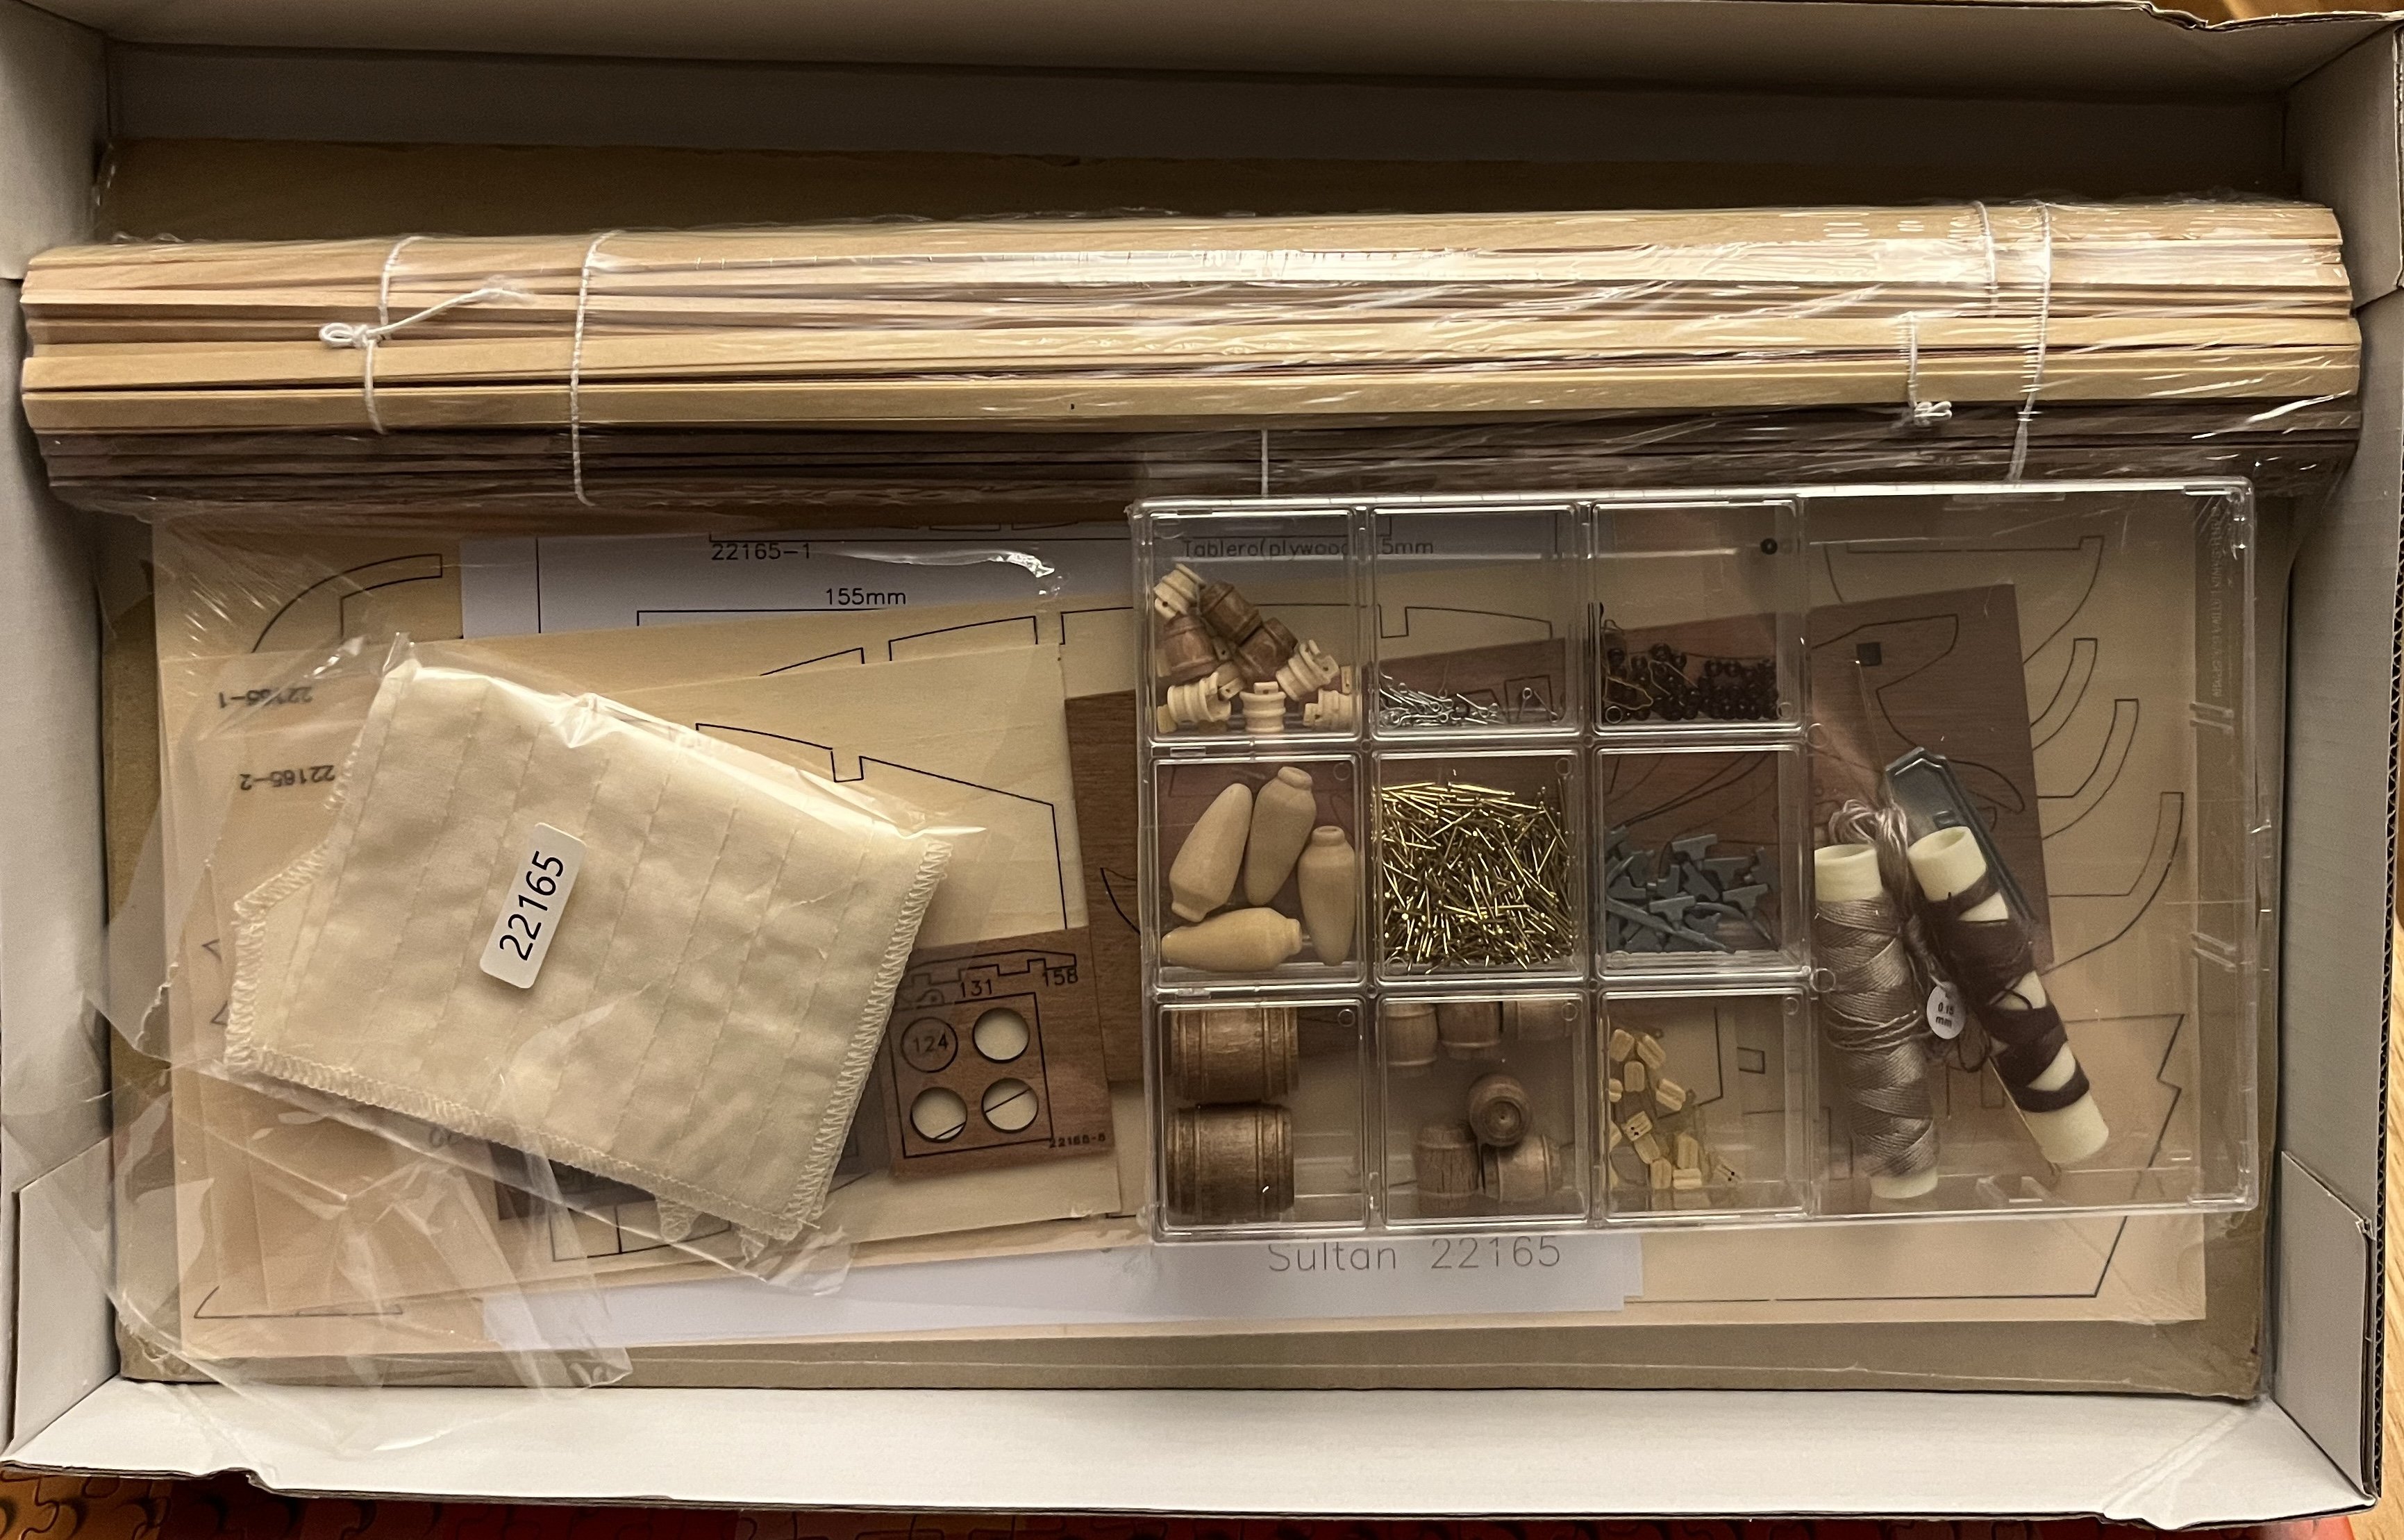
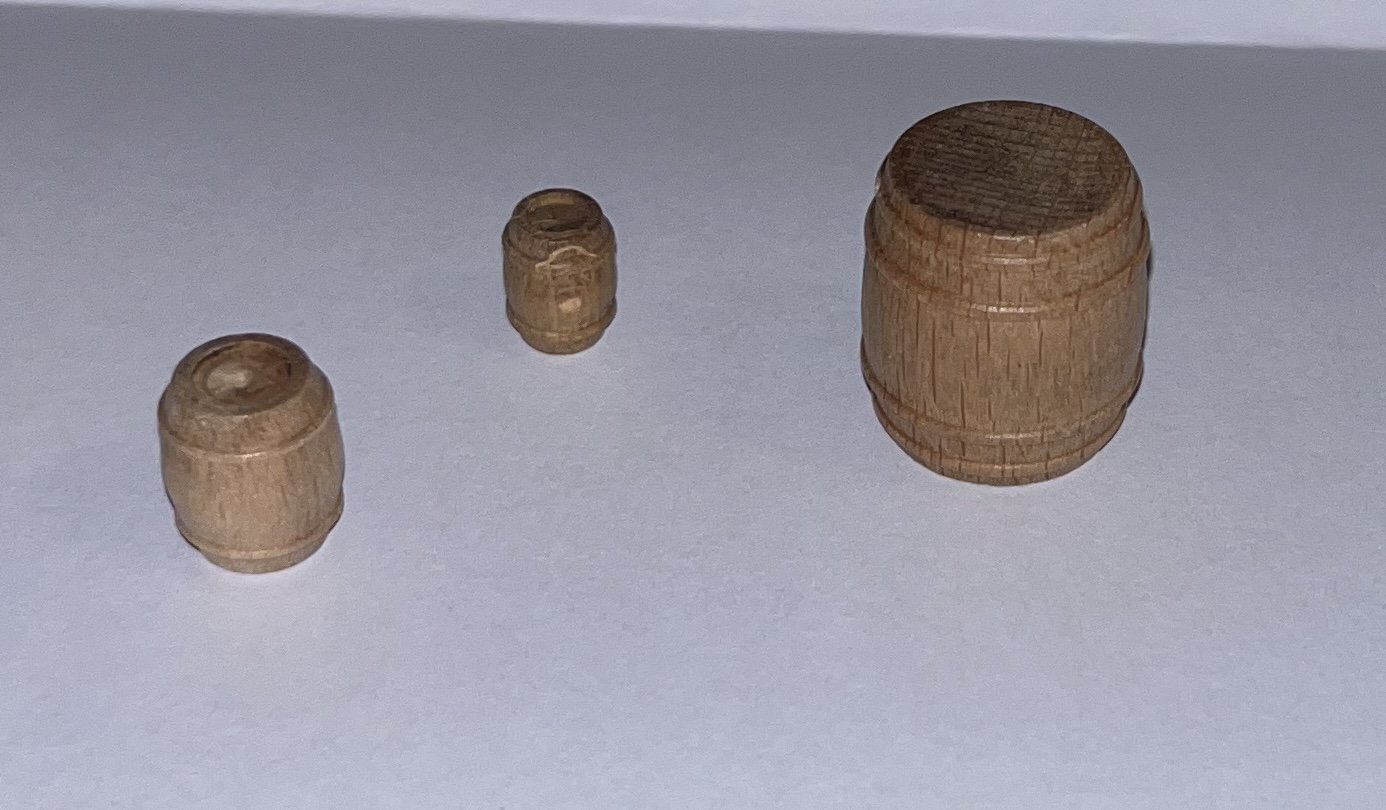
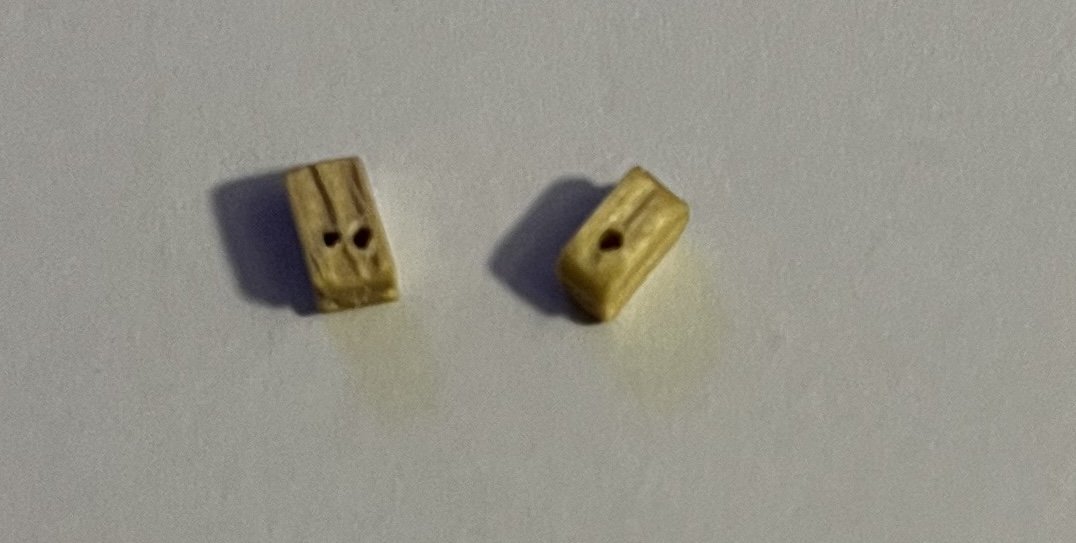
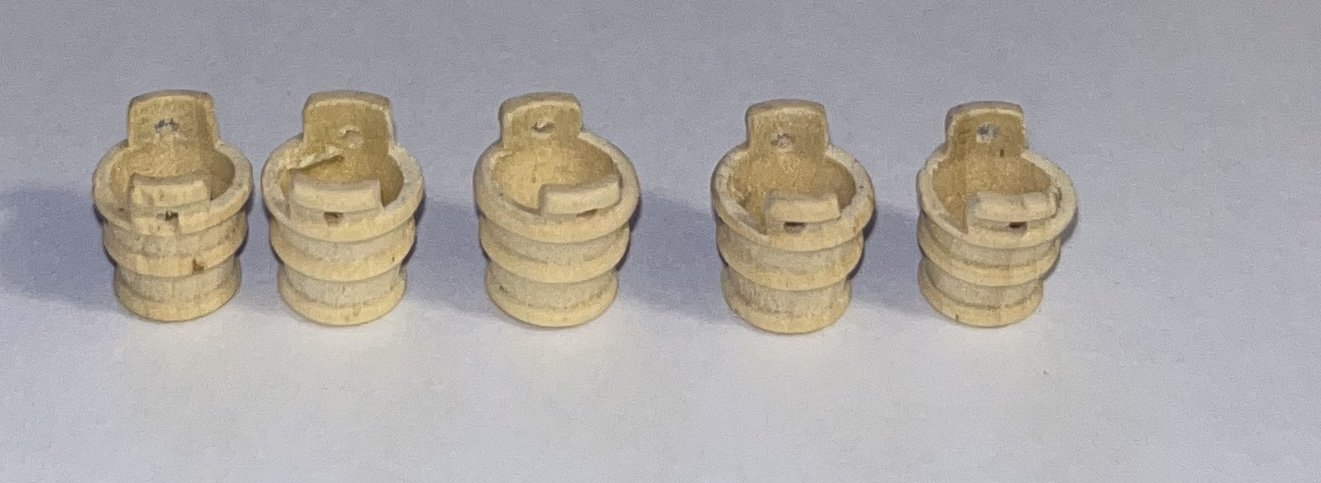
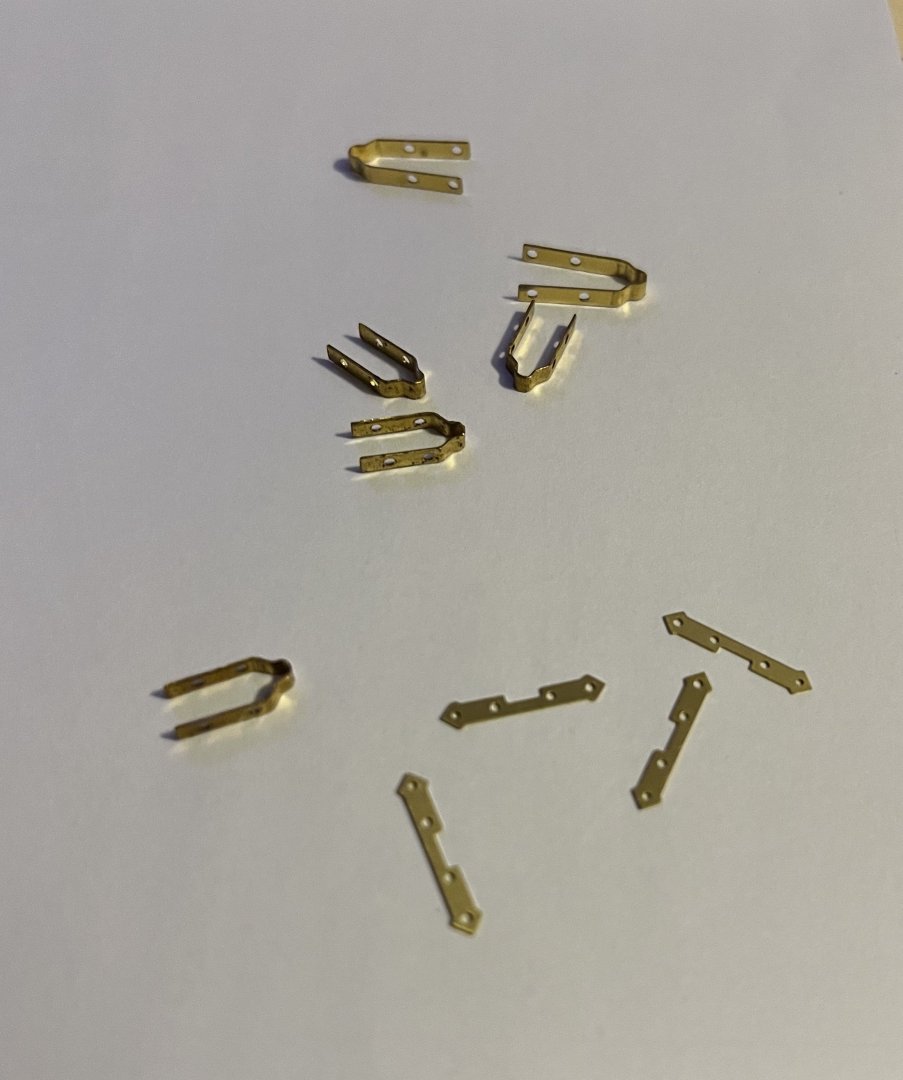
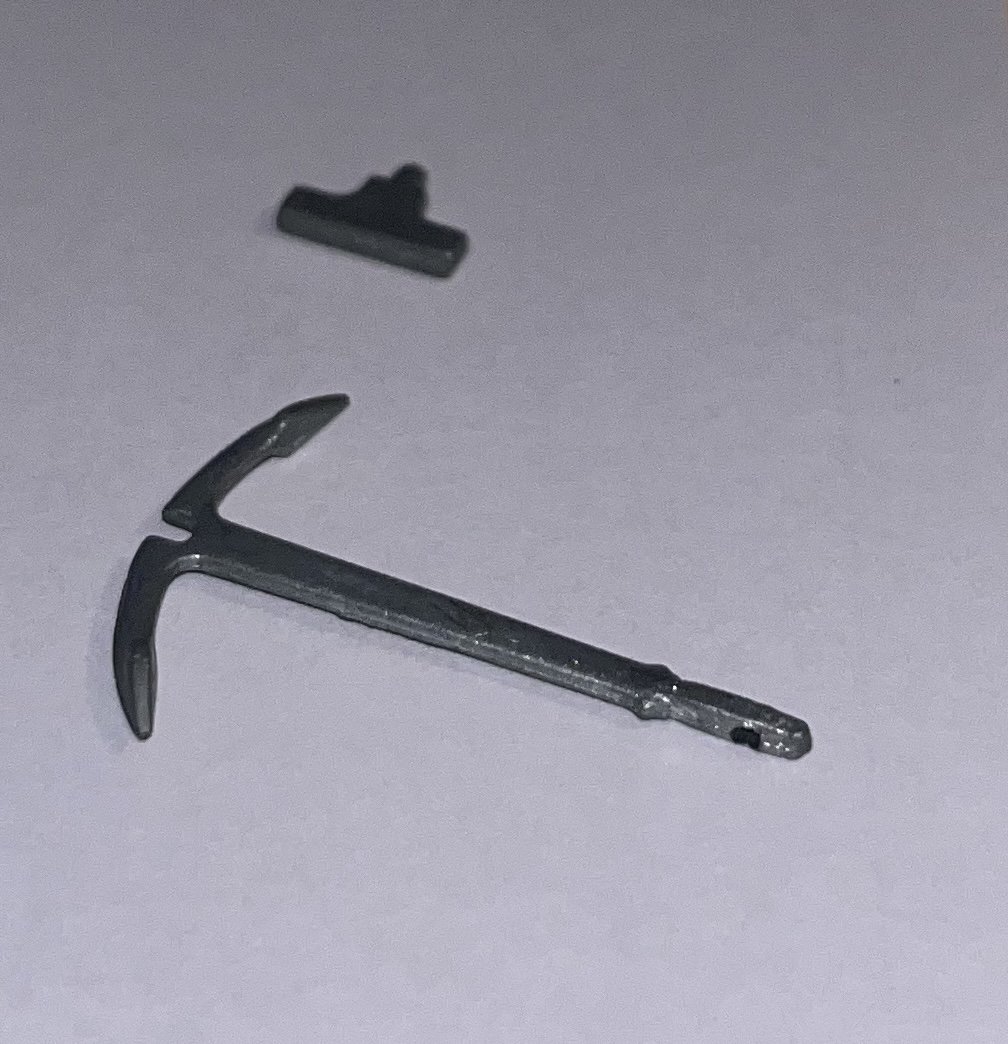
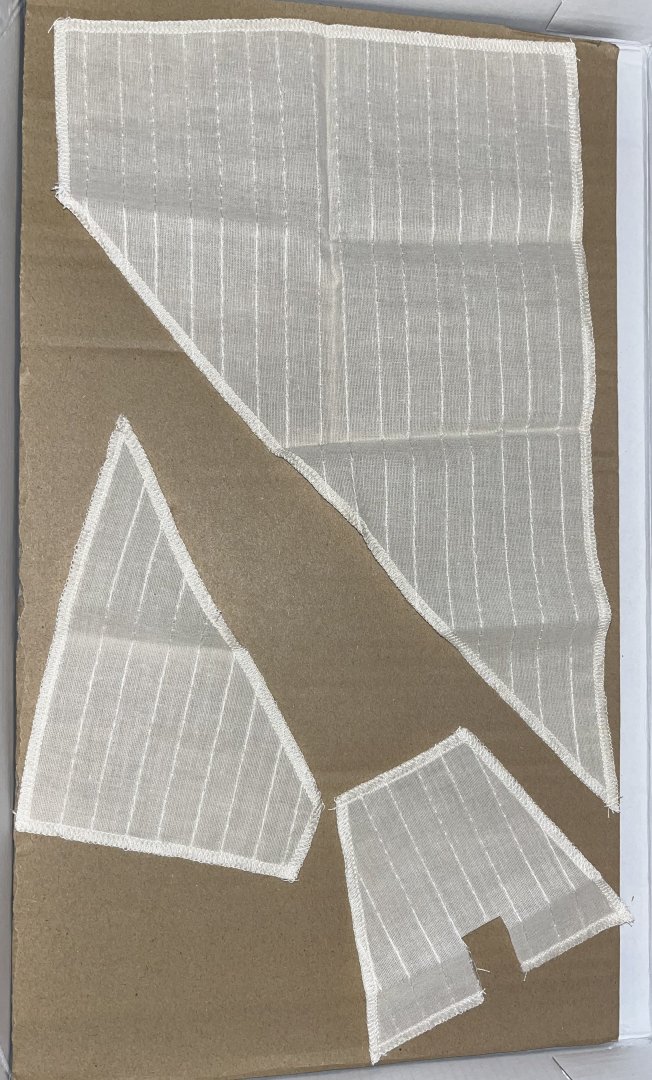
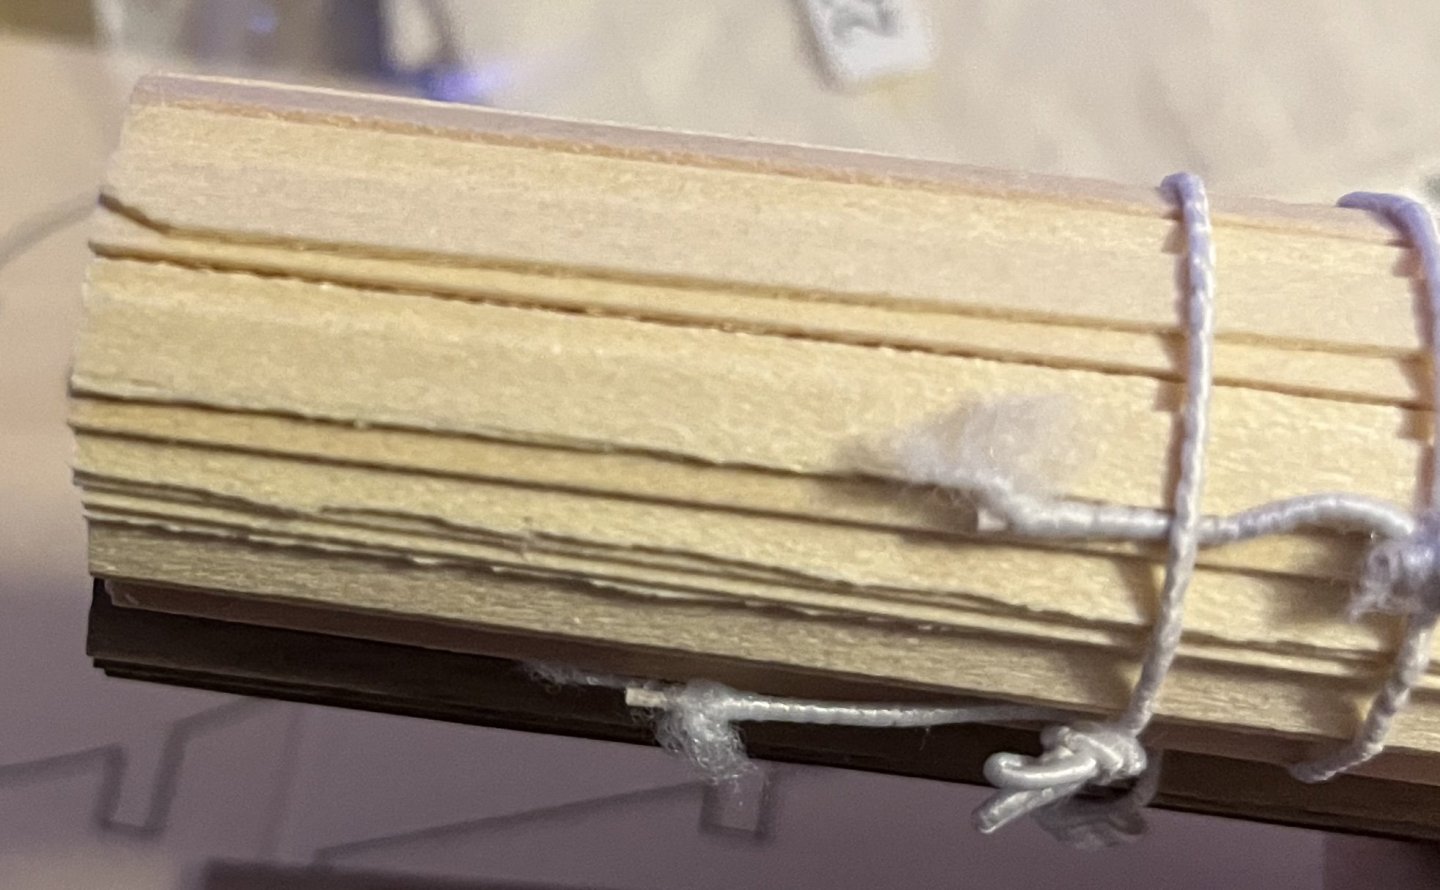
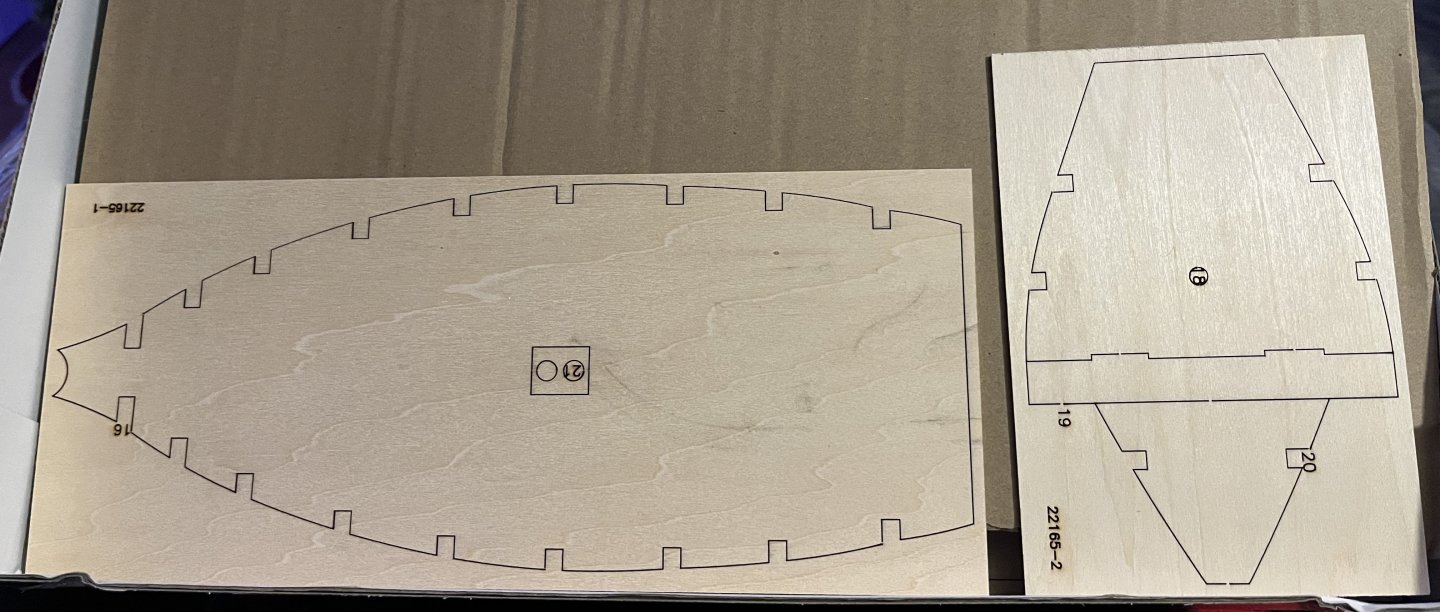
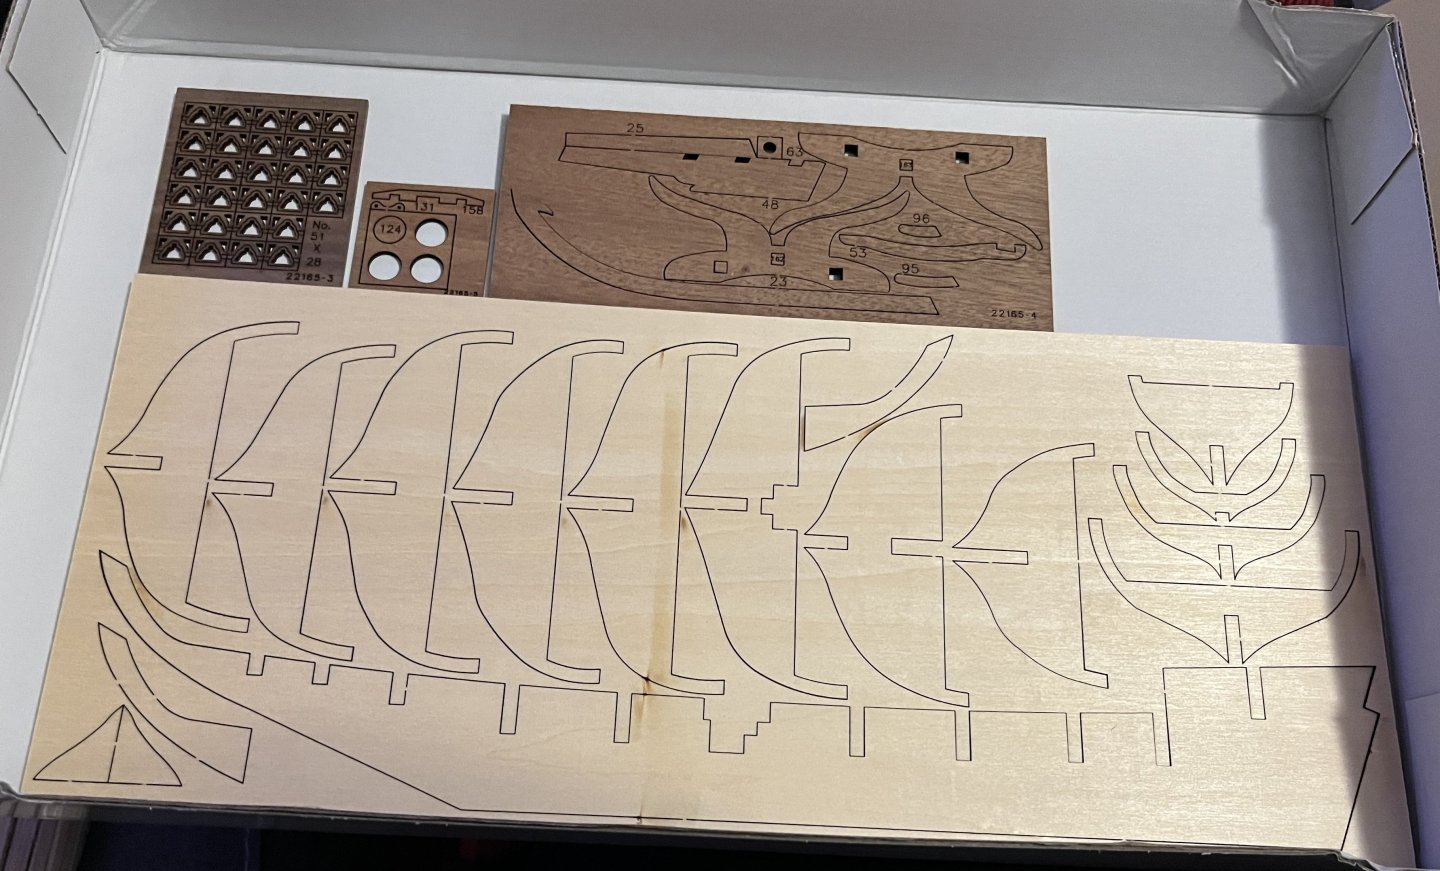
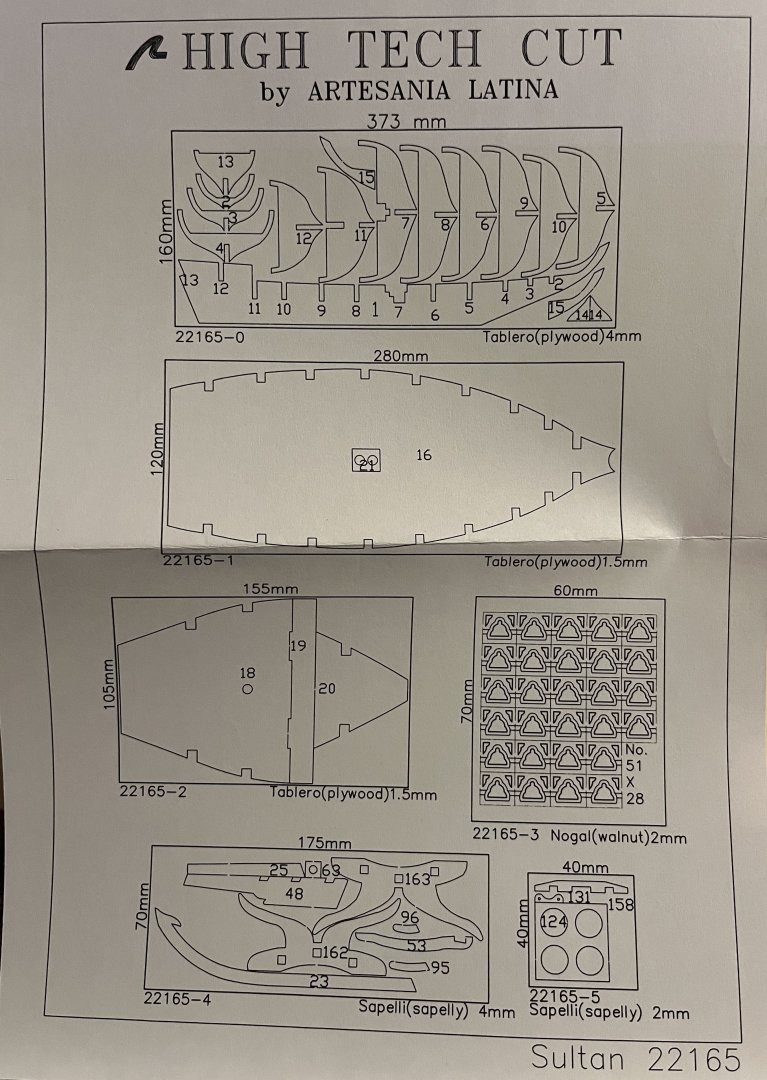
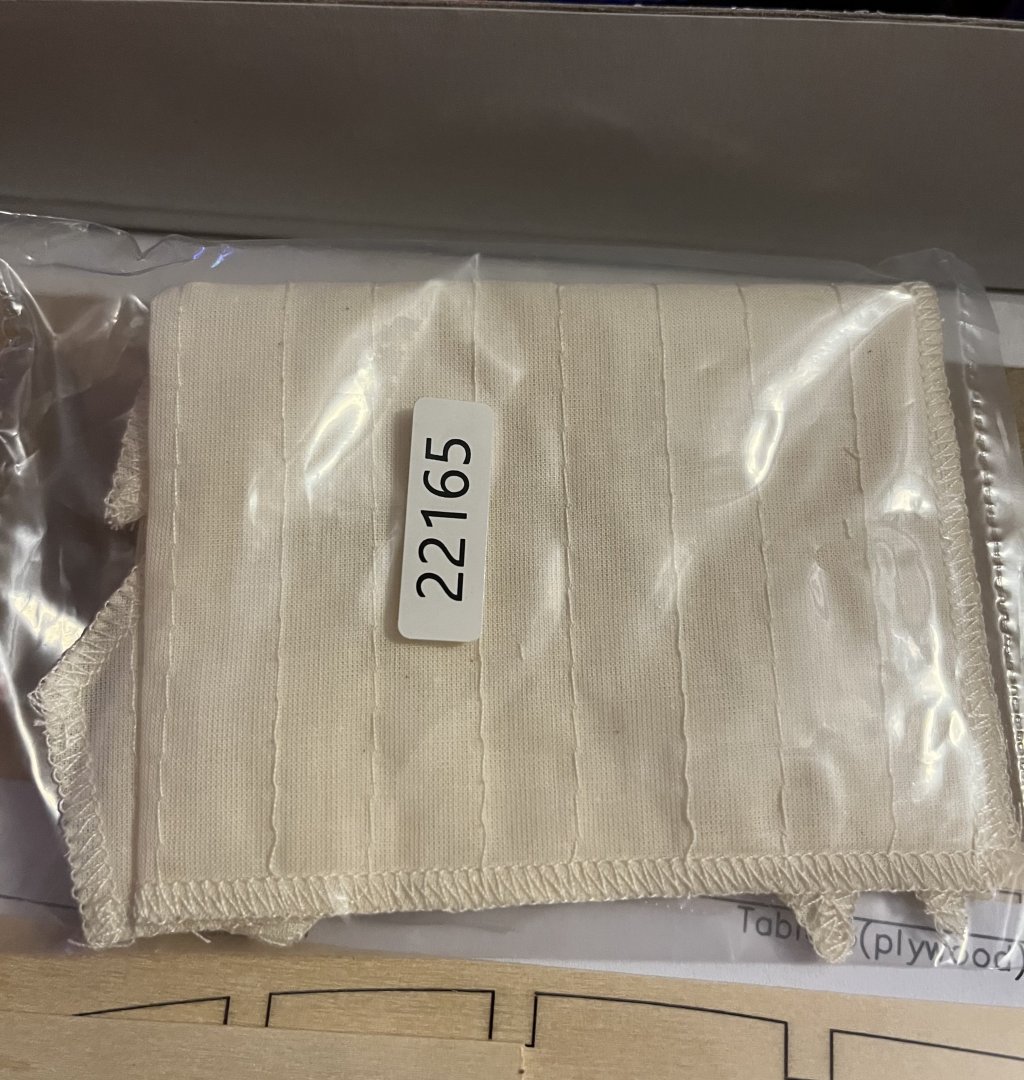
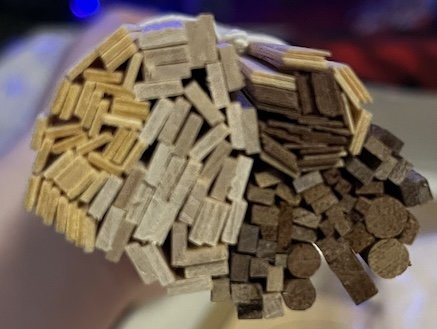
Item Number : 22165 From https://artesanialatina.net : $99.99 390 x 125 x 440 mm Description HISTORY OF ARAB DHOW: KNOW THE MODEL YOU WILL BUILD Discover Sultan, a wooden model ship of this traditional Arabian dhow from the coasts of the Arabian Peninsula, India and East Africa. This boat was the primary instrument in the commerce and in the propagation of the Islamic faith. Also, the dhow was mainly used as cargo ship: grain, fish, minerals and even slaves. The exact origin of the dhow is unknown, although its appearance seems to be linked to Islam. Revolutionary in naval history for its triangular sails and practically unchanged since its initial designs, it is believed that the dhow was the germ for the construction of Venetian galleys and caravels, favoring the creation of larger ships with mixed sails. The dhows are still sailing along the shores of the Indian Ocean. CONTENTS OF DHOW CALLED SULTAN WOODEN MODEL SHIP KIT The wooden model ship kit of the Sultan dhow contains all the parts you need to build the model, a faithful replica of the original boat, thanks mainly to its design by false keel and frames. It is a 1:60 scale model, an elegant two-sided boat primordial on naval modeling. Once it is built, this faithful miniature replica measures 15.35'' (390mm) length, 4.92'' (125mm) width and 17.32'' (440mm) height. The modeling kit Sultan contains a set of parts of board, precut by high precision laser; wood, brass and foundry parts; wood and birch veneer; high-quality brass and photo-etched parts; hand-sewn sails ready to be placed; cotton thread and exhibition base to expose the model ship once it is finished. For its assembly, you can follow our super detailed step-by-step guide on DVD for computer -PC & MAC-. The kit does not include printed instructions. You can also download the digital instructions for free on the button of this product sheet called 'Instructions and Downloadable Contents'. My kit review: Initially opening the box, everything is well organized and tightly packaged in stretch wrap I should note that I did open the package prior to the review to remove the CD instructions. The instructions only being supplied digitally is one aspect of AL kits that I personally do not care for. I don't like having to keep an electronic device in my shipyard that likes to go to sleep and get covered in saw dust. The laser cut wooden sheets are wrapped in another sheet of stretch wrap keeping everything well protected. The sails are also in their own stretch wrap. The laser cut sheets seem to be cut quite well and clean with clear piece numbers (I do have the false keel and frames number side down in the image). The one piece of paper that is included has a map of the laser cut parts. It seems that it is almost not needed. One sheet below seemed to have something smeared on it. It almost looks like sap. It shouldn't matter too much since it won't be visible once built. Some char is smeared across the false deck. The deck will be planked so it will be covered. The sails are pre sewn and stitched. The wood strips are all bundled together and mostly organized. The strips don't seem to be the best quality. There are a lot of jagged edges, chipped ends and uneven color and cuts. The smaller pre-cut and molded parts are in a clear box with different compartments, which is pretty standard for AL. The thread is the normal AL thread. Drill holes in the buckets seem to be mostly centered. I have seen worse in other kits where the holes are so off center that they aren't even closed on one side. Most of the double block holes aren't lined up quite right, but all the holes seem to go straight through. I have seen blocks where the holes are crooked and come out of the side. Rather than a photo etched sheet, the few brass parts are pre-cut and shaped. This feels more like a feature for a beginner kit rather than an intermediate kit. The other metal parts parts (anchor and cleats) seem to look pretty good, without a lot of burs or edges that need to be filed down. The barrels are generally pretty good, but not without some minor factory flaws that should be easy to cover up. On the center barrel, that mark is more of a light reflection off of the finish rather than a flaw in the shaping of the barrel. Here is a sample photo of the instructions. The written instructions are very basic and available in multiple languages. The photos do a pretty good job of showing you what is to be done in each step. They aren't the highest resolution though, so zooming in to get a better idea of what is happening isn't really an option. The way the parts list is organized is step by step essentially listing the parts in the order called for in the instructions. This makes it easy to follow along, but it makes it difficult to do an actual inventory since the part will call for a strip being cut to X mm in length. The result is there is no actual list of the number of each strip that is included with the kit. The inventory of all of the other parts seemed to reveal that everything was there, or possibly even slightly over in number. Overall, I would say that the kit seems to be in fairly good condition and I feel mostly positive about it. My impression of AL is that they generally offer lower priced kits than many other manufacturers. The trade off is that sometimes the quality isn't as good as other kit makers, particularly on the strips, pre-drilled holes and thread. This kit seems to follow that pattern. I look forward to getting started on it.


- 4 replies
-
- 4
-
-
- Kit review
- Artesania Latina
- (and 2 more)