SiriusVoyager
-
Posts
502 -
Joined
-
Last visited
Content Type
Profiles
Forums
Gallery
Events
Everything posted by SiriusVoyager
-
Welcome to MSW!
-
 Thank you. I think if I can get the pain[t] job to look alright, it may actually end up looking like an ok model.
- 62 replies
-
- 2
-

-
- Muscongus Bay Lobster Smack
- Model Shipways
- (and 1 more)
-
You basically finished in 2023, I think we can count it. It’s a very nice looking ship indeed!
- 17 replies
-
- 1
-

-
- Marie-Jeanne
- Artesania Latina
- (and 1 more)
-
Welcome! I would be quite interested in following a lego build
-
This model is one I think I would like to do in the future. The legos in the clamps to hold the frame square is great! Looking forward to future updates.
-
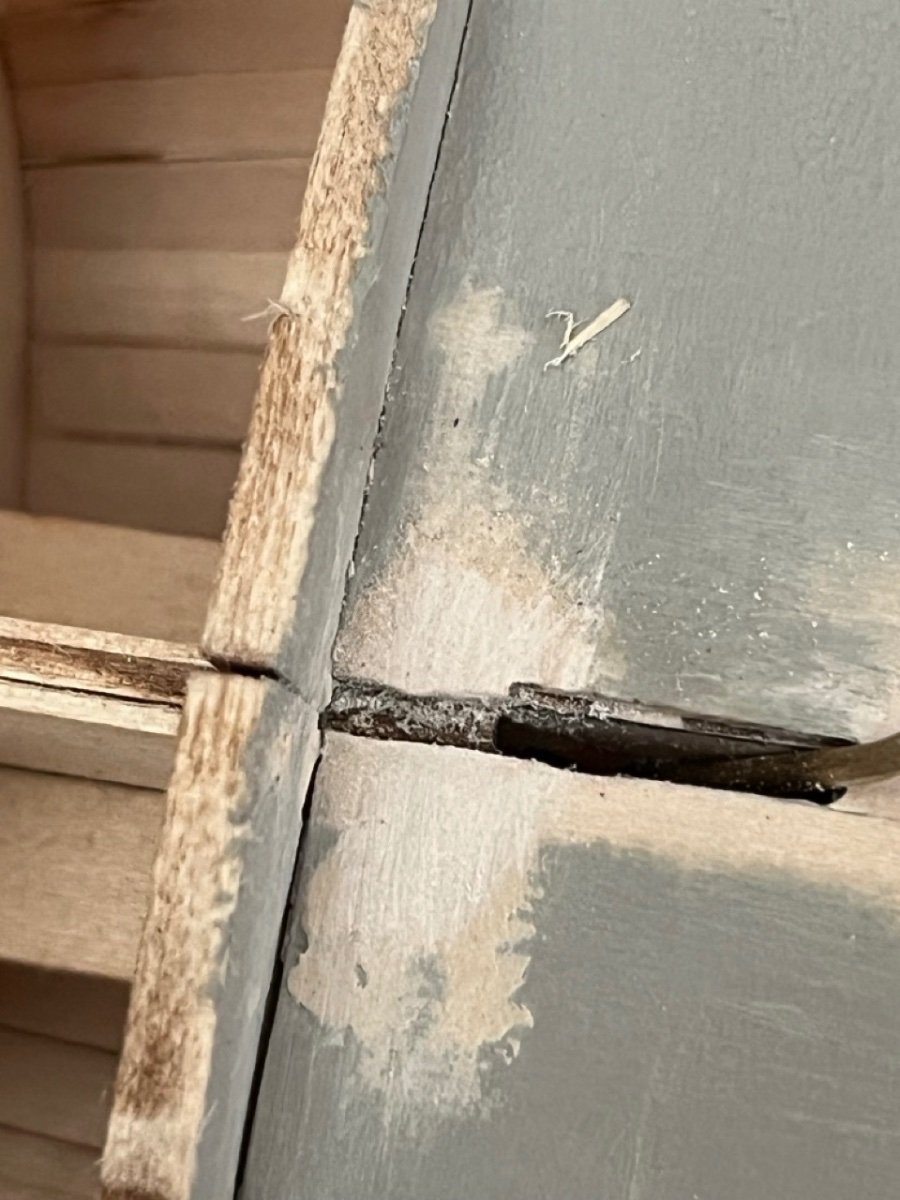
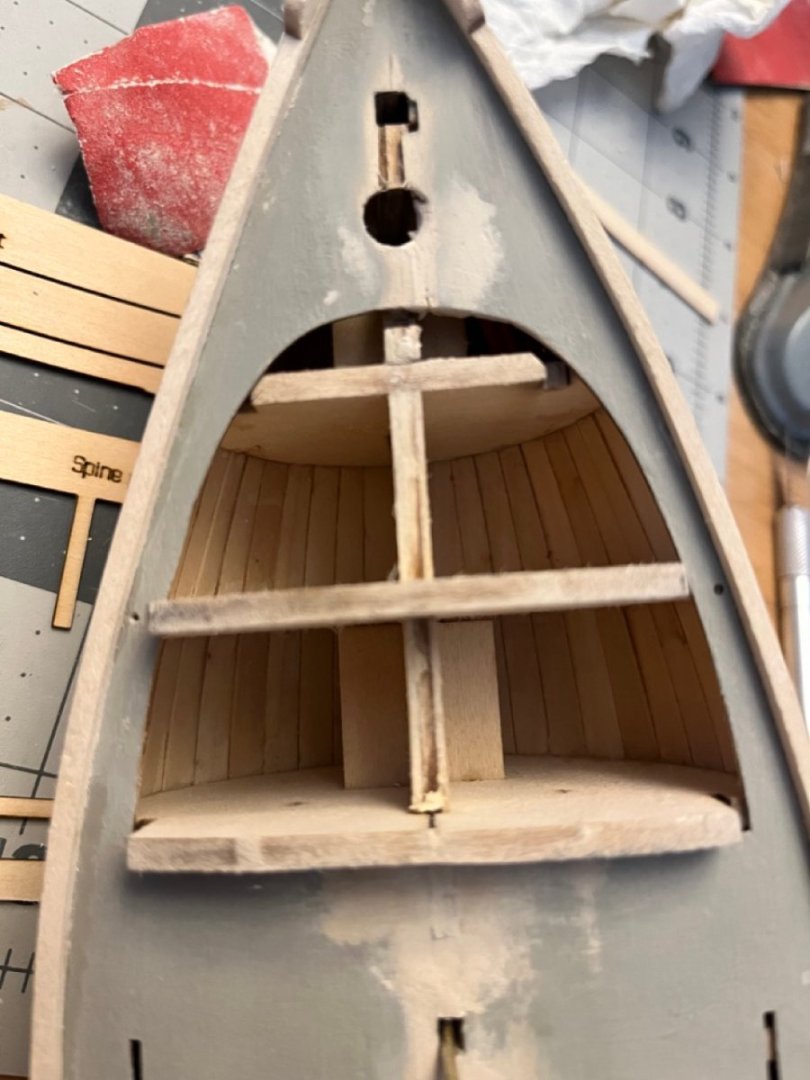
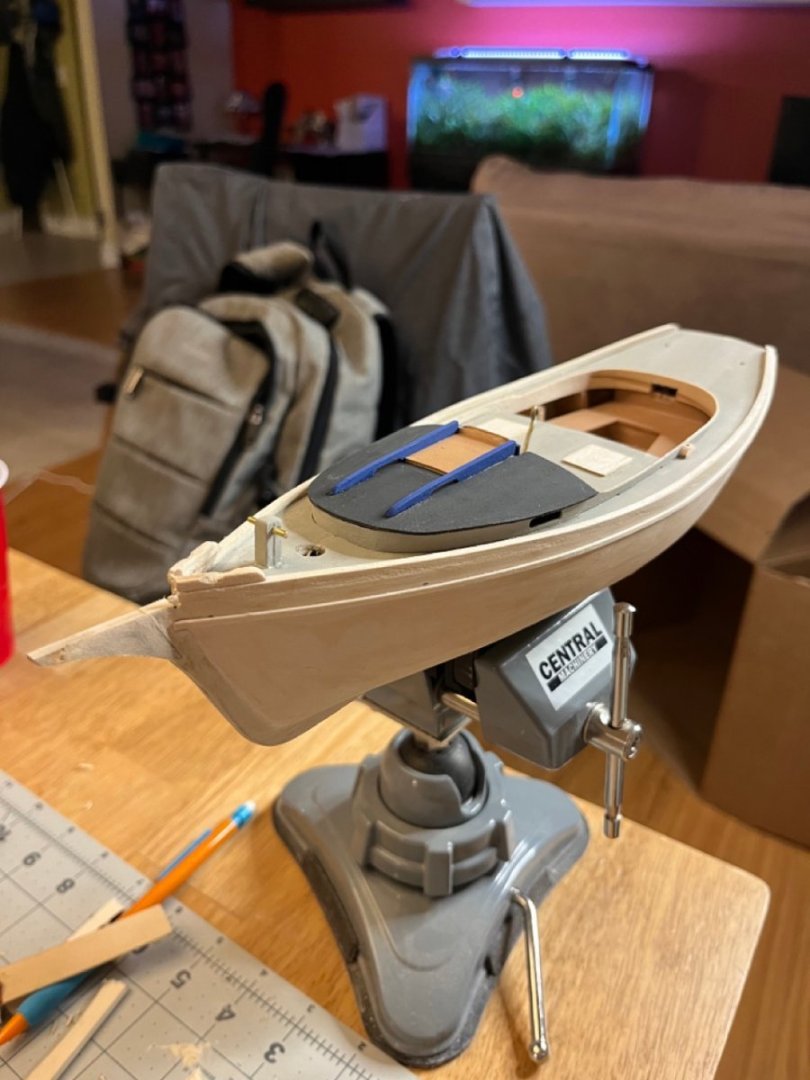
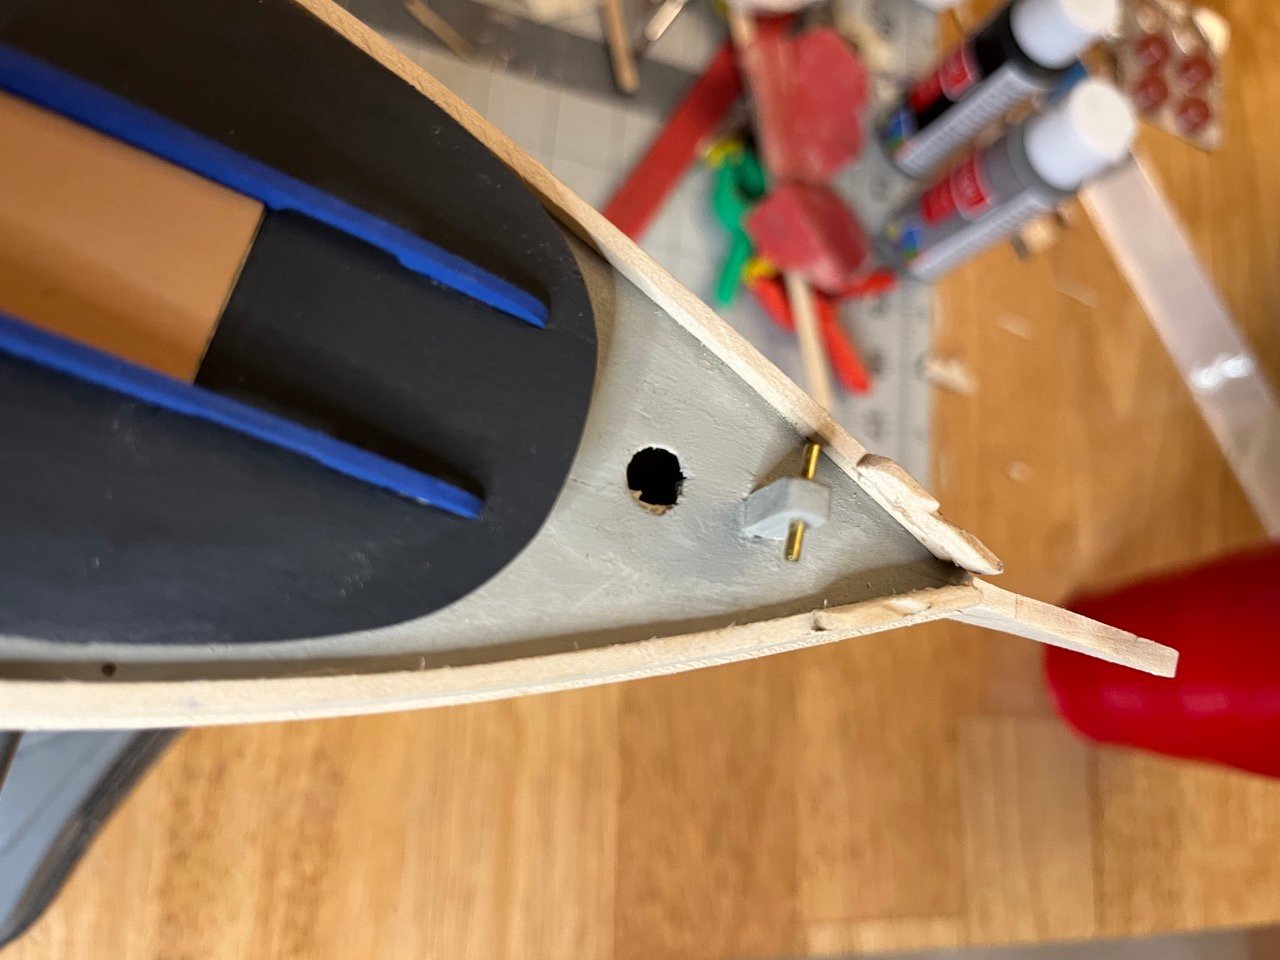
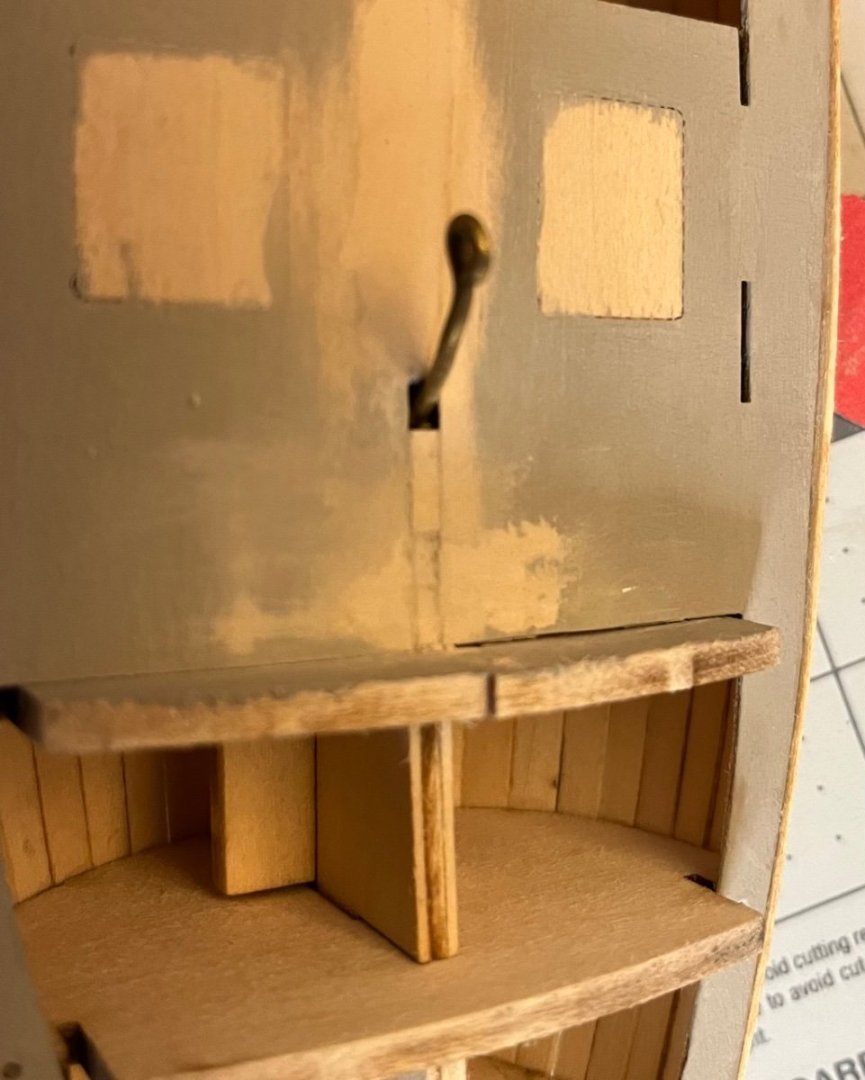
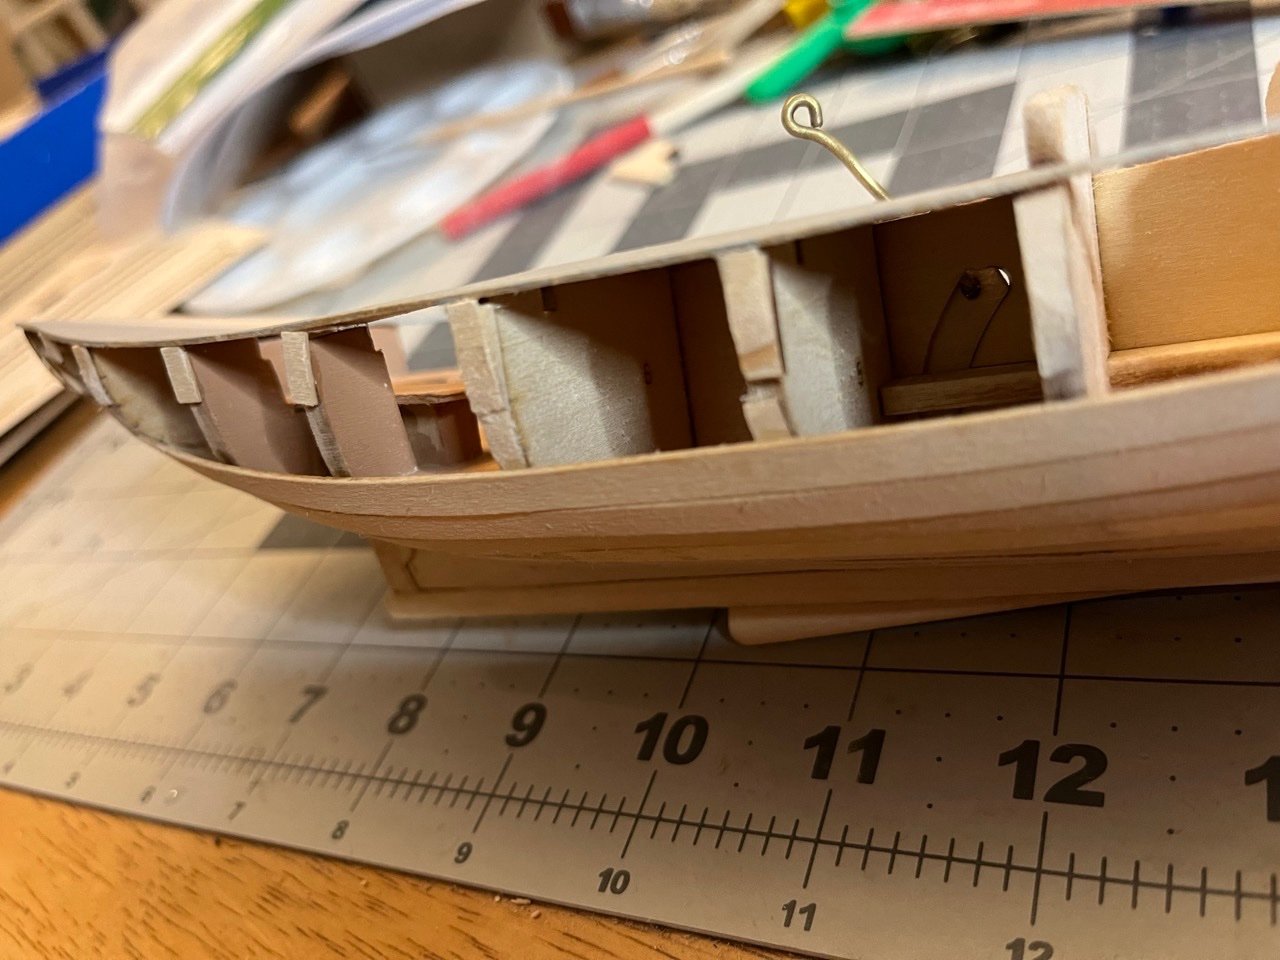
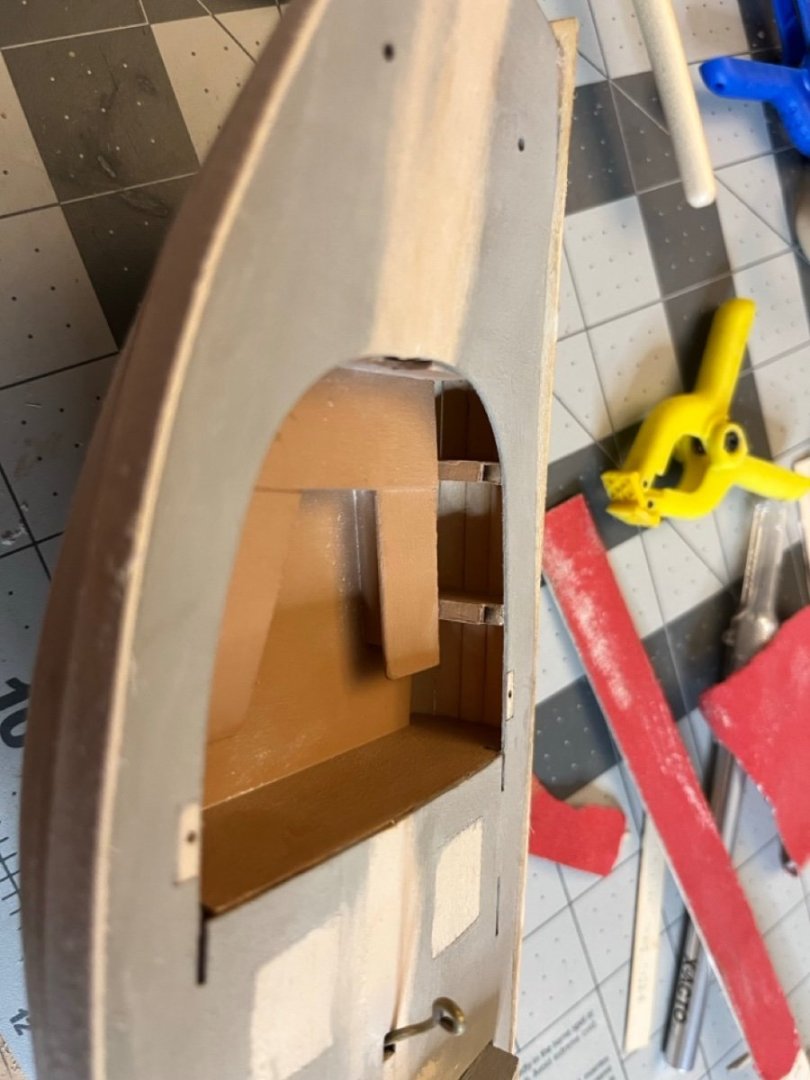
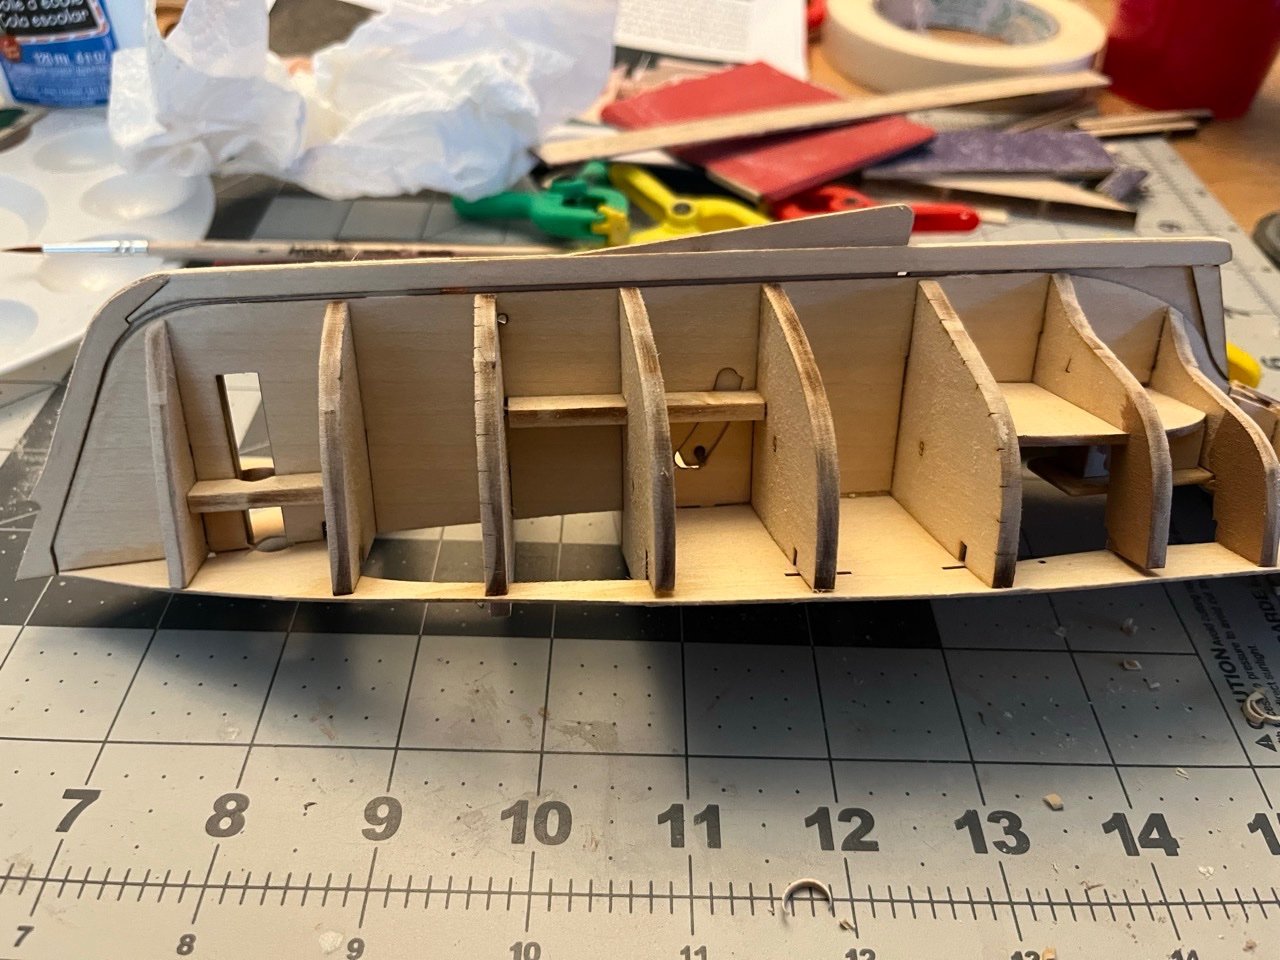
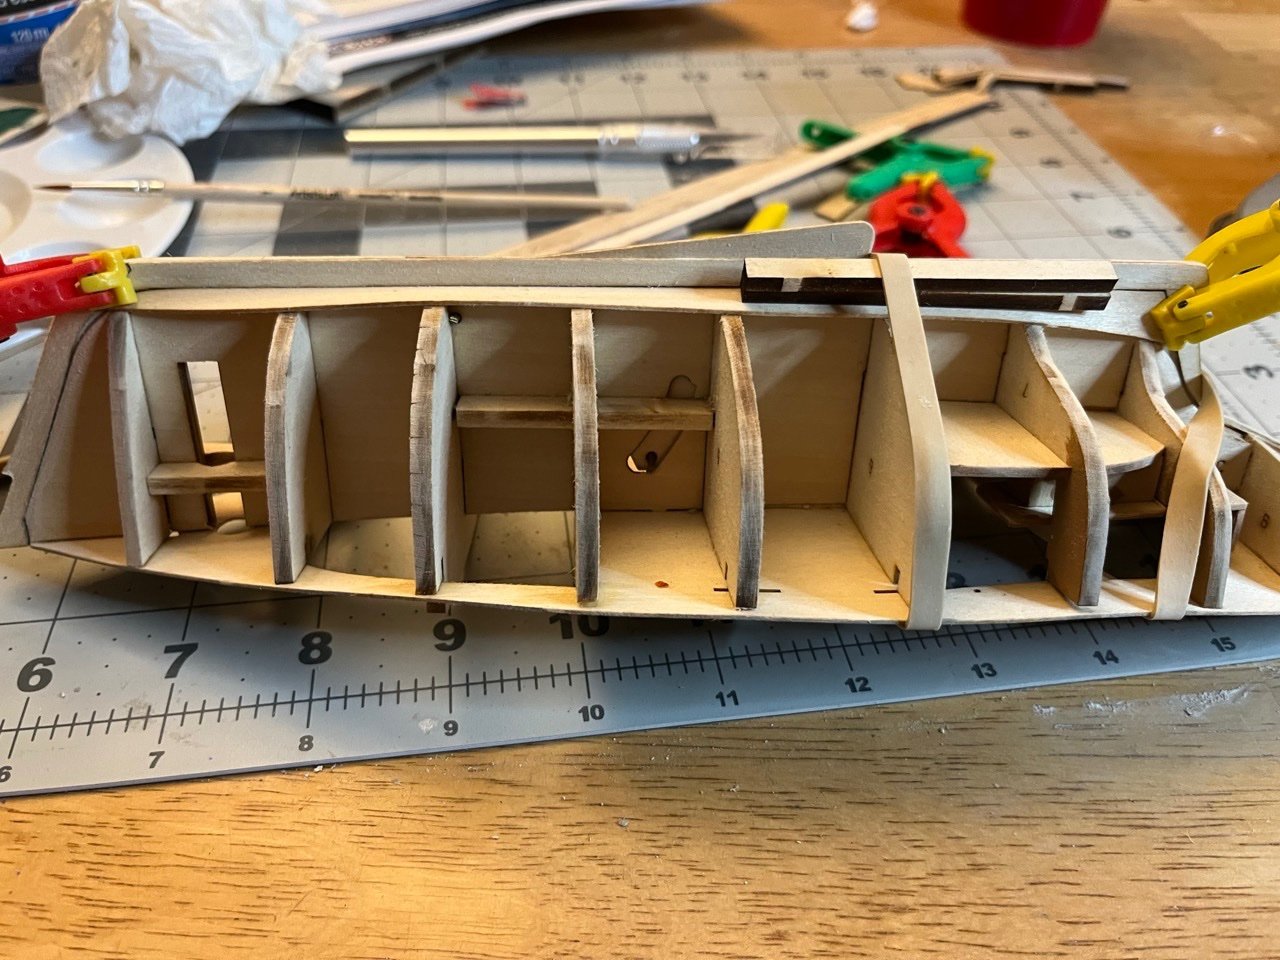
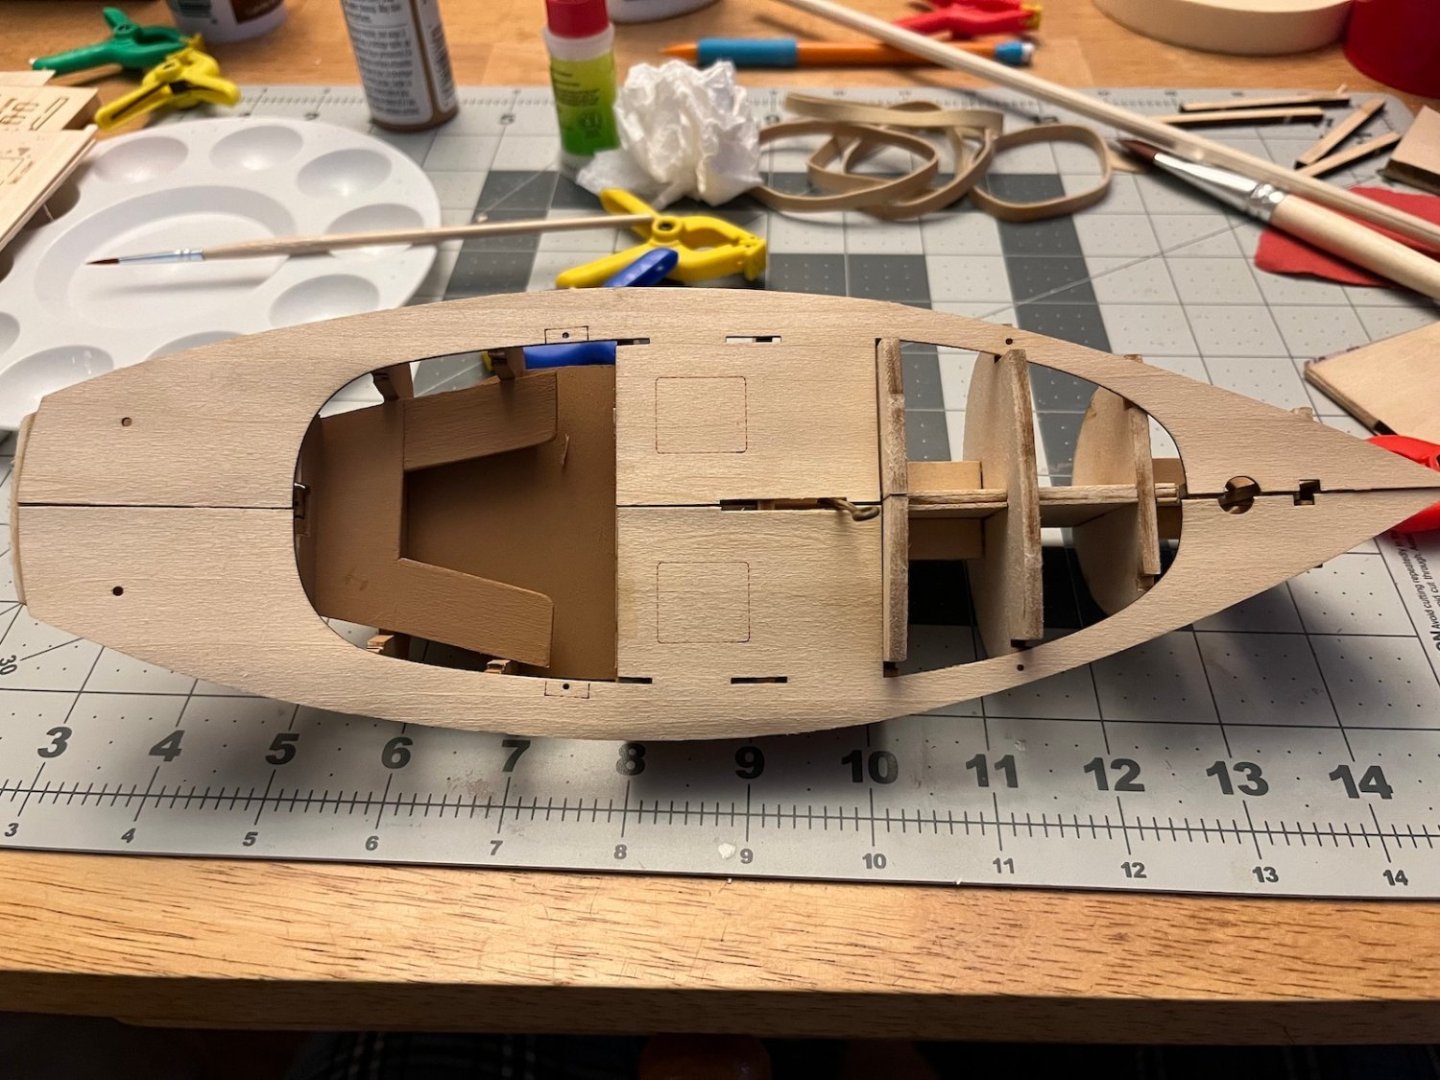
While working on trying to line up the hole for the mast, part of the deck between the mast hole and the sampson post hole broke. I cut a small piece of wood to place in that spot and used some wood filler to smooth it out. I also had to trim the frames for the cabin sides to fit in. The camera angle in the second picture makes it look like the cabin is very lopsided. It is not. Overall so far with the cabin roof installed. The pictures show so many spots that need touched up with the paint that seem to be hard to miss with a naked eye. The colors so far are golden brown for the cockpit and cabin doors. I may paint the masts that color as well. The deck and hull above the waterline are/will be gray. The cabin roof dark gray and the trim and hull below the waterline will be dark blue. I am not sure if the wet well covers should be dark blue or golden brown yet. I am thinking dark blue because golden brown is where people go. The rudder is also ready to go. The instructions make it look like the brass rod will easily fit in the groove in the rudder. The brass rod seemed to be almost as wide as the rudder in the kit. It look quite a bit of CA glue to get it to hold, even after making the rod fairly rough with sandpaper. I think the rod may be completely encased by the glue and that is what is actually holding it to the rudder. It works.

- 62 replies
-
- 6
-
-
- Muscongus Bay Lobster Smack
- Model Shipways
- (and 1 more)
-
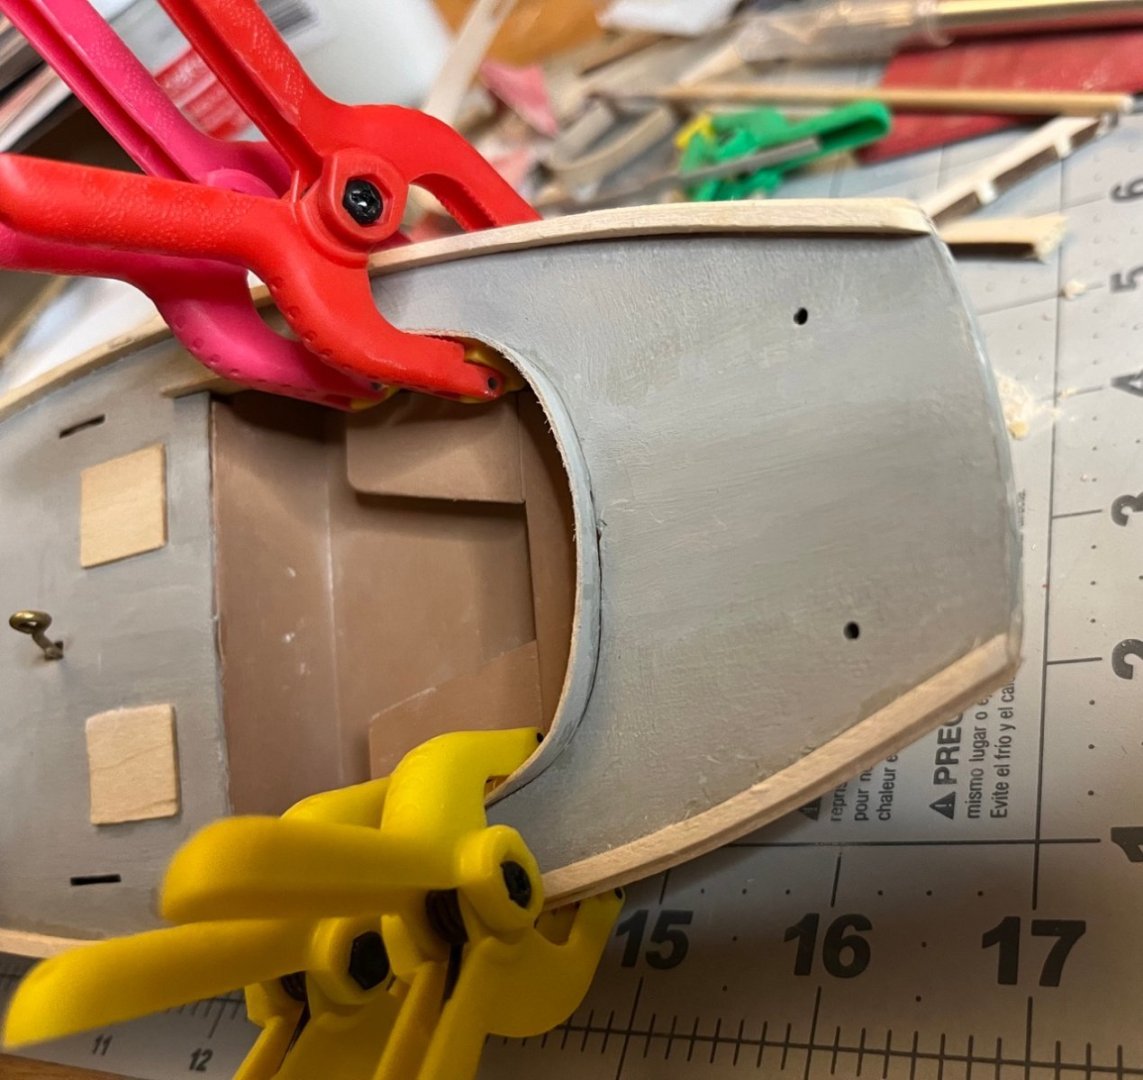
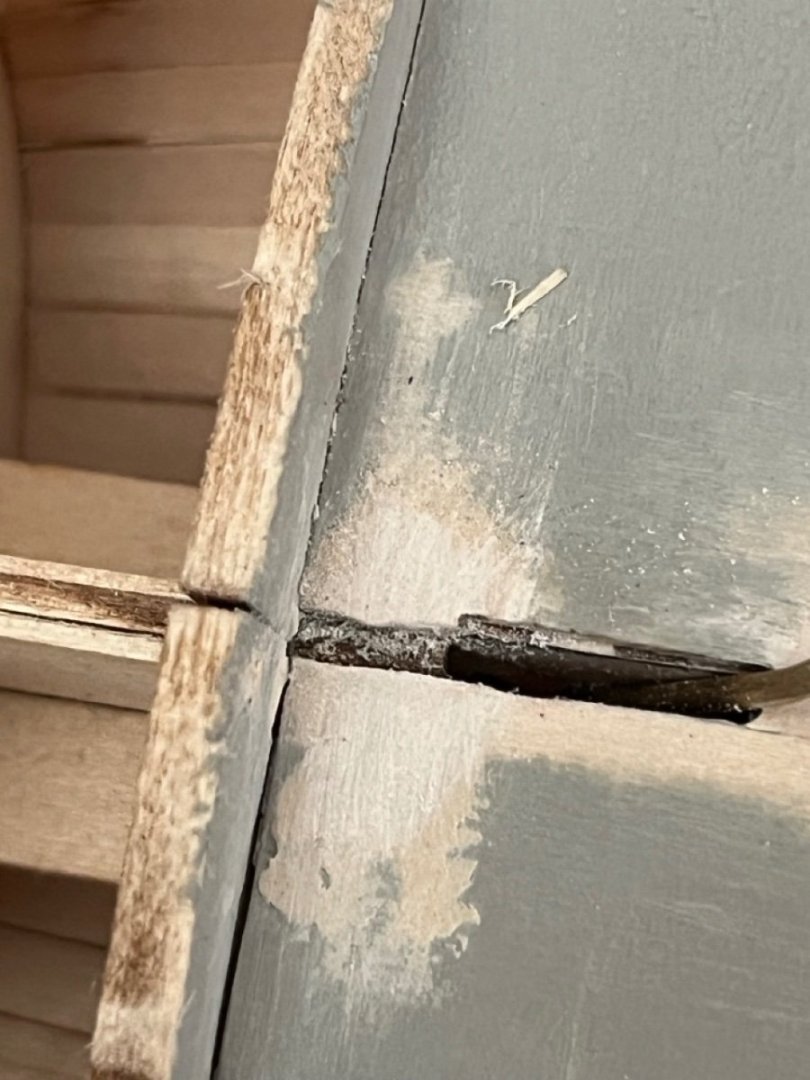
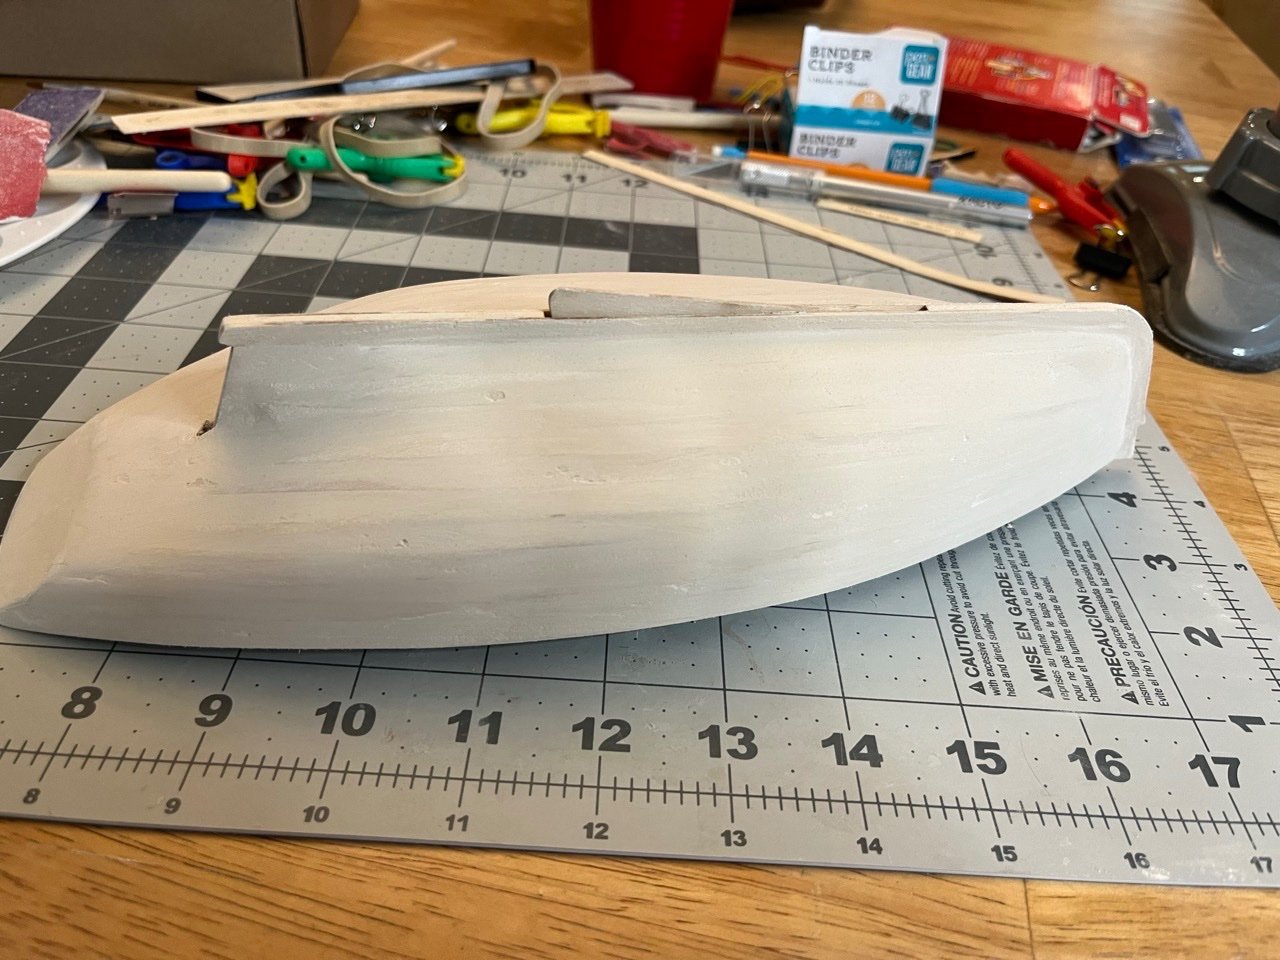
I had a problem with the deck cracking in the middle because the center edges were a bit loose and any movement was causing a crack in the paint and subsequent wood filler. I have finally gotten the deck rigid enough that the cracking should stop. I touched up the paint and will add one more coat to clean up the lines and glue spots when painting the rest of the hull. The coaming is installed as well as are the wet well covers. The wet well covers are one area where I am glad I painted the deck early. The cabin sides are ready to install as is the samson post.
- 62 replies
-
- 7
-
-
- Muscongus Bay Lobster Smack
- Model Shipways
- (and 1 more)
-
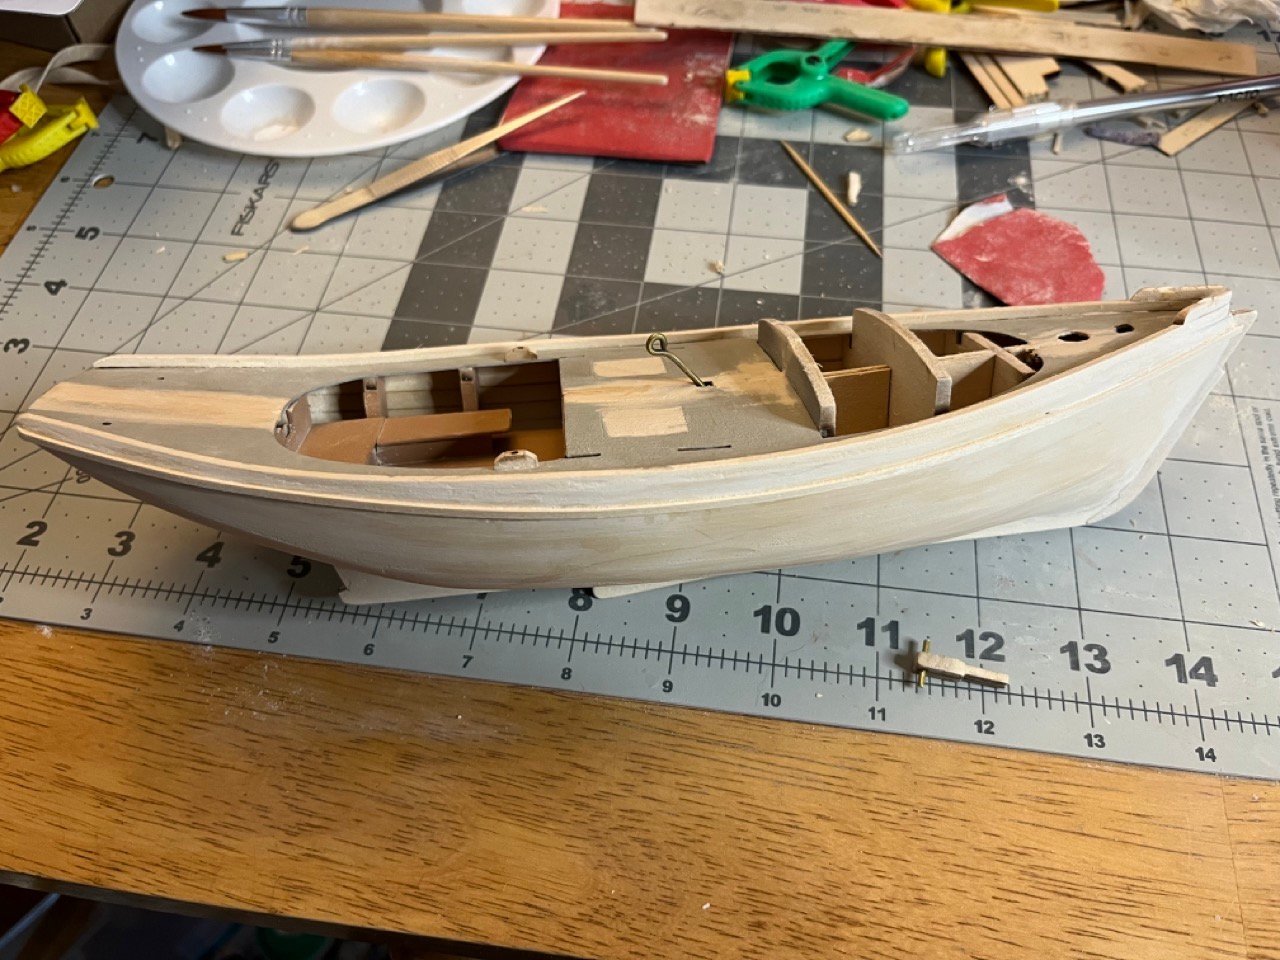
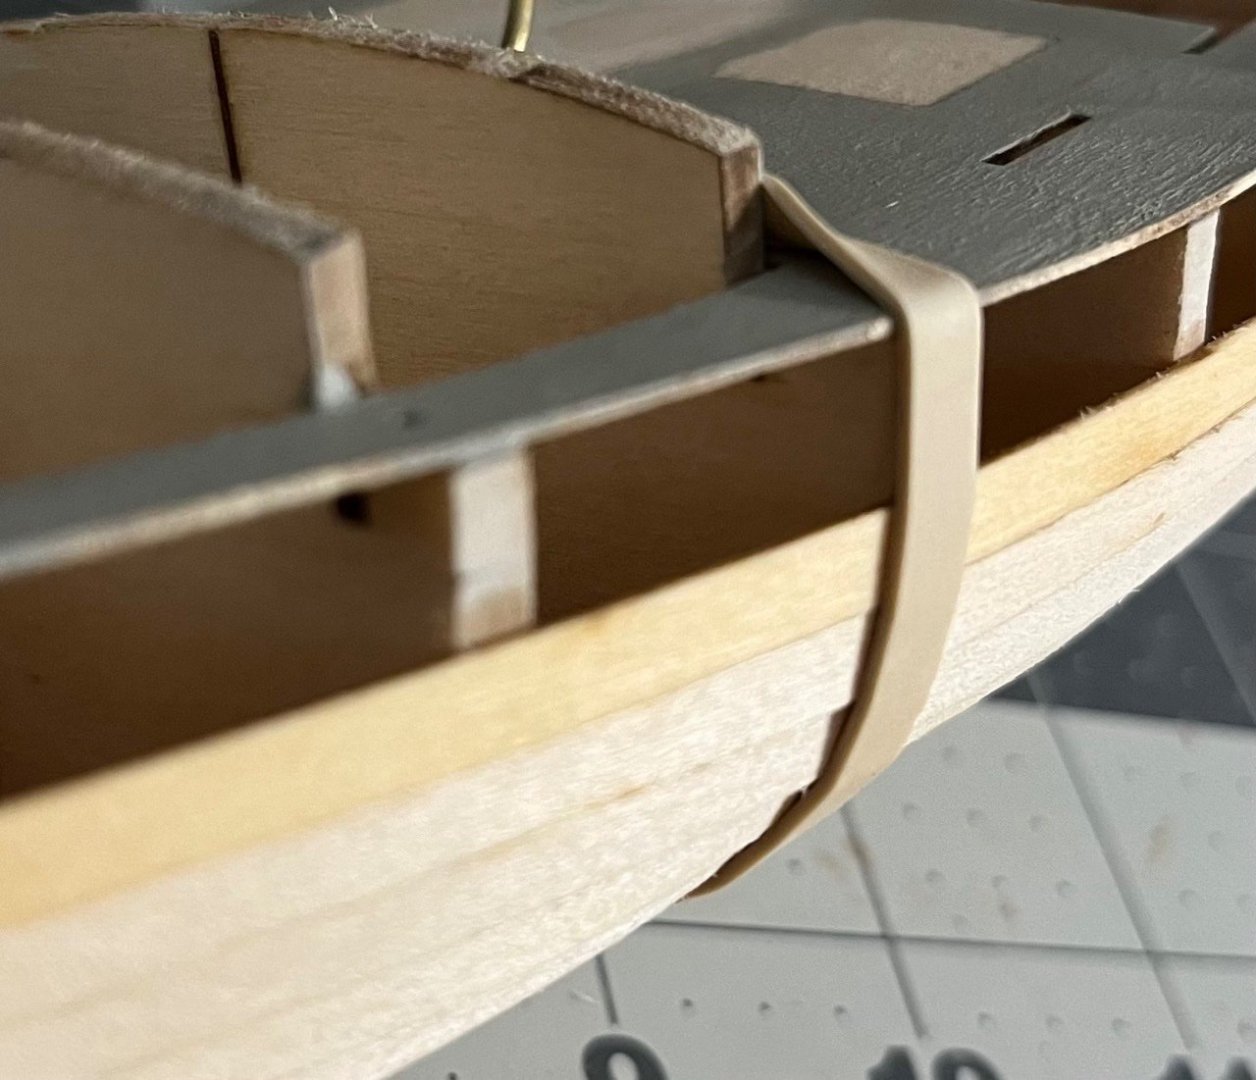
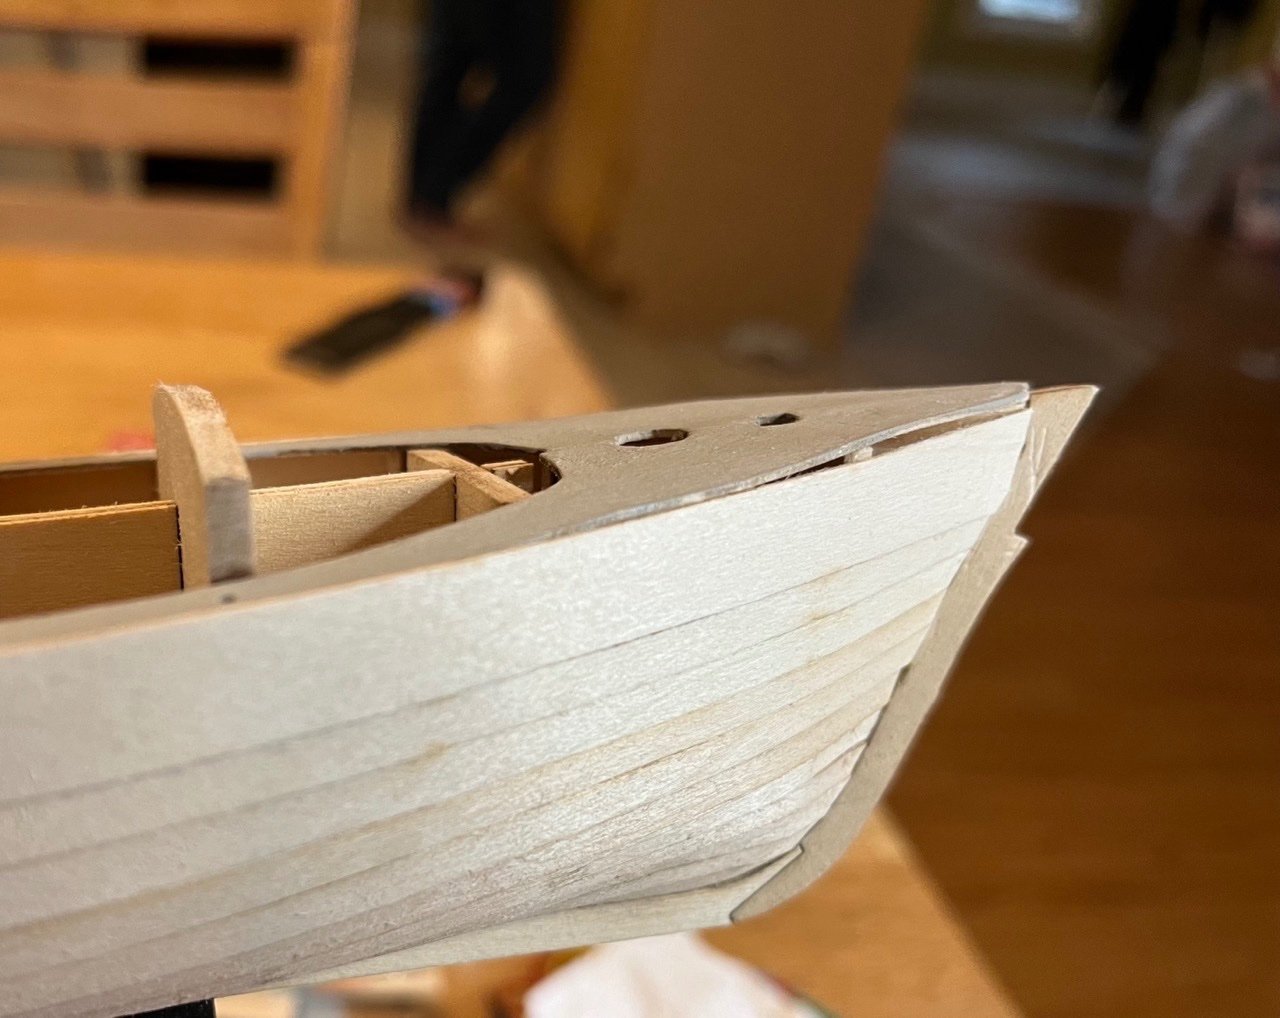
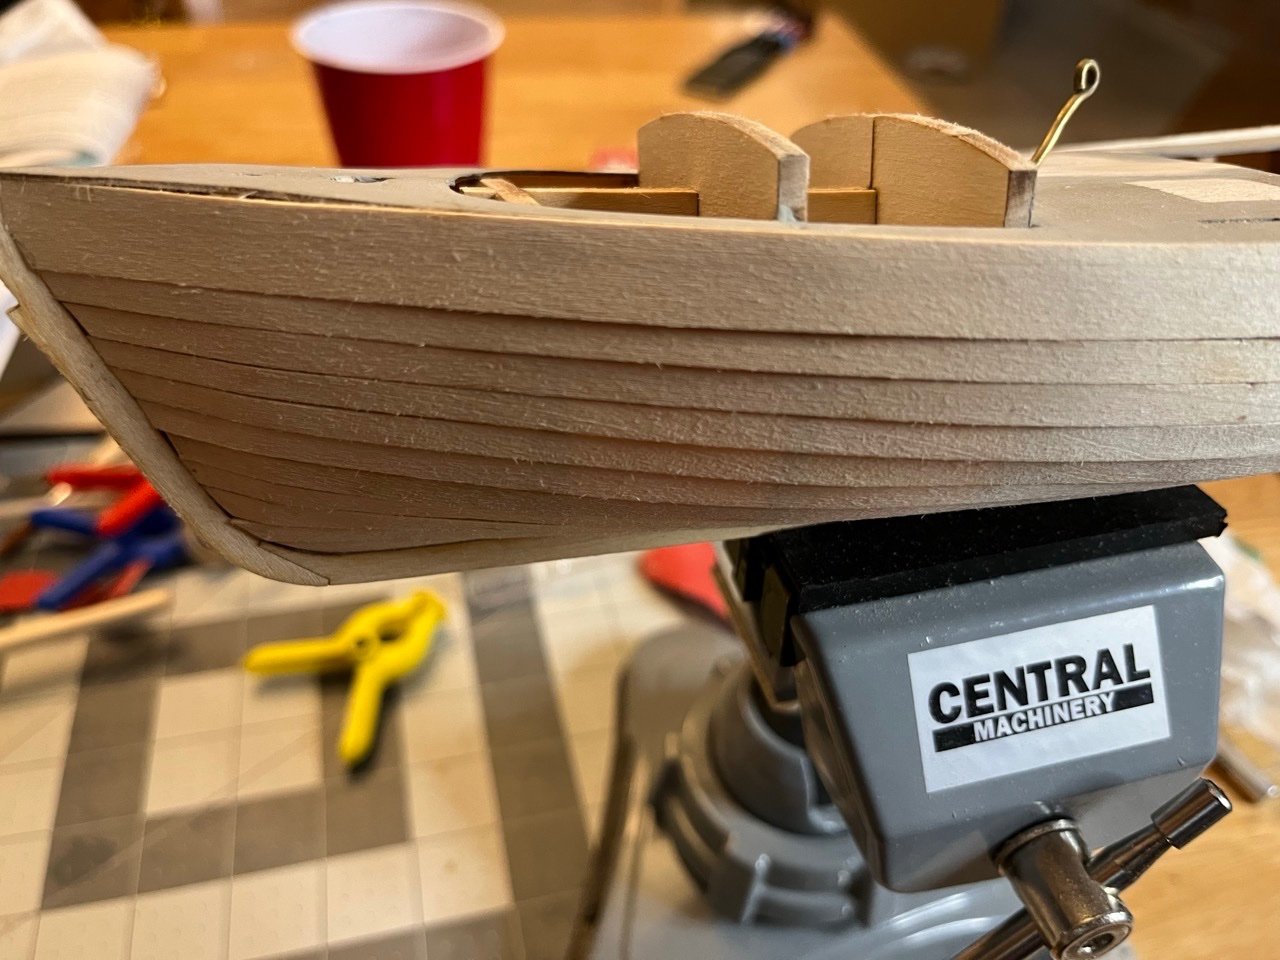
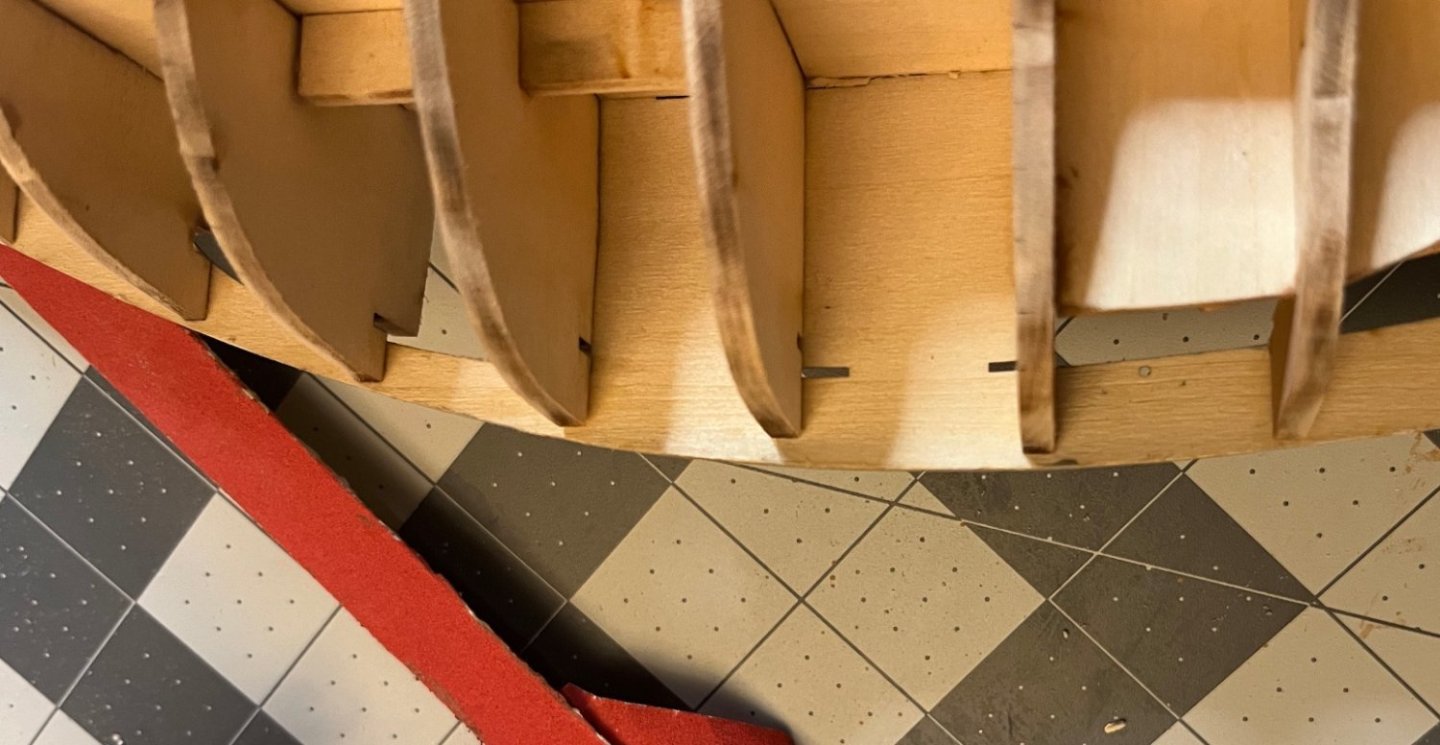
Toe rails, rubrails and fair leads installed. Samson post is also made, awaiting installation. The toe rails were tricky initially because of the bends in multiple dimensions. I got them a bit damp and used a dry iron to heat and bend them. They held their shape quite well after that and were much easier to install. The rubrails were pretty straight forward. I think my fairleads are sitting a little farther aft than they should be so I may be removing those and try moving them forward. I think I will skip a few steps and make the bowsprit so I can test fit the fairleads prior to painting.


- 62 replies
-
- 6
-
-
- Muscongus Bay Lobster Smack
- Model Shipways
- (and 1 more)
-
The pictures do look like the planks are overlapped, but they aren’t. I’m not sure if it is the lighting or bad beveling, but I was very careful to ensure that the planks weren’t overlapped.
- 62 replies
-
- 2
-
-
- Muscongus Bay Lobster Smack
- Model Shipways
- (and 1 more)
-
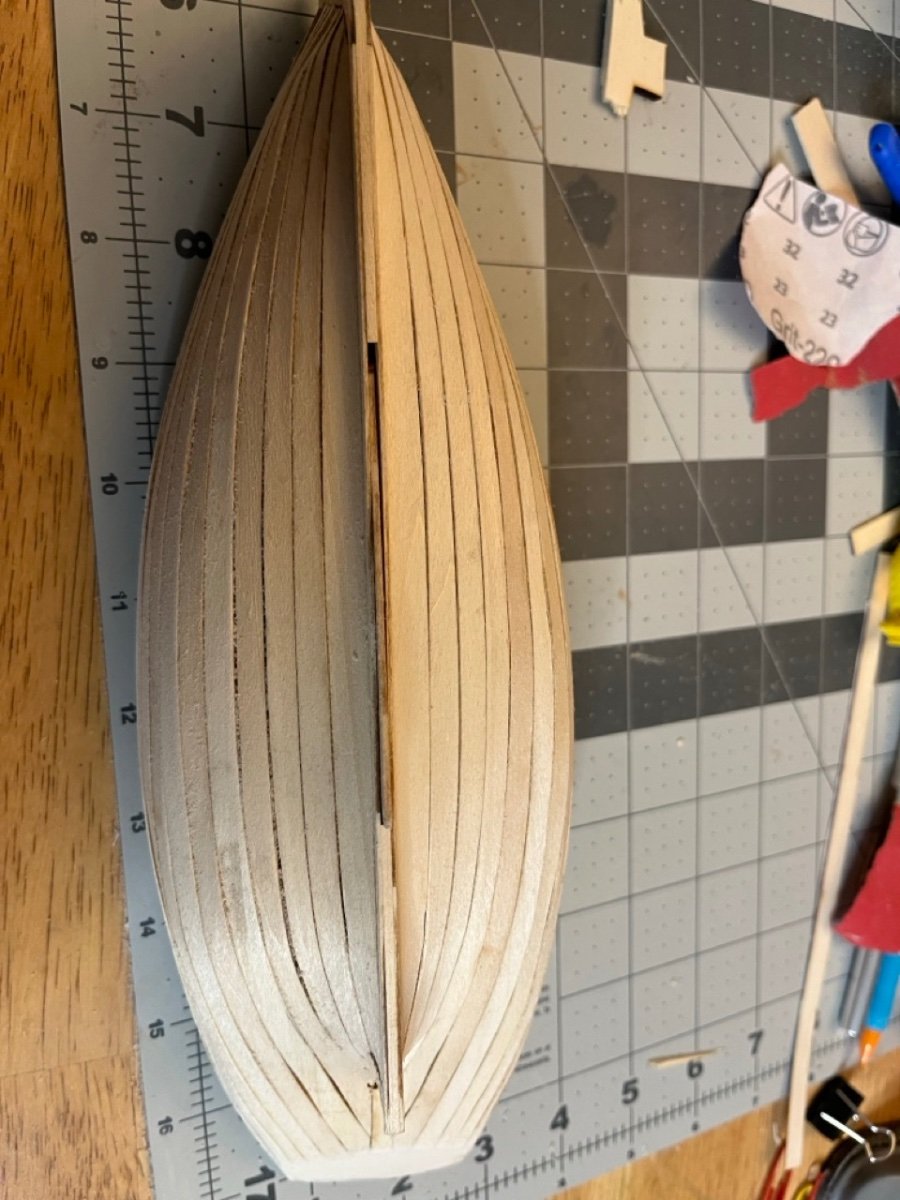
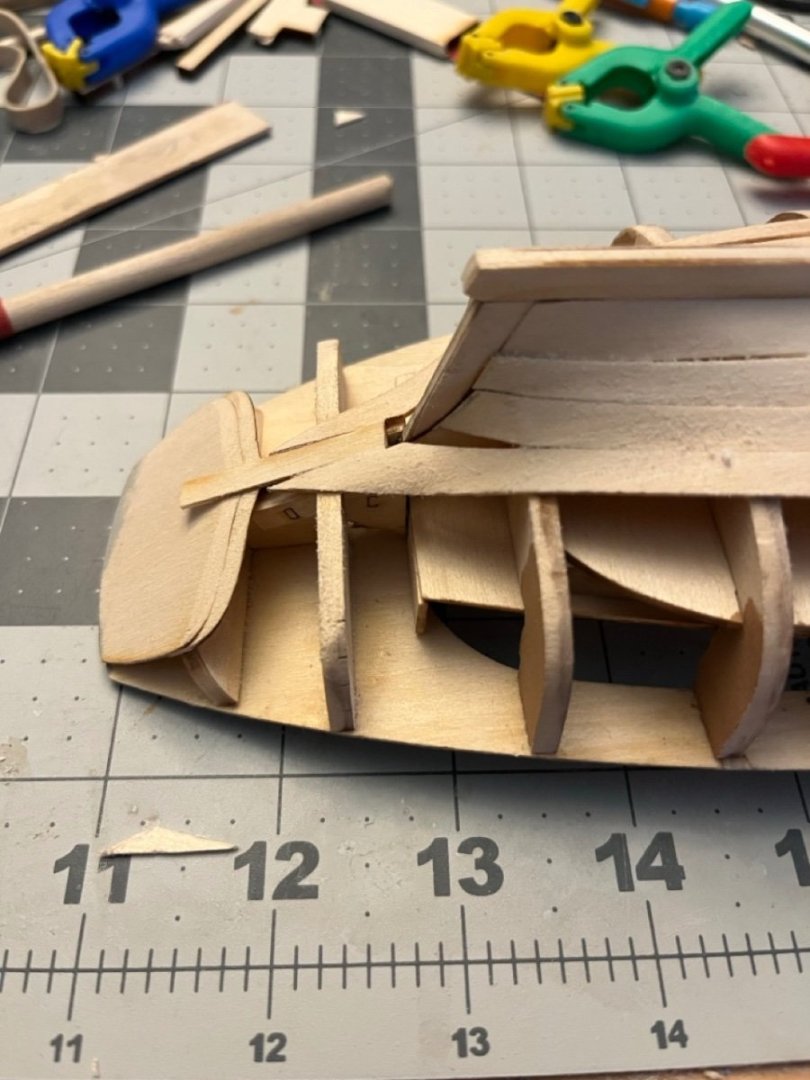
Finishing up the hull planking. Since the frames didn’t reach the edge of the deck I had to add some scrap wood to fill it out. The photo is pre sanding. I faired them as I added each strake. Finishing up the planking, I started to worry that the sheer strake may not be wide enough. Somehow I was almost a full strake below the tick marks on both sides. Both sides on the bow were just slightly short, but amidships and the stern were ok. Strakes sanded and trimmed, ready for filler. I tried to apply the filler as thin as possible. The first sanding went pretty well. I’m pretty happy with the over all shape. I’ll do another application or two and try to fill in some of the little air holes and games that formed. Unrelated to the hull, the deck was loose and soft so I wanted to reinforce it. I also didn’t like the hole in the deck so I filled it in a bit.


- 62 replies
-
- 3
-
-
- Muscongus Bay Lobster Smack
- Model Shipways
- (and 1 more)
-
Welcome!
-
@SkiBee These kits are definitely teaching me a lot as I had basically no modeling experience prior to them. Thanks for the encouragement!
- 62 replies
-
- 3
-
-
- Muscongus Bay Lobster Smack
- Model Shipways
- (and 1 more)
-
Creating that rolling bevel was probably the hardest thing for me to do on the Dory. The strakes are so thin that it is definitely quite a challenge.
-
The amount of detail in your beveling and shaping of such small, thin pieces of wood to make everything fit together so perfectly is quite impressive.
-
Very true. It would be quite the boring hobby if everyone produced a model that looked exactly like what was on the package. Thanks for the encouragement!
- 62 replies
-
- 3
-
-
- Muscongus Bay Lobster Smack
- Model Shipways
- (and 1 more)
-
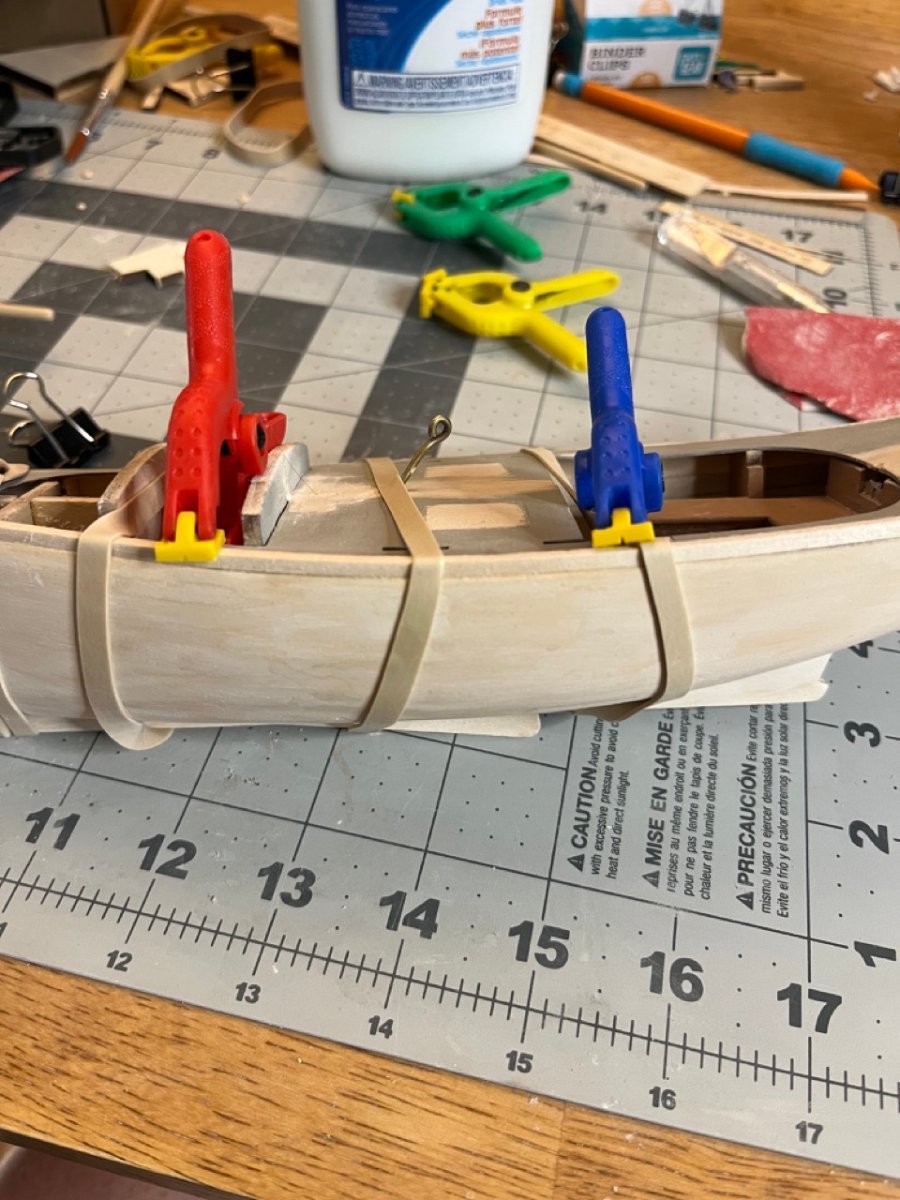
Thanks for the encouragement Gregg! I have been using rubber bands and scrap wood to try and push the planks together while drying and while gluing. I just looked at your Ballahoo log and got an idea of how the binder clips work. I like how the finger loops hit just enough of the previous plank to hold them even with each other as well. I think I will give that a try with the remaining strakes.
- 62 replies
-
- 3
-
-
- Muscongus Bay Lobster Smack
- Model Shipways
- (and 1 more)
-
I am about halfway through planking the hull. I ended up trimming one of the planks too narrow and had a gap. I cut out a small piece to fill said gap and it worked pretty well. I thought I was taking my time, trying to get the planks down as nicely as possible, but it isn’t looking as nice as I had hoped. I am mostly disappointed with some of the gaps in the starboard side. The port side is ok. The plans do call for wood filler to be used to smooth everything out, which is what is allowing me to continue with this planking. You can see on some of the frames where I have started adding extra pieces of scrap wood where there would be obvious gaps between planks and frames. I suspect I will need some more as I fine tune individual planks. I ran into a problem with trimming the excess off of the stern end of the planks. I dry fitted the planks down, used a pencil to mark the edges just slightly past the rabbet, then cut the planks just outside of the pencil marks. I figured this would give me extra room to ensure a good fit. For some reason this trimmed them all too short. This was especially so on the starboard side. I used a little wood putty here early while I could still get a finger into the area from the inside.

- 62 replies
-
- 3
-
-
- Muscongus Bay Lobster Smack
- Model Shipways
- (and 1 more)
-
The entire collection Looks great! I really like the name plates
- 38 replies
-
- 1
-
-
- Model Shipways
- Shipwright Series
- (and 2 more)
-
I was worried about the bevels as well. Especially because the planks are so thin, it is hard to make it look like the instructions. It really isn’t as big of an issue as it would seem. When you place the next strakes, if they don’t seem to lay right, you can fine tune the bevel
-
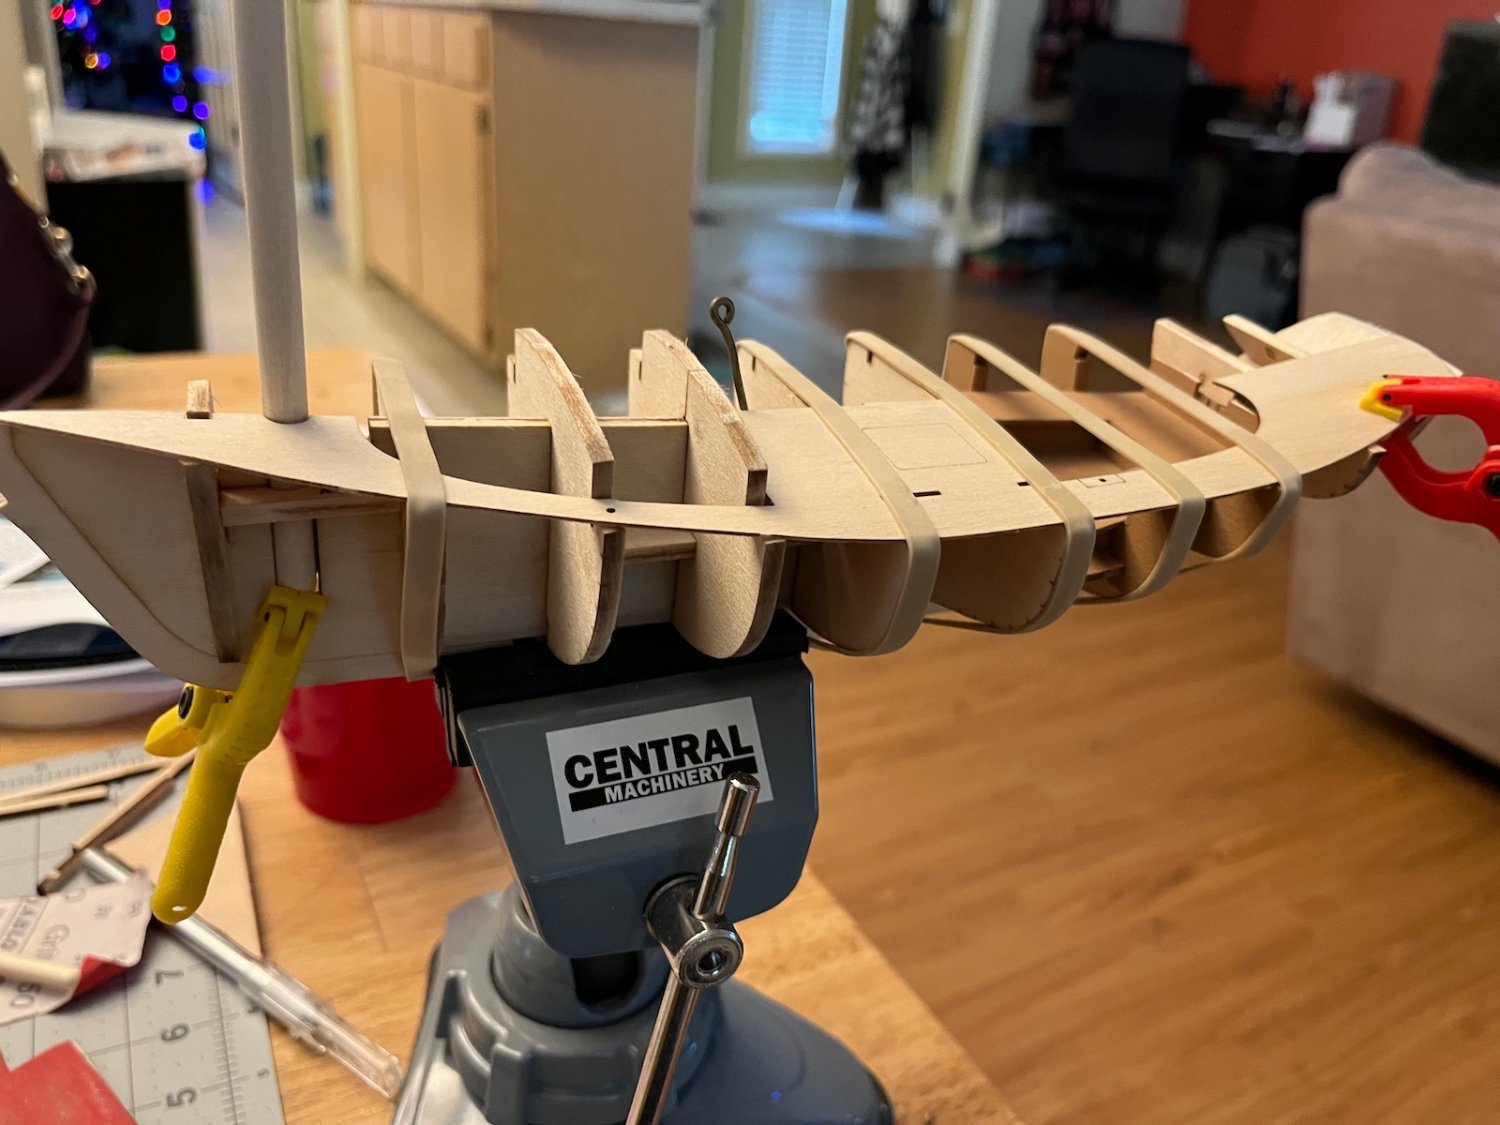
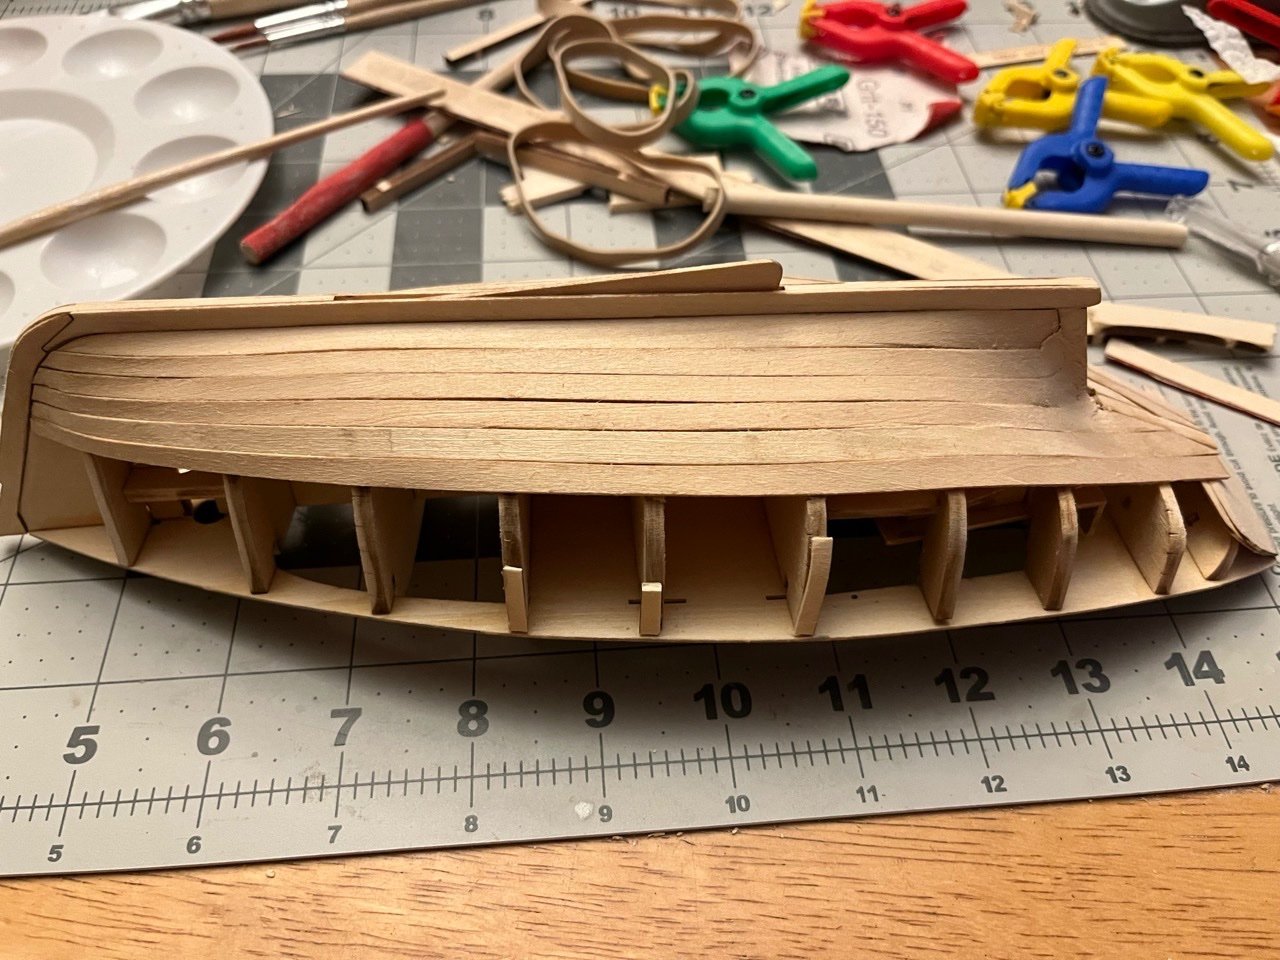
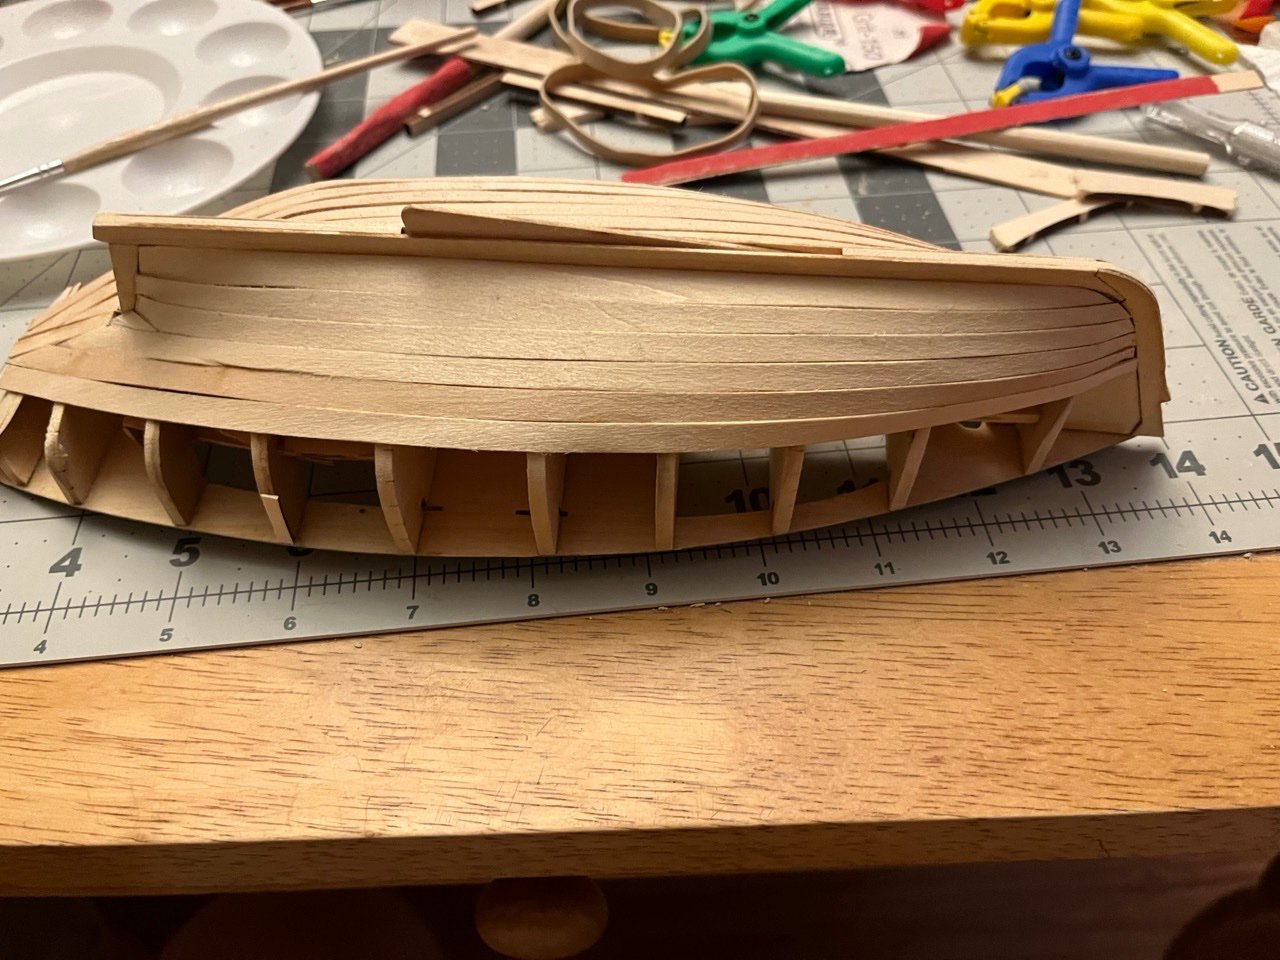
Back to work after a family weekend trip. I spent the weekend trying to decide how to best handle the frames not reaching the edge of the deck. I decided that since it wasn’t every frame it wasn’t worth stressing over. It looks symmetric so I don’t think that I will have a problem with a lopsided hull. Next step is to add the keel pieces to the spine. I initially dry fitted the pieces aligned with the spine edge thinking that the spacer was there just to ensure a rabbet. This was definitely not right. Aligning everything to with the spacer made all of the keel pieces fit together quite nicely. It did require a bit of trimming and sanding of the excess spine. After the keel it was time to start on the garboard strake. There was a little bit of the rabbet that required a bit of surgery to make the plank fit in nicely. after soaking 3-4 times and some trial and error it seems to have bent and twisted quite nicely into shape. After adjusting the fairing of the frames it looks like the first plank will be a success.

- 62 replies
-
- 6
-
-
- Muscongus Bay Lobster Smack
- Model Shipways
- (and 1 more)
-
Welcome Christopher! I’m a beginner as well, just starting on my third boat of the same series. There are plenty of people here that have built this series so you will be in good company. I highly recommend making build logs. I wish I had on my first two boats. It has forced me to slow down and really focus on making a better model. Plus it is nice to have it to look back on. Most importantly, have fun!
-
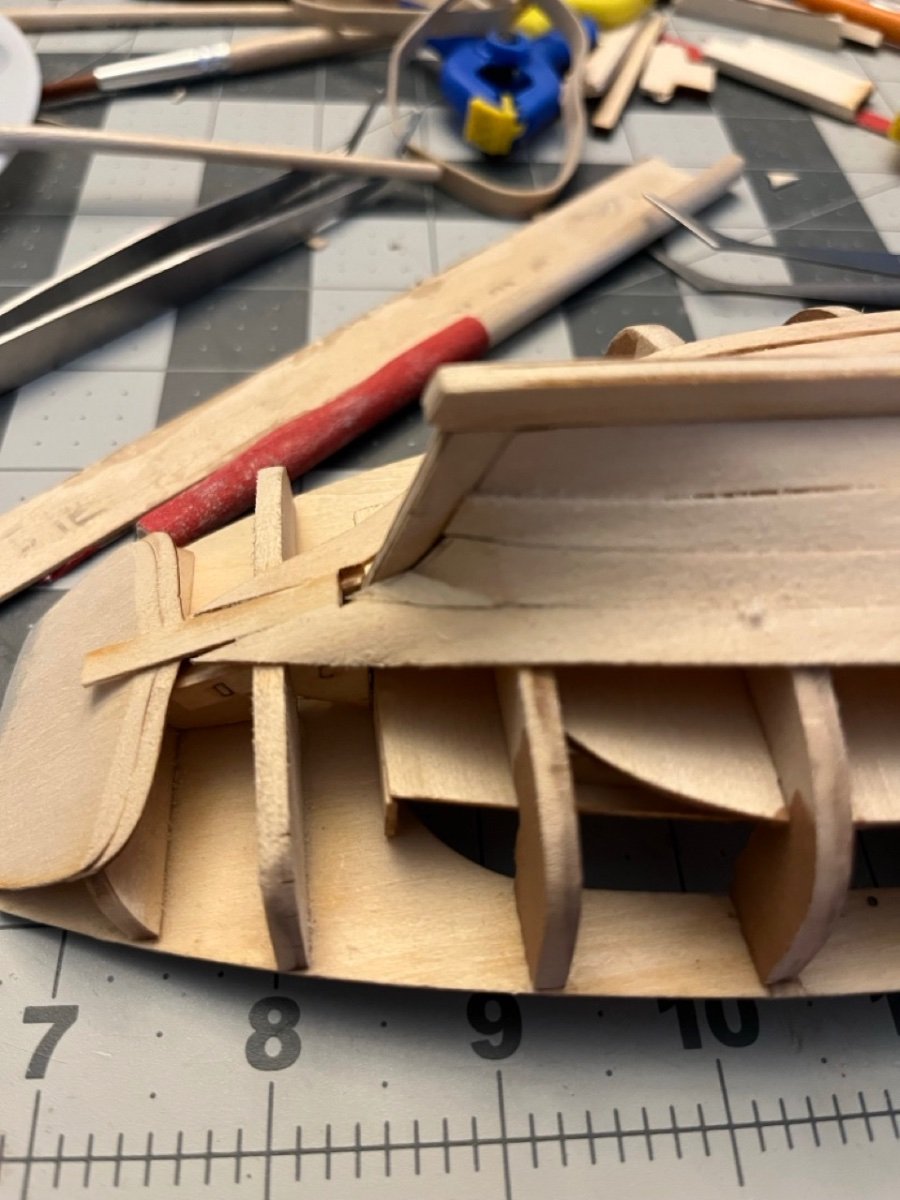
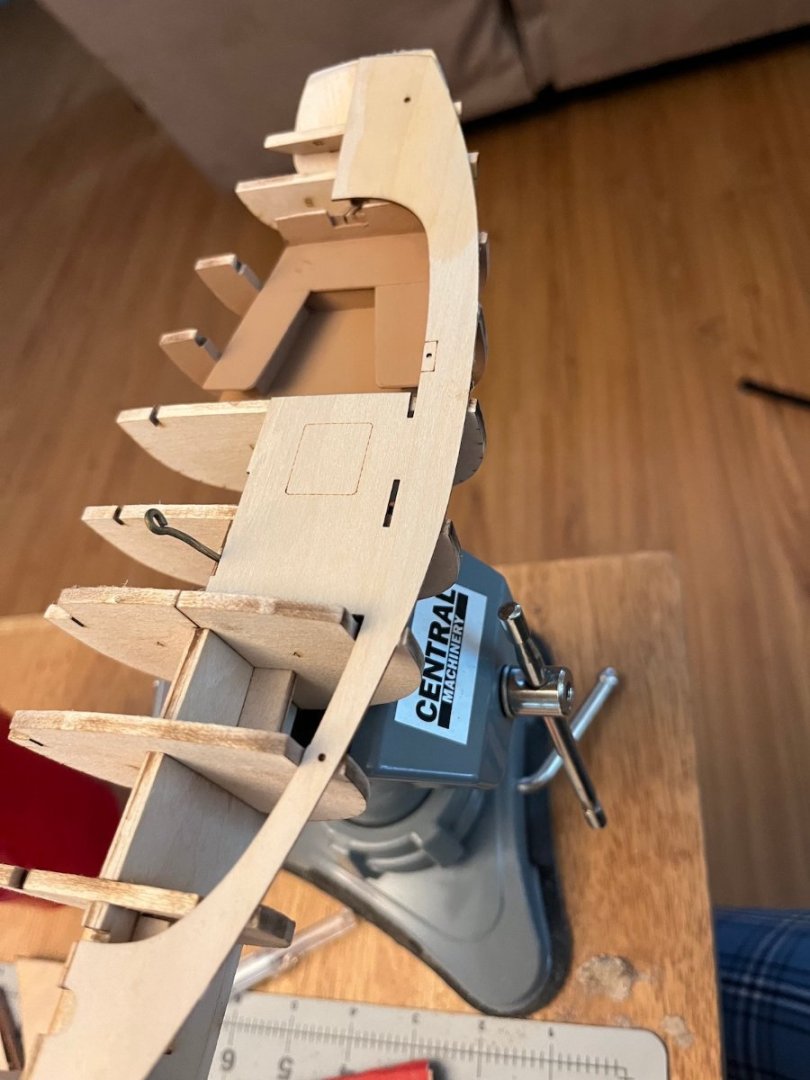
I started working on fairing the frames. I realized I had another problem. Some of the frames don't go all the way to the edge of the deck. I am not exactly sure what happened here. It isn't an issue of them being short on one side and protruding on the other side. I think my best bet will be to add shims and wedges when I do the planking.
- 62 replies
-
- 2
-
-
- Muscongus Bay Lobster Smack
- Model Shipways
- (and 1 more)
-
Your boat looks great! That was a good idea on painting the deck before adding anything else to it. I will have to do that myself.
- 29 replies
-
- 1
-
-
- Model Shipways
- muscongus bay lobster smack
- (and 1 more)
-
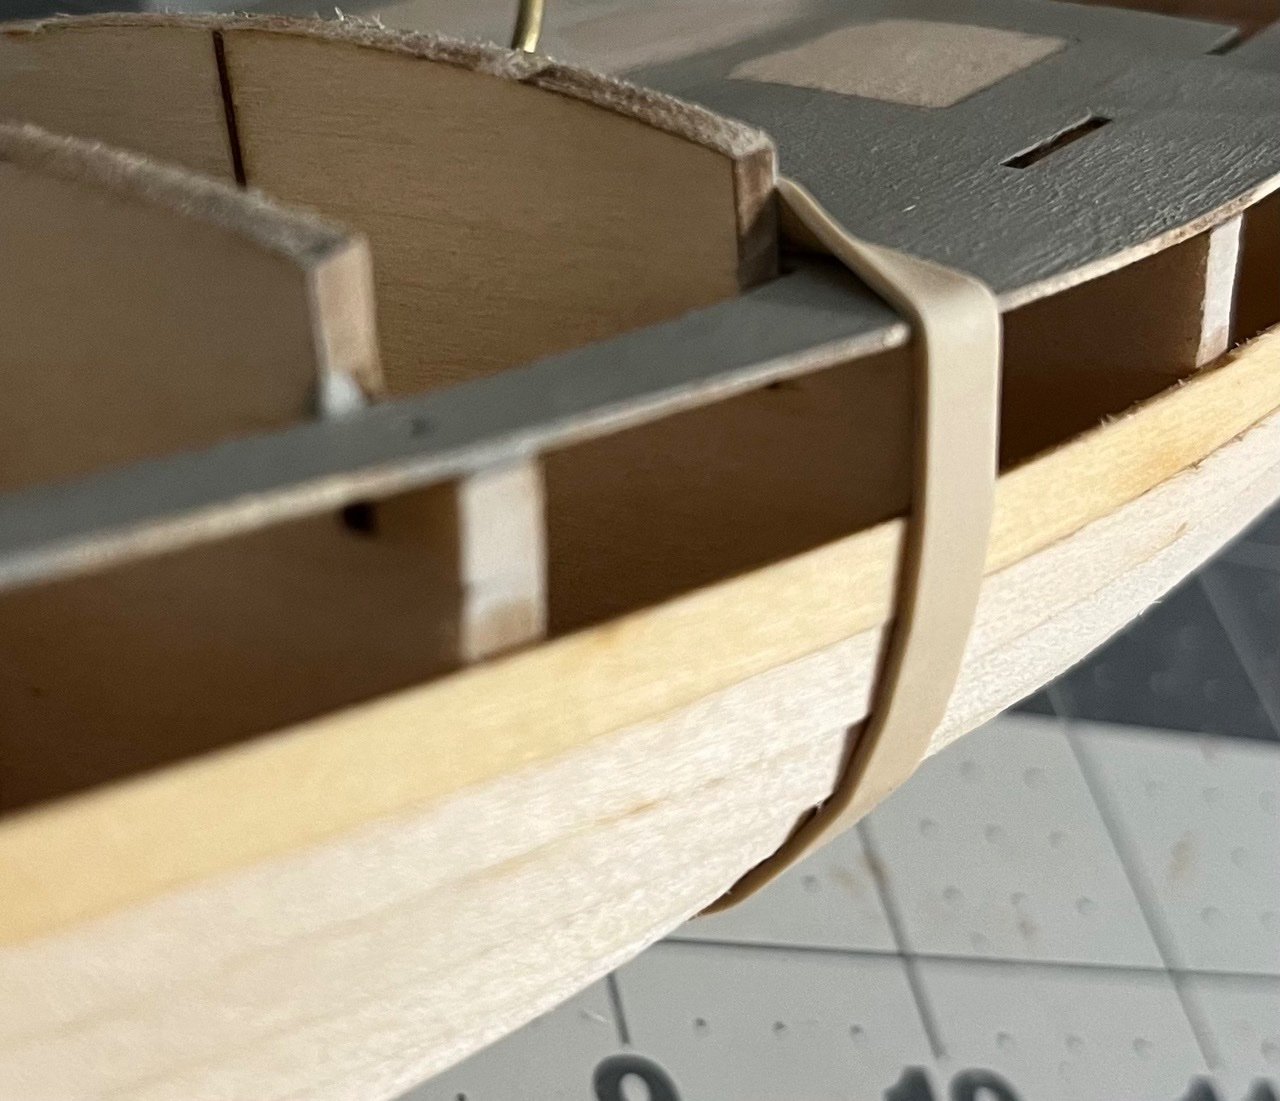
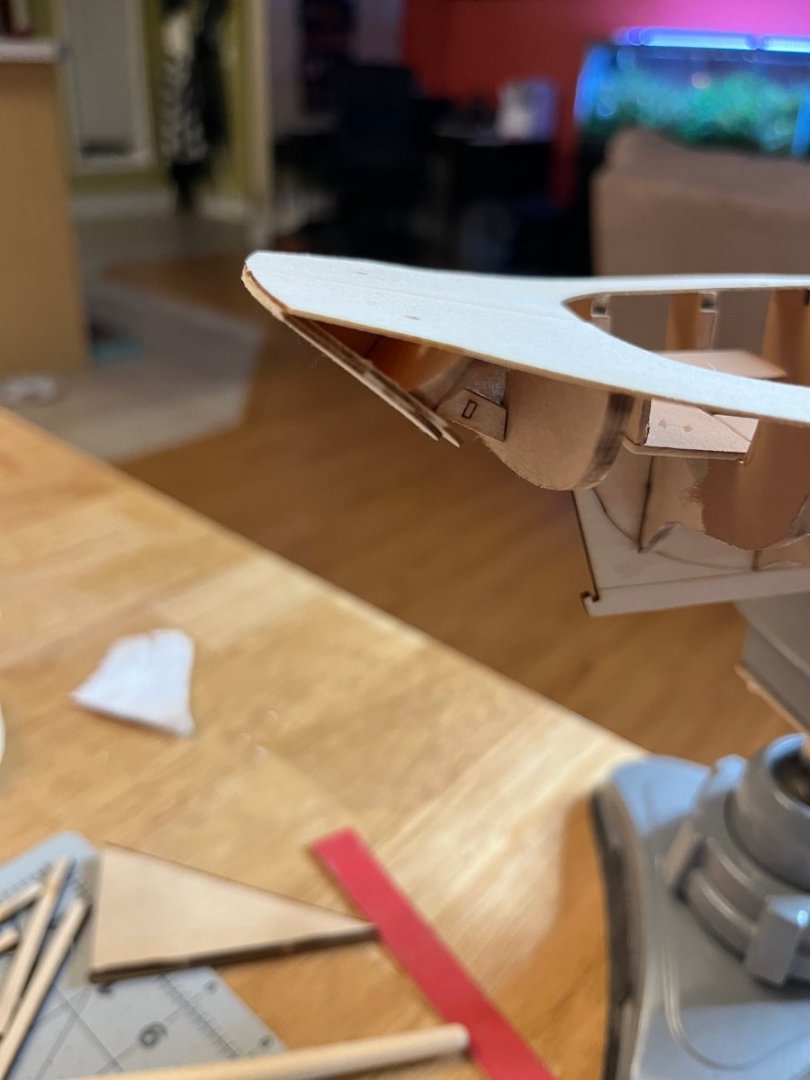
Installing the deck was quite tricky. The instructions said to wet one side so the wood would be easier to bend. I would suggest lightly wetting both sides. The wood curled so much it became difficult to work with. It took quite a few tries to finally get the port side of the deck on to the frames. I found that gluing from the center out worked better than to try and glue all at once. A small paint brush was able to easily get the glue between the frames and the deck. I used a 1/4in dowel (leftover from the pram) to stand in for the mast. After everything had dried I realized that I messed up. The deck was not lined up properly on the frames. After laying down the starboard half of the deck for a dry fit, it was very clear that the port side deck would need to be redone. The frames shouldn't be protruding past the deck and the inboard edge of the deck as well over the center line of the spine. This was my first time ungluing anything at this scale. Fortunately the isopropyl alcohol worked pretty well at loosening the glue and I was able to separate the deck from the frames with an exacto knife. The second attempt was much better. There was a bit of a gap down the center line and I had to choose whether I wanted the bow or the stern to not quite line up. I figured the bow might be easier to correct since it is smaller. I am not sure why the two halves didn't line up properly. My guess is that the spine isn't perfectly straight. A little carving, wood filler and sanding took care of everything. It still needs a little fine tuning, but I will take care of that as needed. I was a little concerned that my bow transom wasn't fitting properly with the deck and the frame, but after sanding everything down, I think it looks how it is supposed to look.


- 62 replies
-
- 4
-
-
- Muscongus Bay Lobster Smack
- Model Shipways
- (and 1 more)