kgstakes
-
Posts
402 -
Joined
-
Last visited
-
 kgstakes reacted to a post in a topic:
Nail pusher nightmare
kgstakes reacted to a post in a topic:
Nail pusher nightmare
-
kgstakes reacted to a post in a topic:
Innocraftsman Mill
-

Cutters, Choppers, Guillotines, Slicers
kgstakes replied to MintGum's topic in Modeling tools and Workshop Equipment
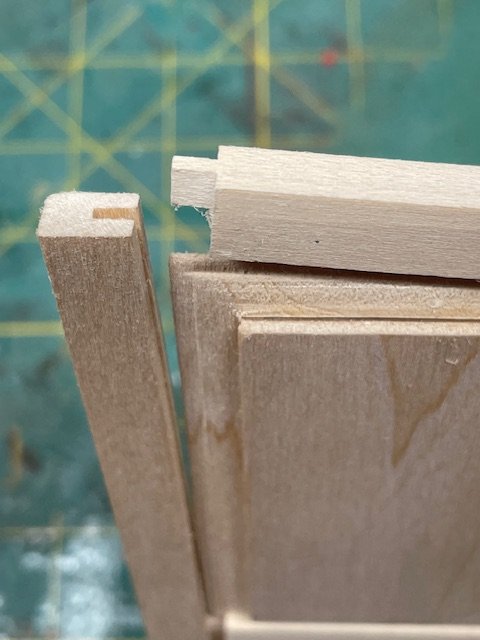
i have the slicer and sander and yes thicker material (3/16” & up) you will need to do one of two things 1- after the cut true to the cut on the sander 2- turn your wood around and take a second cut. The blade on the slicer is beveled on one side. Great for small material but thick material will need a second cut or trued up on the sander. The tools are great tools I use them all the time and the repeatability is like no other machine that I’ve tried. Very precise. -
kgstakes reacted to a post in a topic:
Cutters, Choppers, Guillotines, Slicers
-
aaronc reacted to a post in a topic:
Work area pictures only
-
kgstakes reacted to a post in a topic:
Innocraftsman Mill
-
aaronc reacted to a post in a topic:
Innocraftsman Mill
-
GrandpaPhil reacted to a post in a topic:
KG & B Railway by kgstakes
-
Canute reacted to a post in a topic:
KG & B Railway by kgstakes
-
Paul Le Wol reacted to a post in a topic:
KG & B Railway by kgstakes
-
Thought I would share a video I till with my phone (sorry not too good) of my shadow box switching layout (HO scale). Enjoy!
-
- 3
-
-
Canute reacted to a post in a topic:
Innocraftsman Mill
-
Canute reacted to a post in a topic:
Innocraftsman Mill
-
Canute reacted to a post in a topic:
Innocraftsman Mill
-
Canute reacted to a post in a topic:
Innocraftsman Mill
-
Canute reacted to a post in a topic:
Innocraftsman Mill
-
kgstakes reacted to a post in a topic:
Apostol Felipe by travis - OcCre - 1/60
-
kgstakes reacted to a post in a topic:
Apostol Felipe by travis - OcCre - 1/60
-
 kgstakes reacted to a post in a topic:
Apostol Felipe by travis - OcCre - 1/60
kgstakes reacted to a post in a topic:
Apostol Felipe by travis - OcCre - 1/60
-
kgstakes reacted to a post in a topic:
Apostol Felipe by travis - OcCre - 1/60
-
kgstakes reacted to a post in a topic:
Work area pictures only
-
kgstakes reacted to a post in a topic:
Work area pictures only
-
I’m convinced for what I want to do this will do it!!! Thank you for all your help. i have a proxxon table saw and really like it. Thanks again
-
Is there any movement when using it as a mill (head movement) it’ll stay vertical, true with no movement? Heck if that’s the case that may be the way I want to go for now at least (and maybe for ever if it works the way I want it to) and less expensive than a mini mill.
-
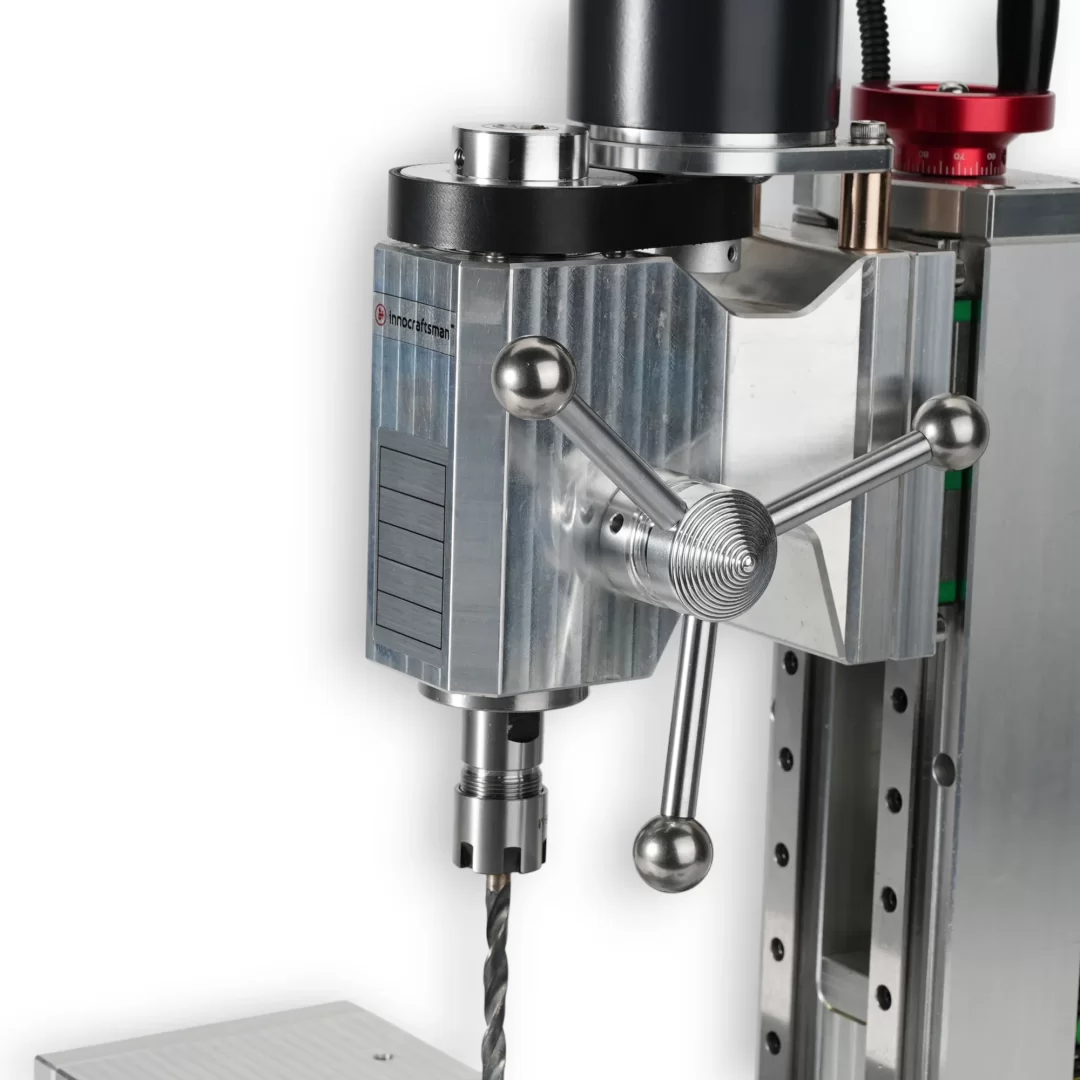
On top towards the rear above the spring? Looks like bolt with a locking nut. So you can turn that to adjust and lock the rotary tool at any vertical Z axis that you want?
-
I thought of that idea too buying a proxxon Professional Rotary Tool IBS/E and the drill press attachment and also the X Y table. But wasn't sure about the side pressure and I really didn't know who to micro adjust the Z axis. How do you micro adjust the Z axis with your set up?
-
i looked at them but if i do want to do some sort of milling operation (and i say that but I’m not doing the milling operations that most do with metal I’m working mainly in wood). the side pressure will damage the drill press because it’s not made for that only vertical. i know at some point i may do some metal work. i just don’t like the hearing that so many small mills have and why plastic gears? Because it’s cheaper? Why not just have it belt driven? Be quieter. More that I’ve gotten feed back on this not real sore which way to go. Have to think on it and do some more research before I buy.
-
Thank you for your response. That is what interested me in the first place is that I could use it as a drill press as well as a mill. i do need a better drill press rather than what I am using (dremel with their drill stand). Again thanks for responding. Still looking at options.
-
It kinda sounds like I should be looking at the Taig Mill or the Sherline Mill for any "real milling". Whether it be metal or wood. Currently, I'm building a lot of miniature furniture. But I also enjoy building horse drawn vehicles, railroad equipment, boats and ships (not so much the last two but did enjoy it). So, next question, if you had to choose a small mini mill (for model work) what would you purchase? You've pretty much talked me out of the Innocraftsman mill so give me some ideas. My thoughts are I have a taig lathe so go with a taig but, I know sherline has good products too. I was also looking at the proxxon mill but I don't like the gears that so many other mini mills have. I like my shop to be quite. Well, music playing but no loud gears!! LOL Let me know your thoughts please, I'm in no hurry to purchase anything so waiting until I can purchase a better machine is not a problem. As I stated before, I'll be working mainly in wood but milling out parts for a carriage or a wagon out of brass would be nice as well. Thank you for your time and patience and looking forward to any and all suggestions.
-
Thanks for all the comments. What I would probably be using the mill for is to replace my Dremel drill press set up. I would like to do some "milling" which would be for my miniature furniture and so I would be using it basically as a shaper sorta speak to do dovetails and dadoes that are to small in with for my table saw that I use now for dadoes (1/16" wide). Also, to do mortise and tenon joinery like I do in my wood shop with a mortising machine. And the one thing that I did like was that it looks to be belt driven verses the plastic gears that you see on other mini mills. Hopefully run quieter too. Someone said it looks like a beefier drill press, I guess that is what I'm looking for that can take the side pressure like a mill can. Most larger drill presses are not designed to have side pressure, they can only handle (really well) vertical pressure. Hence the reason I'm looking at a small mill verses a benchtop drill press. I would be using dental tooling for all my applications and I would see myself doing some metal work with a mill but mostly I would with wood. Same as my Taig lathe. I've done some metal turning on it but mostly wood. I know then why not get a wood lathe? I like the accuracy I get with the Taig that I could not get with a regular wood lathe. Again thanks for the comments and as far as holding things I think (not sure) the holes on the table would work for making an accessory holding jig and bolt to those thread holes (I think they are threaded). I don't think they are countersunk screws for just holding the top plate 🤔🤔.

-
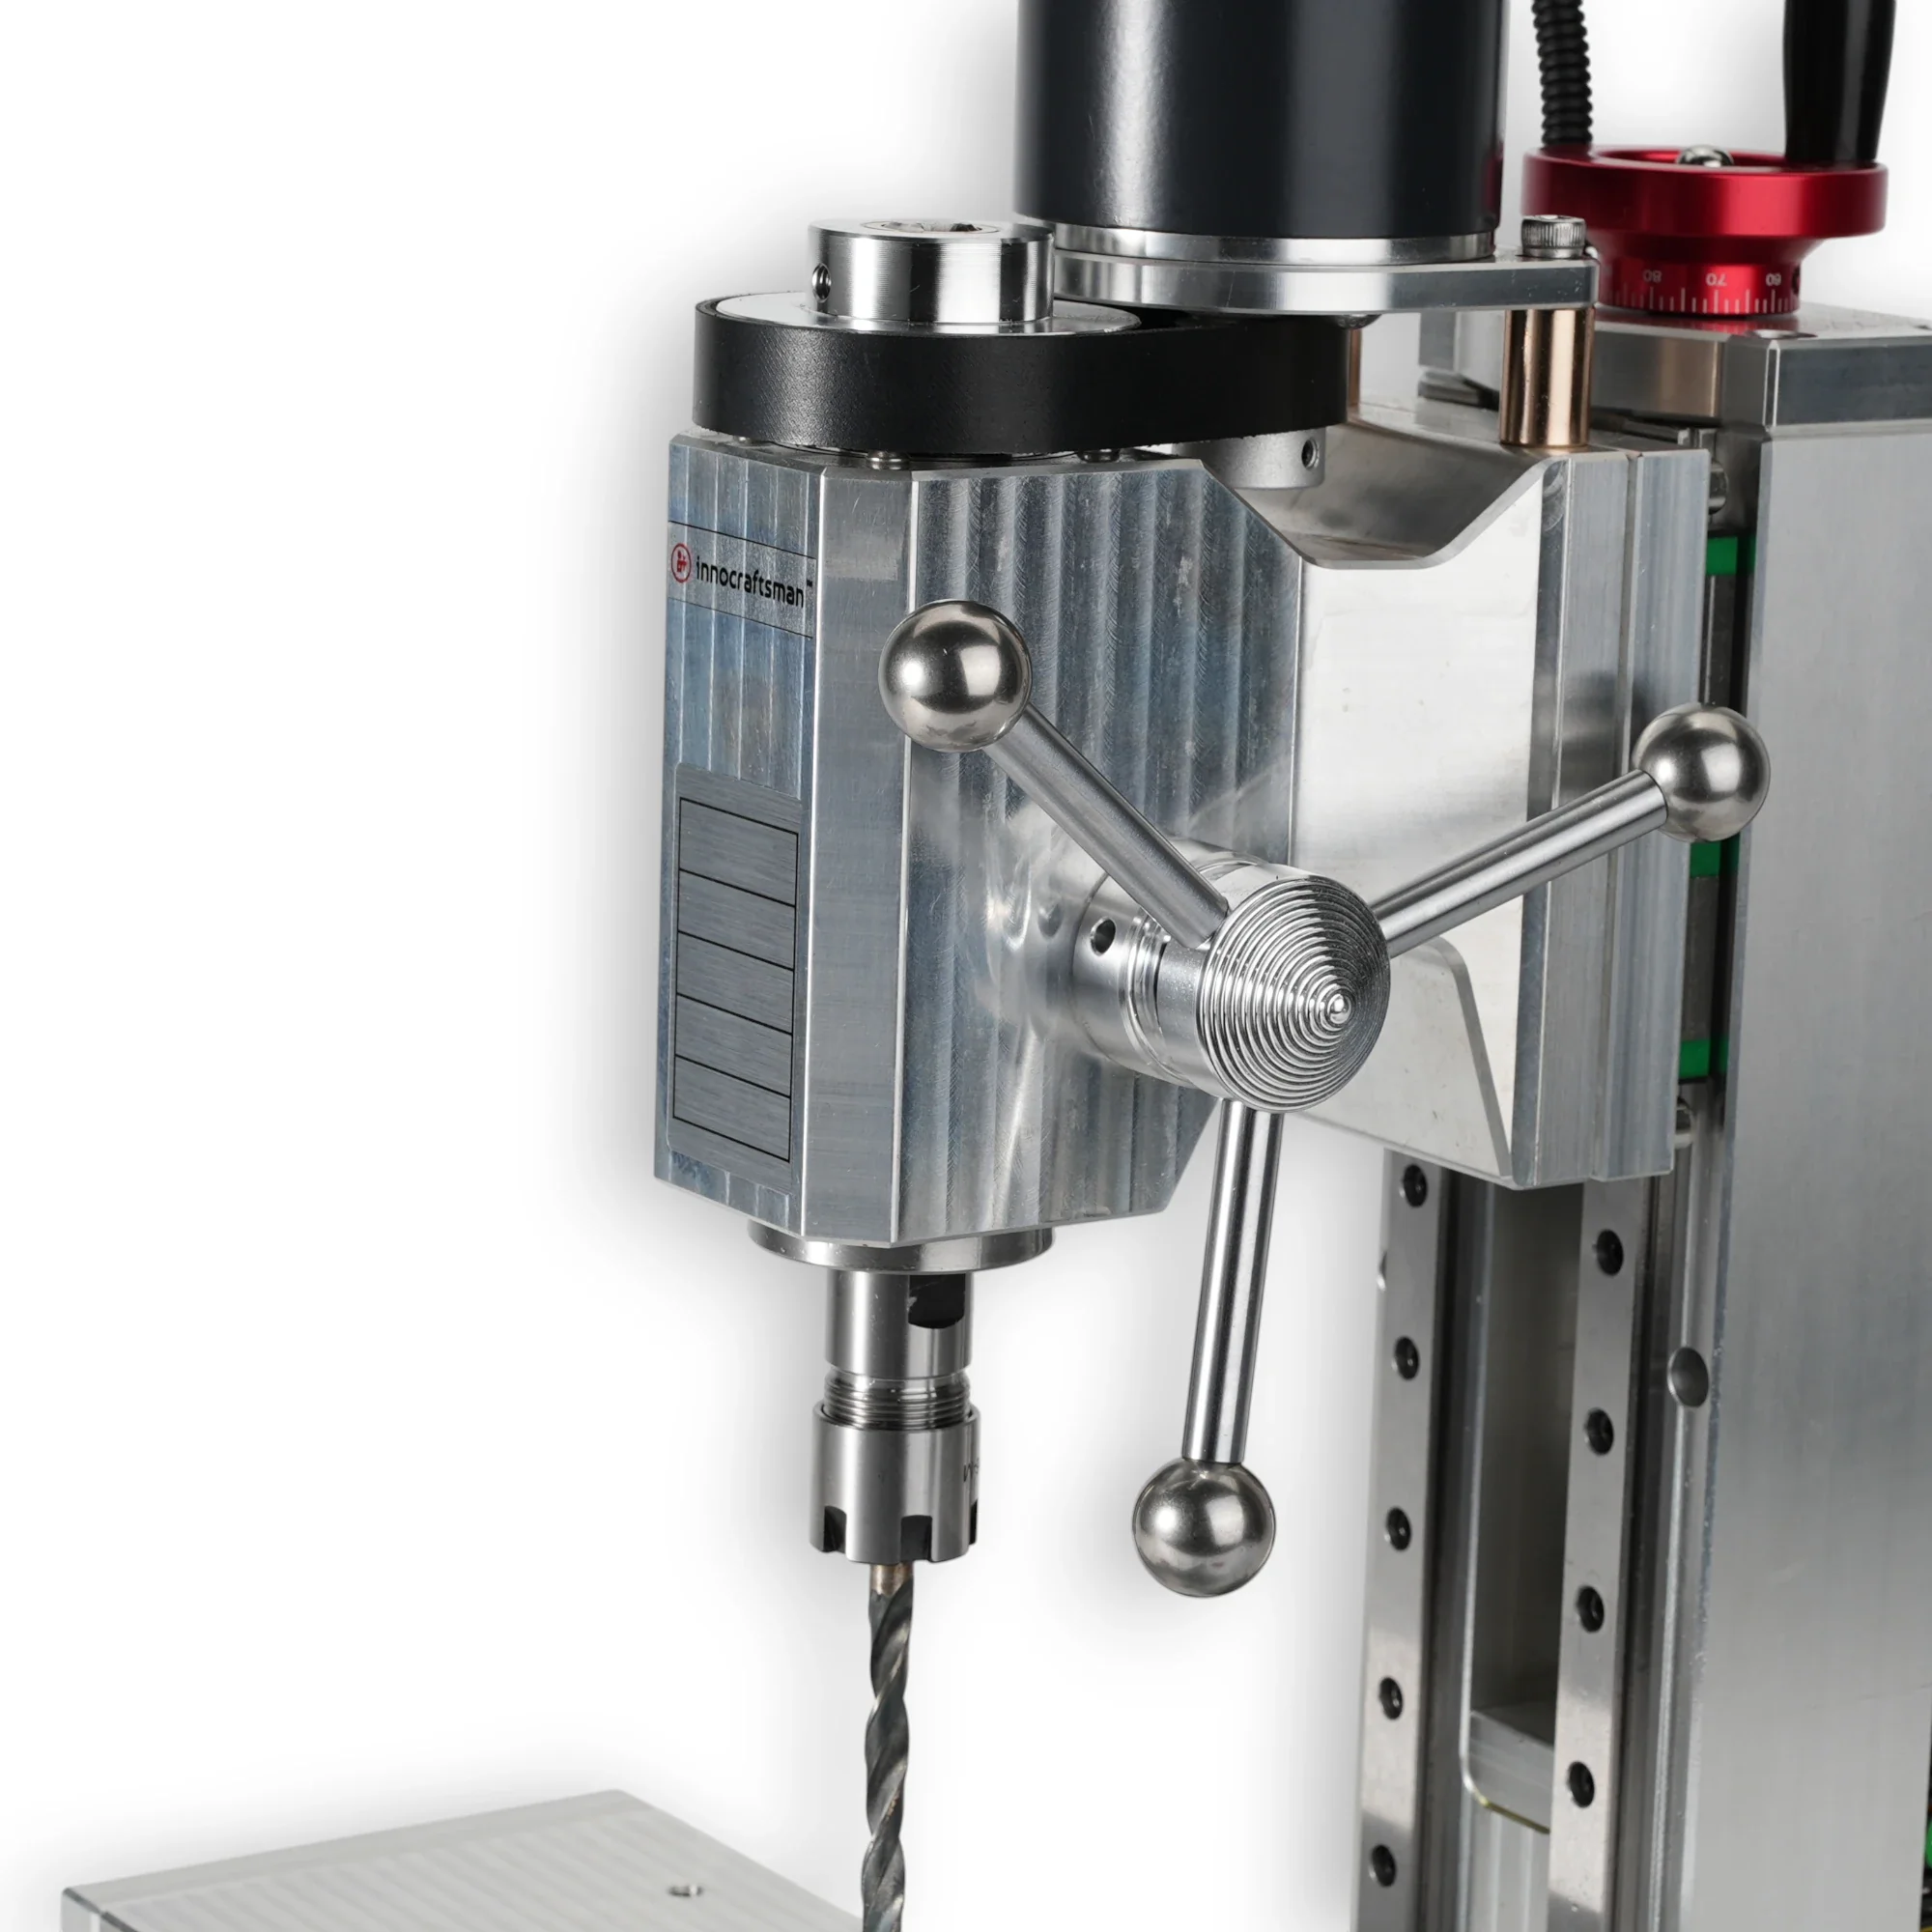
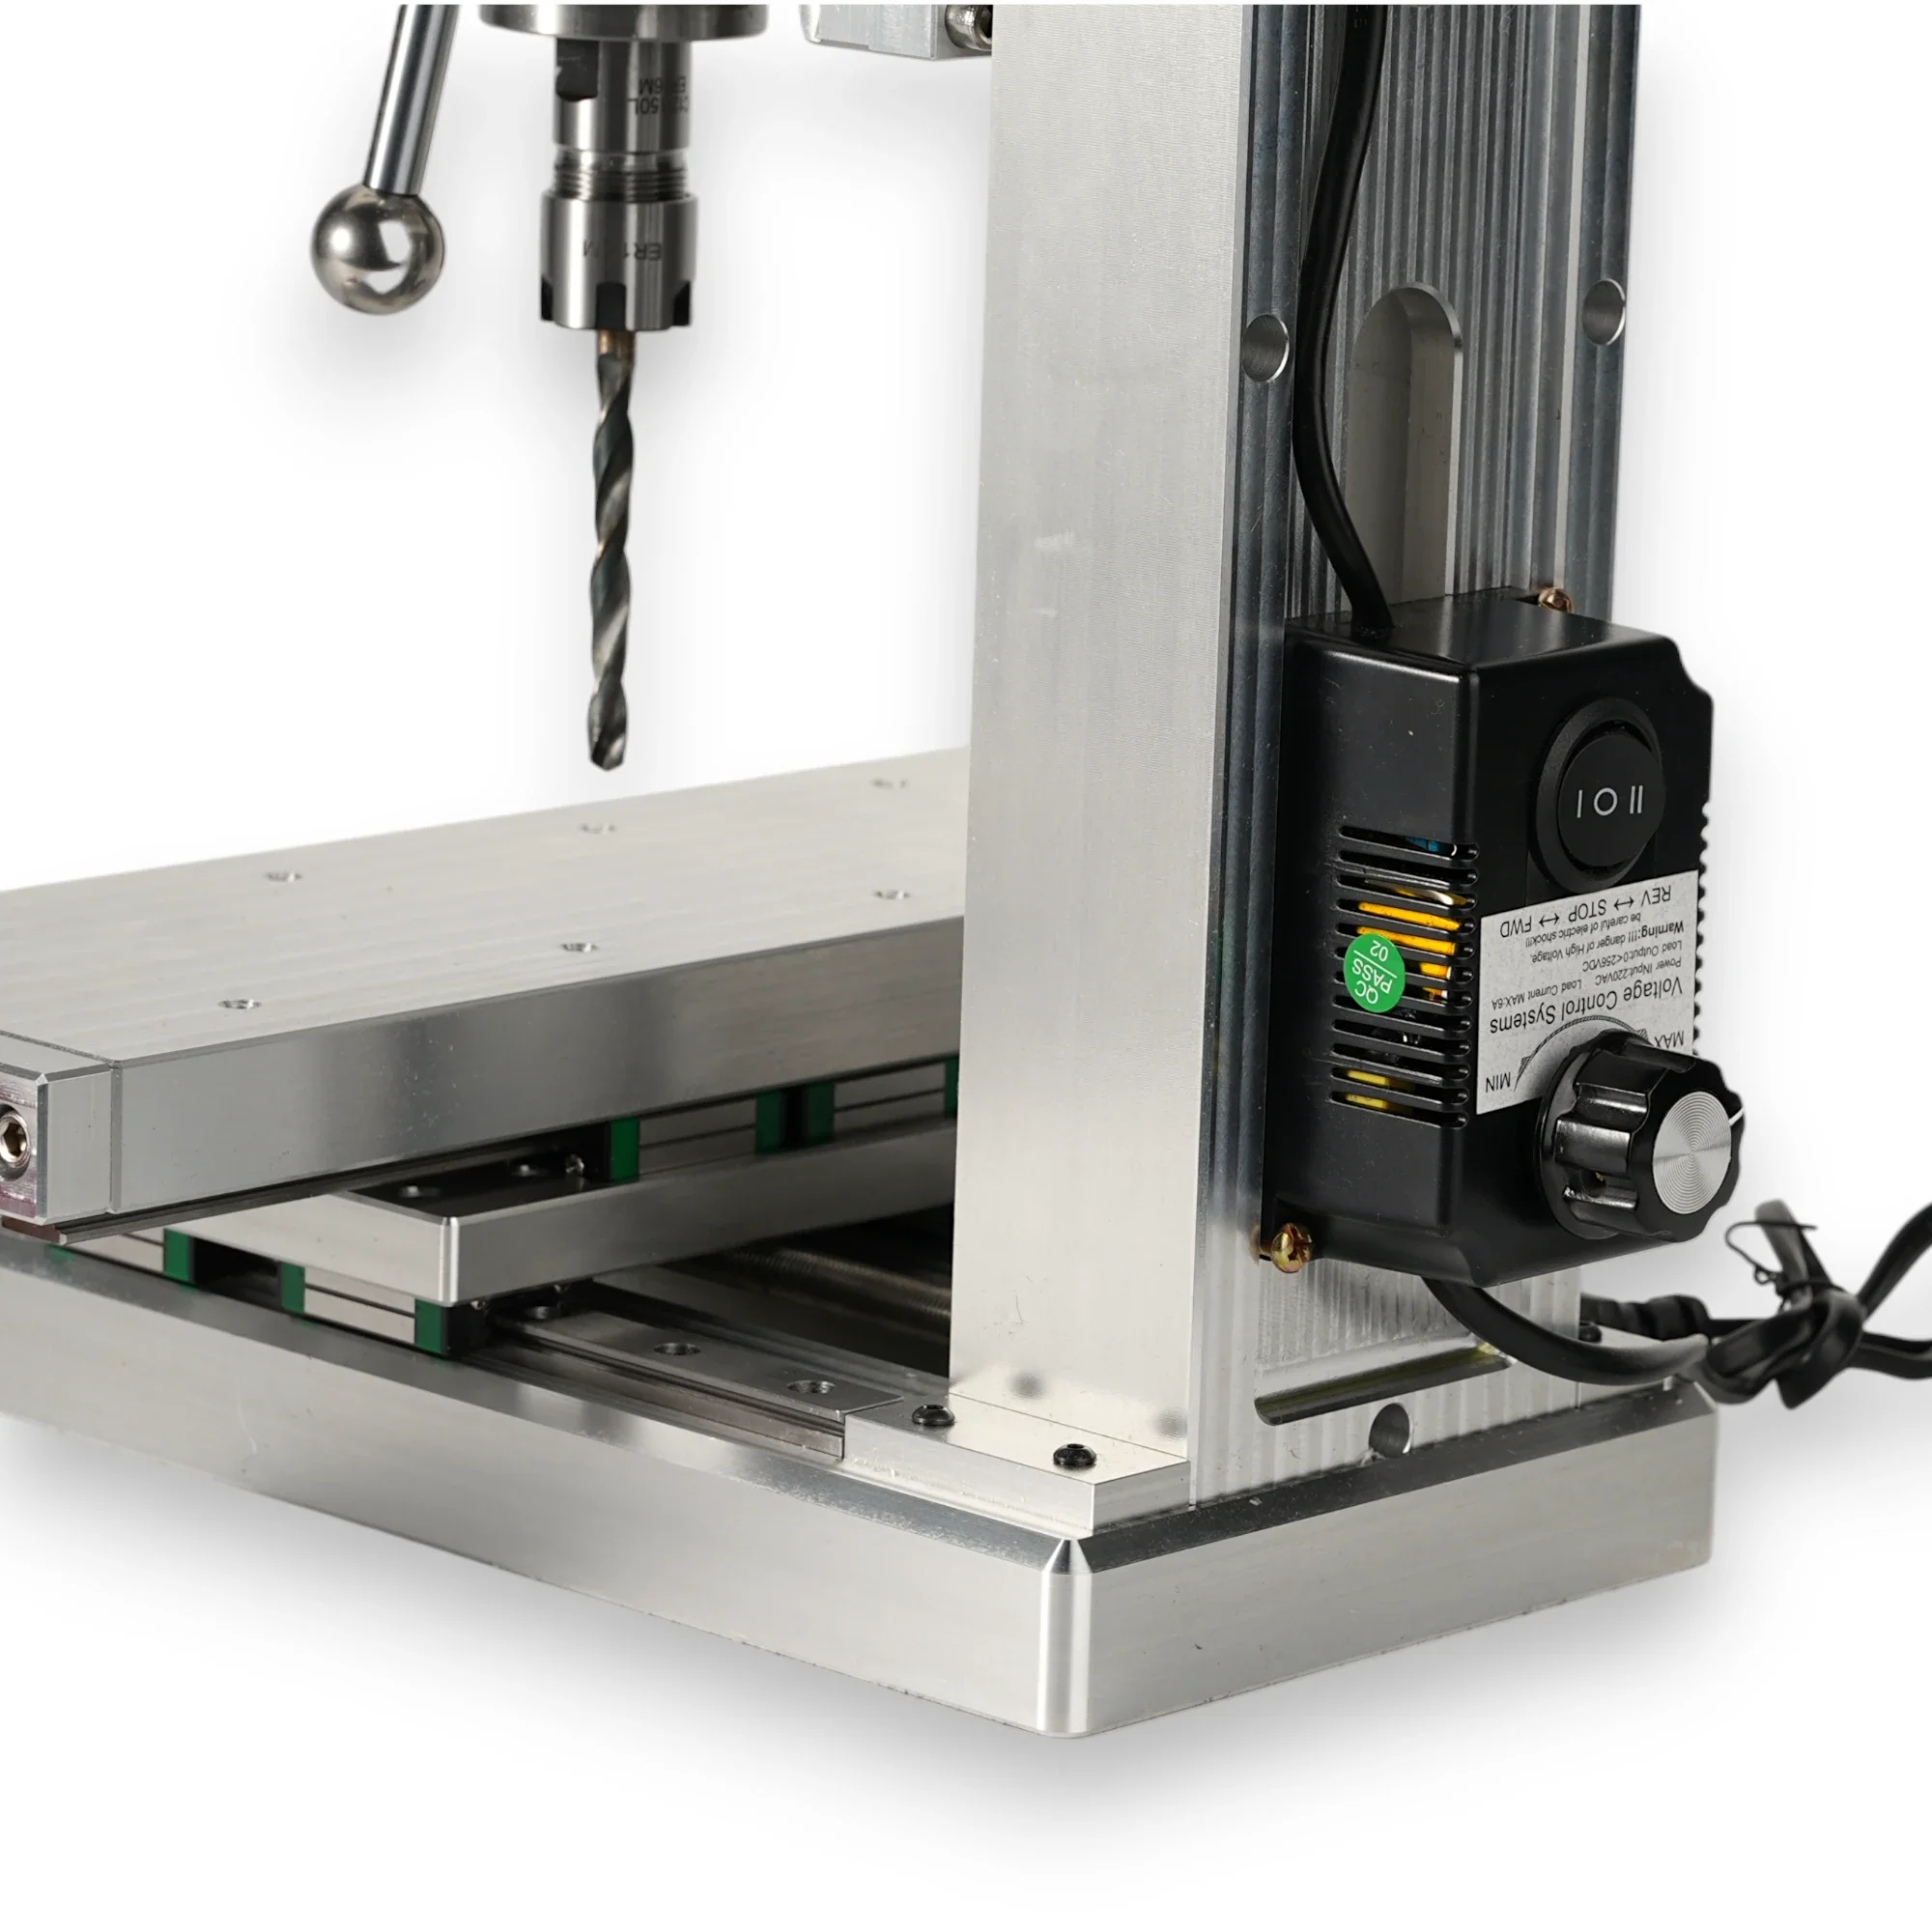
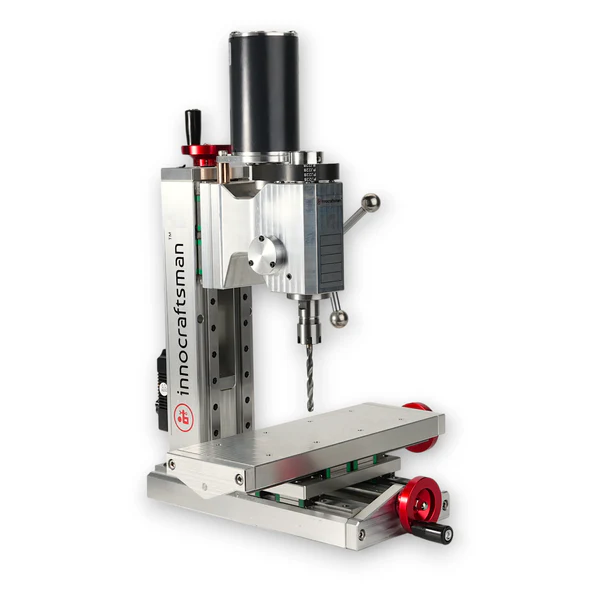
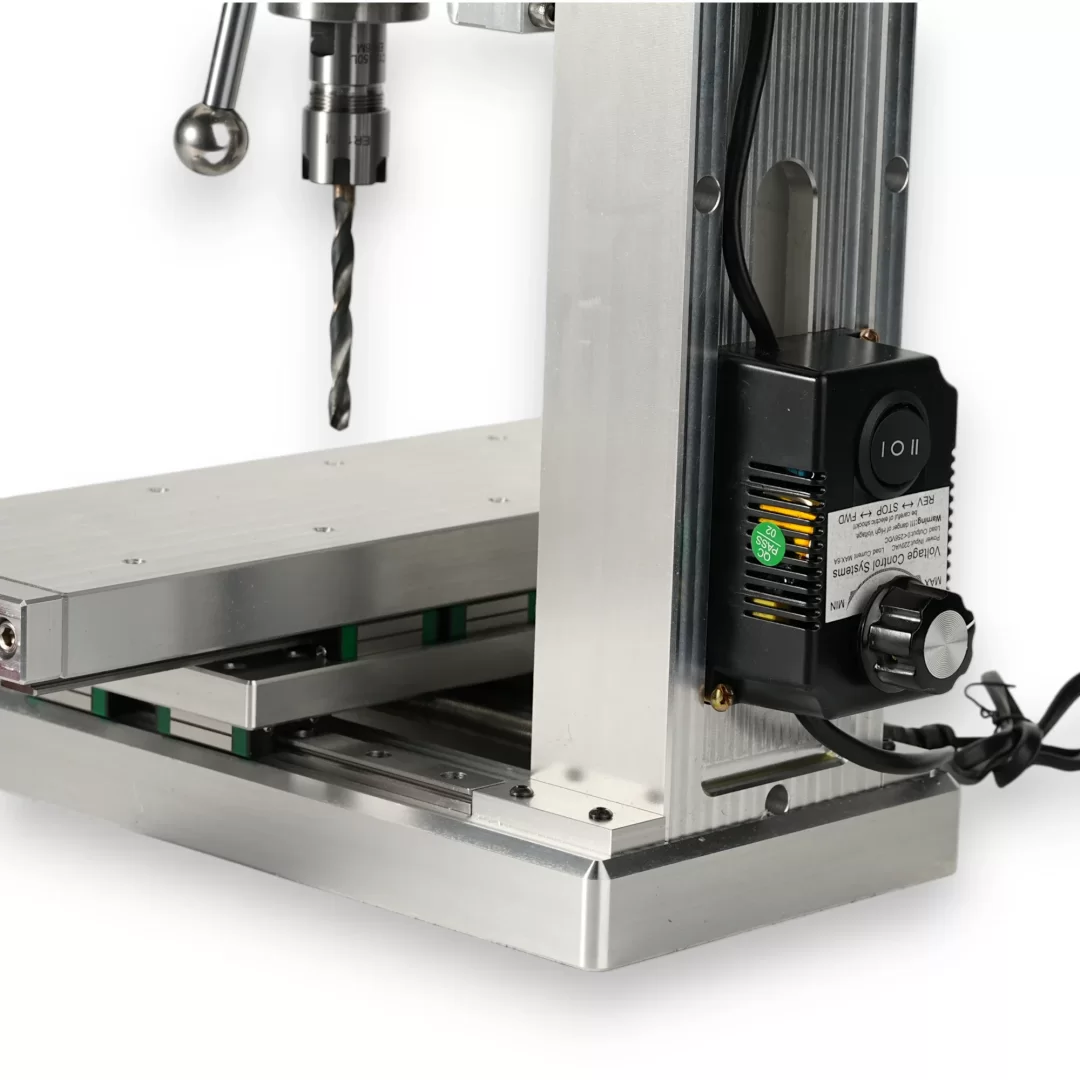
Has anyone used any of the Innocraftsman tools? I am looking at replacing my dremel drill press with a mill and the only mini mill I seen that has a "hand crank" like a drill press is from Innocraftsman. The only part that I'm a little concerned about is the table they are using. No T slots. Wonder why. Seems all others you have to turn the top wheel for the Z axis. Which for milling is fine but for drilling a hole, would take forever. Bridgeport mills have a hand crank for moving the Z axis (which is a full size machine) I question why the smaller machines don't offer that. Anyway, if anyone has used or even has seen one in person, what's your thoughts on the Innocraftsman products. Good? Bad? Stay Away? Here is a picture of what I'm looking at buying. Thoughts?
-
Good 'Hobby Quality' Metal Lathes
kgstakes replied to tmj's topic in Modeling tools and Workshop Equipment
Taig lathe - I got the factory assembled with power feed and then bought most of the accessories for it. then I also bought tool post for wood turning and a few other accessories. One thing I still need to get is a 4 jaw chuck and I’ll buy that from sherline (only because of the smaller size they offer). What mill to you buy from taig?
-
Good 'Hobby Quality' Metal Lathes
kgstakes replied to tmj's topic in Modeling tools and Workshop Equipment
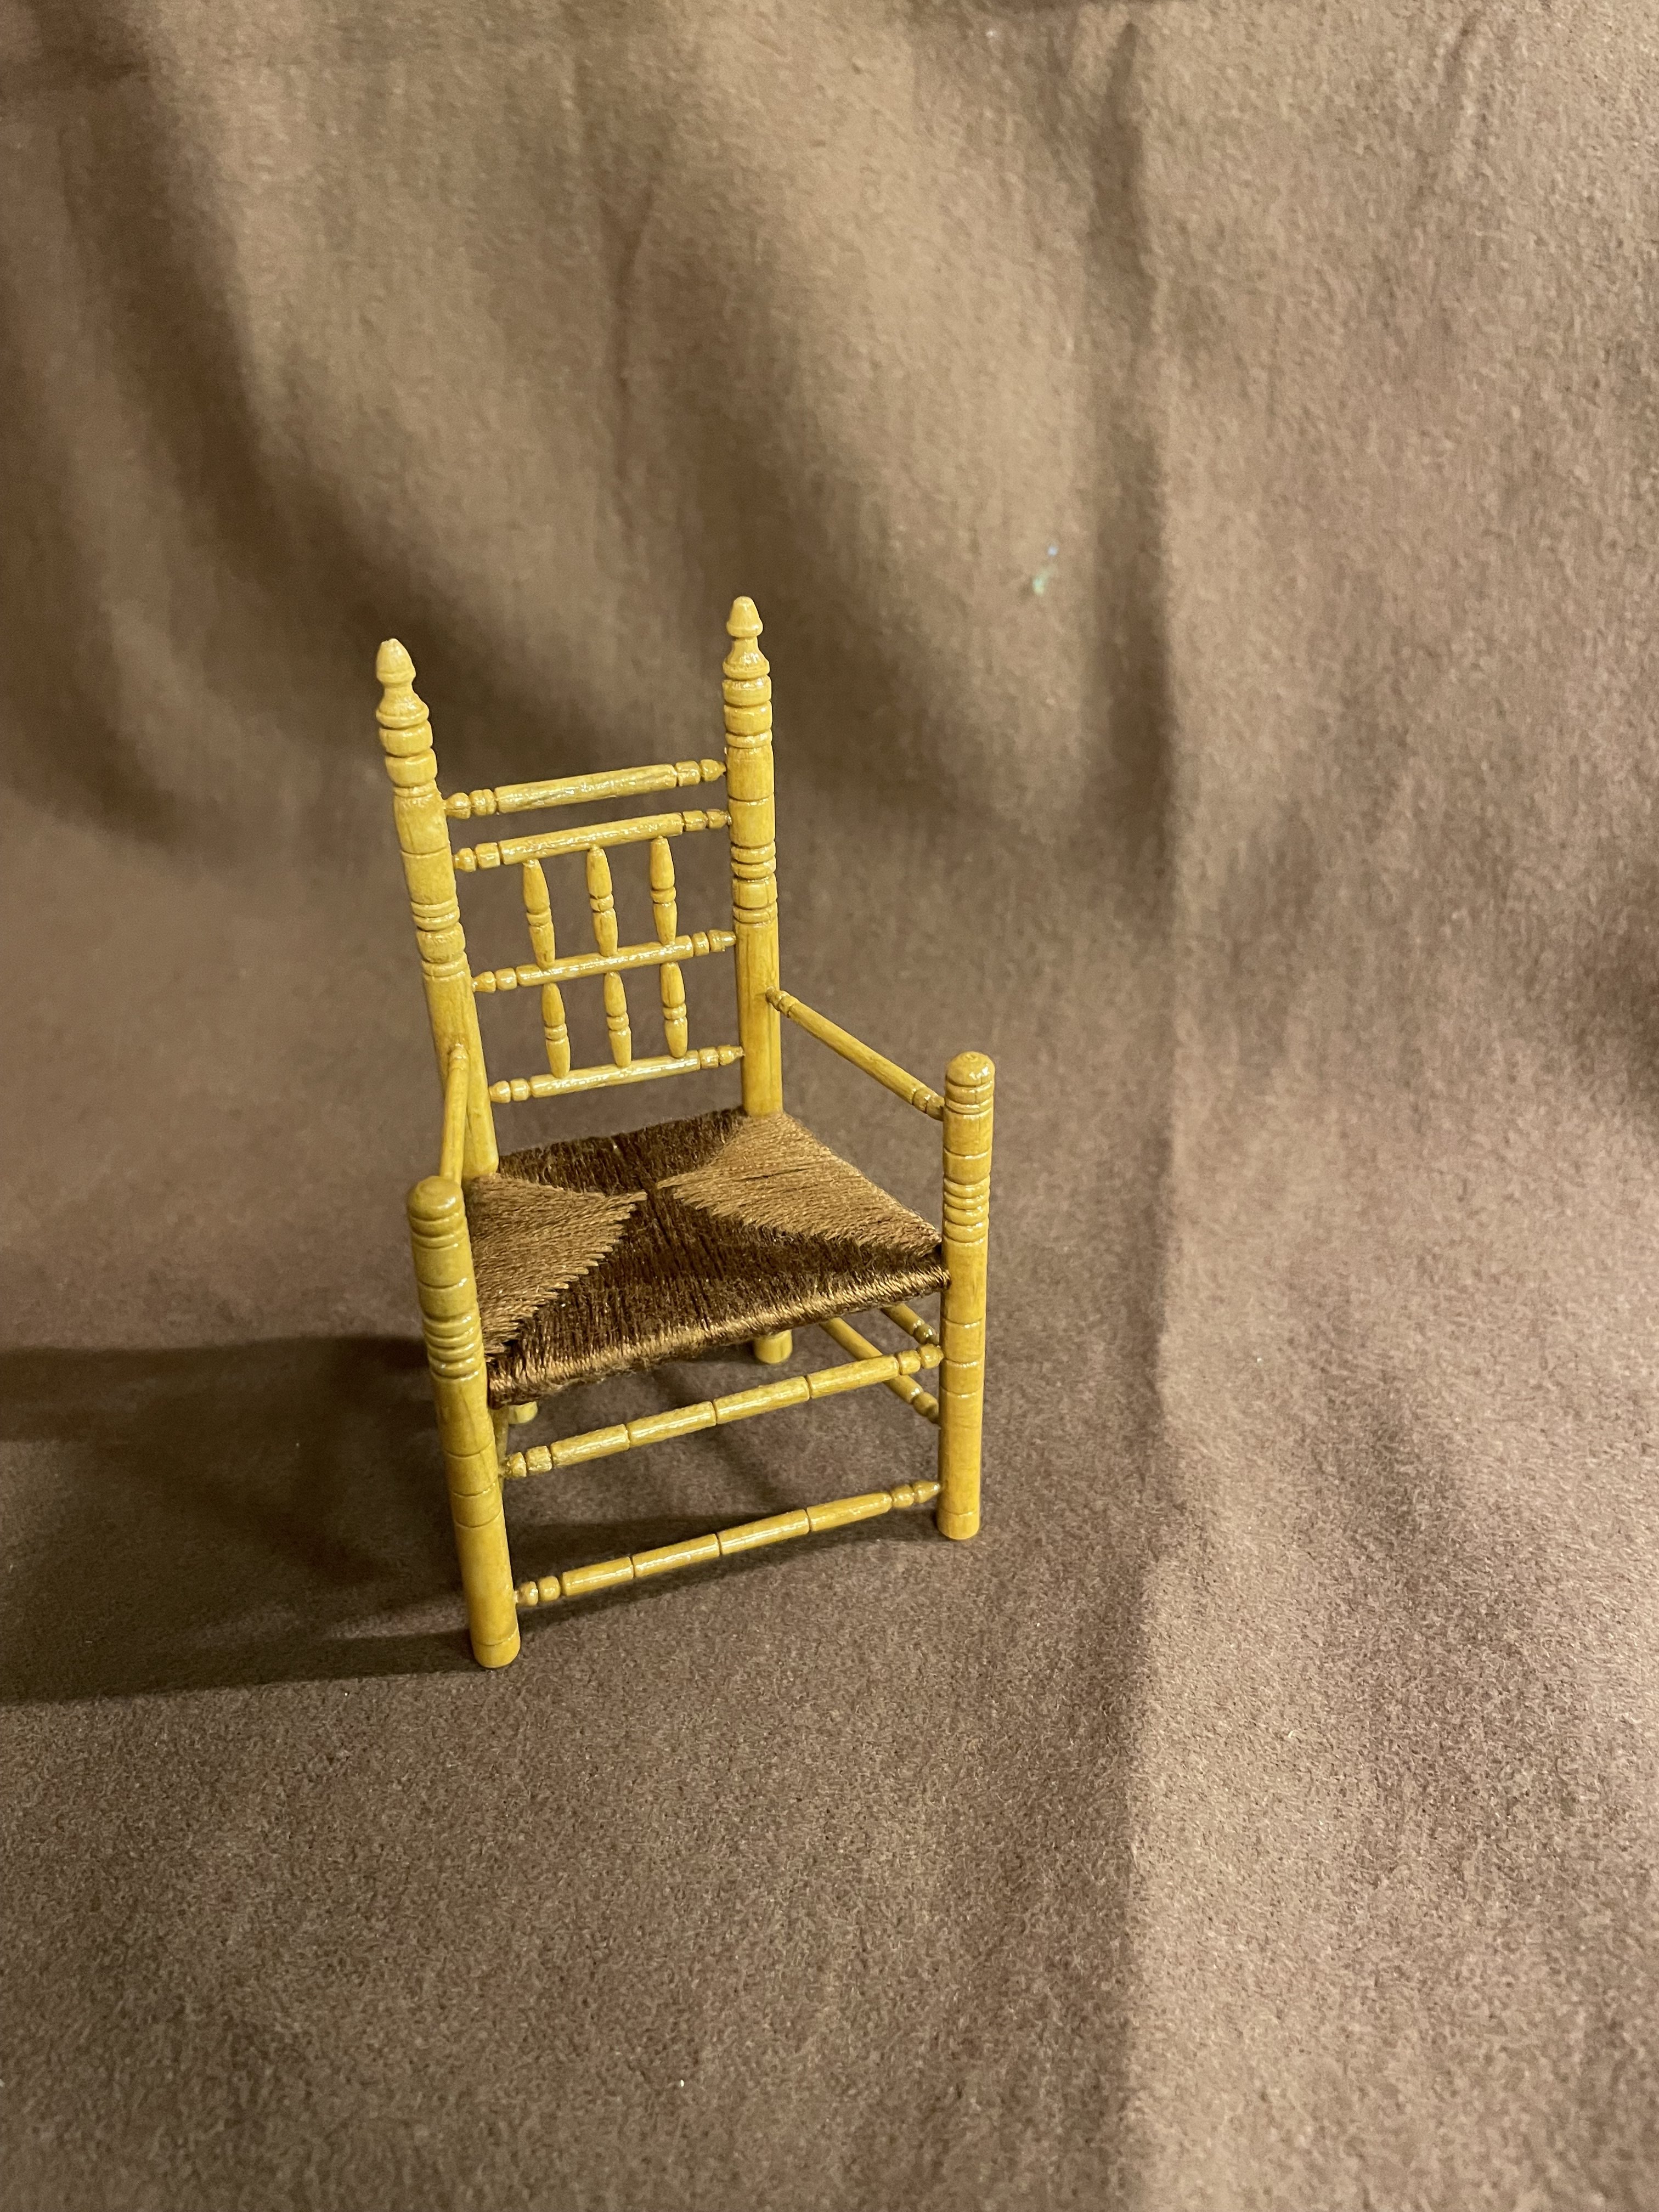
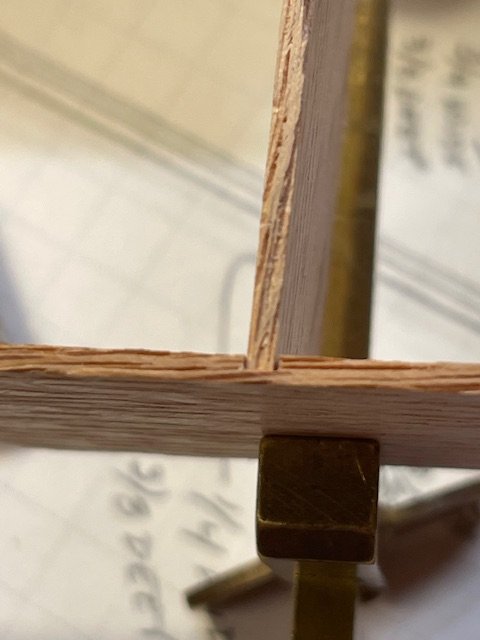
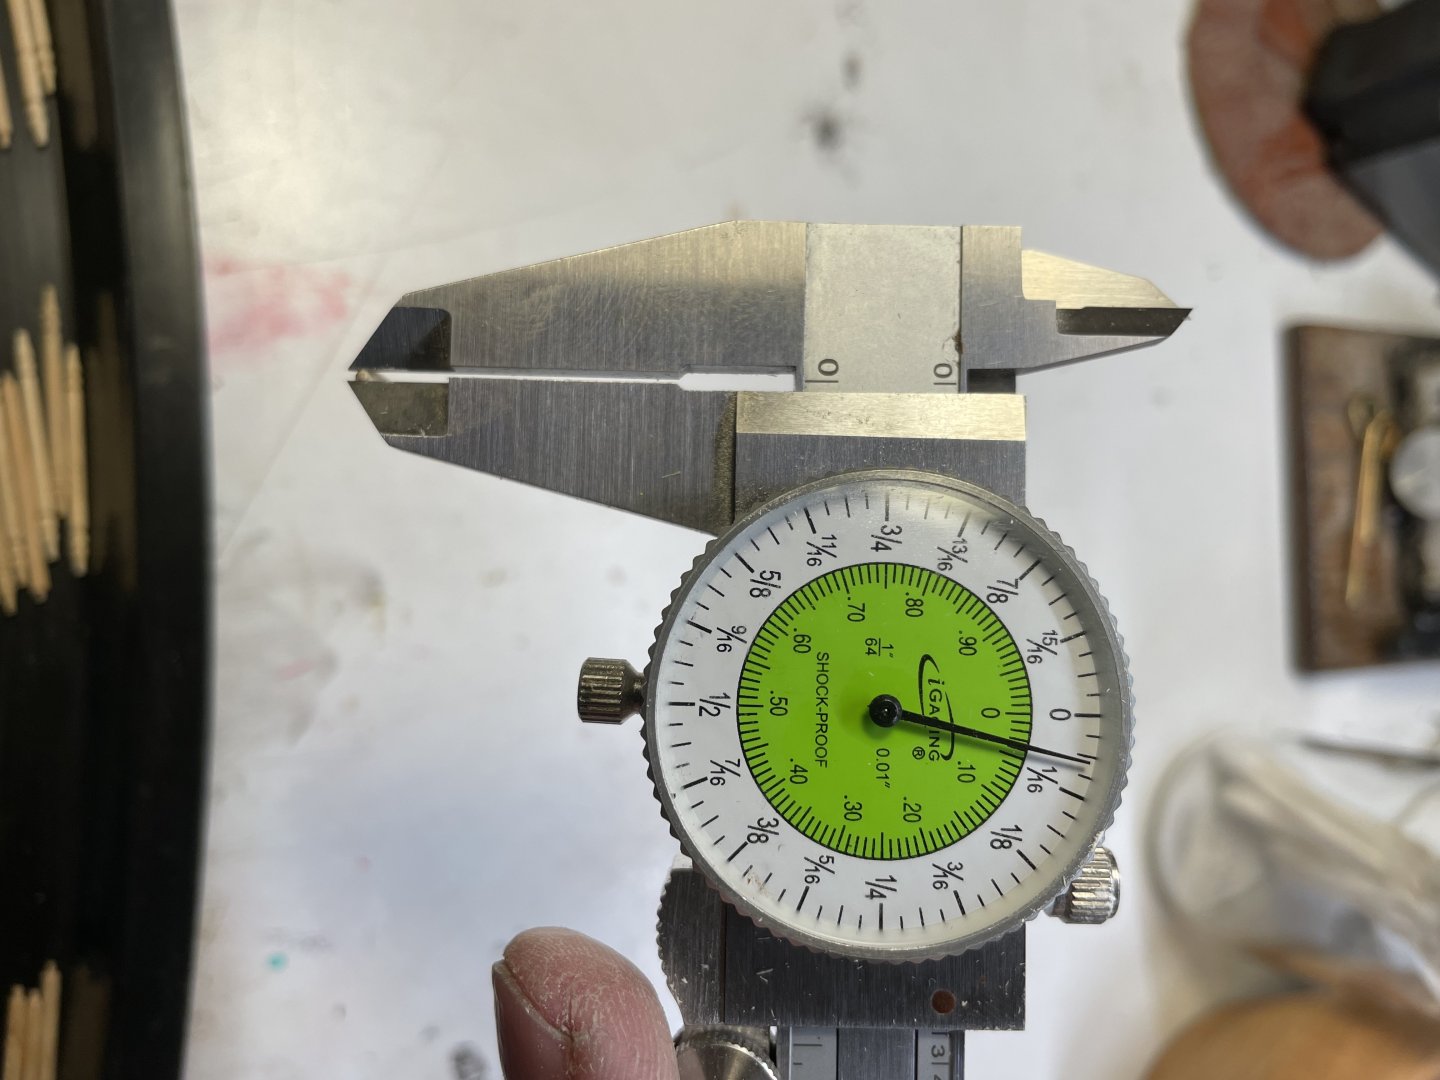
Maybe a little late here but I own a taig lathe and am very happy with the results I get with it. I’ve turned metal and wood on it and works well for both. The smallest I’ve turned - see picture below chair I turned all on taig lathe and it’s 1/12 th scale.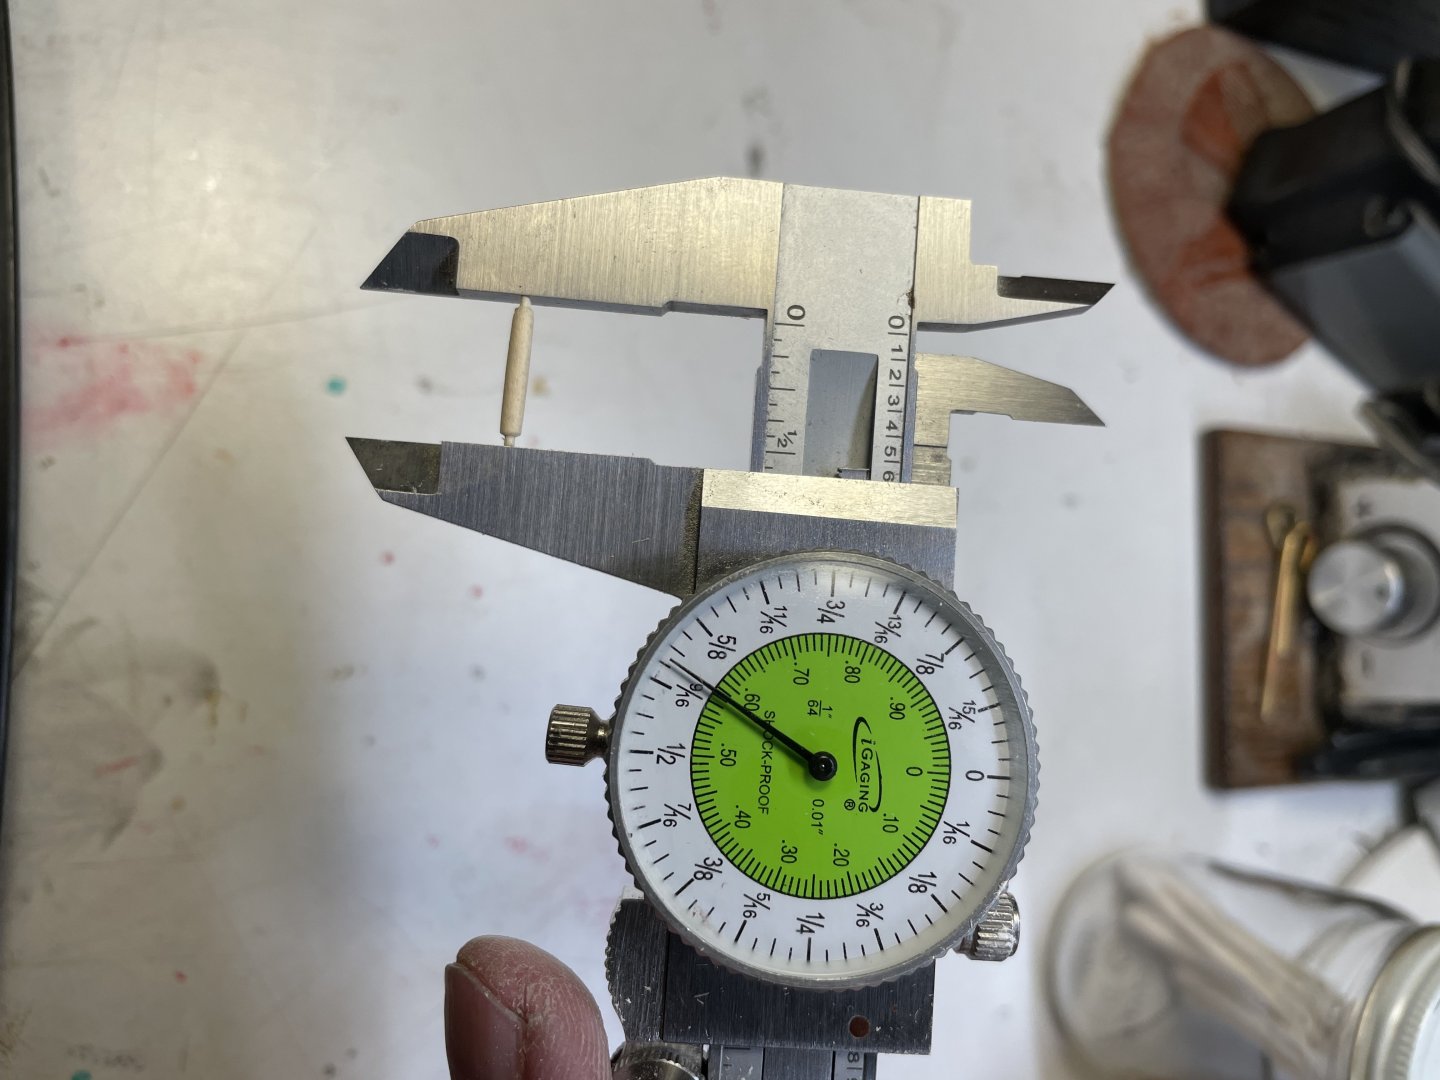

-
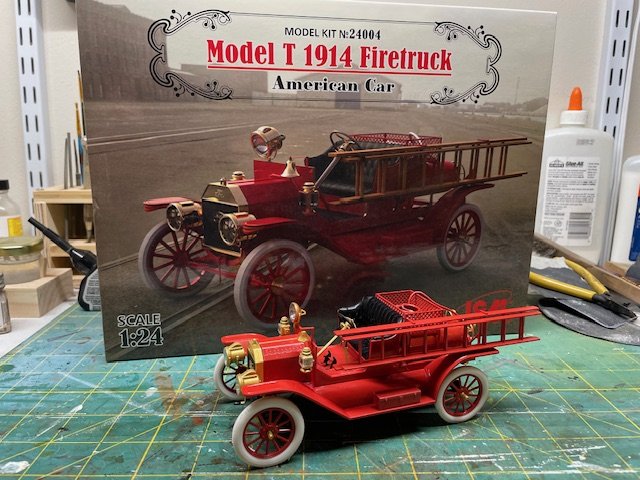
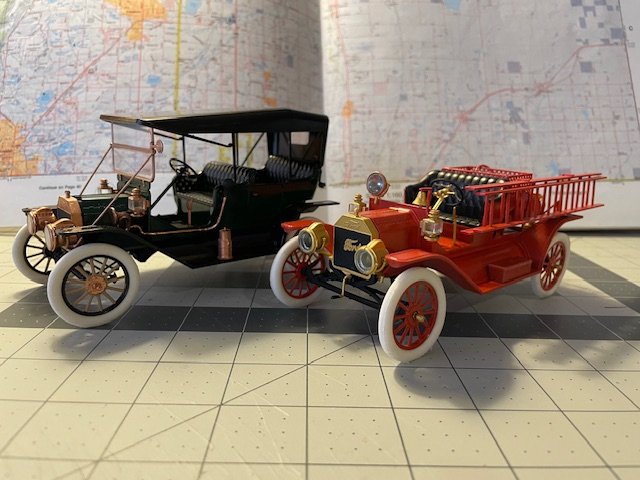
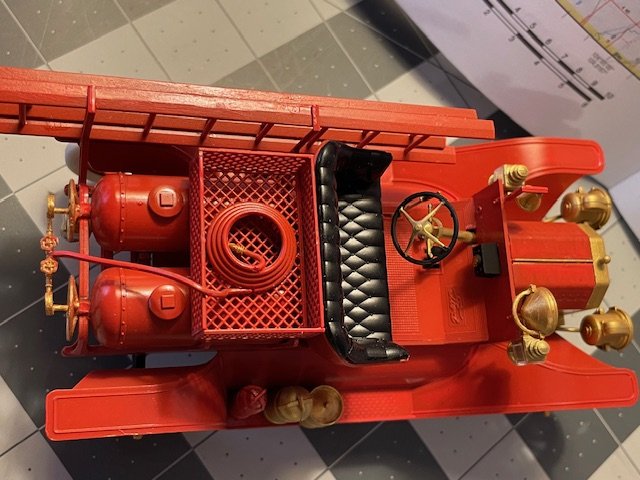
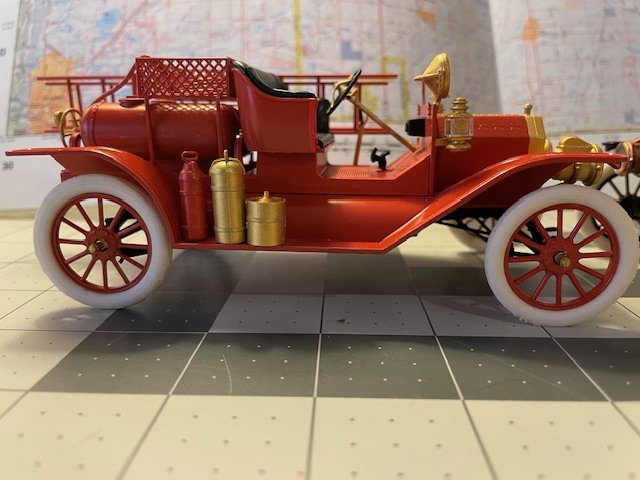
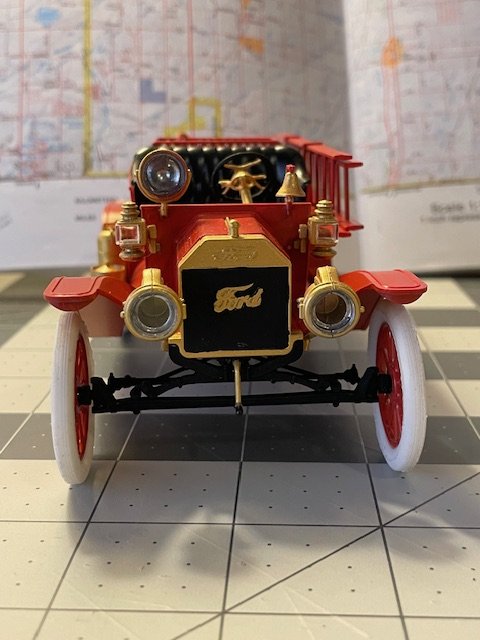
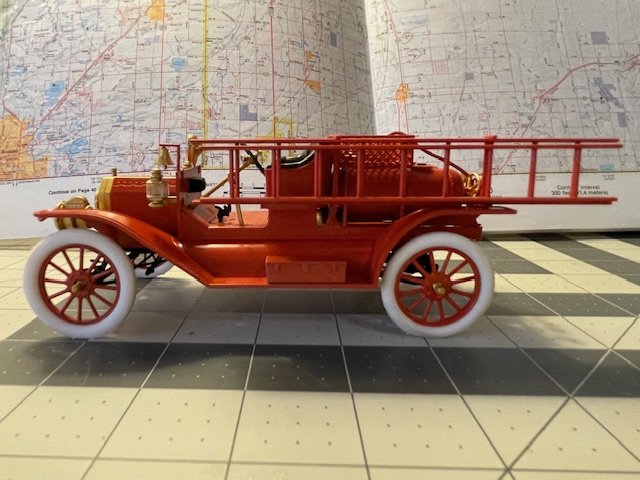
Just finished this Model T. I've built two, one a touring car and now this firetruck. Kits are pretty easy to build, some areas a little tricky but all in all goes together well. Enjoy the pictures. Kurt

-
- 11
-
-
-
San Francisco cable car by kgstakes - FINISHED - OcCre
kgstakes replied to kgstakes's topic in Non-ship/categorised builds
you do a fantastic job woodcarving my friend. I’ve tried it and done some chip carving but nothing even close to what you can do. Keep up the great work!!