westwood
-
Posts
280 -
Joined
-
Last visited


-
 Jack H reacted to a post in a topic:
HMS Portland 1770 by Rustyj - Portland Scale Ship Co. - 1:48 - 50 gun 4th rate
Jack H reacted to a post in a topic:
HMS Portland 1770 by Rustyj - Portland Scale Ship Co. - 1:48 - 50 gun 4th rate
-
Ryland Craze reacted to a post in a topic:
HMS Portland 1770 by Rustyj - Portland Scale Ship Co. - 1:48 - 50 gun 4th rate
-
CiscoH reacted to a post in a topic:
HMS Portland 1770 by Rustyj - Portland Scale Ship Co. - 1:48 - 50 gun 4th rate
-
Nunnehi (Don) reacted to a post in a topic:
HMS Portland 1770 by westwood - Portland Scale Ship Co. - 1:48 - 50 gun 4th rate
-
It's great to see another Portland build. I'll be happy to follow along, and I hope you enjoy the building, Rusty.
-
westwood reacted to a post in a topic:
HMS Portland 1770 by Rustyj - Portland Scale Ship Co. - 1:48 - 50 gun 4th rate
-
westwood reacted to a post in a topic:
HMS Winchelsea 1764 by Frank Wouts 1/48
-
westwood reacted to a post in a topic:
HMS Winchelsea 1764 by shauer - 1:48
-
westwood reacted to a post in a topic:
HMS Winchelsea 1764 by Kusawa2000 (Mike Draper)
-
KARAVOKIRIS reacted to a post in a topic:
HMS Portland 1770 by westwood - Portland Scale Ship Co. - 1:48 - 50 gun 4th rate
-
KARAVOKIRIS reacted to a post in a topic:
HMS Portland 1770 by westwood - Portland Scale Ship Co. - 1:48 - 50 gun 4th rate
-
westwood reacted to a post in a topic:
HMS Montague 1779 by garyshipwright - 74-gun Alfred-class
-
westwood reacted to a post in a topic:
Christiania 1774 by TJM – approx. 1:67-1:64 – Danish Light Frigate based on Vanguard Models HMS Sphinx
-
VolkerB reacted to a post in a topic:
HMS Portland 1770 by westwood - Portland Scale Ship Co. - 1:48 - 50 gun 4th rate
-
yvesvidal reacted to a post in a topic:
HMS Portland 1770 by westwood - Portland Scale Ship Co. - 1:48 - 50 gun 4th rate
-
davyboy reacted to a post in a topic:
HMS Portland 1770 by westwood - Portland Scale Ship Co. - 1:48 - 50 gun 4th rate
-
Rustyj reacted to a post in a topic:
HMS Portland 1770 by westwood - Portland Scale Ship Co. - 1:48 - 50 gun 4th rate
-
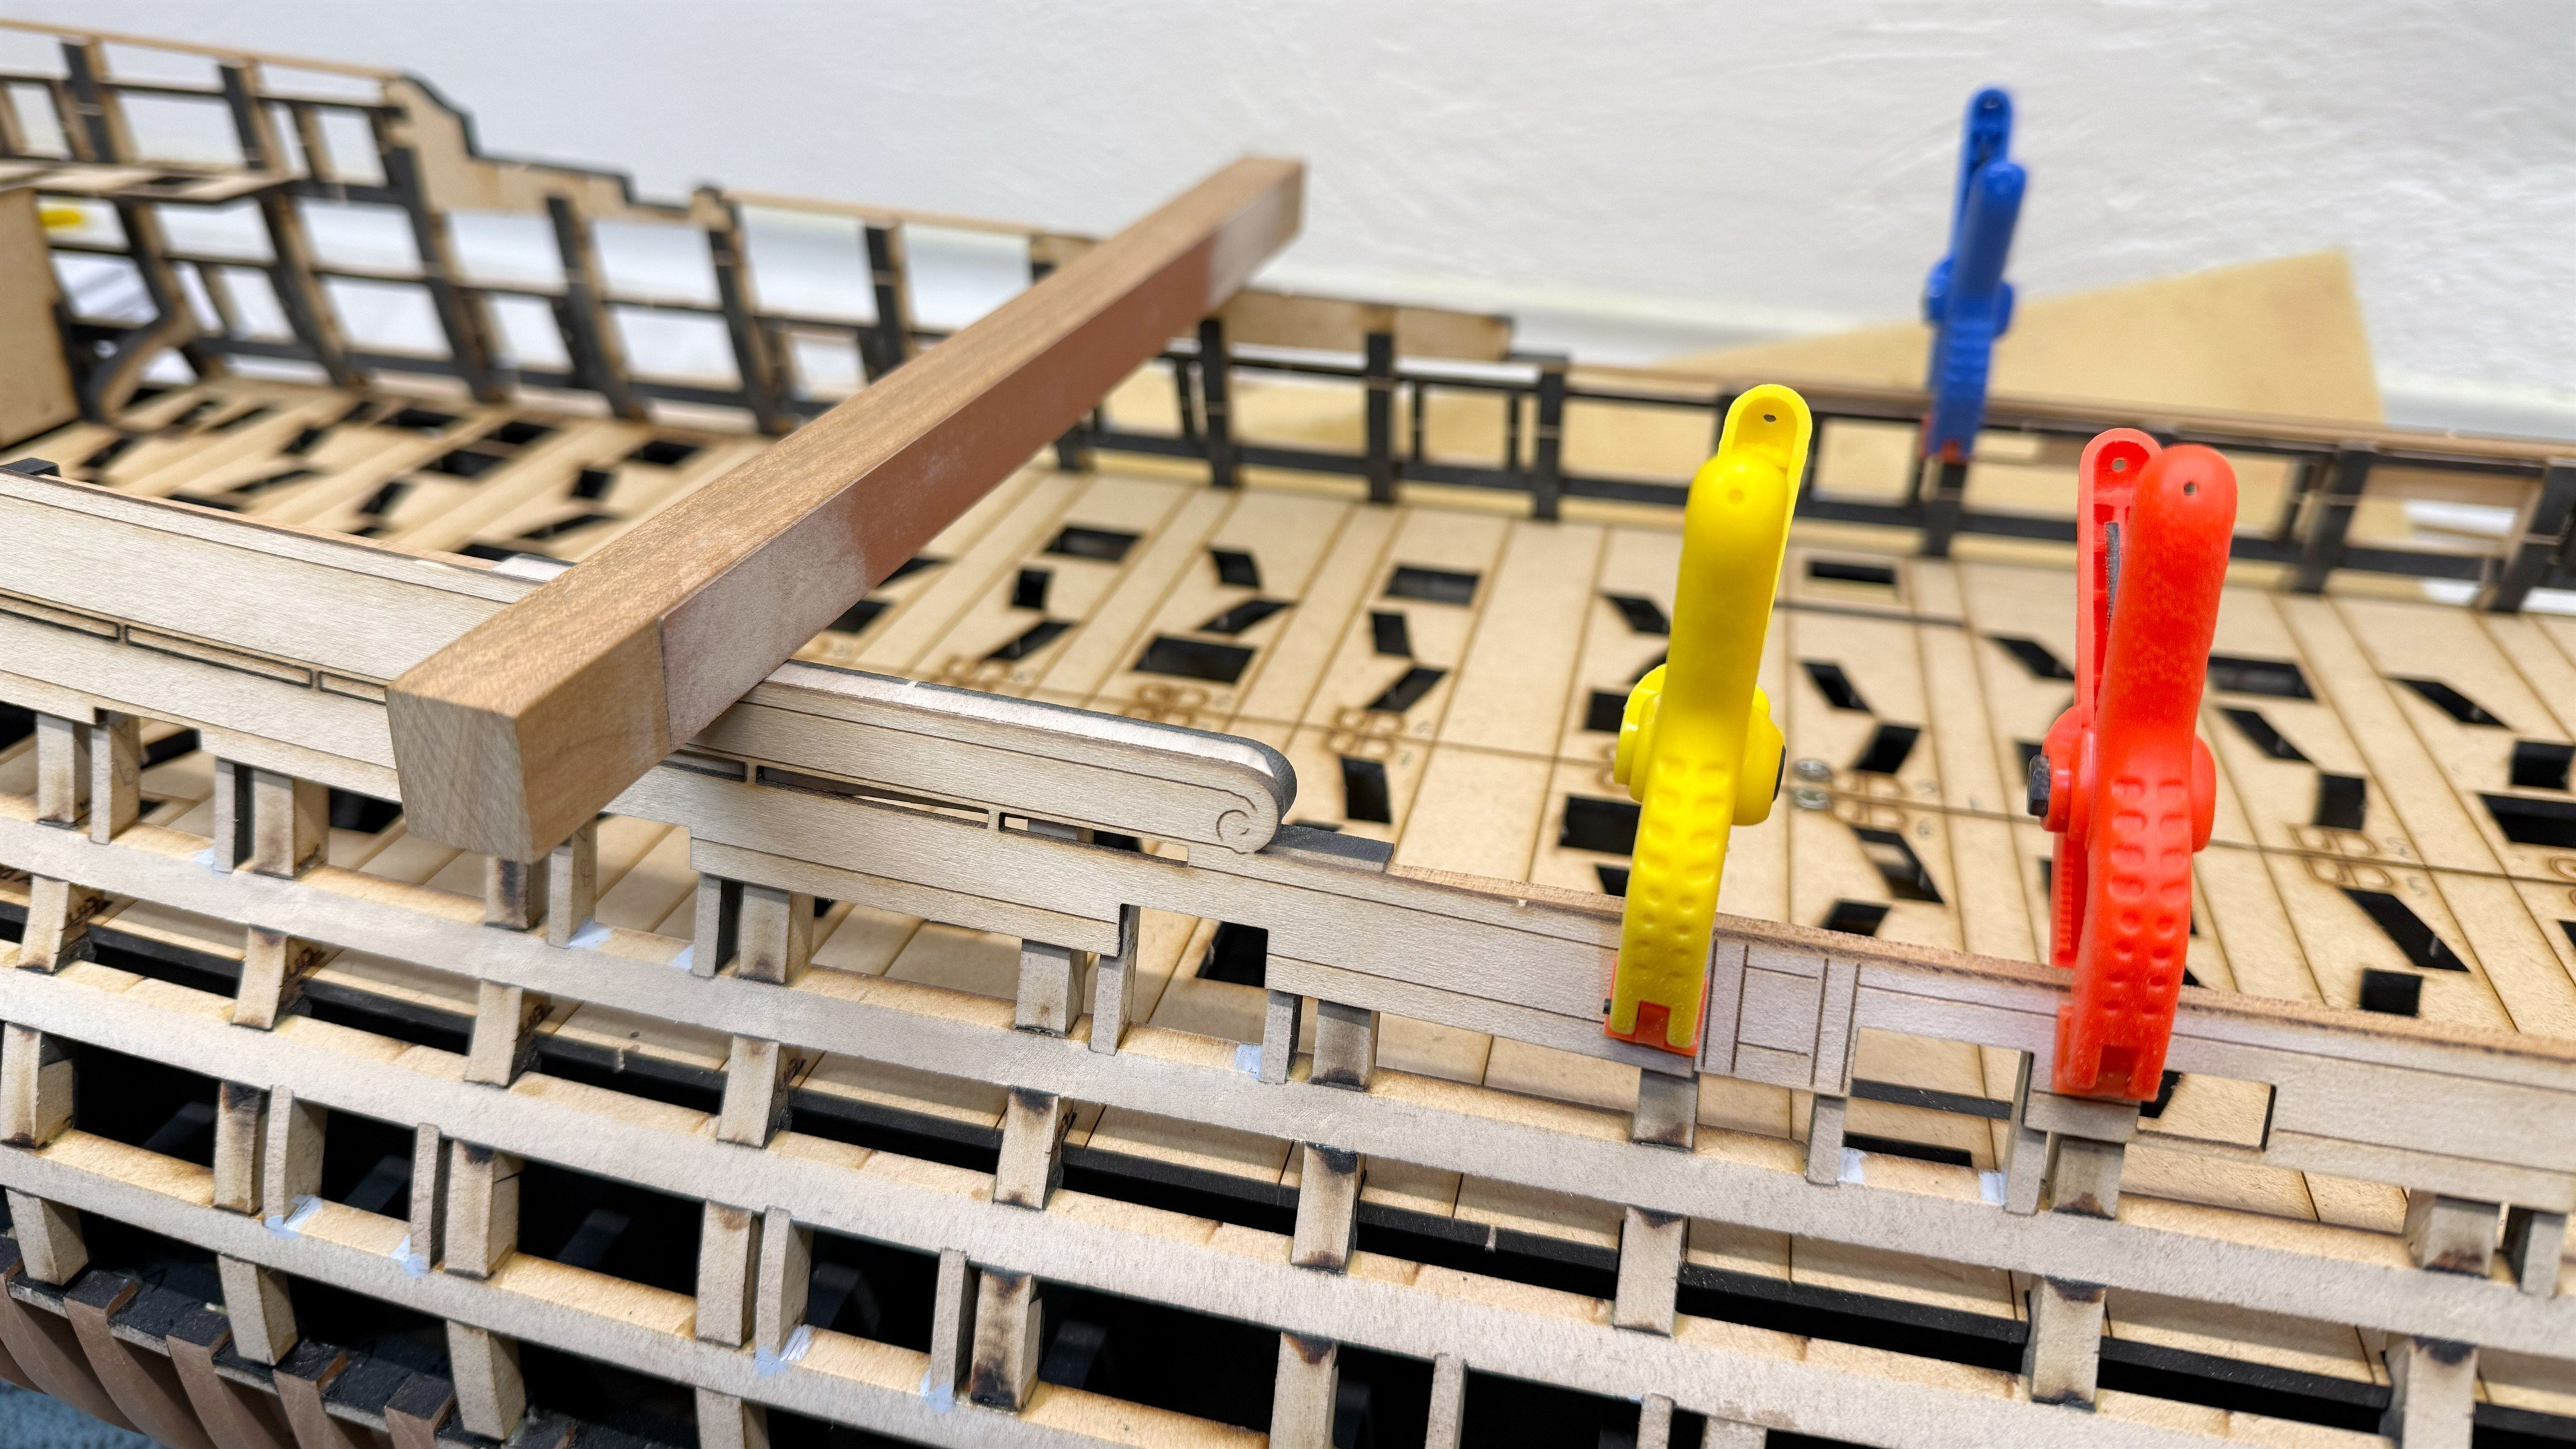
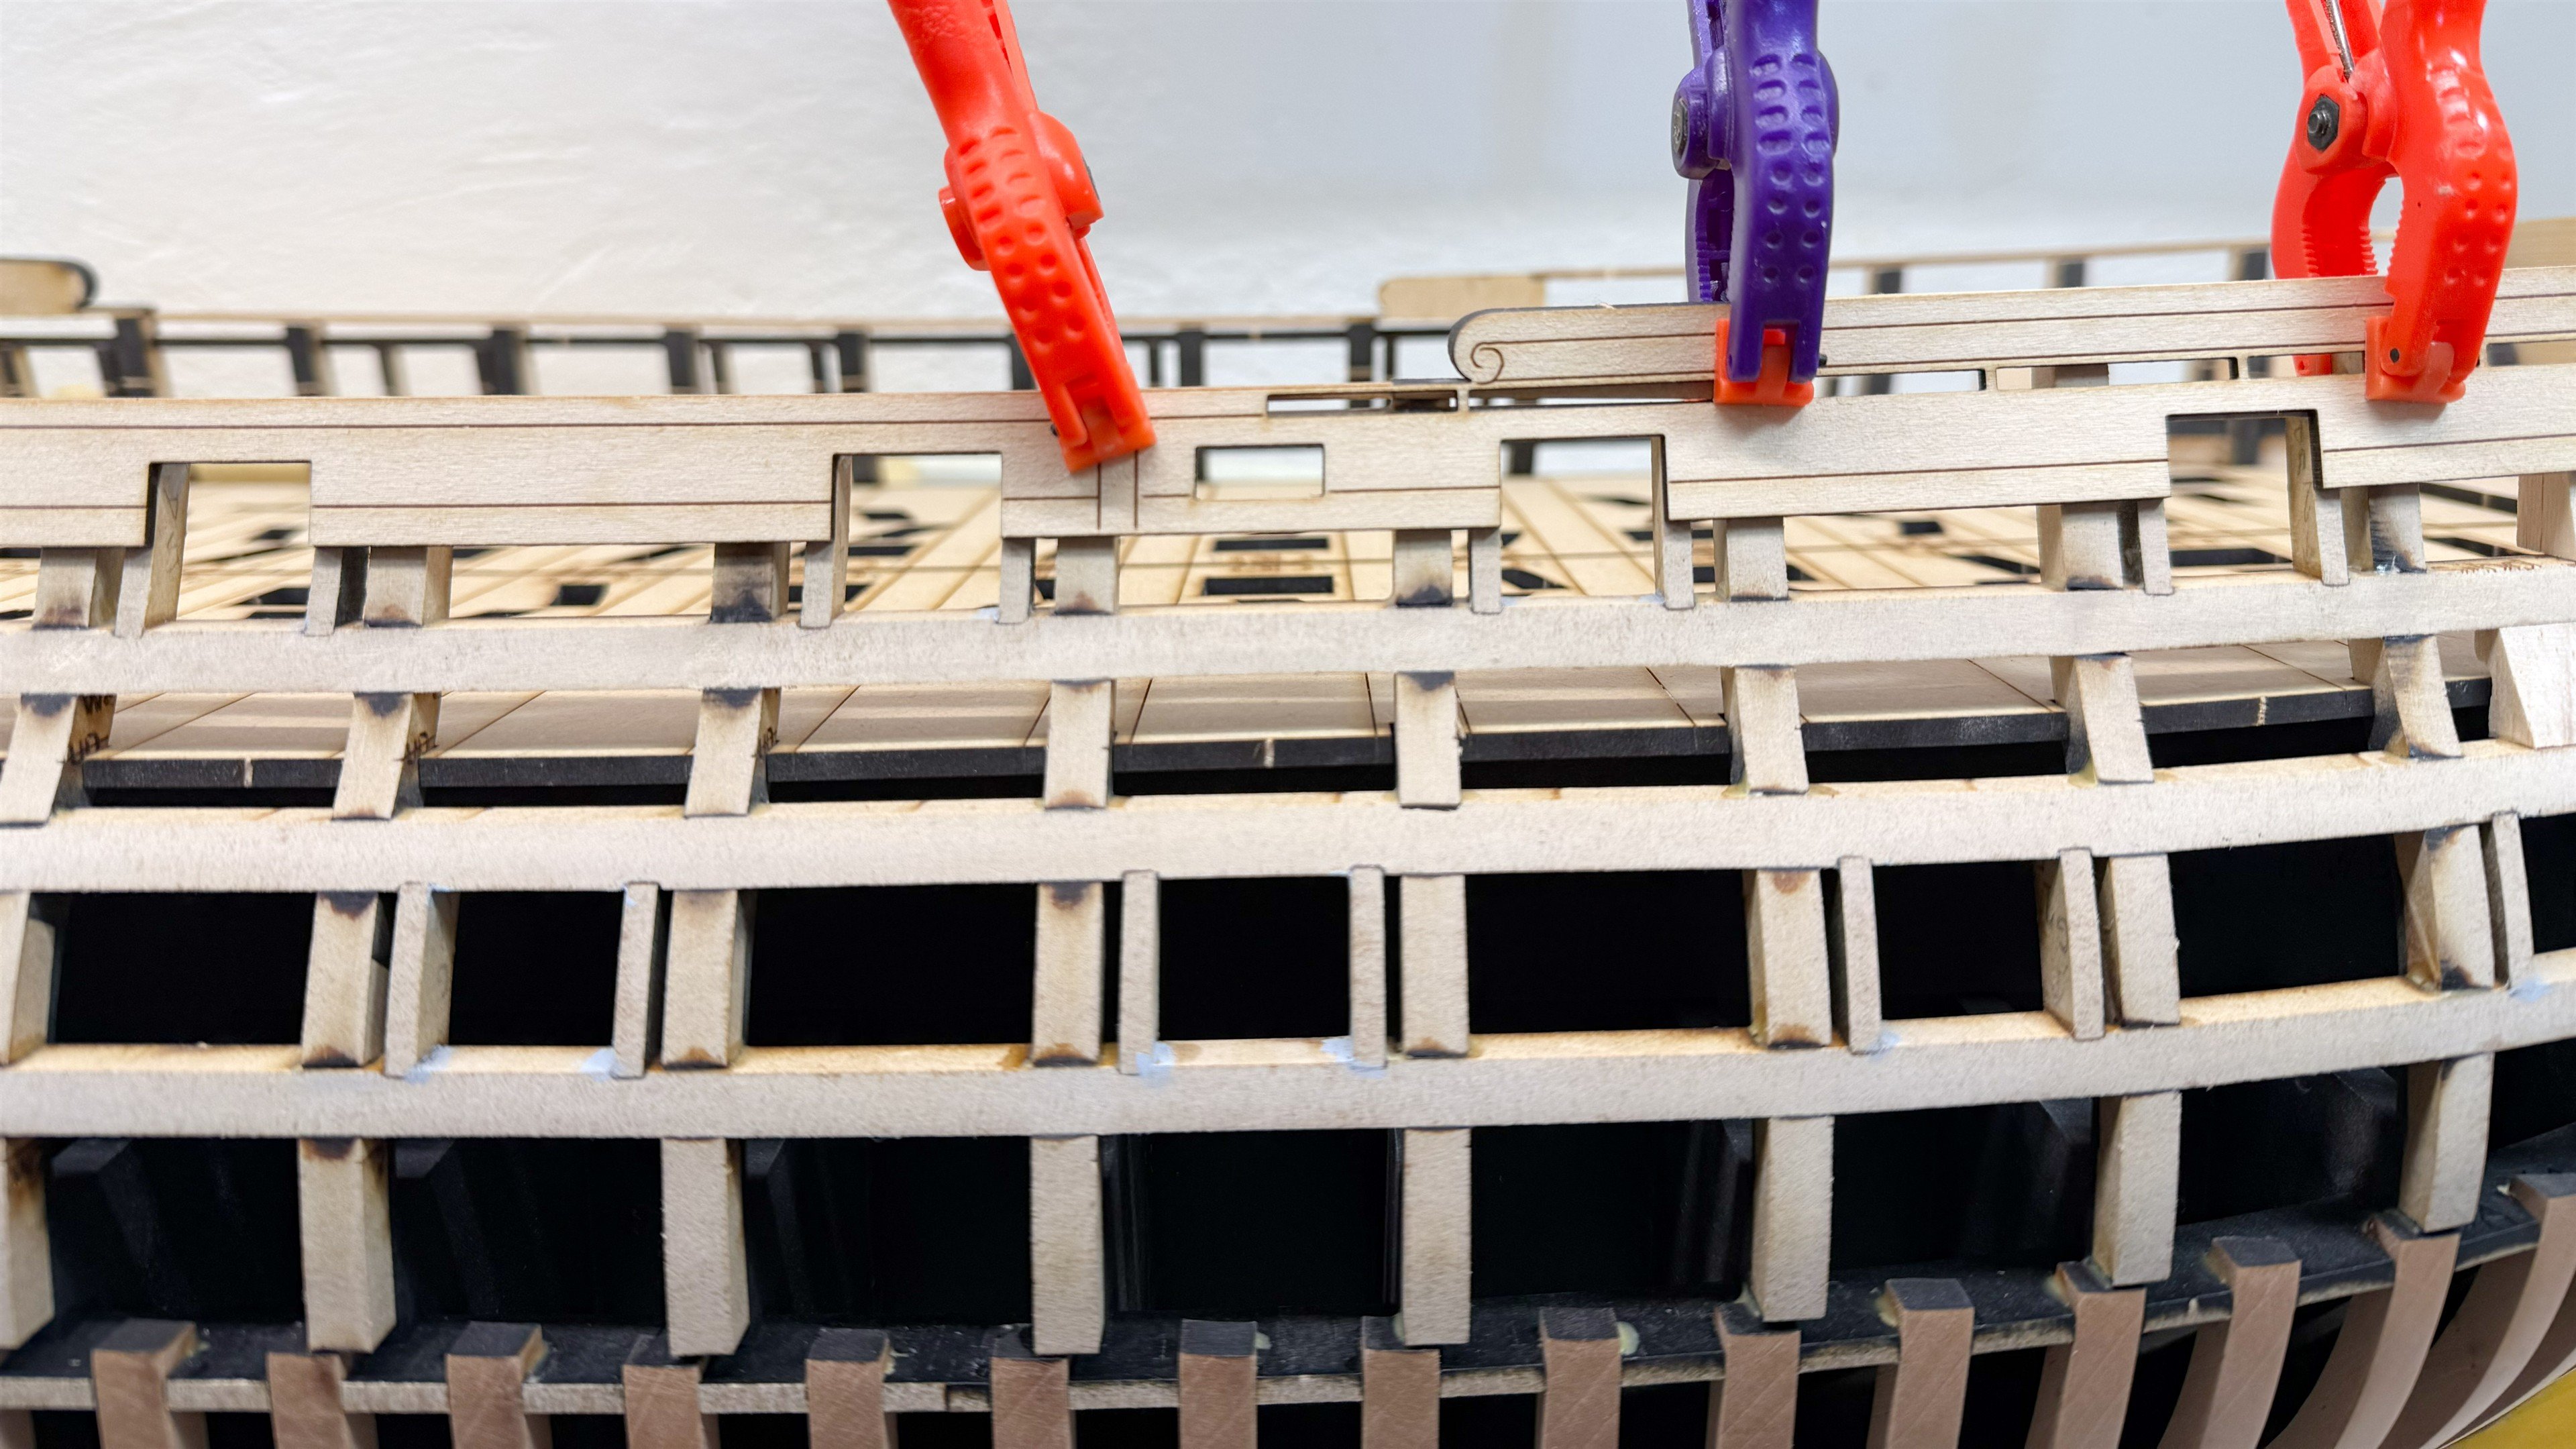
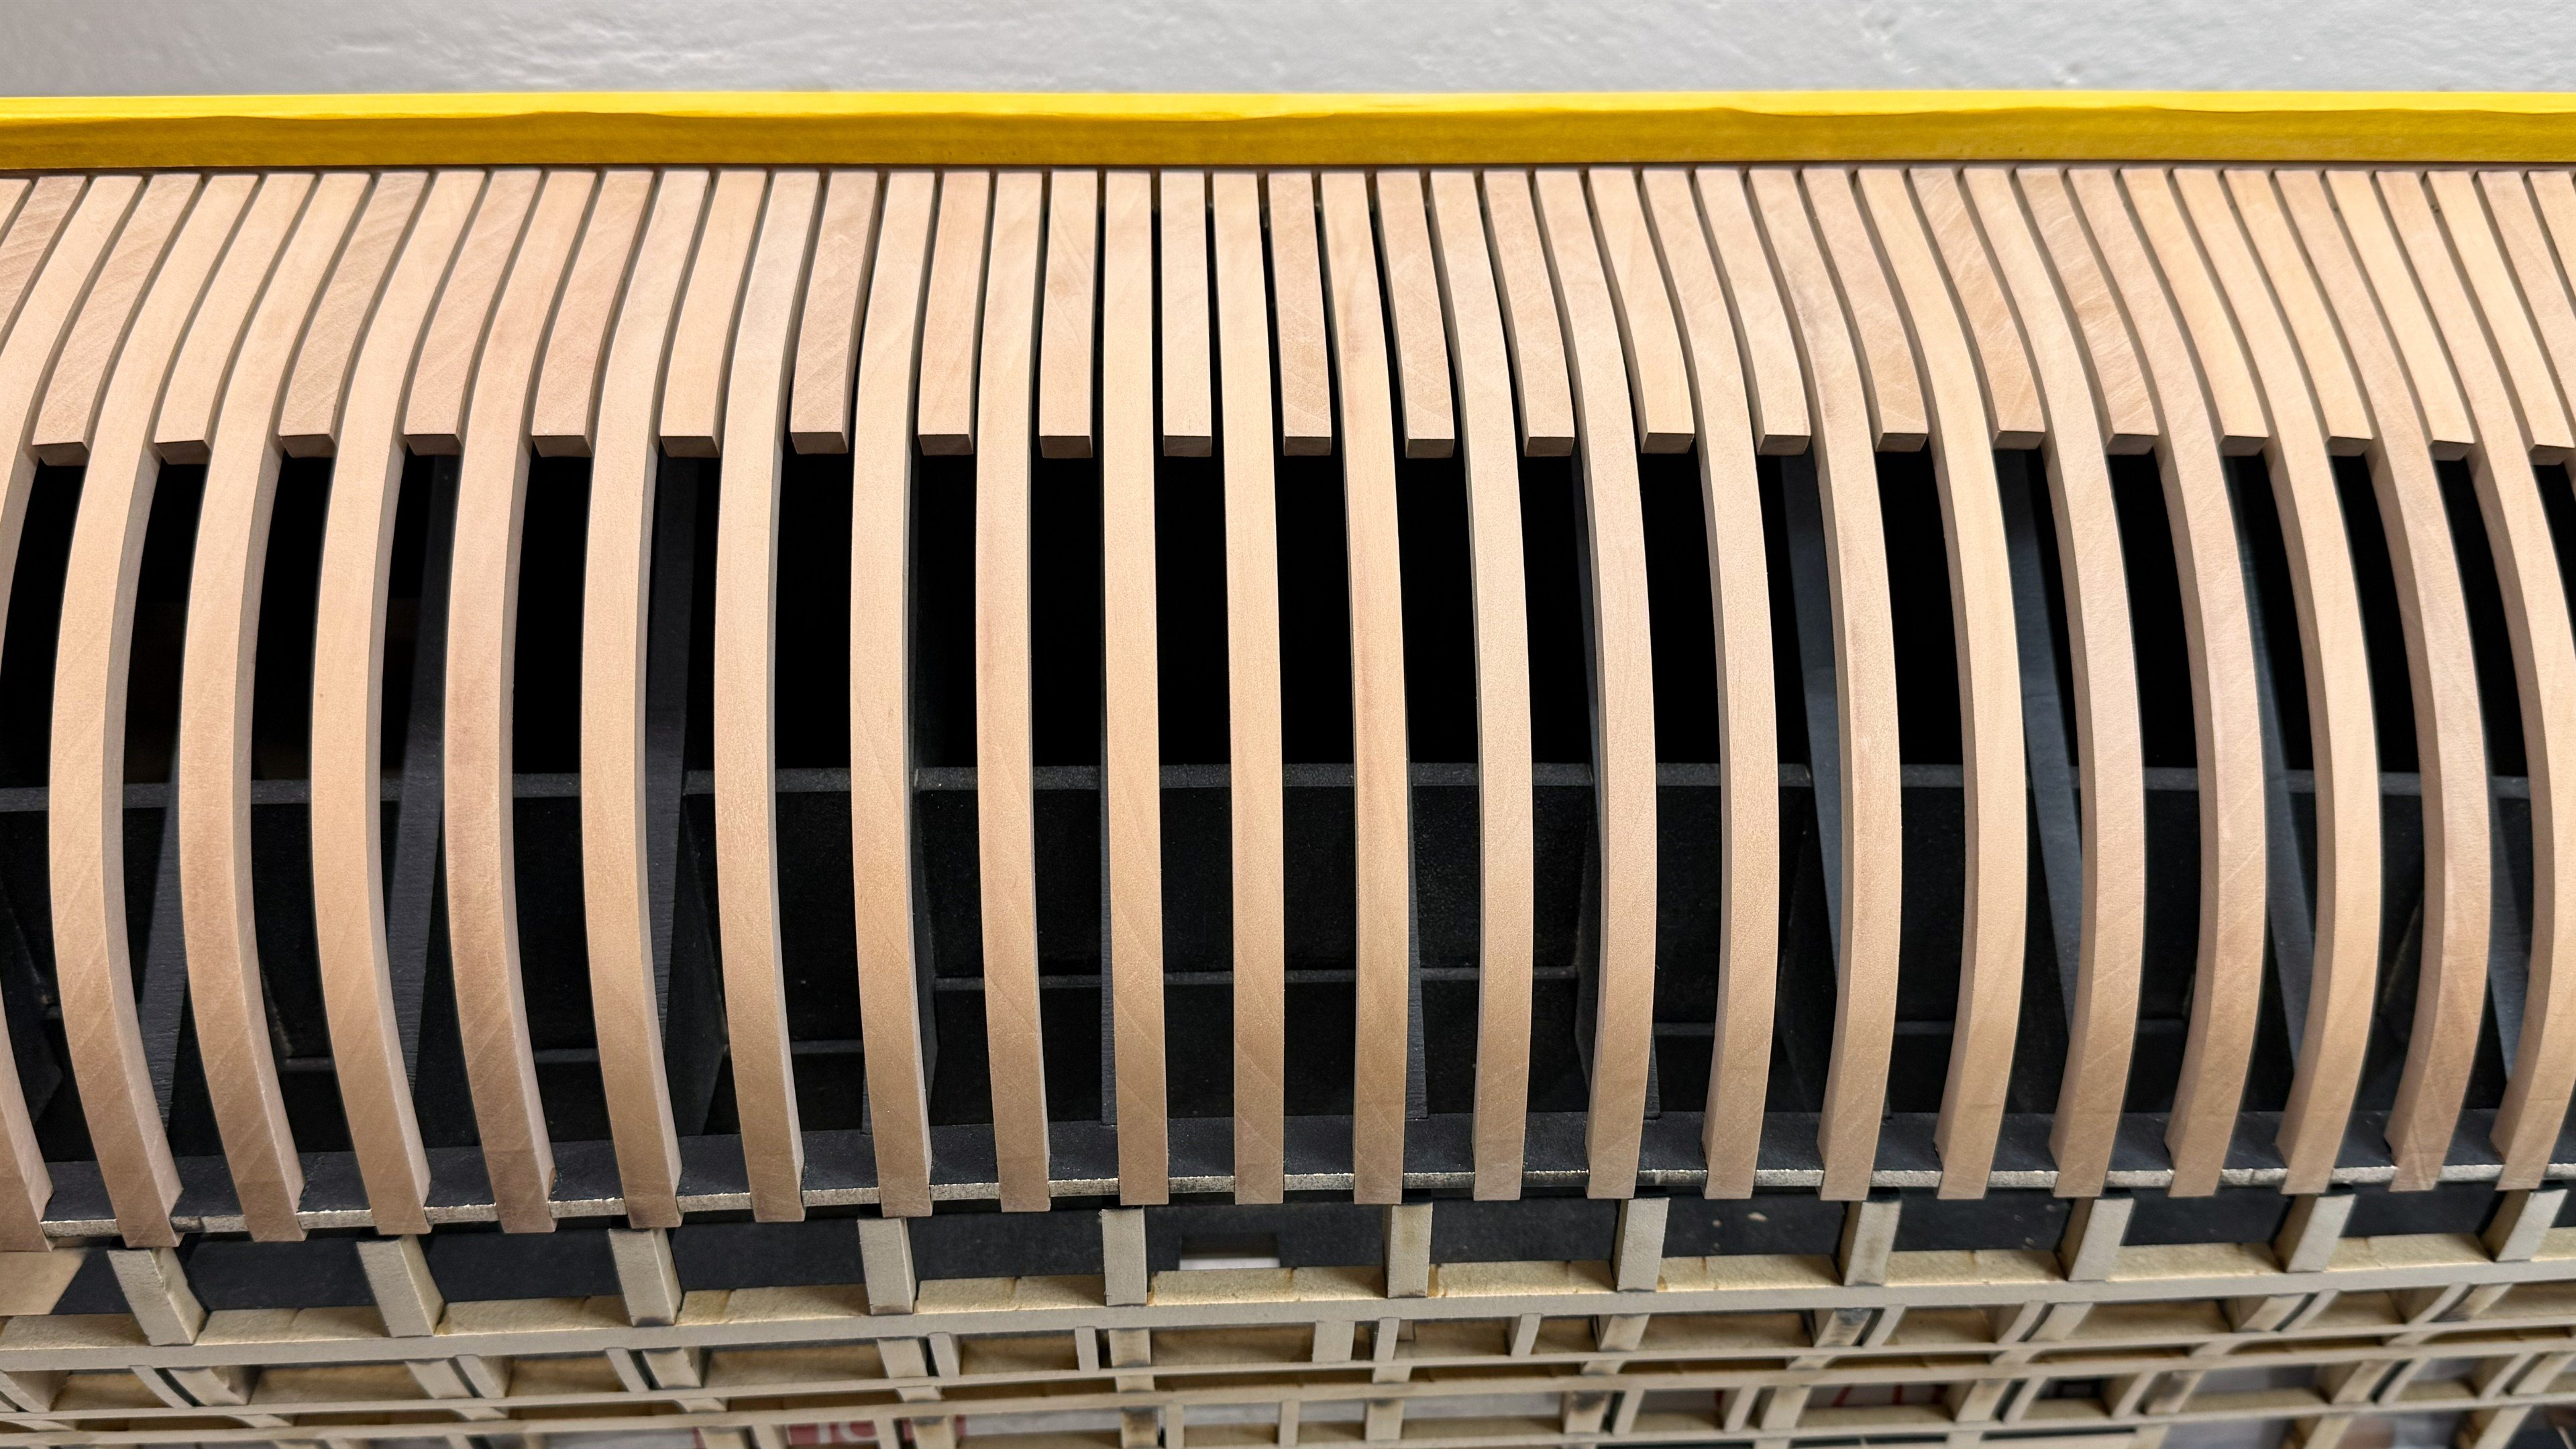
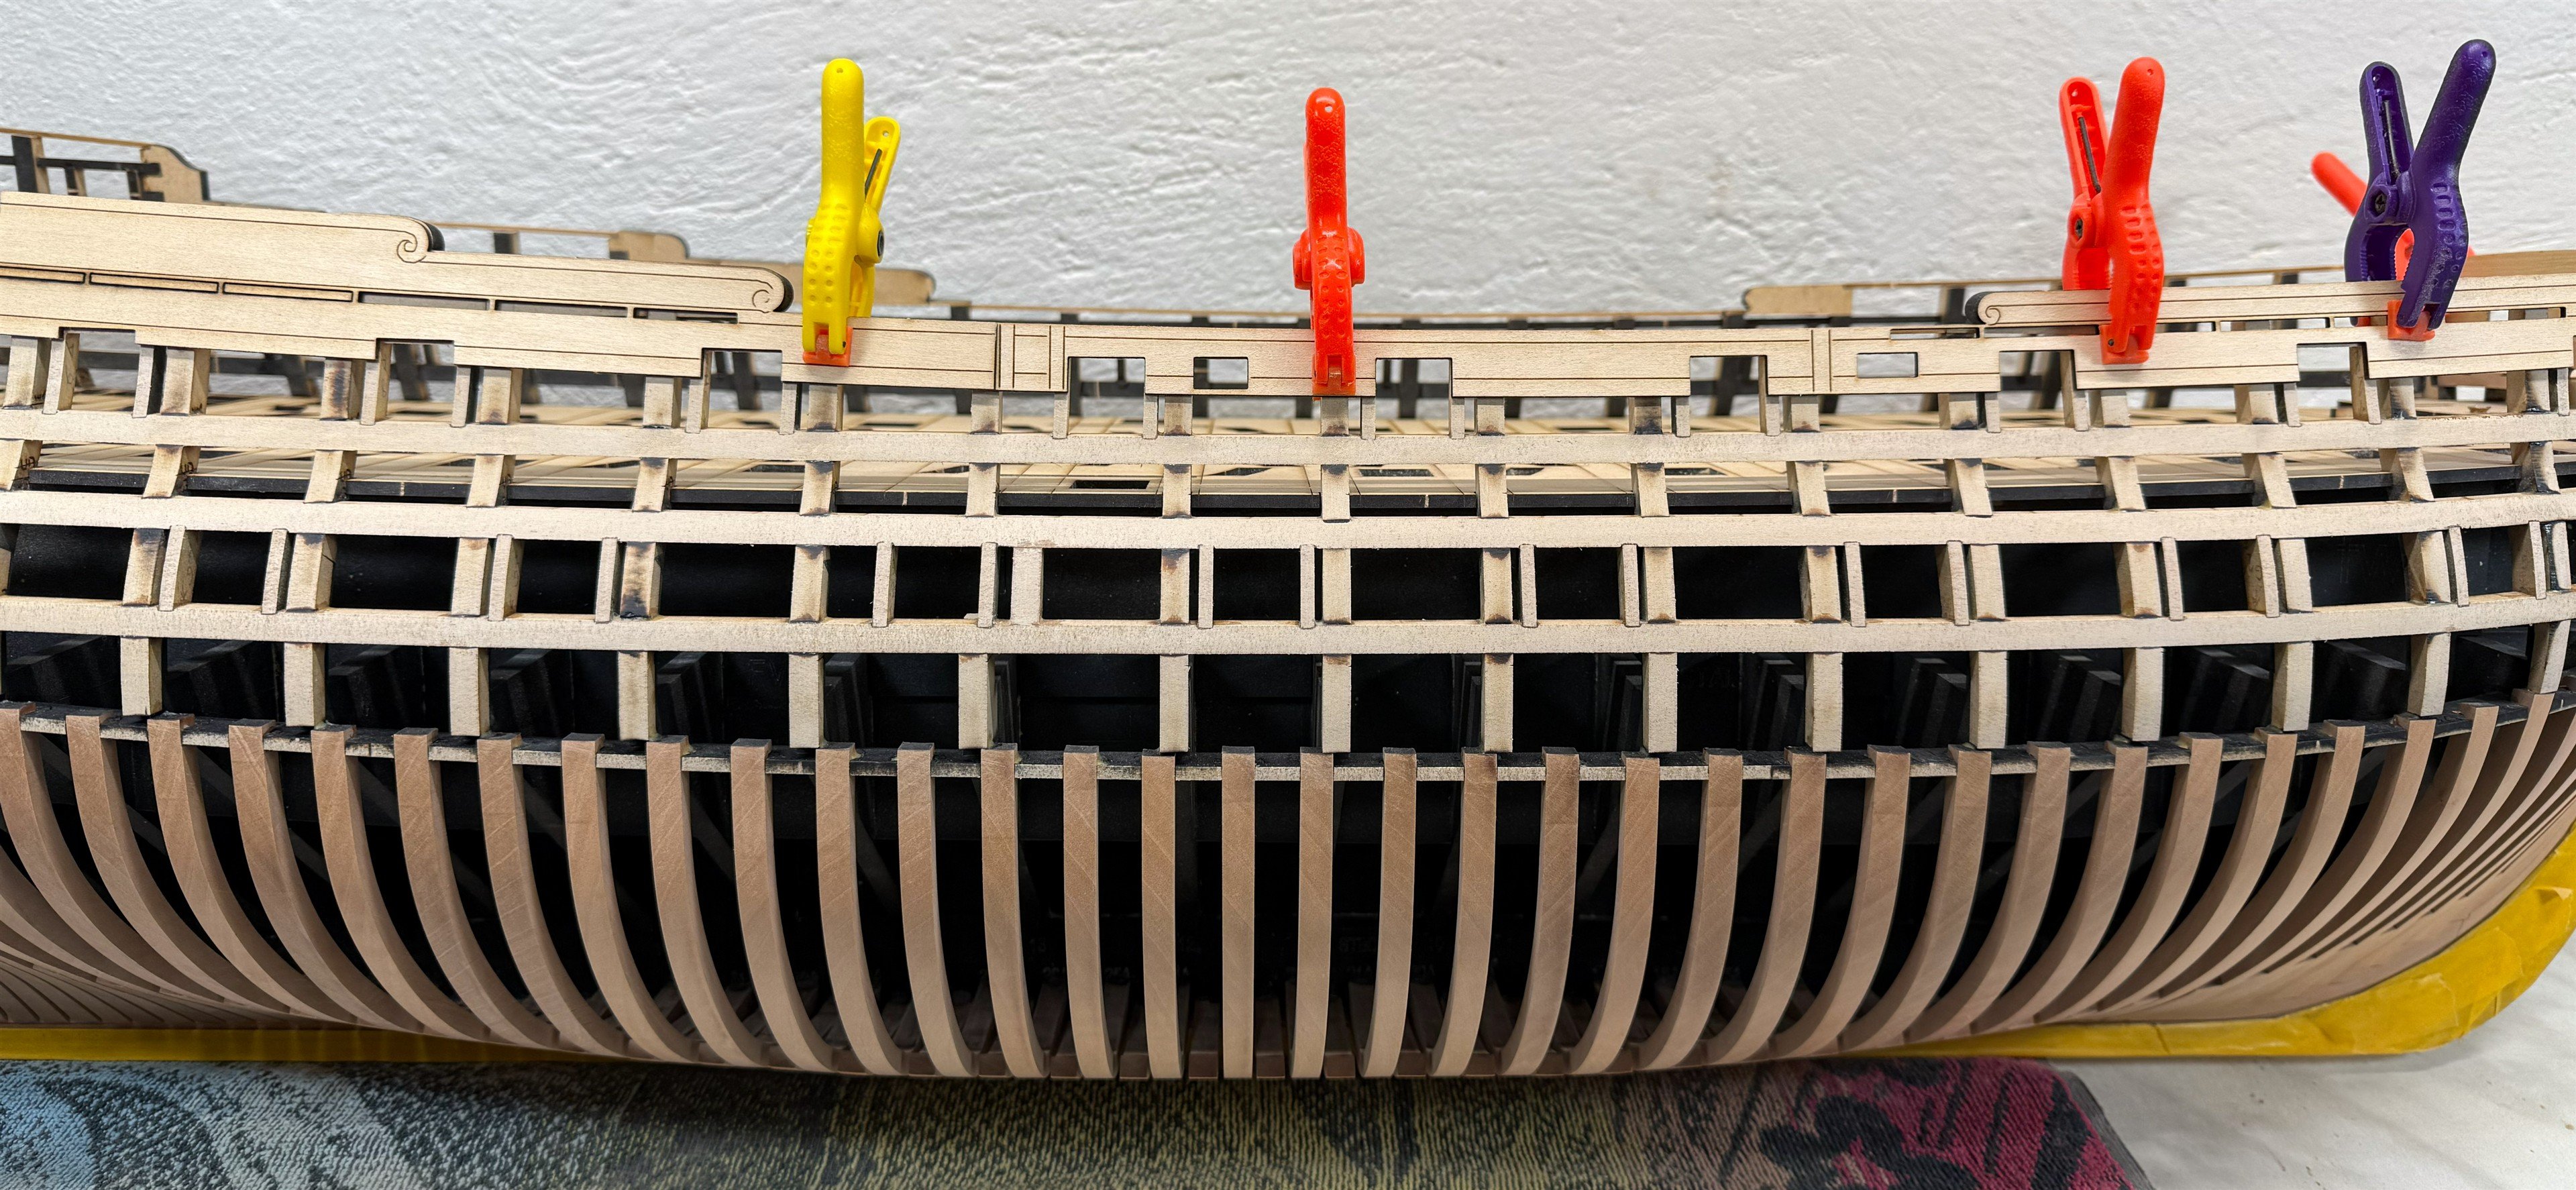
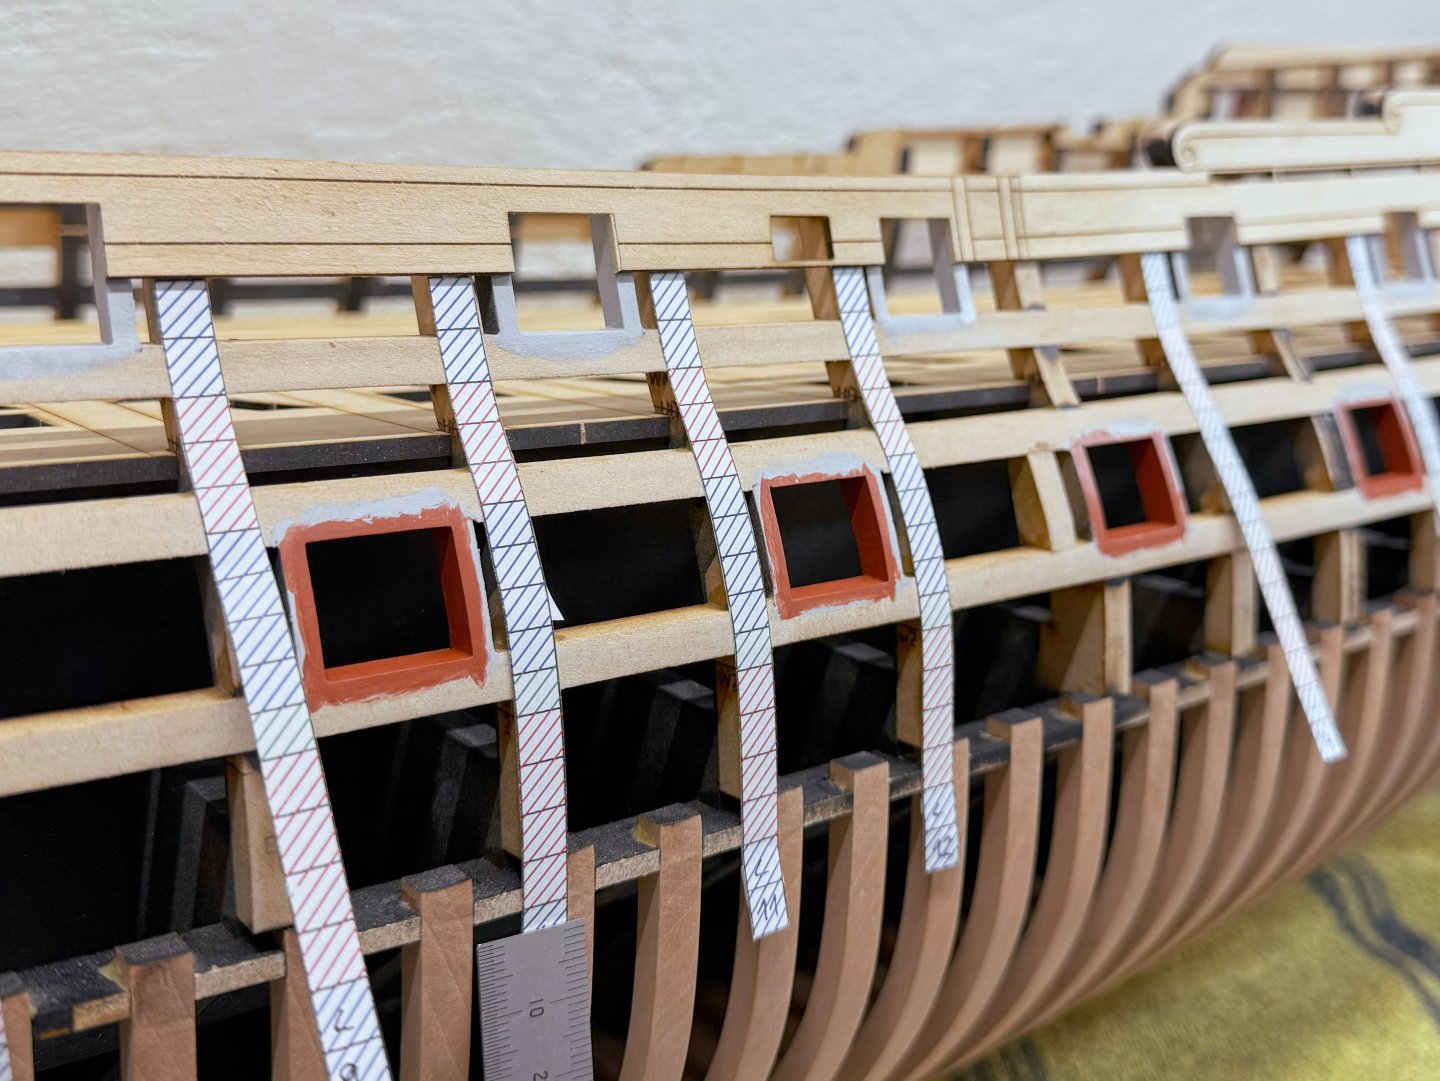
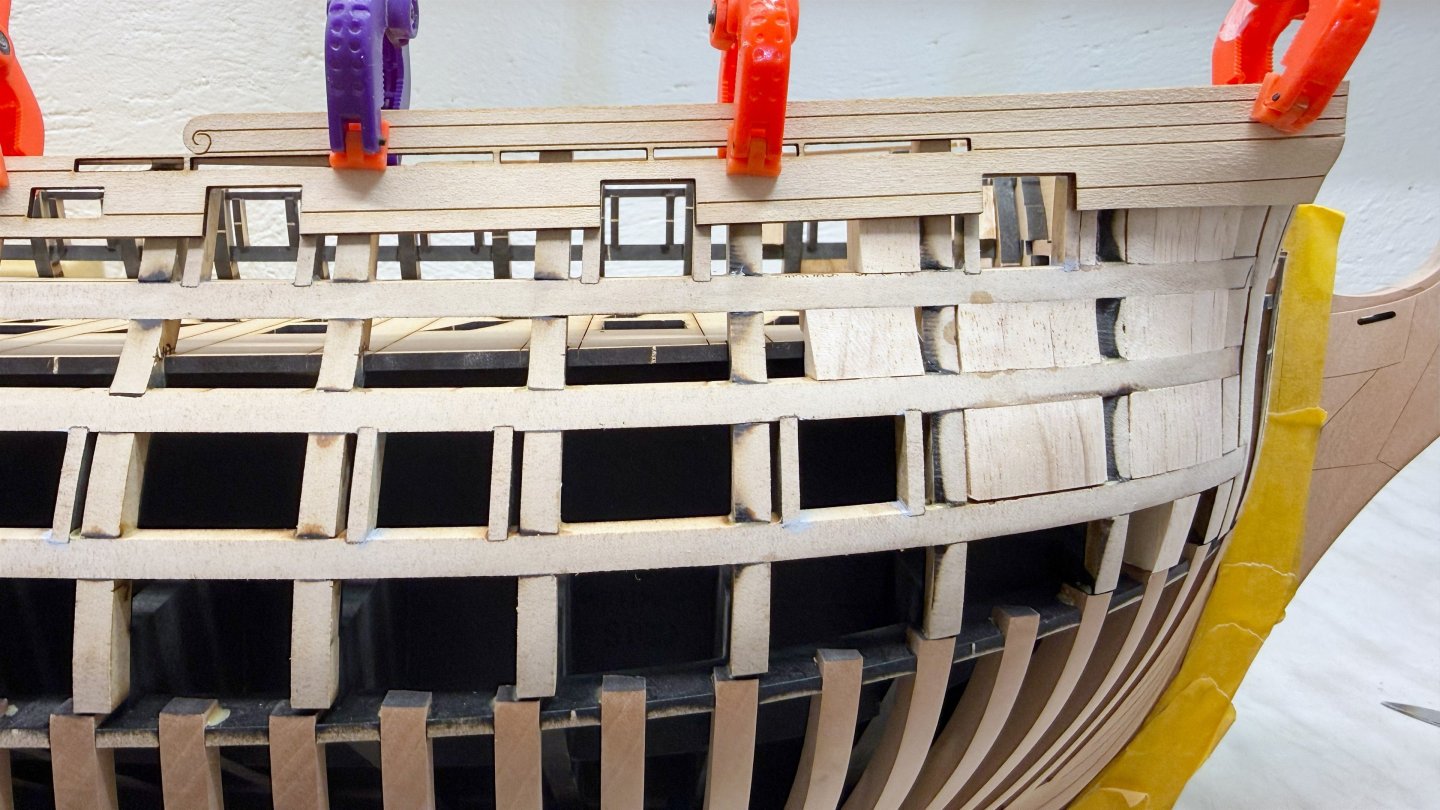
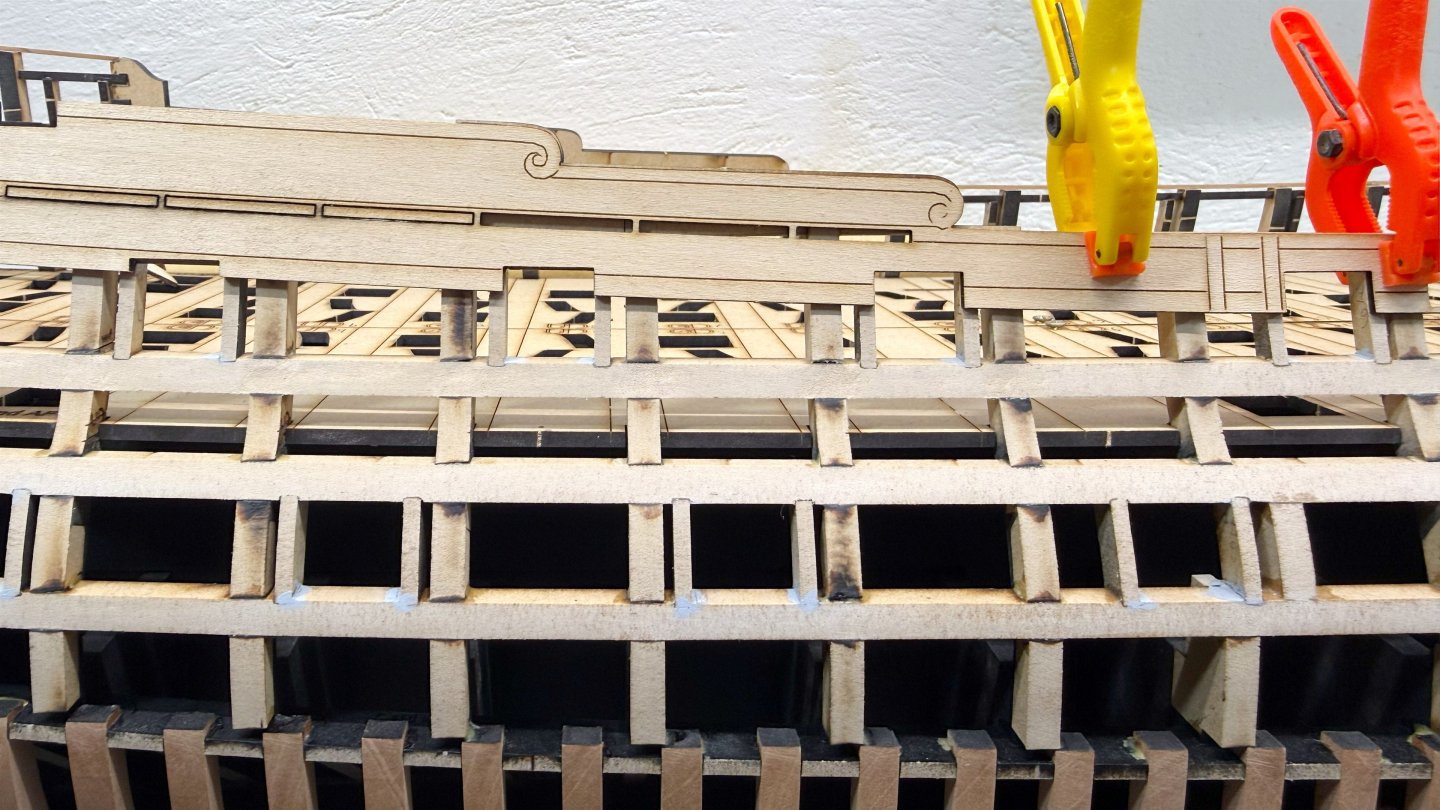
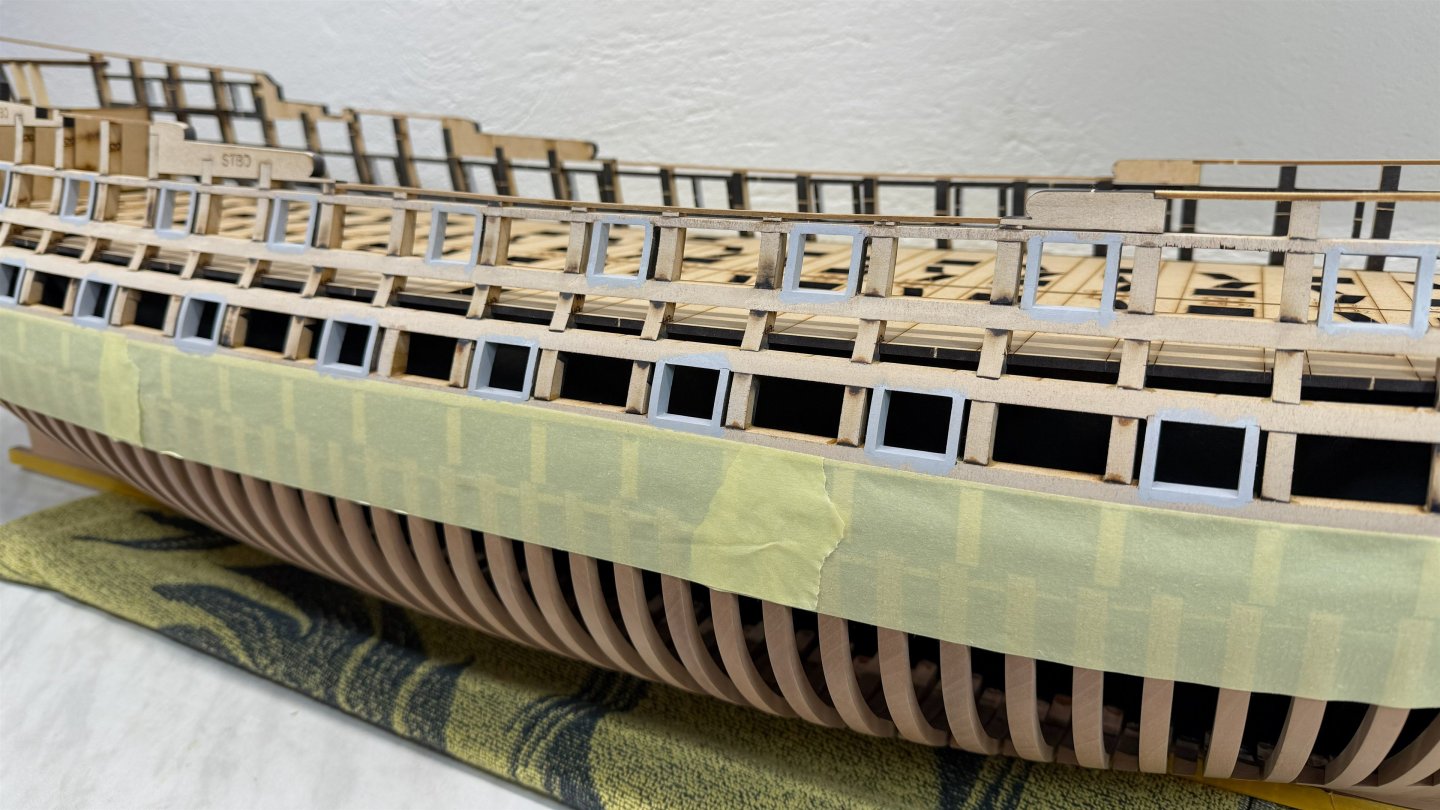
The first two strakes are now in place.
-
westwood reacted to a post in a topic:
HMS Crocodile 1781 by Pirate adam - 1/48 scale - POF
-
westwood reacted to a post in a topic:
HMS Winchelsea 1764 by shauer - 1:48
-
westwood reacted to a post in a topic:
HMS Winchelsea 1764 by shauer - 1:48
-
westwood reacted to a post in a topic:
Double Capstan Project by shauer - Portland Scale Ship Co Kit
-
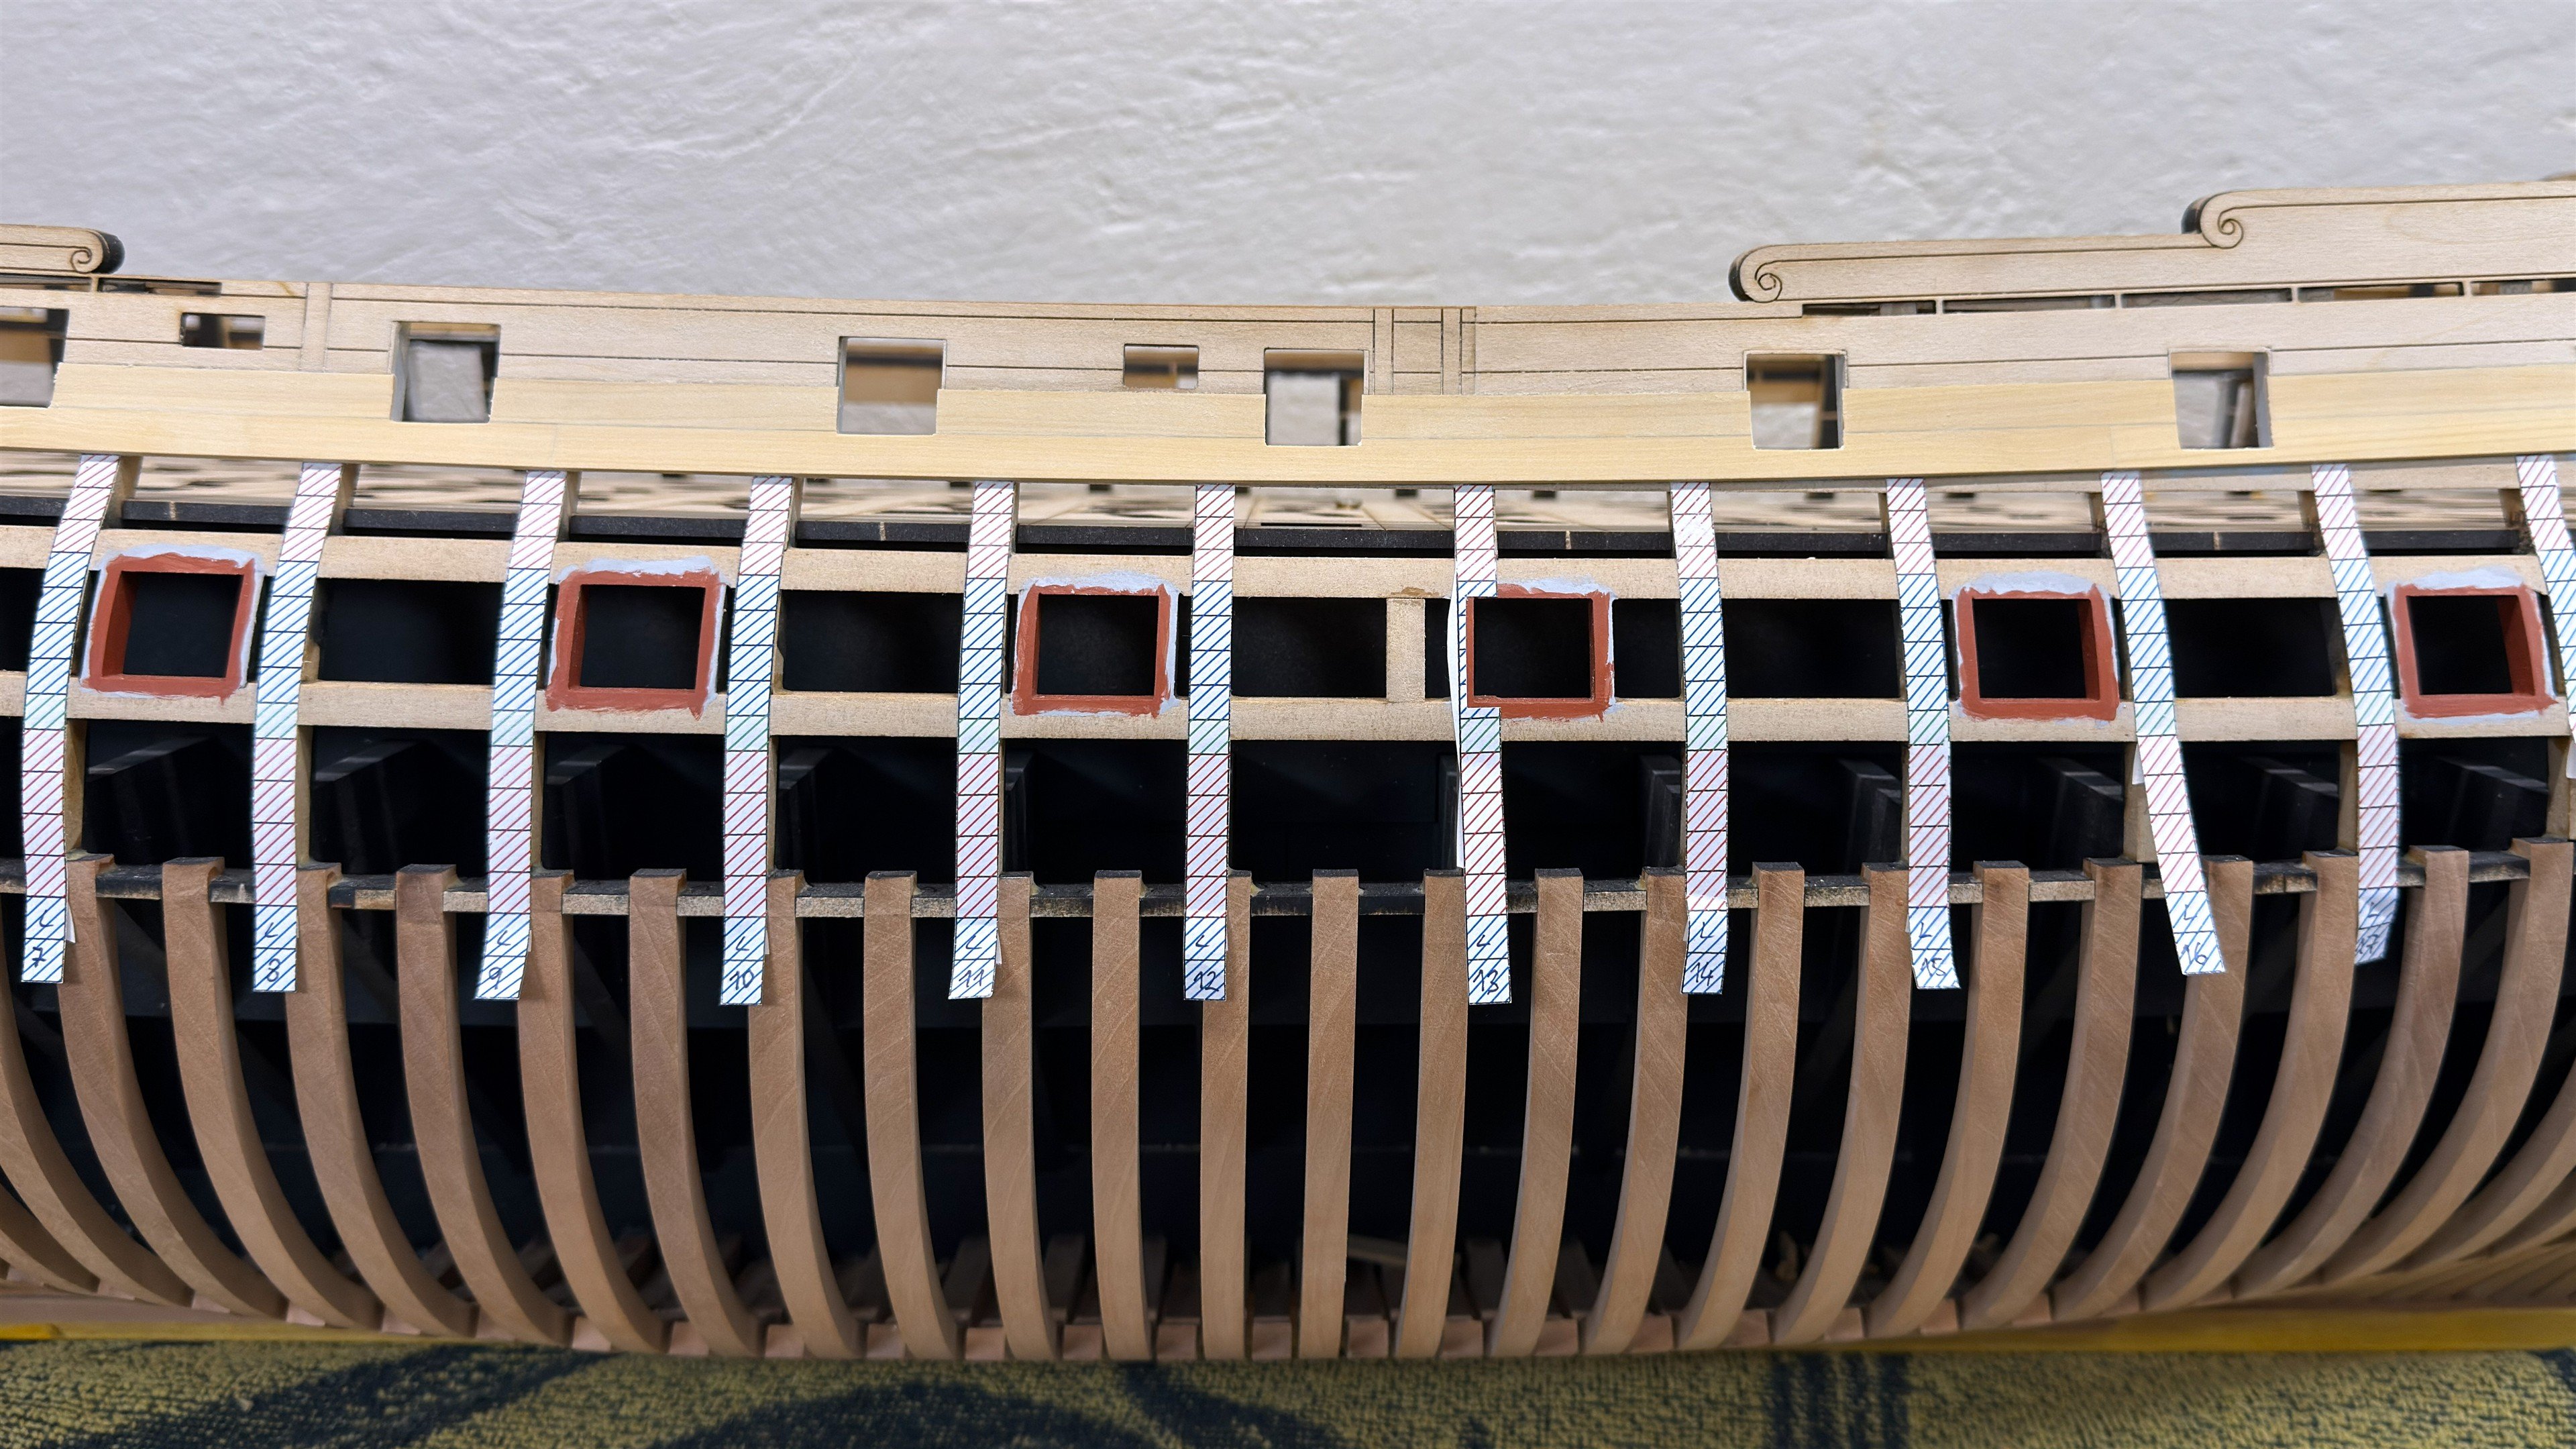
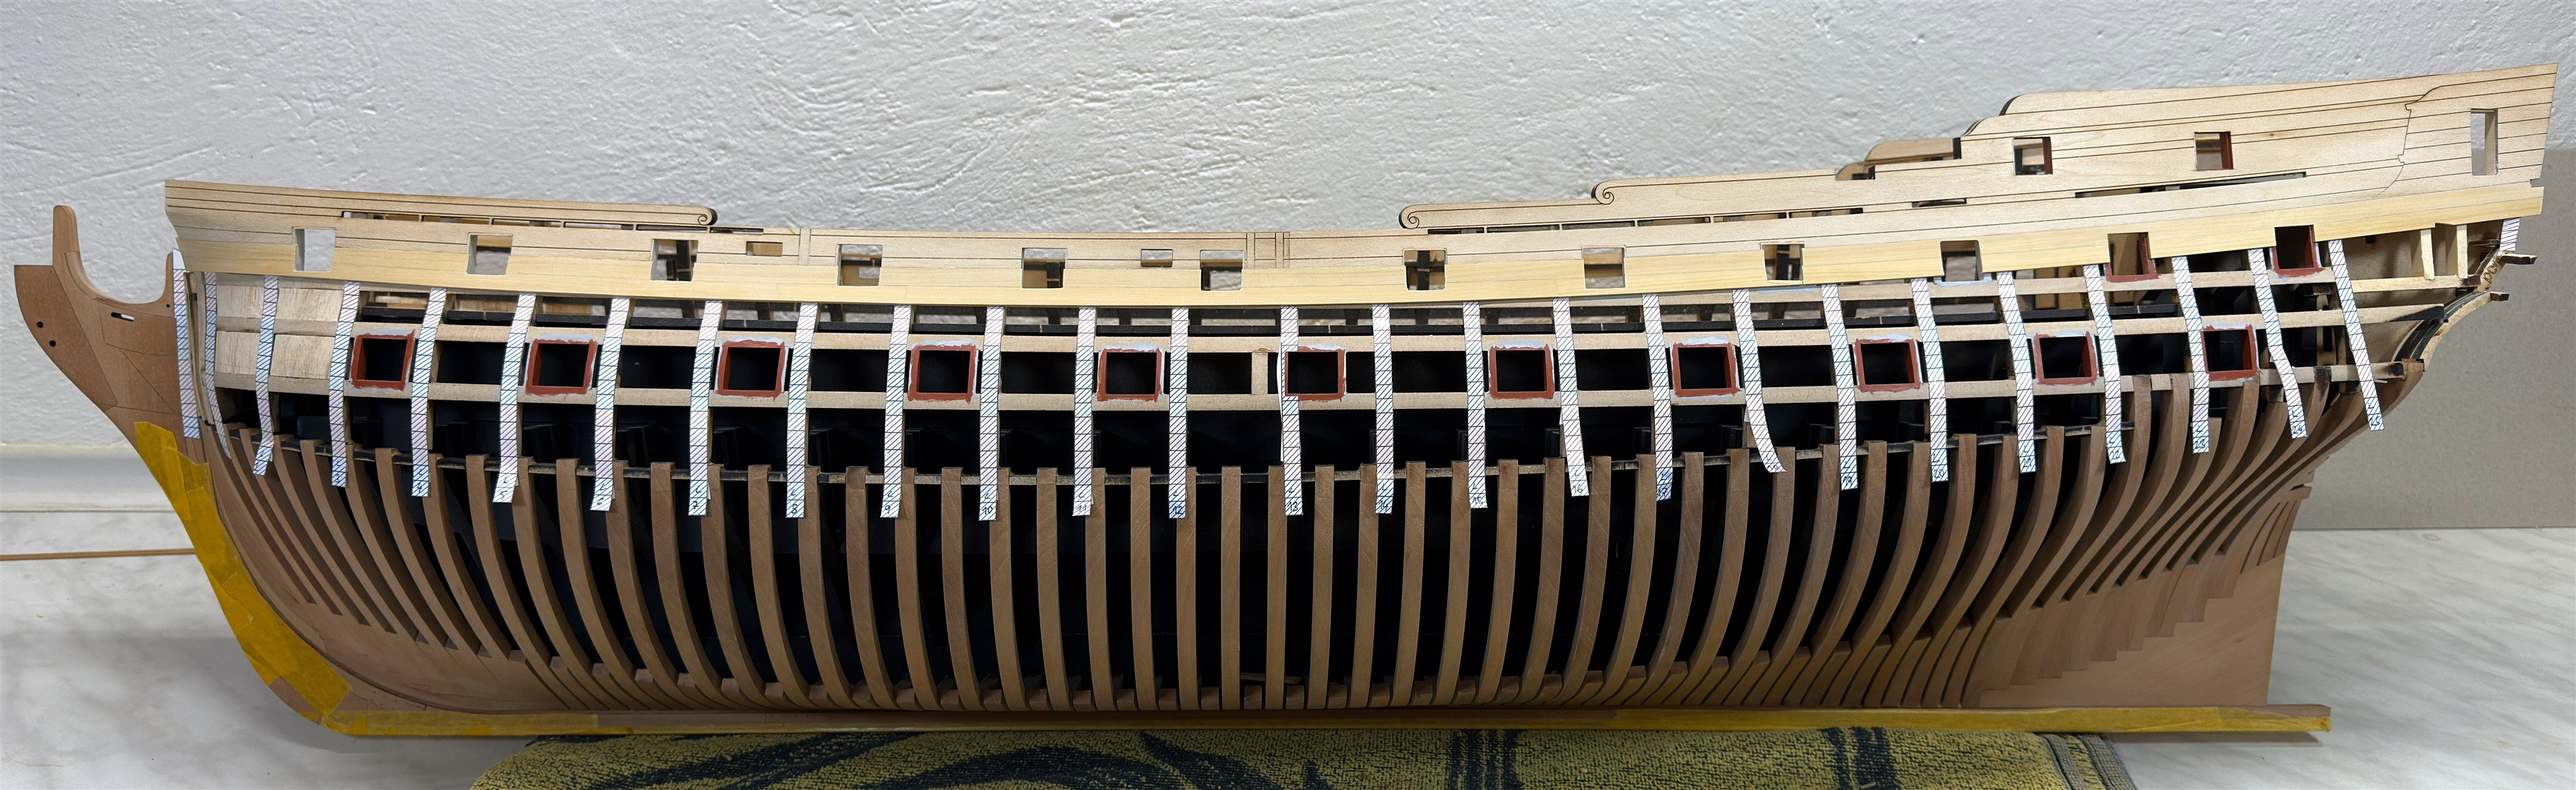
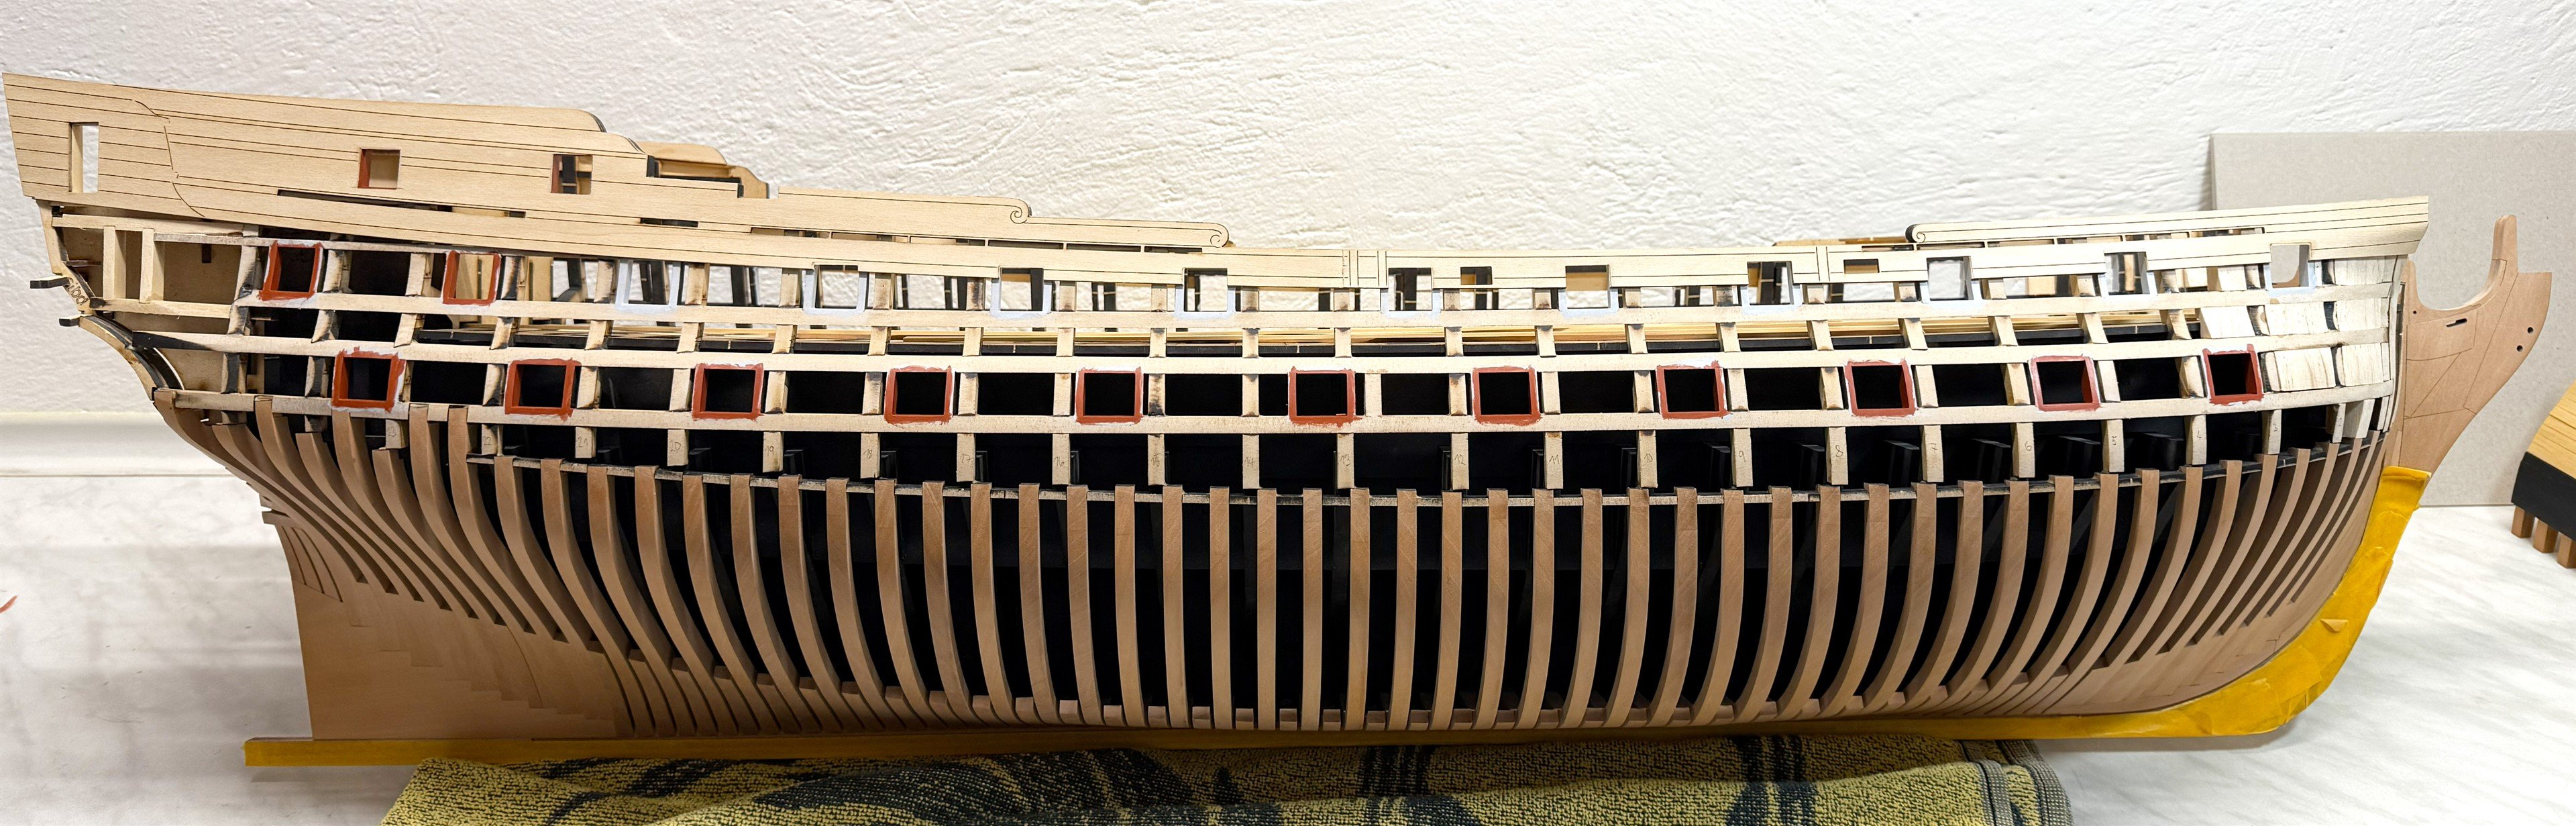
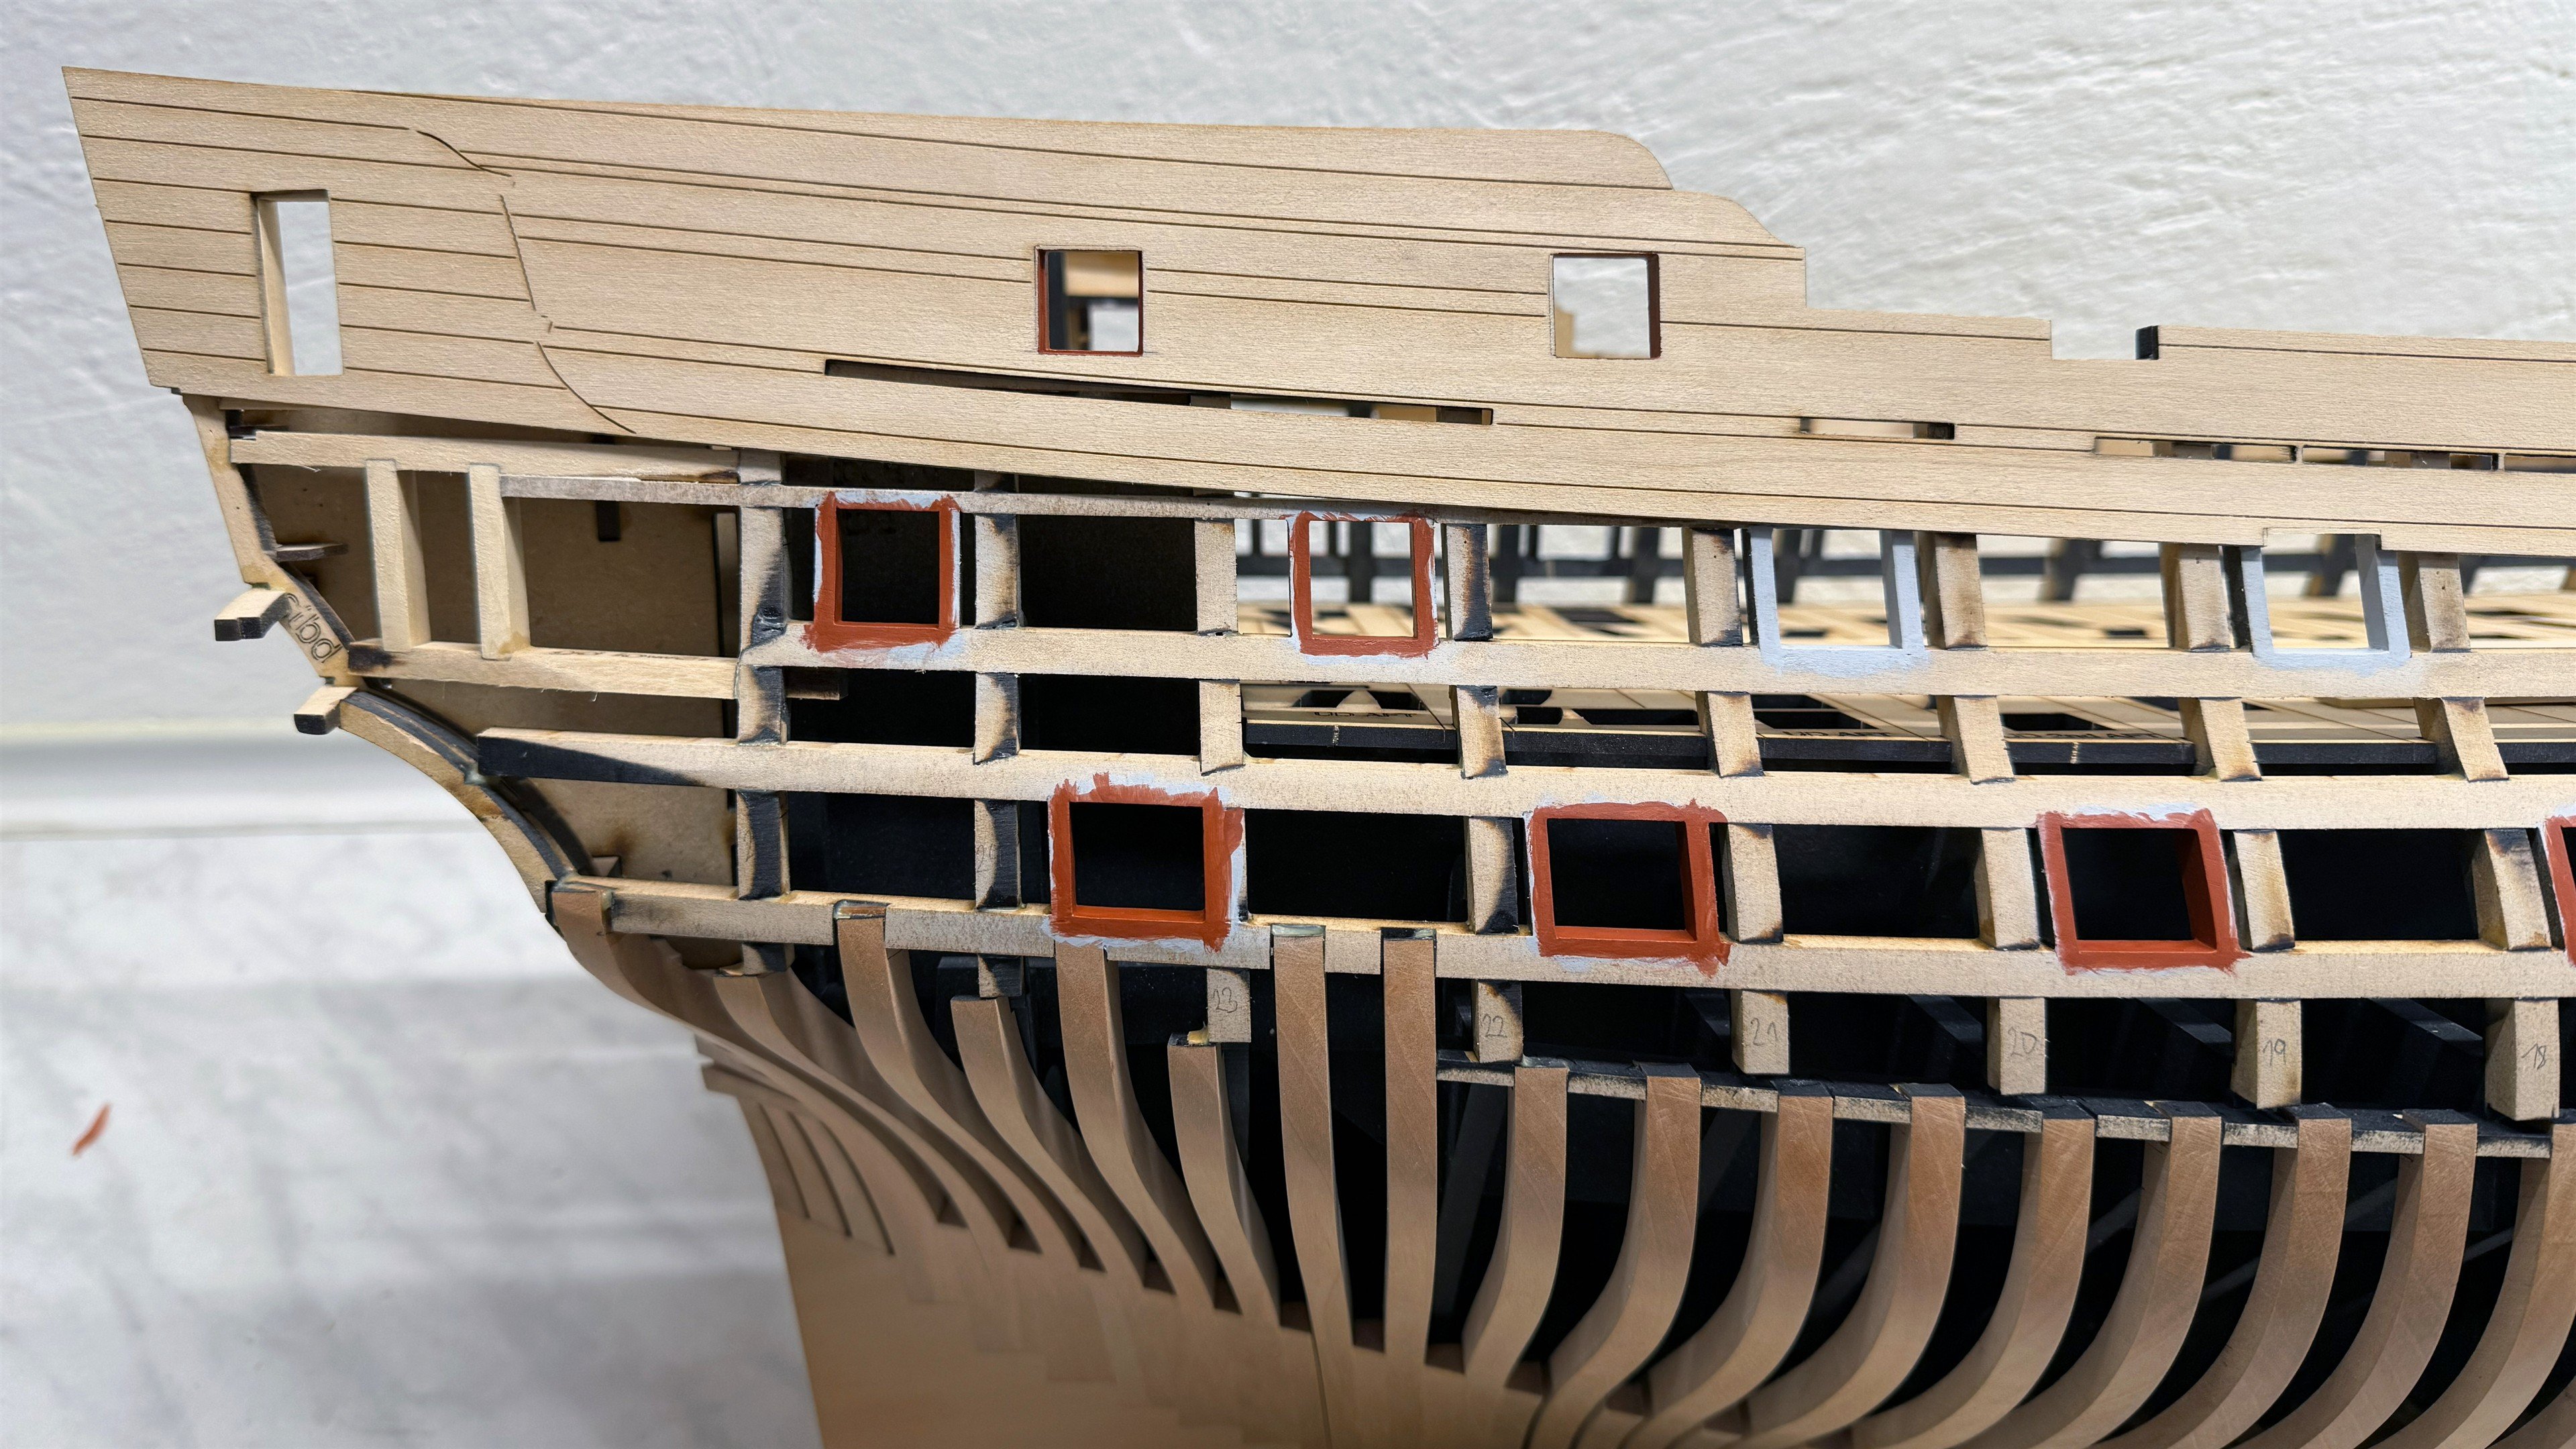
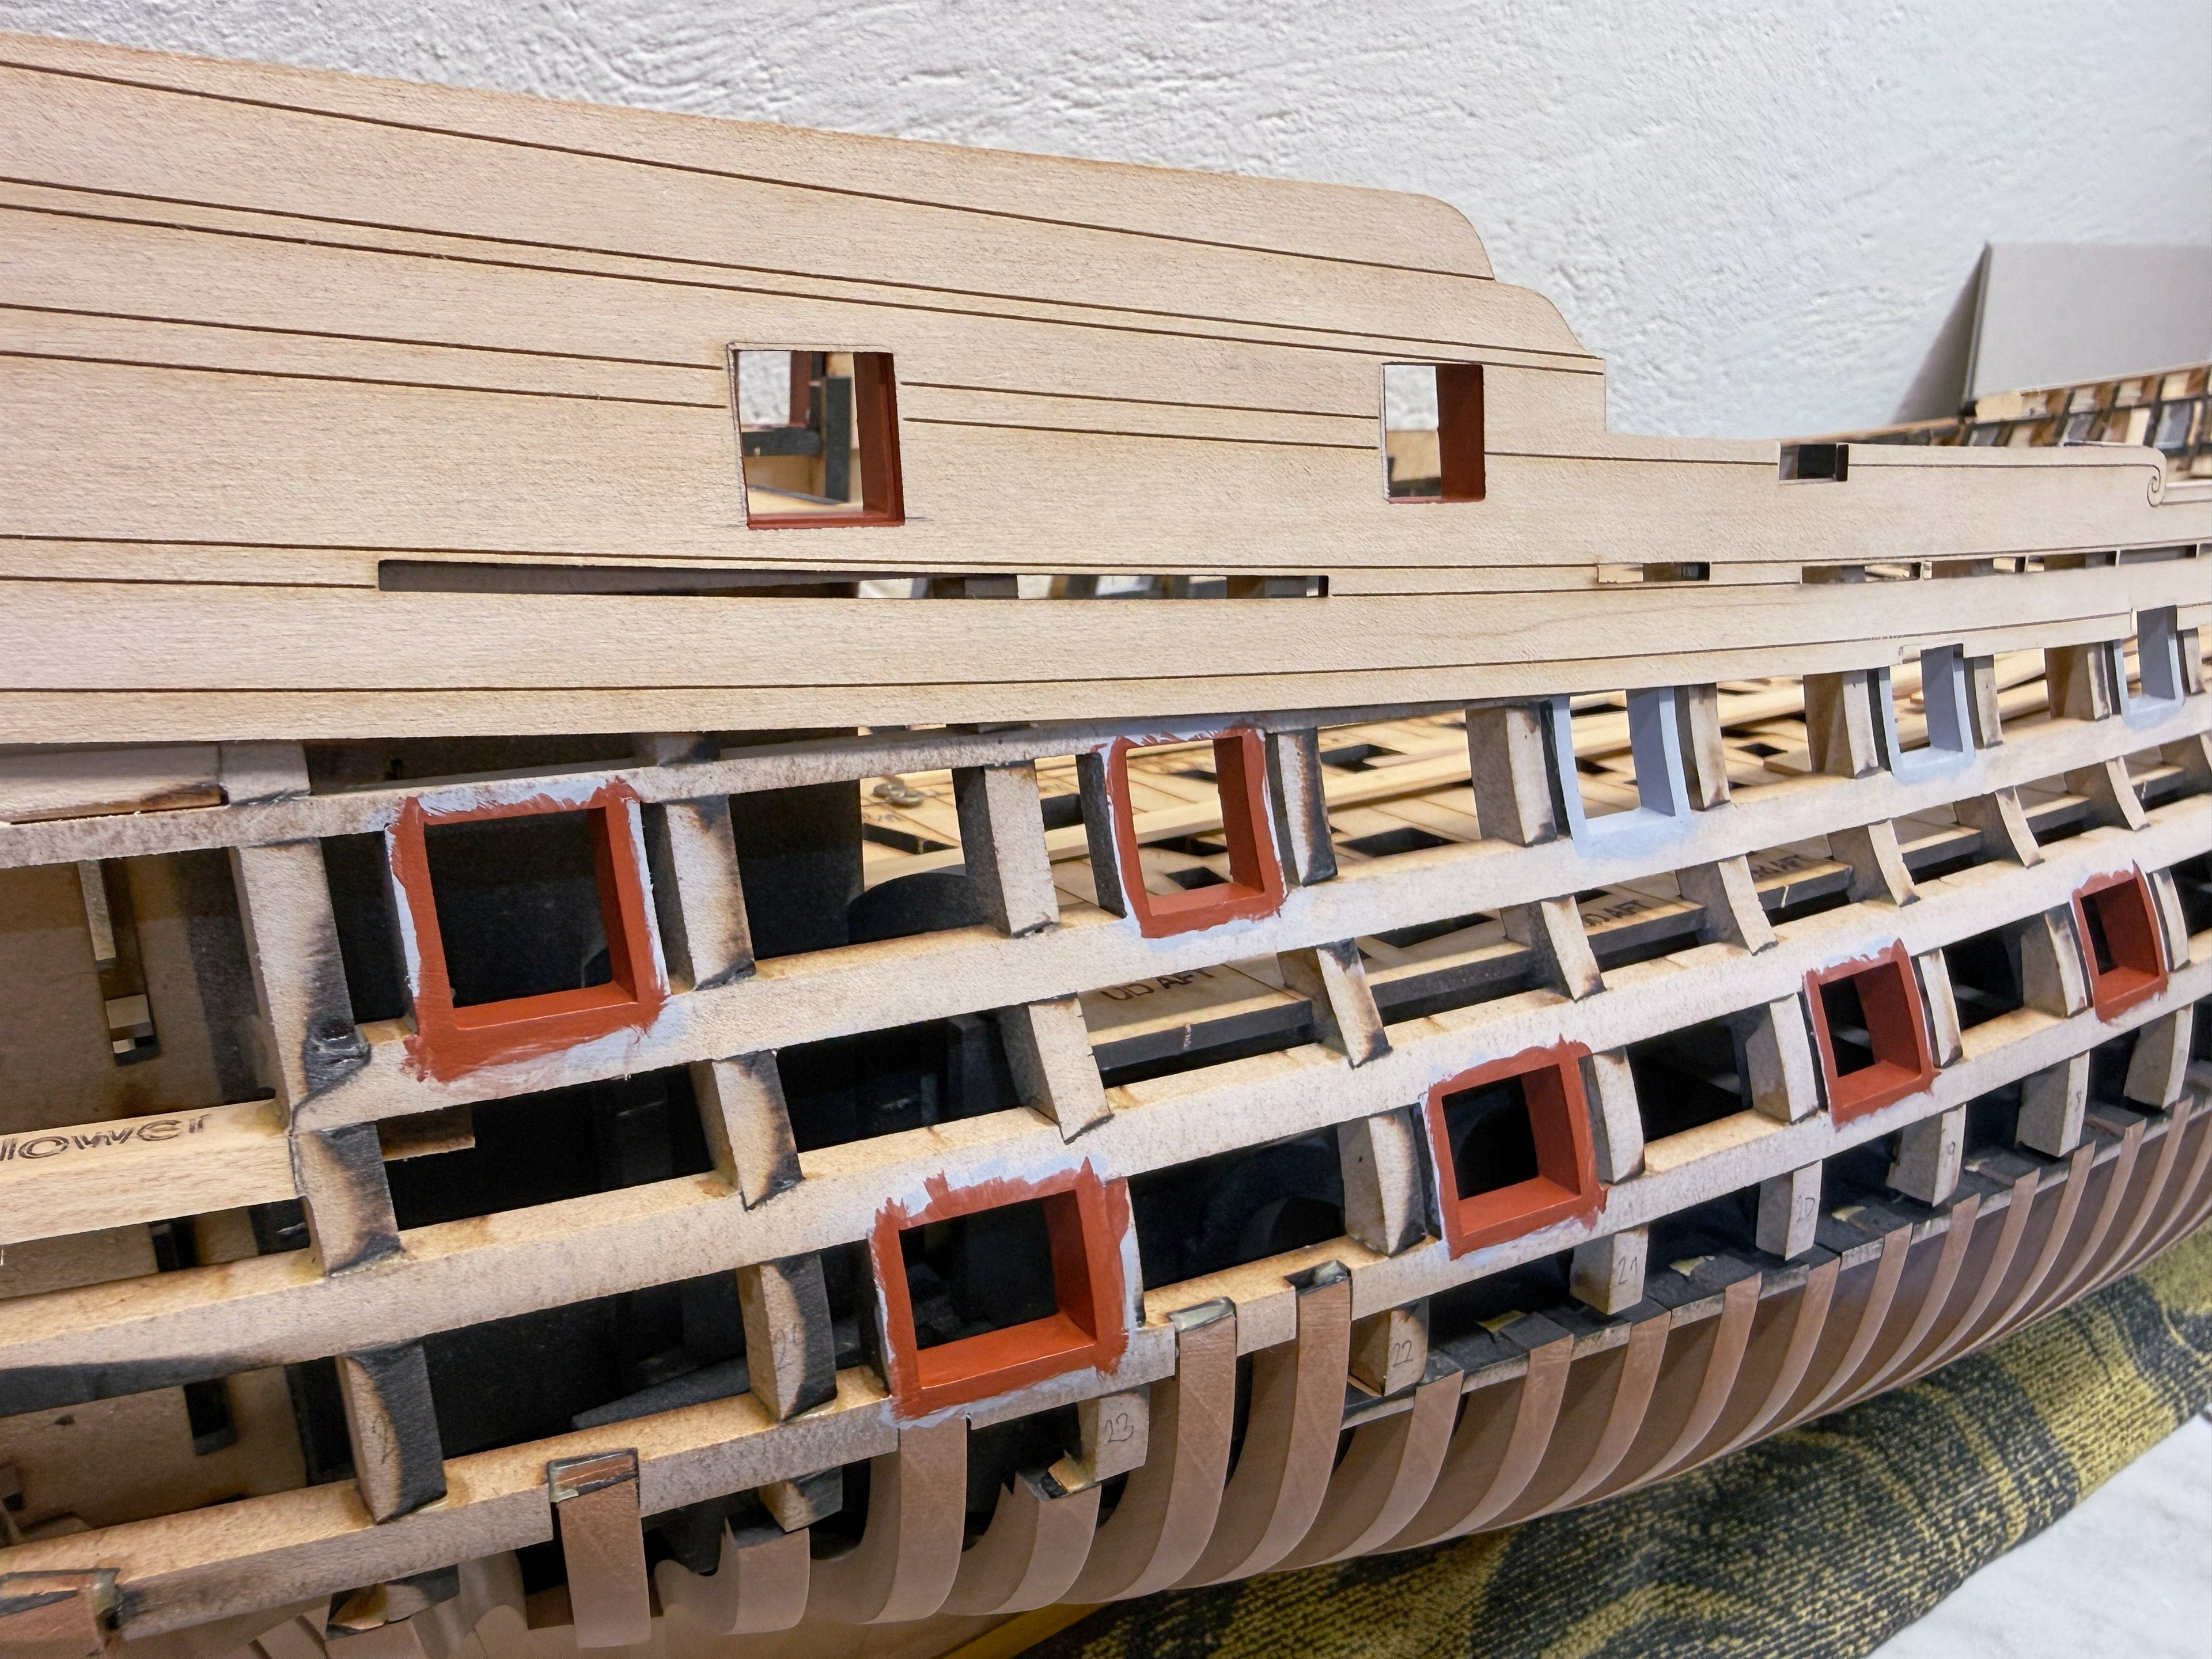
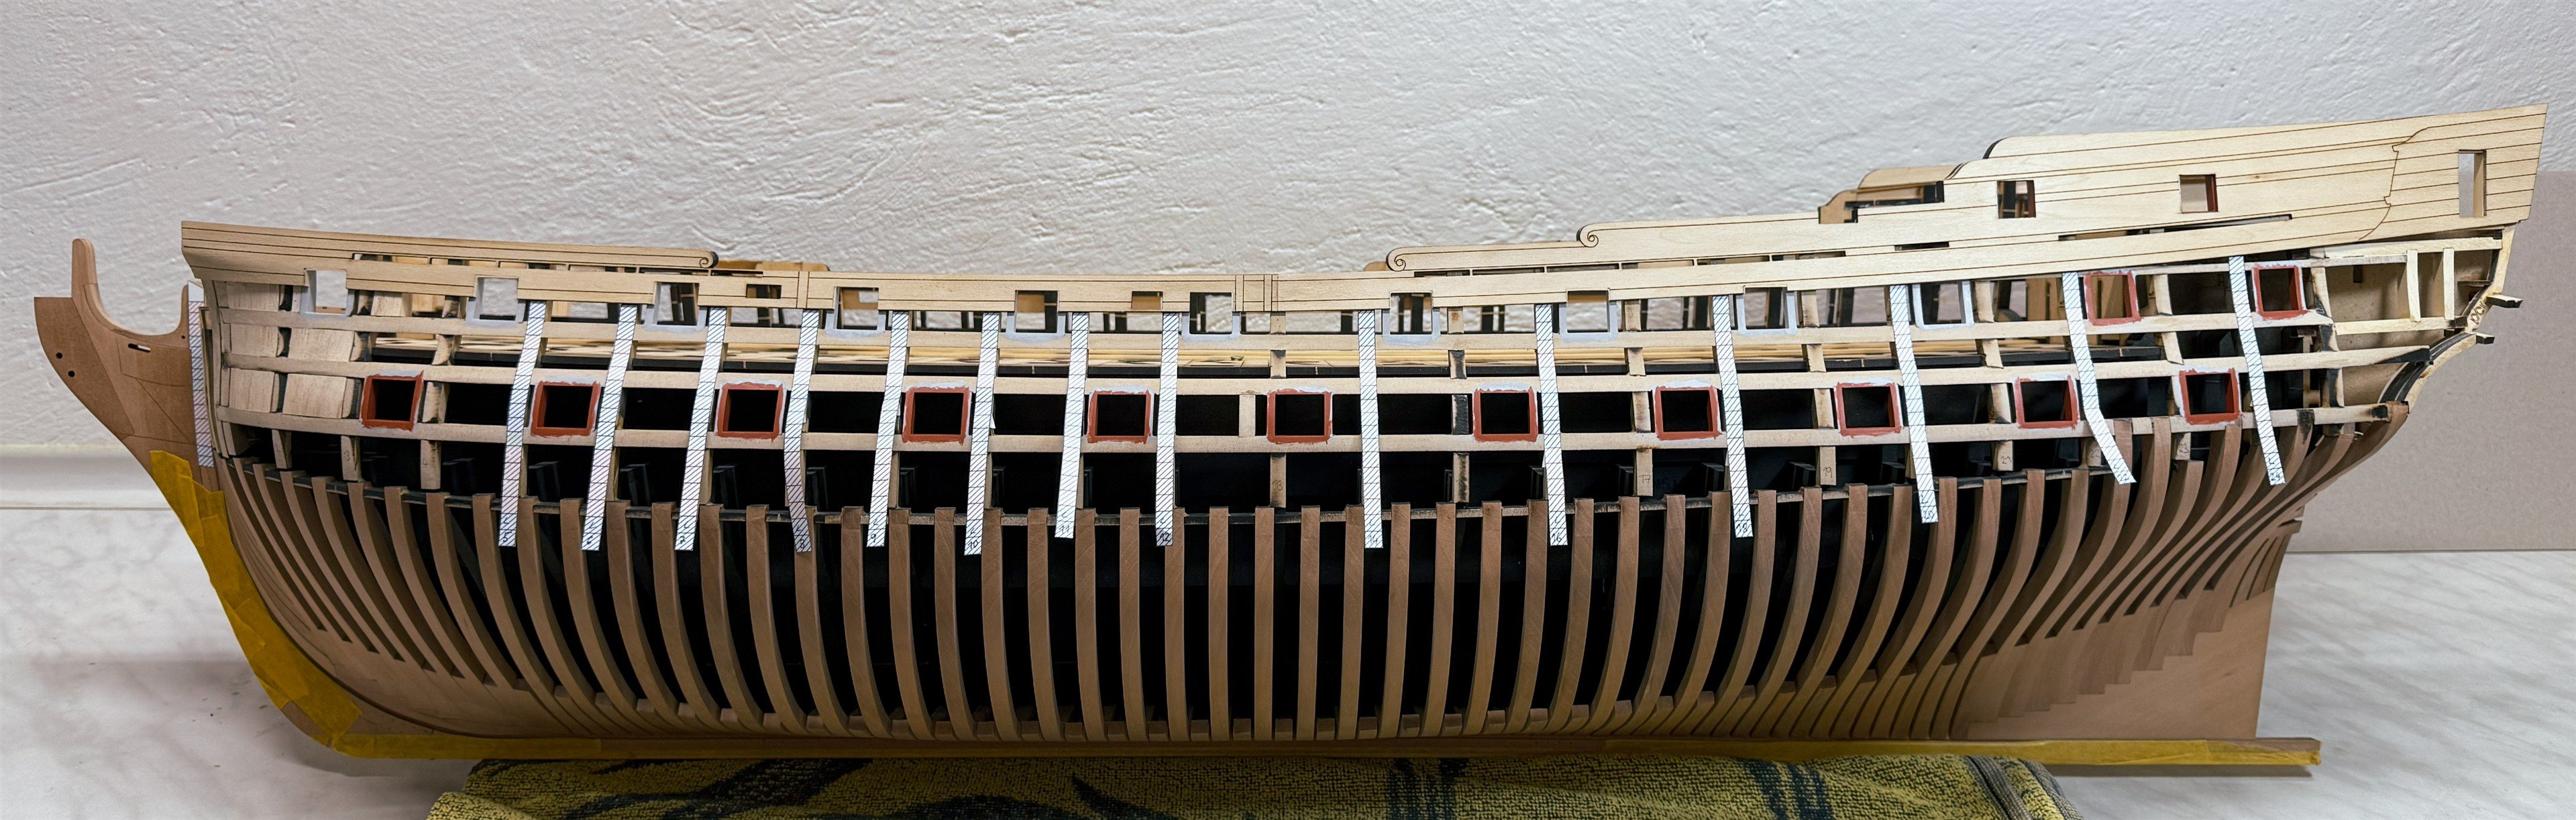
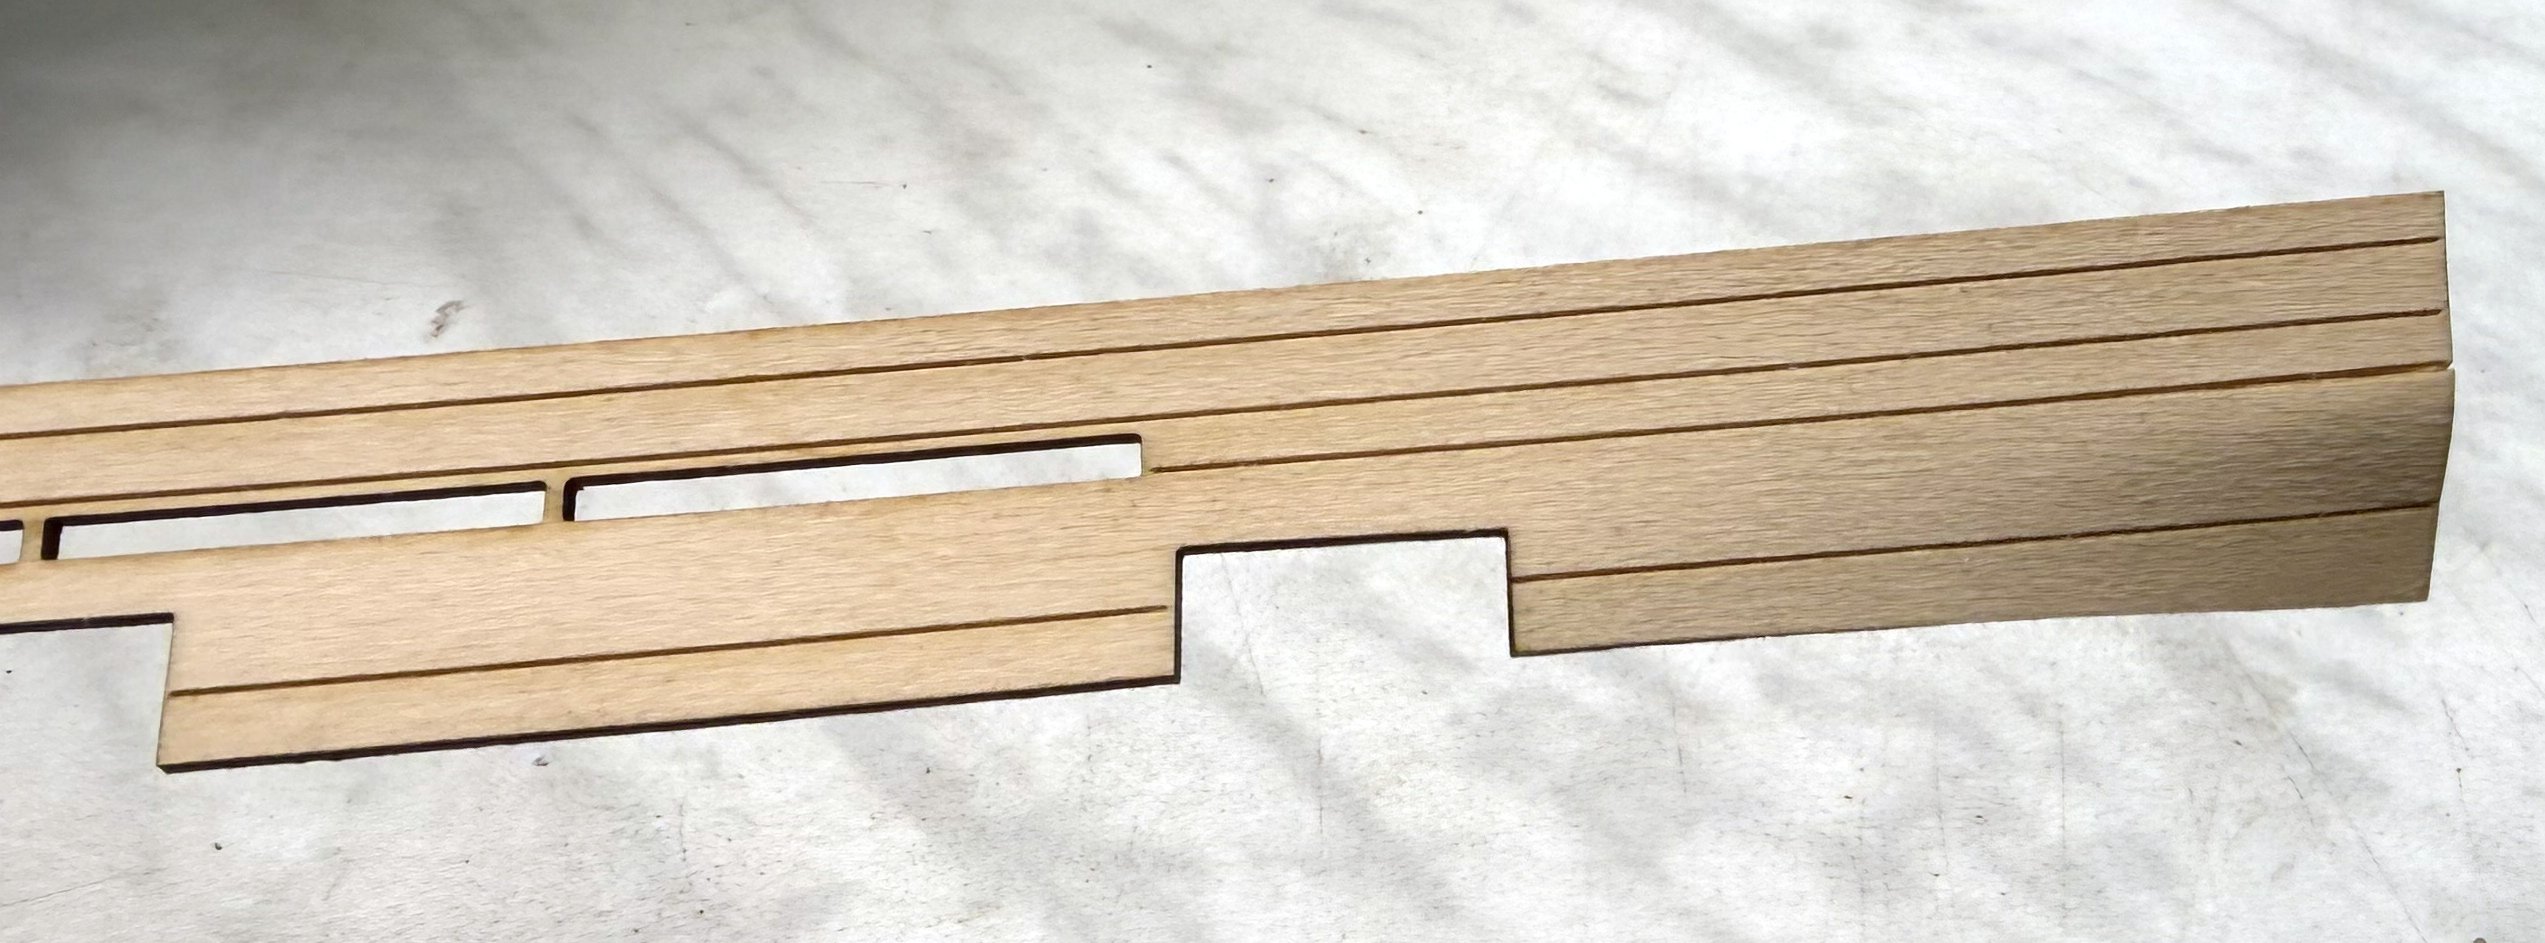
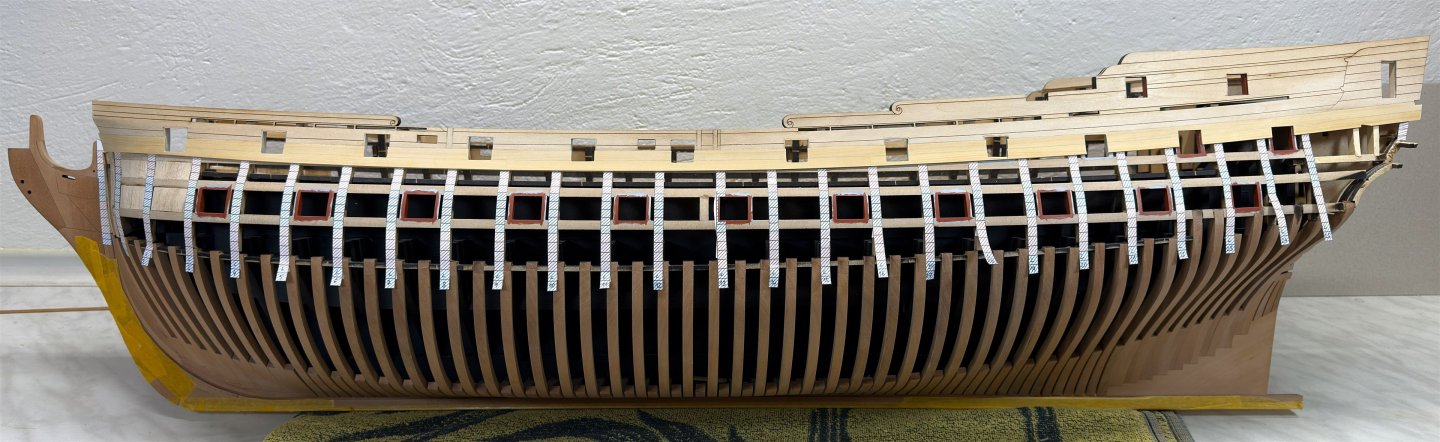
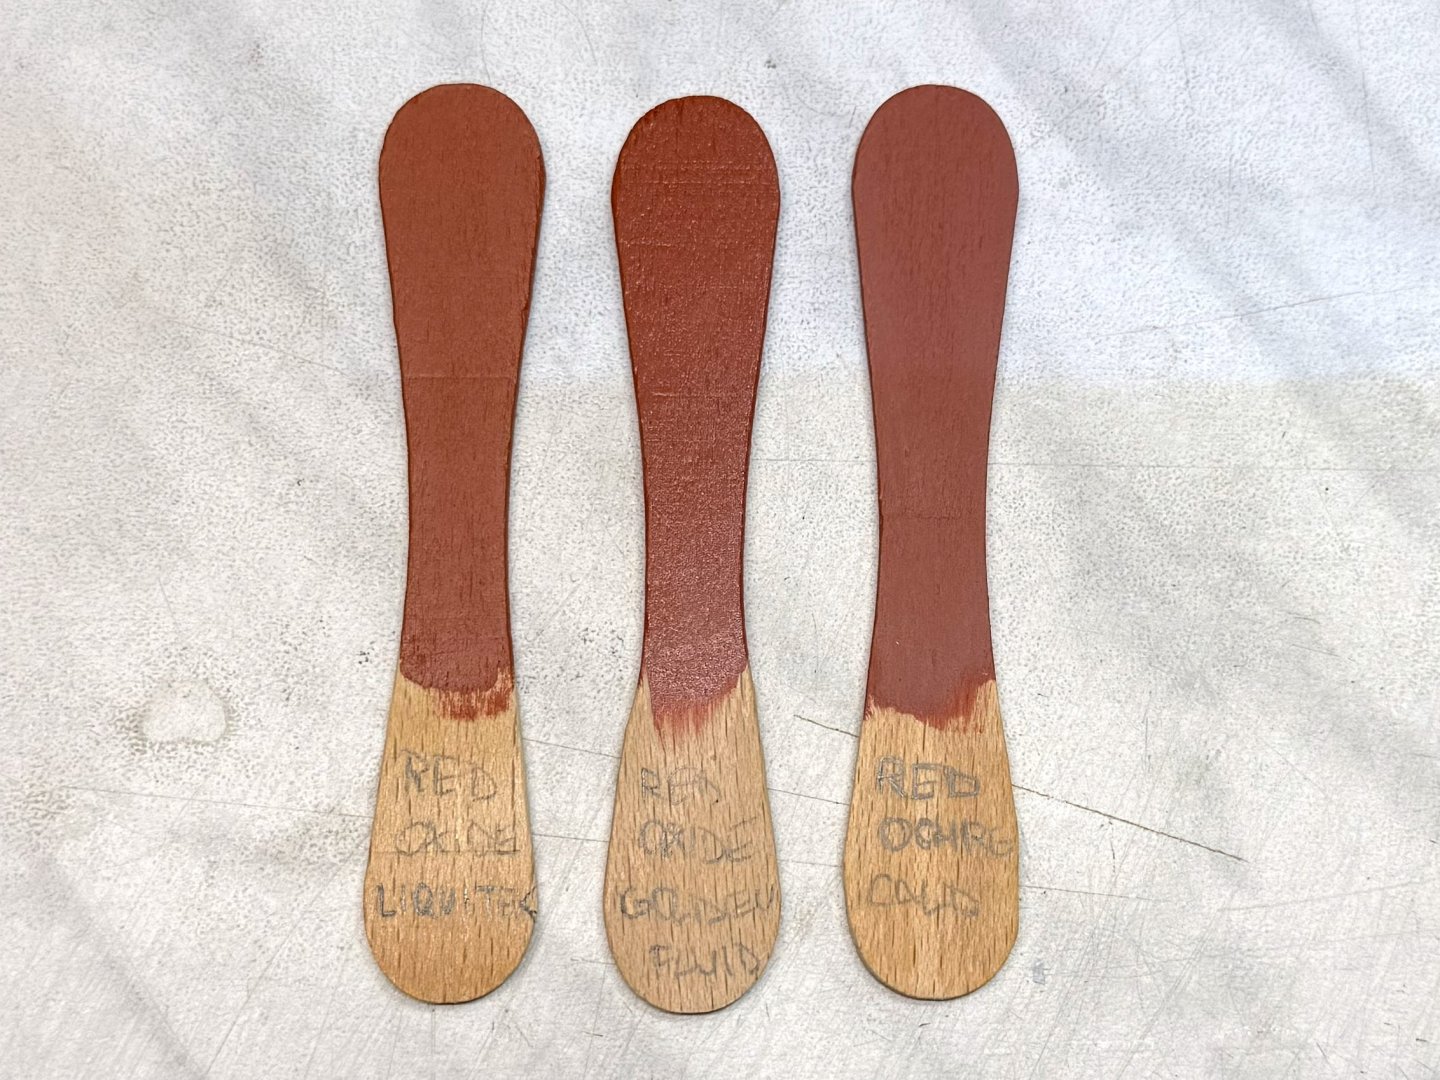
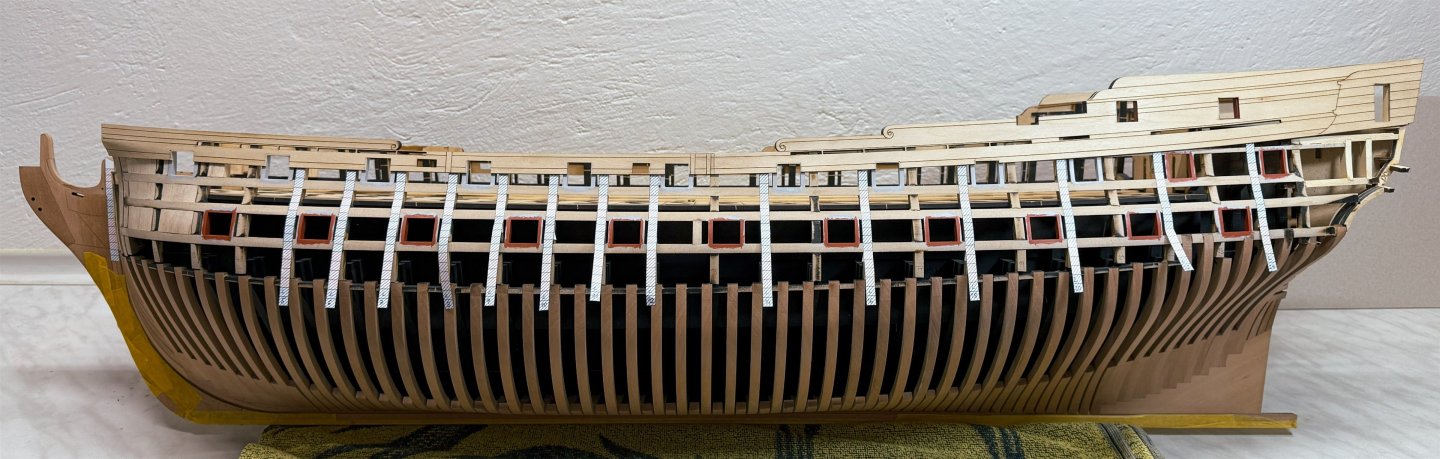
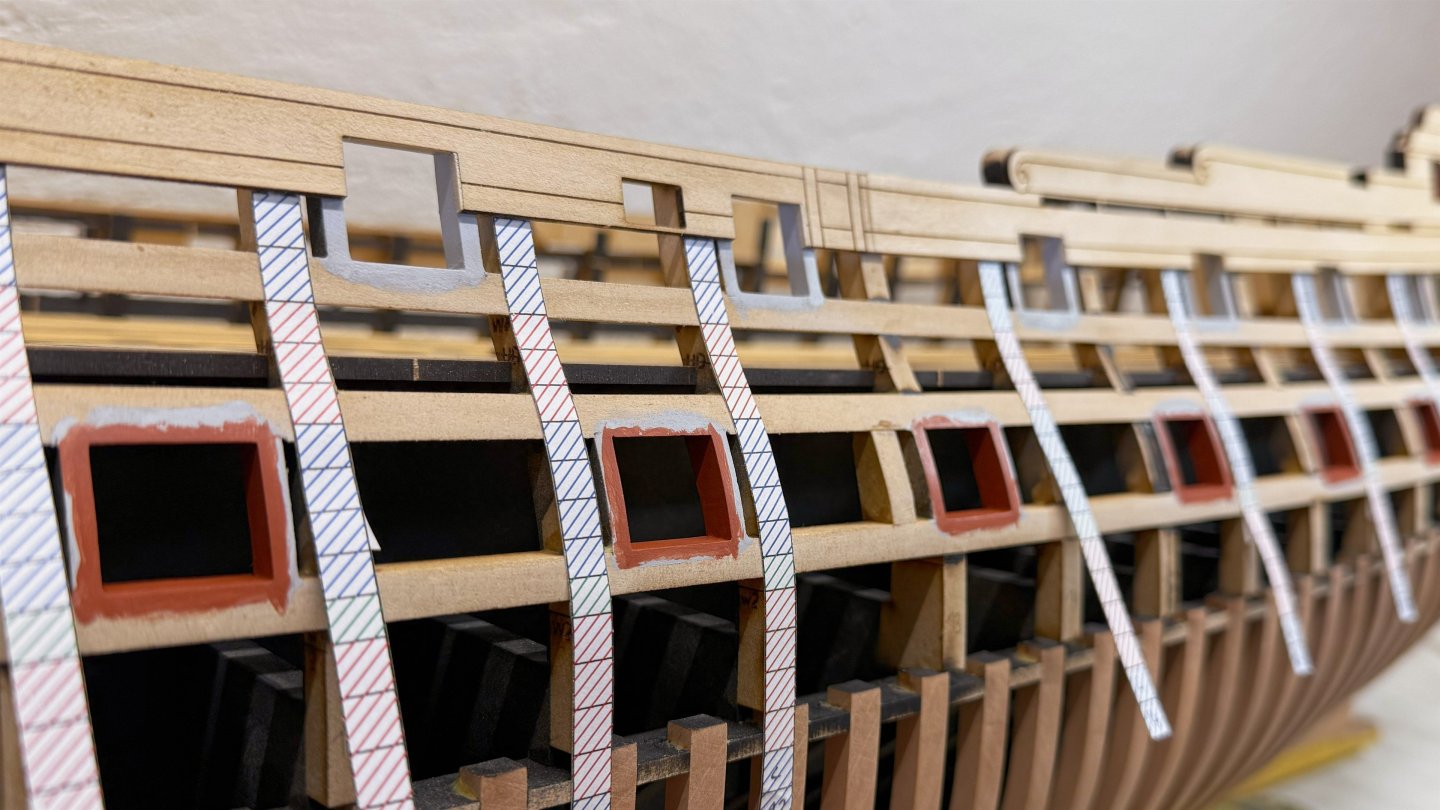
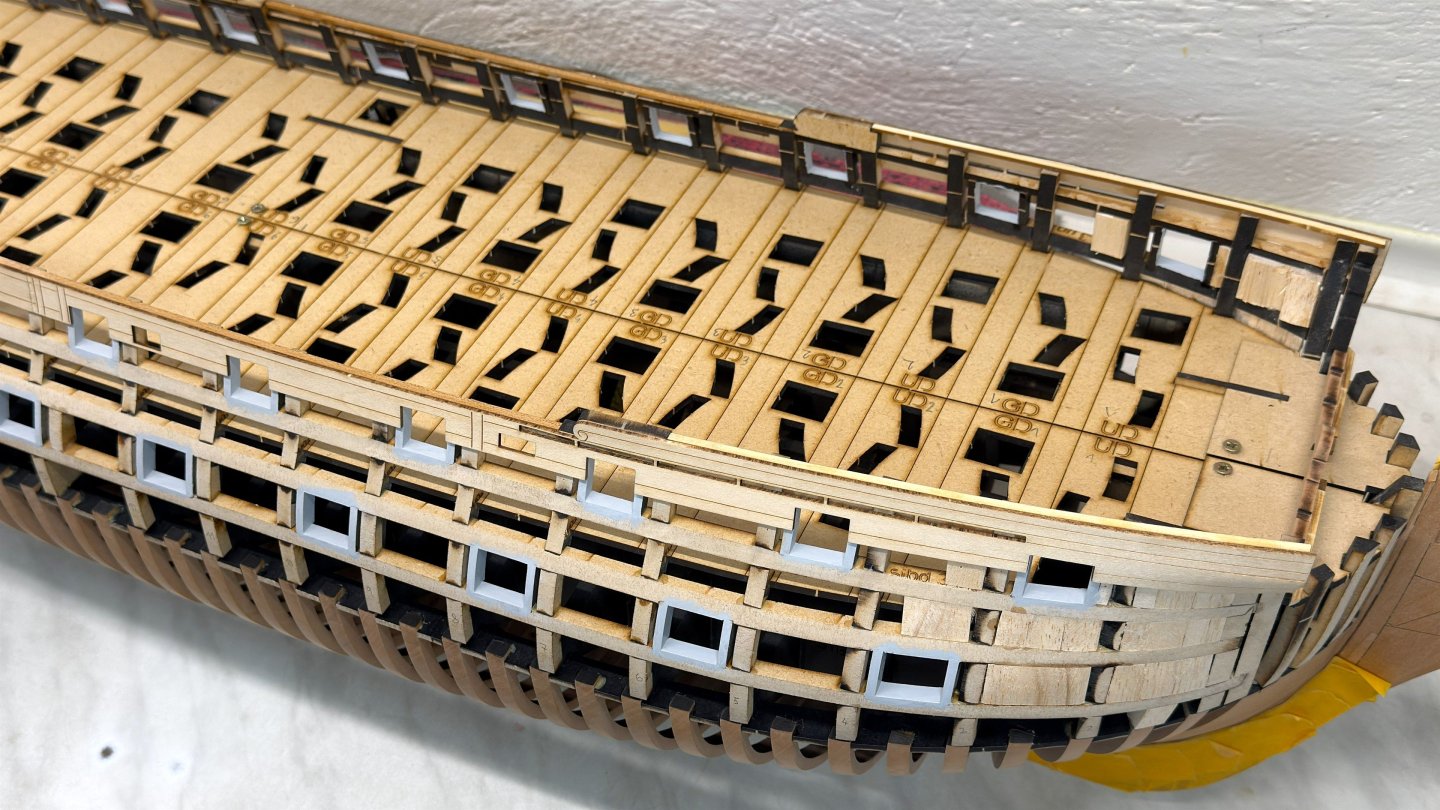
Hi guys, Finally, another update! I was waiting for a new order of Castello boxwood. I have it now, and the first strips are cut and ready. Originally, I planned to paint the gun ports last. However, I decided to paint all the ports with doors before planking. I chose Red Ochre from Caldercraft. I also tried Liquitex Soft Body Red Oxide, but it's too brown. Golden Fluid Red Oxide is a nice shade too, but it's glossy, and even the matting medium didn't make it matte enough — it almost made it transparent. I'm thinking about trying Winsor & Newton Gallery Red Ochre. Does anyone have a comparison with Caldercraft? After painting, I glued planking strips that I printed on self-adhesive paper to the bulkhead. I didn't glue them all on purpose, in case some fine-tuning is needed later. Now, the planking fun can begin!


-
Hi JJ, It looks good, I'm looking forward to the continued third chapter. I'm very curious to see what comes next. But for now, I want to wish you all the best, good health, and success with your new project!
-
It looks fantastic, Ben! Congratulations! I wish you all the best in the new year!
-
Yes, they are, but I randomly picked these profiles. However, I'm also looking forward to the revised scraper shown in the picture. I noticed that the side profiles are much more accurate on that one.
-
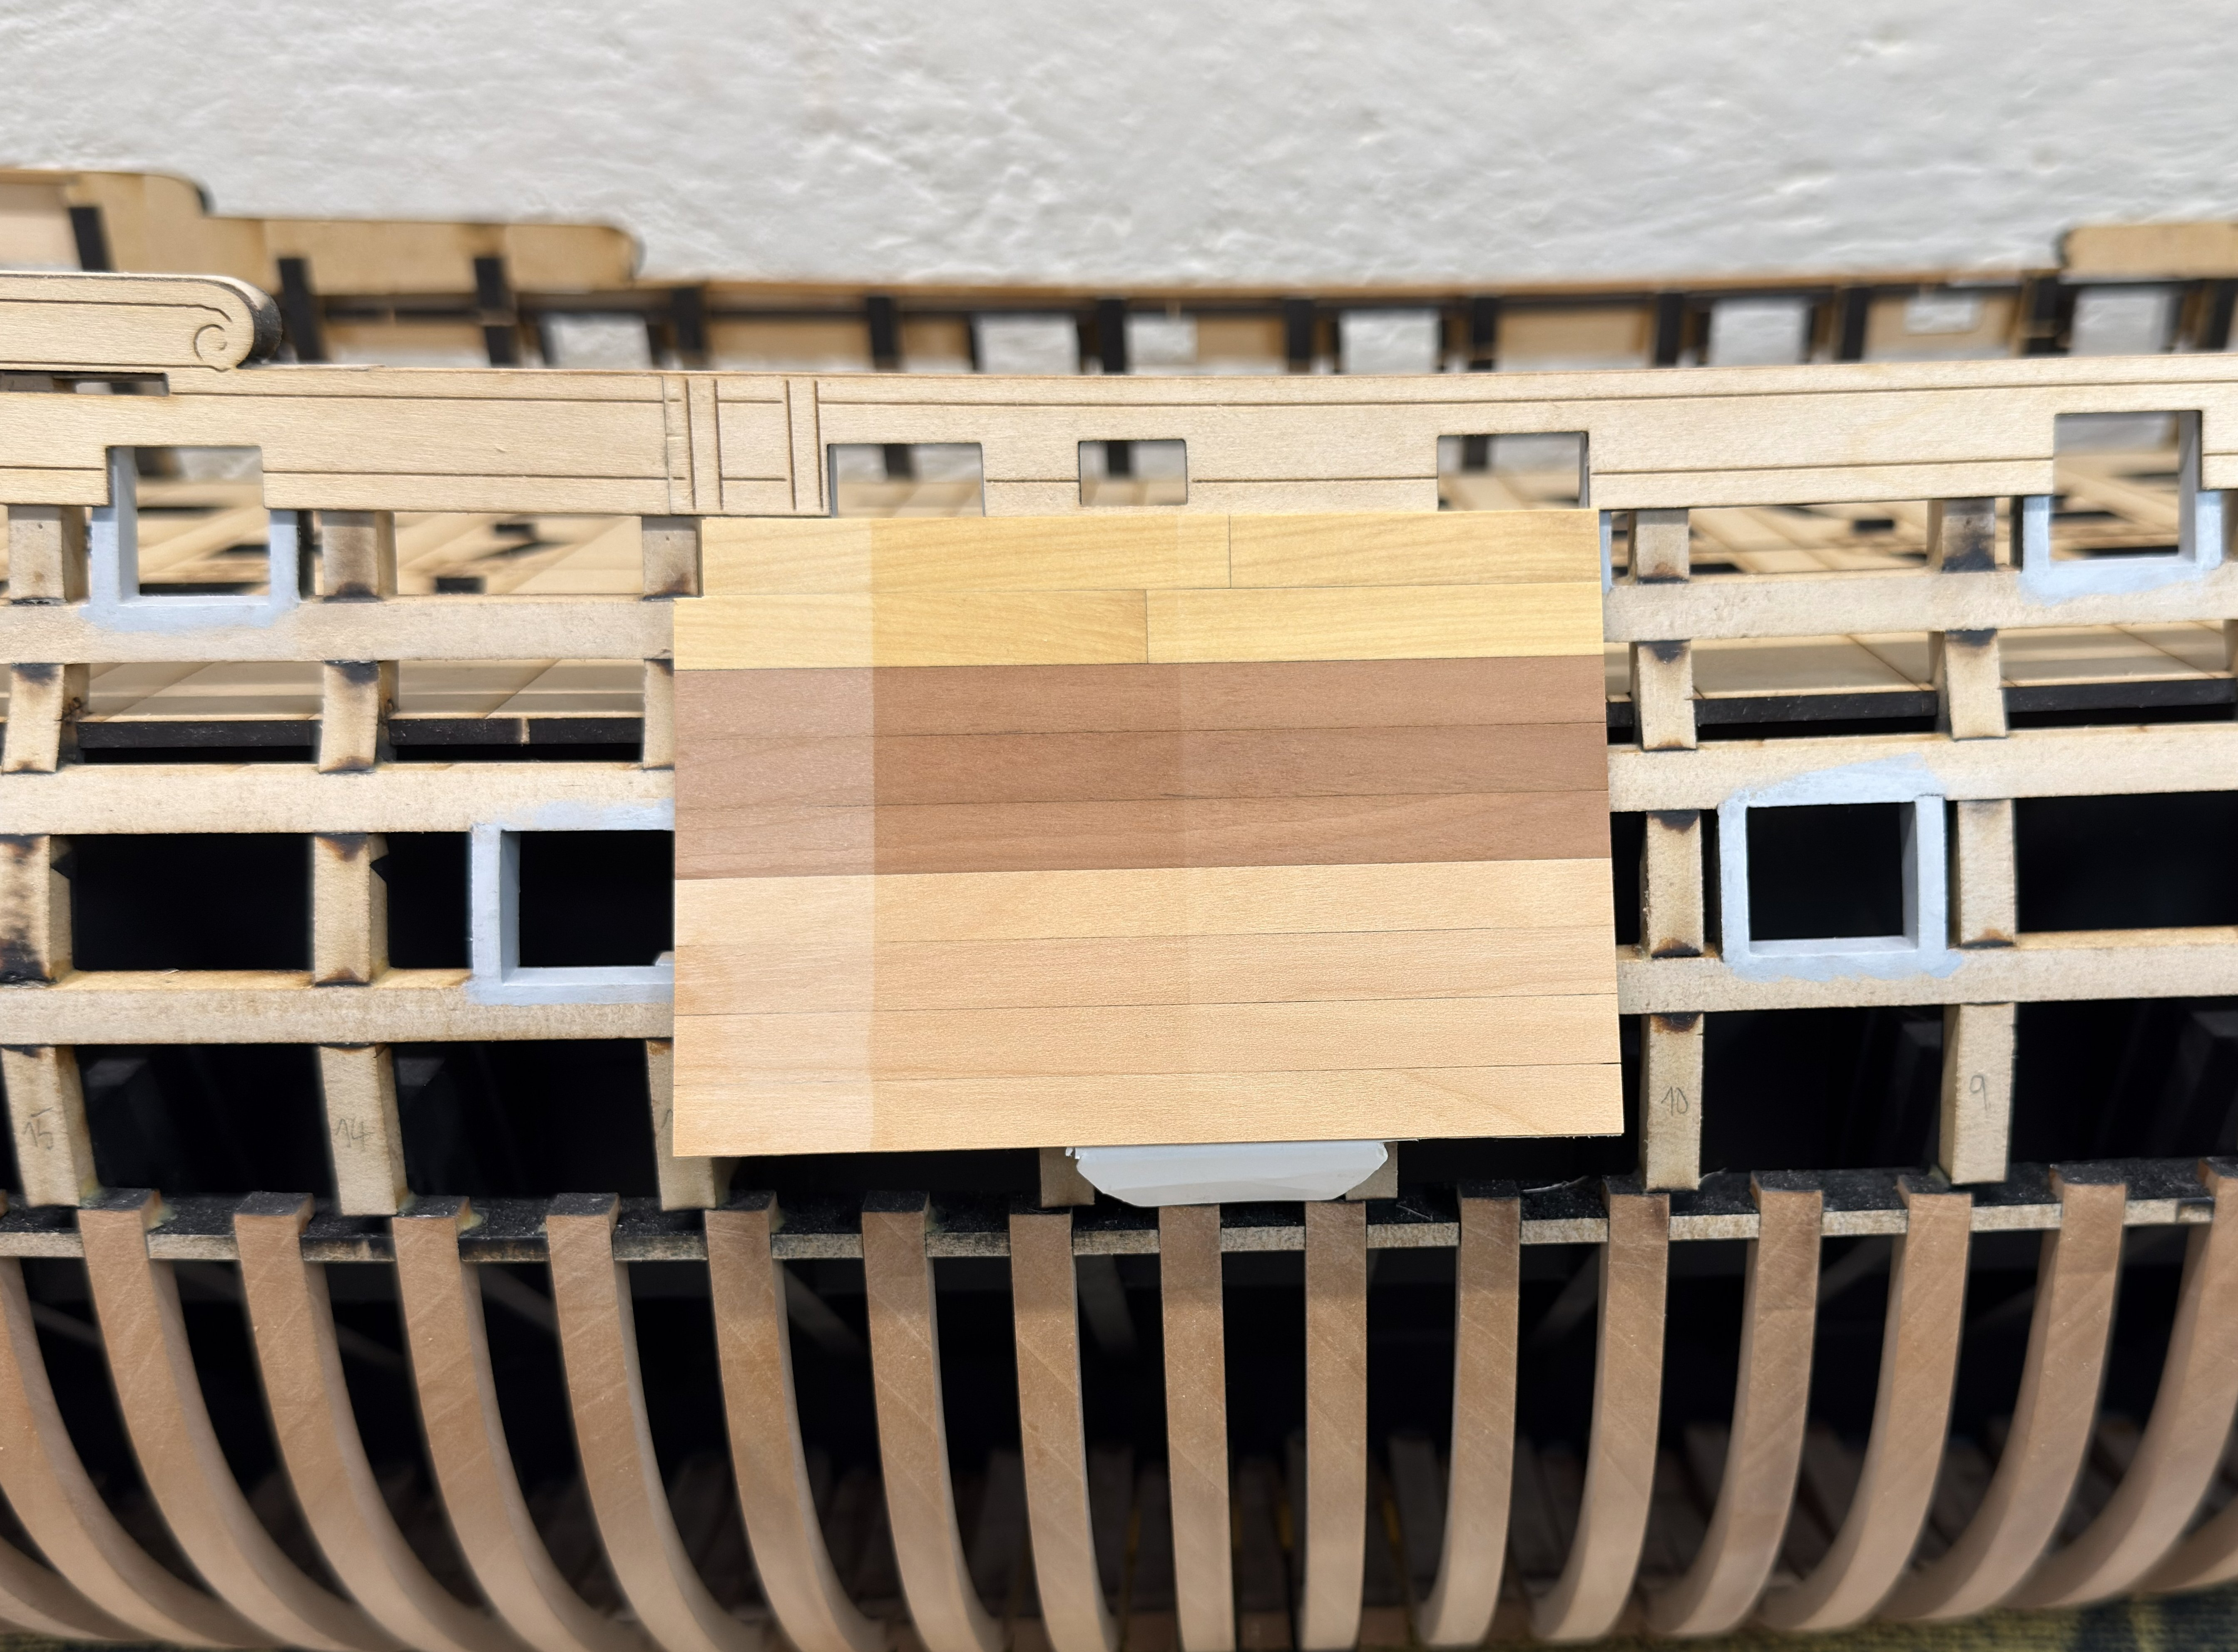
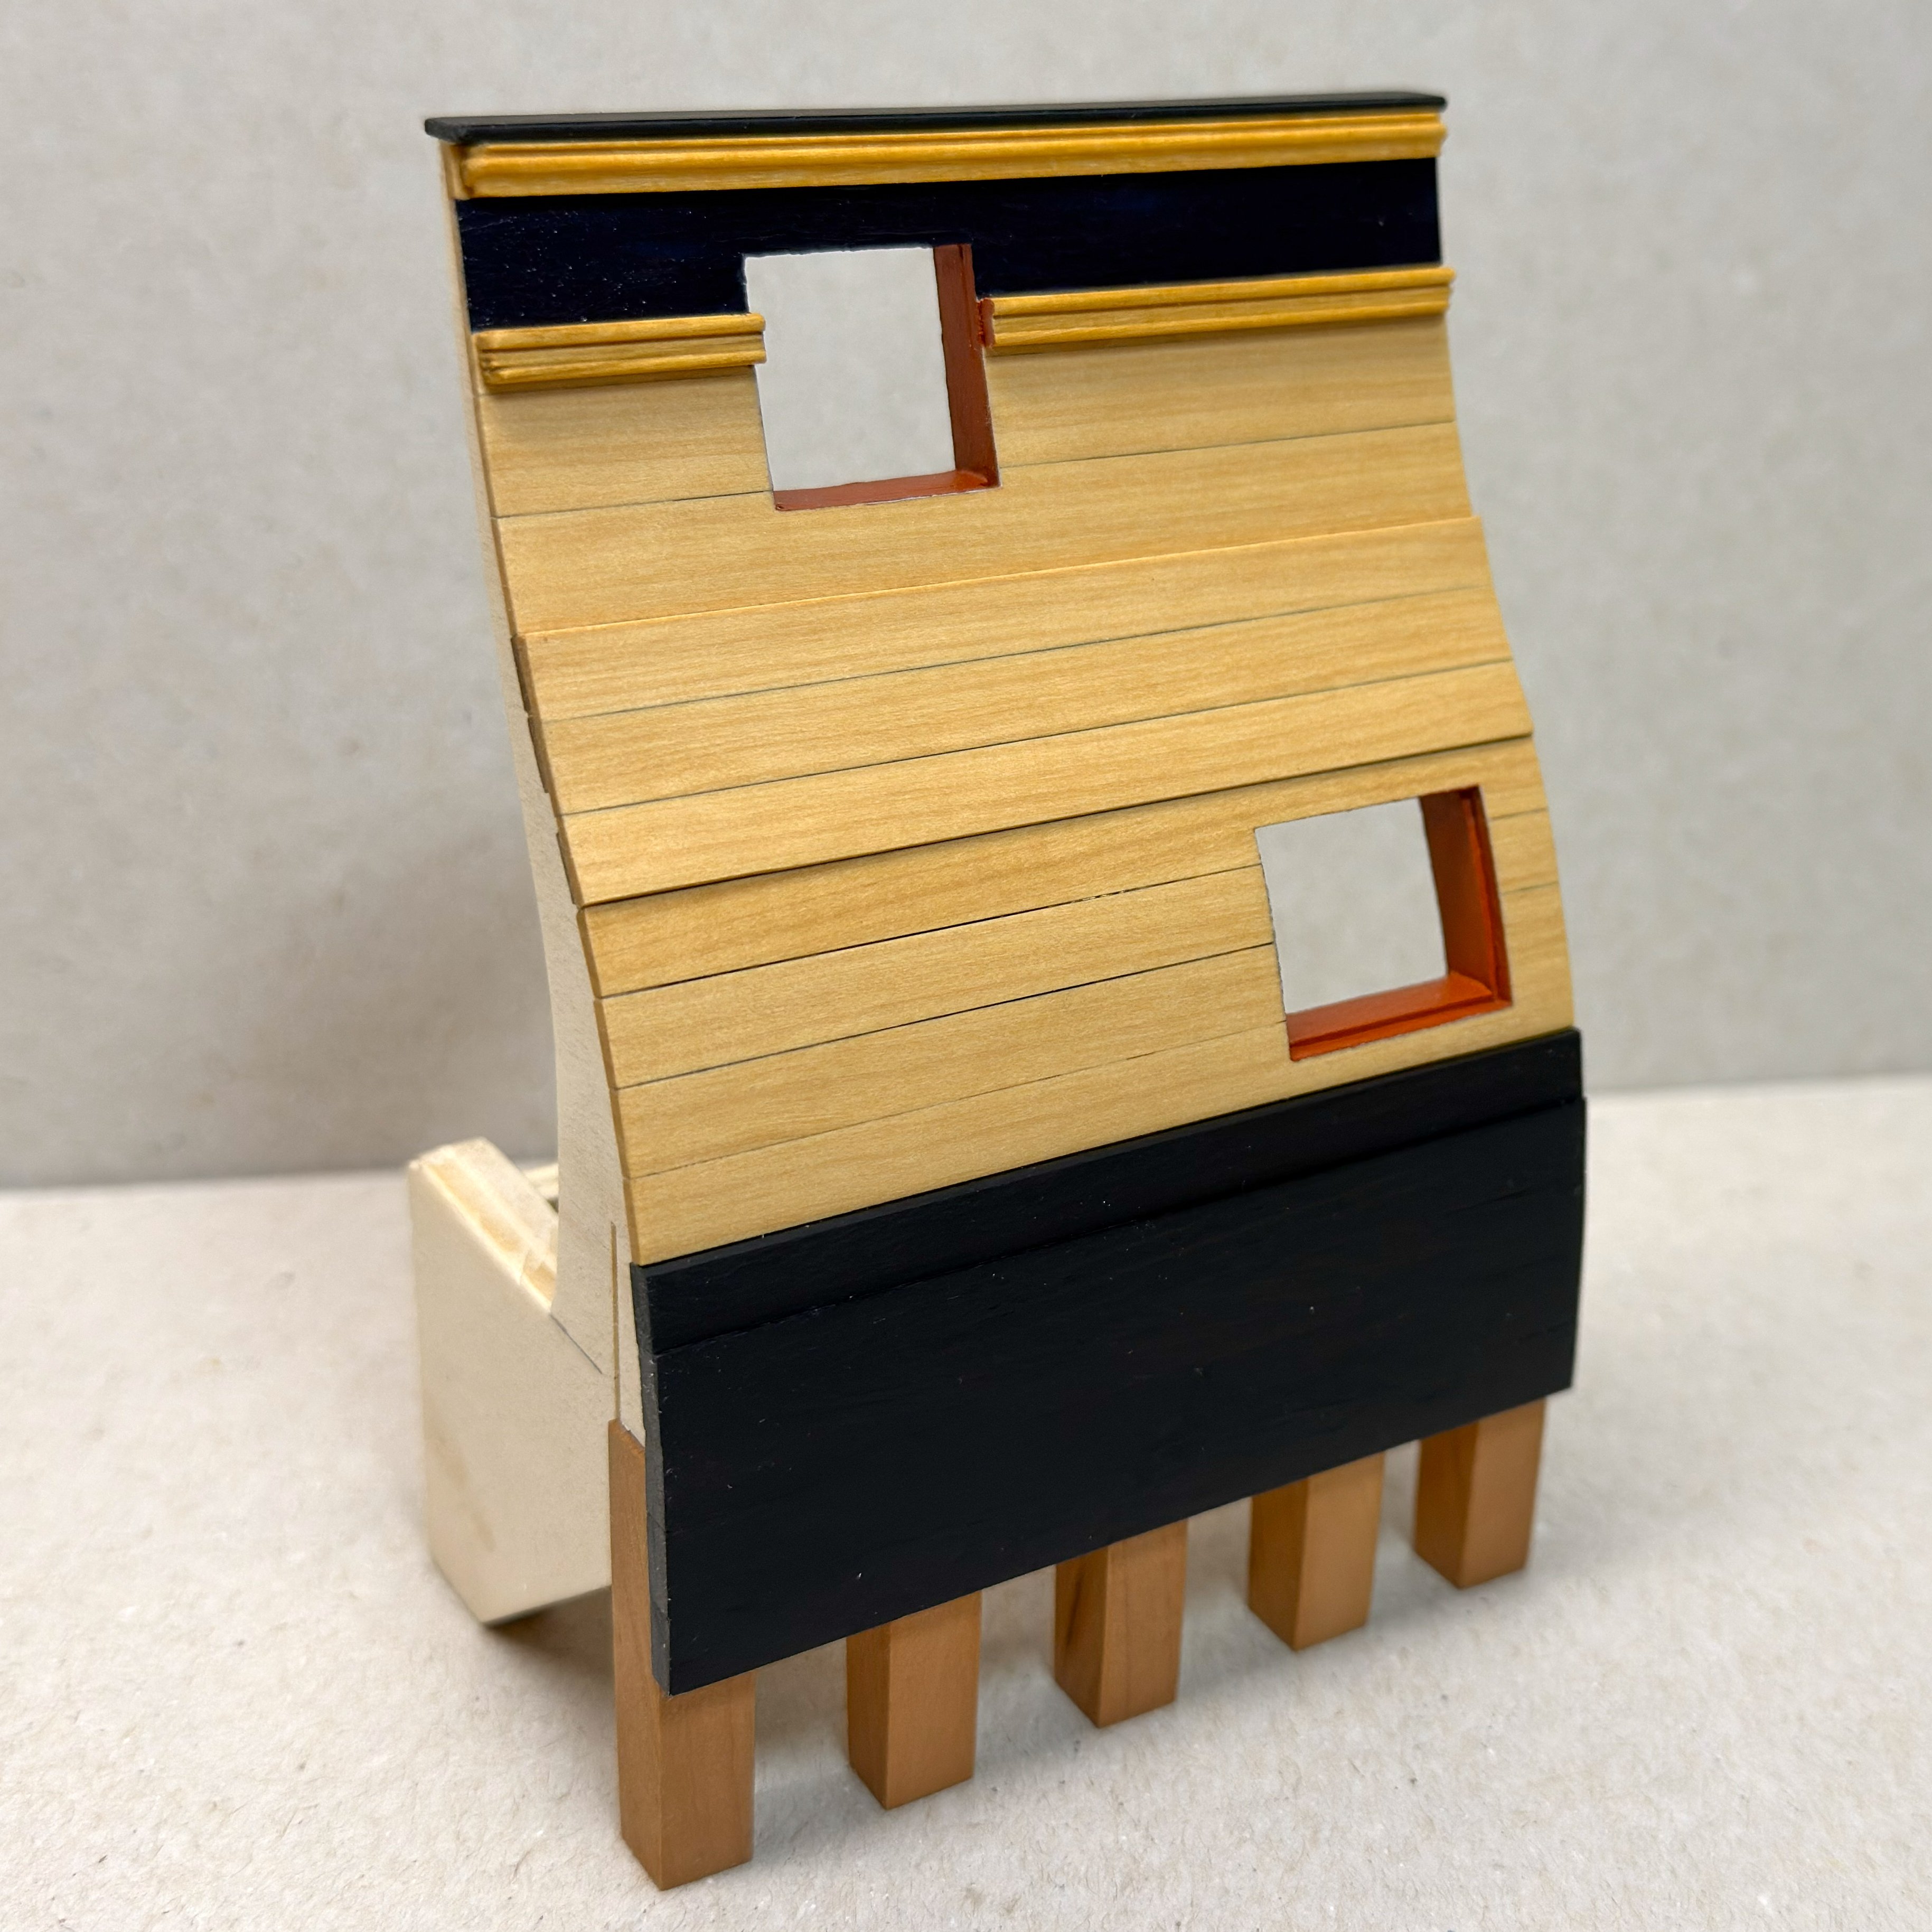
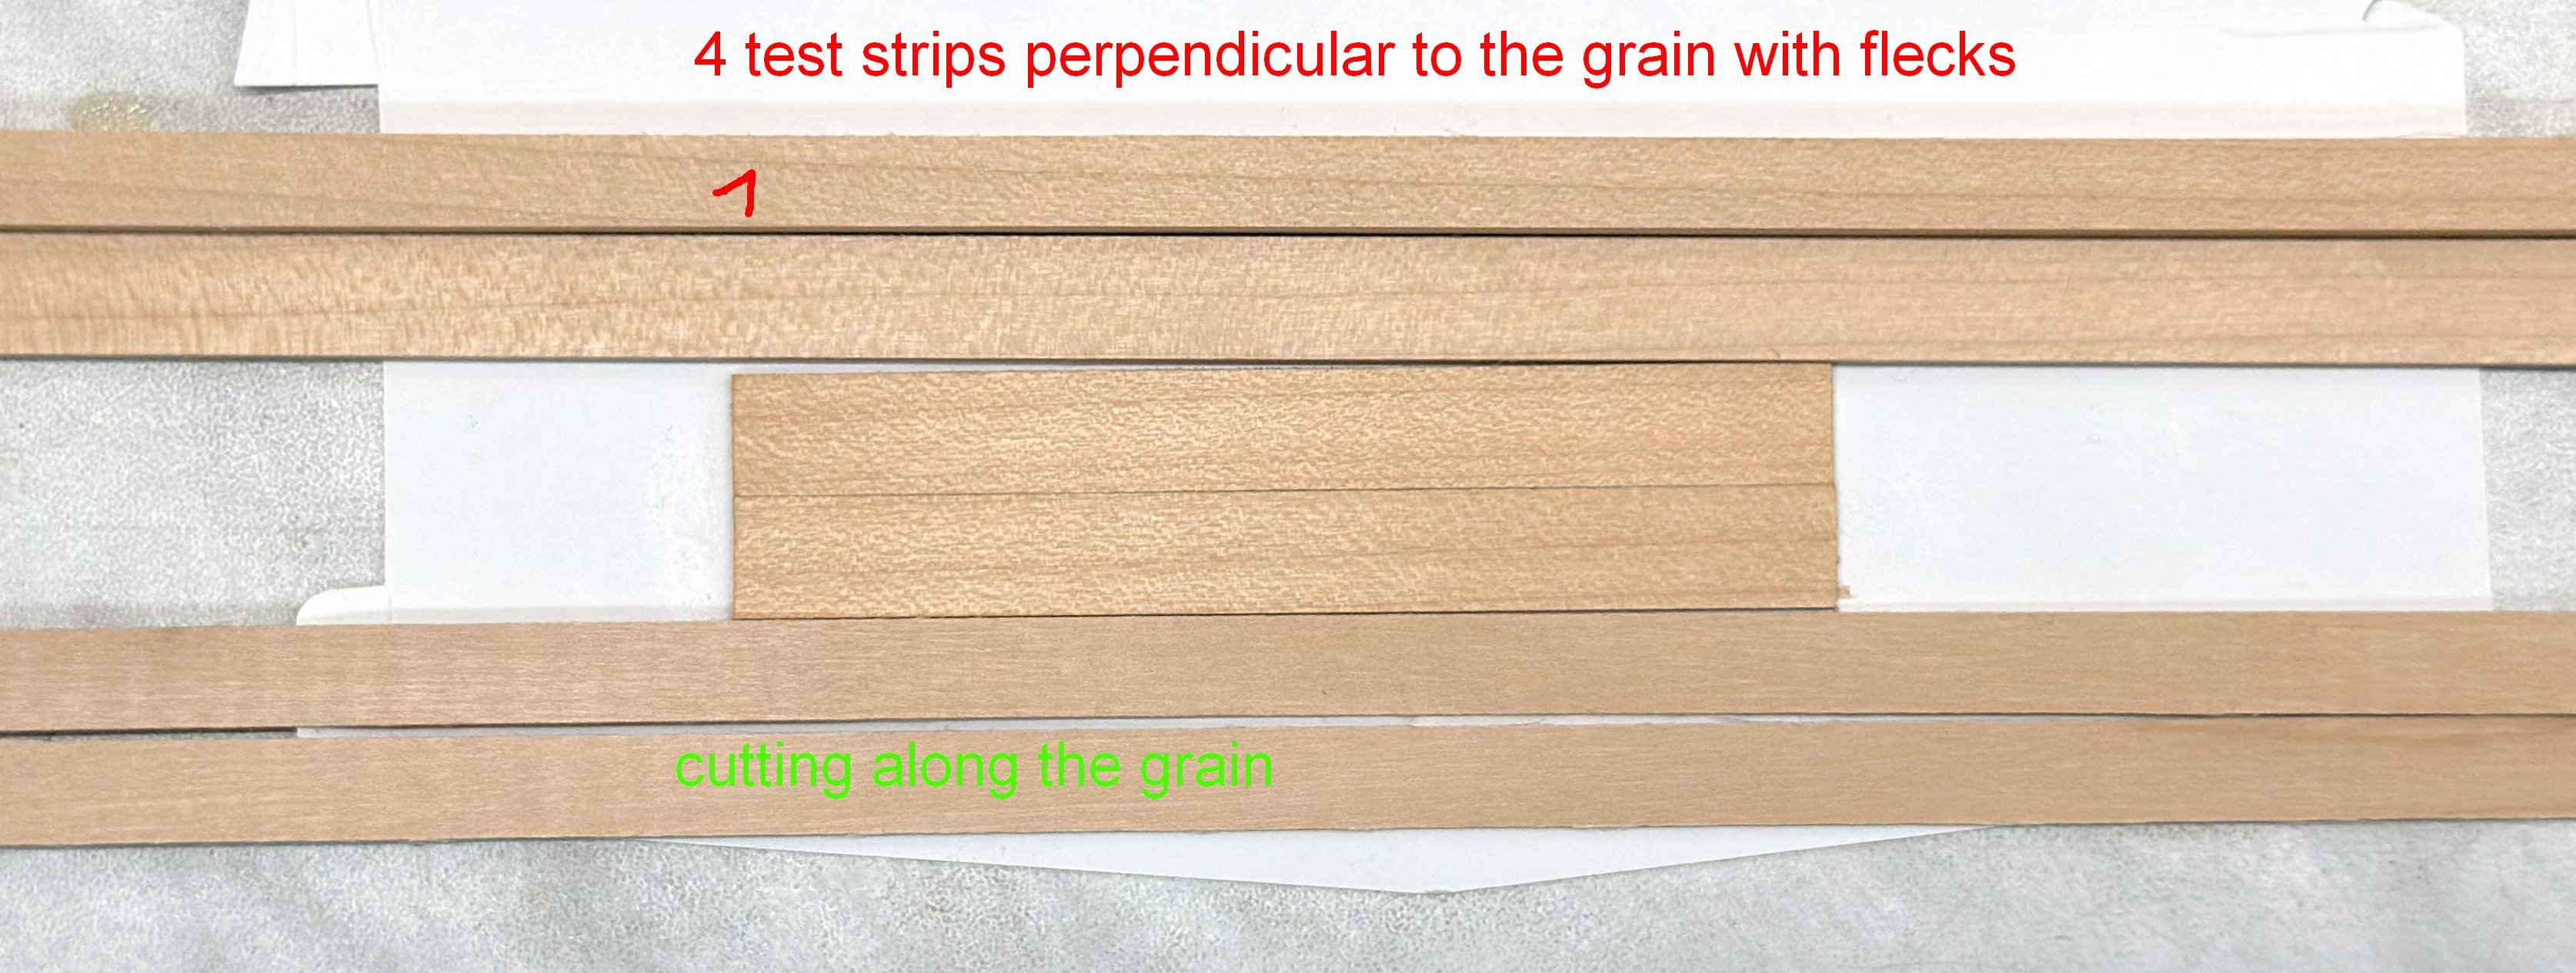
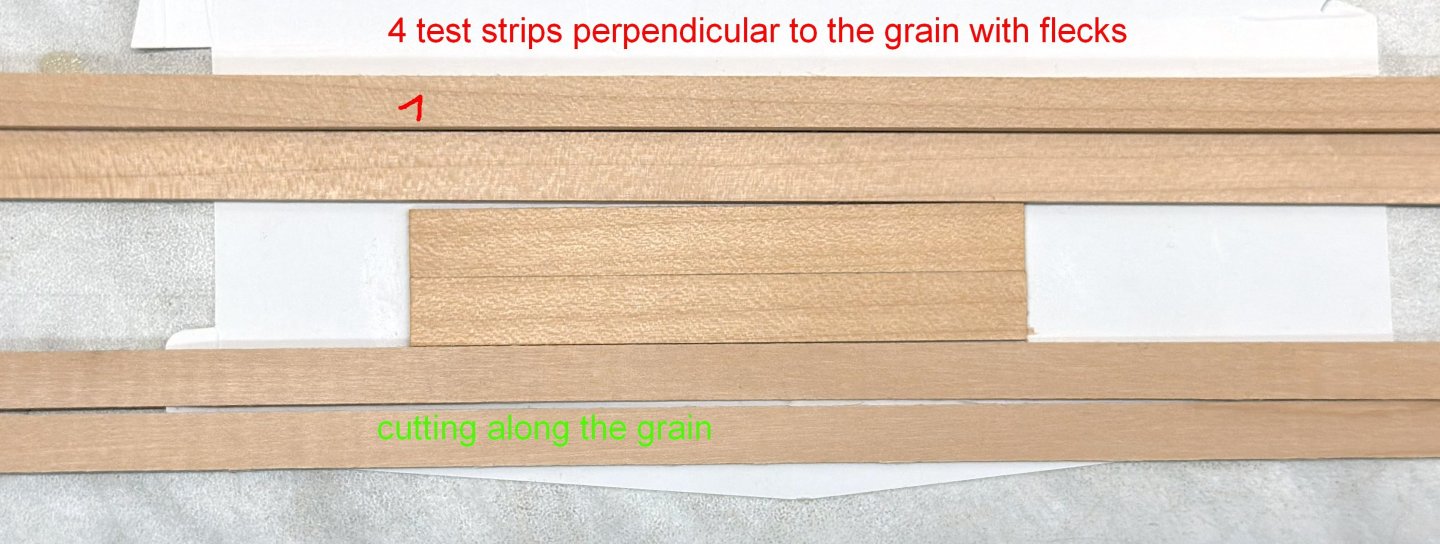
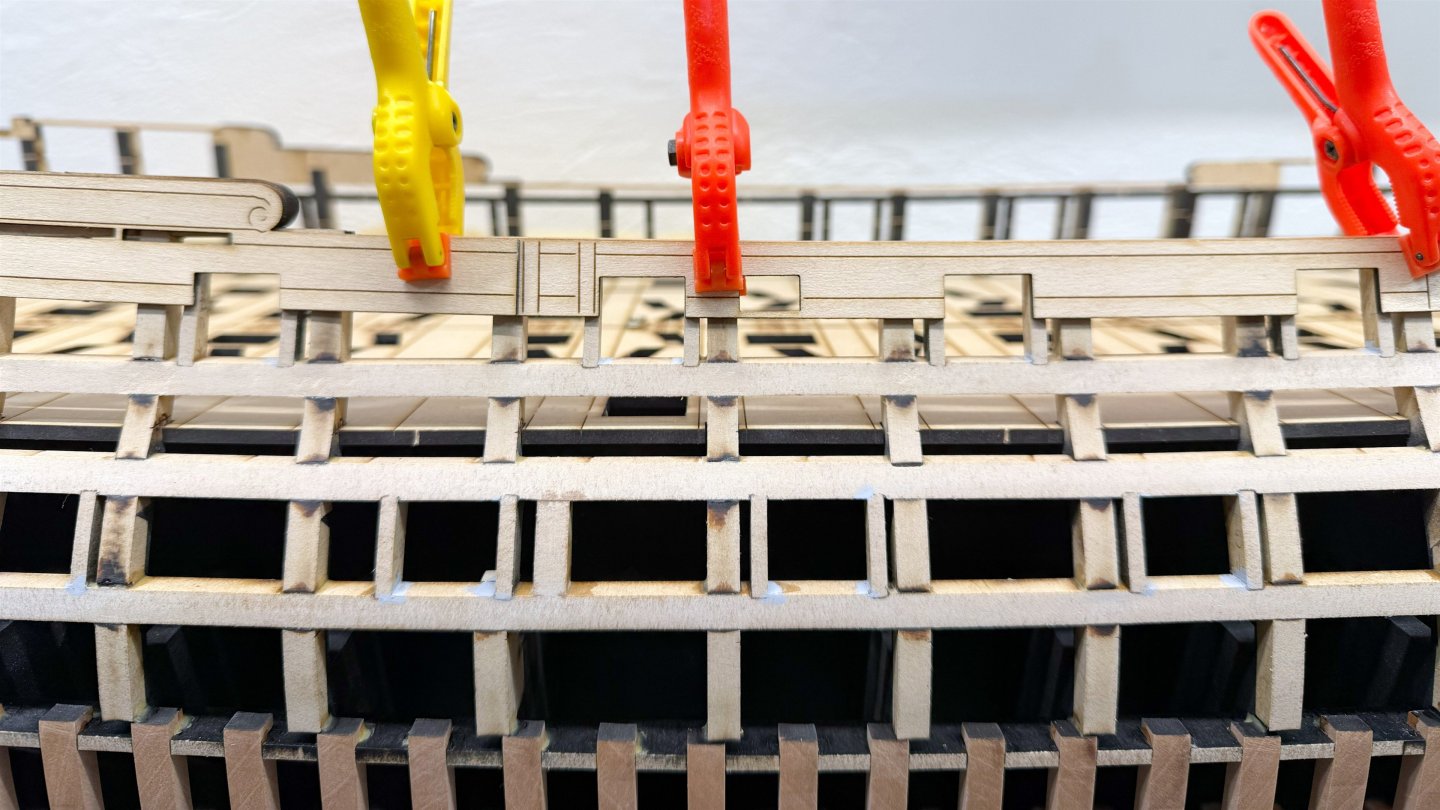
Hi guys, There's no major progress yet, just a small preview of what the planking might look like. It's a weekend project. The Wales is black hornbeam and the planking is Castello boxwood. It's coated with Osmo hard wax. The background under the friezes is Prussian blue. I'll try Cerulean blue, too. I can't decide. I originally wanted to make the planking from light pear wood, but I was disappointed with the material I had prepared. When I cut it perpendicular to the grain, the grain is very visible, and when I cut along the grain, the planks twist. In the end, I'll probably choose Castello boxwood. What do you think?


-
Hi guys, I finally managed to permanently glue the frieze panels. Now, I have to cut the strips for the planking. It was originally supposed to be light pear, but the boards that I cut the strips from are all warped, so I'm not happy with them. So, in the end, it will probably be Castelo boxwood. But more on that later.


-
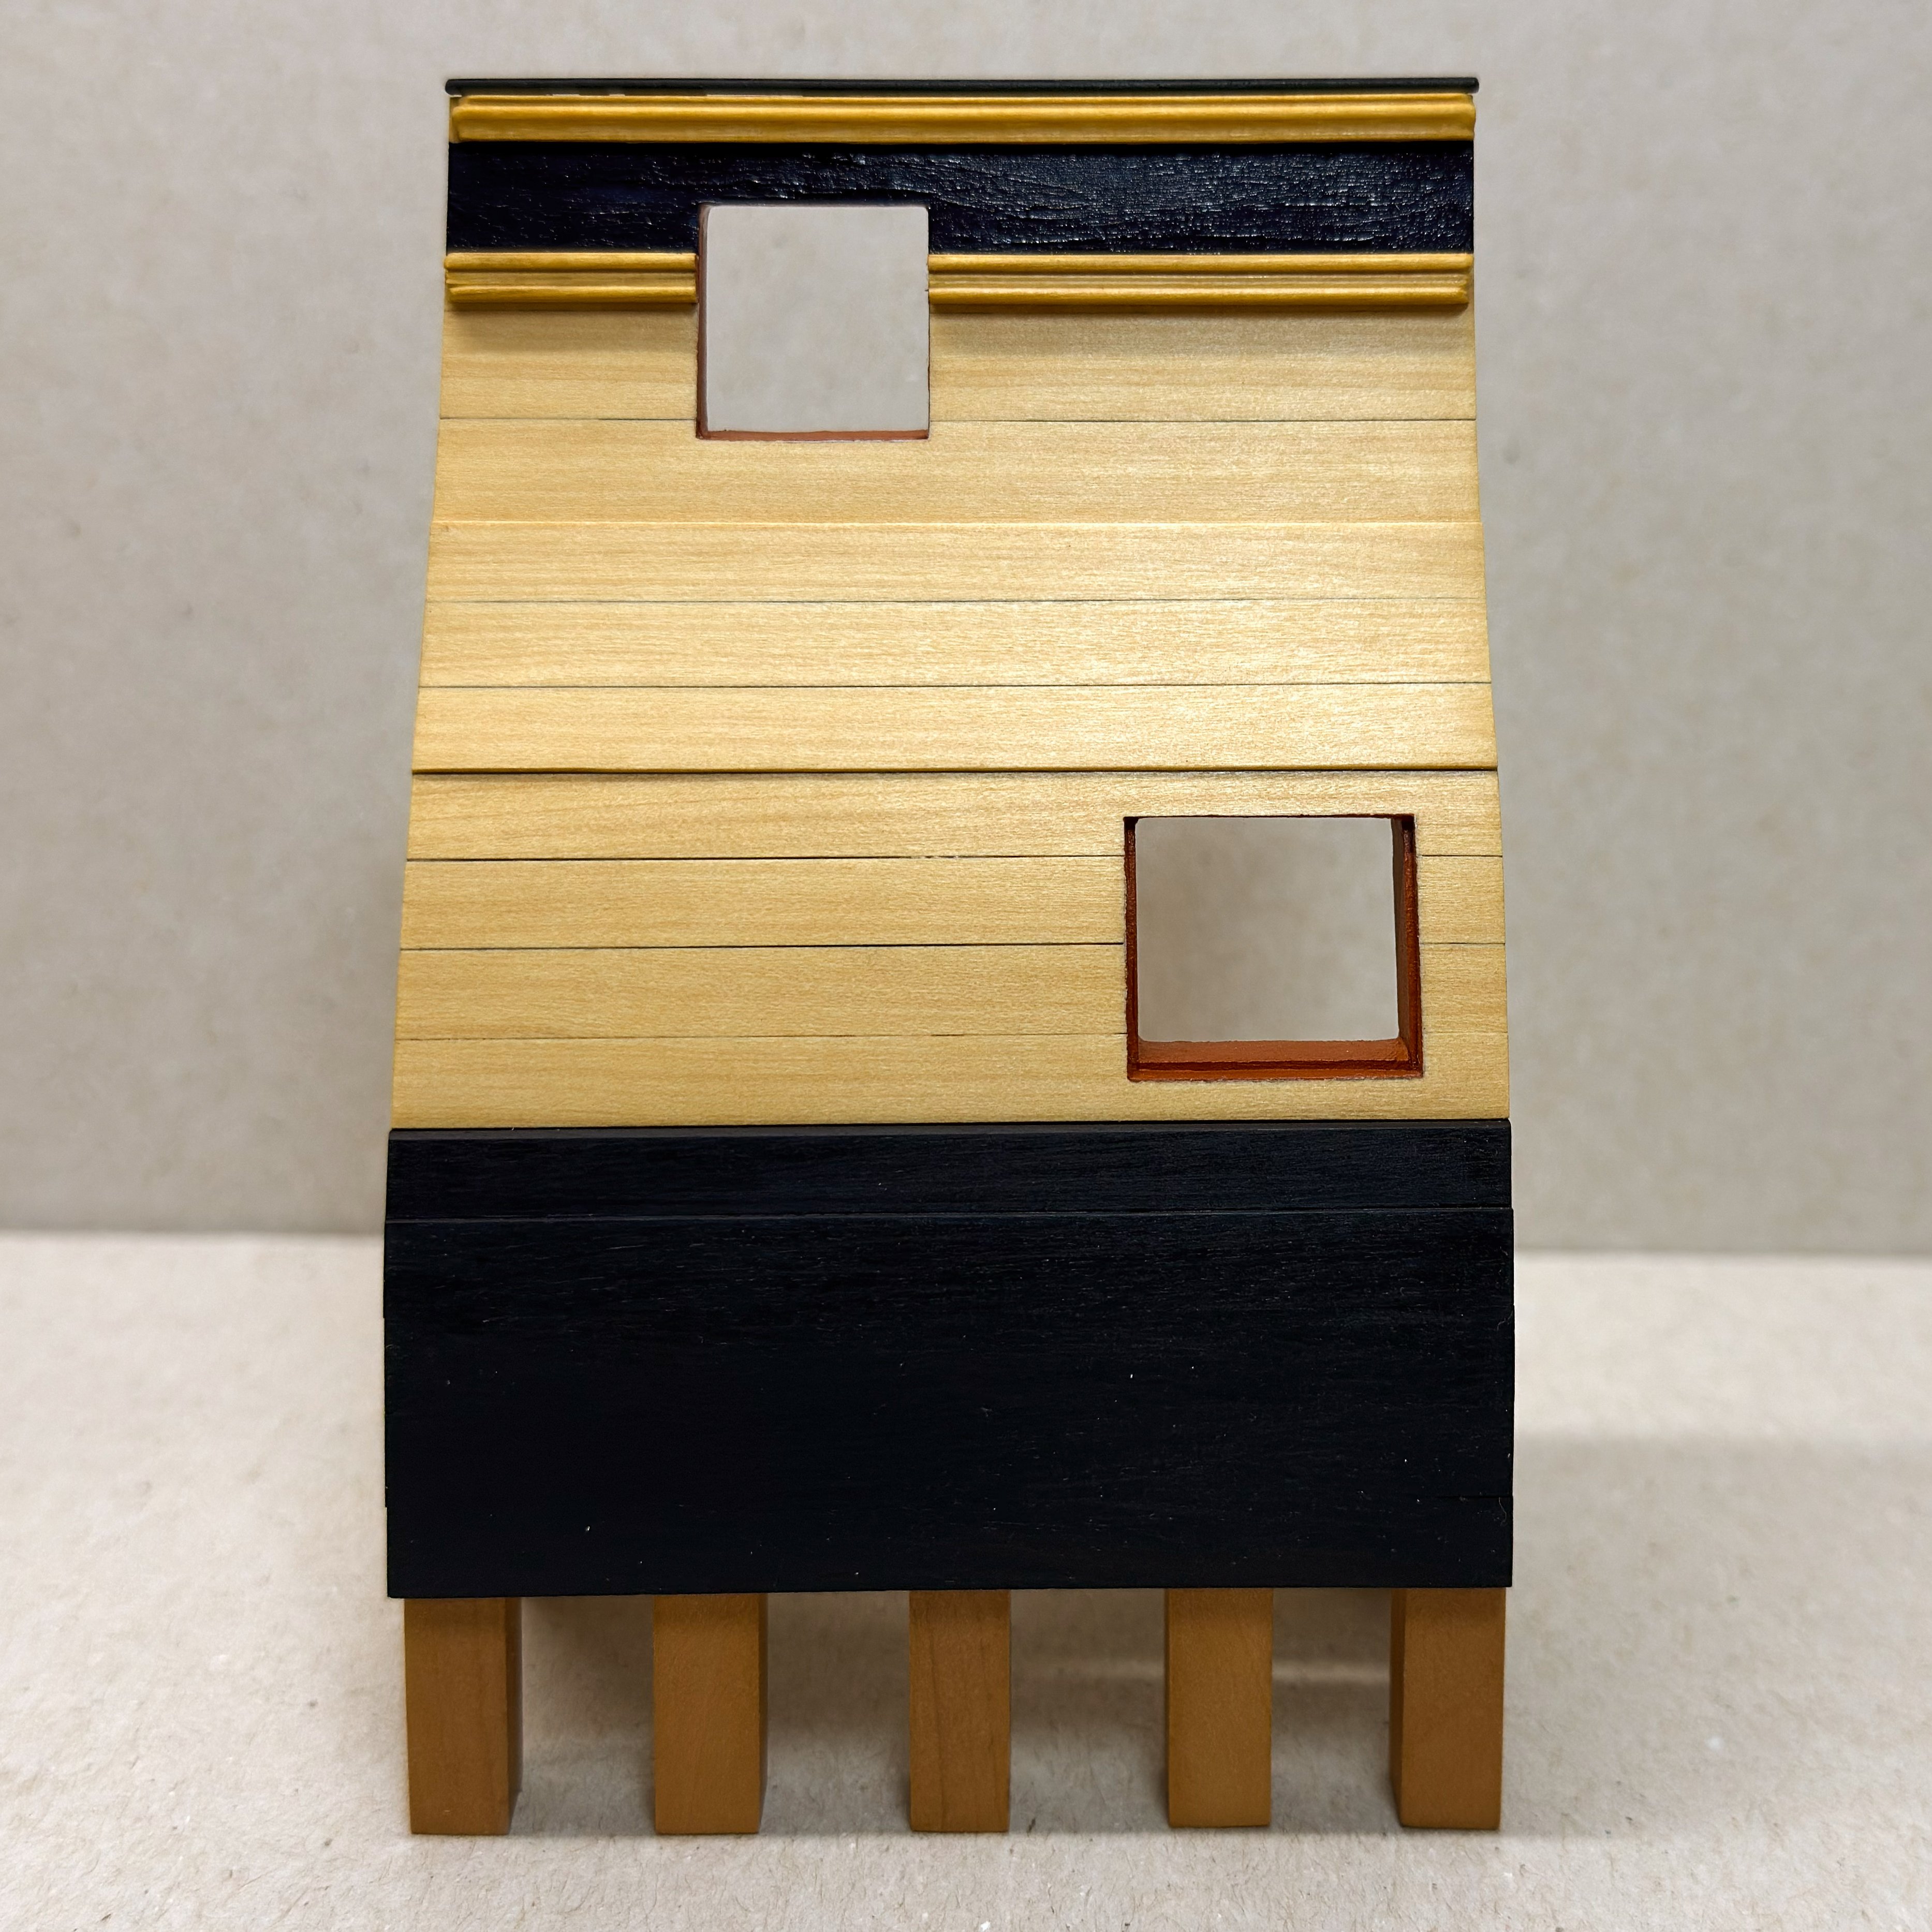
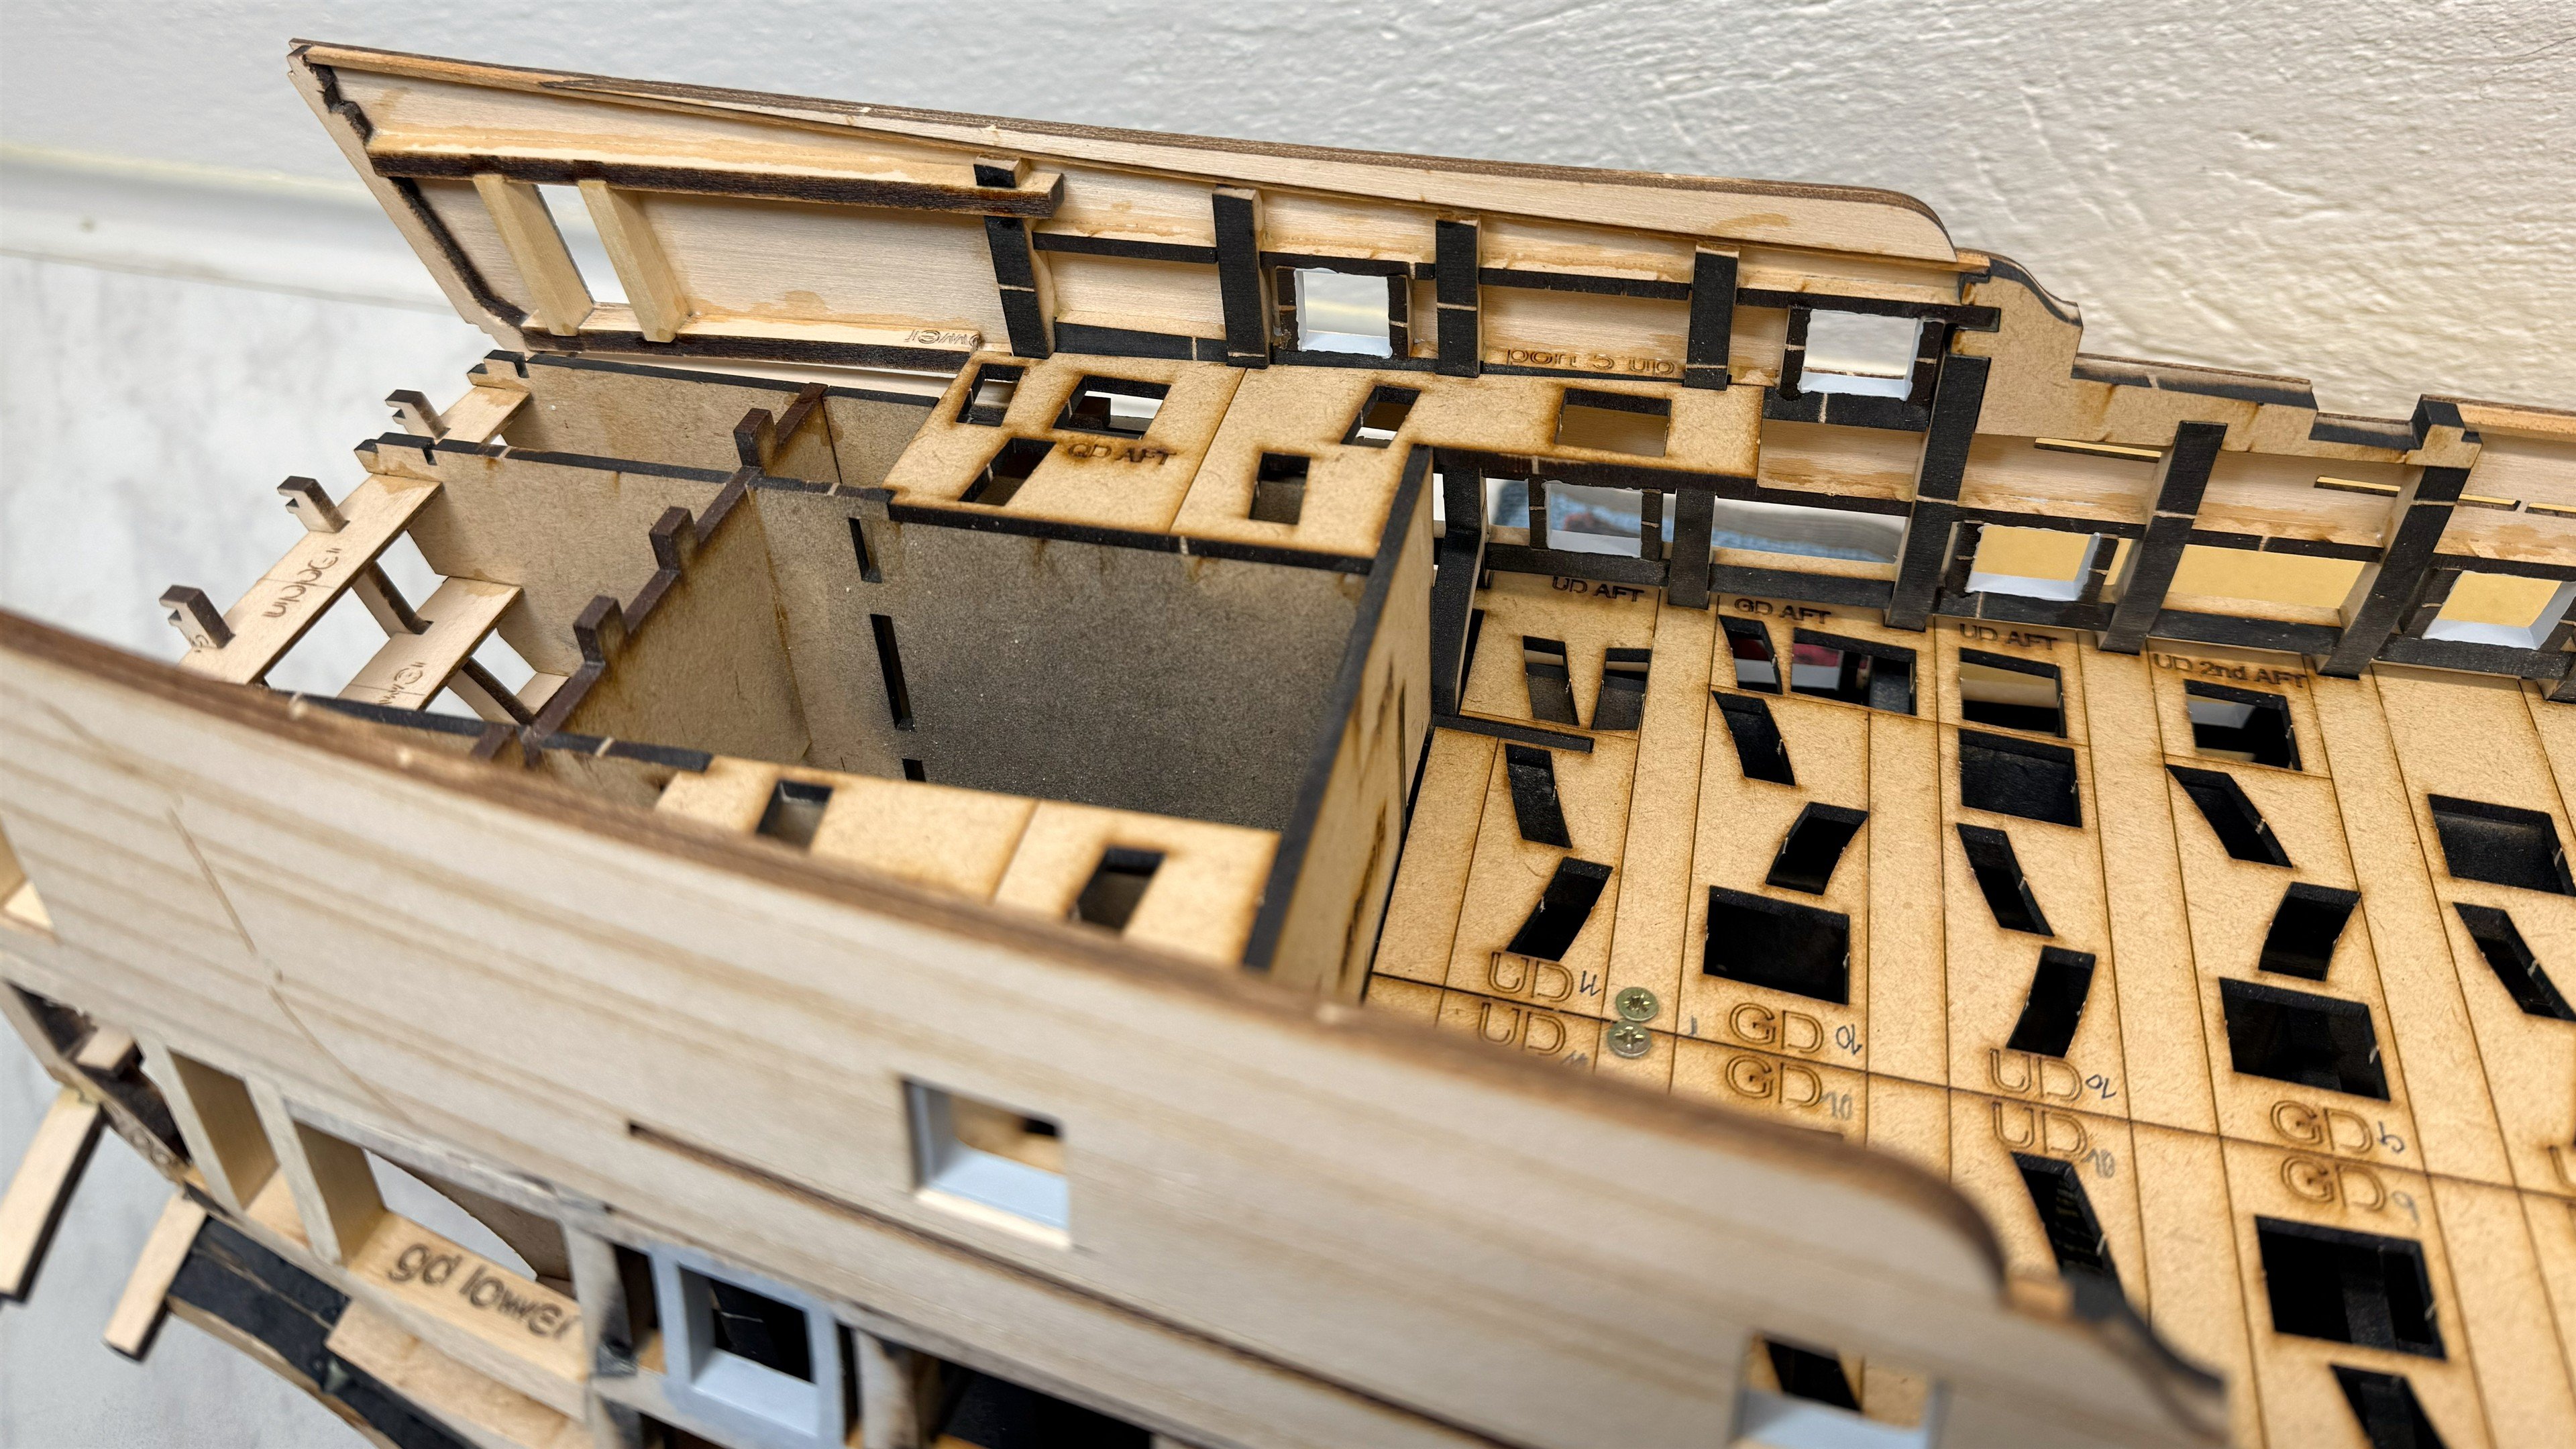
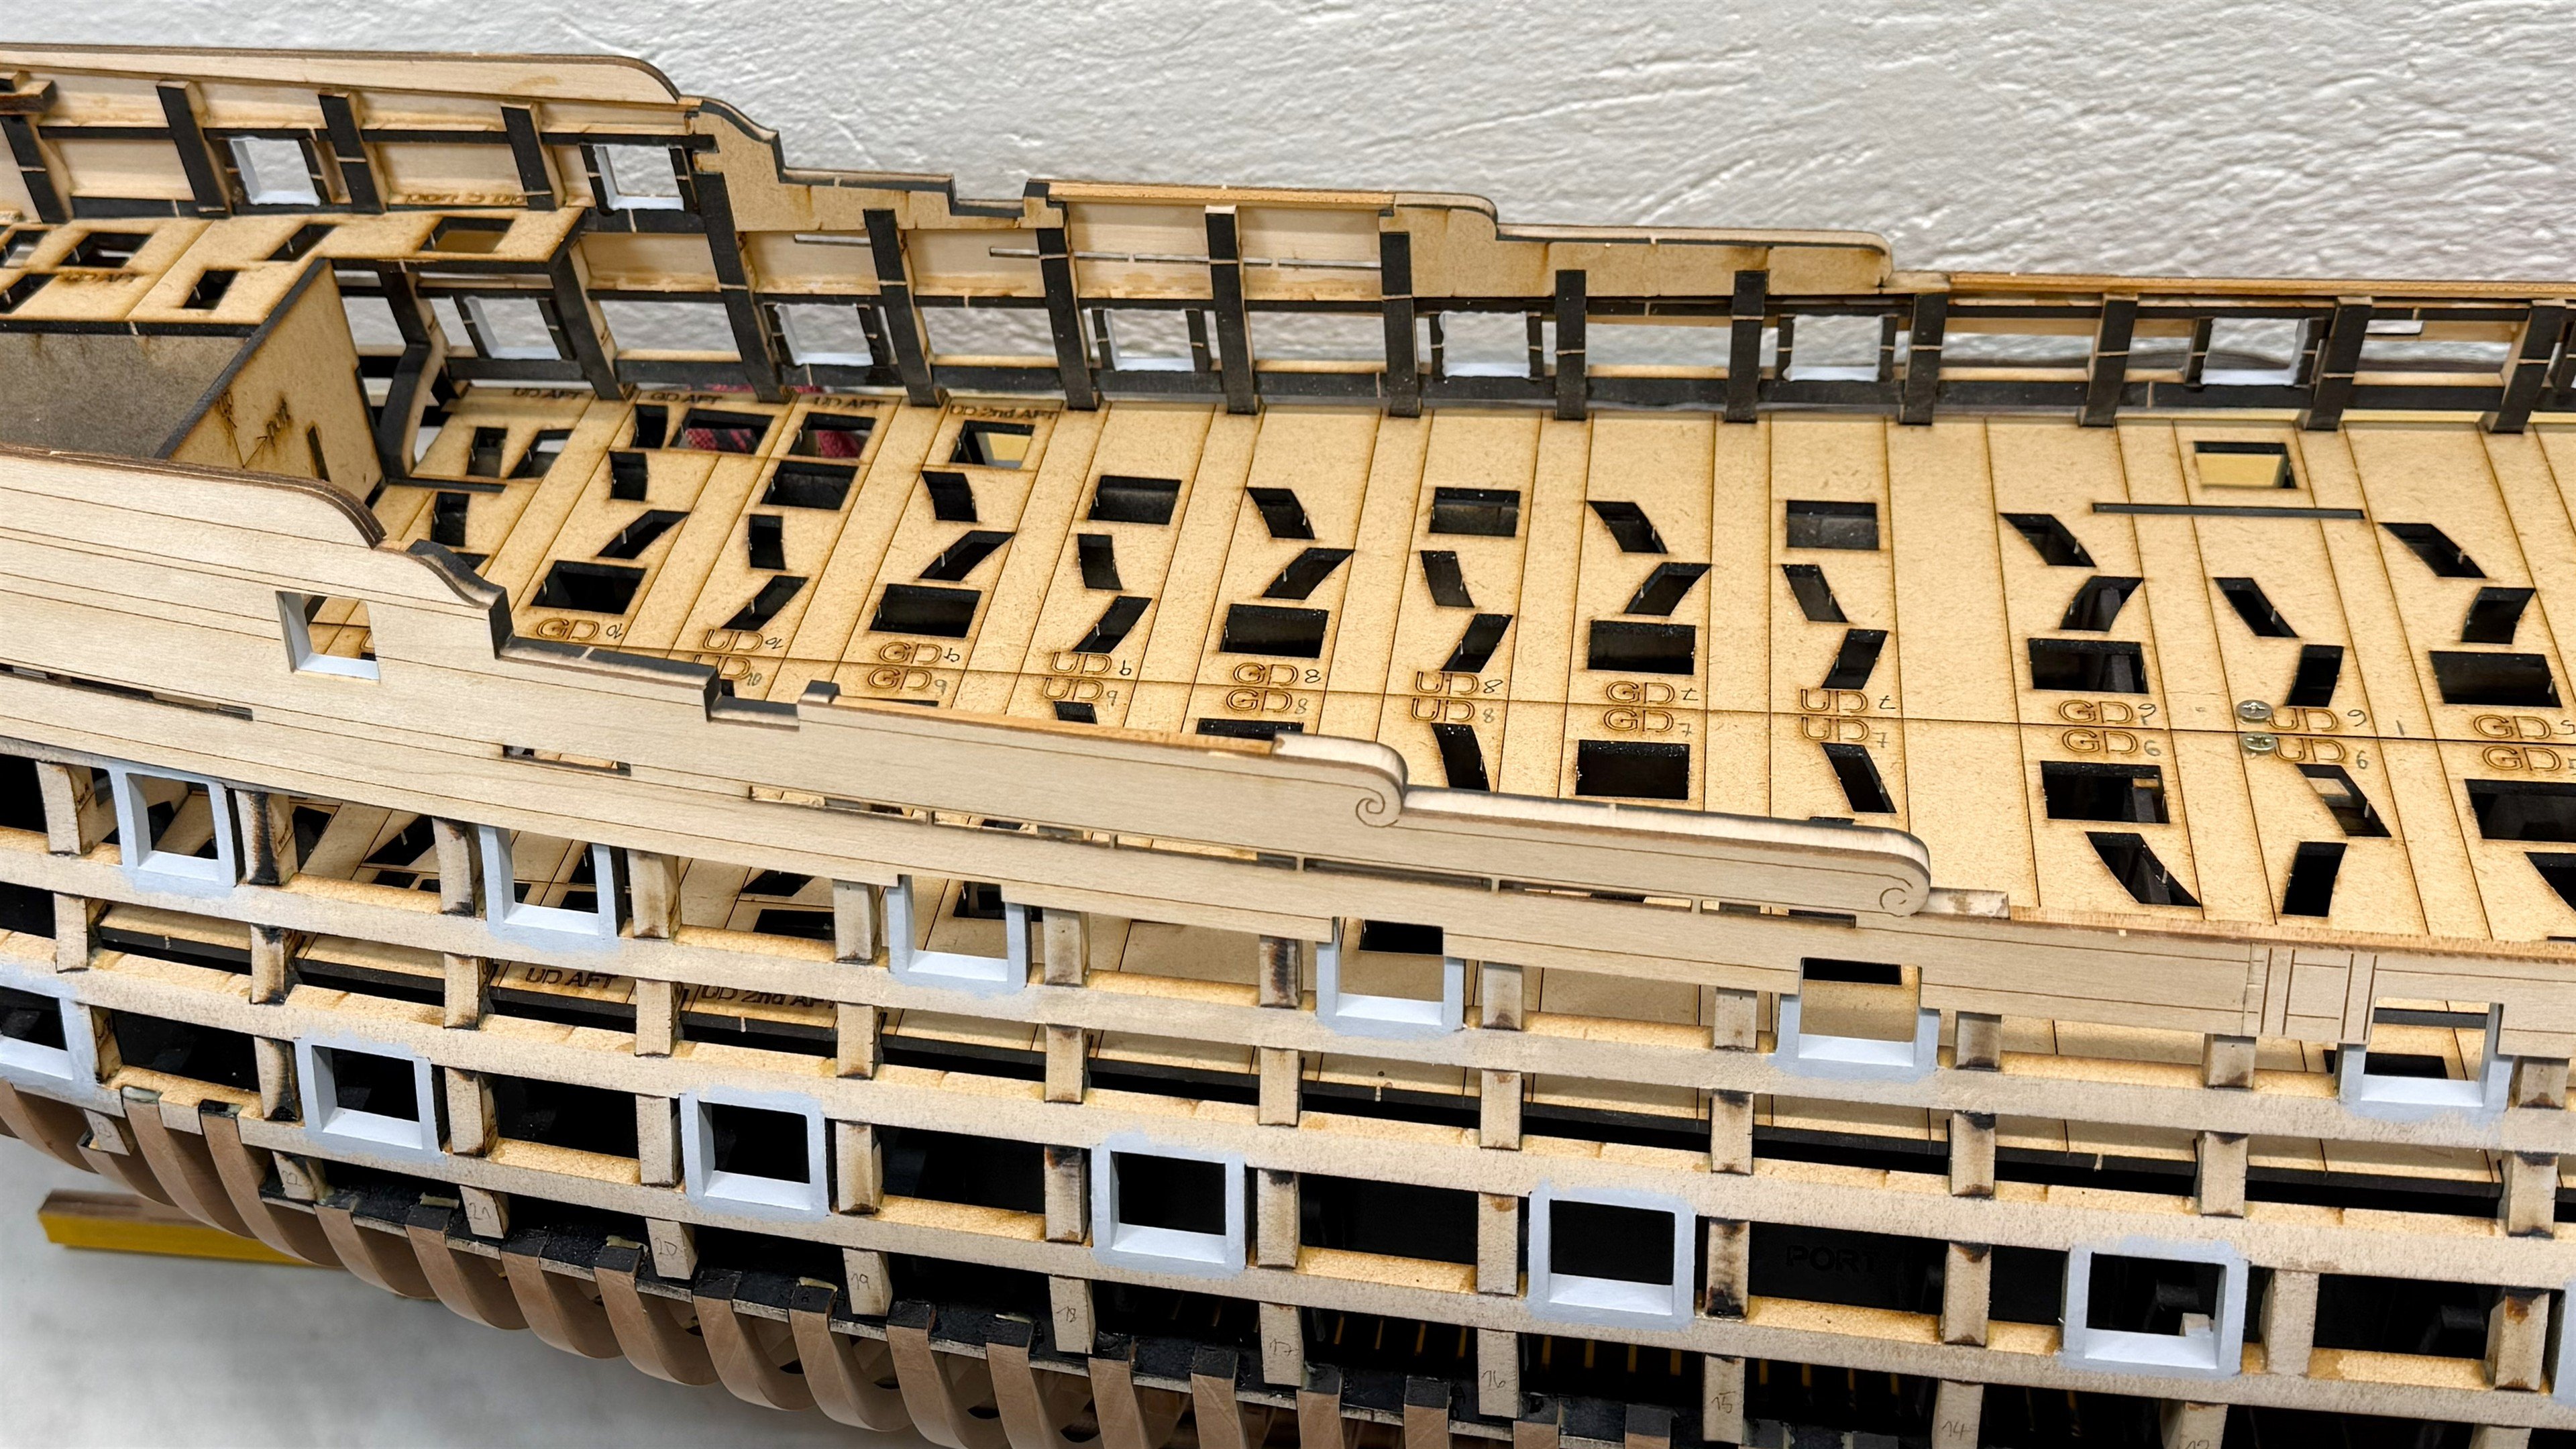
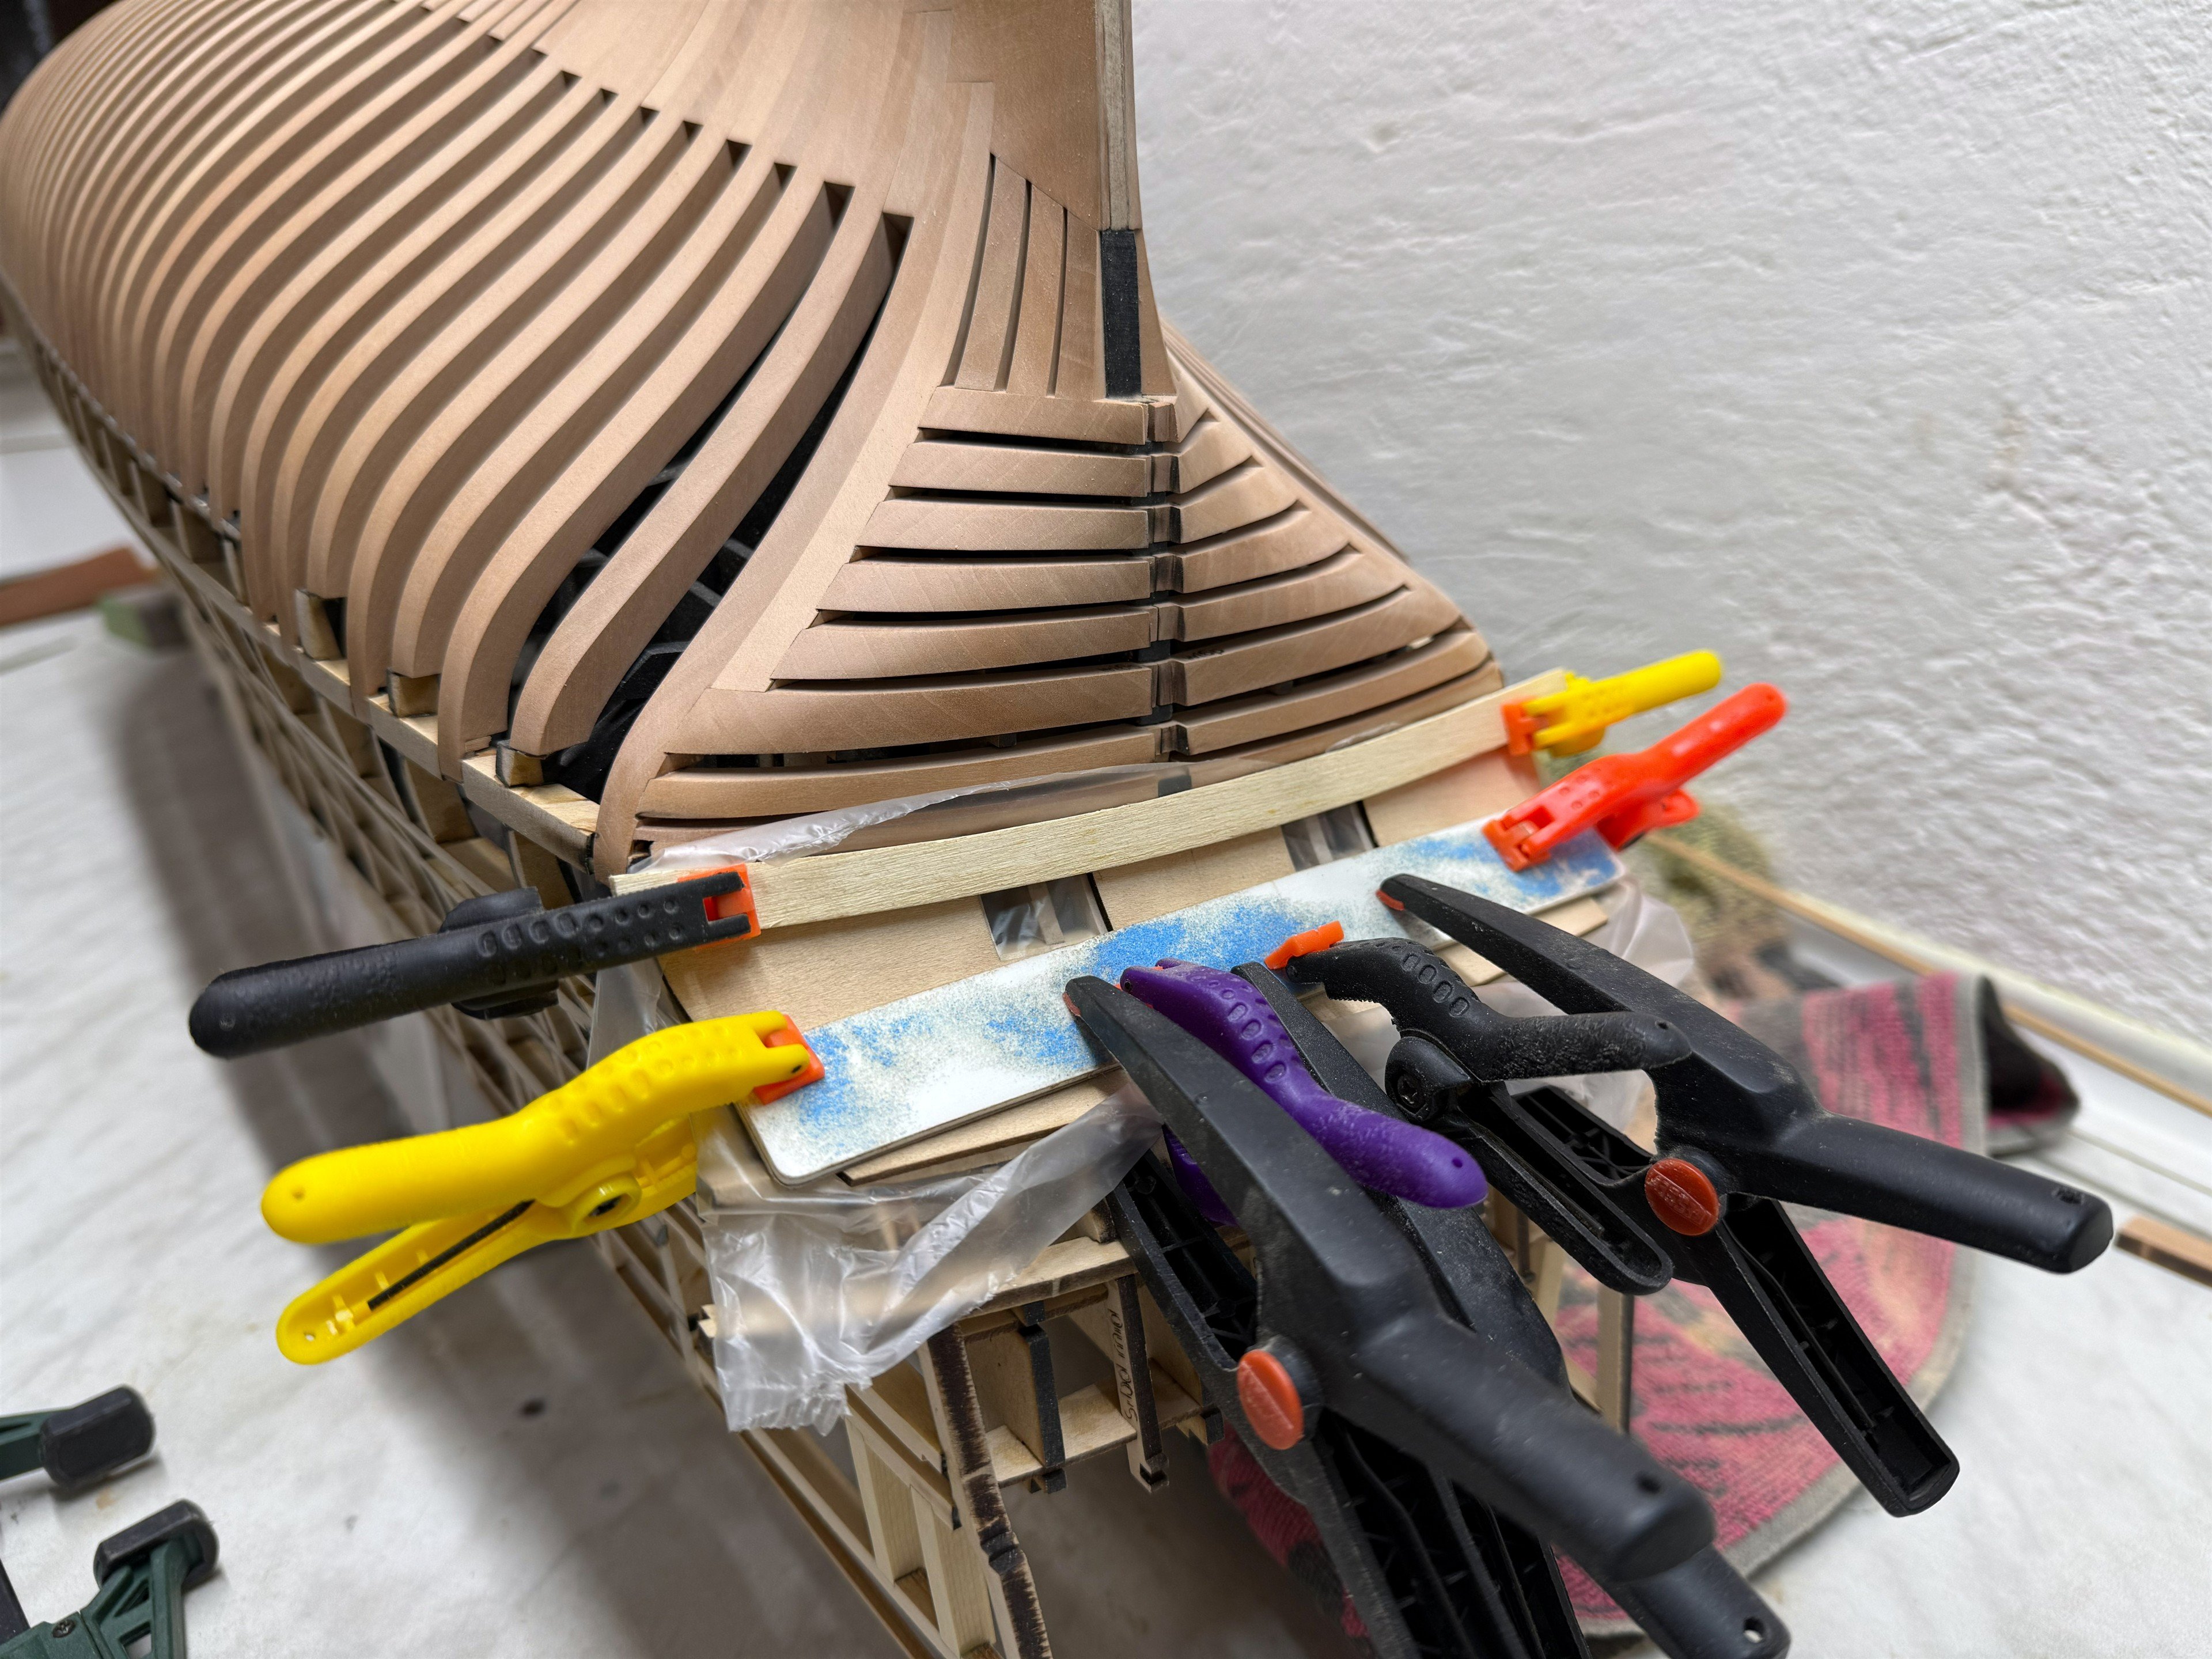
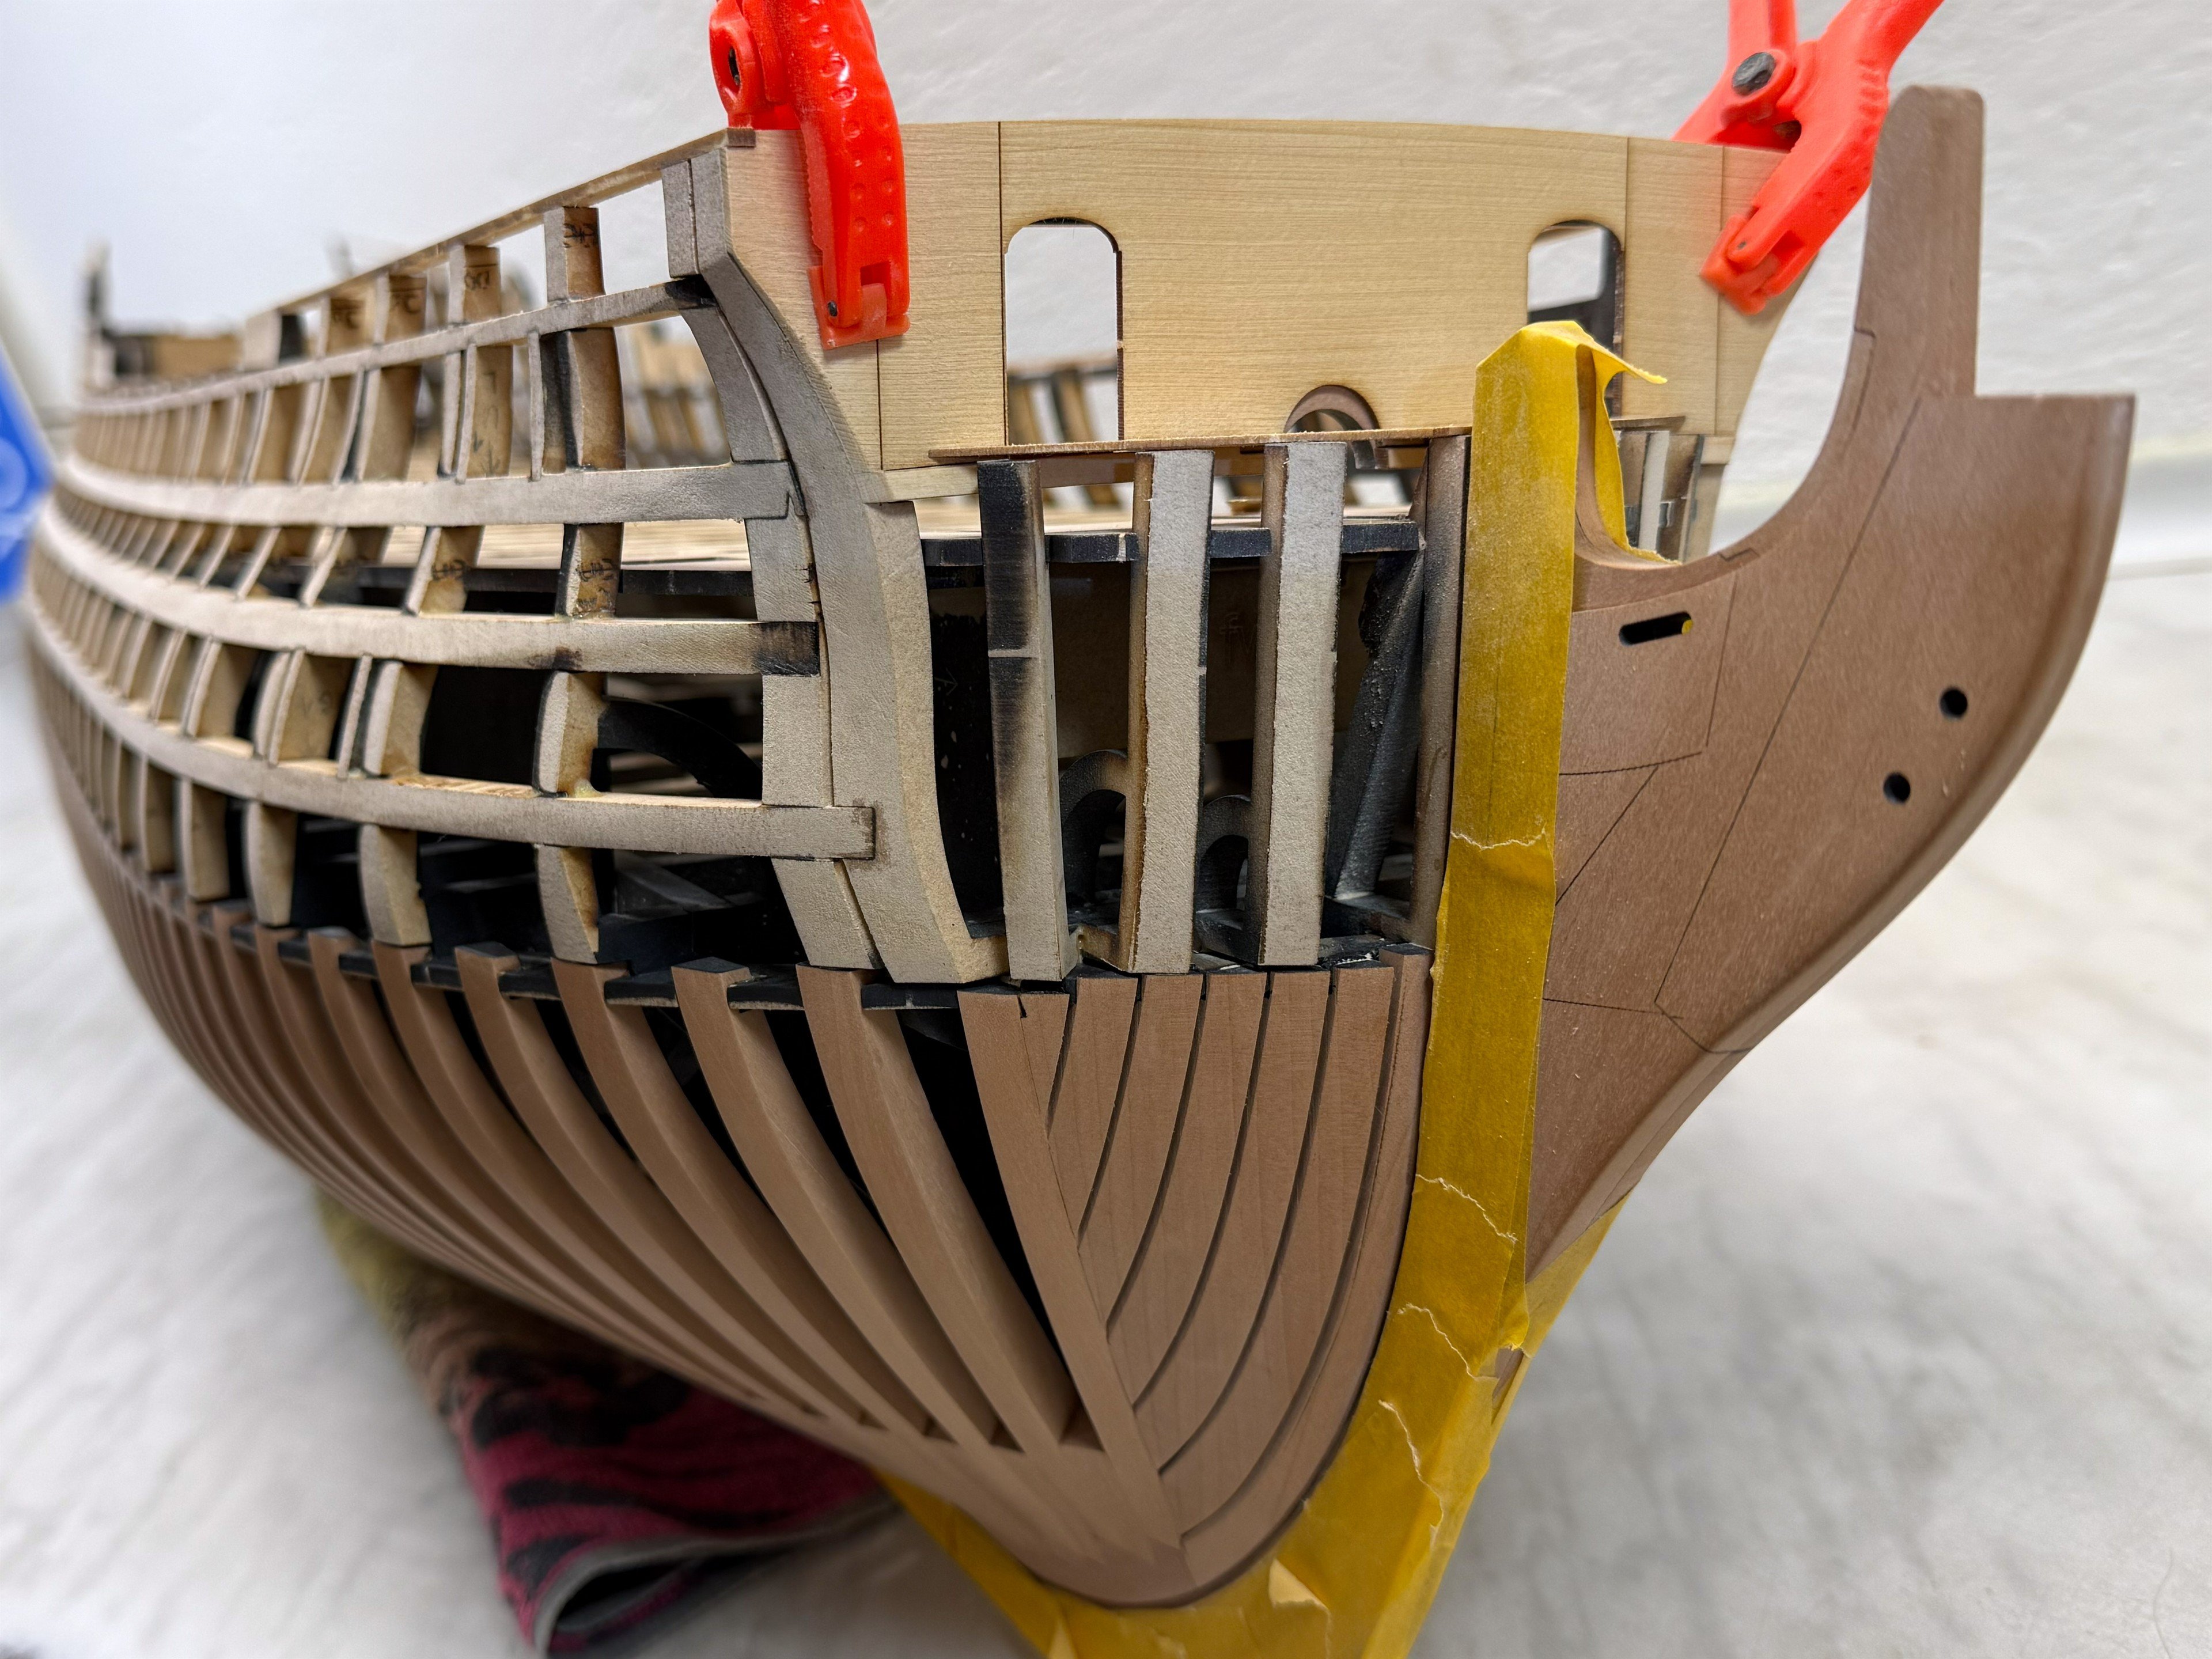
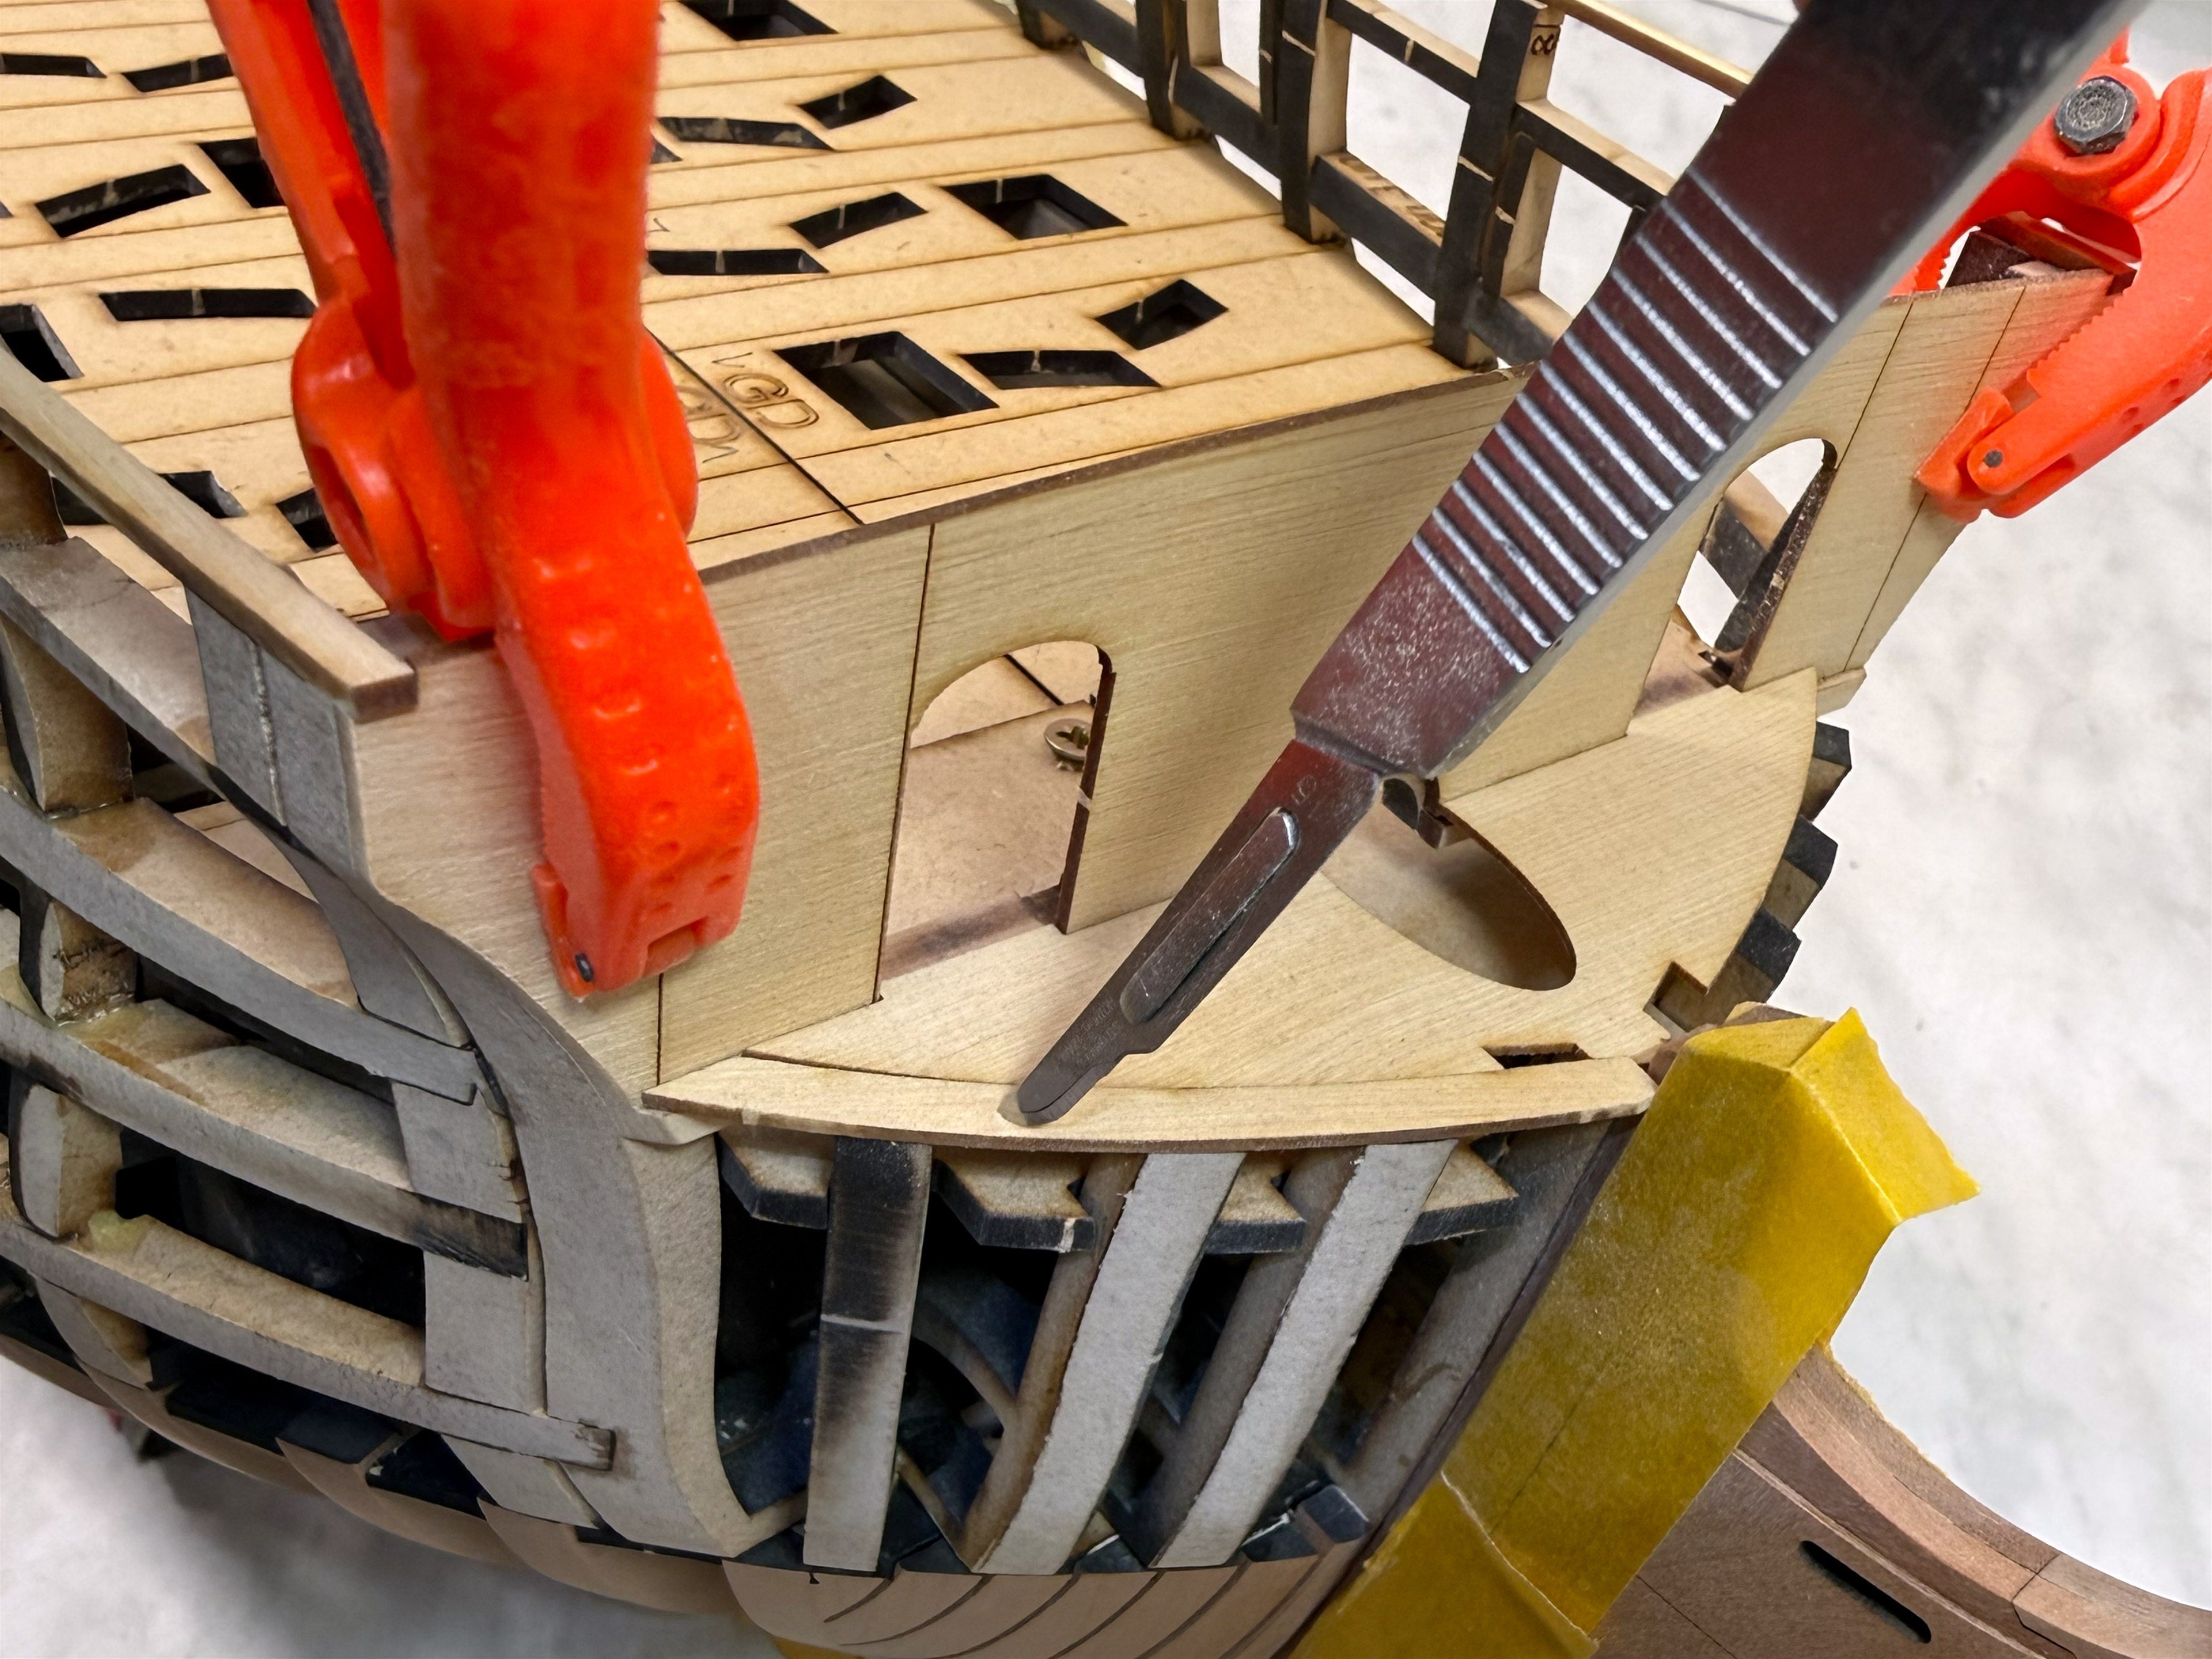
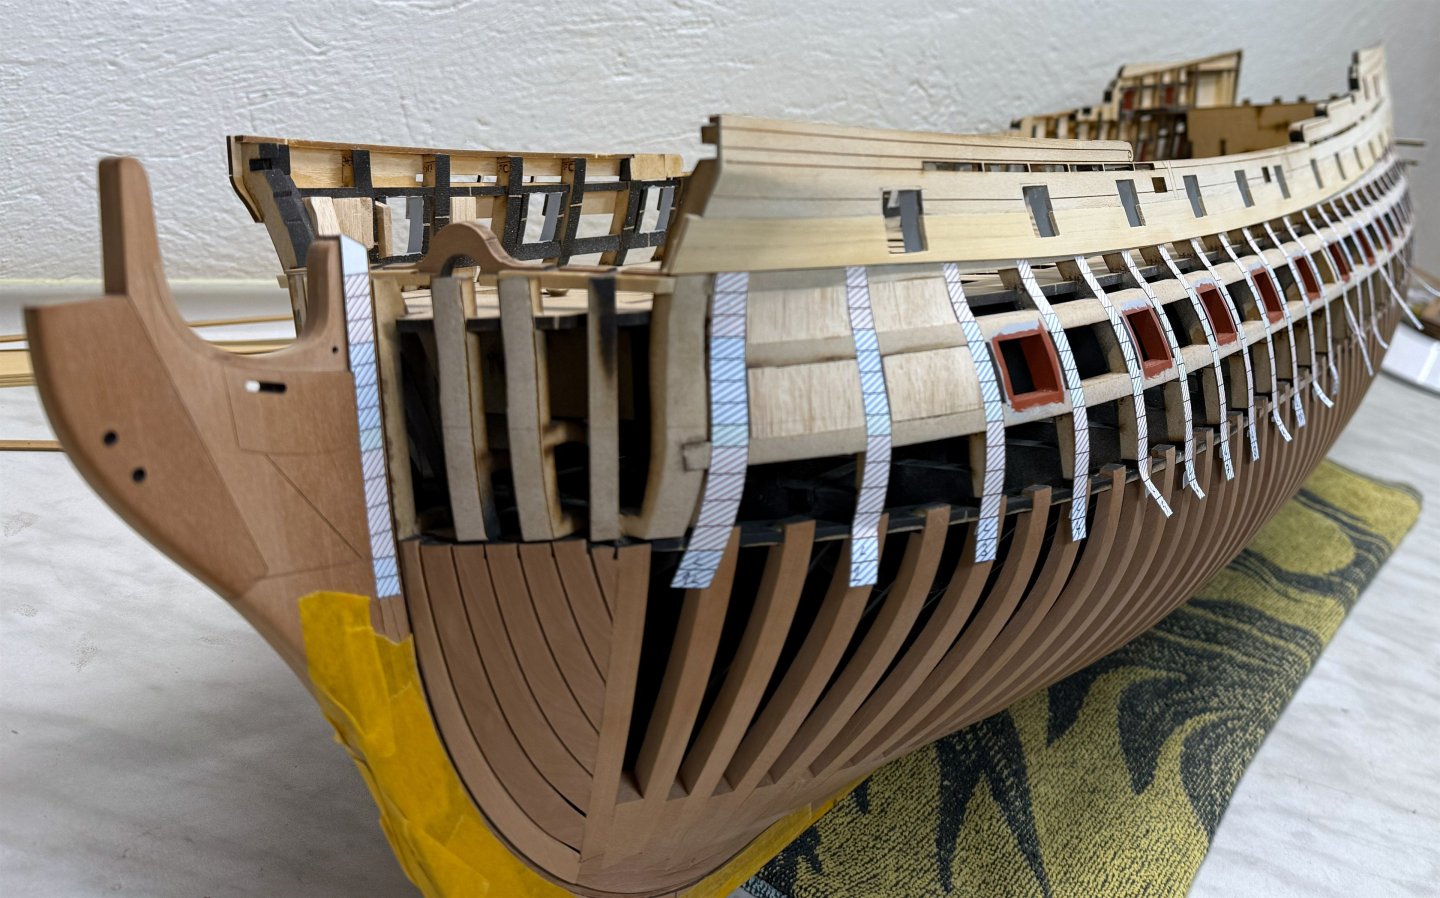
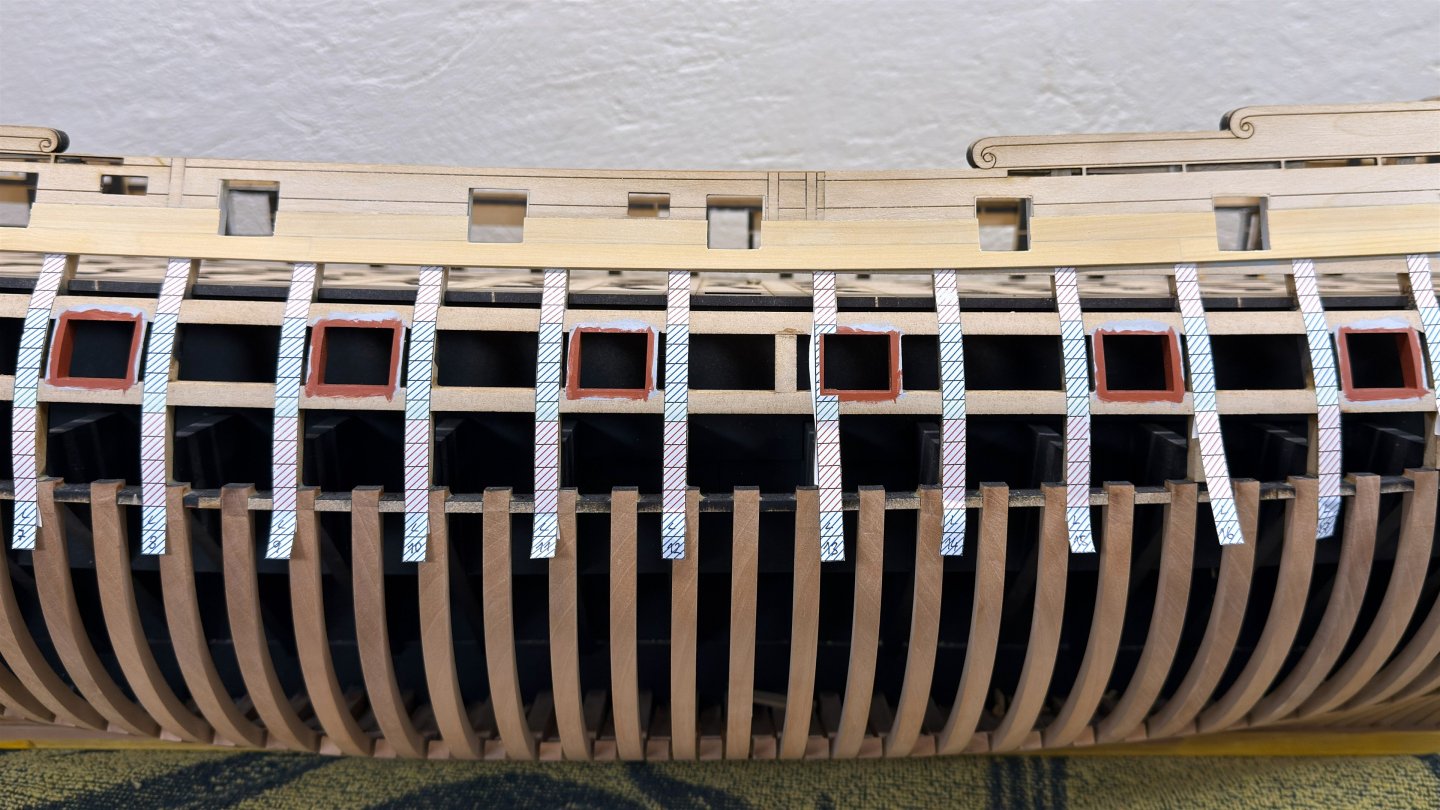
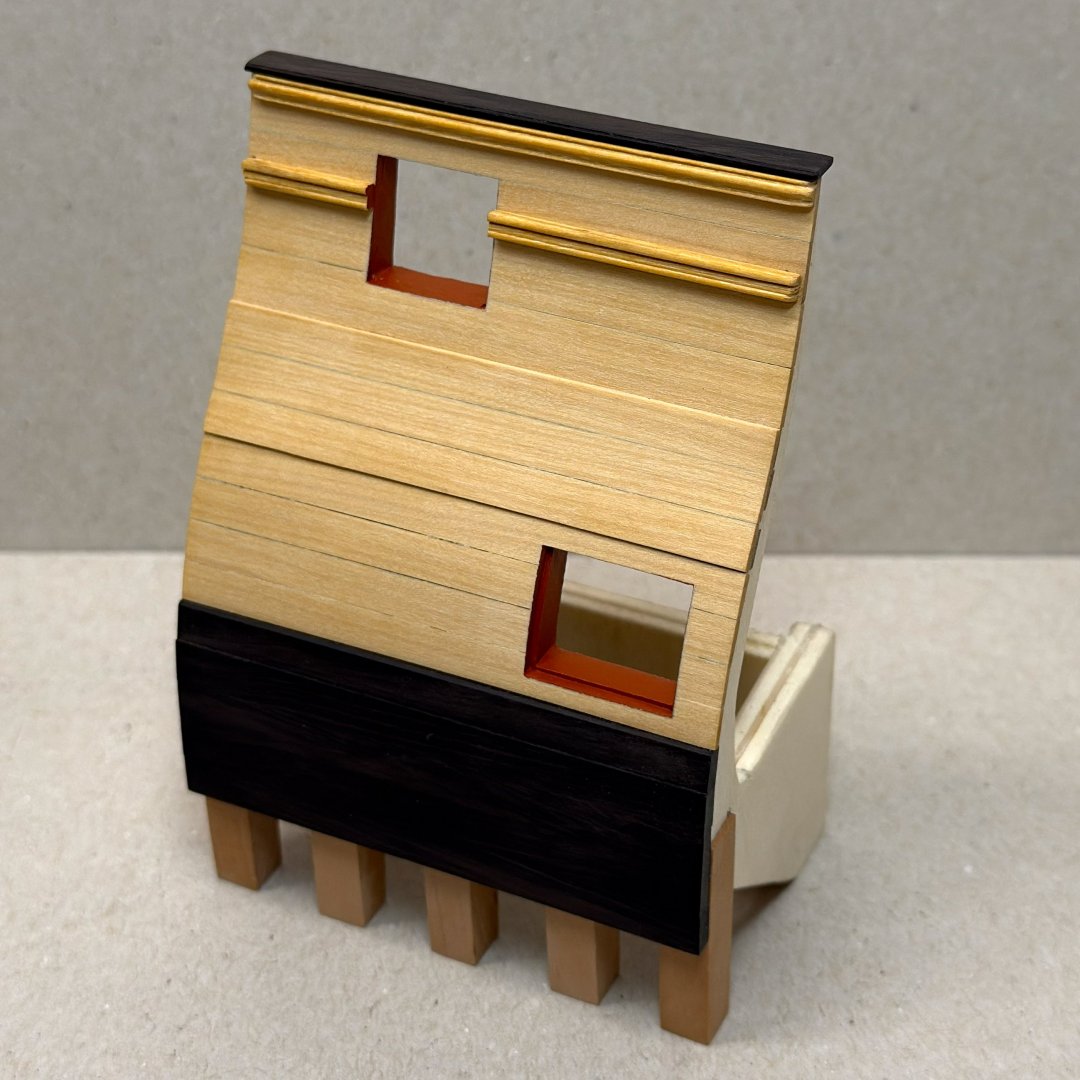
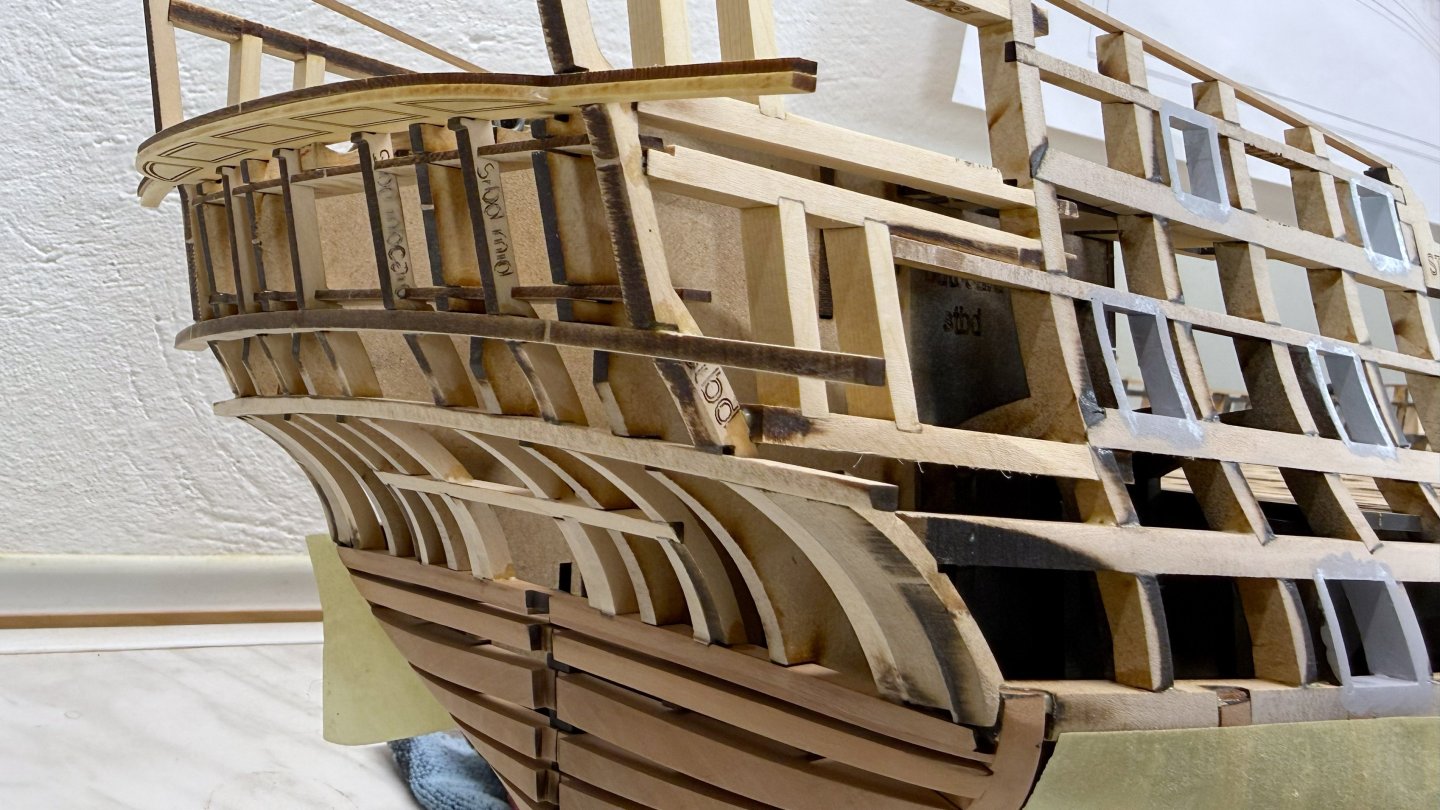
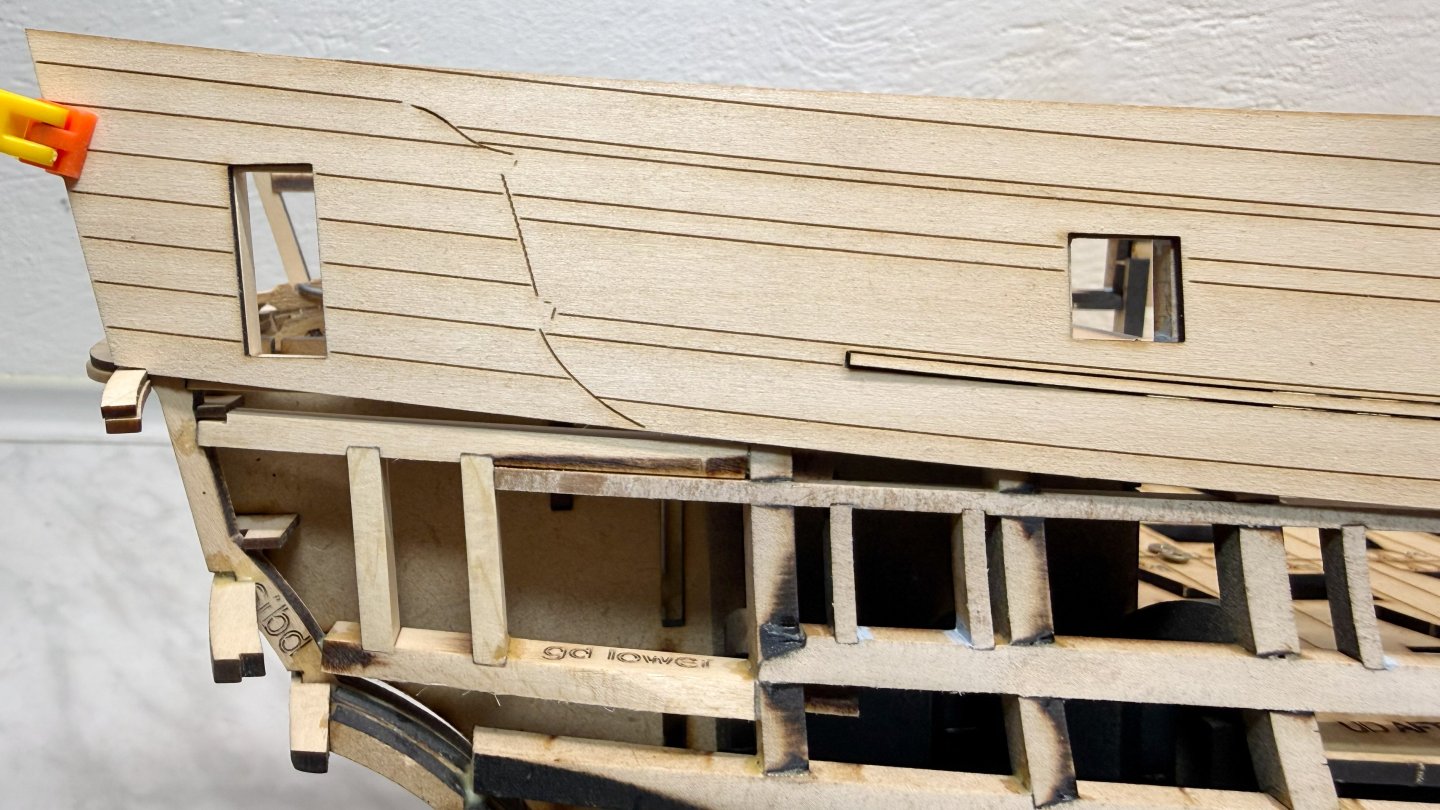
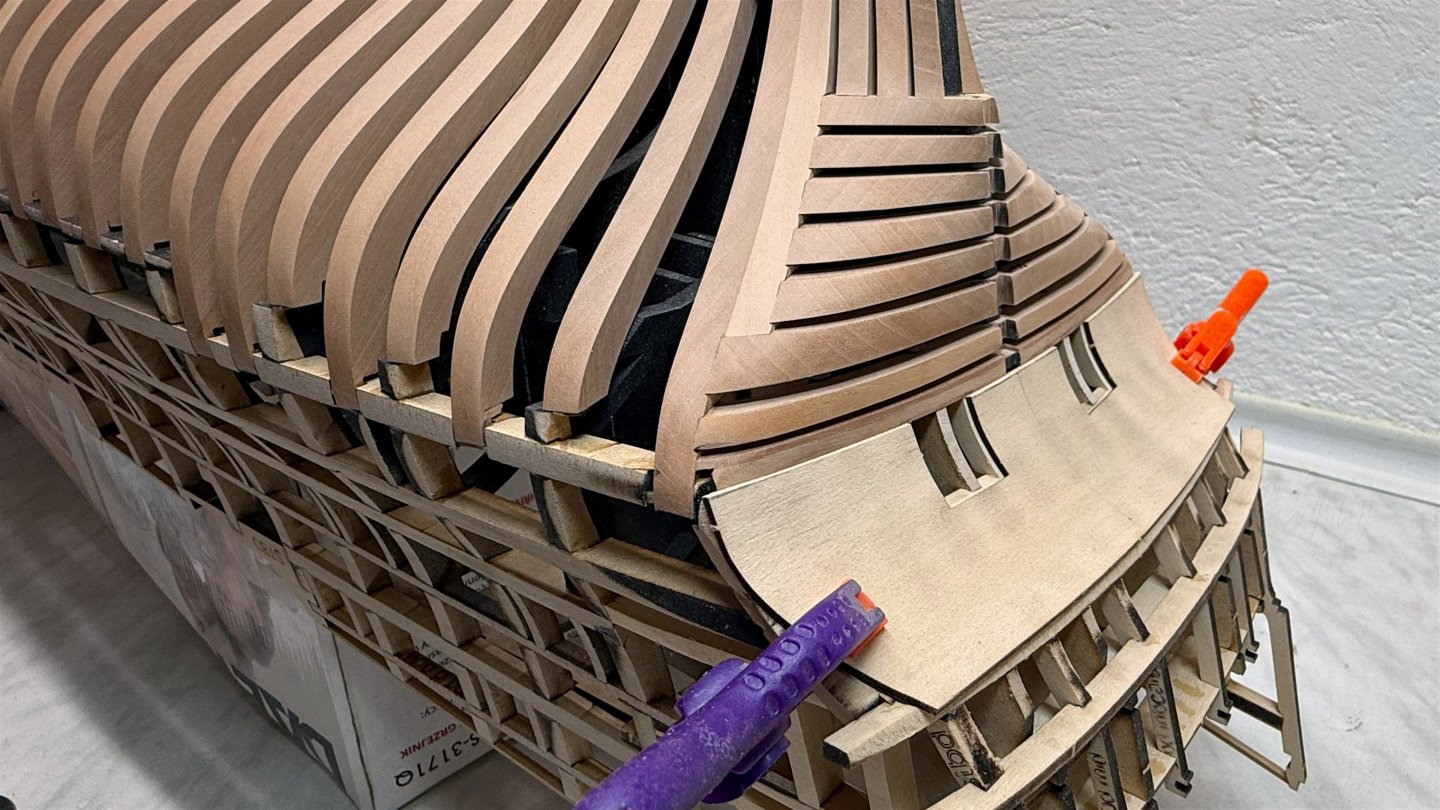
Another small update: I set the lower counter aside for now, but I shaped the front of the frieze panel similarly. I also did a dry fit of the bottom of the balcony to determine the placement of the panels. It was good not to have glued it yet because the overlapping parts could easily break off, and fairing the hull was also easier. After countless tests of placing these panels and the planking strips—which unfortunately did not make it into the photo, I managed to apply the first coat of Tamiya surface primer. So I'm getting closer to planking


-
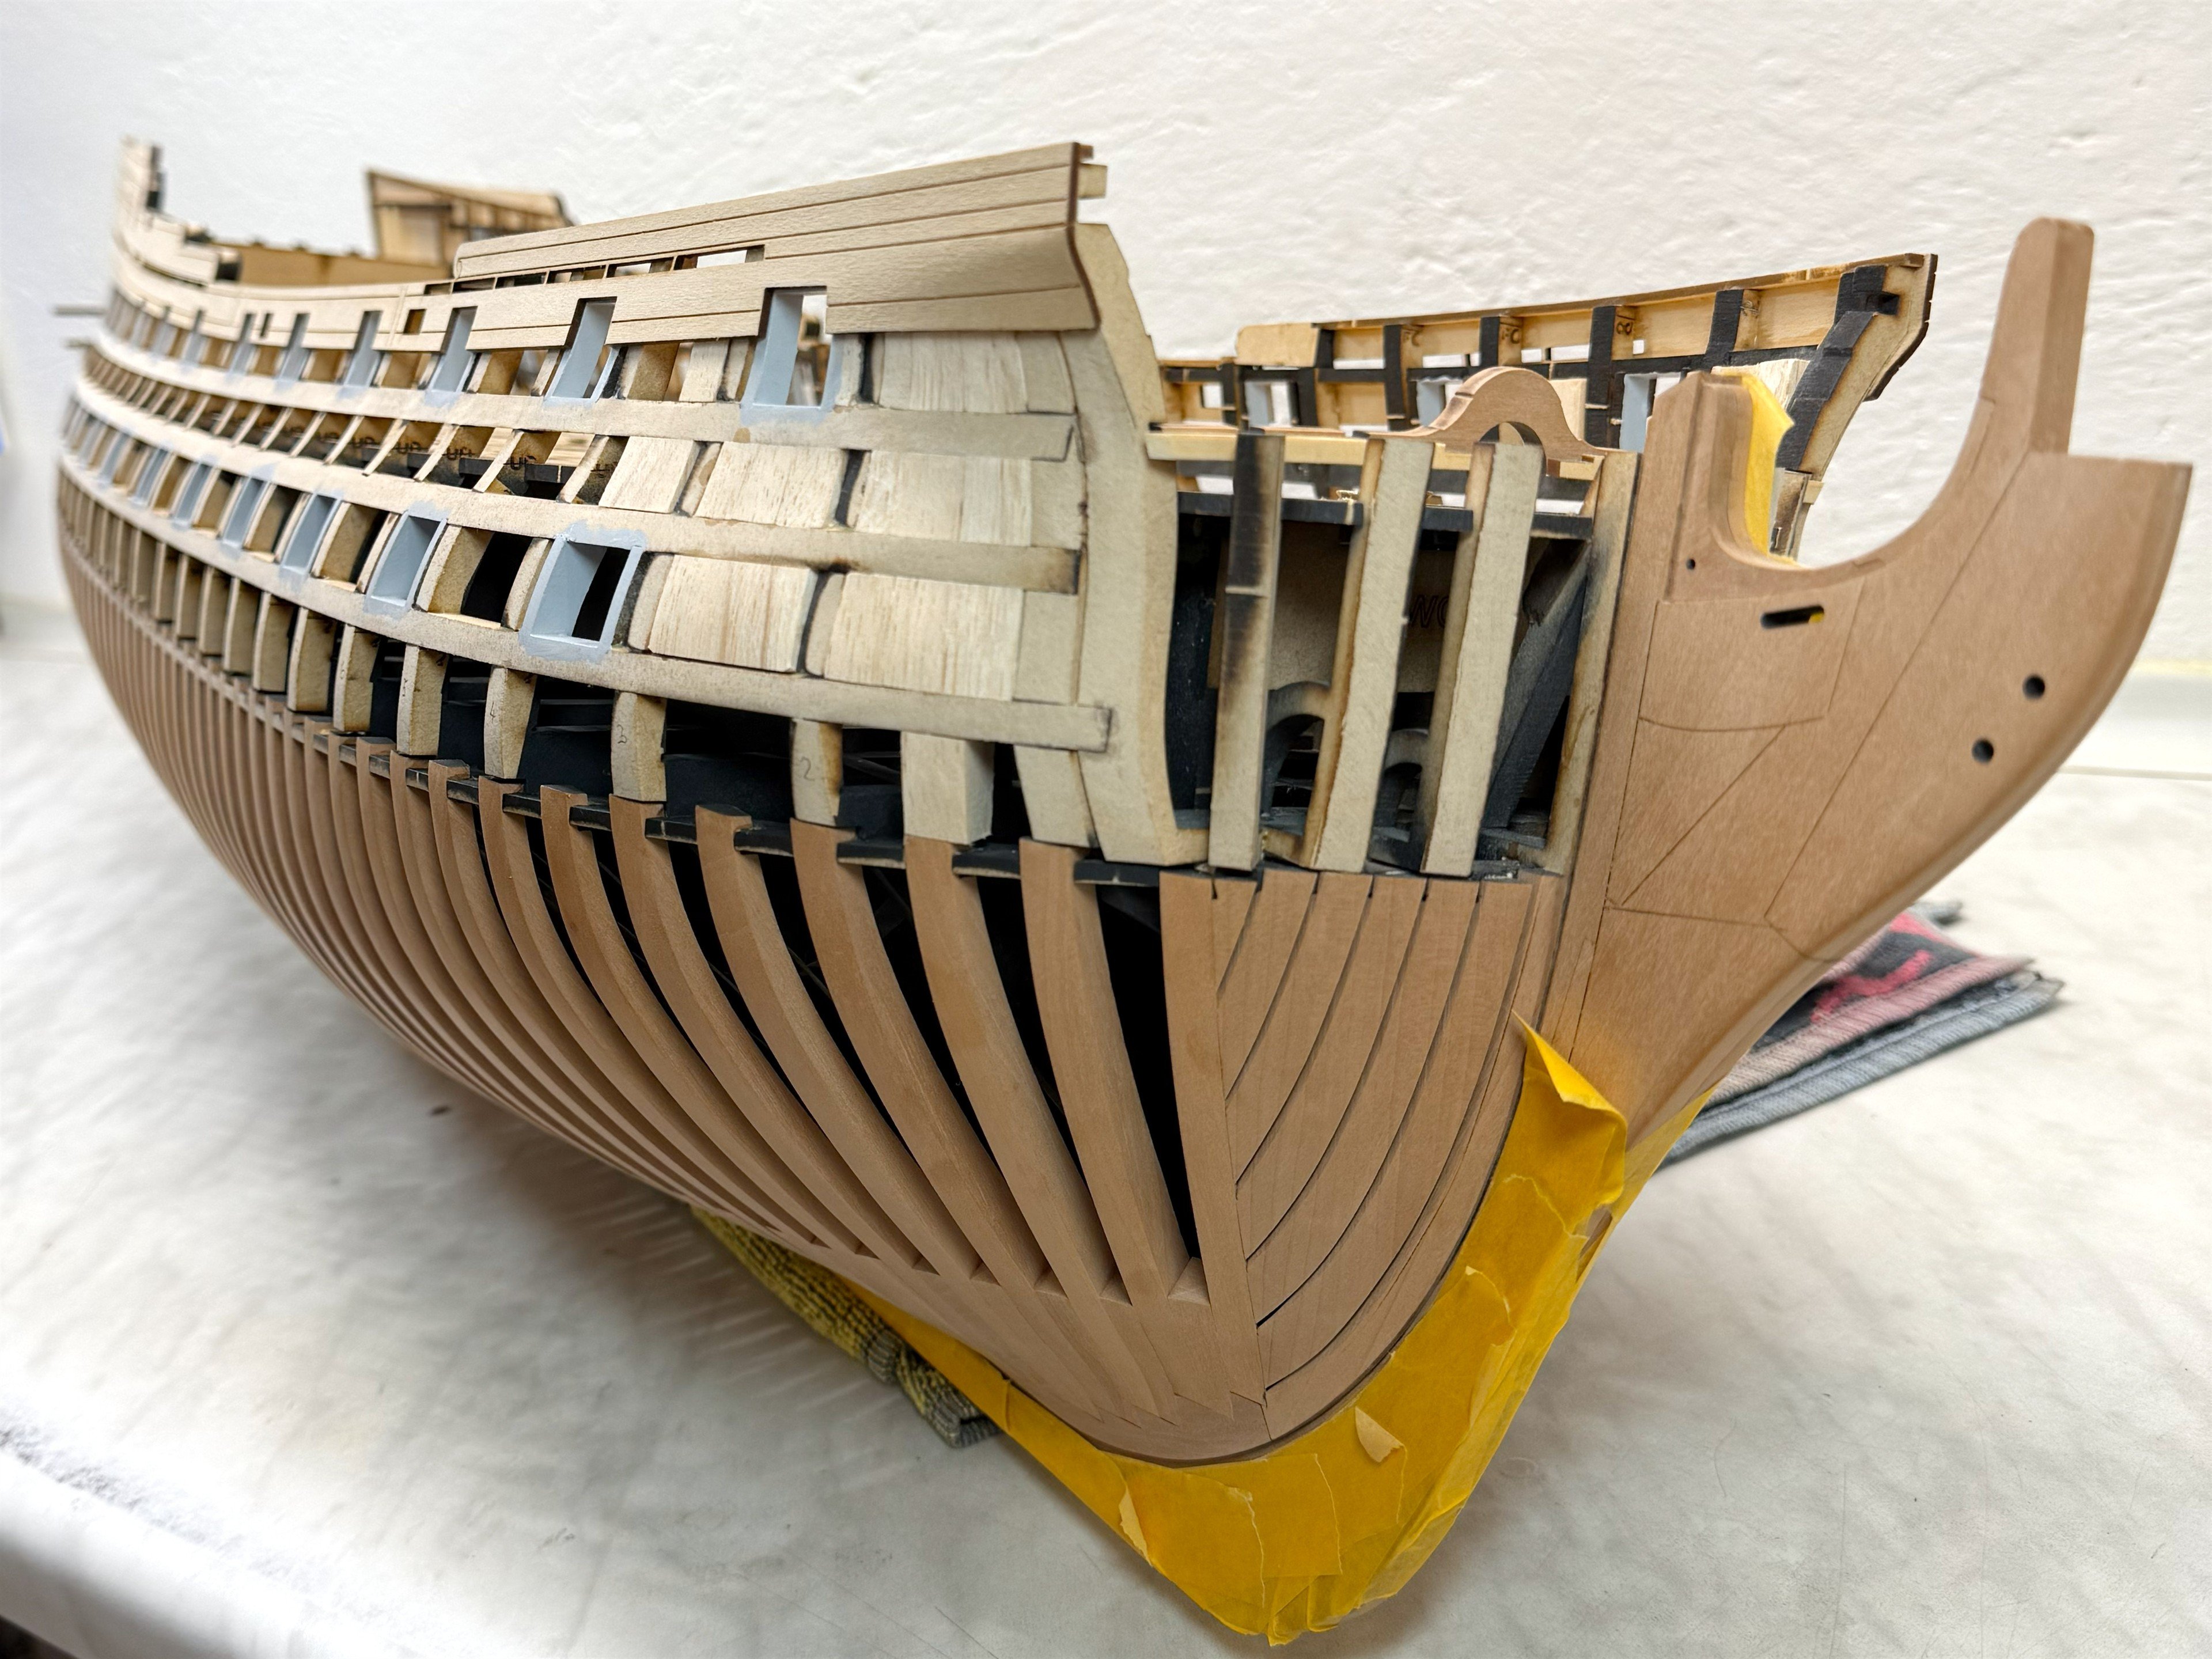
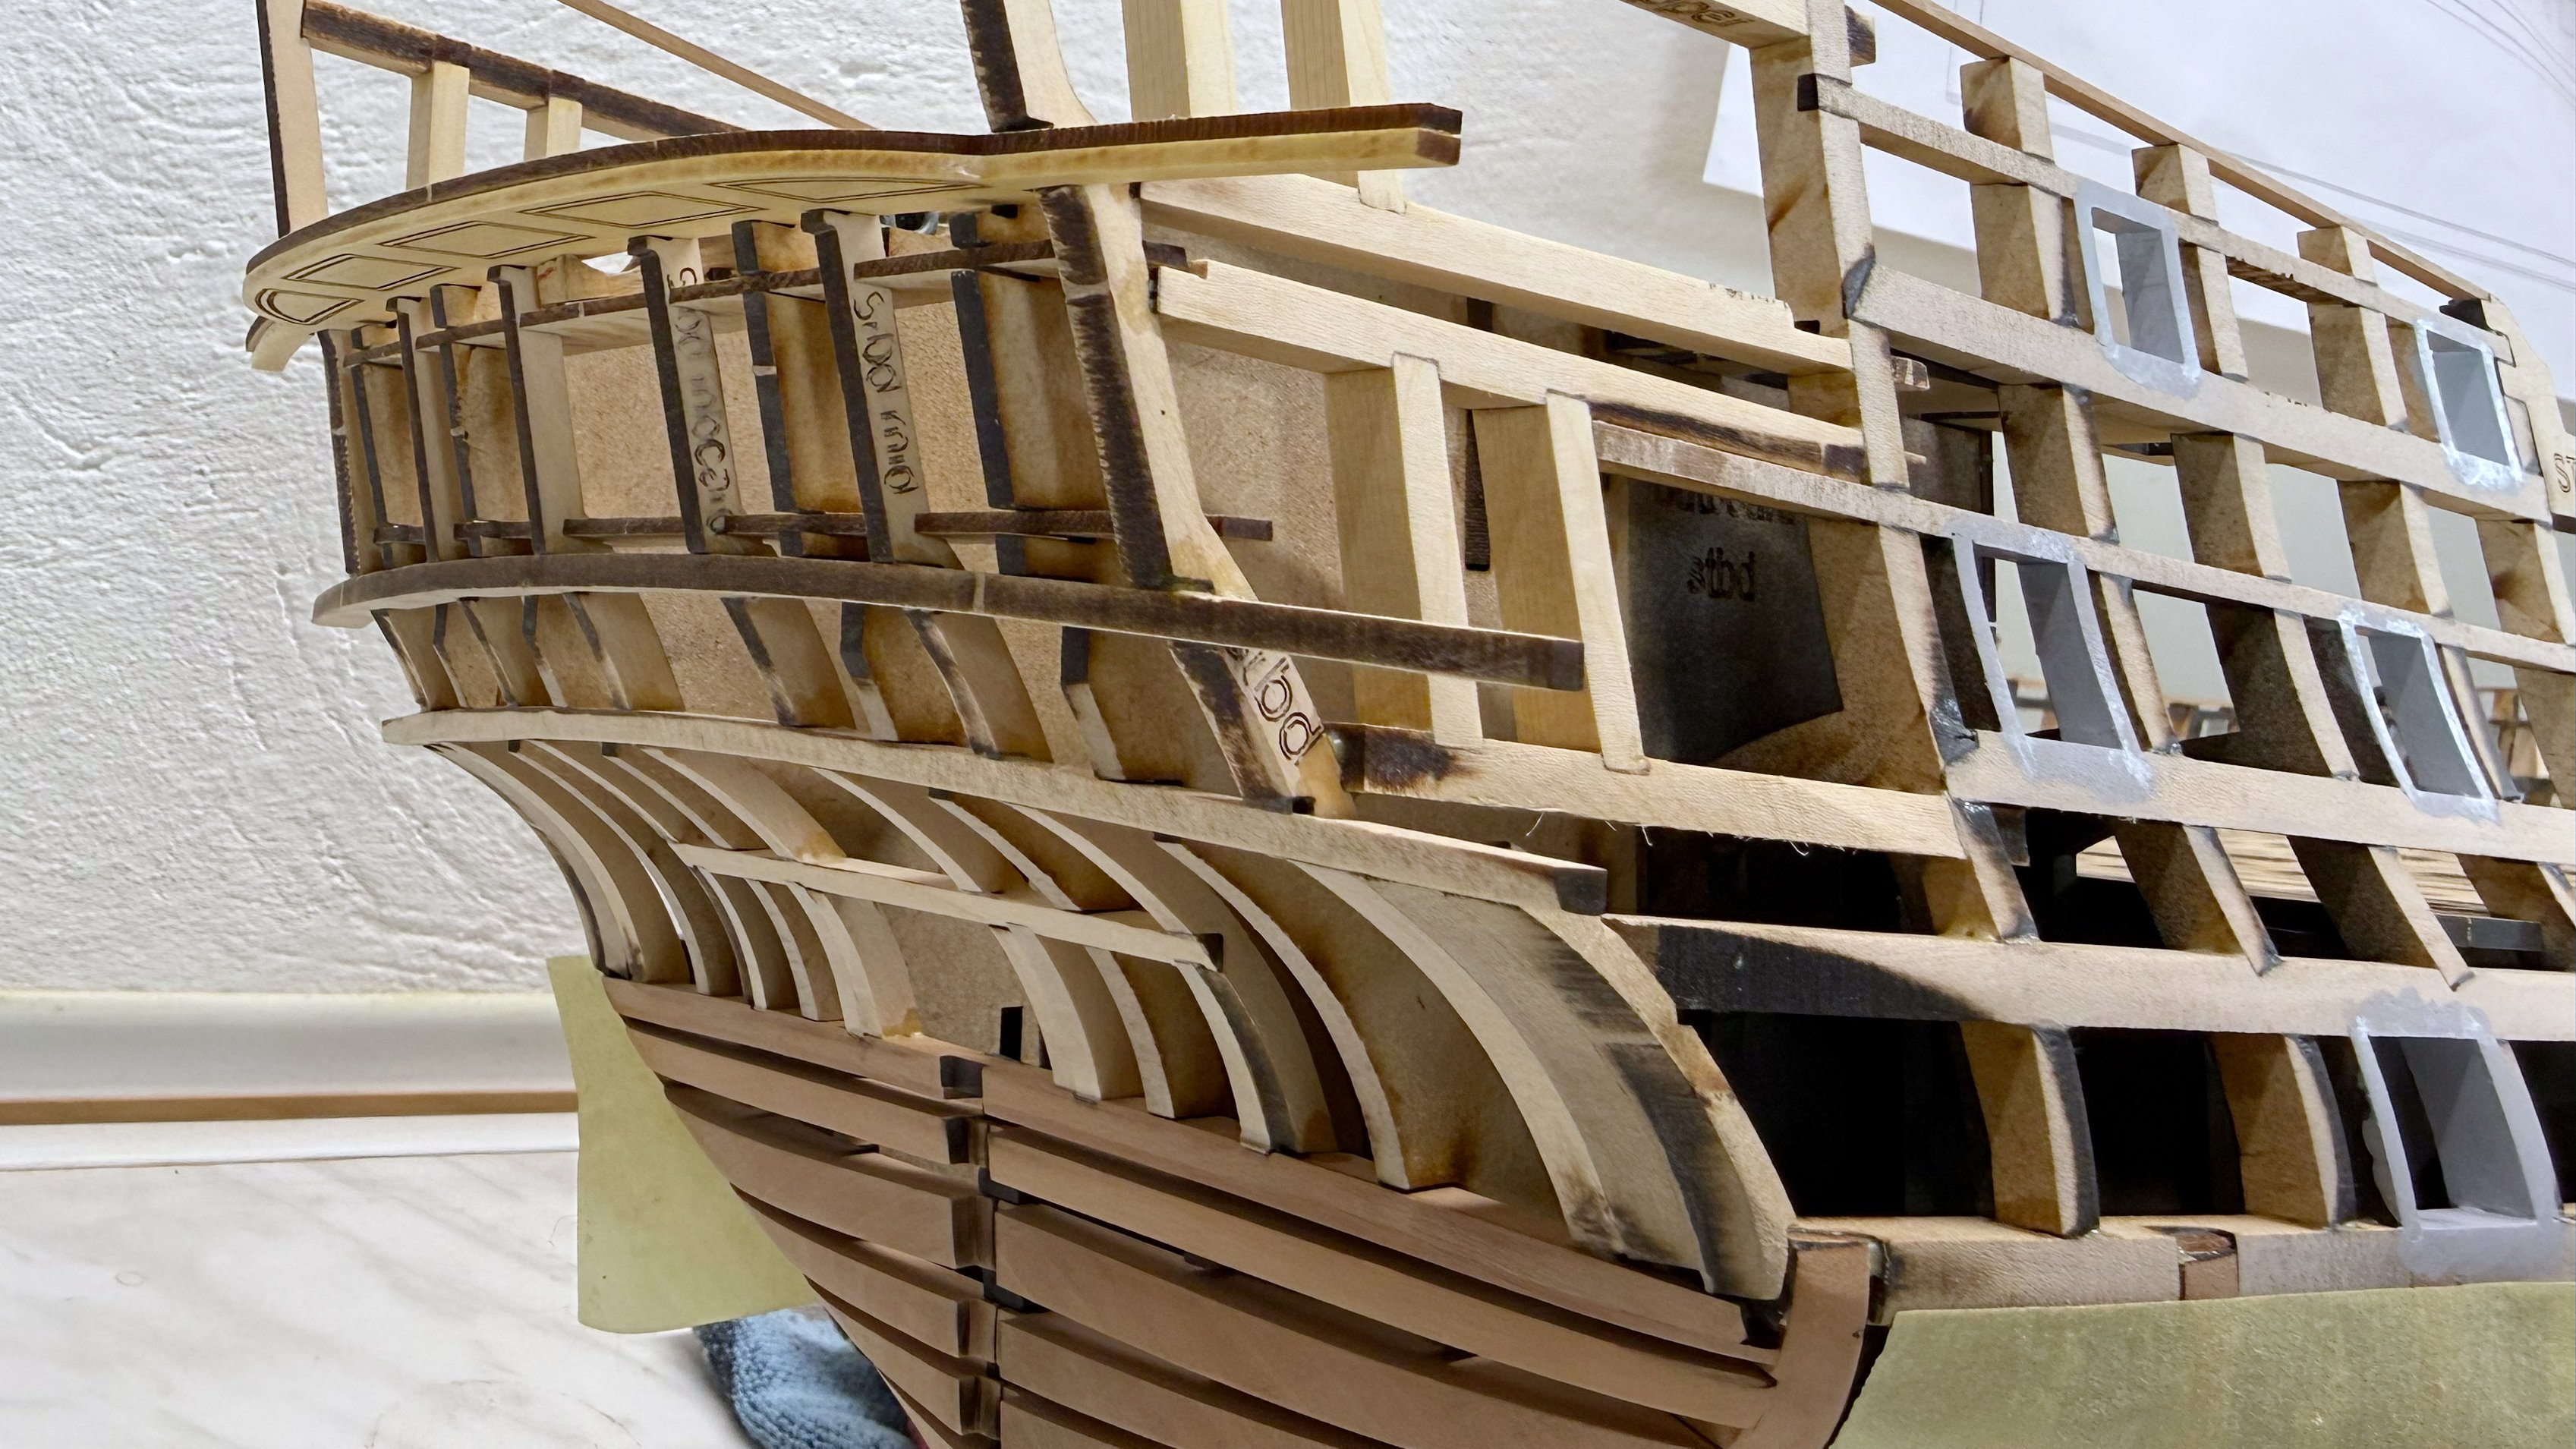
Thanks, guys. You're right, Ben, the modified apron with added material and bevel marks has improved it a lot and I think JJ did the same thing with dead wood. Before gluing on the side frieze panels I decided to shape the lower counter first. Although it could have been attached dry, I ended up soaking it and letting it dry overnight. Now that it holds its shape, I will make some adjustments to the edges. I also decided to add some fillers to the bow for better control of the hull fairing in this area.

-
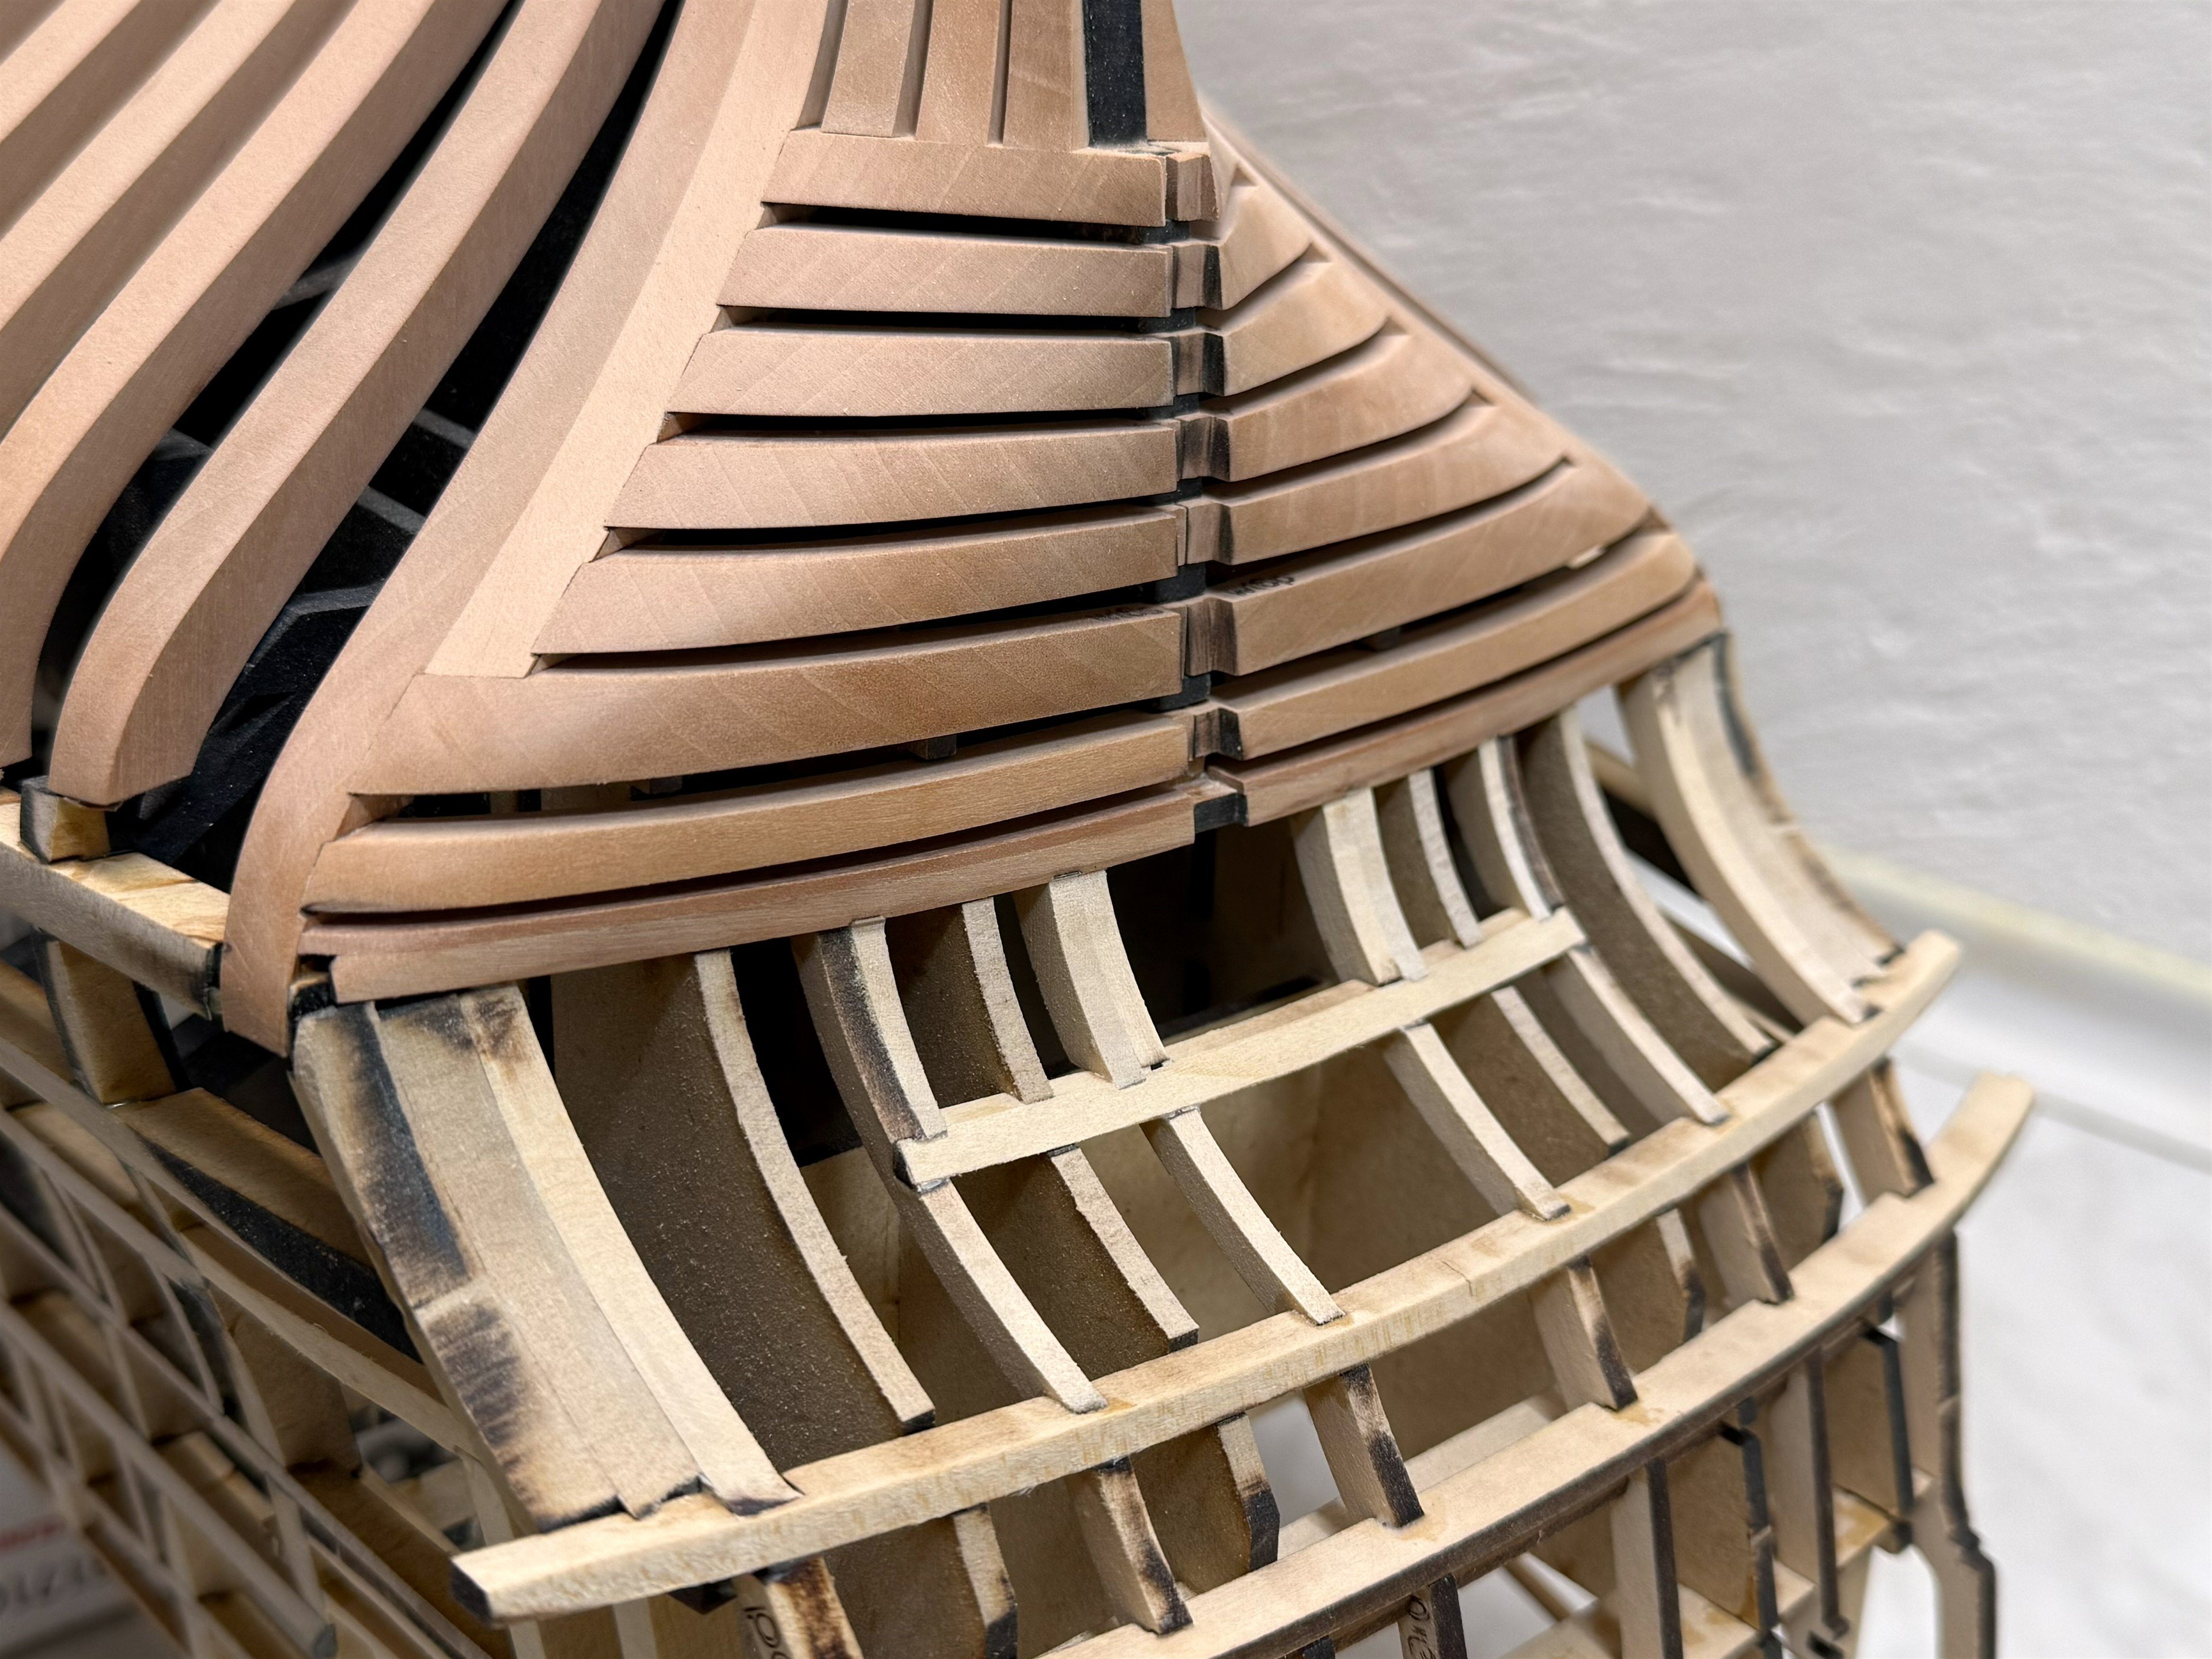
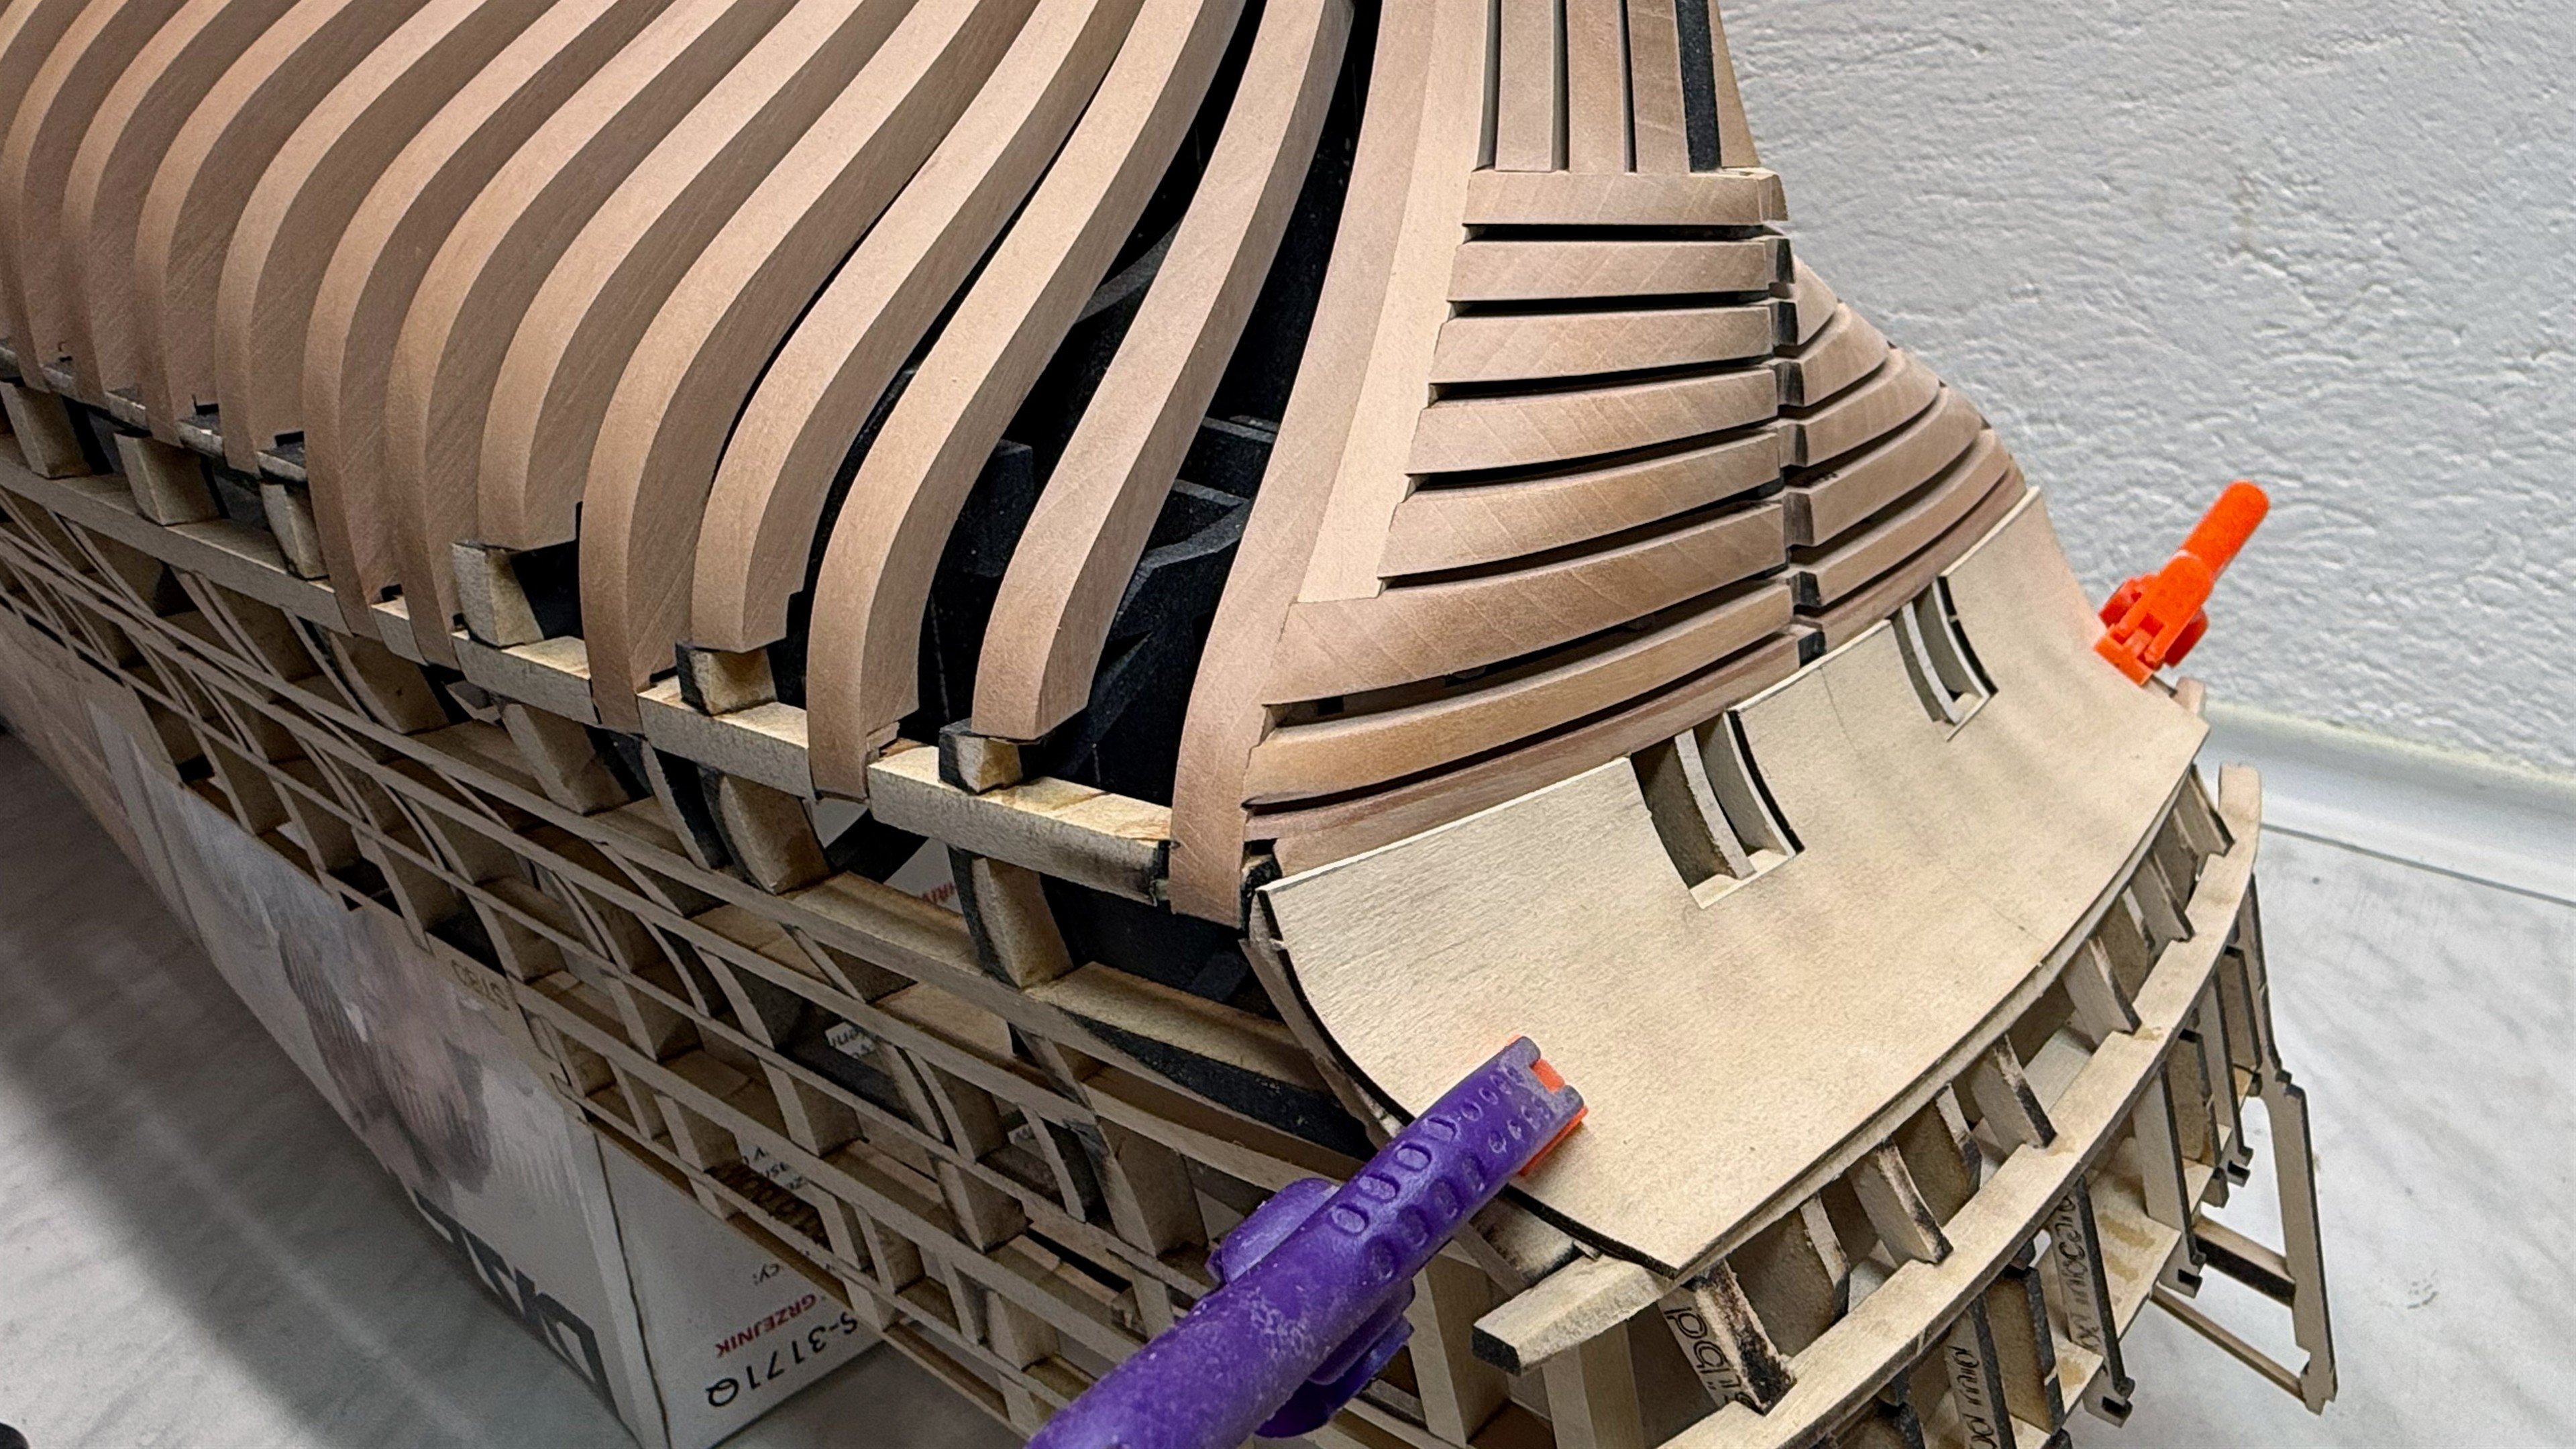
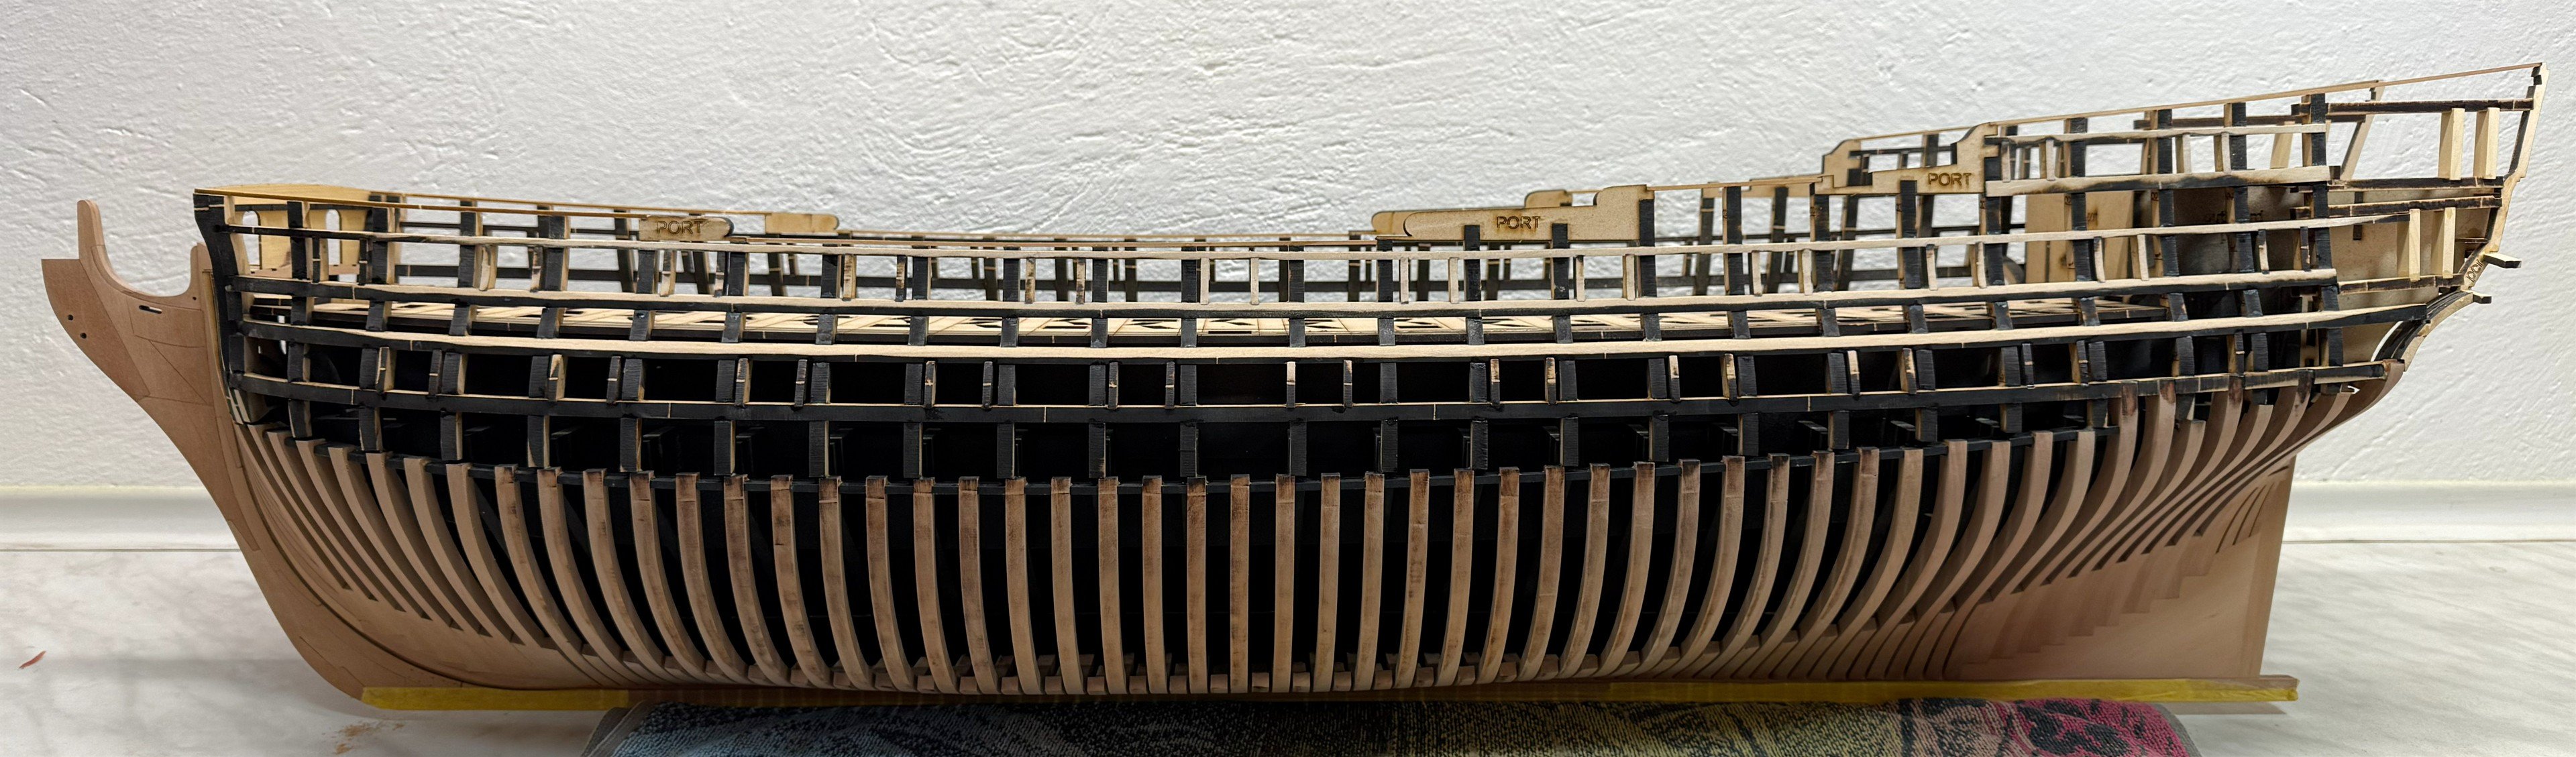
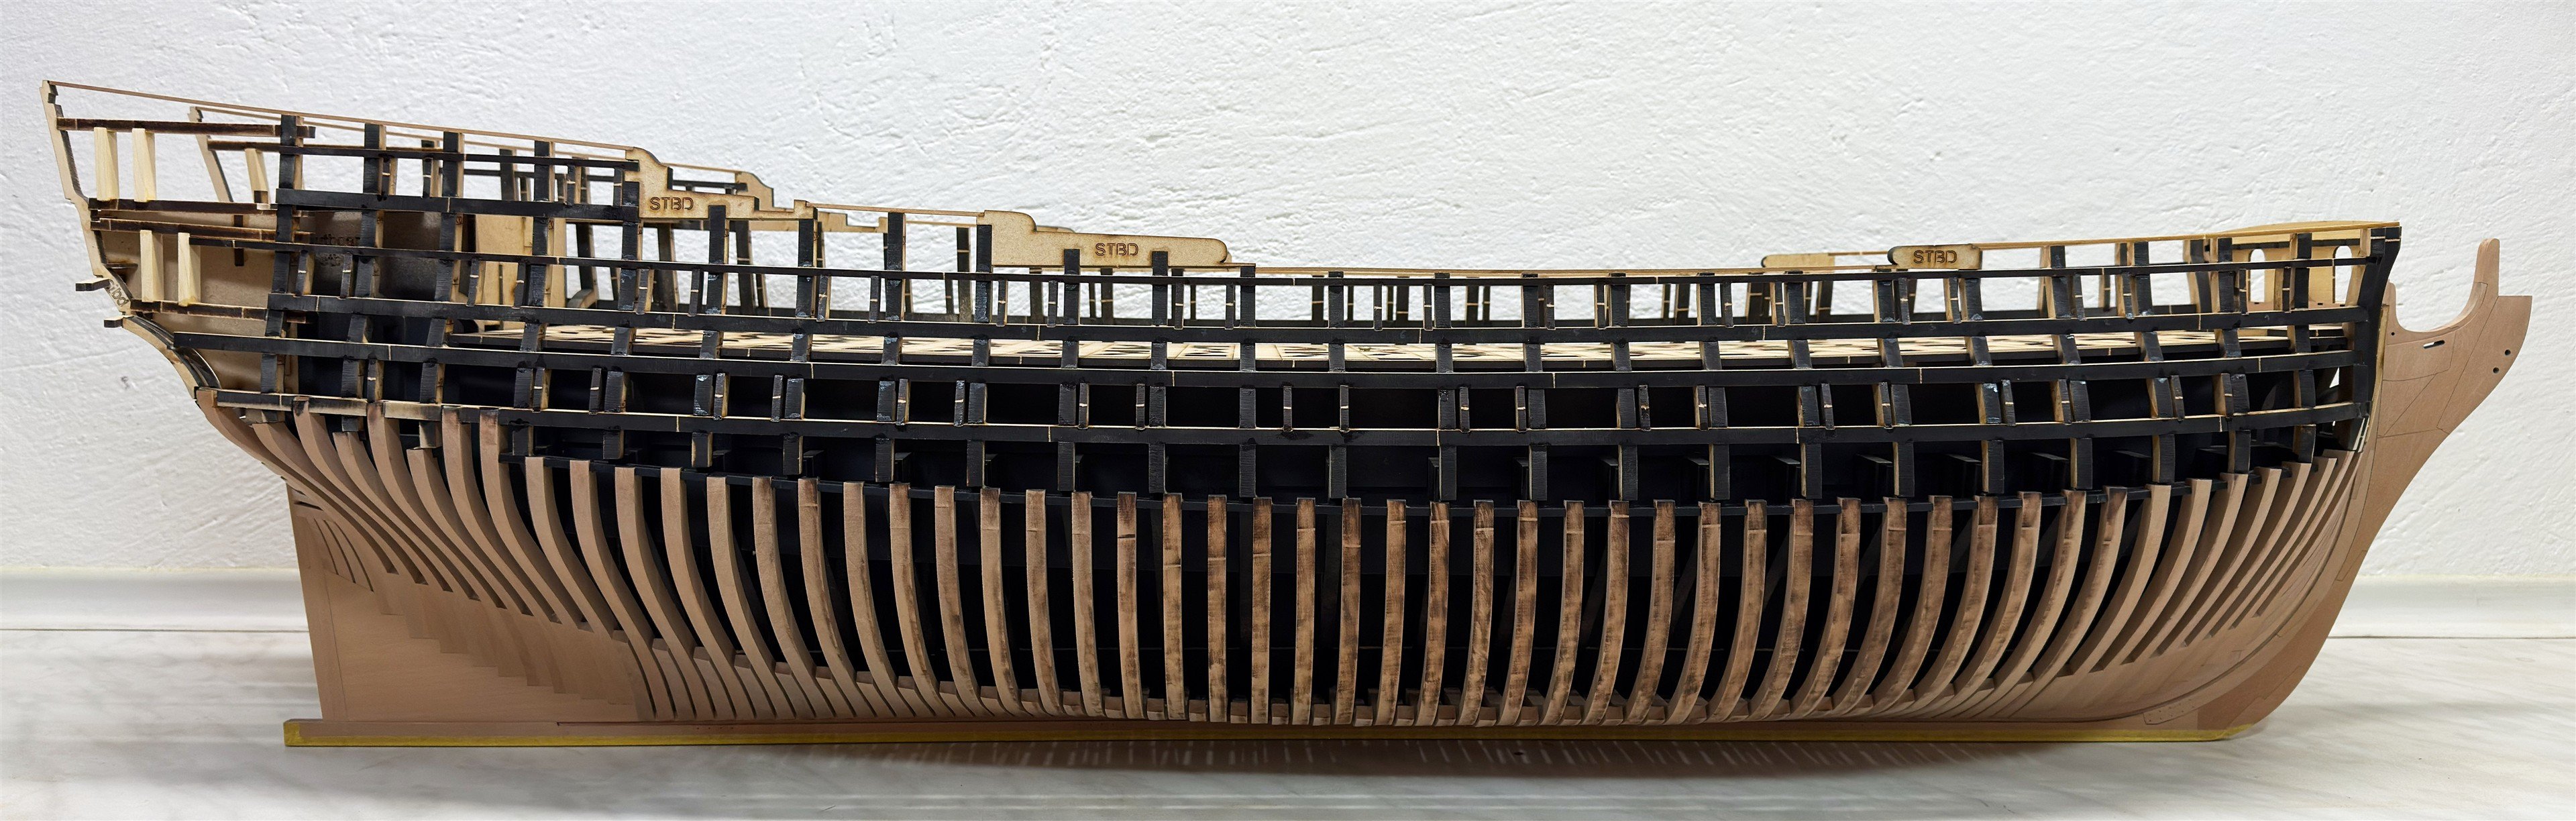
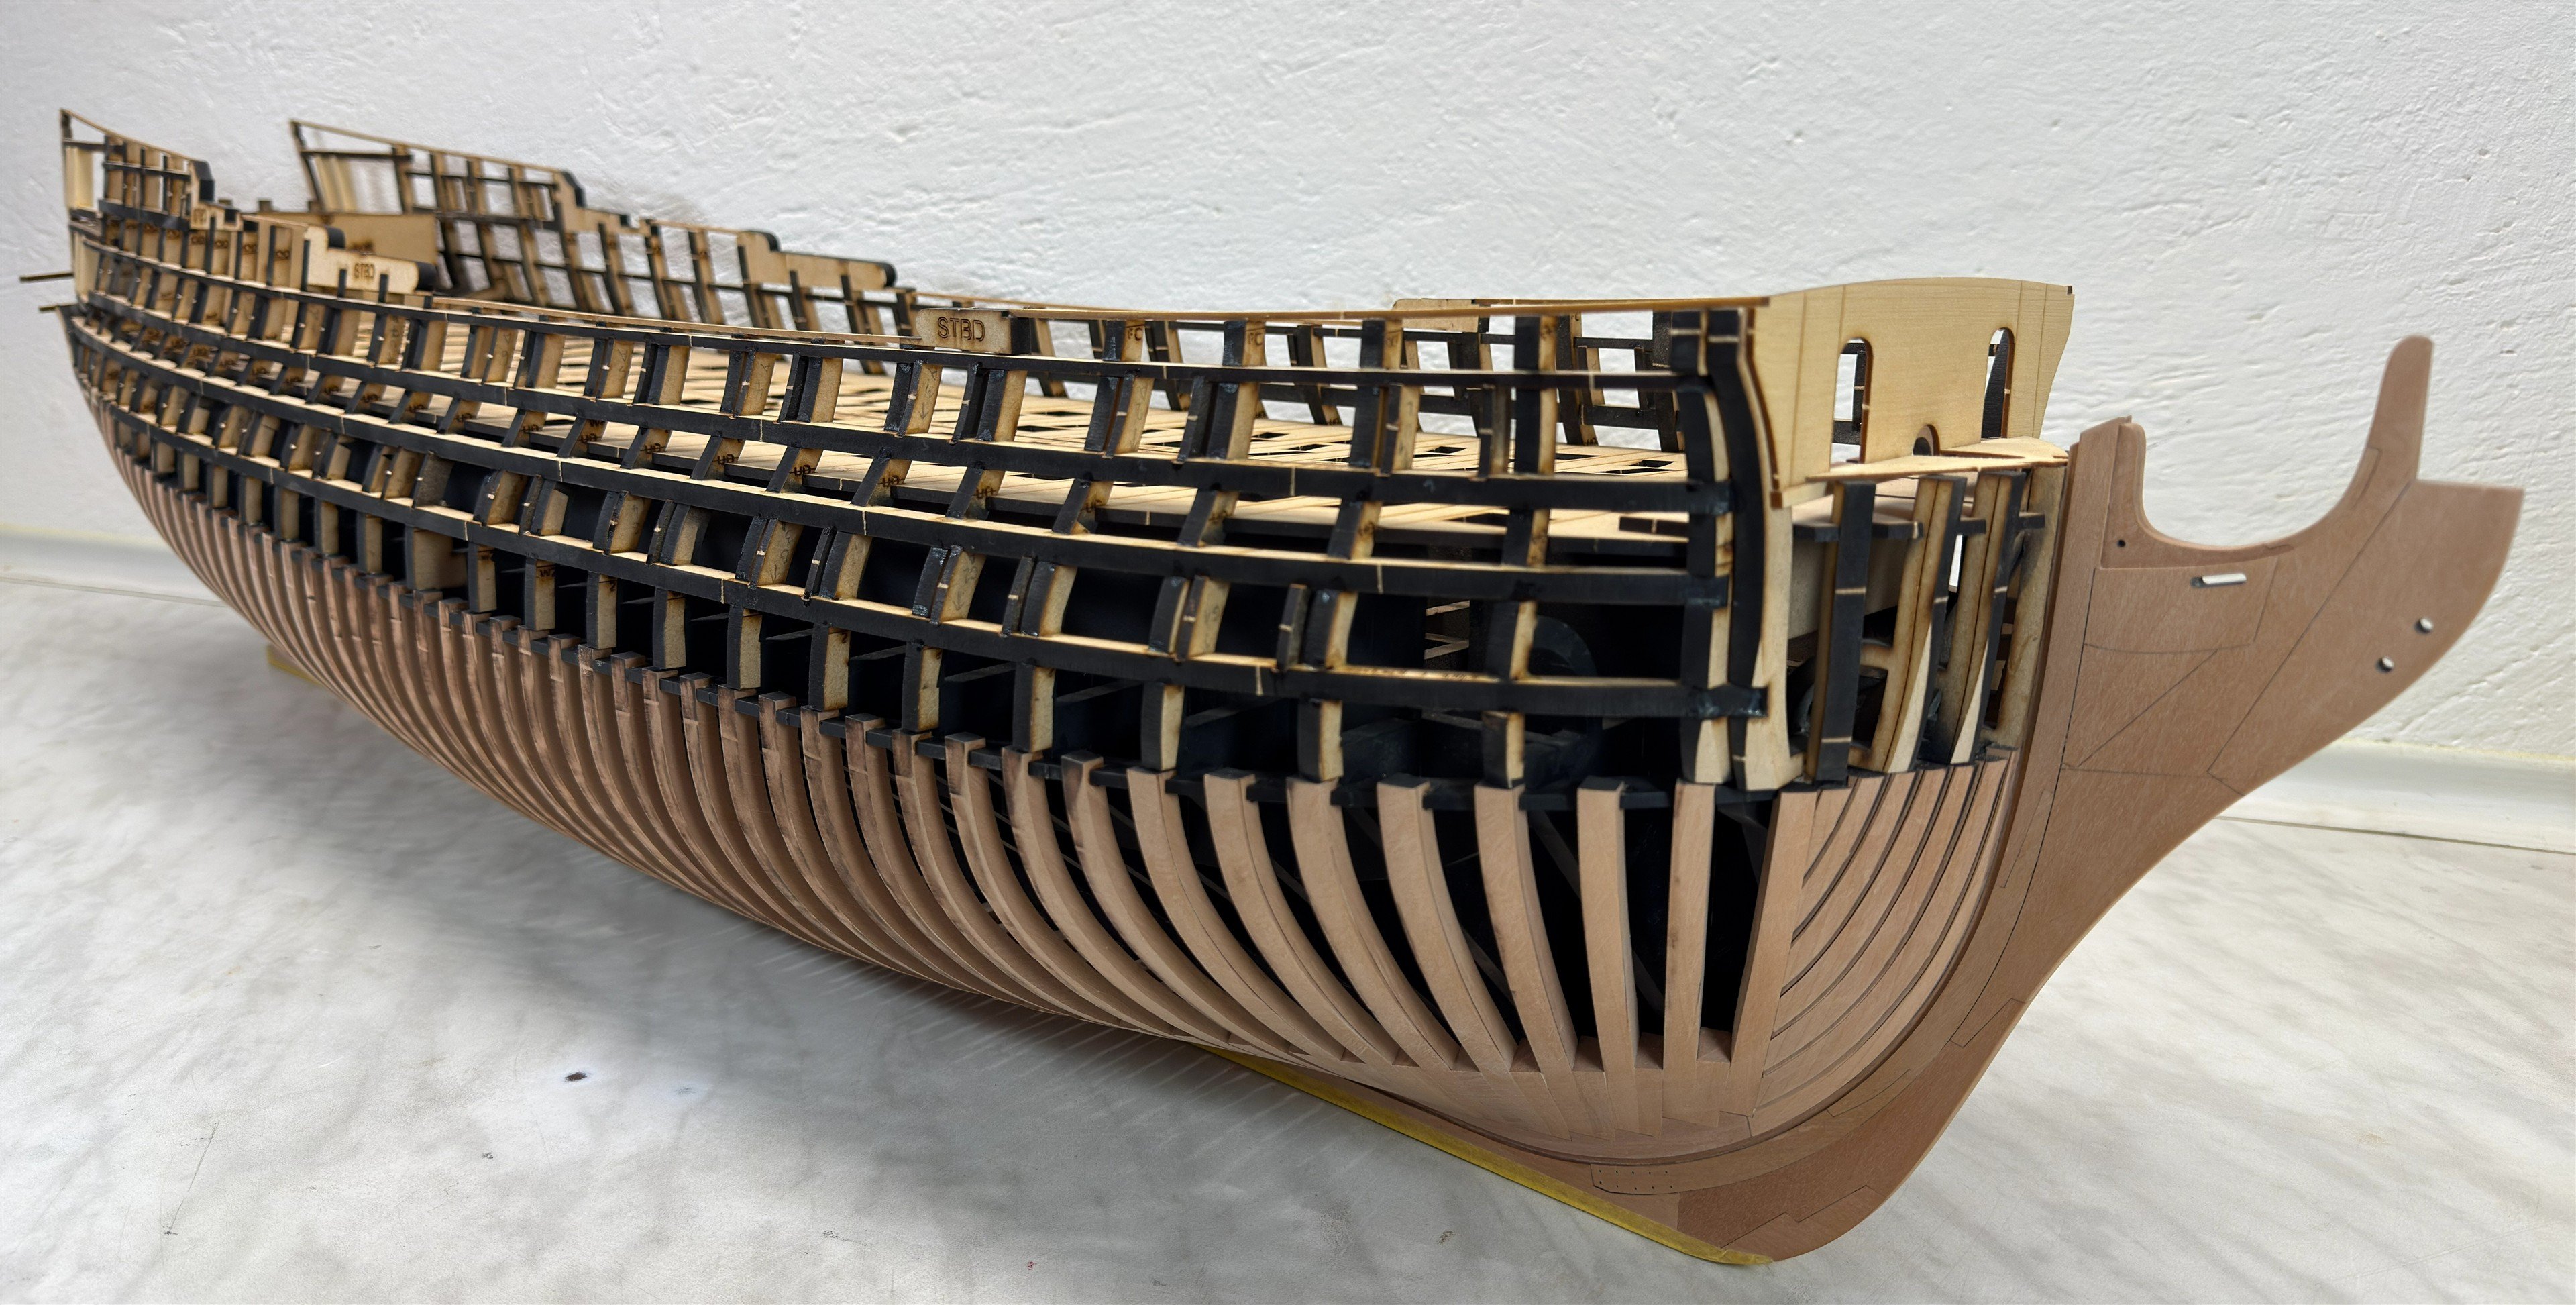
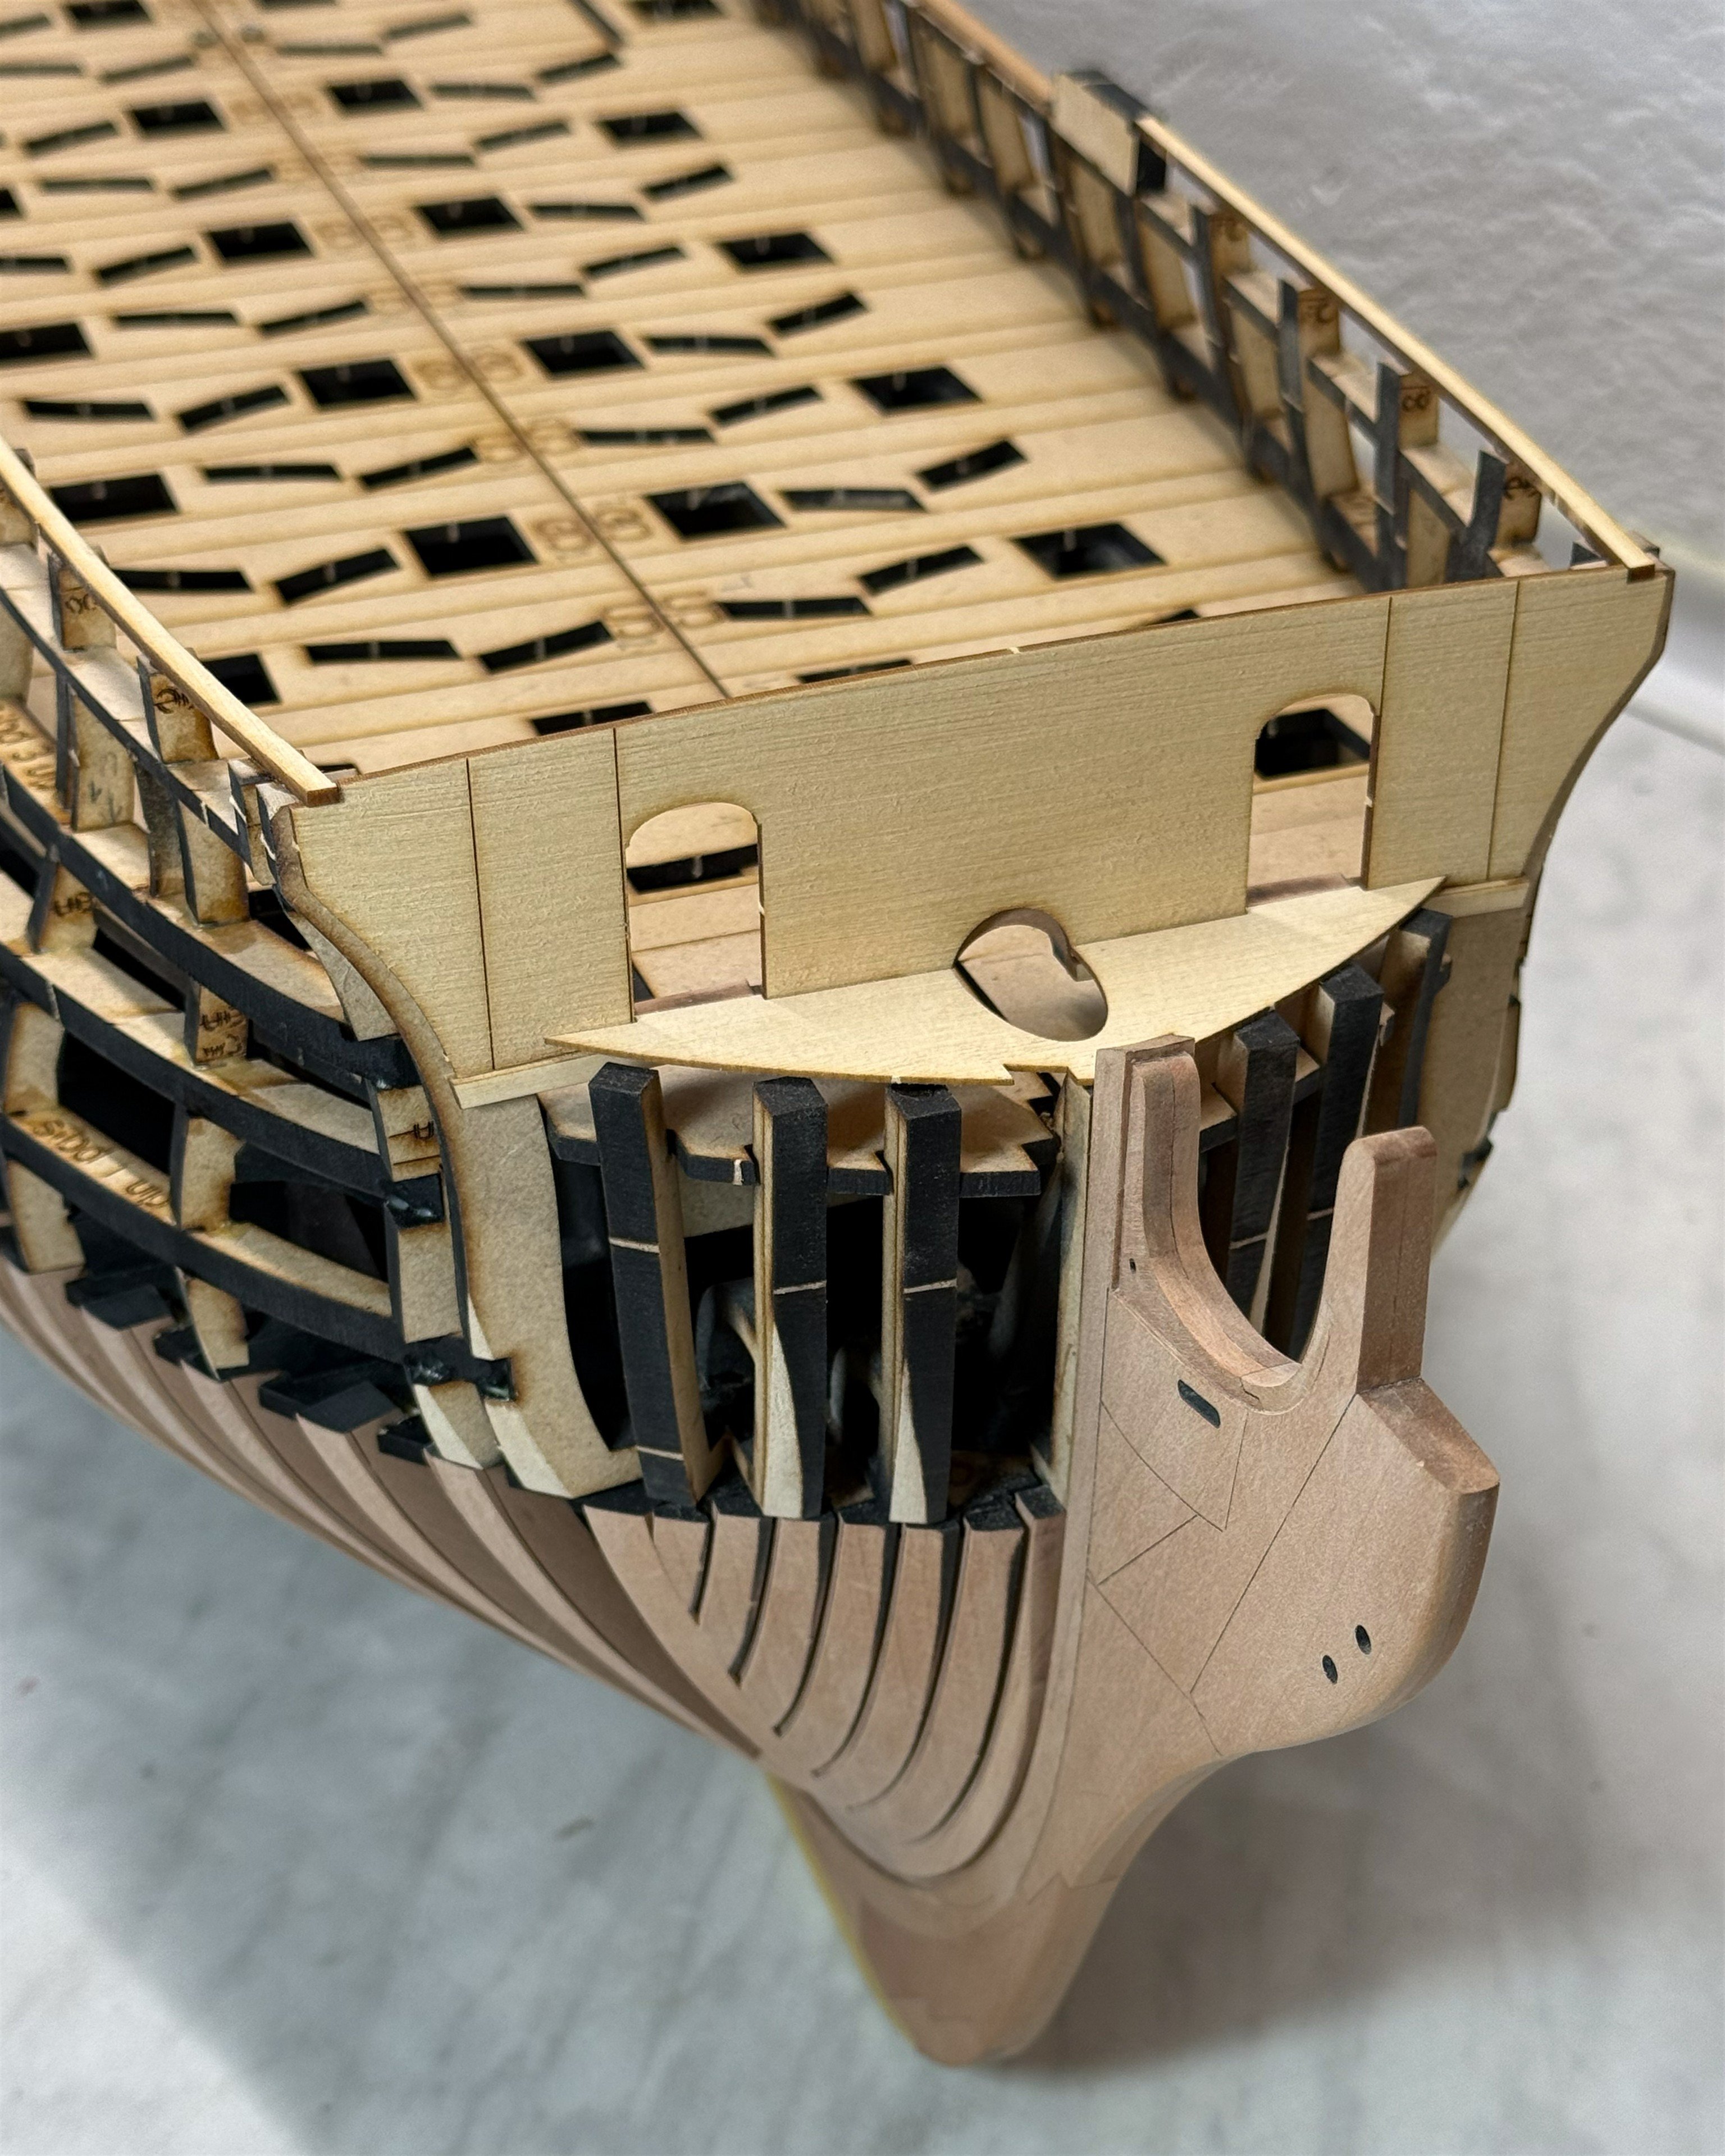
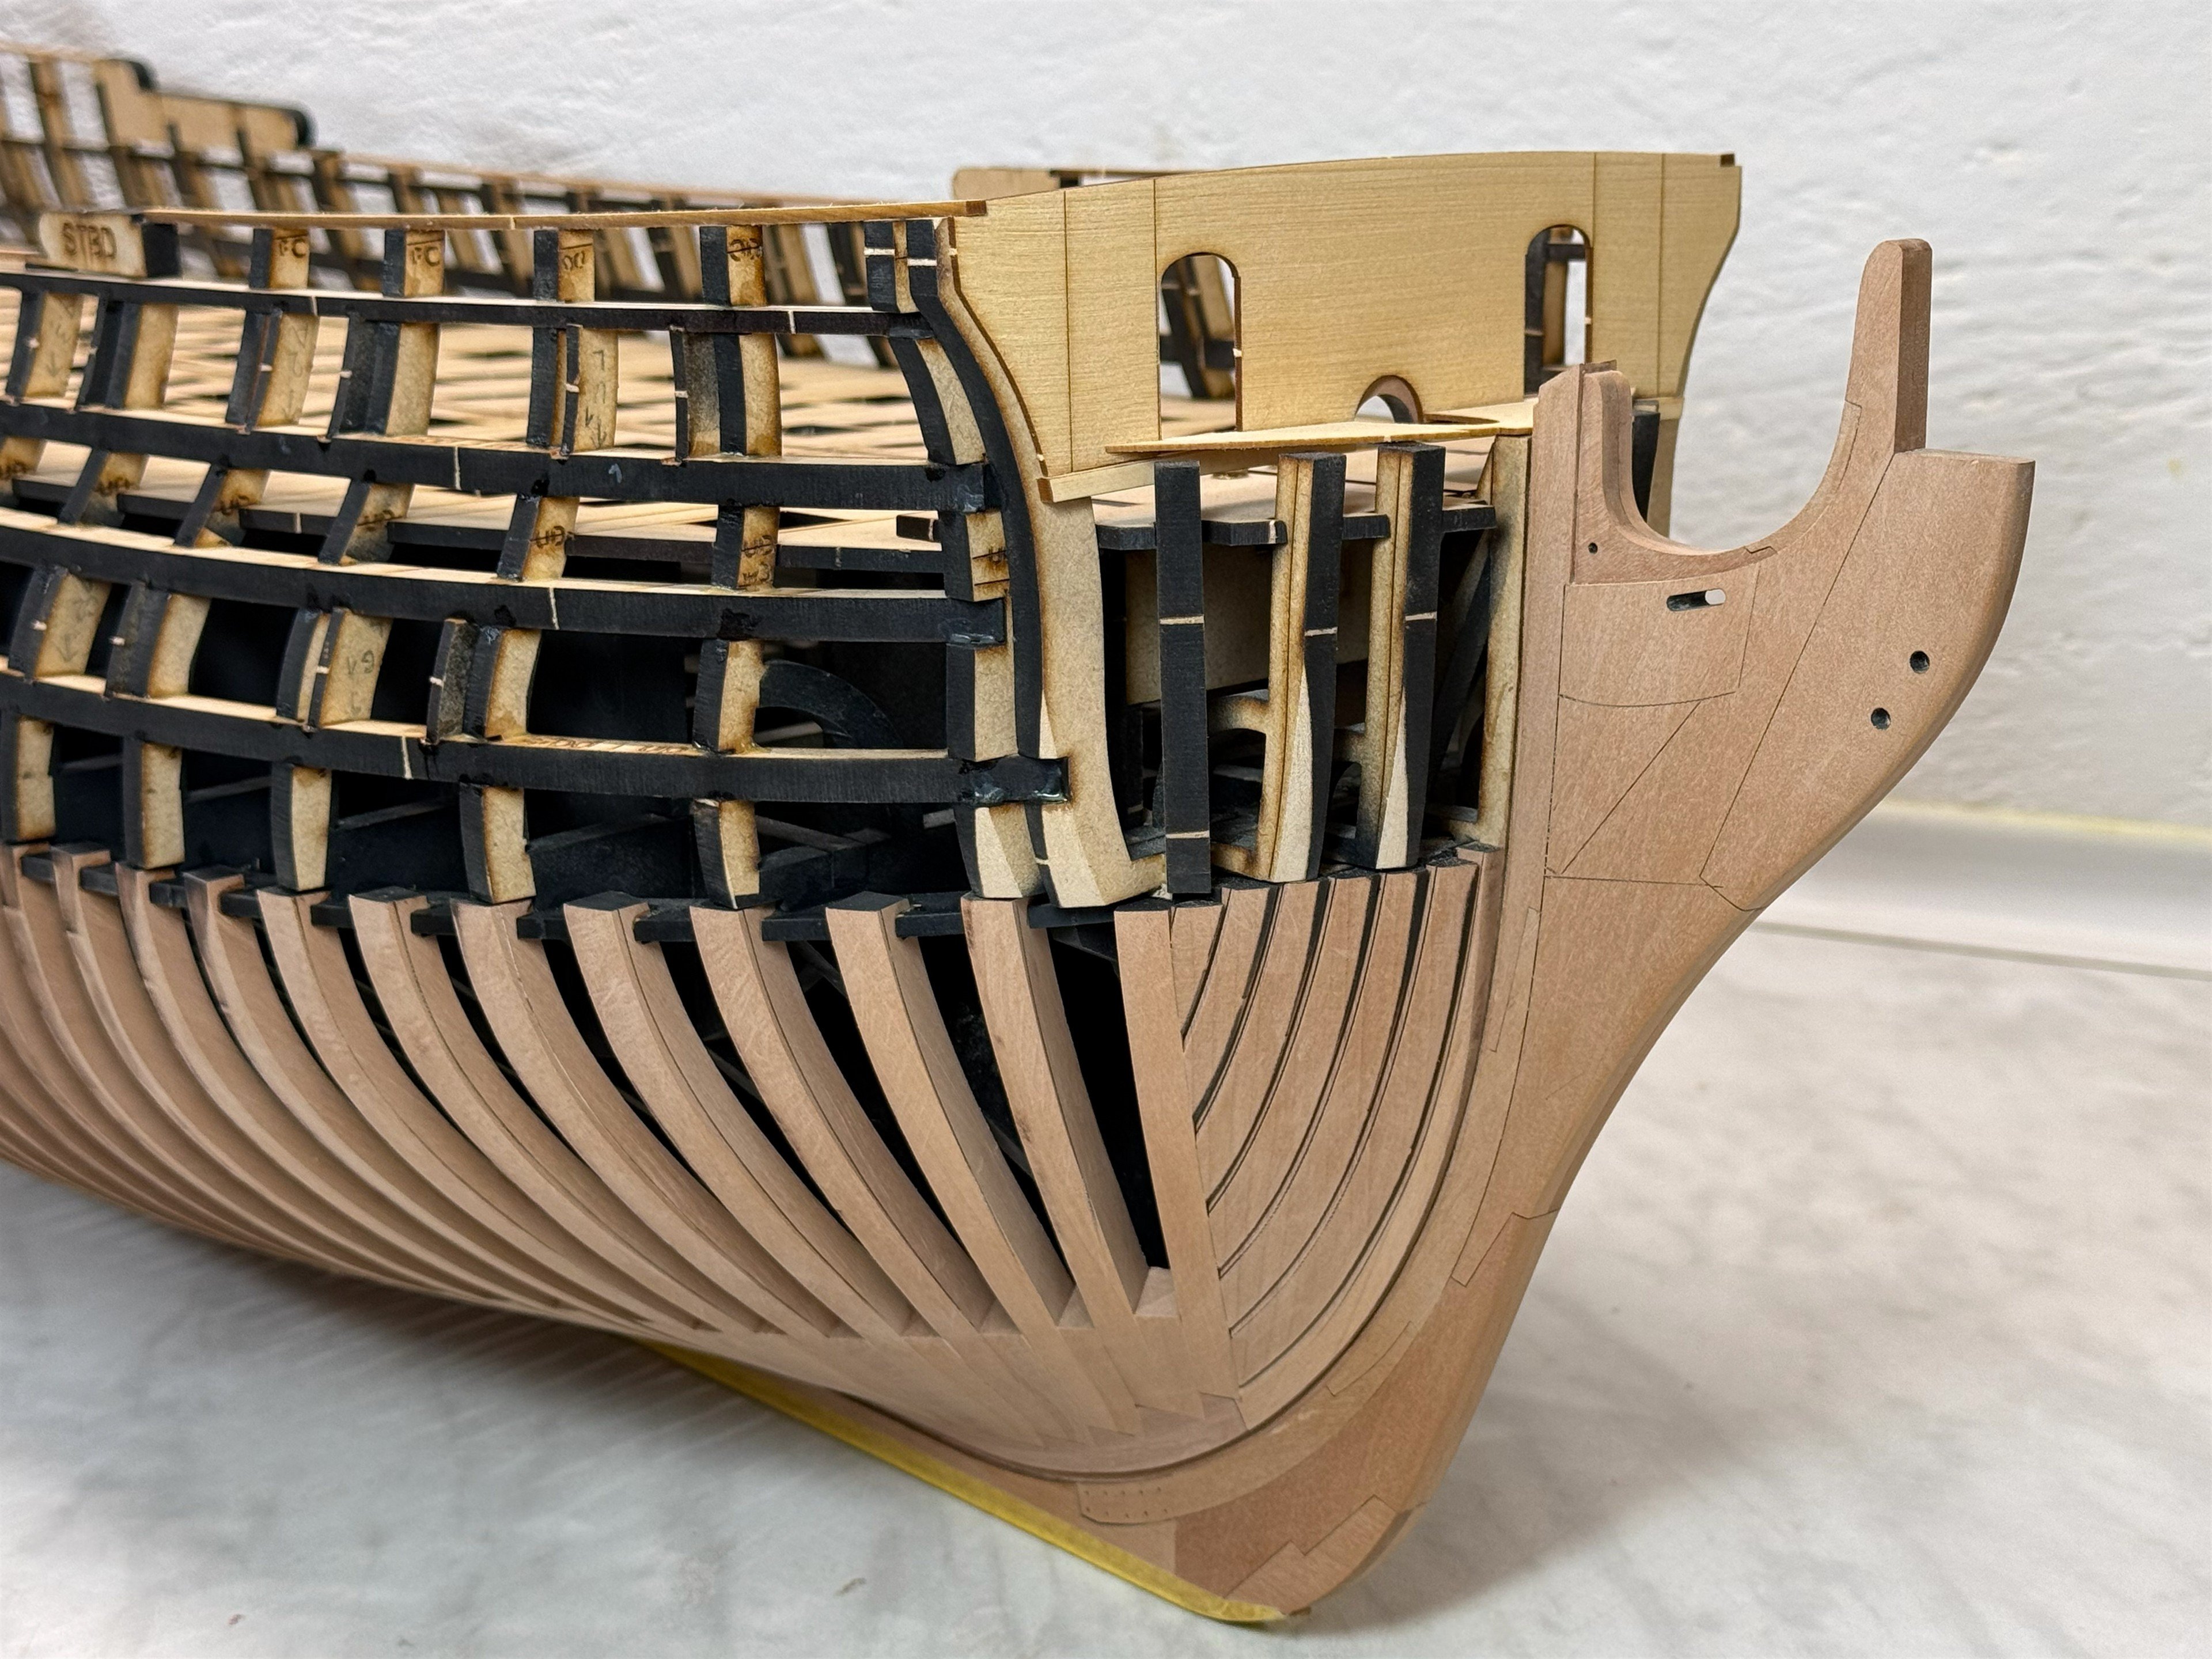
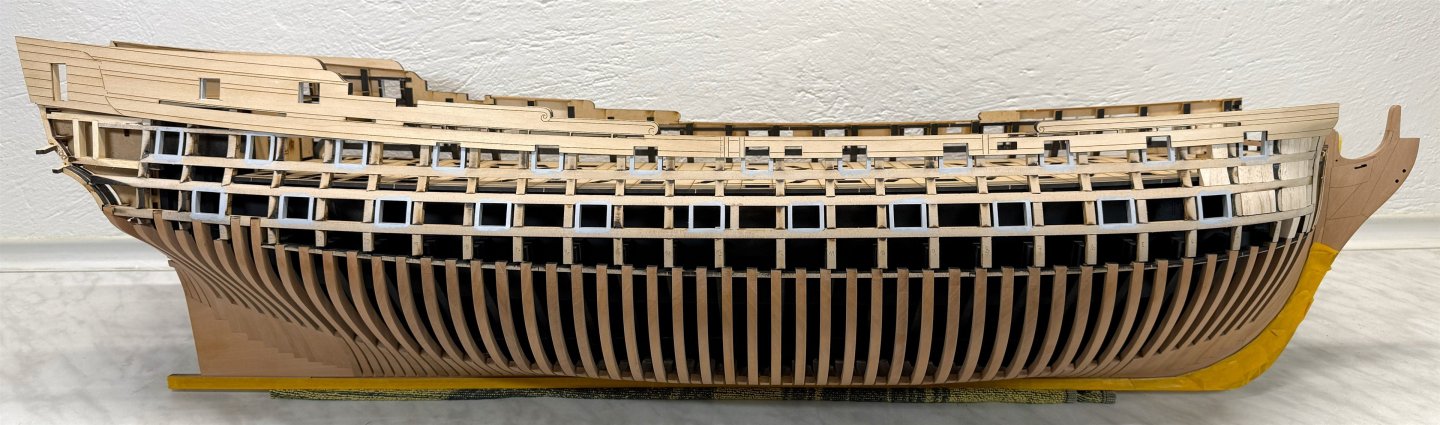
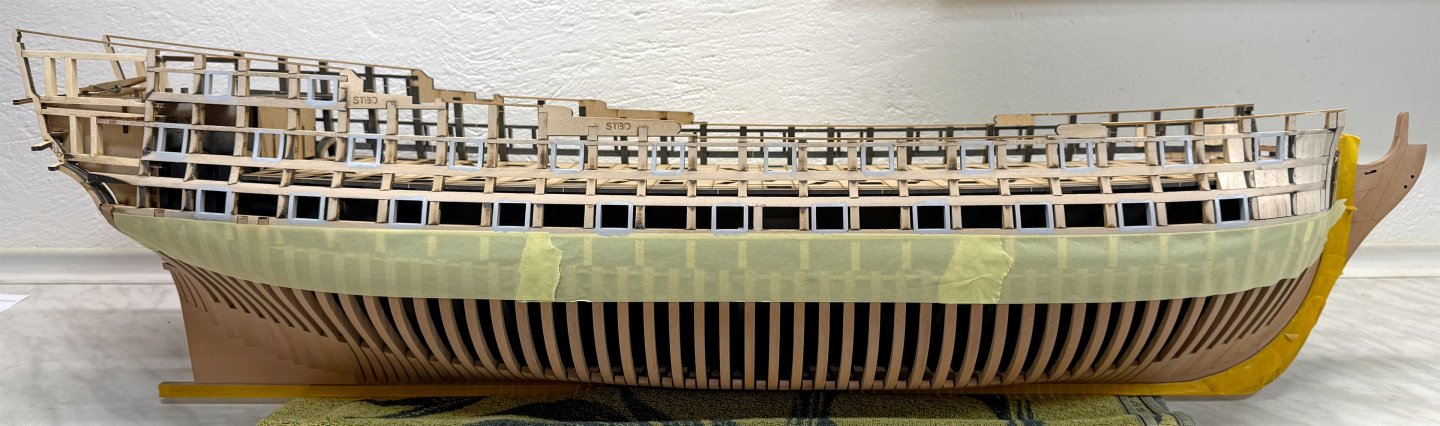
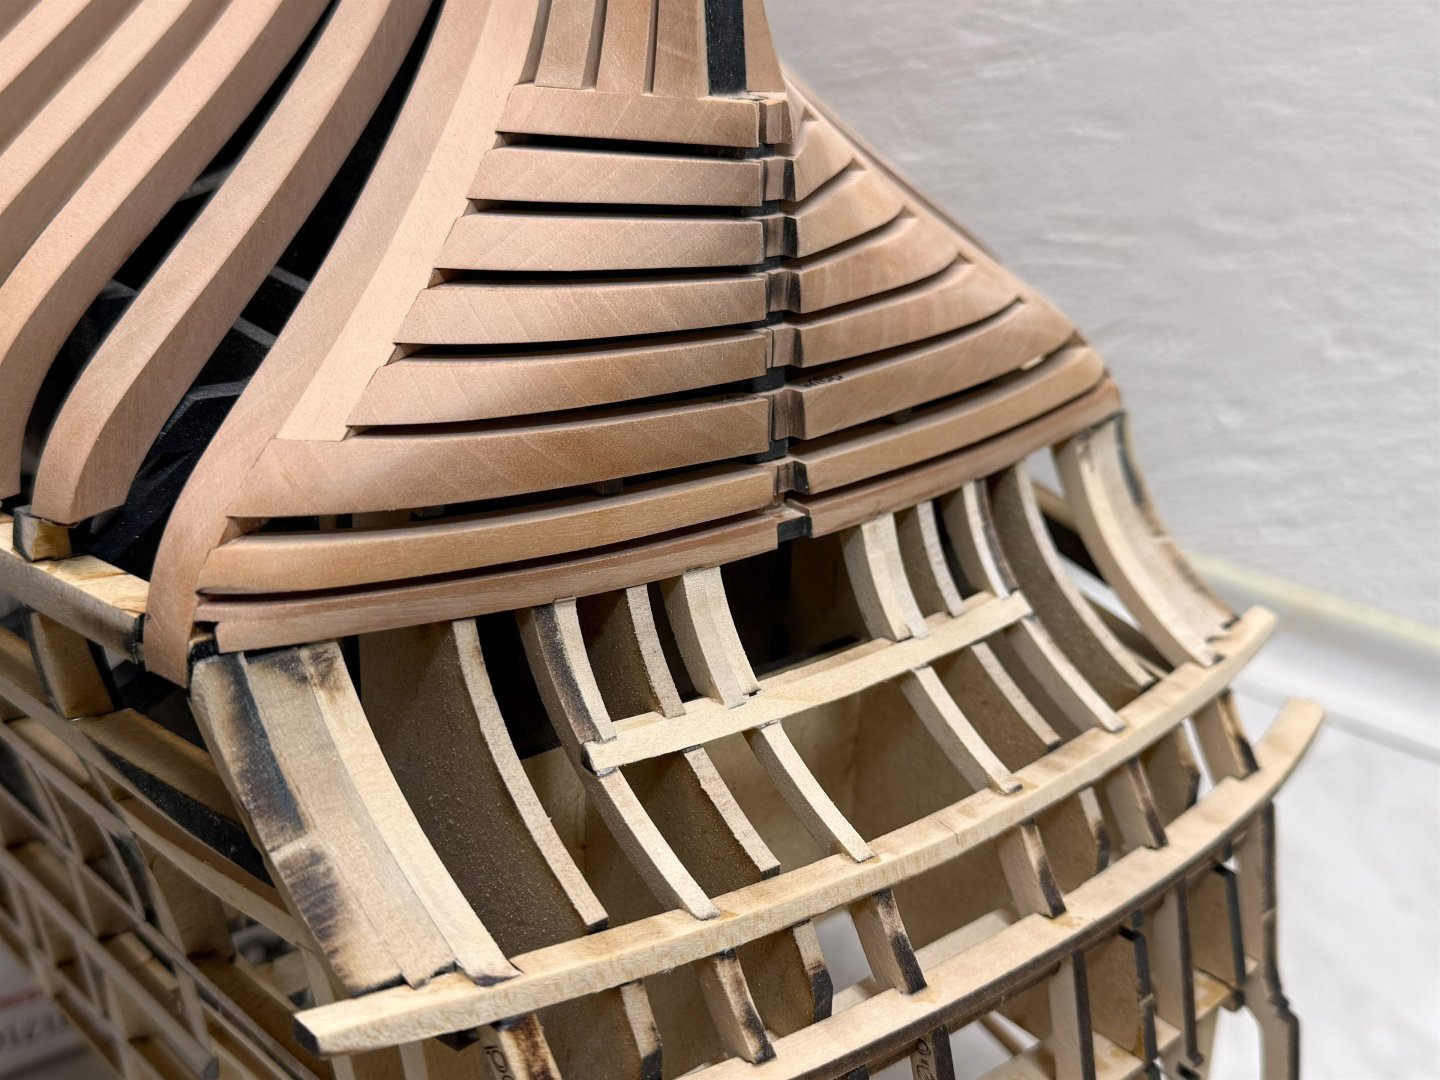
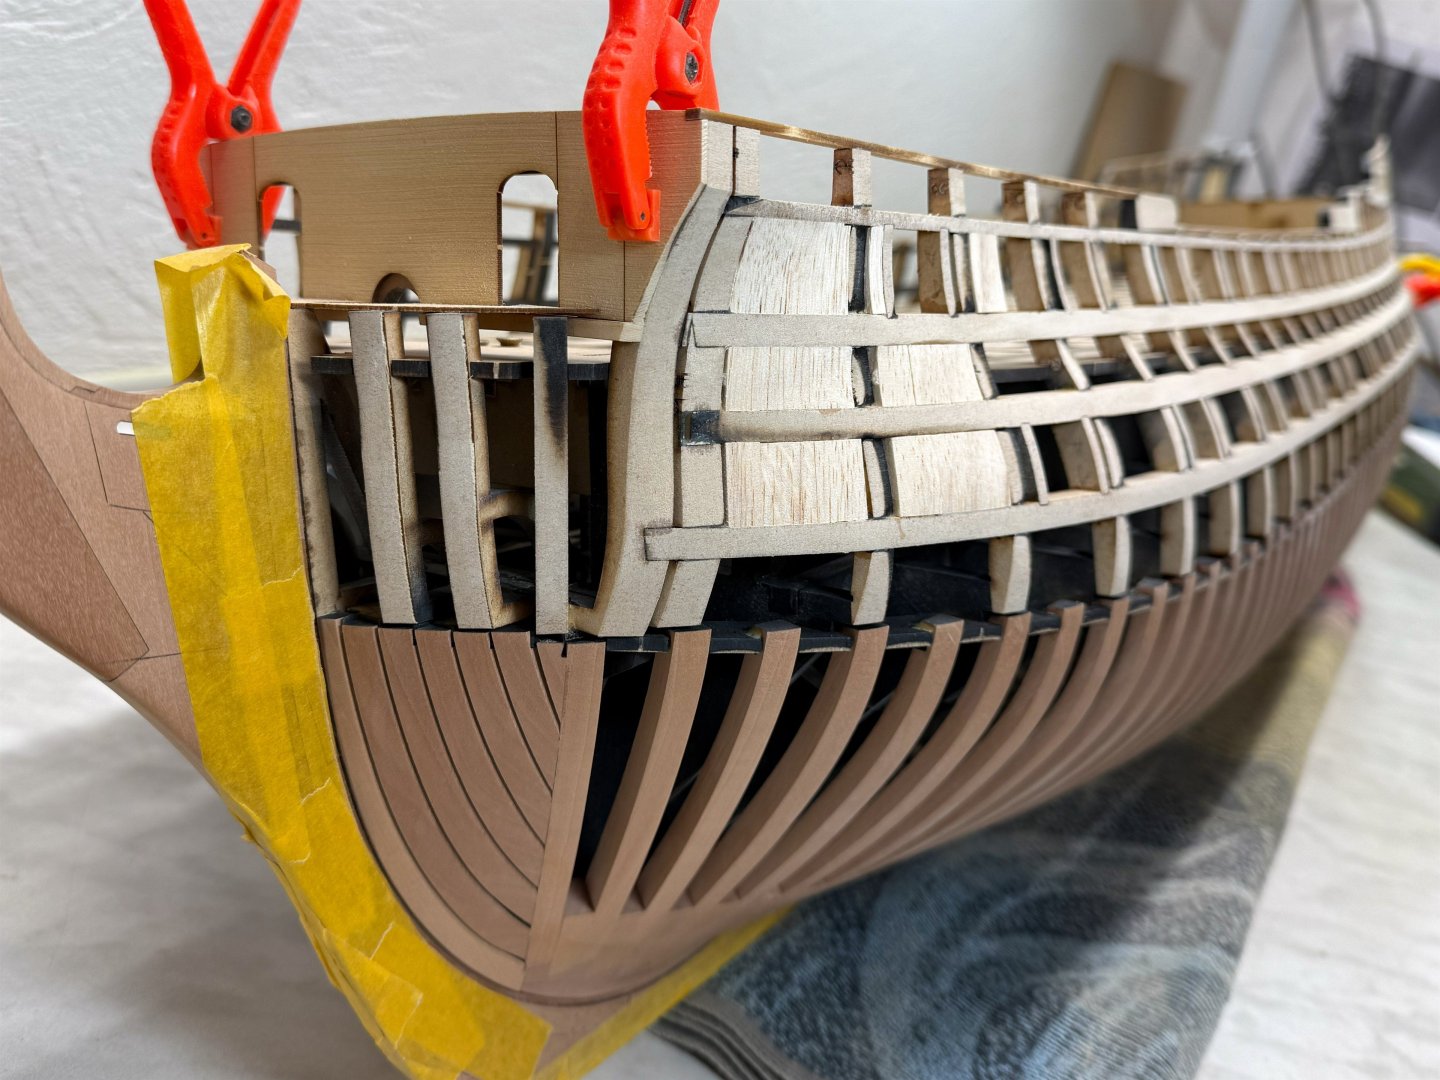
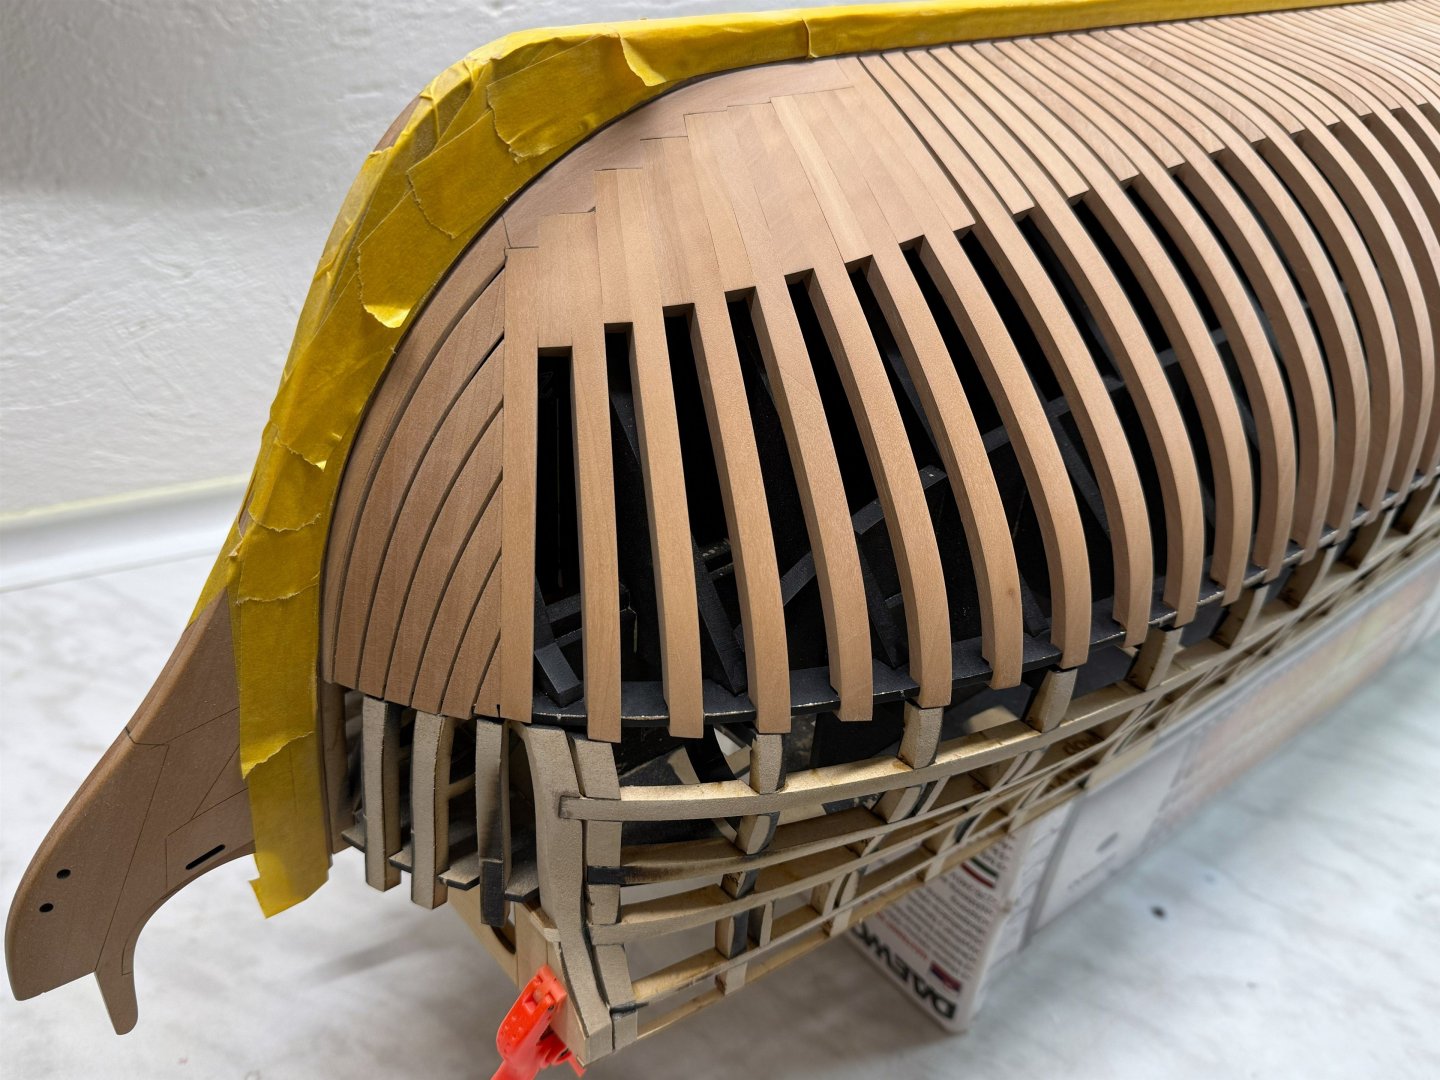
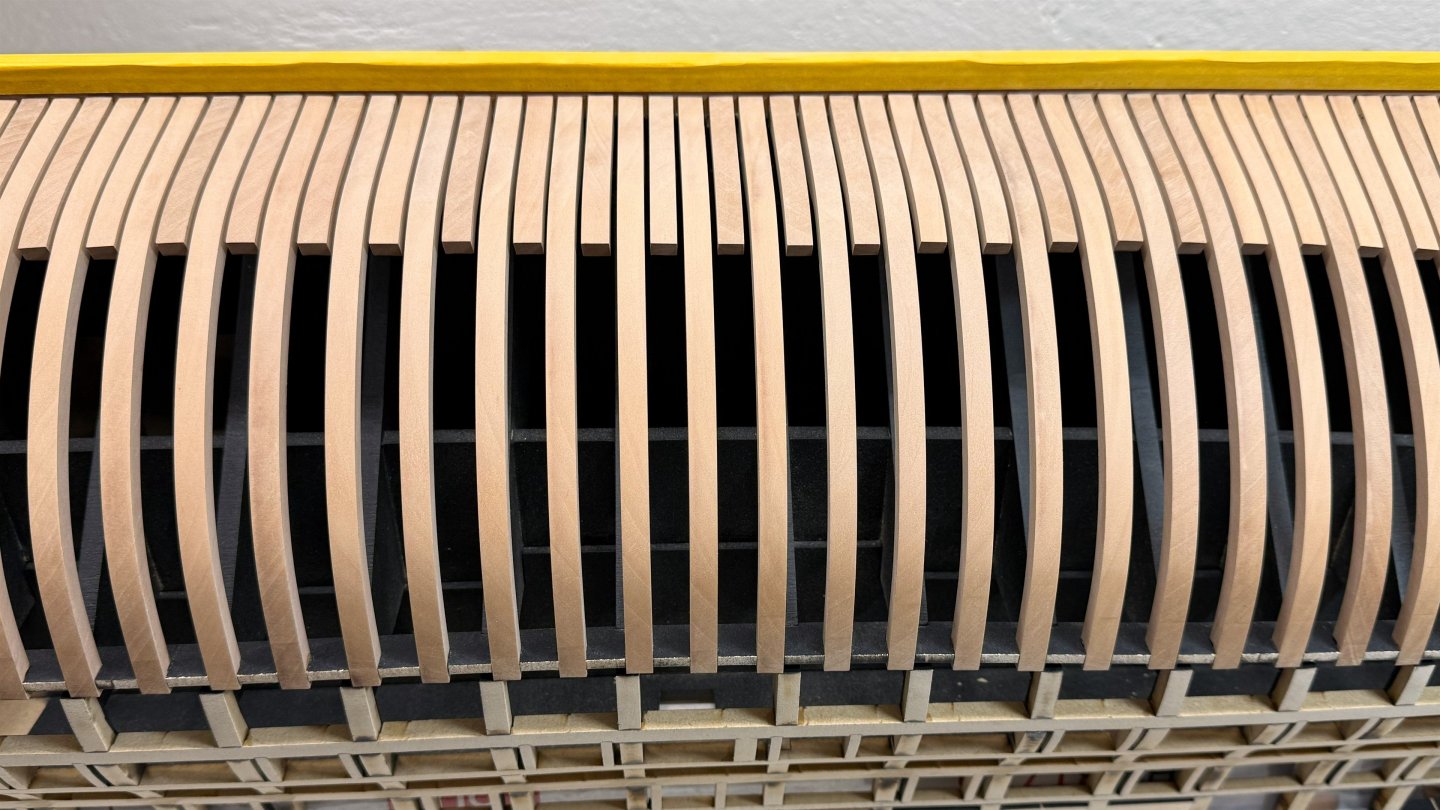
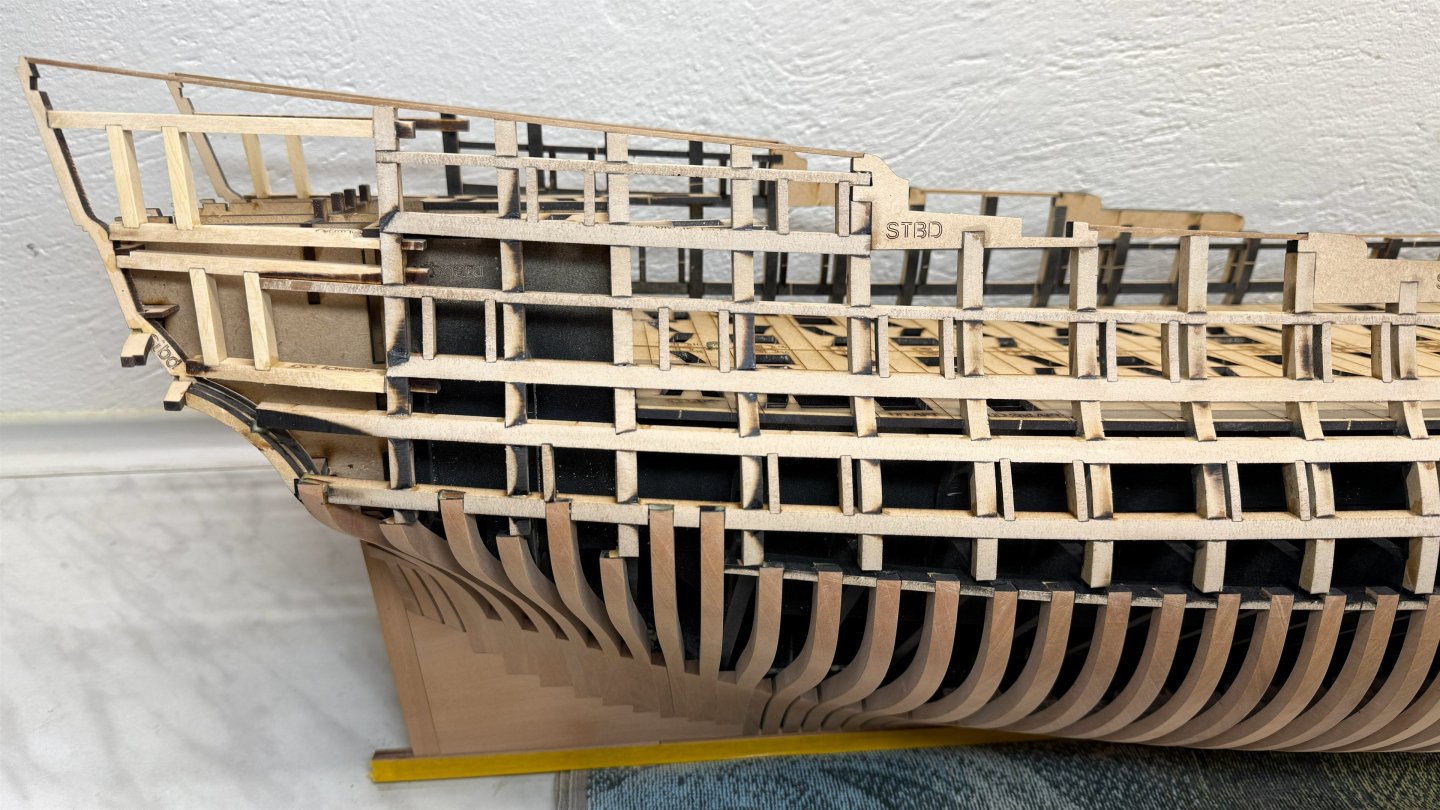
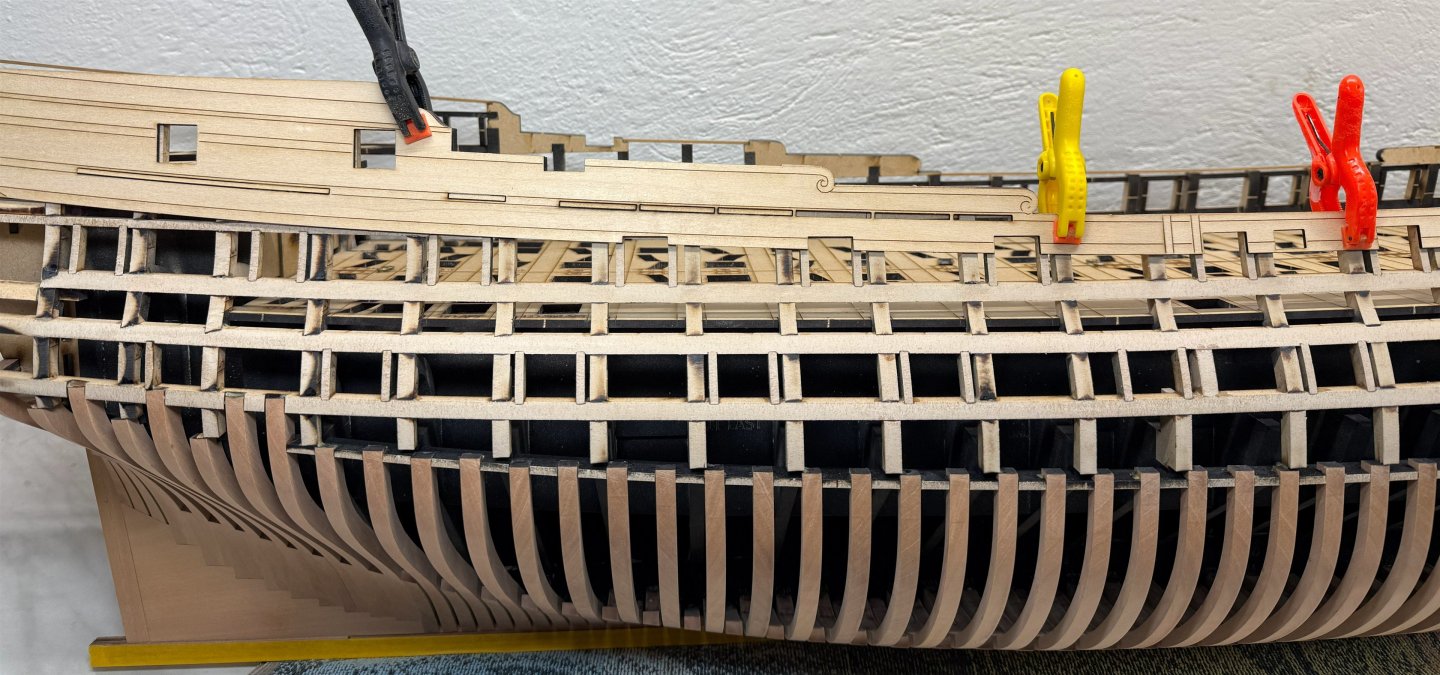
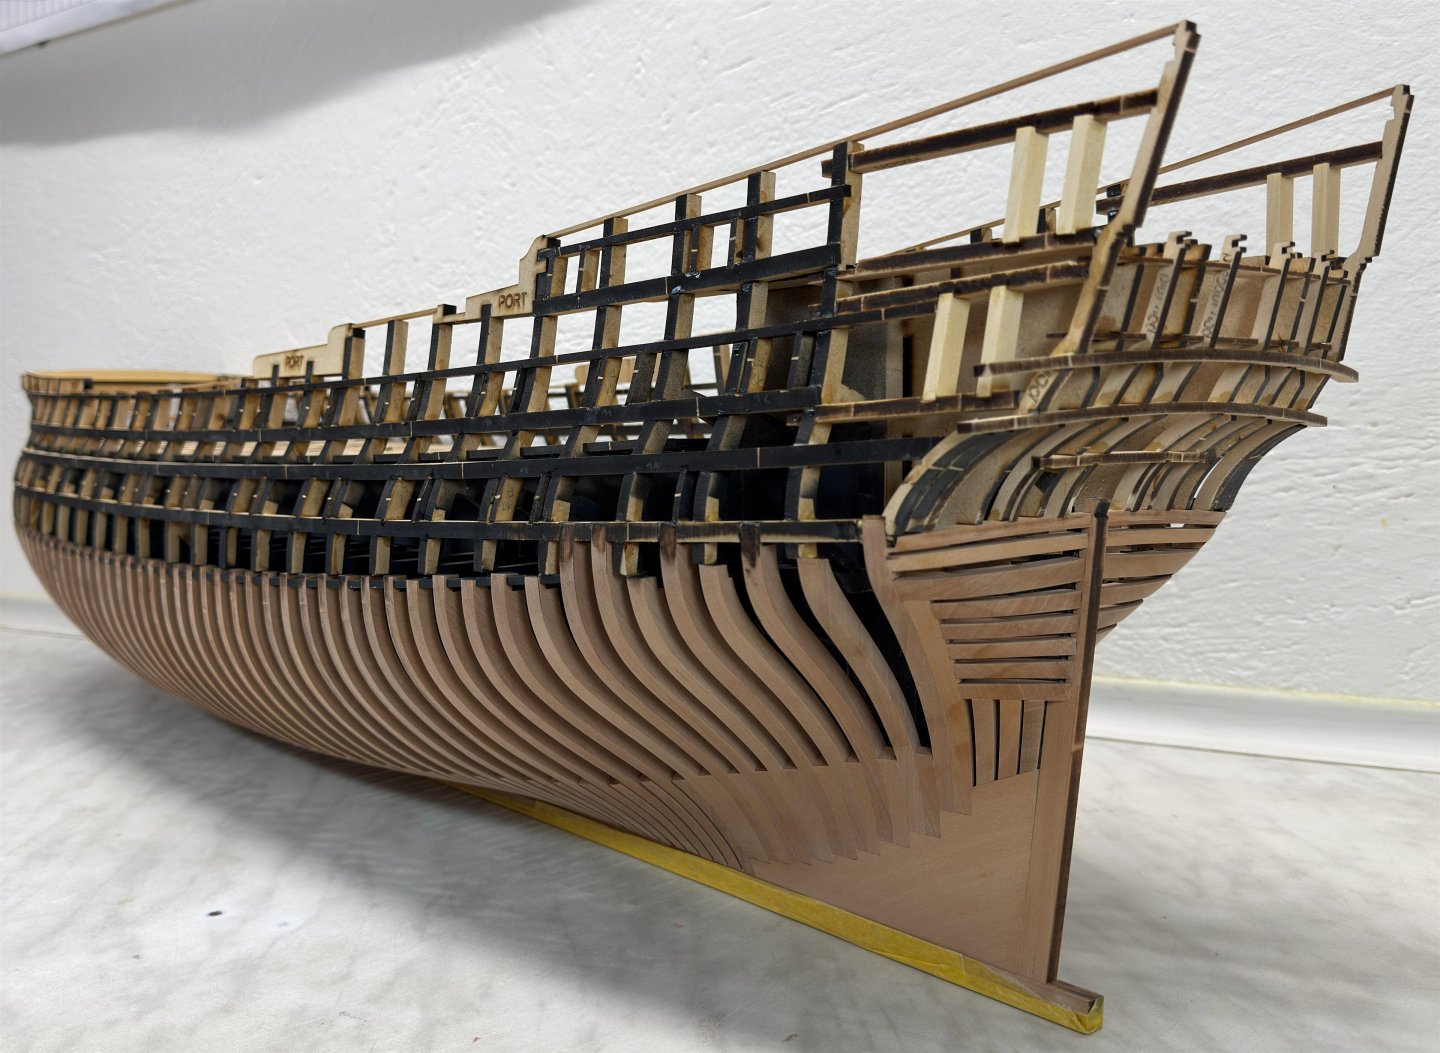
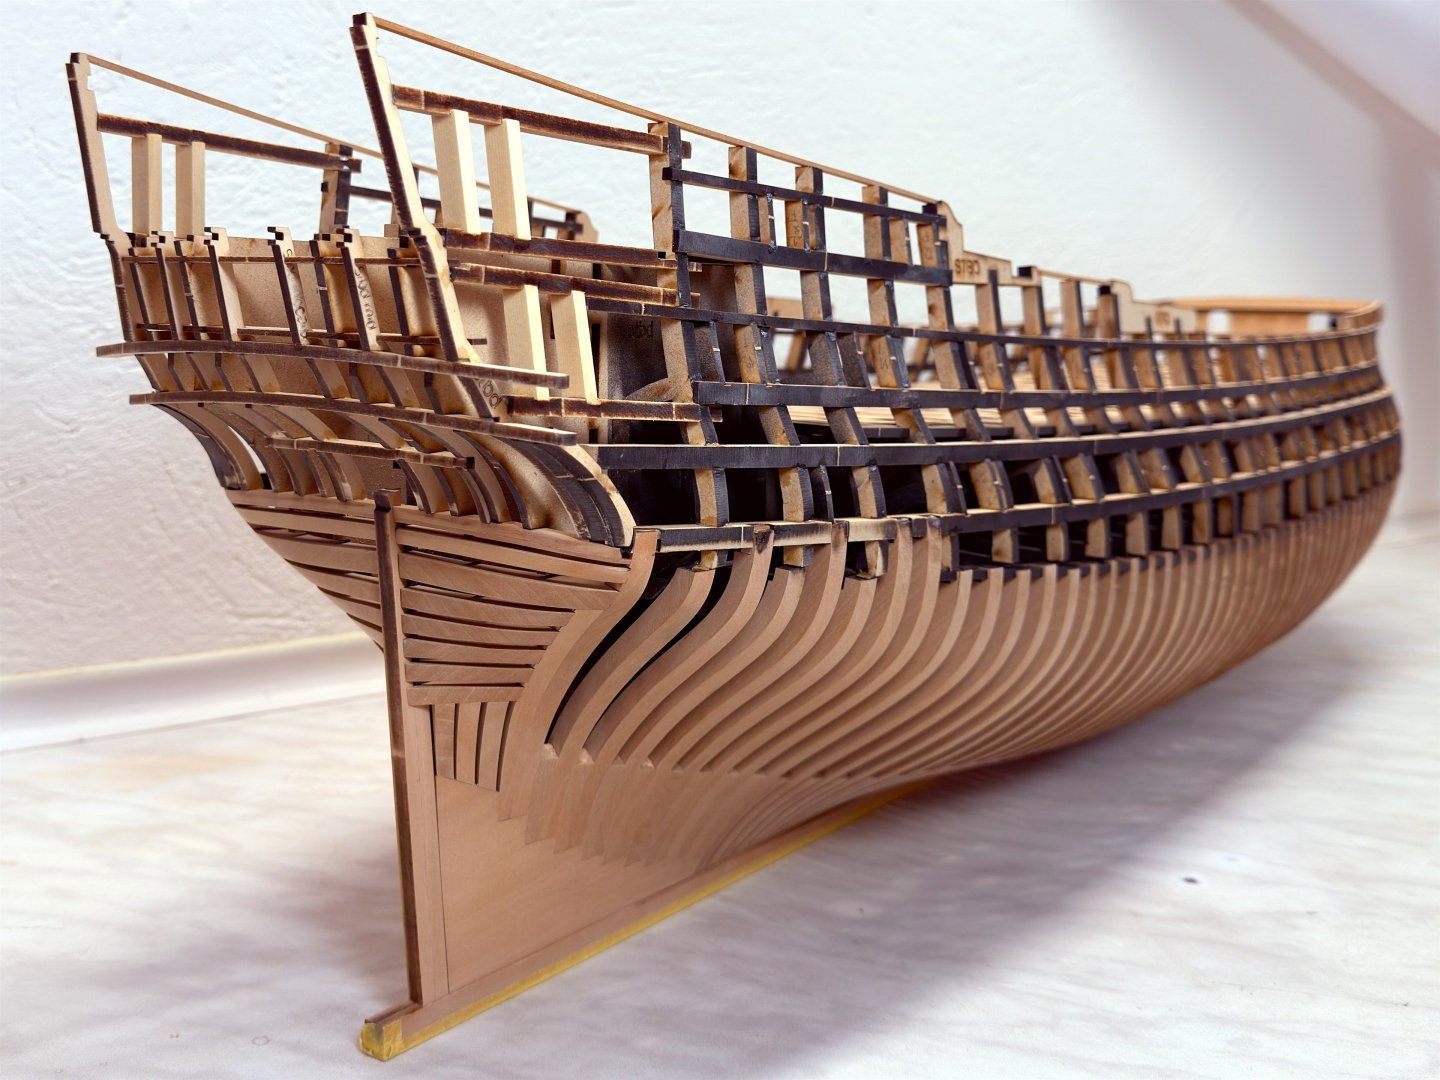
Hey guys, it took a lot of sanding, but I think it's almost finished, just a little fine-tuning of the bow frames. So here is the hull fairing on the starboard side and the test of the frieze panels.


-
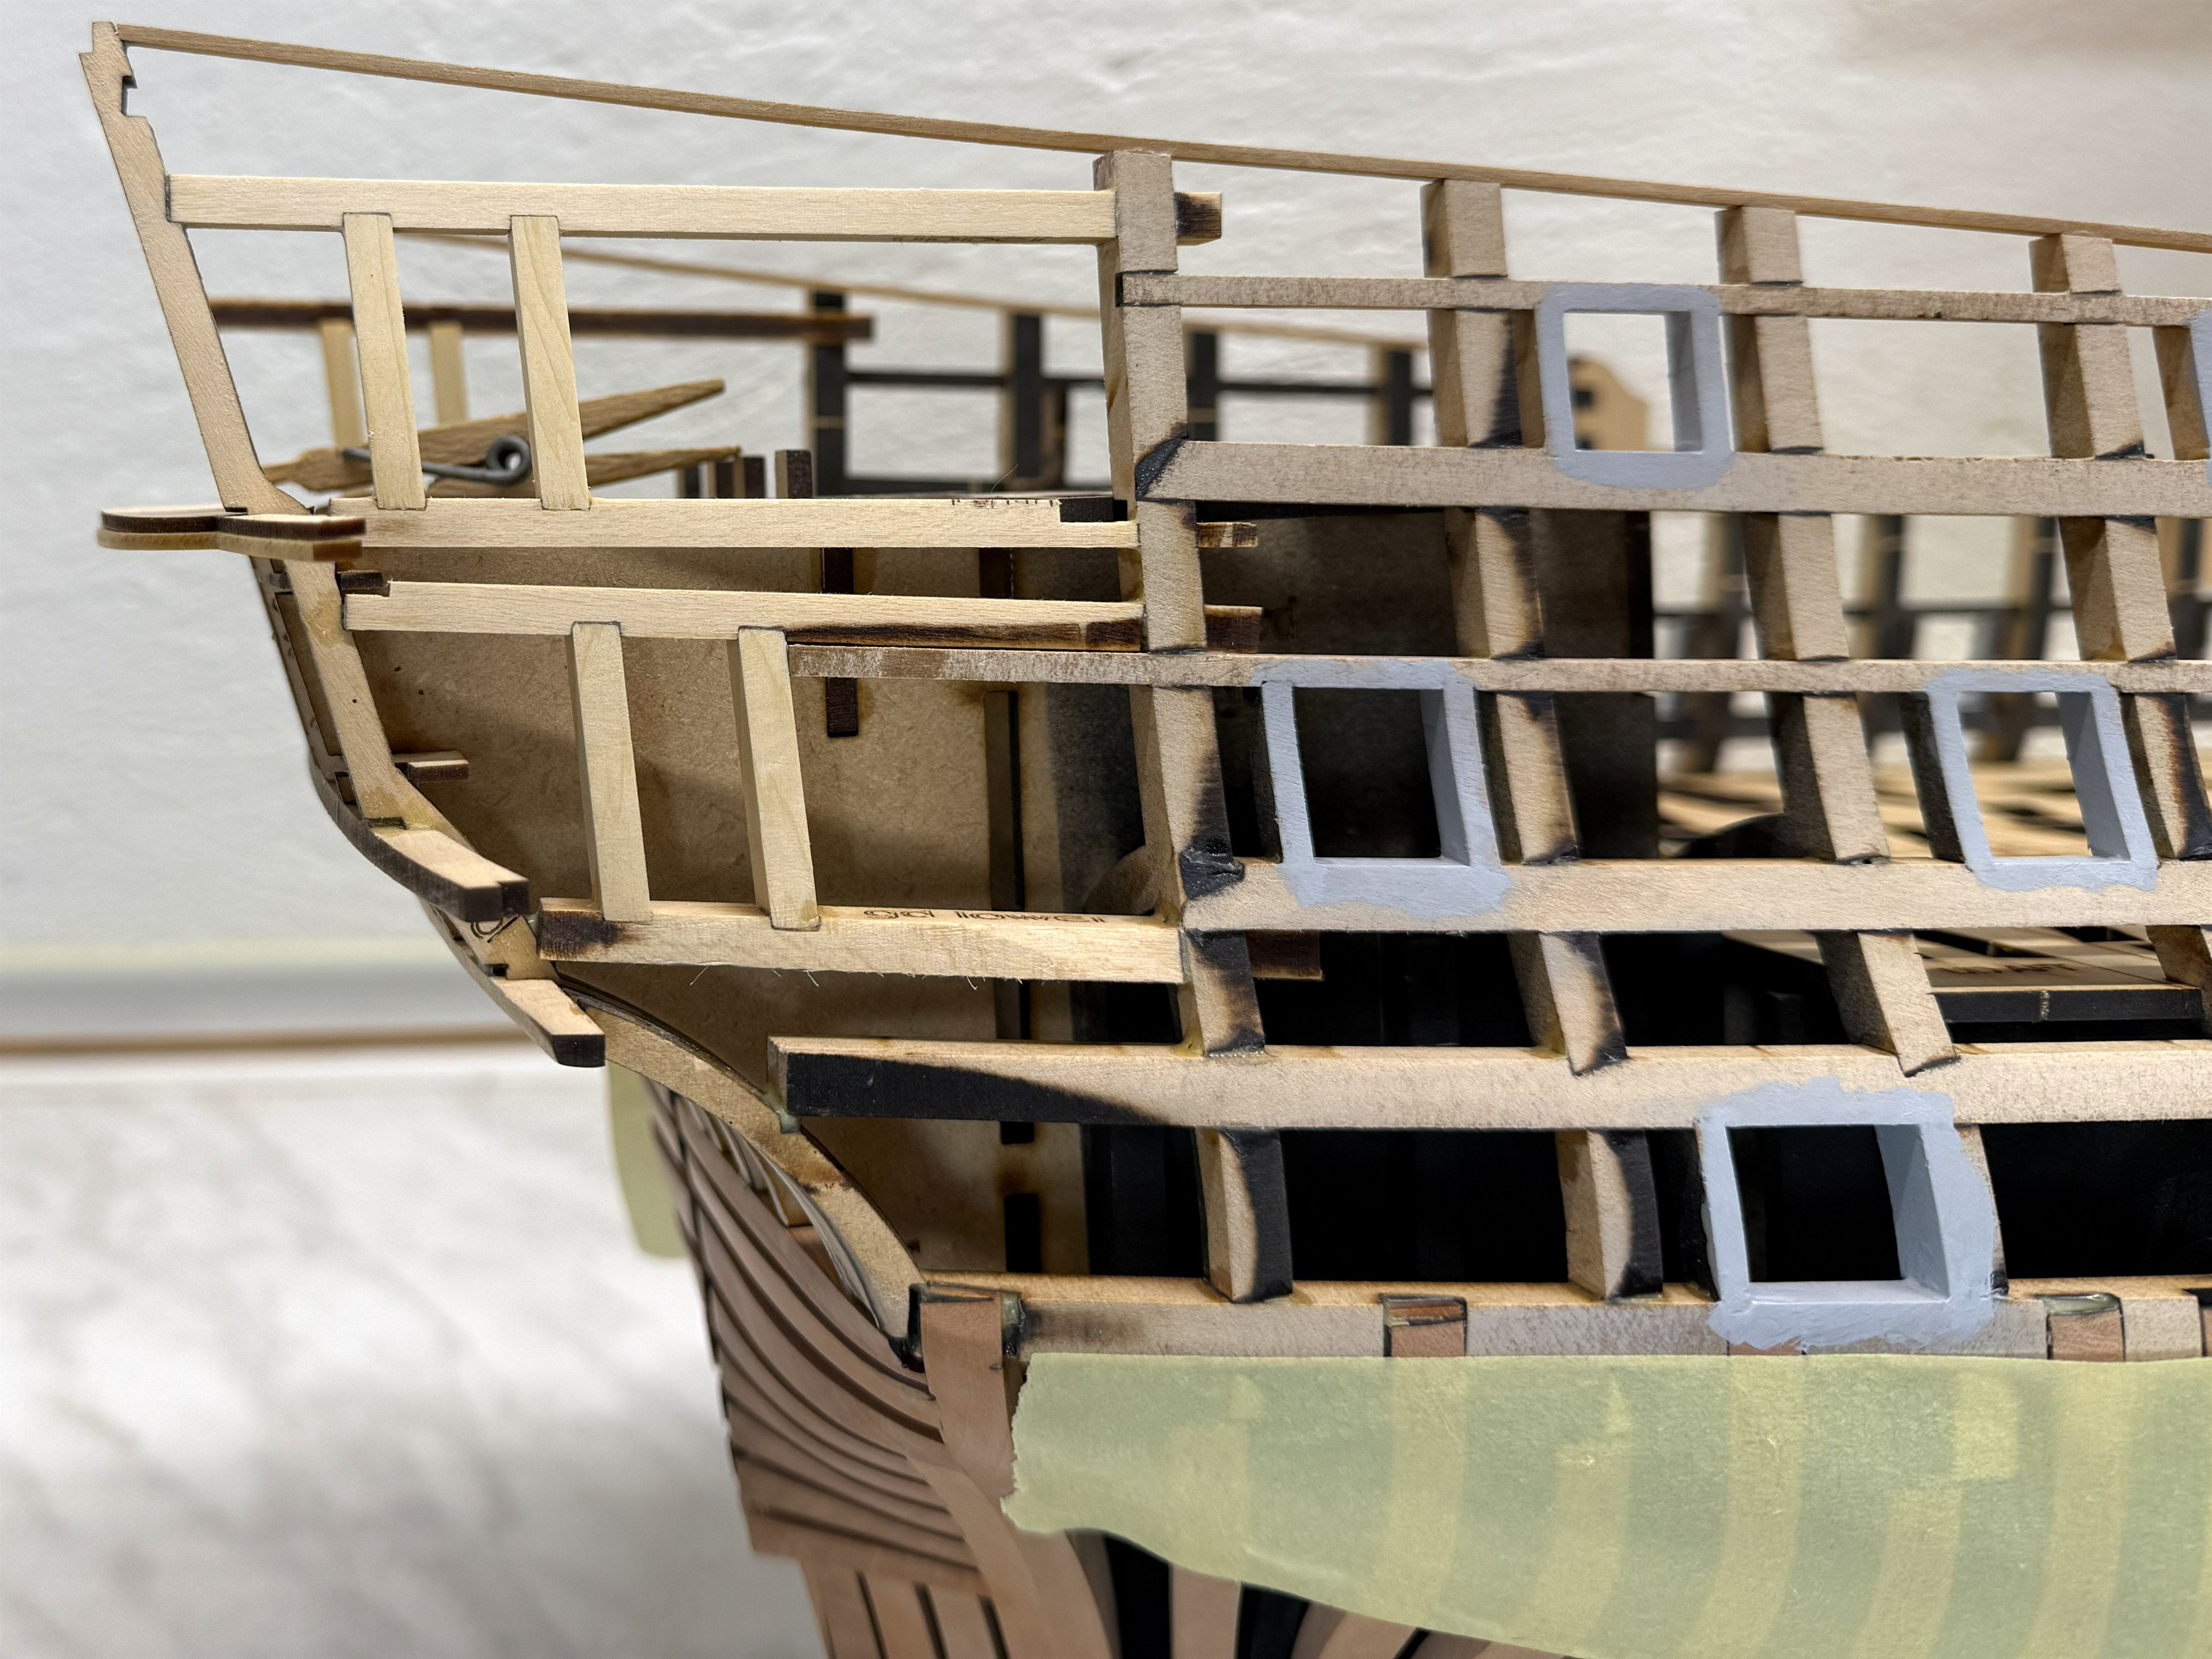
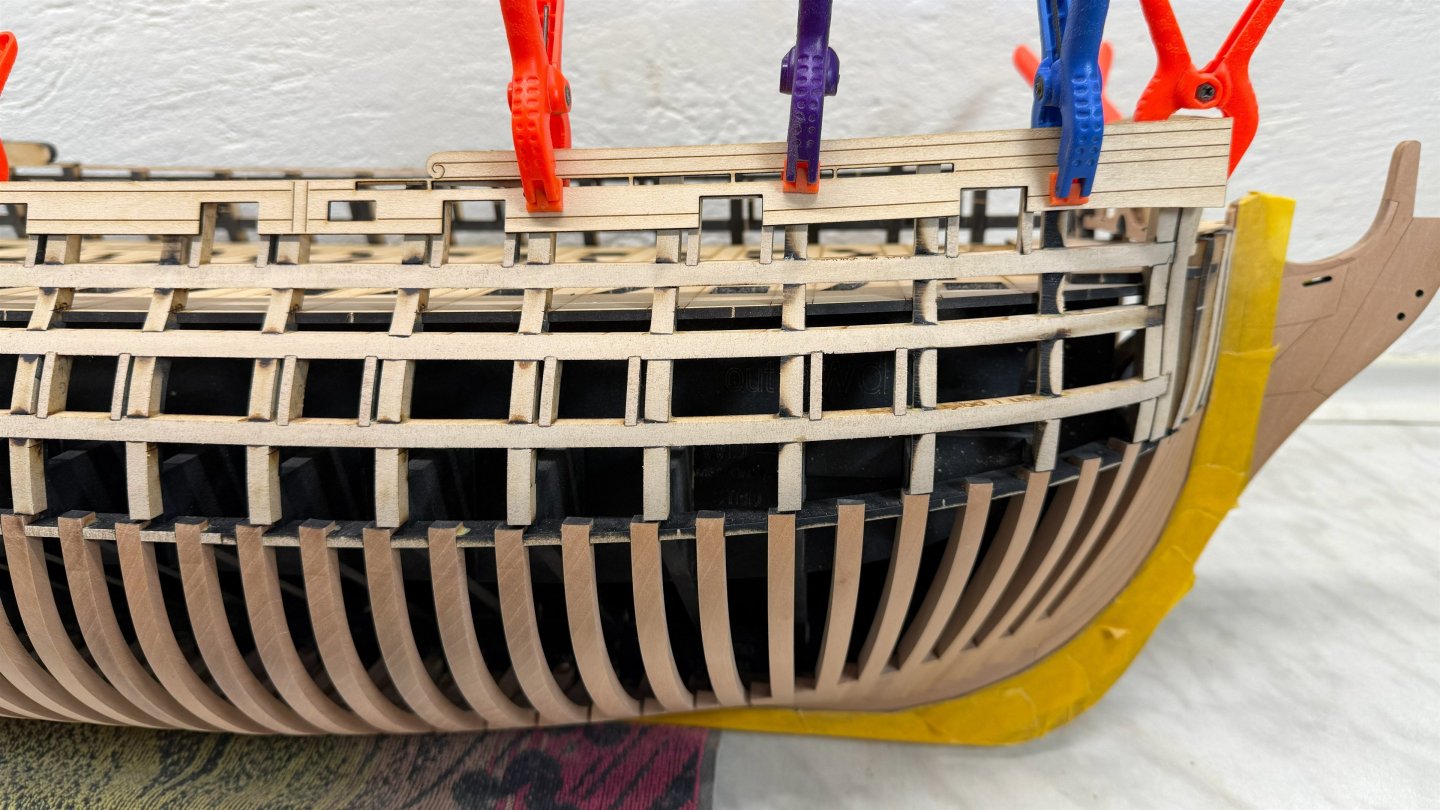
So I started with the fairing on the port side. And it's almost done.


-
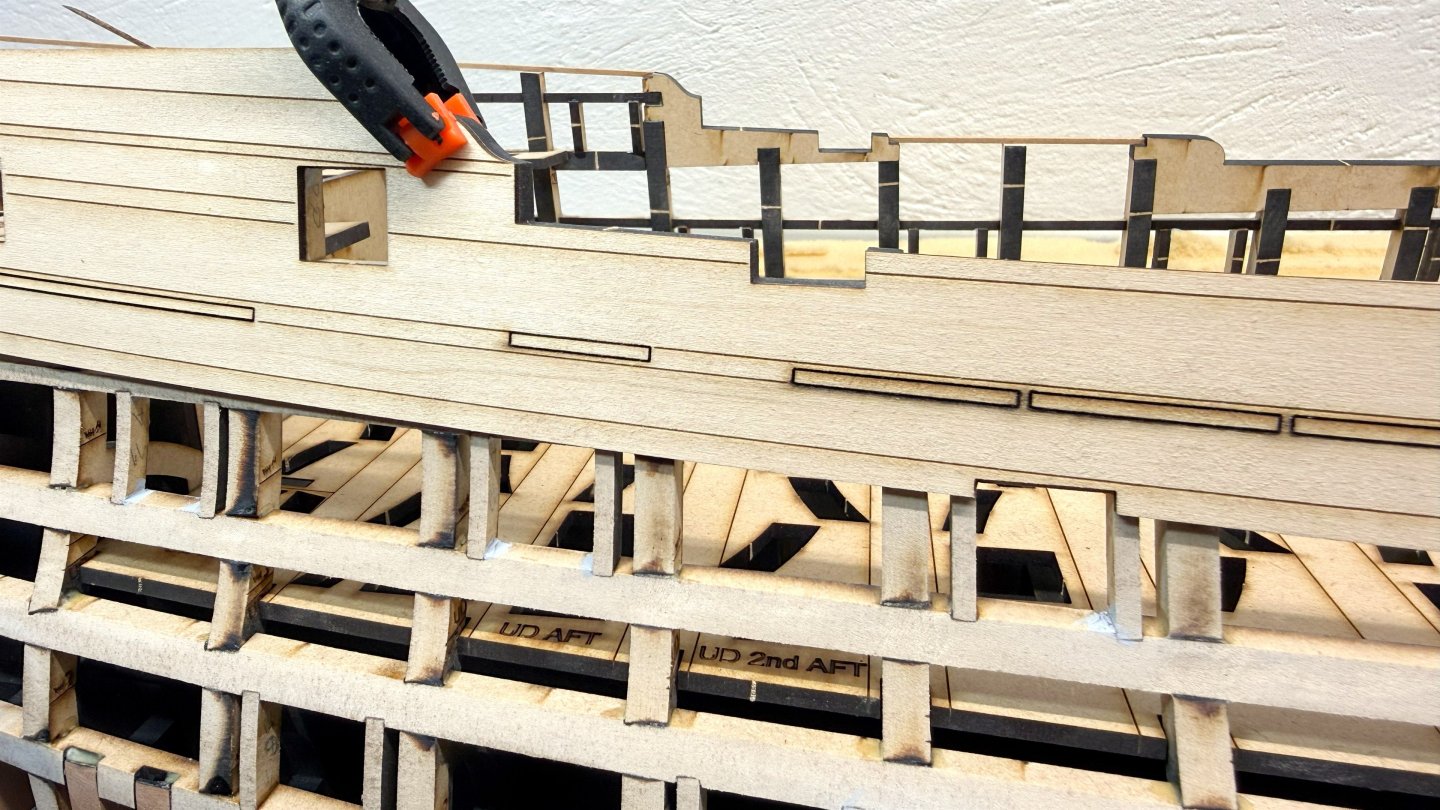
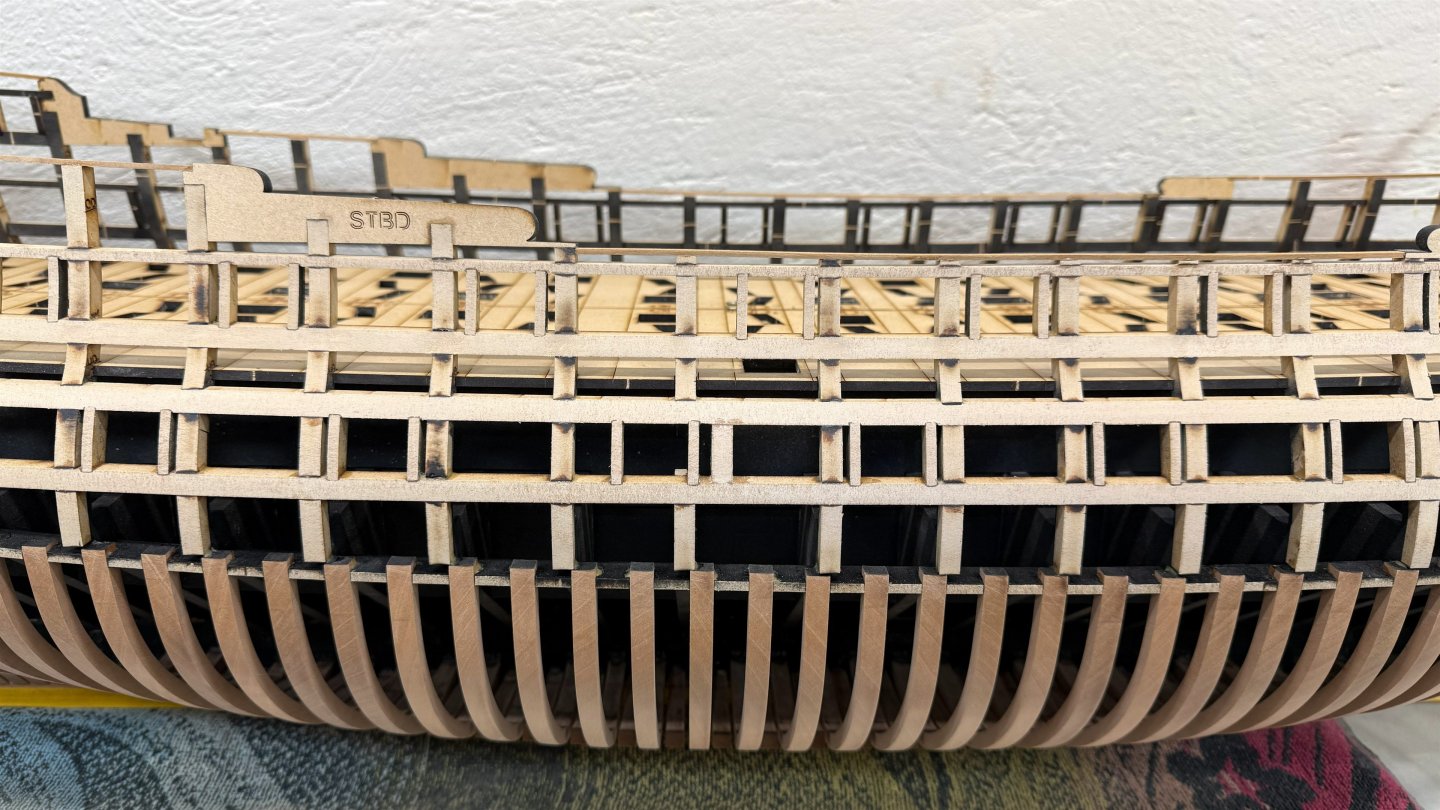
Chapter two has begun! There's a lot of fairing ahead of me.

-
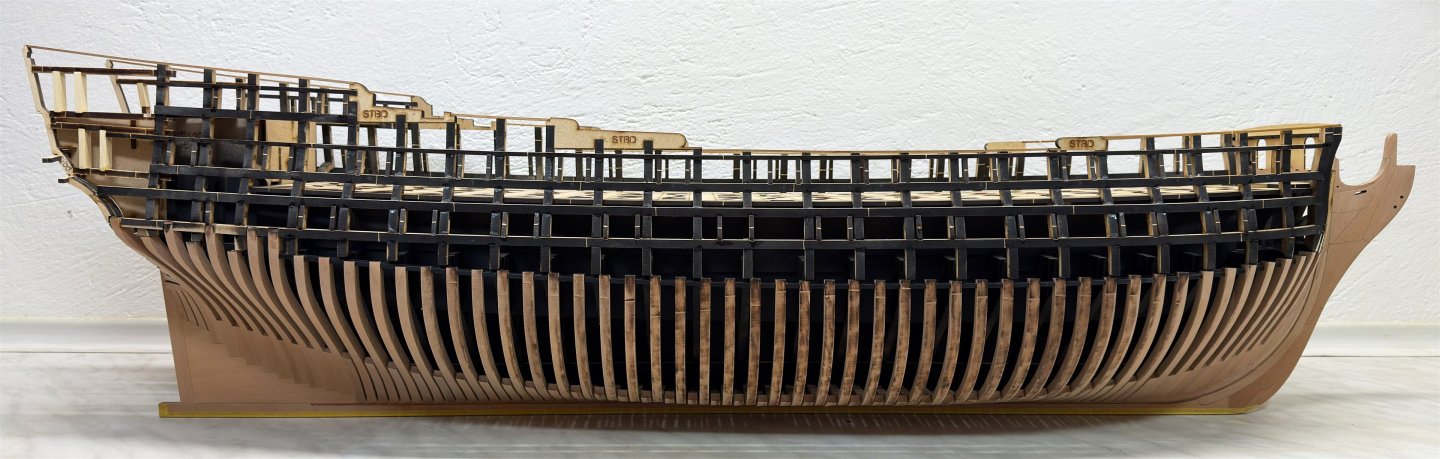
Hey, guys! Today is the day I can finally say that the first chapter is done. Thanks for watching, commenting, and liking!


-
Hi Frank, I have a JLC saw like the one in the picture. JLC-Precision-Resin-Saw And your Winnie looks fantastic.