HOLIDAY DONATION DRIVE - SUPPORT MSW - DO YOUR PART TO KEEP THIS GREAT FORUM GOING! (Only 20 donations so far - C'mon guys!)
×

TJM
-
Posts
333 -
Joined
-
Last visited
Content Type
Profiles
Forums
Gallery
Events
Everything posted by TJM
-
Wow, this build is so next level. I am amazed and humbled every time you update this thread 😁
-
Yes, I believe so. I am not sure when I will have tome to start mine, but it is not right around the corner. Perhaps I should take a loss and sell the v2 and get the new v3 instead. I will have to think about that
- 52 replies
-
- 1
-

-
- Oseberg
- Pavel Nikitin
- (and 1 more)
-
I have v2 sitting for a future build, I will follow with interest!
- 52 replies
-
- 2
-
-
- Oseberg
- Pavel Nikitin
- (and 1 more)
-
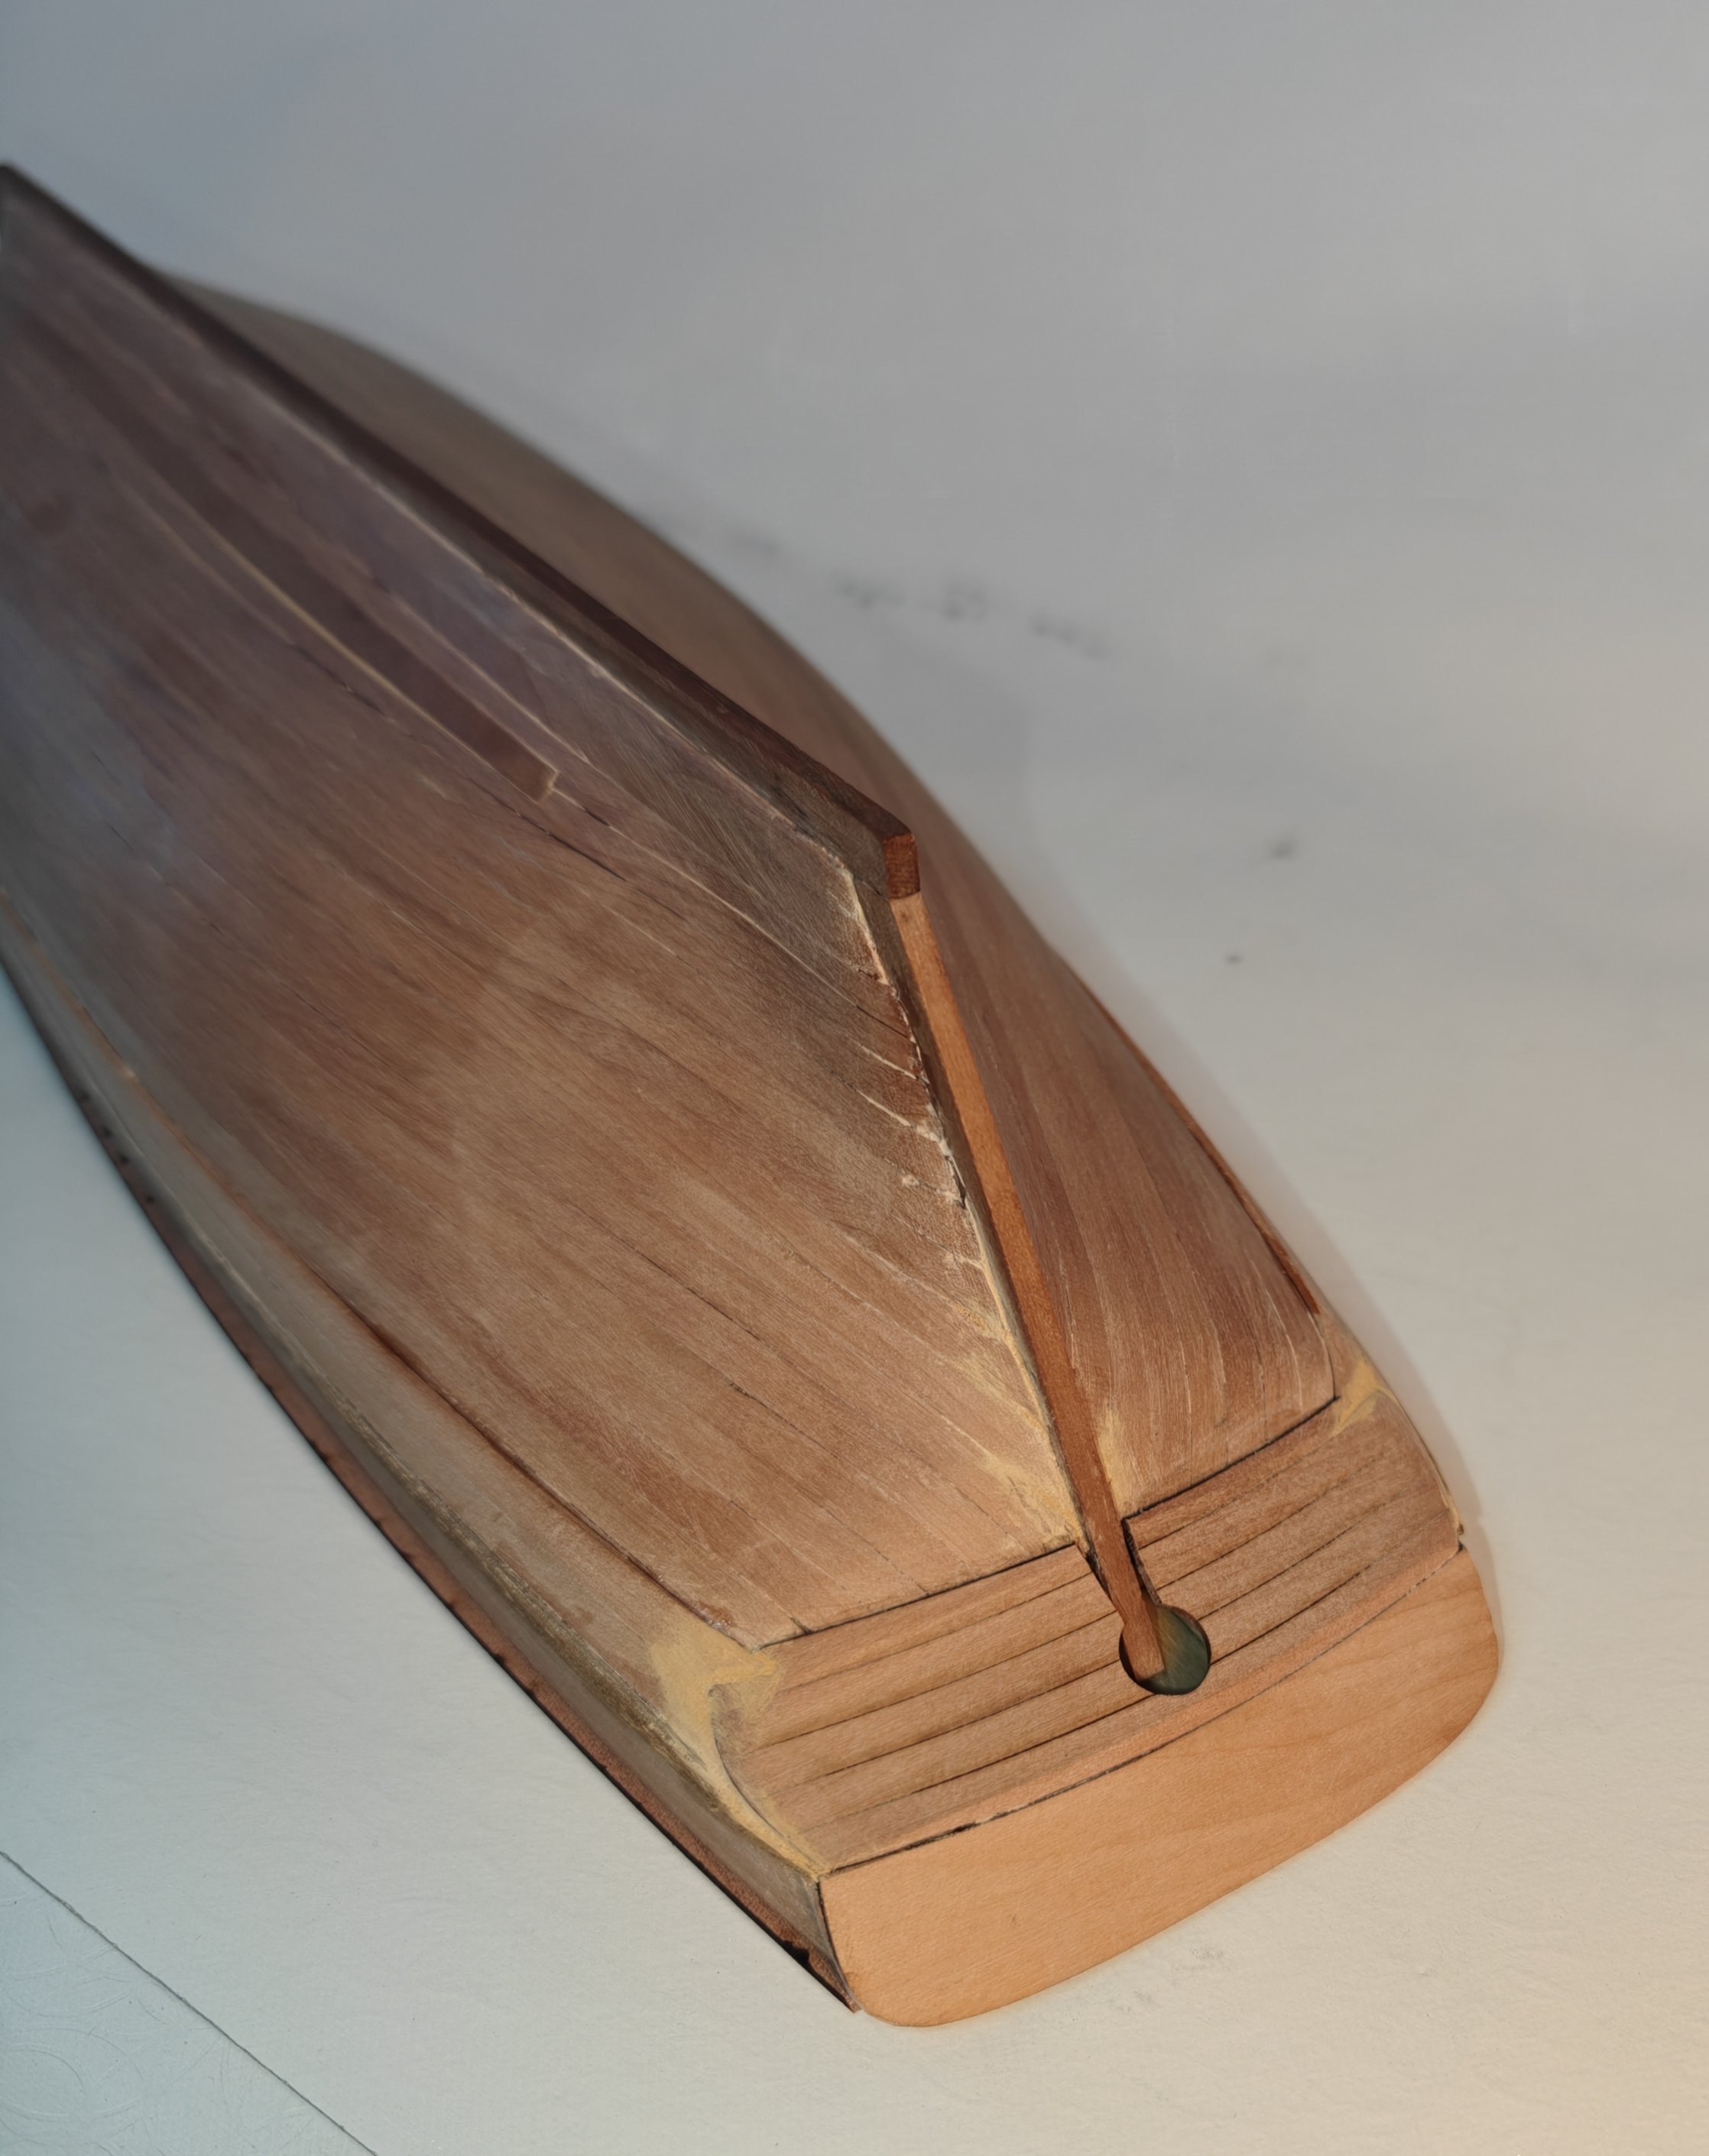
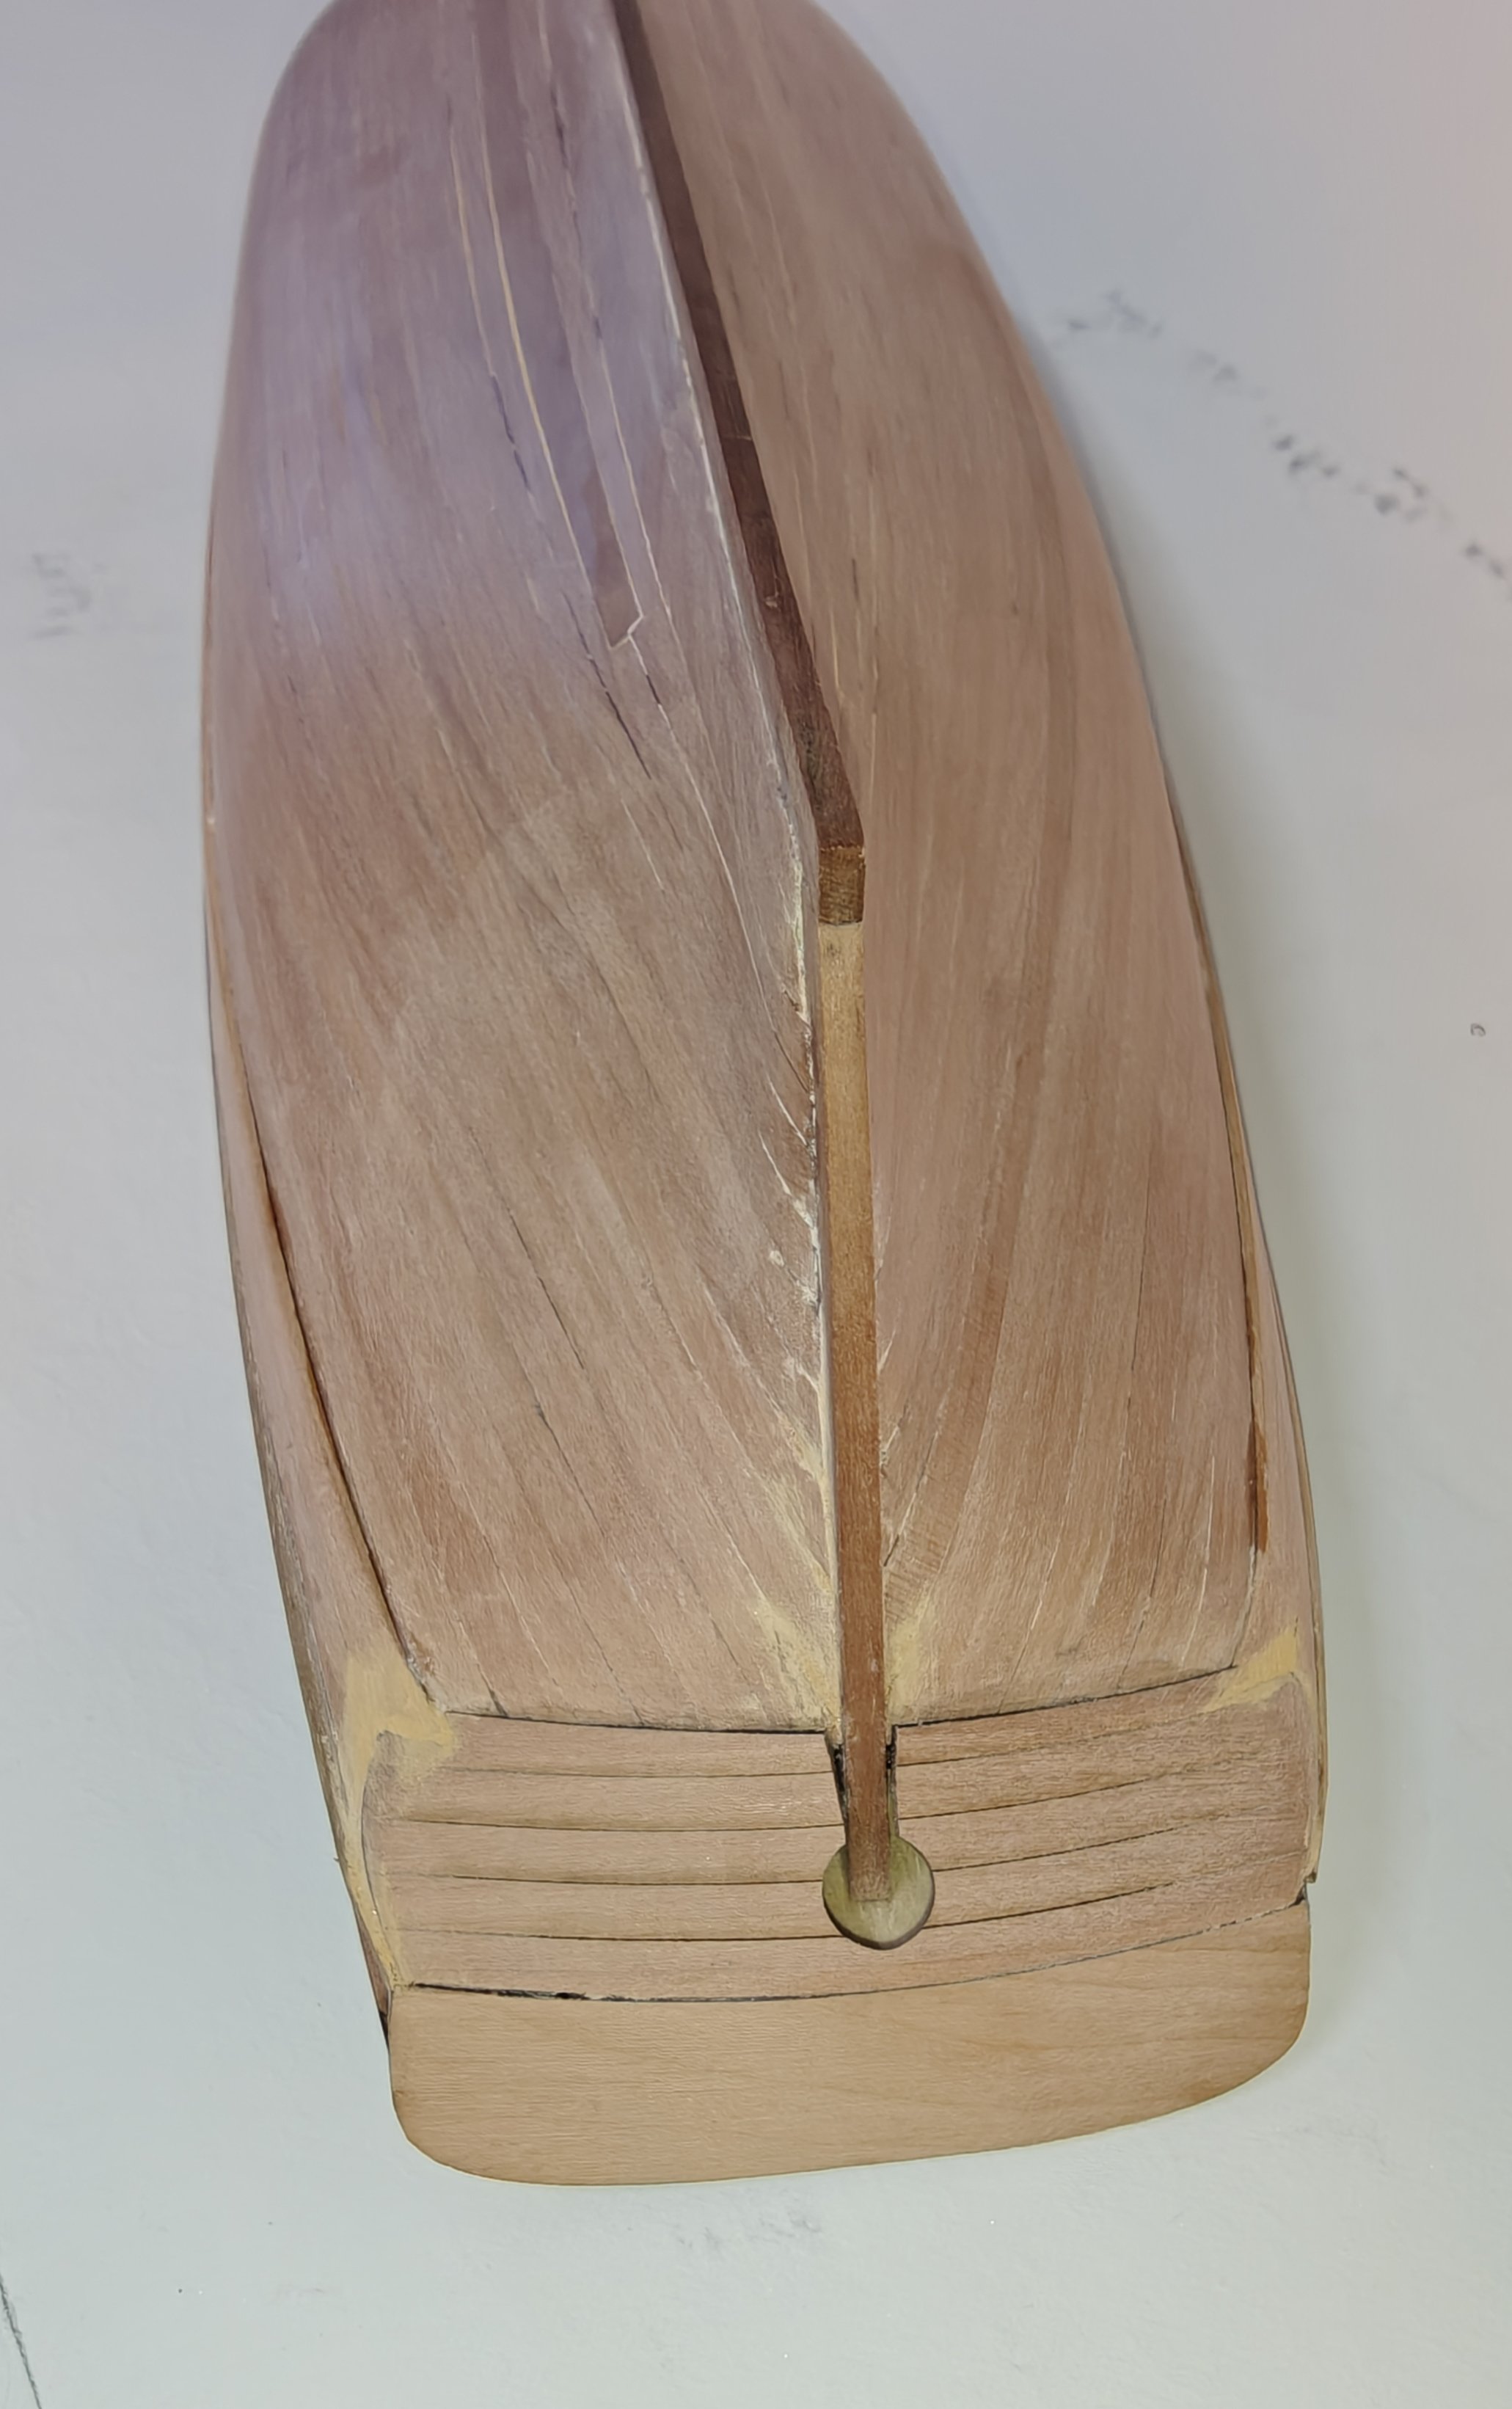
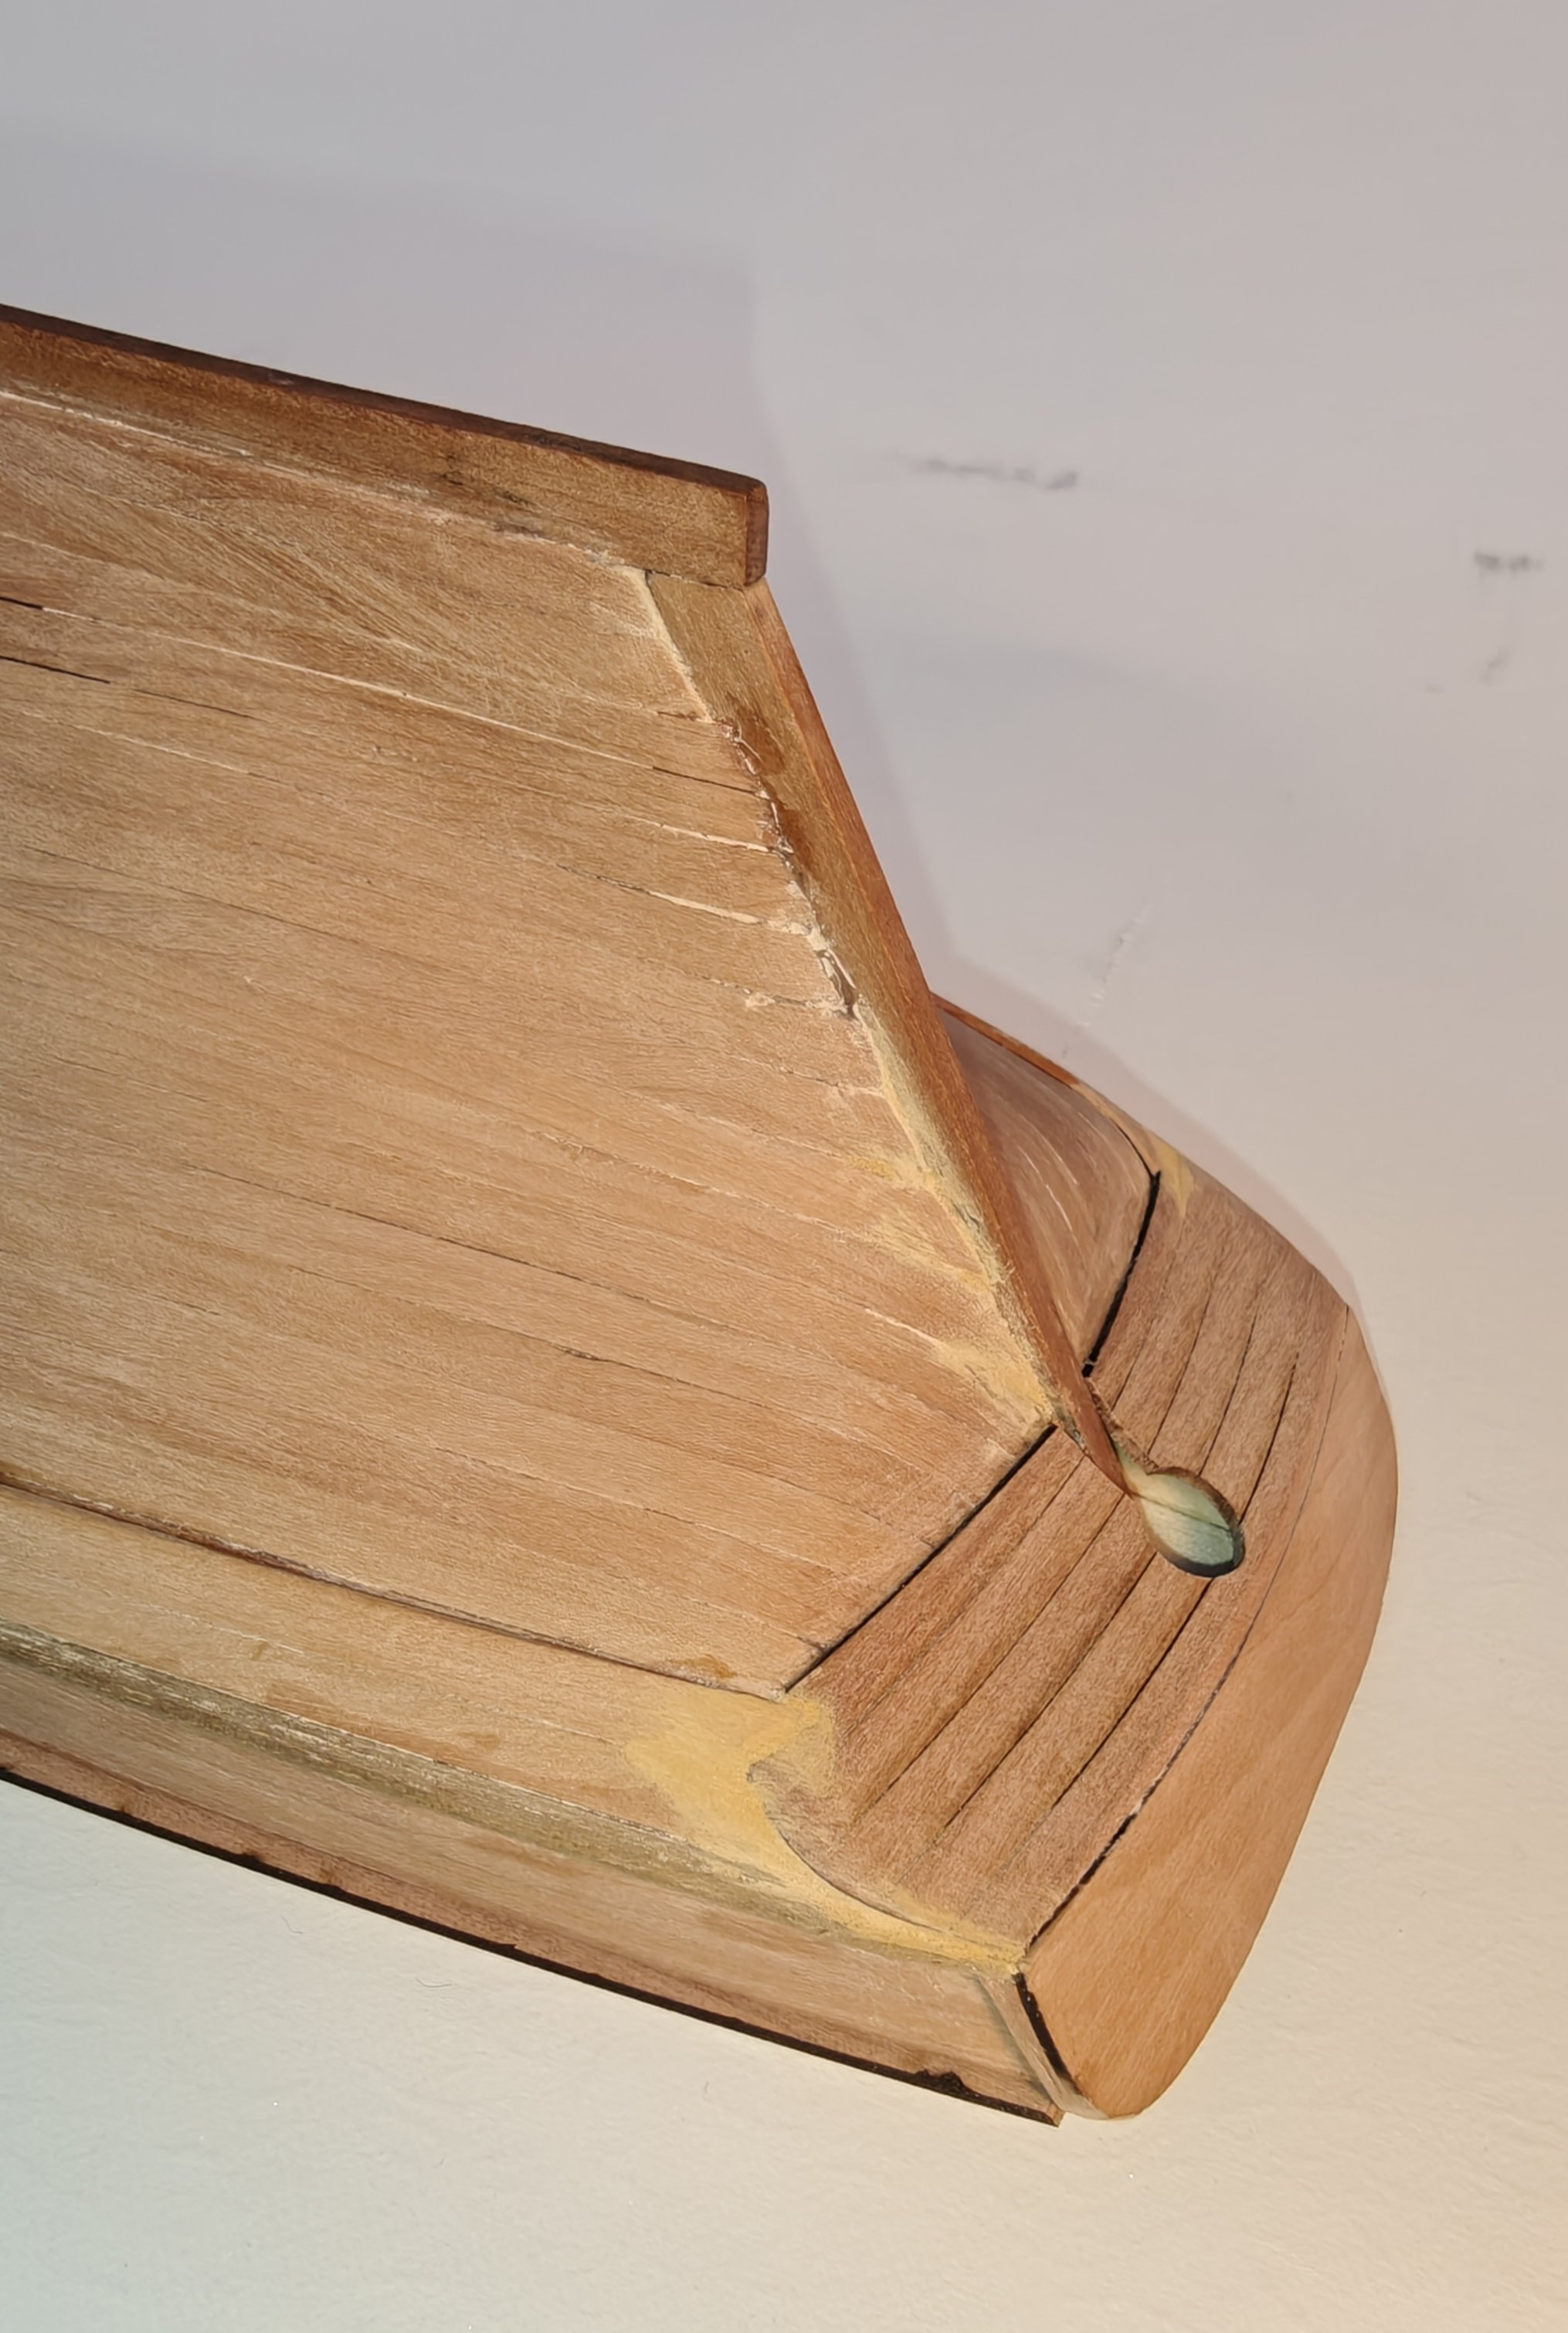
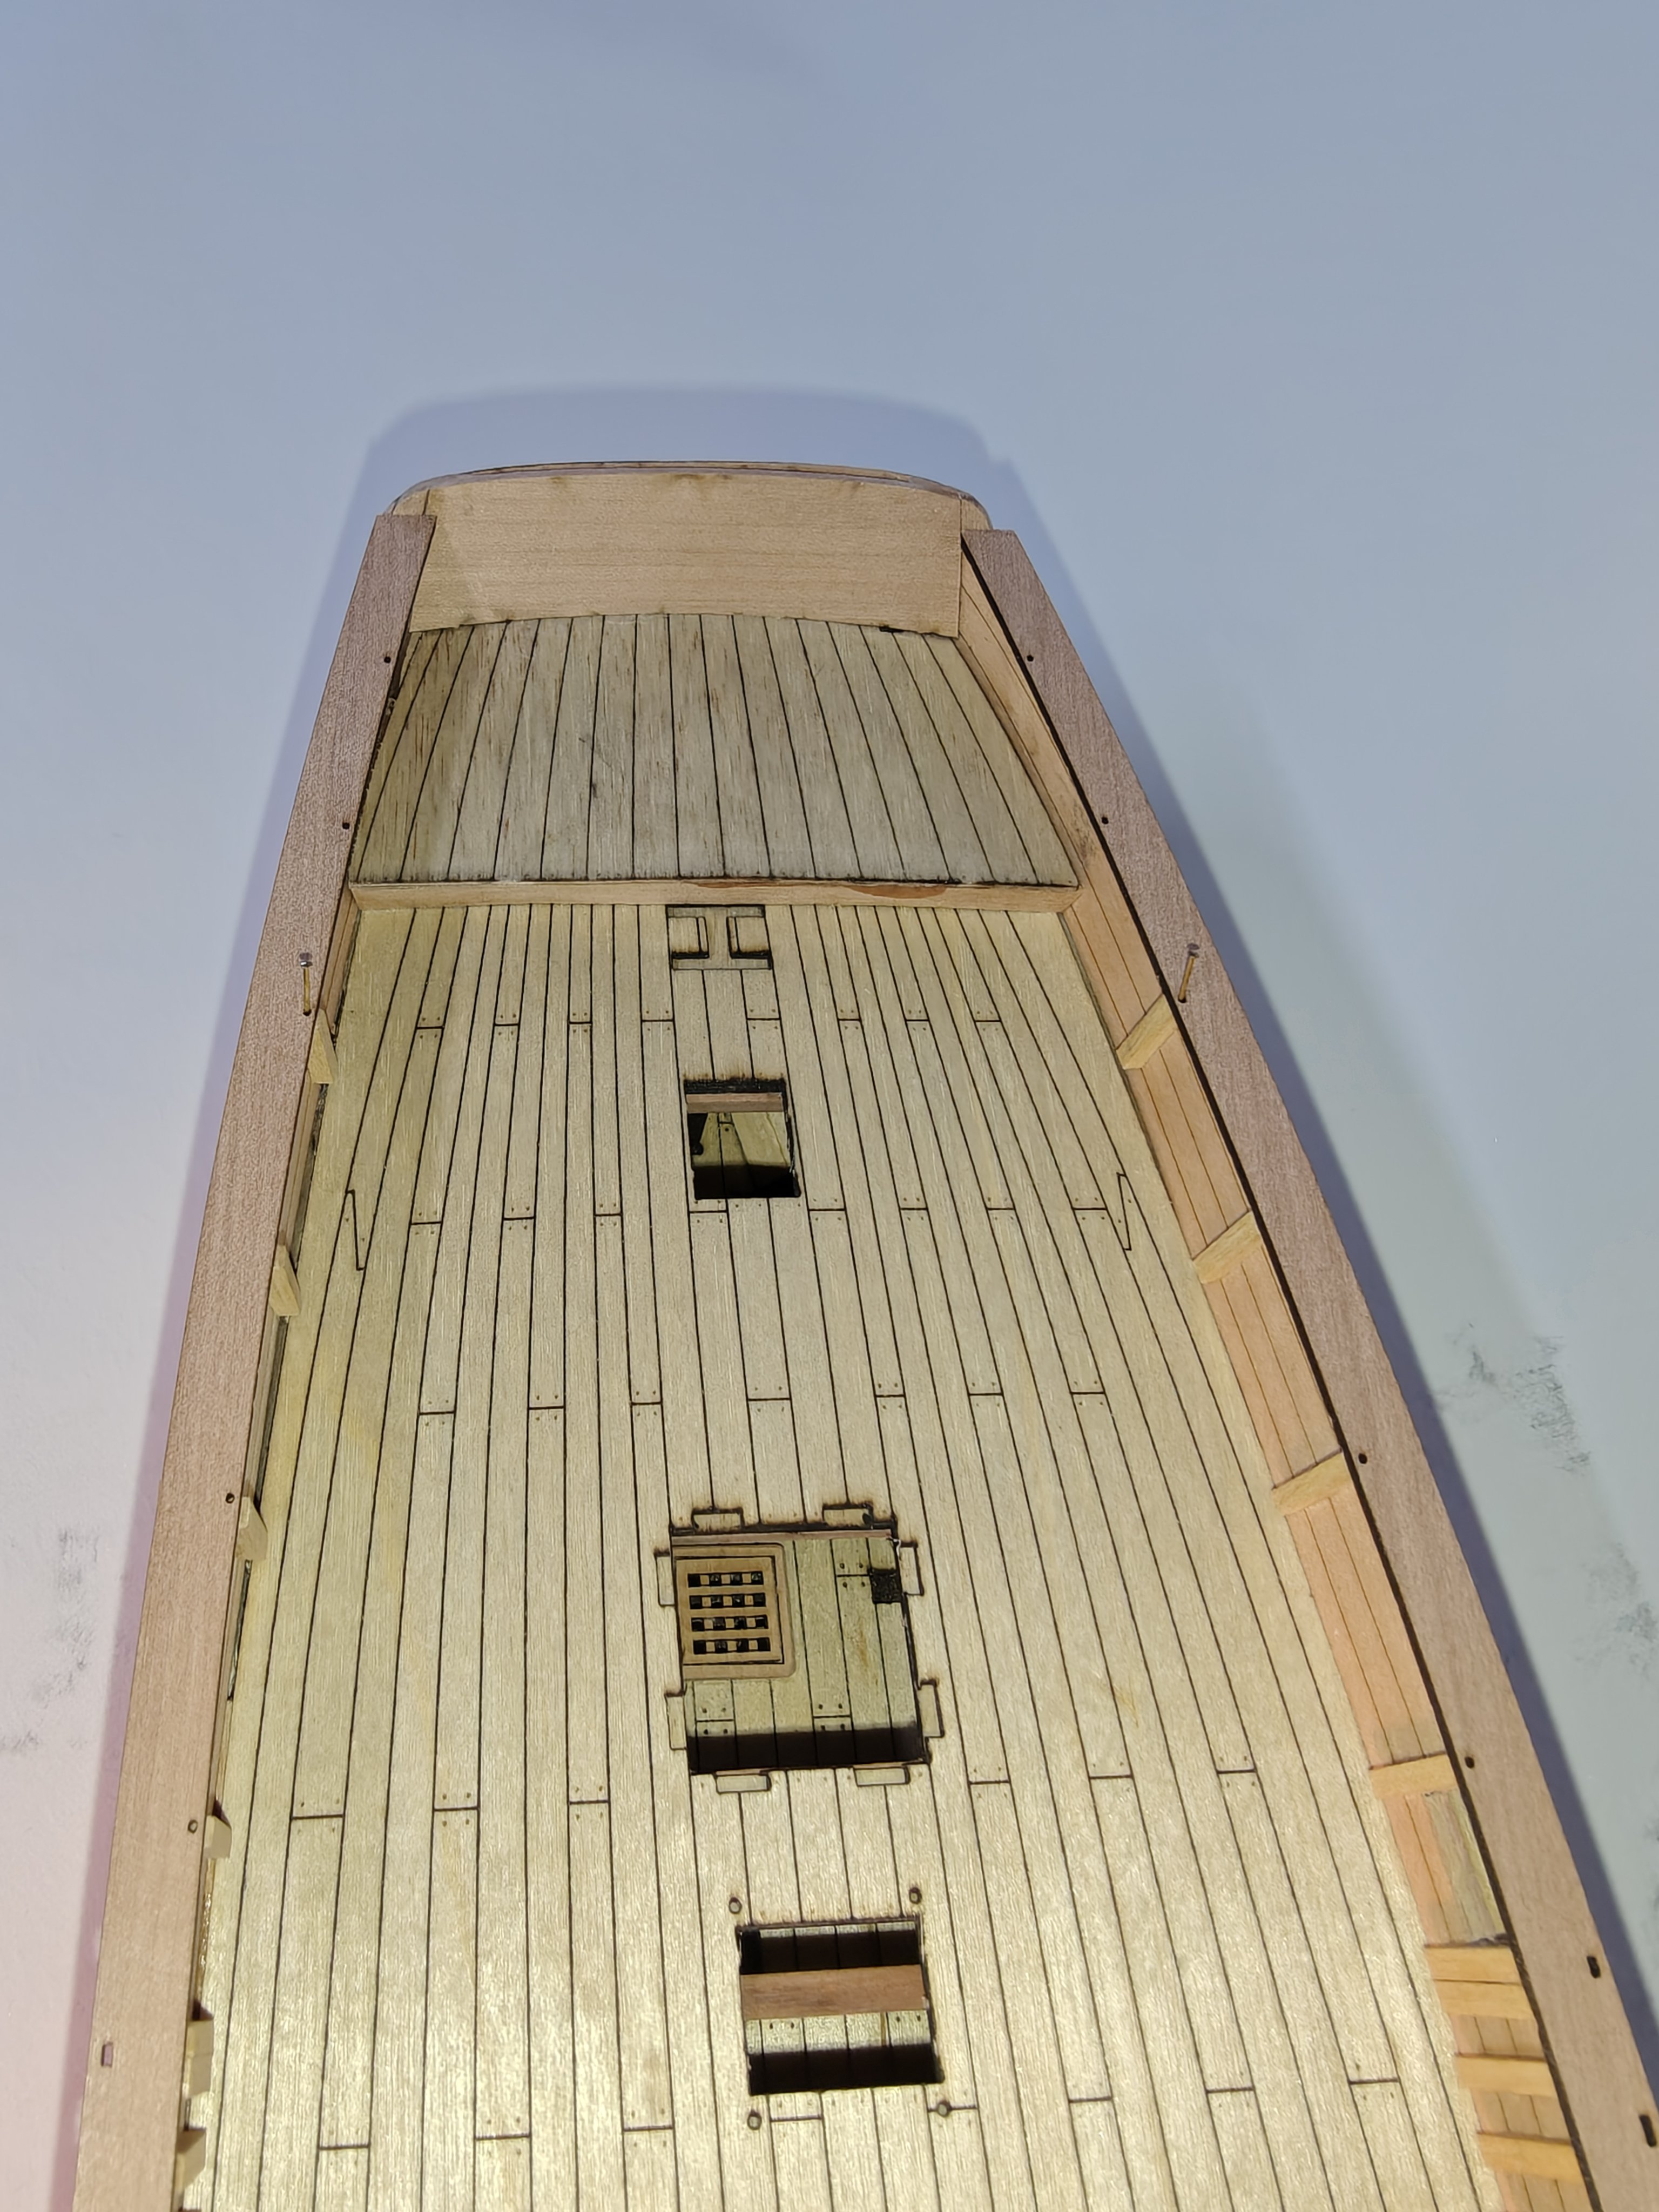
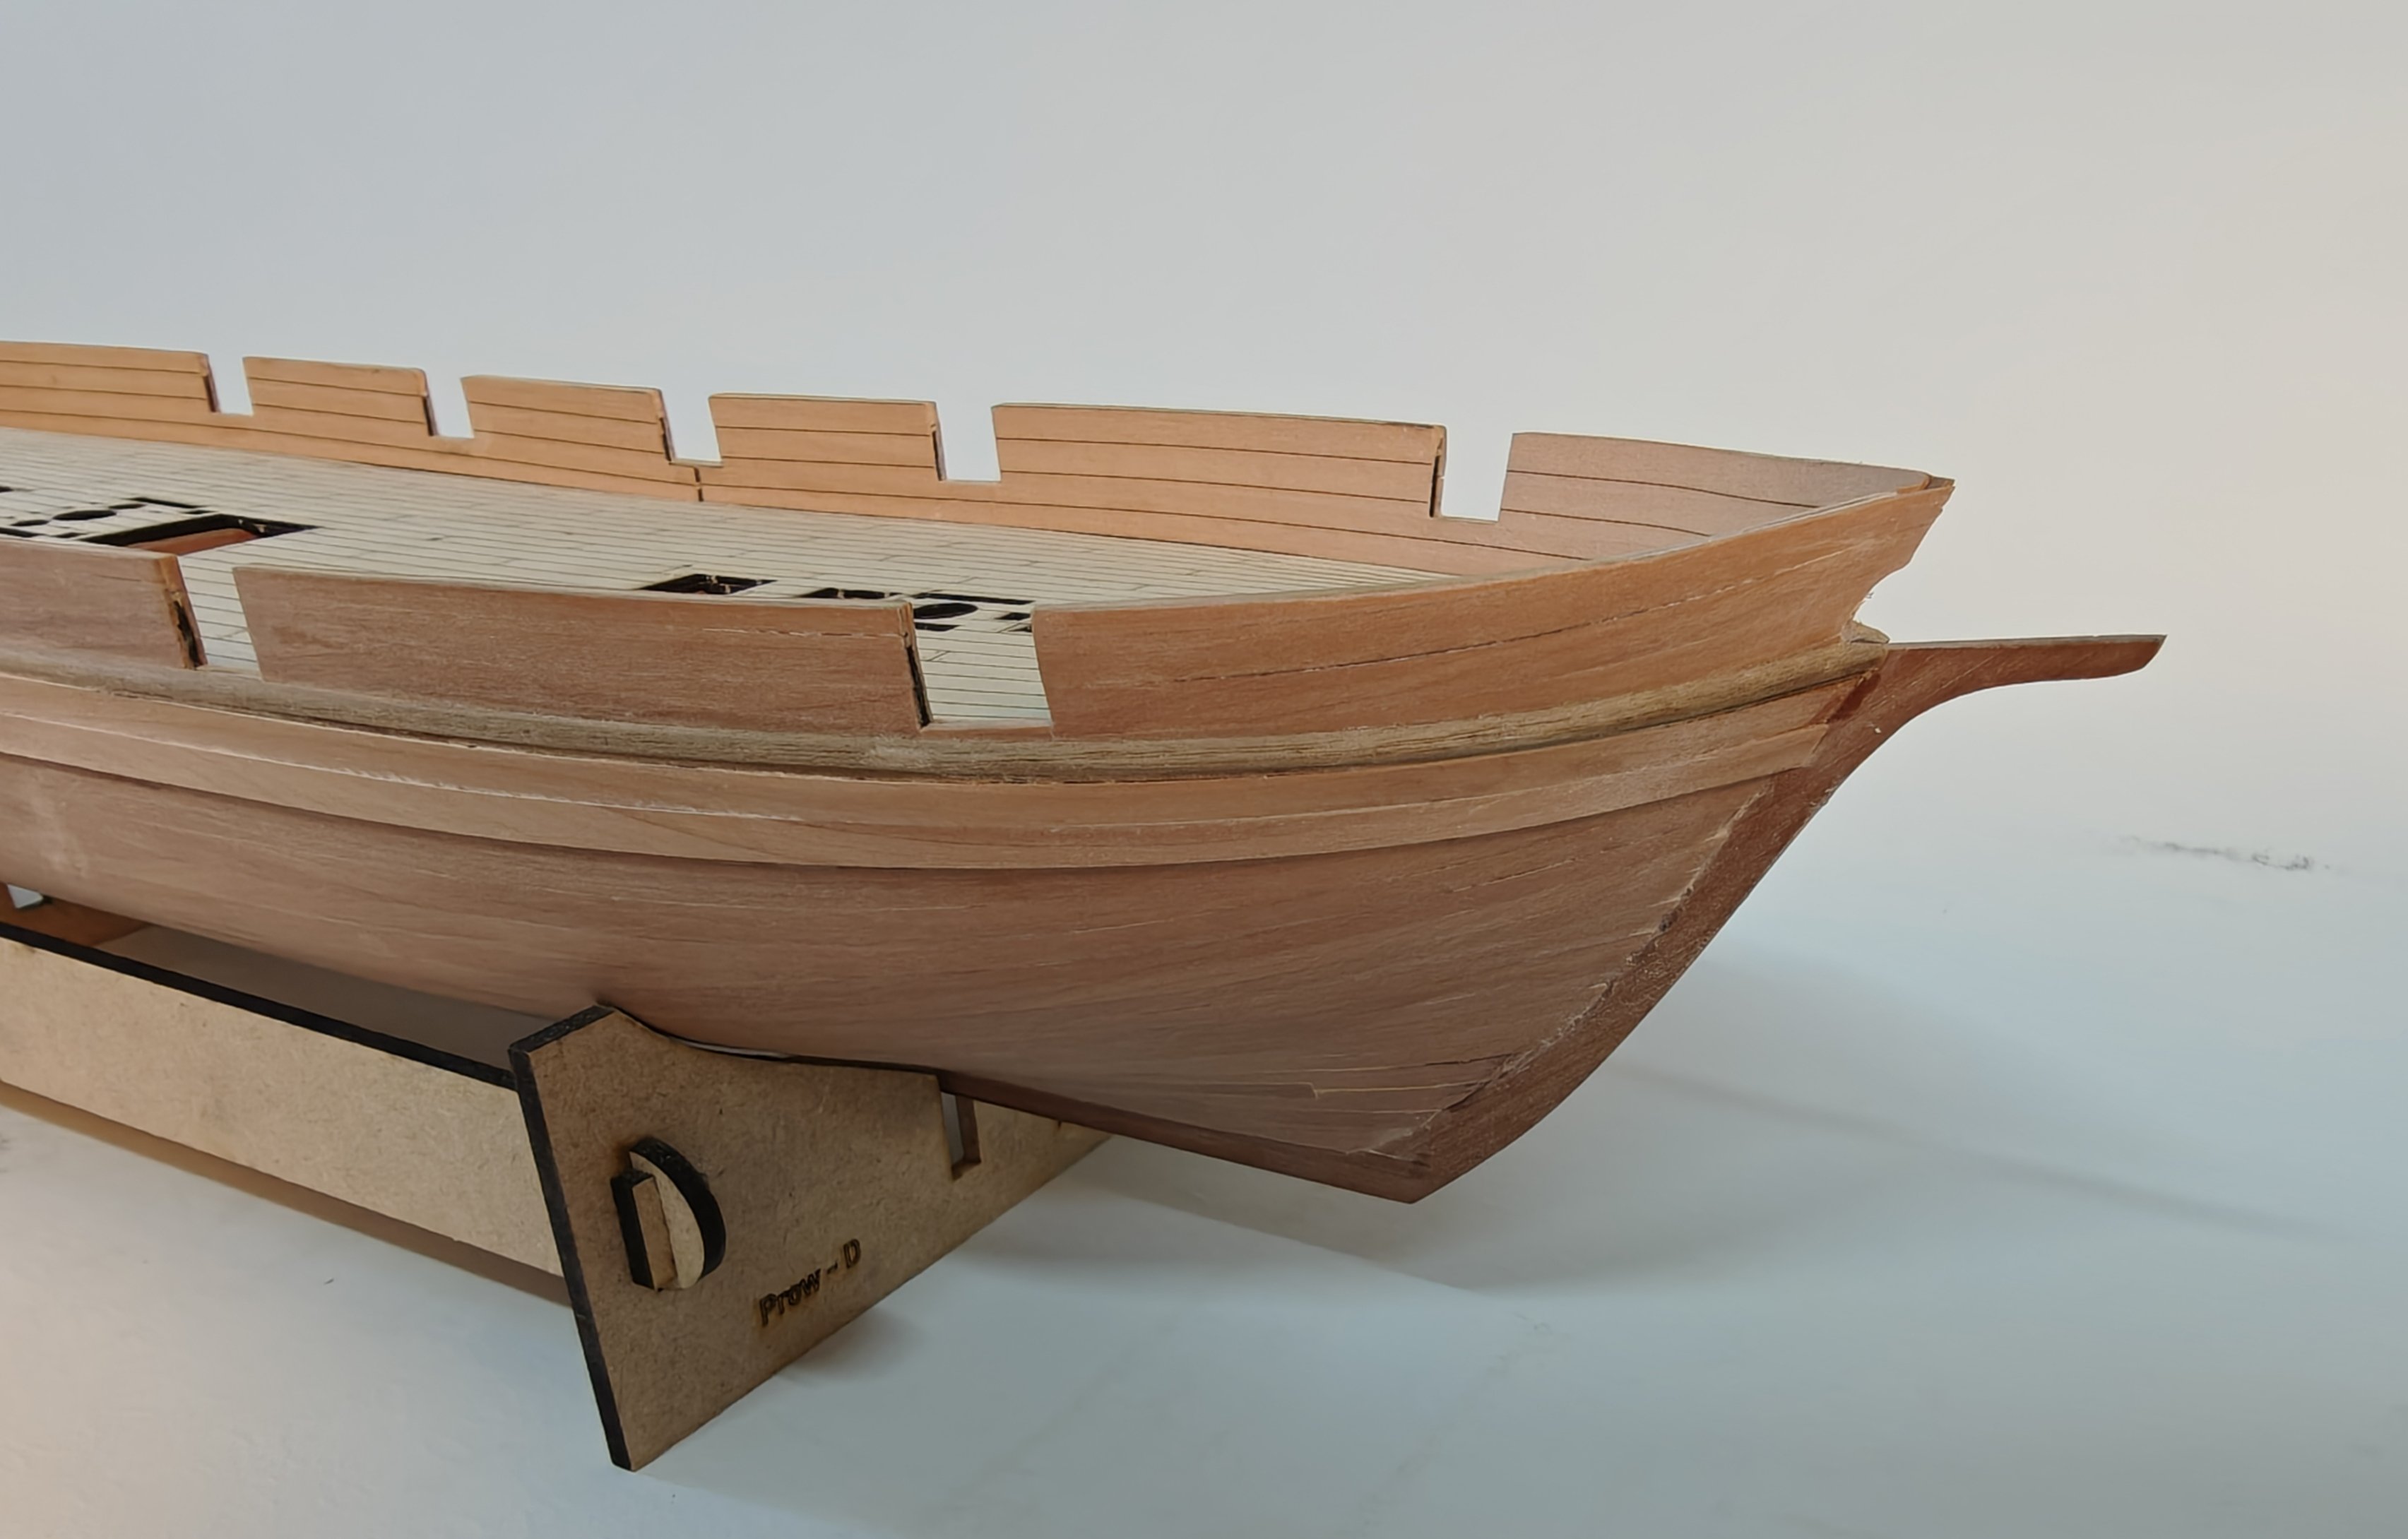
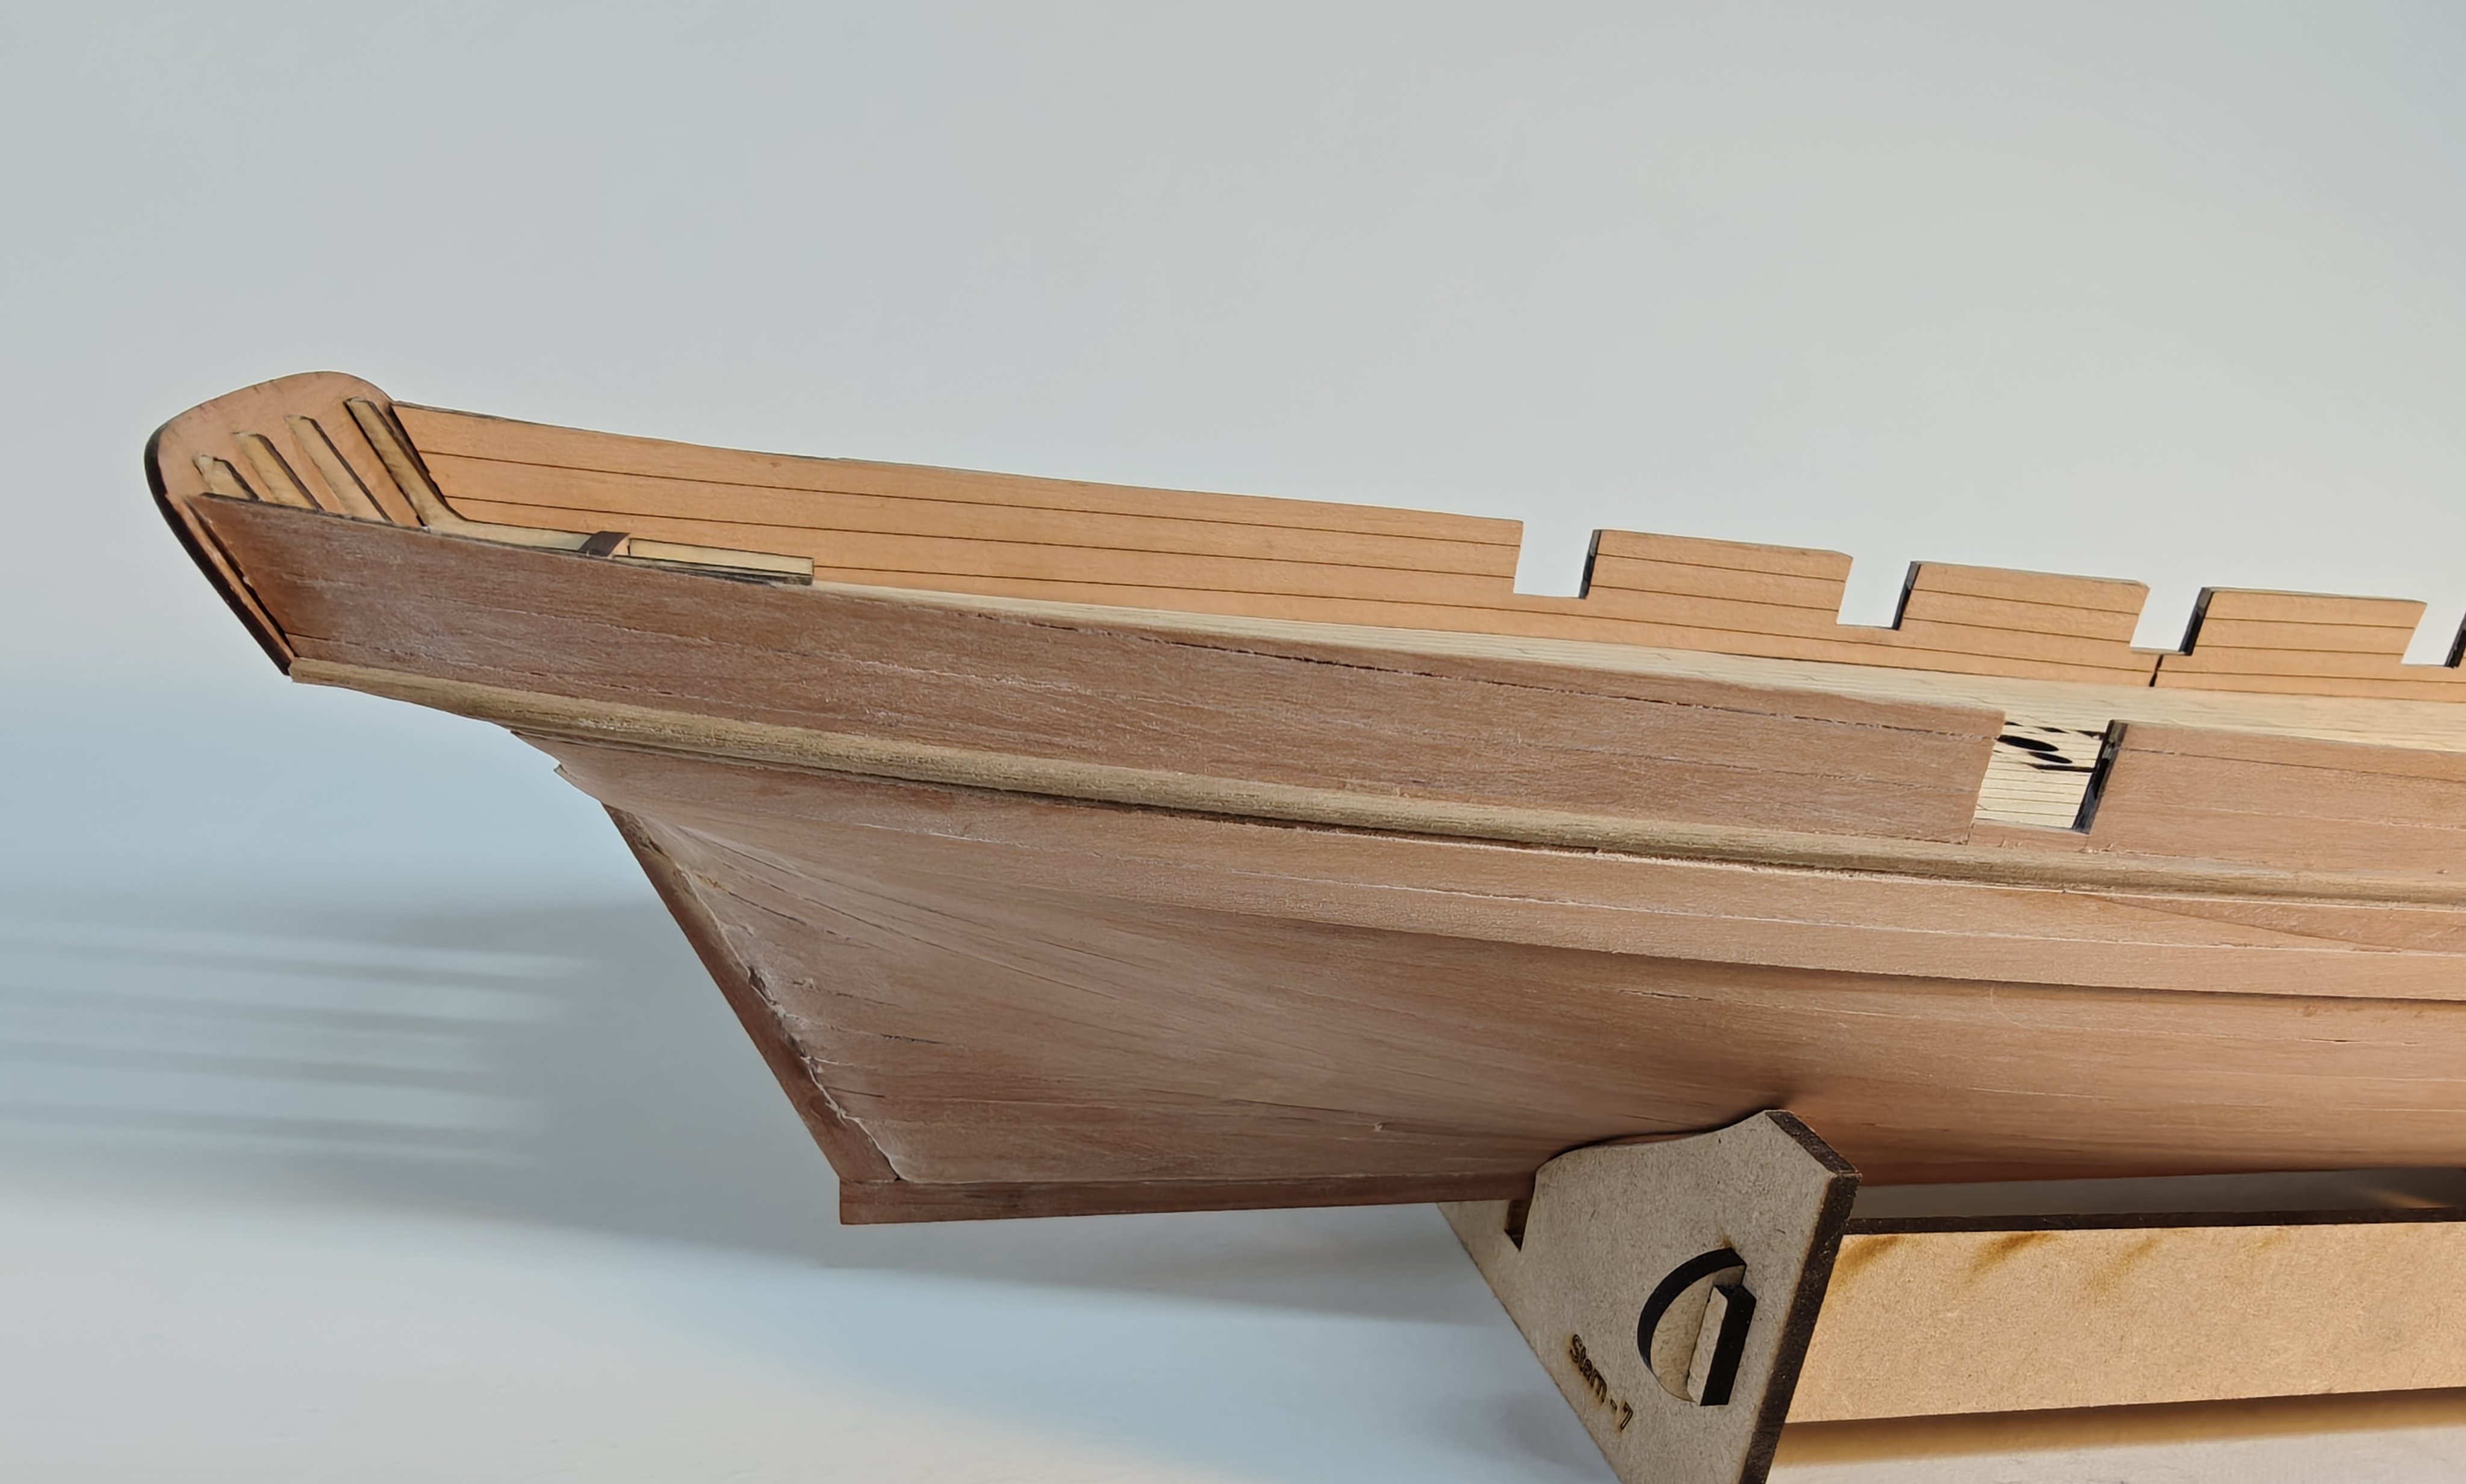
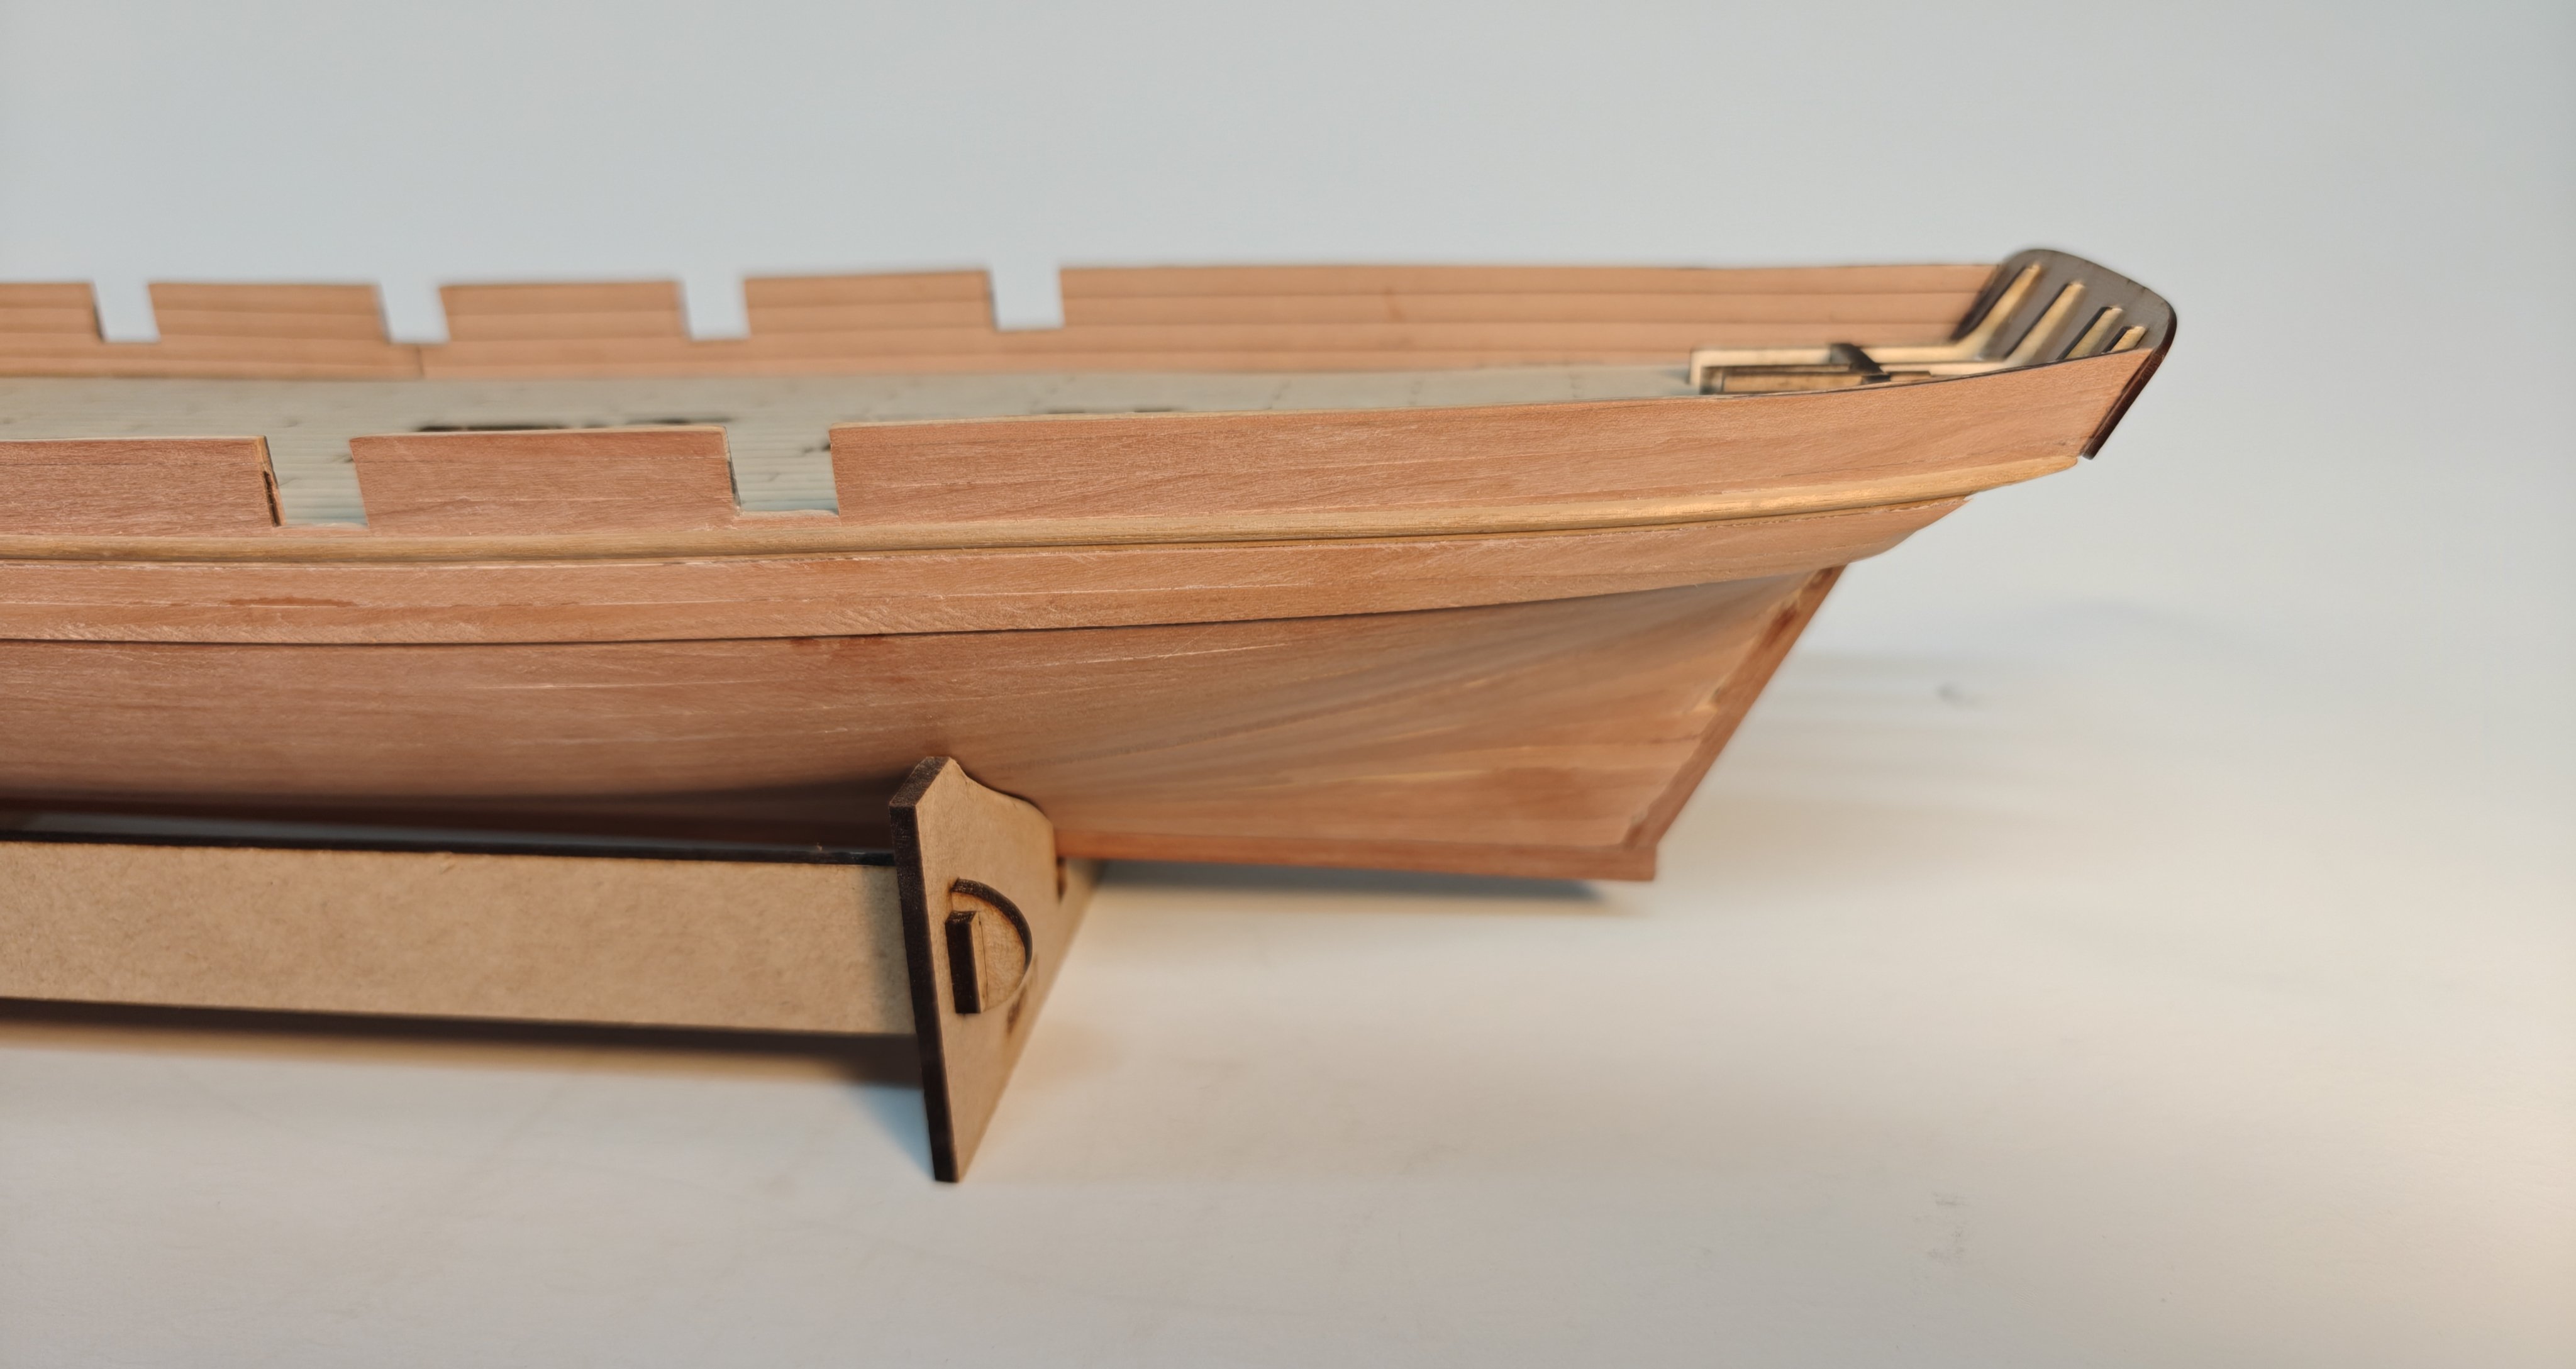
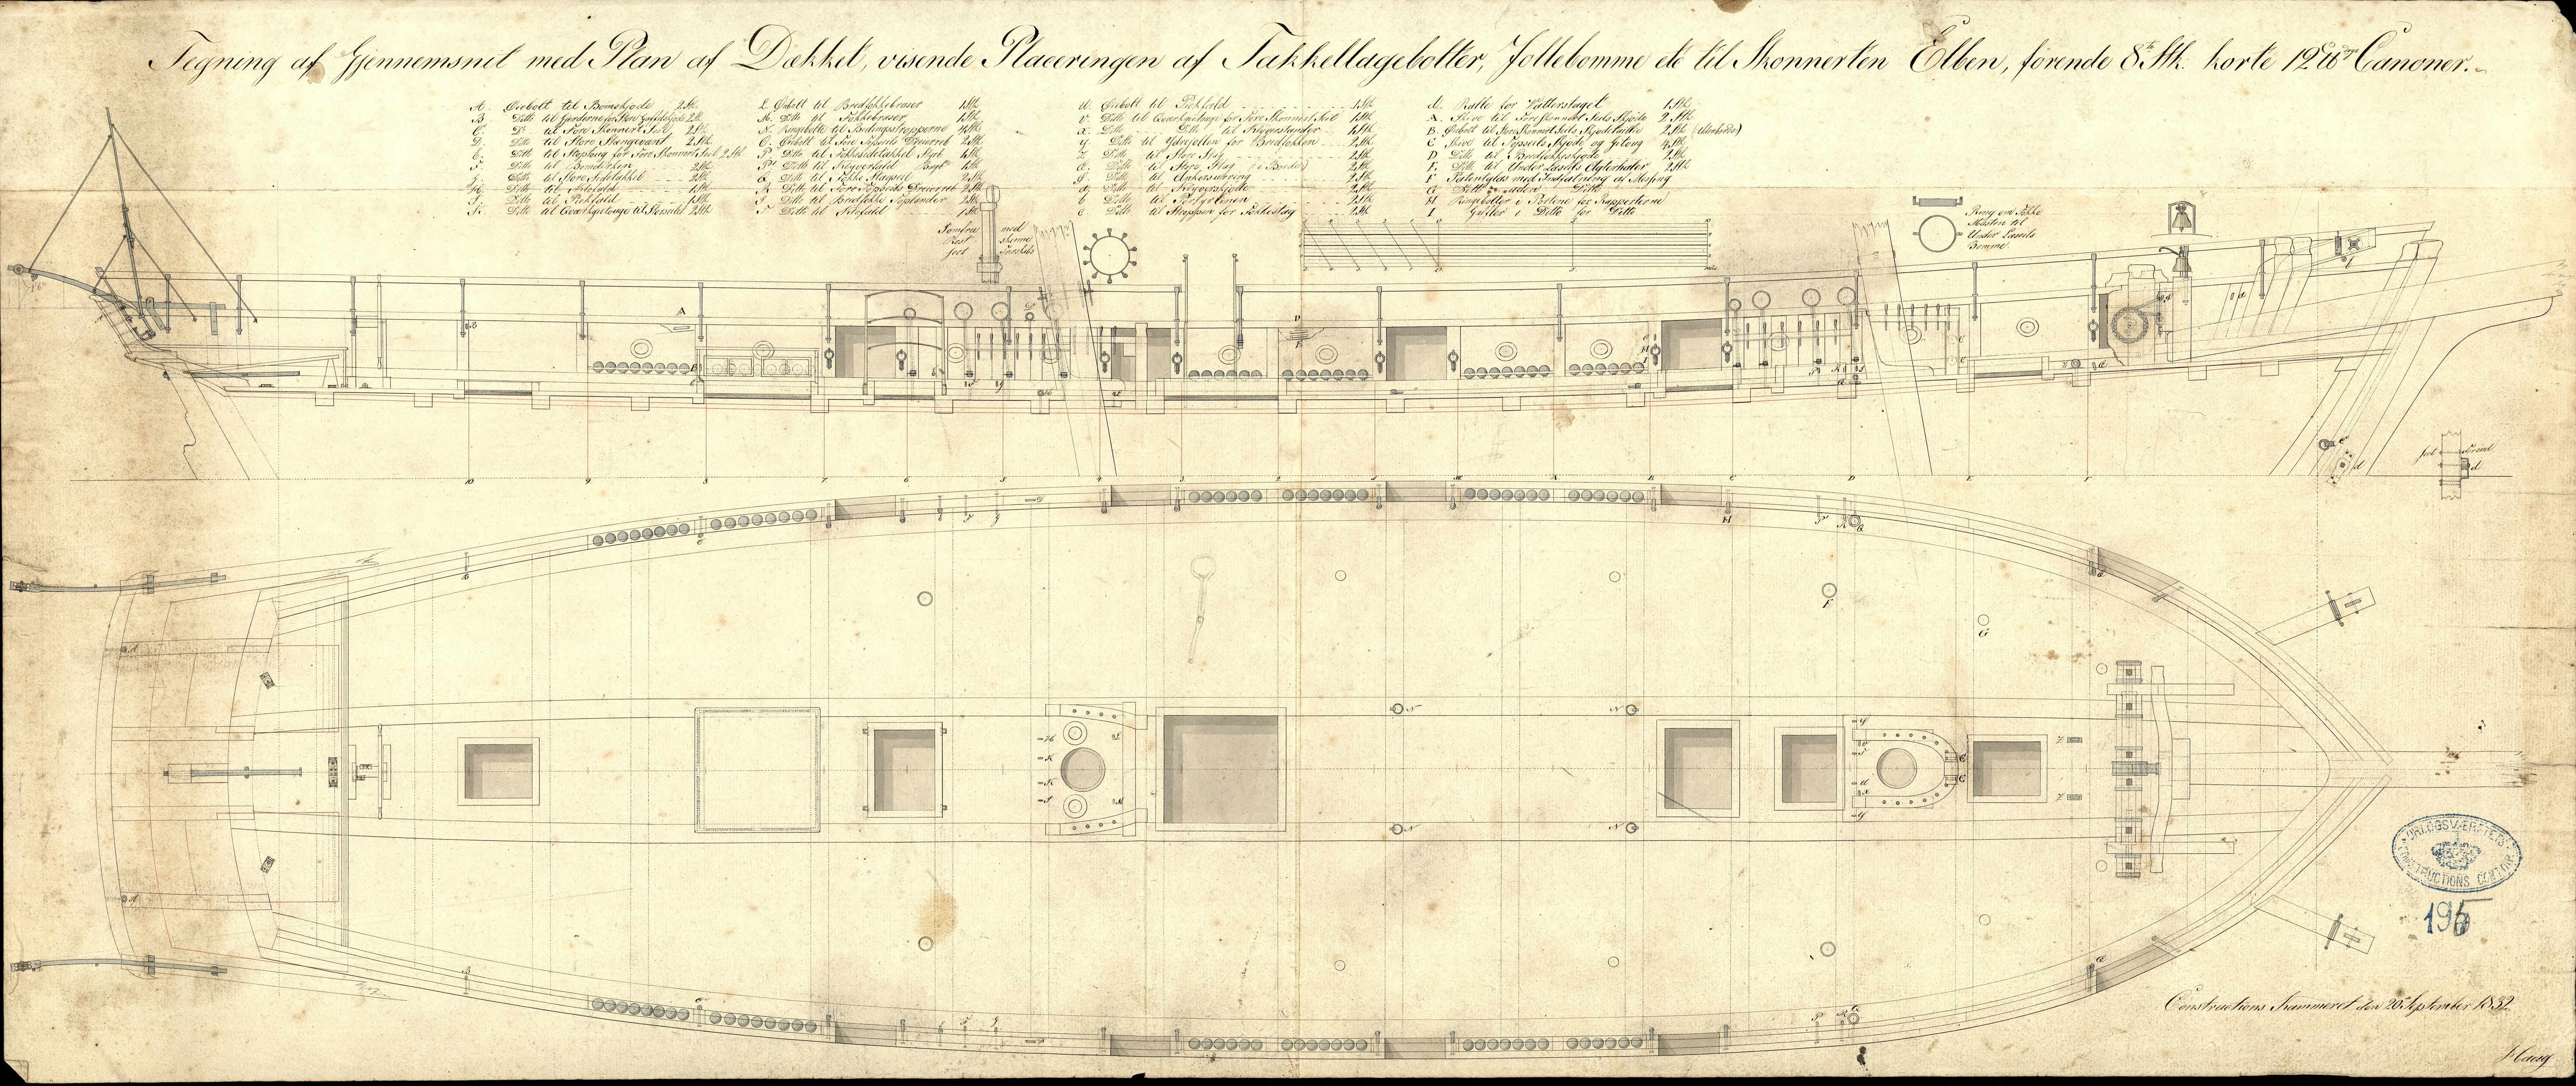
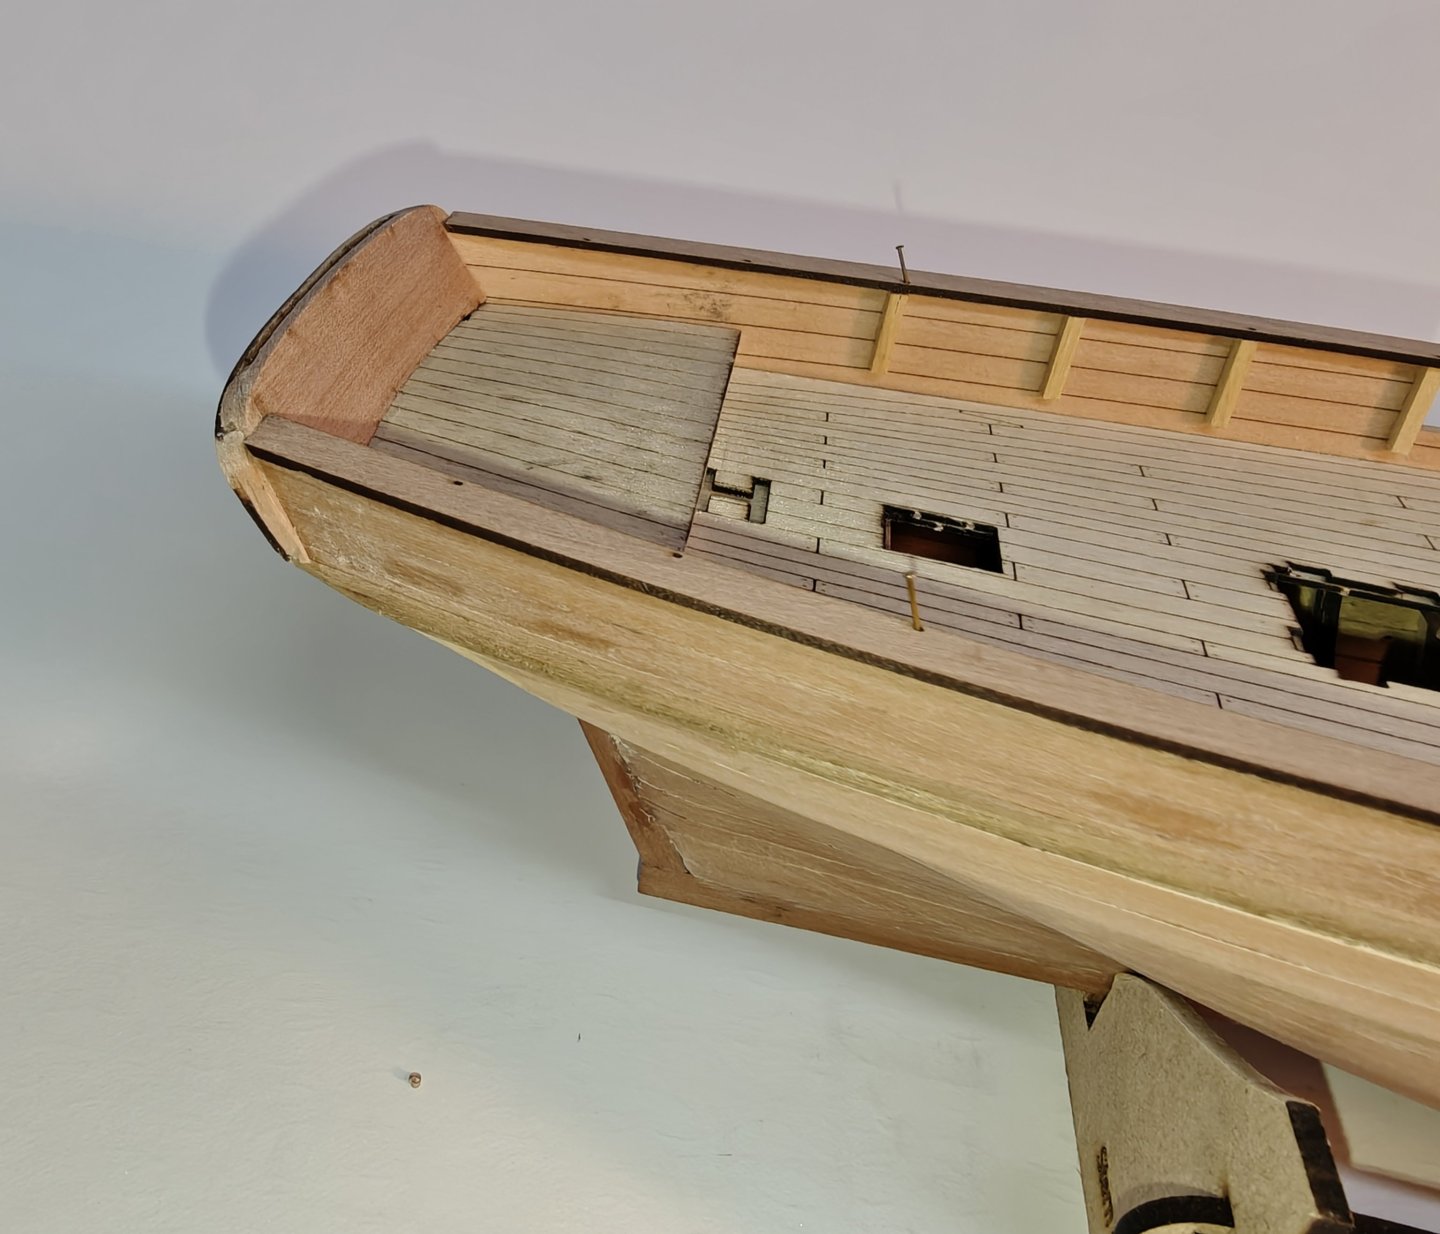
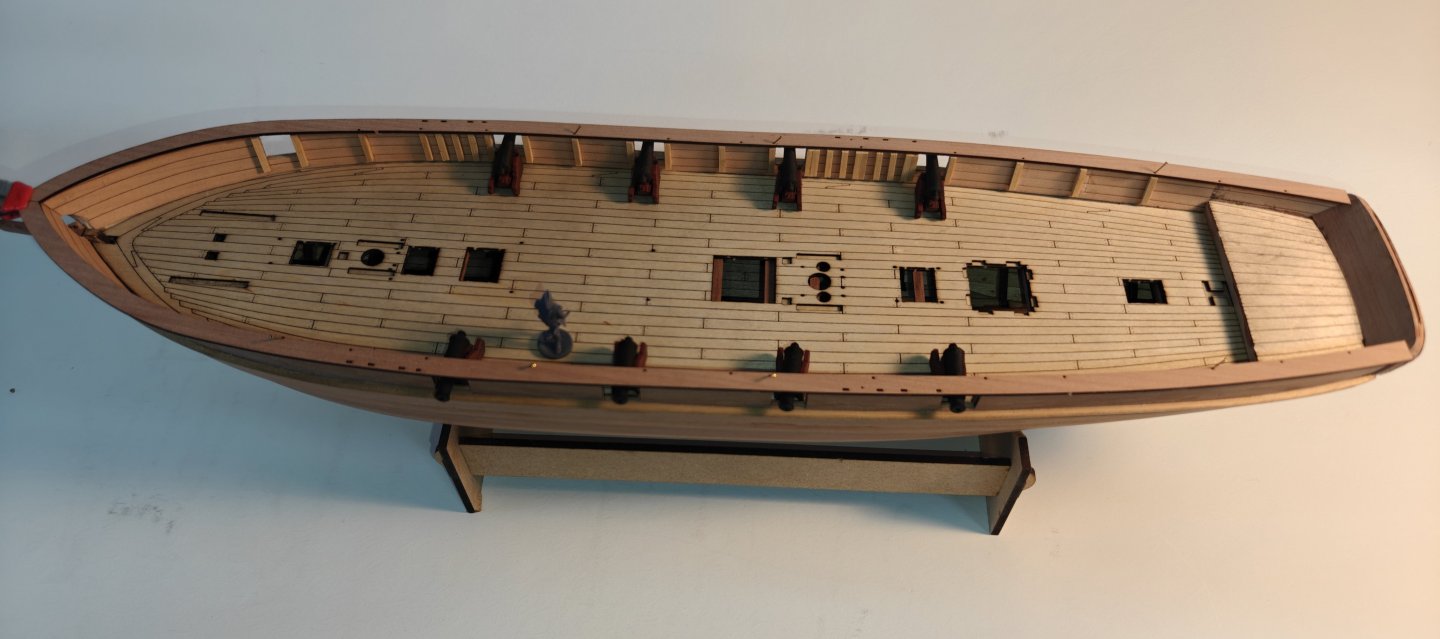
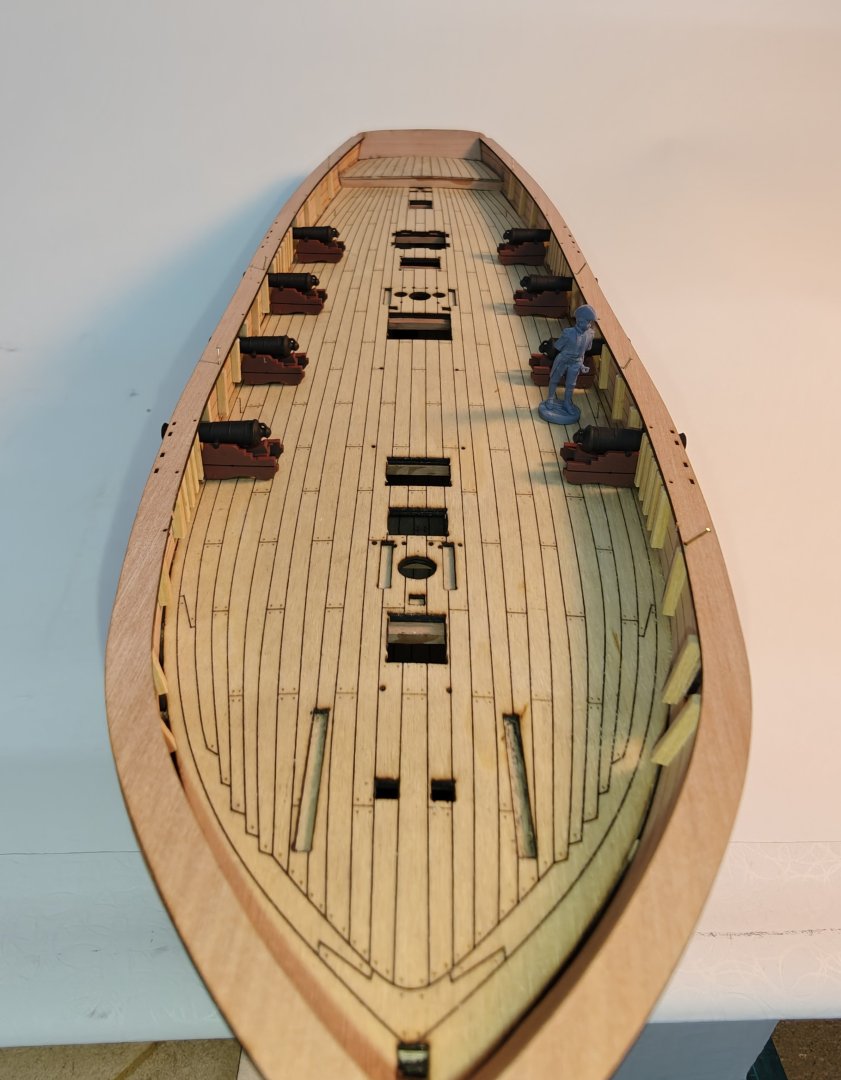
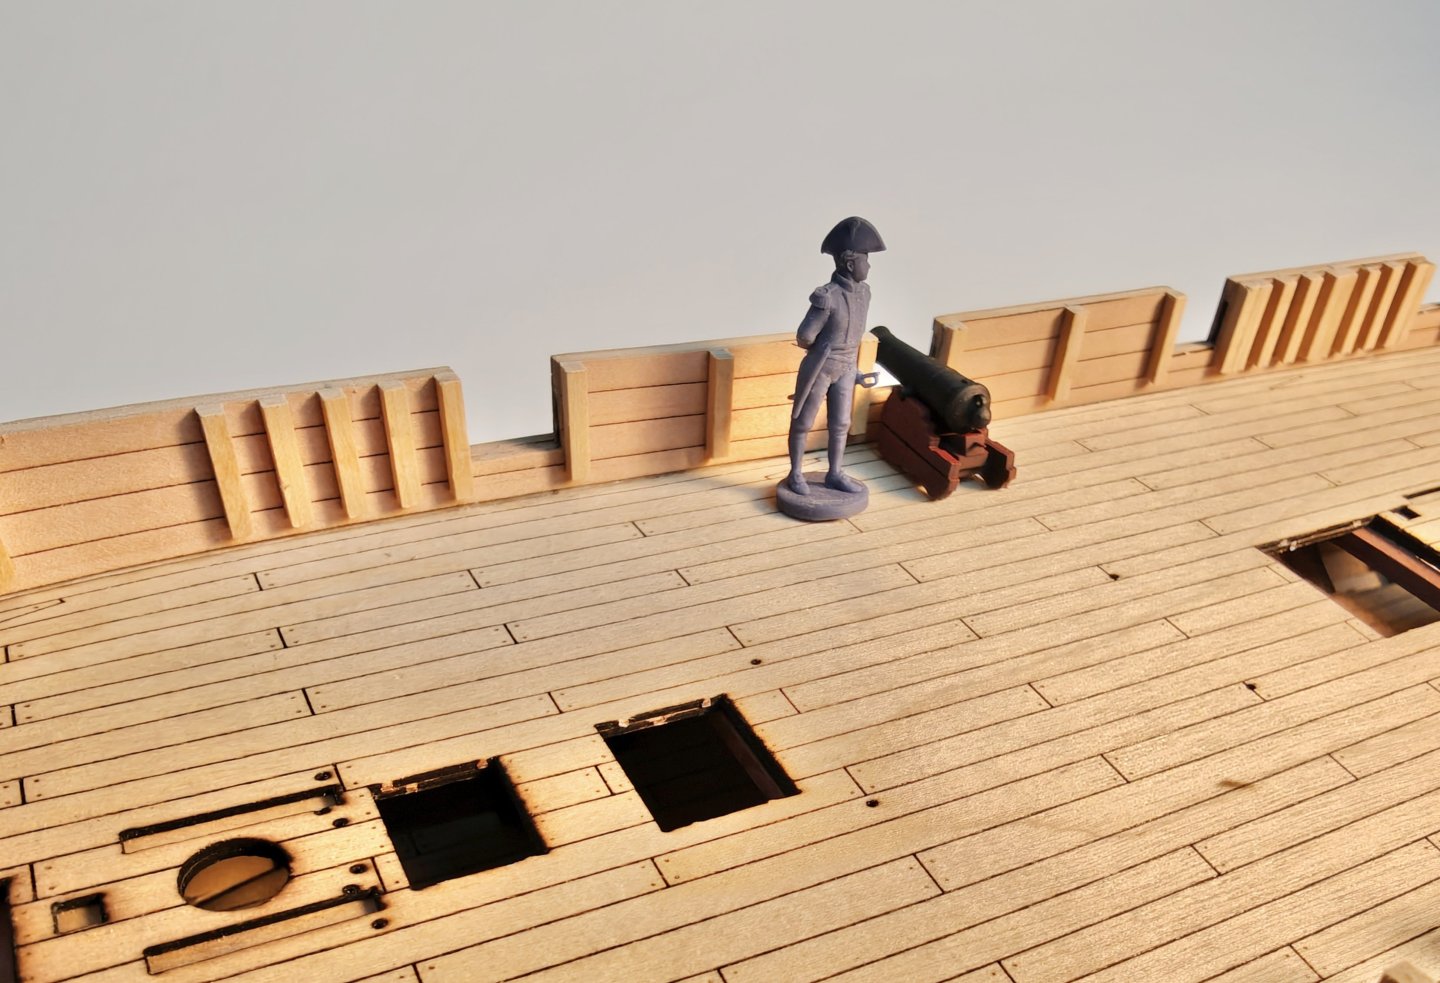
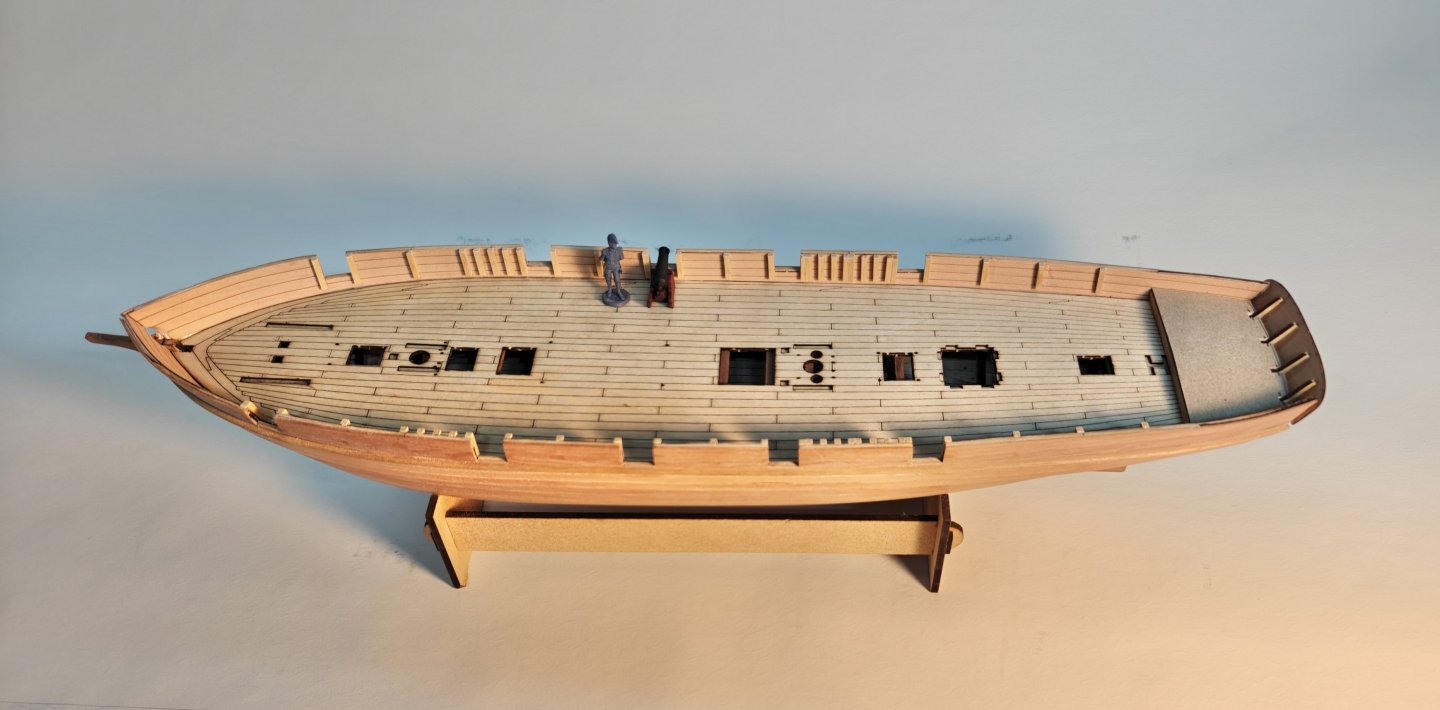
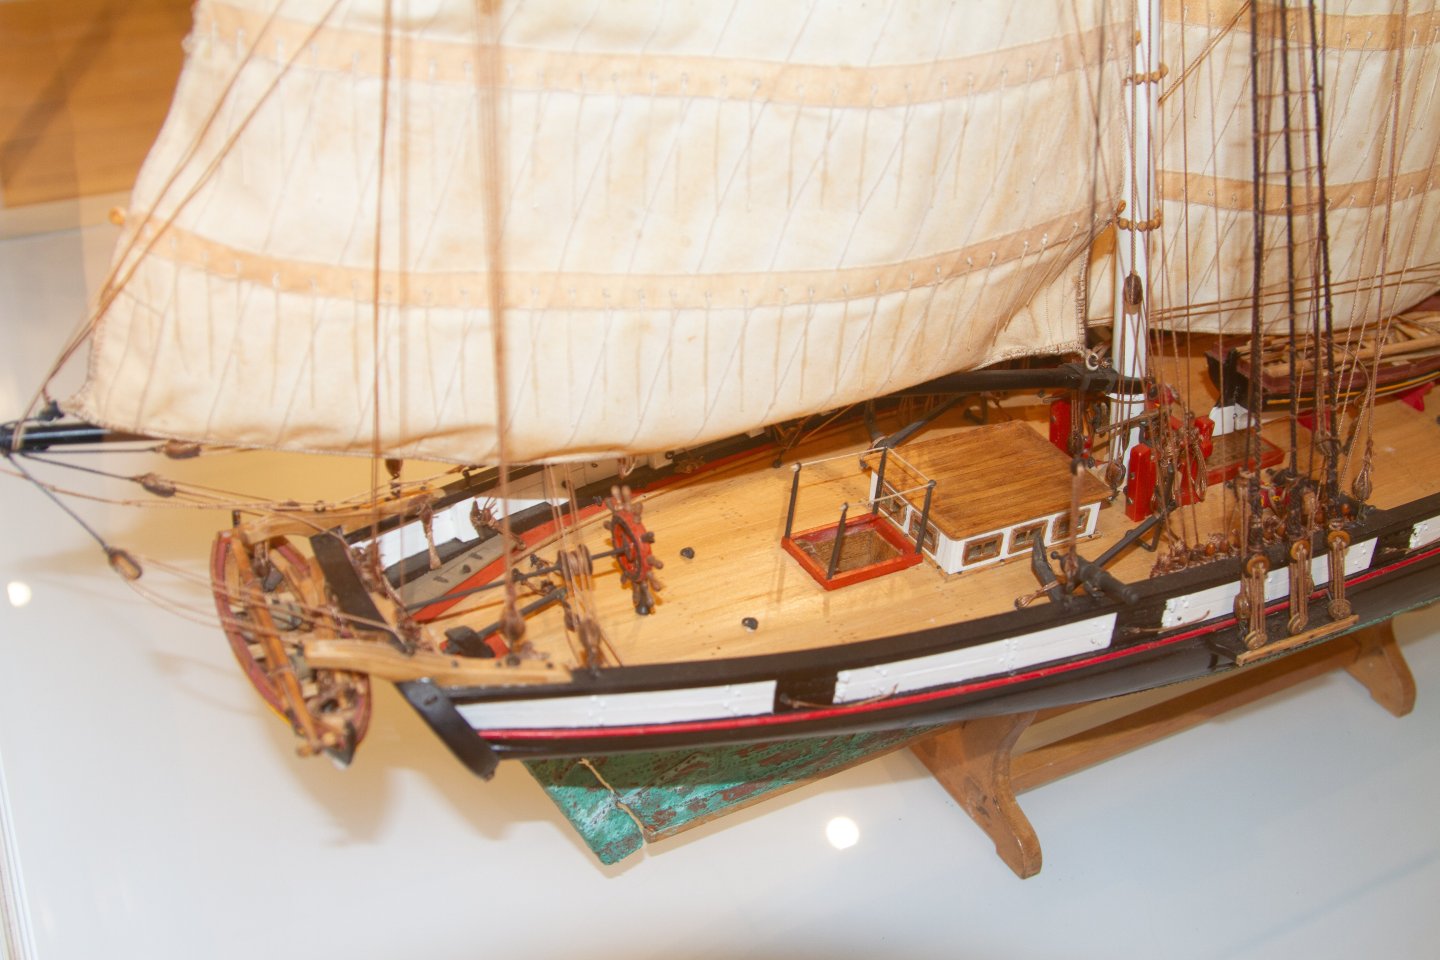
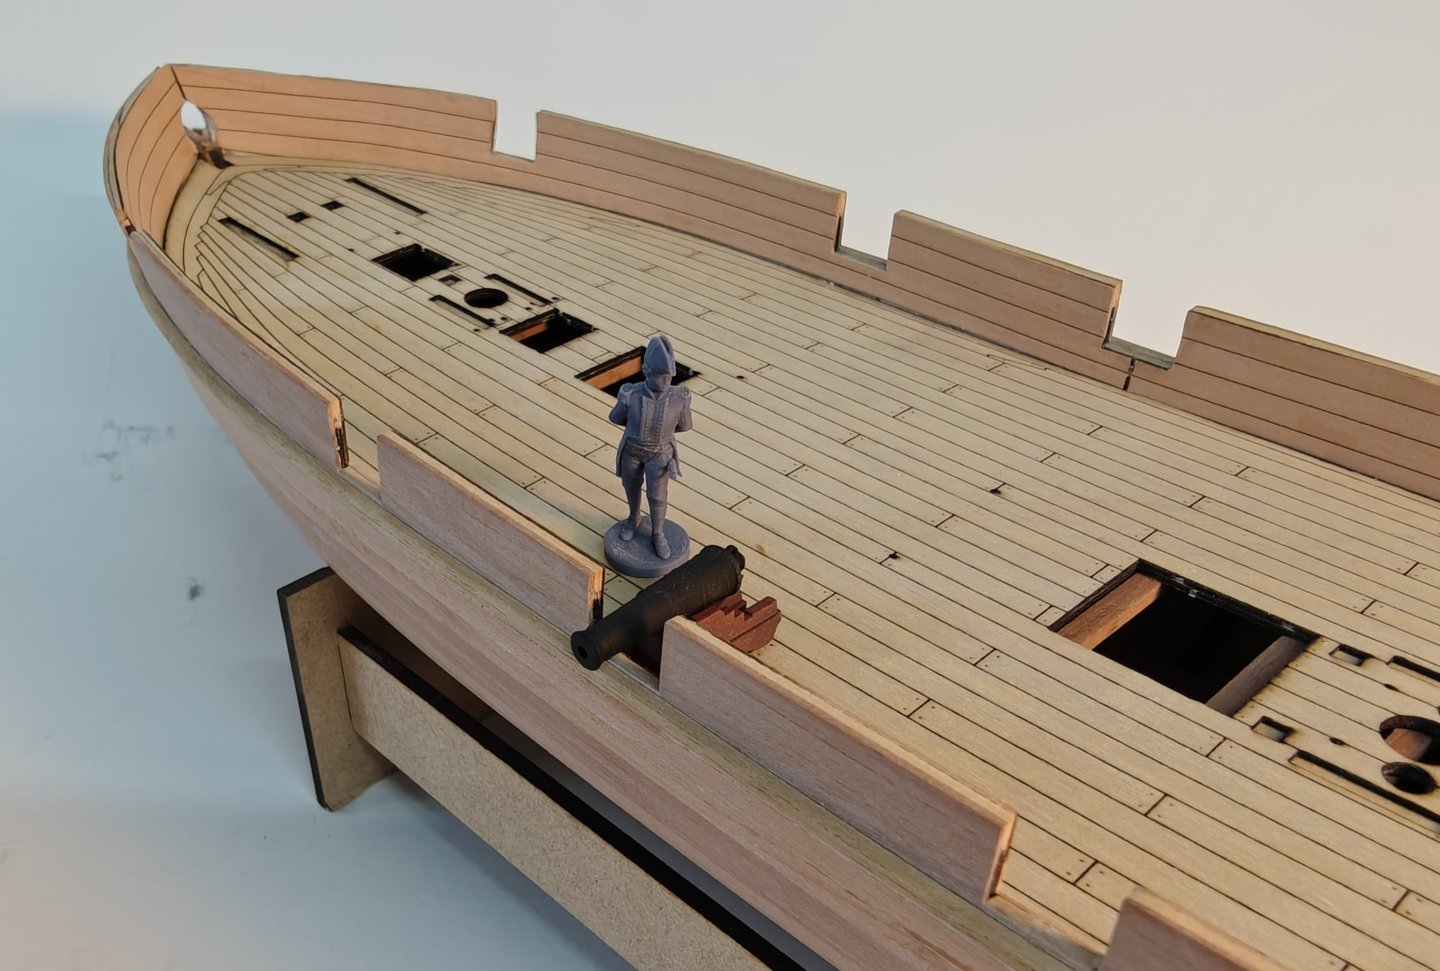
Log entry 11 - stern and raised deck I had forgotten that I had to finish the lower stern before I can move on to painting! So I have been working on that, cutting out paper templates, scanning, drawing in CAD, laser cutting and attaching. This is the result: I had to use a bit of filler, but I think I need to get another kind. This one is a bit grainy and I won't sand as smooth as the surrounding wood. I think it won't be hodden enough under paint. So I will look for something smoother to use on top. Before painting, I also need the raised deck st the stern installed, as the little vertical piece need to be white like the inner bulwarks. I have drawn and cut the railing as well, as that is nicer to do map out on the unpainted hull. In these images, it is just loosely attached with a few pins, but it gives a good idea of the future appearance of the ship. As you can see, they double as channels for the shroud rigging - an interesting arrangement and not one I have seen replicated in the few other models I have seen of these small Danish schooners (see examples a few posts back by me and Beckmann). But it is quite clear from the original plans. And I couldn't help myself, but had to try to place the short 12 pounders on the deck. I think it will be a nice looking deck eventually 🙂. Thanks for looking! BR TJM


-
Log entry 10 - inner bulwarks pt. 2 Returning now to give a bit of attention to the inner bulwarks. I have added all the vertical bulwark elements (is there a technical term?). They are simply made from 2x2 mm boxwood - I would have preferred pear to keep it consistent, but boxwood is what I had. And it really doesn't matter, as everything will be painted white anyway! They are raised 2 mm above the deck to make space for the edge that will be installed after painting. I have also taken care with the spacing, which is a little inconsistent in the plans. I have used the shot garlands as templates to get the correct distances where I could. At the stern you can also see a cardboard template for the raised deck section. Now I will mark the waterline, mask everything off and get busy with the airbrush! After that, coppering will begin and I am both looking forward to that, and dreading it! BR TJM
-
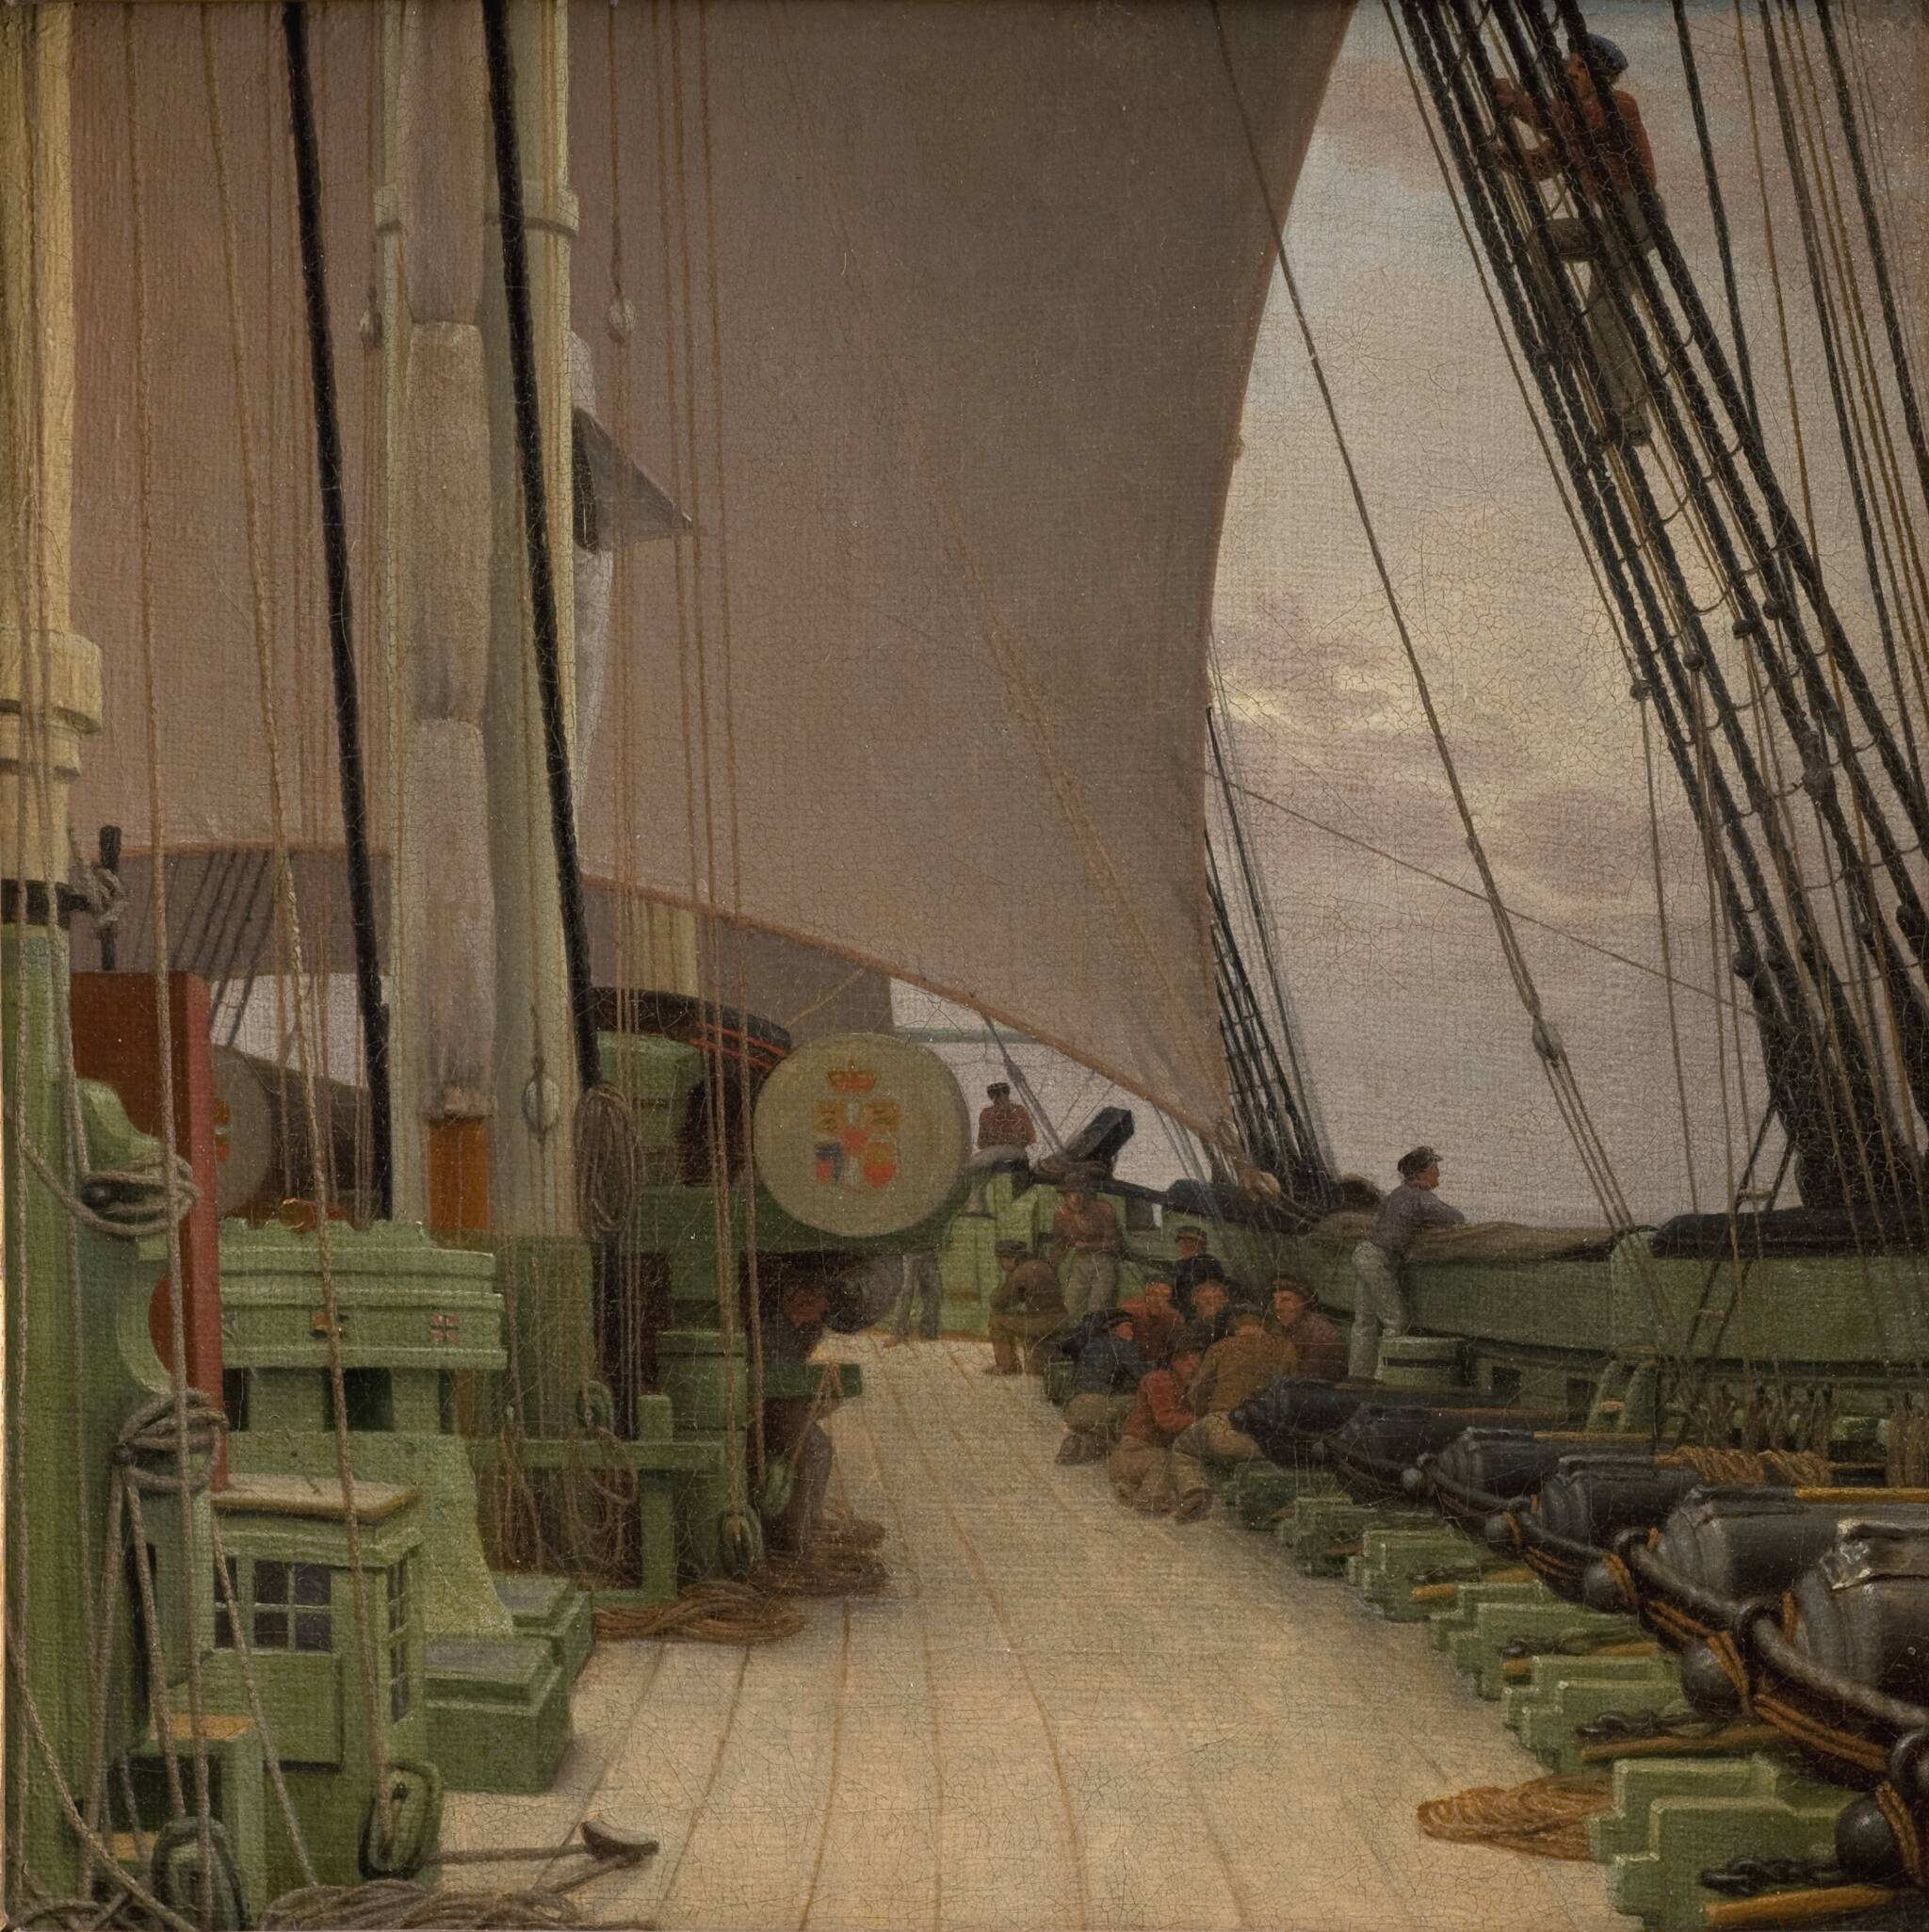
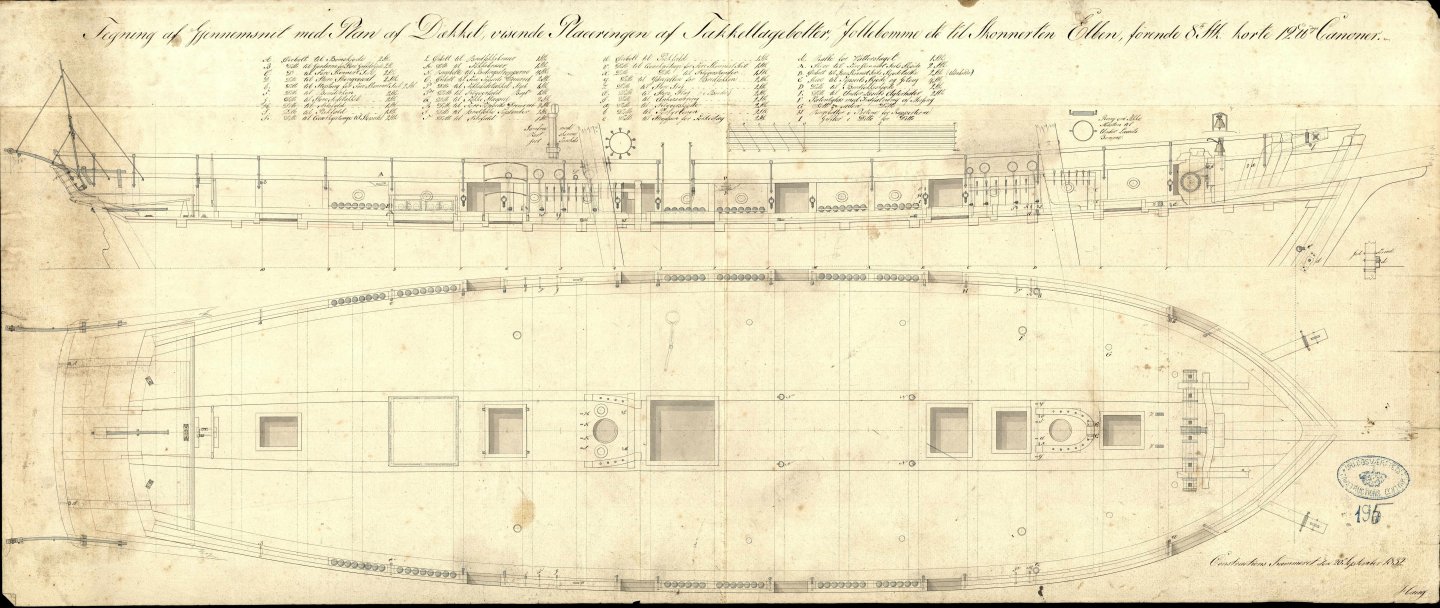
Hi wefalck, Thanks for the comment - yes, I am very mindful of that. Elben was made at around the time where they moved away from black/red/yellow trim and moved to black/white/olivegreen trim. How it was originally is anyone's guess, but the great model builder Peter Maack chose the former colour scheme for Delphinen, Elbens little sister: This is the colour scheme I am going for. I am sure it was re-painted later, likely when it was still in Danish service, before 1864, and I imagine it would have been painted like the Corvette Najaden, as captured by Eckersberg in this painting from the 1830/40's BR TJM


-
Thank you Matthias, I had not seen any of these before! Great for reference! Much appreciated 😃
-
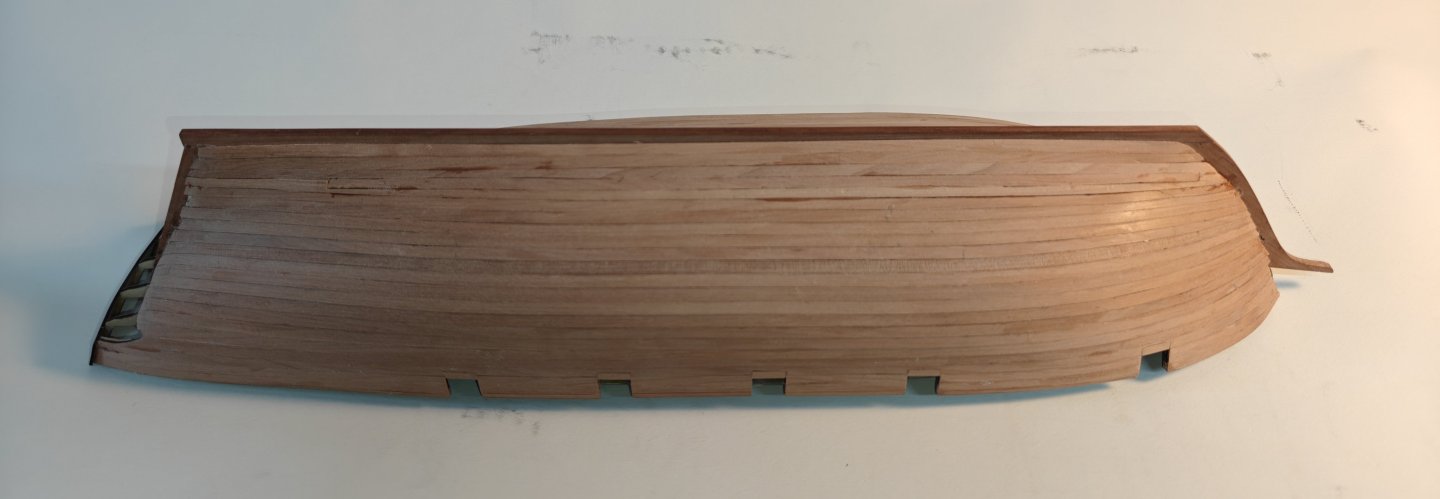
Log entry 9 - whales I have now installed the molding and the wales: The molding is from Amati and in walnut, hence the different colour of the wood compared to the pear planking. The moulding is a tad oversized compared to the drawing, but I still think it is preferable to a simple thinner strip. Everything will soon be painted: white for inner bulwarks and outer bulwarks above the whales, black below. The molding itself will be red, as will the inside of the gunport lids. This painting will happen after I add vertical strips on the inner bulwarks as per the drawings: BR TJM


-
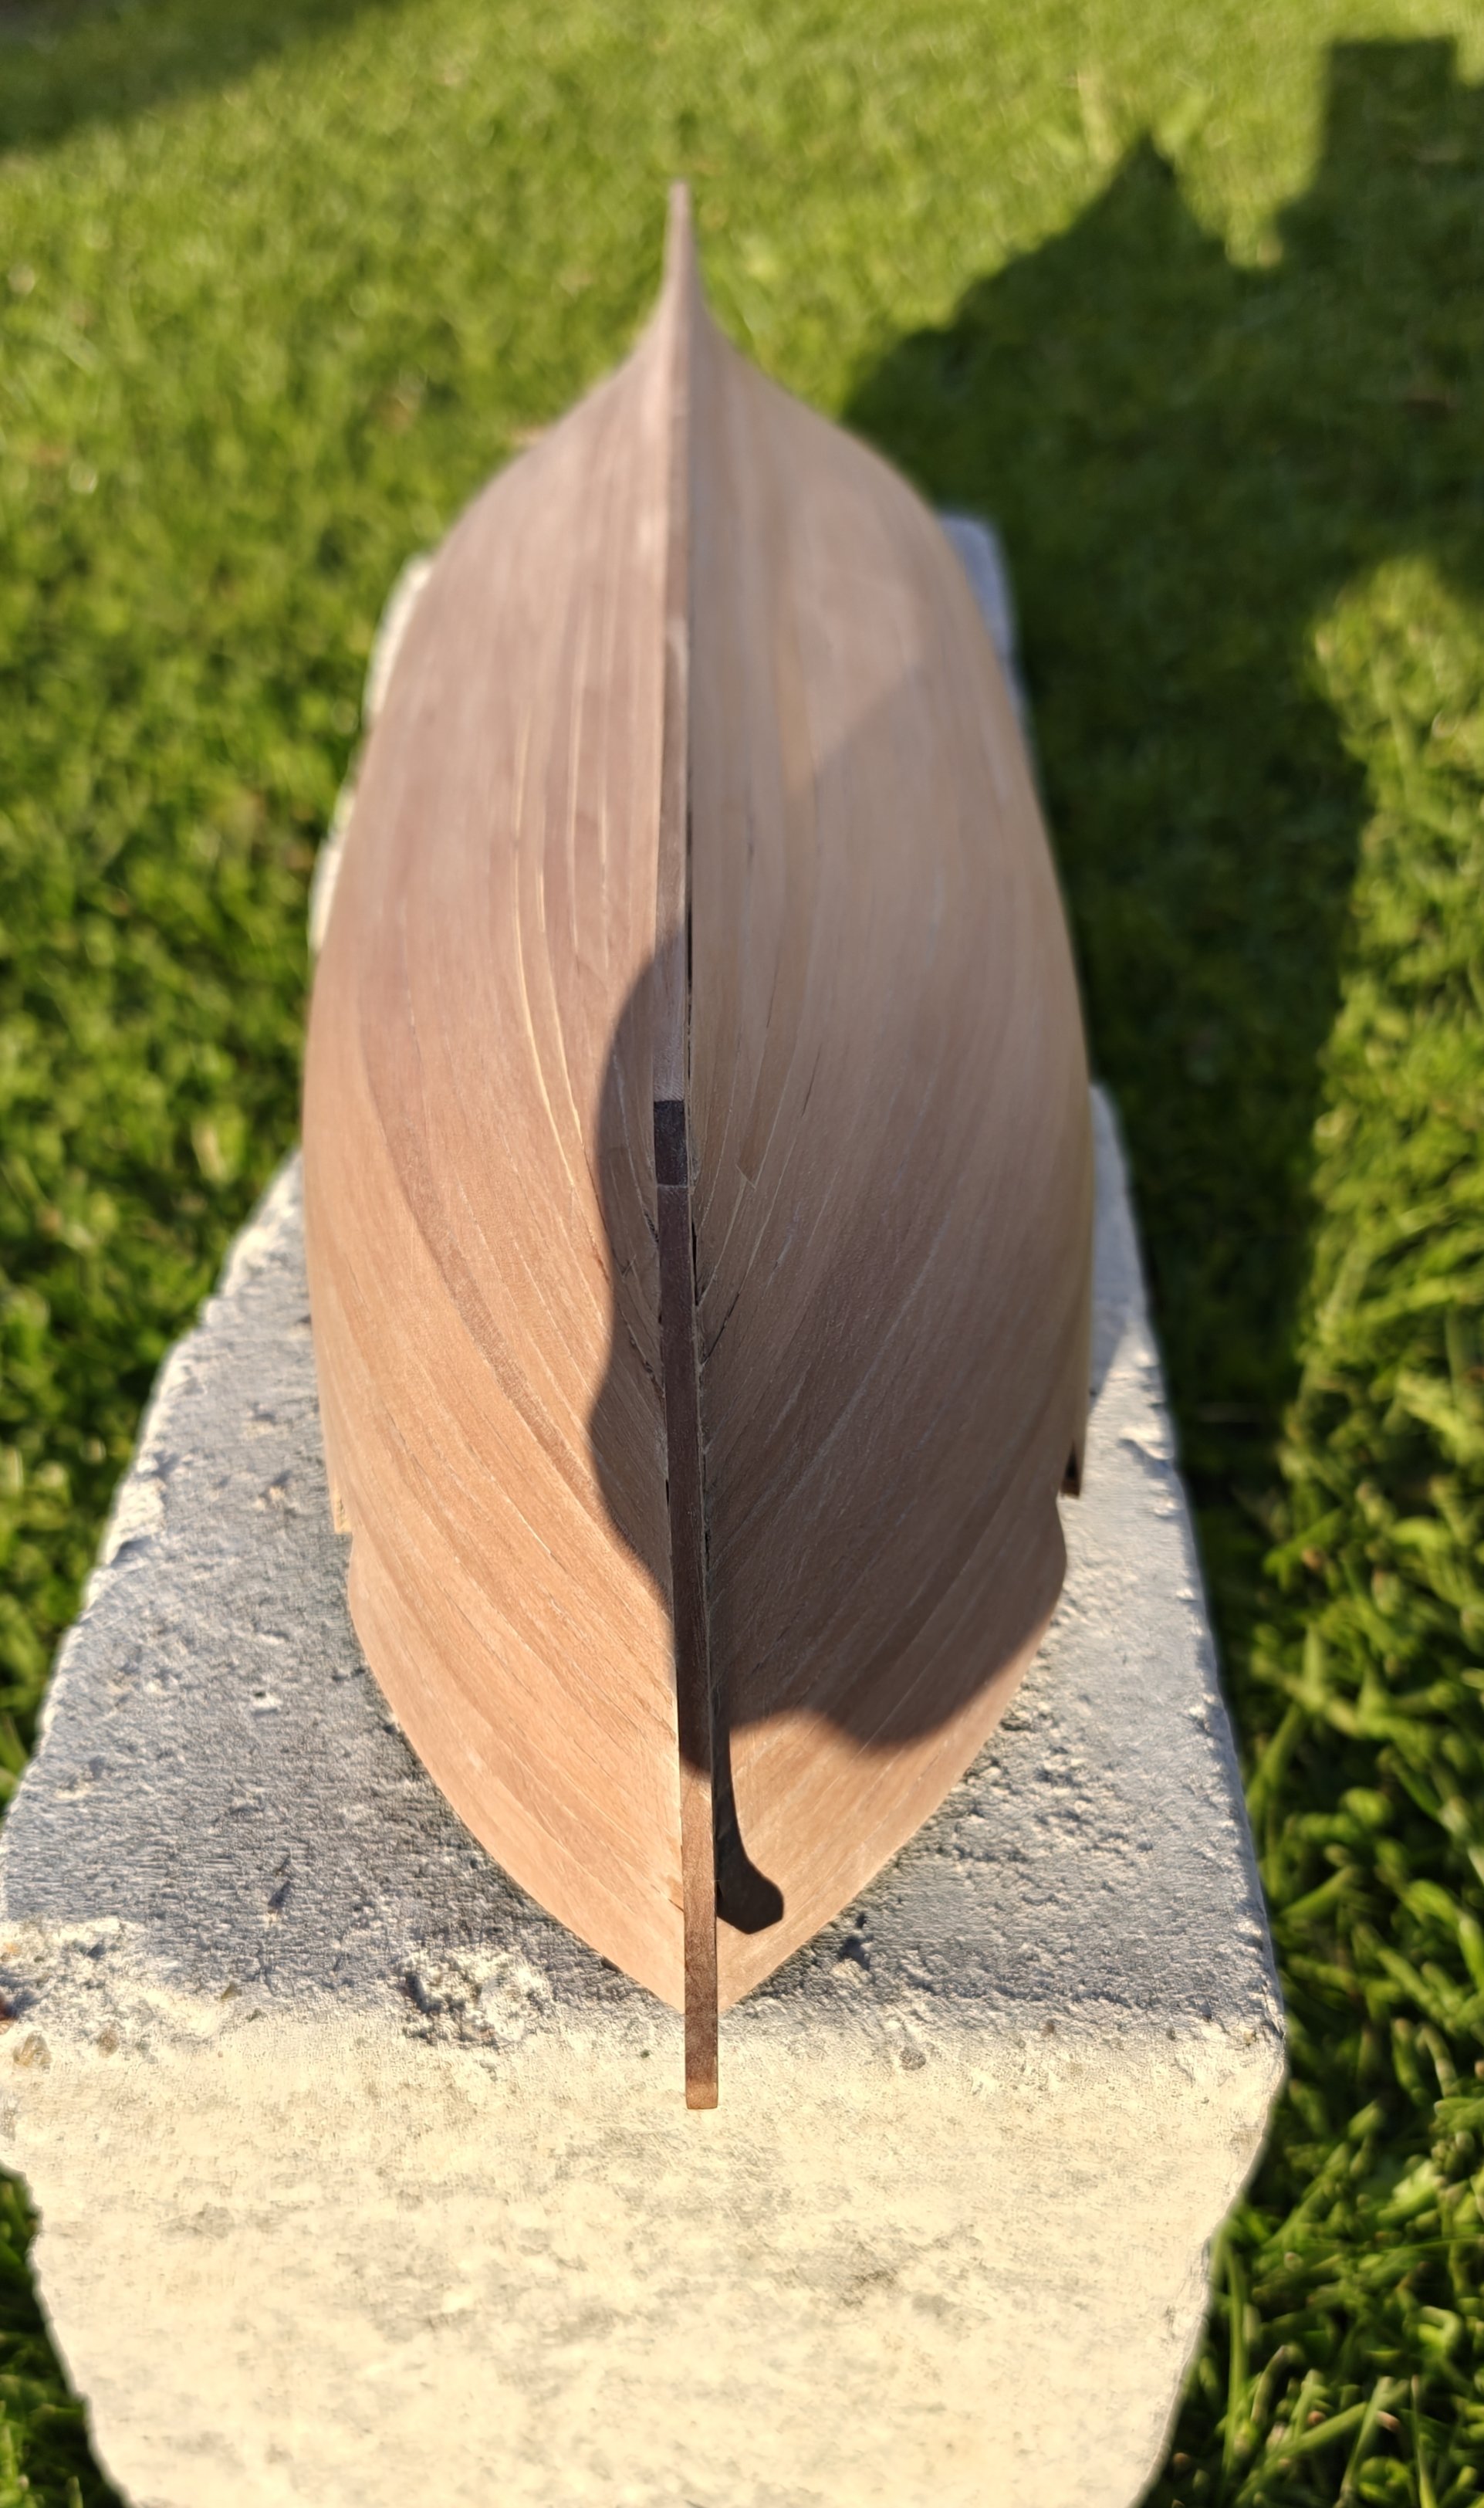
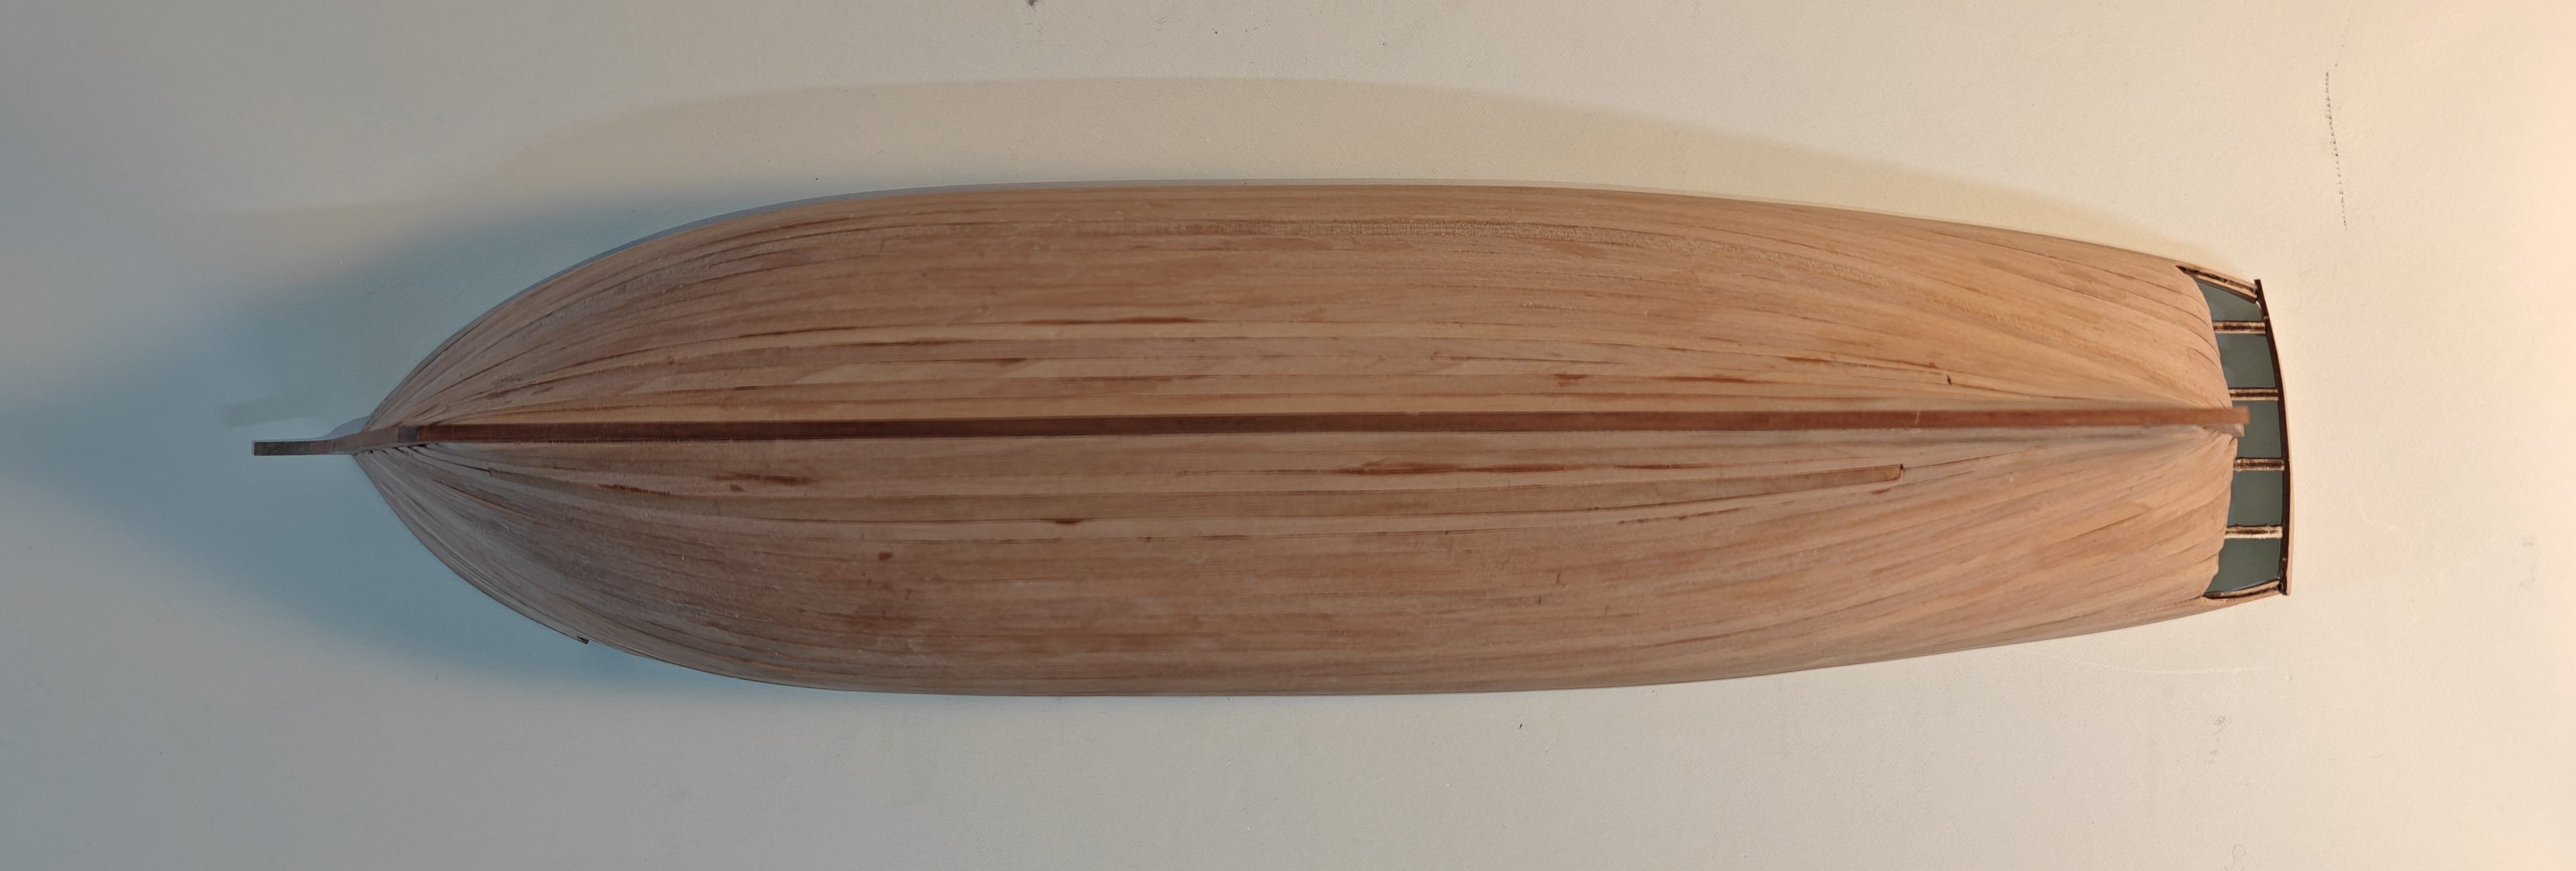
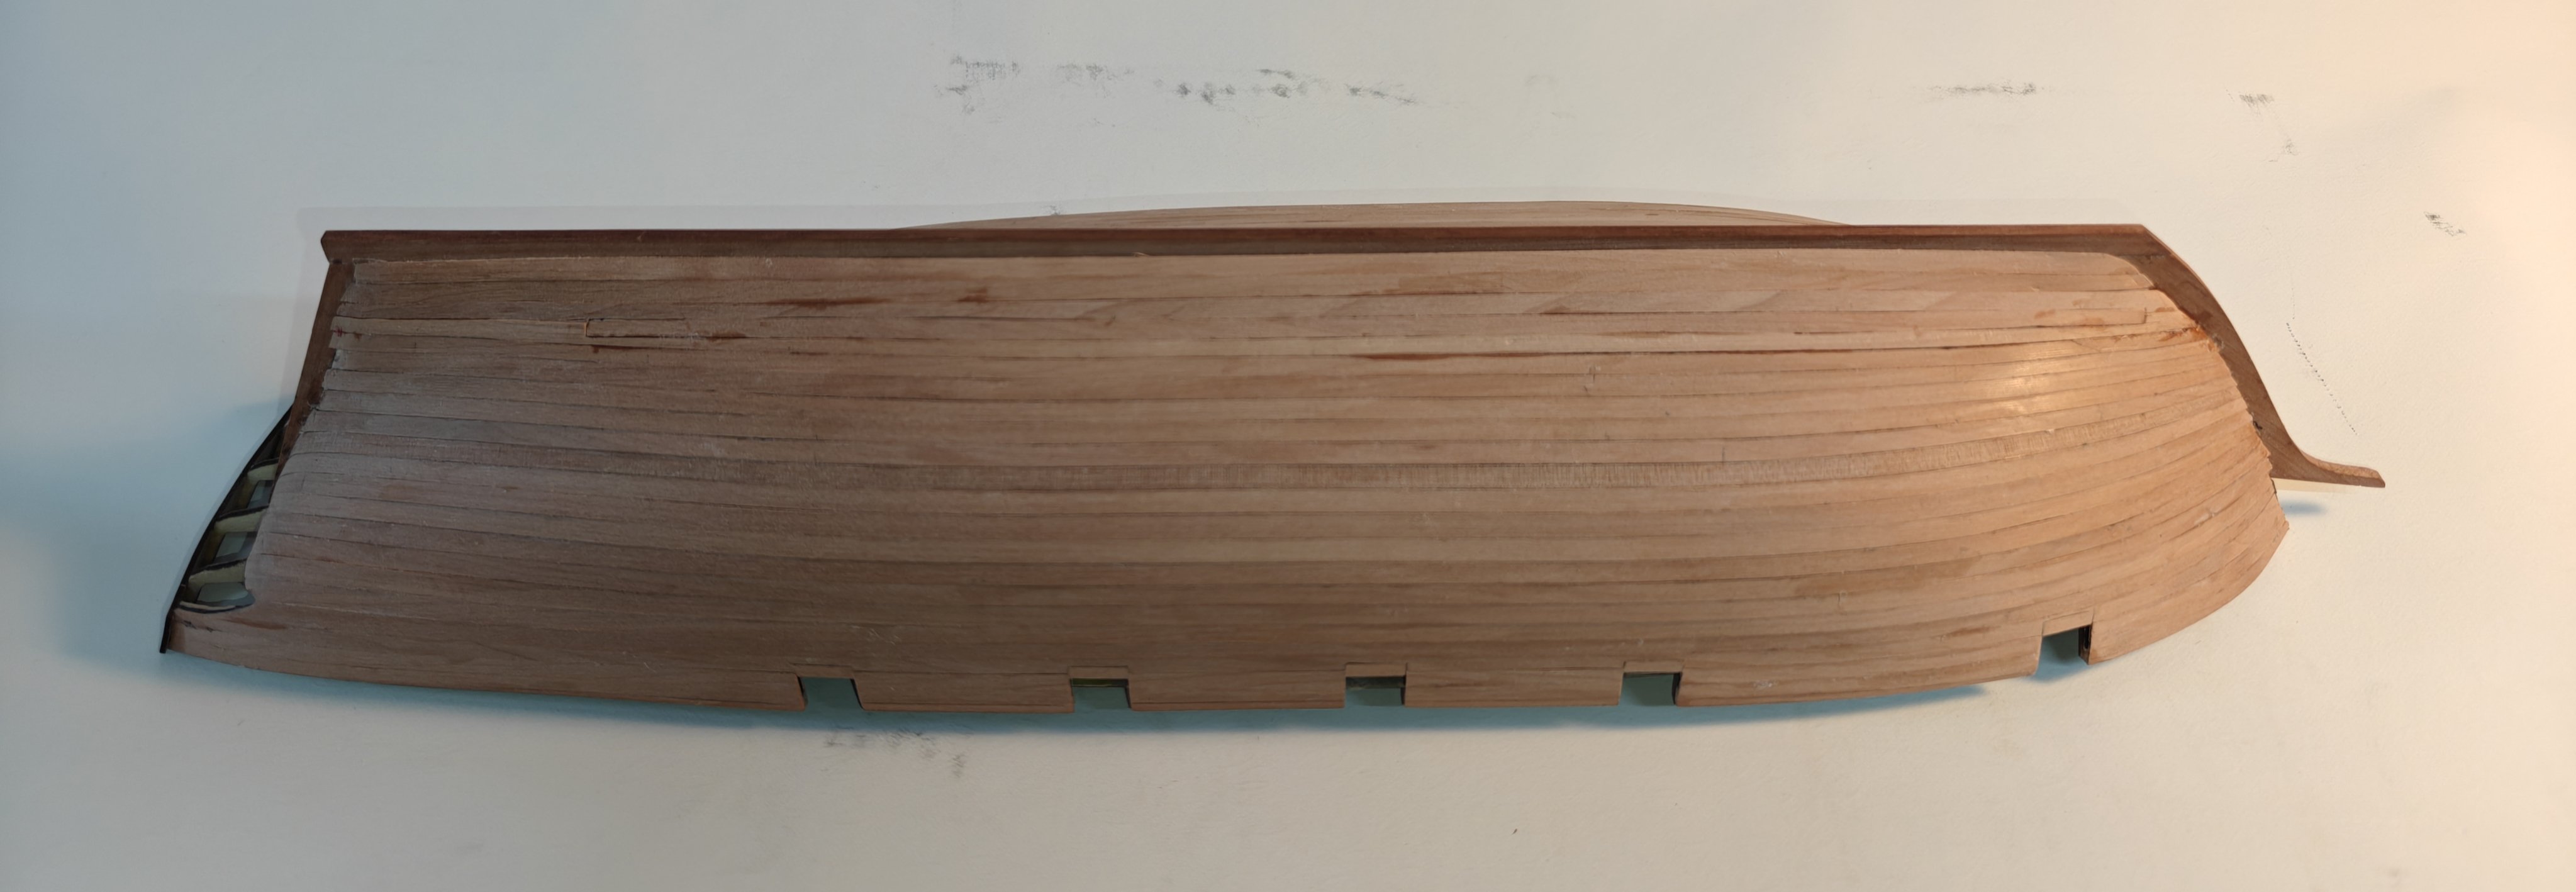
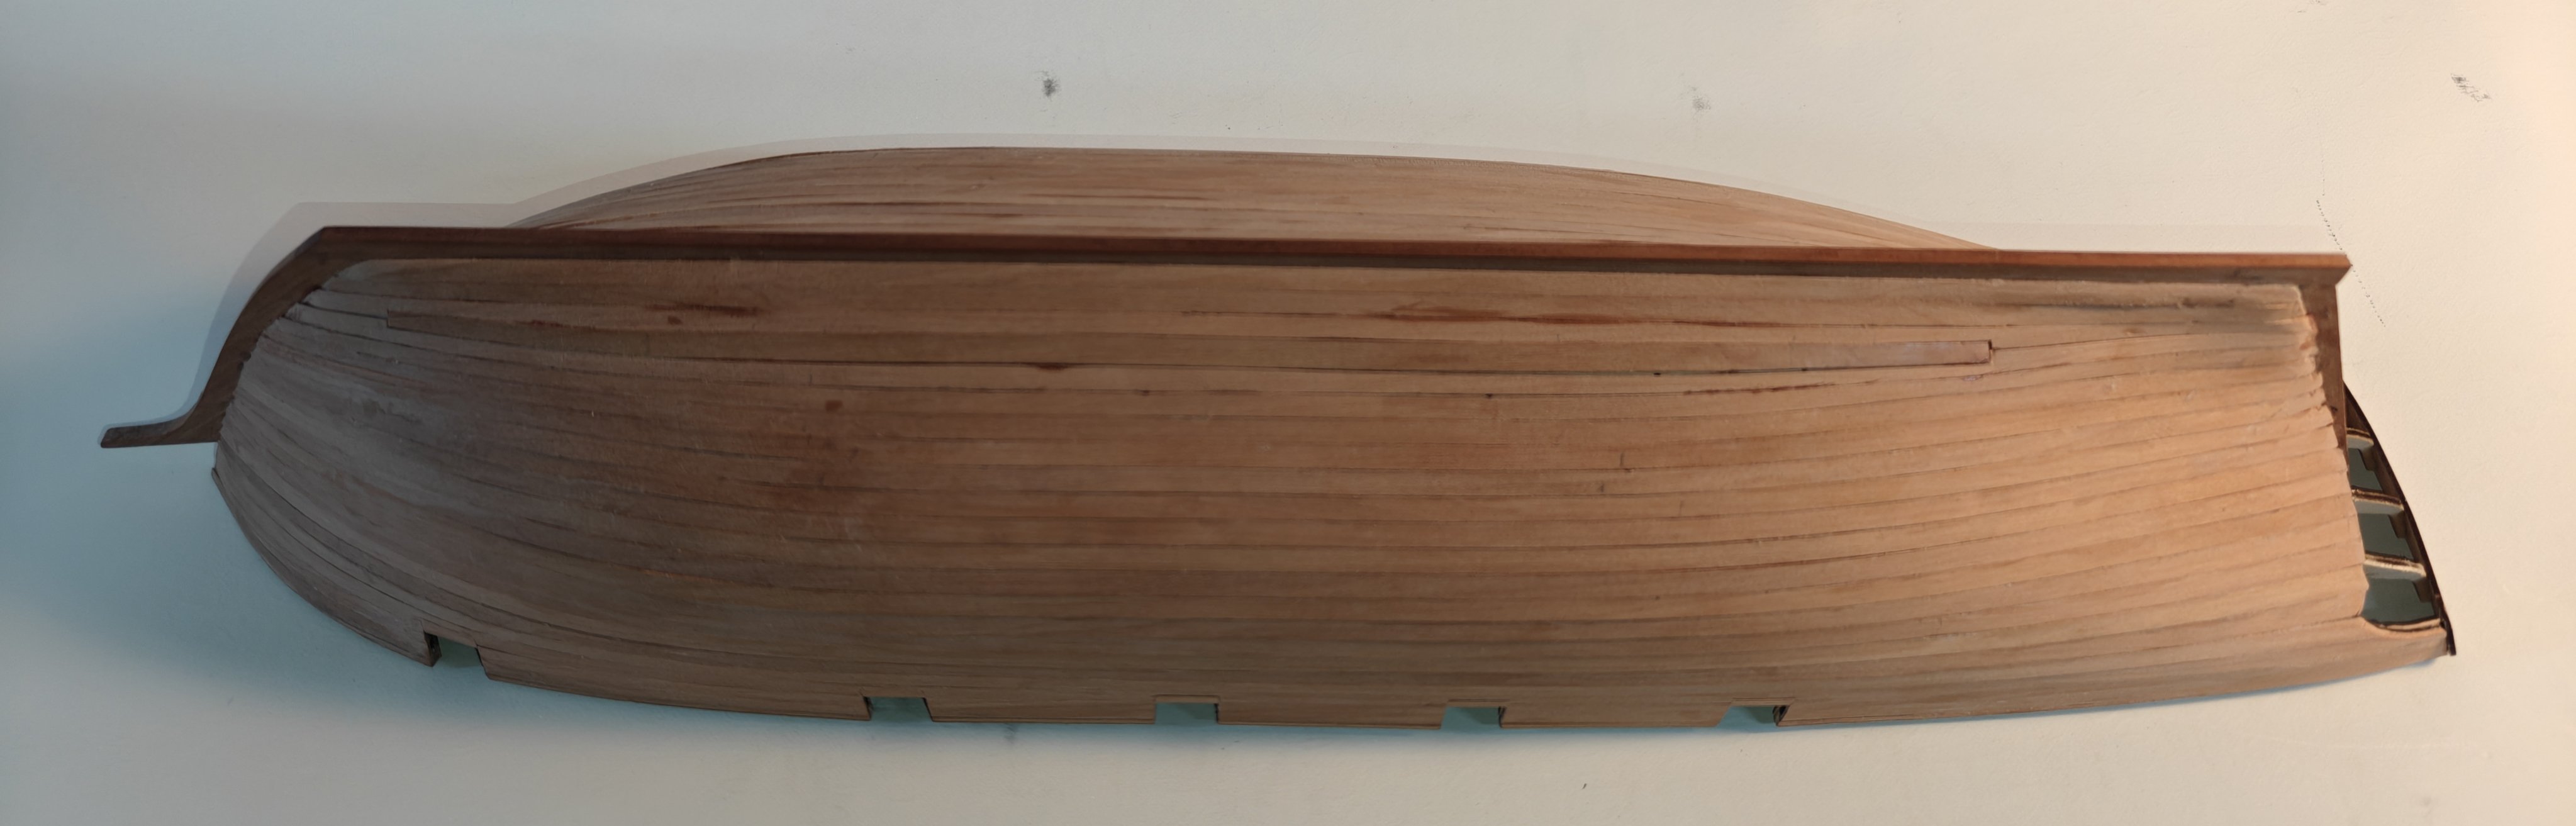
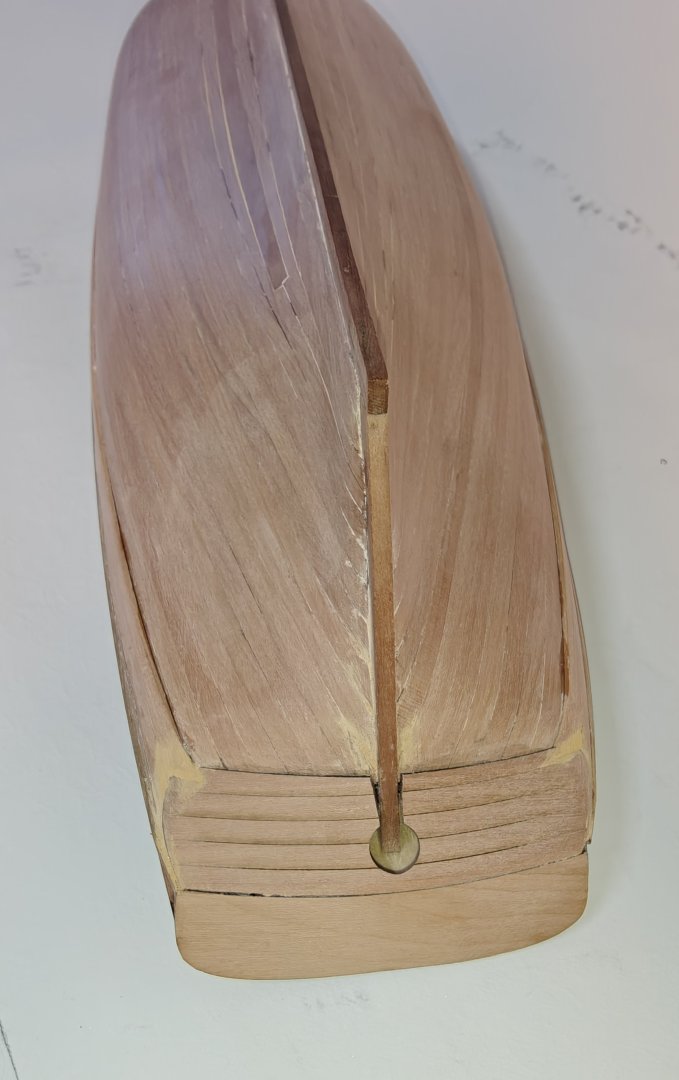
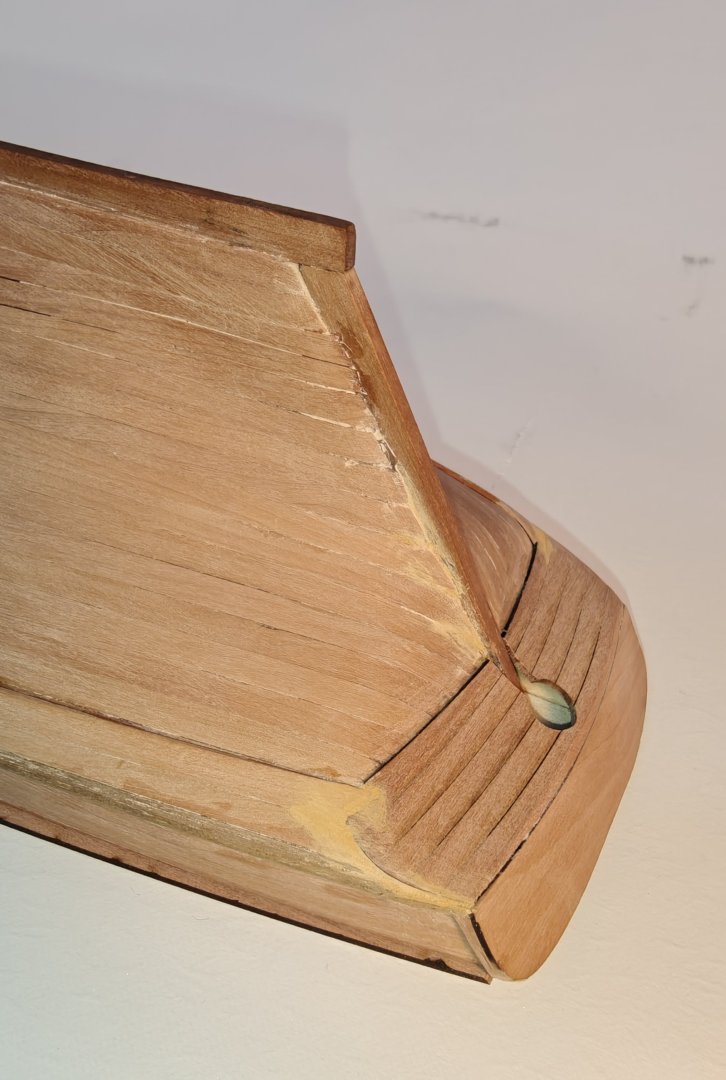
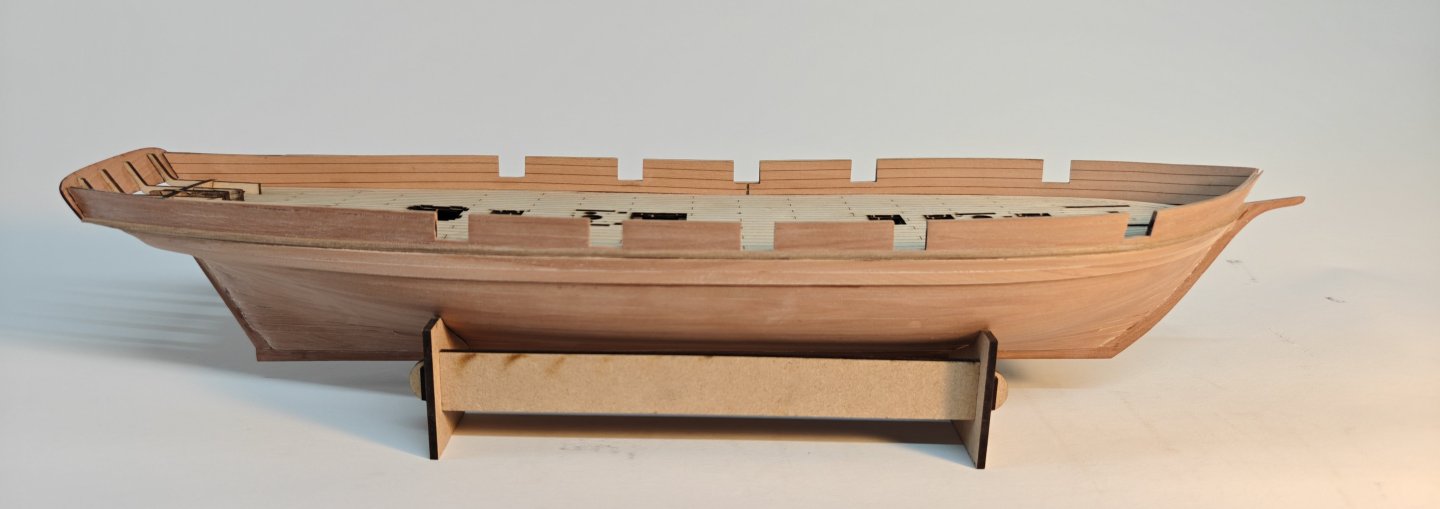
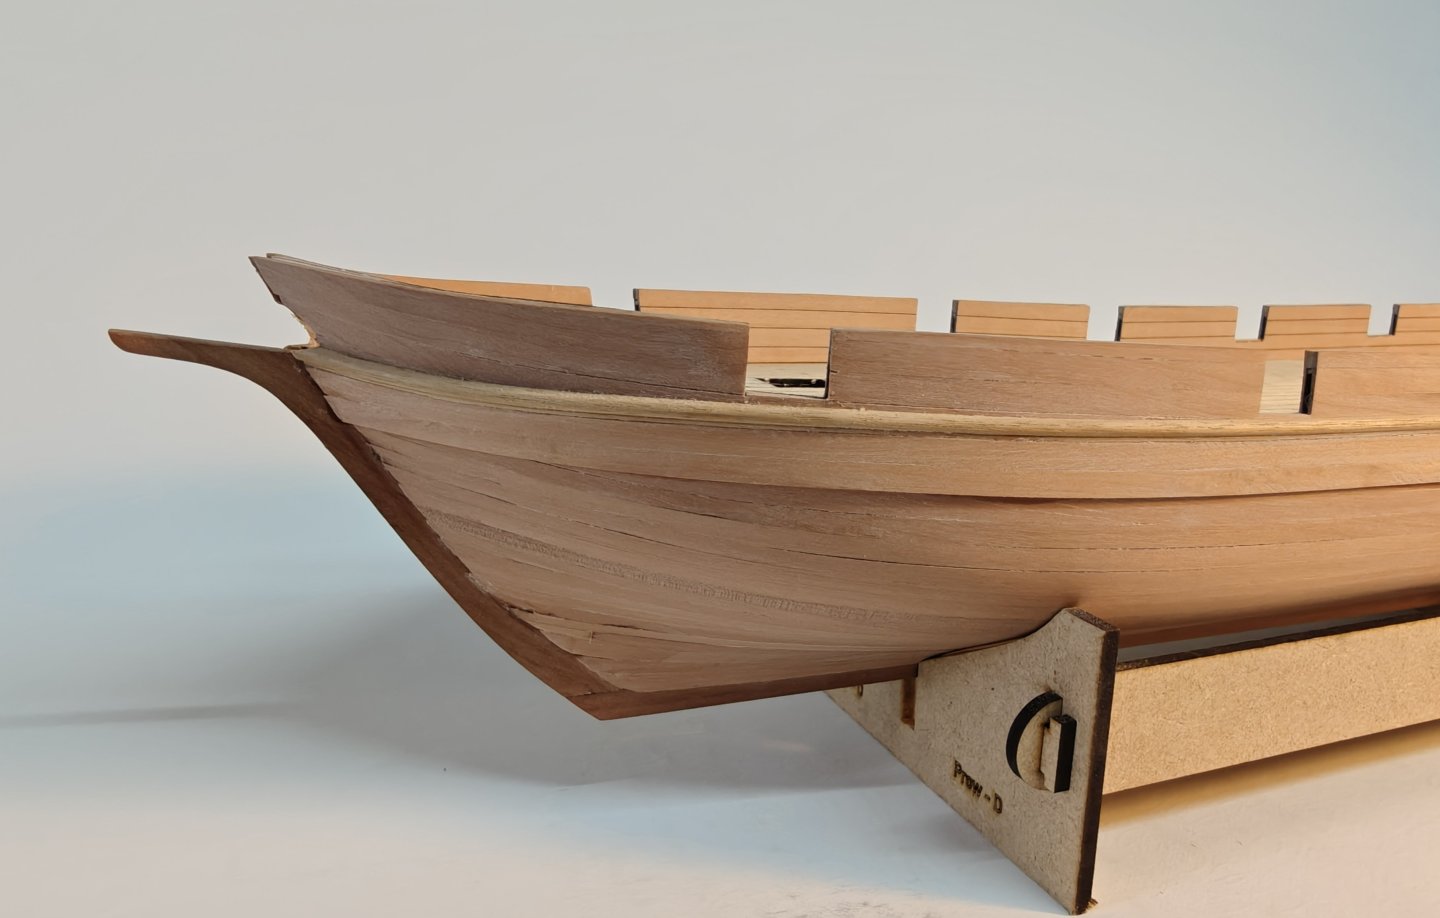
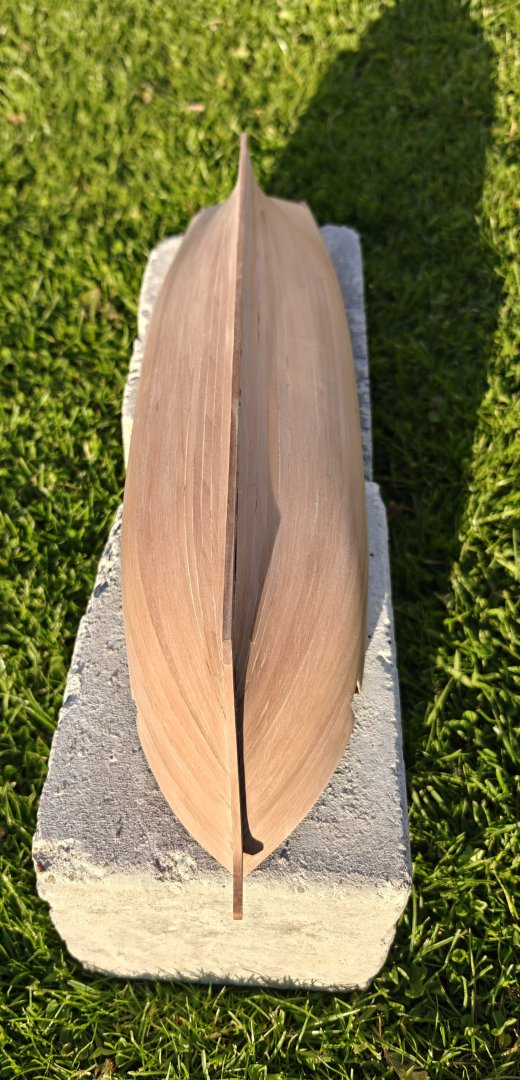
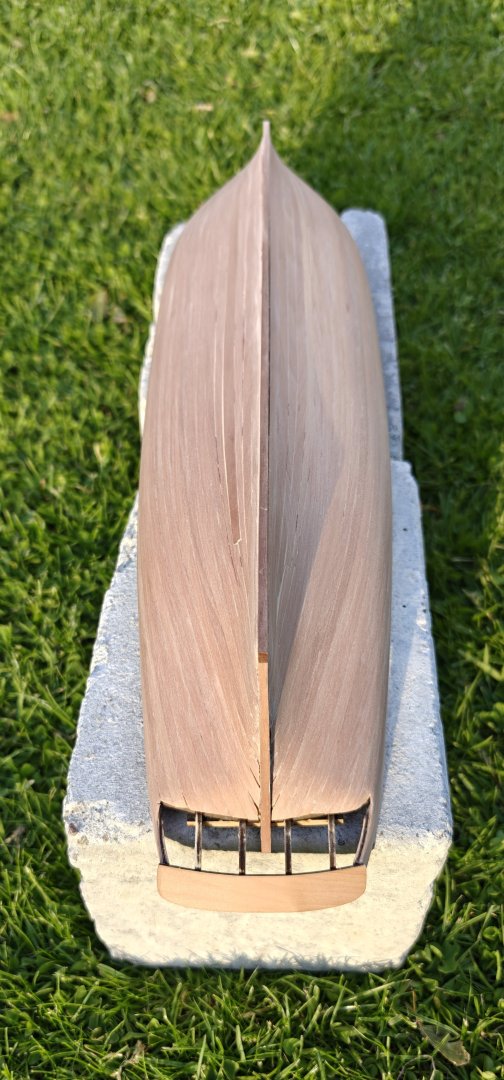
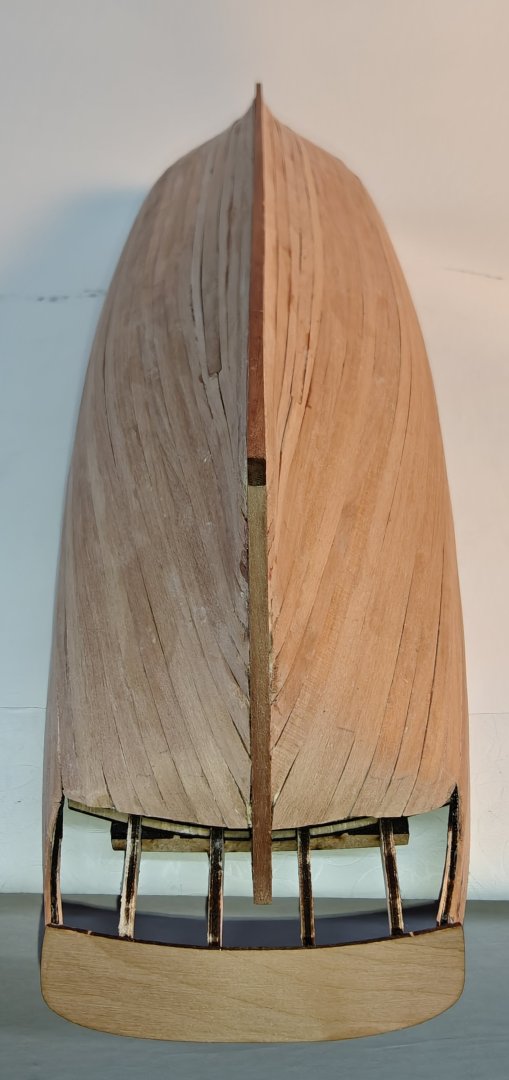
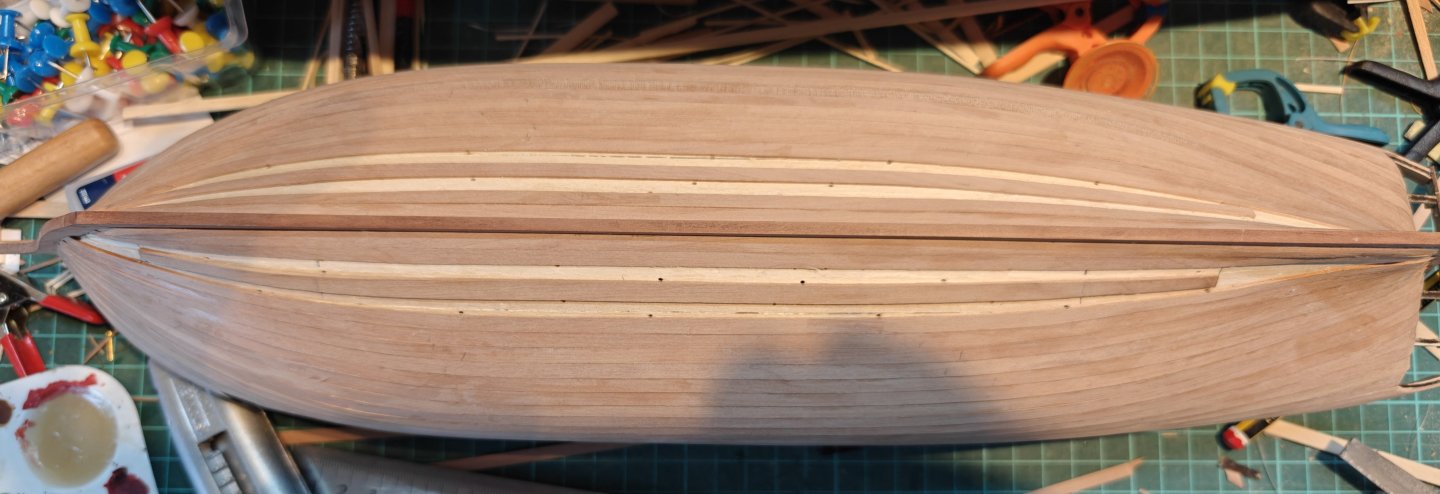
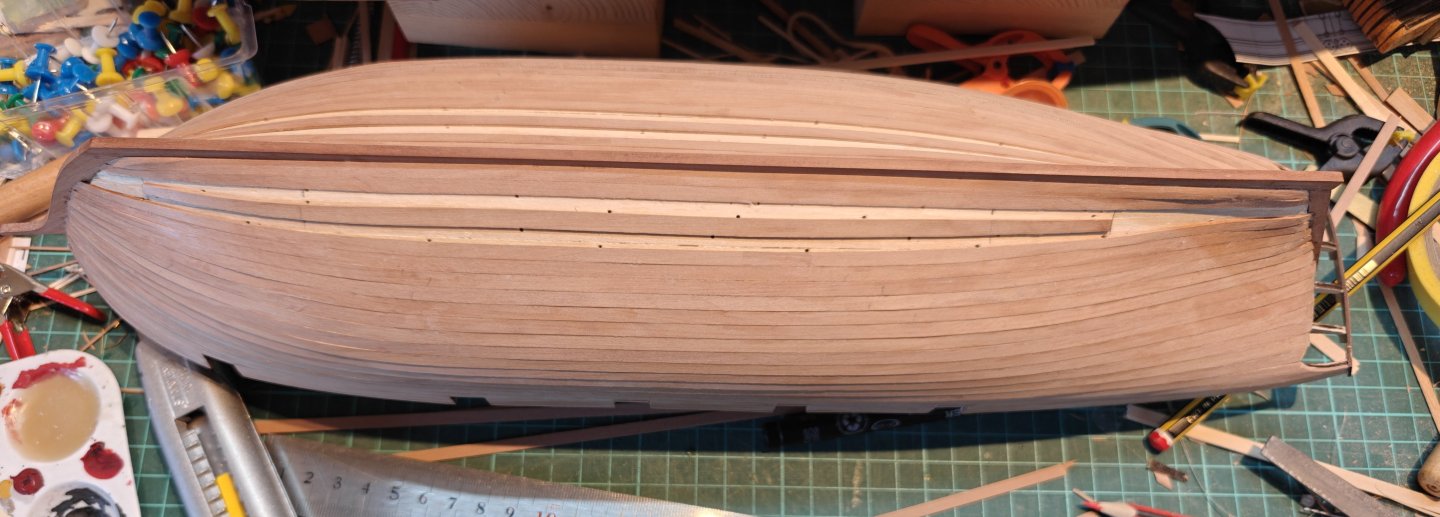
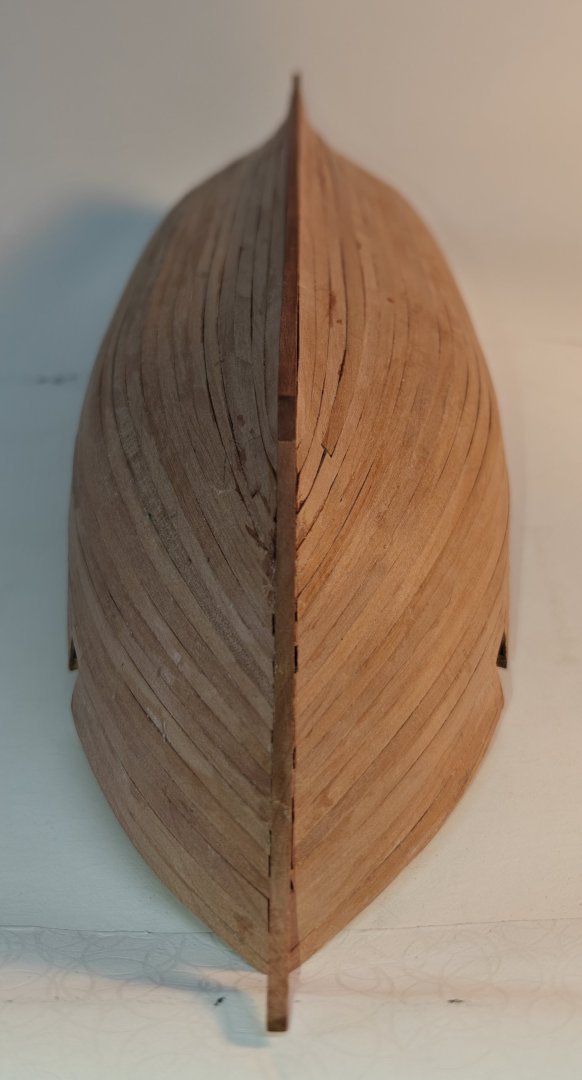
Log entry 8 - second planking completed! It has been a while, but I finally have some solid progress to show. I have completed the second planking, and it has turned out fine, in my opinion. Not at all perfect, but good enough. Here are some images before the very last planks were added: And here it is completed, but before sanding: And then after initial sanding: I am happy with the hull shape, but I need a bit of filler at the stern. The hull is nice and smooth, but as mentioned, it is not visually perfect - that is ok, as it will be entirely covered by paint and copper plates. The next step is to add a molding that sits just below the gun port lower edges and the whale in connection to that. In total, it will be 11 mm wide, including the molding. More to come soon, I hope! BR TJM


-
I completely understand! What you can do is to try it out on heroforge.com and if you make something you like, you can purchase that stl file and have a local 3D printing service print it dor you. As long as you own the file, you can have others do the printing for you.
-
Beginner CAD recommendation
TJM replied to krith's topic in CAD and 3D Modelling/Drafting Plans with Software
I use QCAD, it is very cheap for a lifetime license, I find it very easy and intuitive to use with no prior CAD experience and there is a free trial you can just download to evaluate if this is for you. The downside is that it is strictly 2D, so all the spacial considerations will have to happen in your head! It's like doing it on paper, but with digital precision and layers. It is very easy to import an image, scale it, and then start to draw your design on top of that reference. I have designed several PoB hulls from original construction drawings like this over past year. Have a look here: https://modelshipworld.com/topic/37190-historical-plans-via-cad-to-laser-cut-parts-practicum/ You can also use Onshape, which is online and completely free AND full 3D. But the learning curve is steeper and I have not progressed very far on mine yet! -
Hi Manning, It is not permitted to re-sell files or figures made from files obtained through Heroforge. This thread is to showcase the viability of making your own figures with Heroforge (which is very easy through their user interface, it runs in the browser). You are all welcome to post your tests from Heroforge in this thread - playing with the app is completely free, so you can just give it a go 🙂. BR TJM
-
Thanks, @Thukydides! I totally agree, I need a little more, especially on the reds. I will try it out 😃
- 111 replies
-
- 3
-
-
- Christiania
- Vanguard Models
- (and 1 more)
-
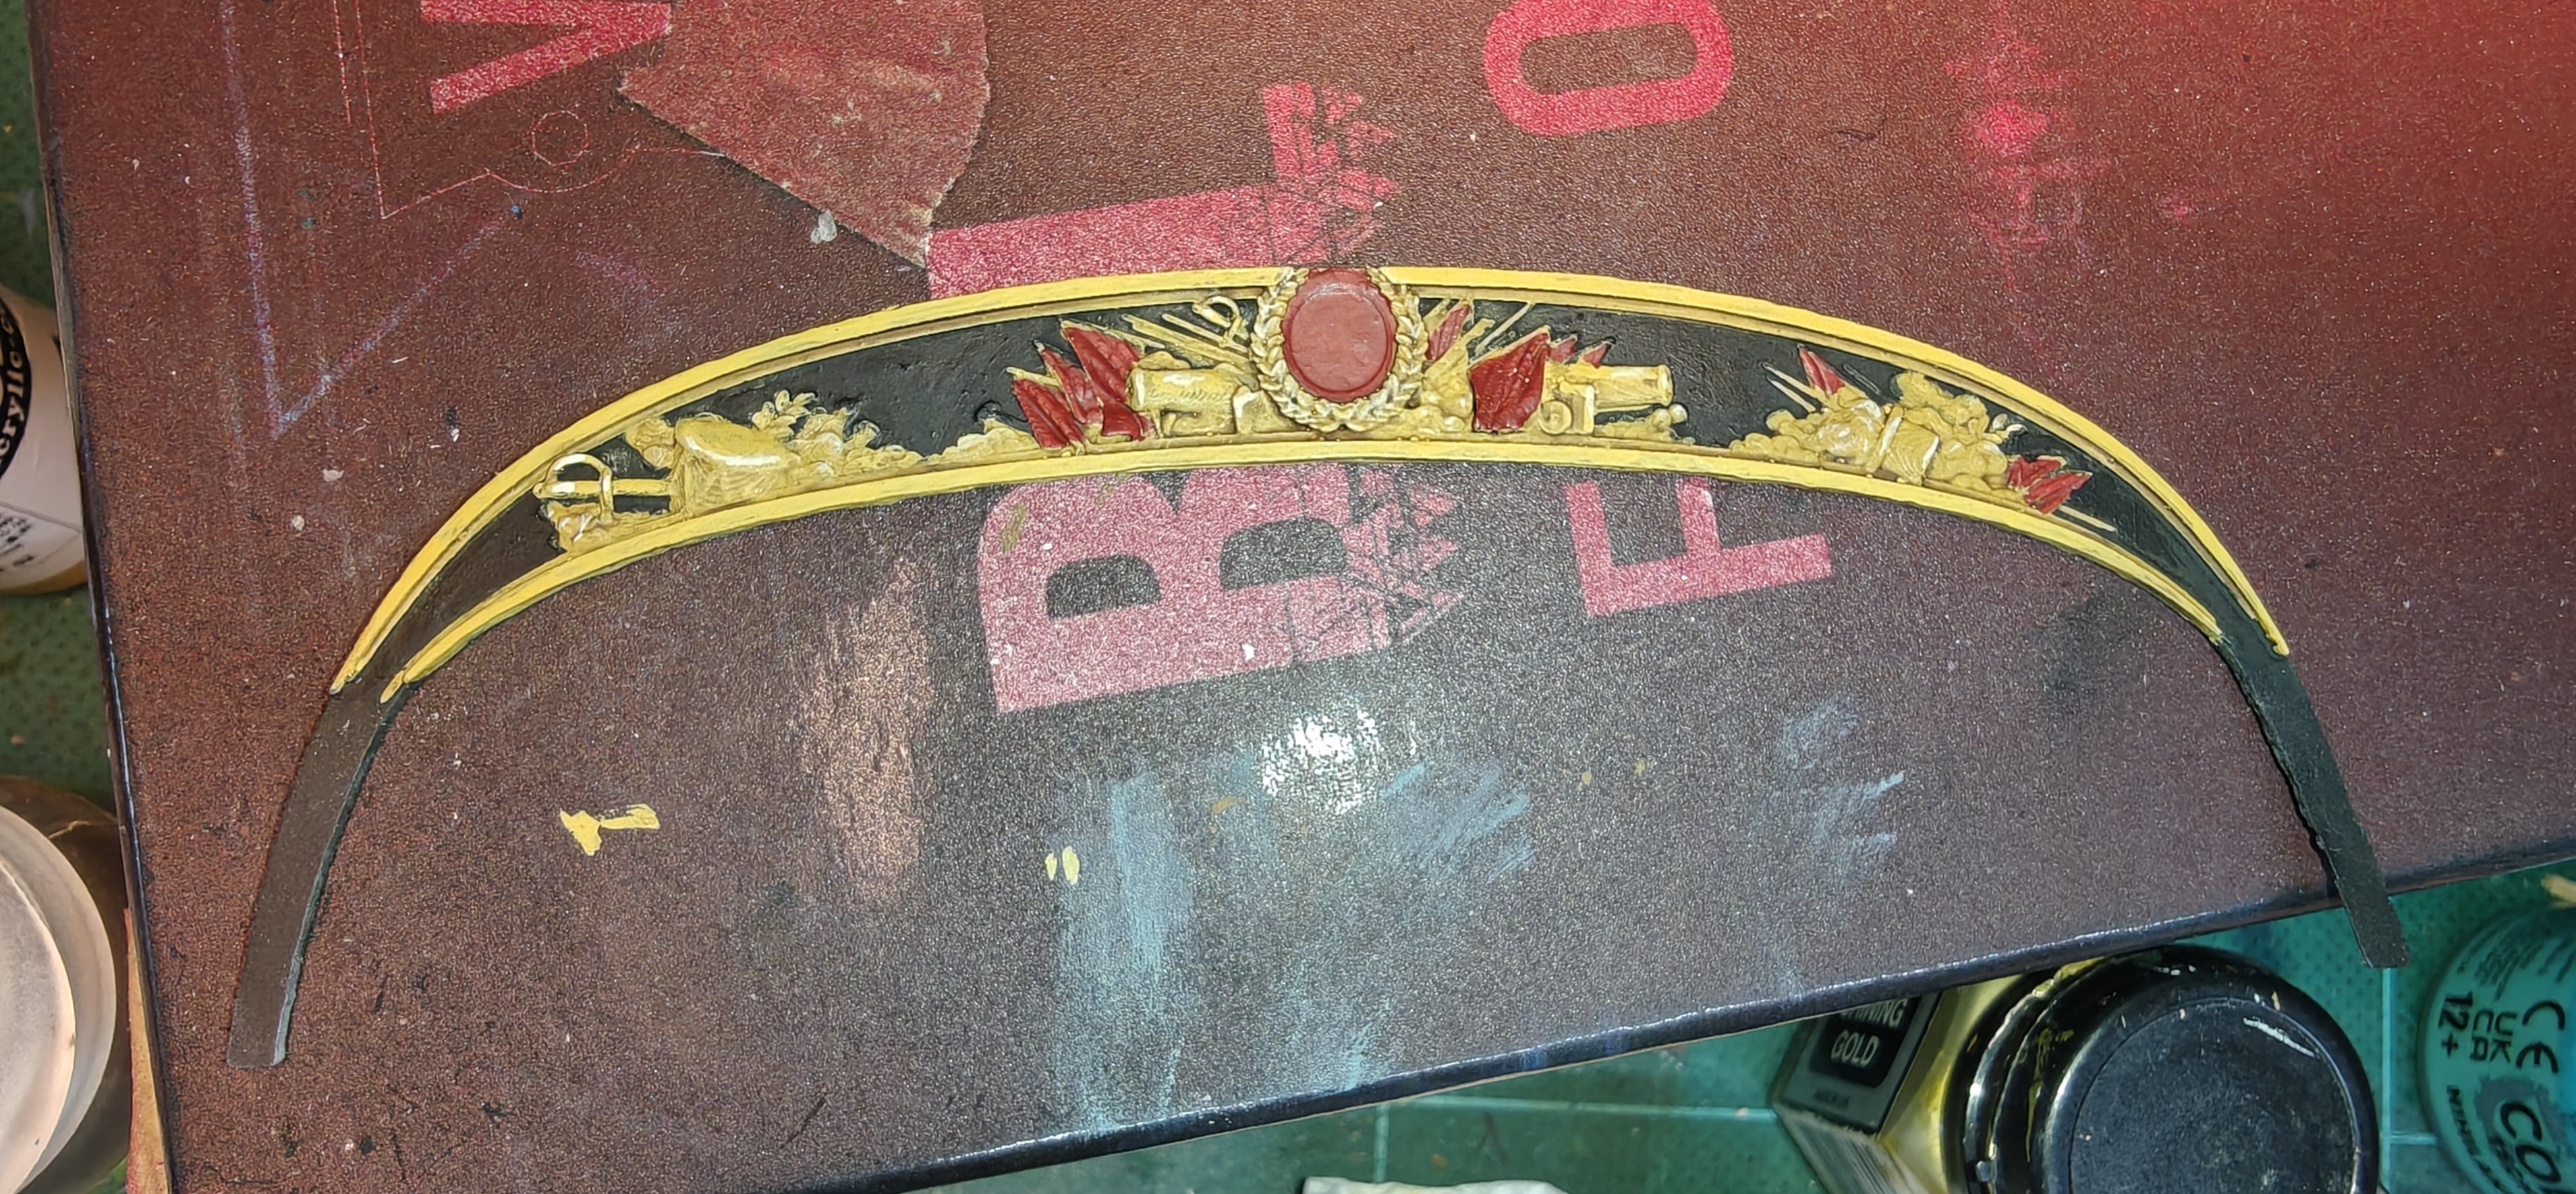
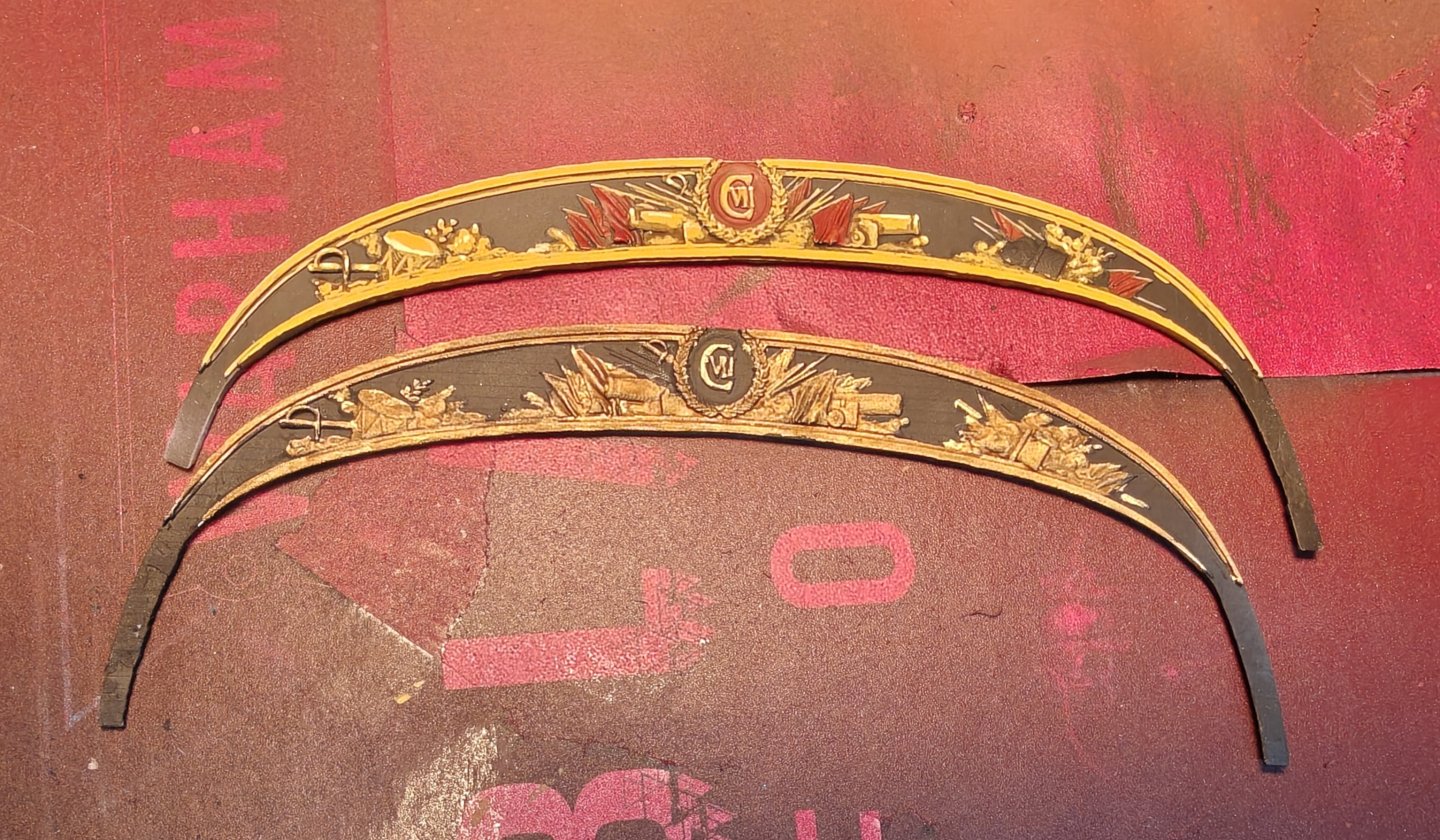
I have tried again with my new brushes and a few new paints and a wet pallette to keep the paints thin and flowing. These are the steps I took: 1. Base coat yellow areas with a light brown: 2. main colour layer with yellow ochre. 3. Bace colour on the red areas: 4: wash all areas with brown wash. 5: go over with main yellow colour again. 6. Dark red wash on red areas 7. Highlights with a yellow/beige mix and a light red 8. final highlights with beige: I am ok with this result and from normal viewing distance it looks totally fine. A little unhappy about the monogram details though. I am considering re-printing this but with the z-axis scaled to 150% or so. It should make it much easier to paint when the relief is not as shallow and it may still be ok in terms of overall thickness. It is very thin as it is. But I would probably be ok with this one if it is the best I can get 🙂. BR TJM


- 111 replies
-
- 12
-
-
- Christiania
- Vanguard Models
- (and 1 more)
-
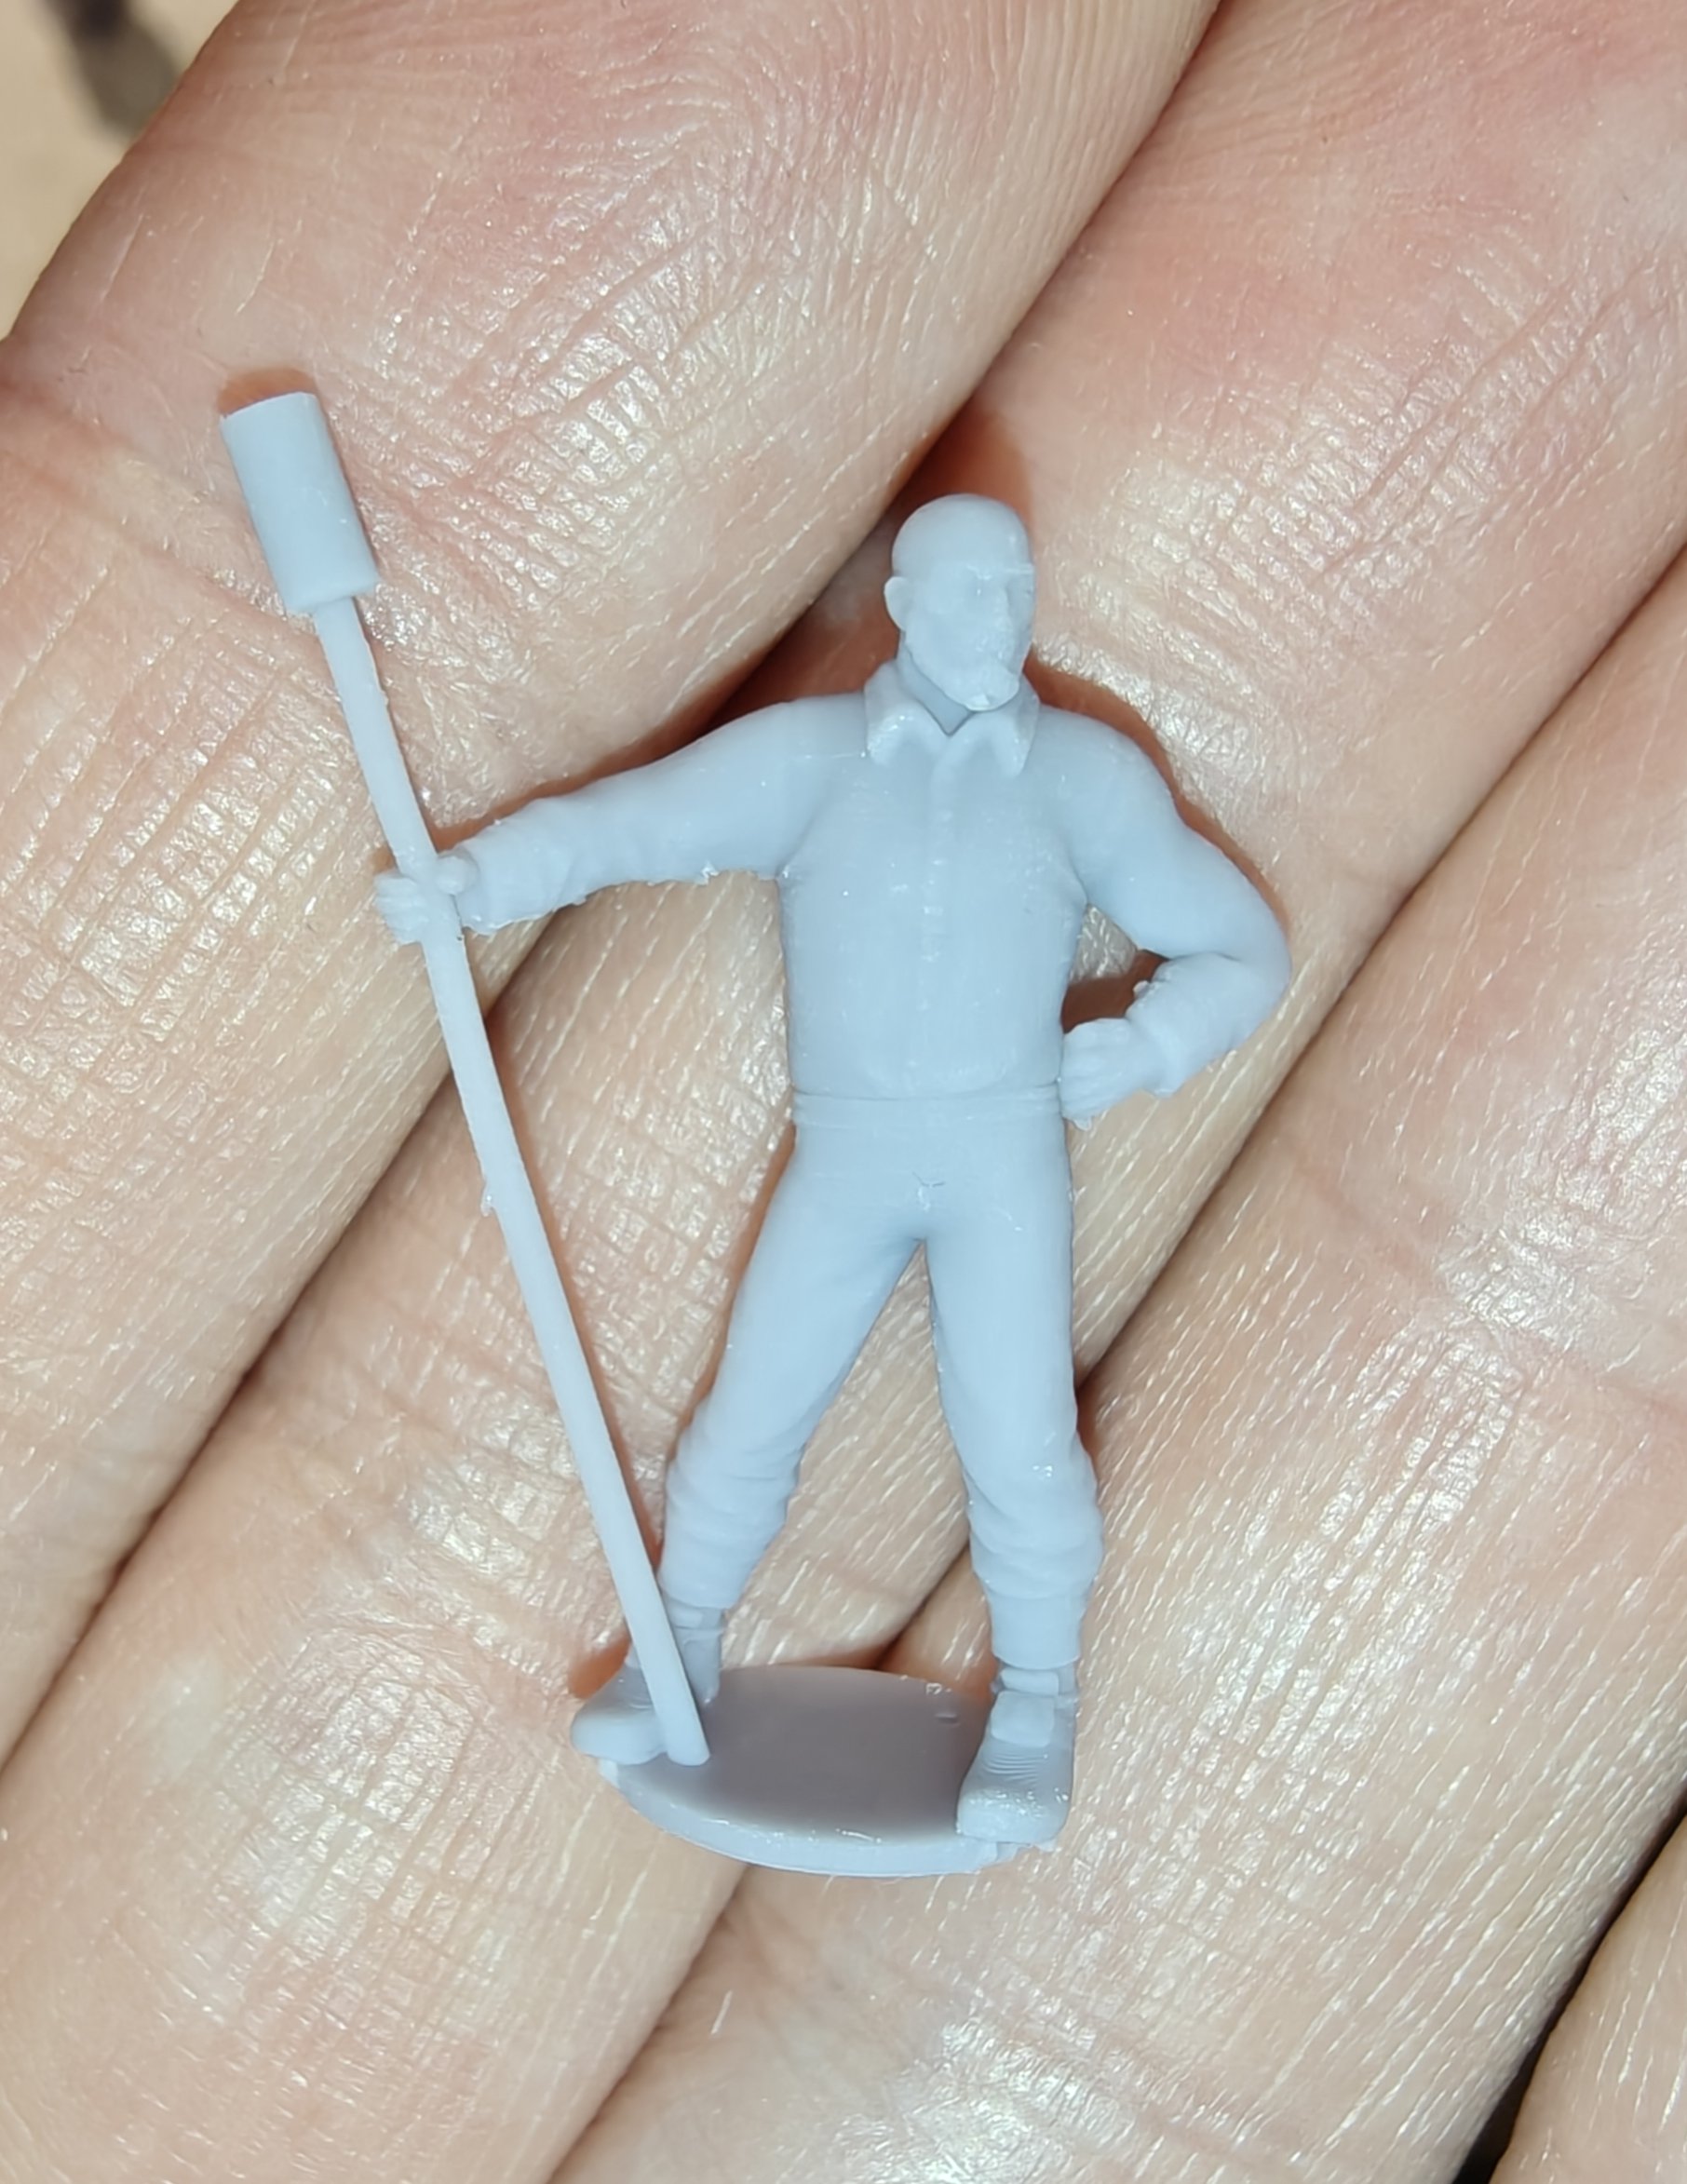
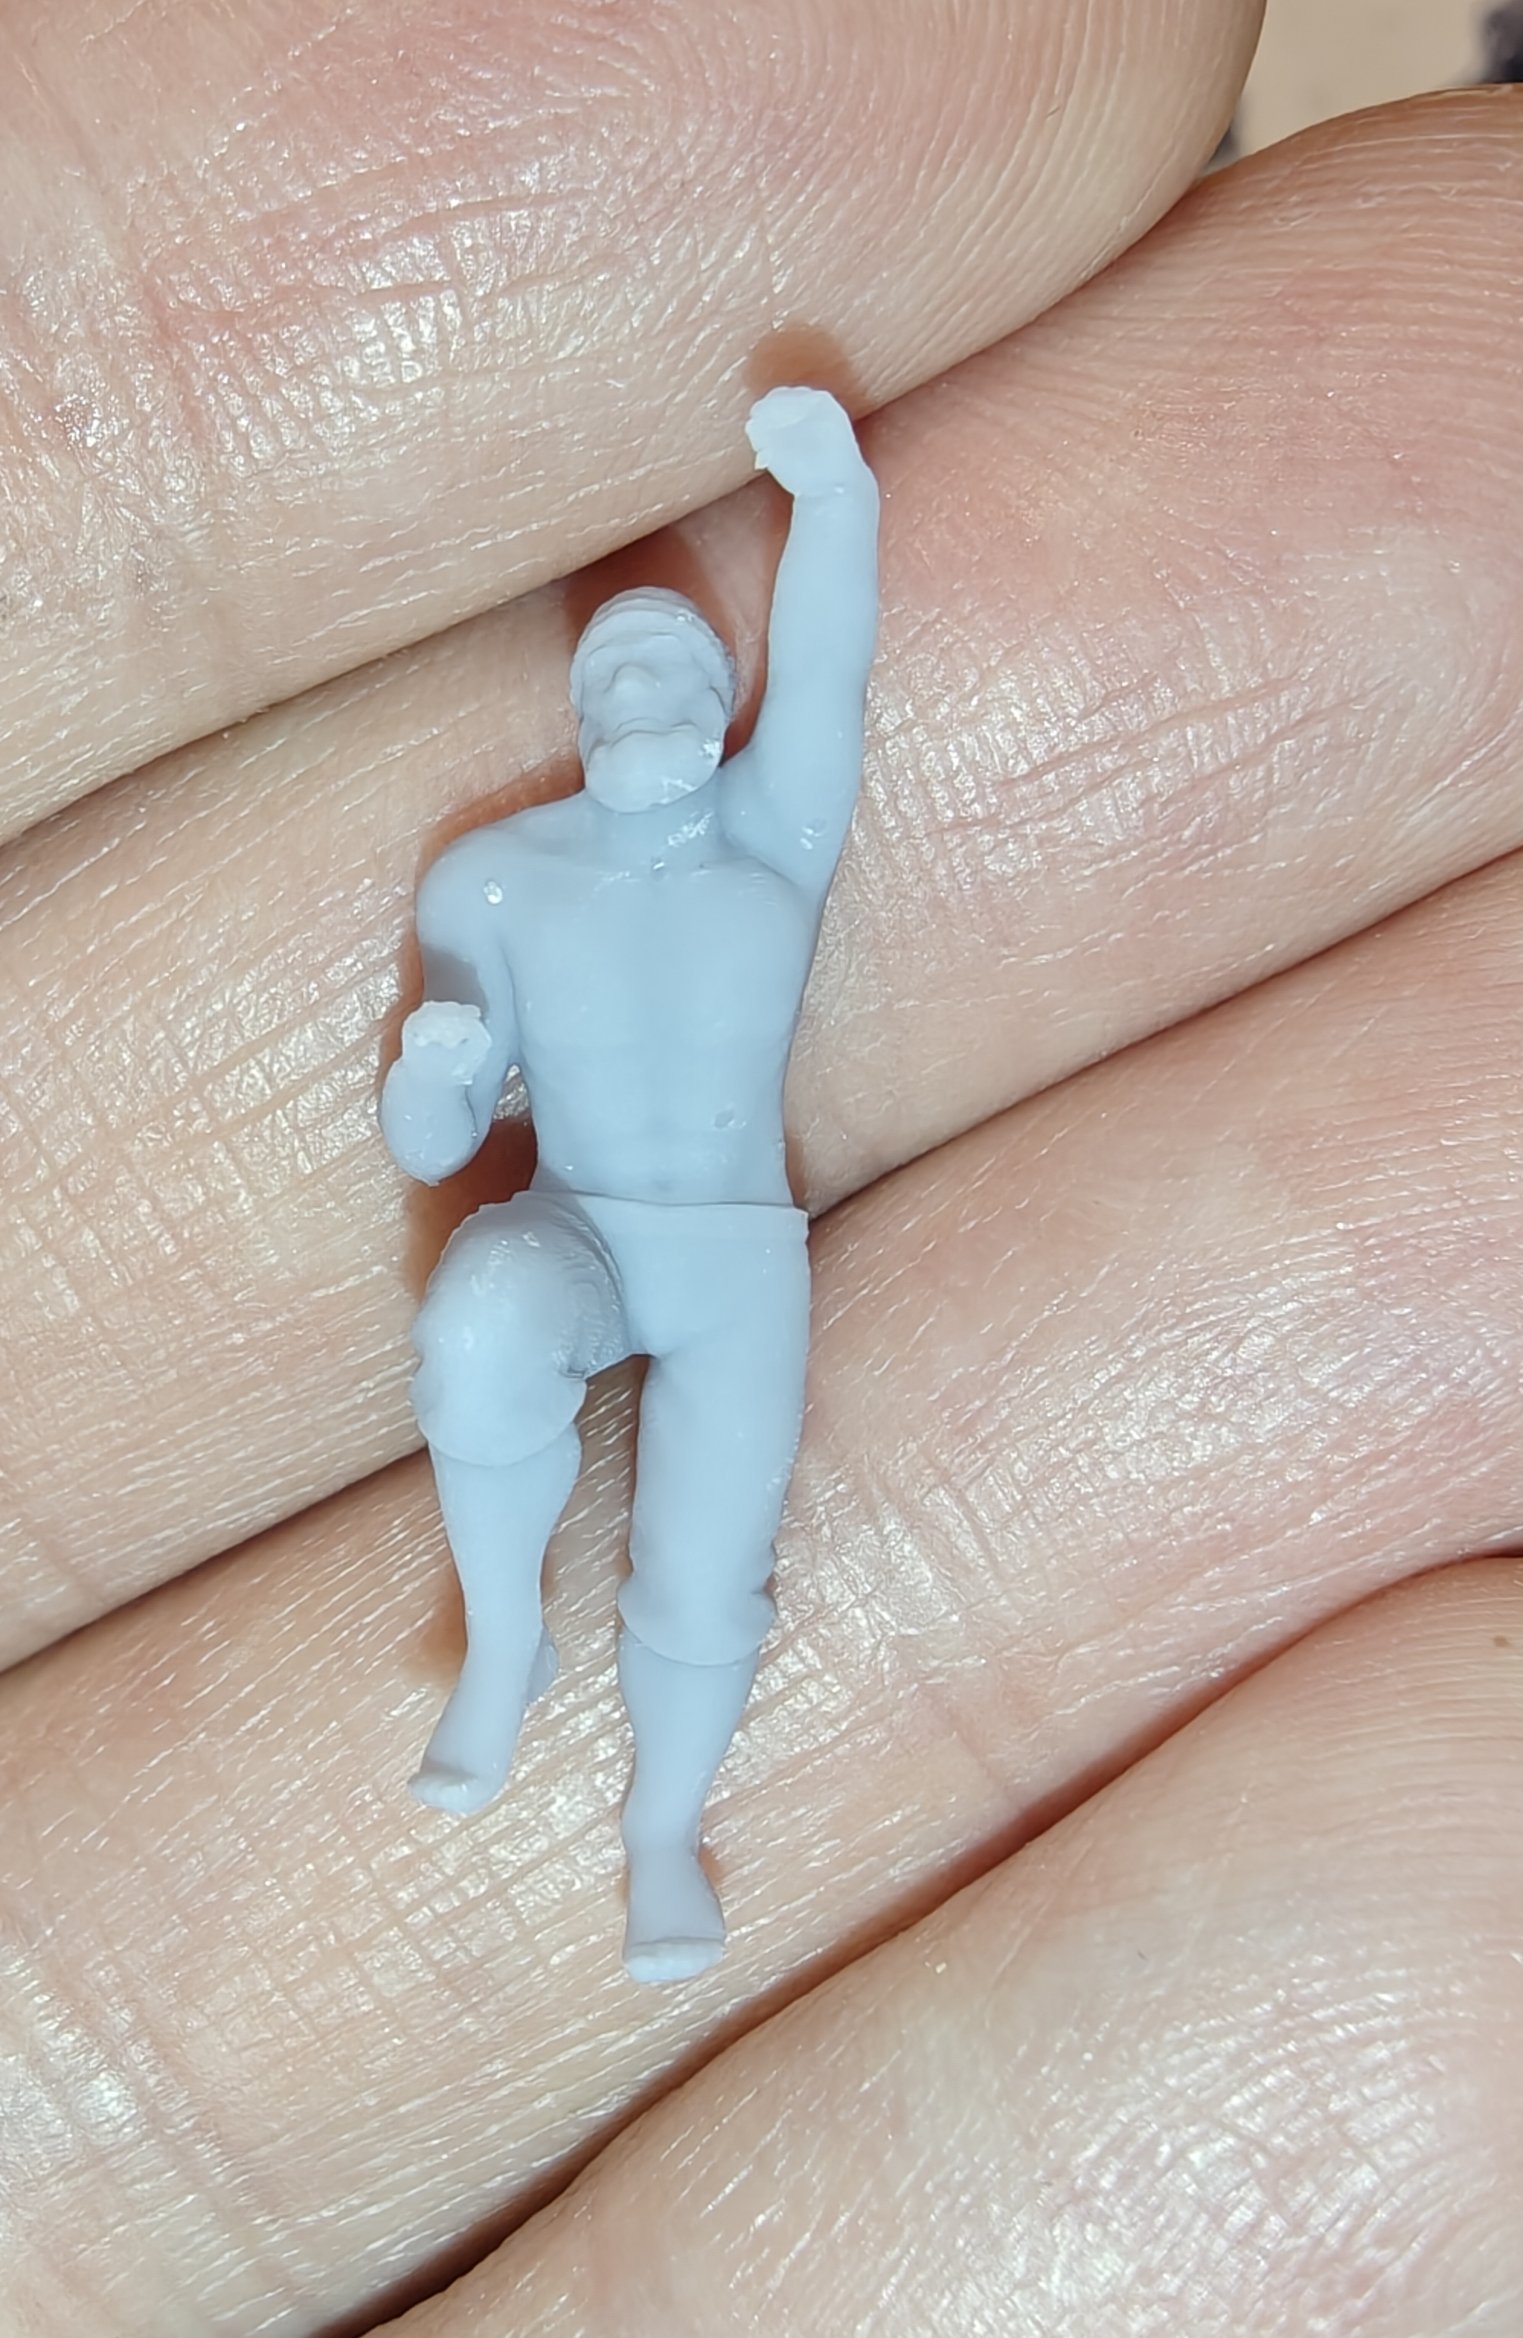
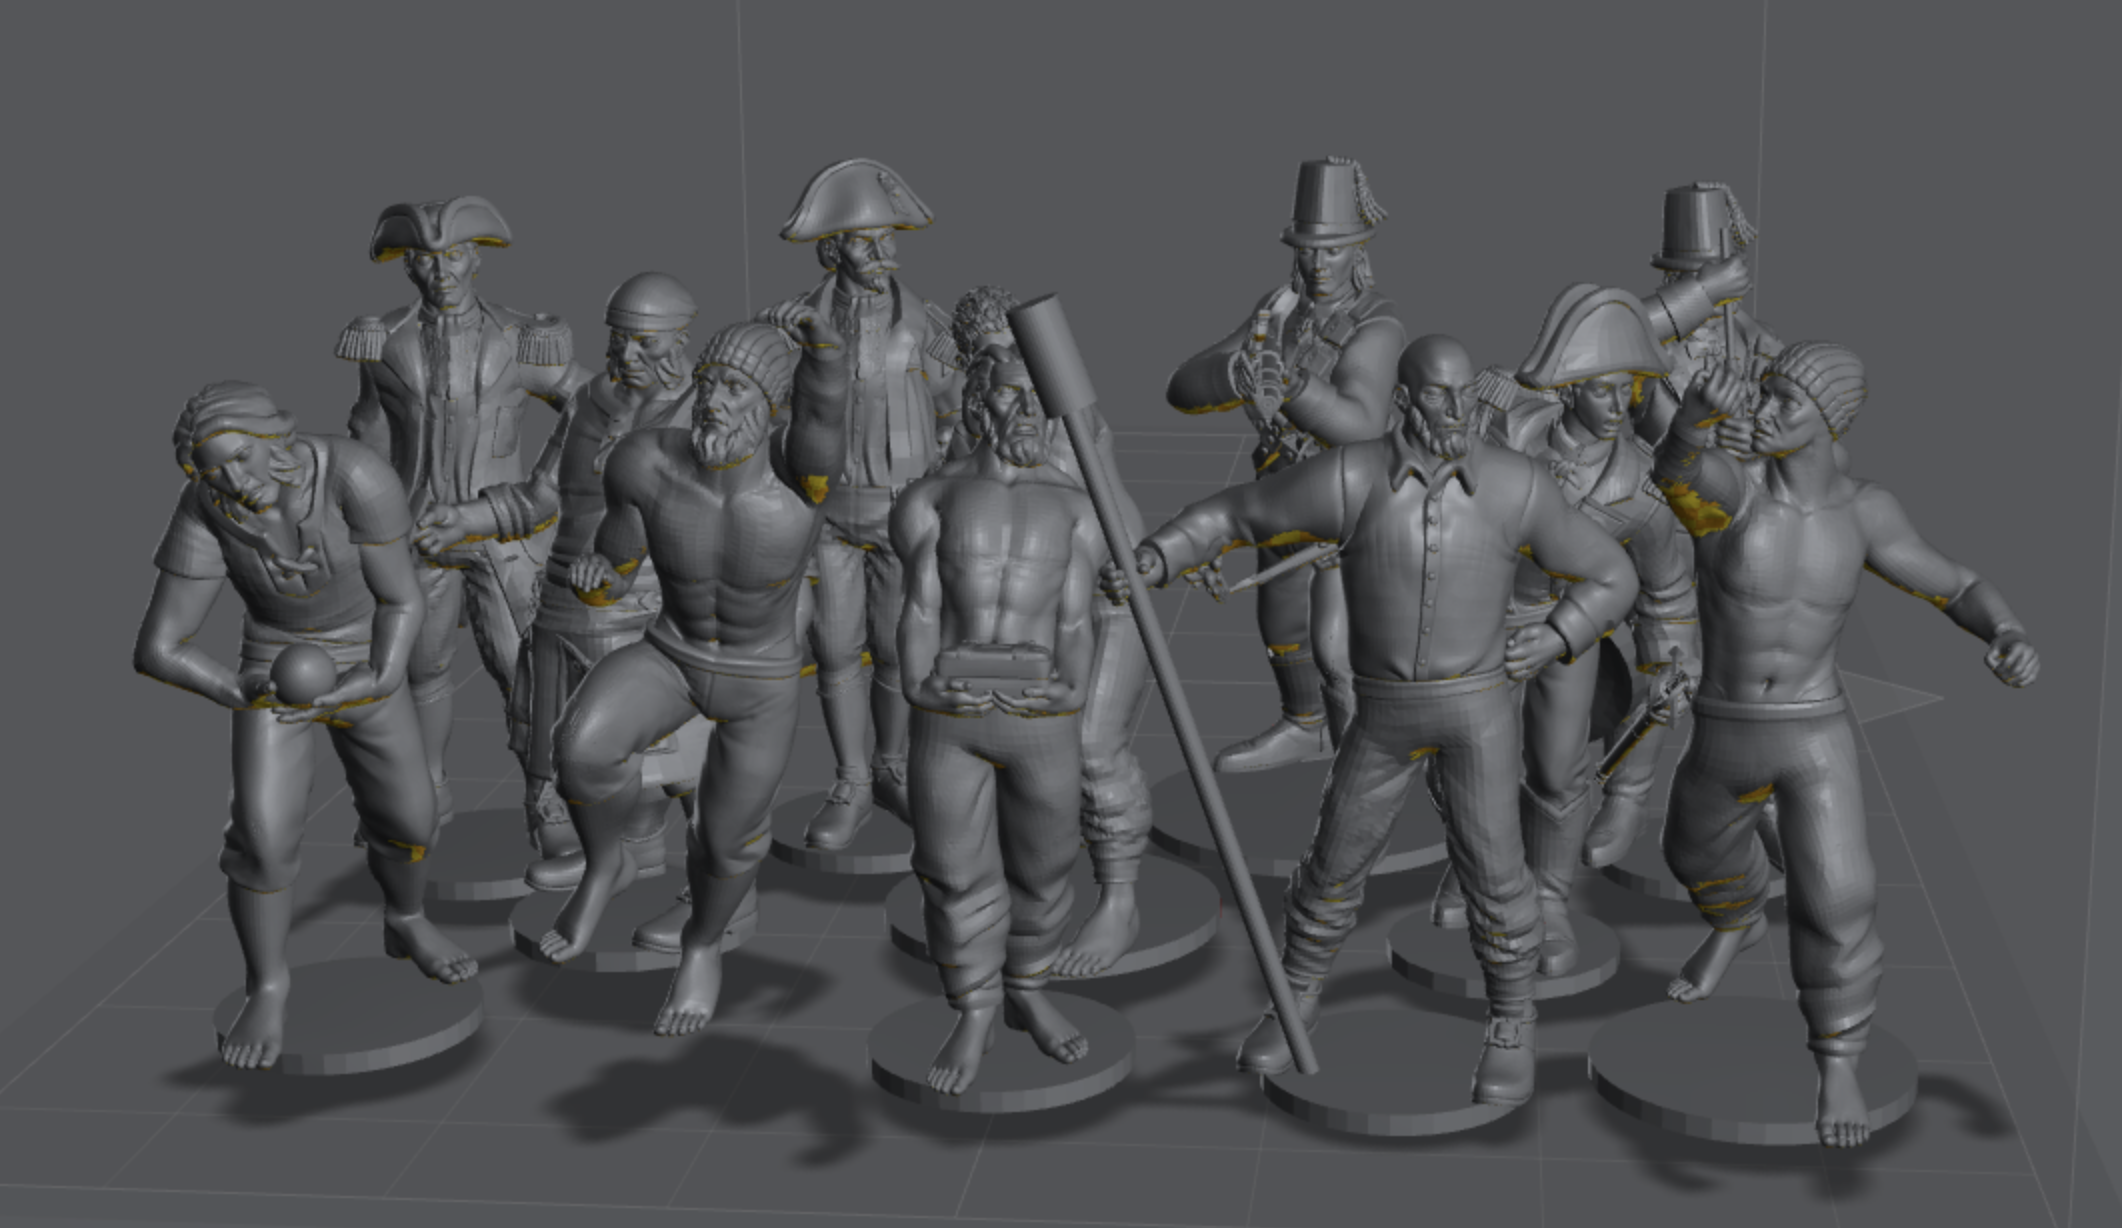
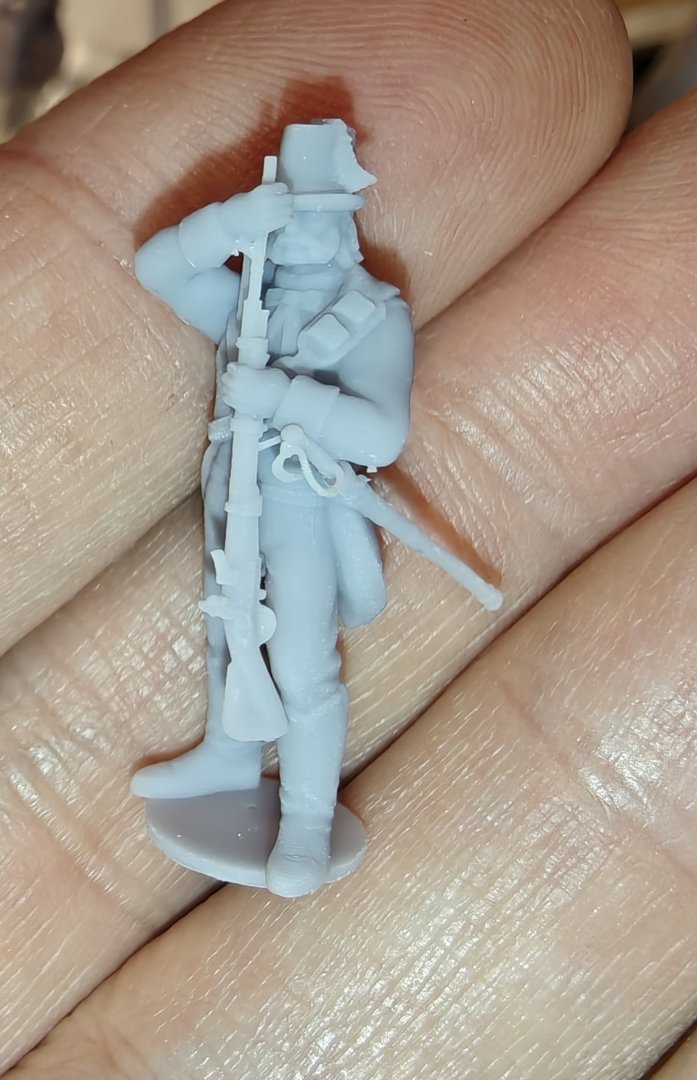
I have printed some of the figures in twice the size, that is 1:32. They hold up quite well, even at this scale! Here you see the whole crew along with a 24 pdr cannon: A few close-ups: While the 1:64 are tiny, these in 1:32 are really huge! Twice the linear size, 8 time the volume. The math is clear, but the reality when comparing one to the other is still striking. Here they are with their 1:64 counterparts: BR TJM


-
These are amazing! Absolutely fantastic design.
-
I am doing it myself! It's just that I am not allowed to sell the figures made from Heroforge files that I have bought to anyone else, according to their terms. But there are many people who offer 3D printing services, so it may be viable to create your own Heroforge files and have them printed by someone. I am sorry, I don't know any US sellers of scale figures - I only know that Vanguard Models in the UK sells very nice resin figures.
-
Thank you @manning16, @capnharv2, @CDR_Ret and @Chuck for your comments and to all of you for the likes. Much appreciated! @manning16, apart from unfortunately not having the time for such a venture, selling Heroforge prints are forbidden in their terms - it would undermine their business, I guess. You can print the minis for others, but they need to own the stl from Heroforge - that also means that you can use print services to have your own Heroforge files printed, but you have to ensure that they don't get sold to anyone else. But if you have access to a resin 3D printer, a one year subscription for Heroforge costs 168$. That sounds steep, but with 60 credits for stl downloads included, it is a, to me at least, very reasonable 2.80$ per model - and you can of course print as many of them as you could wish for. I think that is good value!
-
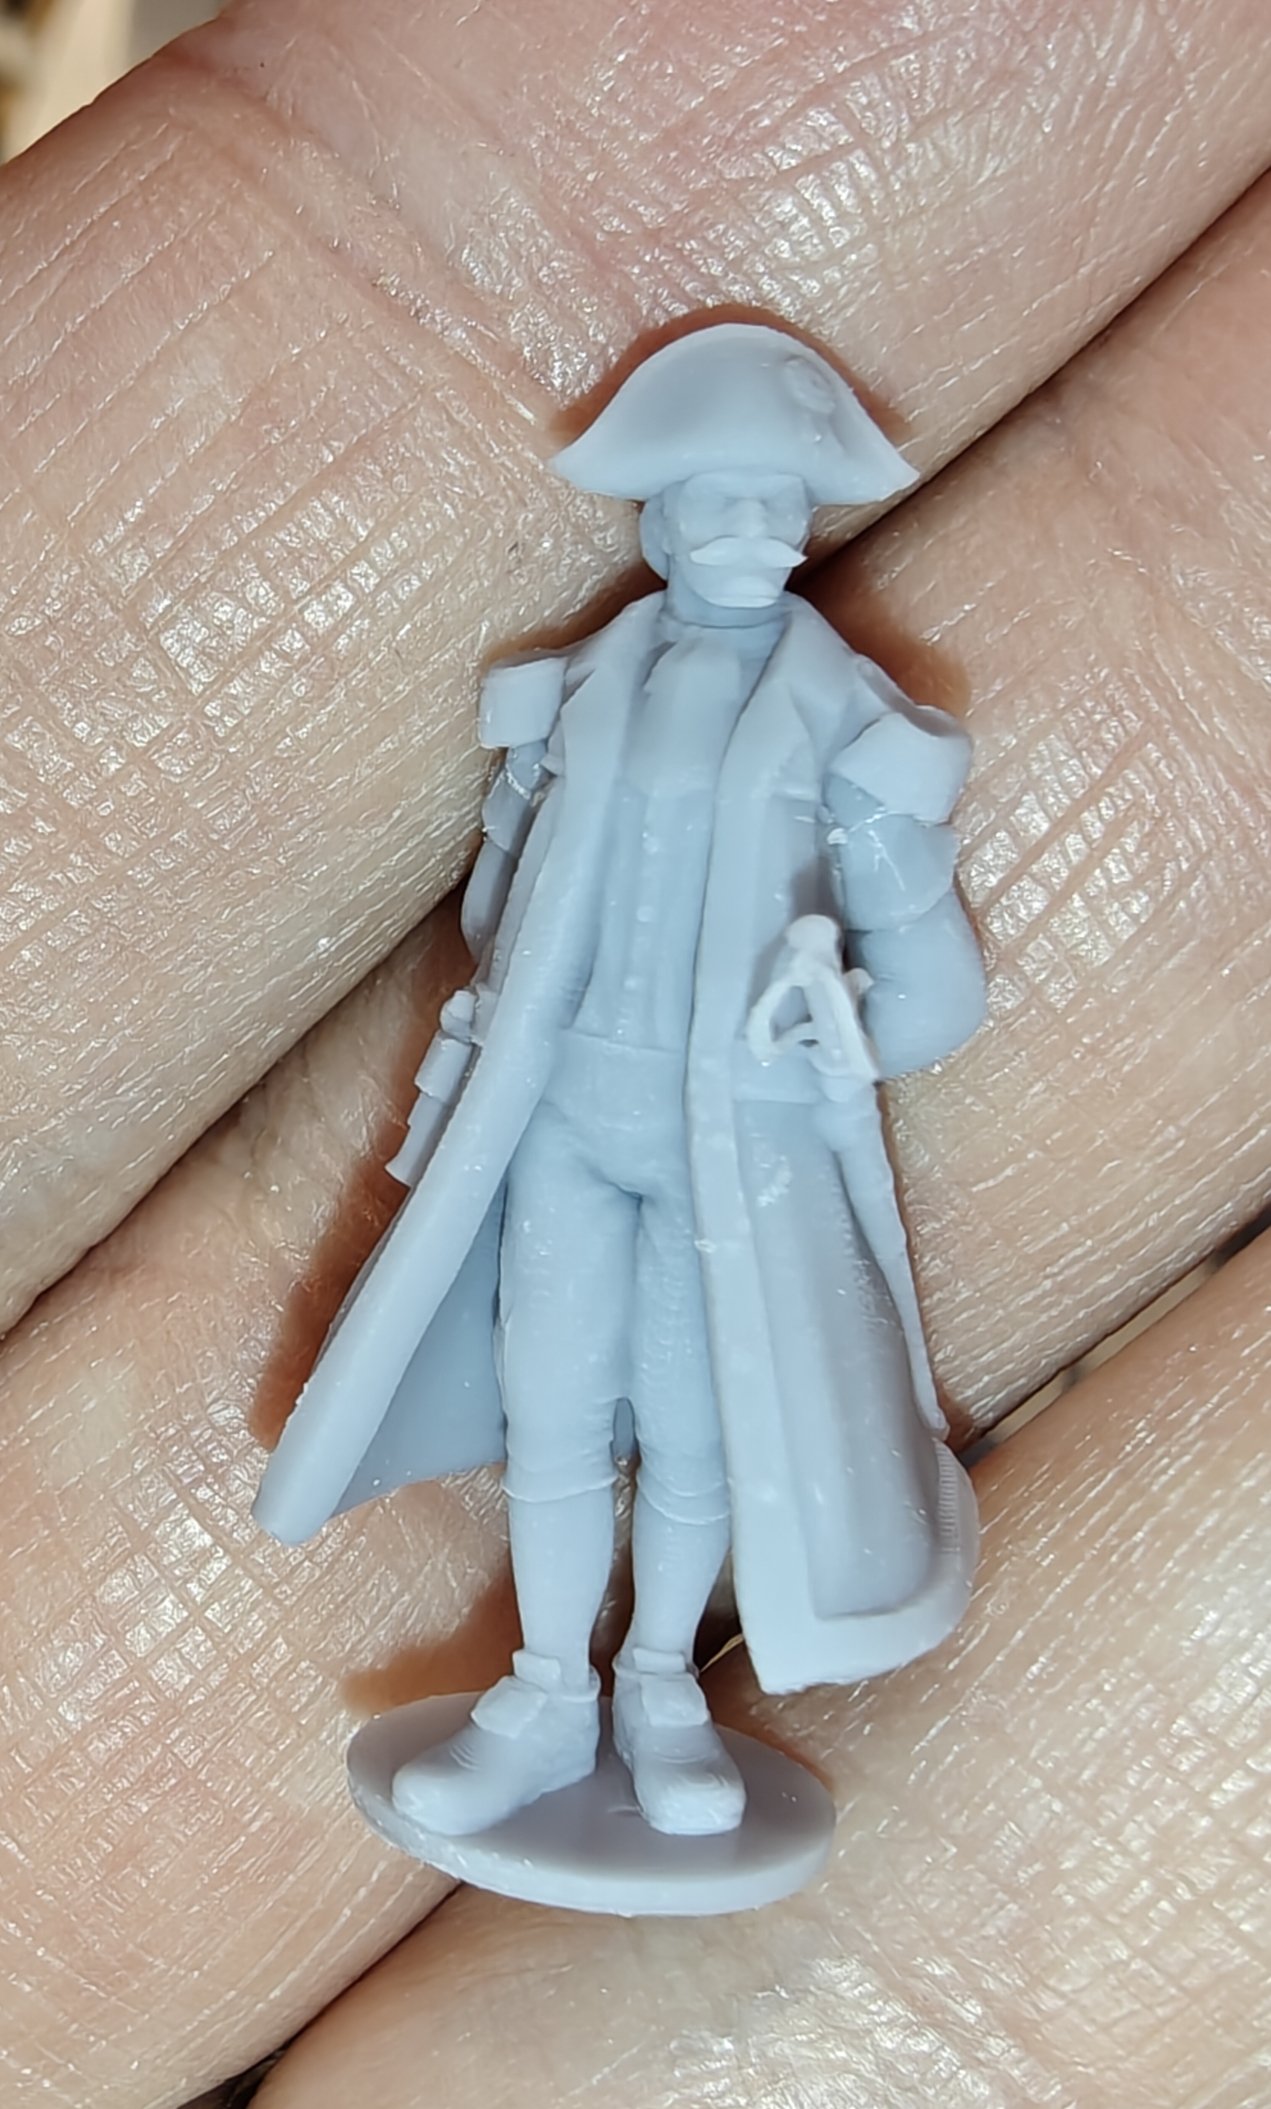
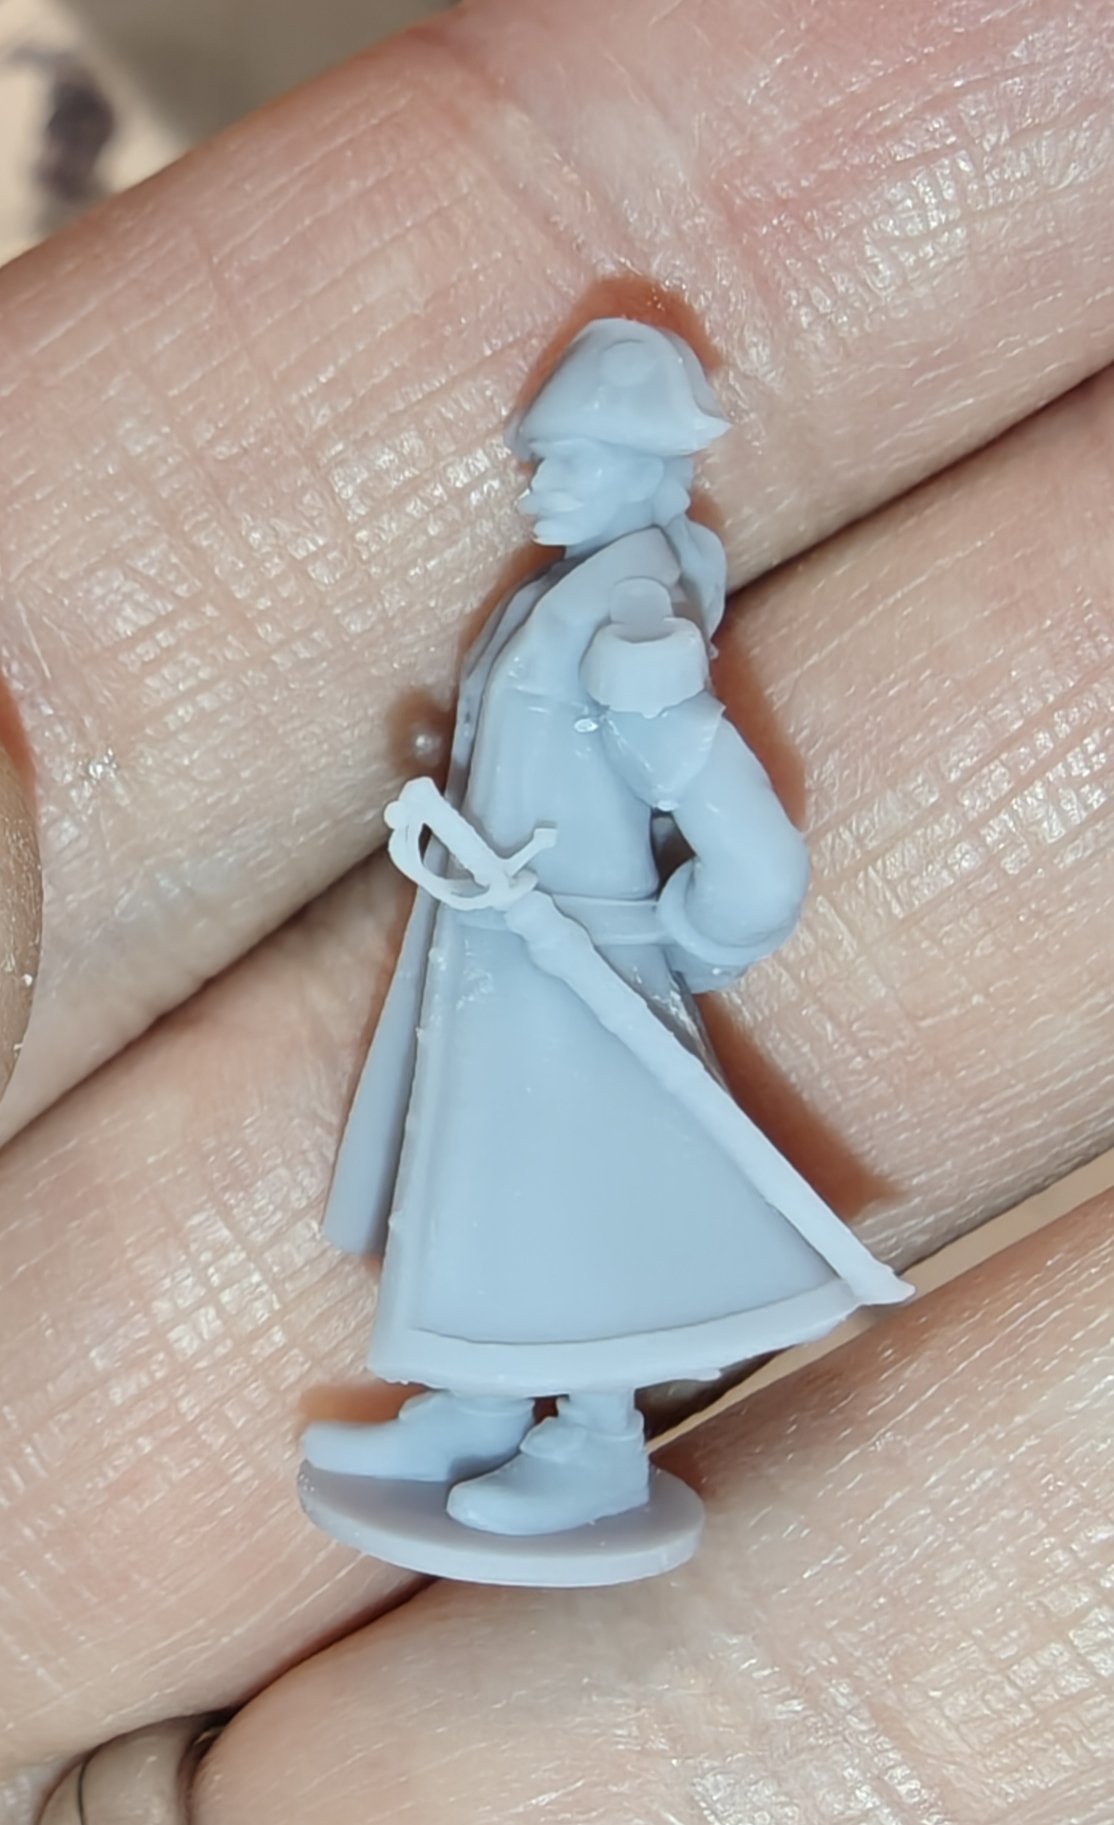
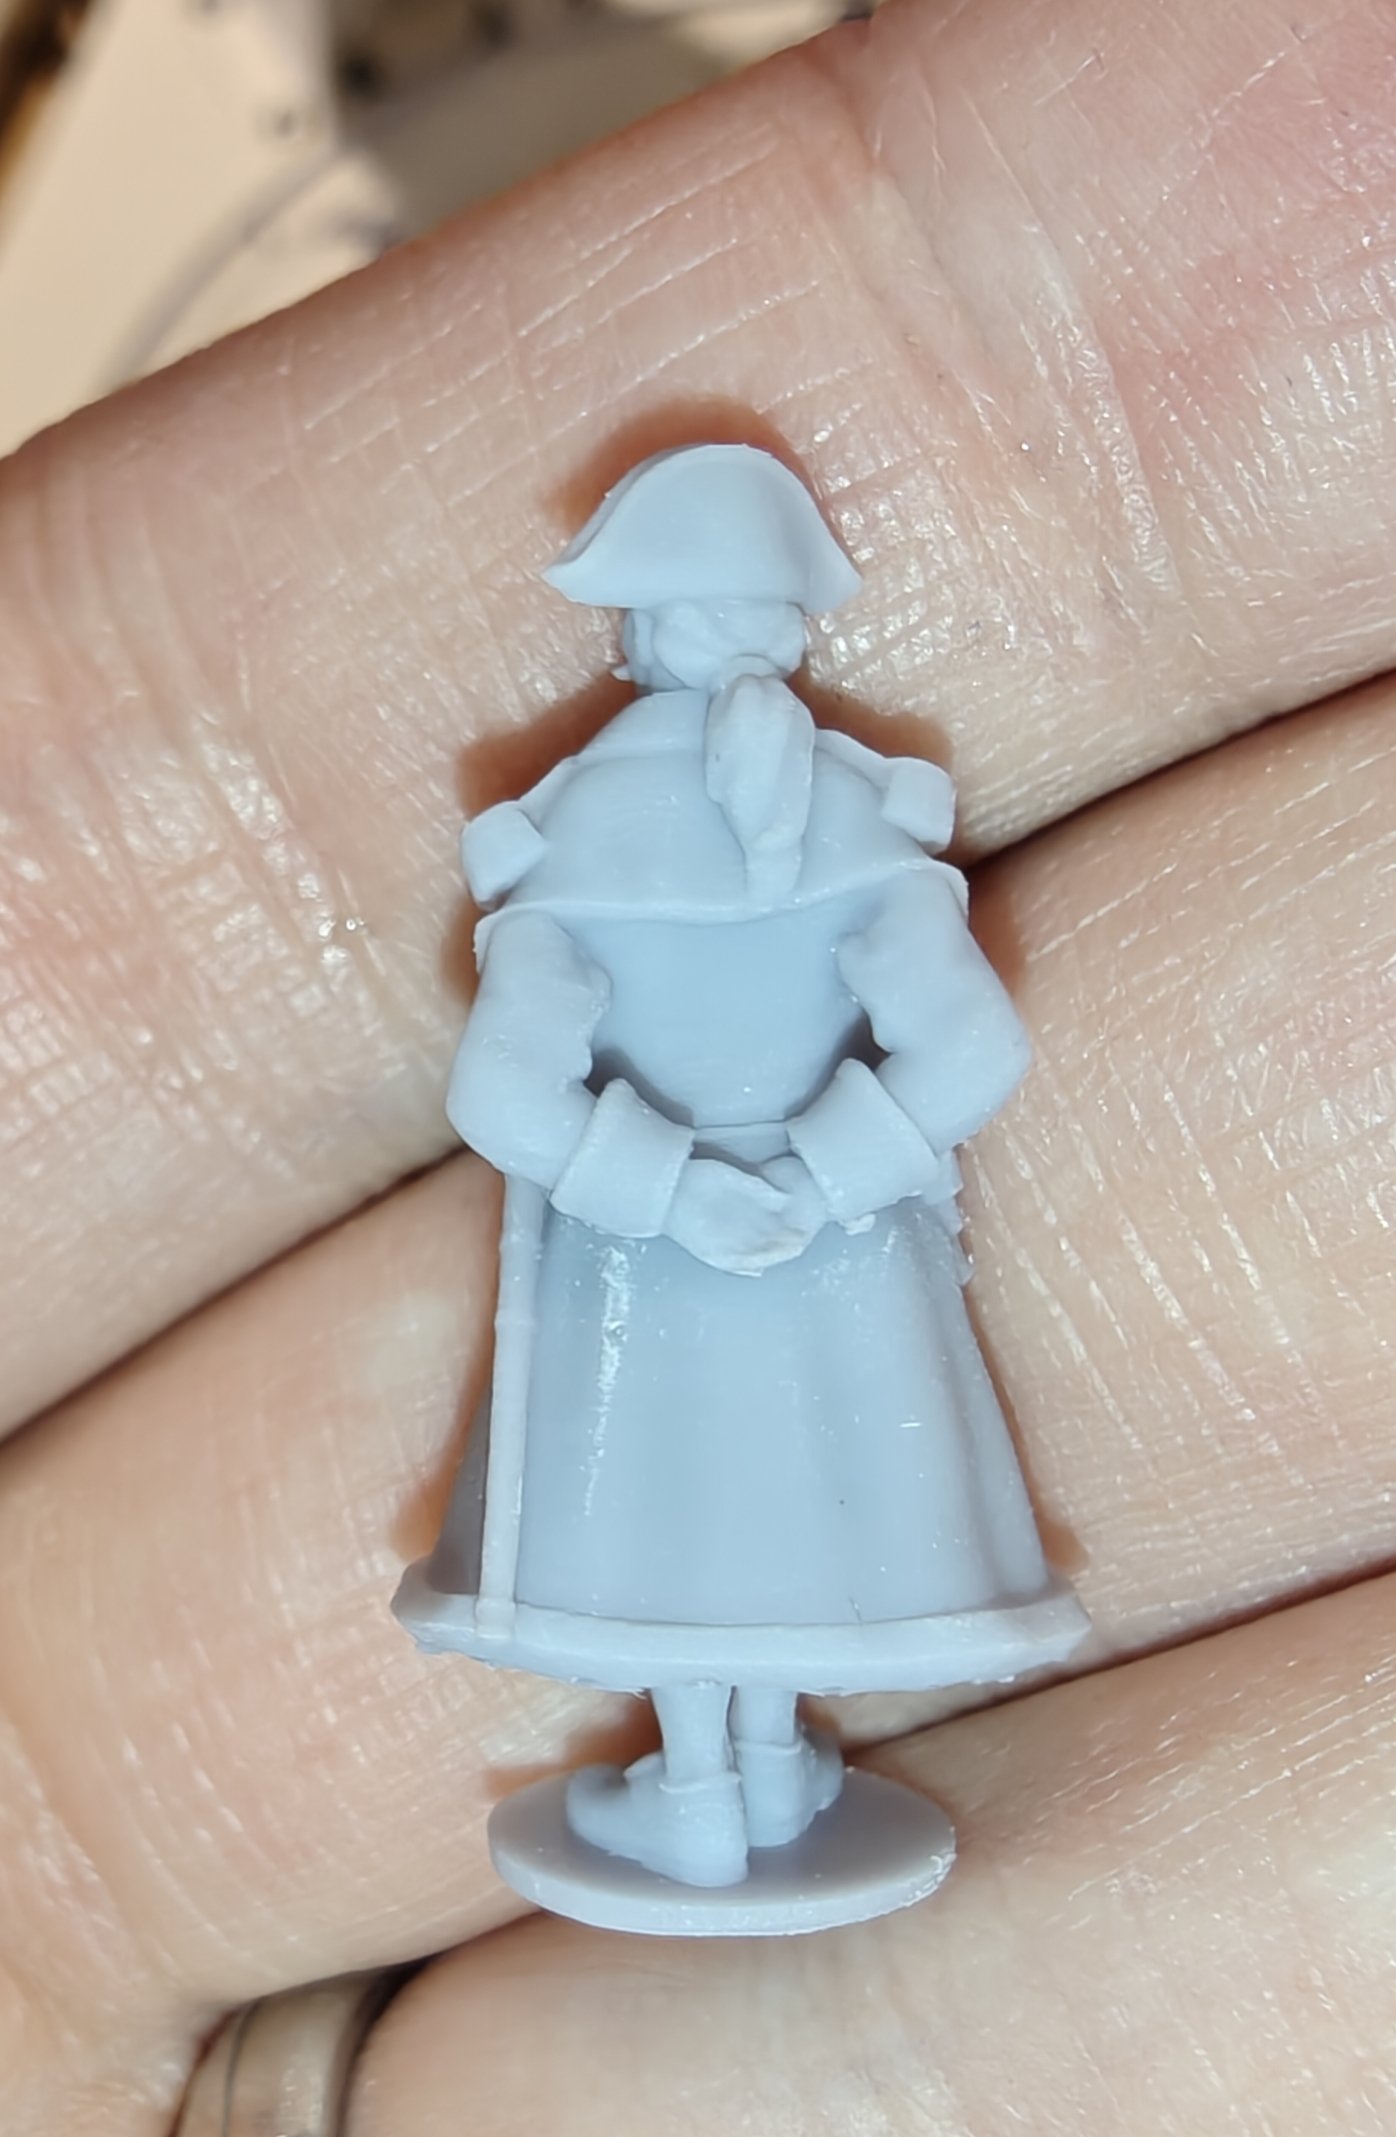
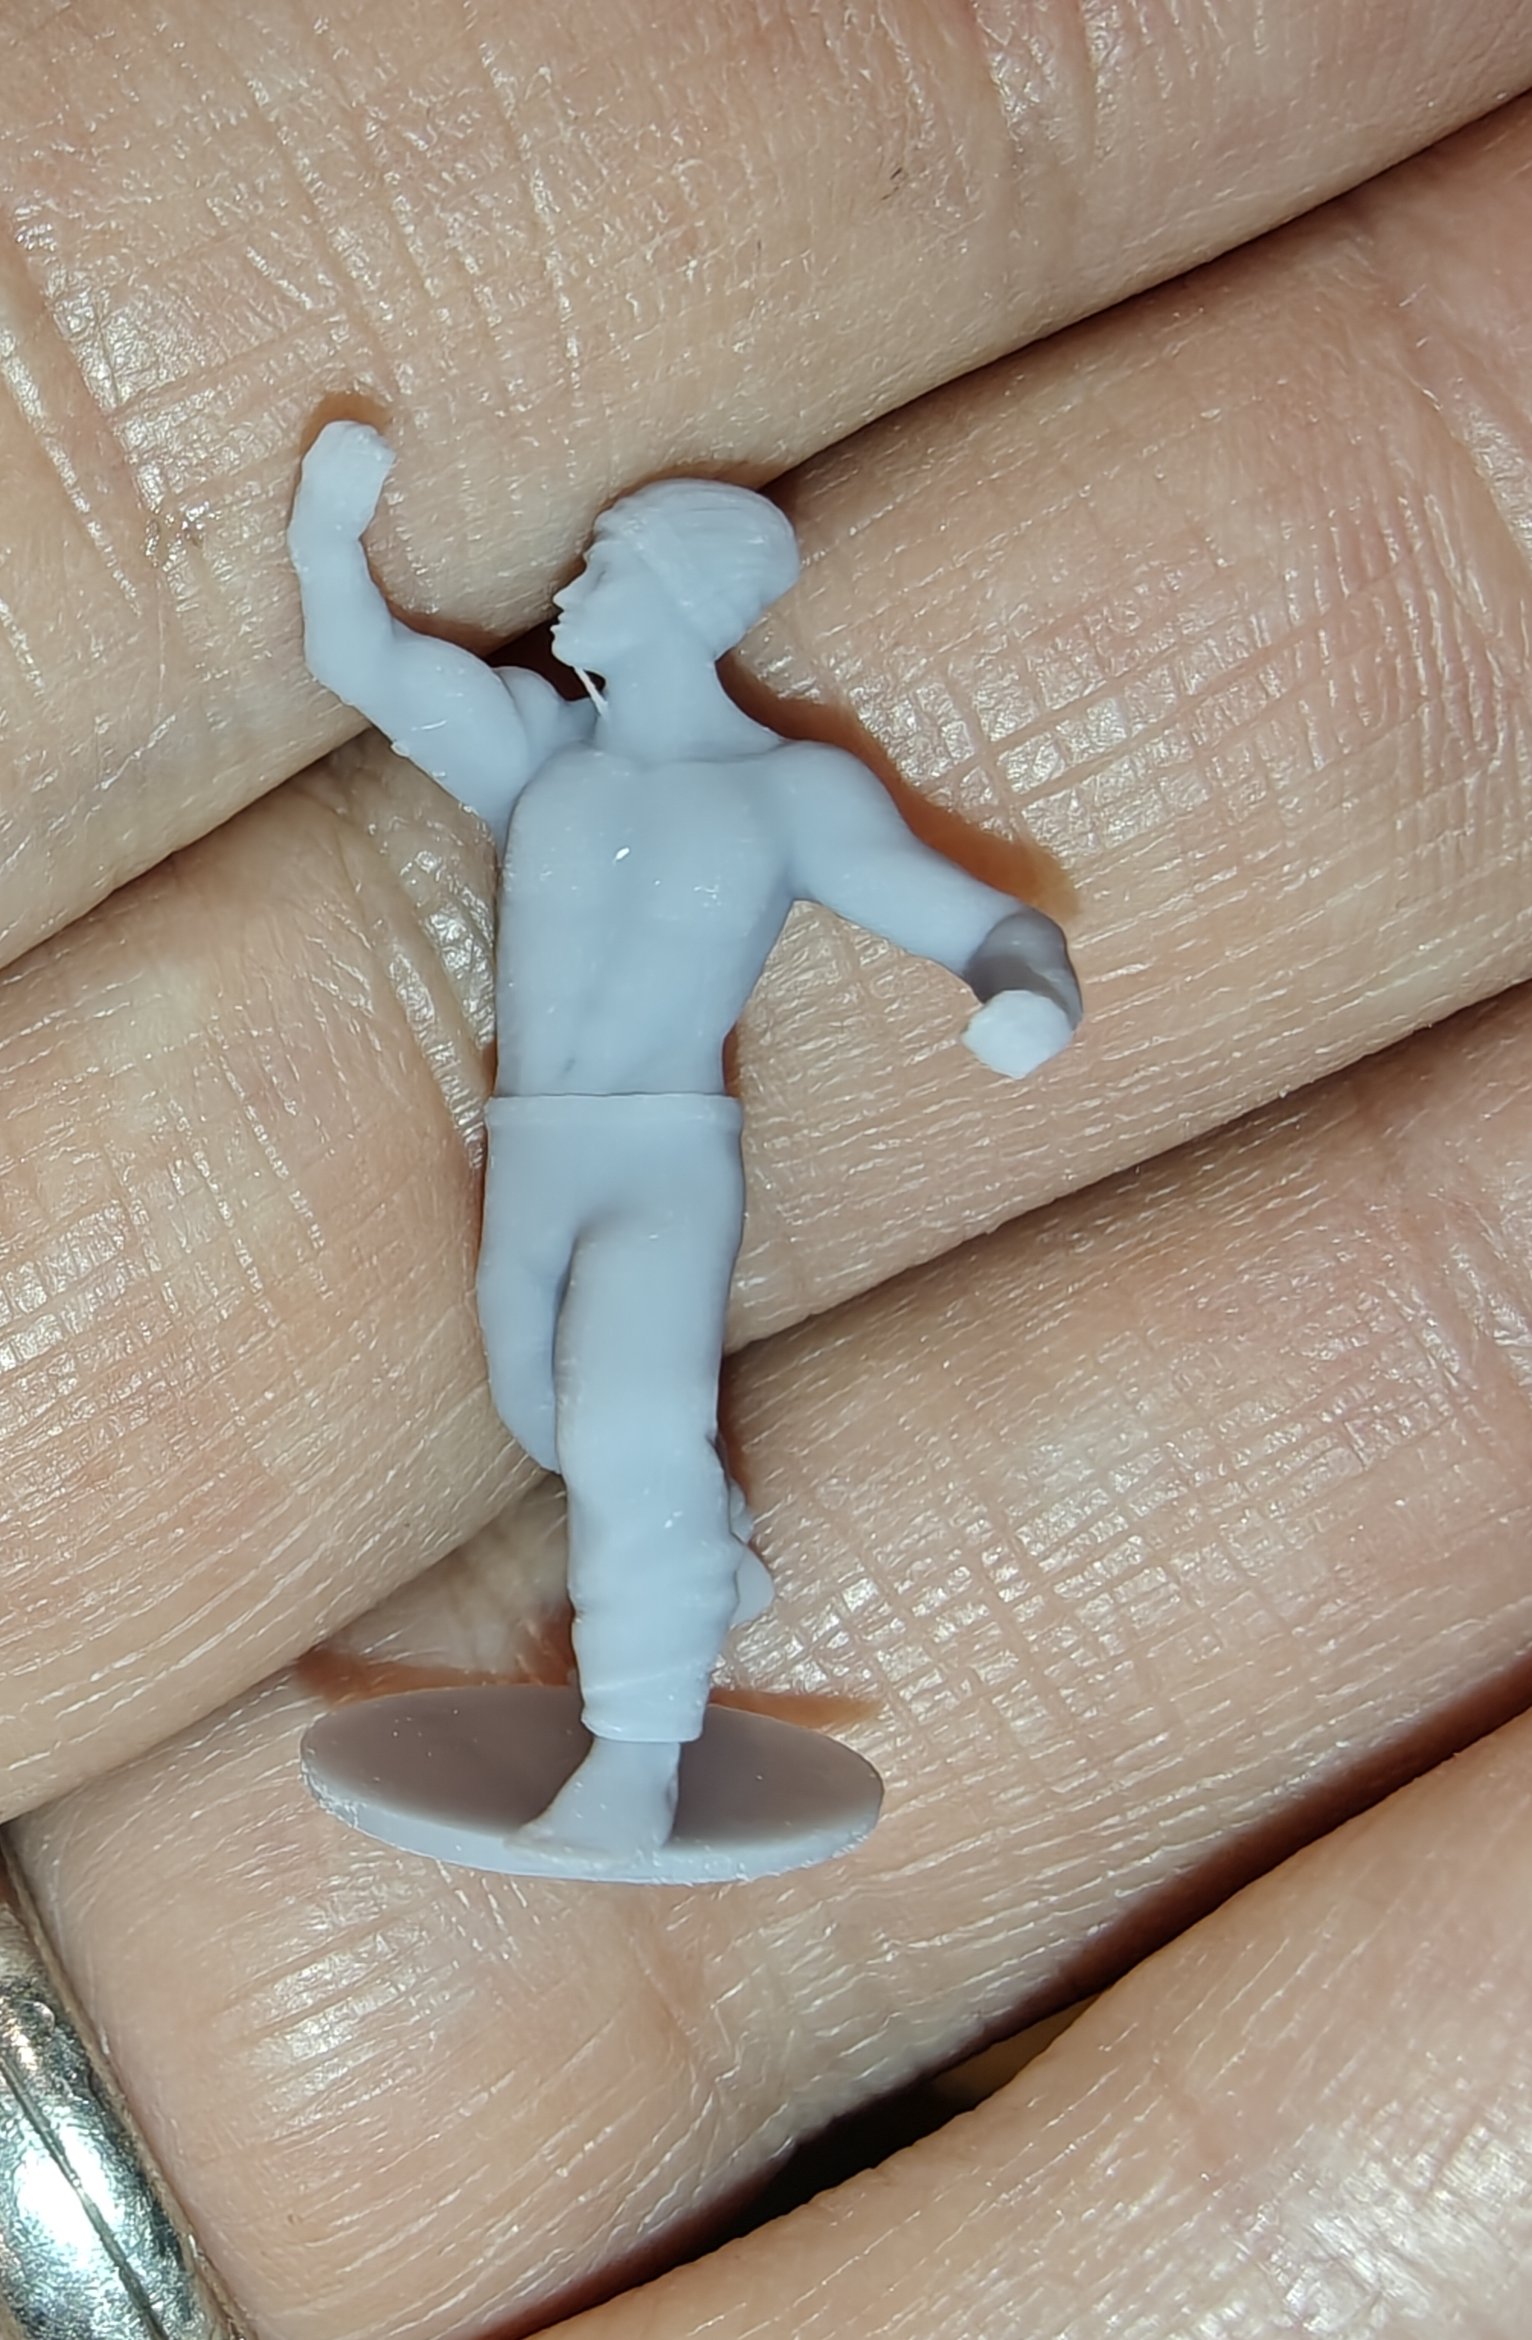
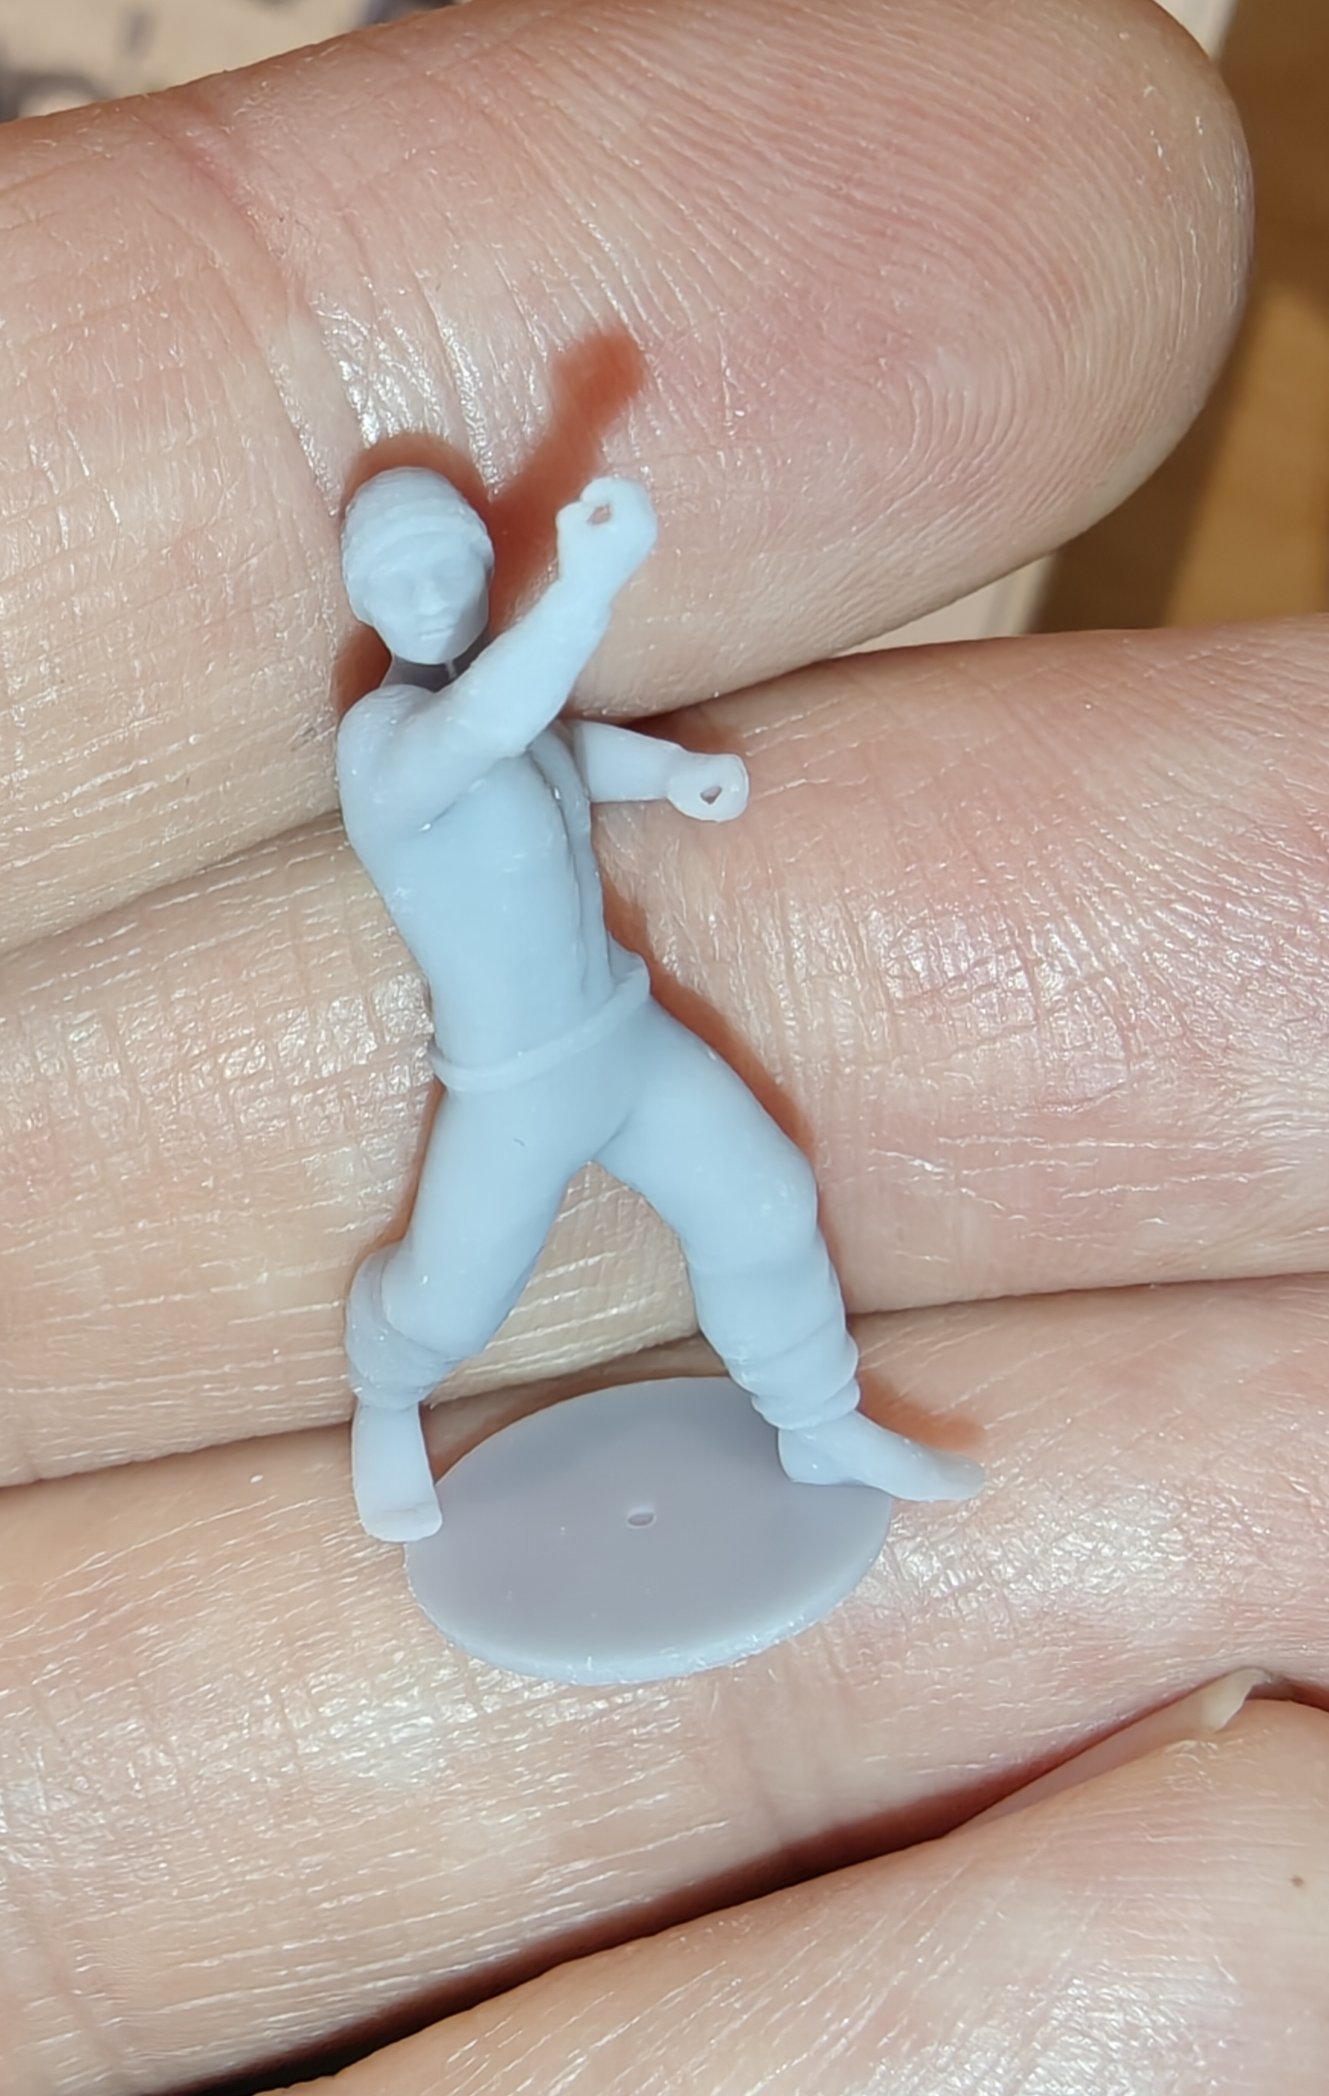
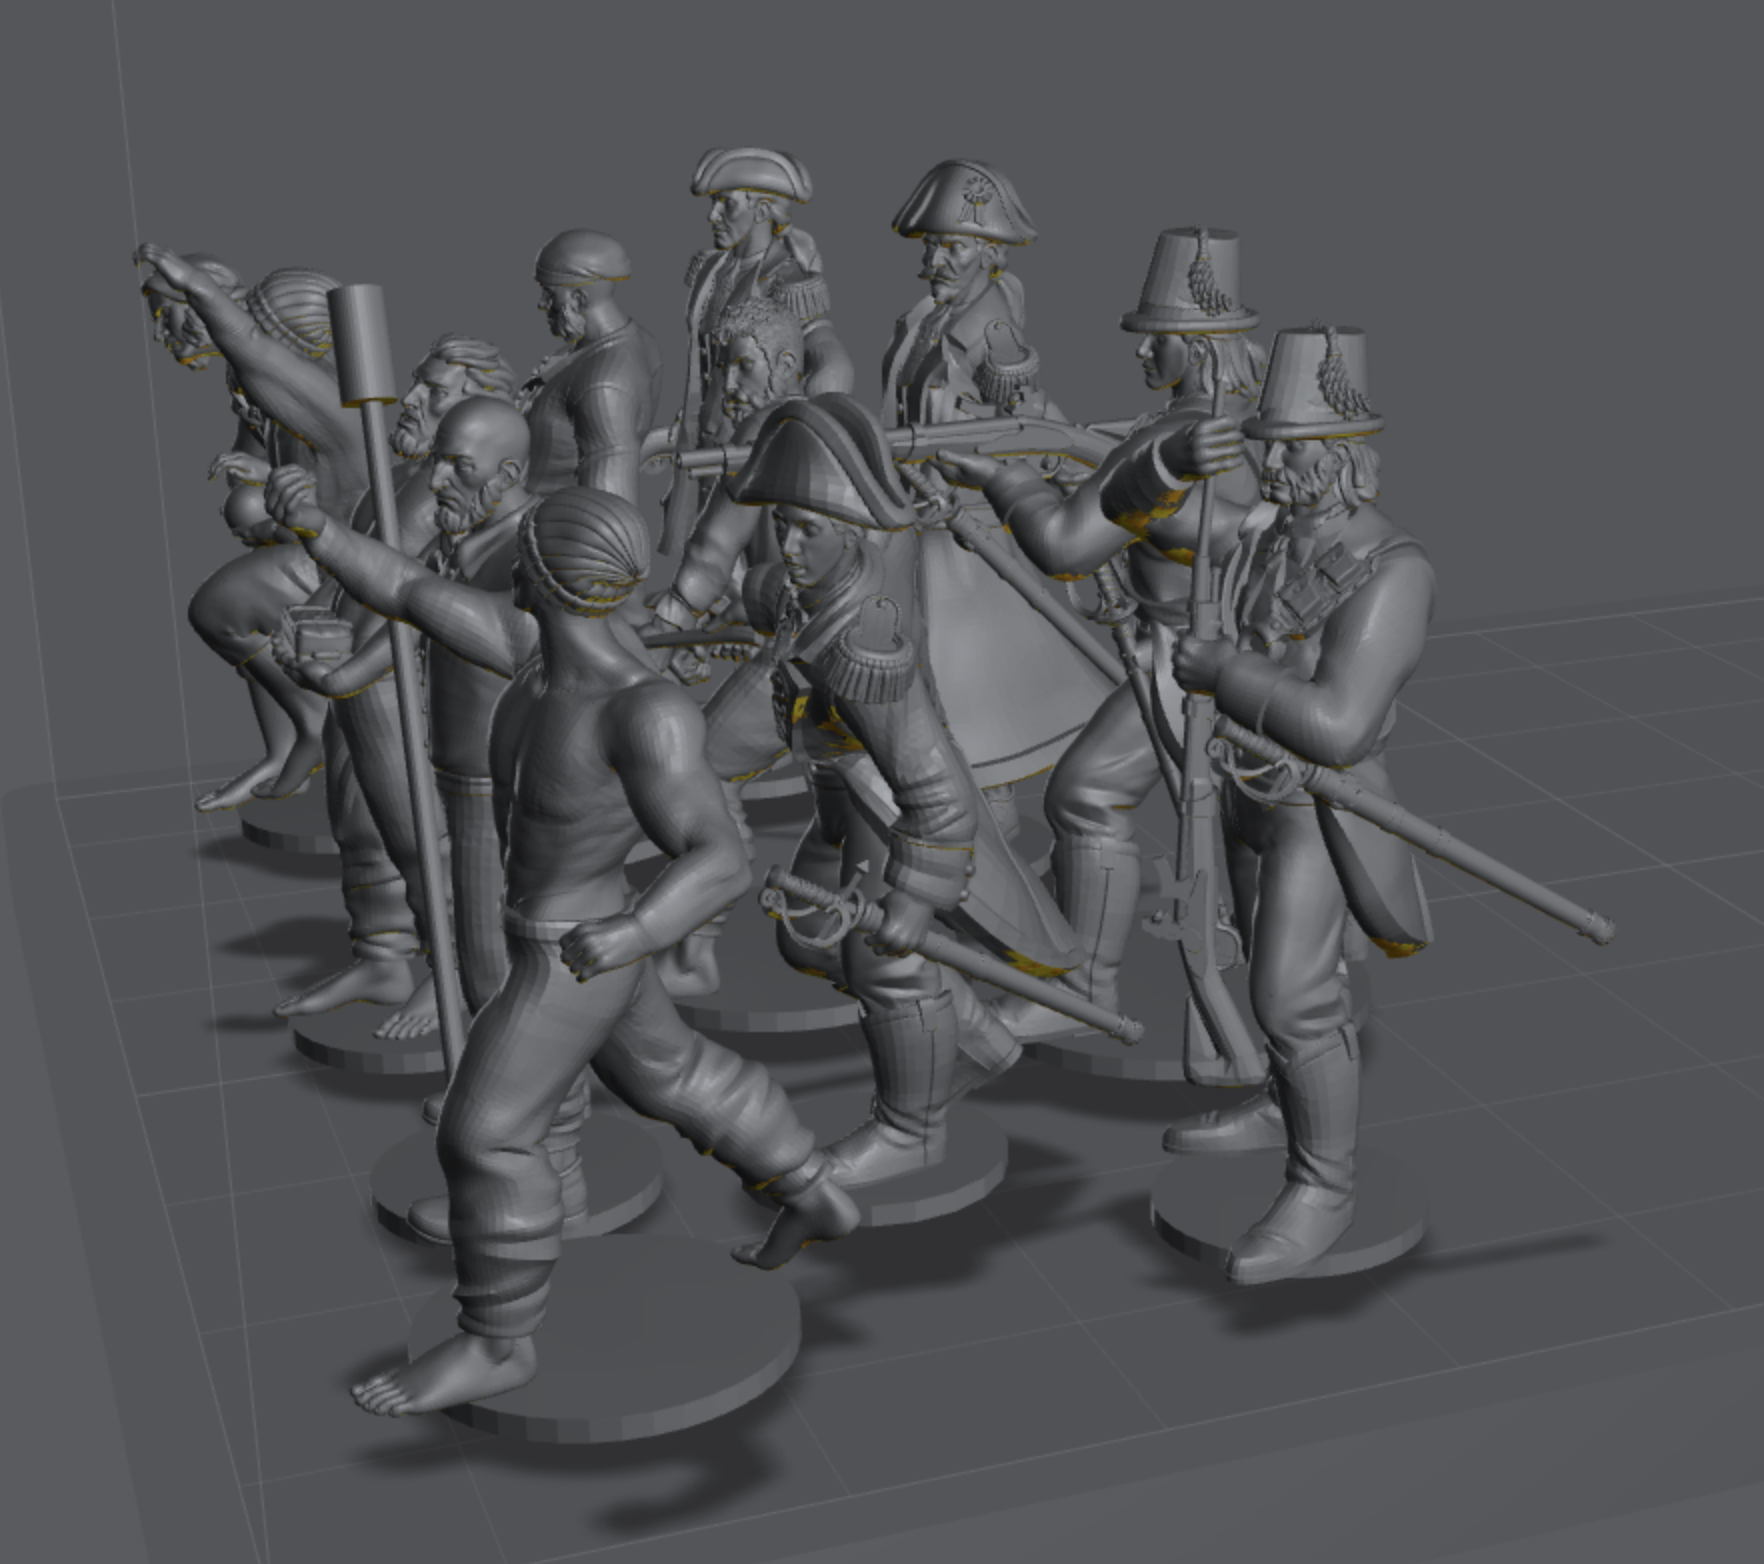
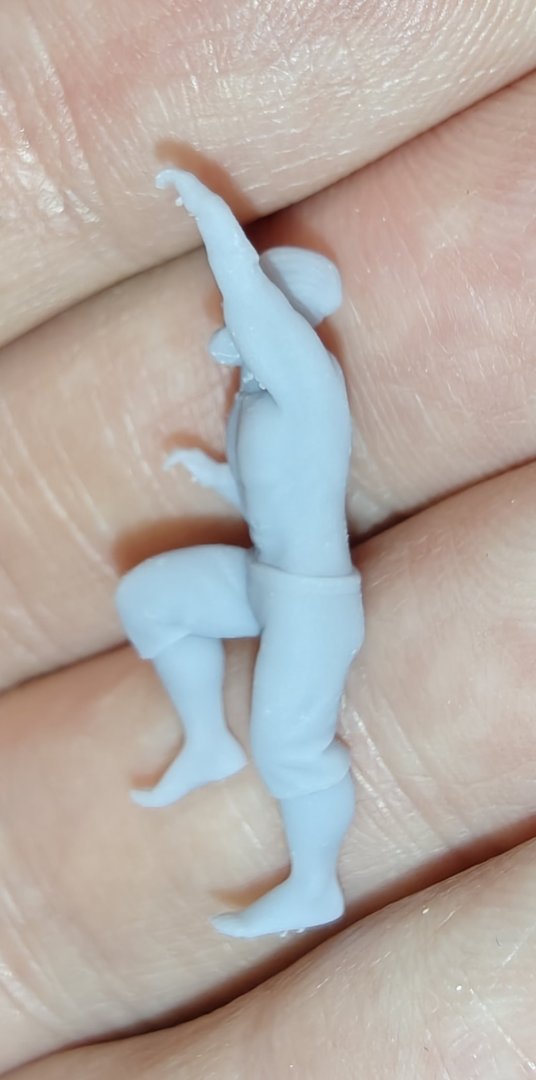
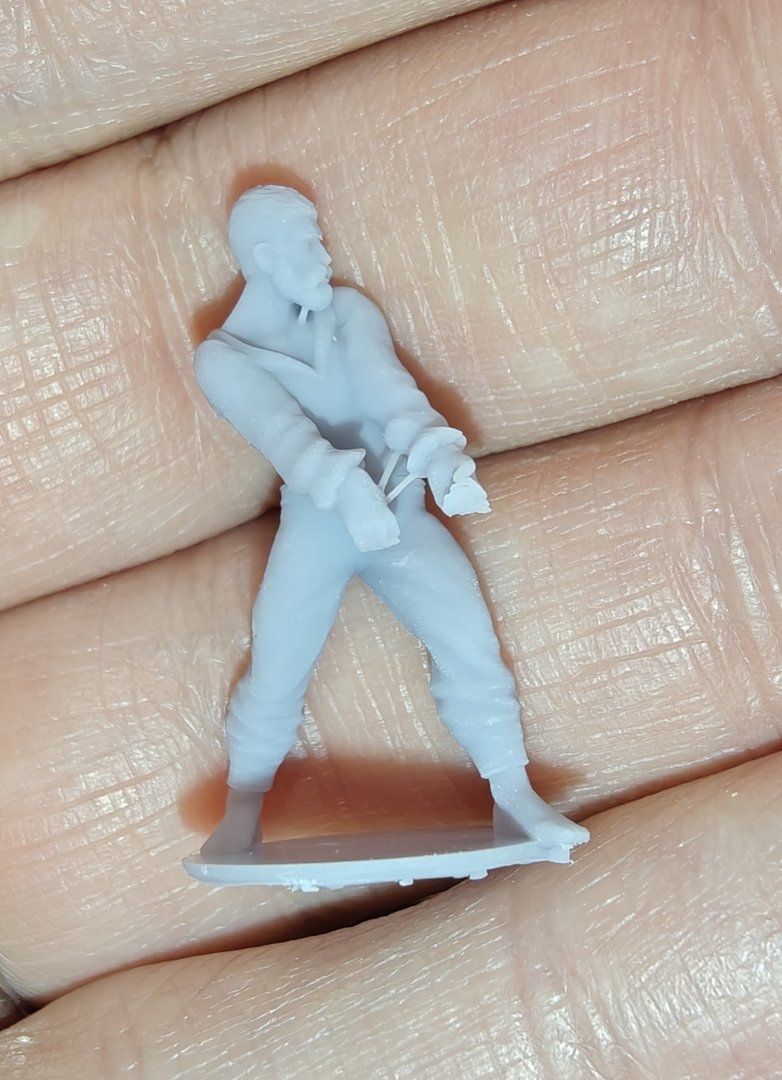
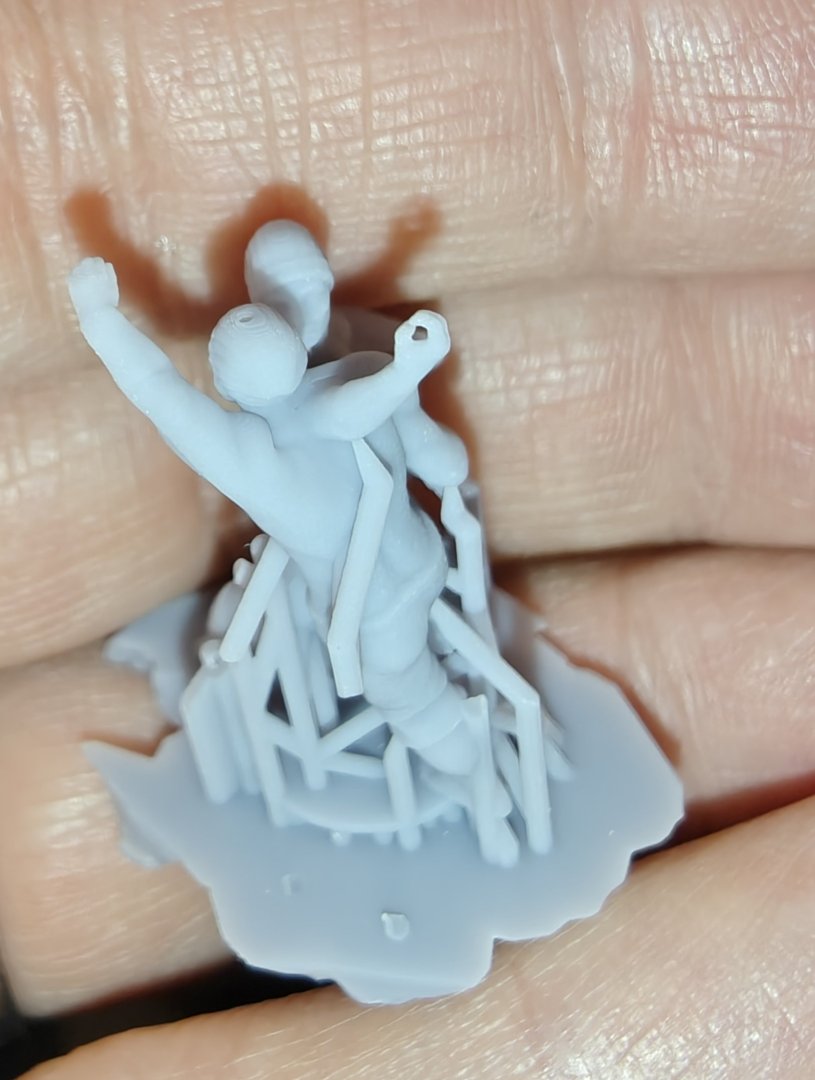
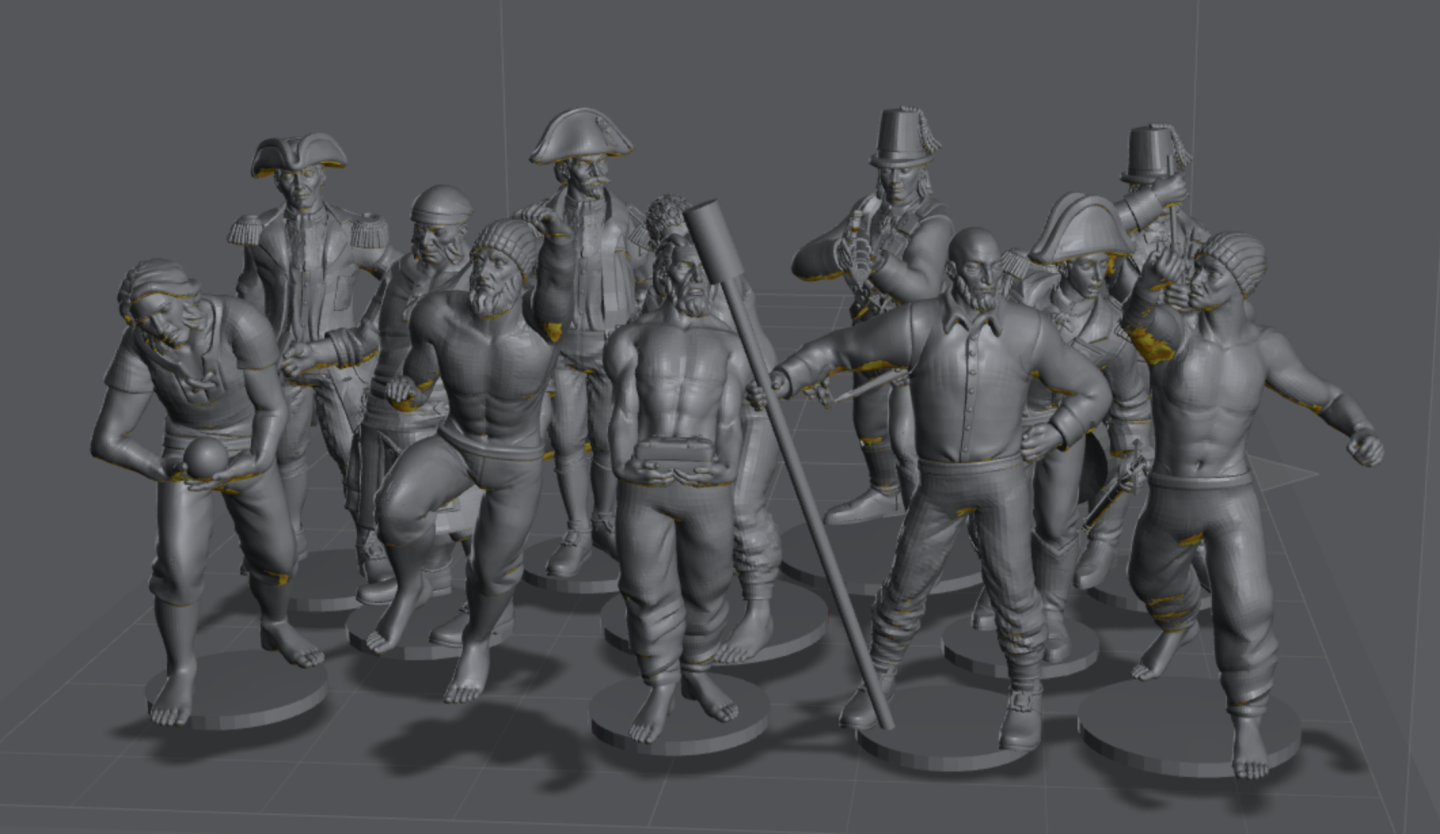
Alright, that went much better than I had hoped! Except for two figures with insufficient supports in one spot, they all printed perfectly! Even with all the ridiculously thin elements like the saber hand guards etc. This technology is some real Sci-Fi. Remember, these are at 1:64 scale, so around 26 mm for man-height. Here's a bunch of pictures: And then I made a copy paste error in the slicer and got two figures in the same spot.. 🤣 But I am very happy with these results. With a few tweeks of the few misprints, they should all be good to go. BR TJM


- 15 replies
-
- 14
-
-

-
Really great explanation and it looks very good. I love your choice of blue colour!
-
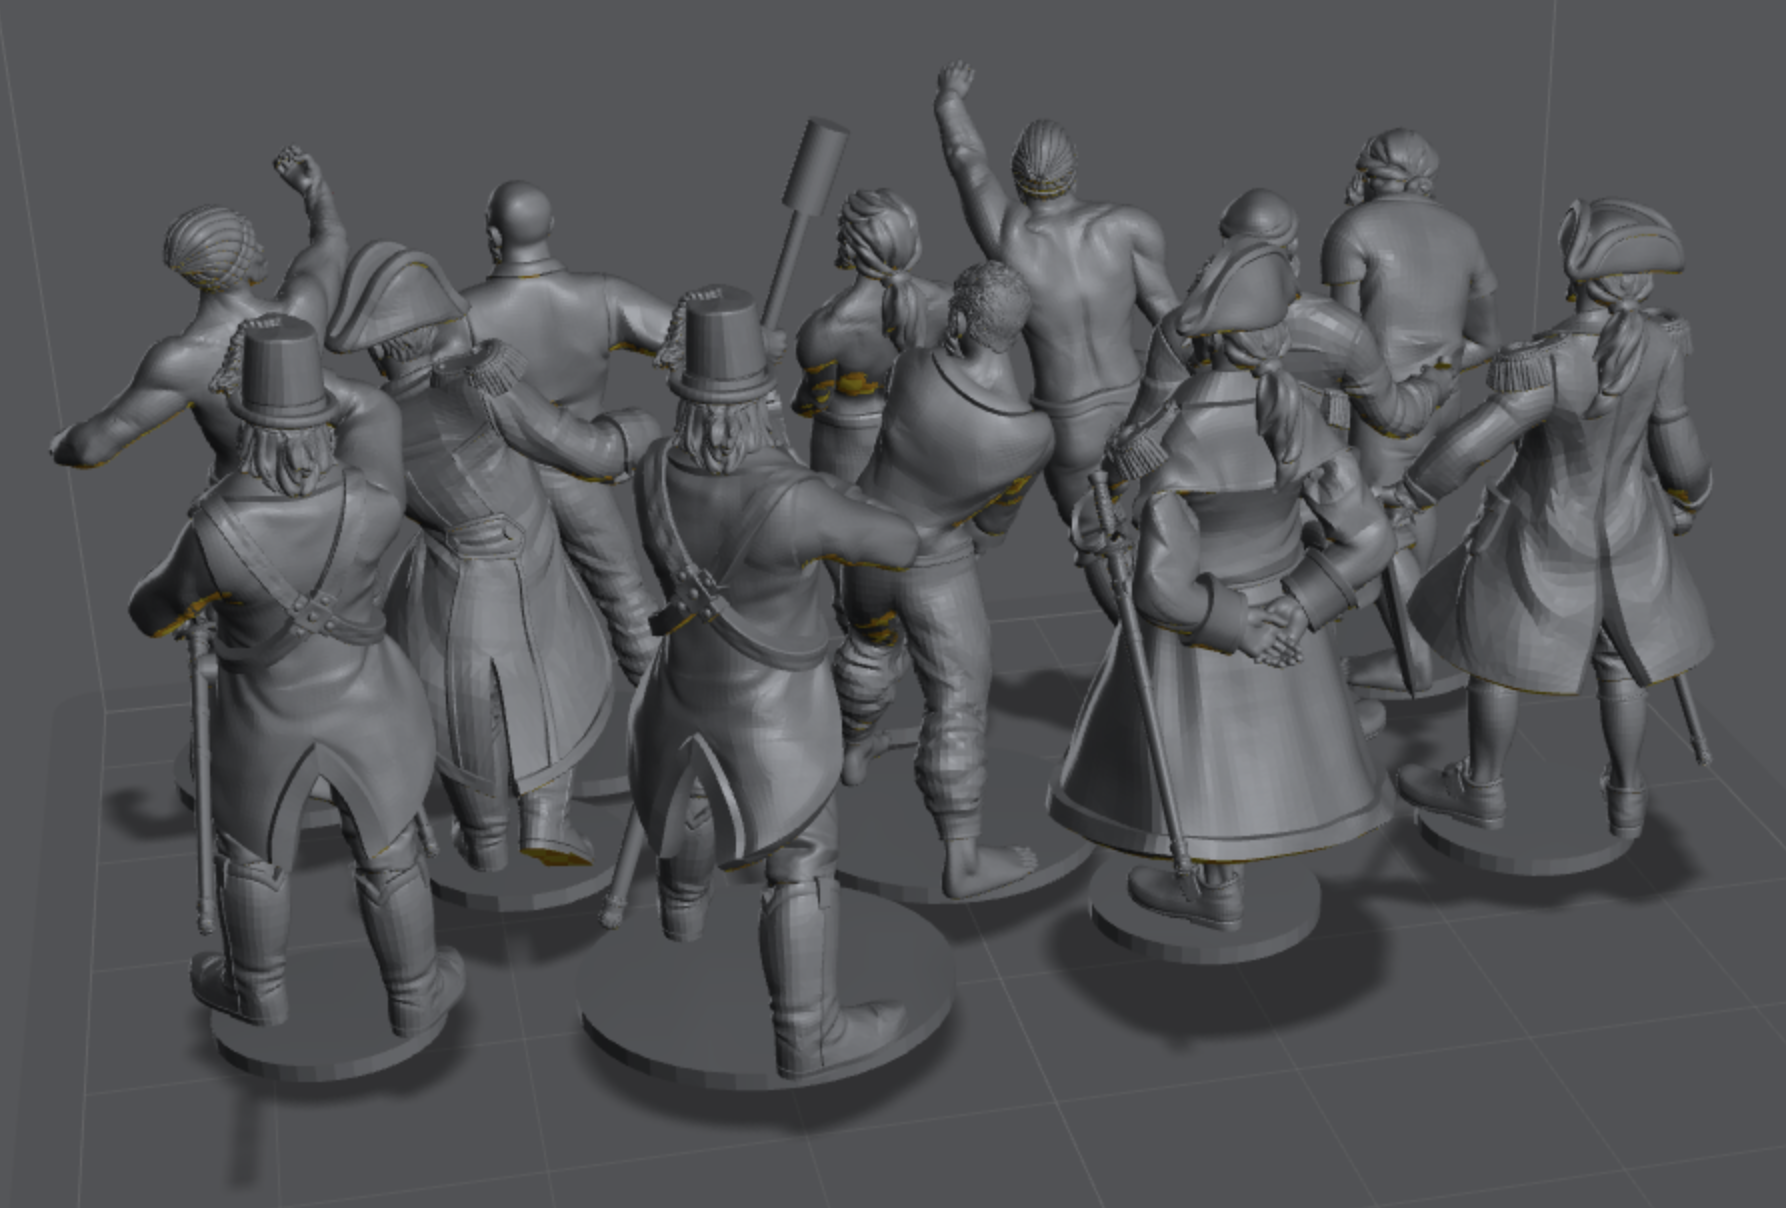
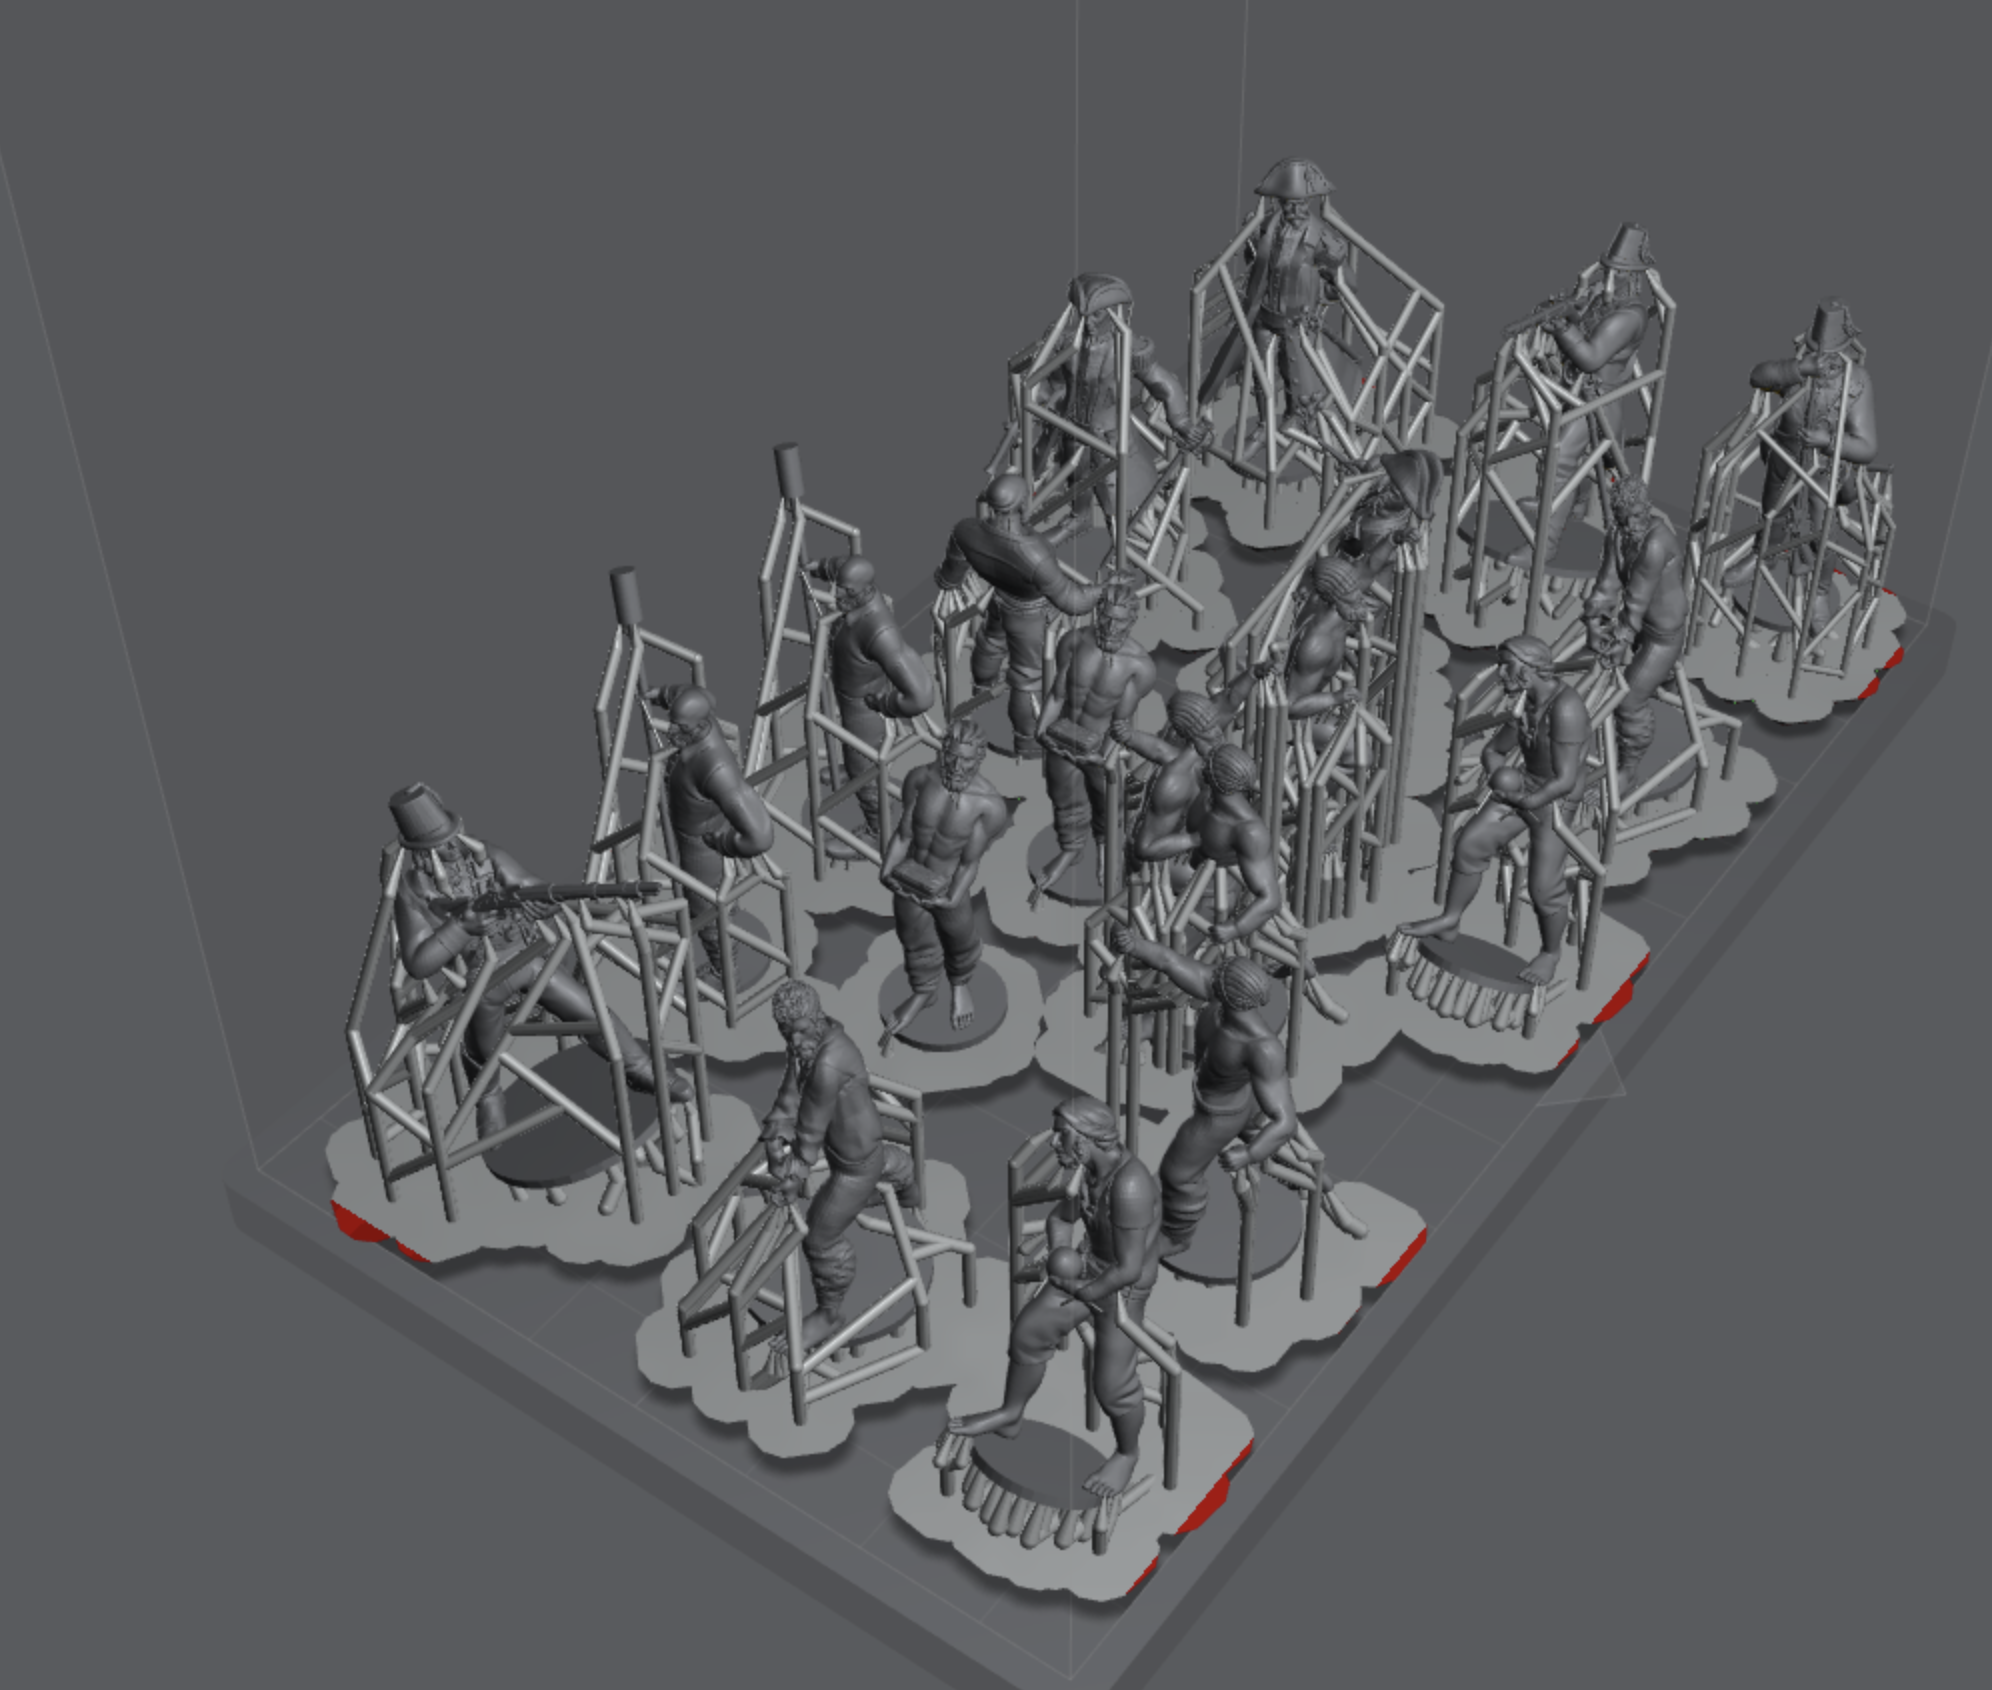
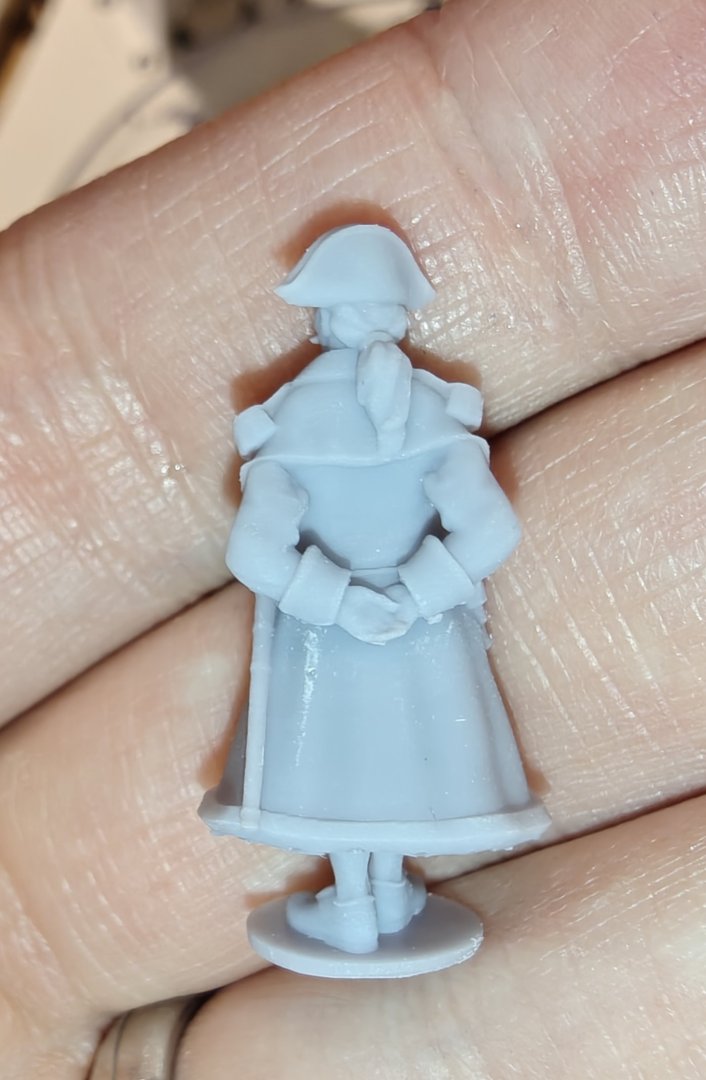
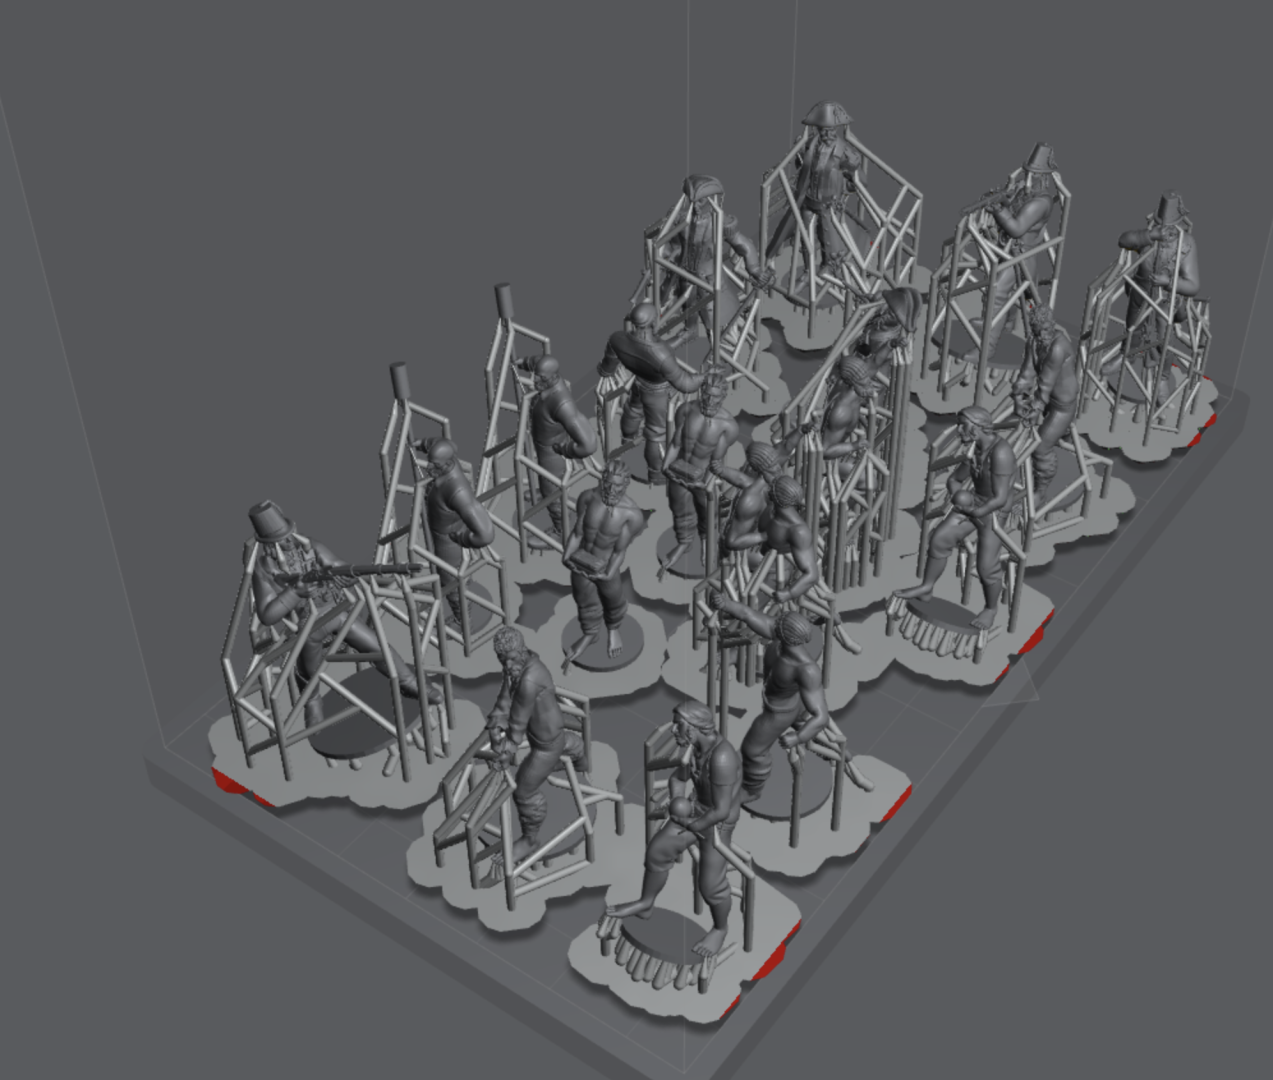
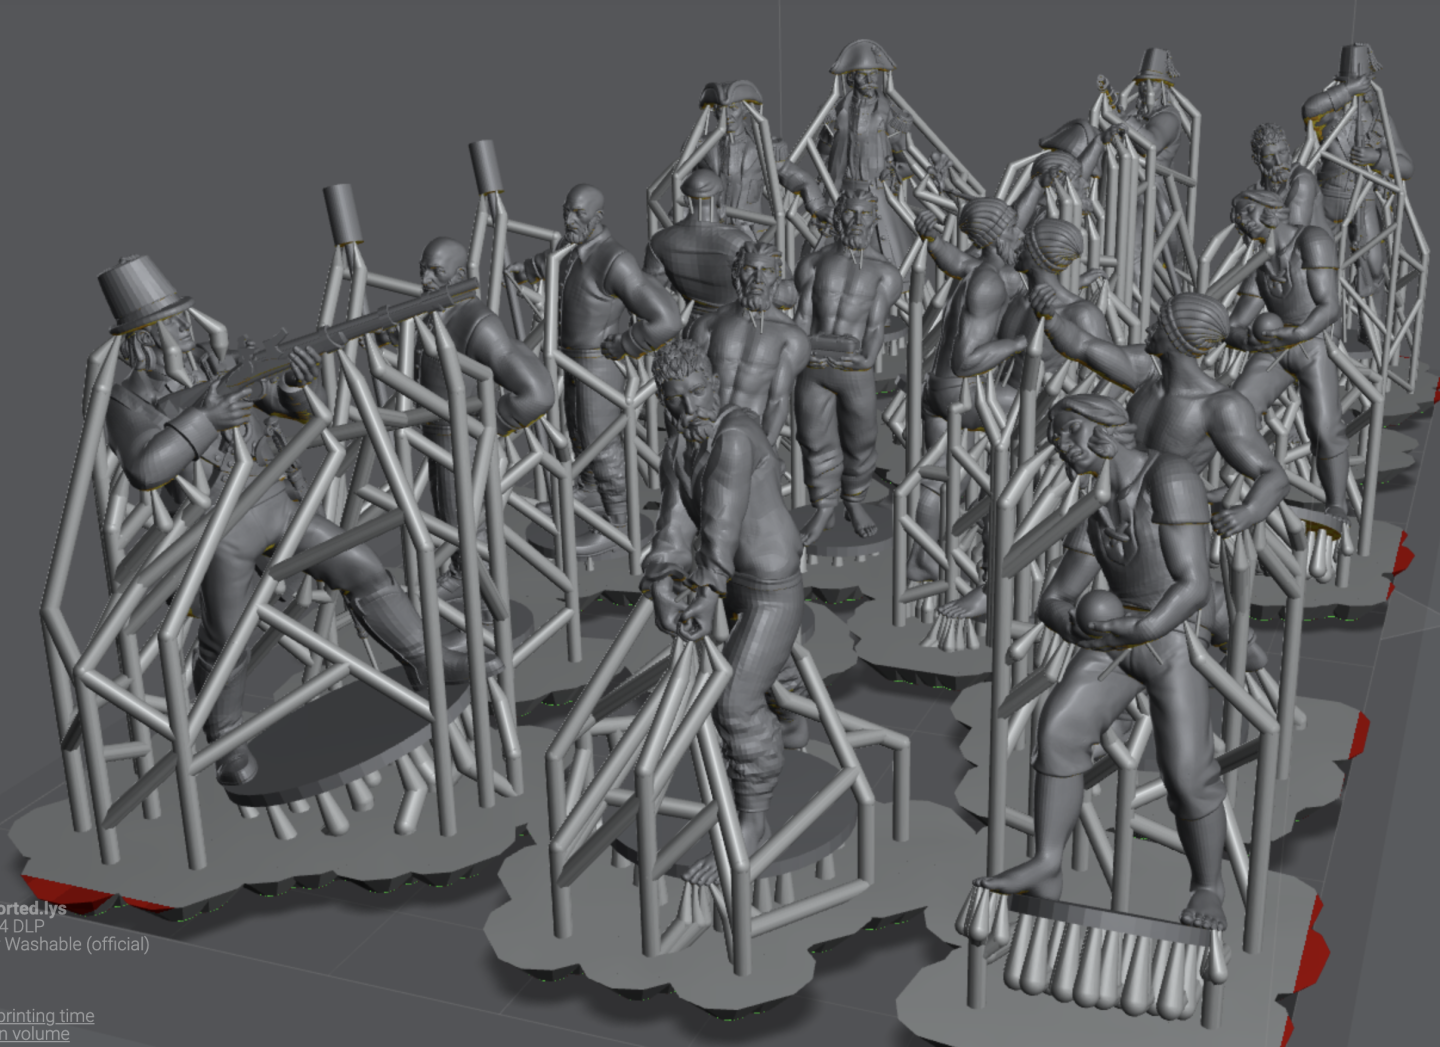
Hi All, I have splunged on a one year Heroforge membership which, apart from their full customization functionality ('kitbashing'), comes with 60 credits for STL downloads. I have plans to use it for designing parts of ship ornaments like figureheads (see my Christiania build), but also for crew figures. With the full customization options unlocked, it is possible to control hand and feet size (along with all other body proportions) - I mention this as I have seen several comments on the cartoonish looks of Heroforge minis. This is definately true for the stardard proportions, but it is possible to get quite nice proportions with a bit of tweaking. Another note - it is difficult to get anything close to historically accurate in terms of clothing (except for very simple clothes). The site is meant for creating Fantasy and Sci-Fi miniatures for tabletop games like D&D. So the designs will not hold up to historical scrutiny or large scale models. But for my use, which is scale figures at 1:64, very little detail will be actually visible when printed, despite the very high resolution of modern resin 3D printers. And my paint job is likely to cover anything that is left to be scrutinized anyways... But this should enable me to create more crew figures for ships at a reasonably low cost. Here are a few images from the slicing software: I have prepared a supported set and filled my little build plate: Now I have to try to print them, hopefully I will get a chance to try tomorrow. They are only about 26 mm tall (plus/minus, depending on hats and posture) and I have no idea if I have supported them sufficiently. Lets see how it goes! BR TJM


- 15 replies
-
- 13
-
-
-
Thank you! I remember all of these techniques when you mention them, but I am so rusty! So thanks for the great description here. I am at least encouraged to try again and really try my best, keeping these points in mind - I think the postman has delivered my new brushes today, so....
- 111 replies
-
- 4
-
-
- Christiania
- Vanguard Models
- (and 1 more)
-
Thank you for that, I really appreciate it. And yes I know we are all our own worst critics, but I just know I could do better once 😄.
-
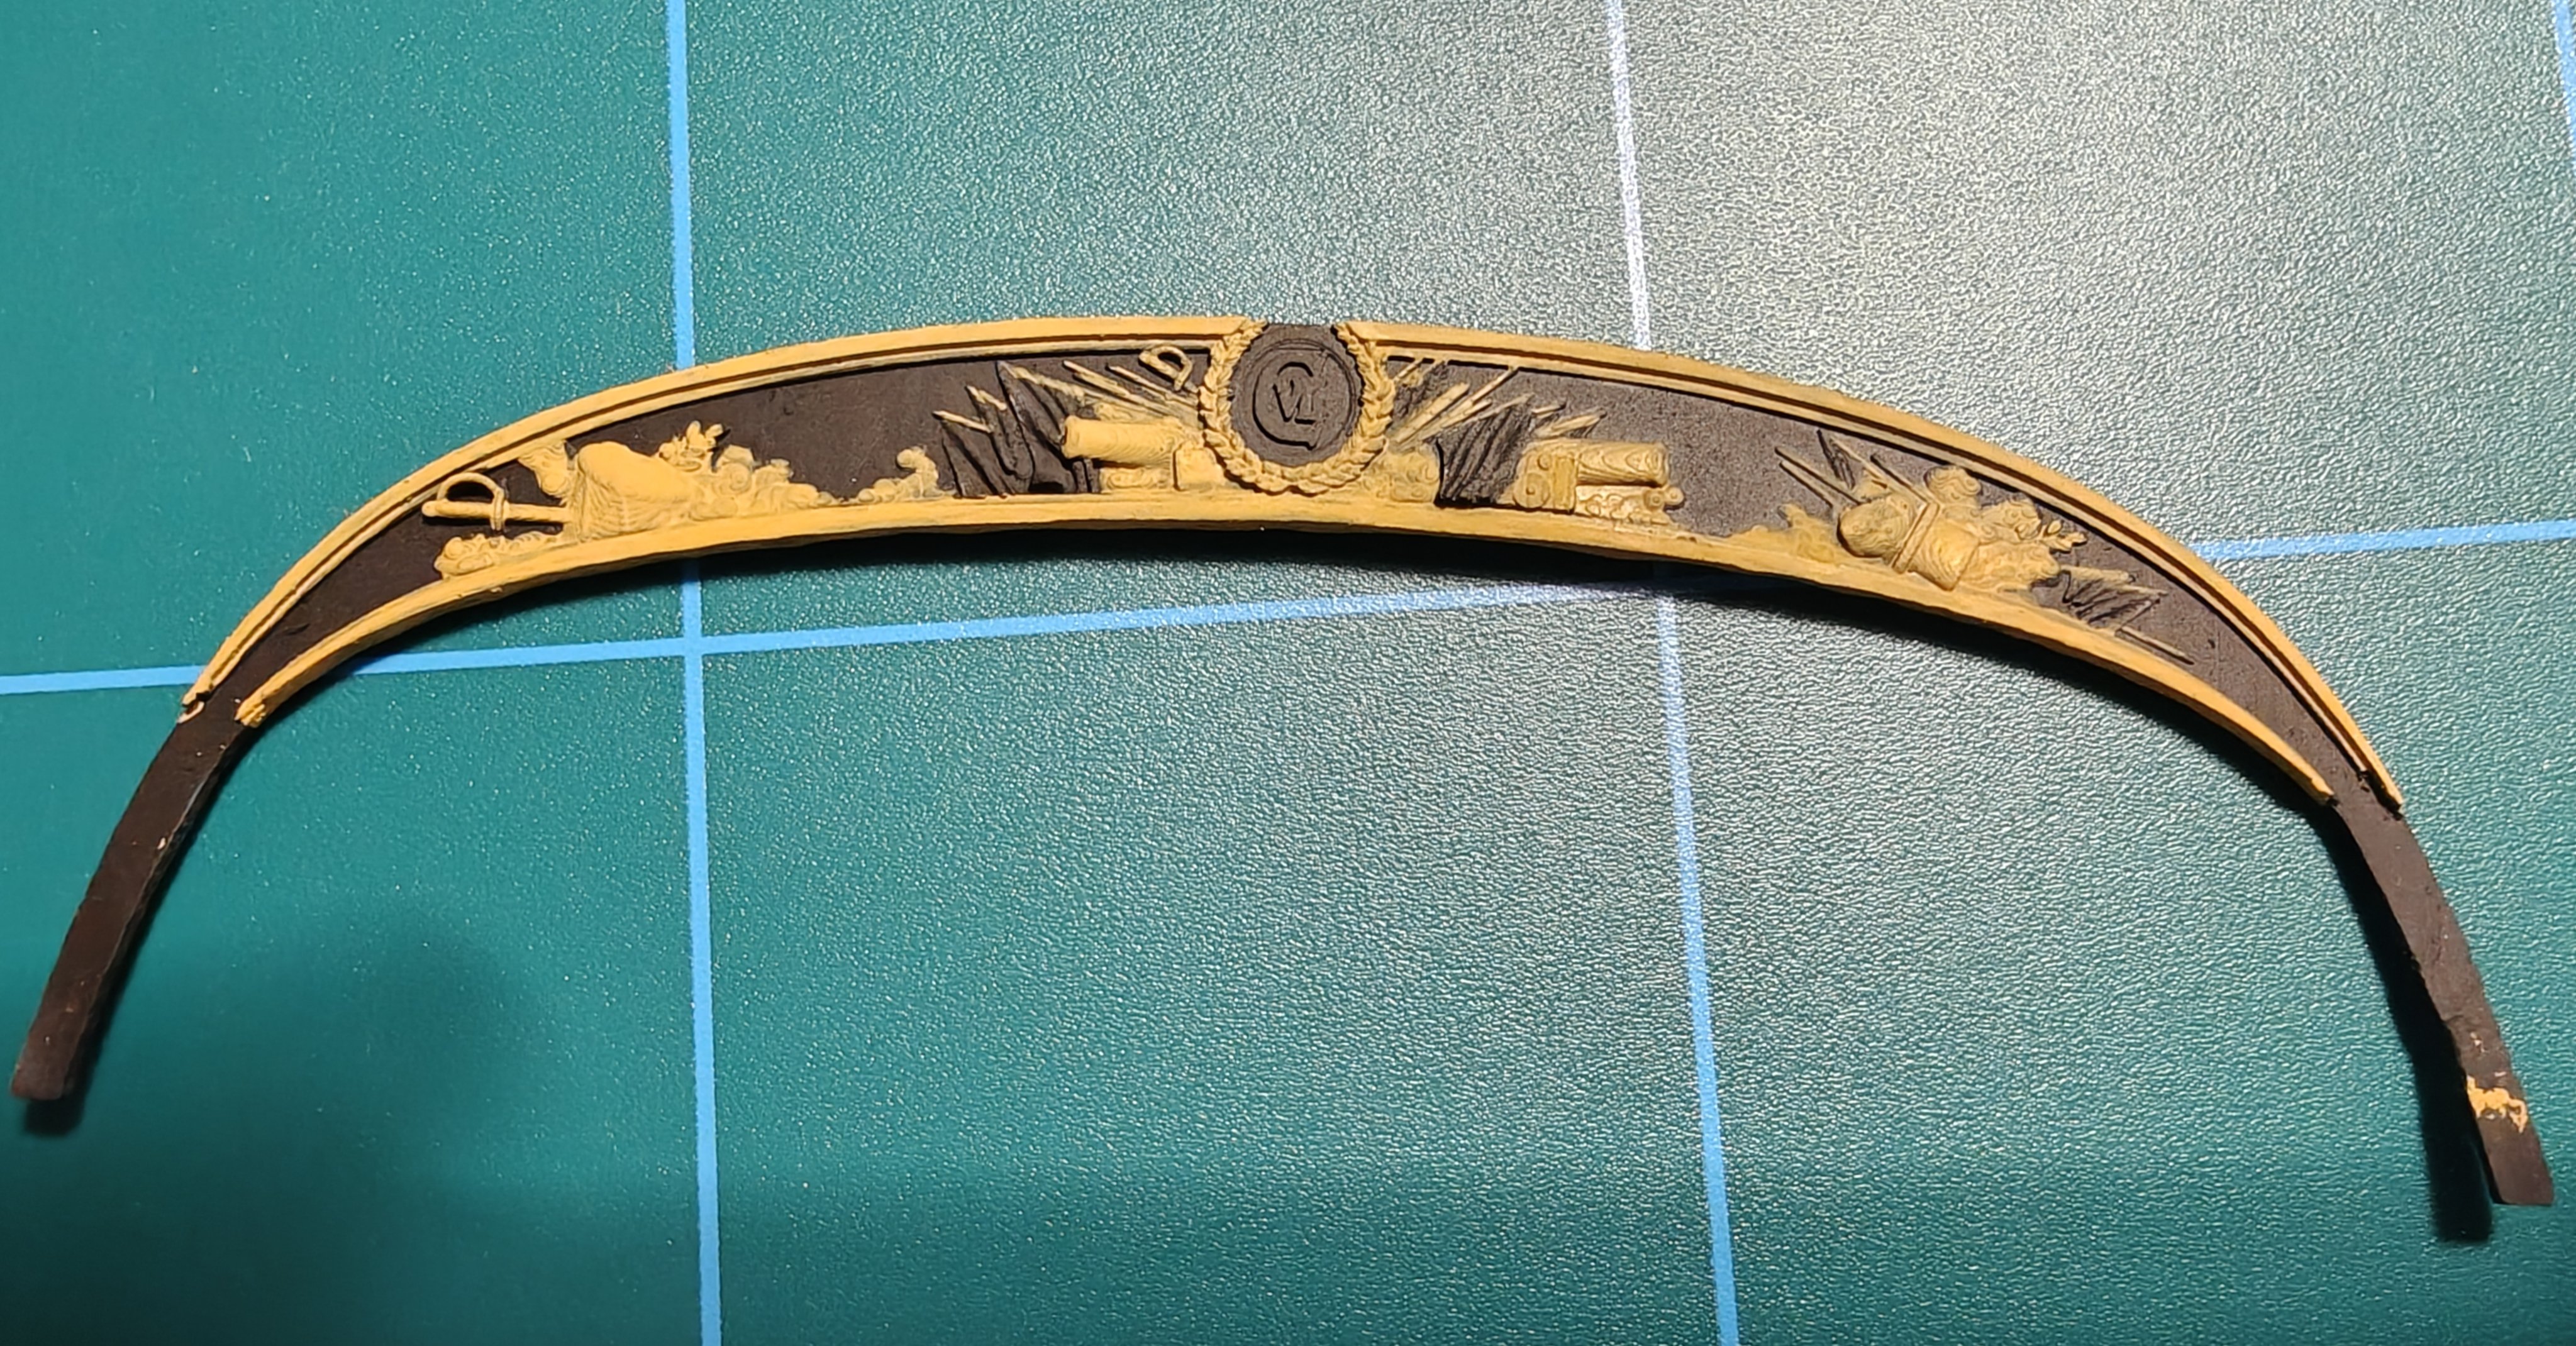
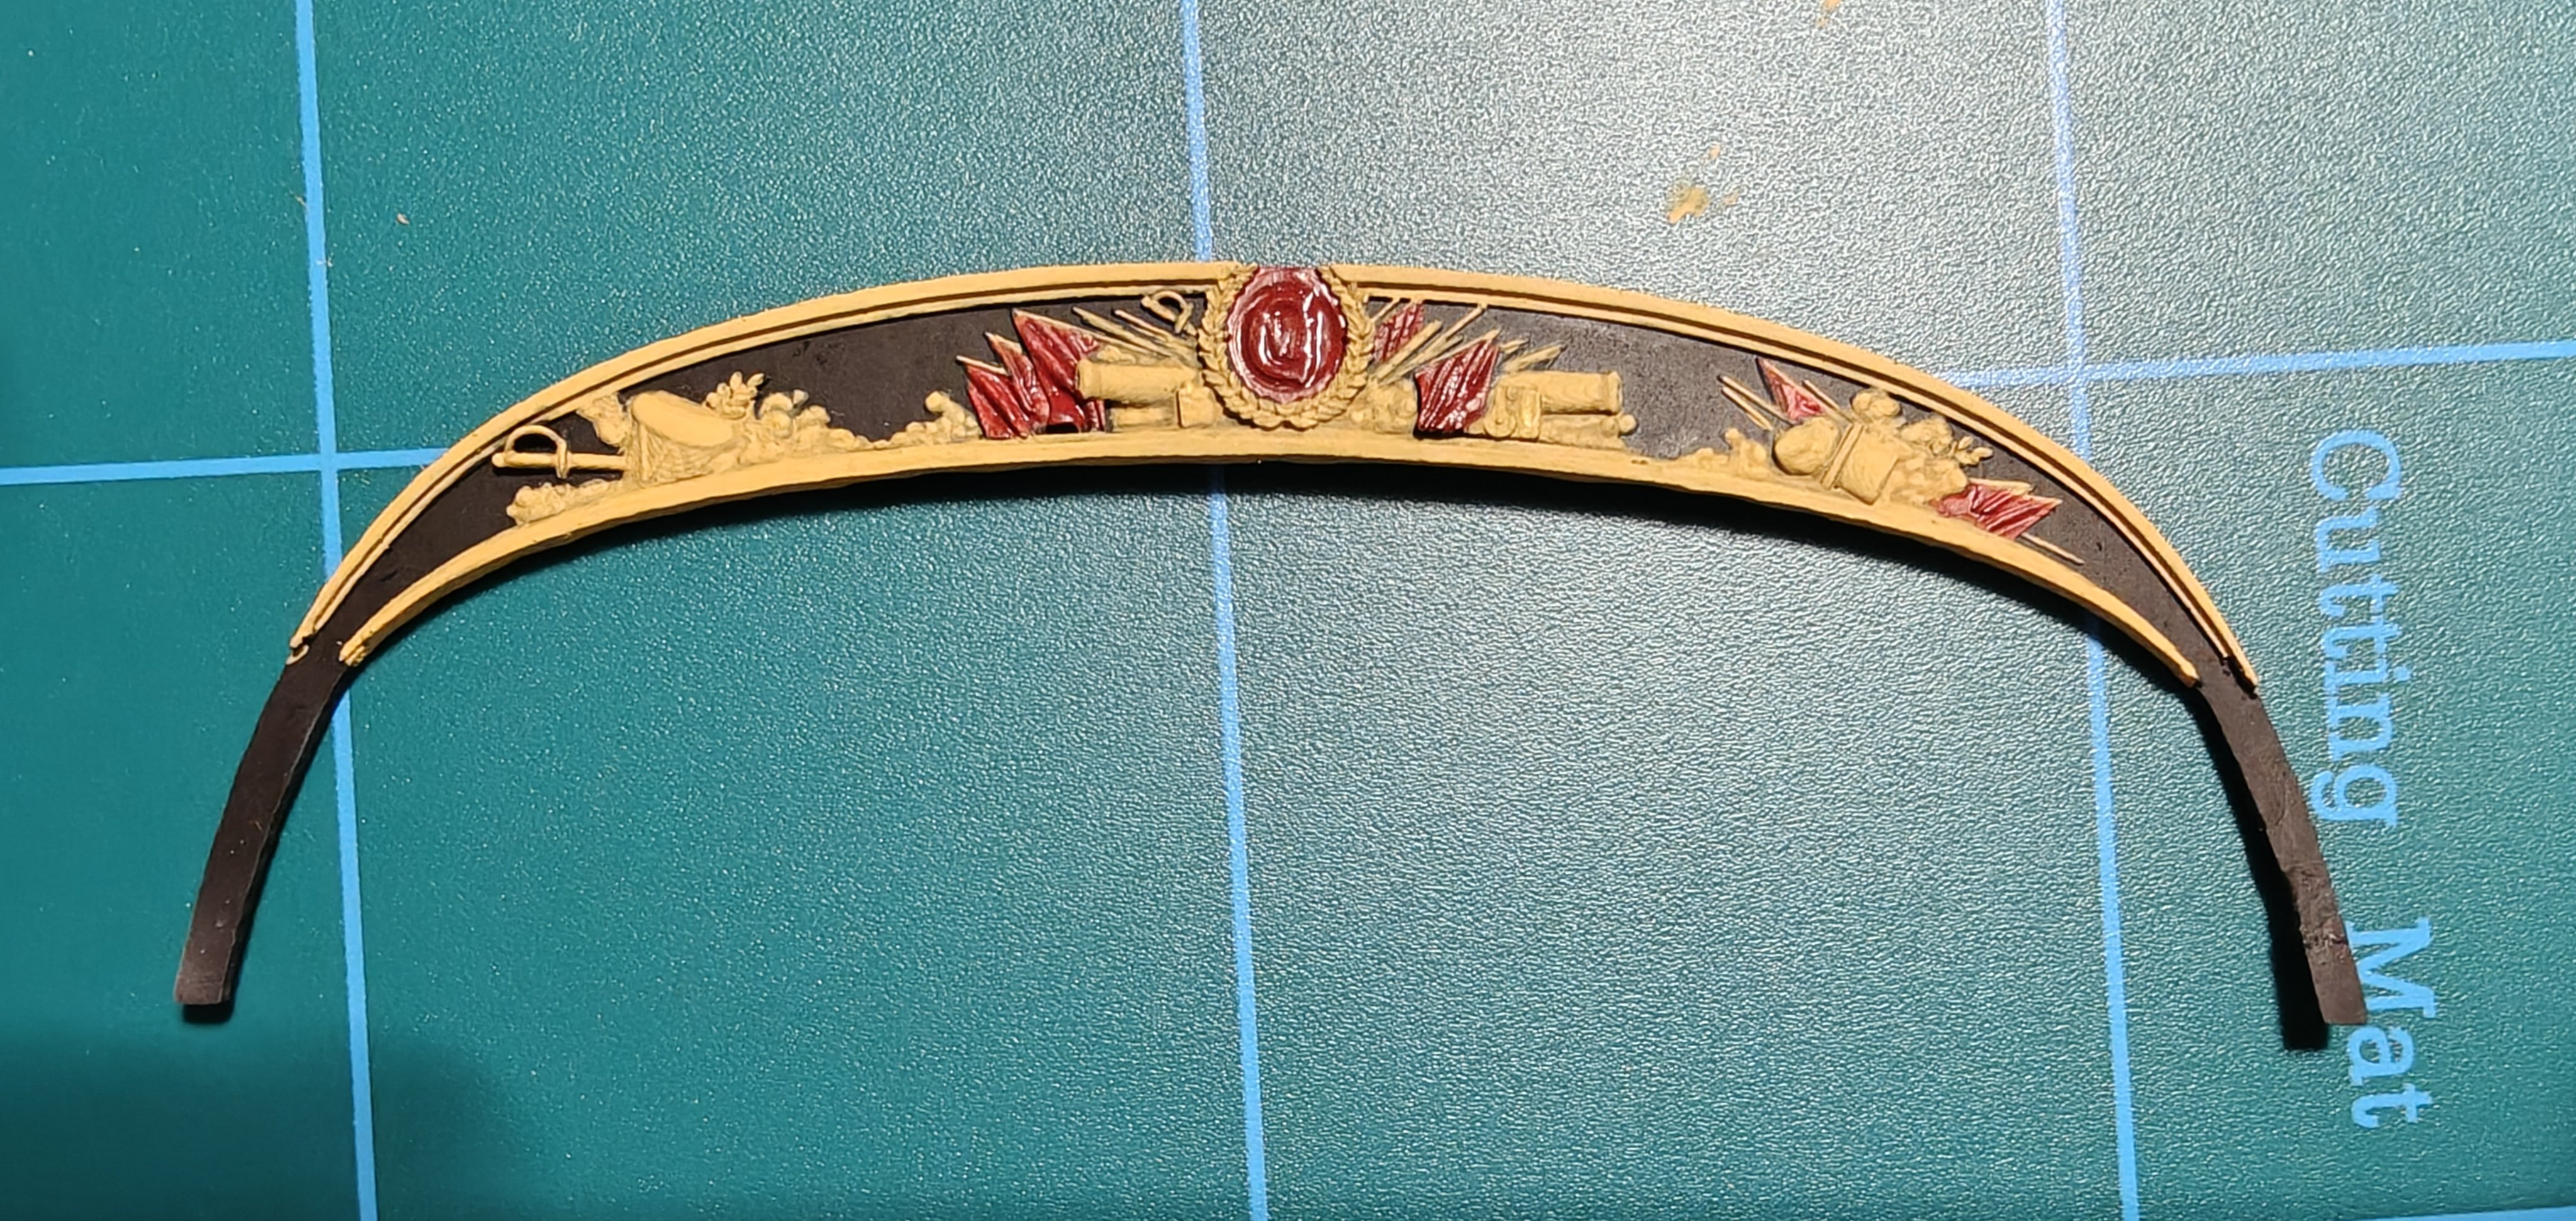
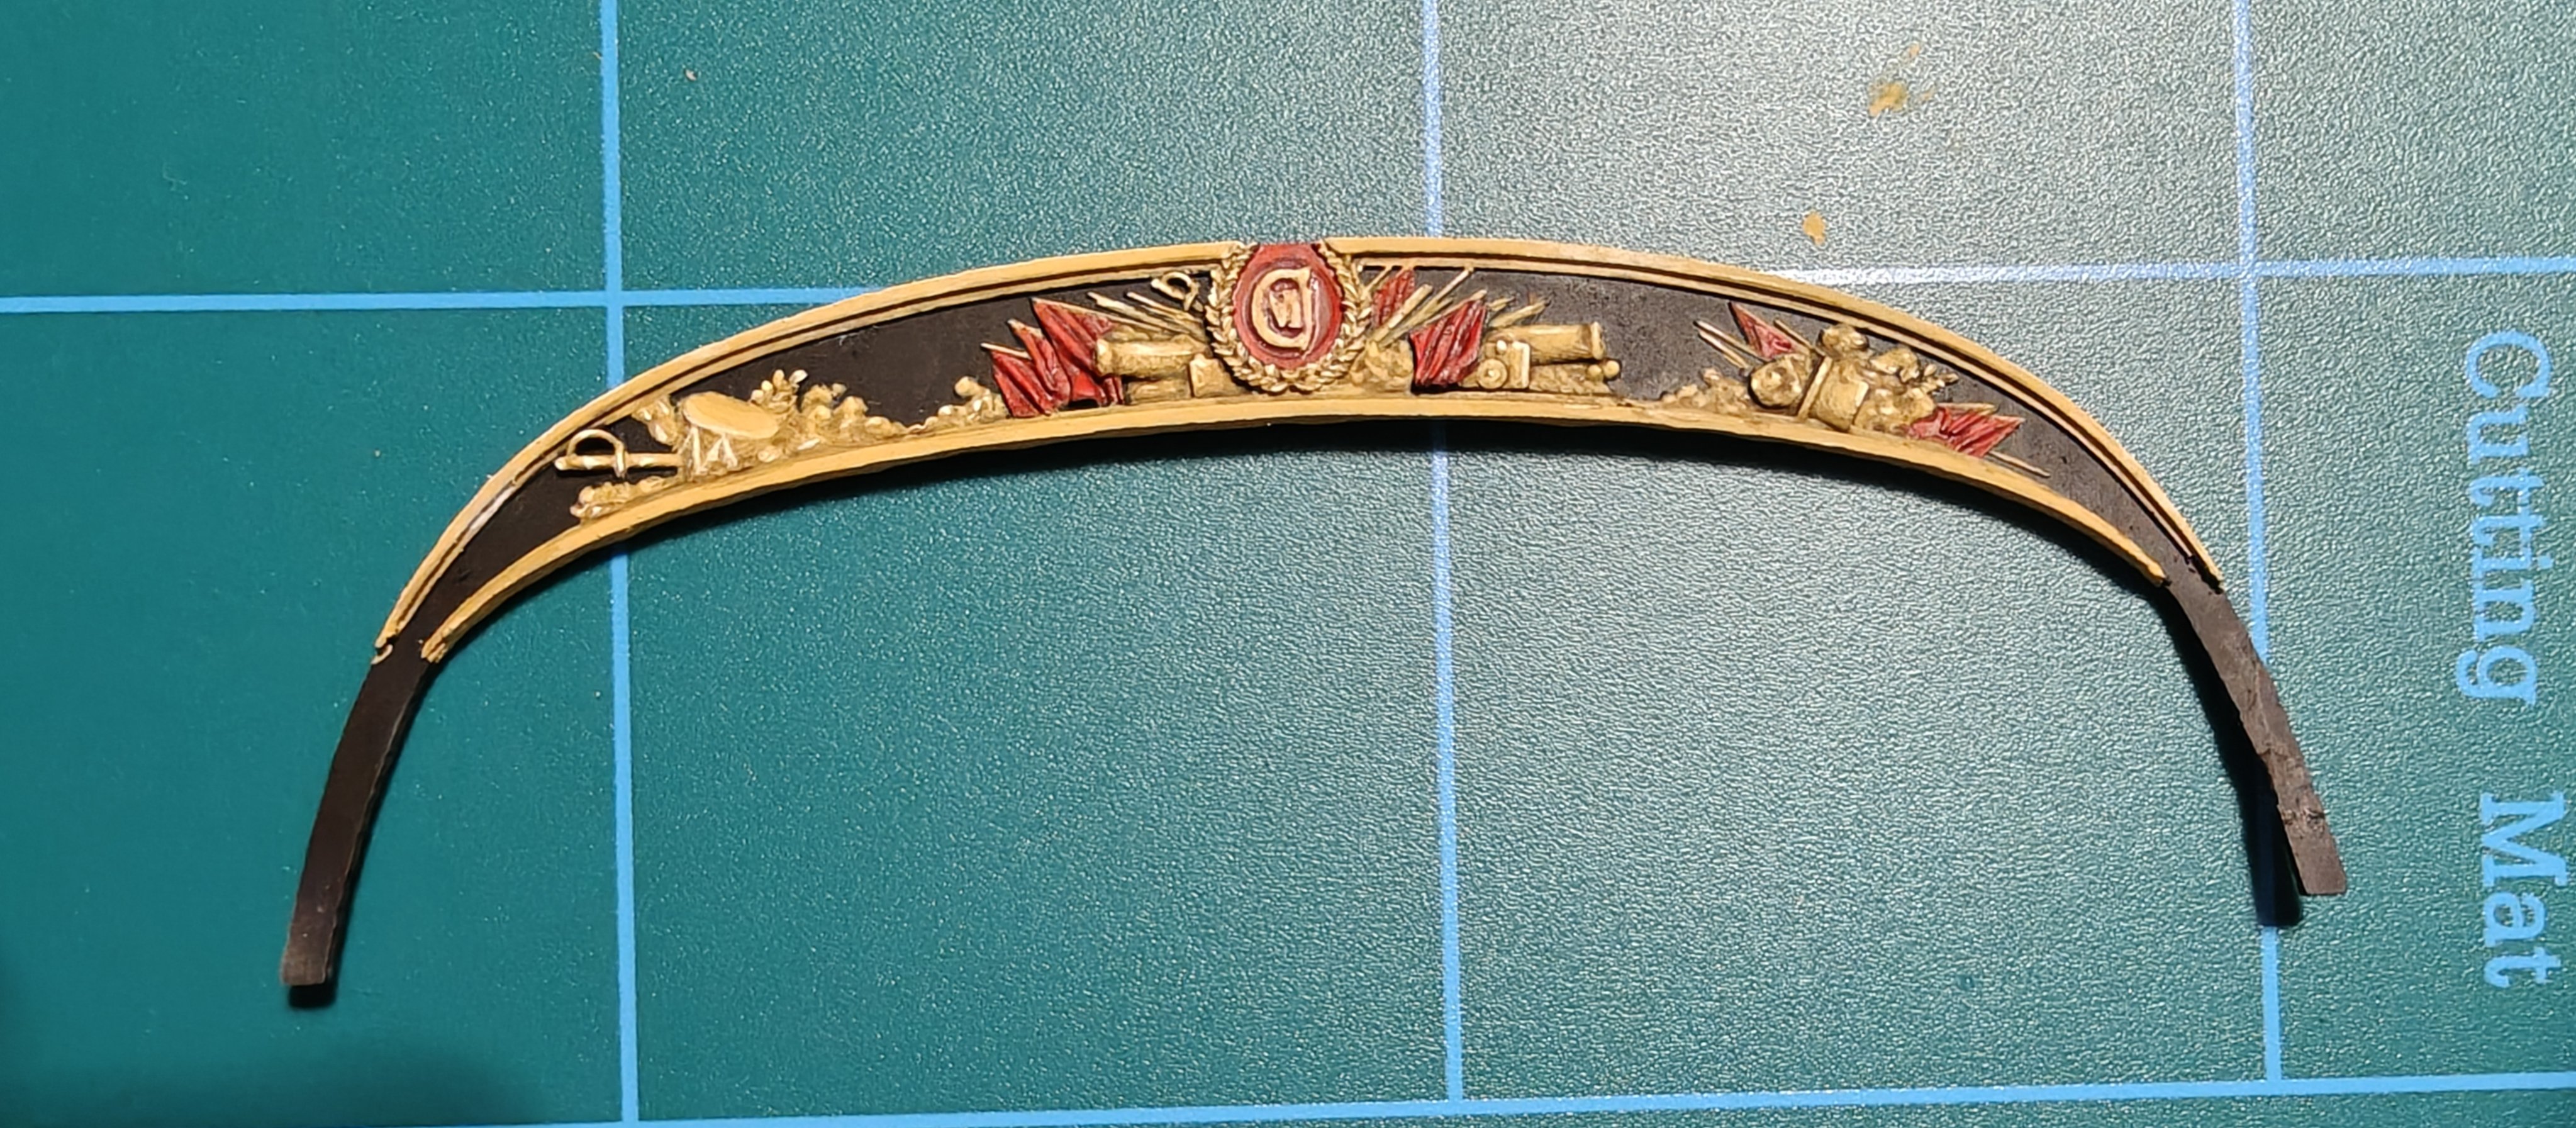
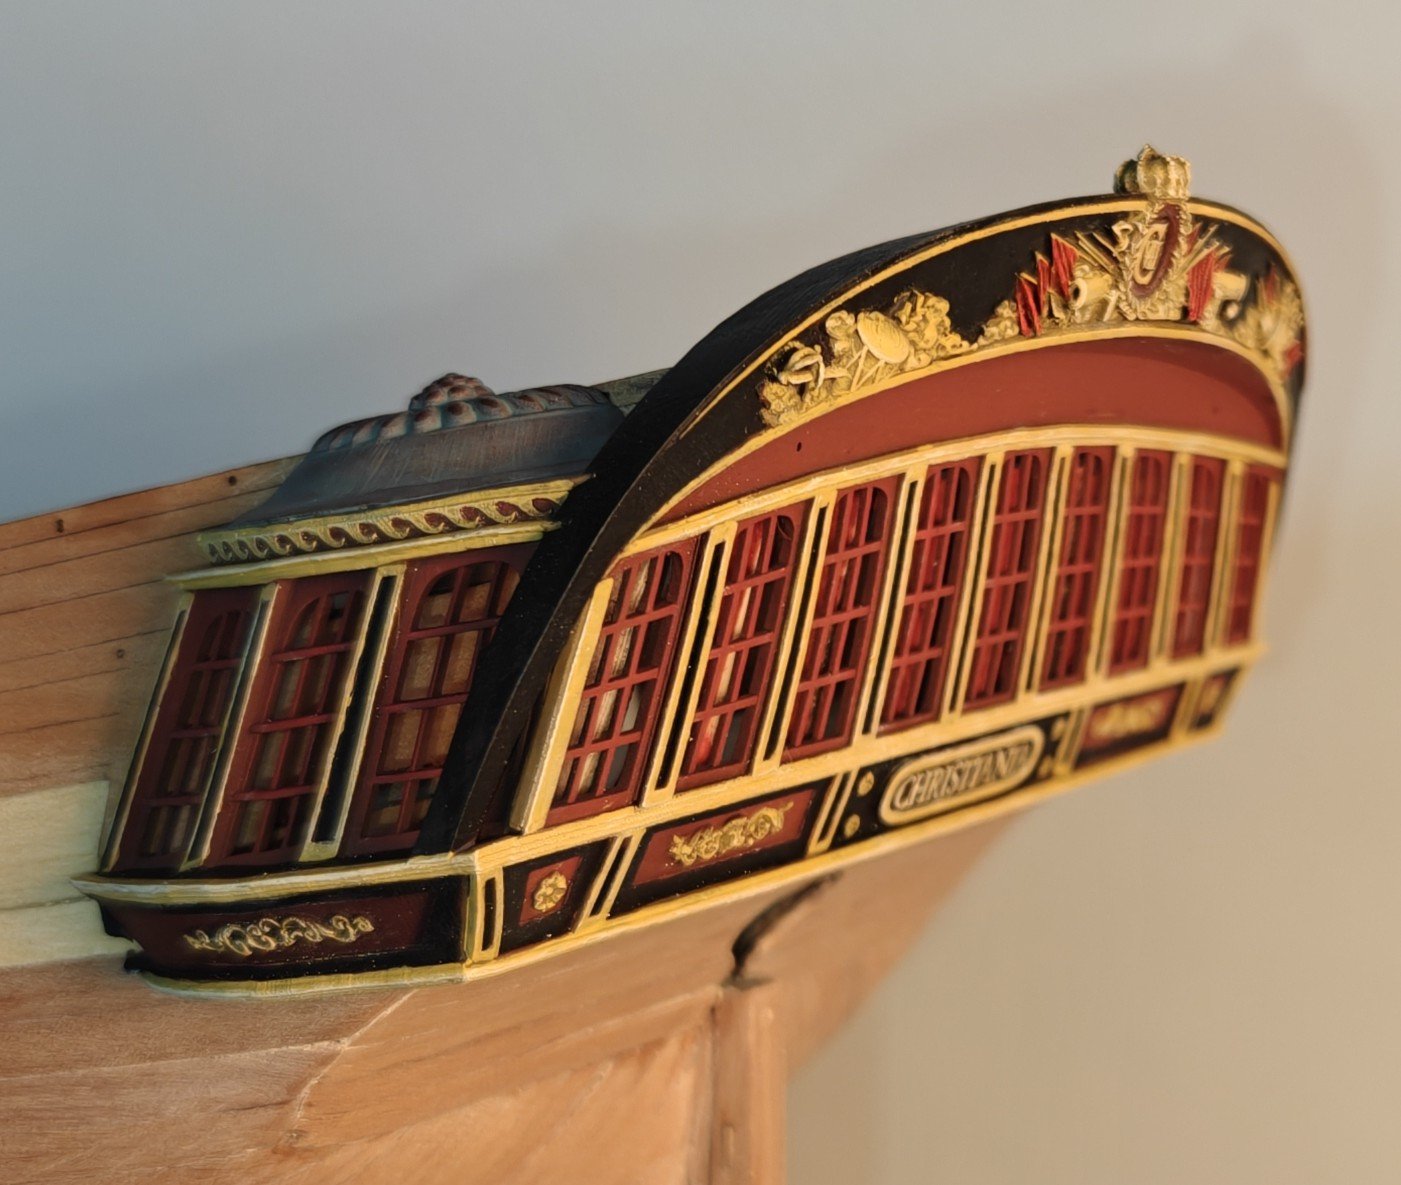
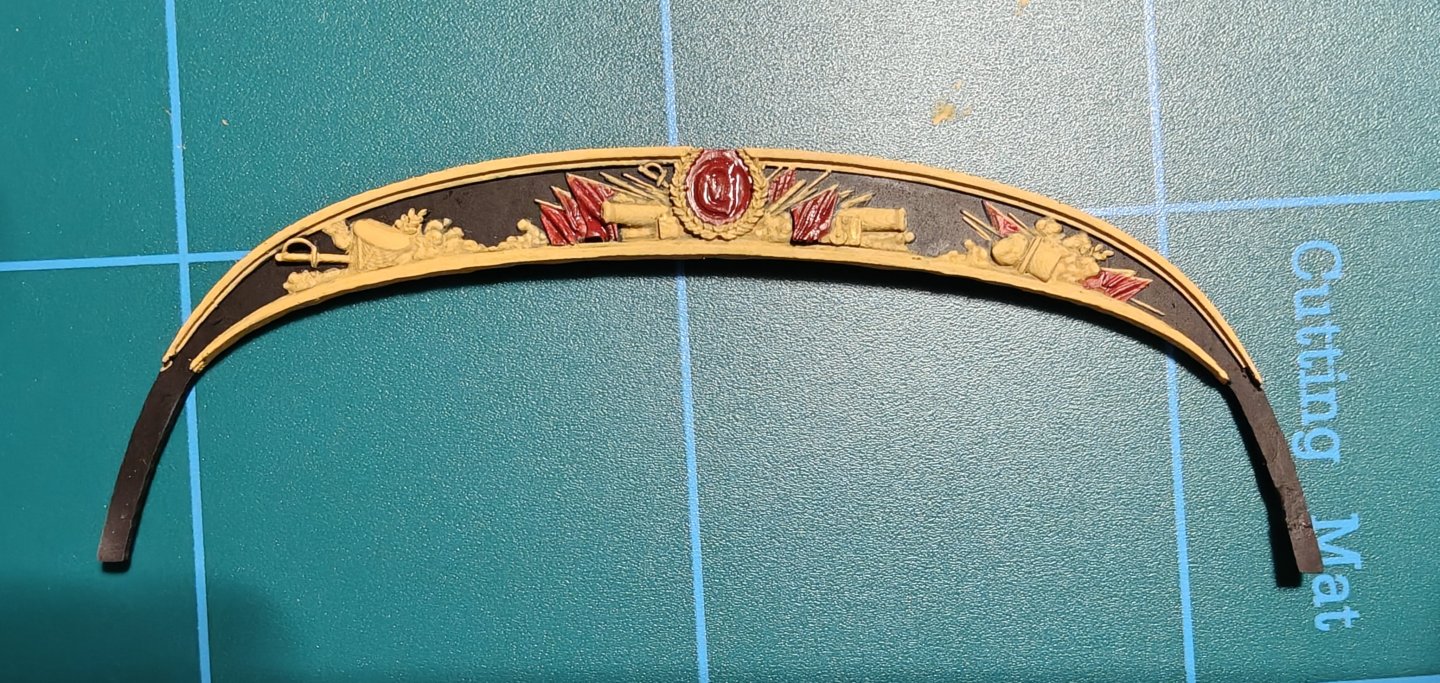
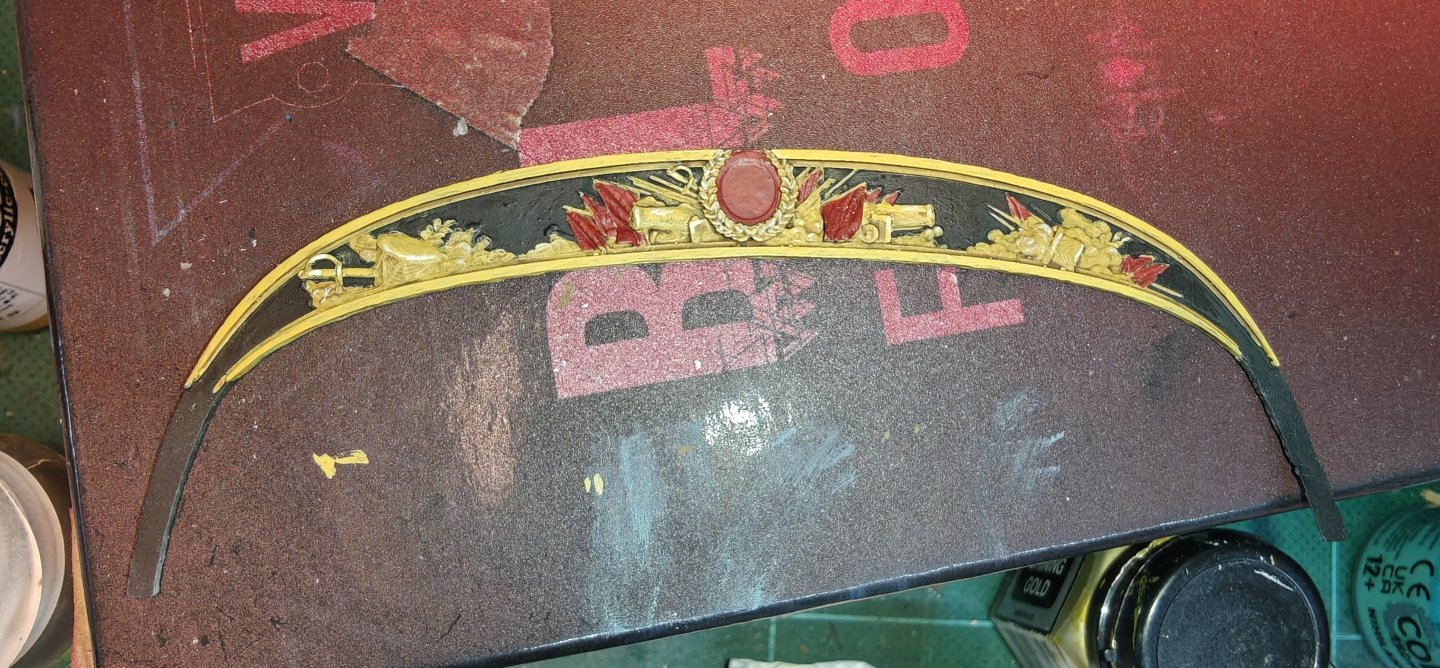
Log entry 25 - stern colour tests While planking snails on, I have been trying a few options for the stern decorations on some mis-prints (I had a few, as I had a hole in the release film on my printer...). The upper test uses non-metalics and I started with a medium brown, followed by yellow ocre with a few beige highlights. The second is using Vallejo Liquid Gold with a brown shade. I would do highlights as well jere, but decided at this point that I will be going the non metallic route. Now for a few observations: - I am woefully out of practice when it comes to painting miniatures. I did this for many, many years and while I never achieved mastery, I was a solid painter. Not so anymore! - I really need new brushes. I don't have a detail brush that will keep a point or let the paint flow smoothly (I hope this is a big part of my bad performance here). Order placed. - I need to start with a lighter tone of brown/yellow and use more colours in between. I have gotten away with this combo before, but on small parts. - these were quick tests, just around an hour of work. I will spend more time on the final piece. - on a side note, the liquid metal paints from Vallejo absolutely destroys brushes and while coverage and finish is great, it cannot be applied to fine details (like the tiny poles on my friese) as it is super runny! I am still waiting for new brushes, but I tried again with lighter colours on another scrap piece: Better, but still not satisfied. It looks fine from a distance and the macro shots reveal all the nasty stuff, but I would still like to do a little better than this. And I have only base coated the red flags for now. I would like the white cross of the Danish flag on the big one on the right, but I am not sure I can make it work. Let's see what new paints and more time will do. BR TJM
- 111 replies
-
- 12
-
-
-
- Christiania
- Vanguard Models
- (and 1 more)