
TJM
-
Posts
362 -
Joined
-
Last visited
Content Type
Profiles
Forums
Gallery
Events
Everything posted by TJM
-
Thank you for that, I really appreciate it. And yes I know we are all our own worst critics, but I just know I could do better once 😄.
-
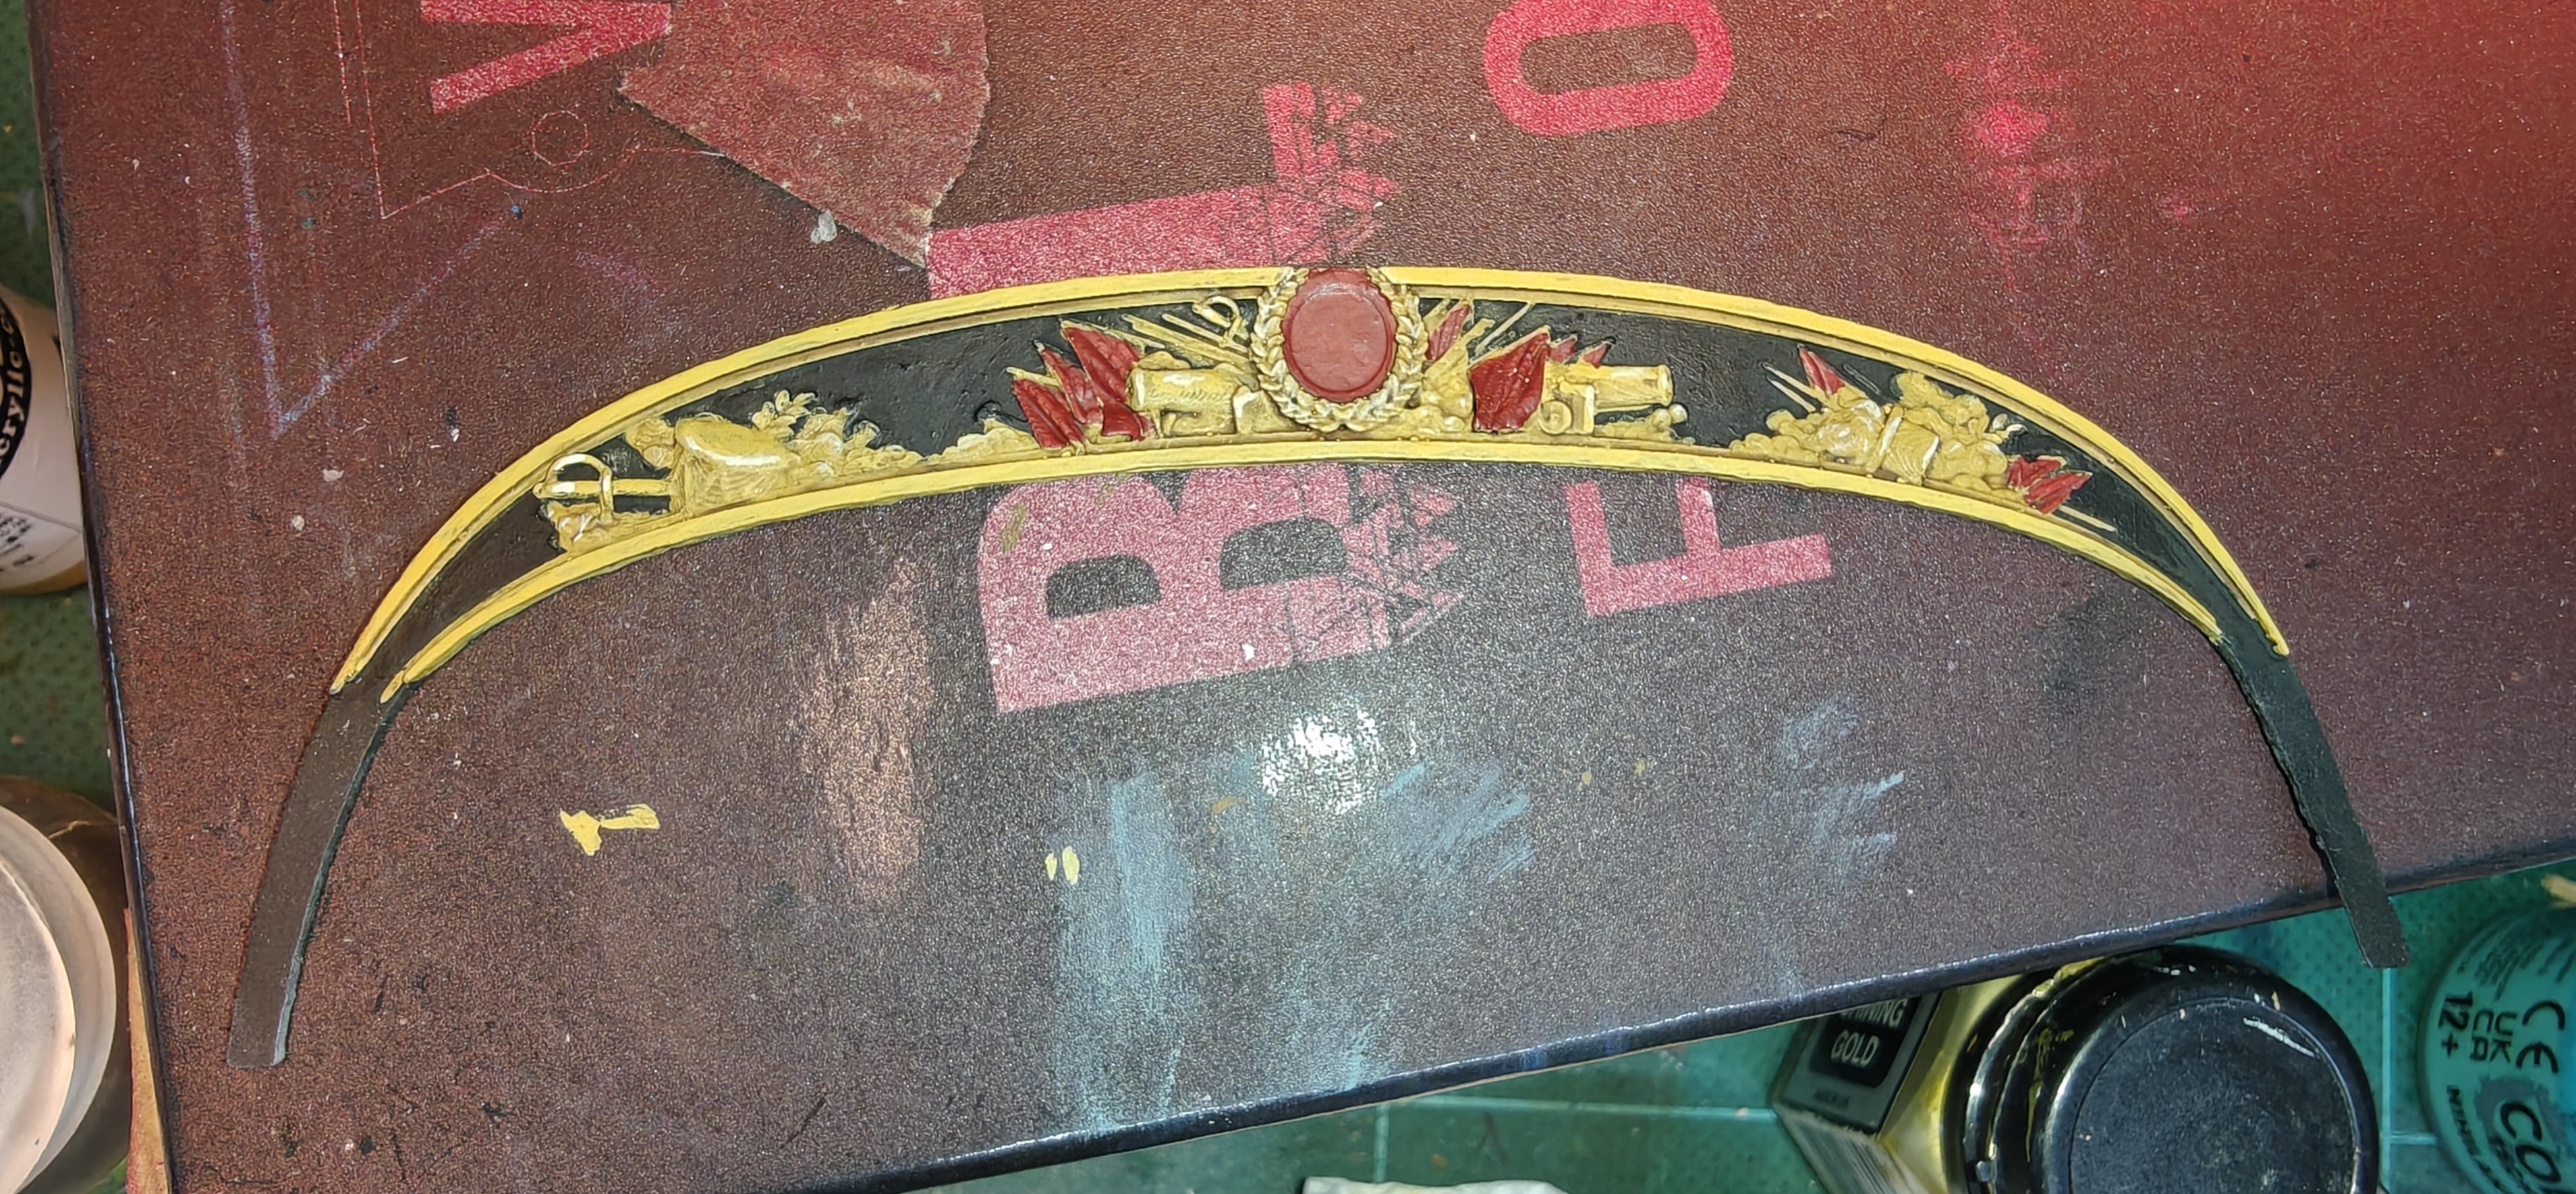
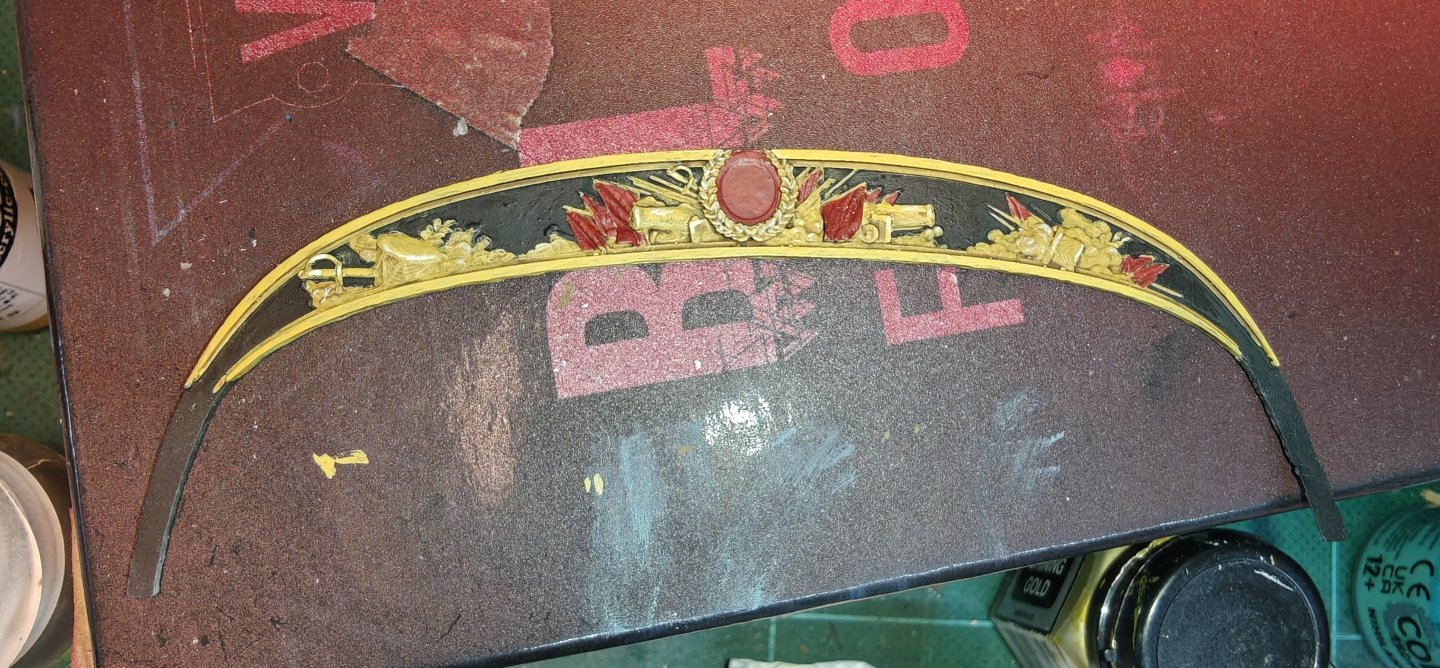
Log entry 25 - stern colour tests While planking snails on, I have been trying a few options for the stern decorations on some mis-prints (I had a few, as I had a hole in the release film on my printer...). The upper test uses non-metalics and I started with a medium brown, followed by yellow ocre with a few beige highlights. The second is using Vallejo Liquid Gold with a brown shade. I would do highlights as well jere, but decided at this point that I will be going the non metallic route. Now for a few observations: - I am woefully out of practice when it comes to painting miniatures. I did this for many, many years and while I never achieved mastery, I was a solid painter. Not so anymore! - I really need new brushes. I don't have a detail brush that will keep a point or let the paint flow smoothly (I hope this is a big part of my bad performance here). Order placed. - I need to start with a lighter tone of brown/yellow and use more colours in between. I have gotten away with this combo before, but on small parts. - these were quick tests, just around an hour of work. I will spend more time on the final piece. - on a side note, the liquid metal paints from Vallejo absolutely destroys brushes and while coverage and finish is great, it cannot be applied to fine details (like the tiny poles on my friese) as it is super runny! I am still waiting for new brushes, but I tried again with lighter colours on another scrap piece: Better, but still not satisfied. It looks fine from a distance and the macro shots reveal all the nasty stuff, but I would still like to do a little better than this. And I have only base coated the red flags for now. I would like the white cross of the Danish flag on the big one on the right, but I am not sure I can make it work. Let's see what new paints and more time will do. BR TJM
- 148 replies
-
- 12
-

-

-
- Christiania
- Vanguard Models
- (and 1 more)
-
Decoration for 3D Victory printing
TJM replied to GustavG's topic in CAD and 3D Modelling/Drafting Plans with Software
That is really fantastic! Can I ask what your process looks like and what digital tools you are using to get such a stunning result? -
Very nice!
-
They really look fantastic! If it is feasible to do them in 1:64 scale, I would definitely buy a bunch!
-
This looks like a good balance to me! Fantastic looking model!
- 39 replies
-
- 1
-
-
- Black Seas
- wargaming
- (and 1 more)
-
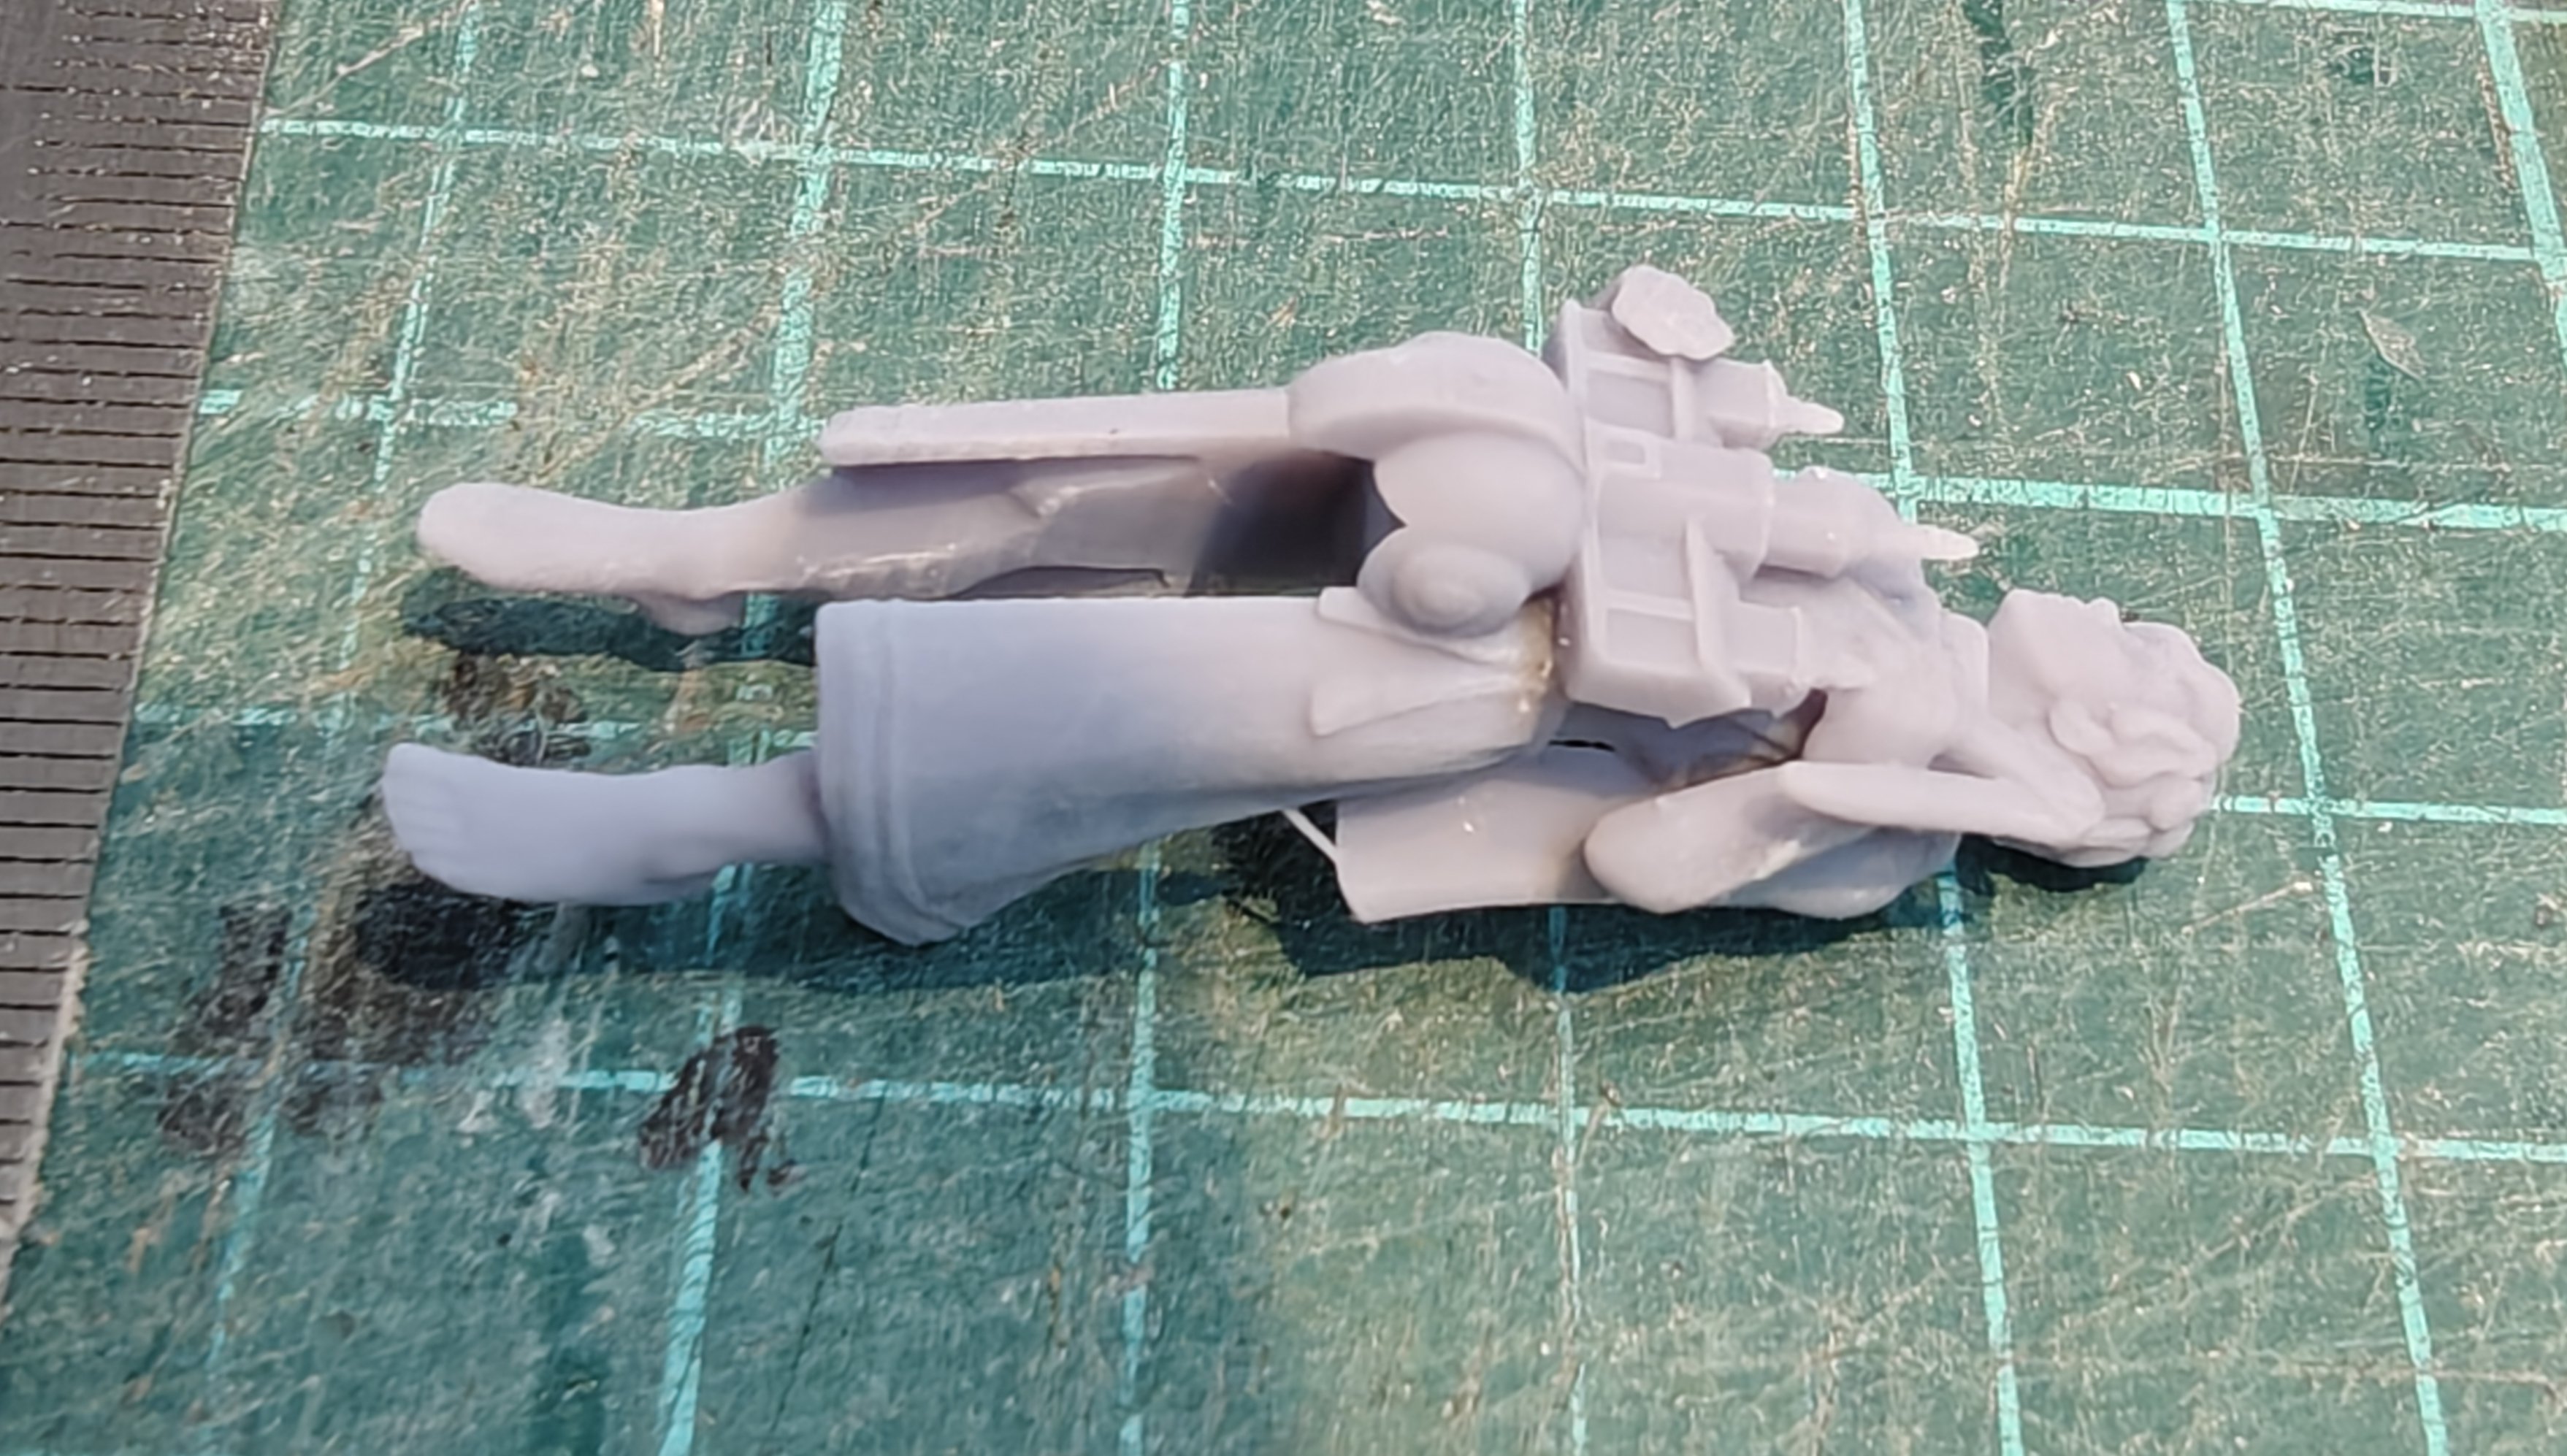
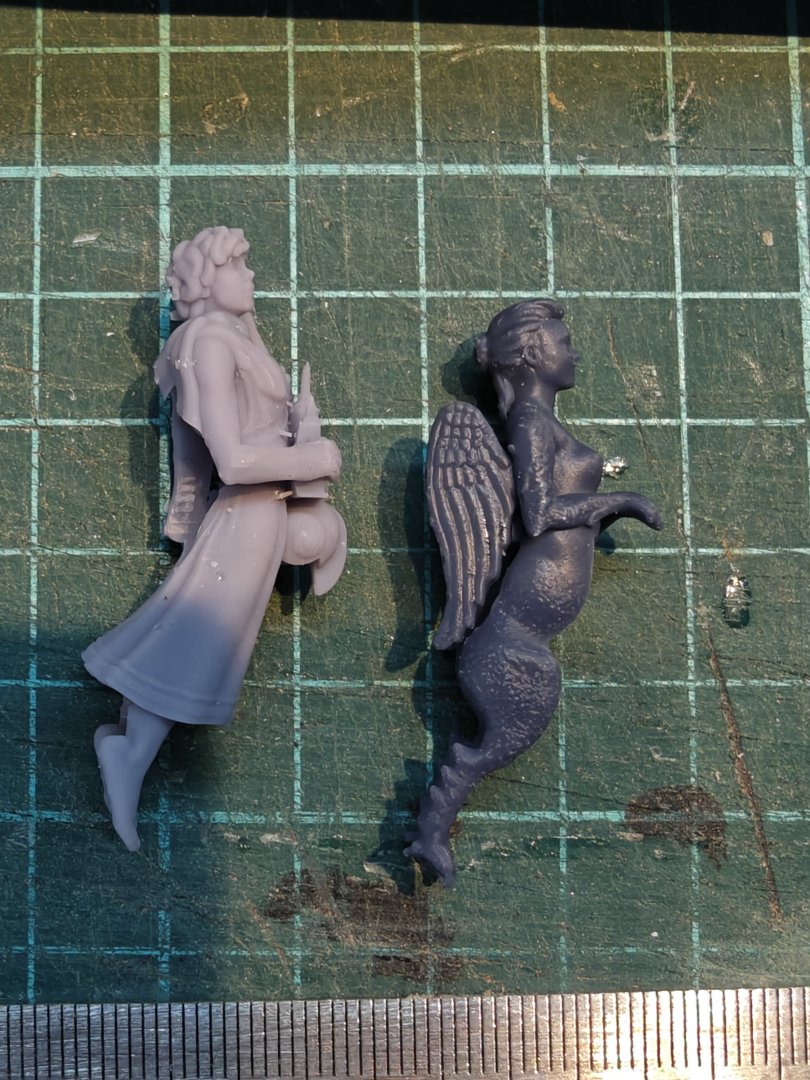
Thanks for the likes 😃. Thanks Ronald, much appreciated! They are a bit cartoony by default, but you can just make the body size larger without changing hands, feet and head until the proportions look more realistic. I have done that for all the tests I have made. This is the only example where I have purchased the STL and printed it, but there will be more coming 😉. Here's a few examples:


- 148 replies
-
- 7
-
-
- Christiania
- Vanguard Models
- (and 1 more)
-
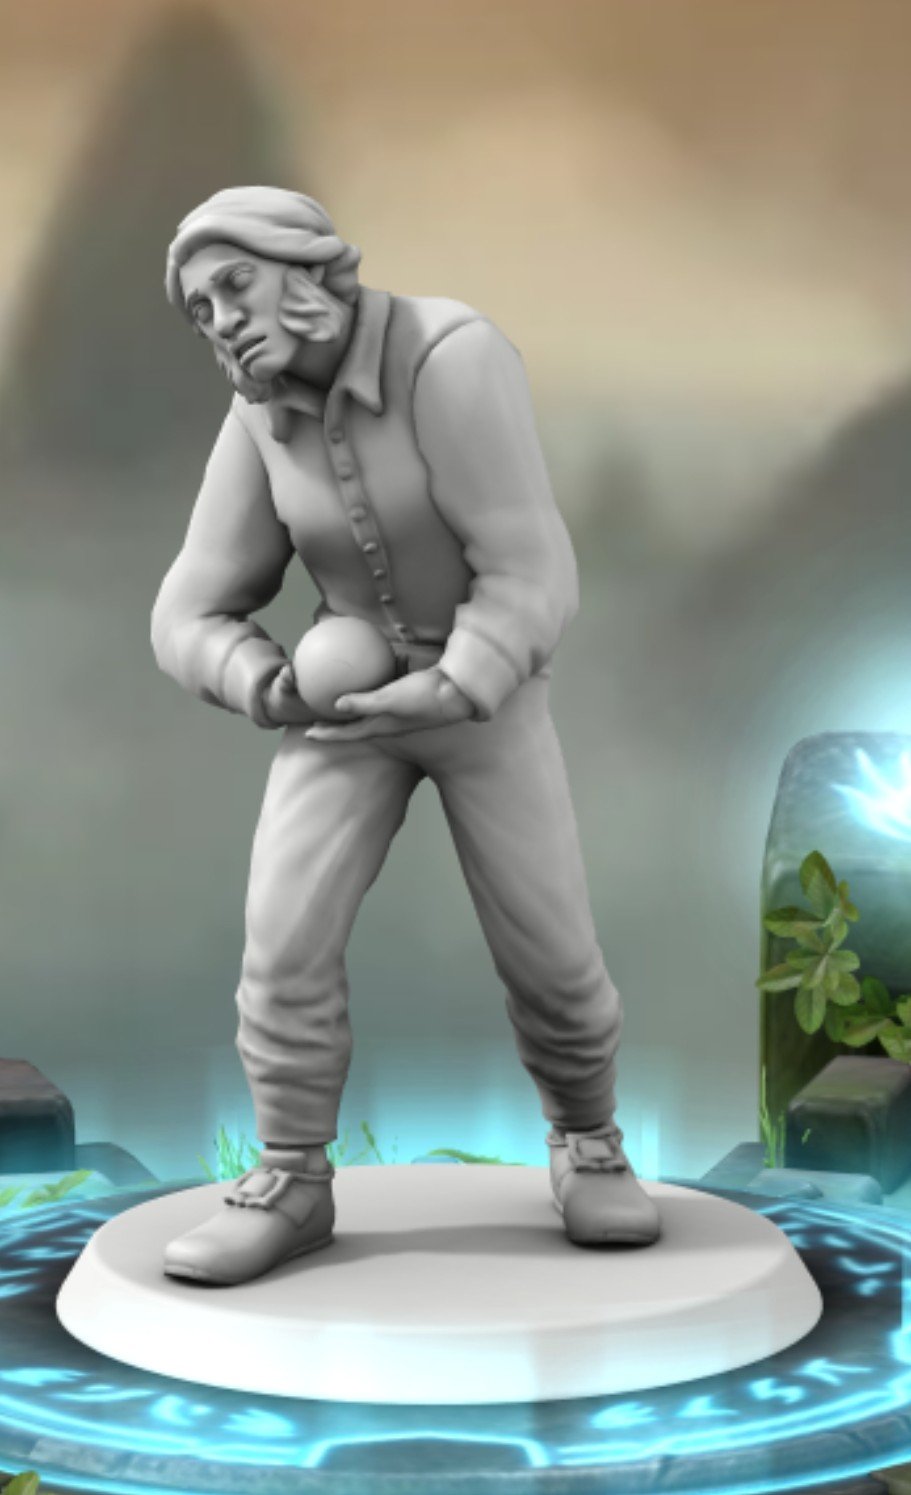
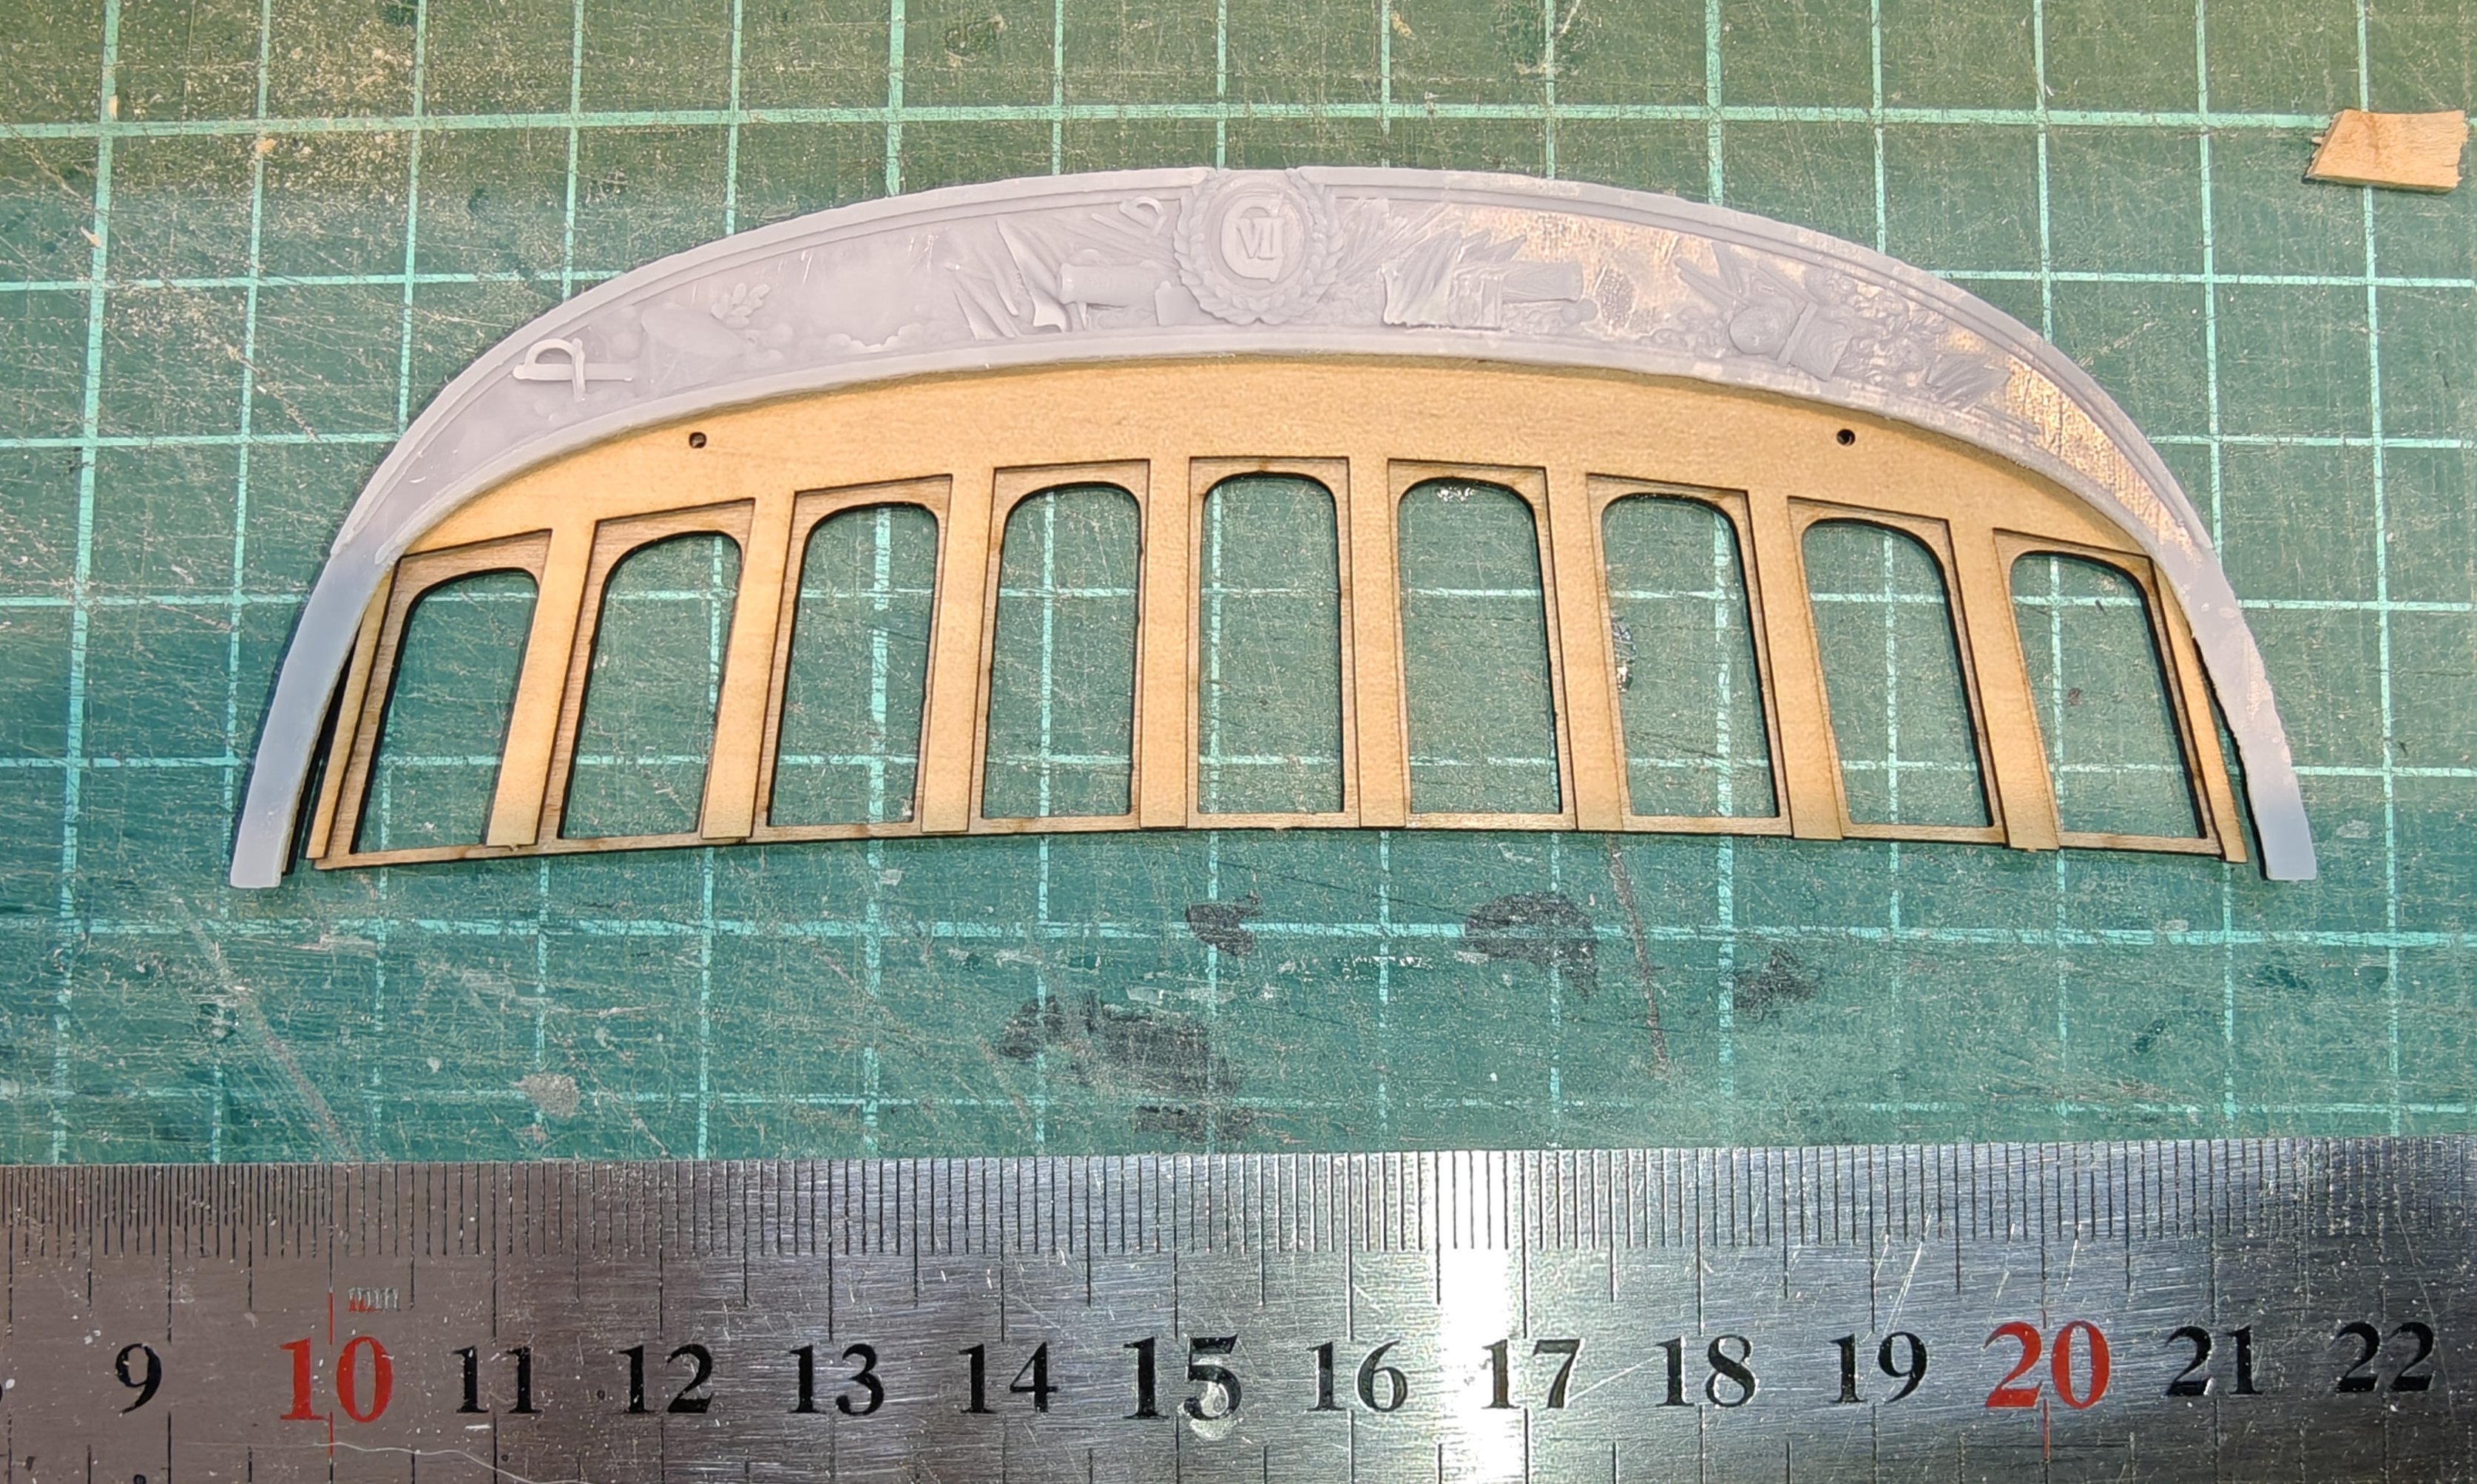
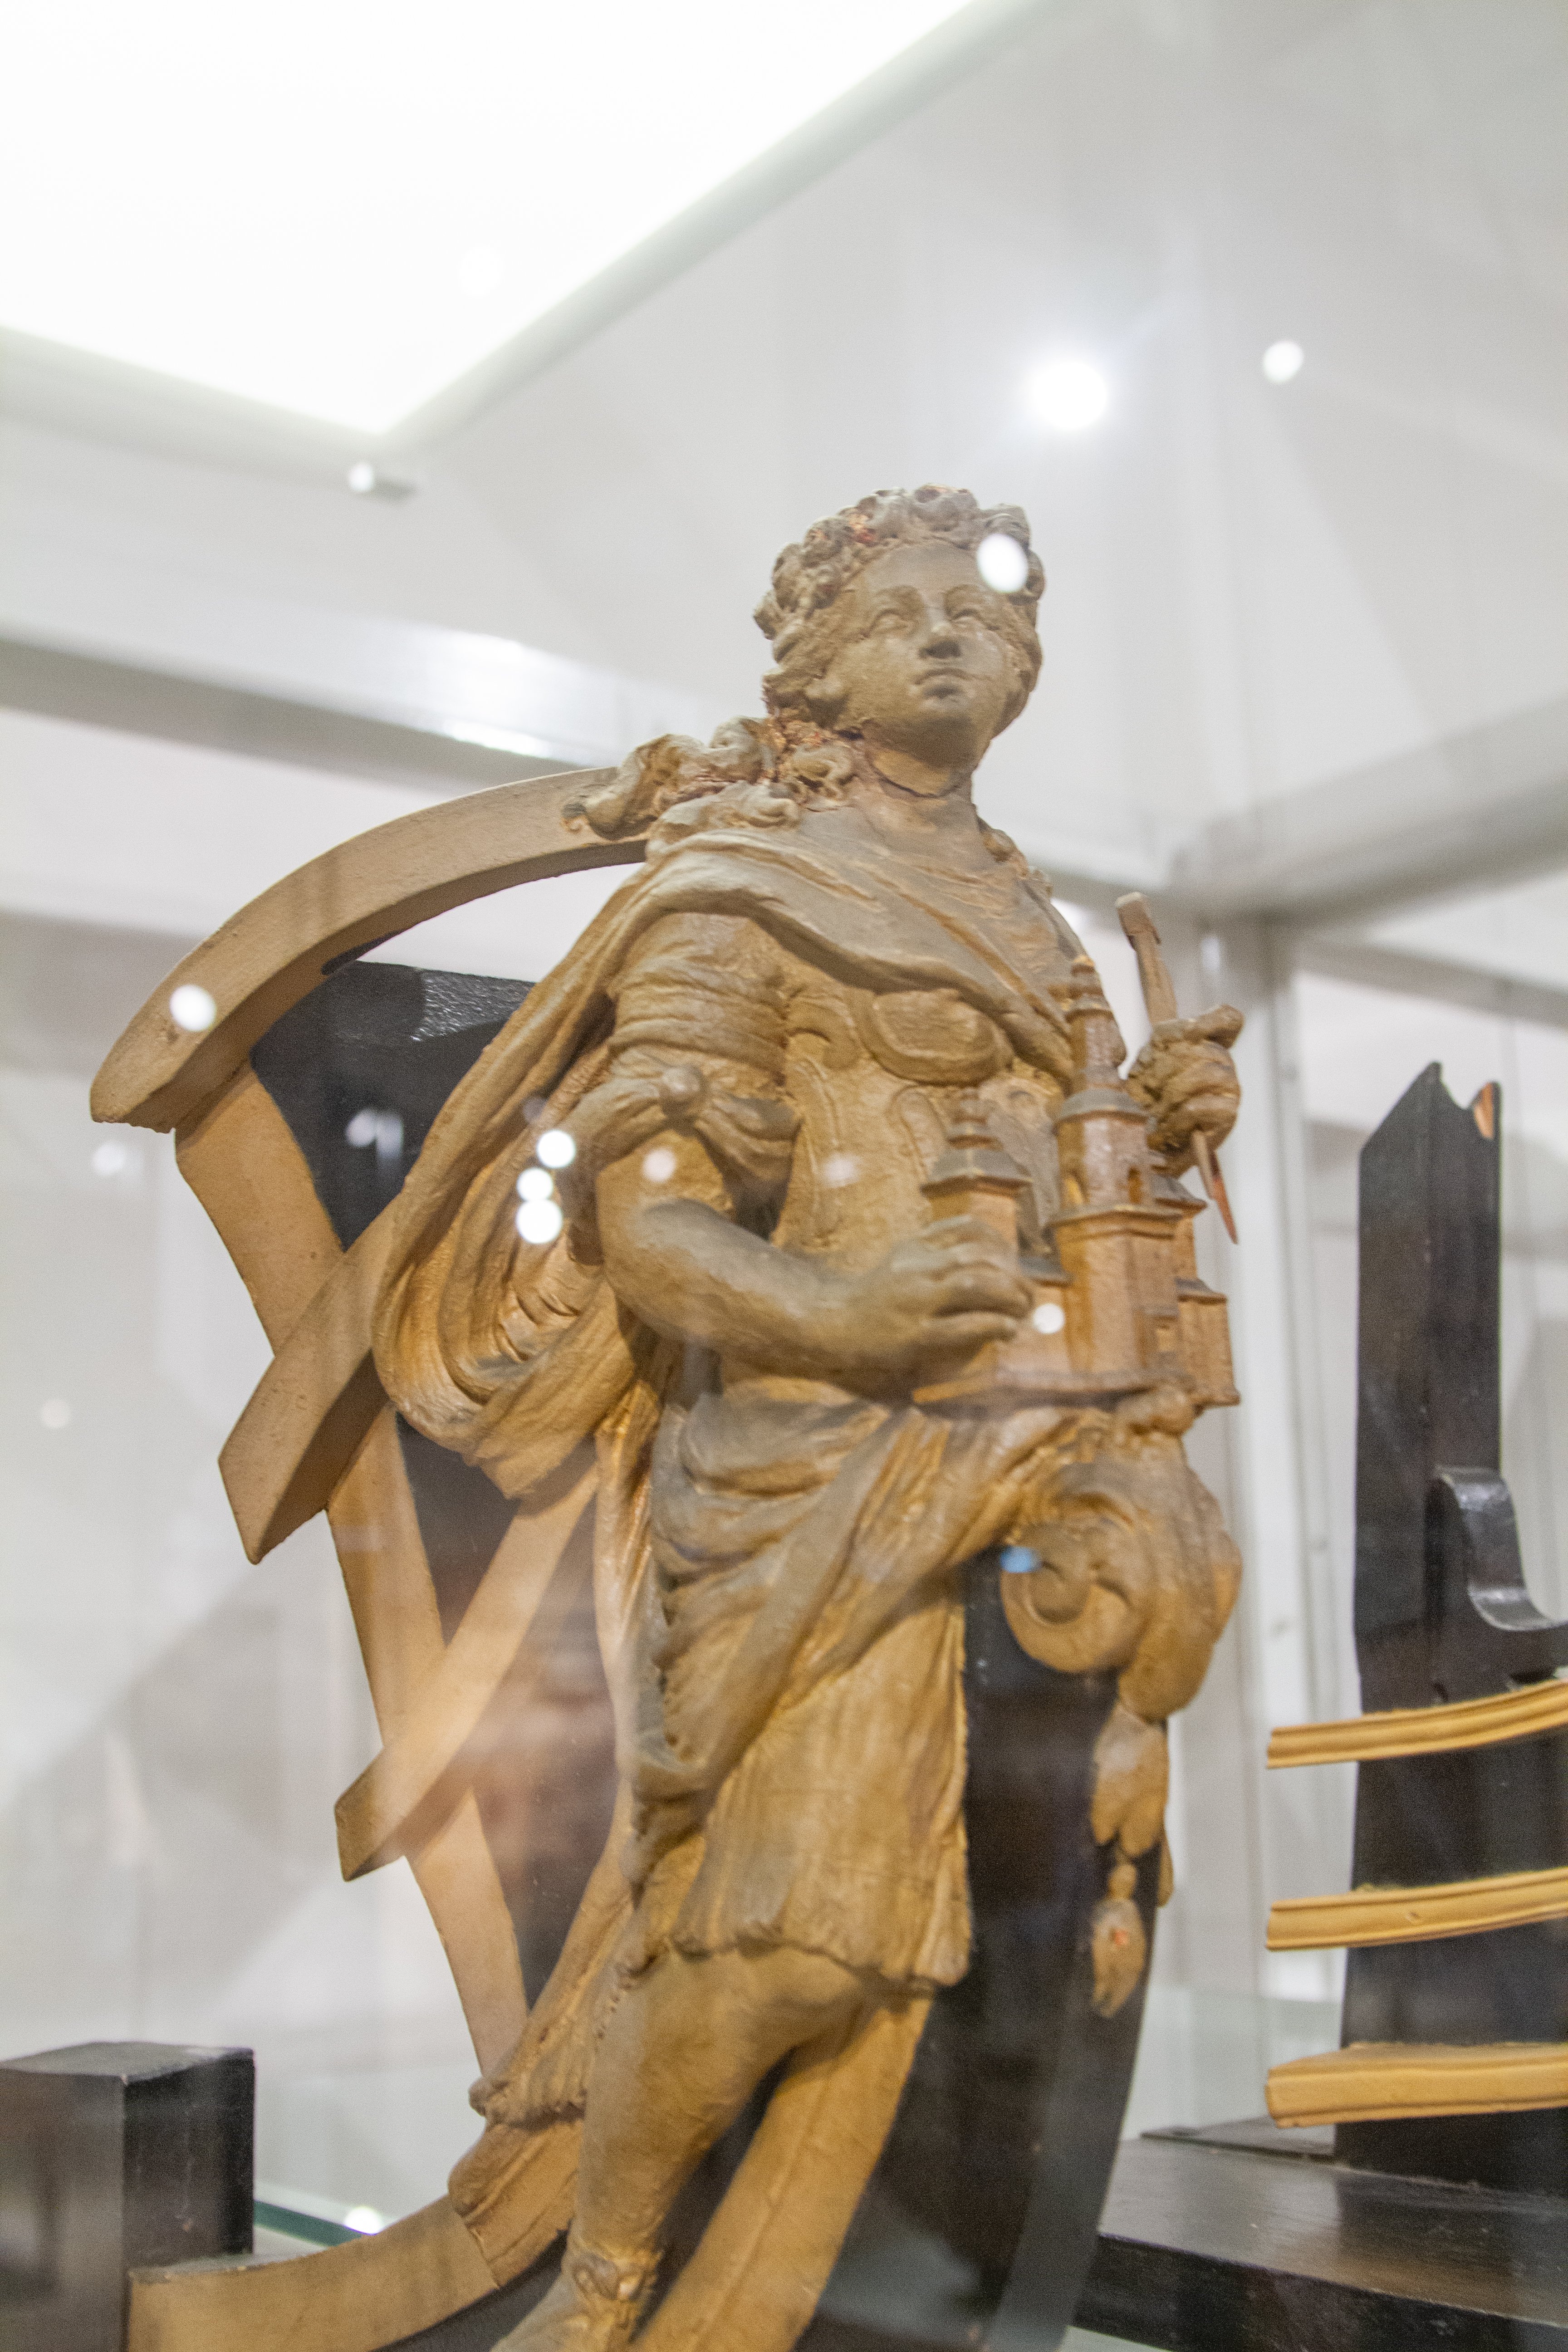
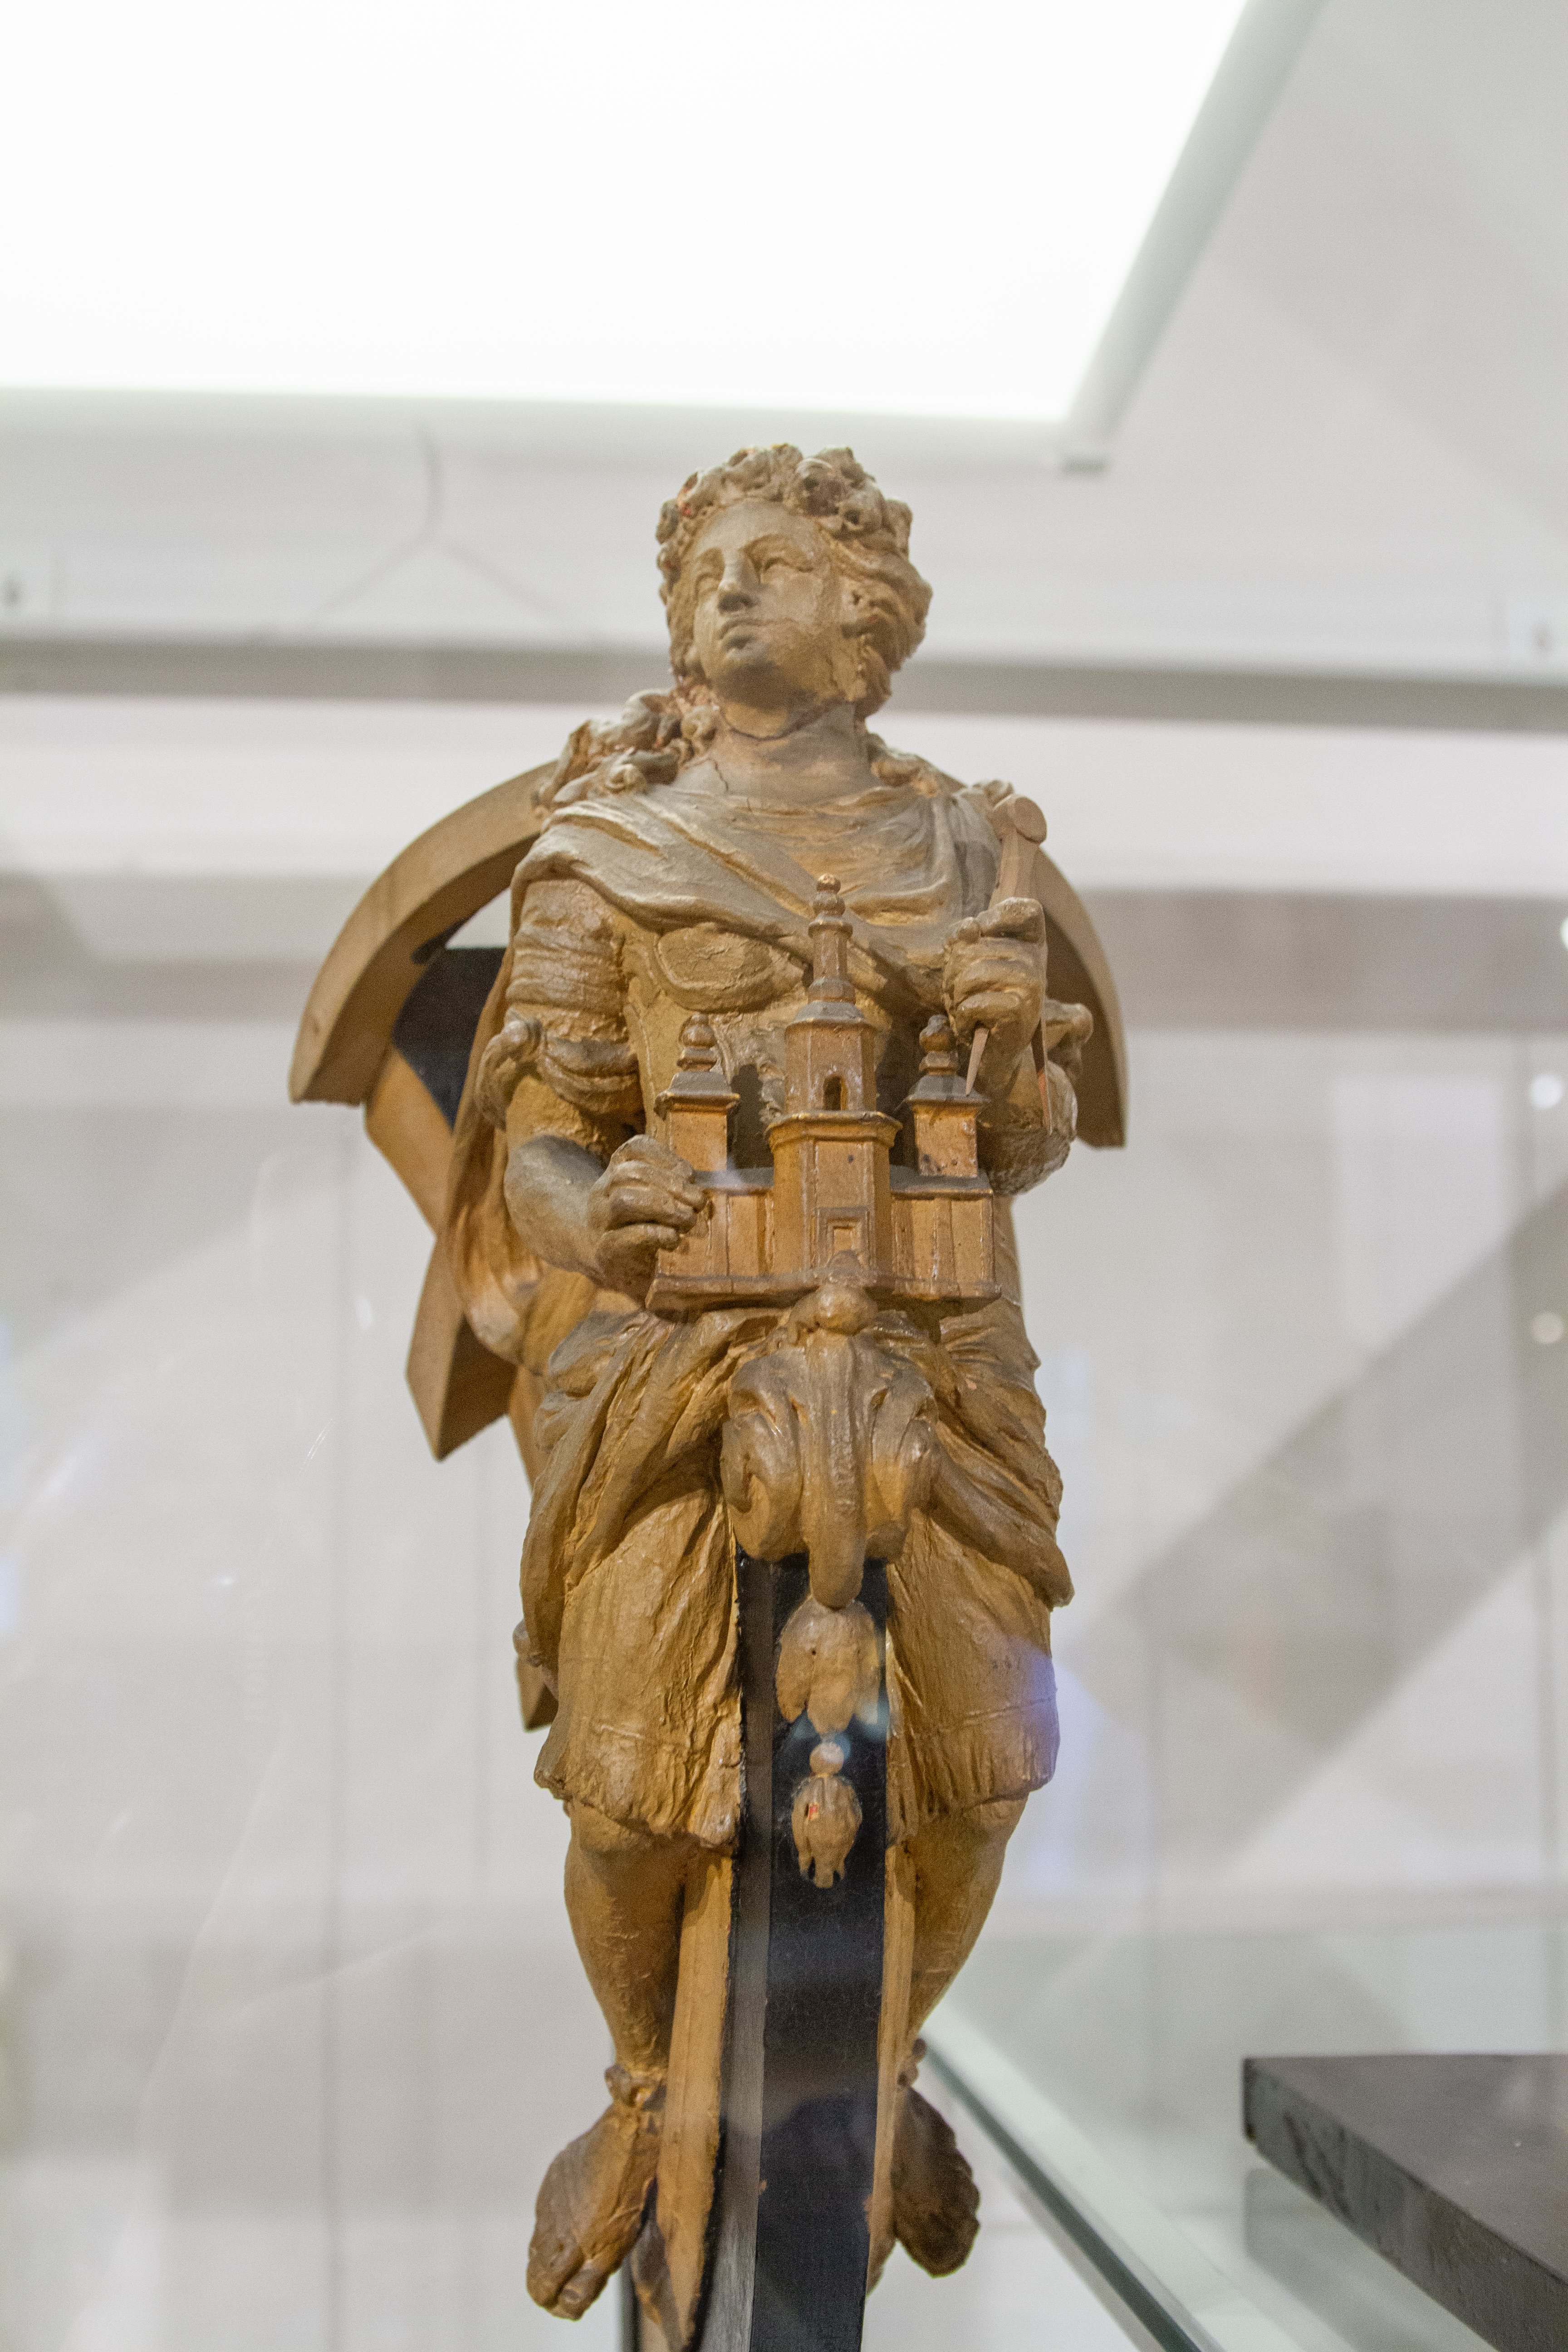
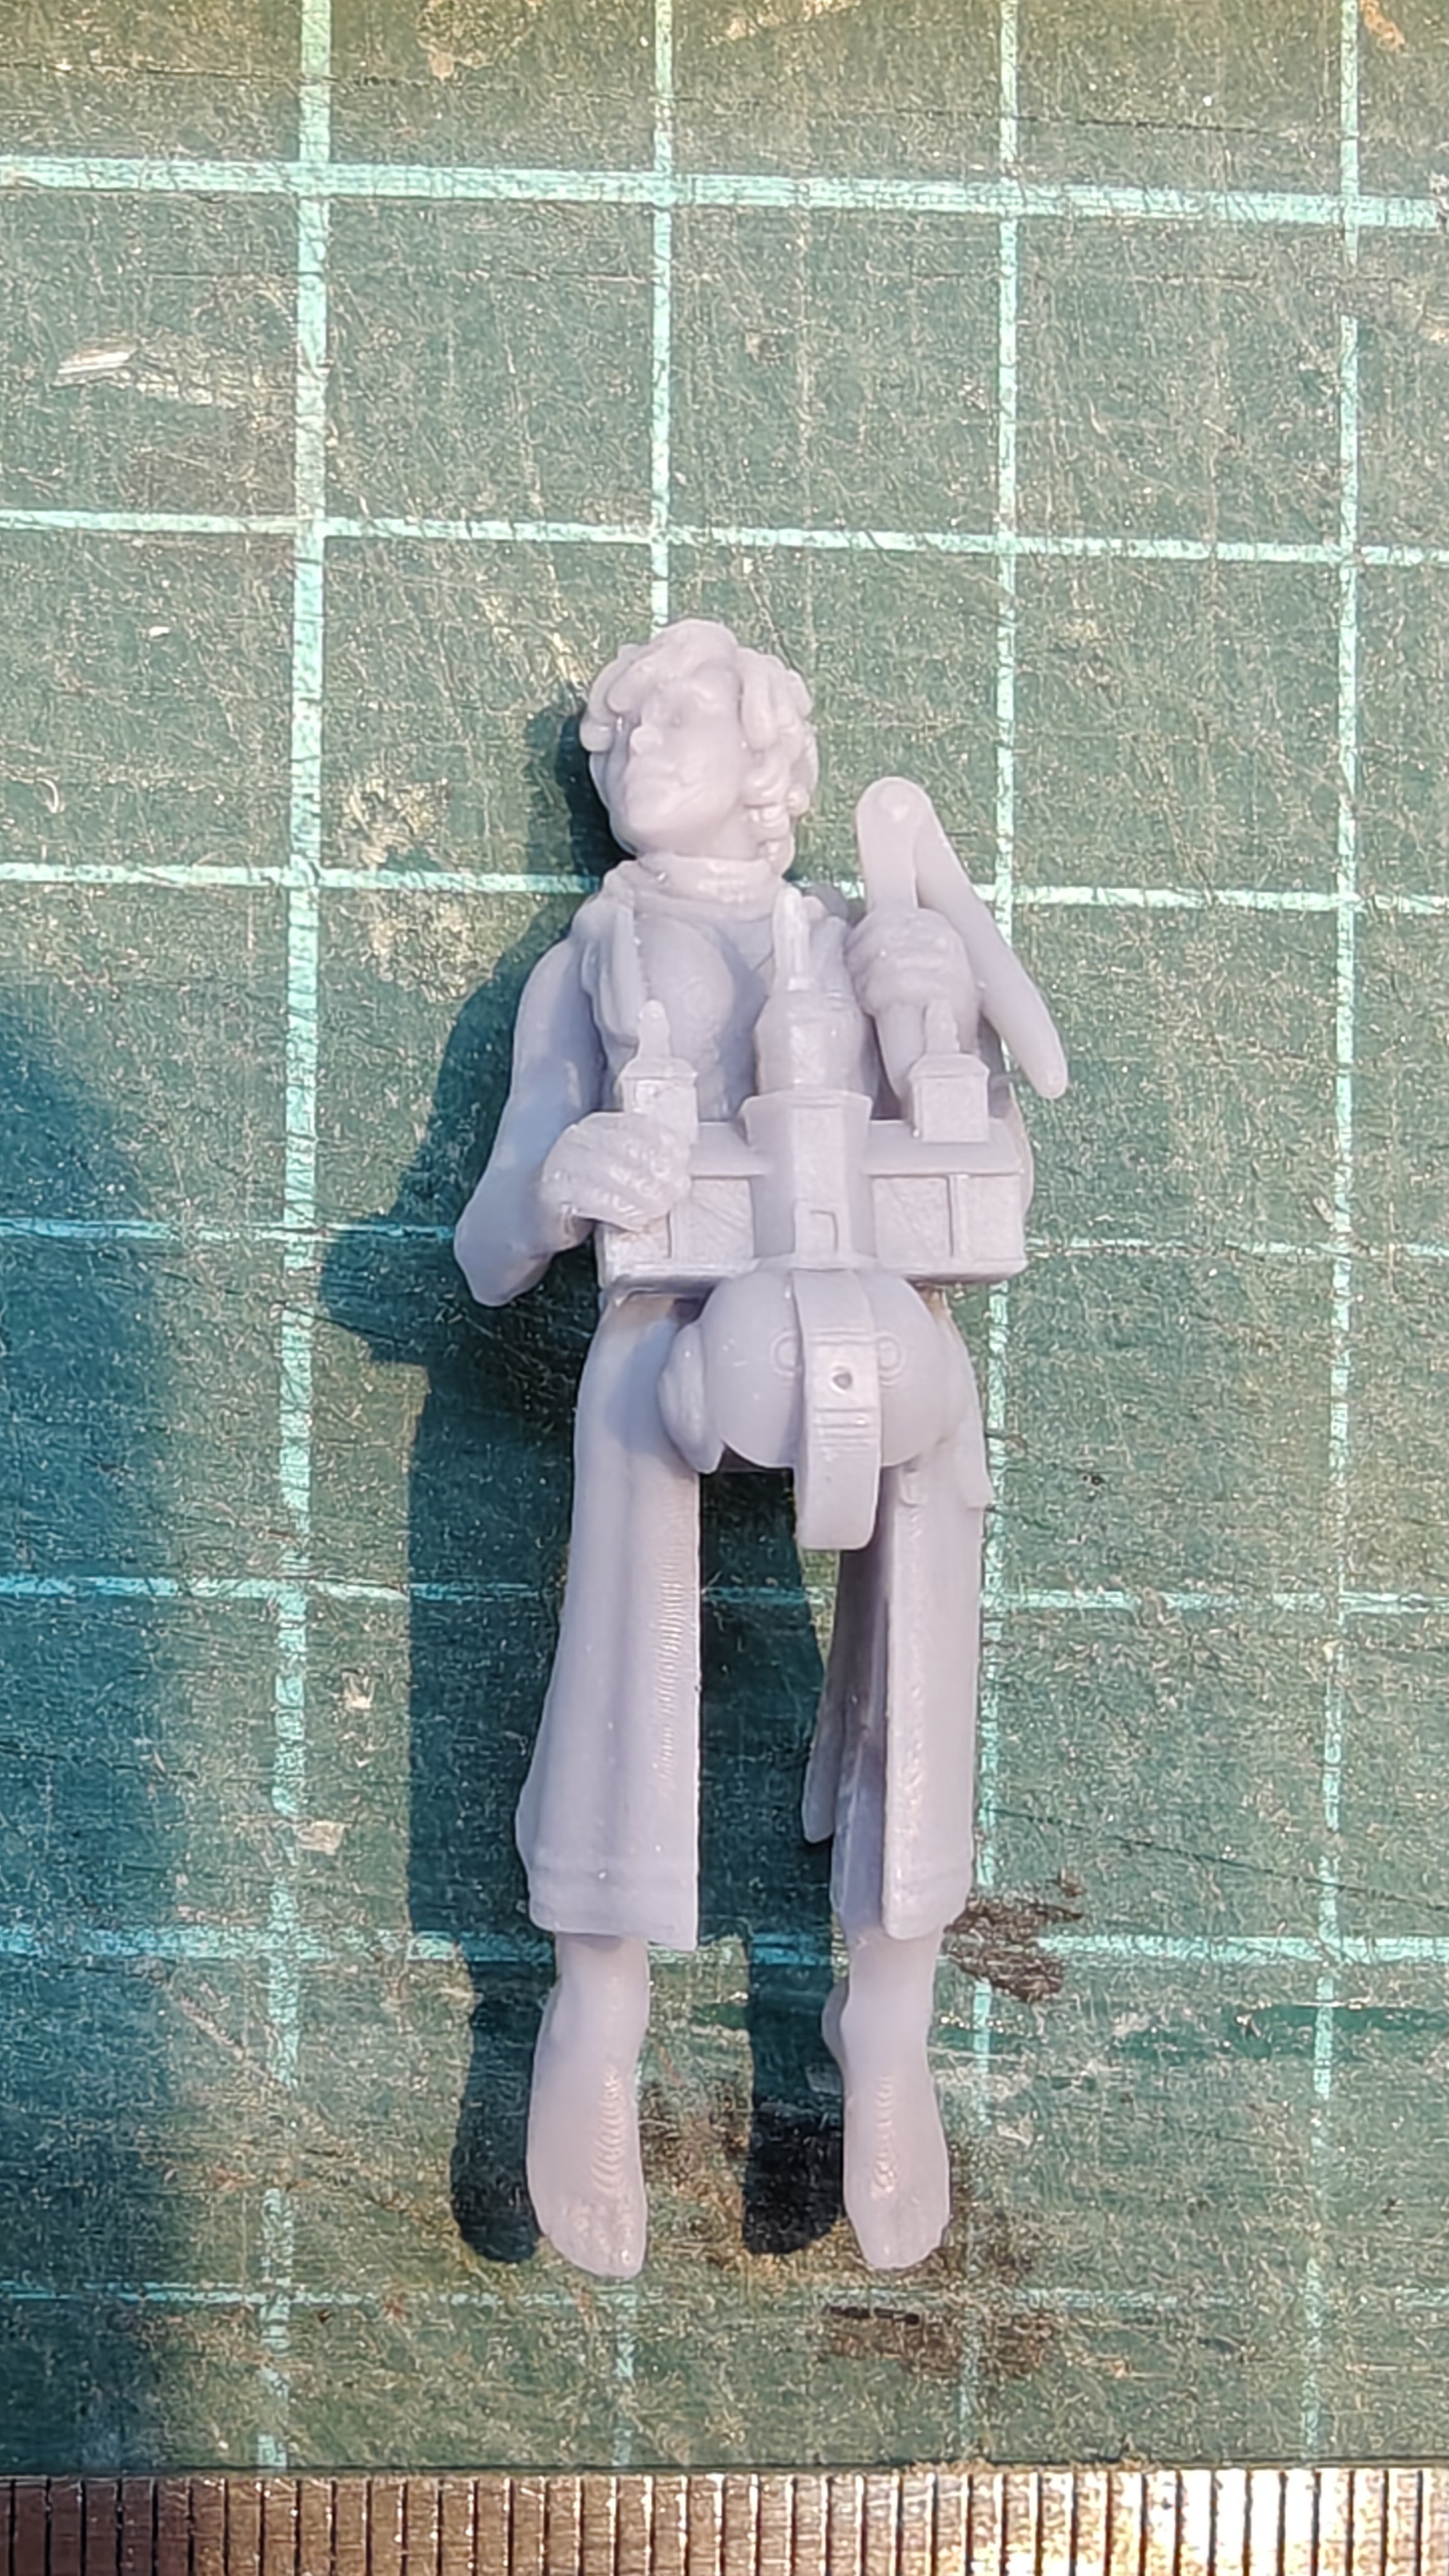
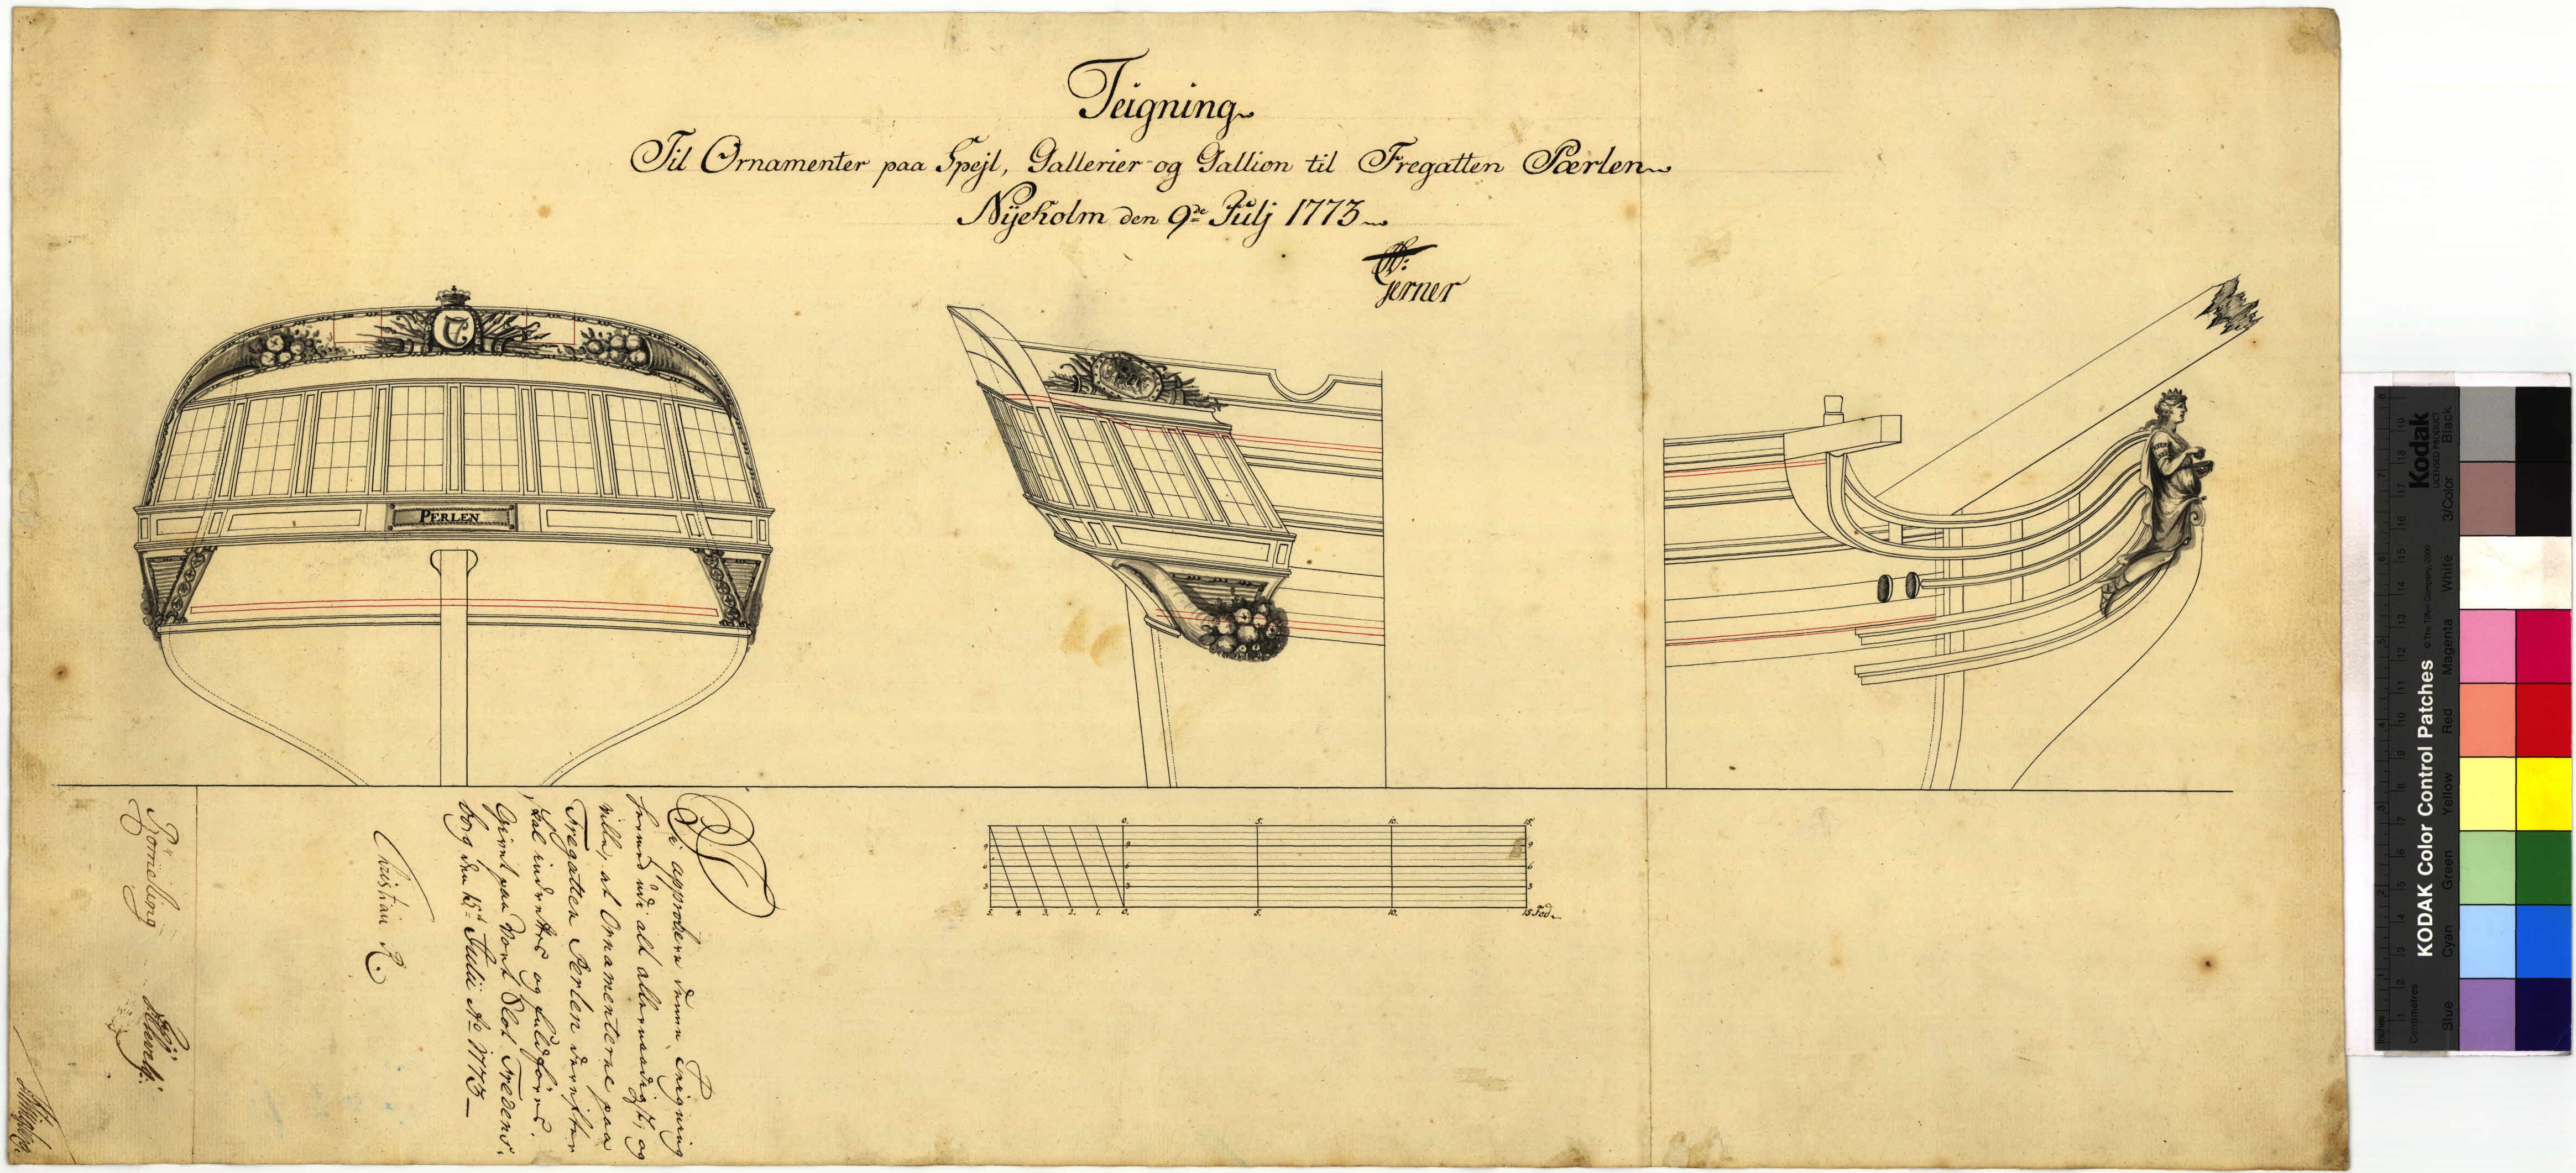
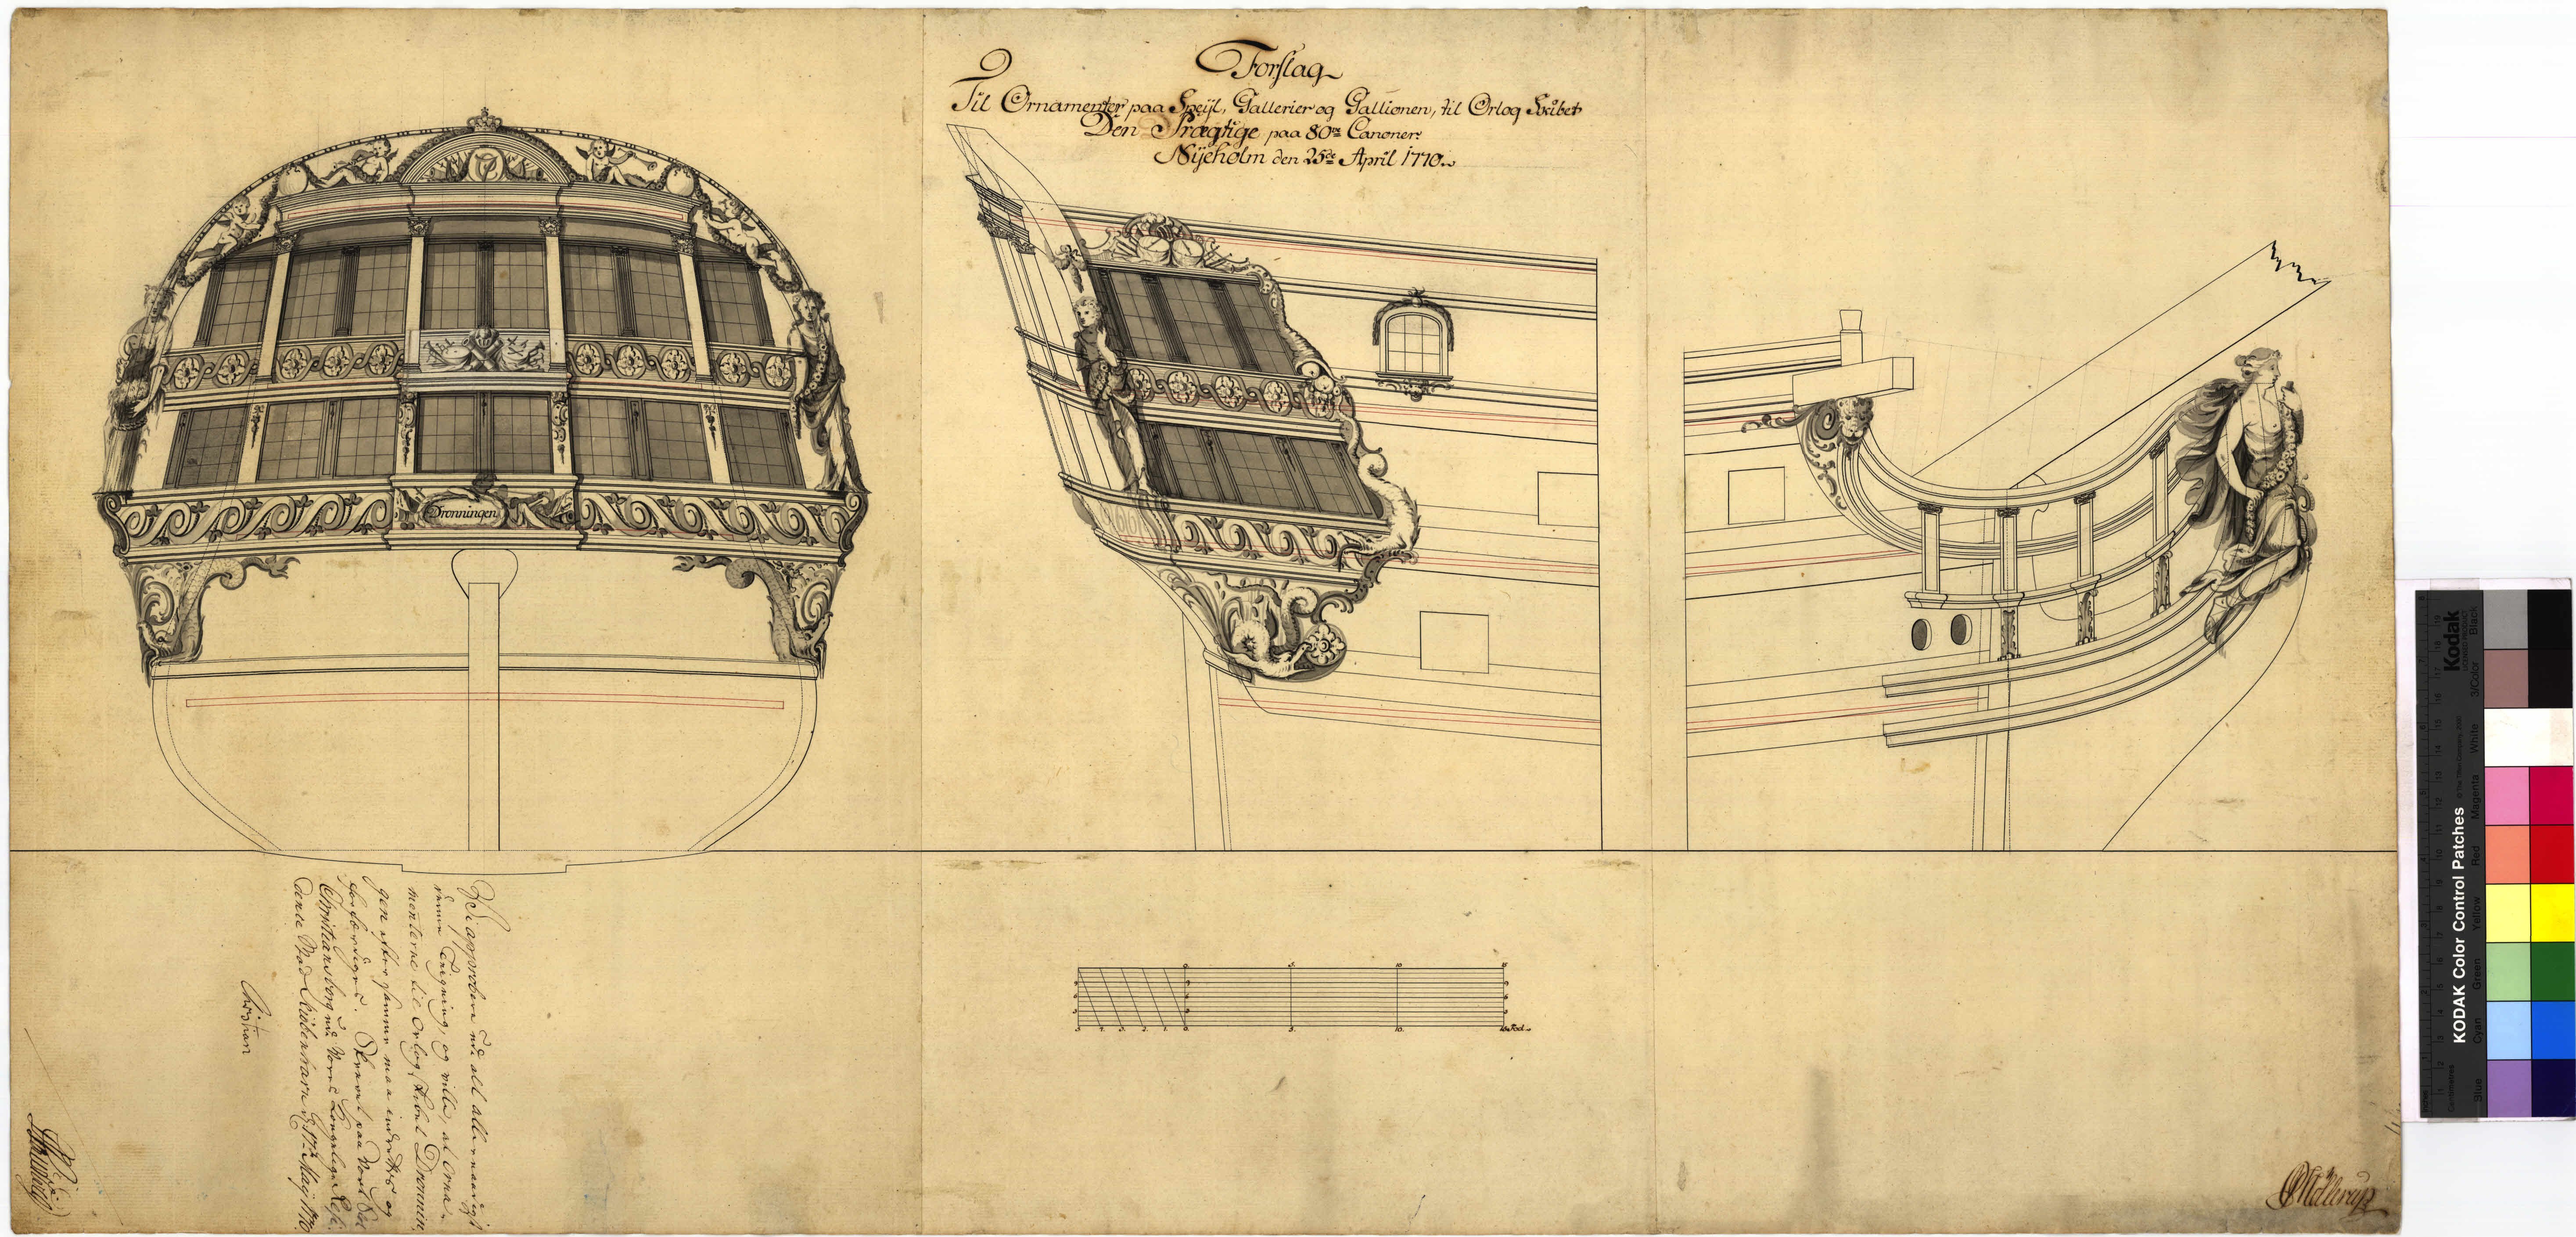
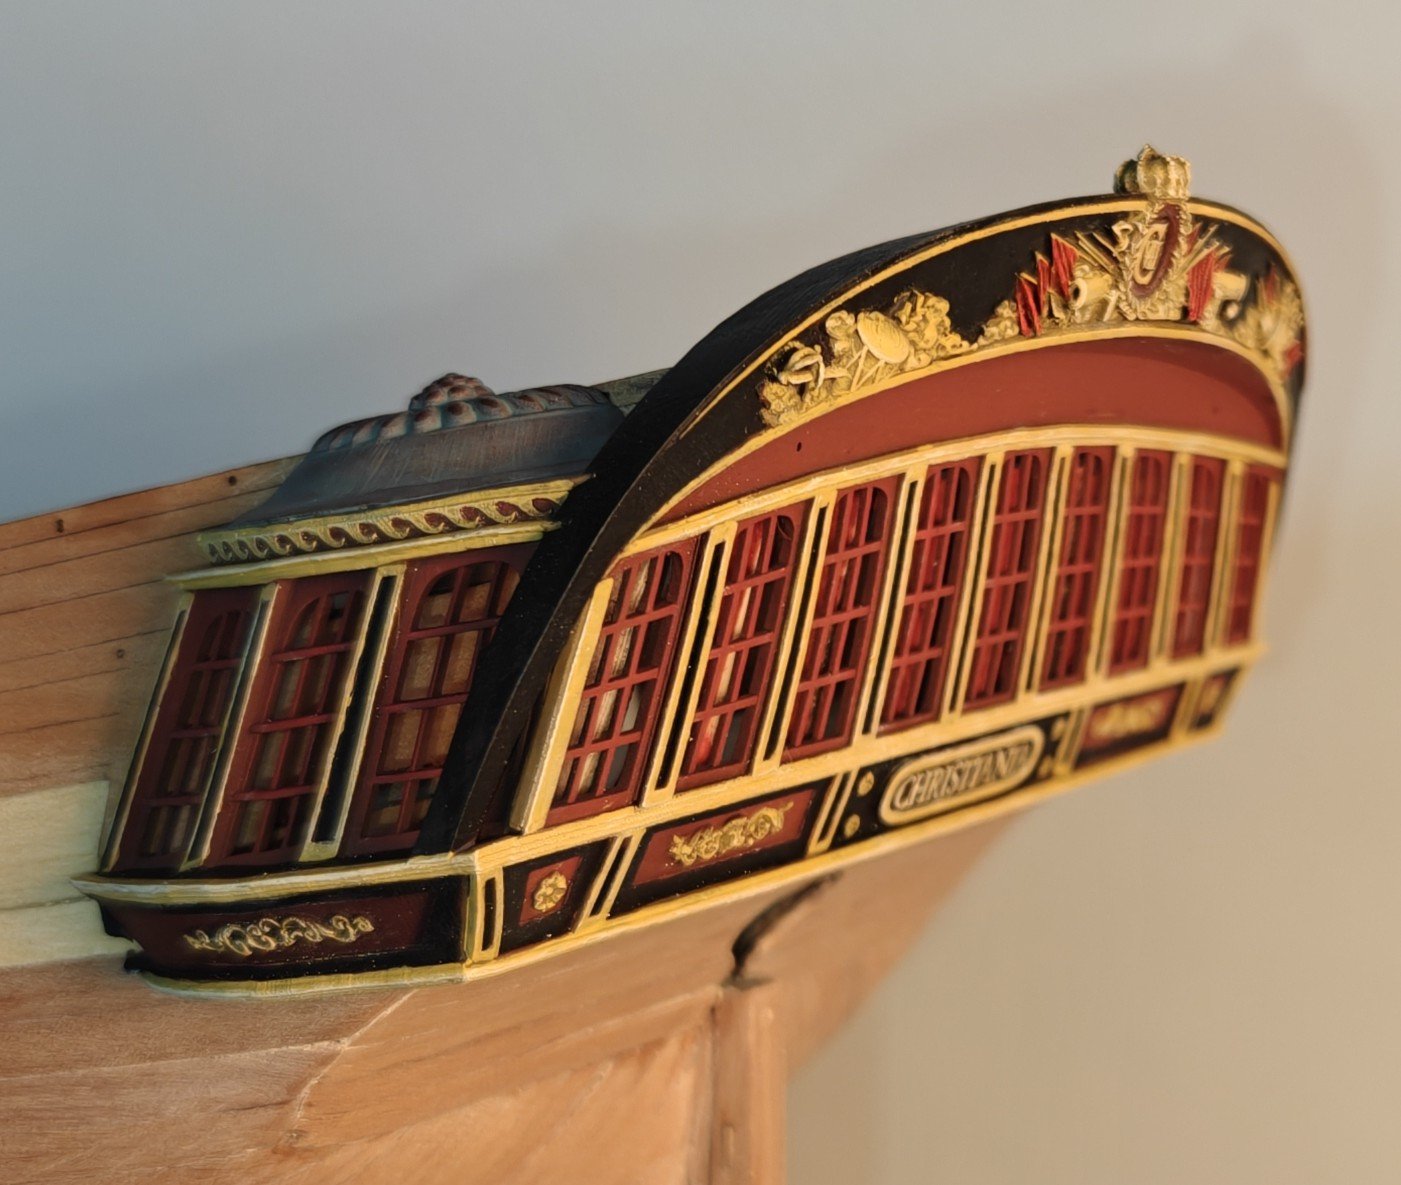
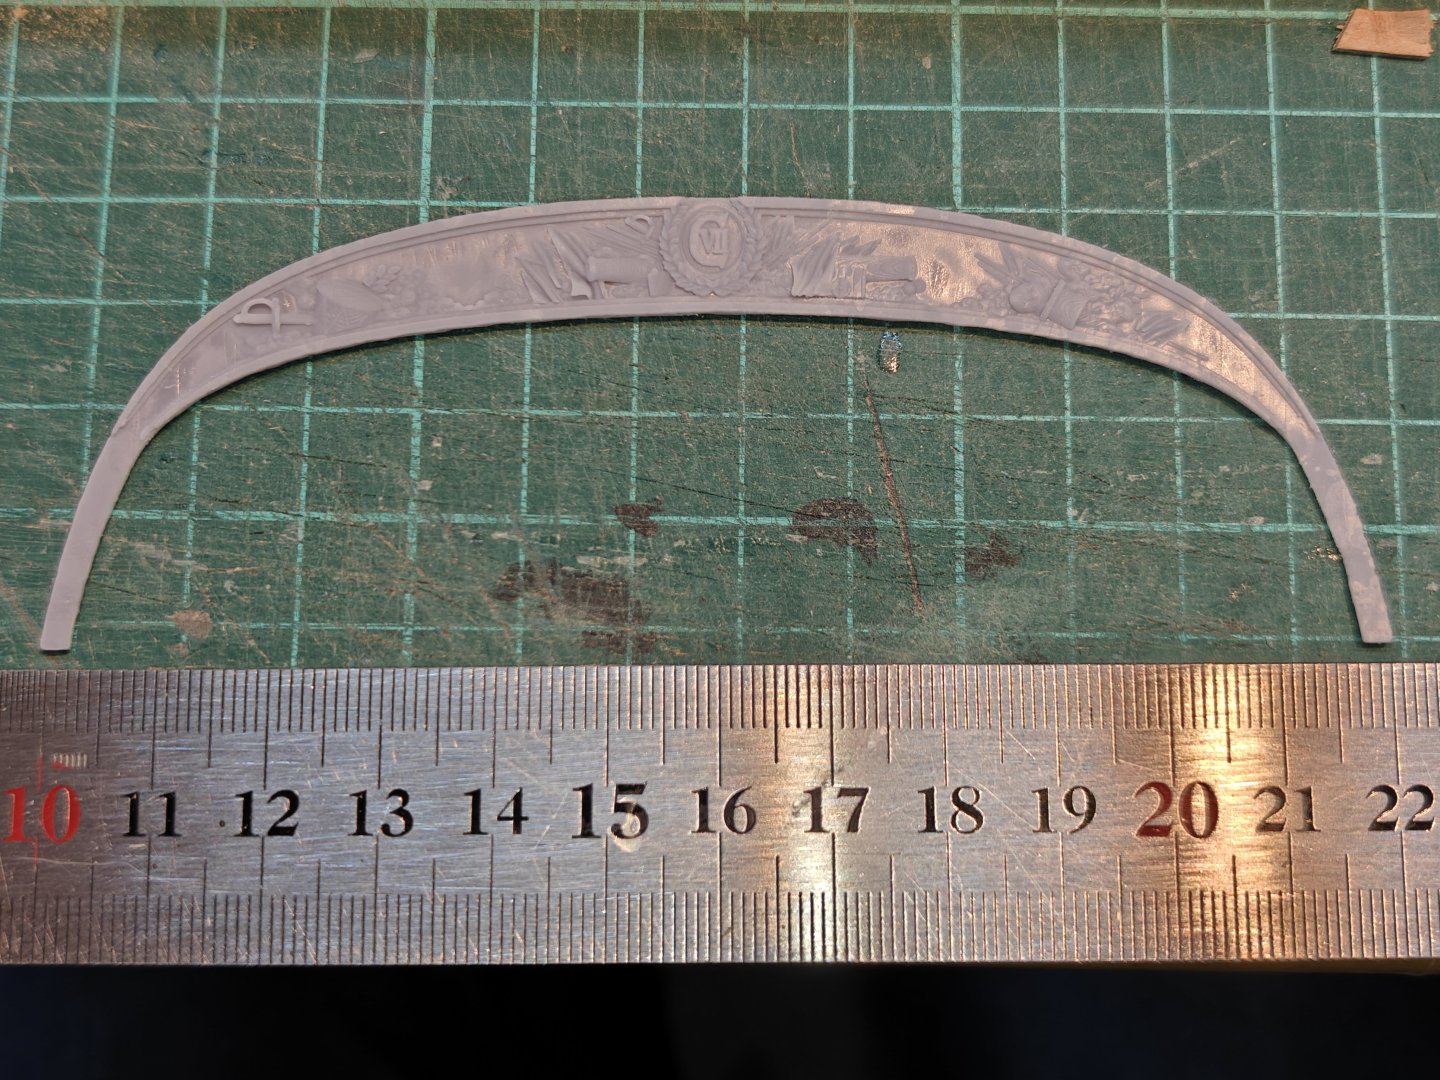
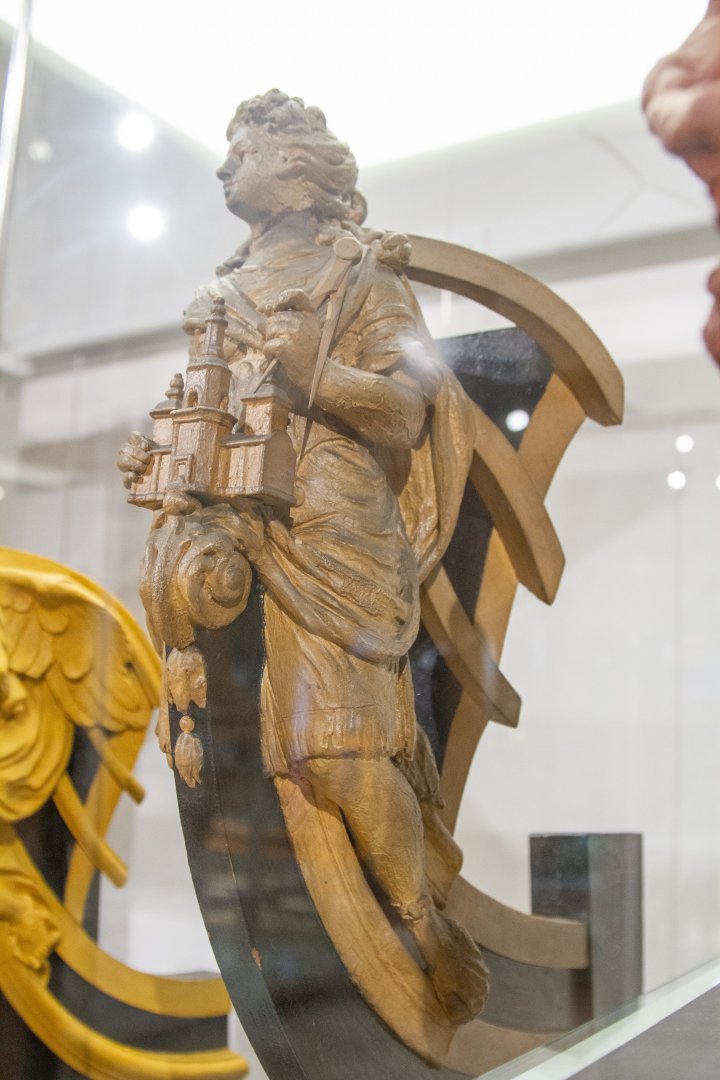
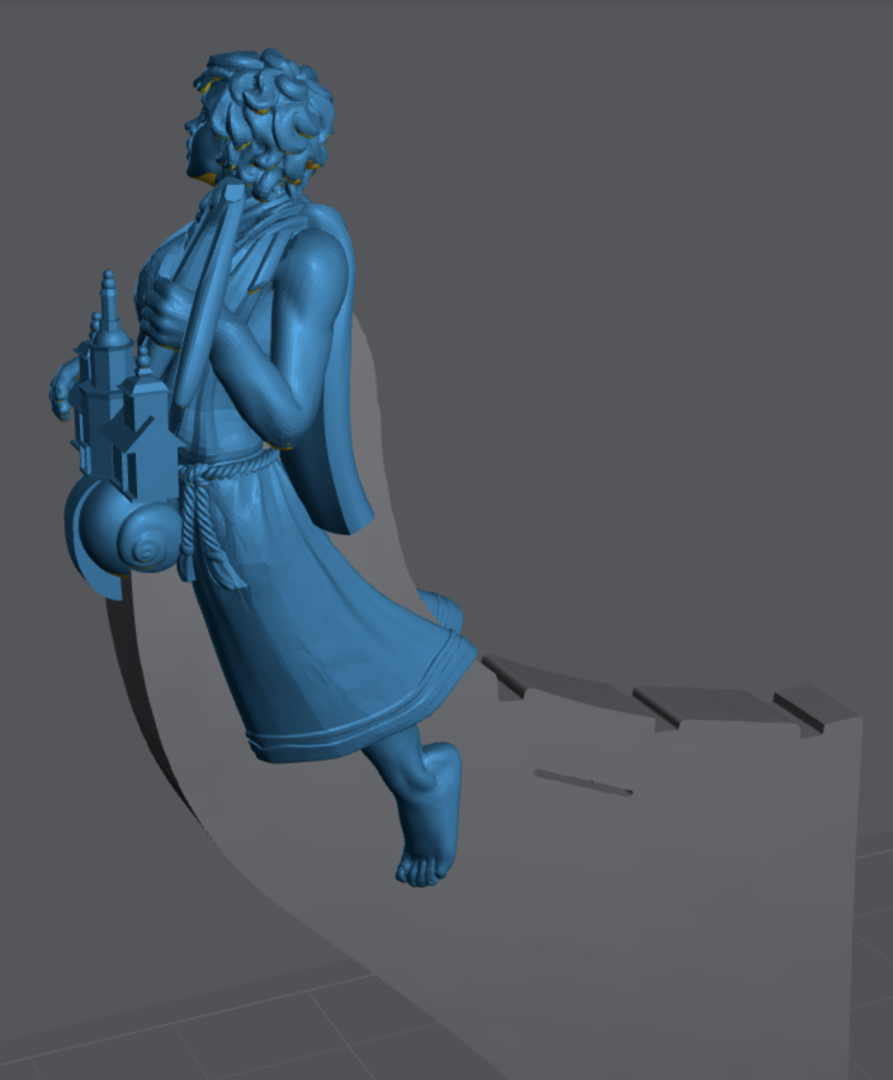
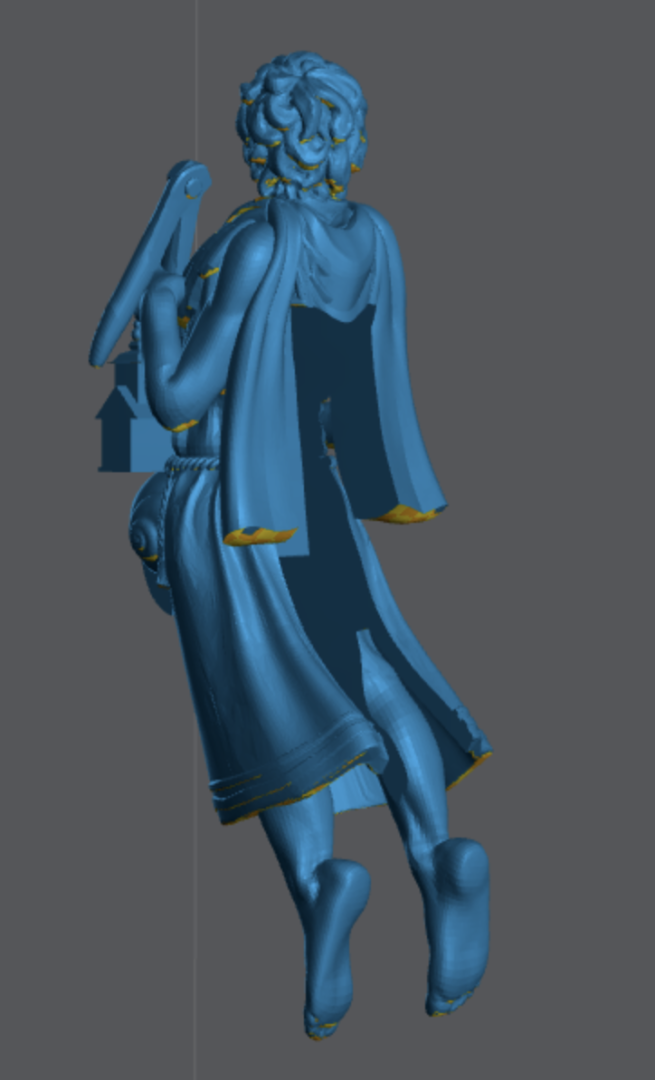
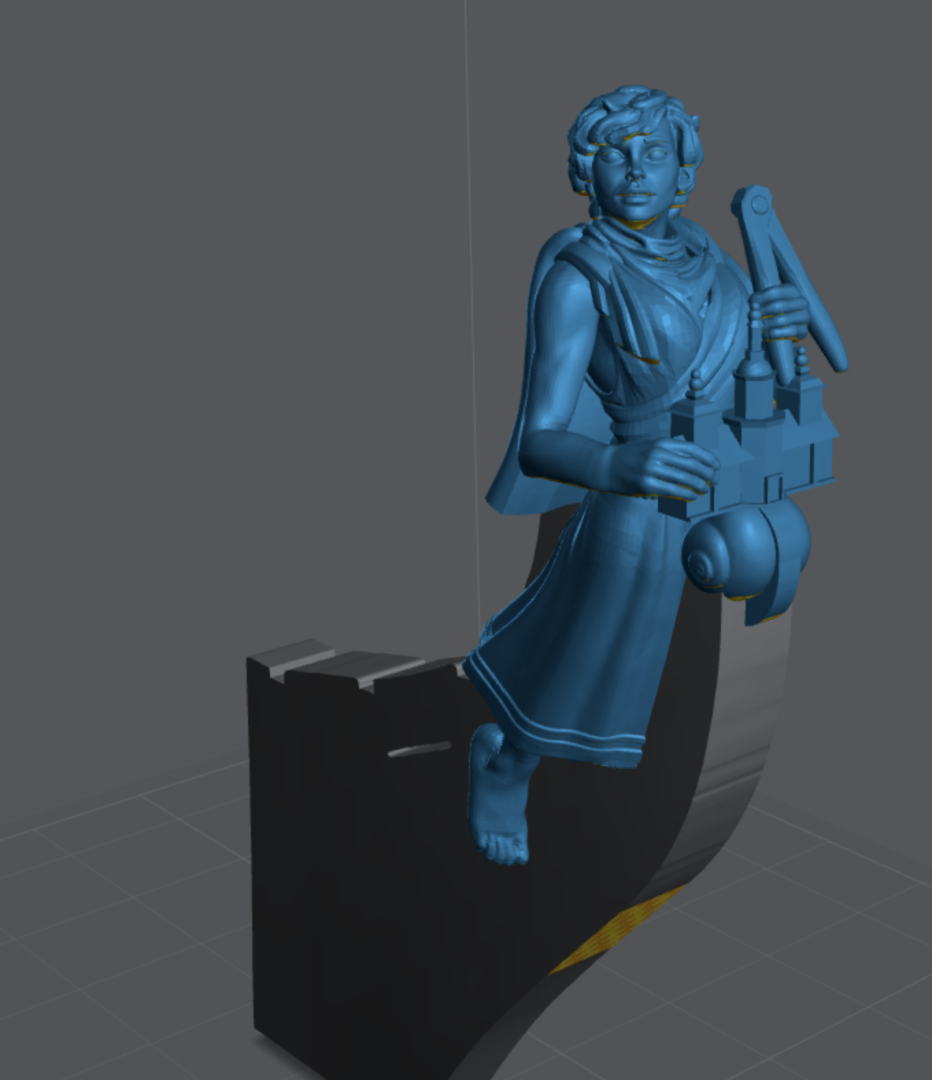
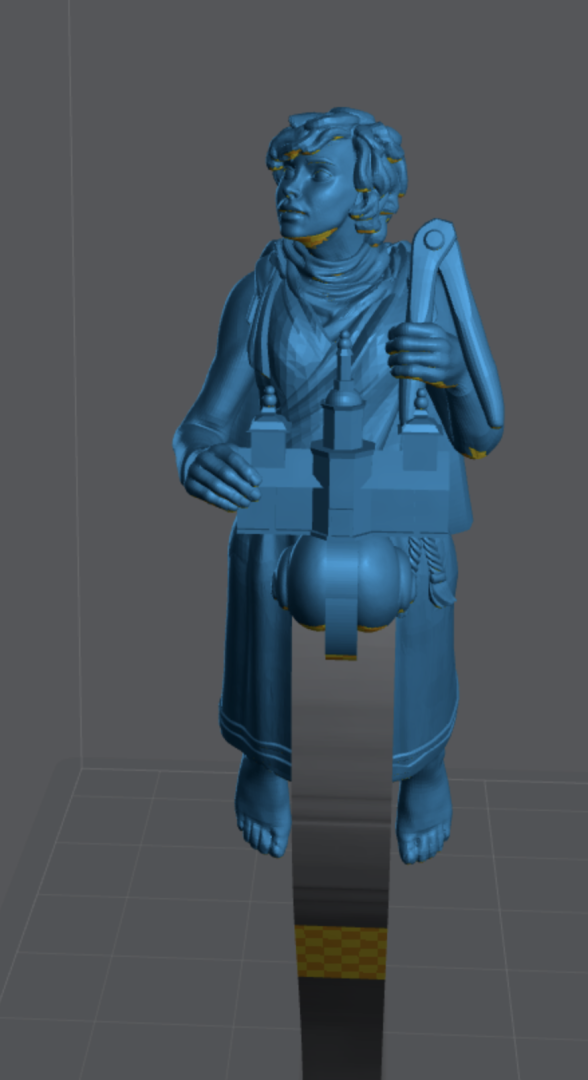
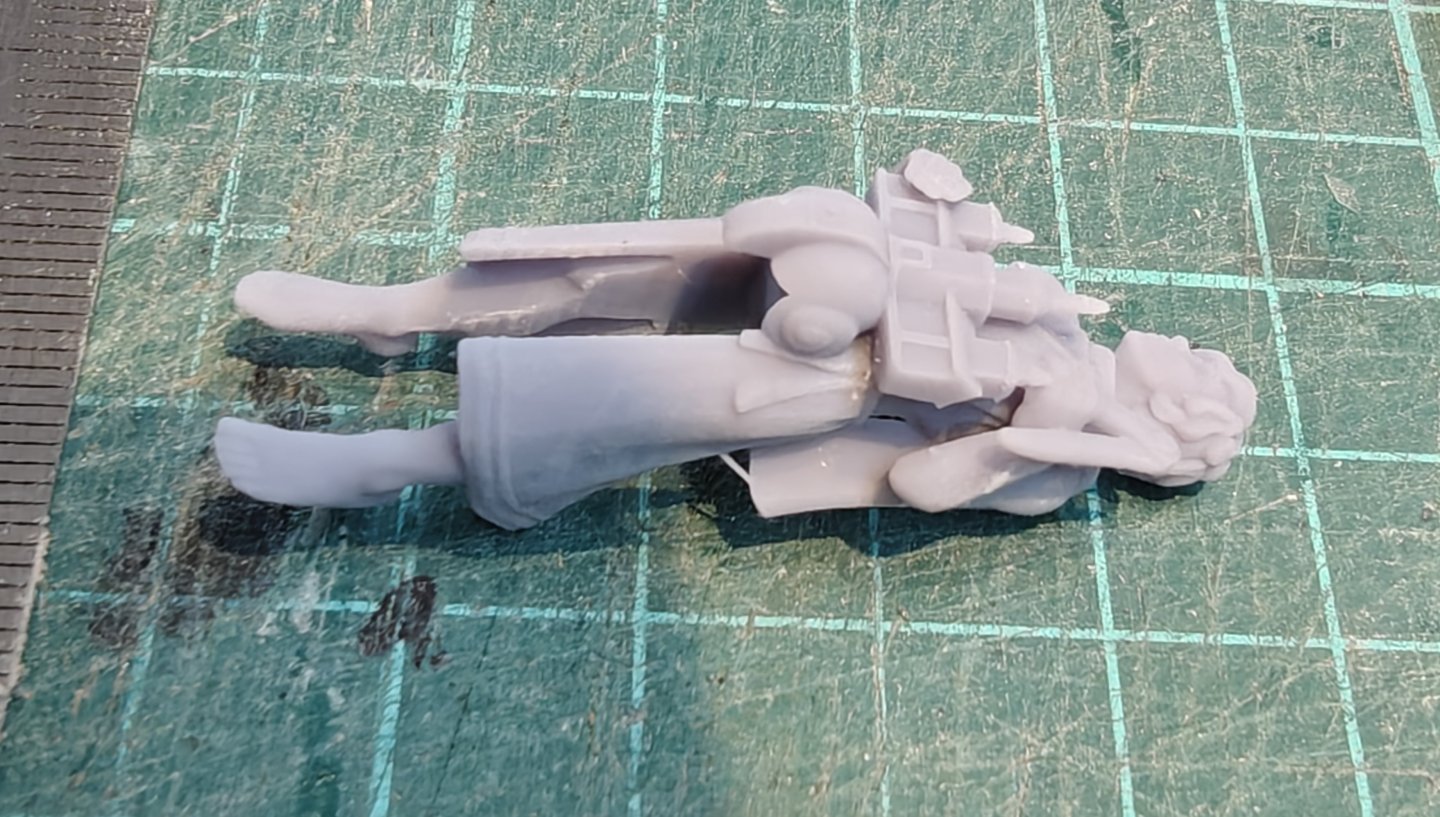
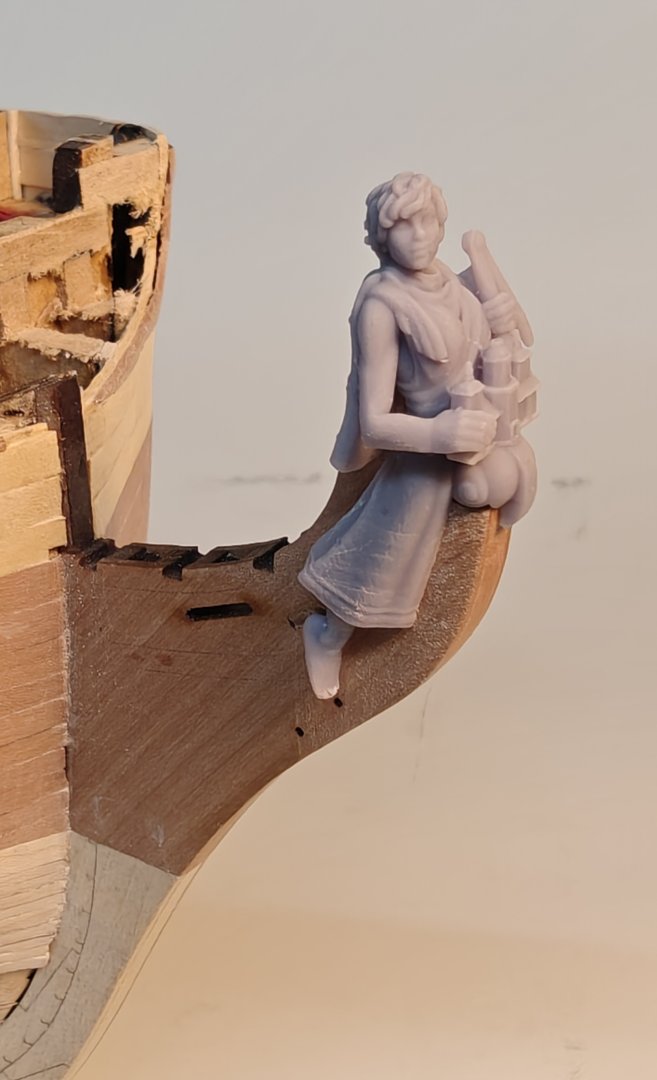
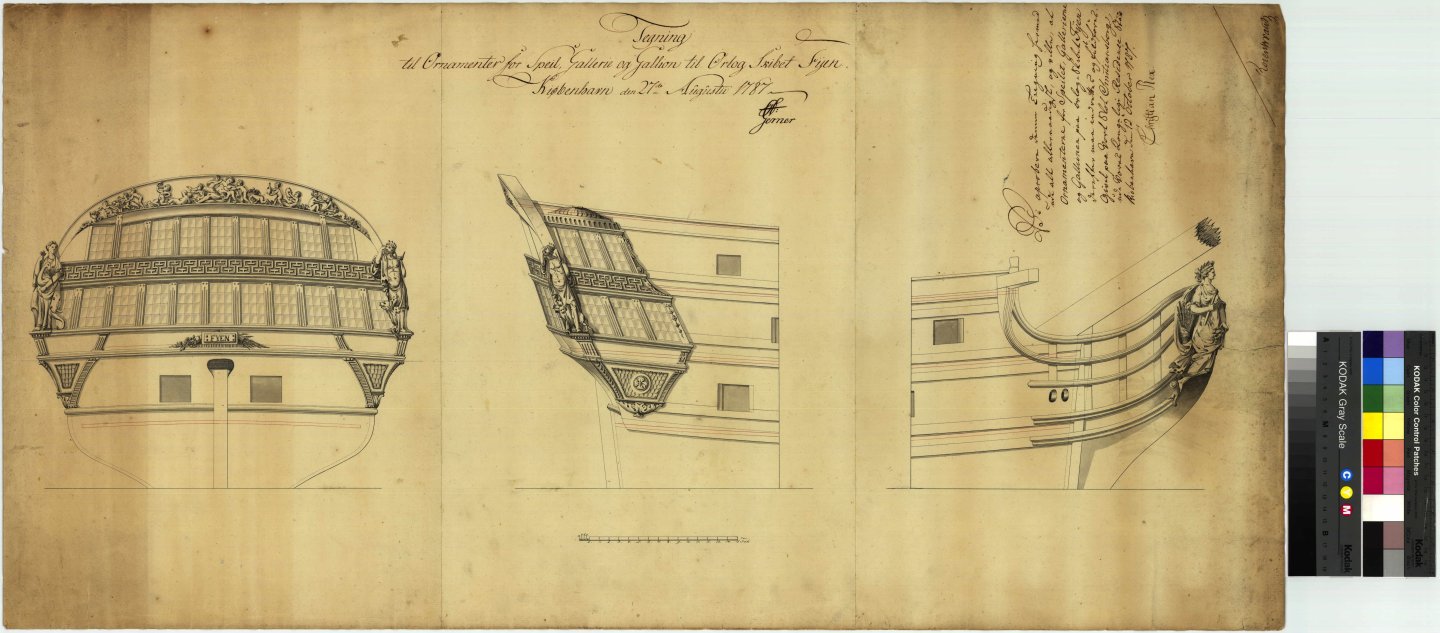
Log entry 25 - 3D printing and designing the figurehead I had a lot of mis-prints trying ro get everything dialed in, but fortunately it mostly wastes time, as the material consumption is very small for these 1:67 scale parts. In the end, I got a nice print of the stern friese: And a few detail shots: I am very pleased with the detail level. It is finer than my painting skills will support I am afraid, but I have a bunch of almost perfect mis-prints to practice on first! This is how it goes together with the sten parts: The fit is very good, though the back of the print is quite uneven. I will sand it a bit and then I will use some filler at the edges when I have glued it on - it will be a while before I reach that stage, but now it is ready. You have to forge while the iron is hot, so while I was 'at it' I tried to design the figurehead. Now, back in the first post, i showed the two designs from the archive: a lion as proposed by the original architect Krabbe, and a lady in Greek dress as proposed by his successor H. Gerner in 1794. However, the War Museum in Copenhagen has an original model of a figurehead for this exact ship! And it looks like none of the drawings: I don't know how many different figureheads the ship had, but I am confident one of them at least looked like the model in the museum, and I will therefor go for that design. I believe the building she is holding is the Oslo Cathedral (then called the Christiania Cathedral), showing the provenance and namesake of the ship. Now for the tricky part: how to get a reasonable resemblance to this original model? Enter heroforge.com, where you can design your own figures meant for tabletop fantasy role playing games like D&D. With a subscription, you get full poseability of the models and credits to download stl files. I did my best to recreate the model, though there are many discrepancies. I then added the Cathedral and other ornamental elements in the slicing software. The most difficult part technically was to remove a section that fits the stern. This was done by drawing the shape in QCAD, making a 3D extrusion of this, importing it and the figurehead model into Onshape (free online 3D design programme - thanks for pointing me in this direction a while back in another thread @Thukydides!), and then subtracting the prow shape from the figurehead. This is what I got: Overall I am happy with the resemblance despite the differences - I am a bit constrained by the clothing options on heroforge. A few mis-prints later and I got an actual figurehead: Yay! The fit is abit too tight, I will sand the prow a bit. And I broke the top of the Cathedral spire... Sigh. I will glue on a replacement or just re-print the next time I print something. A few reflections to end this very long post: Heroforge looks very promising also for creating crew models. It will never be as good as hand modelled figures by real 3D artists like the stuff you can get from Vanguard Models, but it allows for an infinite variability. Some may notice that this figurehead is a bit larger and especially taller than the Sphinx figurehead I am replacing: This fits with the Christiania drawings, but it could seem like I might get into trouble with the bowsprit! Fortunately, the angle of the bowsprit on the sailplan for Christiania is significantly steeper than on Sphinx, so I think it will be all fine. Now I need to get on with that planking job! Thanks for looking and following along! BR TJM


- 148 replies
-
- 10
-
-
-
- Christiania
- Vanguard Models
- (and 1 more)
-
They look great, I really like your dark wood paint scheme for the insides. Perhaps a bit of contrast by painting the wale black? Or a yellow, red or blue trim somewhere? But they look great already!
- 443 replies
-
- 4
-
-
- Indefatigable
- Vanguard Models
- (and 1 more)
-
Thanks for the comment and complement! It makes sense that carved designs were more or less balanced for weight, but I actually think frieses like this one were painted on, perhaps with the exception of the central monogram design, but I am not sure. I know I would not be successful if I tried to freehand paint it, so I went for a 3D design. As for symmetry, none of the Danish ships from 1700's are completely symmetrical in their ornamentation. Here are a few more or less random examples from the archive: These are definitely closely balanced, but not quite symmetrical - the last example looks almost symmetrical but that is not too common.


- 148 replies
-
- 4
-
-
- Christiania
- Vanguard Models
- (and 1 more)
-
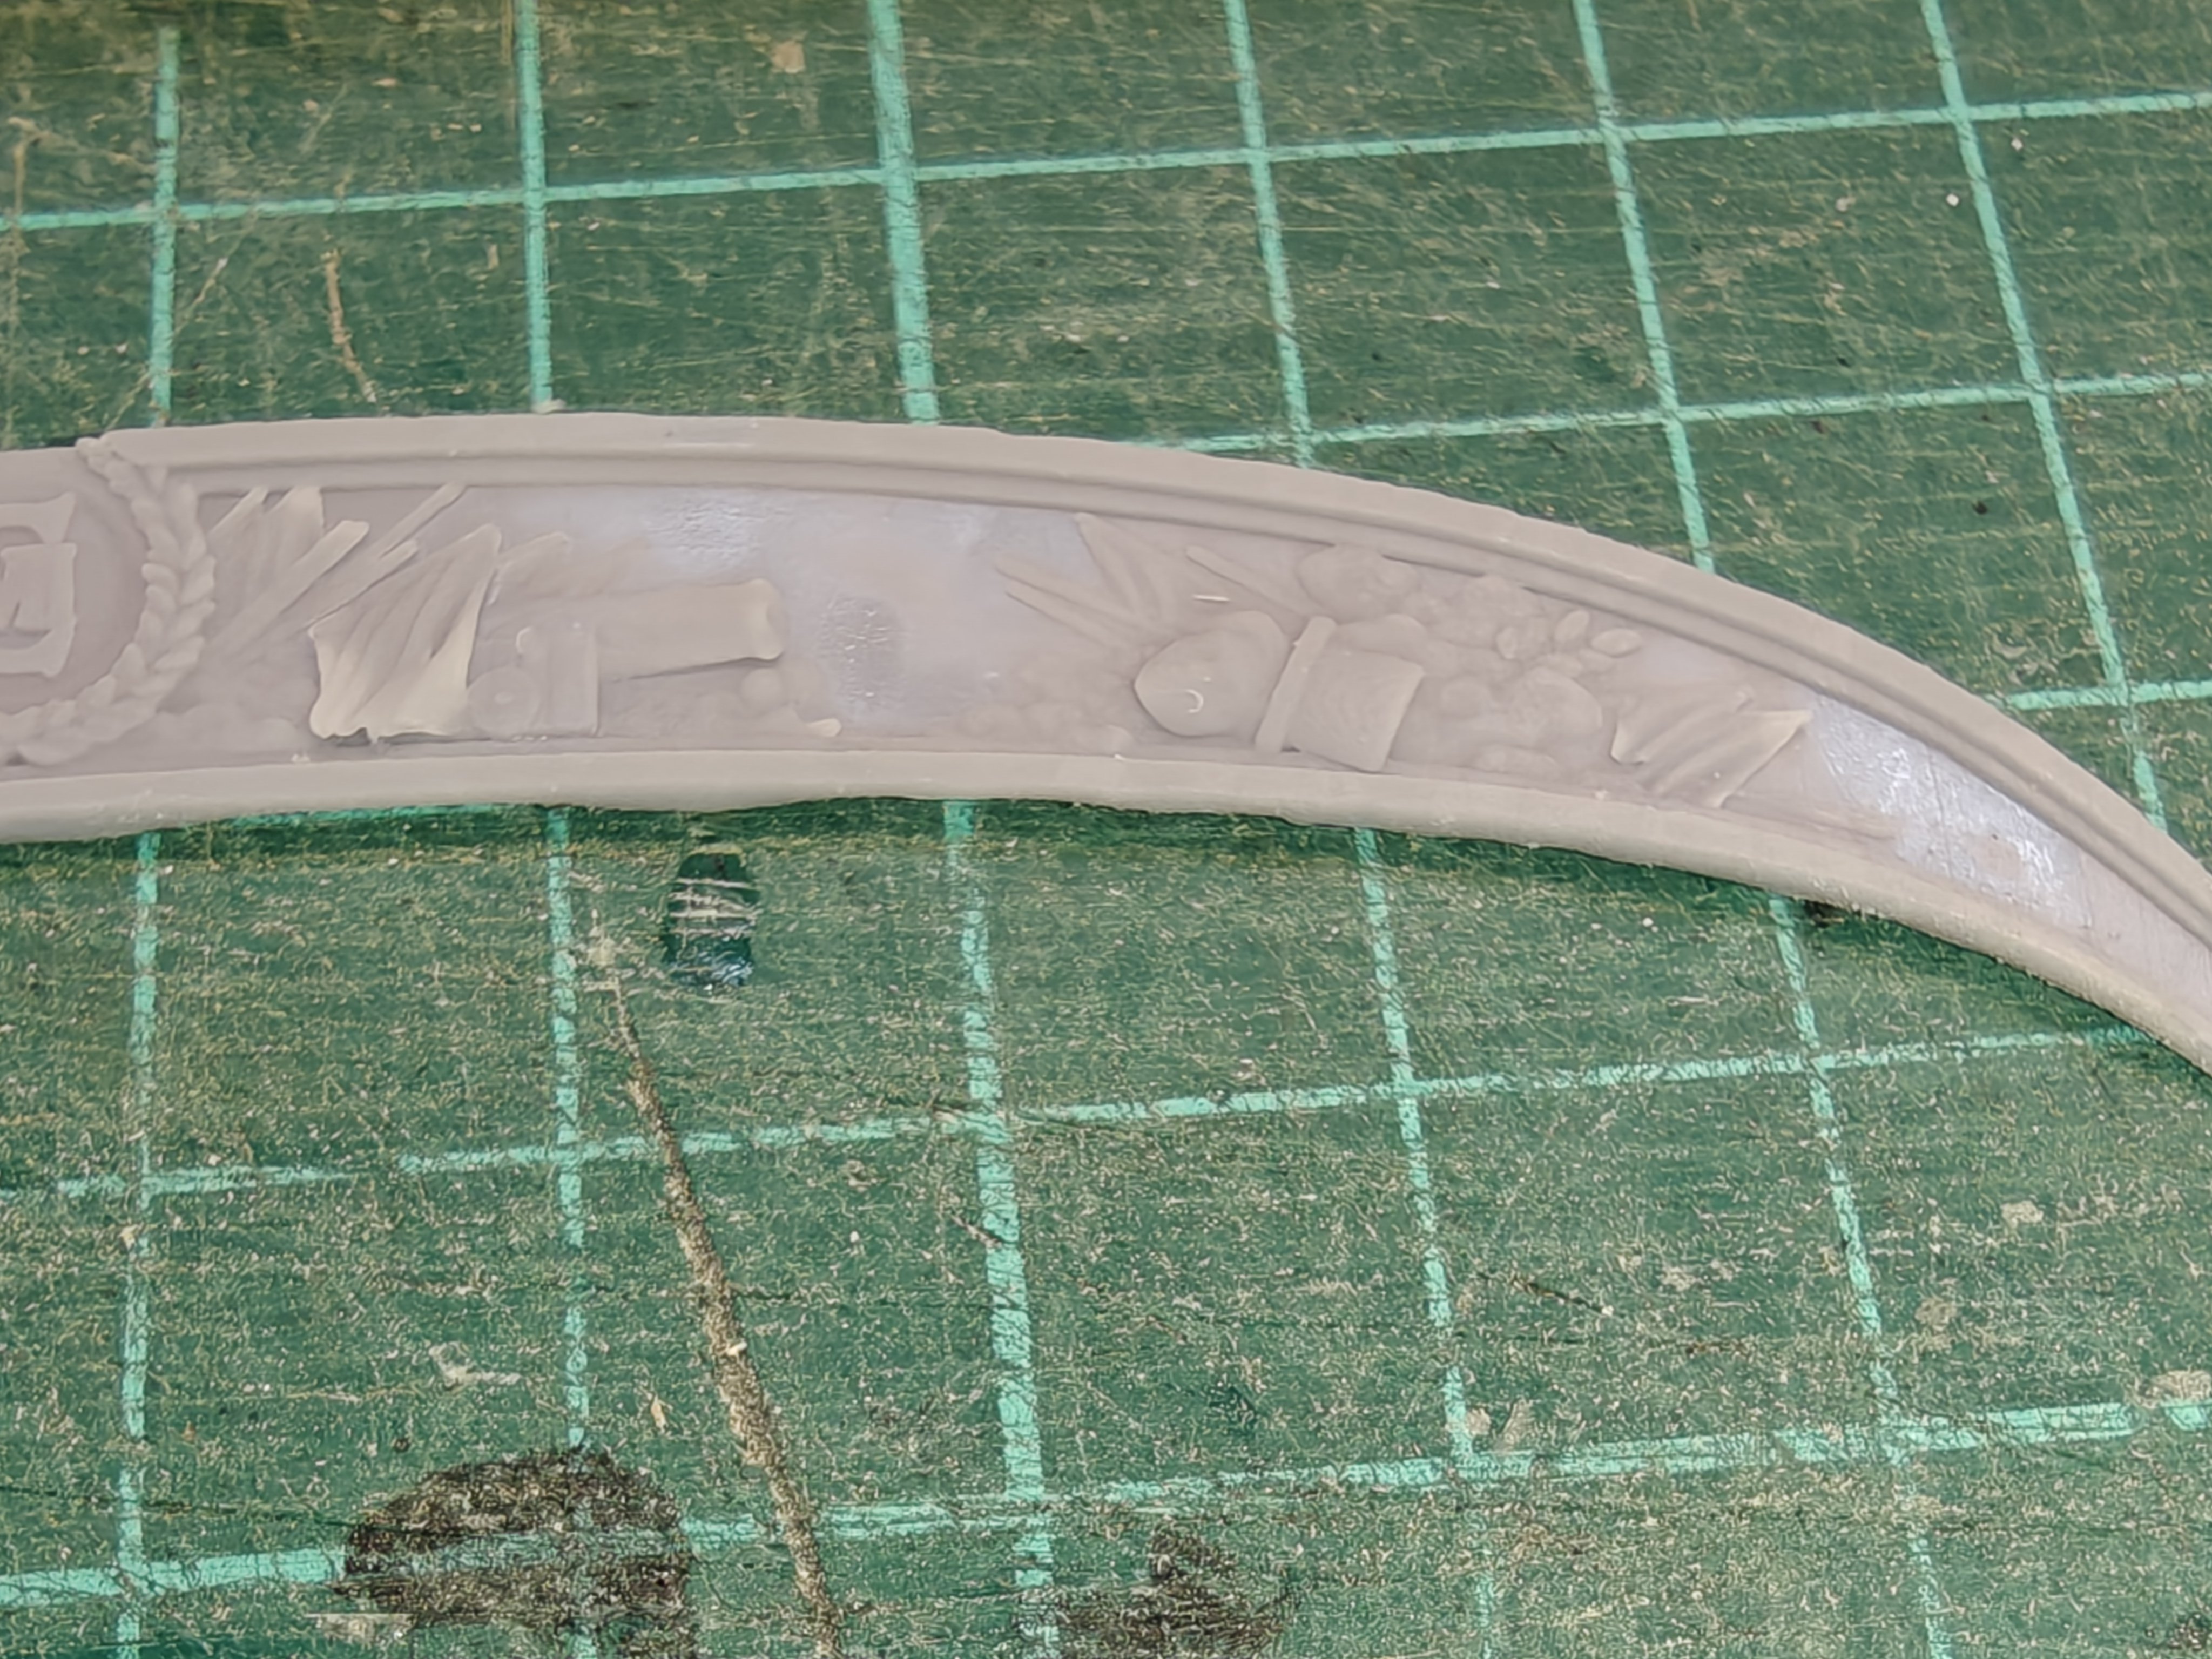
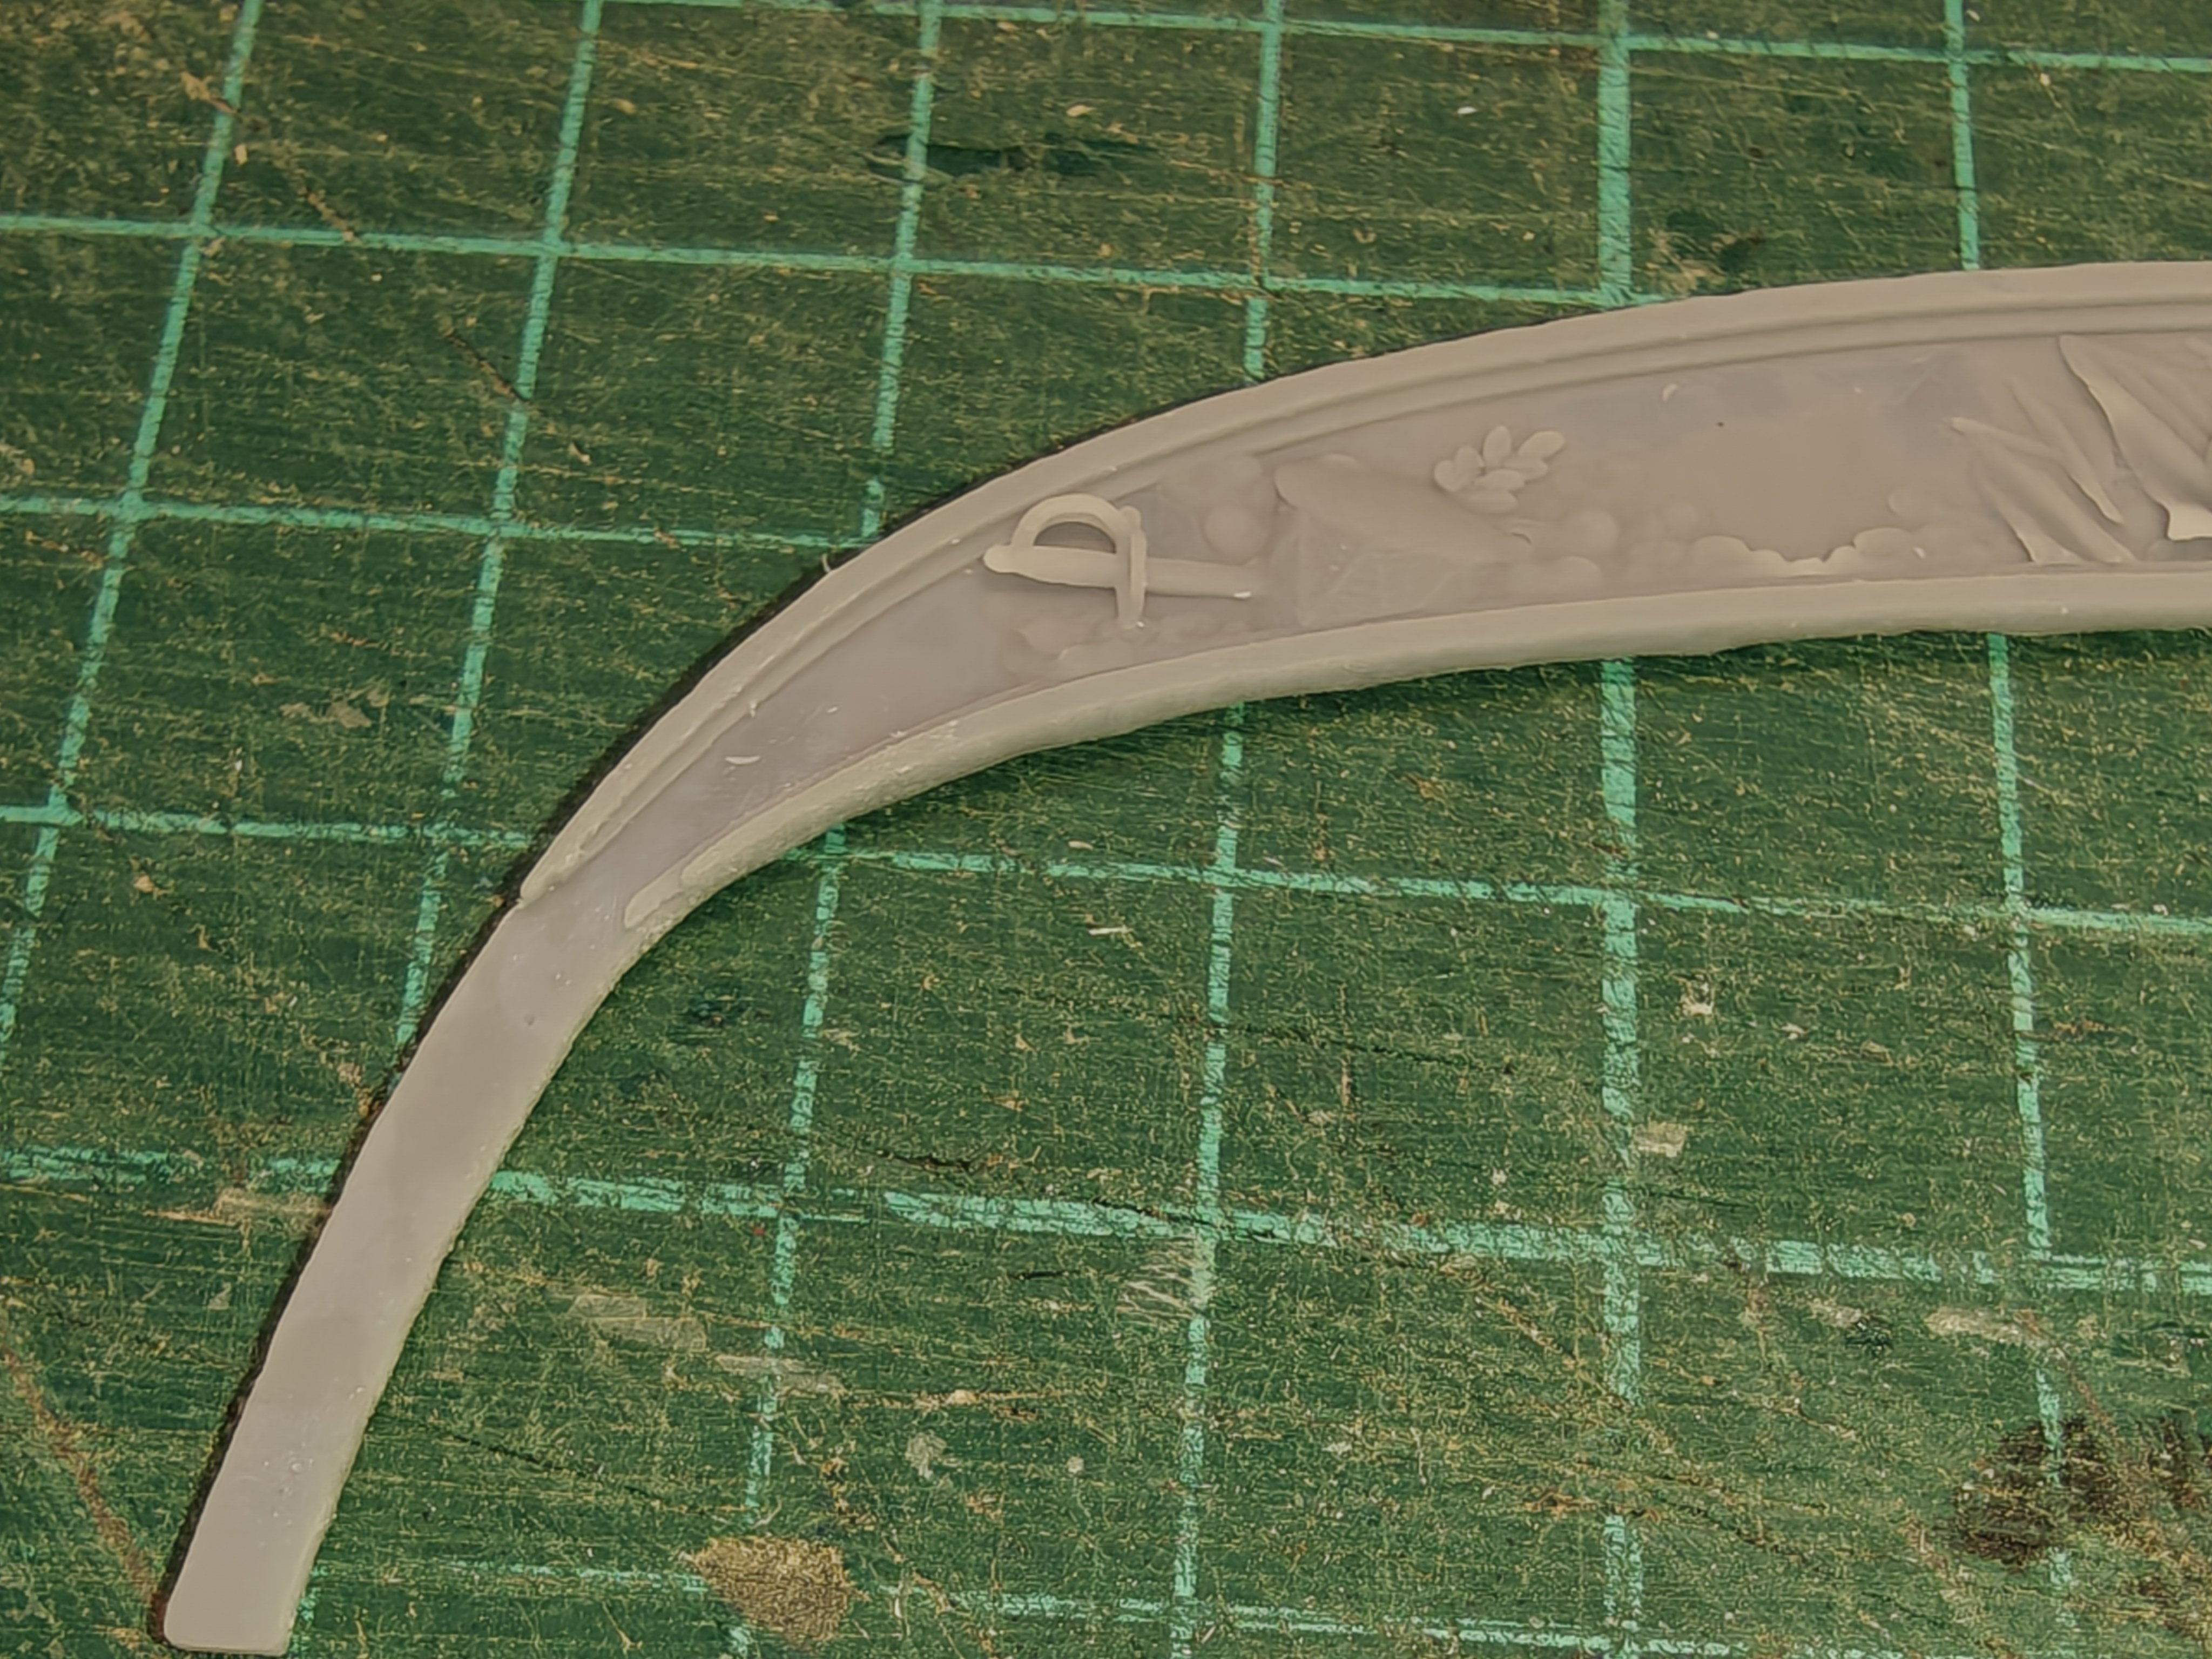
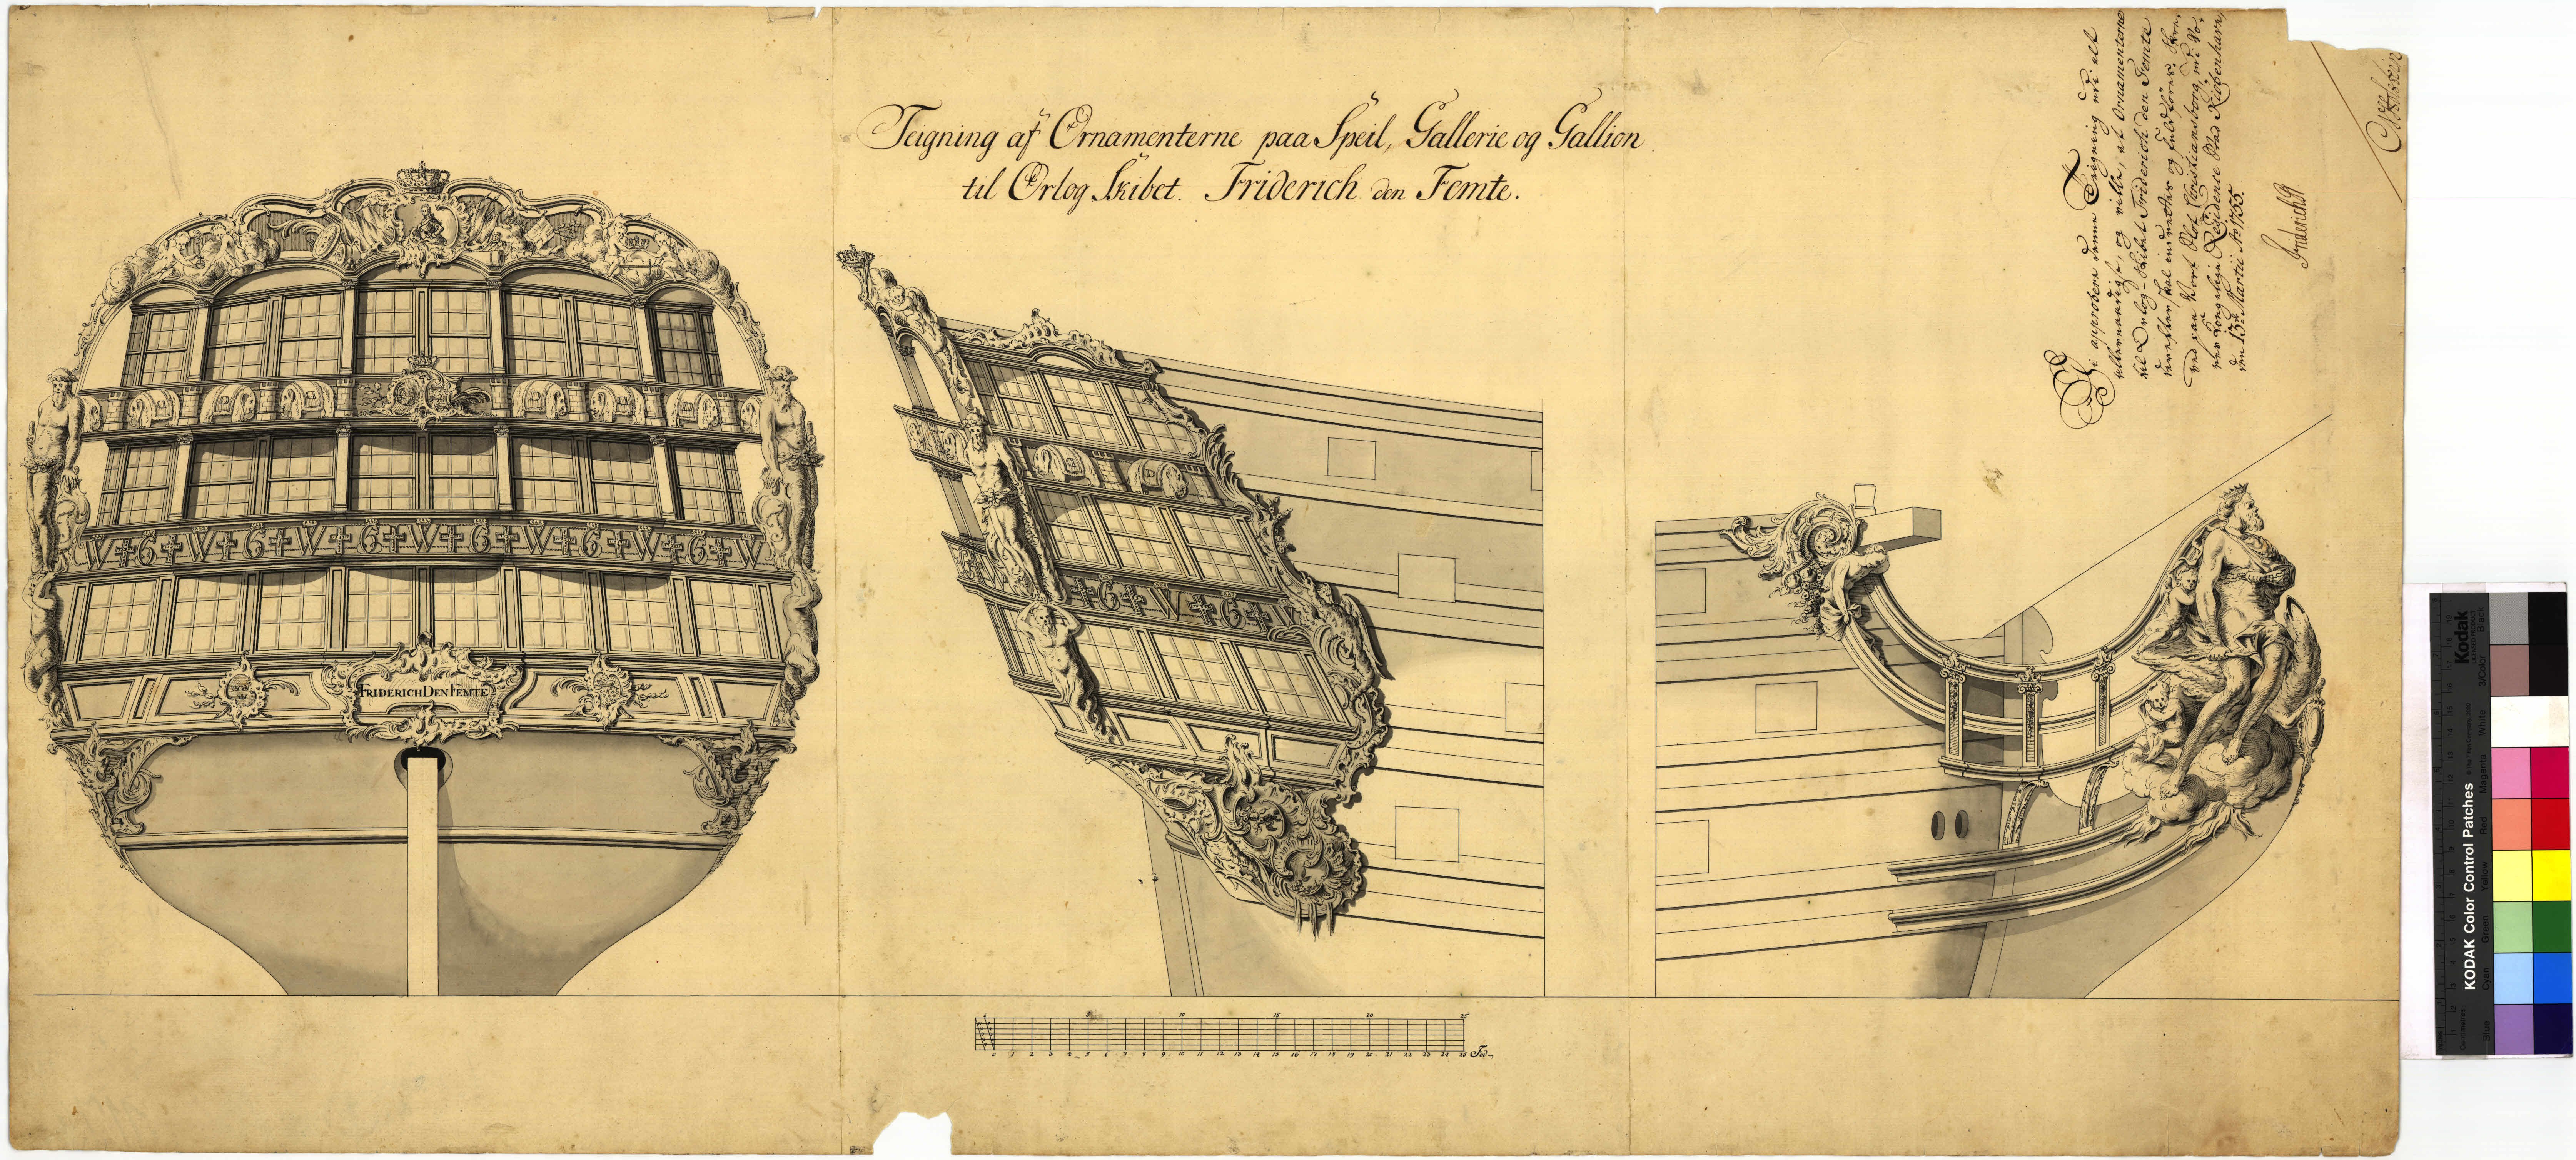
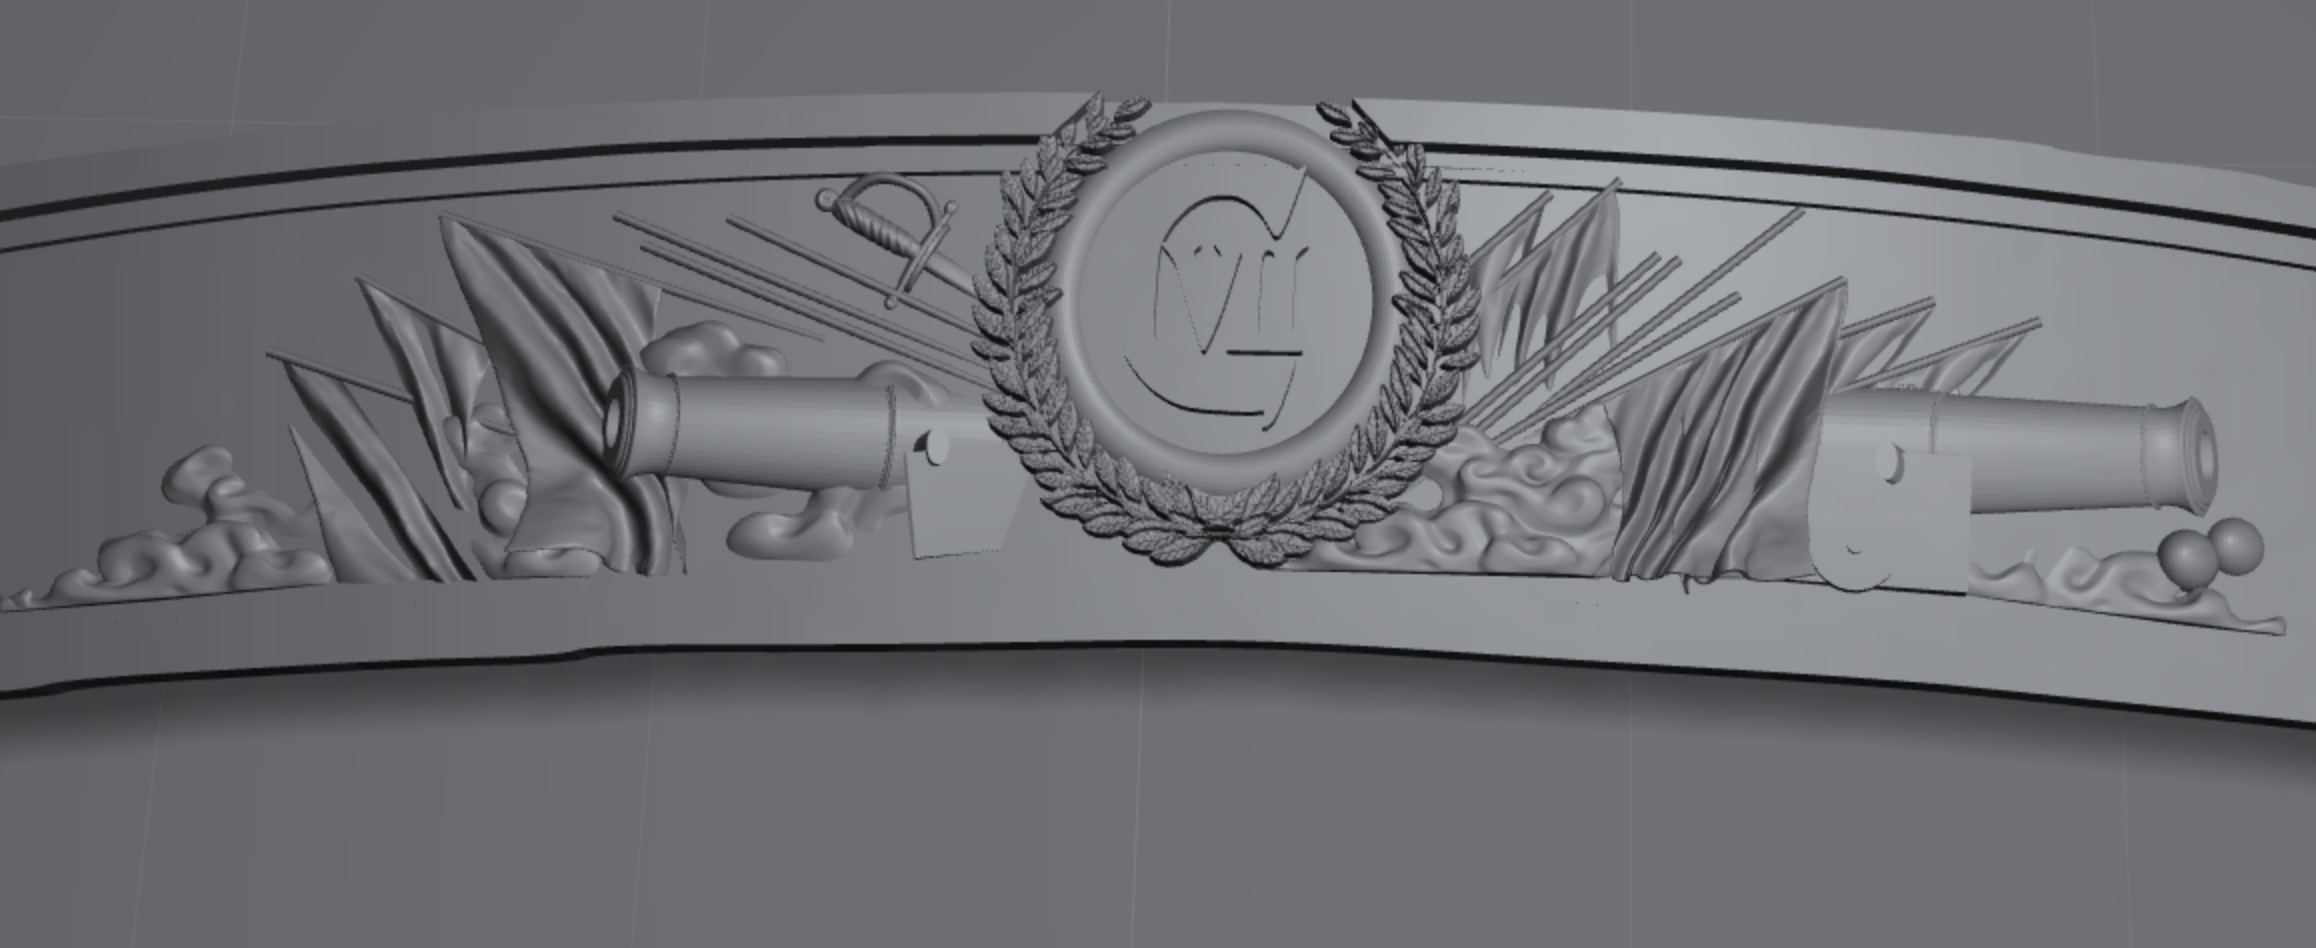
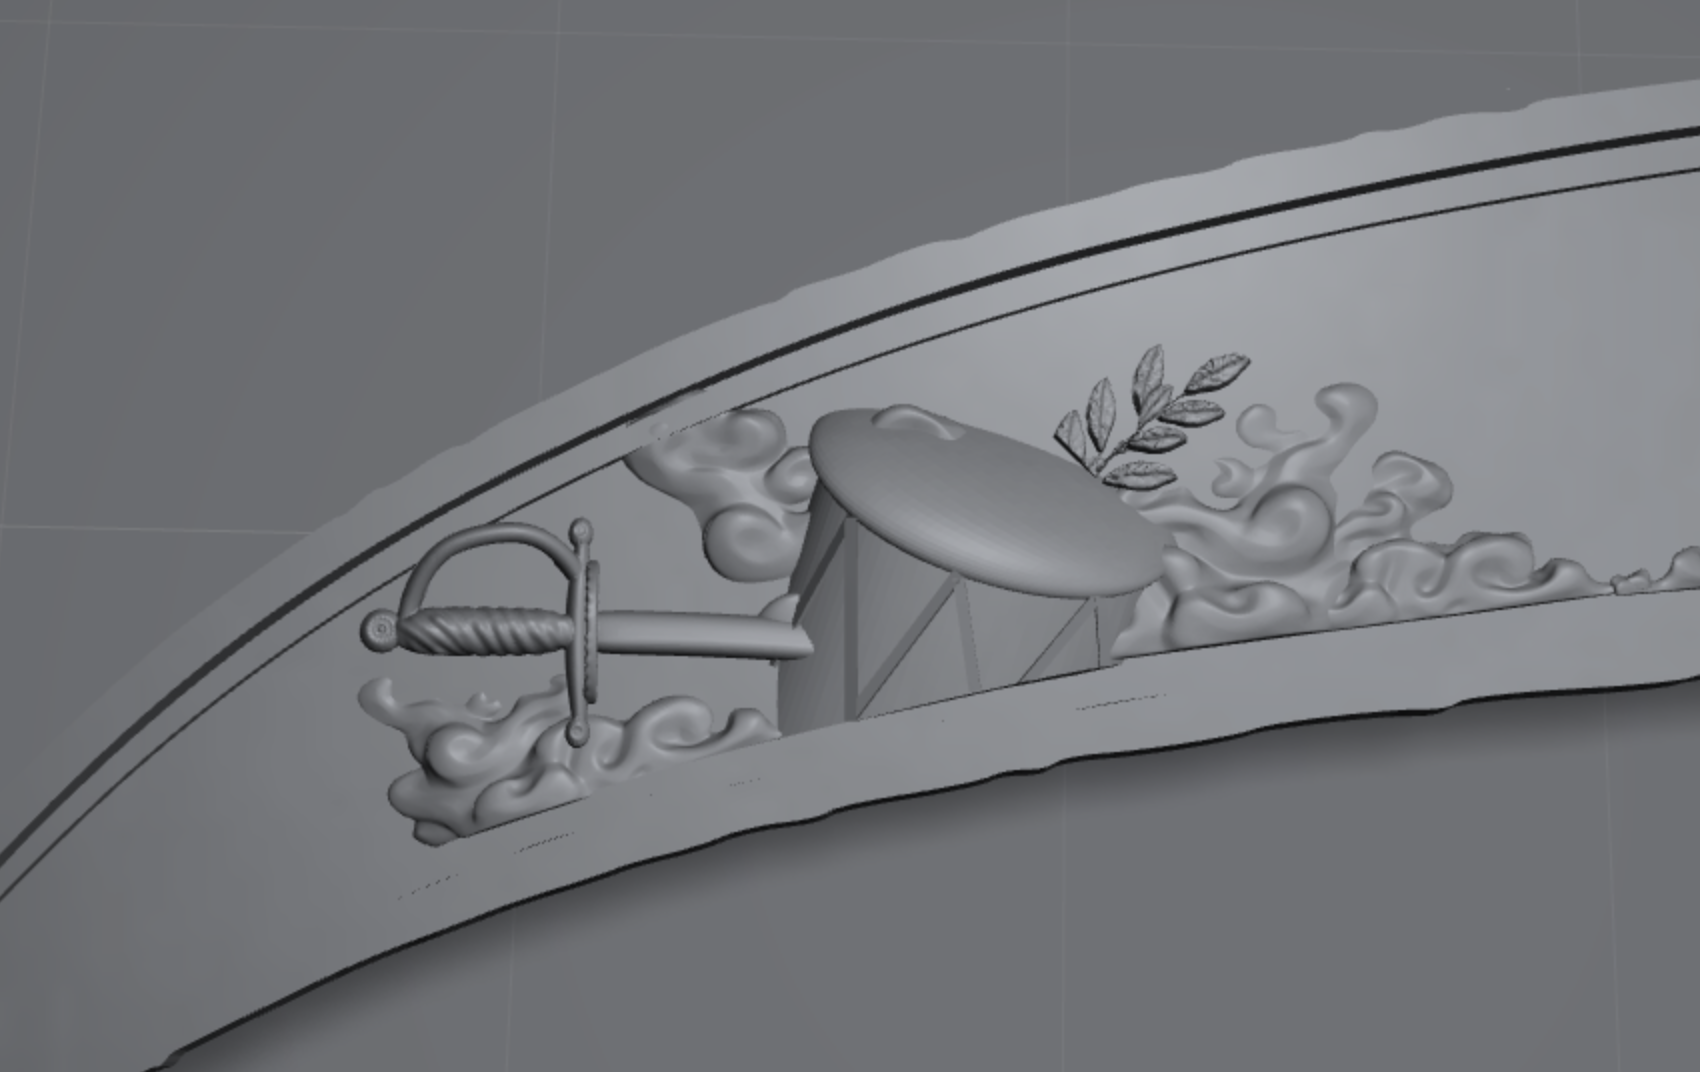
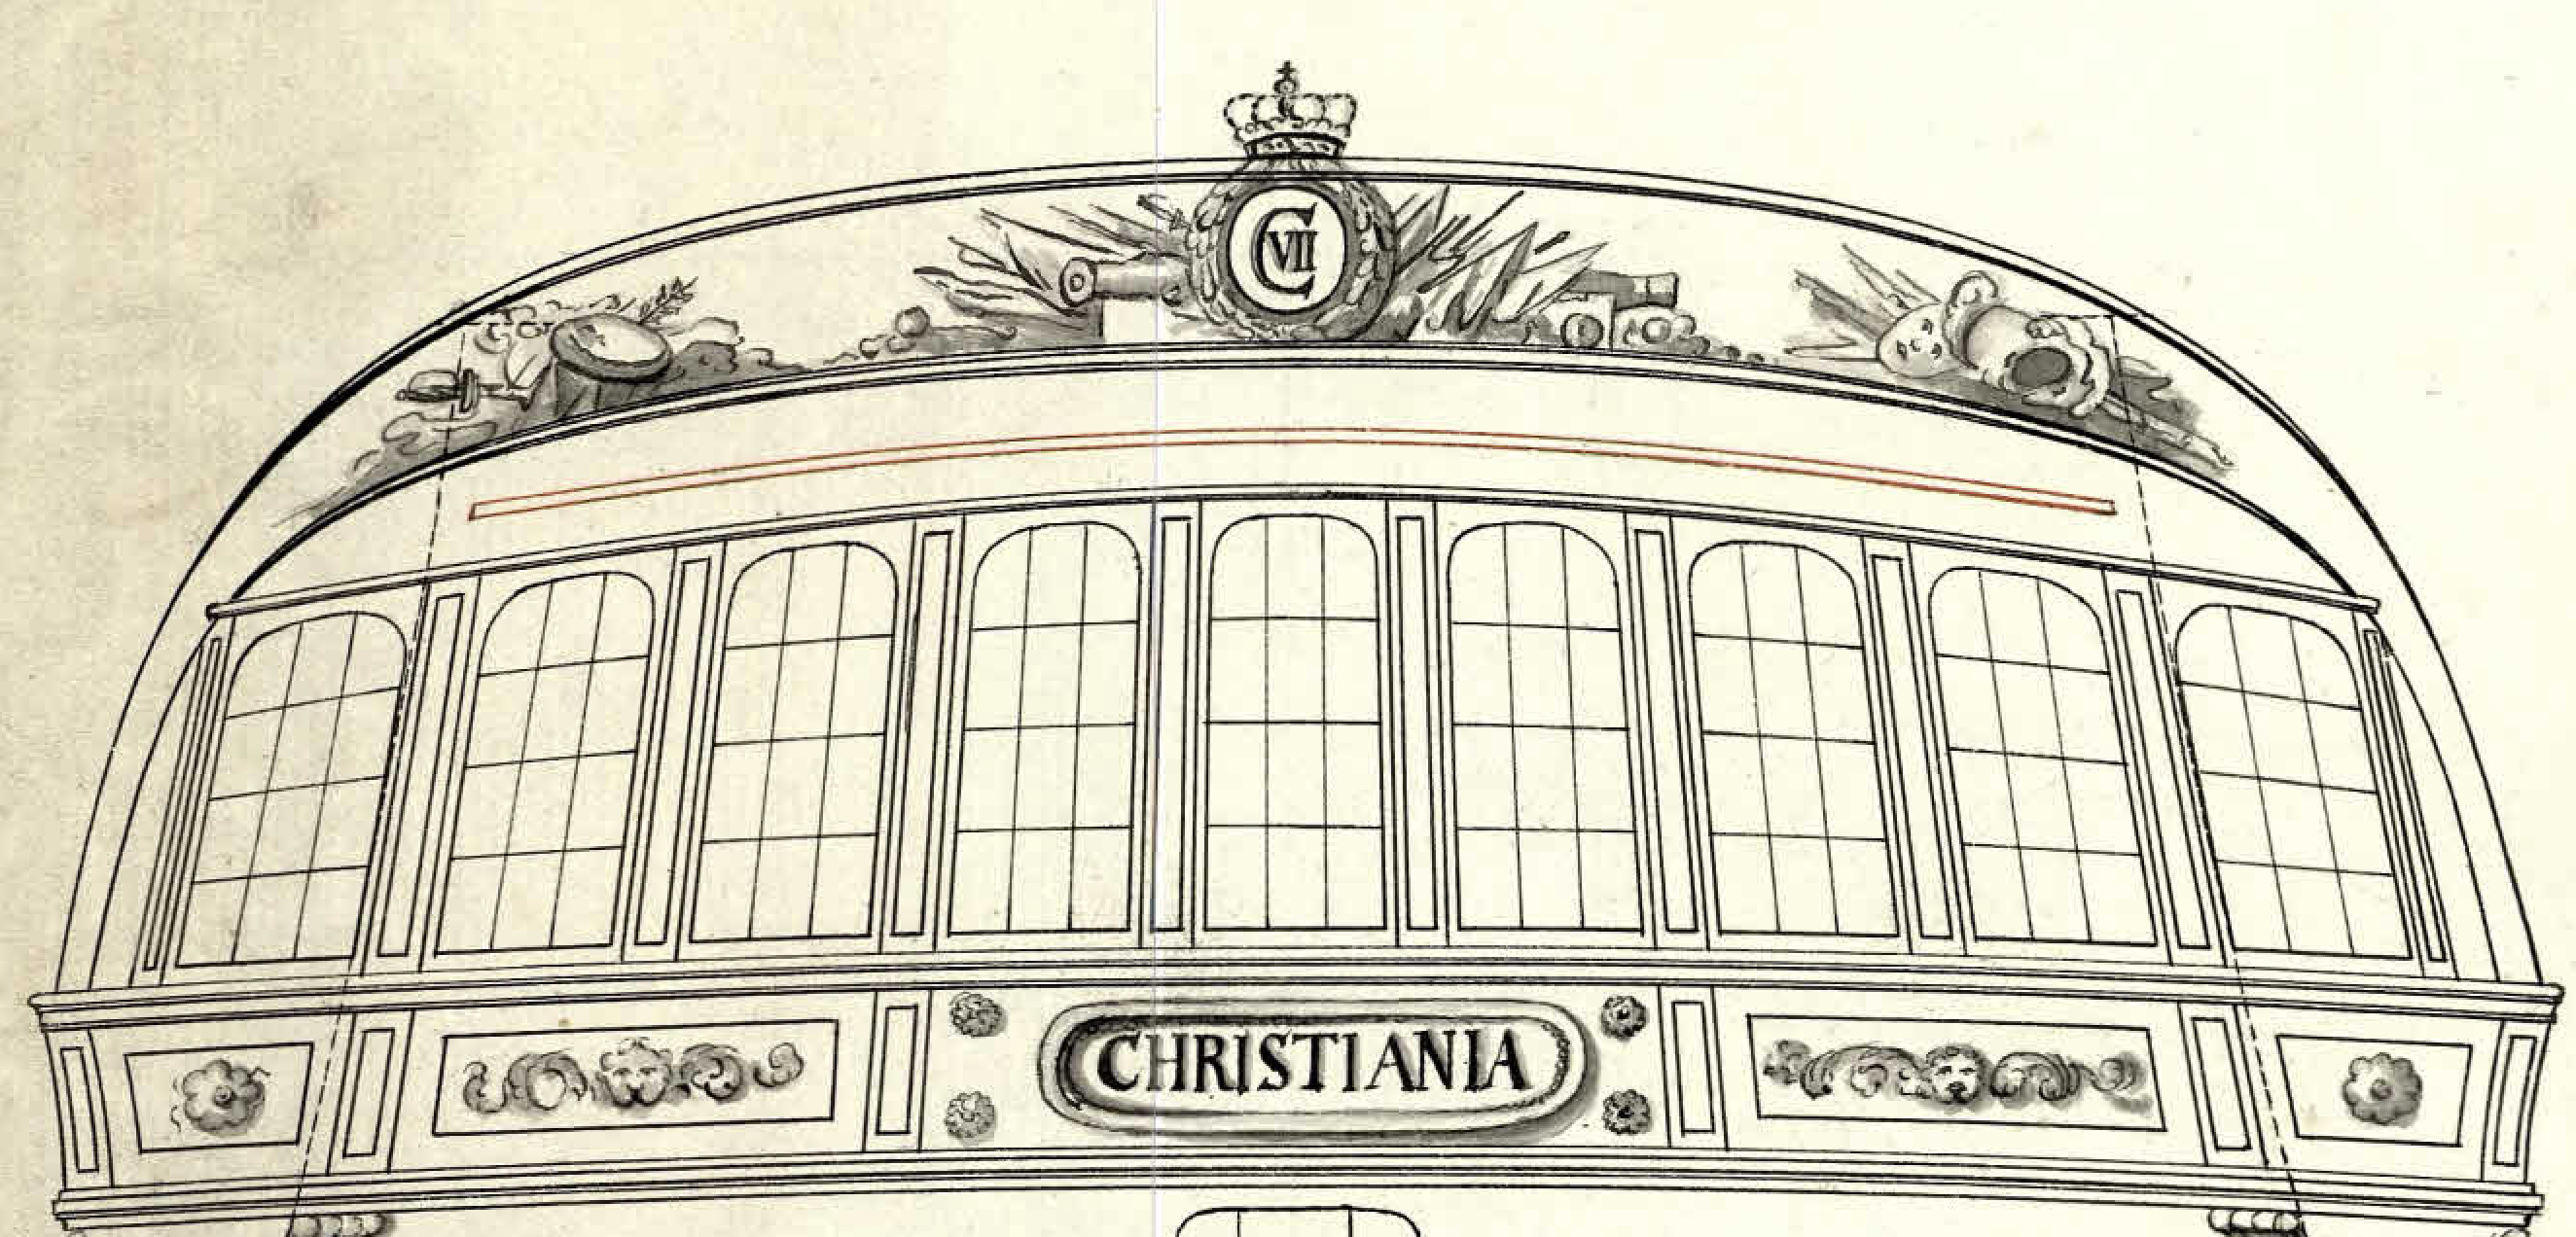
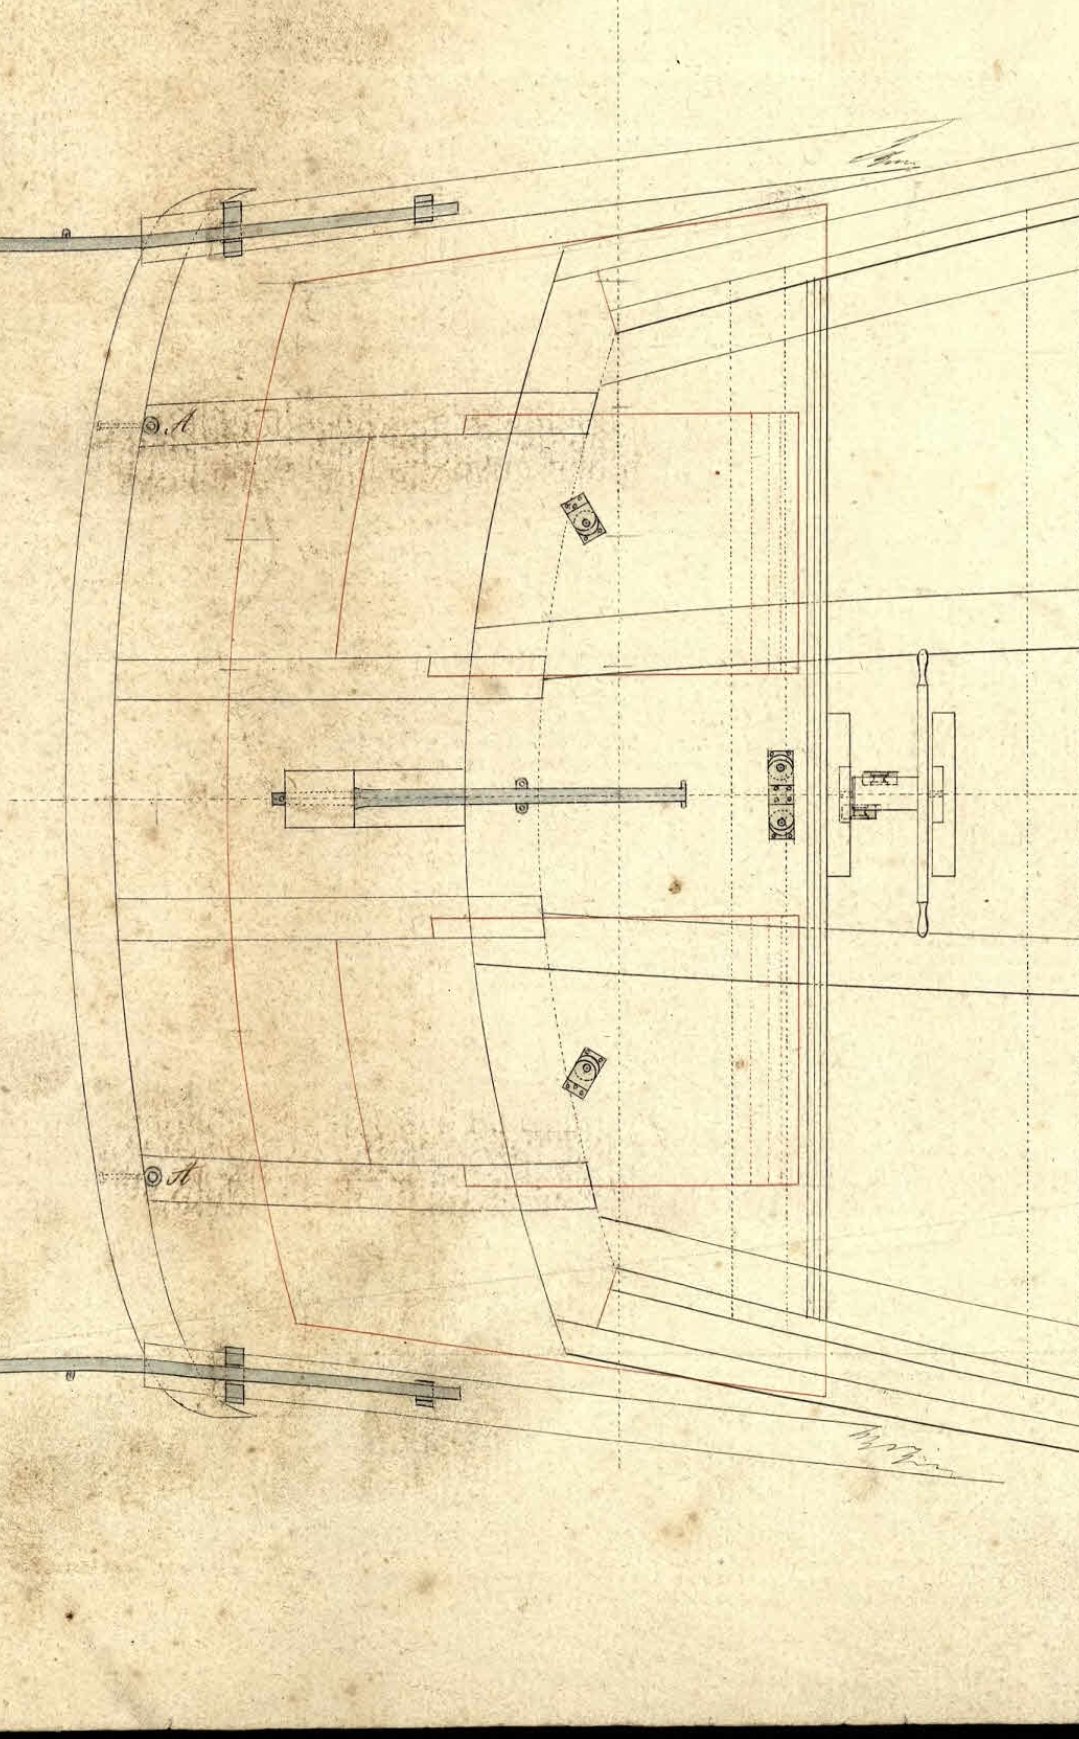
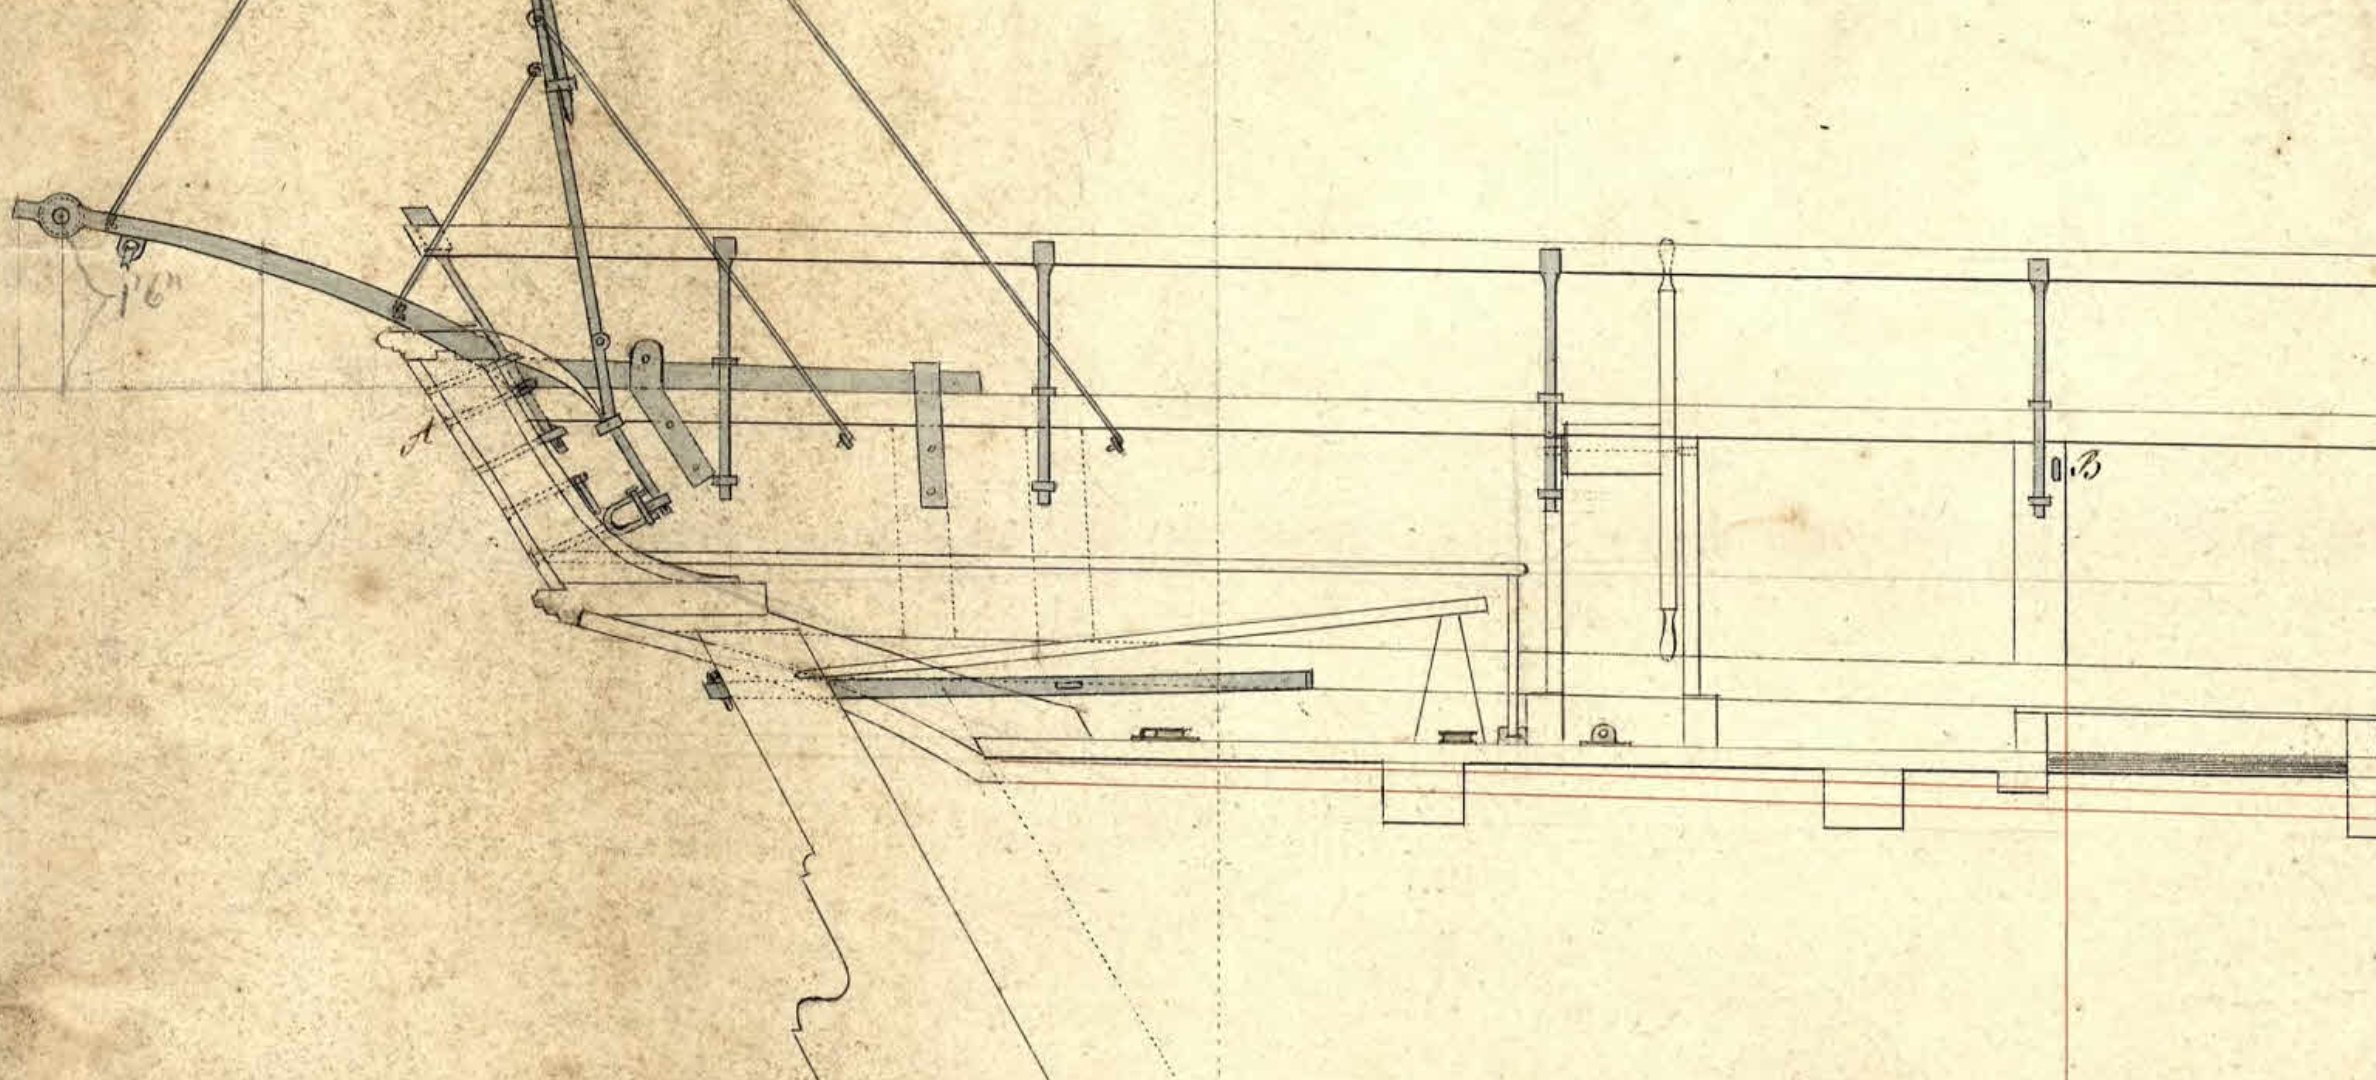
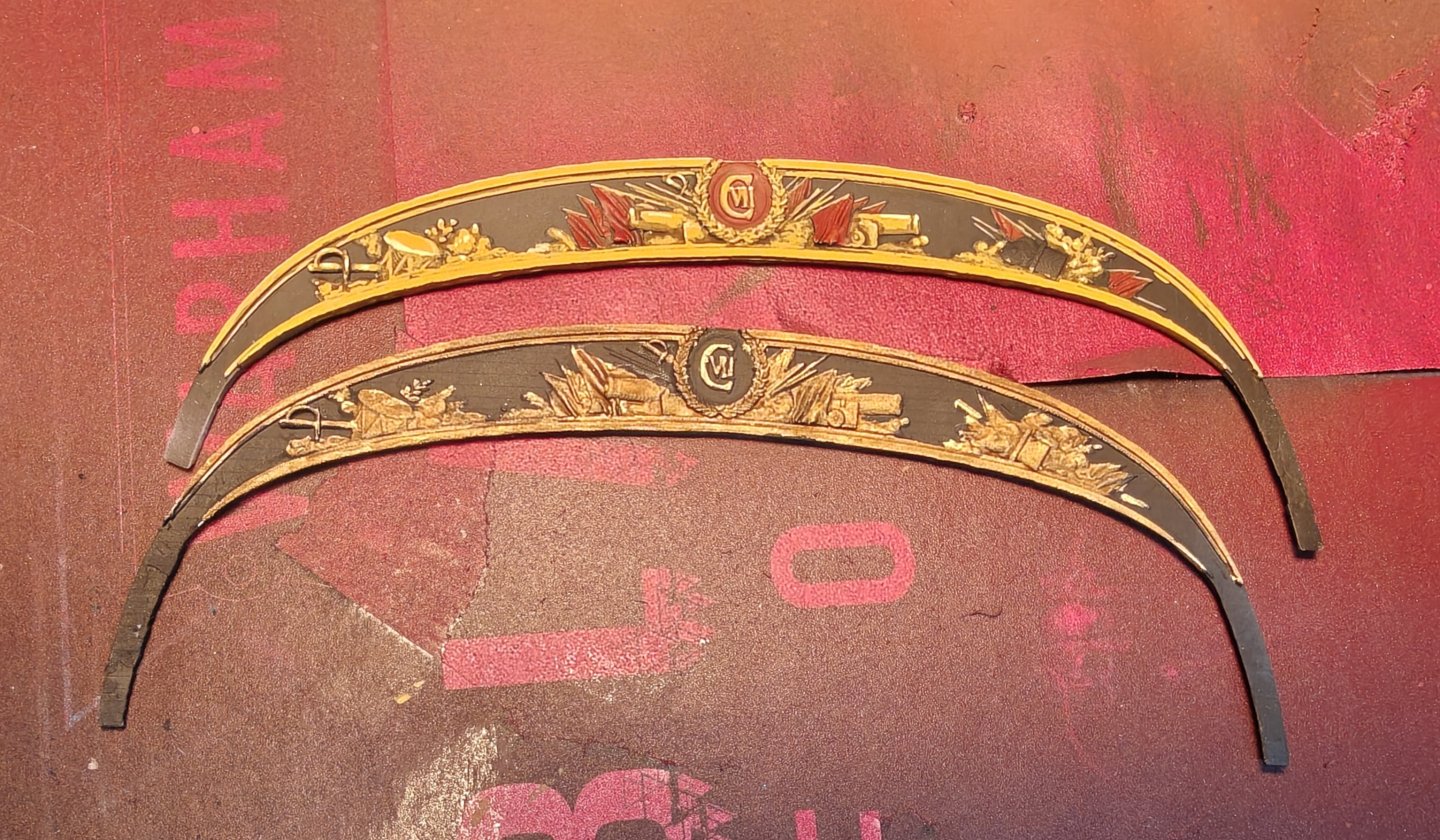
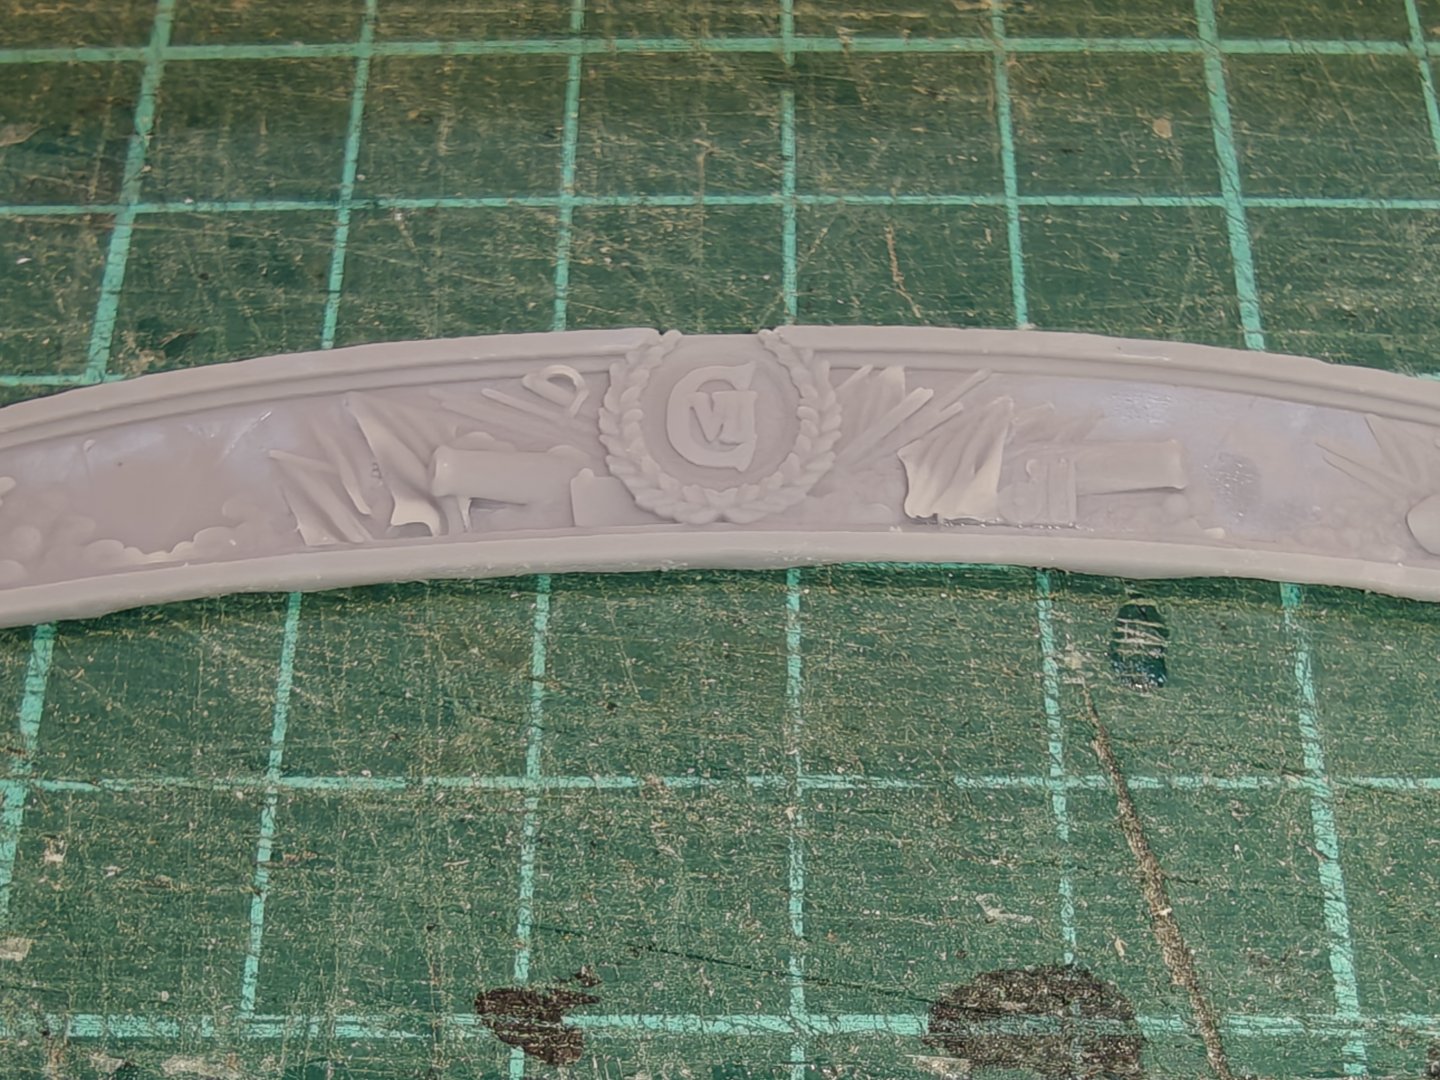
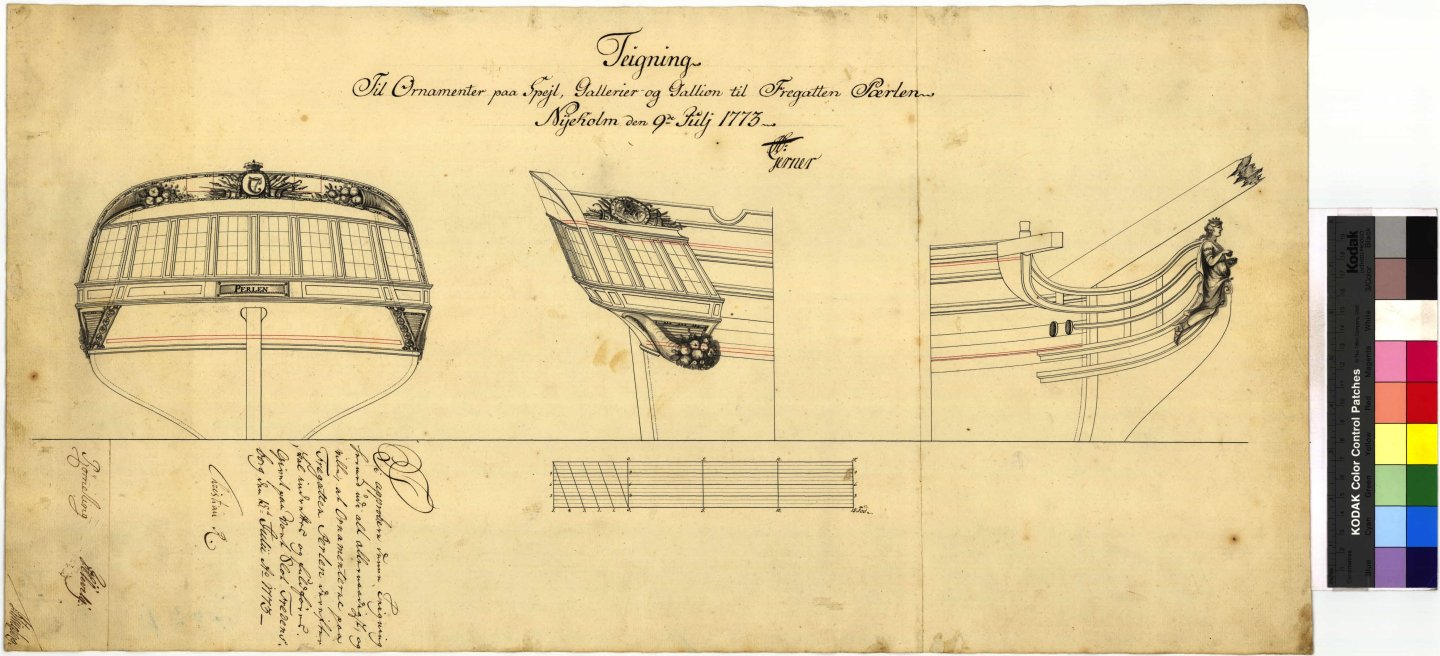
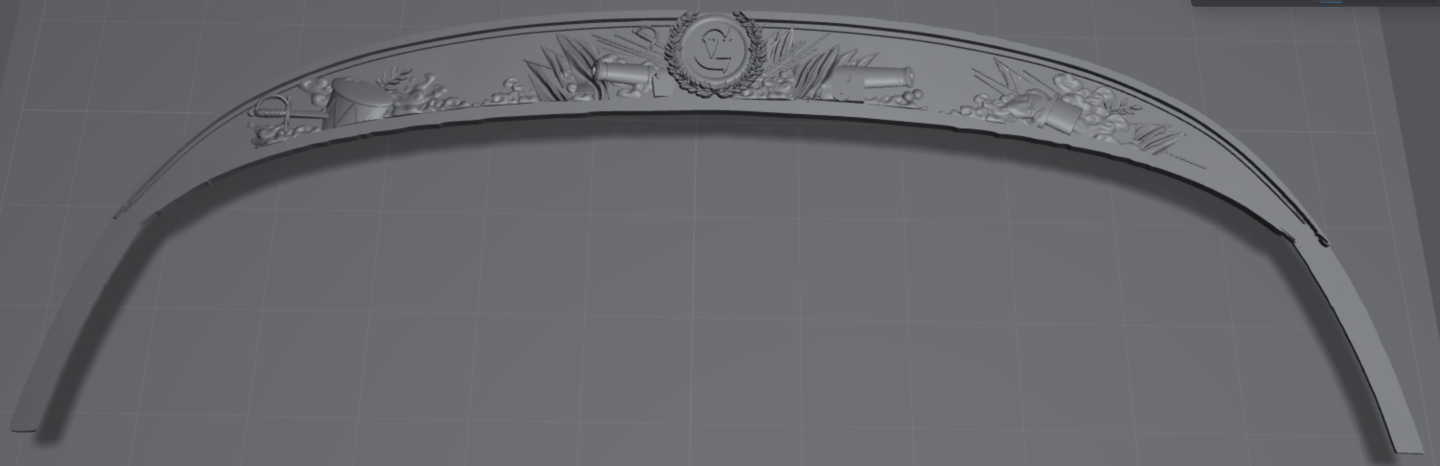
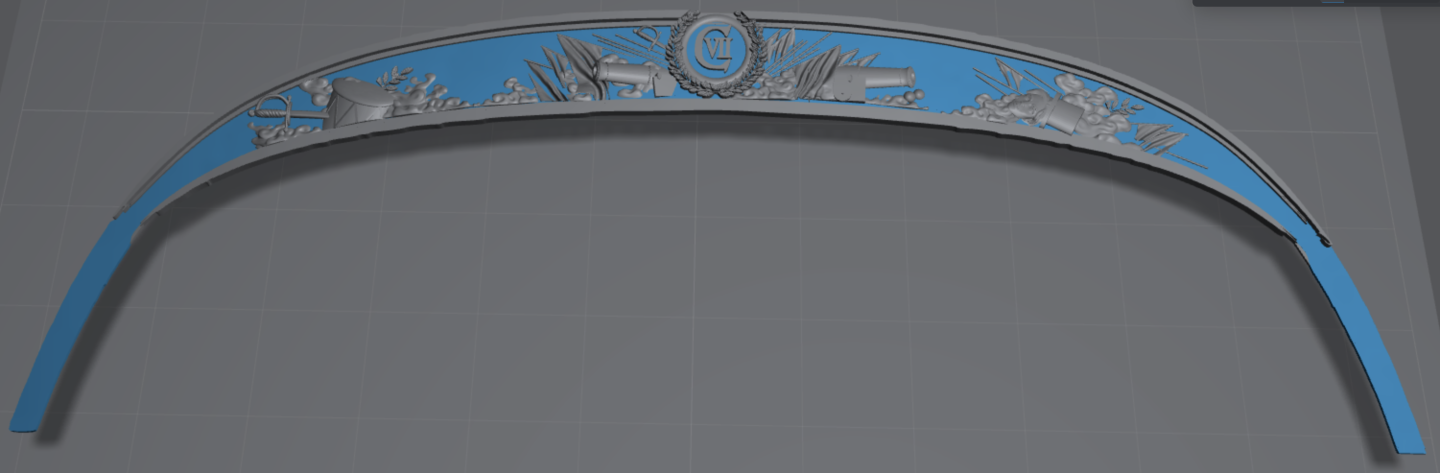
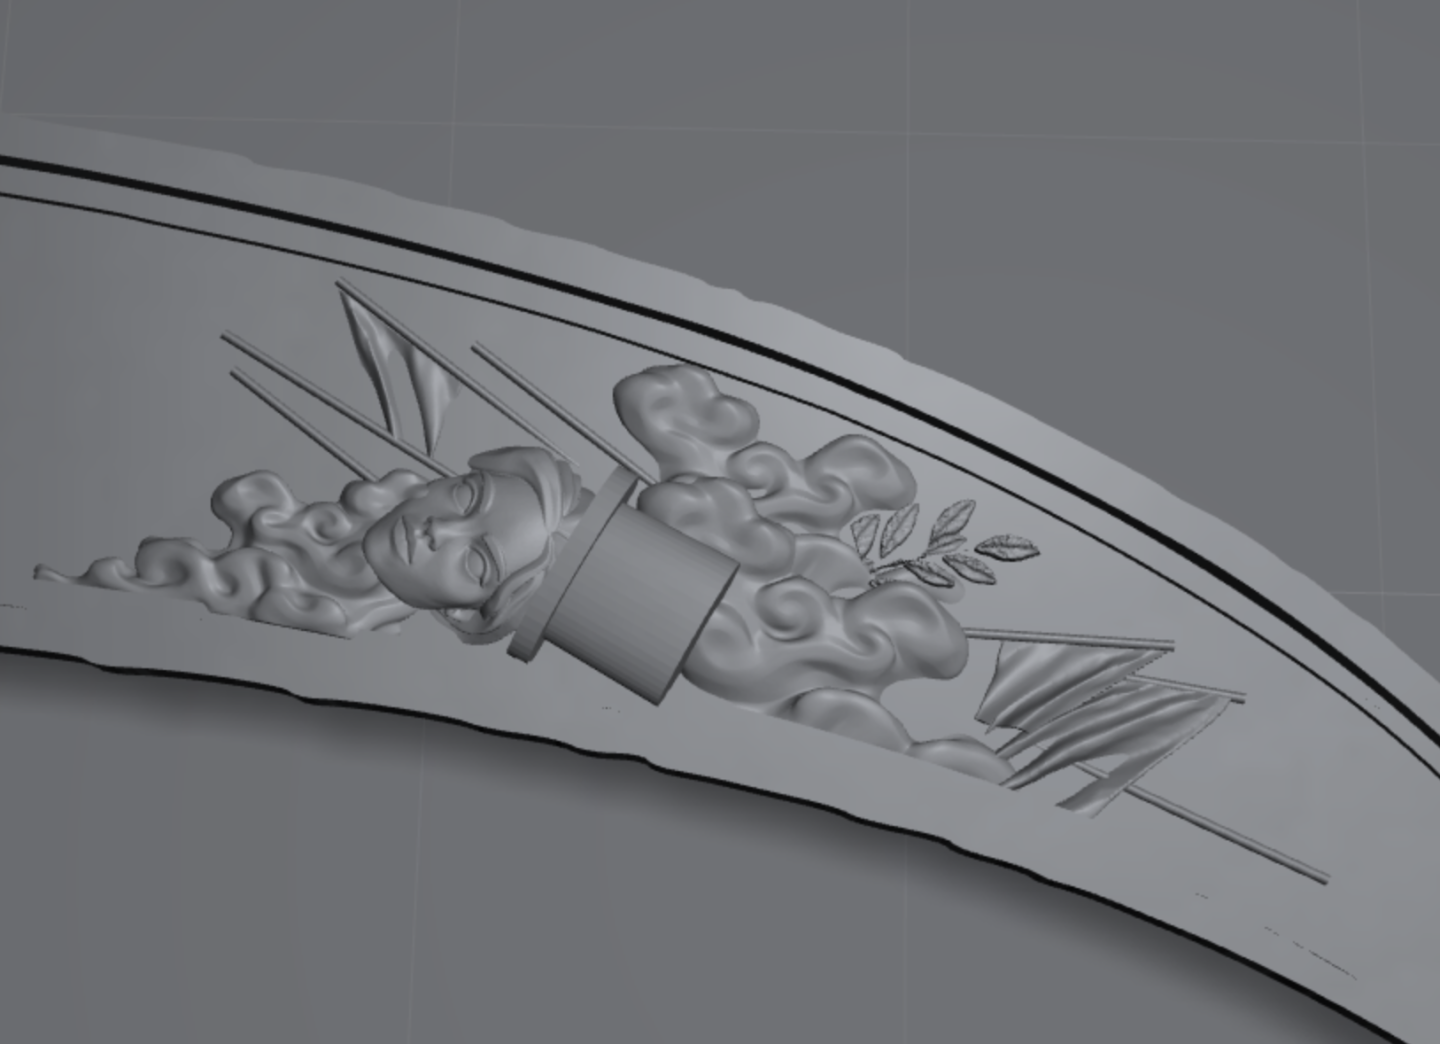
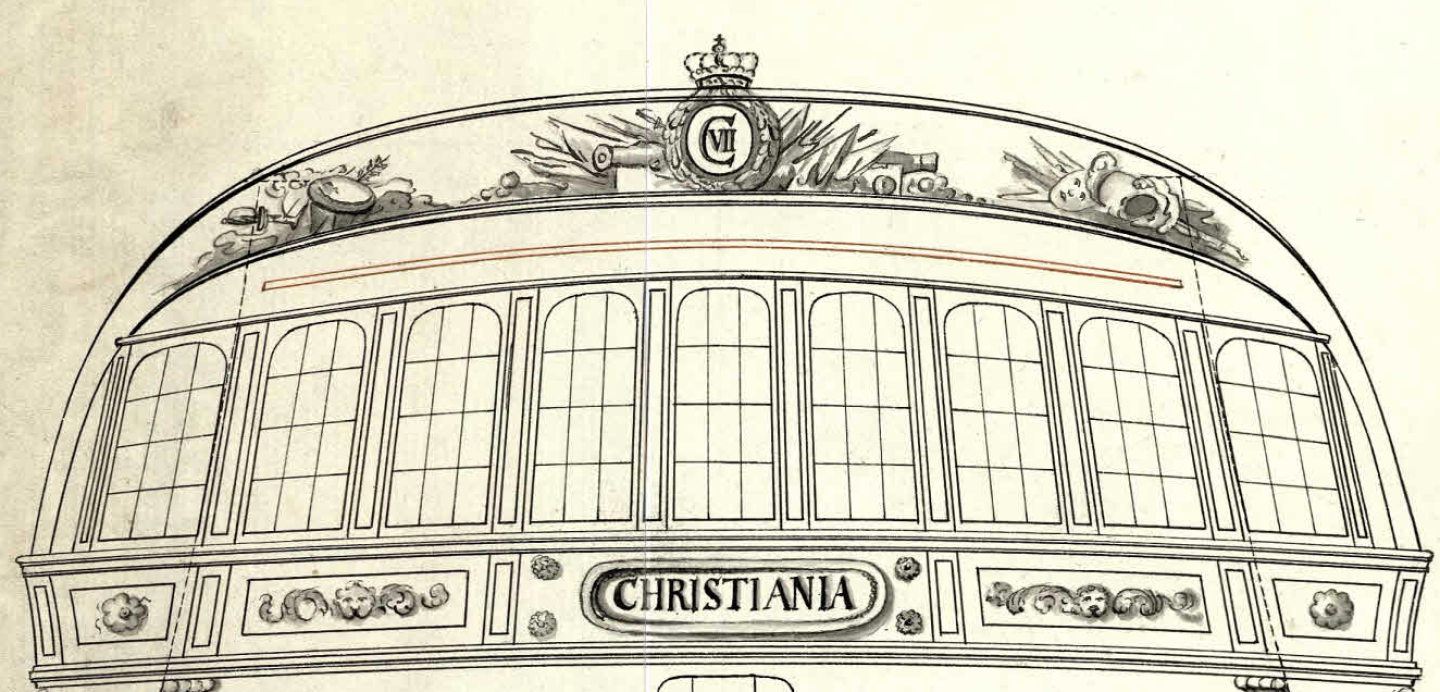
Log entry 24 - 3D 'modelling' the stern friese It has been a long while since my last update, and planking is moving forwards, but slowly - I am spending time on Elben and other projects instead of just getting the planking done. Anyways, since the beginning of this build, and actually well before I started it, I have been wondering how exactly to do the decorations. I have moved from the idea of using a vinyl cutter to engraving the actual original sketc with the laser, but now I have the small 3D printer and I feel printing the friese and other ornaments is the perfect use of this tool. Only problem: I have absolutely zero 3D modelling skills! And I don't have access to fancy 3D modelling programs (or the patience to lear how to use them...). So this is what I have come up with: I can draw simple shapes to scale in QCAD, export them as PNG and then use imagetostl.com to 'extrude' the design. By using shades of gray, I can get some depth structure. The internet is full of free and paid-for 3D assets in STL format. With a few of these, and a lot of copy pasting, tweaking and, cutting rotating, etc, I can 'compose' a scene in the slicer hardware (I use Lychee). I am sure expericed 3D modellers will cringe at this workflow, but I won't do this very much and there is almost no learning curve. So for now, this is how I do it. Here is the original drawing that I am woking from out of the three available sketches: Even though this is as simple as it gets for this period, there is alot going on when each element is added individually. Most of the elements are simple: flags, cannon, swords, a drum, a wreatch, etc. The fase to right. gave me some issues - I am not sure what else is depicted around it. It may be a hat of sorts (which is what I wnet with), but it is difficult to decipher. Anyways, here is the current state of my 3D 'hacking': And with blue background to better see the individual elements: I used a smoke-element to give texture around the other stuff. I think that works quite well. Here is a few zoom-ins: It looks a bit rough at this scale, but remember how small it really is; around 120 mm for the full width at the bottom or the arch - the oval around the CVII monogram is 8 mm tall. The squares on the background are 1x1 cm. I think the few edge imperfections will be fine after I print it. I will make a test print when I return home from the Easter hollyday I am currently on, and look forward to seeing if this is viable at all! Now I am thinking about the colour: black background, mainly gold or yellow details, perhaps with a few coloured flags? The face should pehaps be white? Hmm.... BR TJM


- 148 replies
-
- 11
-
-
-
- Christiania
- Vanguard Models
- (and 1 more)
-
Thank you Matthias, that is very kind of you indeed! However, I am not sure this would meet a proper 'kit standard', and quite a few tweaks would be needed - besides I don't really have any ambitions in that direction (and my skills are not good enough in my own opinion!). But I do really enjoy the design process and will be doing more of that! And when this model at some point gets finished (it is still early days on this build!), if anyone is interested in the plans you can reach out and I will be happy to share. But let's see how it goes first 😉.
-
Fantastic result, really striking colour palette! I have enjoyed following along very much 😁.
-
Ah, those will be covered by a raised deck right in front of the wheel. It will hide the rudder cables etc. You can see the construction on these plans: I just haven't gotten around to making that part yet 😁. So those exposed mdf pieces are there for a structural purpose on my build and does not reflect how the original would have been made!


-
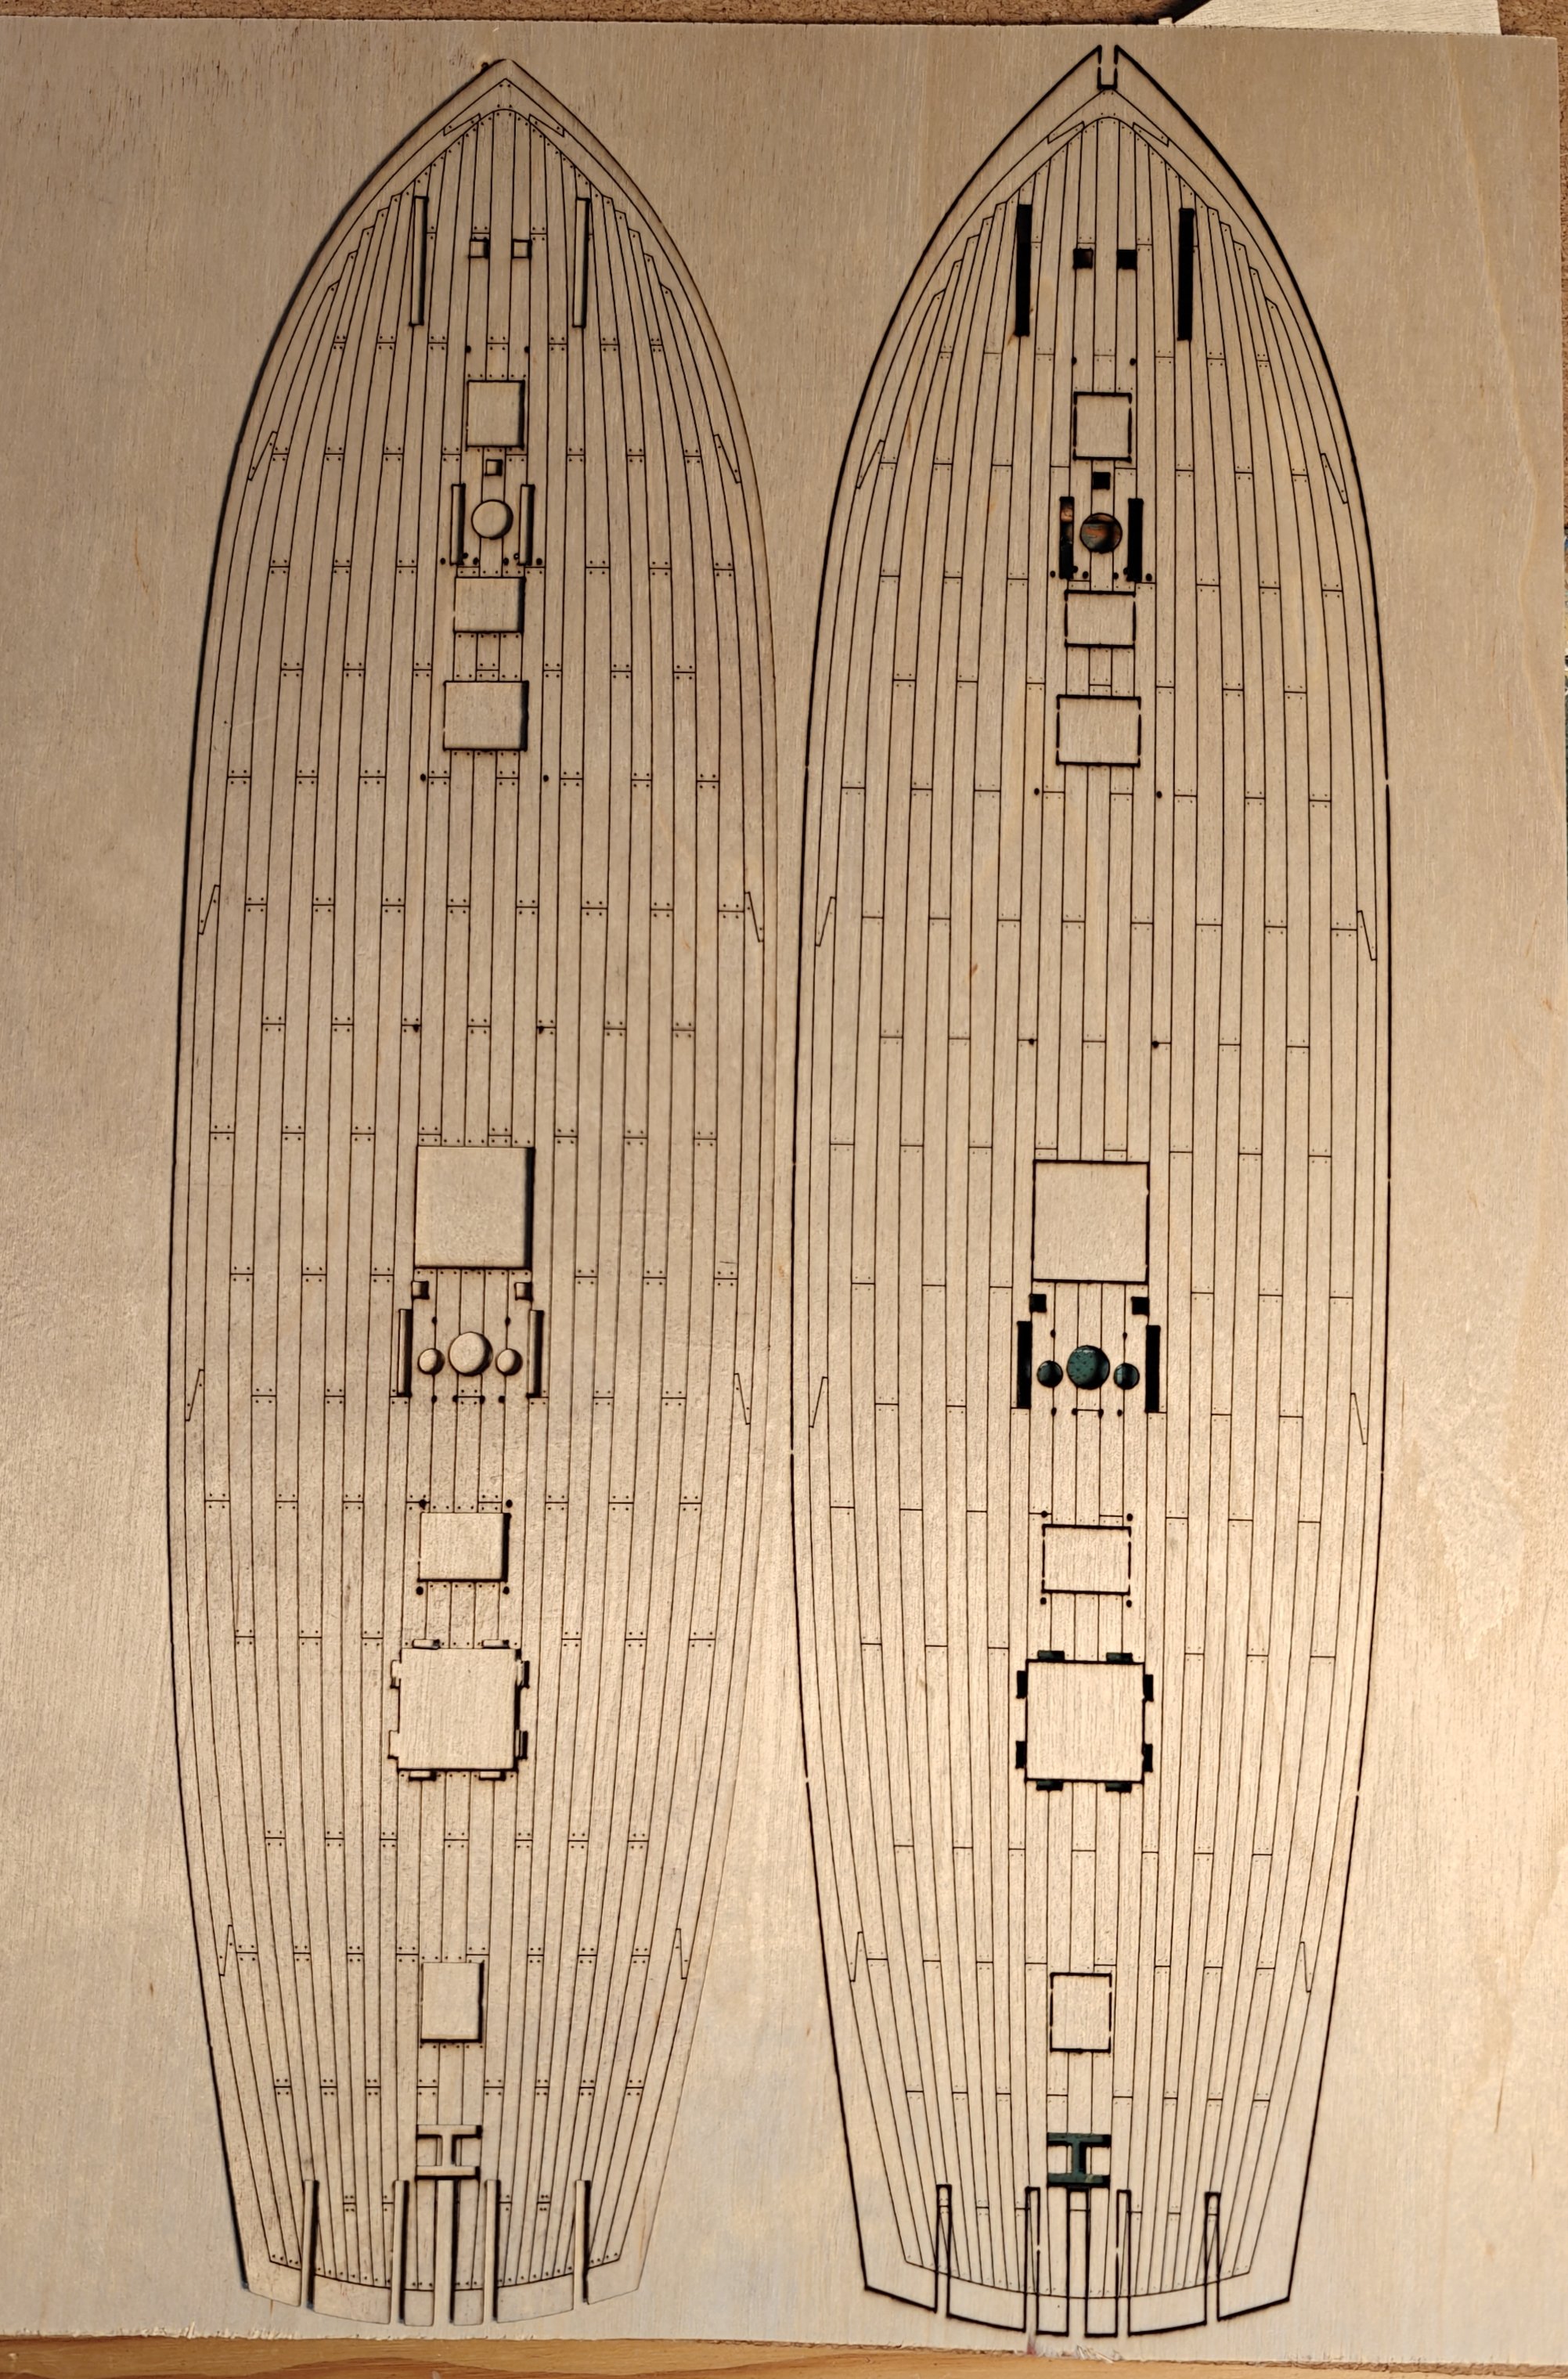
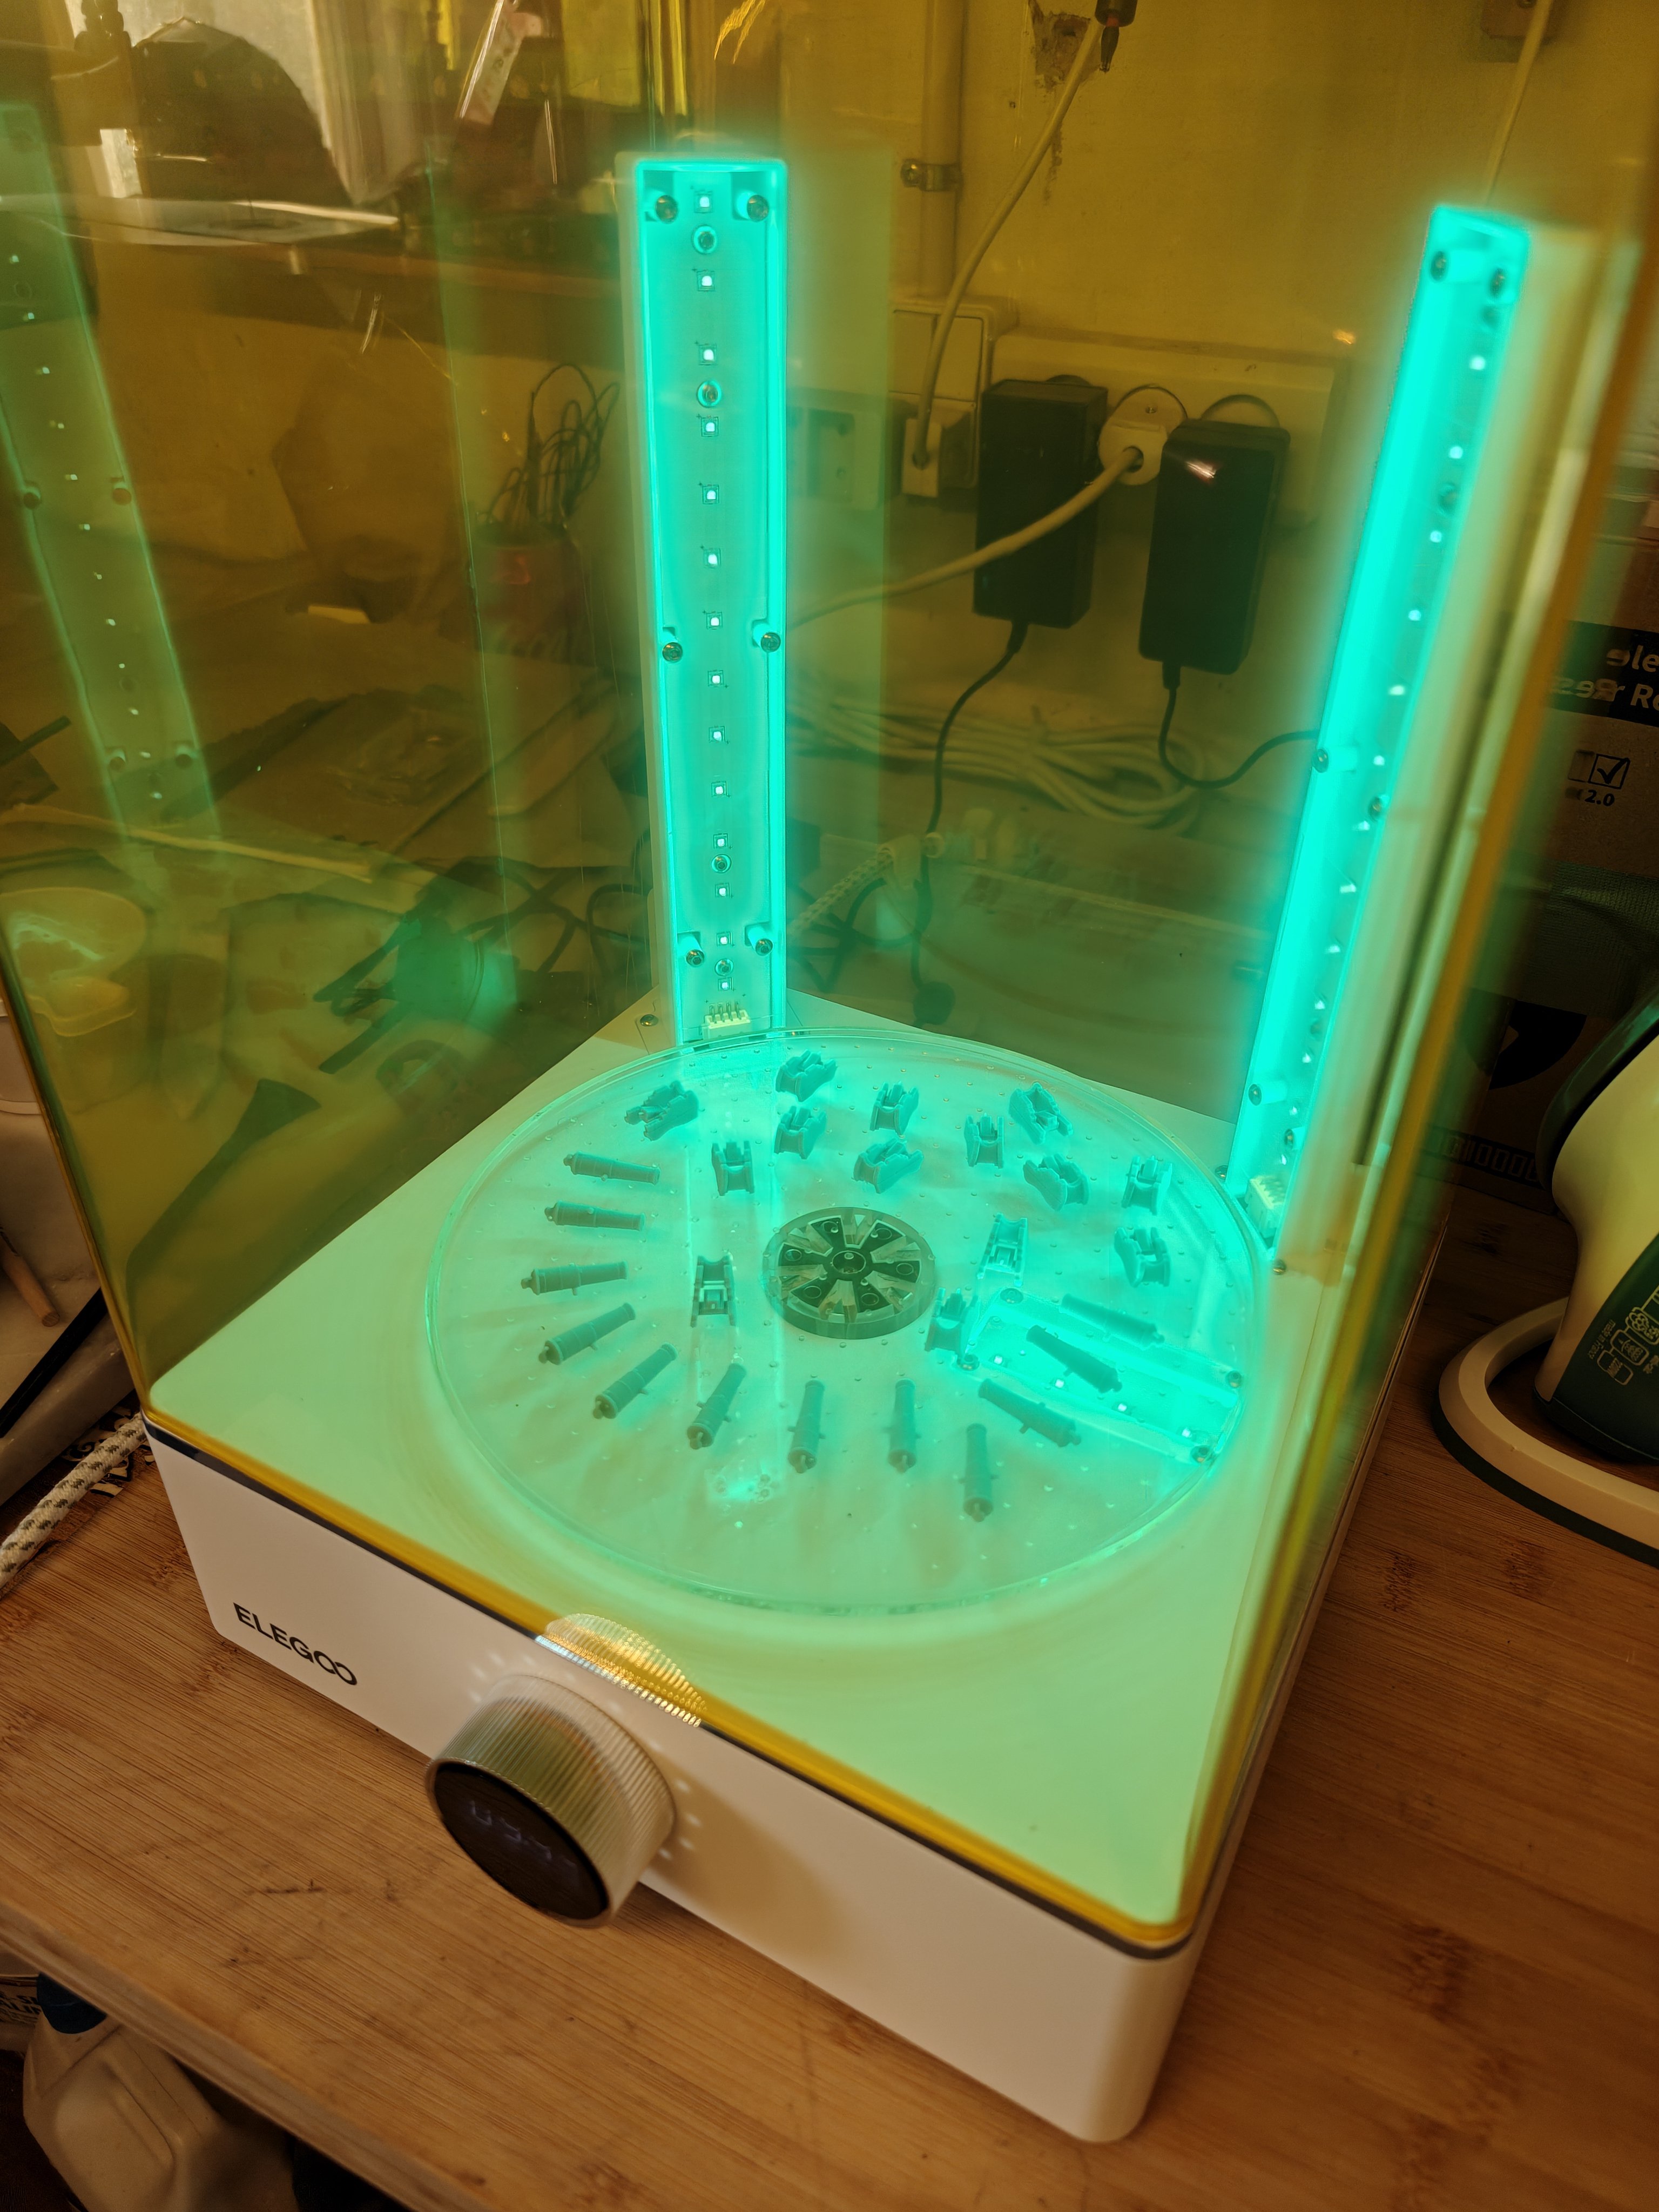
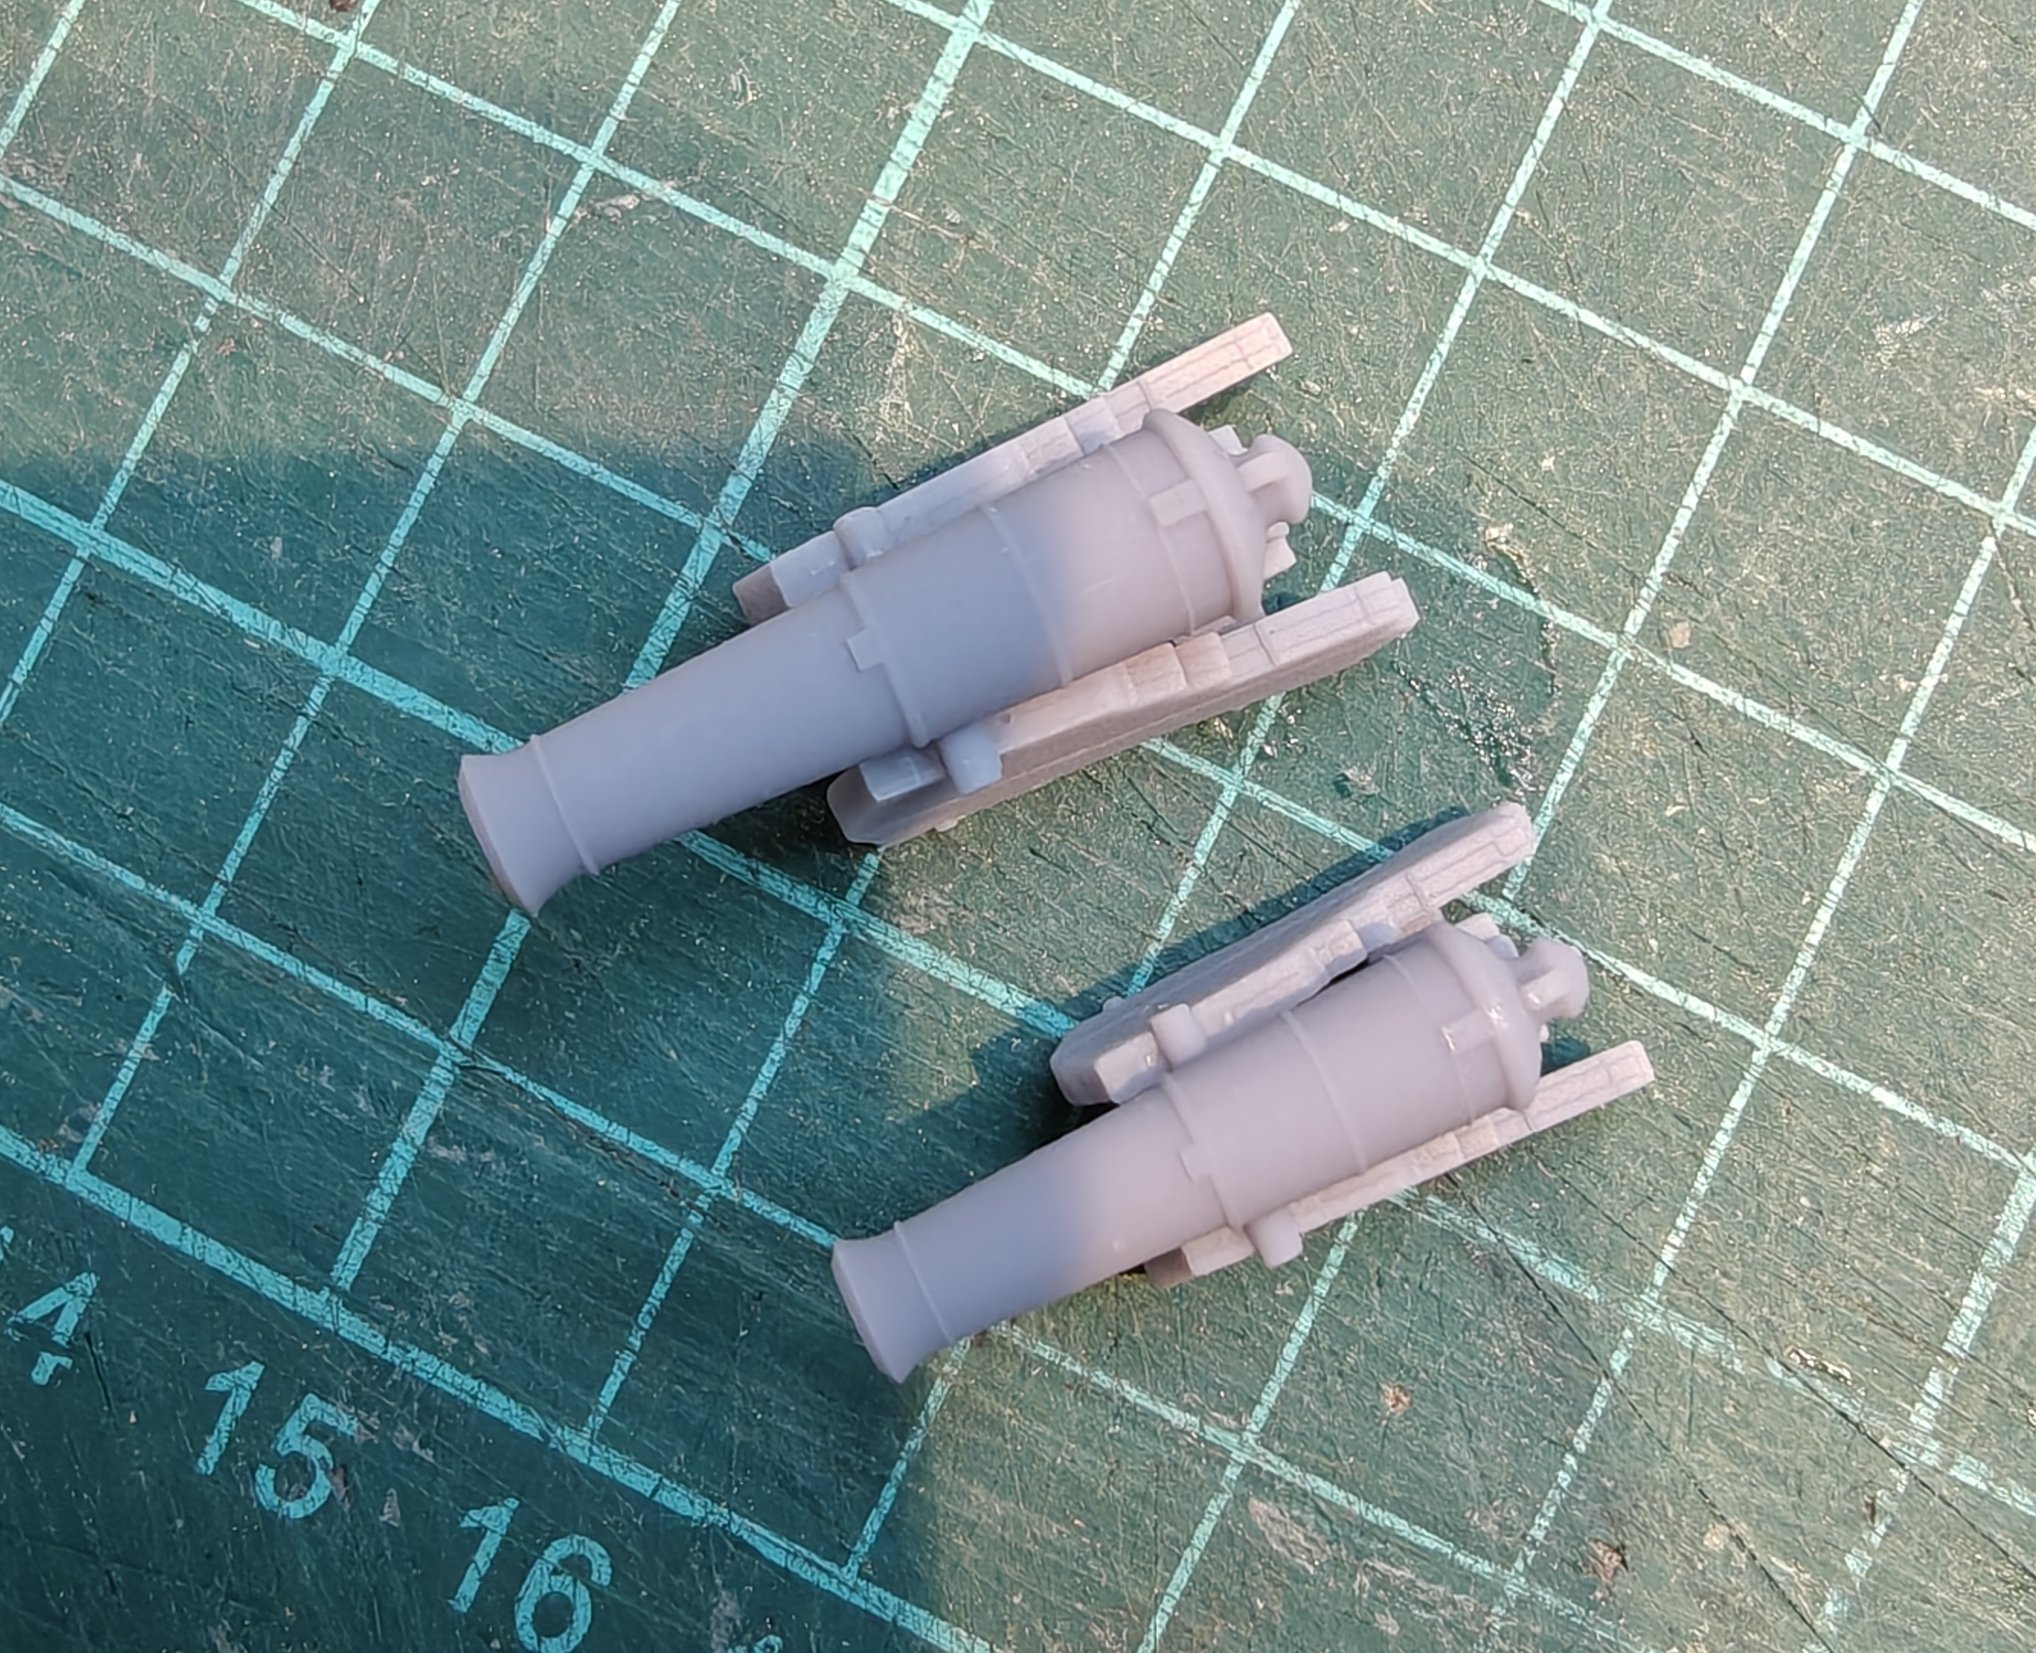
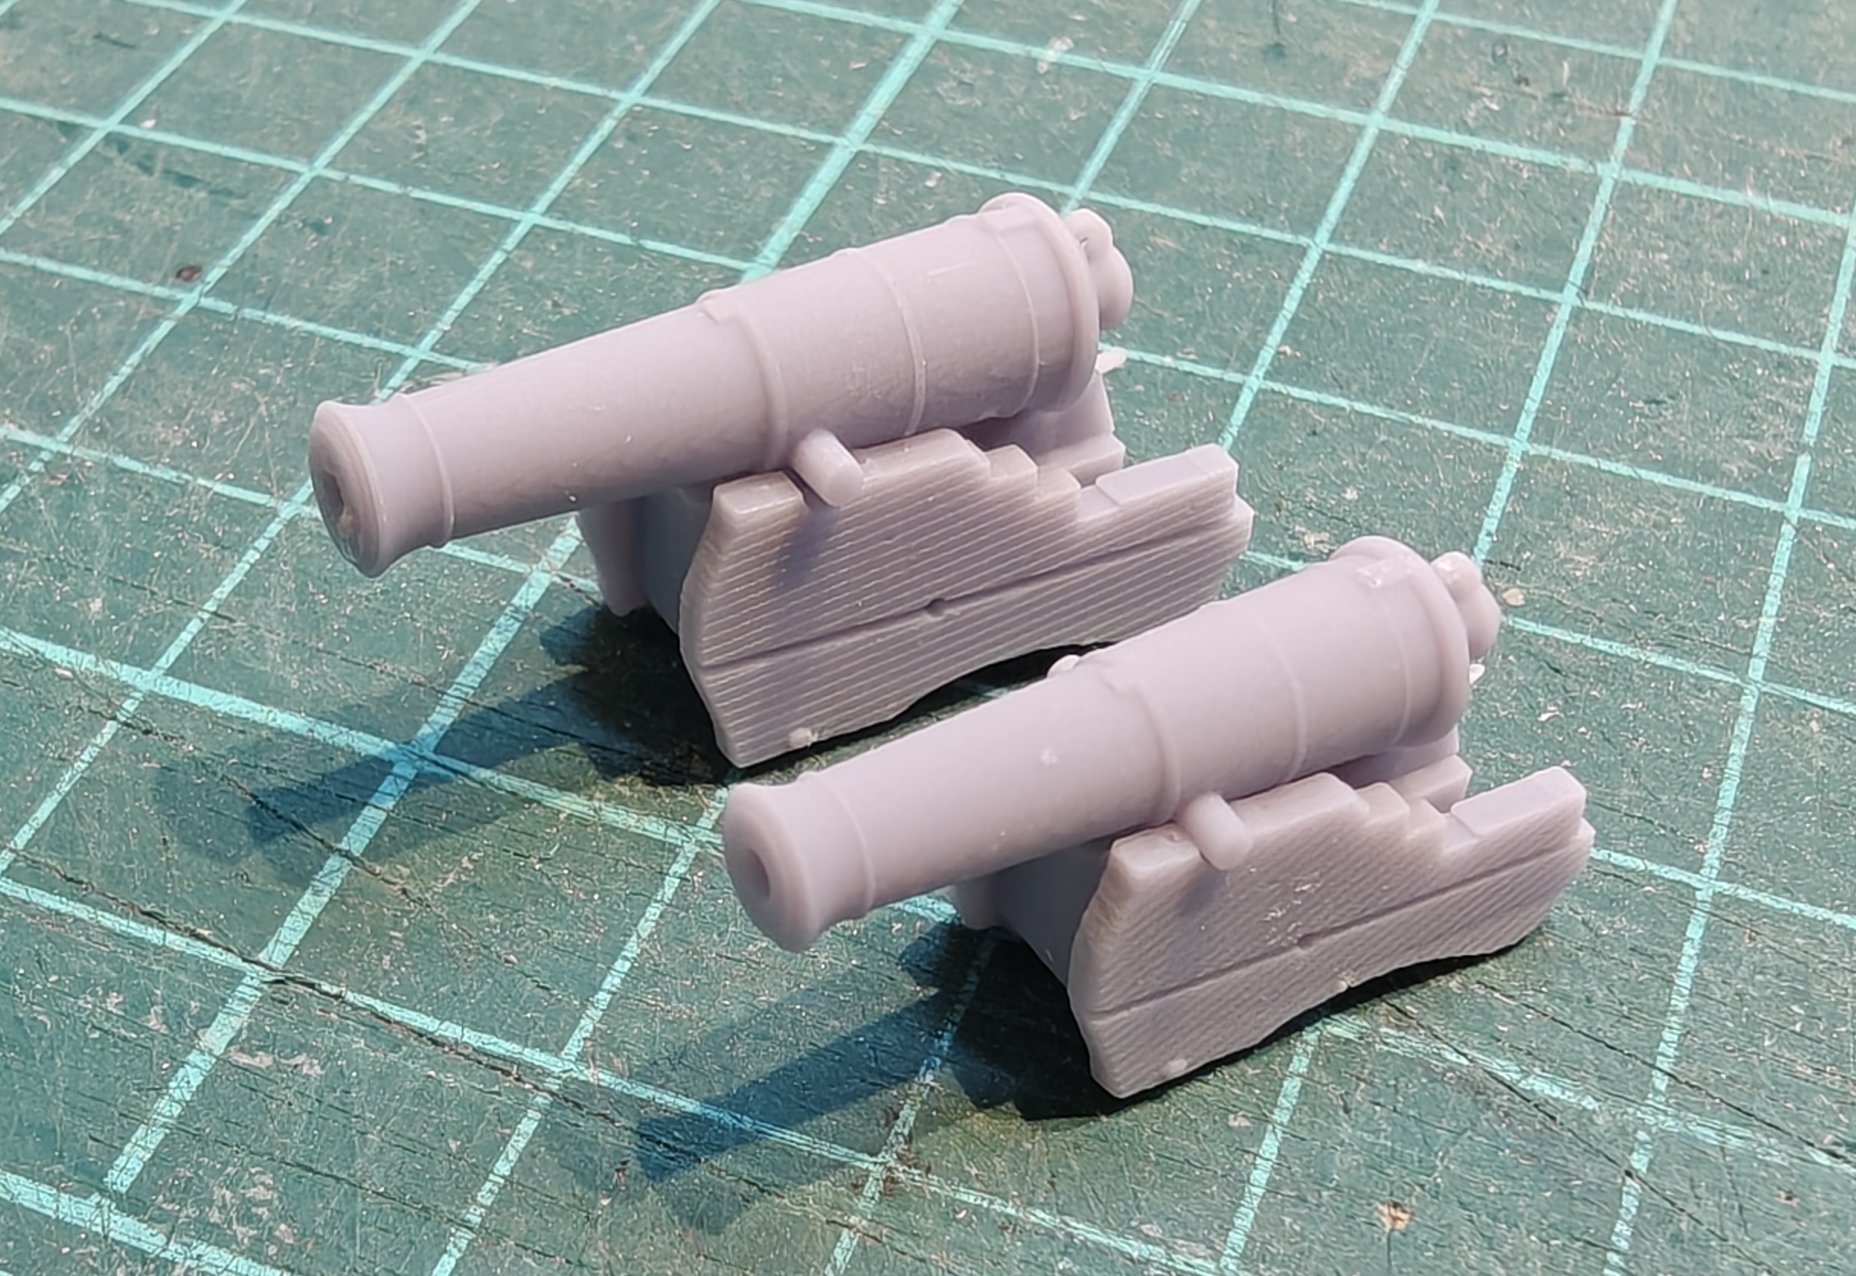
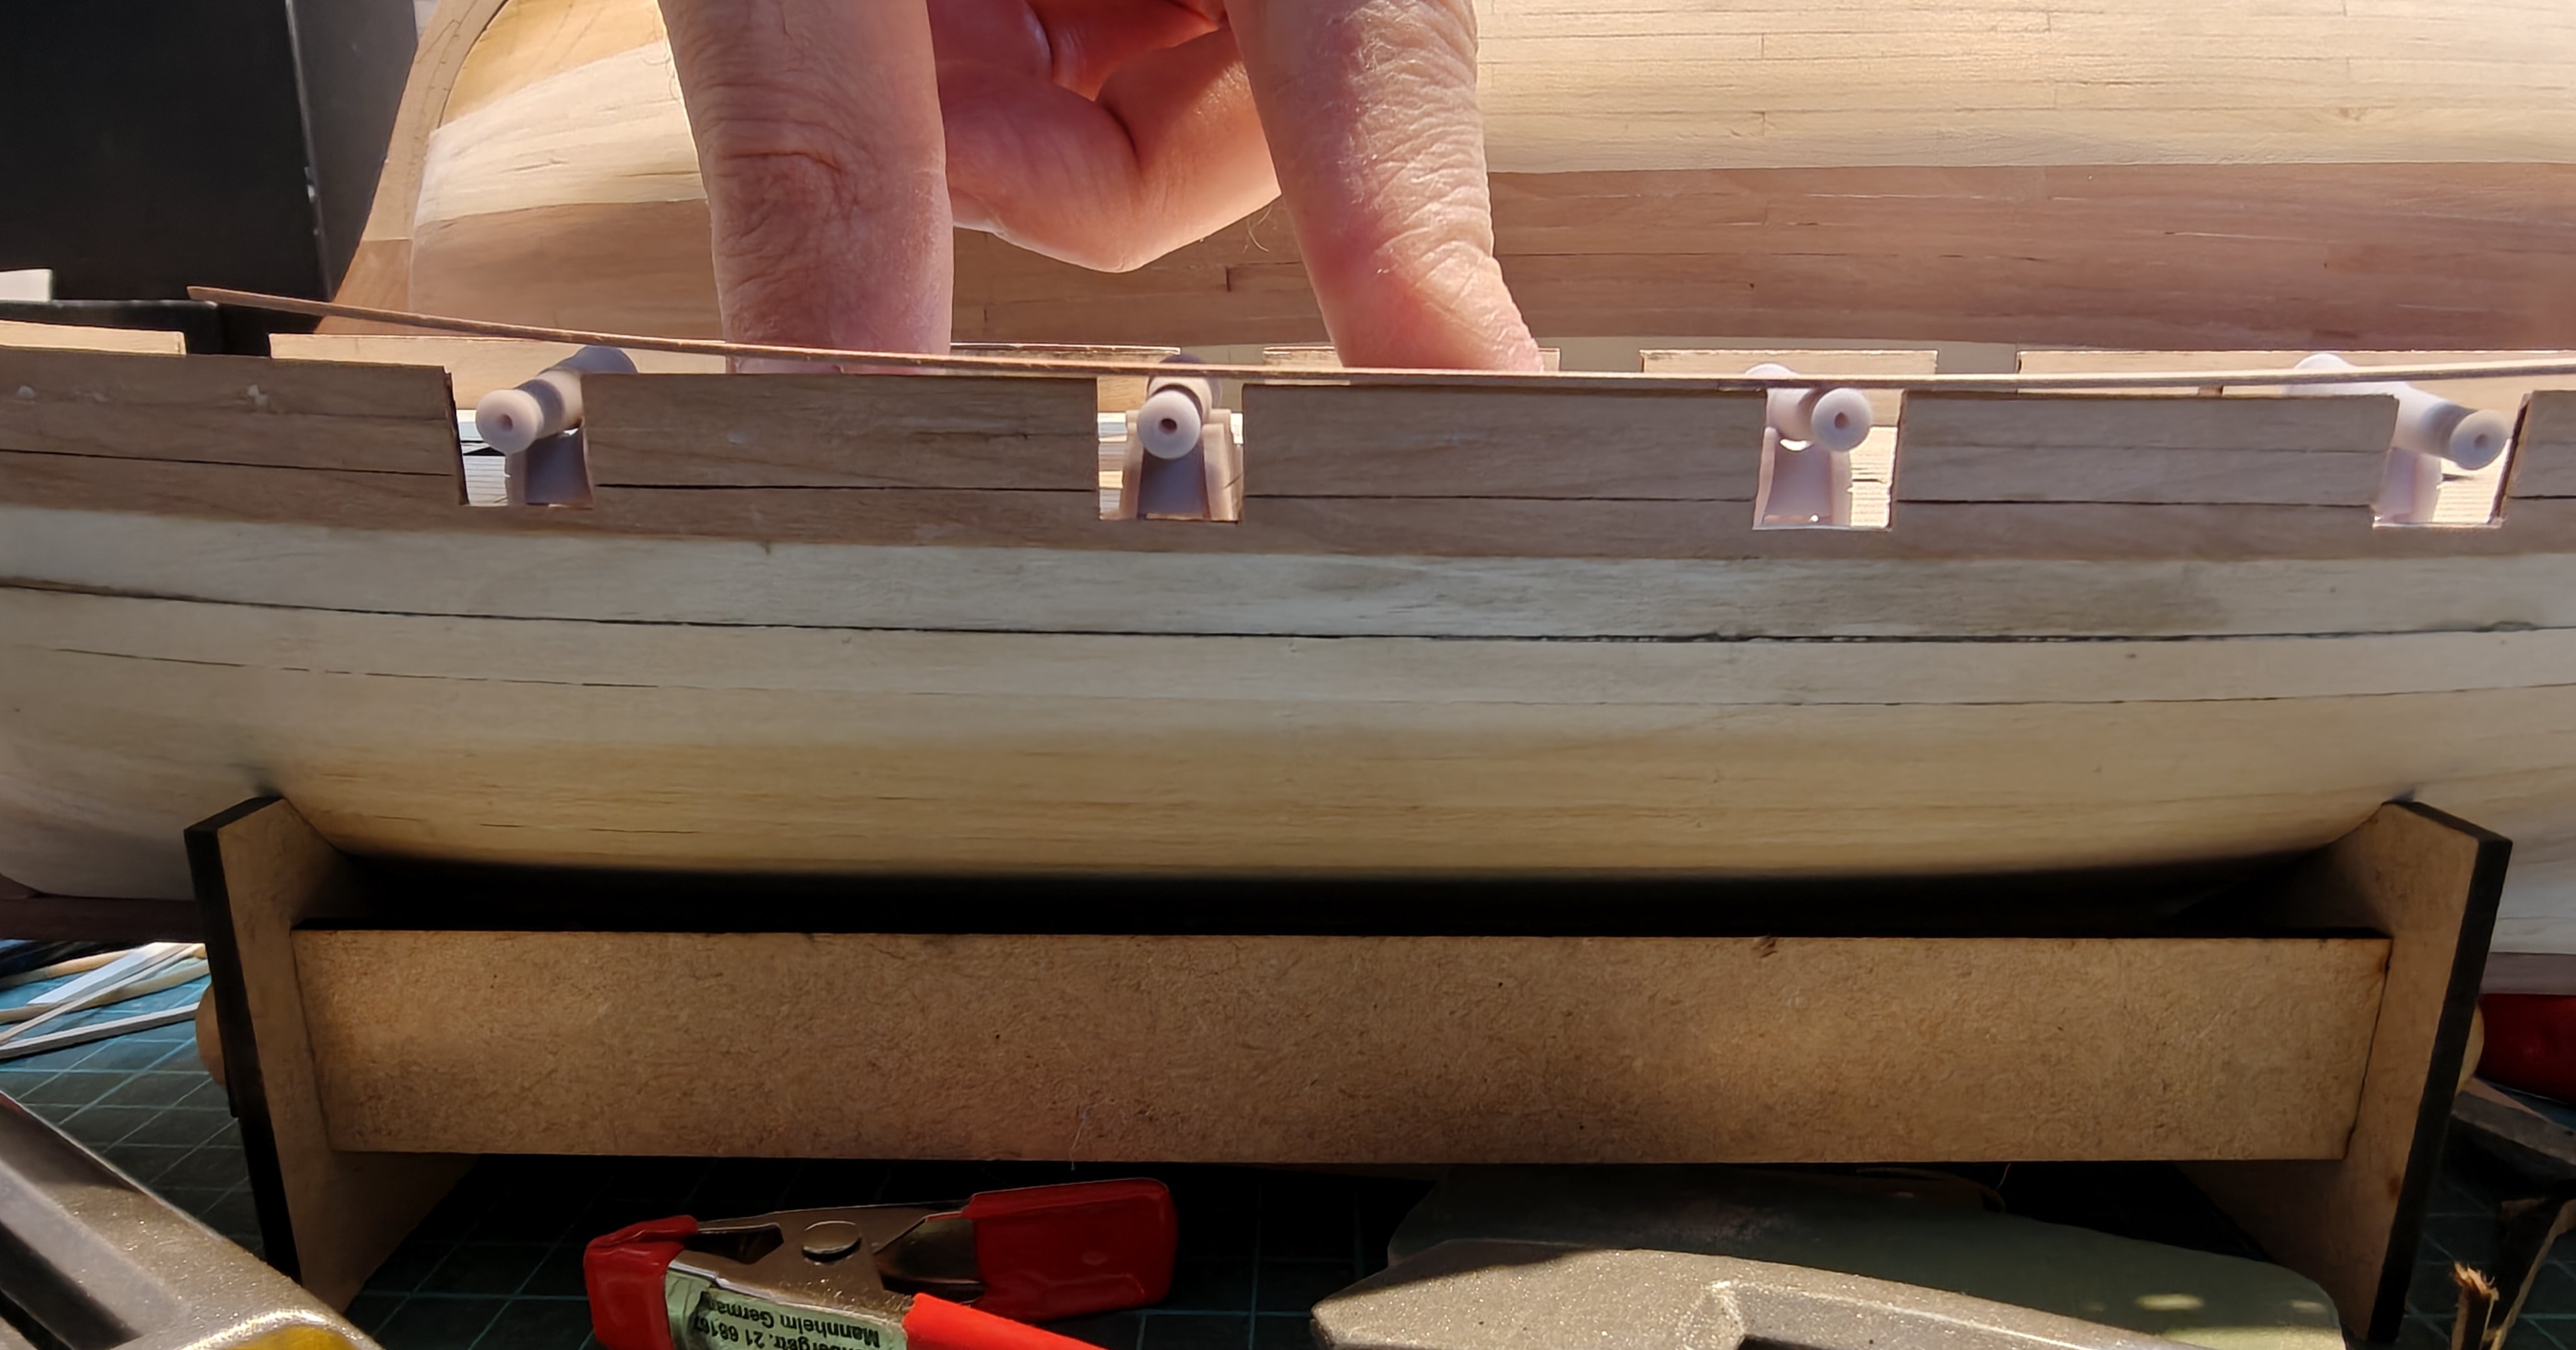
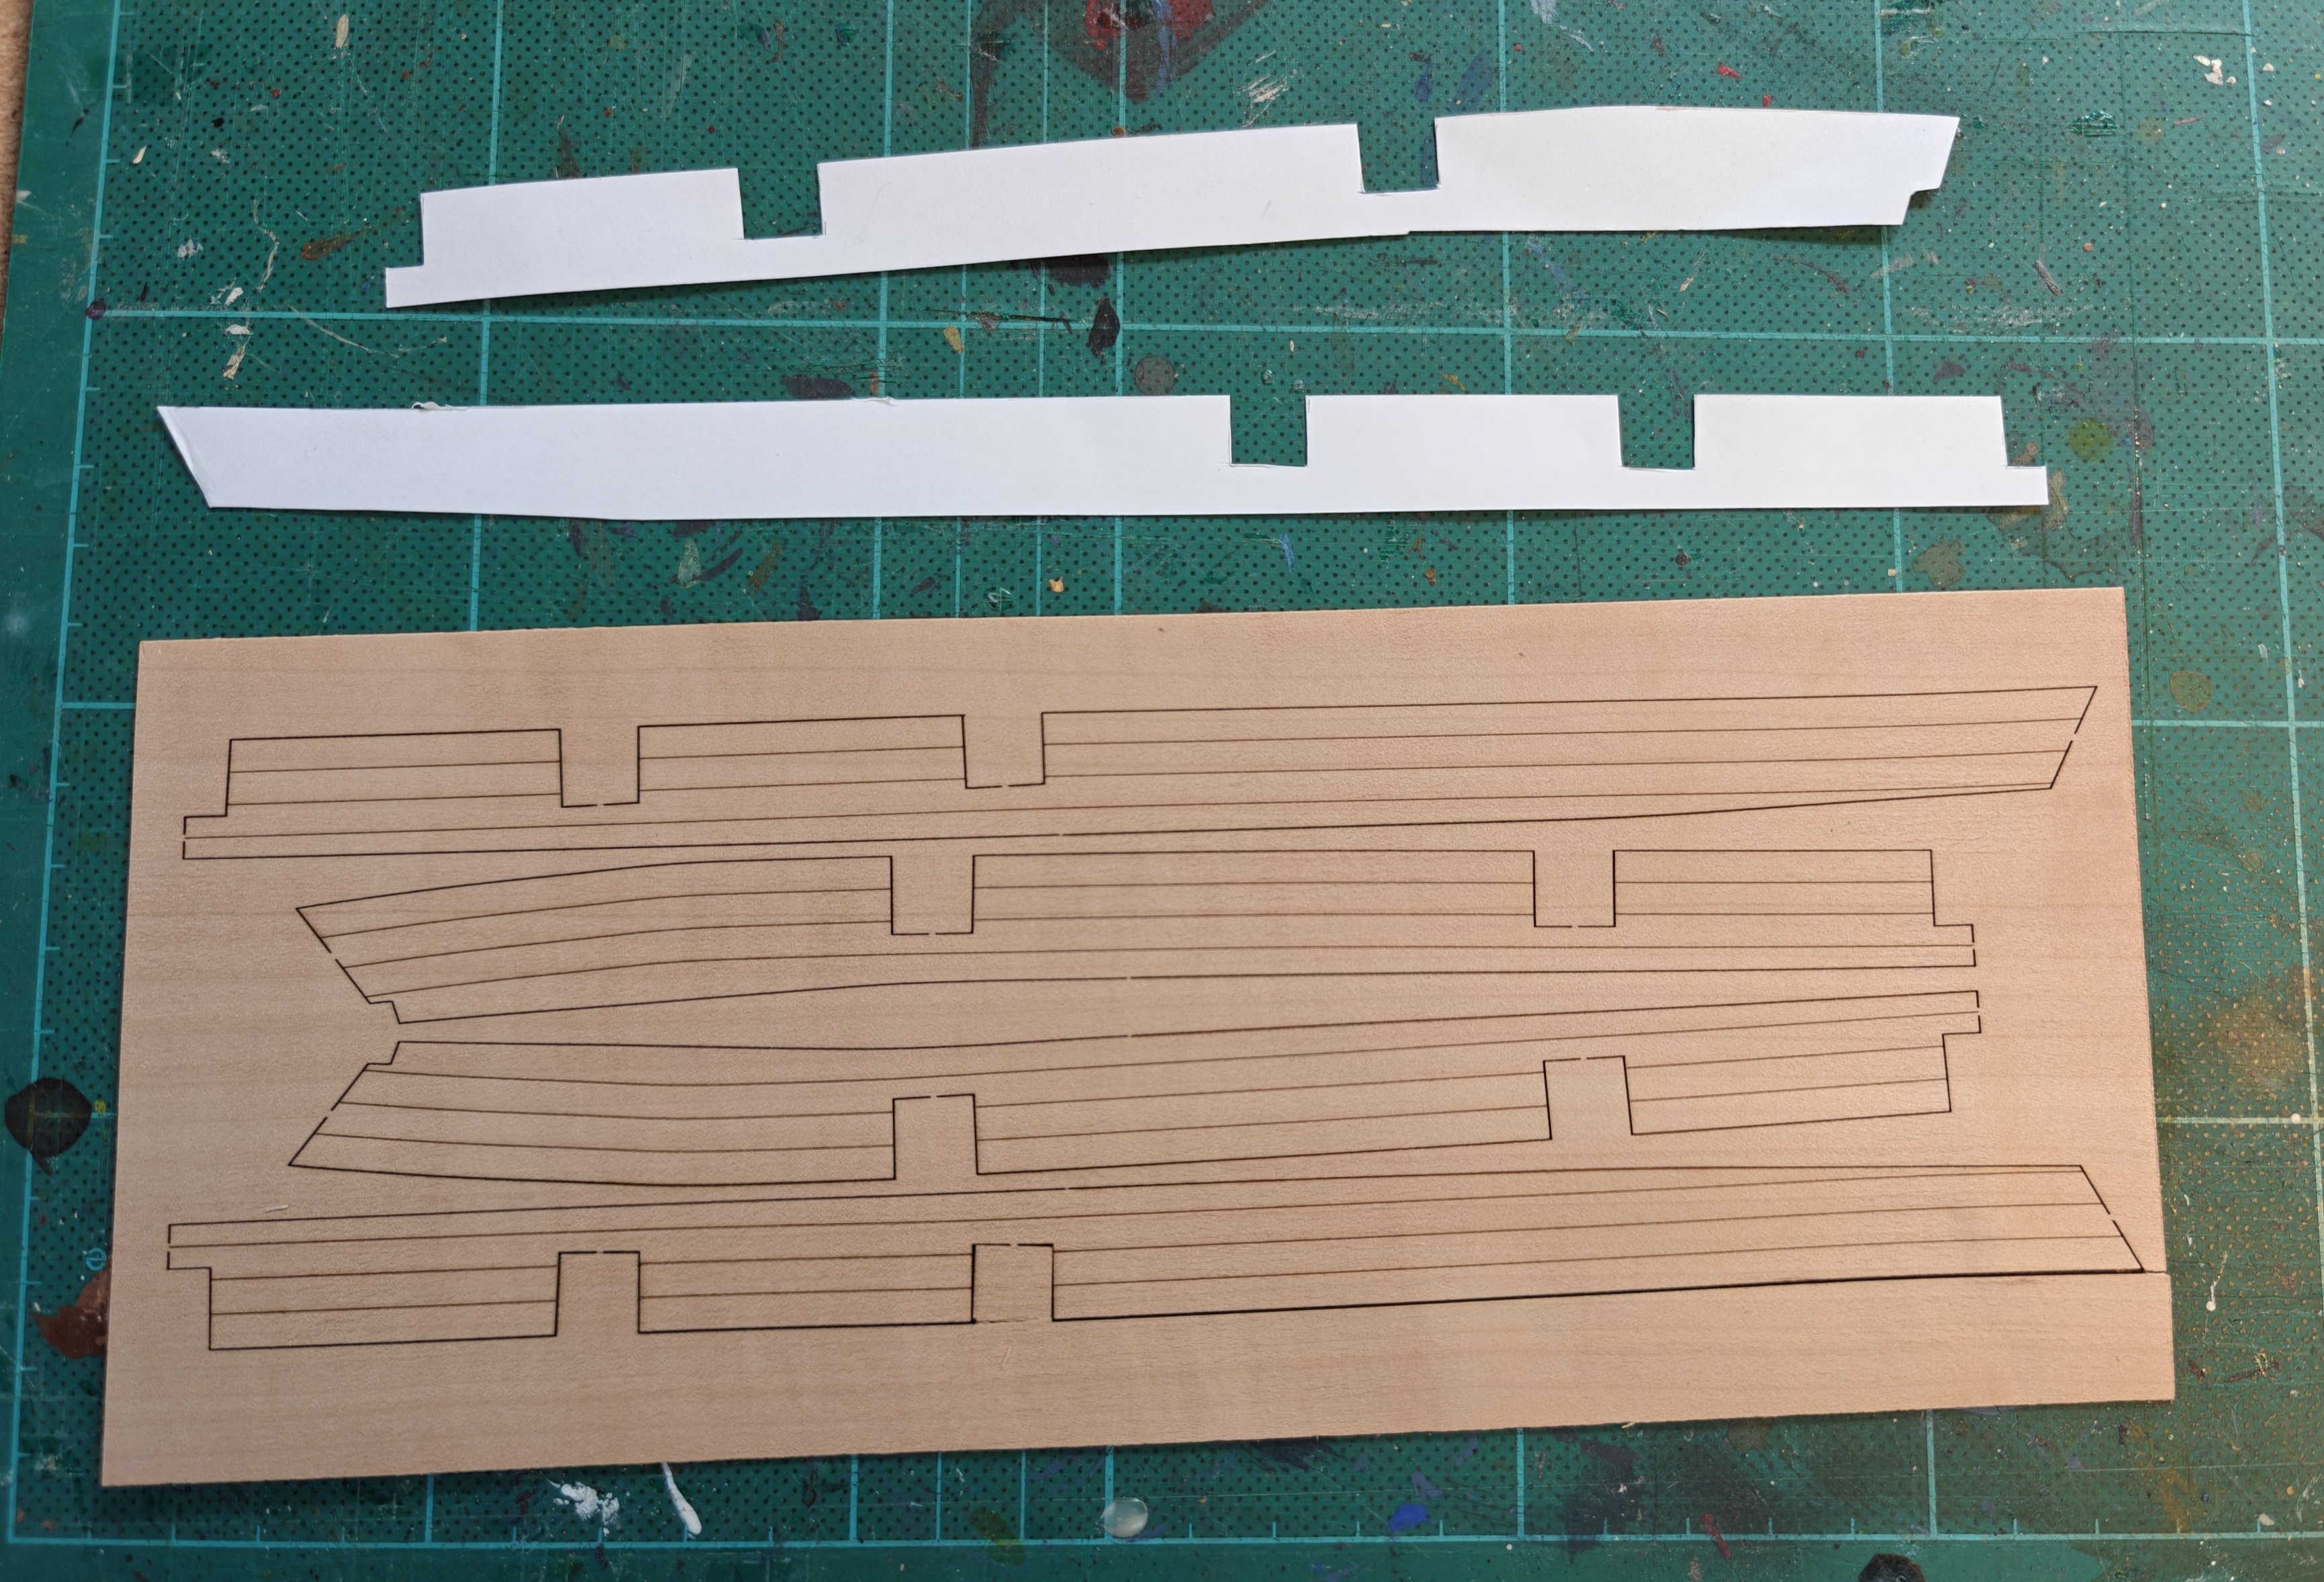
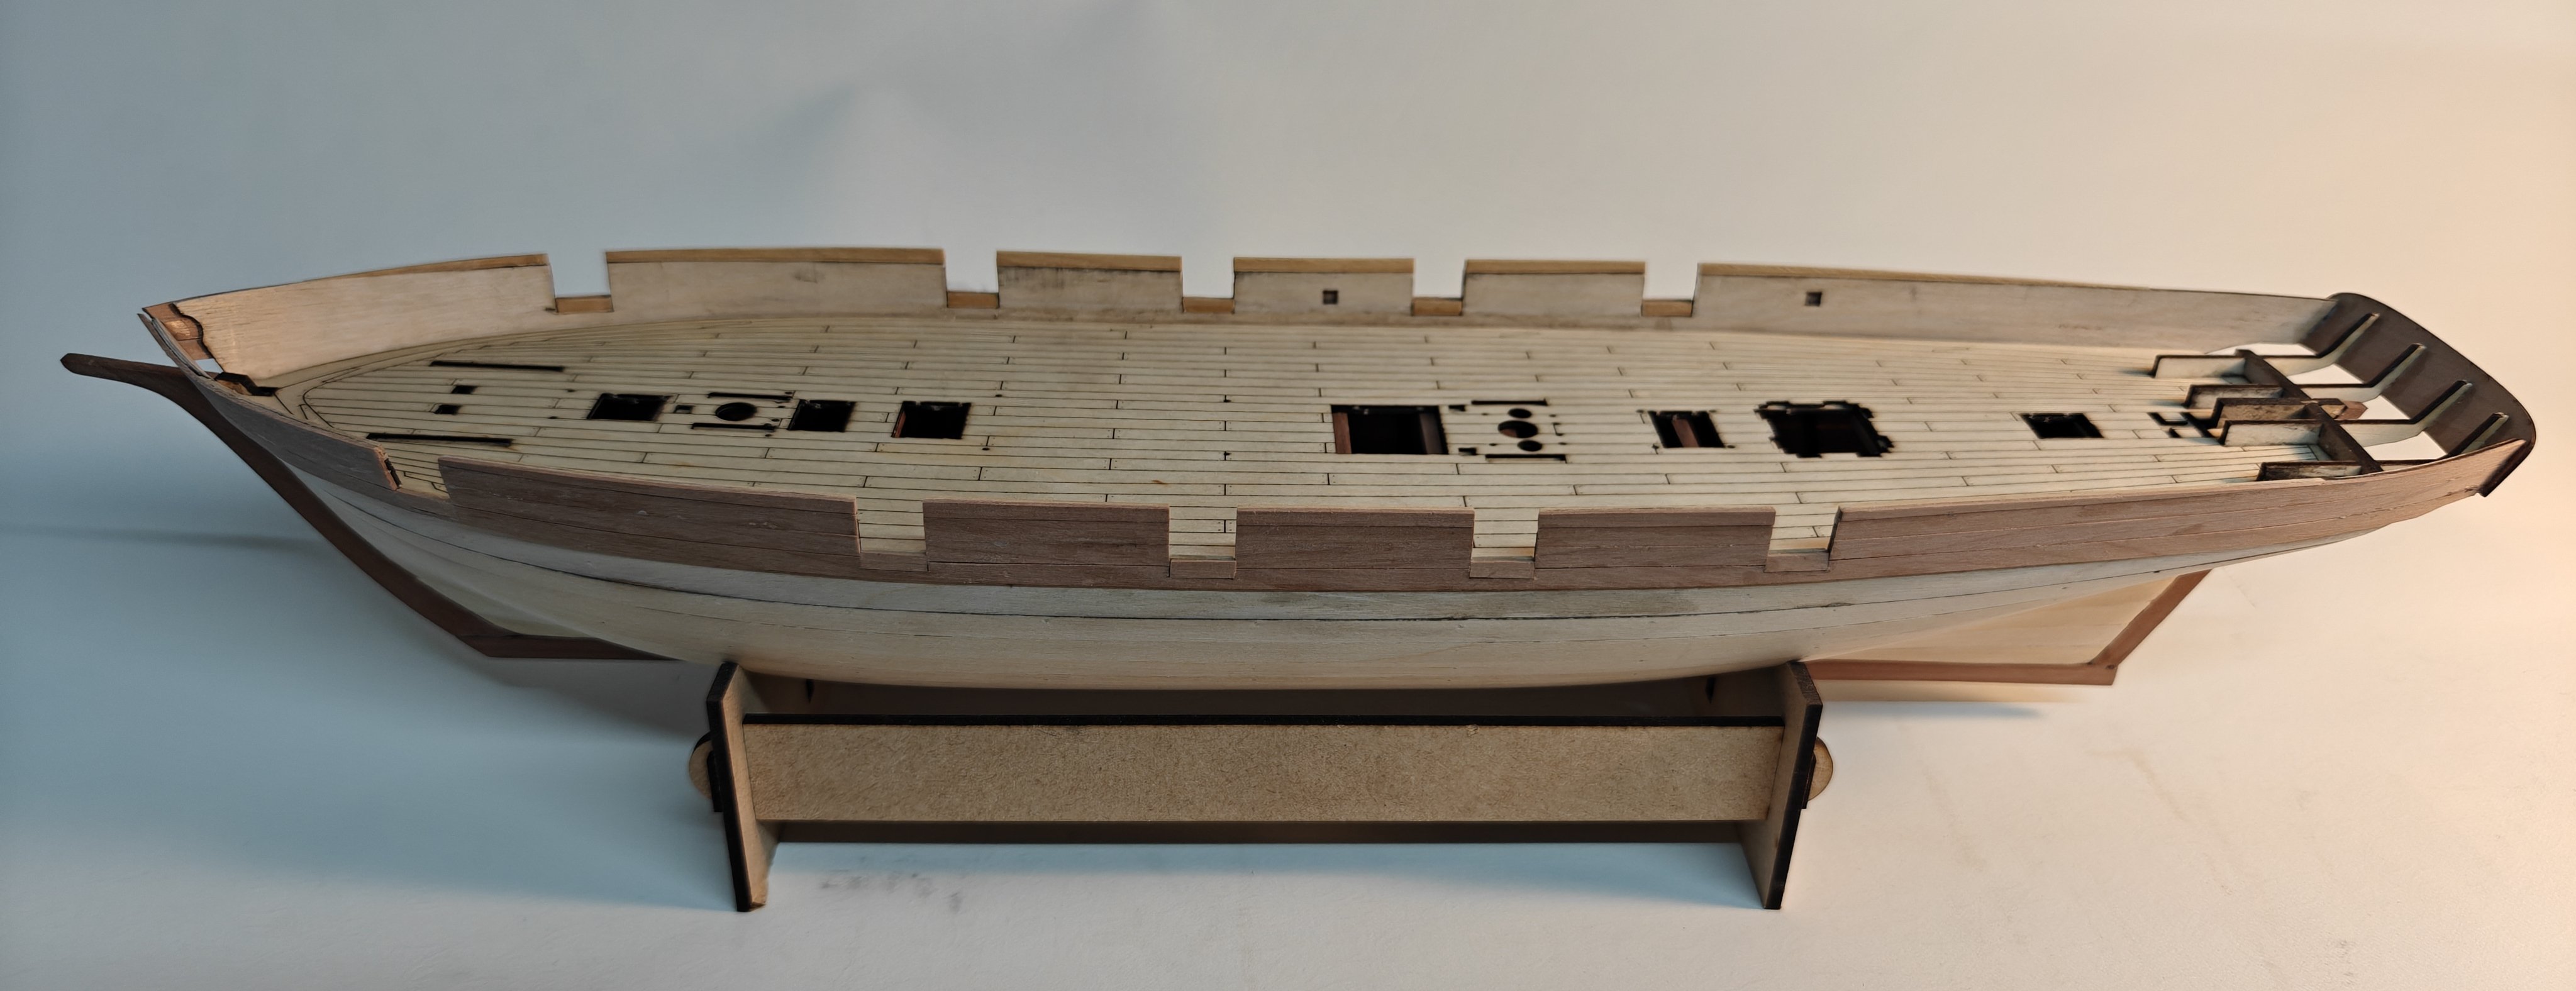
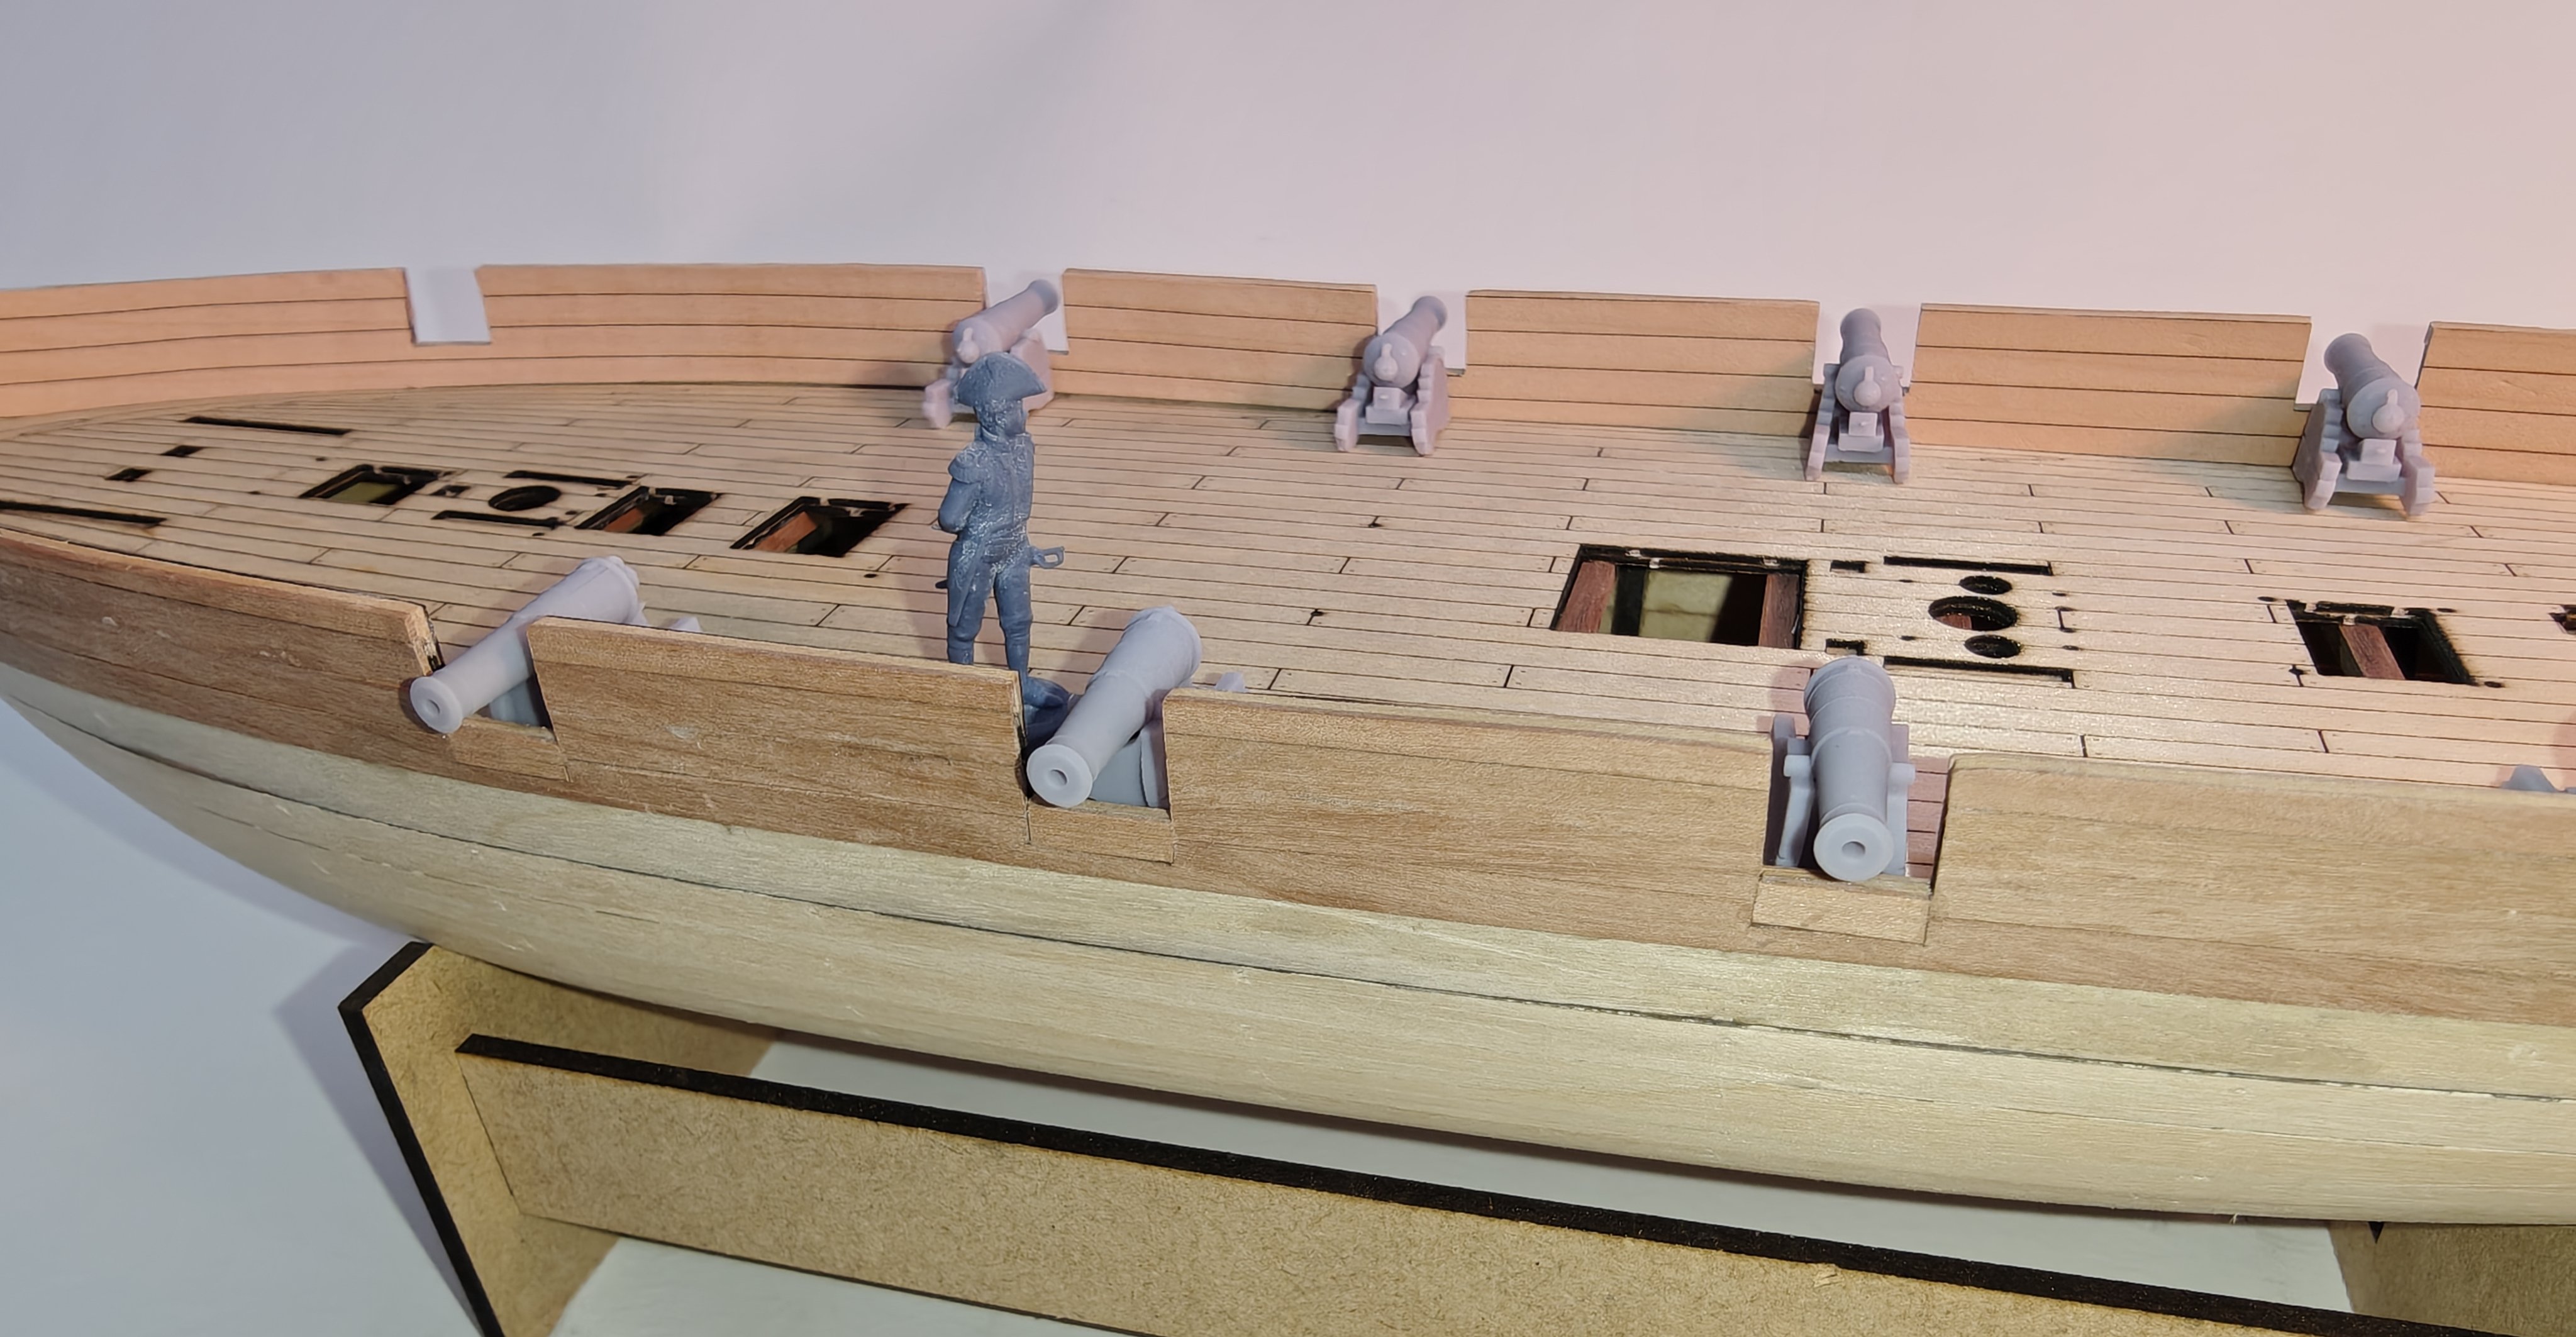
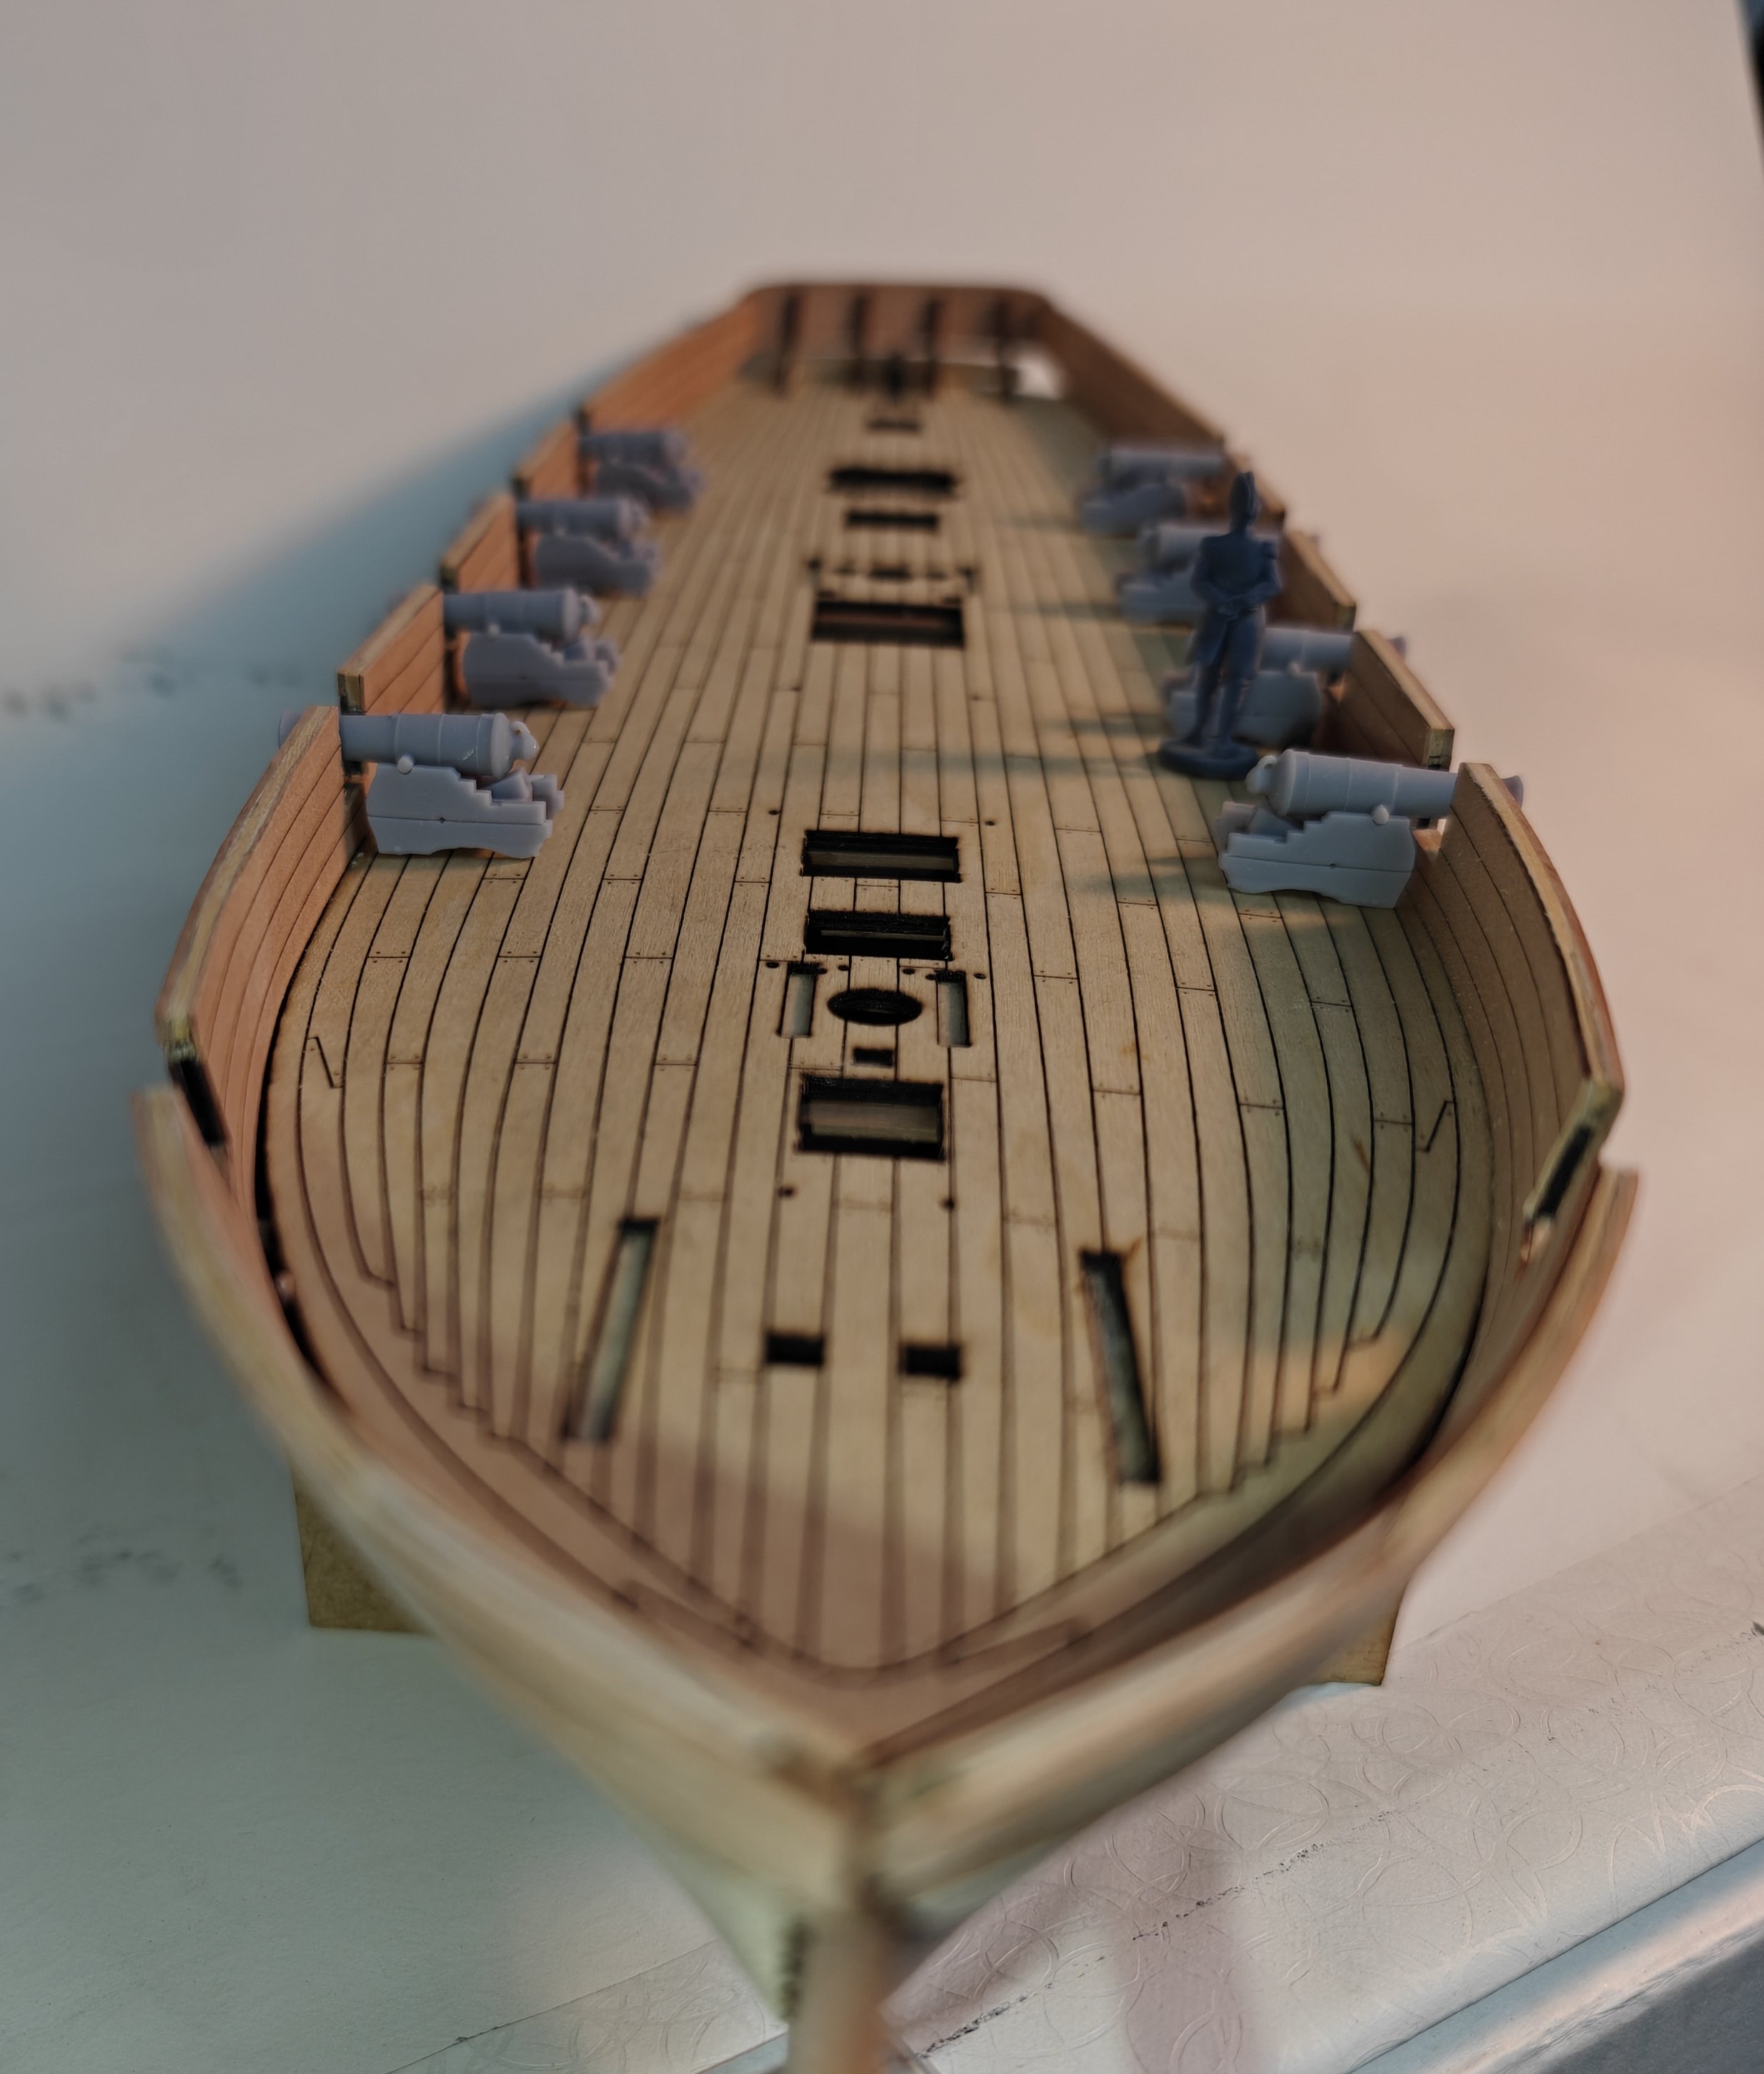
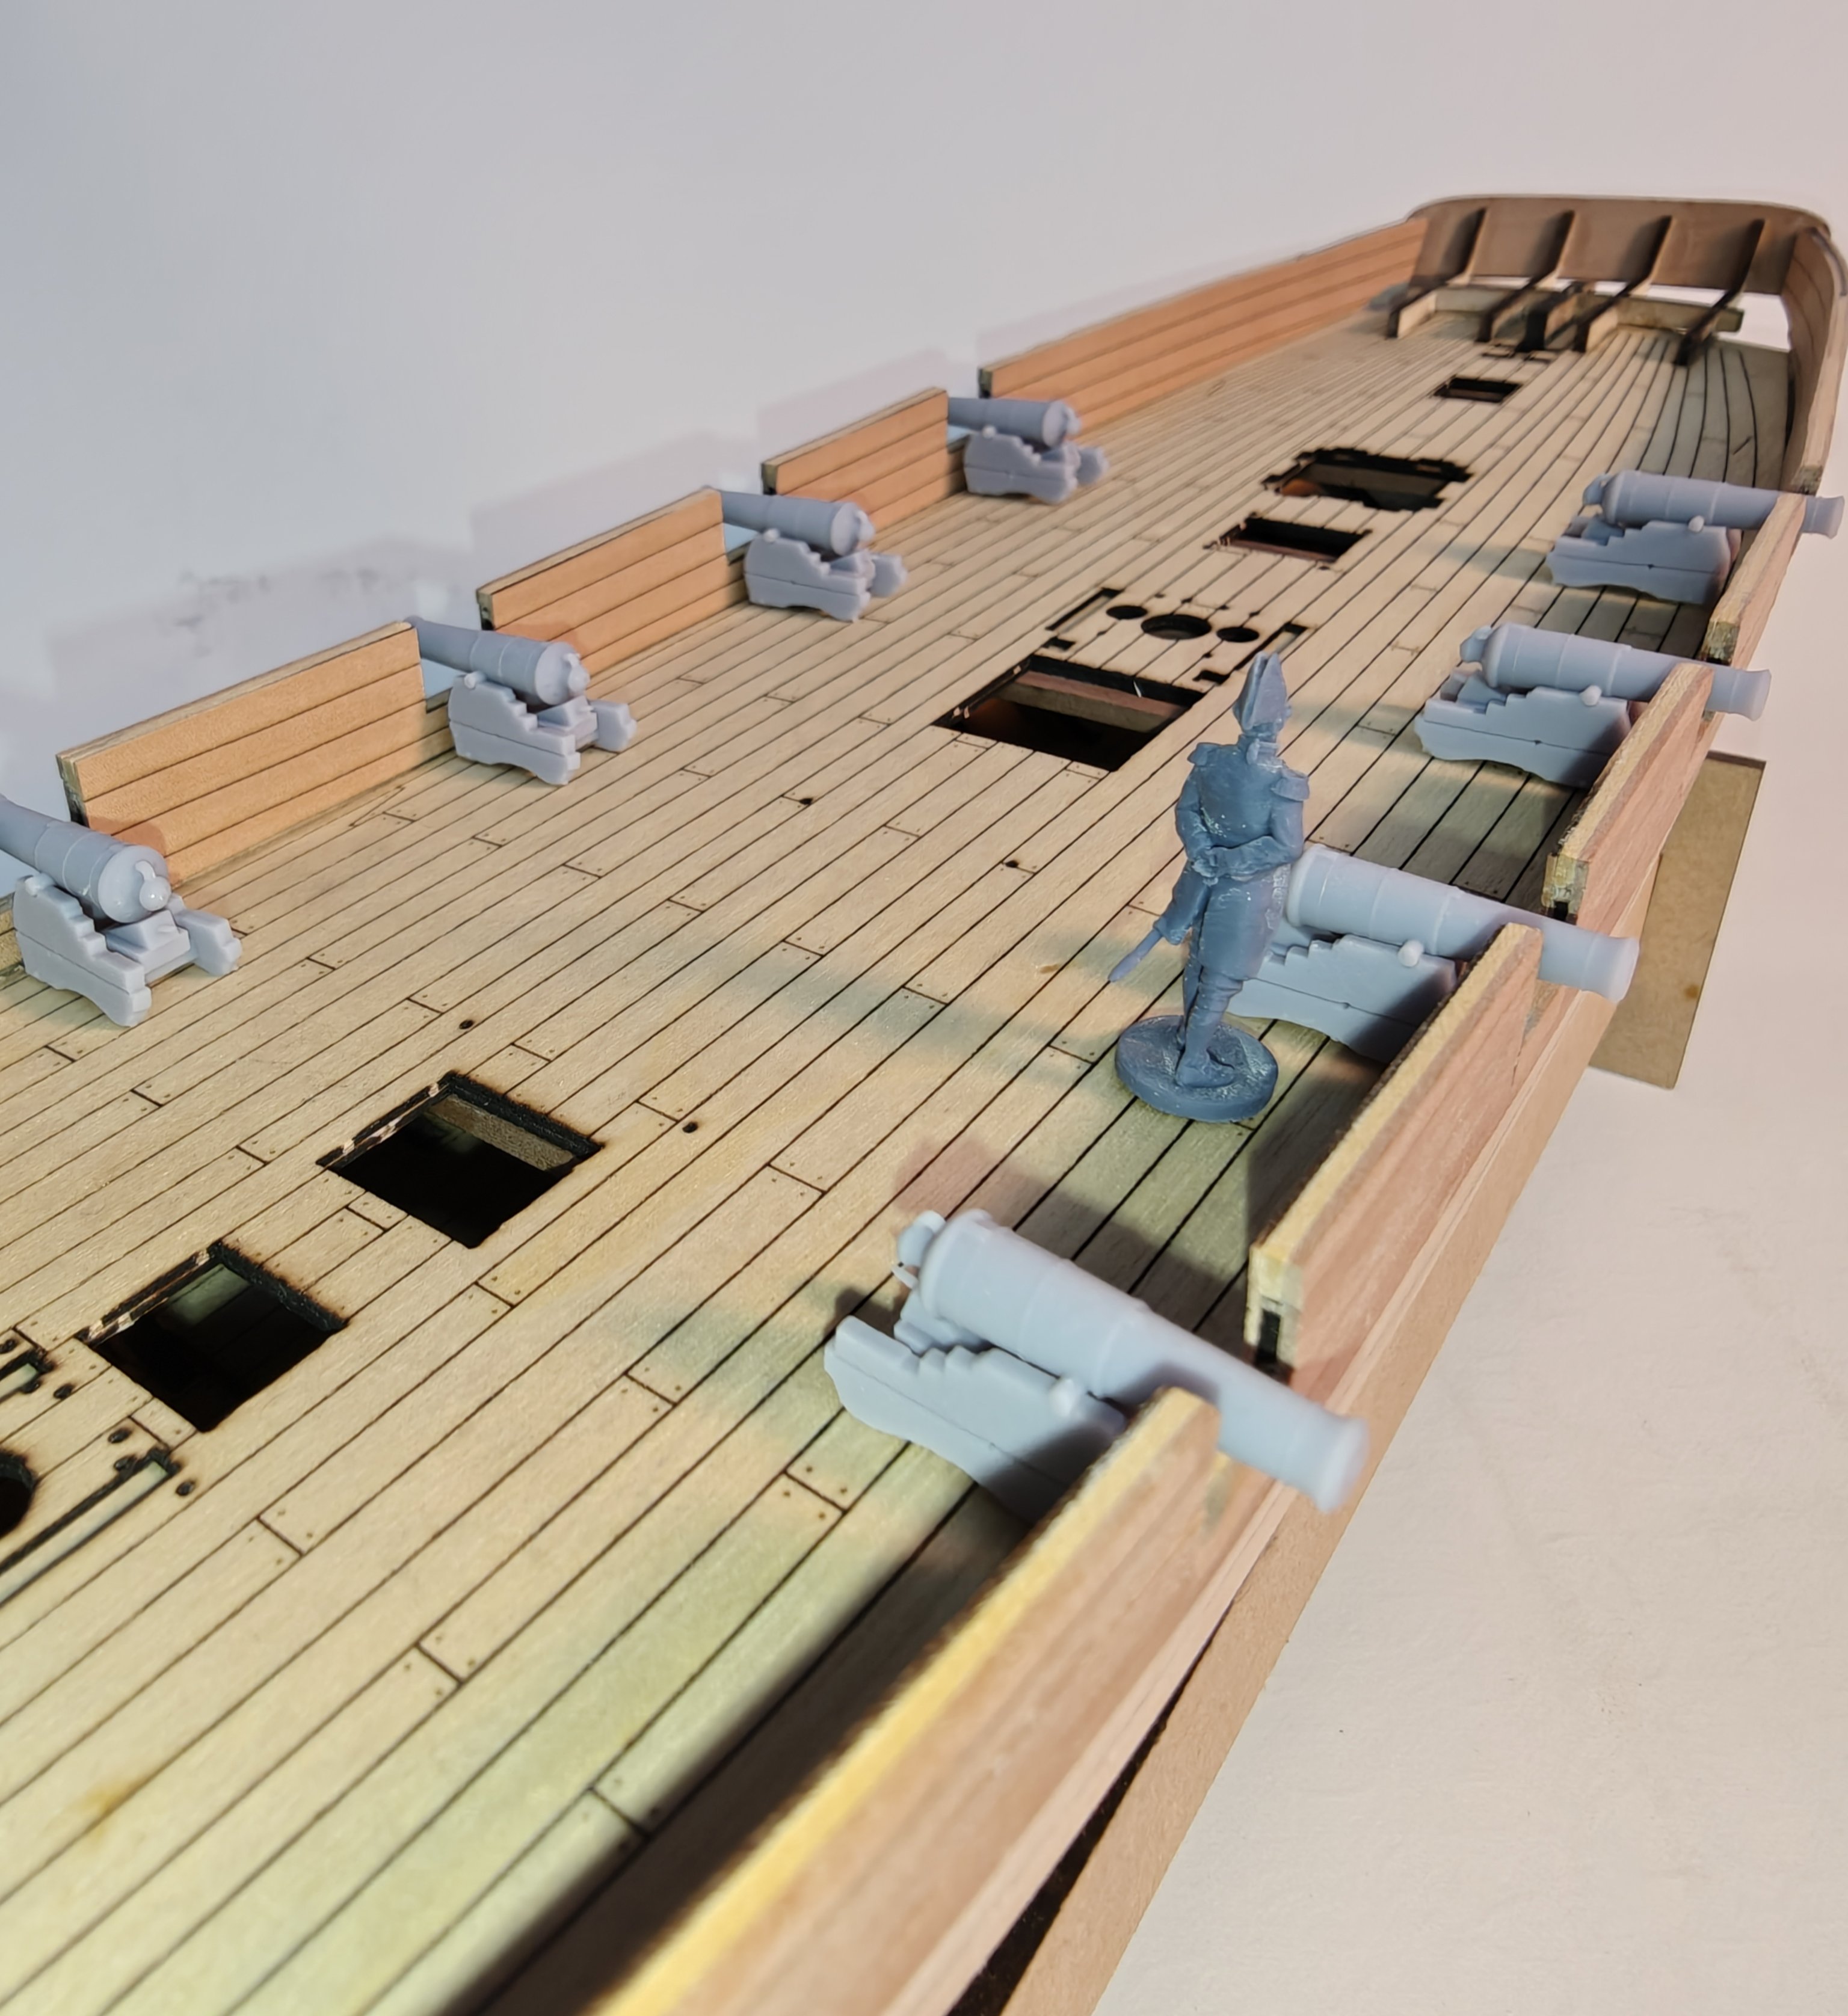
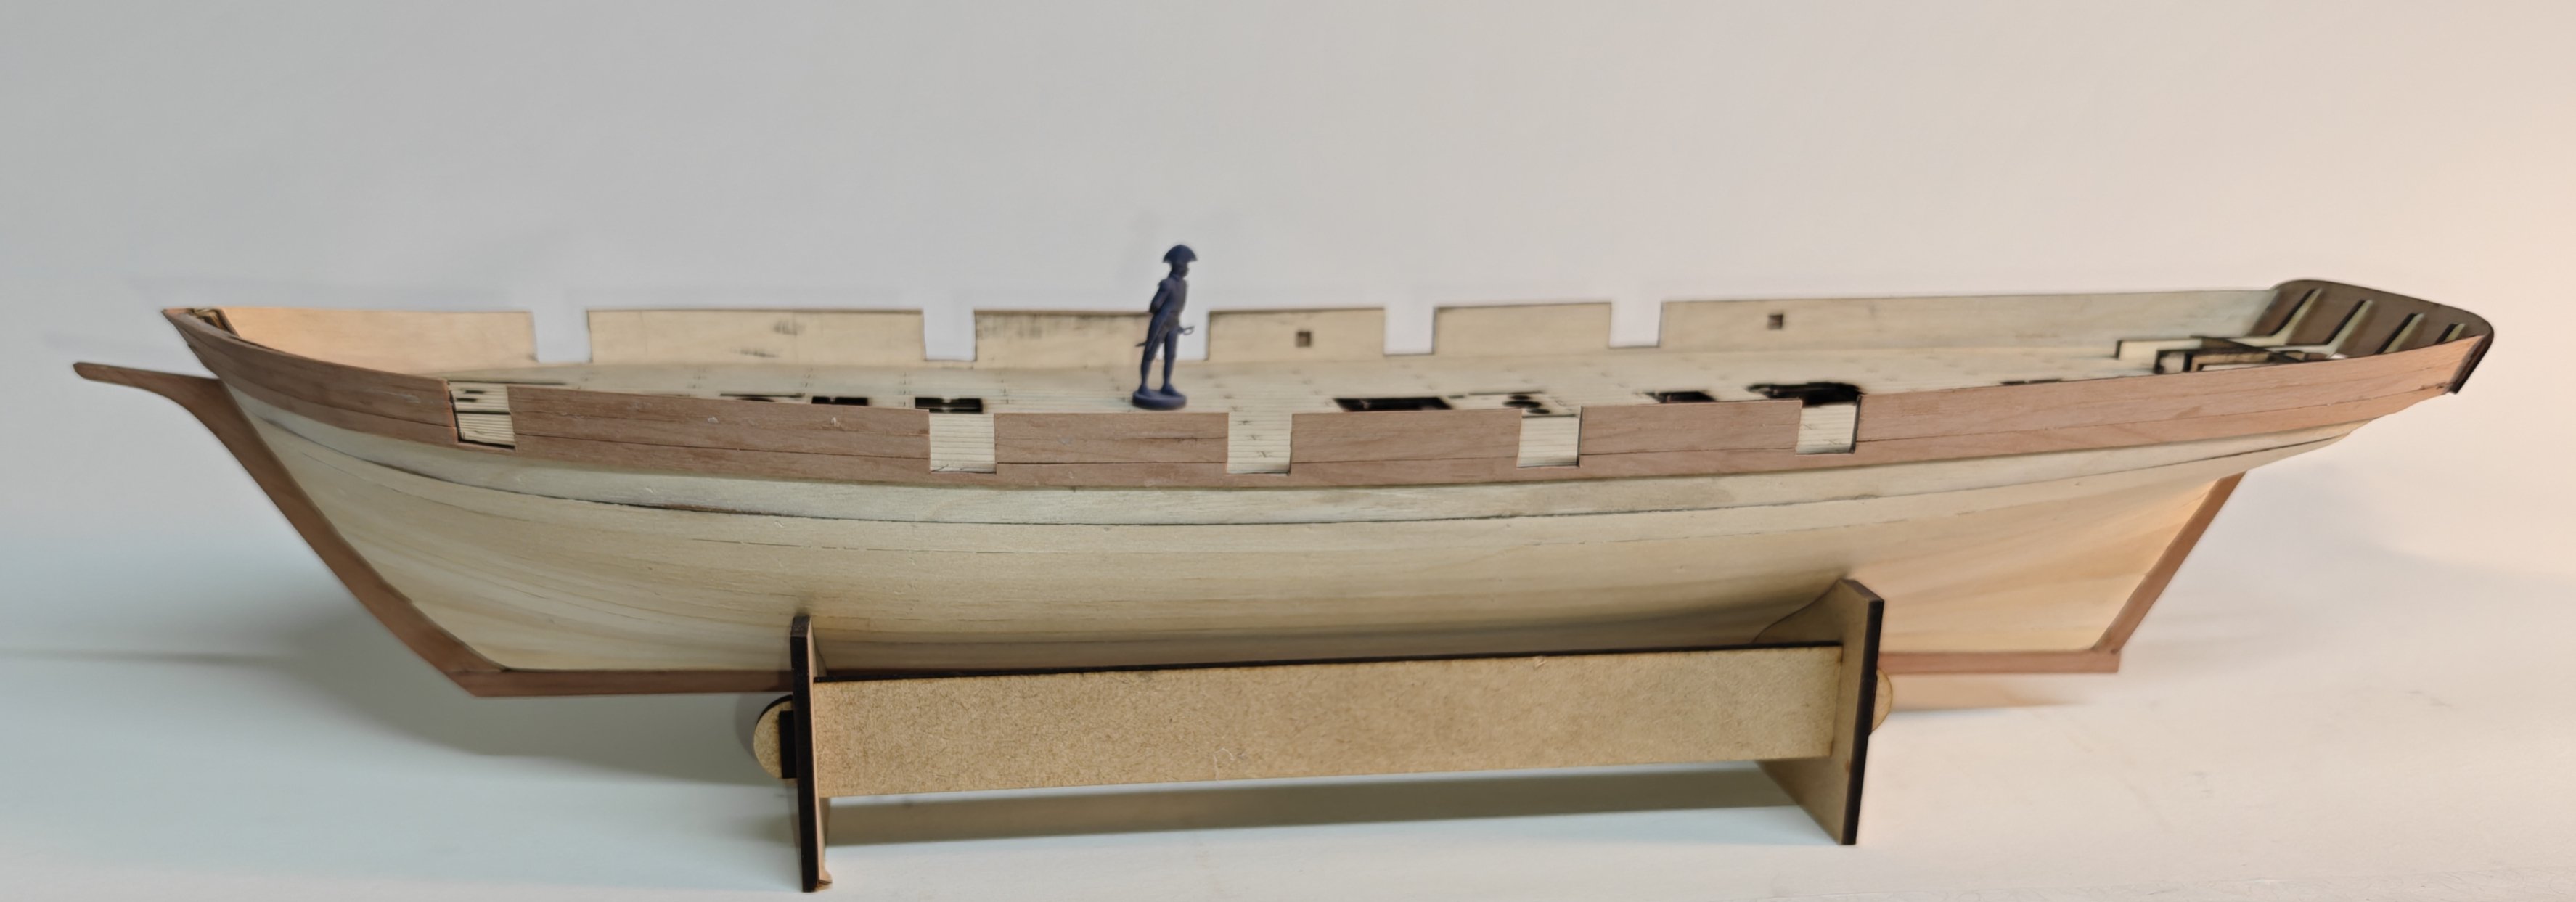
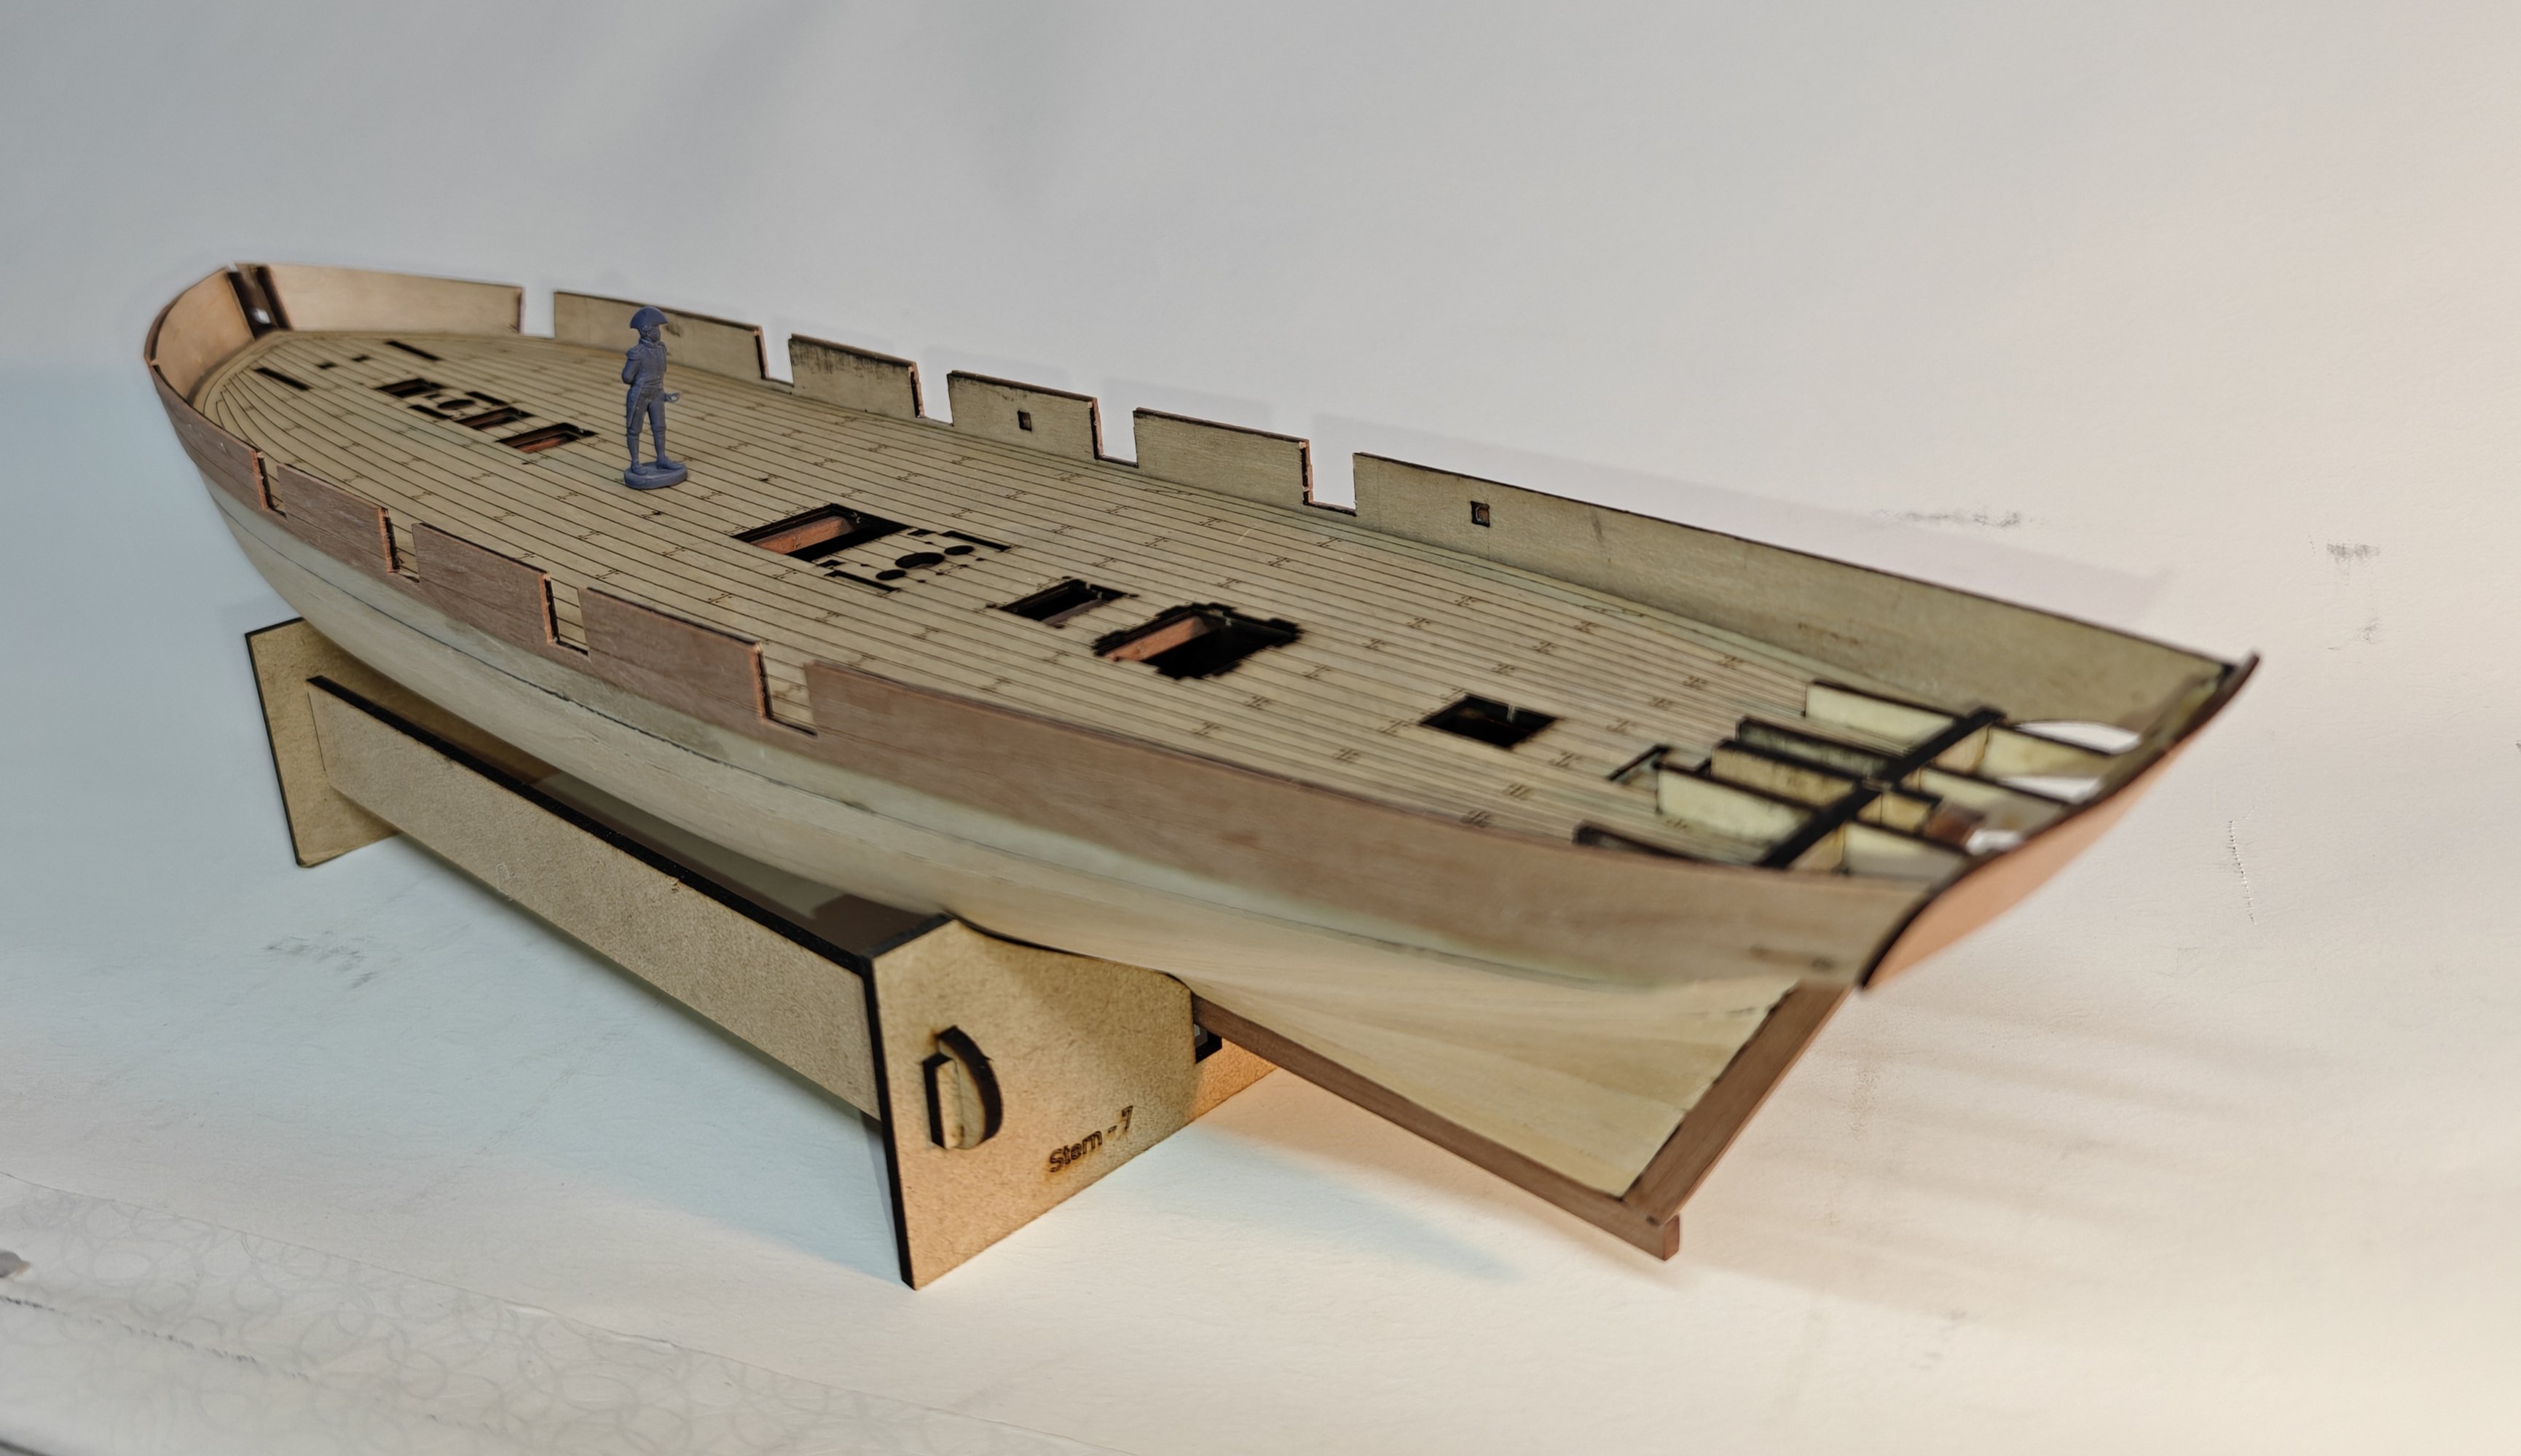
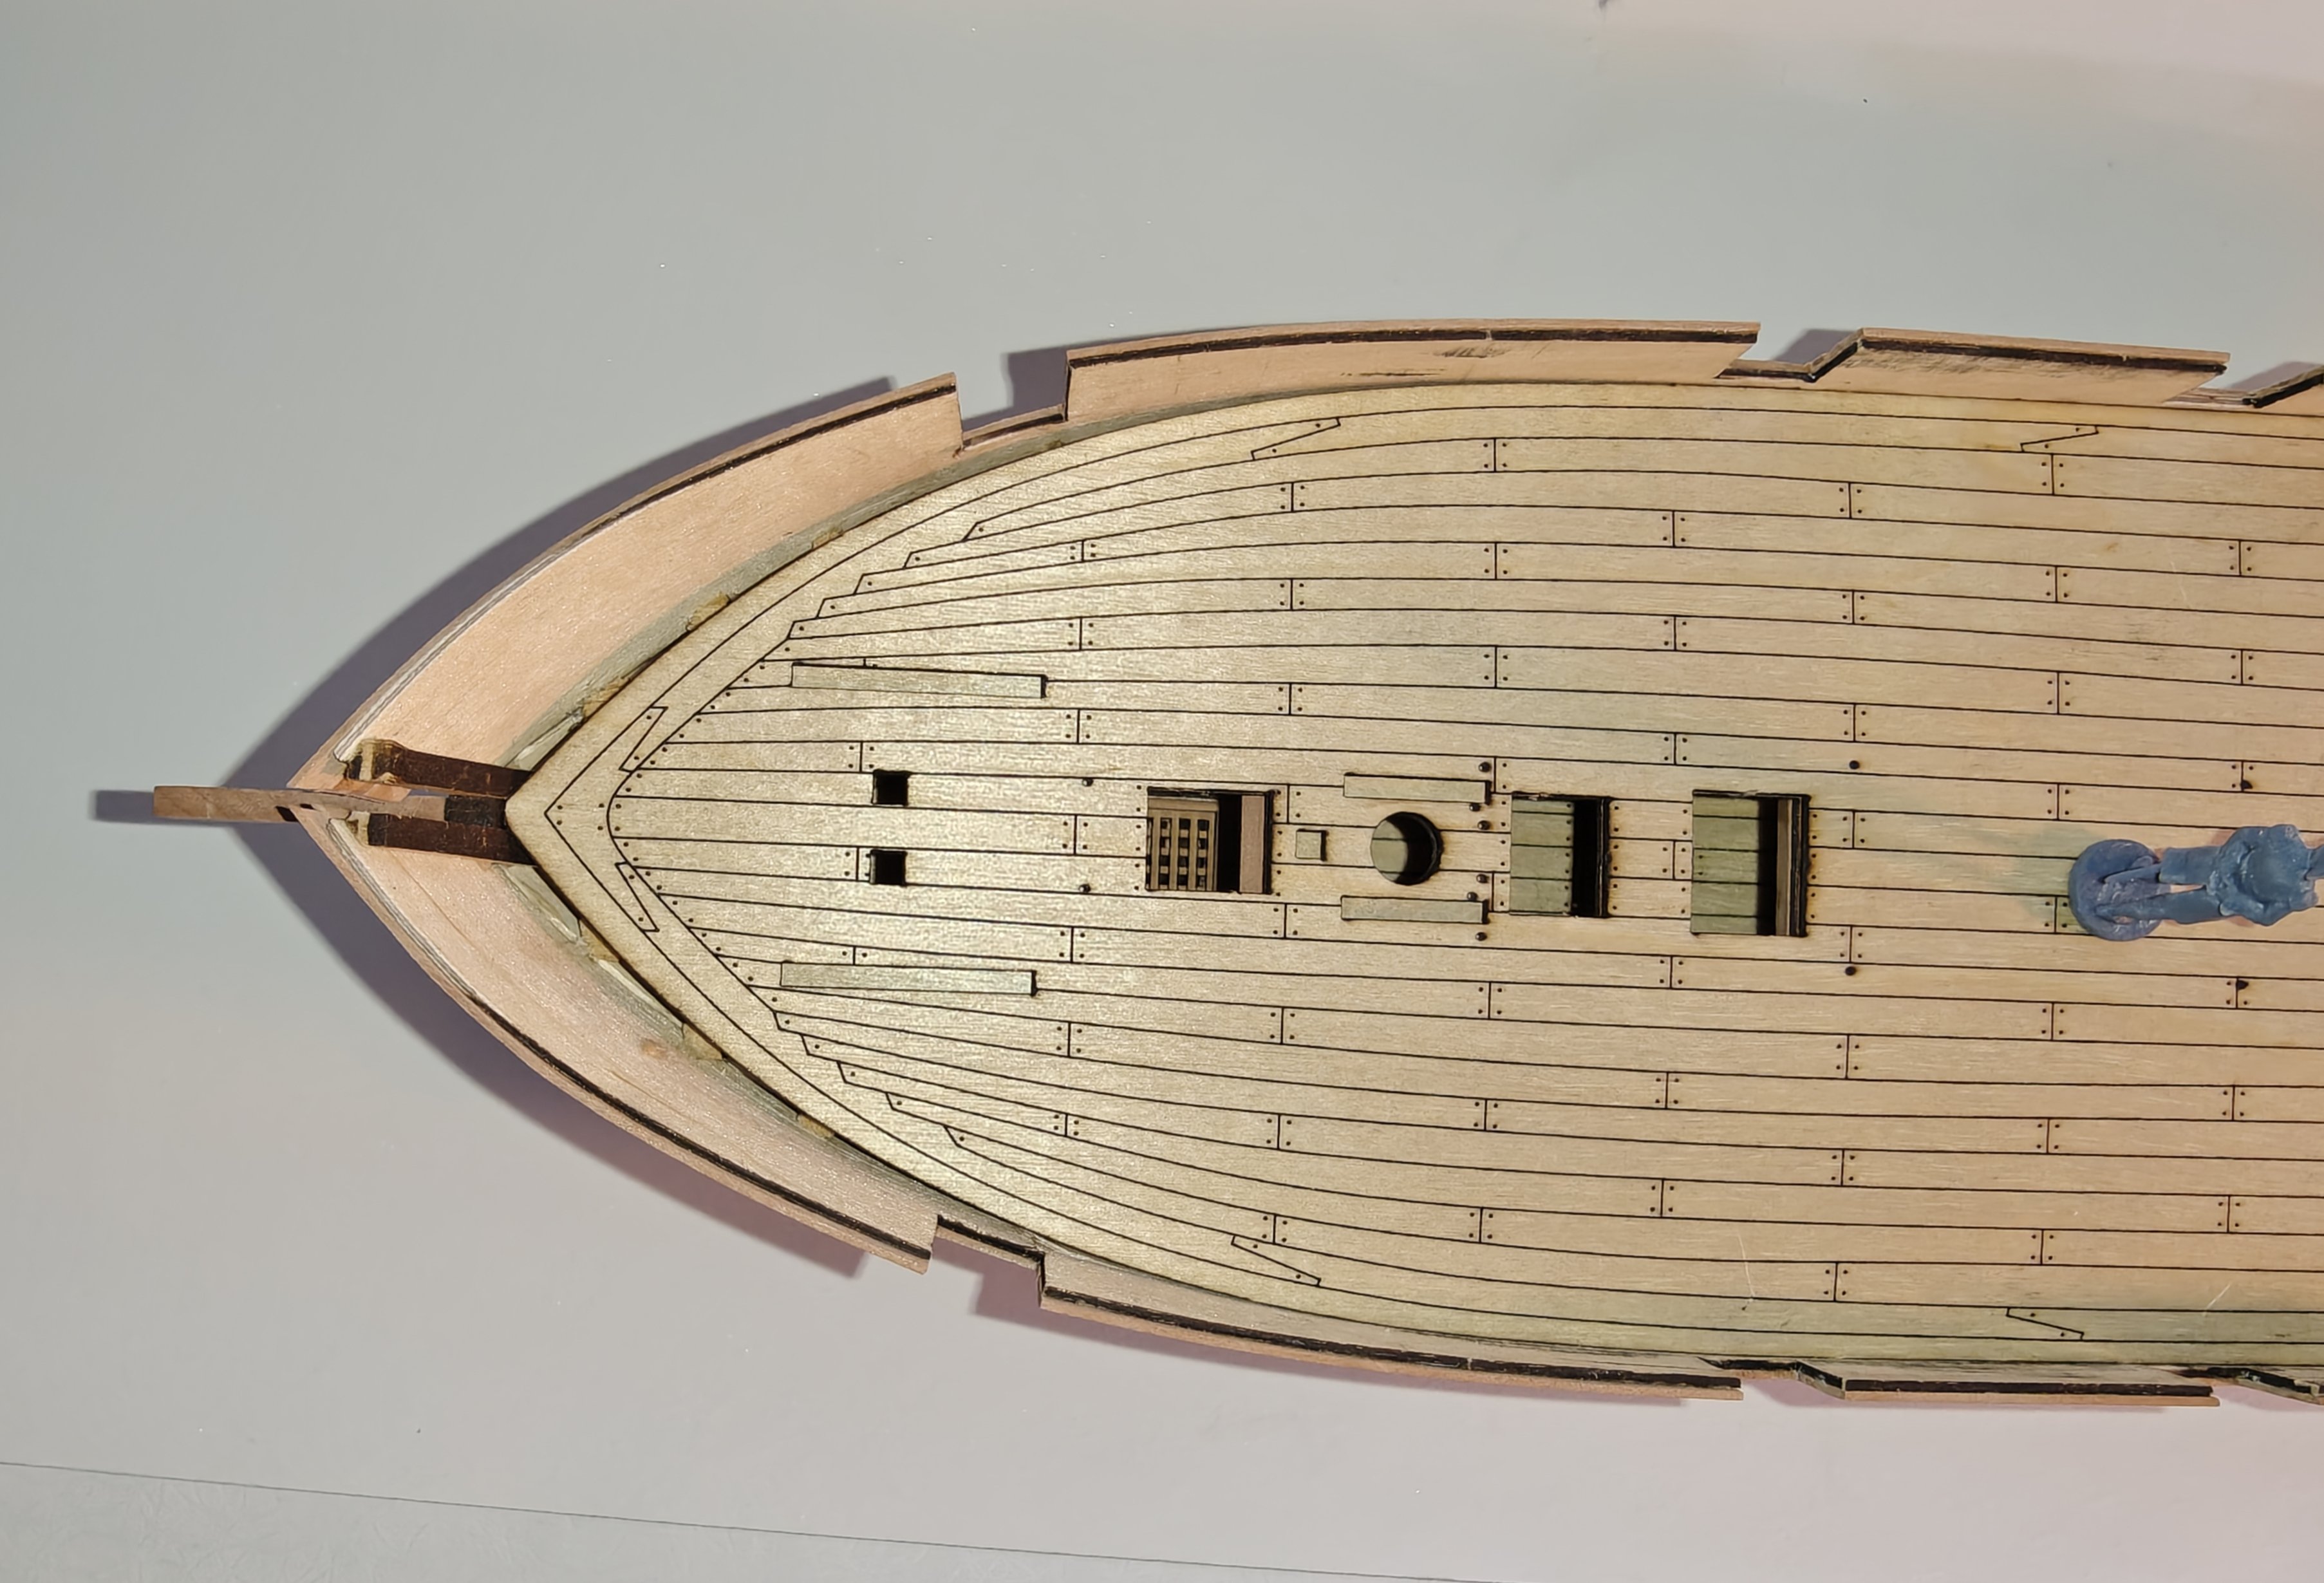
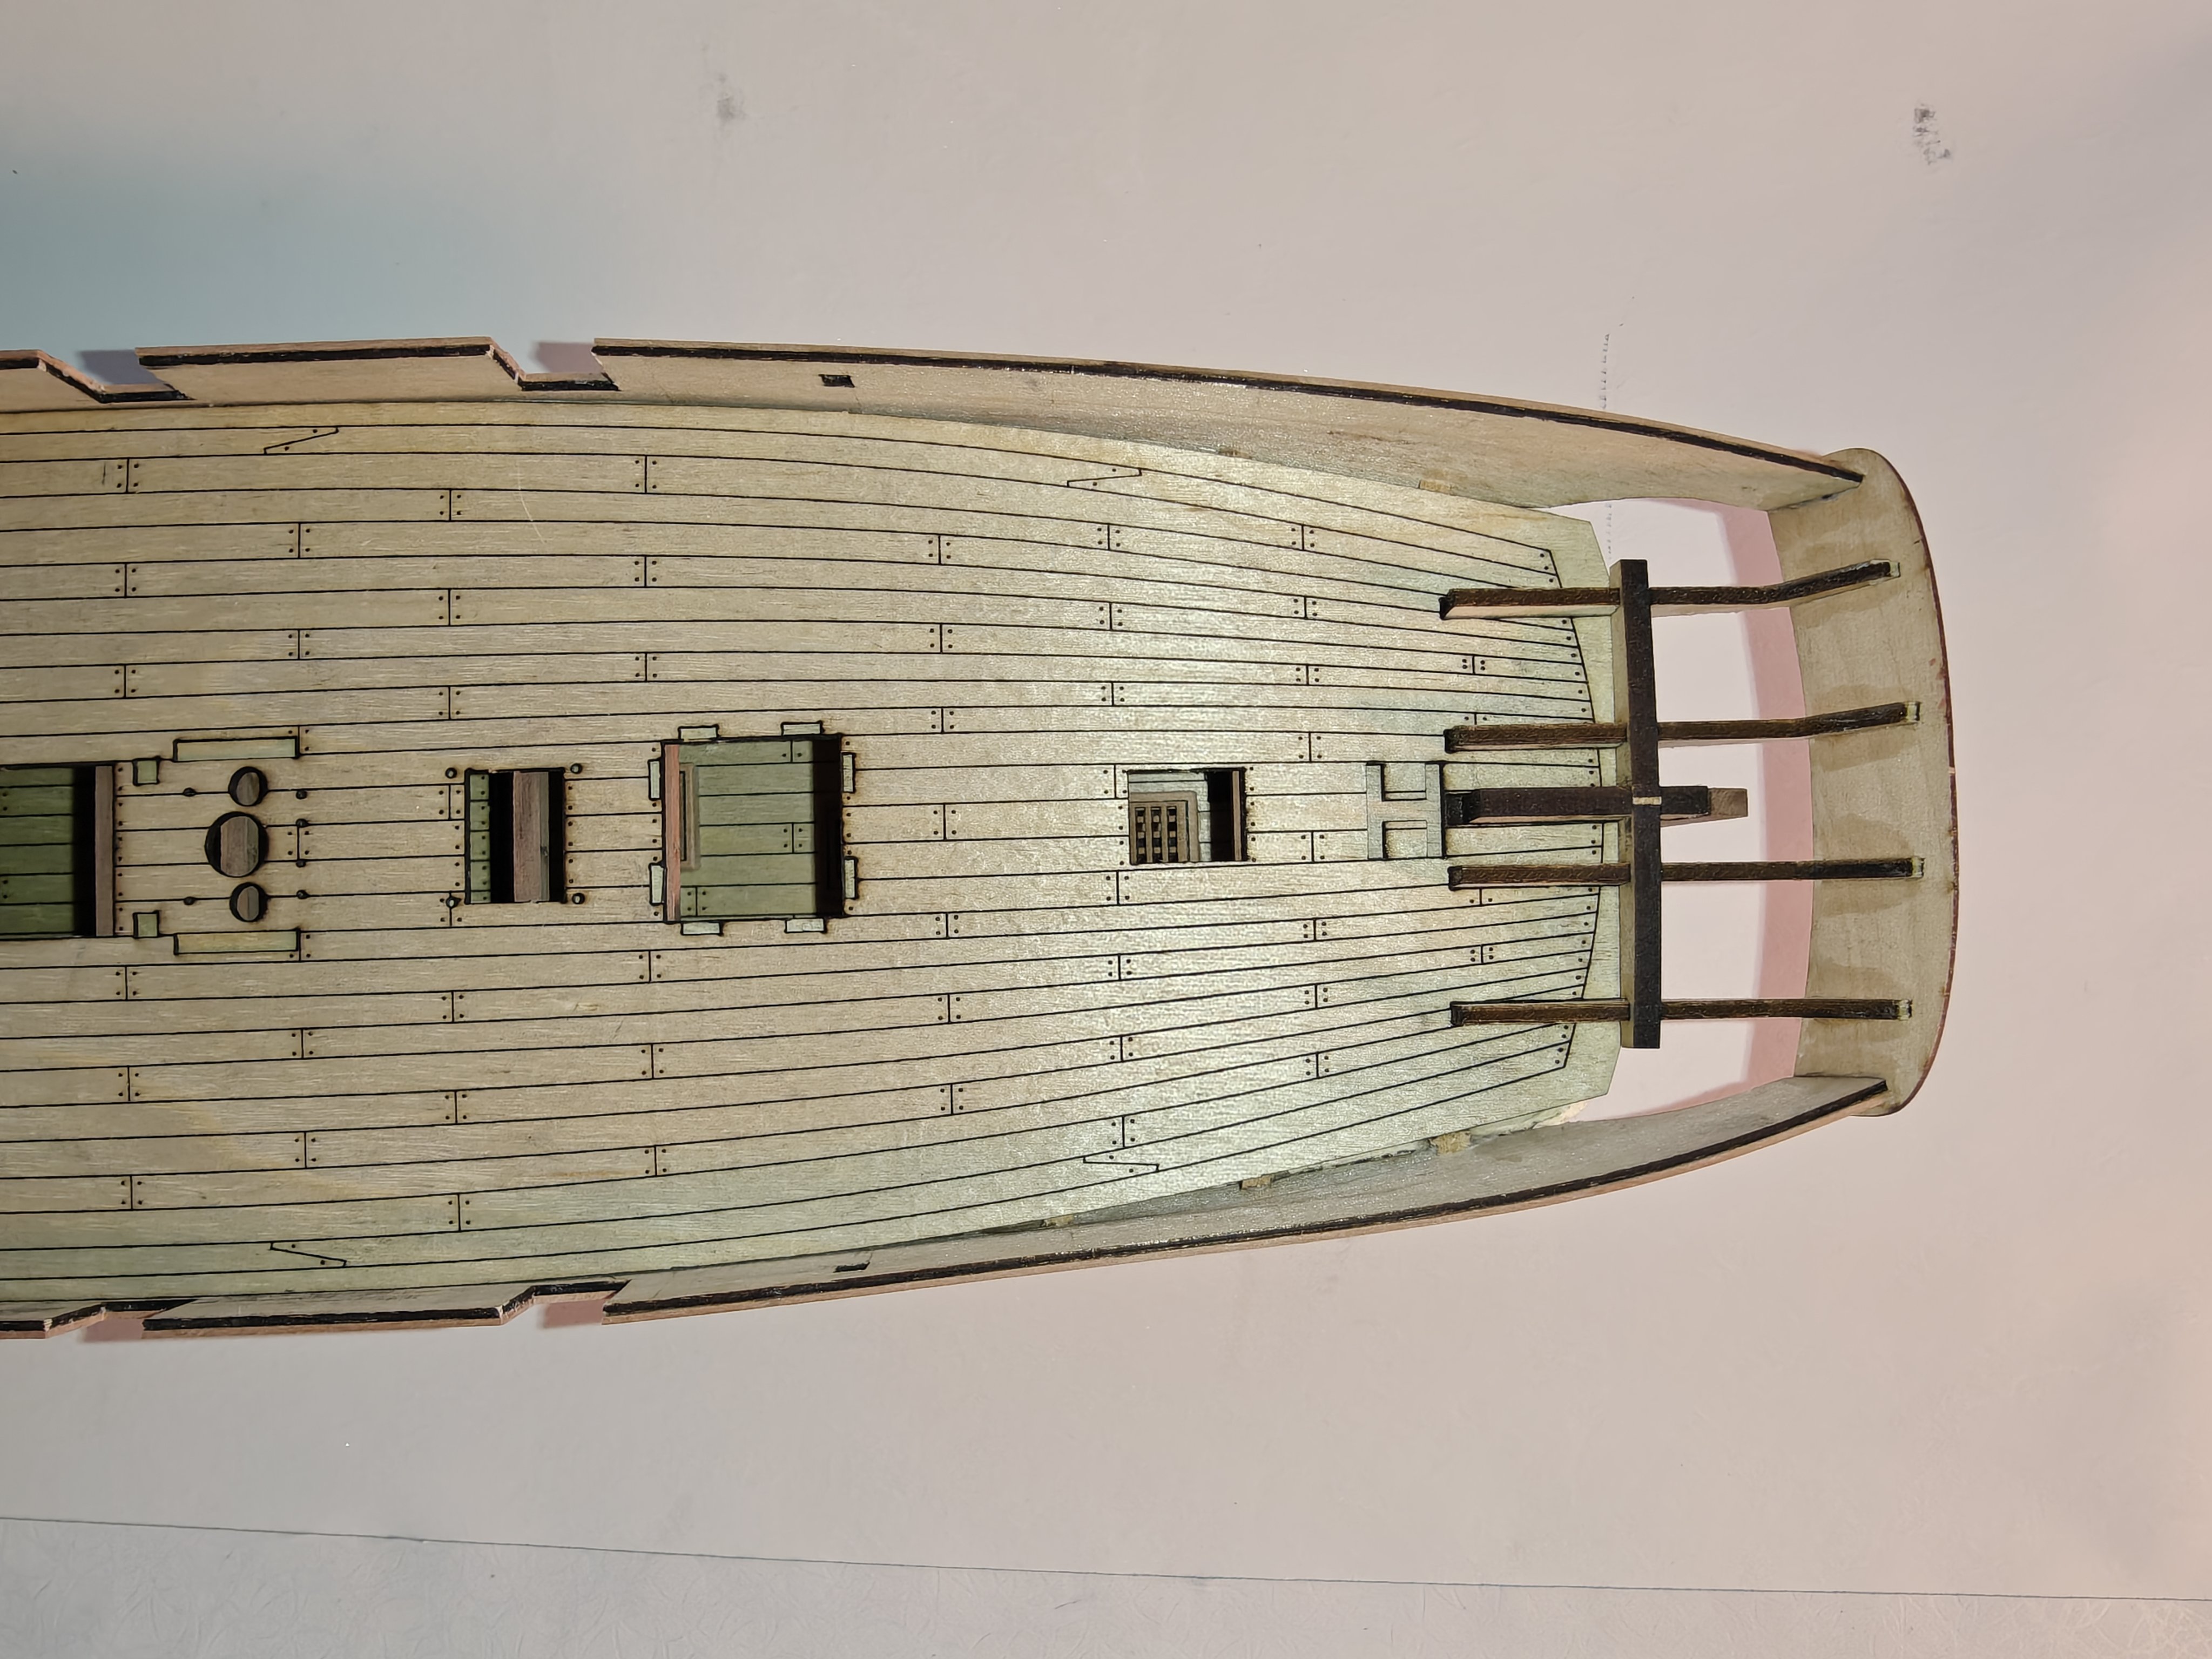
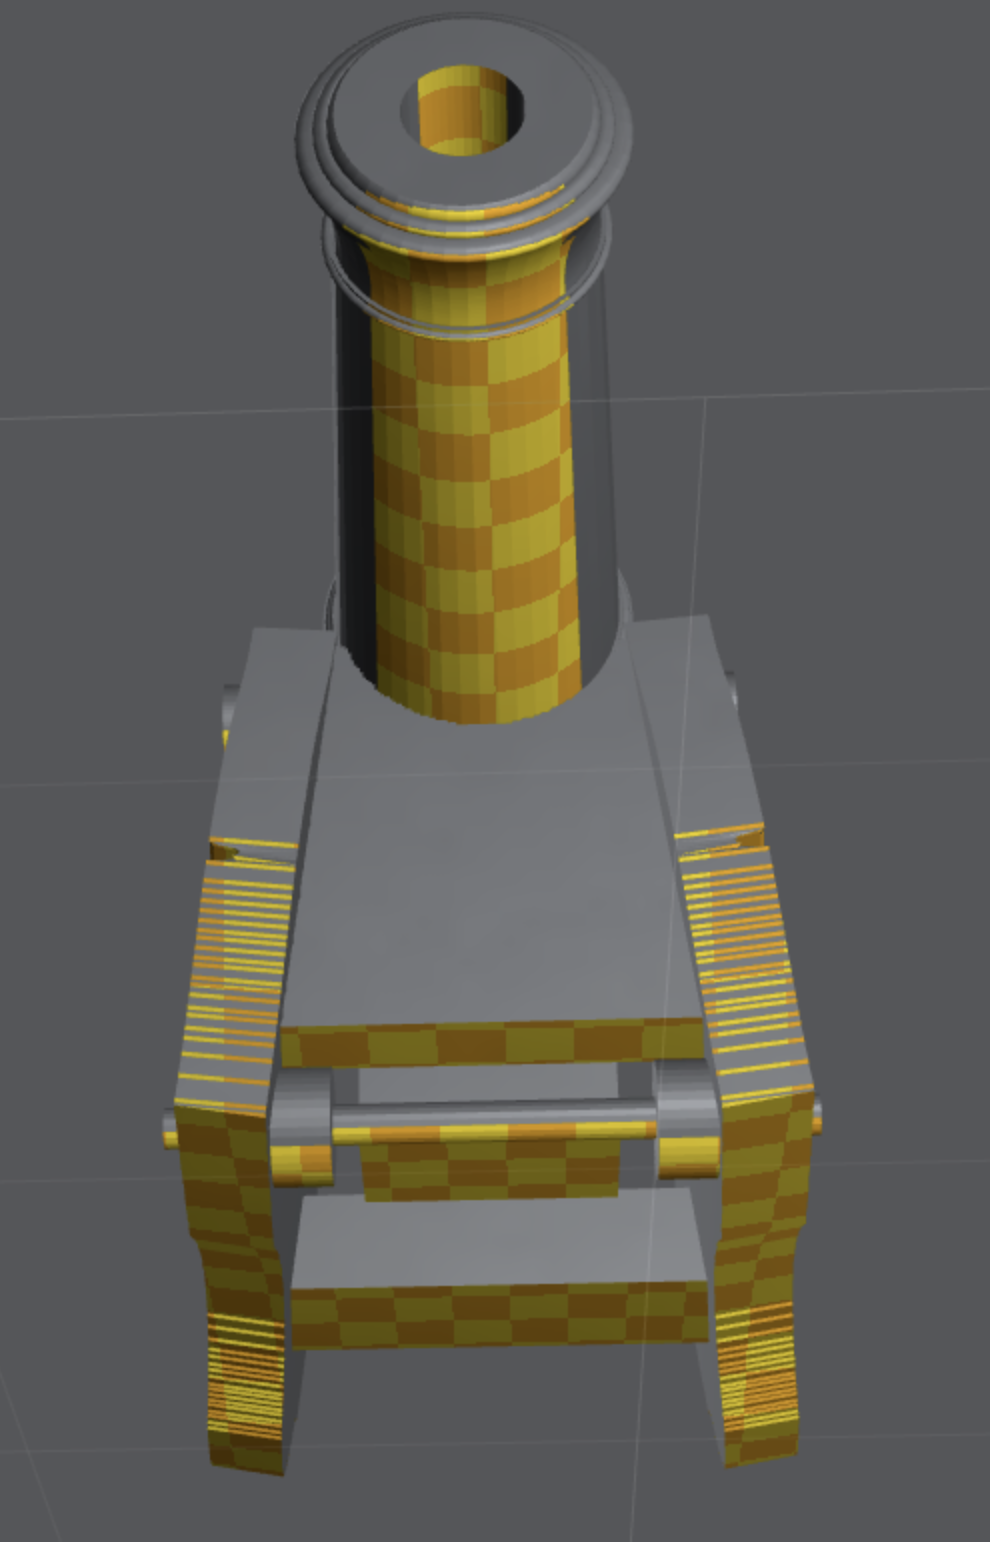
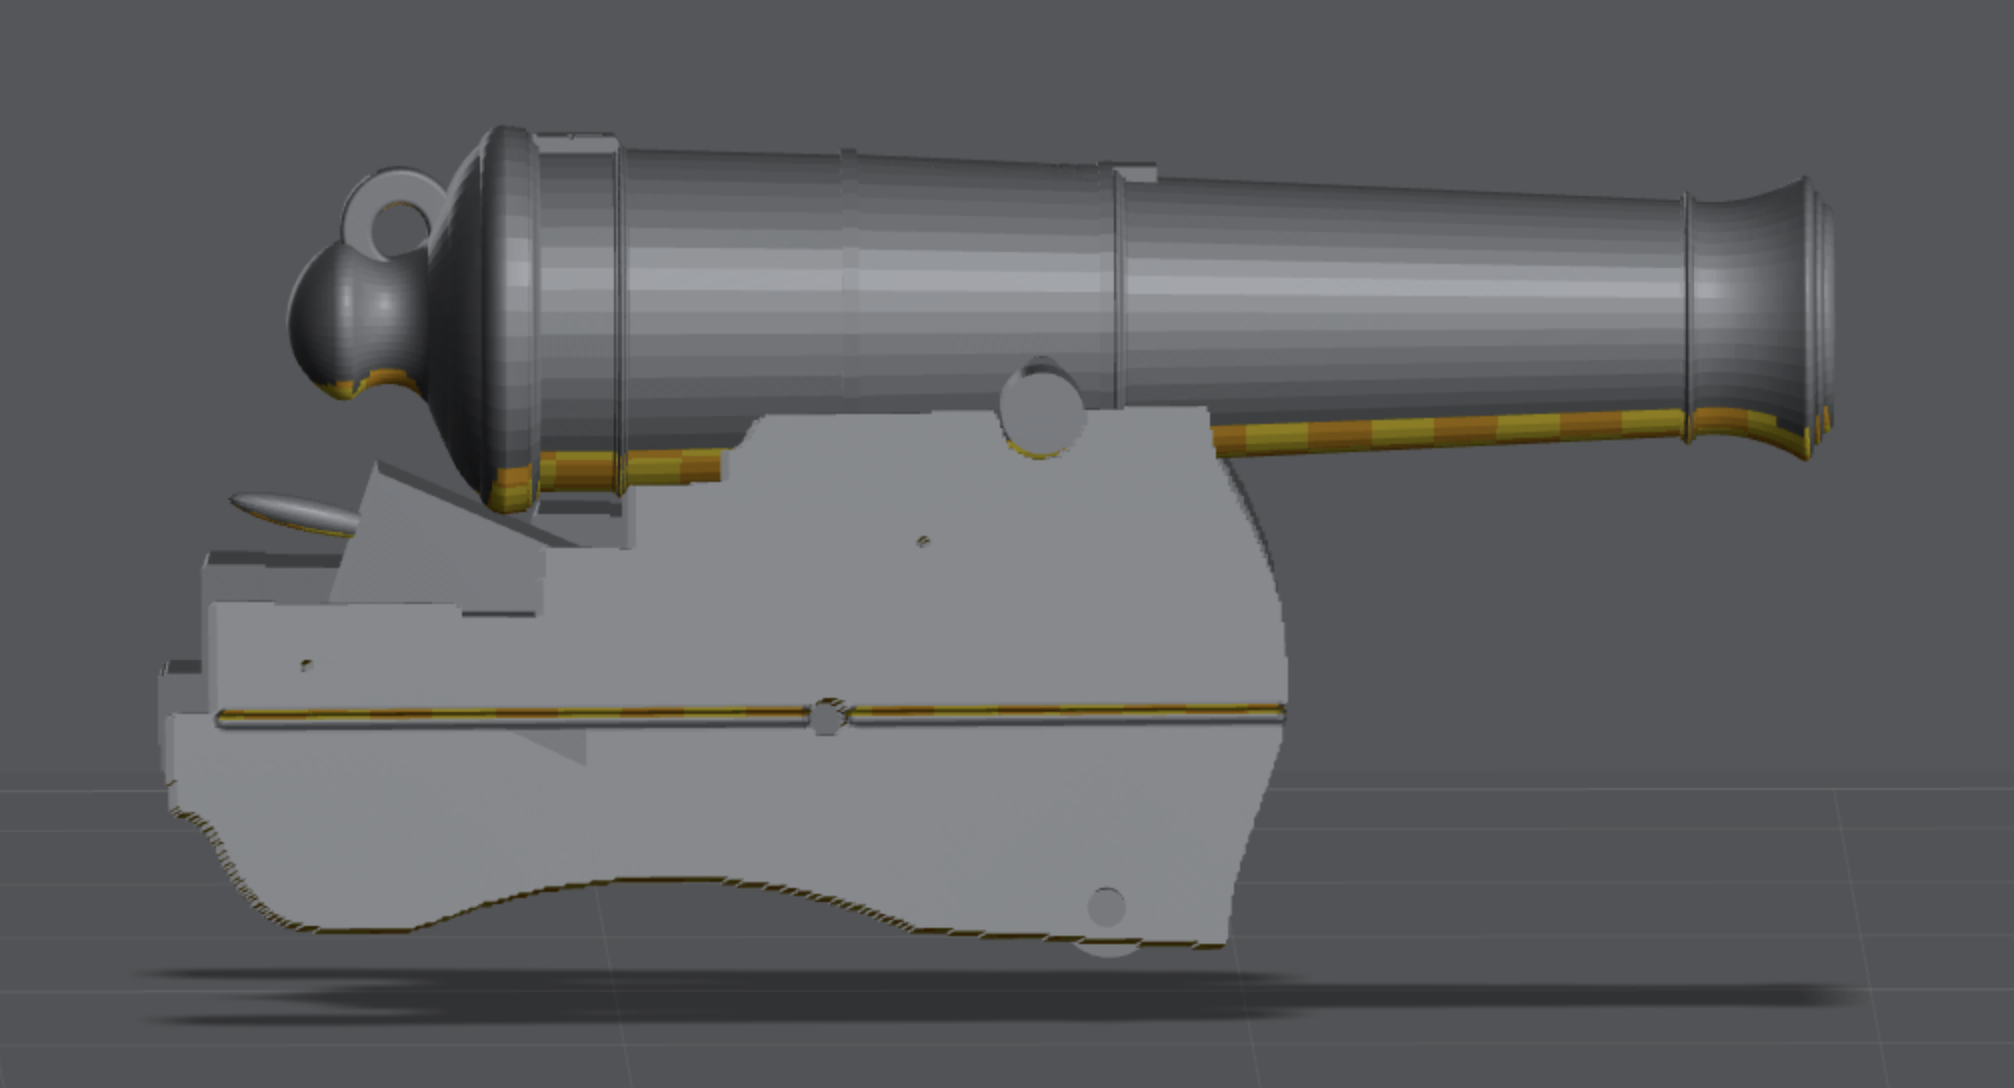
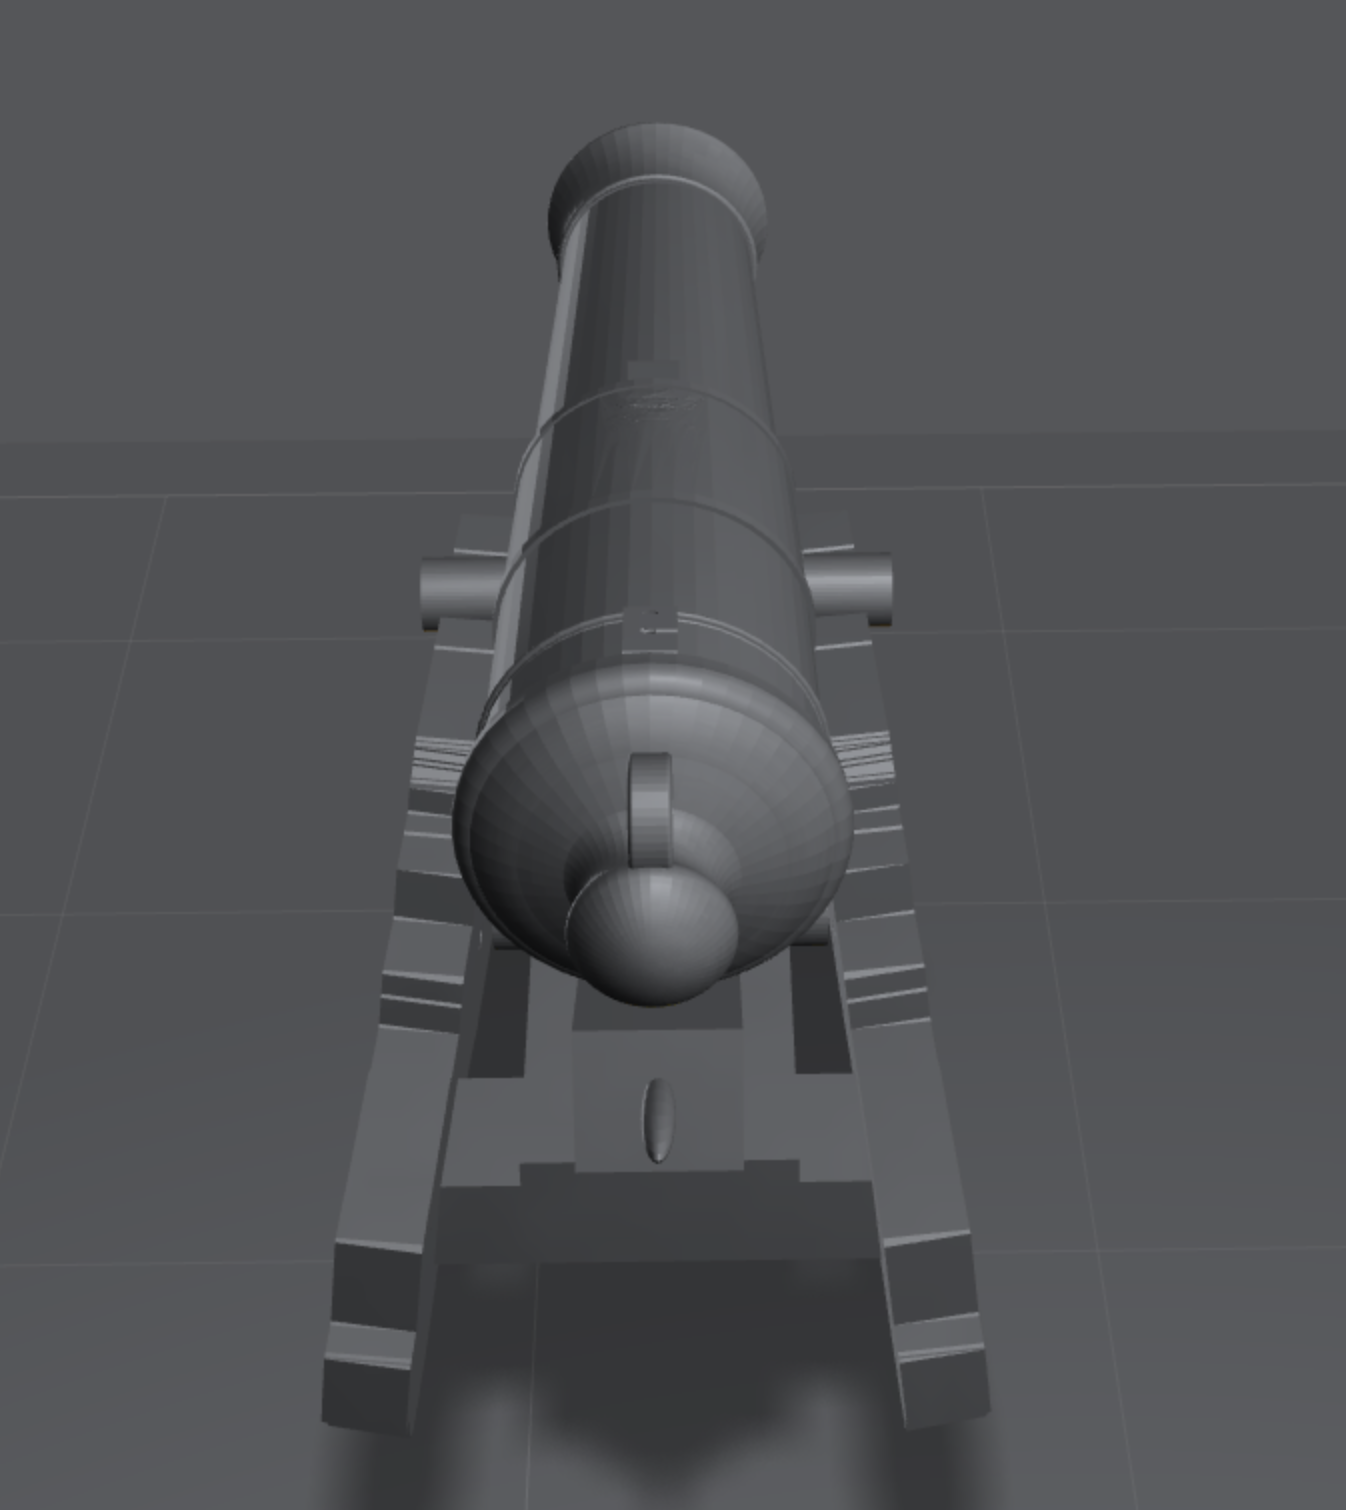
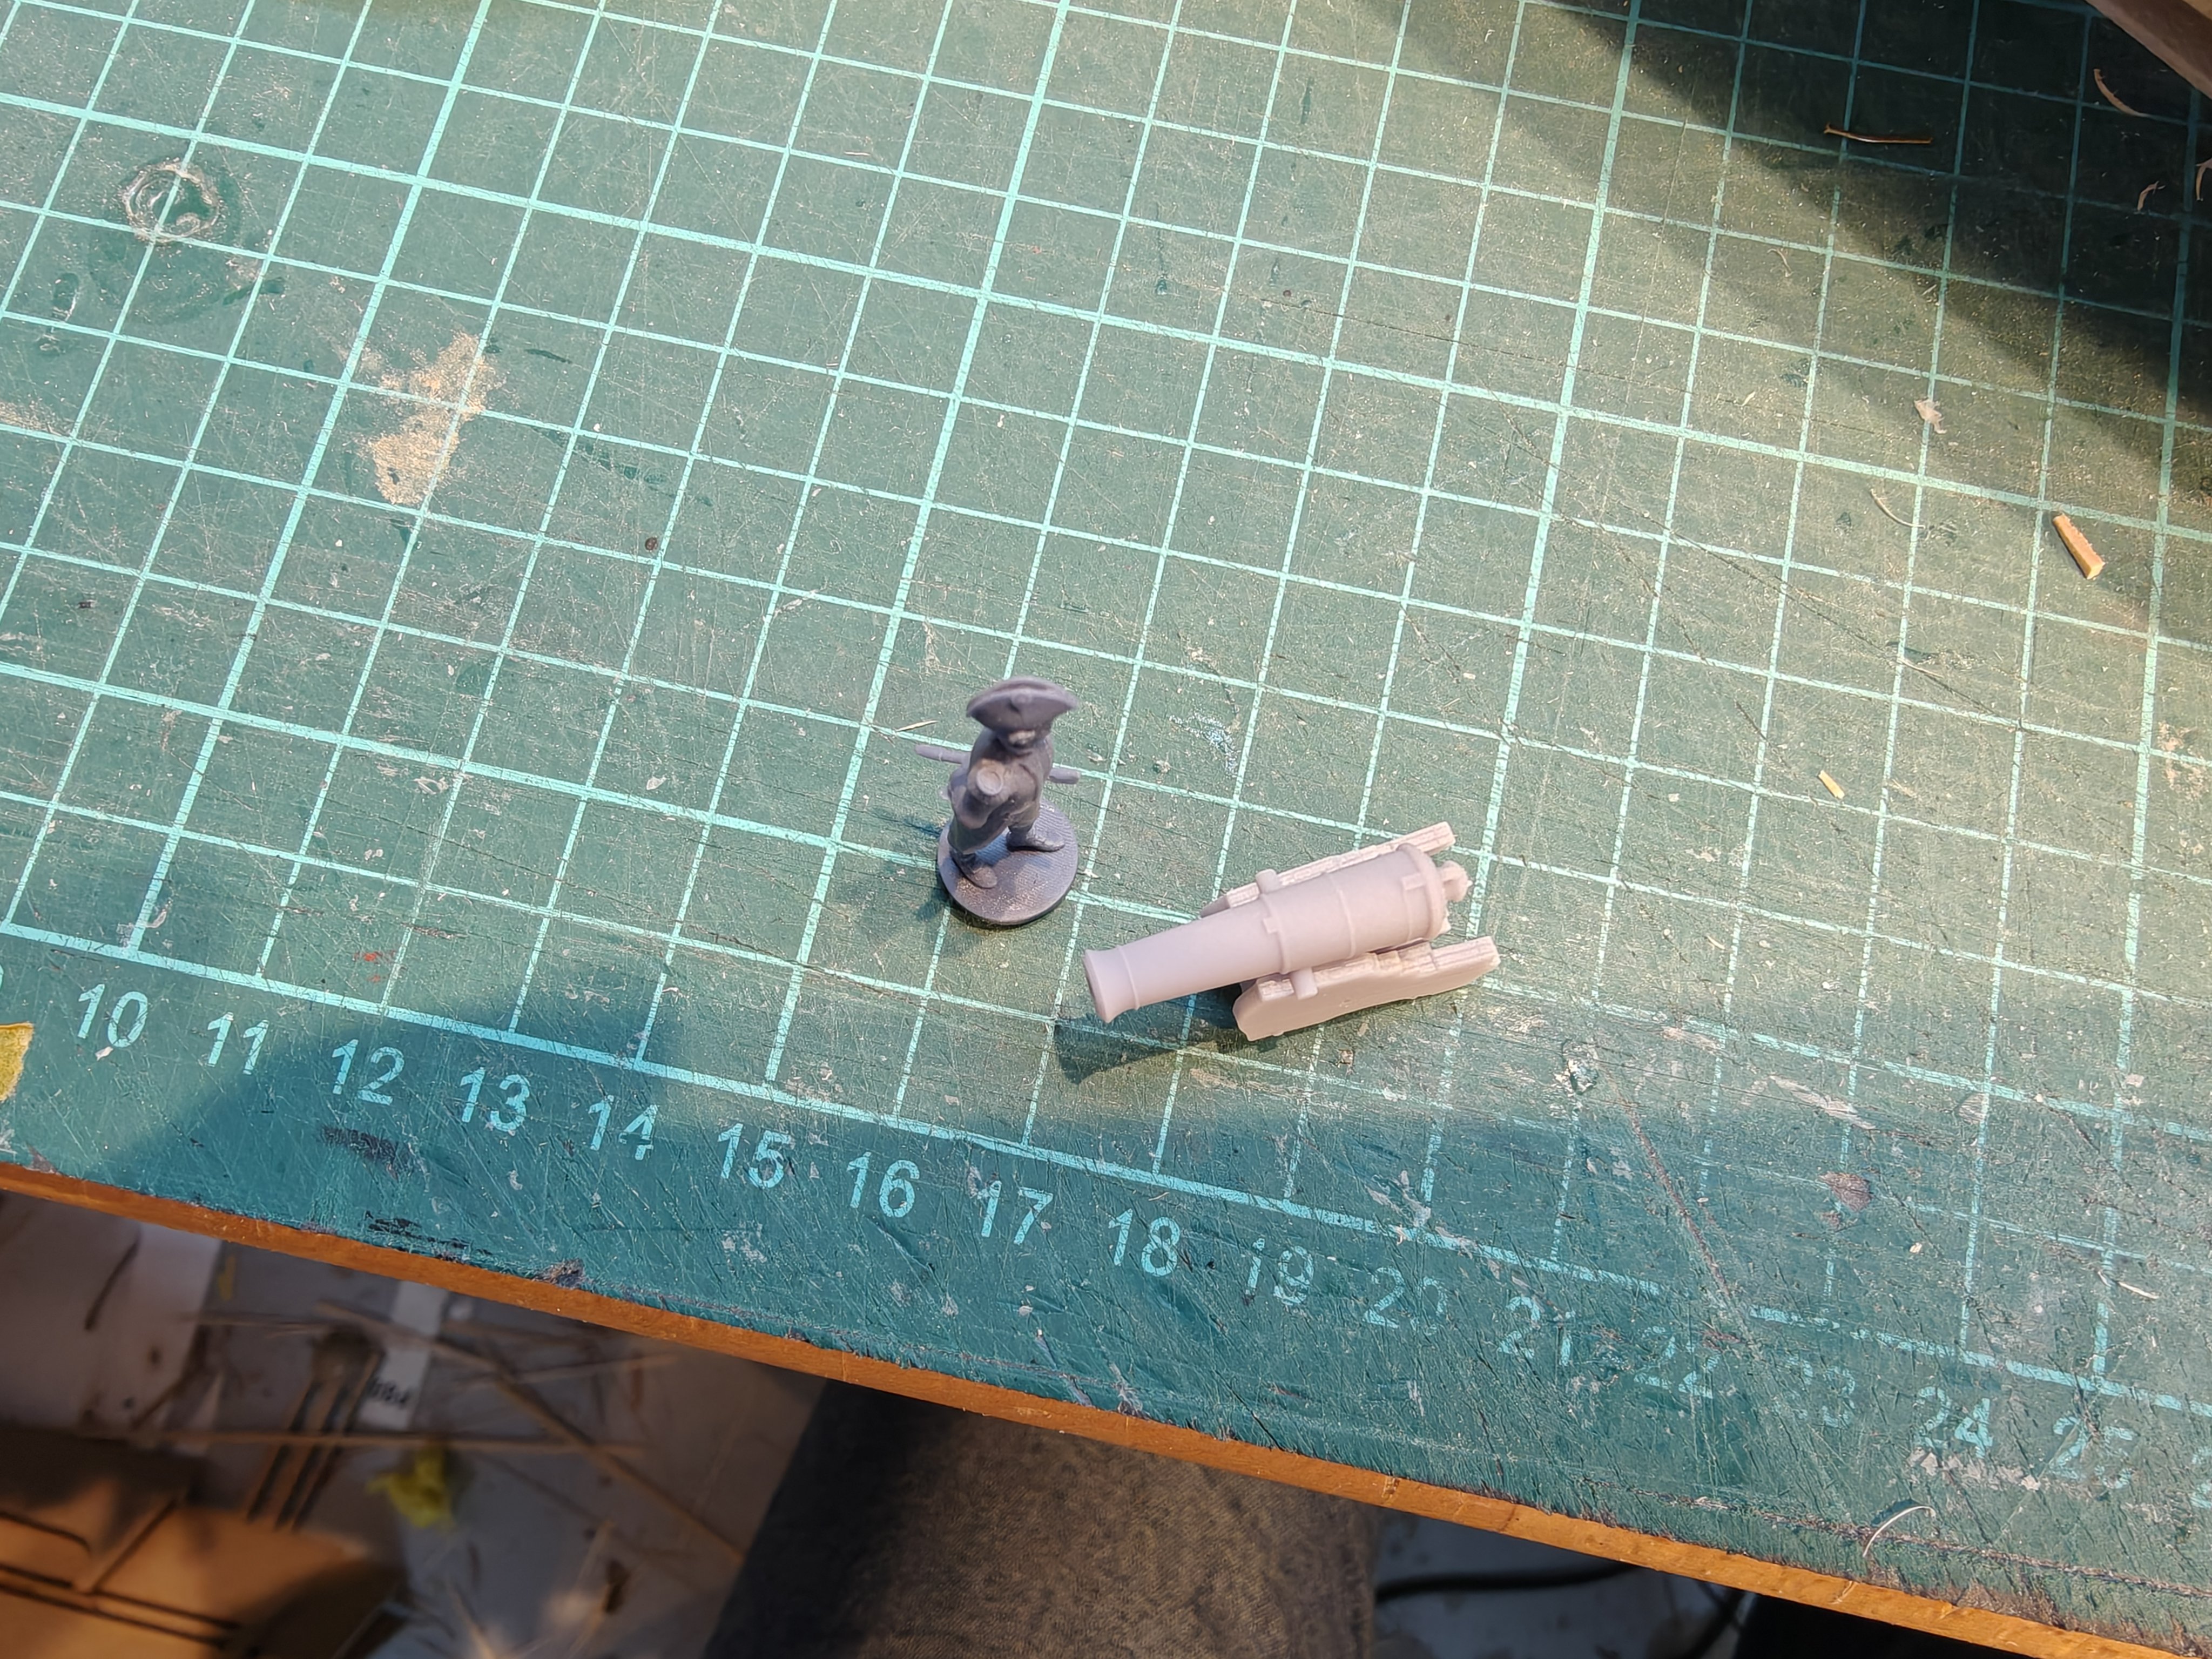
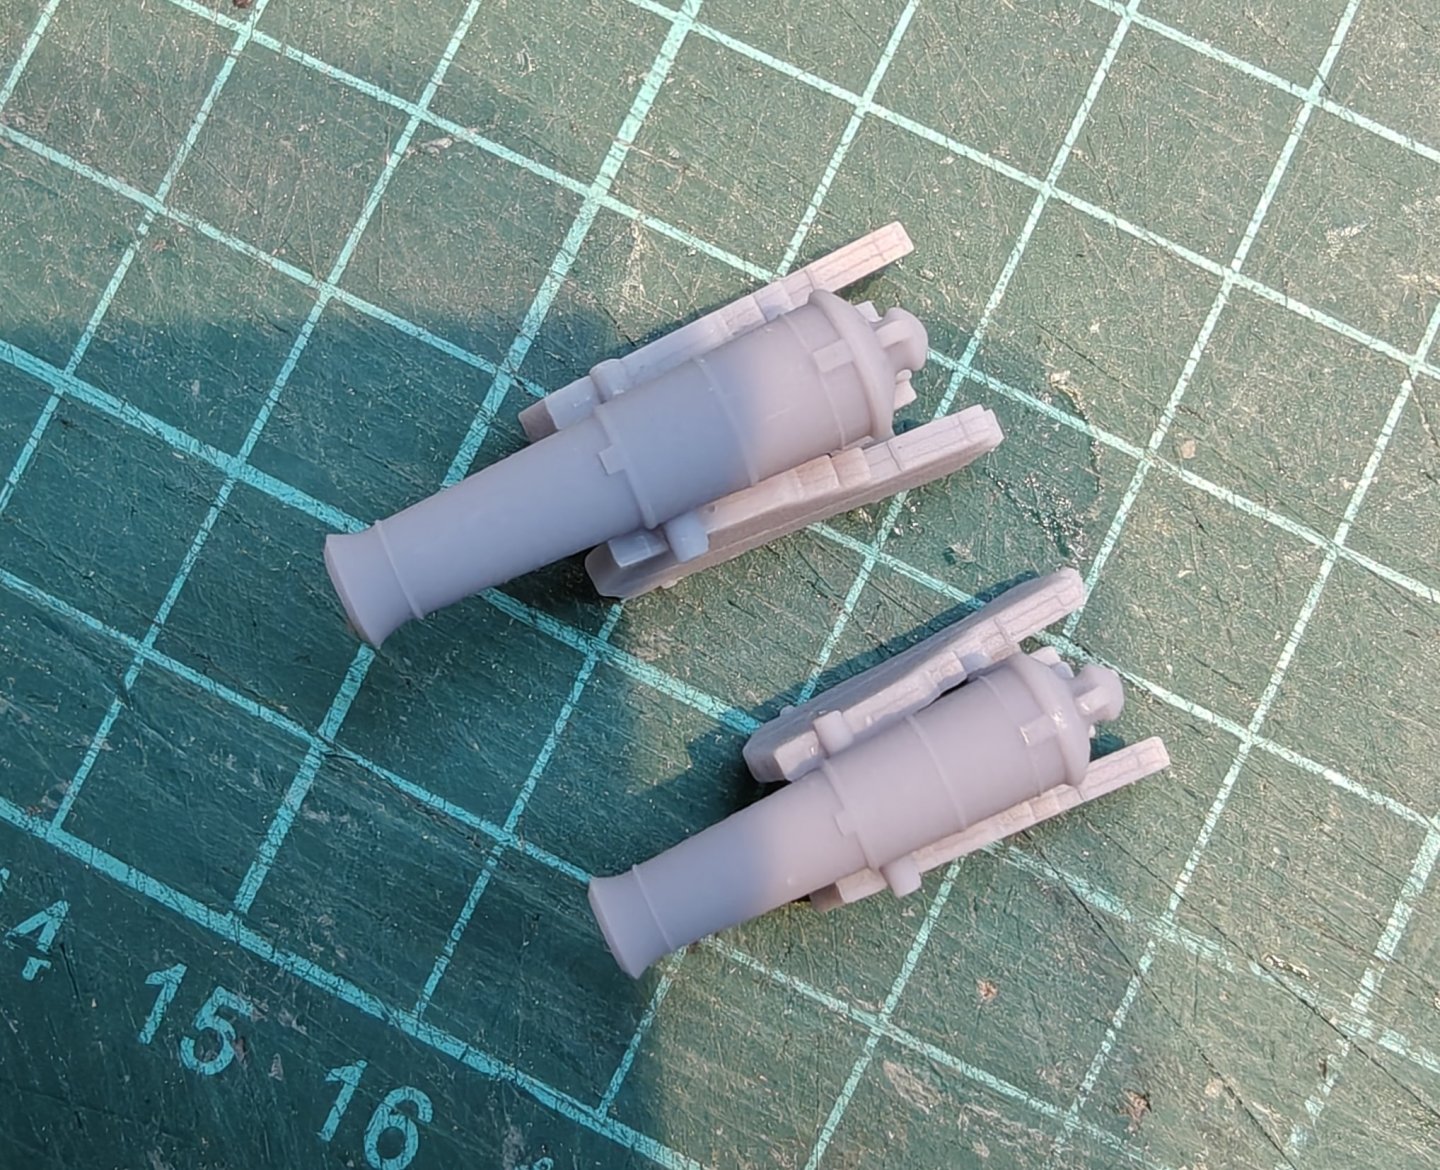
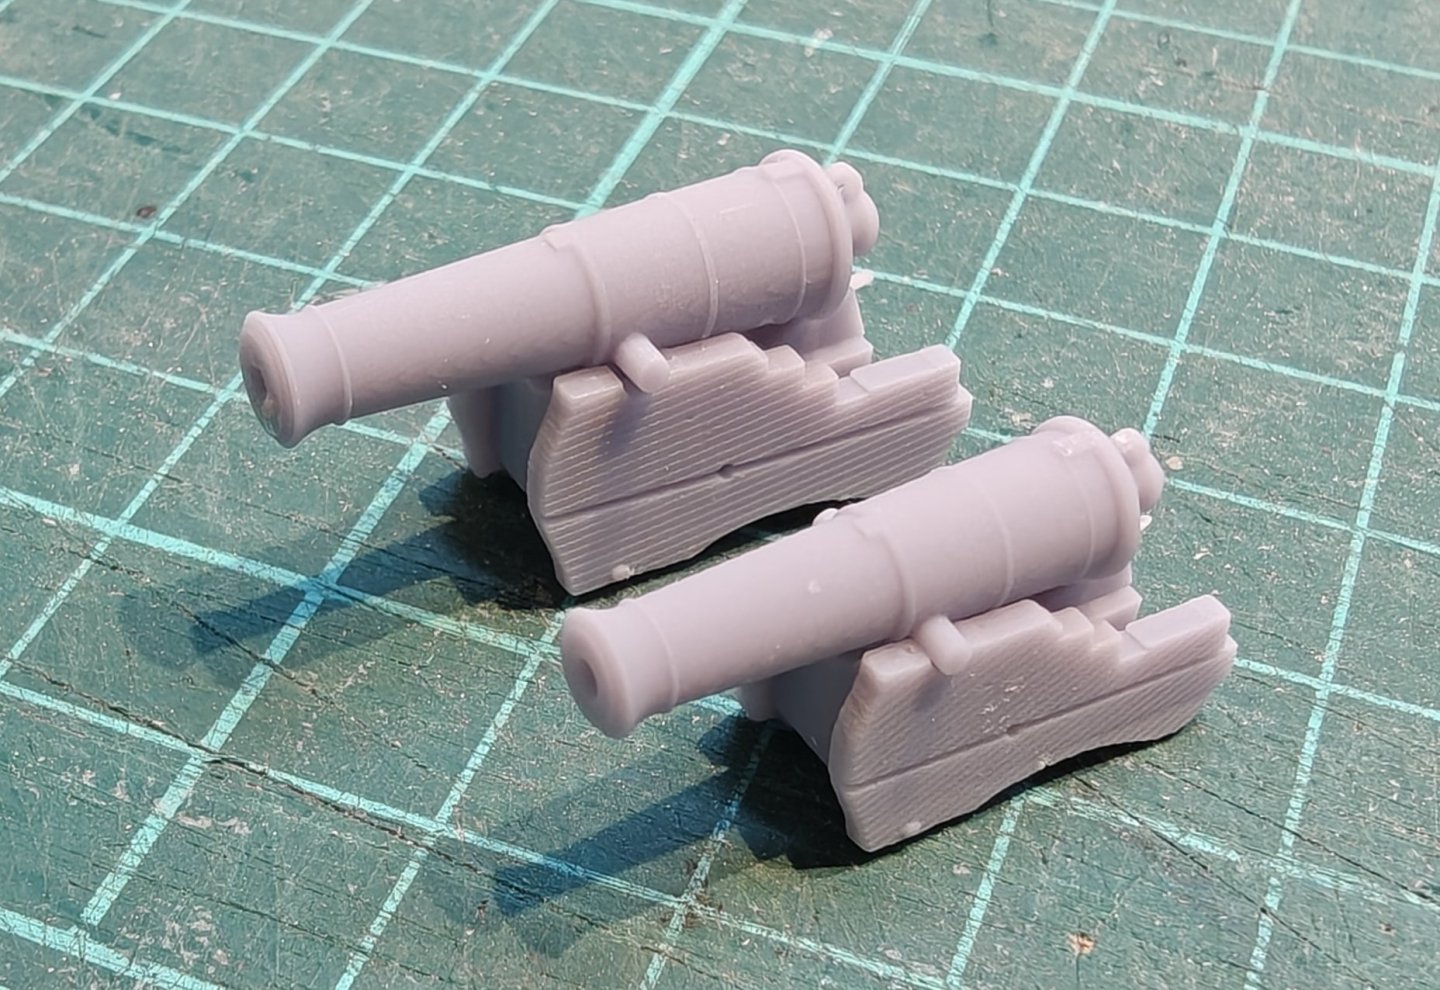
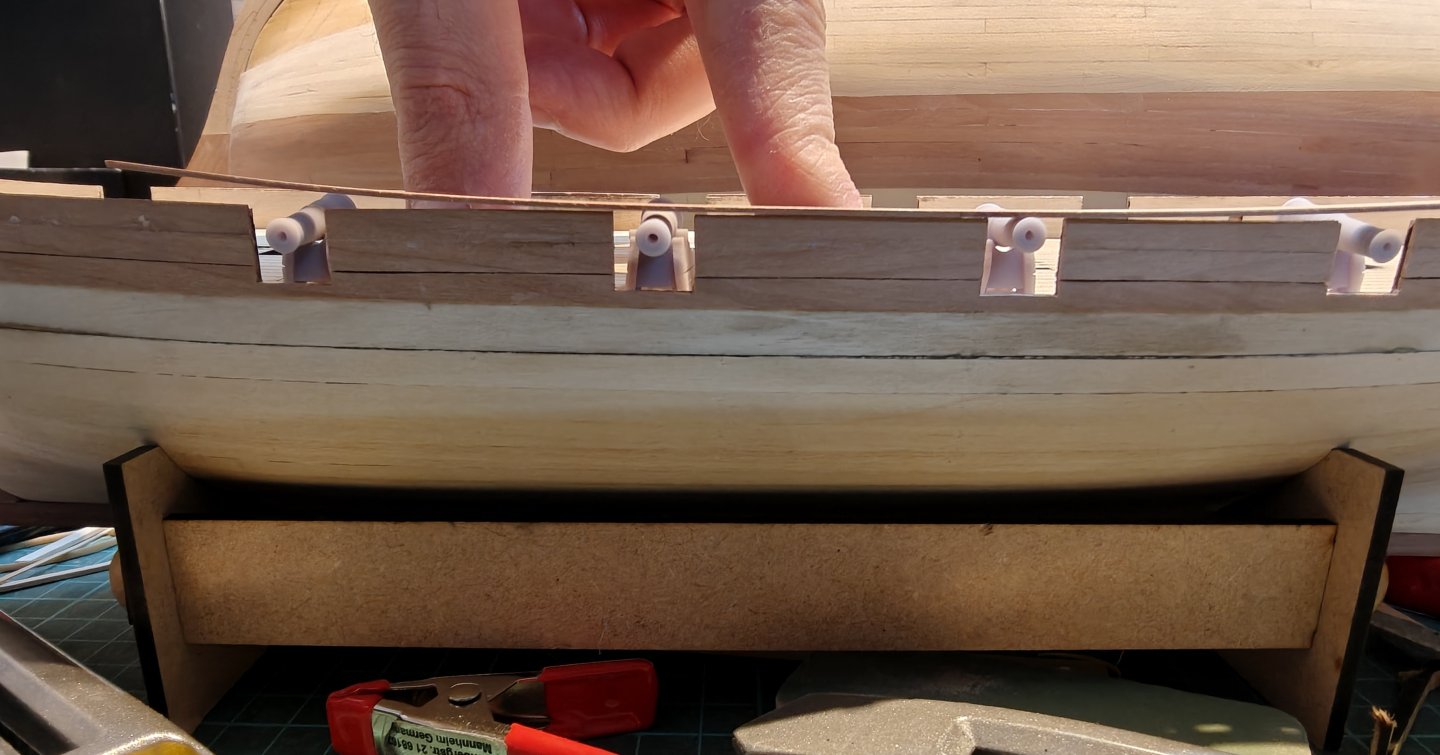
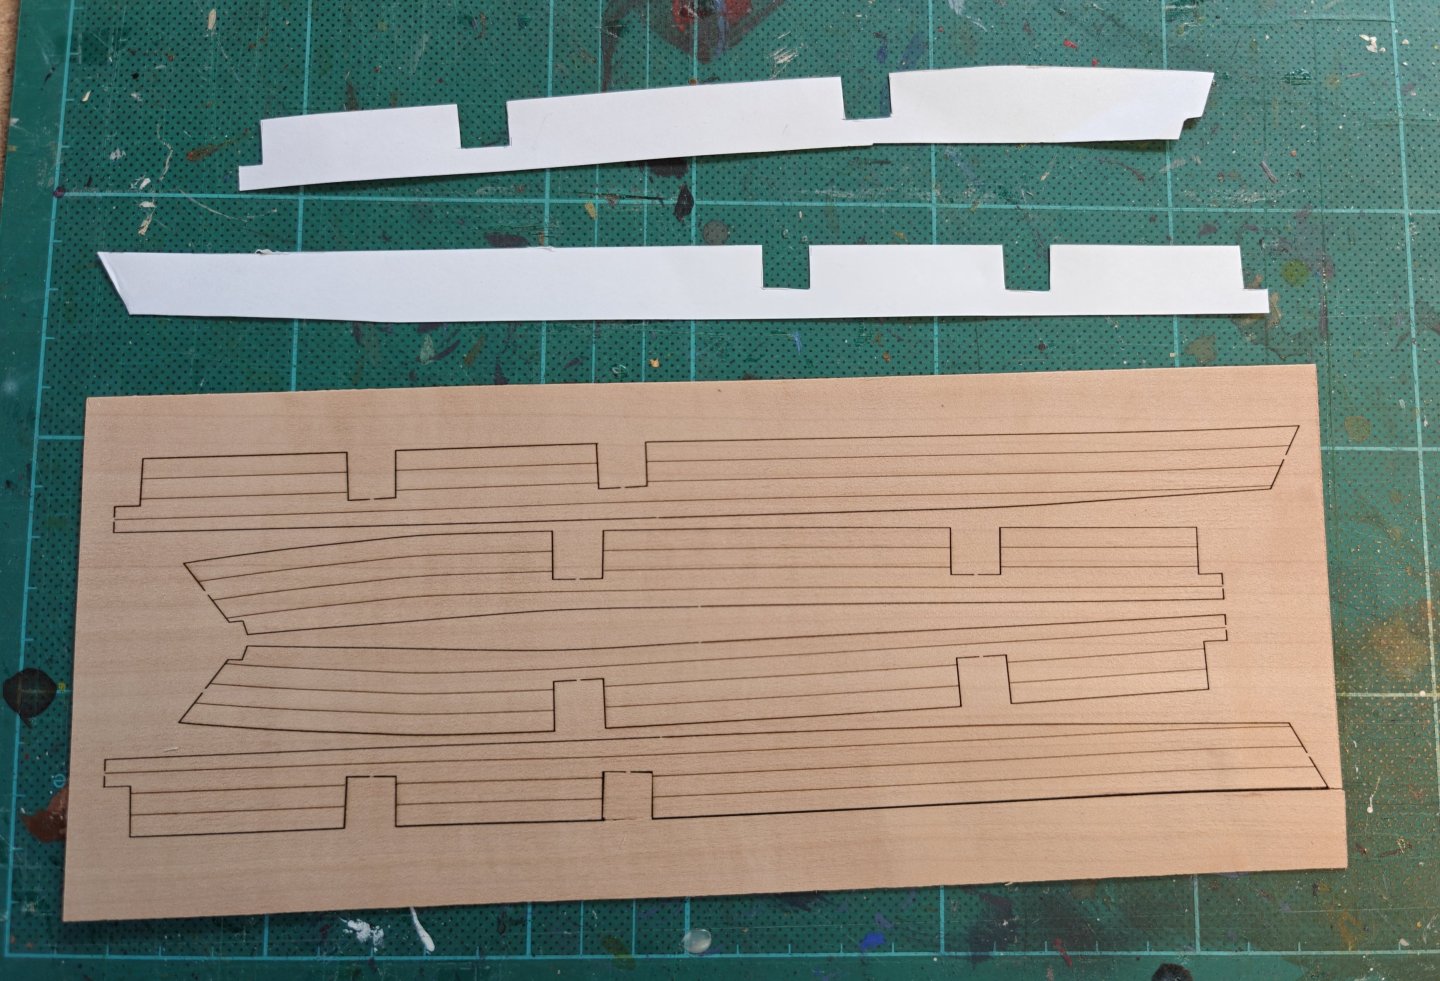
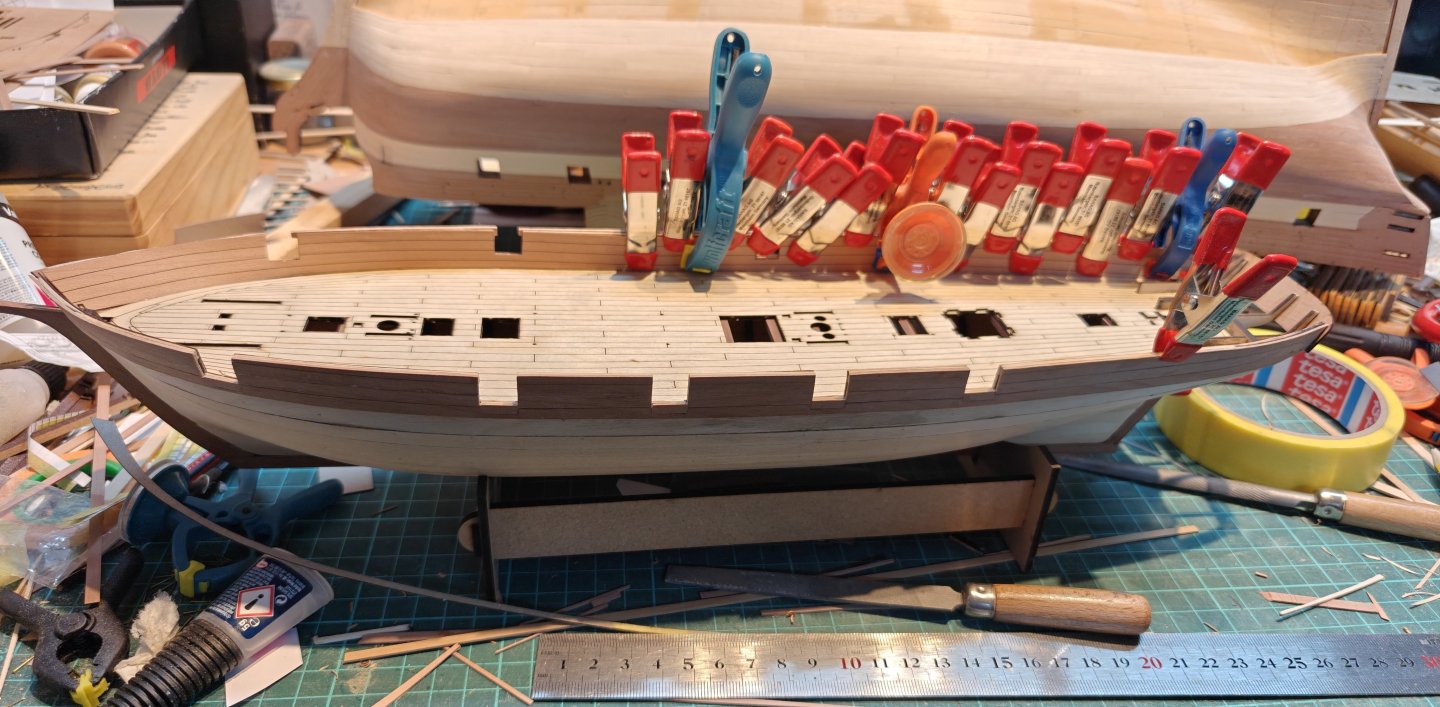
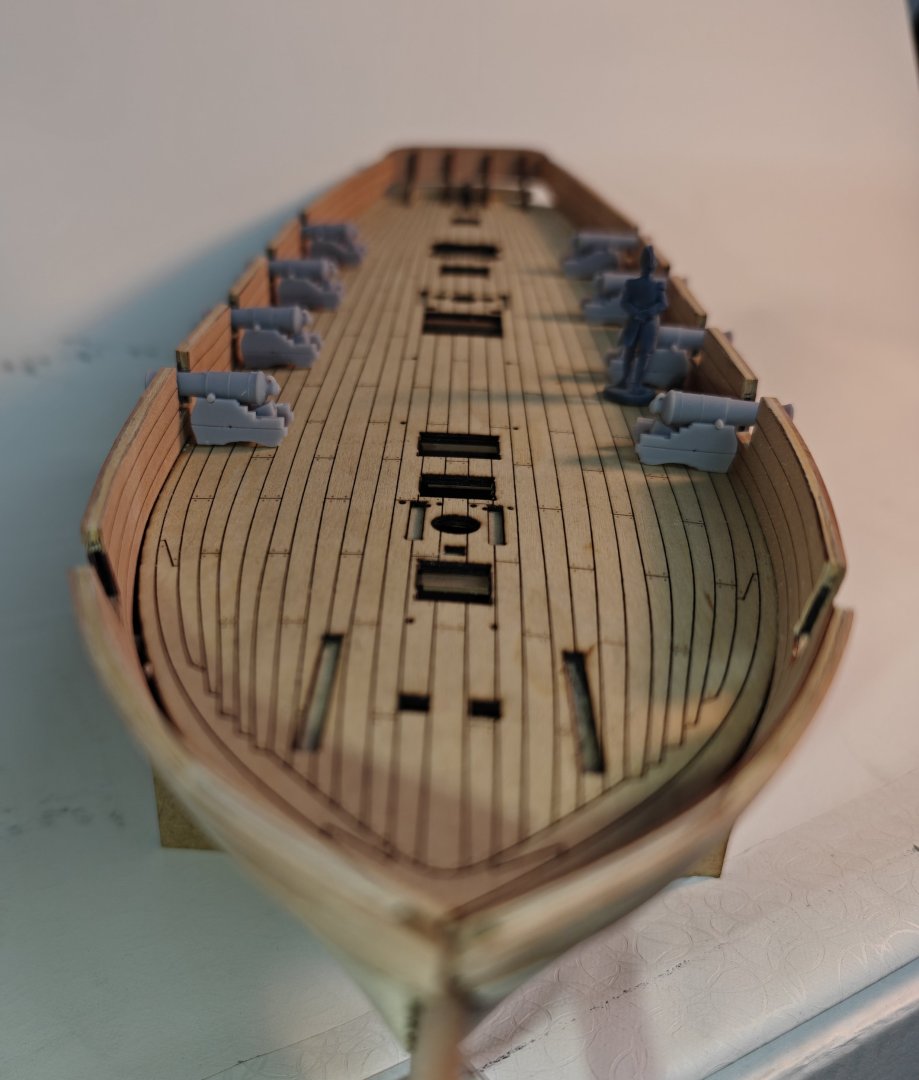
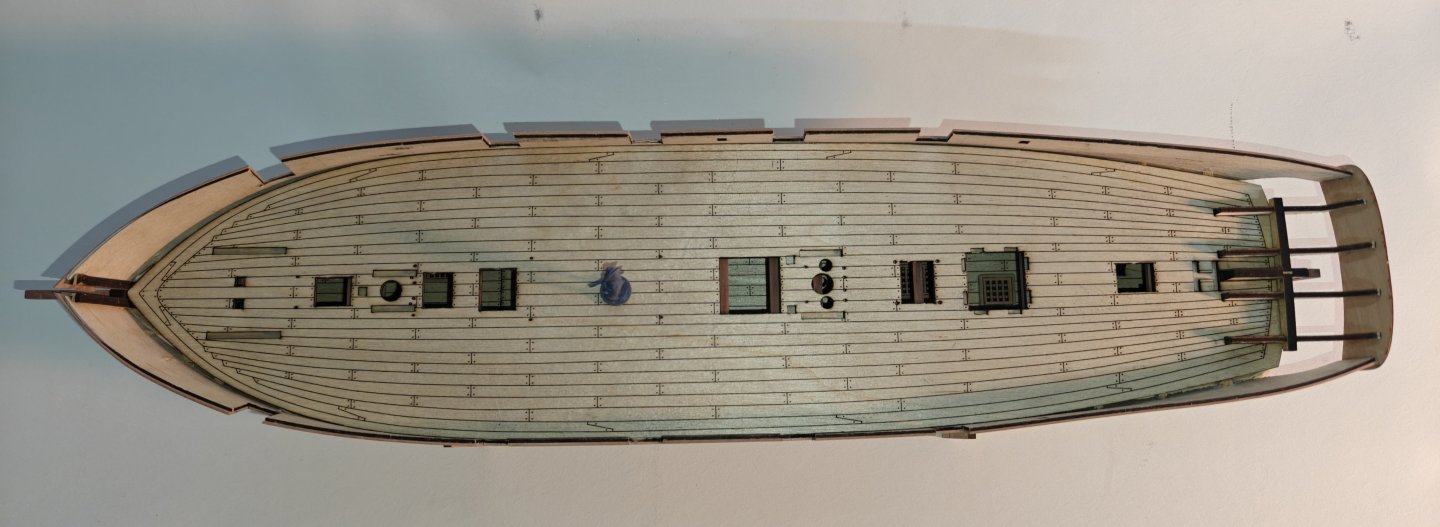
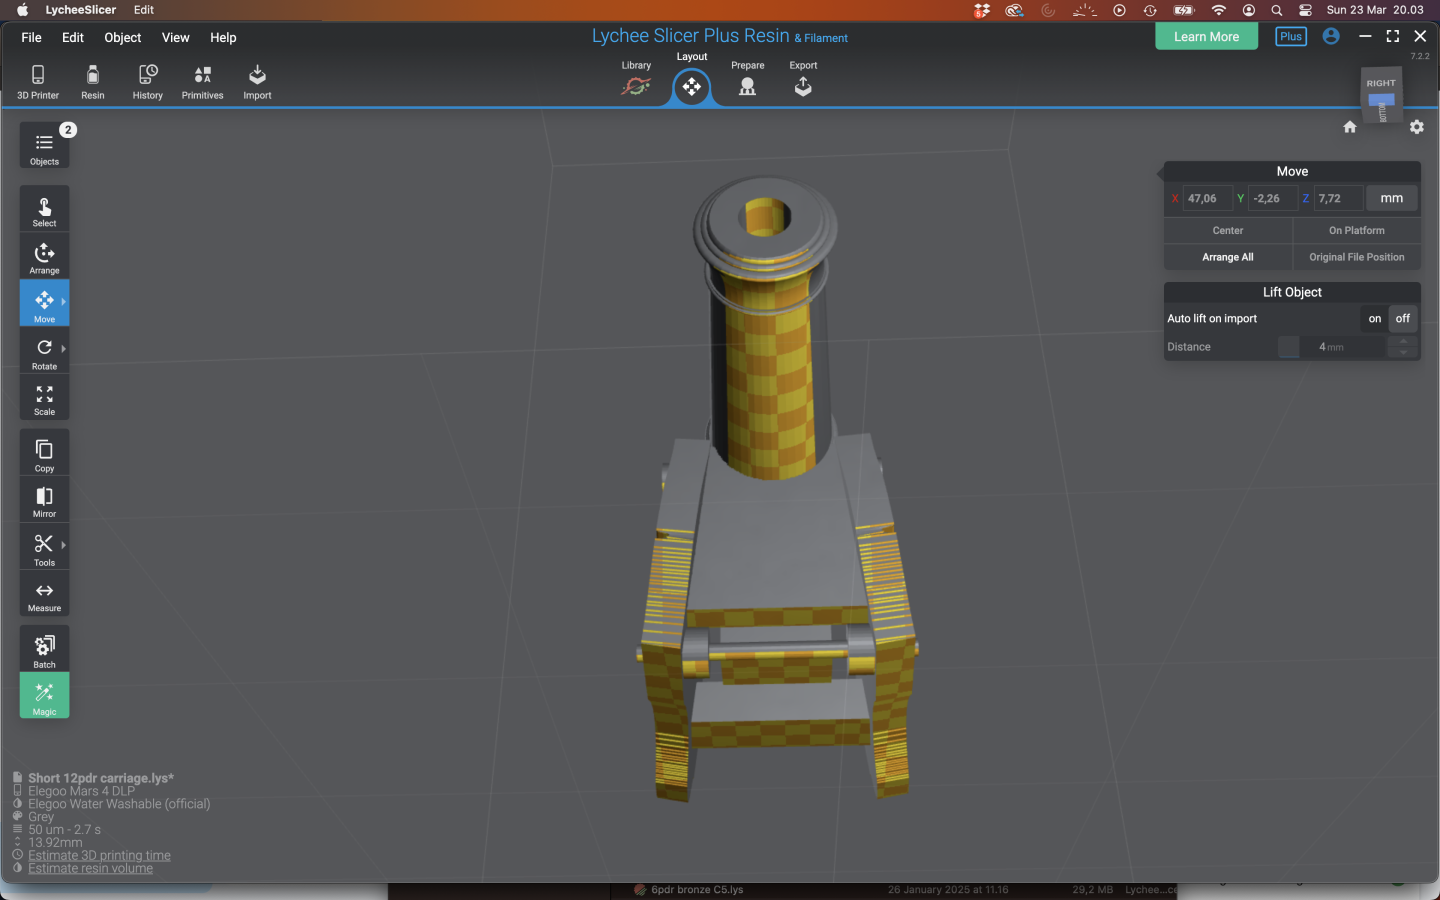
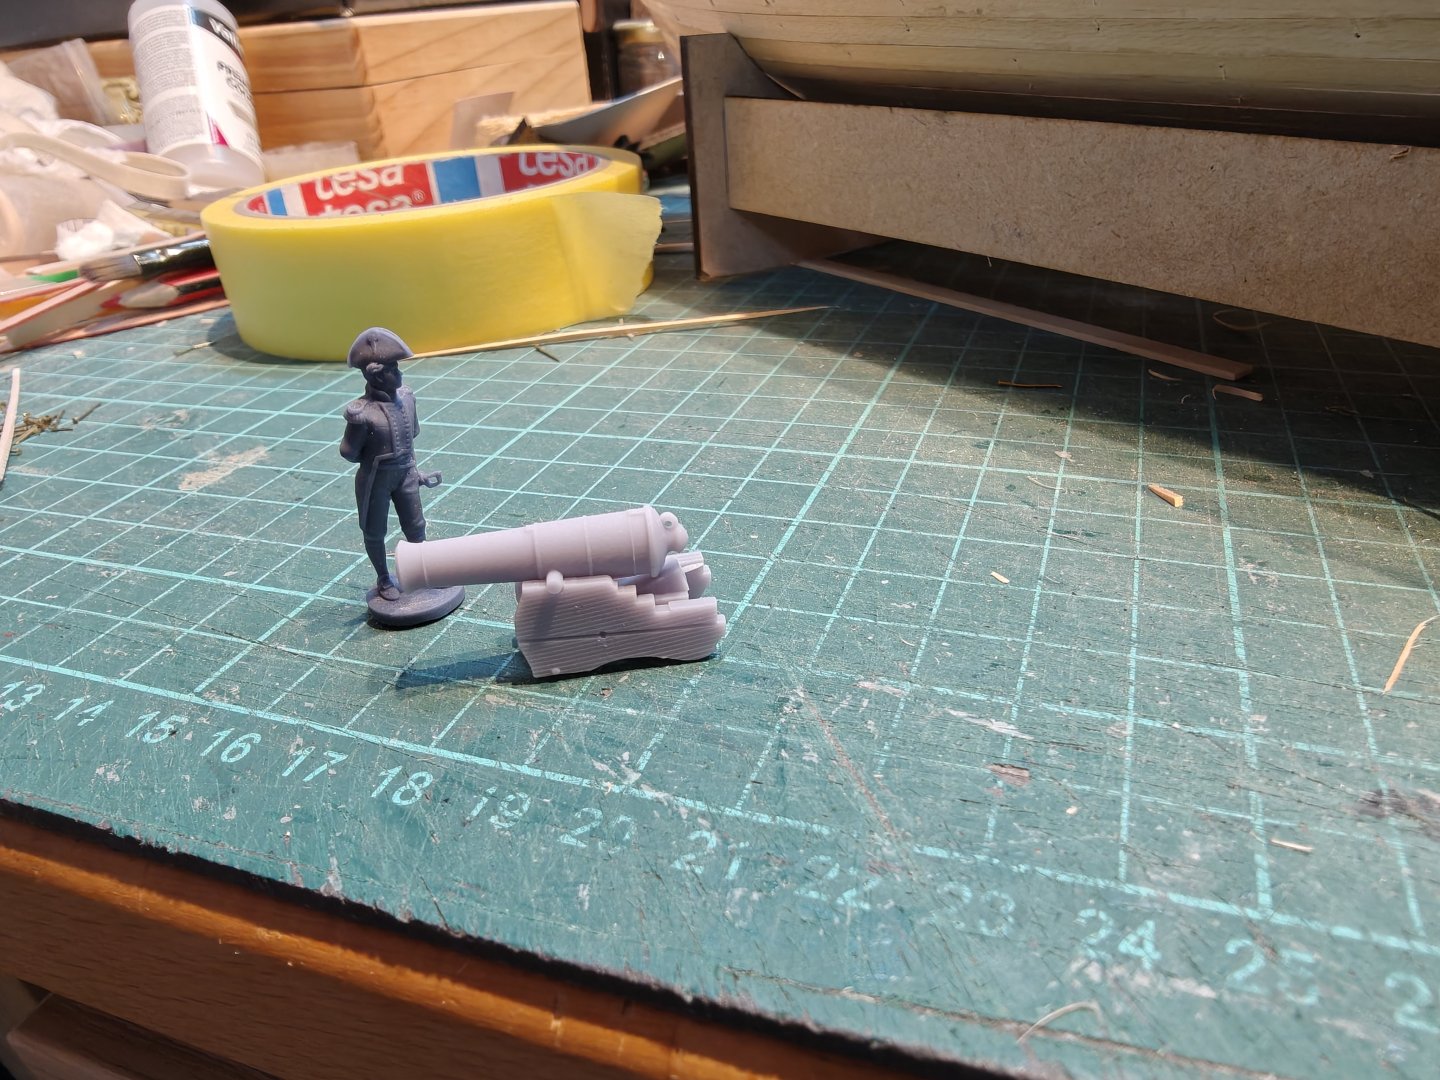
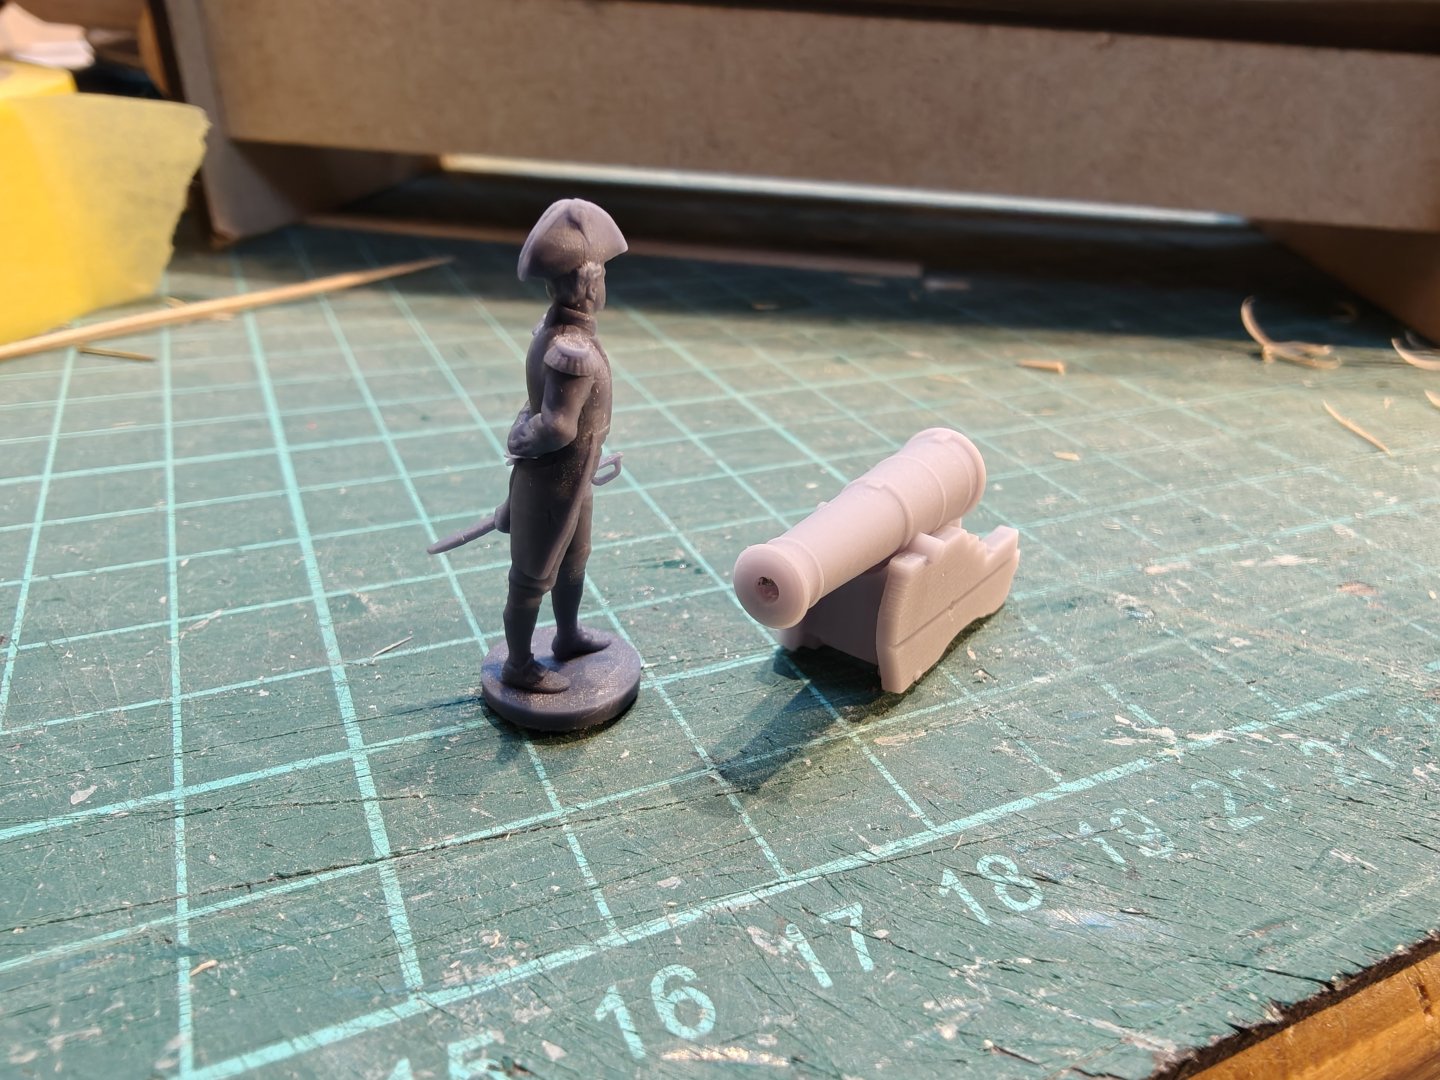
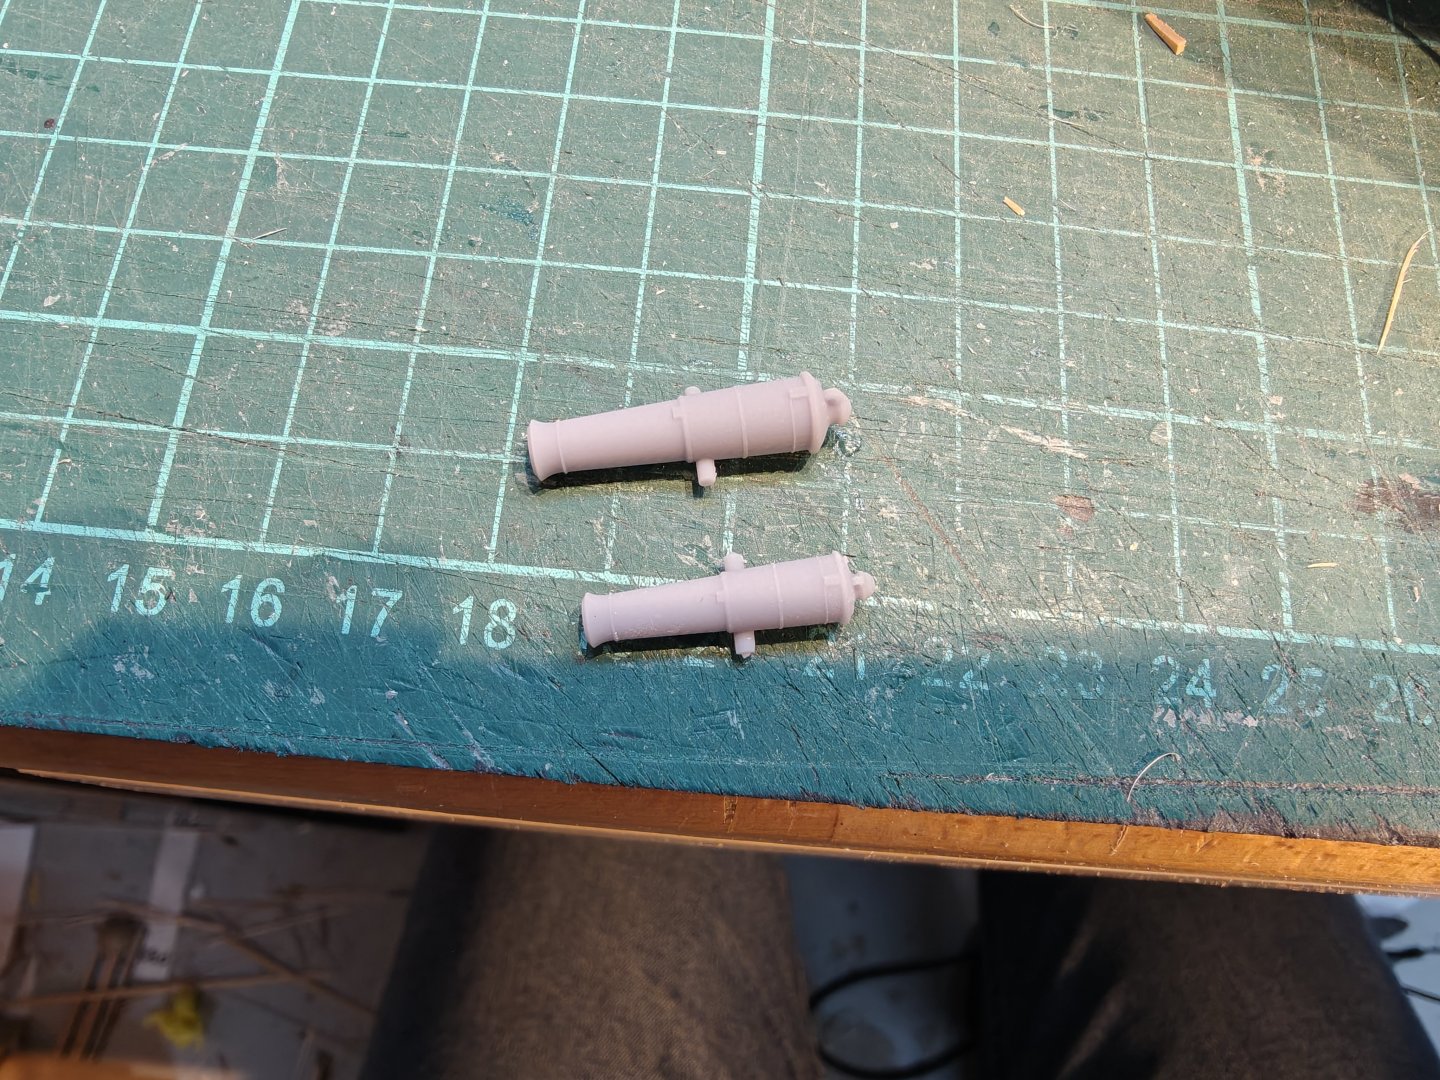
Log entry 7 - modified deck, re-printing cannon, fixing mistakes and inner bulwarks This turned into a long post - quite a few things have happened in the past few days. New engraved deck As mentioned in the previous post, I needed a new deck with a better fit. I decided to keep the engraving and only change the outer shape to fit. This is because I actually drew the deck planking based on the original plans, so changing the engraving would be moving away from the historical sources. I took the advice I received a few posts back and made the nail engravings less deep - I like the new look. Here it is compared to the first version: Cannon in the right size I scaled down my 18 pdrs to 12 pdrs and re-printed them. Here they are curing: And here's a comparison to the 18 pdrs: Even though they are only 13% smaller, they look significantly smaller side by side. Problems... This is where the trouble began. I naturally put the cannons on the deck and quickly realized I had an issue: the barrels were not at all in the middle of the gun ports. I did a bunch of measurements on the model, on my CAD designs and on the original plans and I cane to the conclusion that two things had happened; I had used the wrong thickness of the two layer deck and therefore had the deck a bit too high, by about 0.8 mm and when applying the plywood bulwark patterns, the fit was good at the ends, but due to the curvature of the hull and less than perfect taper of the parts, they were sitting to low at the middle of the hull, by about 1.2-1.5 mm. A total of 2.0-2.2 mm. A quick decision was made to build up the bulwarks to make up for the difference. This will only be adding the 0.8 mm that the deck sits too high at the middle, the rest is just compensating for the bad fit of the plywood bulwark. It is not so pretty right now, but that fortunately does not matter, as the wales will entirely cover the repairs - it sits right under the gun ports. Inner bulwark patterns But as I now had the repair sitting on top of the bulwark, I decided to add the inner bulwarks to strengthen them, and therefore I needed to glue in the deck first! I made a paper template on the model, scanned it (with a ruler...), drew it in CAD and laser cut it - it was quick work and only took around an hour total. I made it in two parts to not waste the 0.5 mm material. Here the last part being glue in with almost enough clamps... And this is now the state of things: I like the small, fat cannons and the carriages with no visible wheels (they do have two small wheels on the inside at the front). Now, I can continue with the planking. I will protect the engraved deck with a cardboard cover while I work on the outside of the hull. BR TJM


-
I am just happy I could help! And I hope you enjoy your trip up here in summer!
-
Magnificent! 😲 I am very impressed - the end result is so smooth and the colour contrast between the painted and natural wood looks stunning!
-
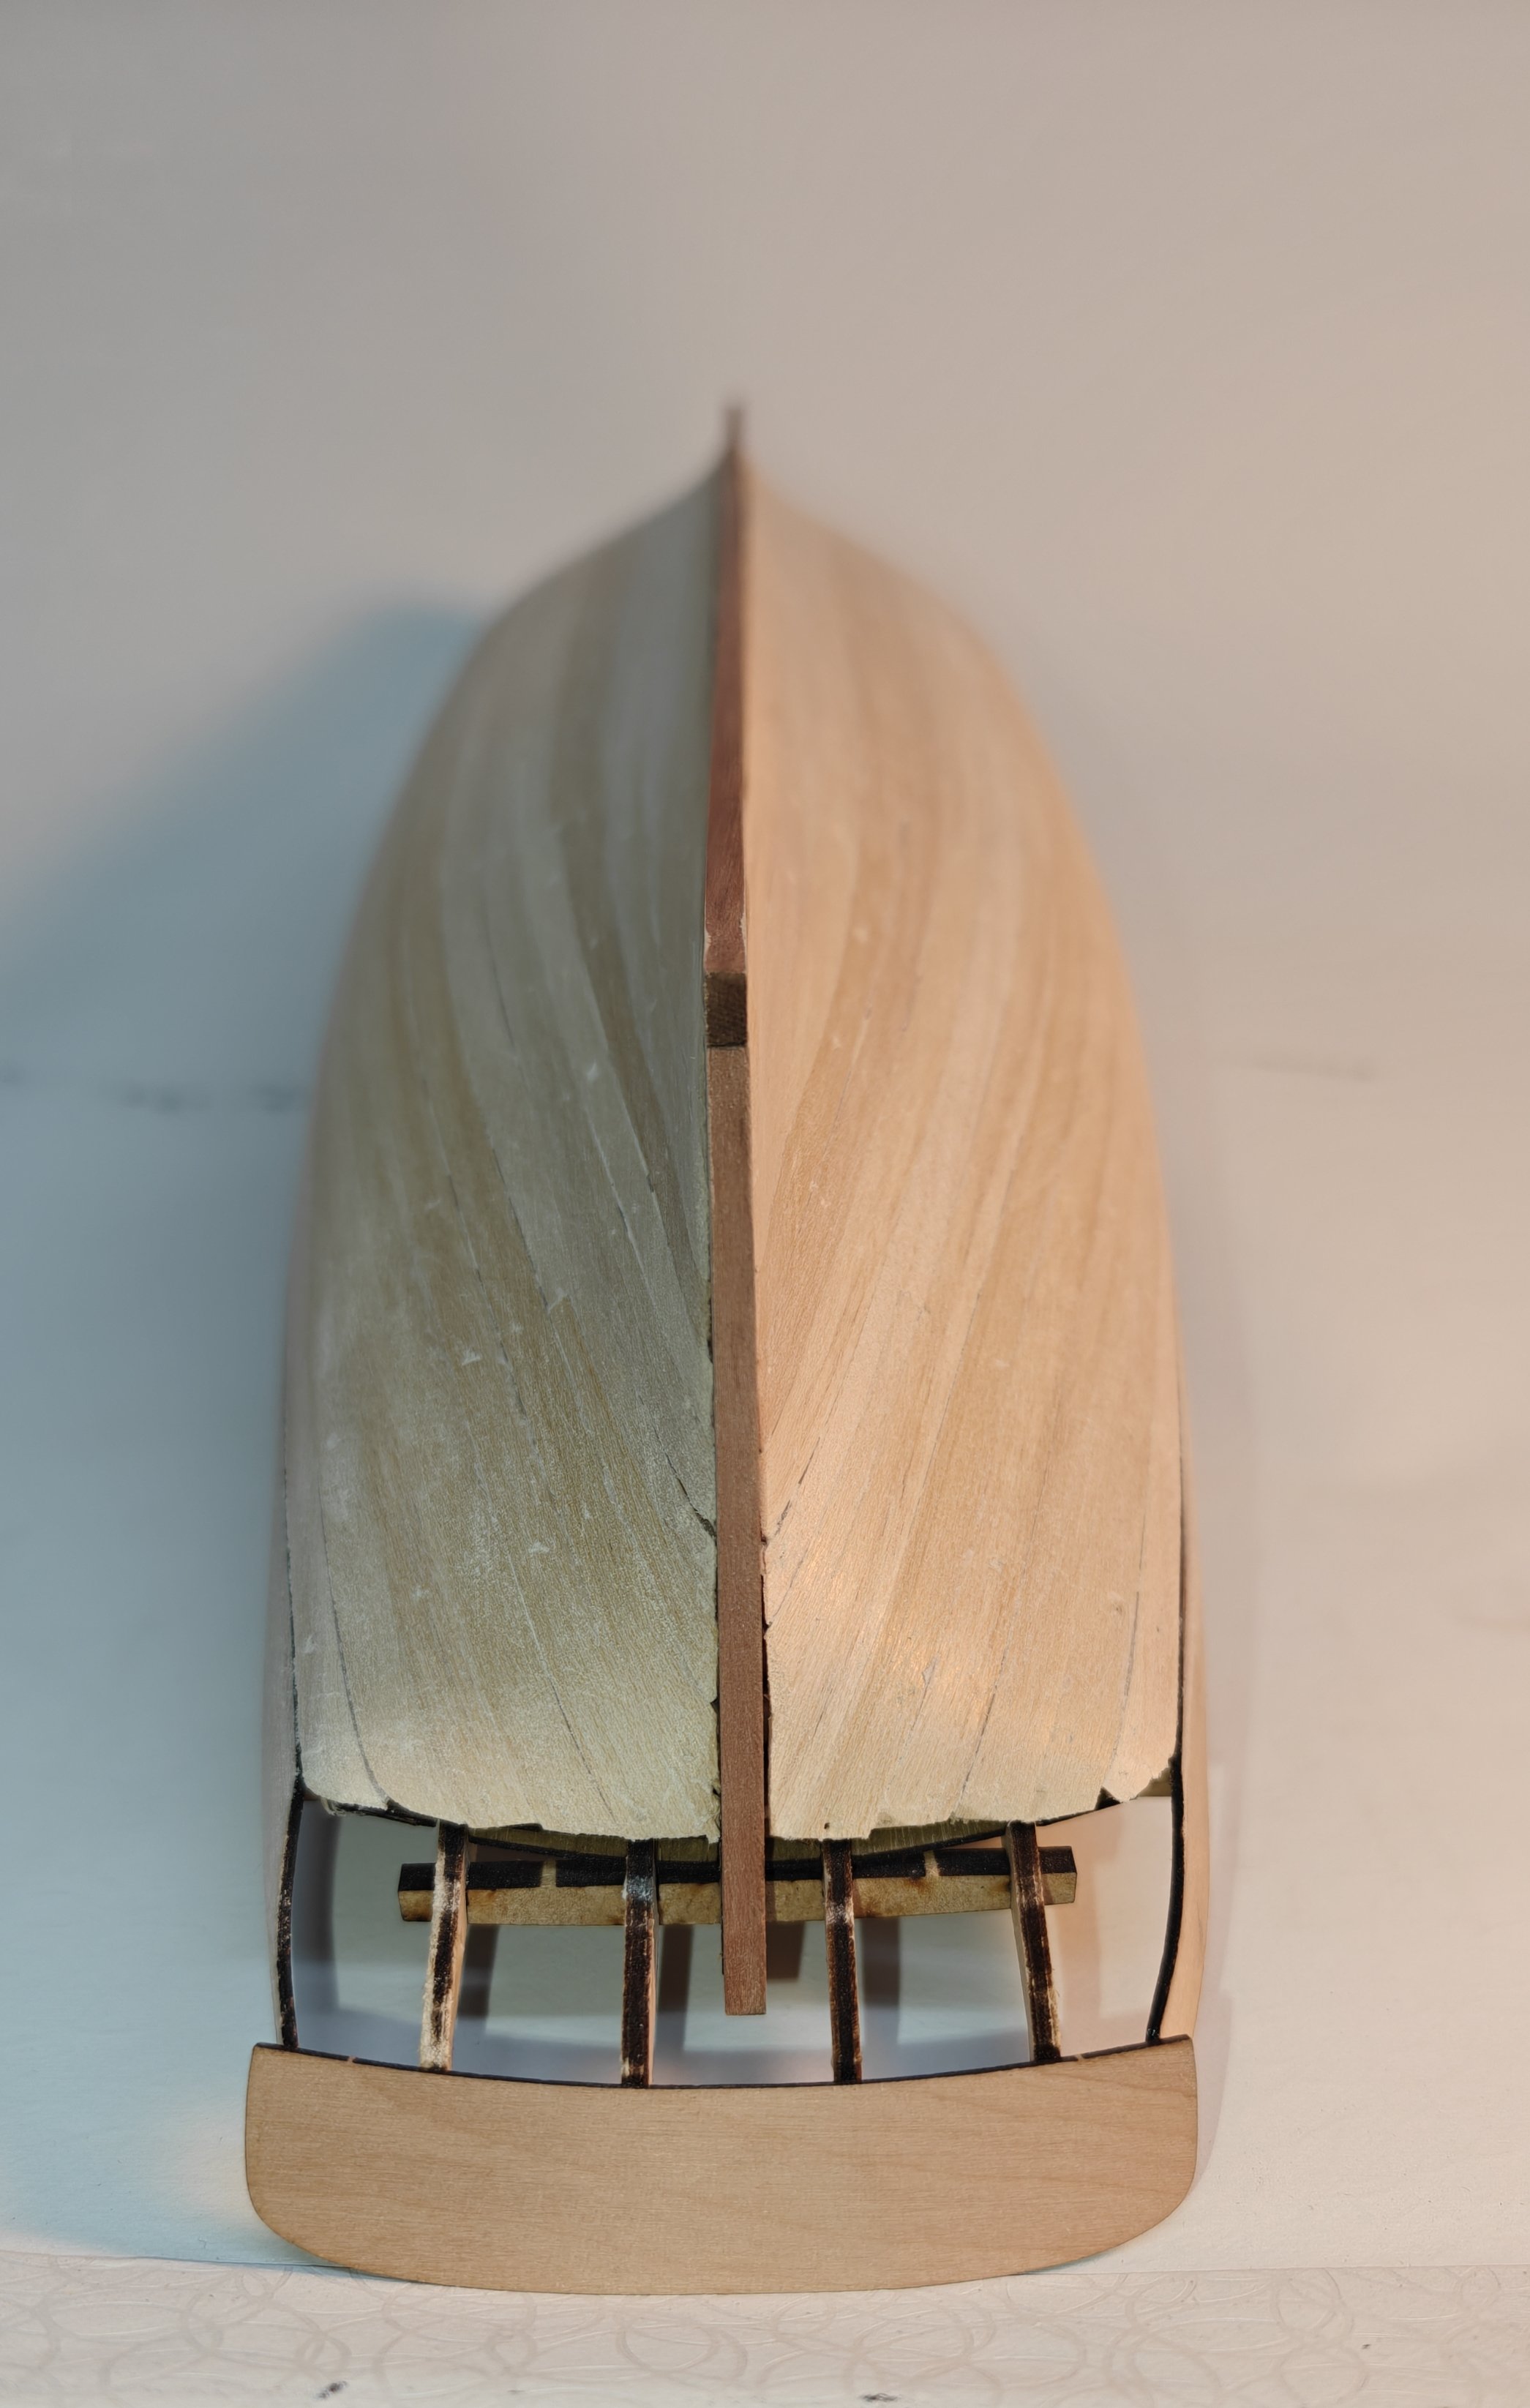
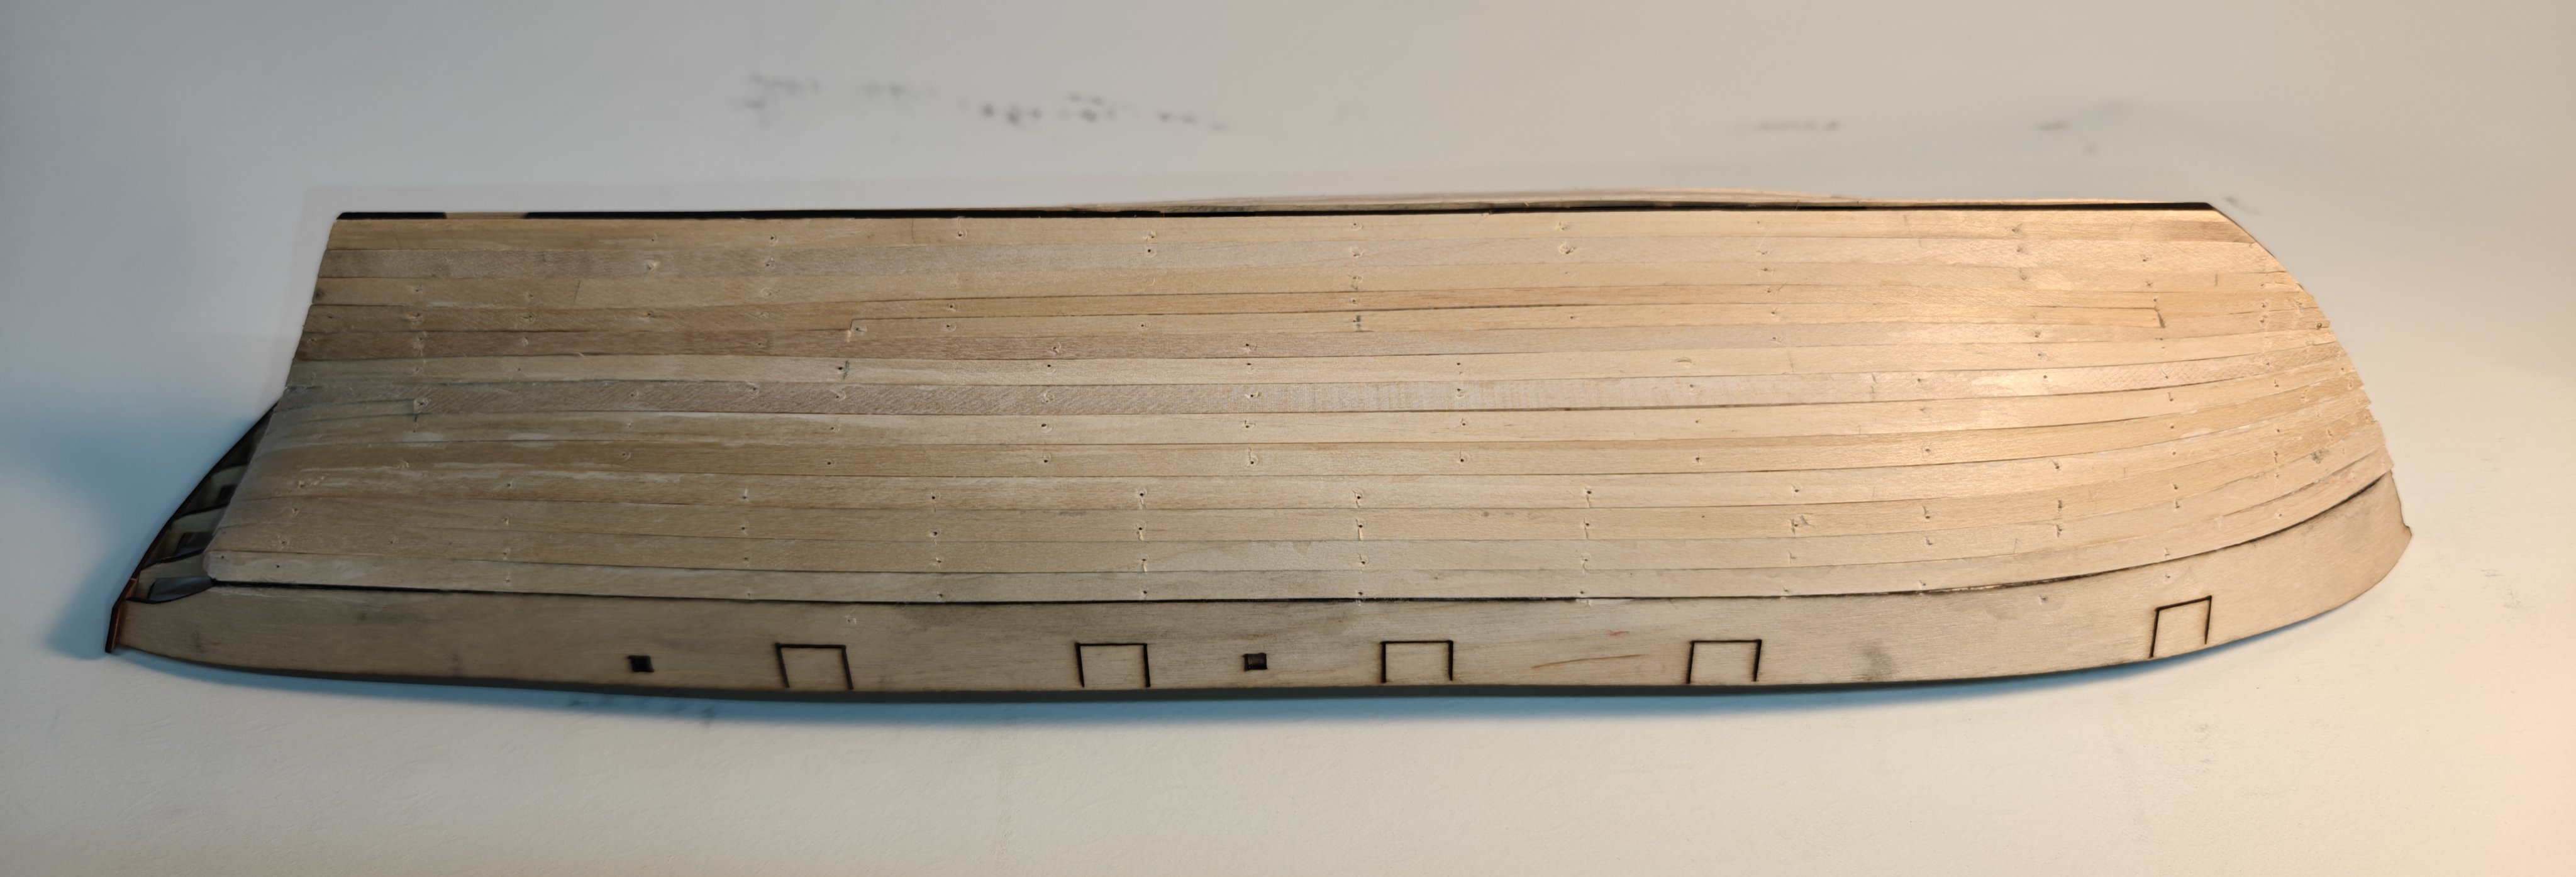
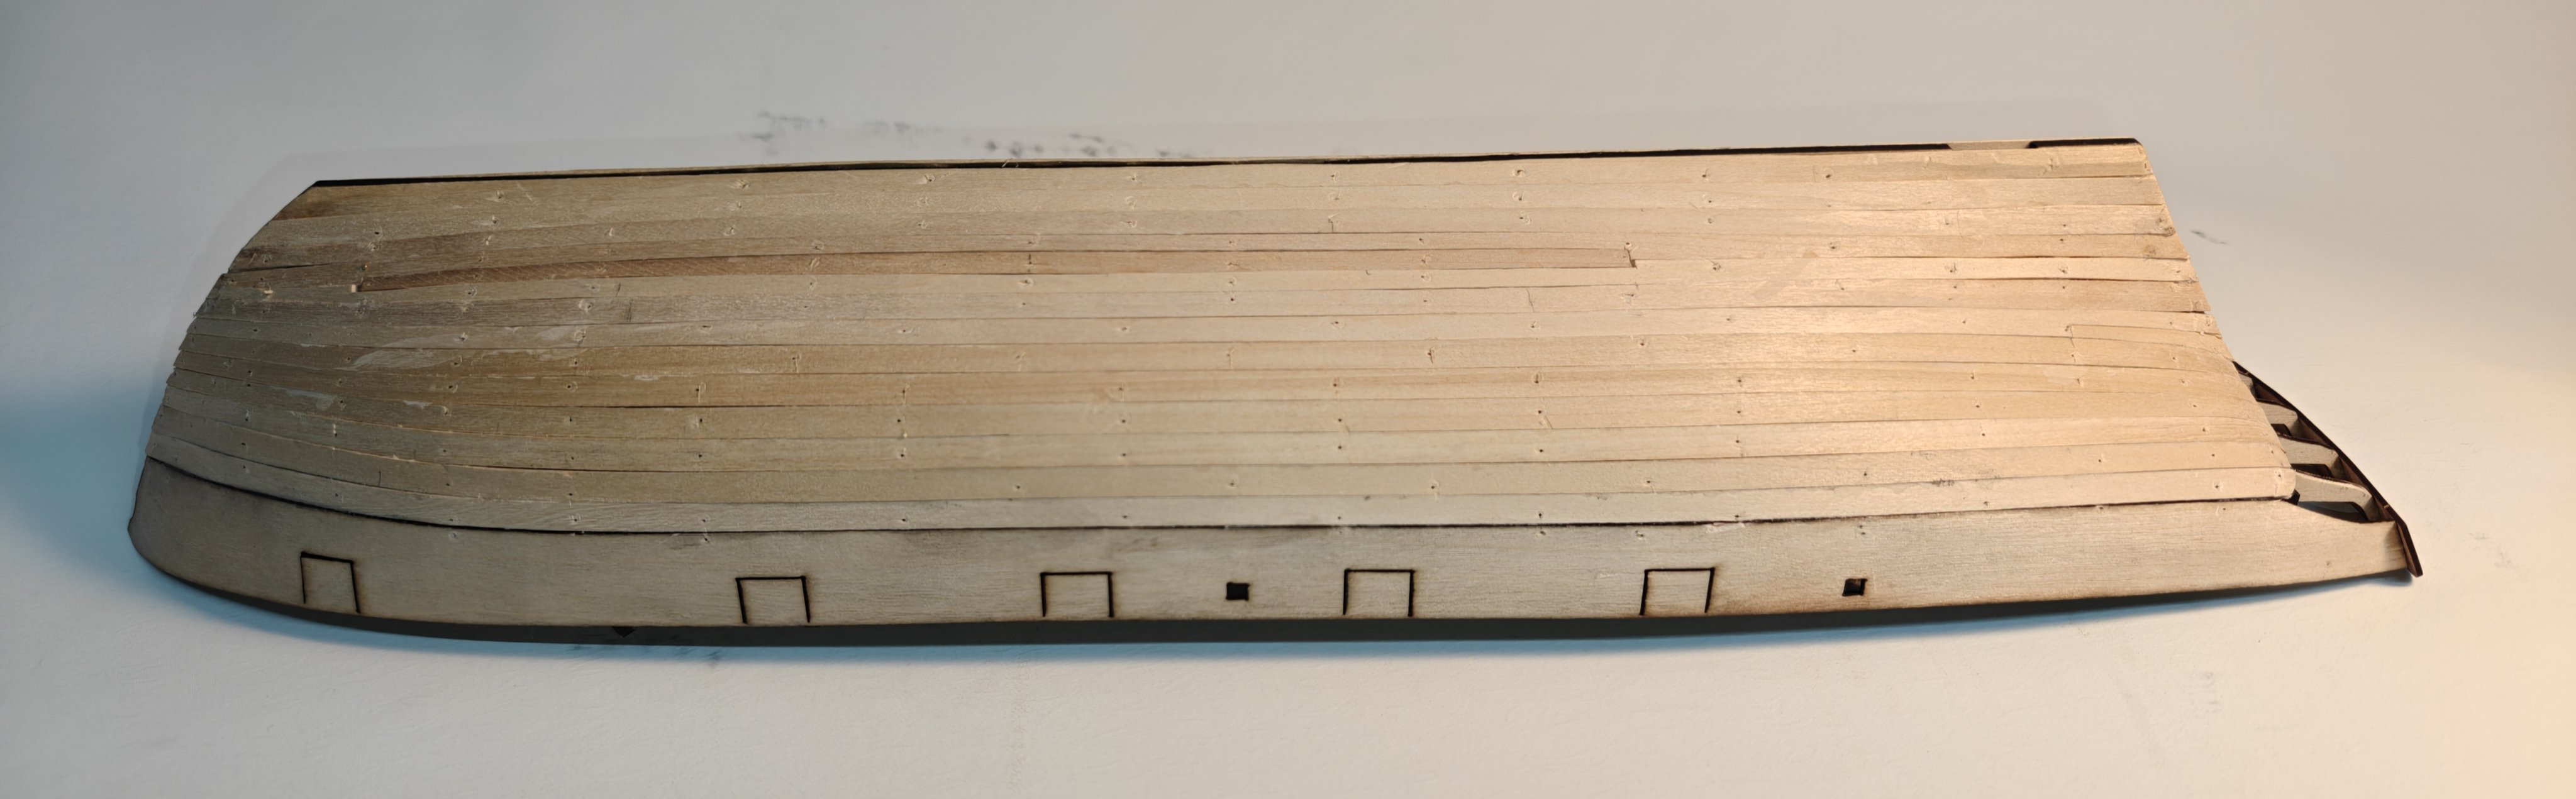
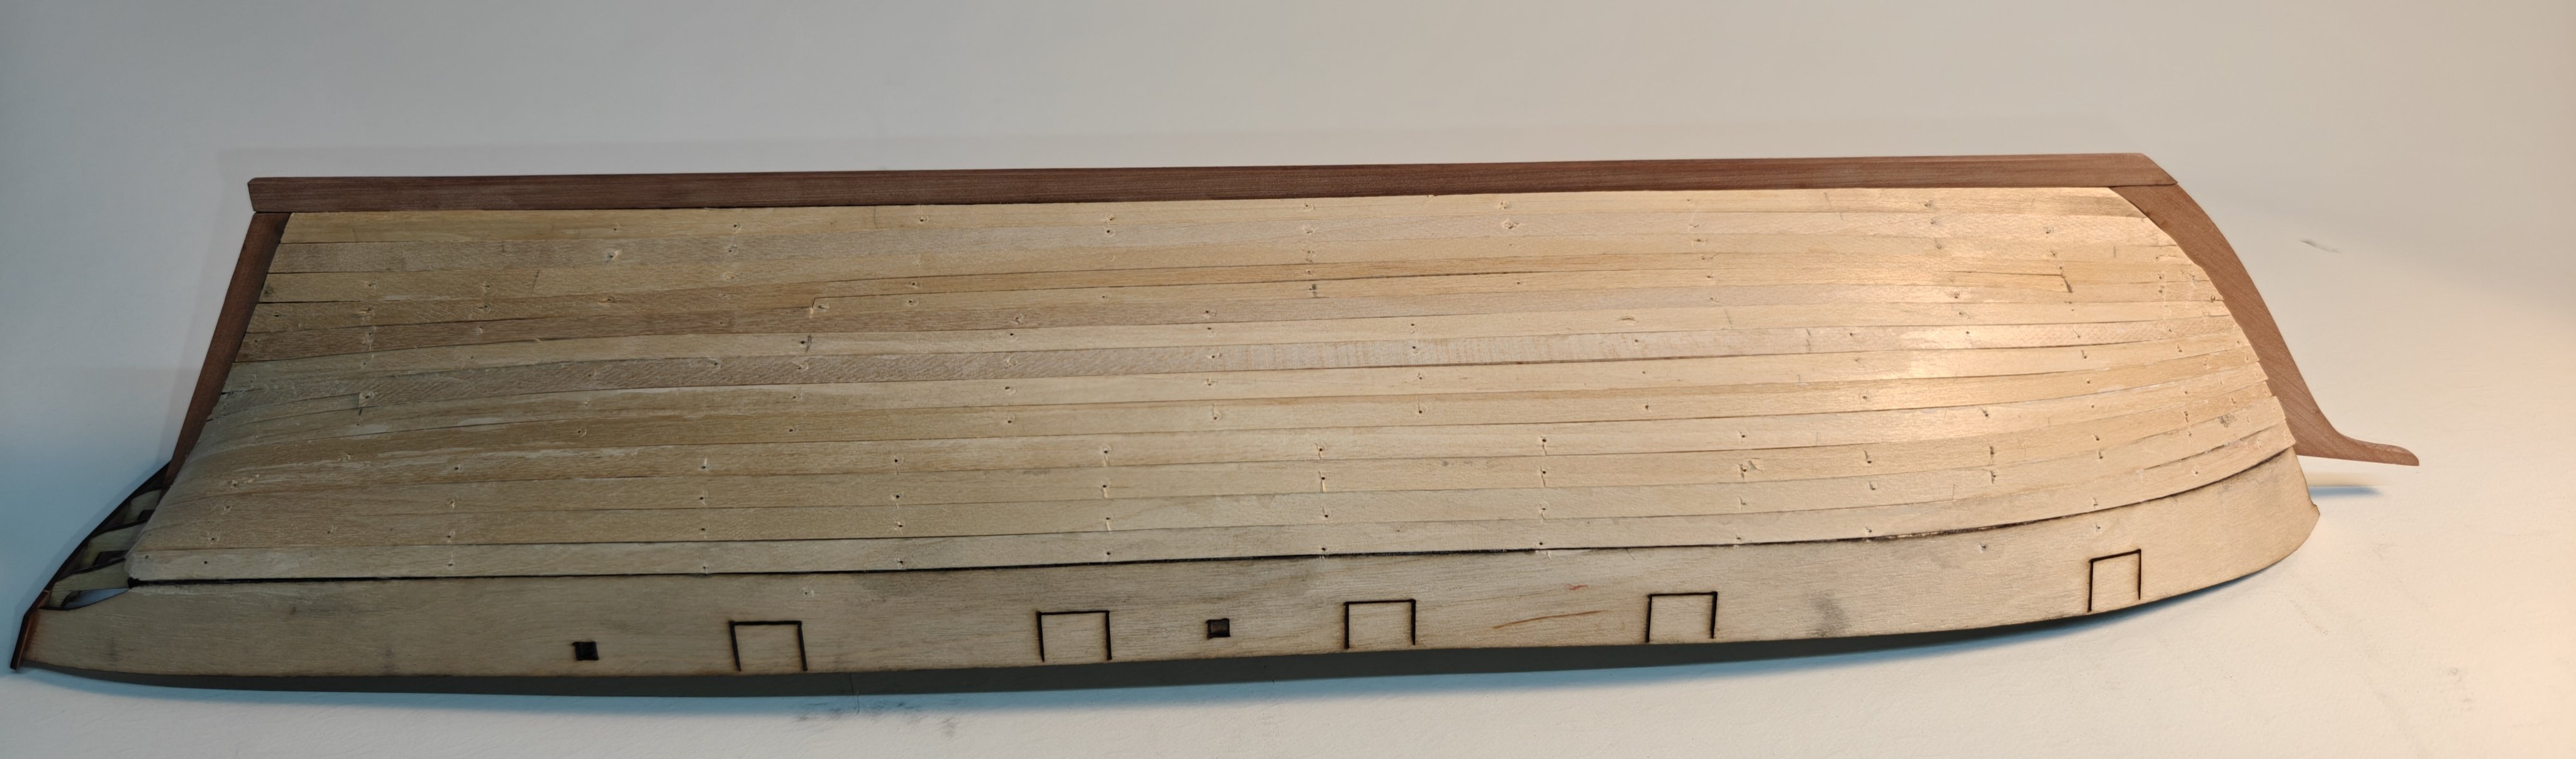
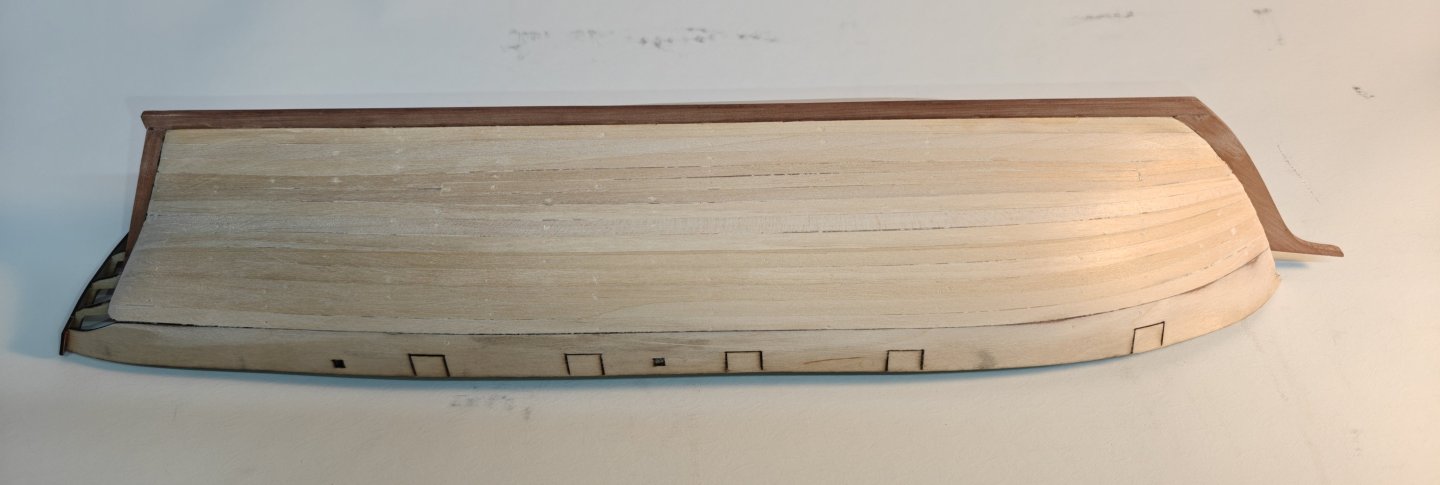
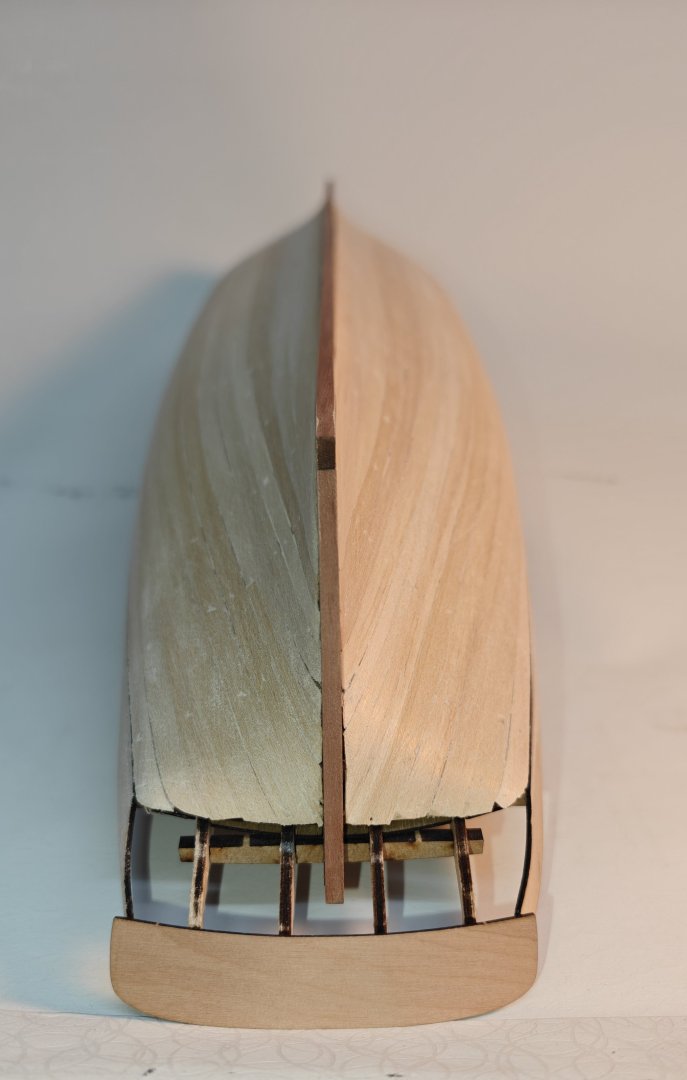
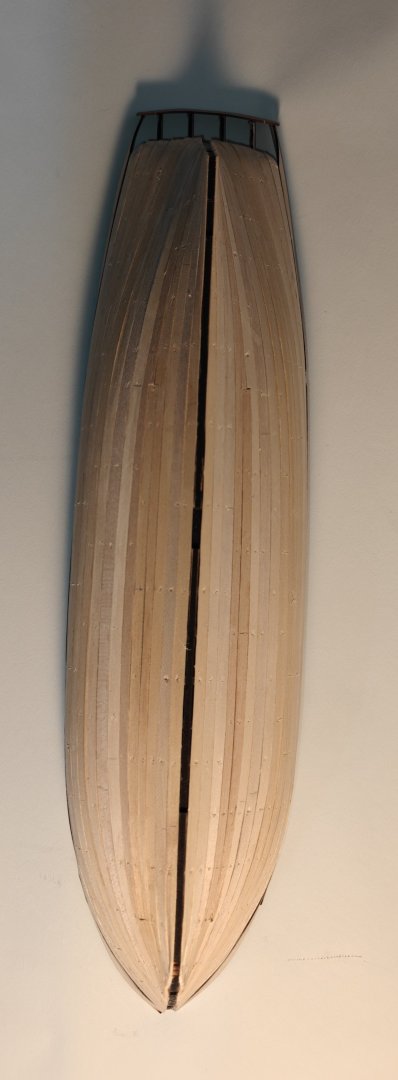
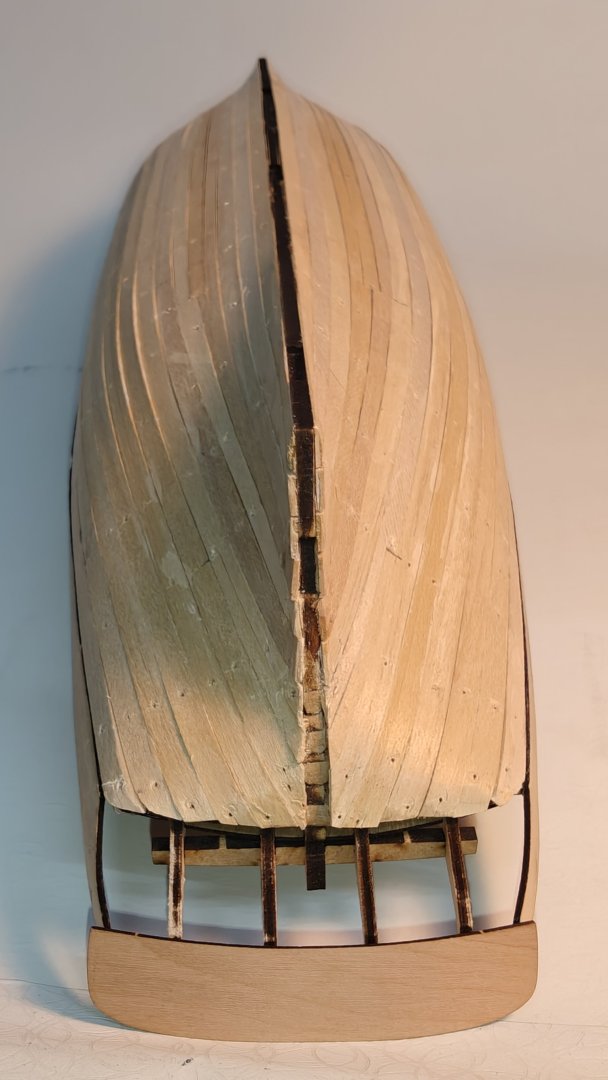
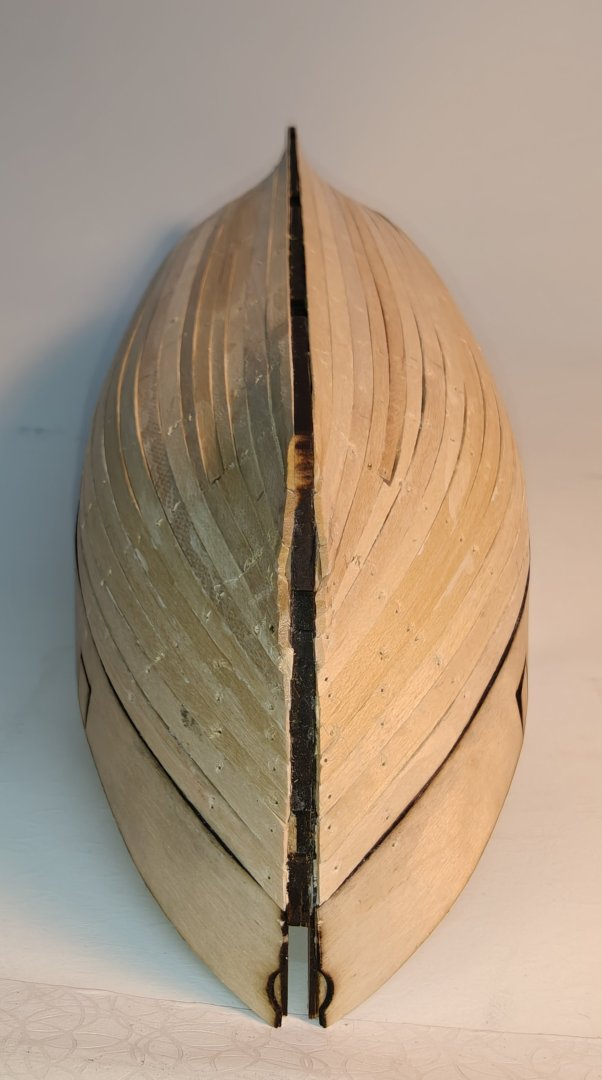
Log entry 6 - sanding, keel and start of second planking Sanding the hull went quickly and there were no weird areas that needed filler, which I was happy about, especially as I designed the frames myself. There are a few hairline cracks between a few of the planks, but nothing that will be an issue when adding the second layer I deem. Here is the state after sanding and gluing in the keel: I went on and added the three first planks of the second layer and removed the upper parts of the bulkheads and the temporary braces. I also tested the fit of the engraved deck, but as expected it needs a bit of tailoring both at the stern and the prow. I guess it was very optimistic to cut this to begin with with everything being modelled only in 2D CAD! However, these images still give a good impression of what it will look like when a slightly better fitting version is added (which won't be until the second planking is completed). I just need to redesign the deck - making the engraving fit will be a bit tedious, but a few hours should see it done and cut. I can do it while I re-print my canon in the correct size... 🤣. The worst will be that I will need to re-design and re-cut the 2 mm pear edge and due to the shape it takes a whole 500x80 mm sheet so that was a bit of a waste. Anyways, that will teach me to be over confident and cut everything from the start just to have it all like a kit... 😅 On with the planking! BR TJM


-
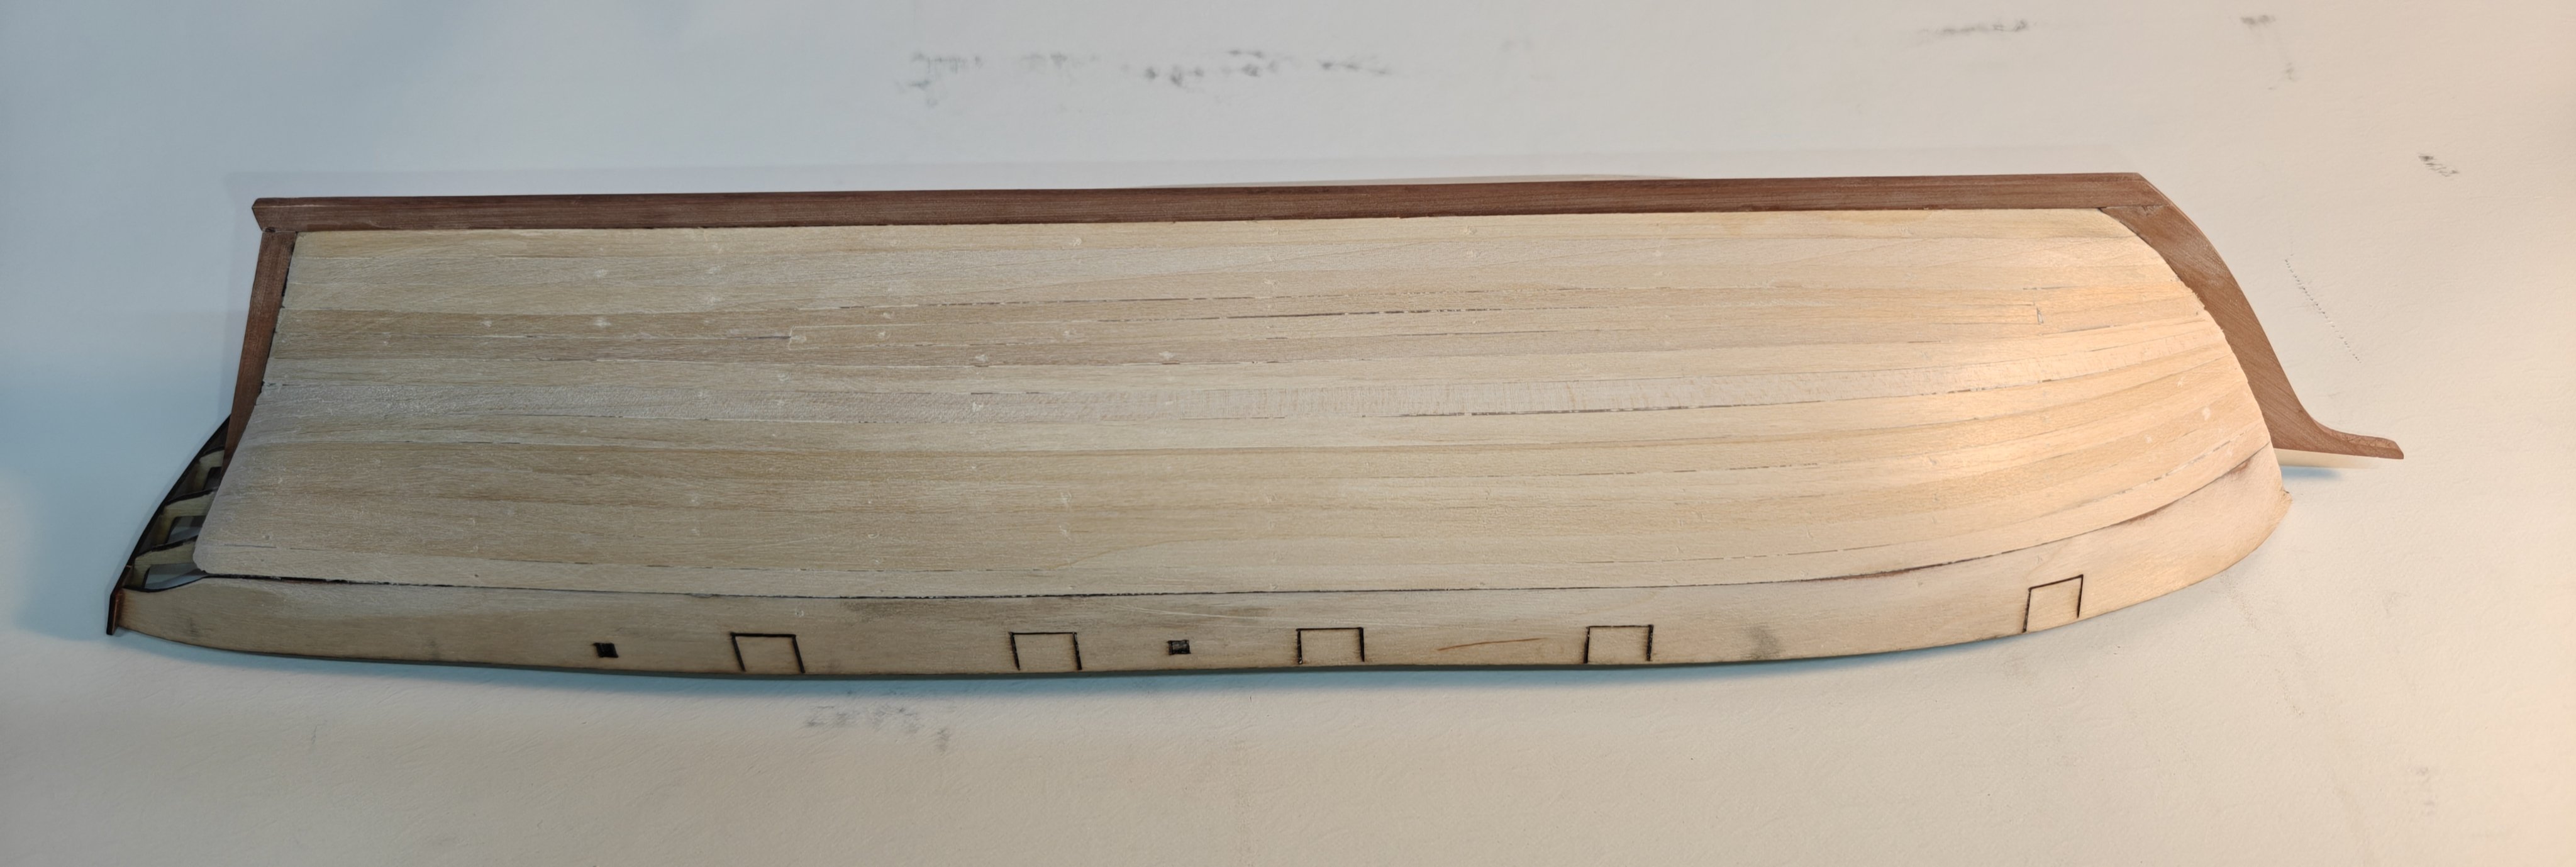
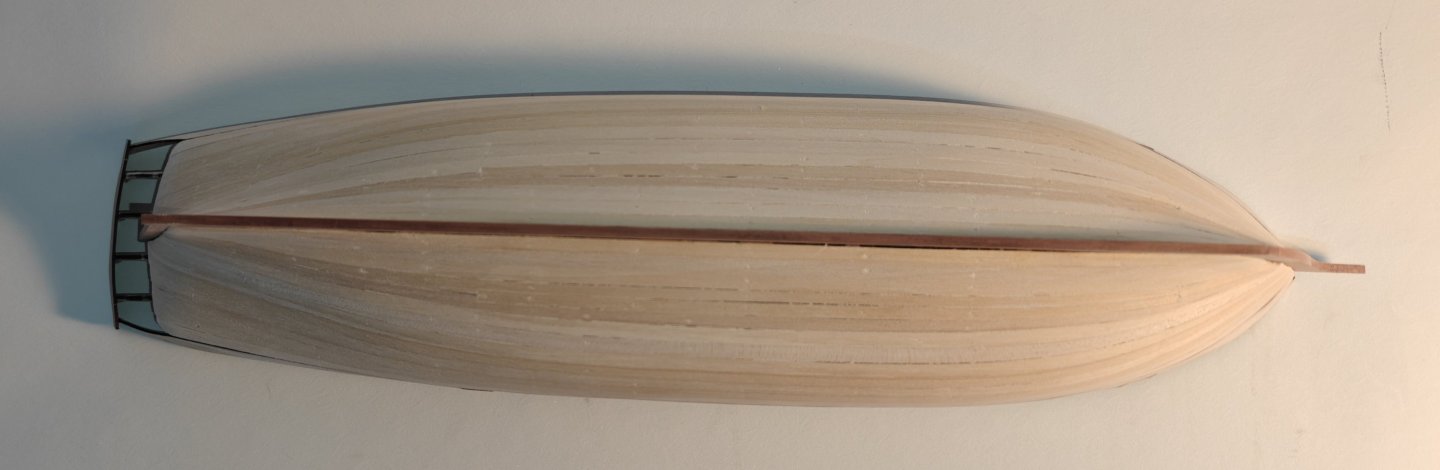
Log entry 5 - first planking layer done! Alright, the first layer is done! Here is the current state, before any sanding: It was a very easy hull to plank, with quite gentle curves and relatively little tapering needed. This is my third time planking a hull, and this was definitely the easiest yet. Also the smallest, which helps. It looks a bit rough now, before any sanding, but looking down the hull, I think it will be easy to sand it and the lines are very nice as you turn the hull in your hand (if that makes sense, hard to explain...). I also dry fitted the keel, made from 3 mm pear, which fit in very nicely: After sanding, I will glue this in, and then it is on to the second planking! BR TJM


-
Very good looking model, I have enjoyed following along! 👍
- 422 replies
-
- 1
-
-
- Vanguard Models
- Sphinx
- (and 1 more)
-
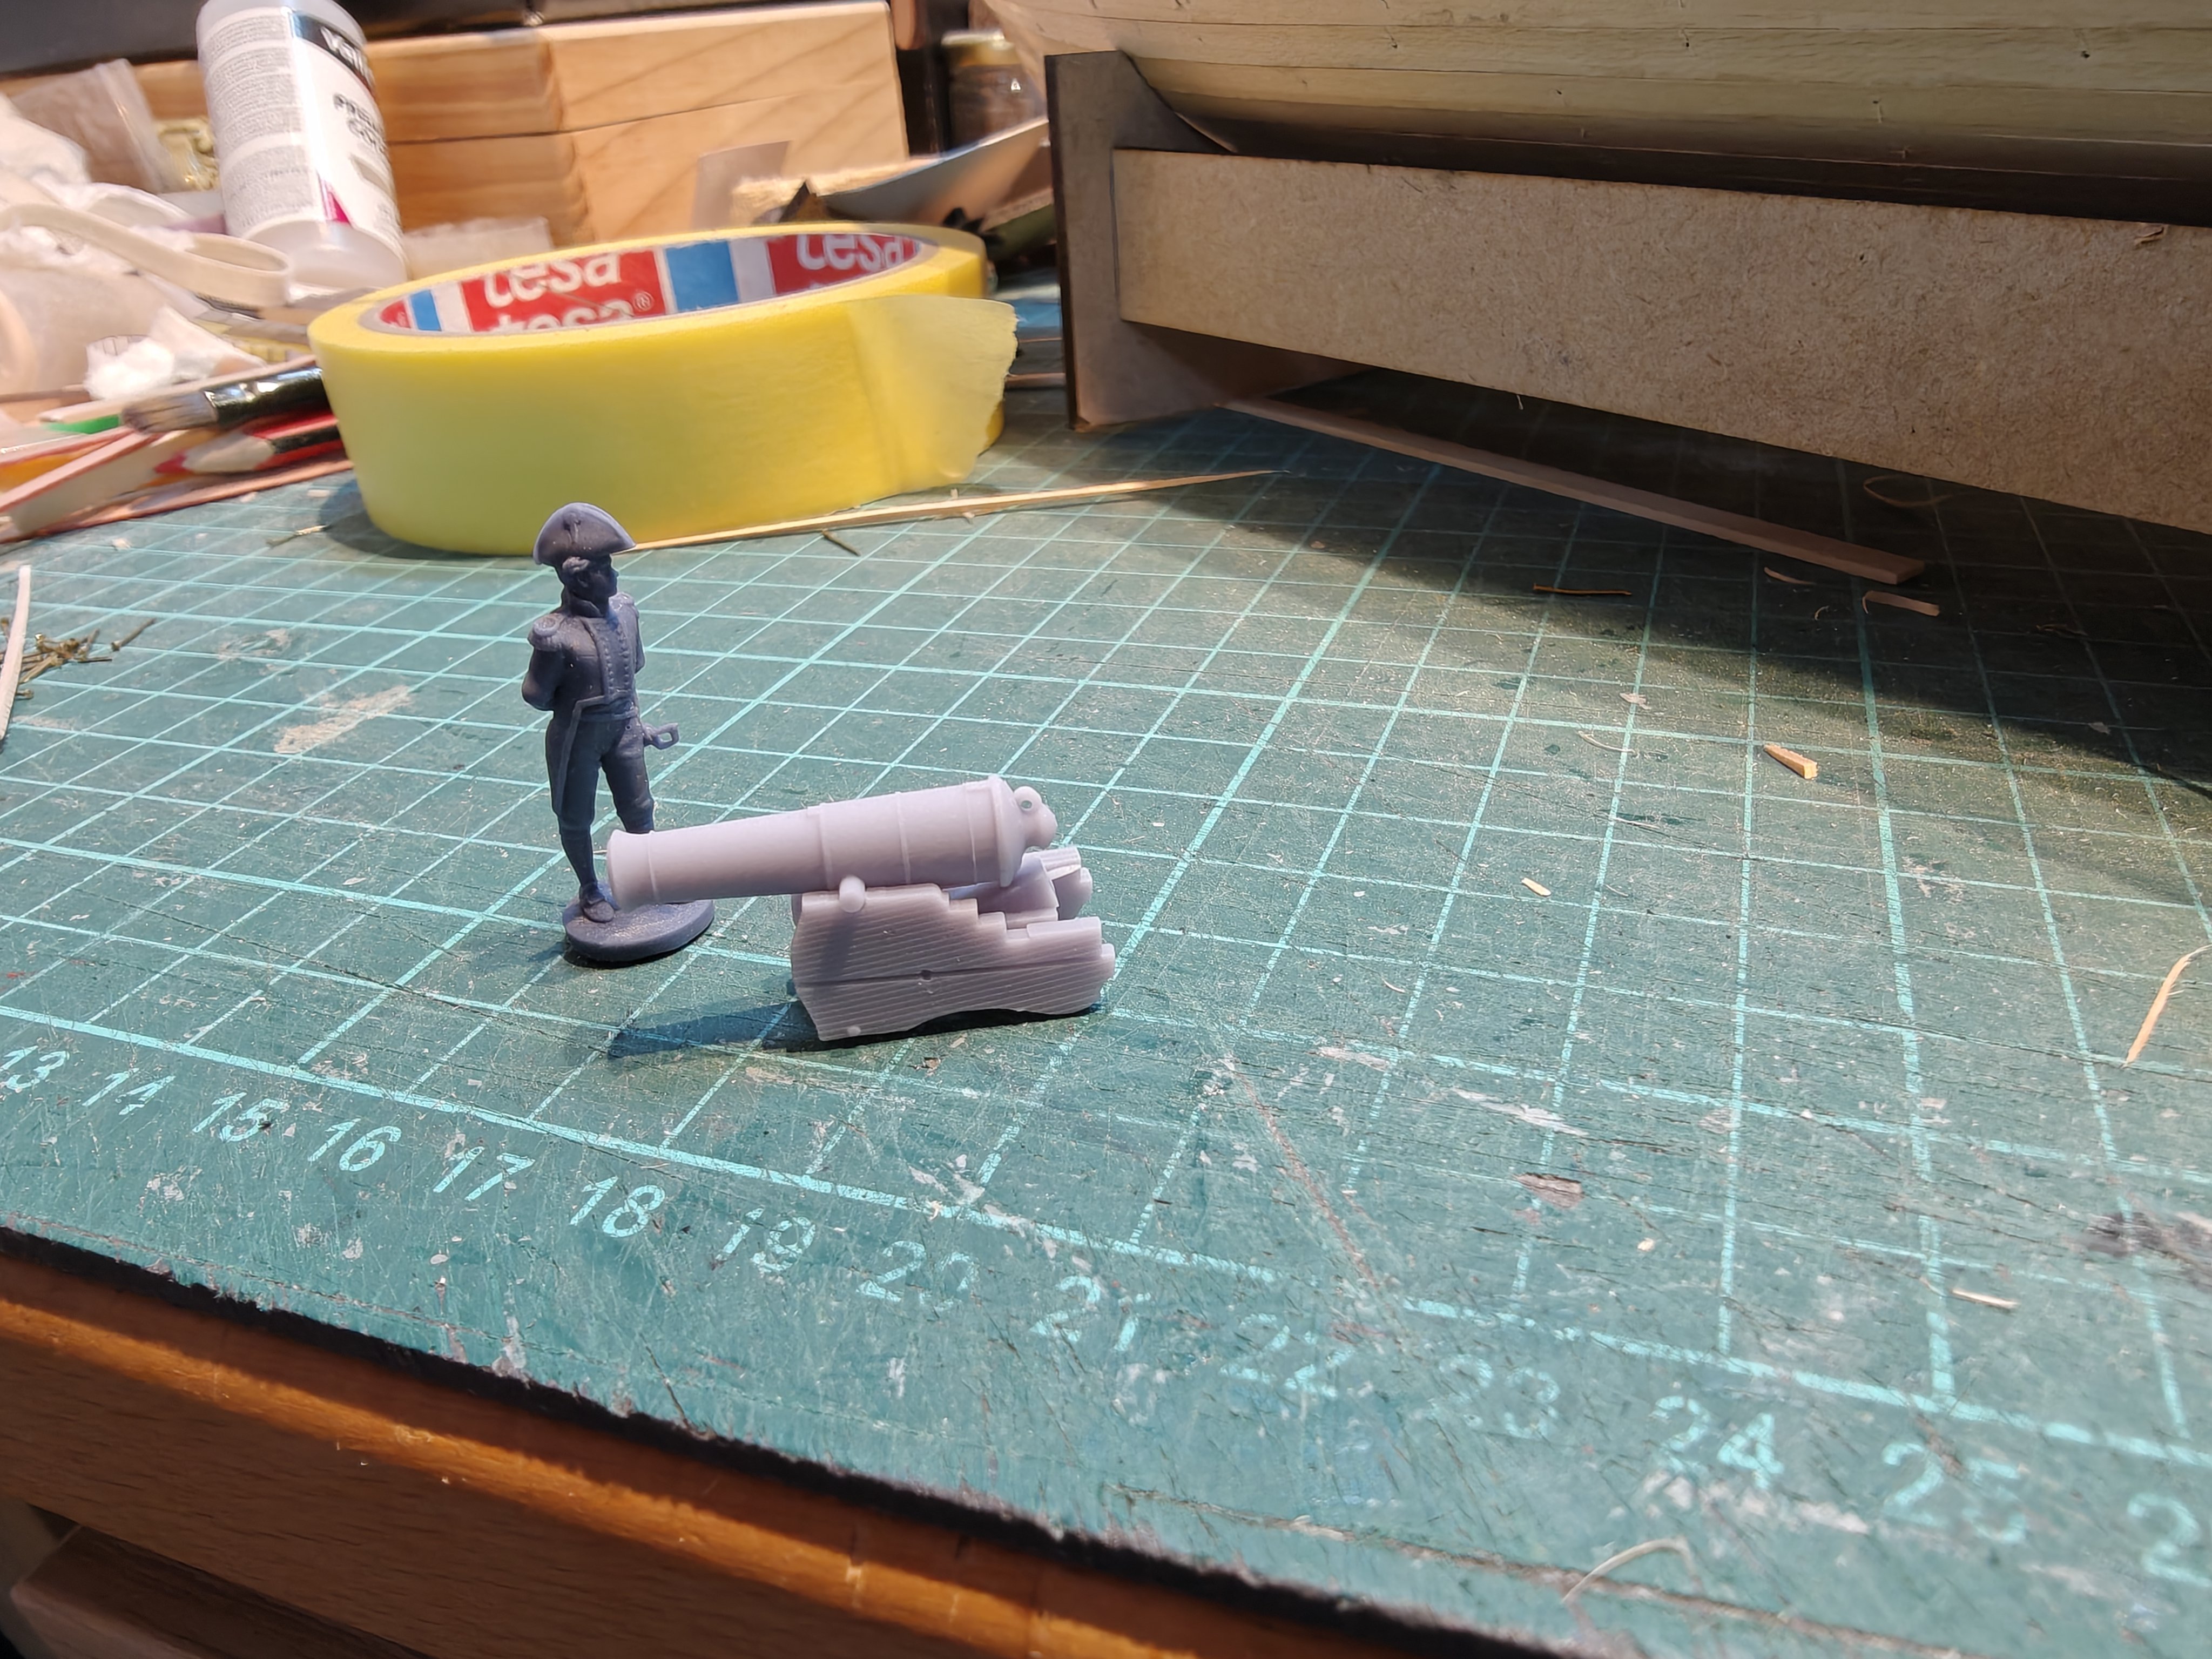
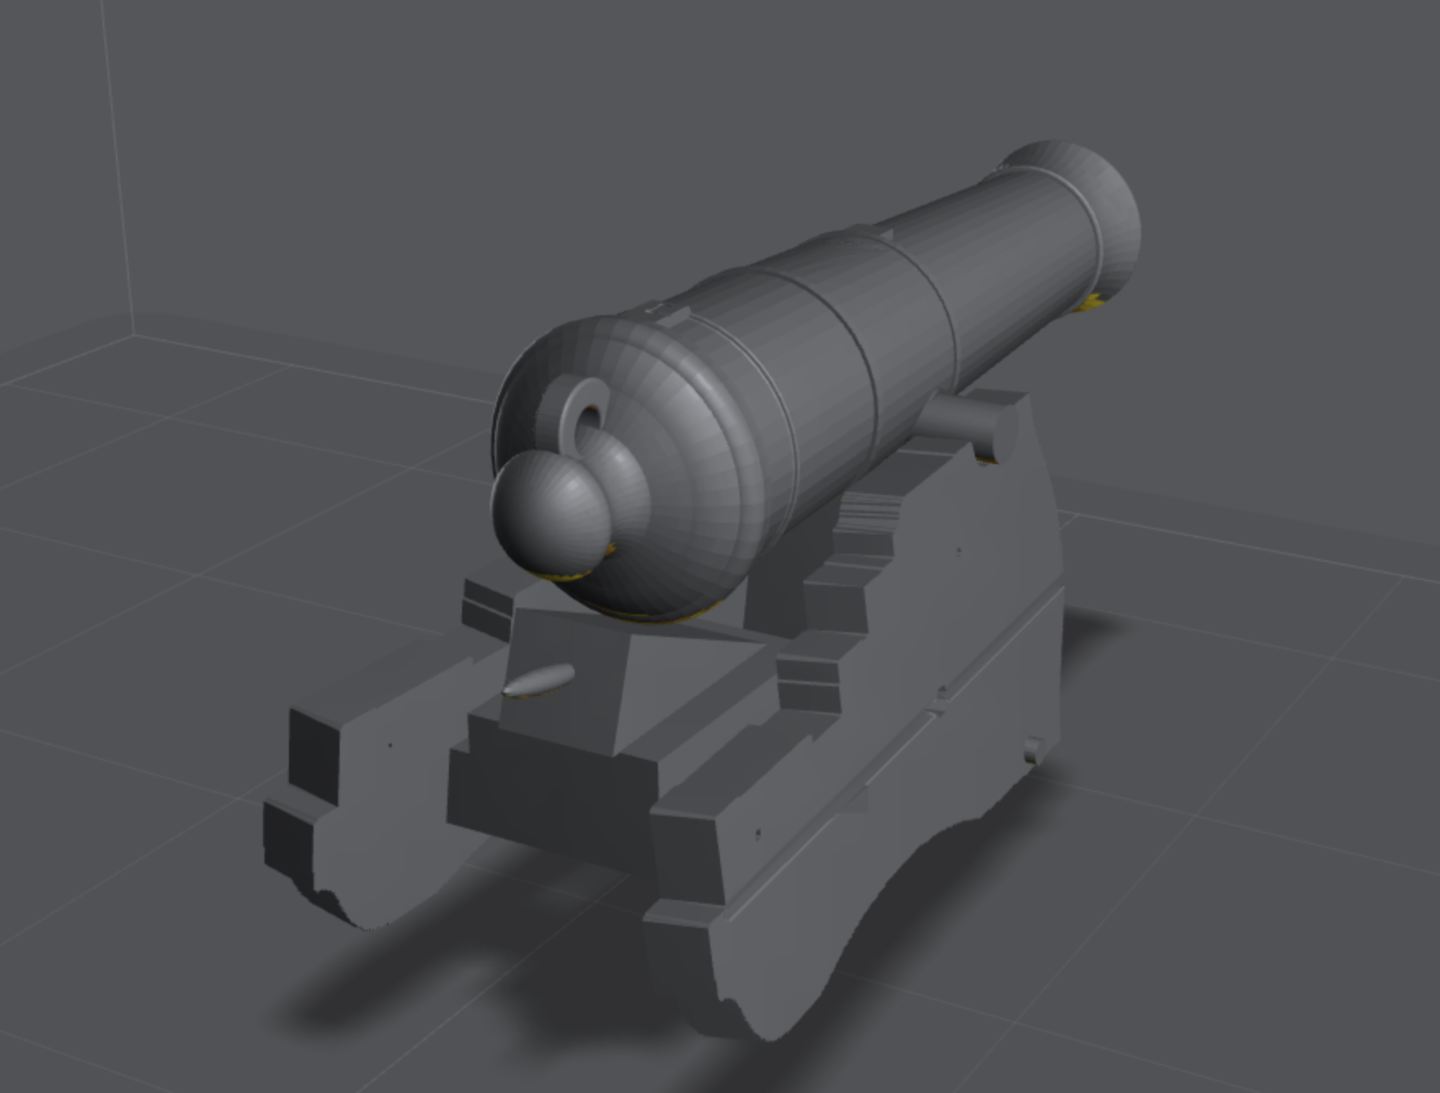
Log entry 4 - more canon and carriages It has been a little while and it is time for a few updates. I have almost finished the first planking of the hull, but I am missing the last two planks - I will show some pictures in the next update. In the meantime, I tried to create a carriage as best I could from the drawings and Eckersbergs paintings and drawings. There is a bit of guesswork, but I am quite happy with this look. I considered making it from laser cut wood, but decided to try to 3D print it first. However, in my excitement I forgot that I was actually modelling the short 18 pdr! So I didn't scale it down to 12 pdr size... But I decided to print some barrels at the same time, so I got a bunch of 18 prdr barrels and carriages that fit together: I think it will work nicely with the 3D printed carriage when fitted out with eye bolts and painted, I just need to scale it down to 87 % size for it to be a 12 pdr instead! Here is a comparison of the new 18 pdr and my previously printed 12 pdrs: I will be back with another update on the hull planking soon. BR TJM


-
I had somehow not noticed you started this project @Thukydides! It is absolutely fantastic! Your micro modelling and painting skills are really superb! 🏆 I found files for these 1/700 ships for 3D printing and was sorely tempted, but I think I will hold off a bit. That is another rabbit hole and I would not do it justice like you. I will just admire your work here for now 😁 BR TJM
- 39 replies
-
- 3
-

-

-
- Black Seas
- wargaming
- (and 1 more)
-
That looks really good Walter! I think your yellow is spot on 👍