TJM
-
Posts
82 -
Joined
-
Last visited
Content Type
Profiles
Forums
Gallery
Events
Everything posted by TJM
-
Just amazing! 👏
-
Wow, it's moving fast now! Very nice! I am looking forward to this part of the rigging process myself.
-
HMS Flirt by TJM - Vanguard Models - 1:64
TJM replied to TJM's topic in - Kit build logs for subjects built from 1751 - 1800
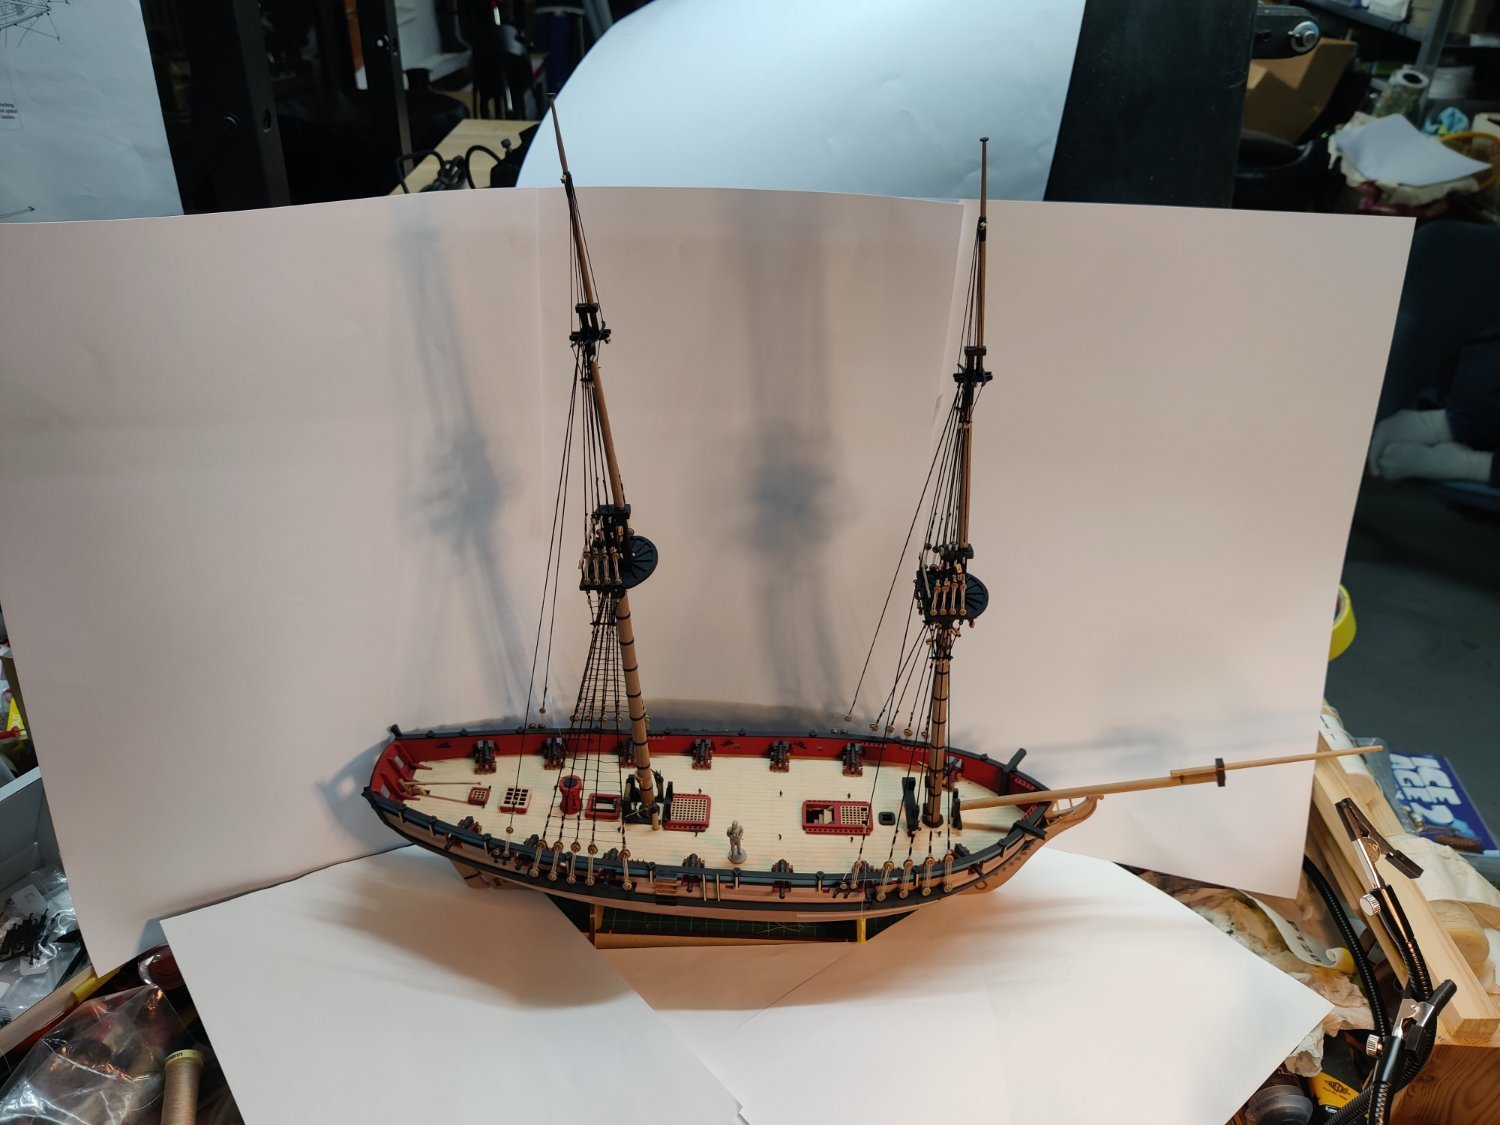
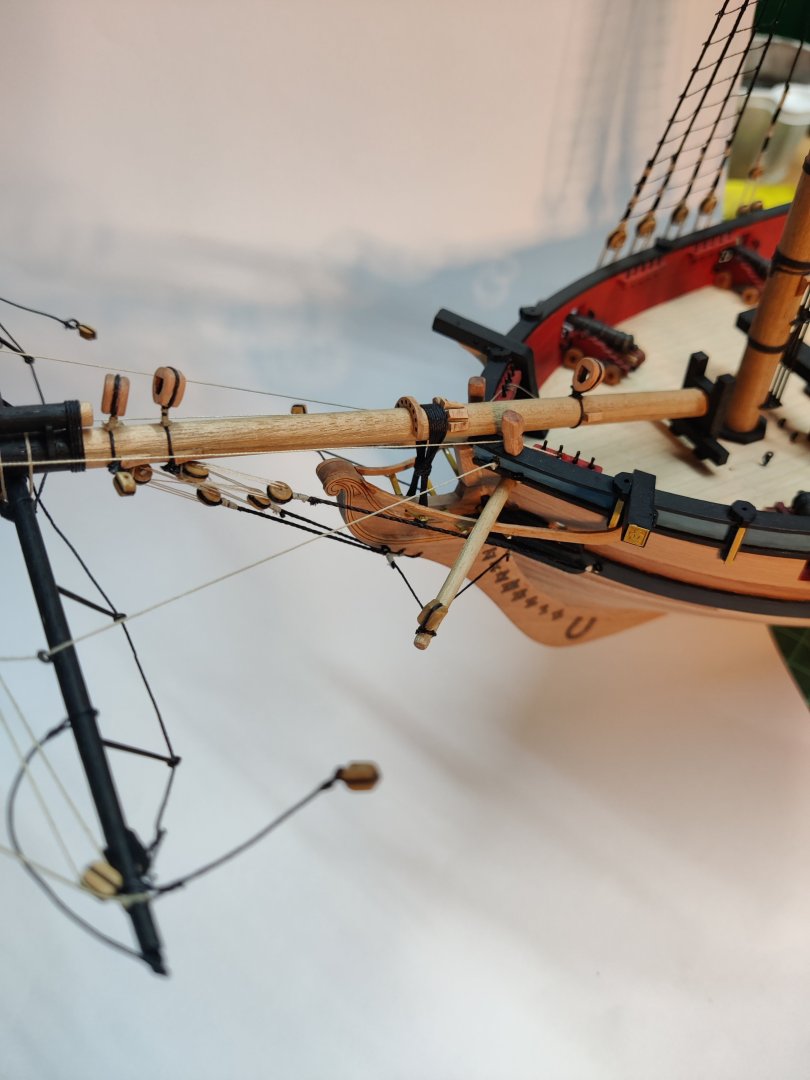
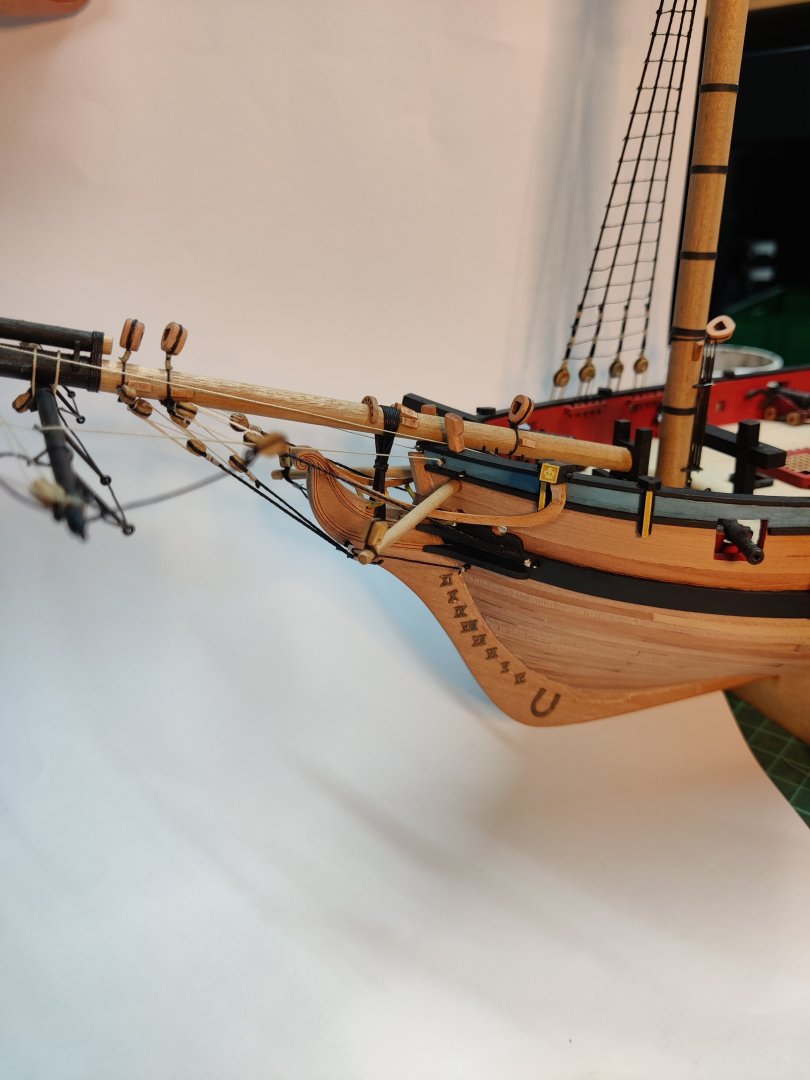
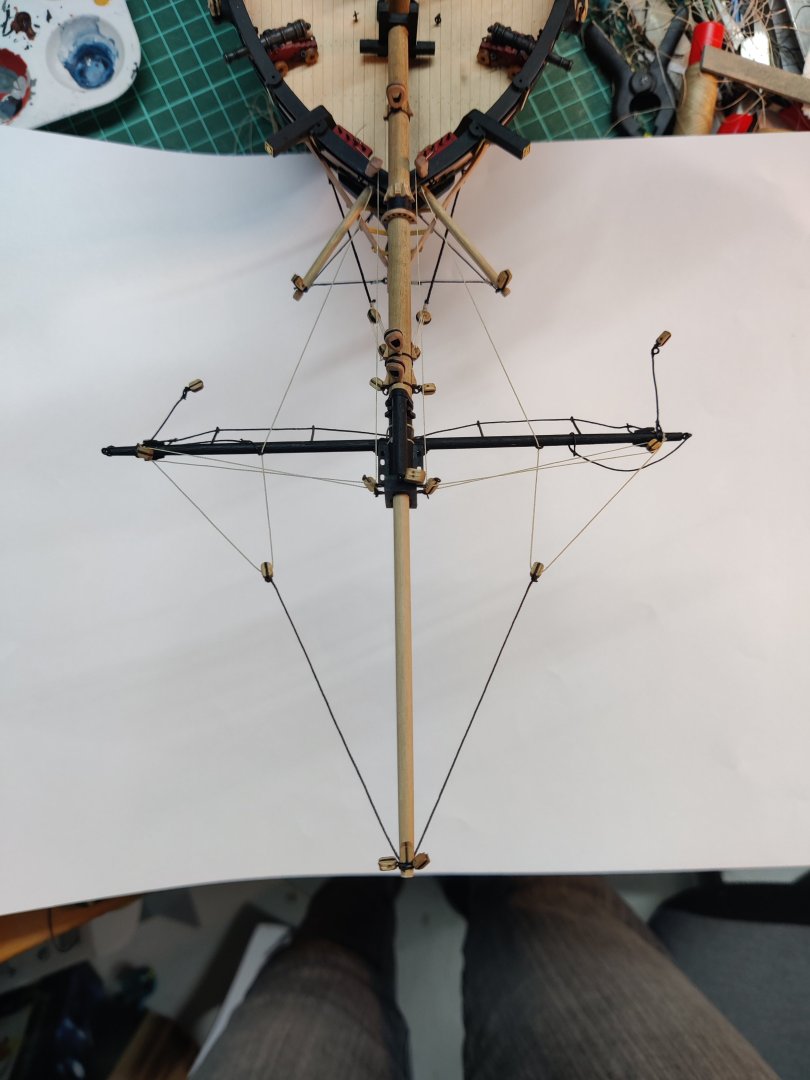
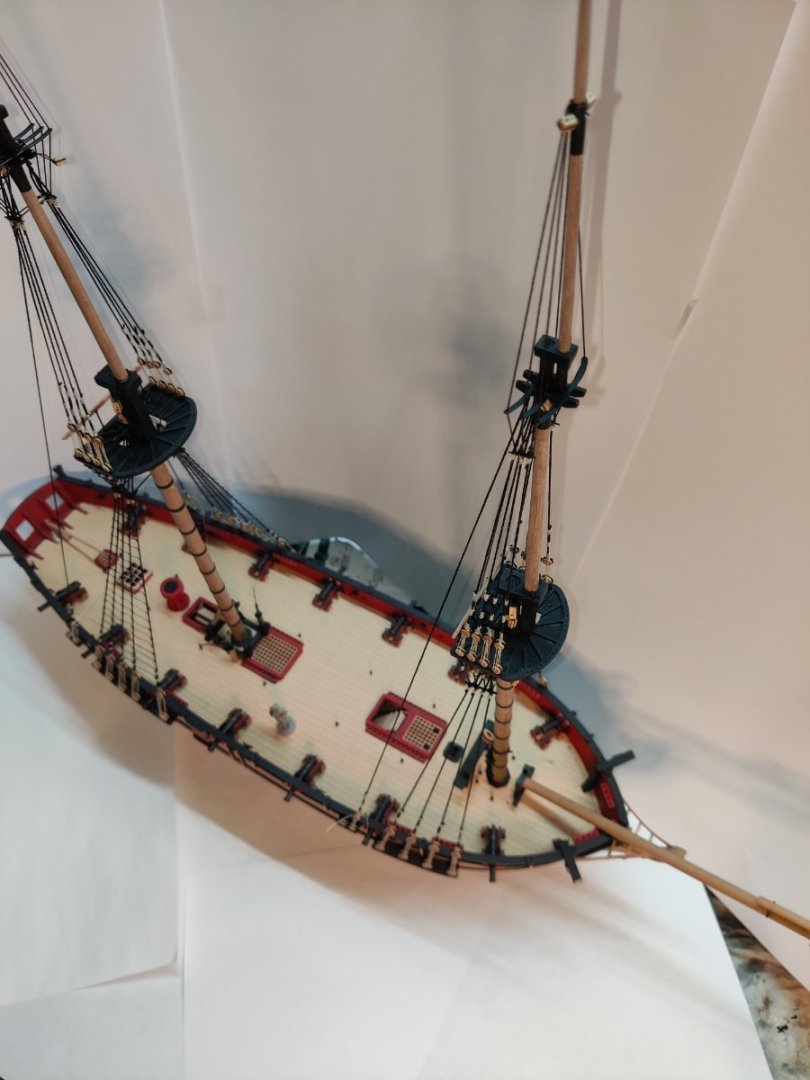
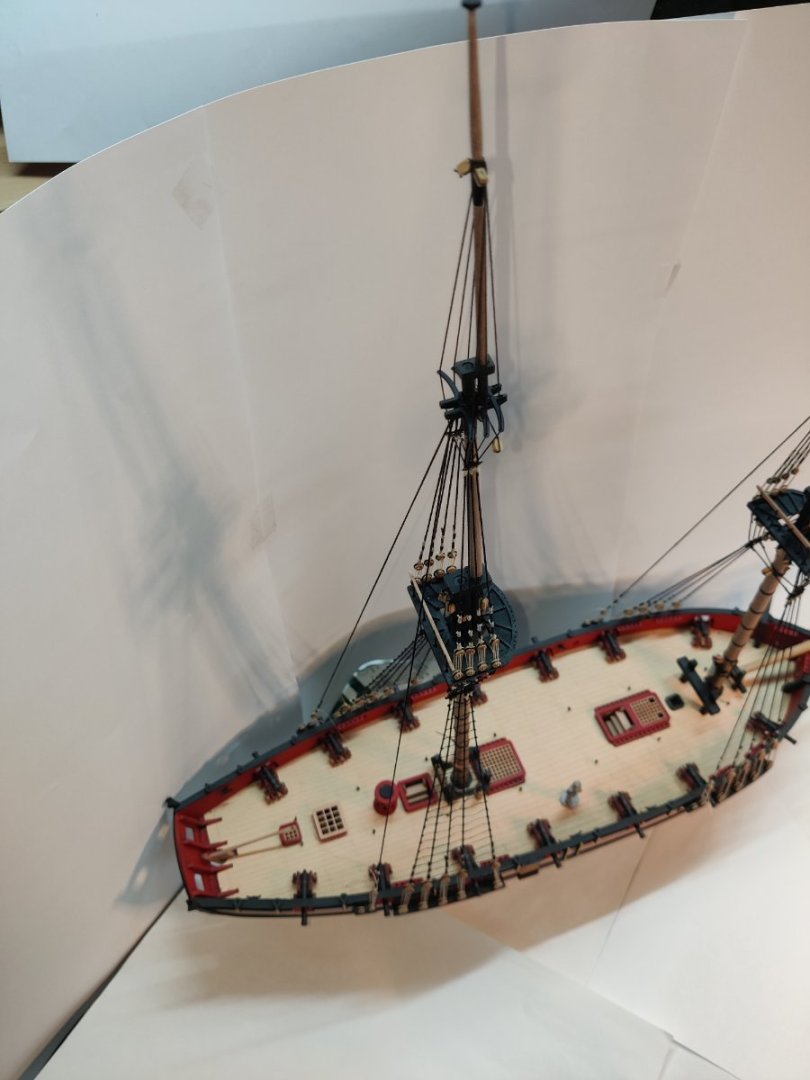
Log entry 30 Rigging of the bowsprit is now complete: It went well overall, though it is difficult to get to some part of it! How @Thukydides and others manage to make such beautiful knots and splices at this scale is beyond me! Hats off to you! But from a few feet away, I am happy with how my efforts are turning out. Now, on with the yards. BR TJM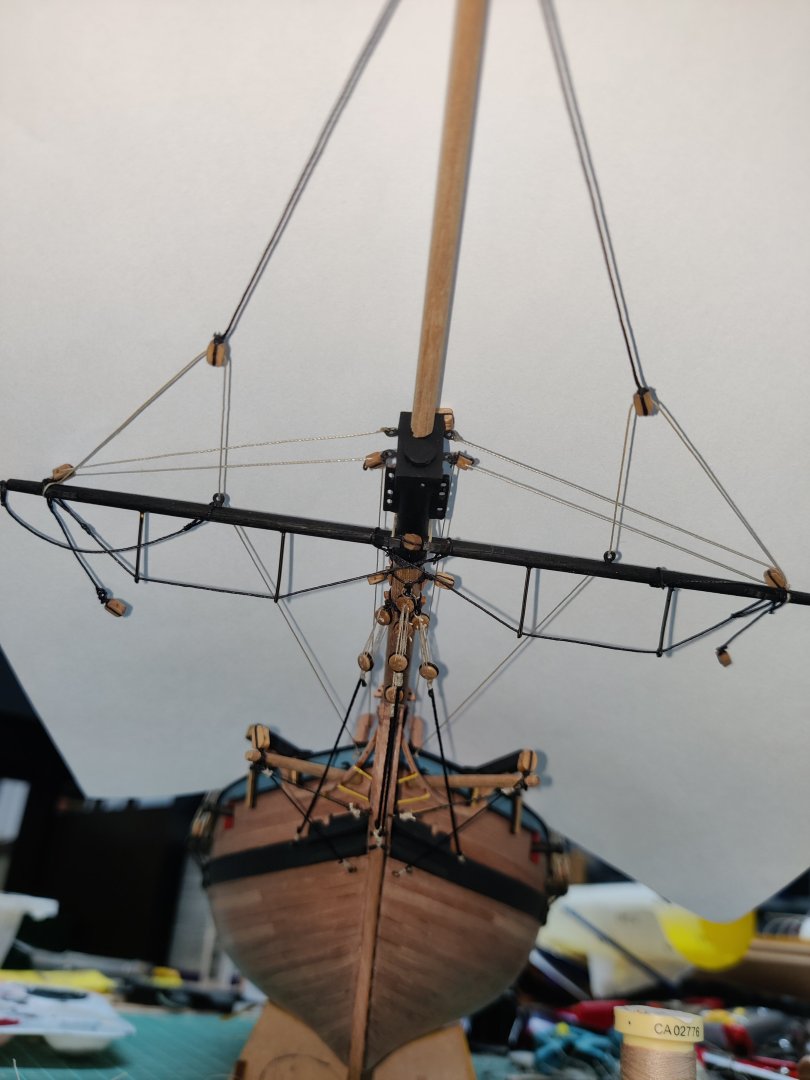
-
This is really looking good! Very inspiring!
-
HMS Flirt by TJM - Vanguard Models - 1:64
TJM replied to TJM's topic in - Kit build logs for subjects built from 1751 - 1800
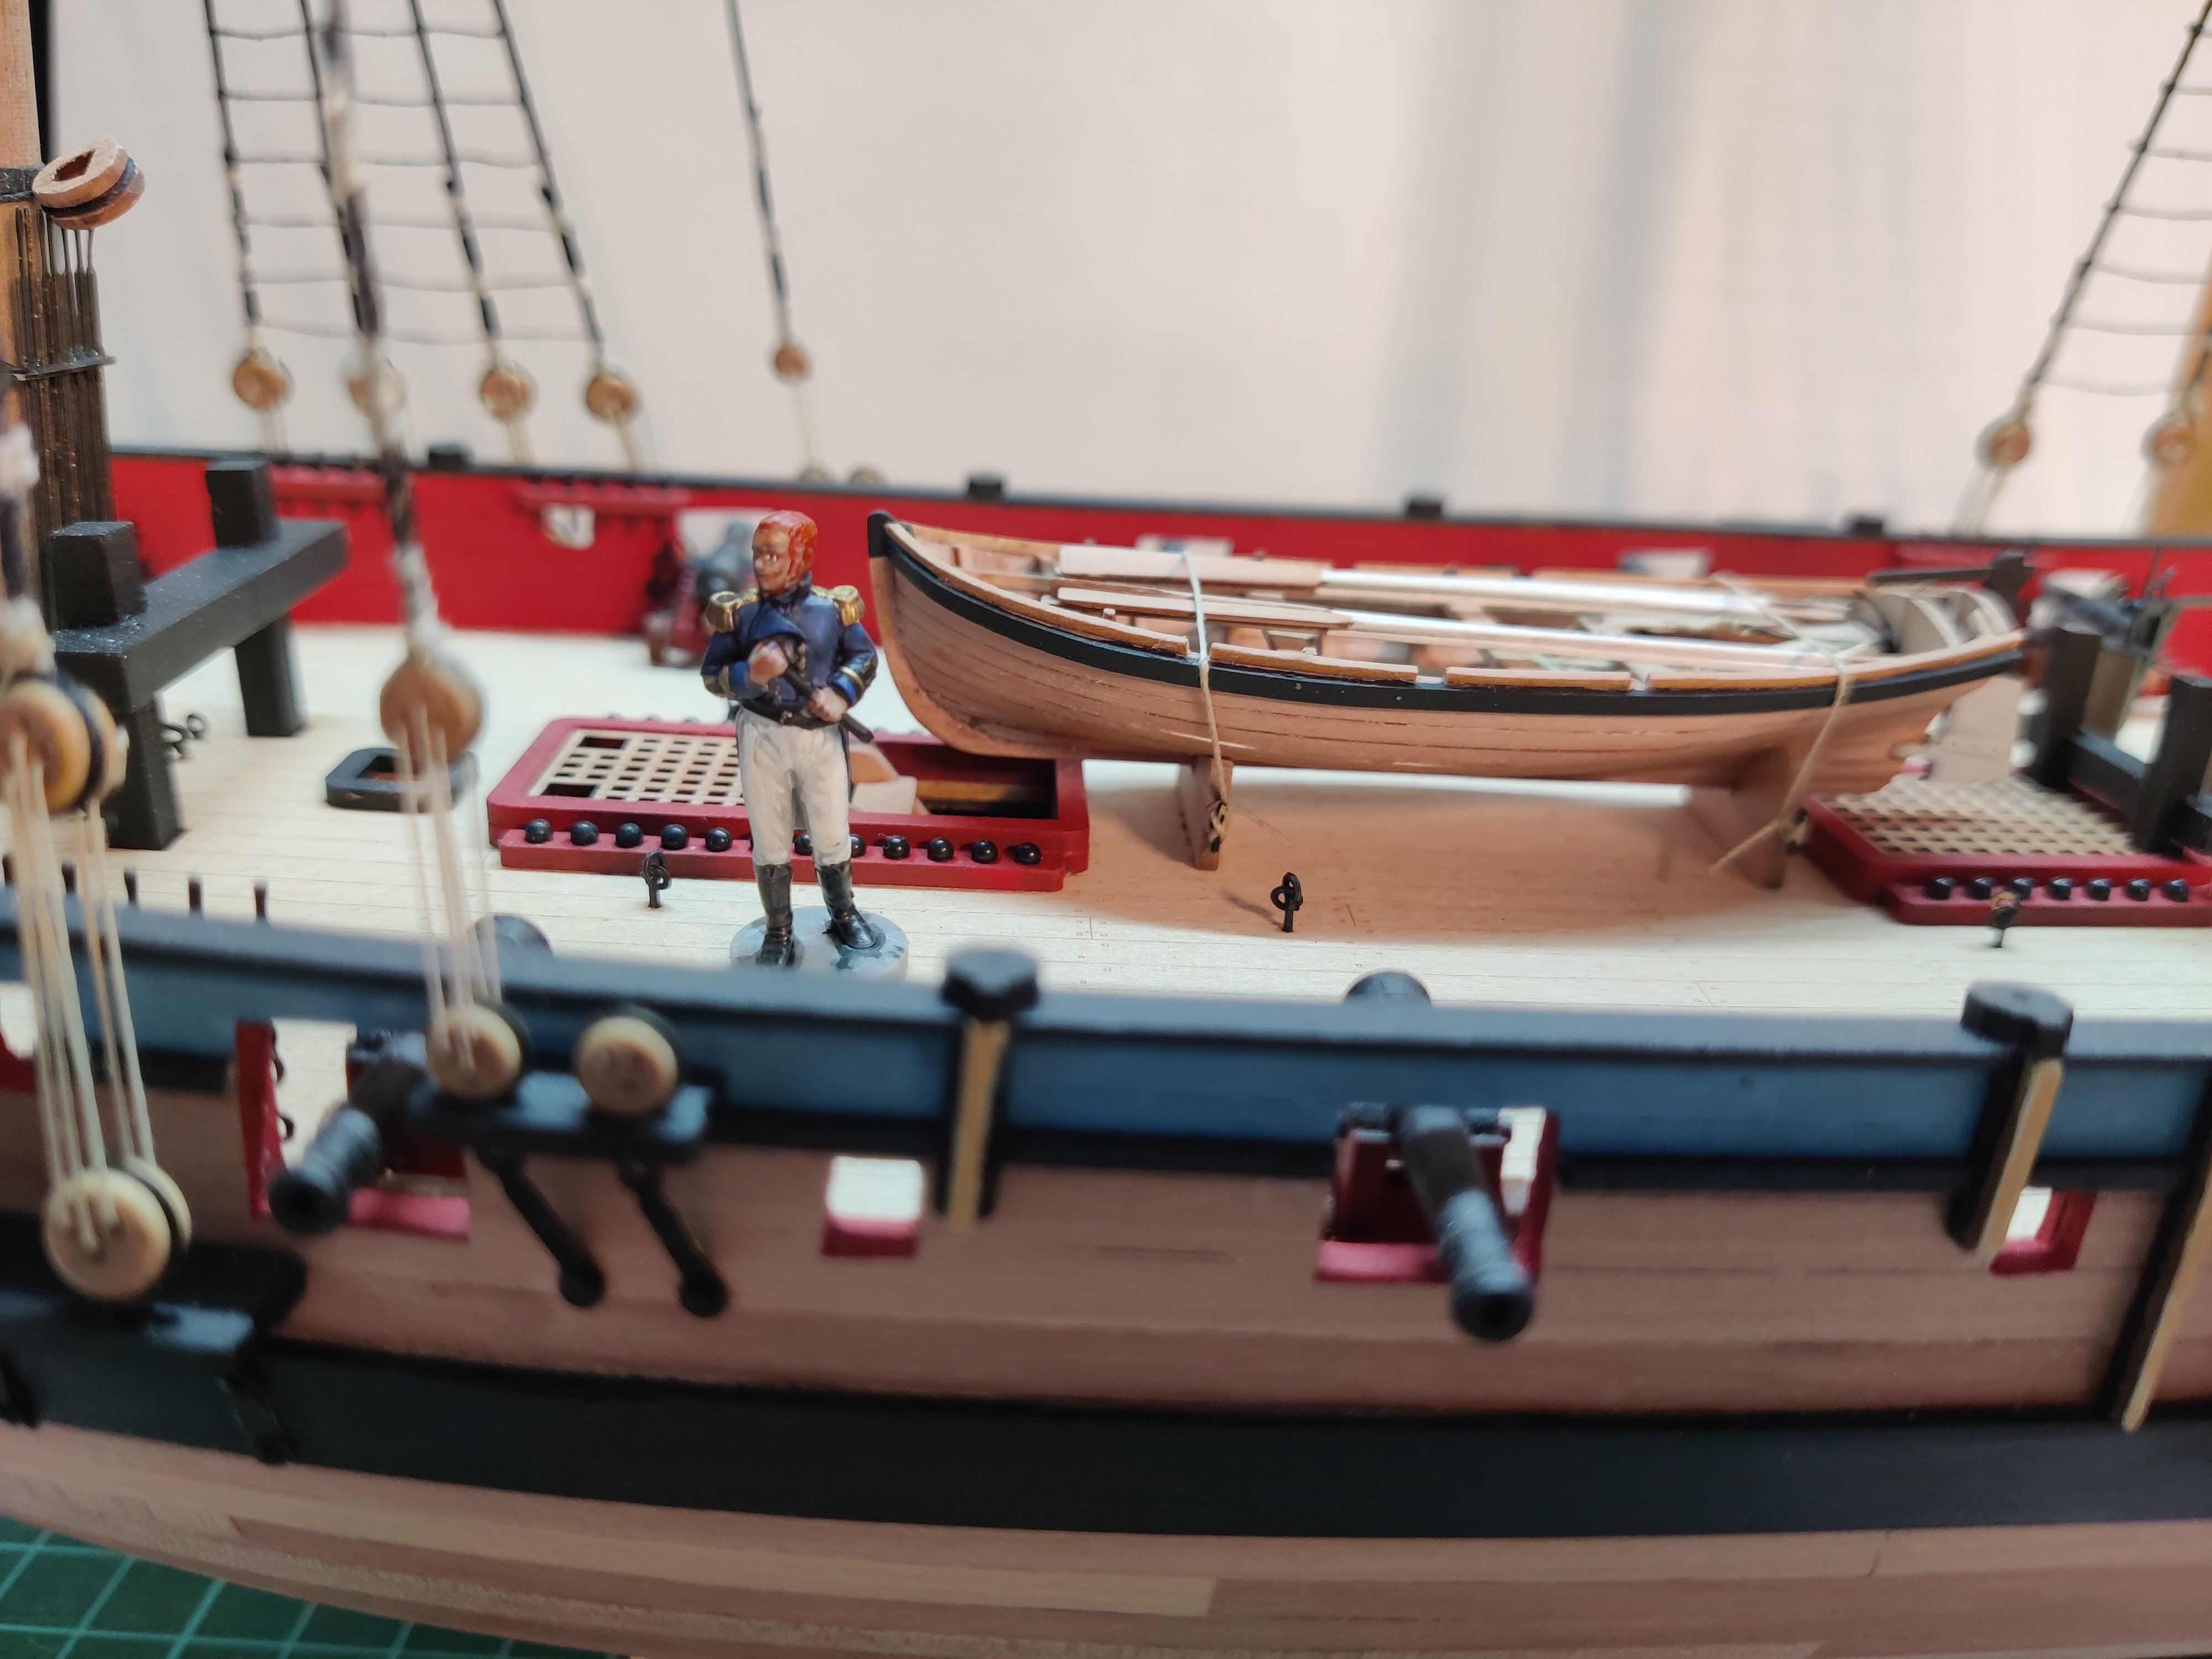
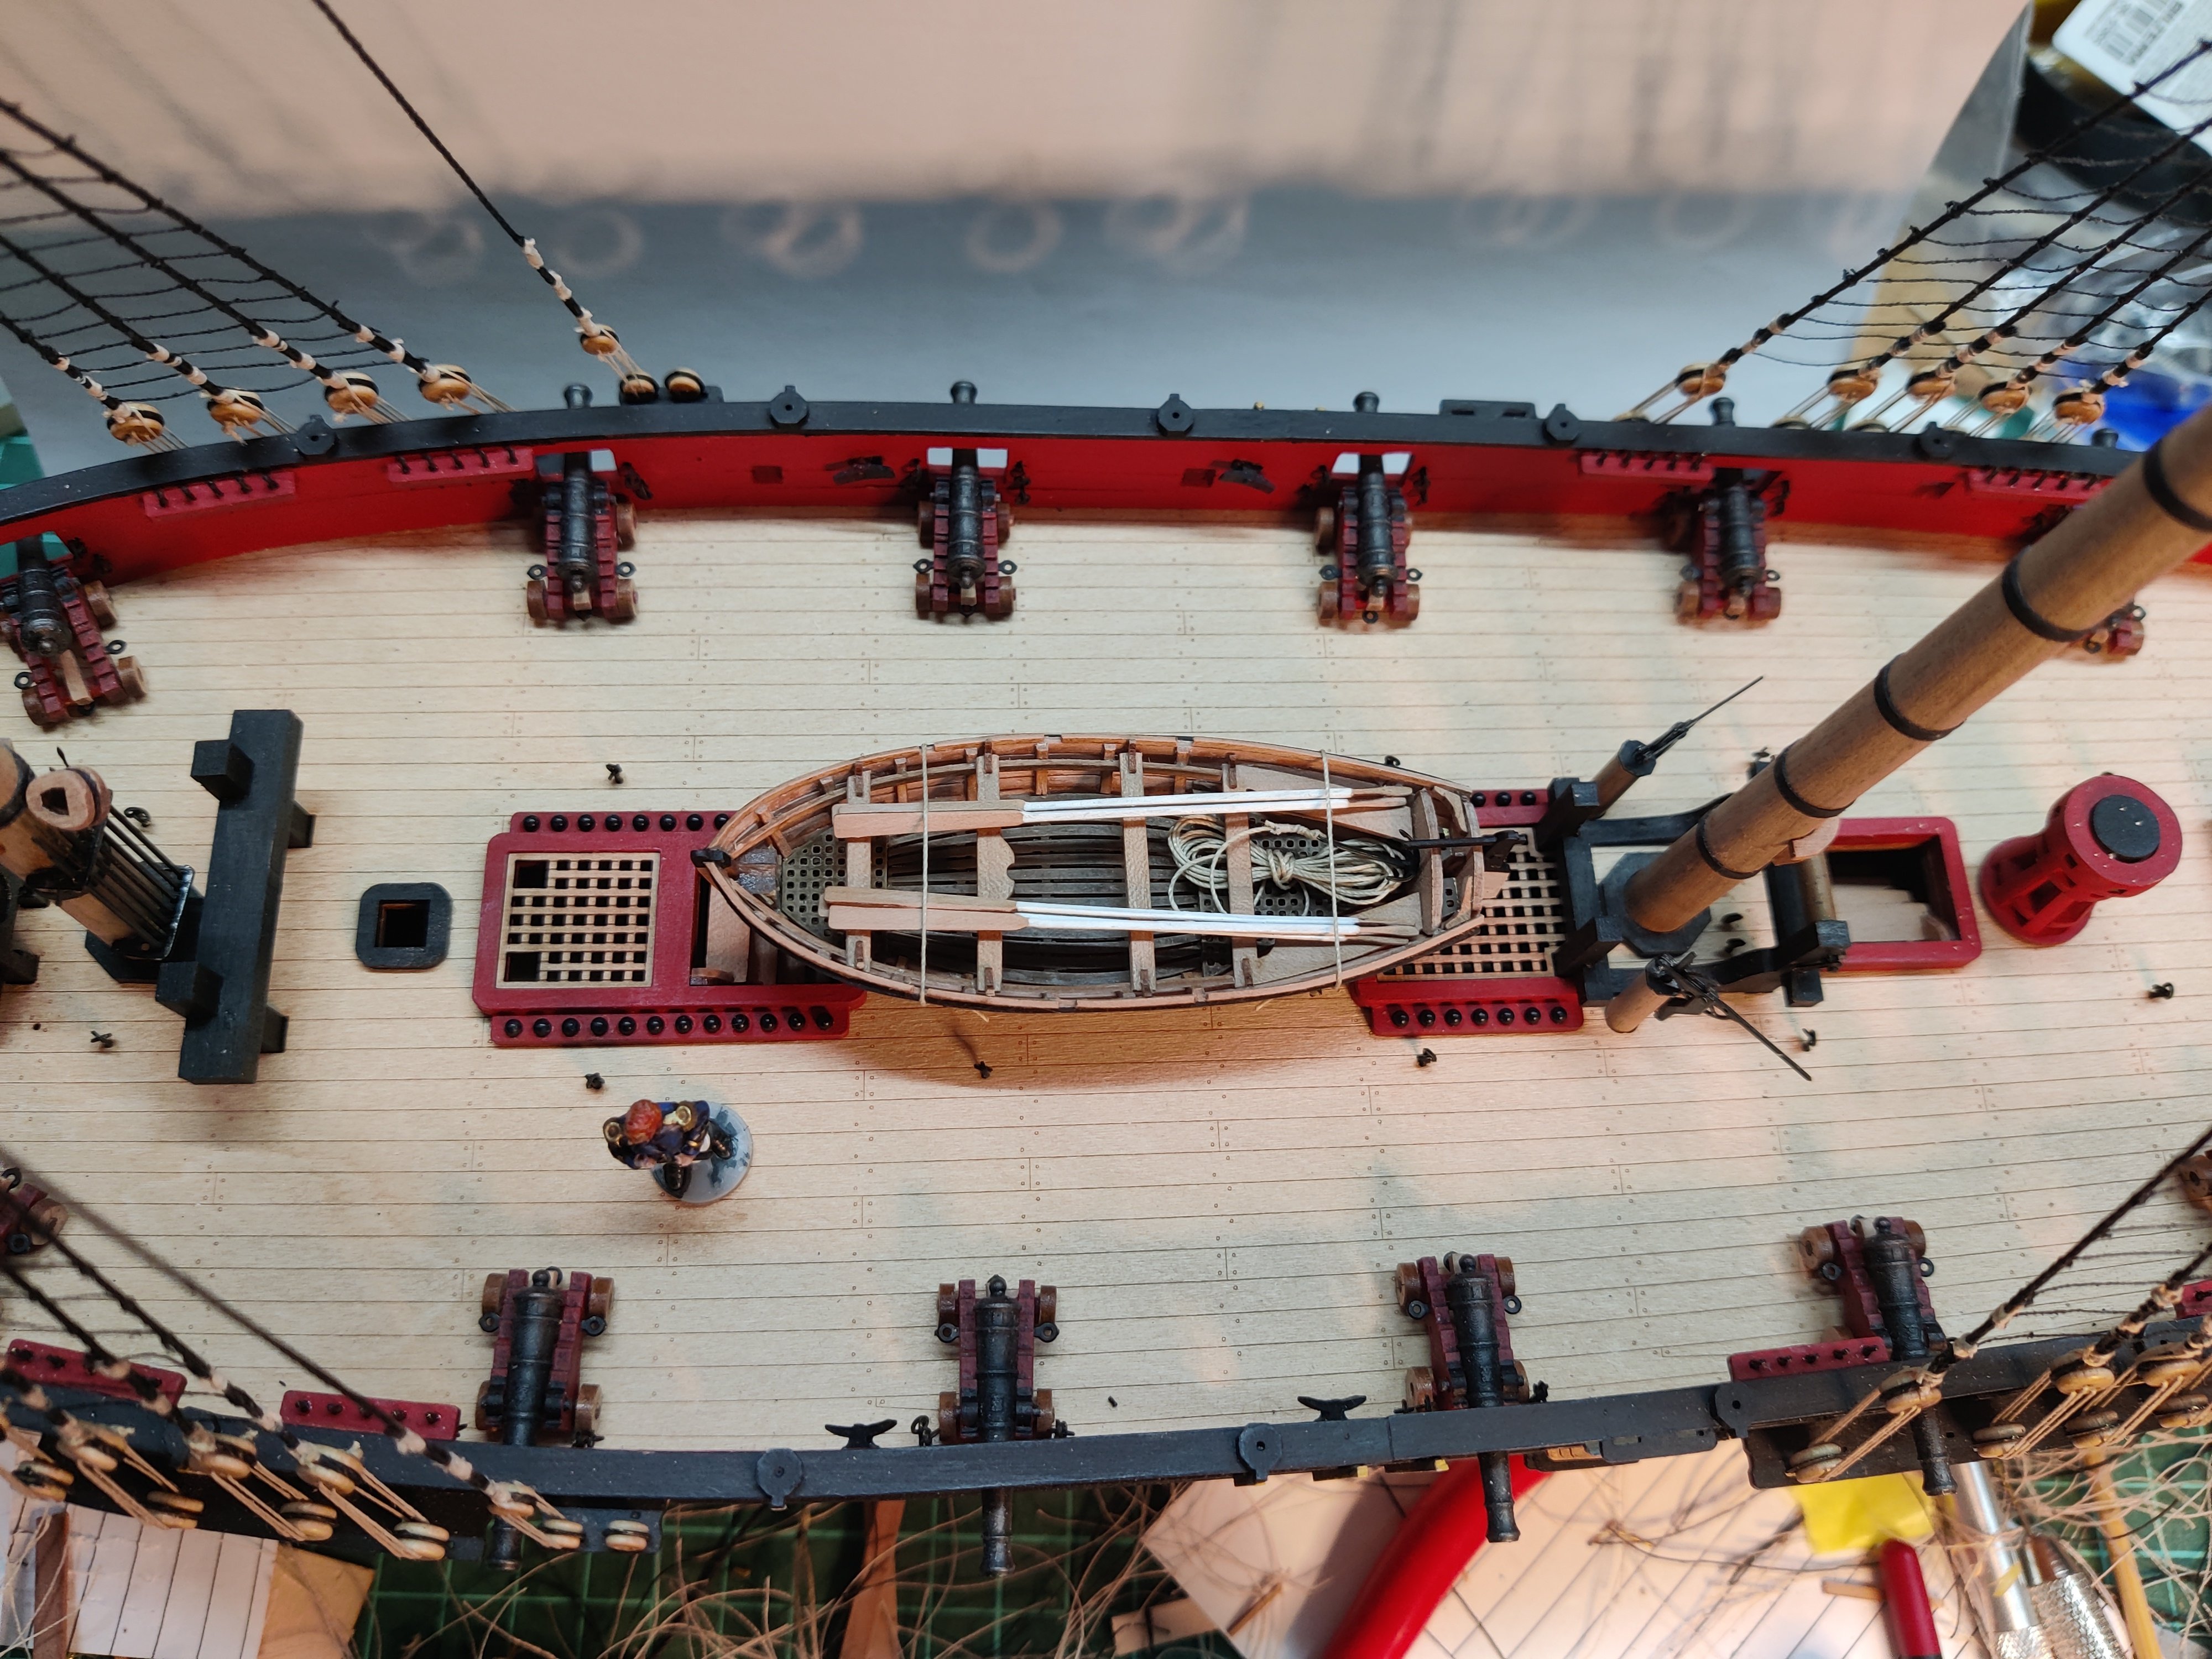
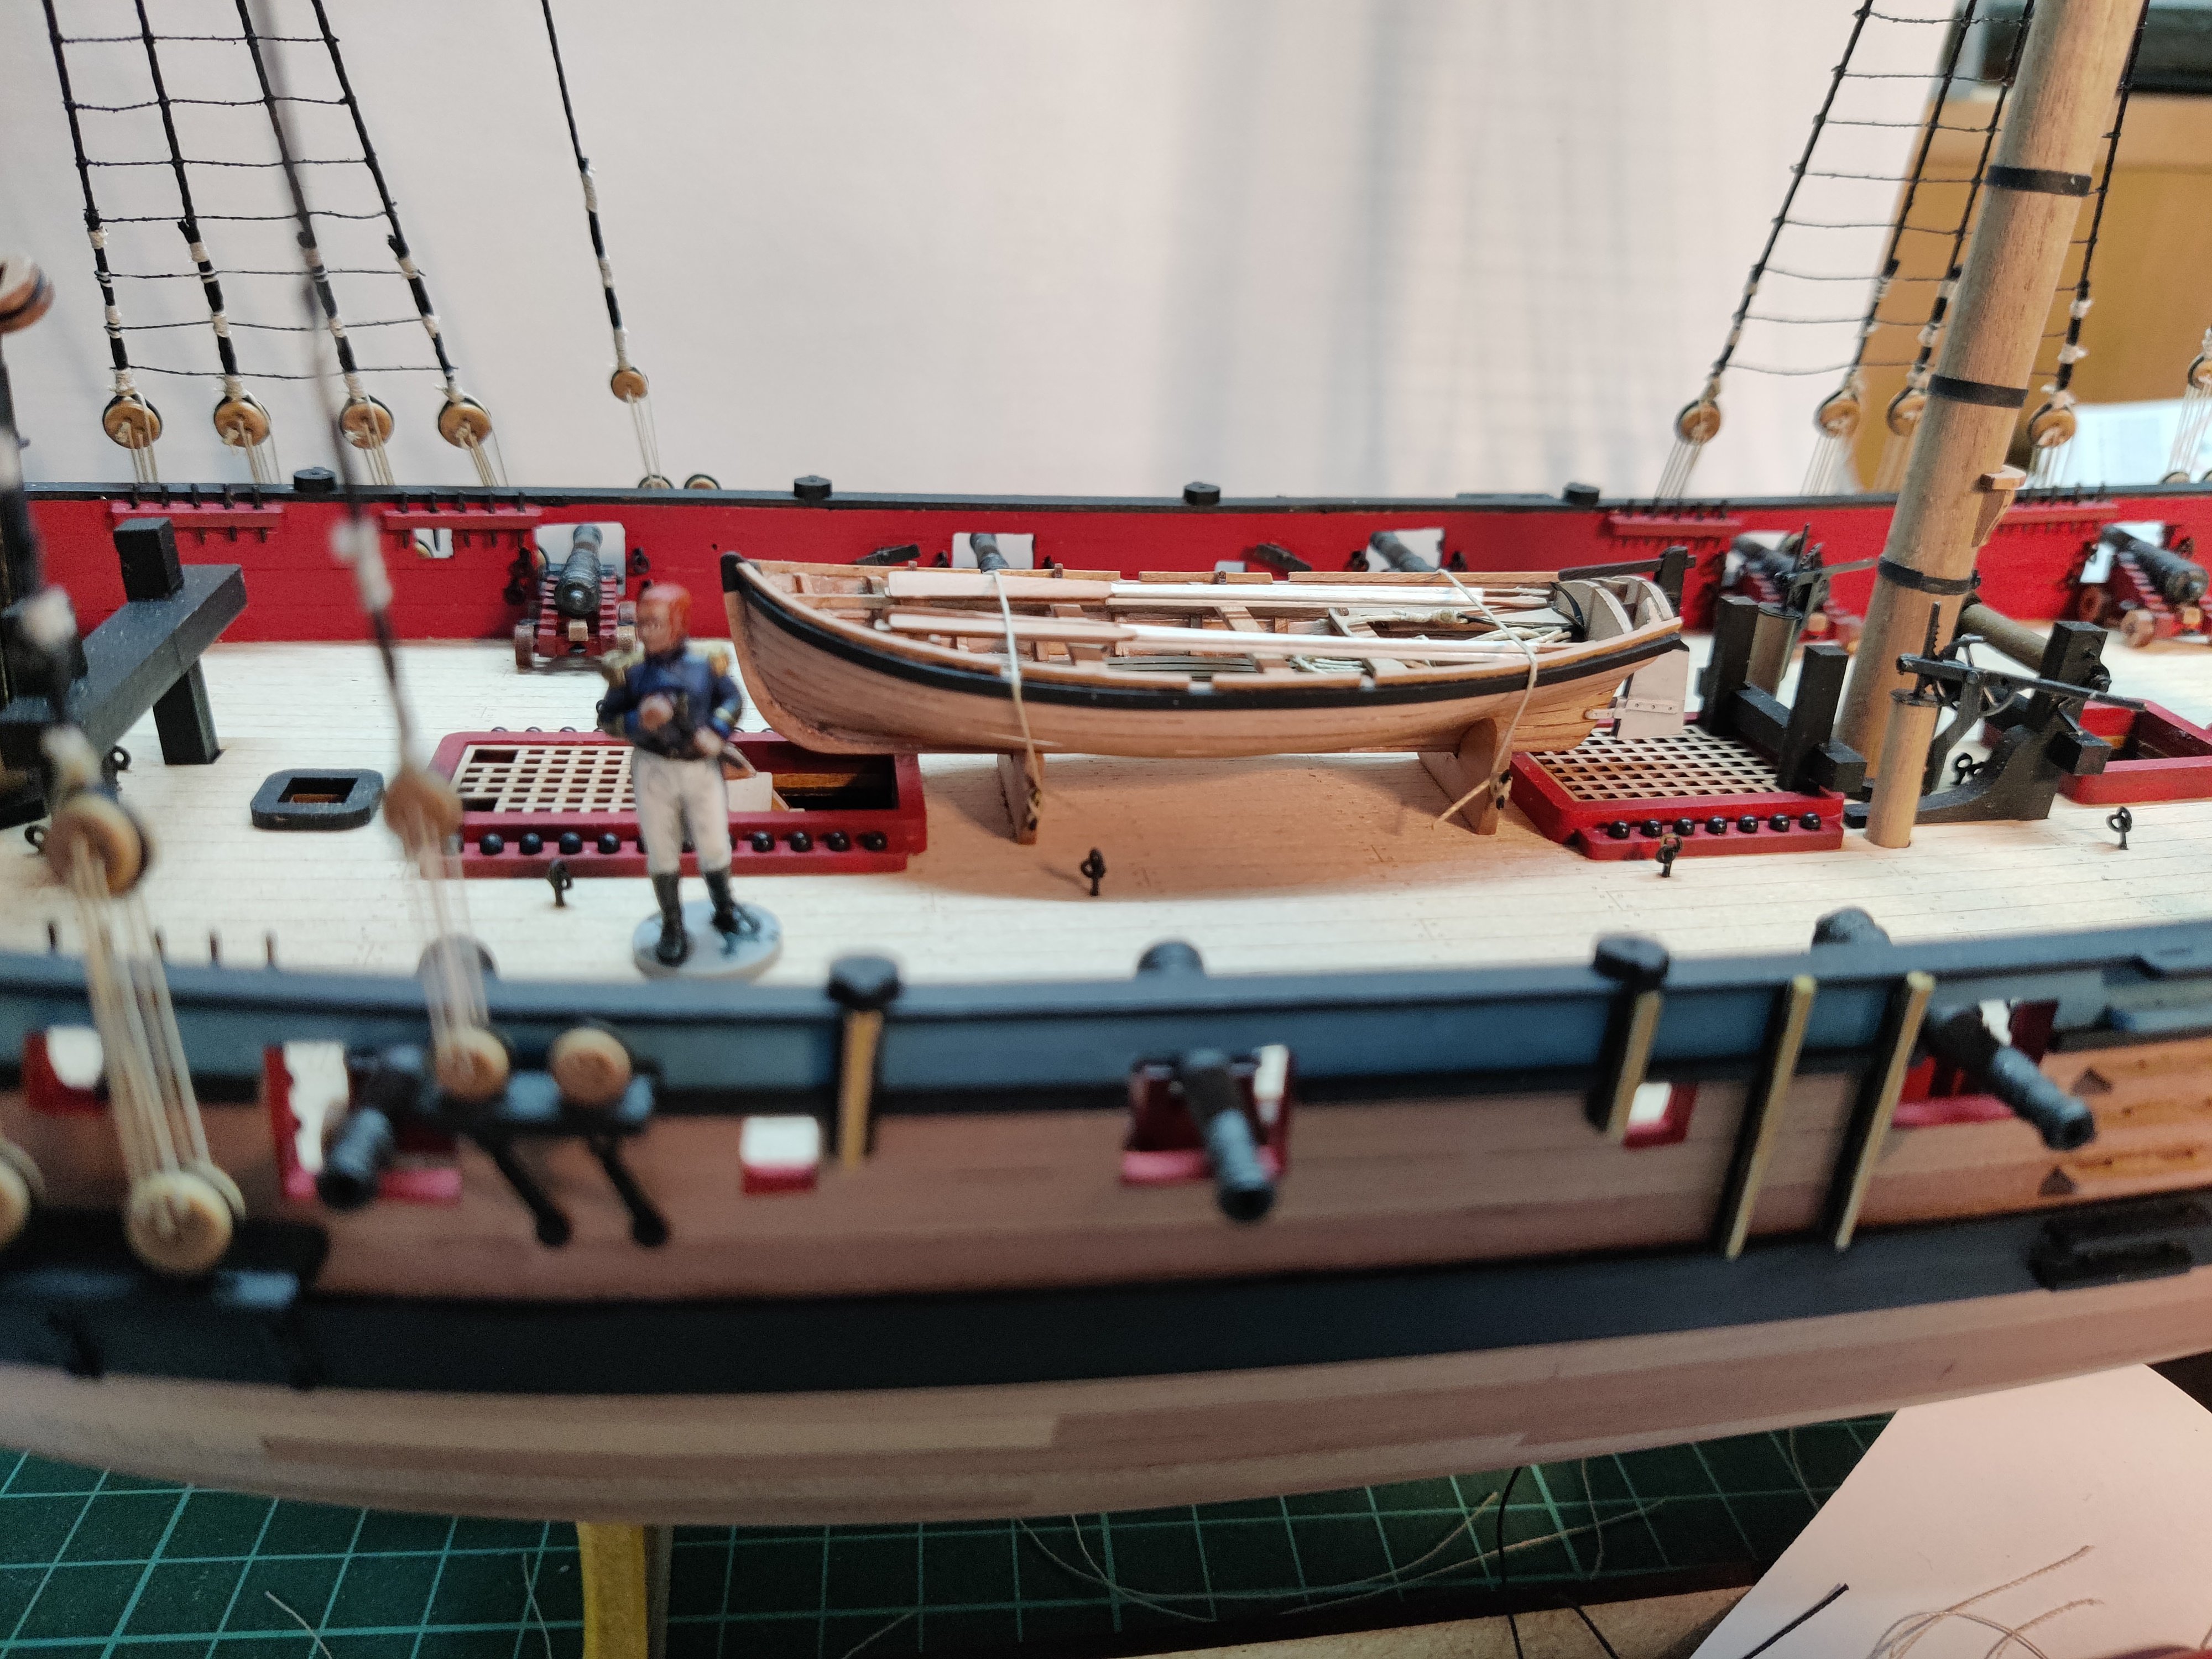
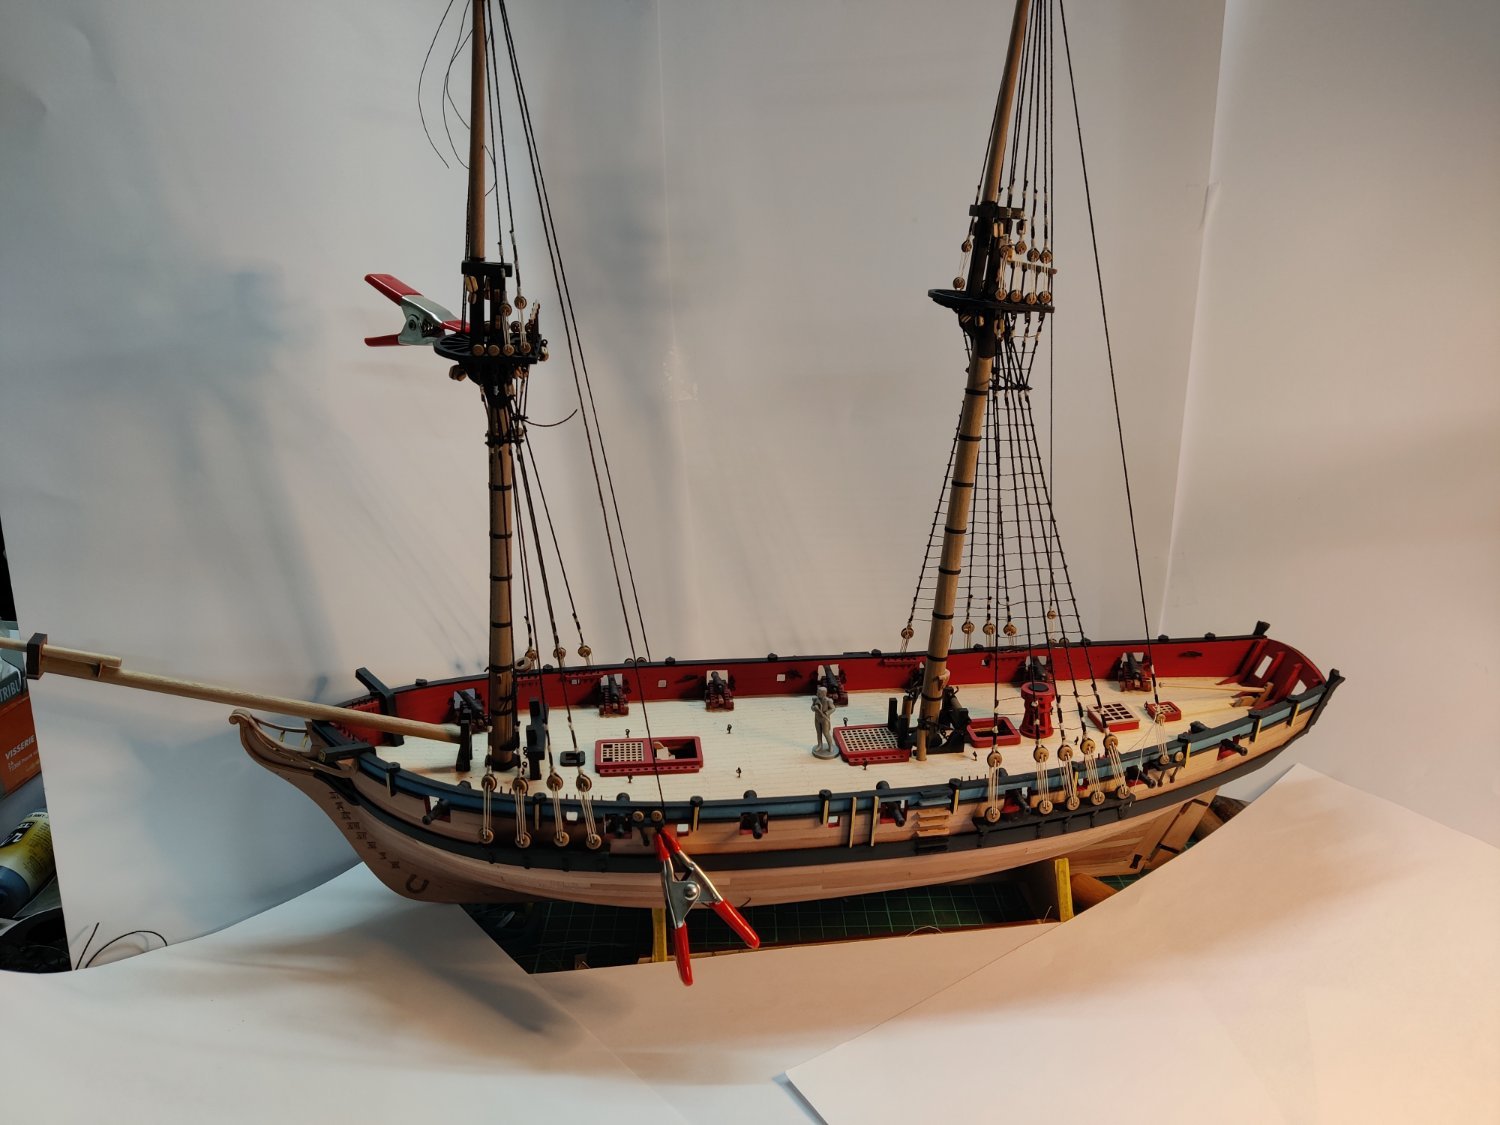
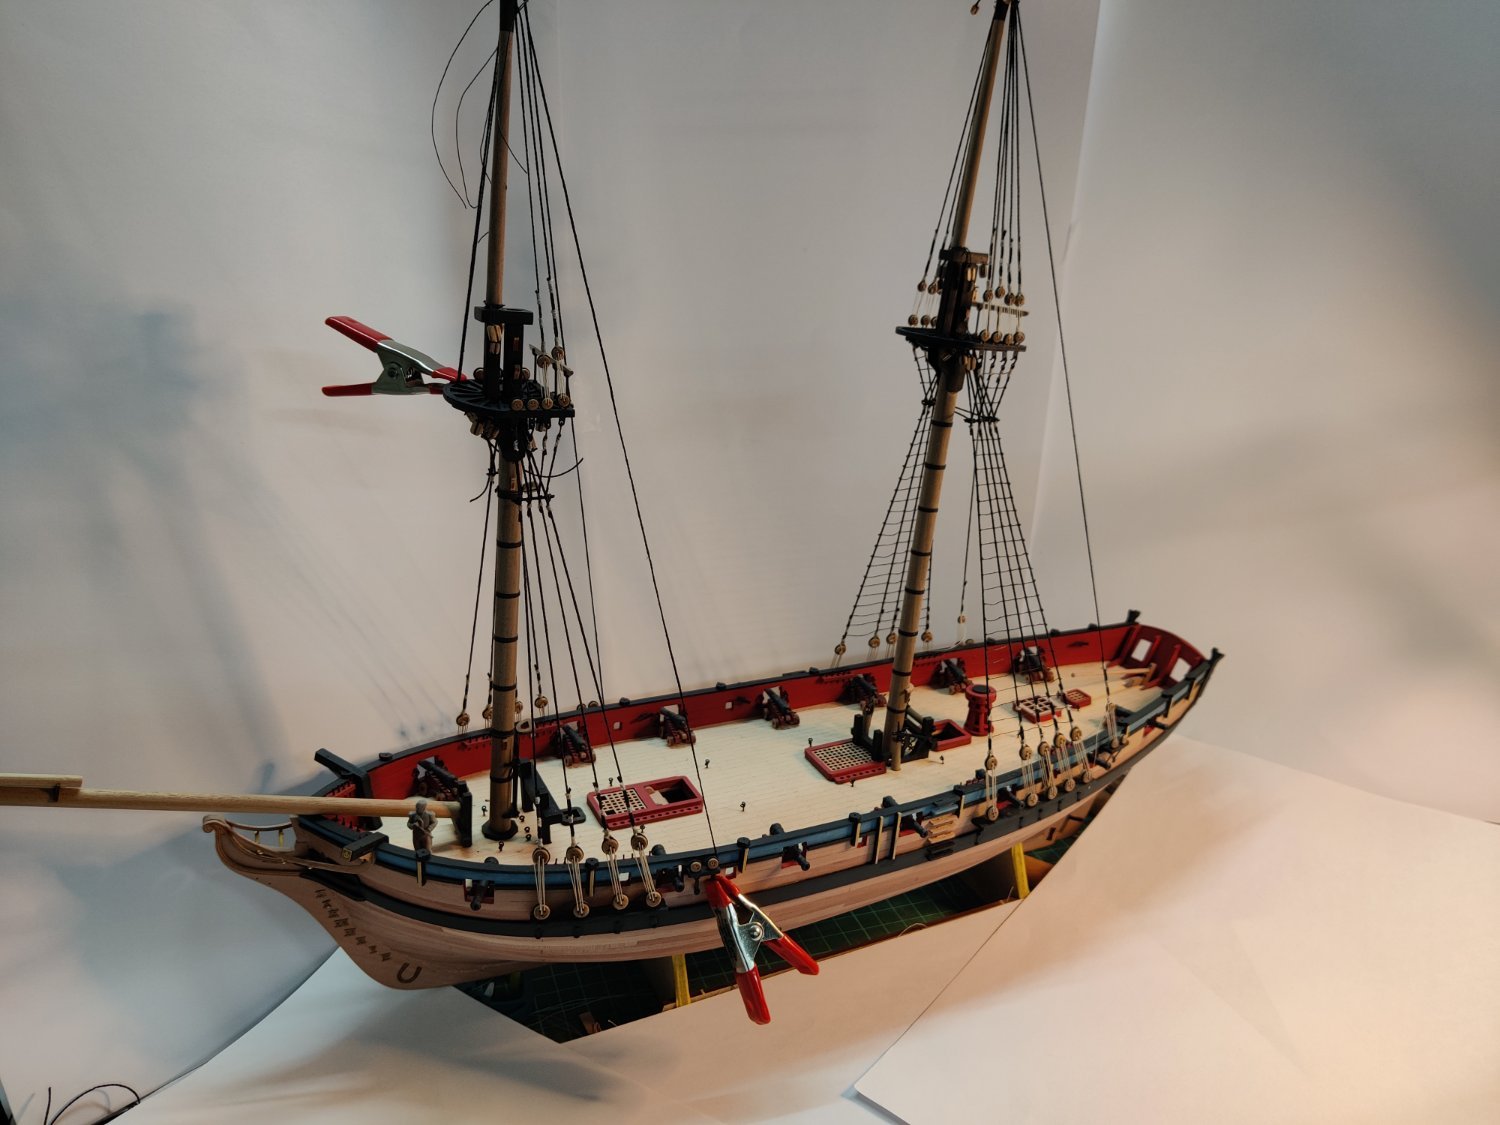
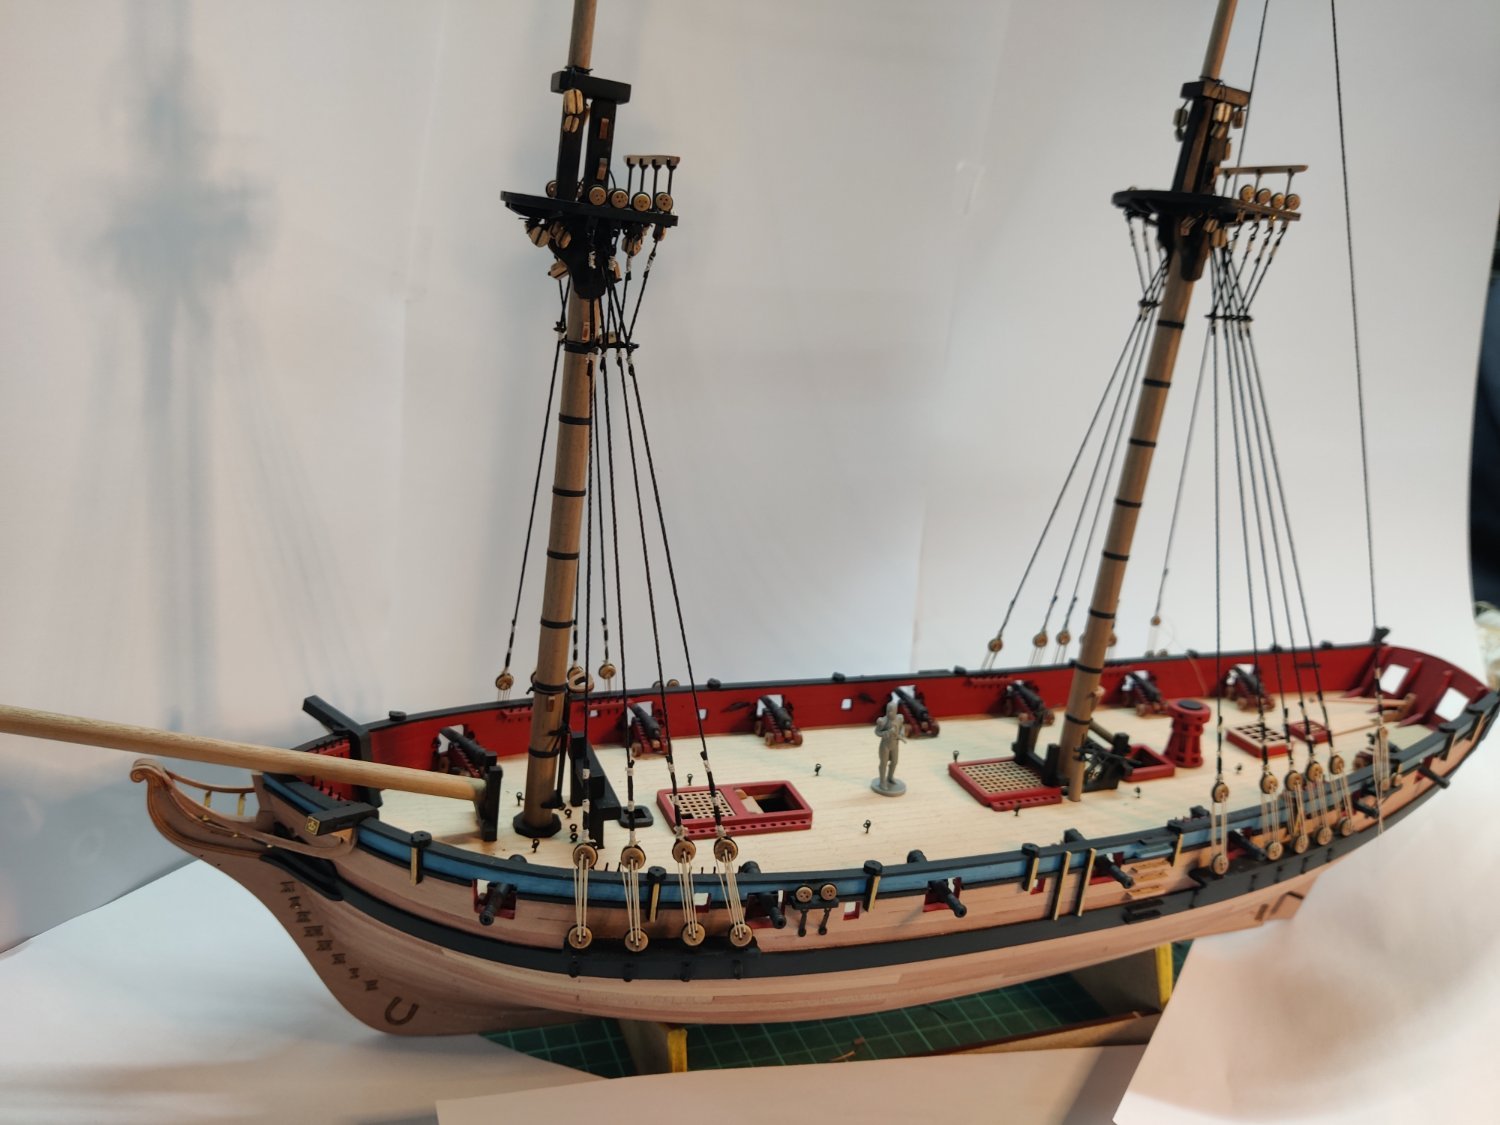
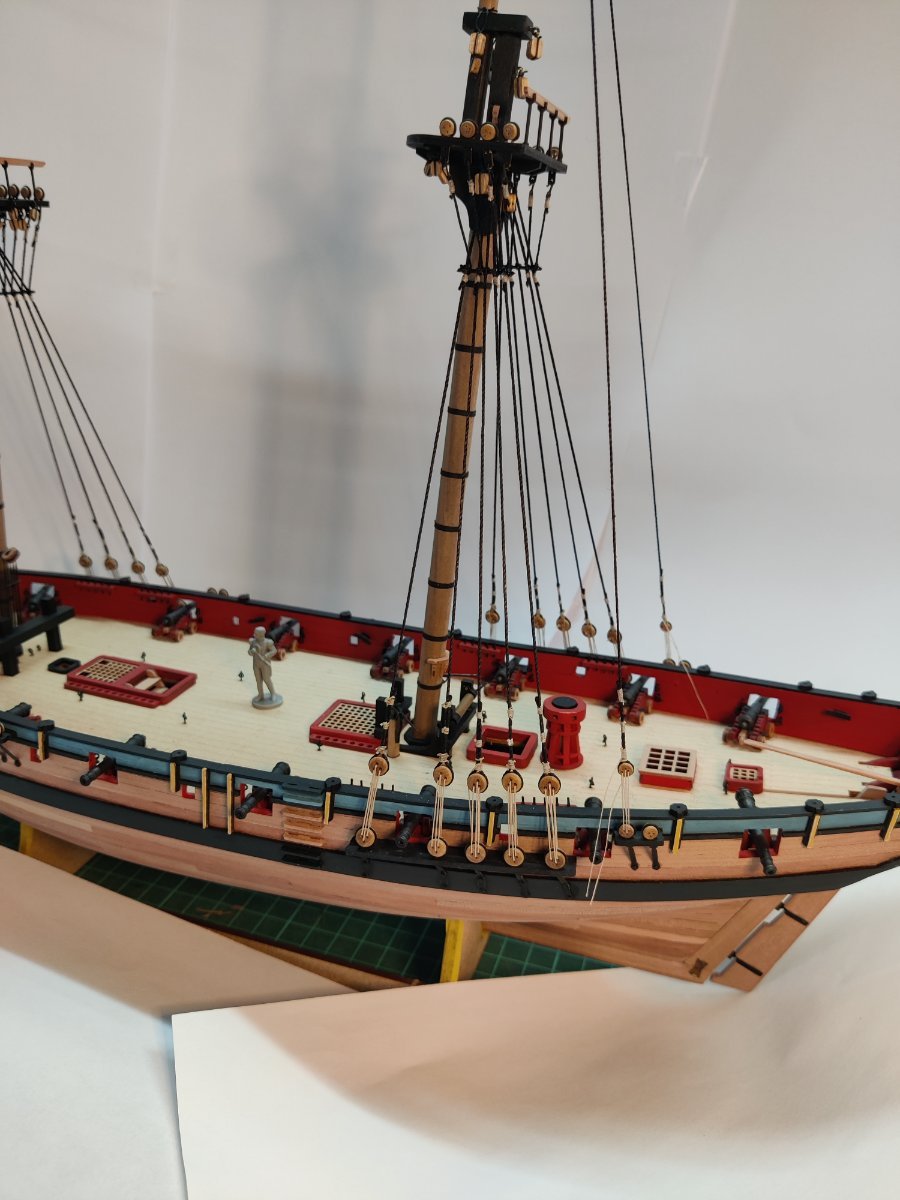
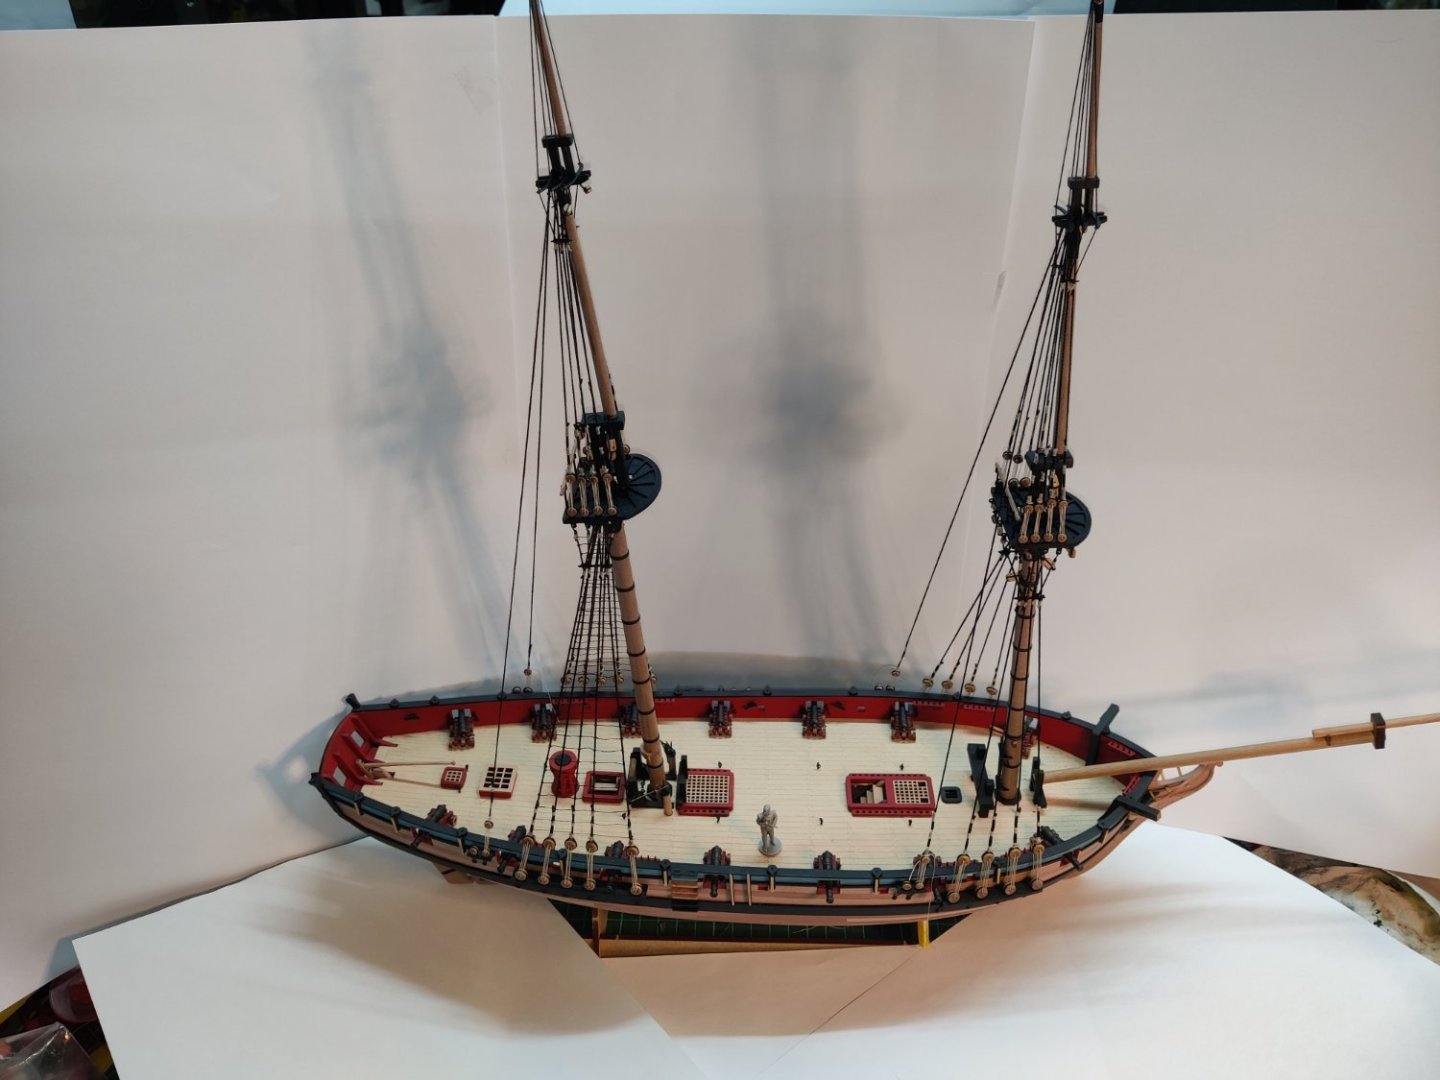
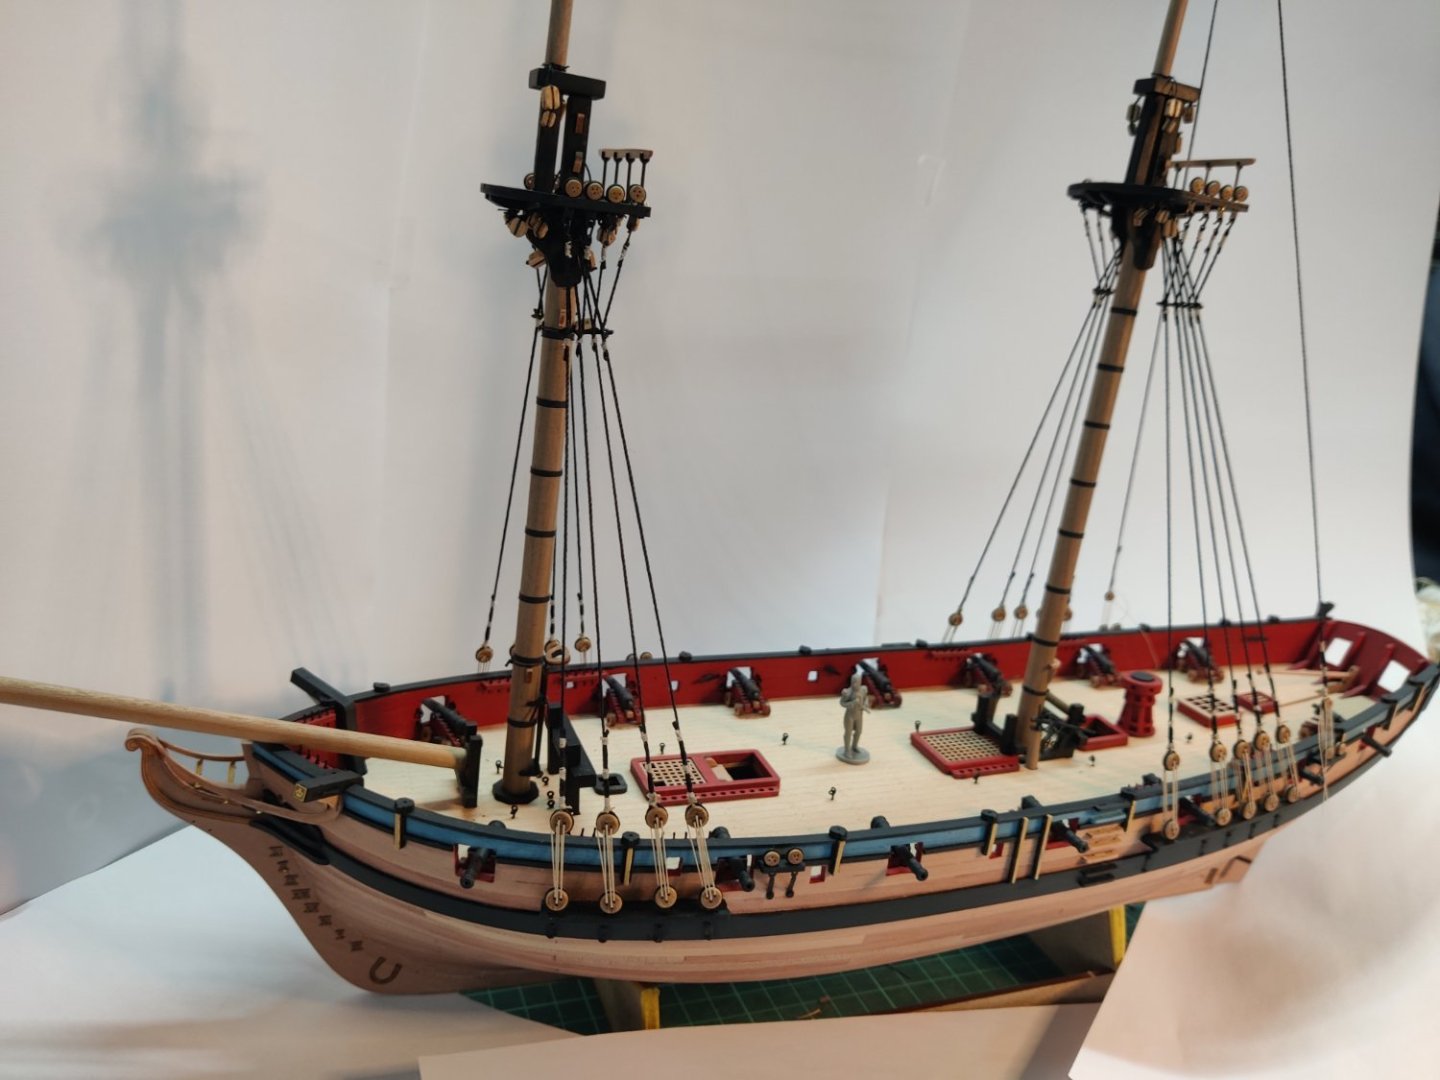
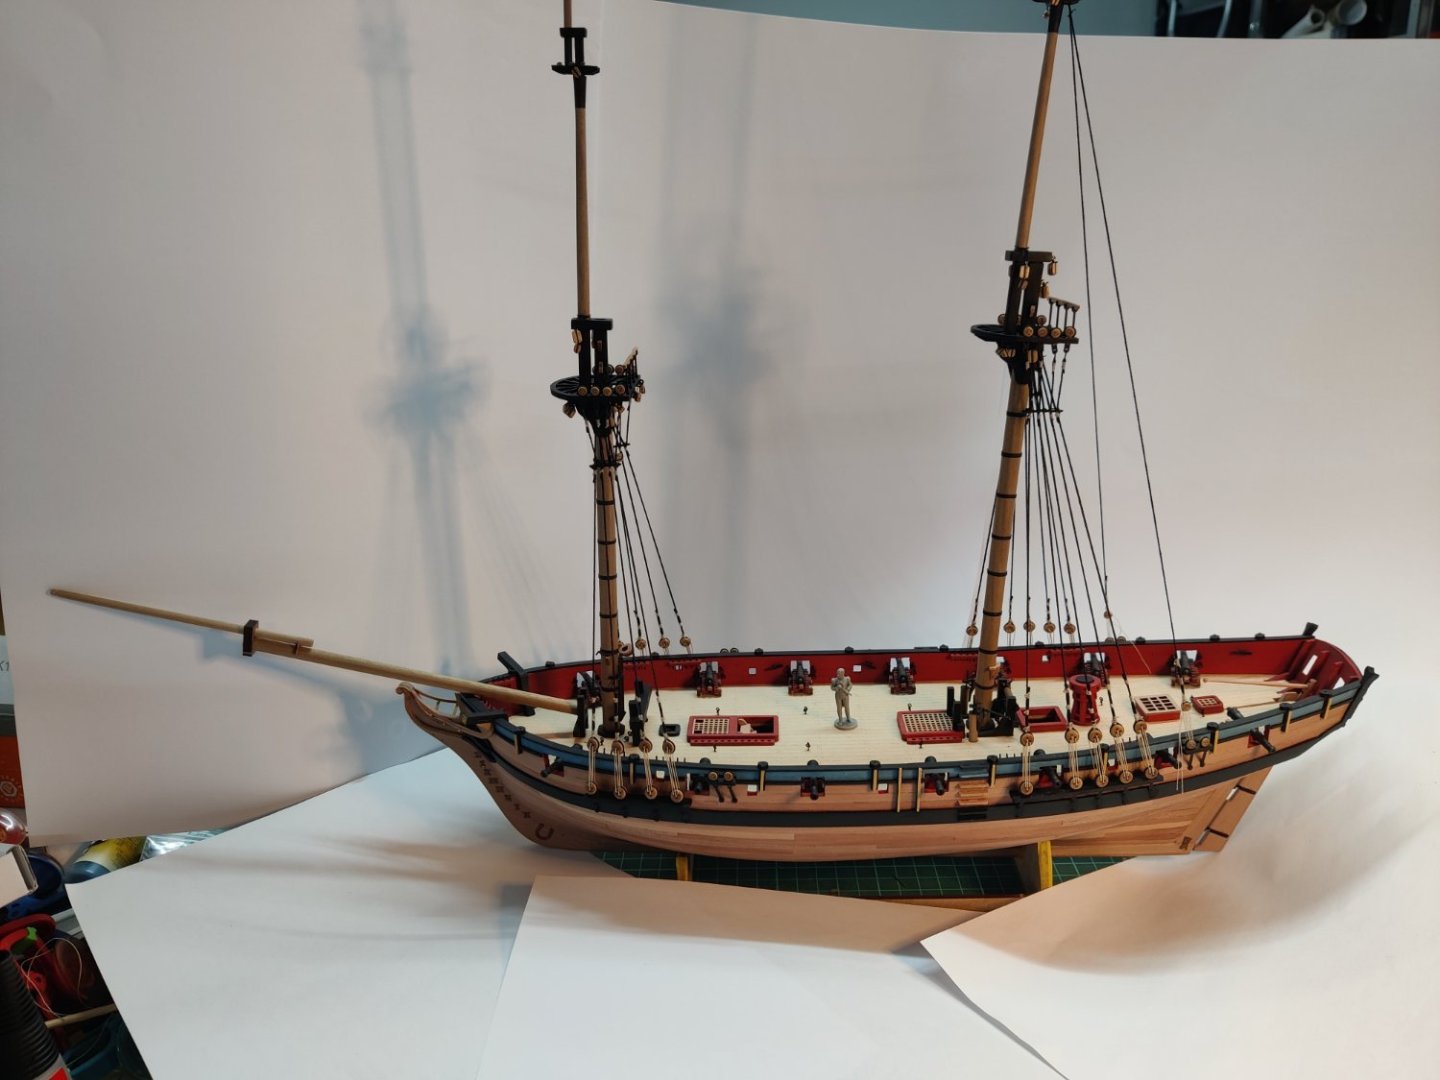
Log entry 29 The cutter is now completed and installed on the deck. I am really happy with the decision to add this, and to me it was definitely worth the time and effort. As you see, Cochrane has also gotten some colours. I am severely out of practice when it comes to miniature painting at this scale. Faces and eyes are never easy at this scale, but I used to be able to do better! 10 years ago... Anyways, he is just there for scale, so this will have to do. Now I can continue with the bowsprit boom and rigging. BR TJM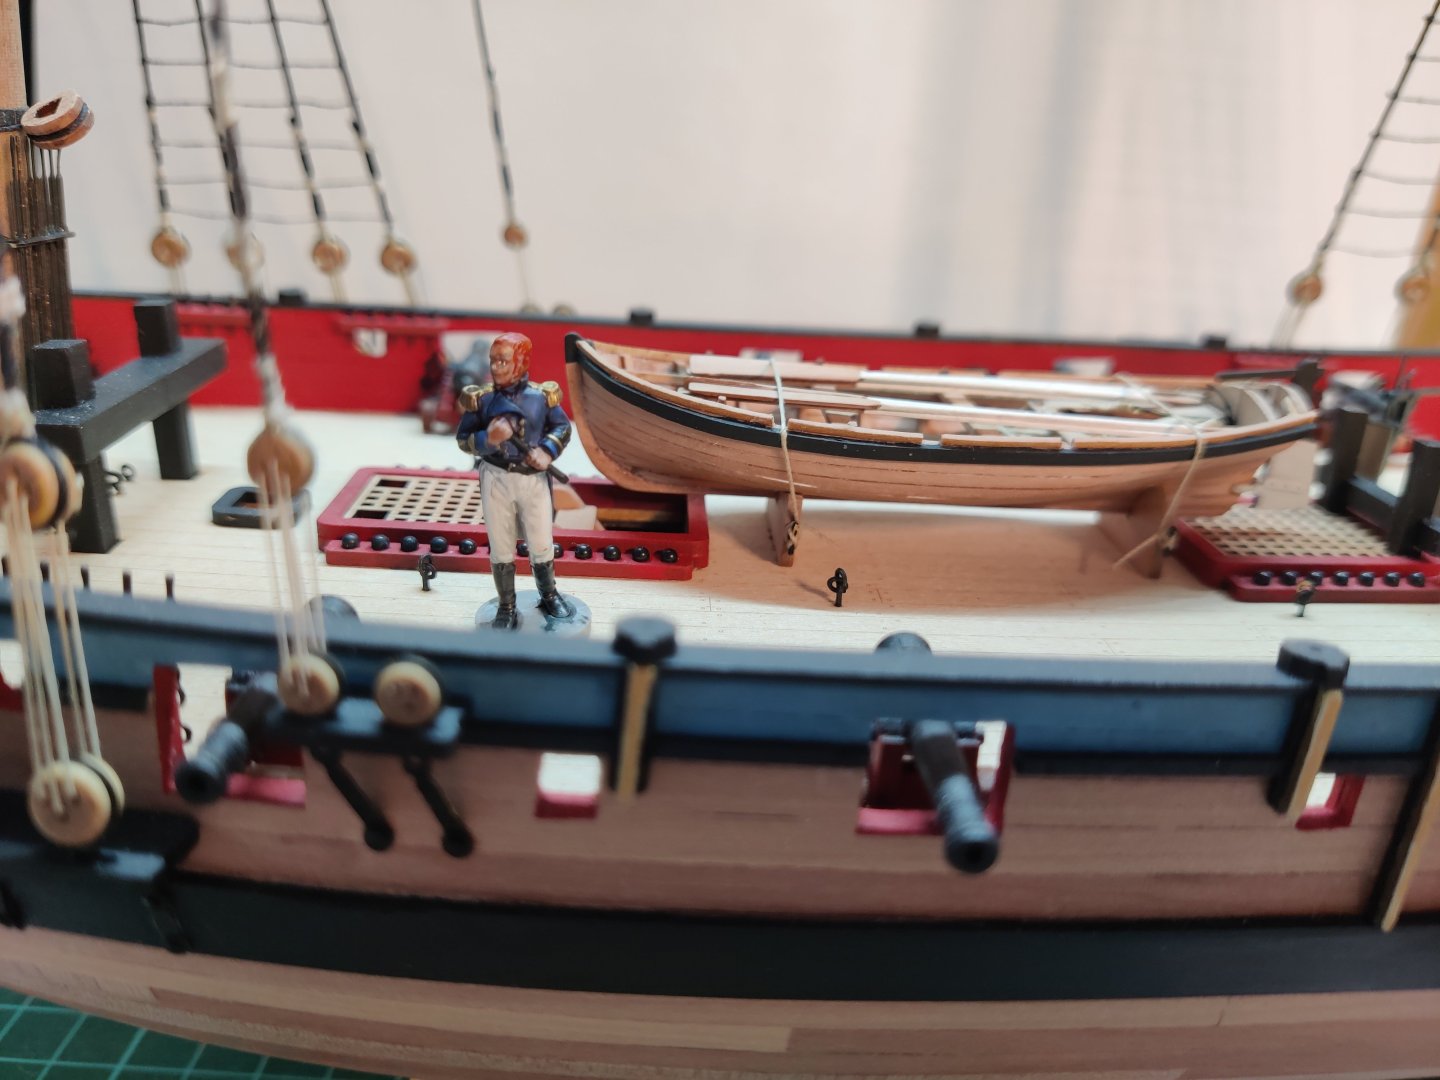


-
Now that changes the looks! Really nice! 👍
-
HMS Flirt by TJM - Vanguard Models - 1:64
TJM replied to TJM's topic in - Kit build logs for subjects built from 1751 - 1800
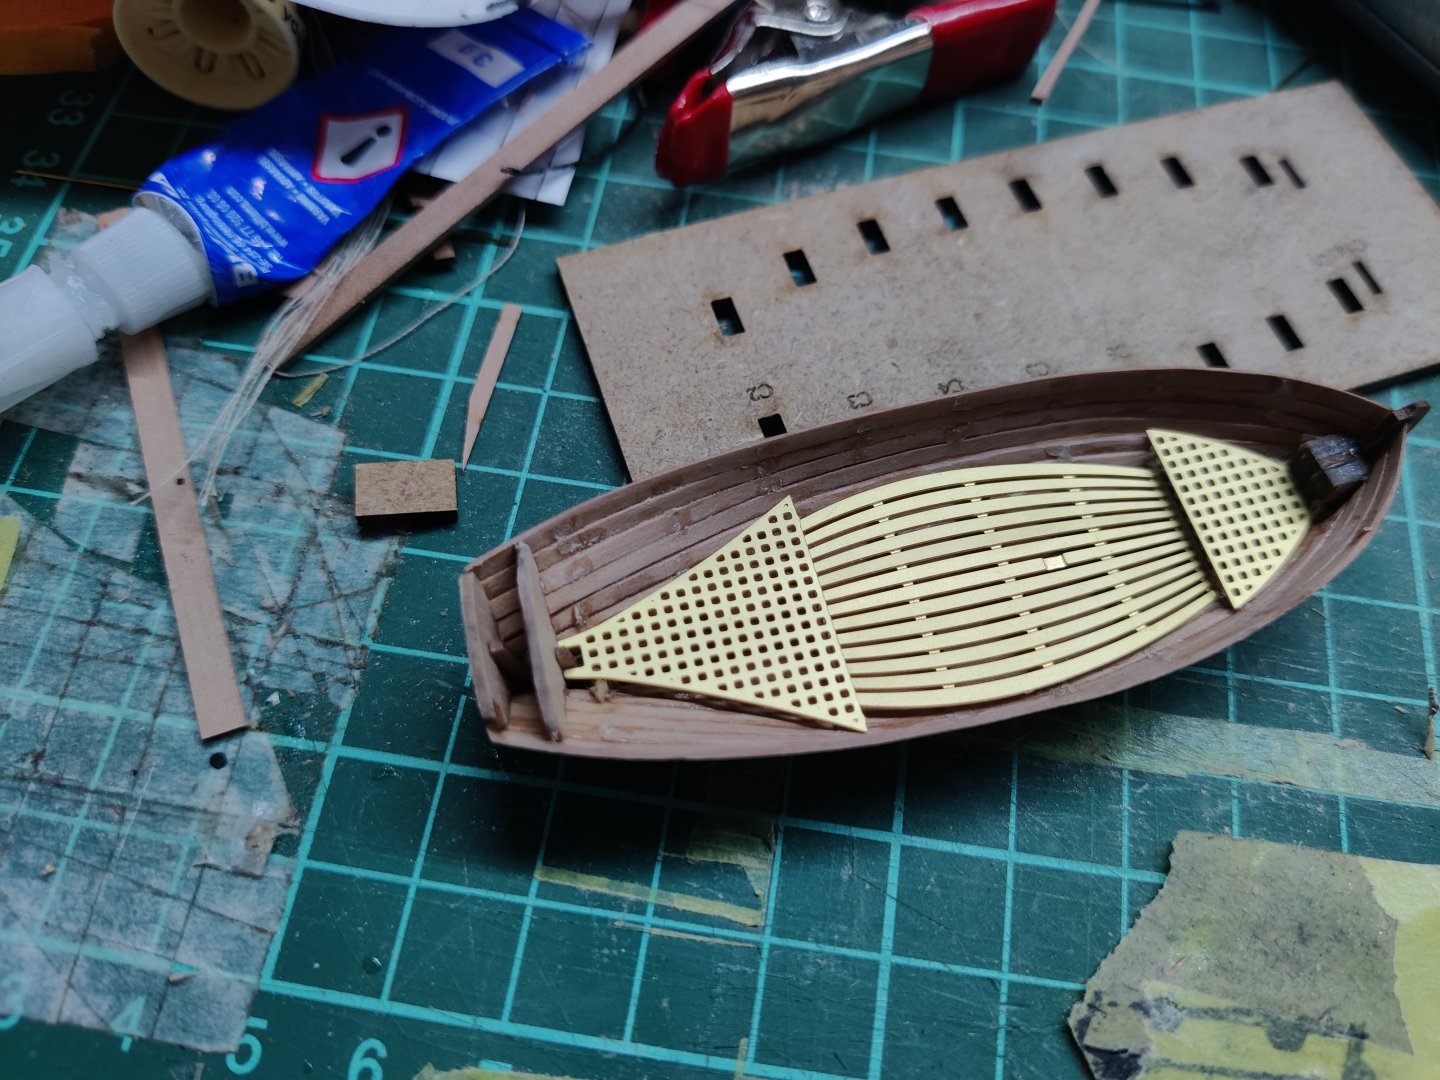
Log entry 28 the cutter is close to completion. I am missing the top bulwark (if that is the correct term....), painting and attaching the rudder and the oars. Cochrane paid a visit to inspect the progress (though he is still in a... pale state himself!). It is not perfect and the macro shots are harsh on it! From a reasonable viewing distance, I think it looks ok. It will make for a great upgrade to the deck of Flirt, for sure! BR TJM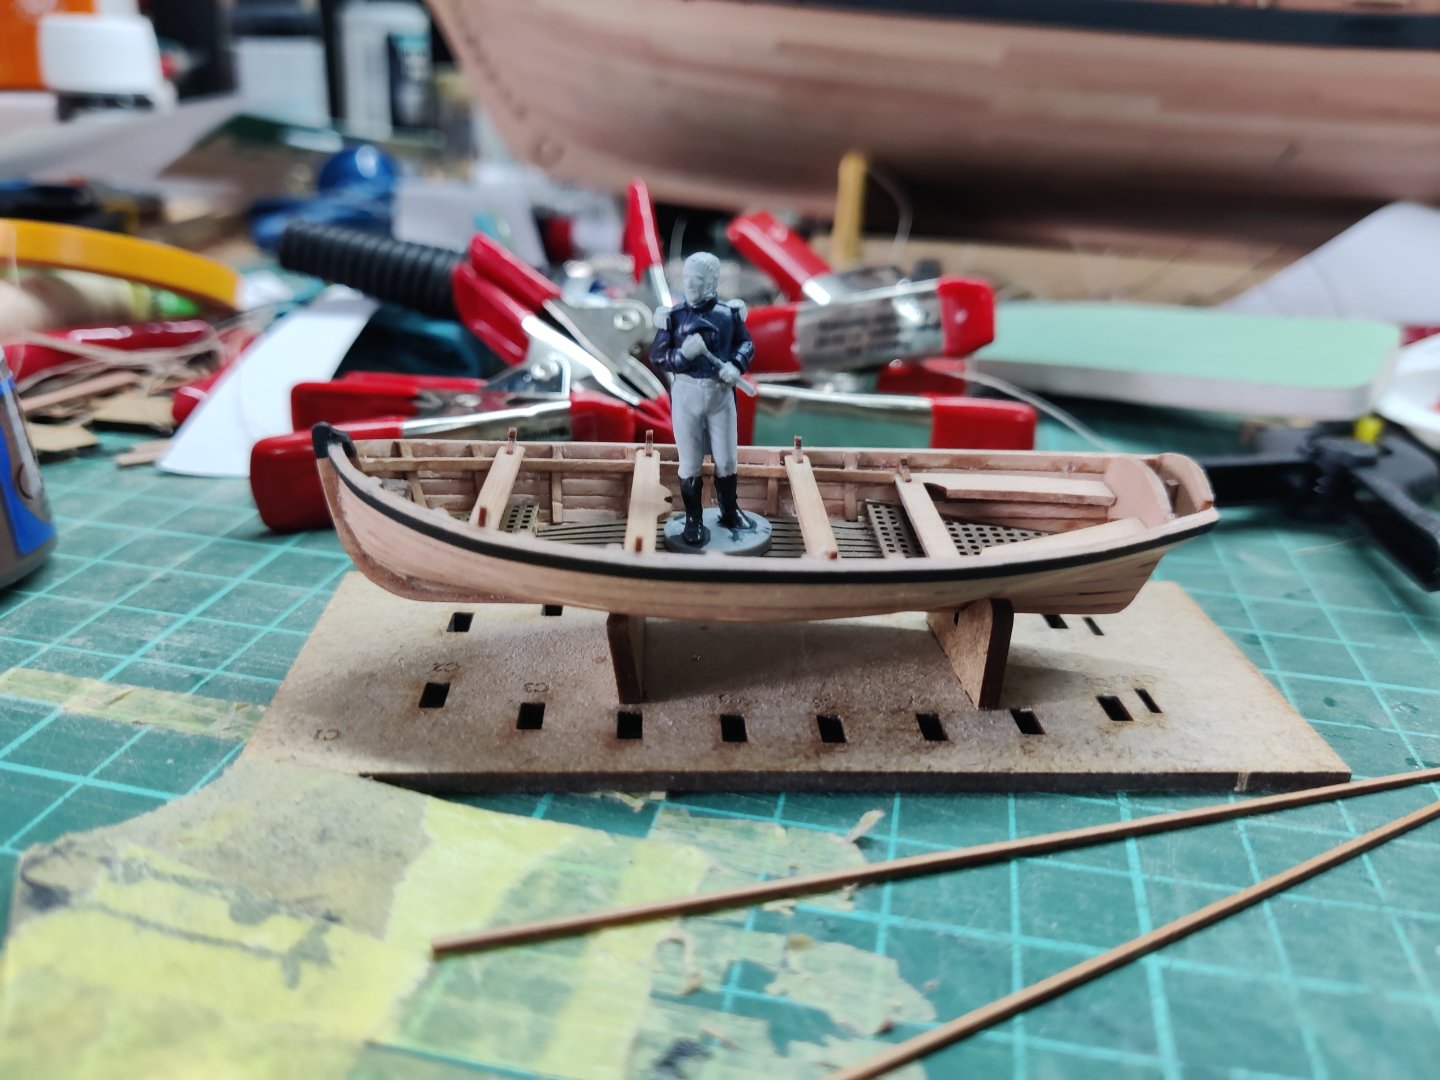

-
HMS Flirt by TJM - Vanguard Models - 1:64
TJM replied to TJM's topic in - Kit build logs for subjects built from 1751 - 1800
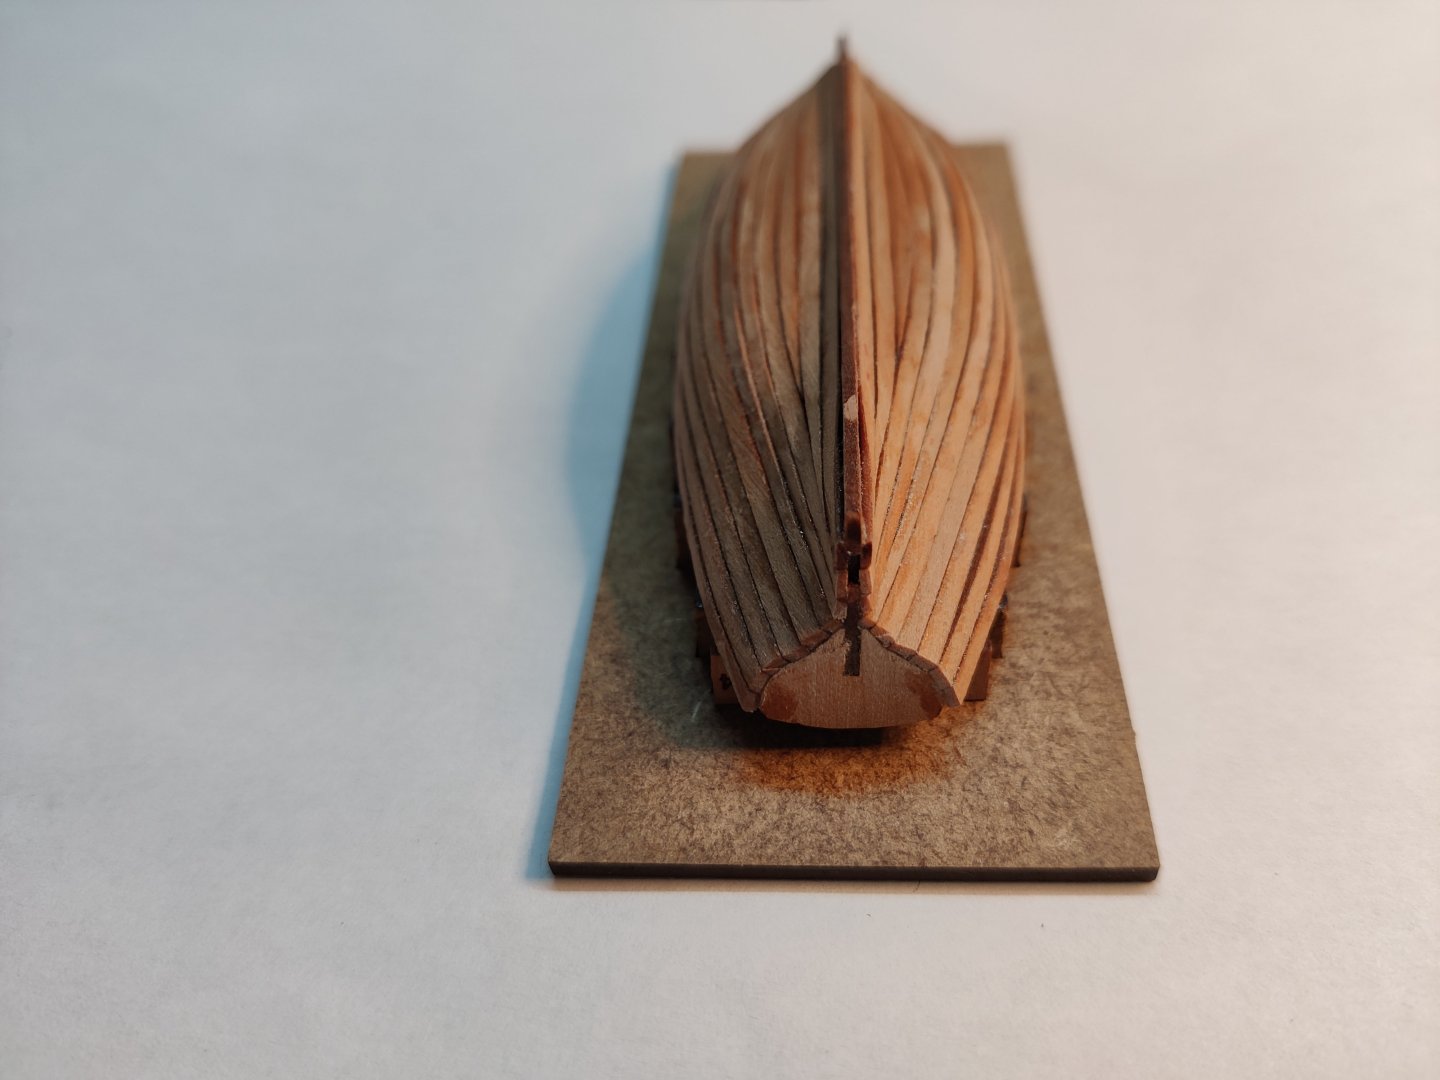
Log entry 27 Just a small update on the cutter. The outside has been sanded an the temporary bulkheads removed without issues, much to my relief! Now to decide how much cleaning on the inside to do. It is very difficult to sand properly and the material is very thin already... TJM
-
For what it is worth, I think it looks great! 👍
-
HMS Flirt by TJM - Vanguard Models - 1:64
TJM replied to TJM's topic in - Kit build logs for subjects built from 1751 - 1800
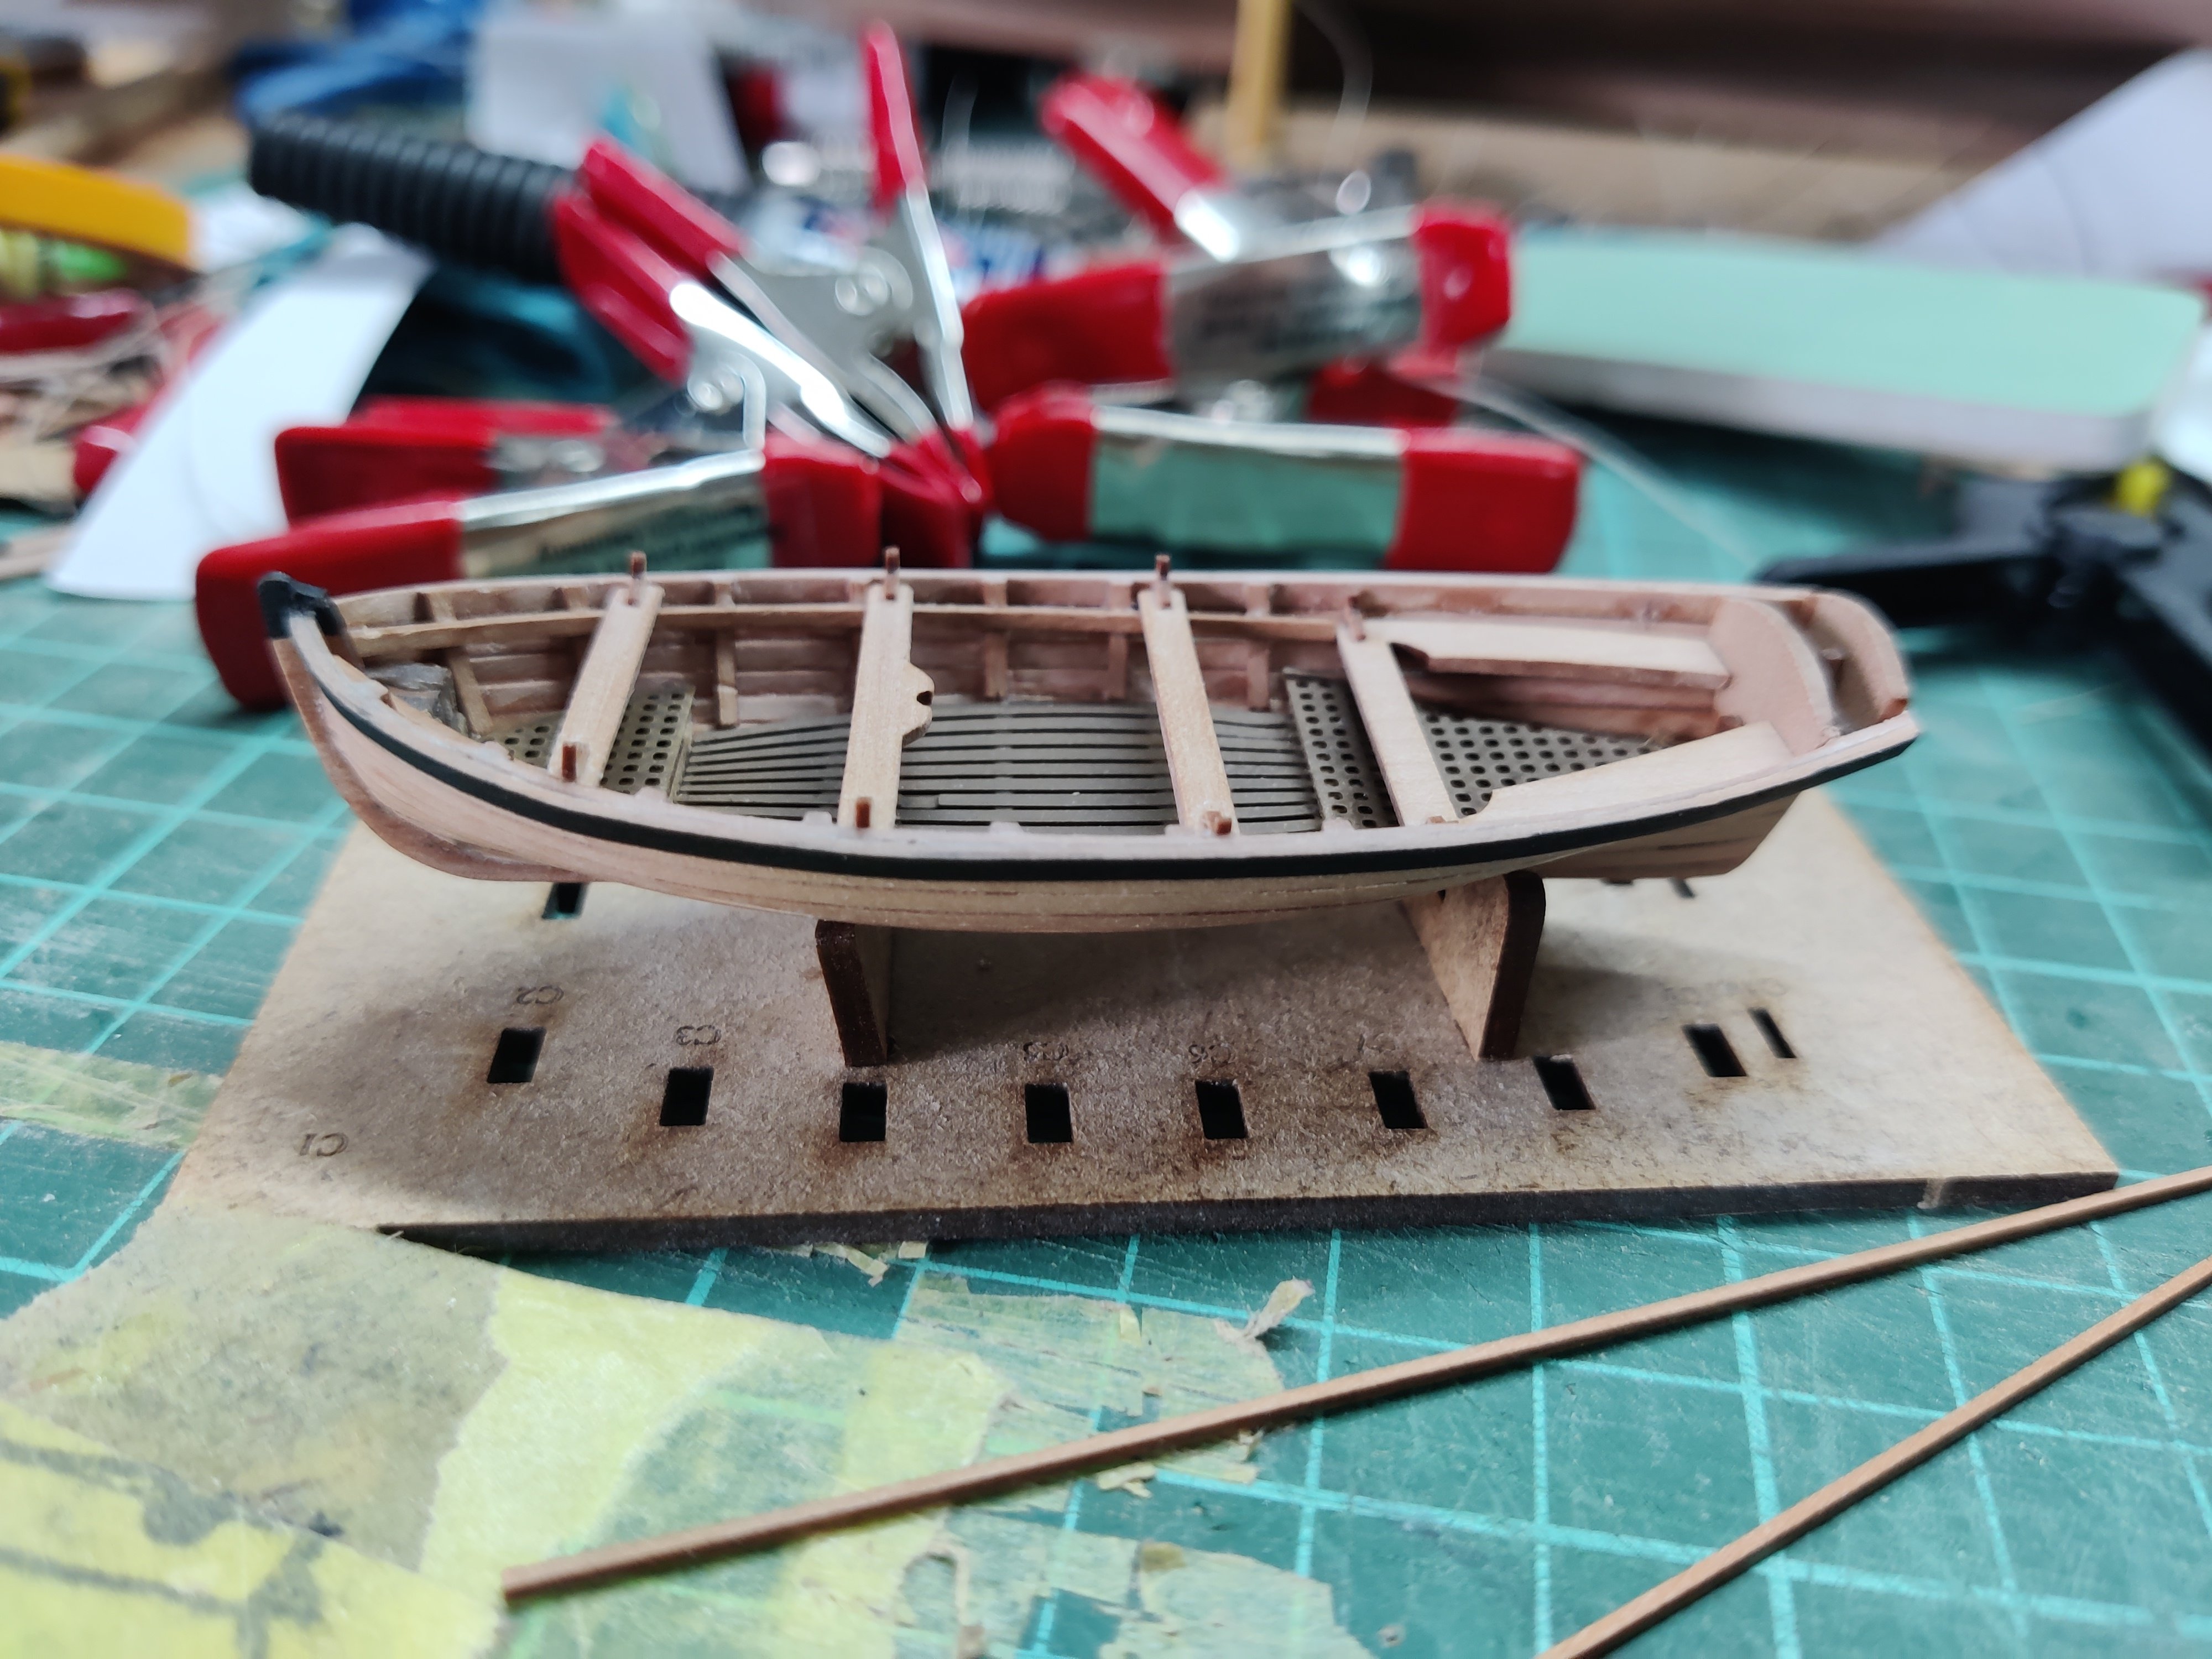
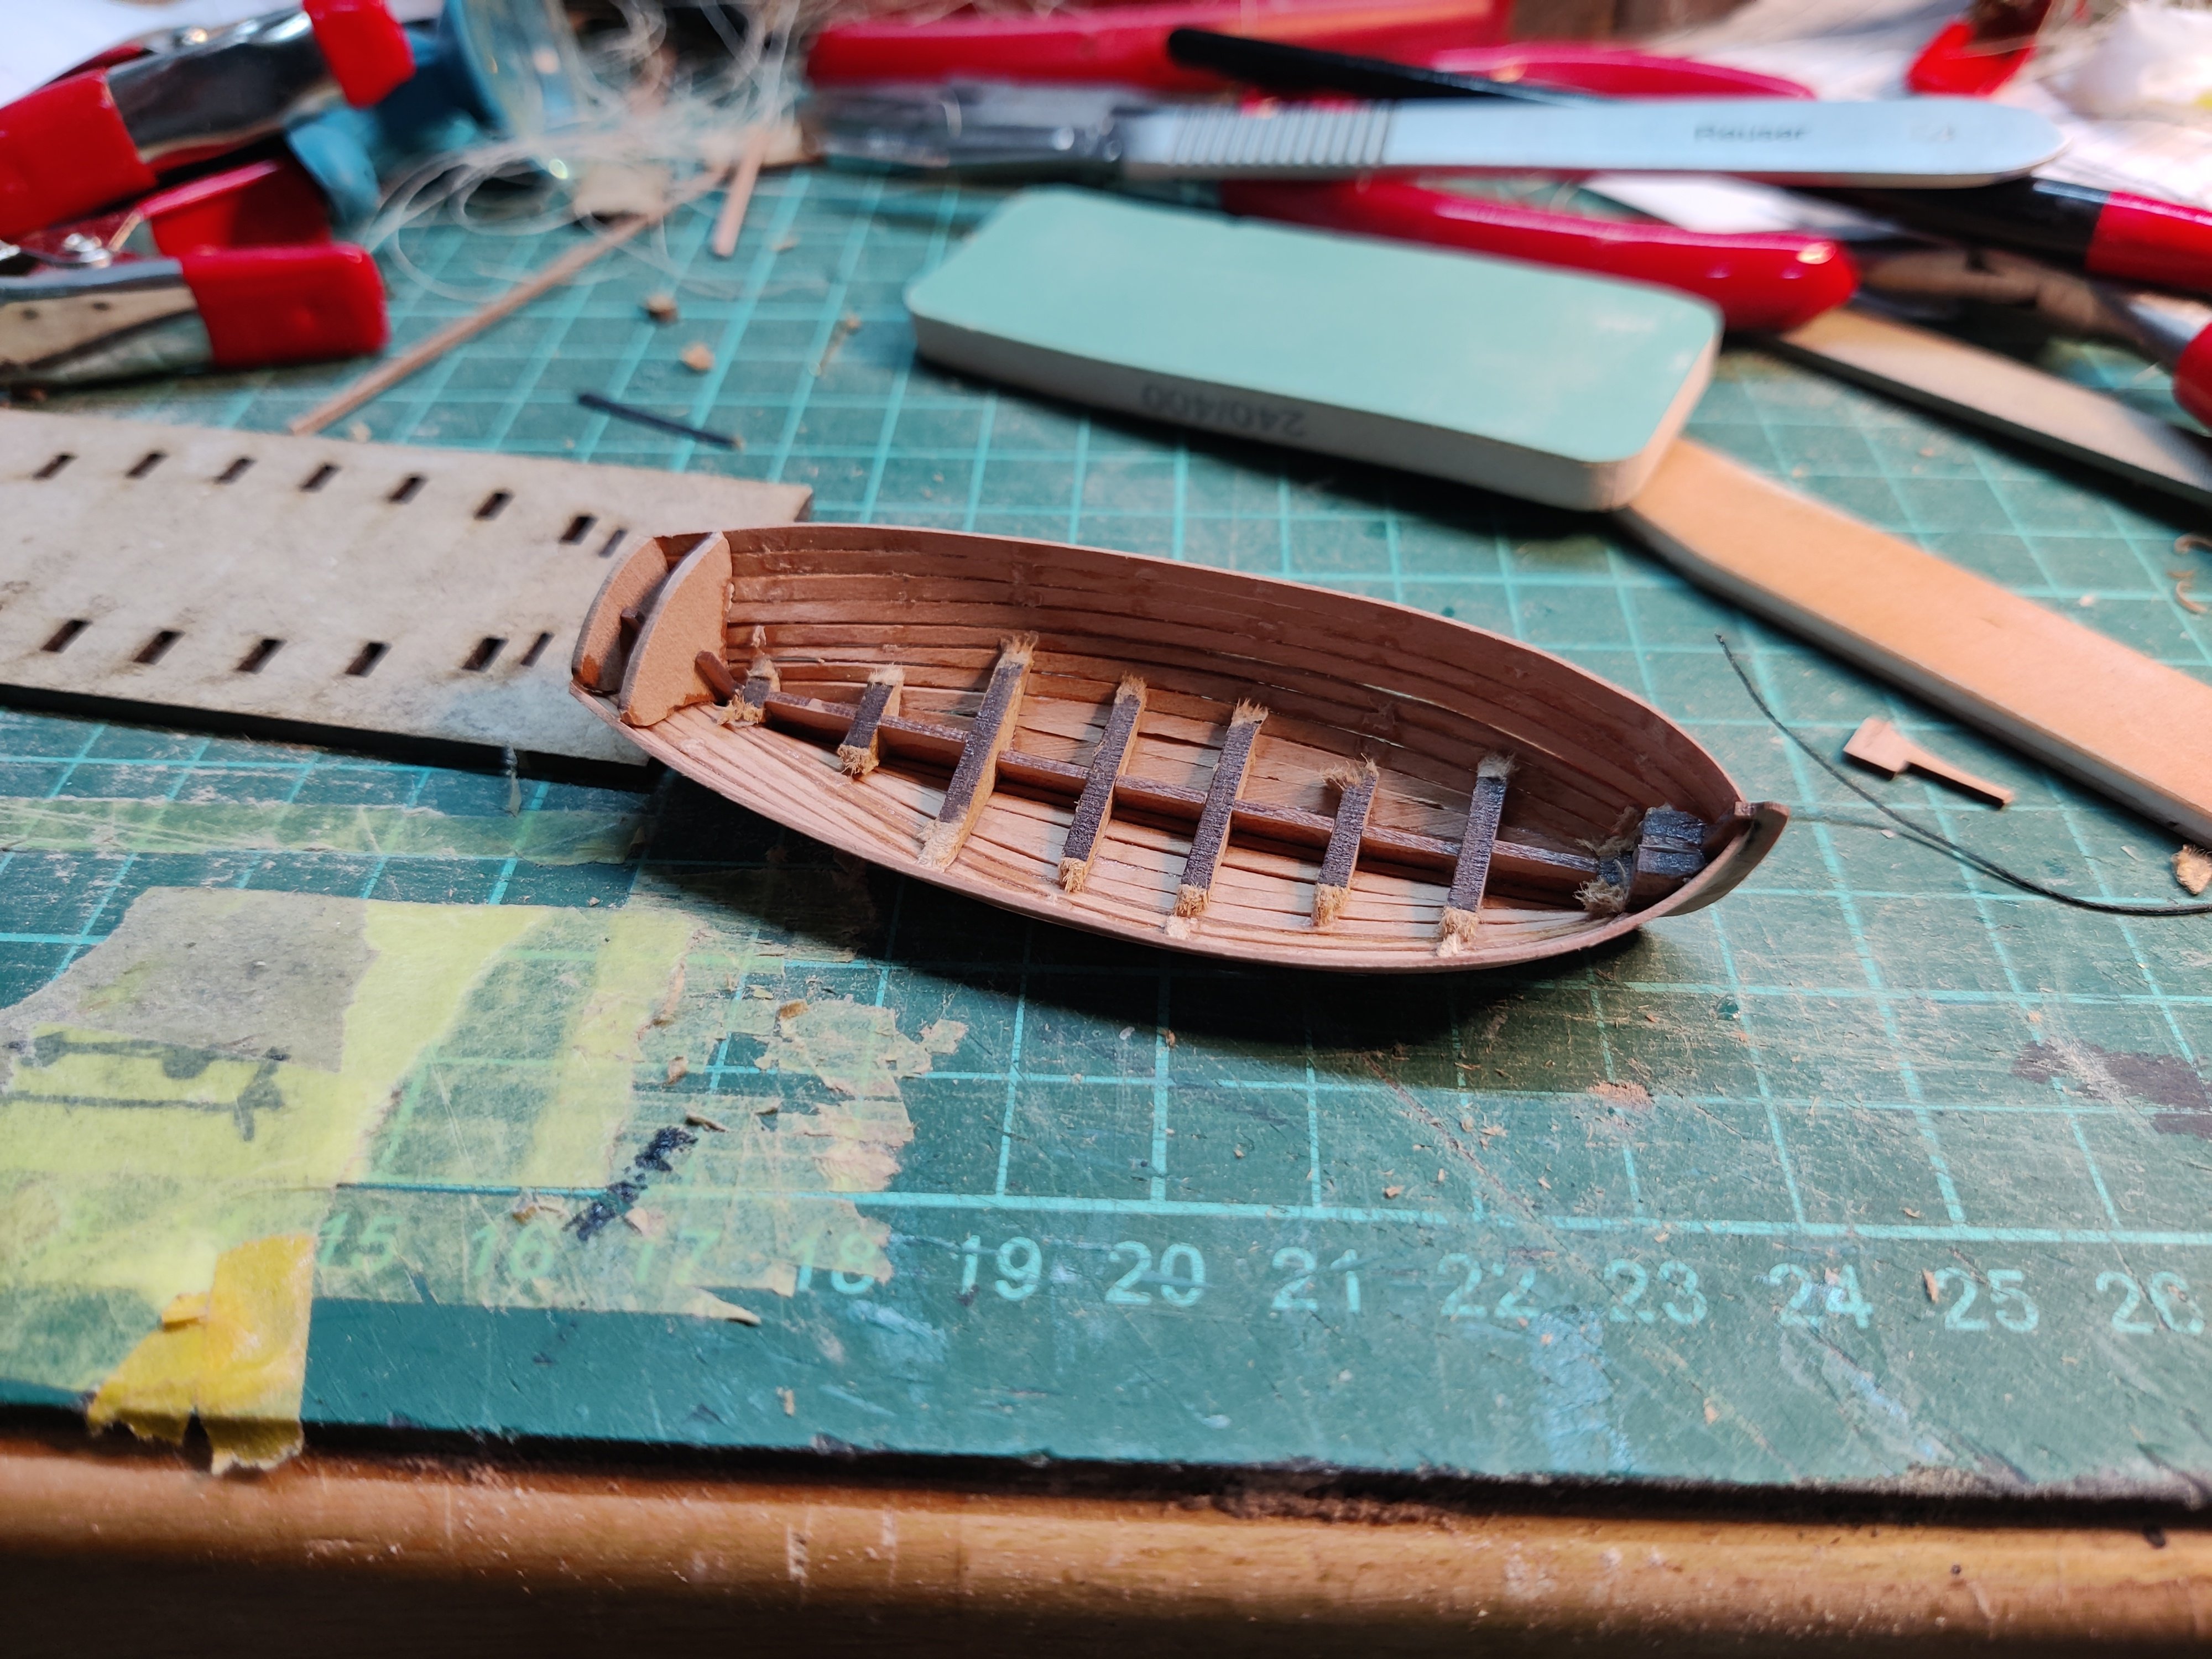
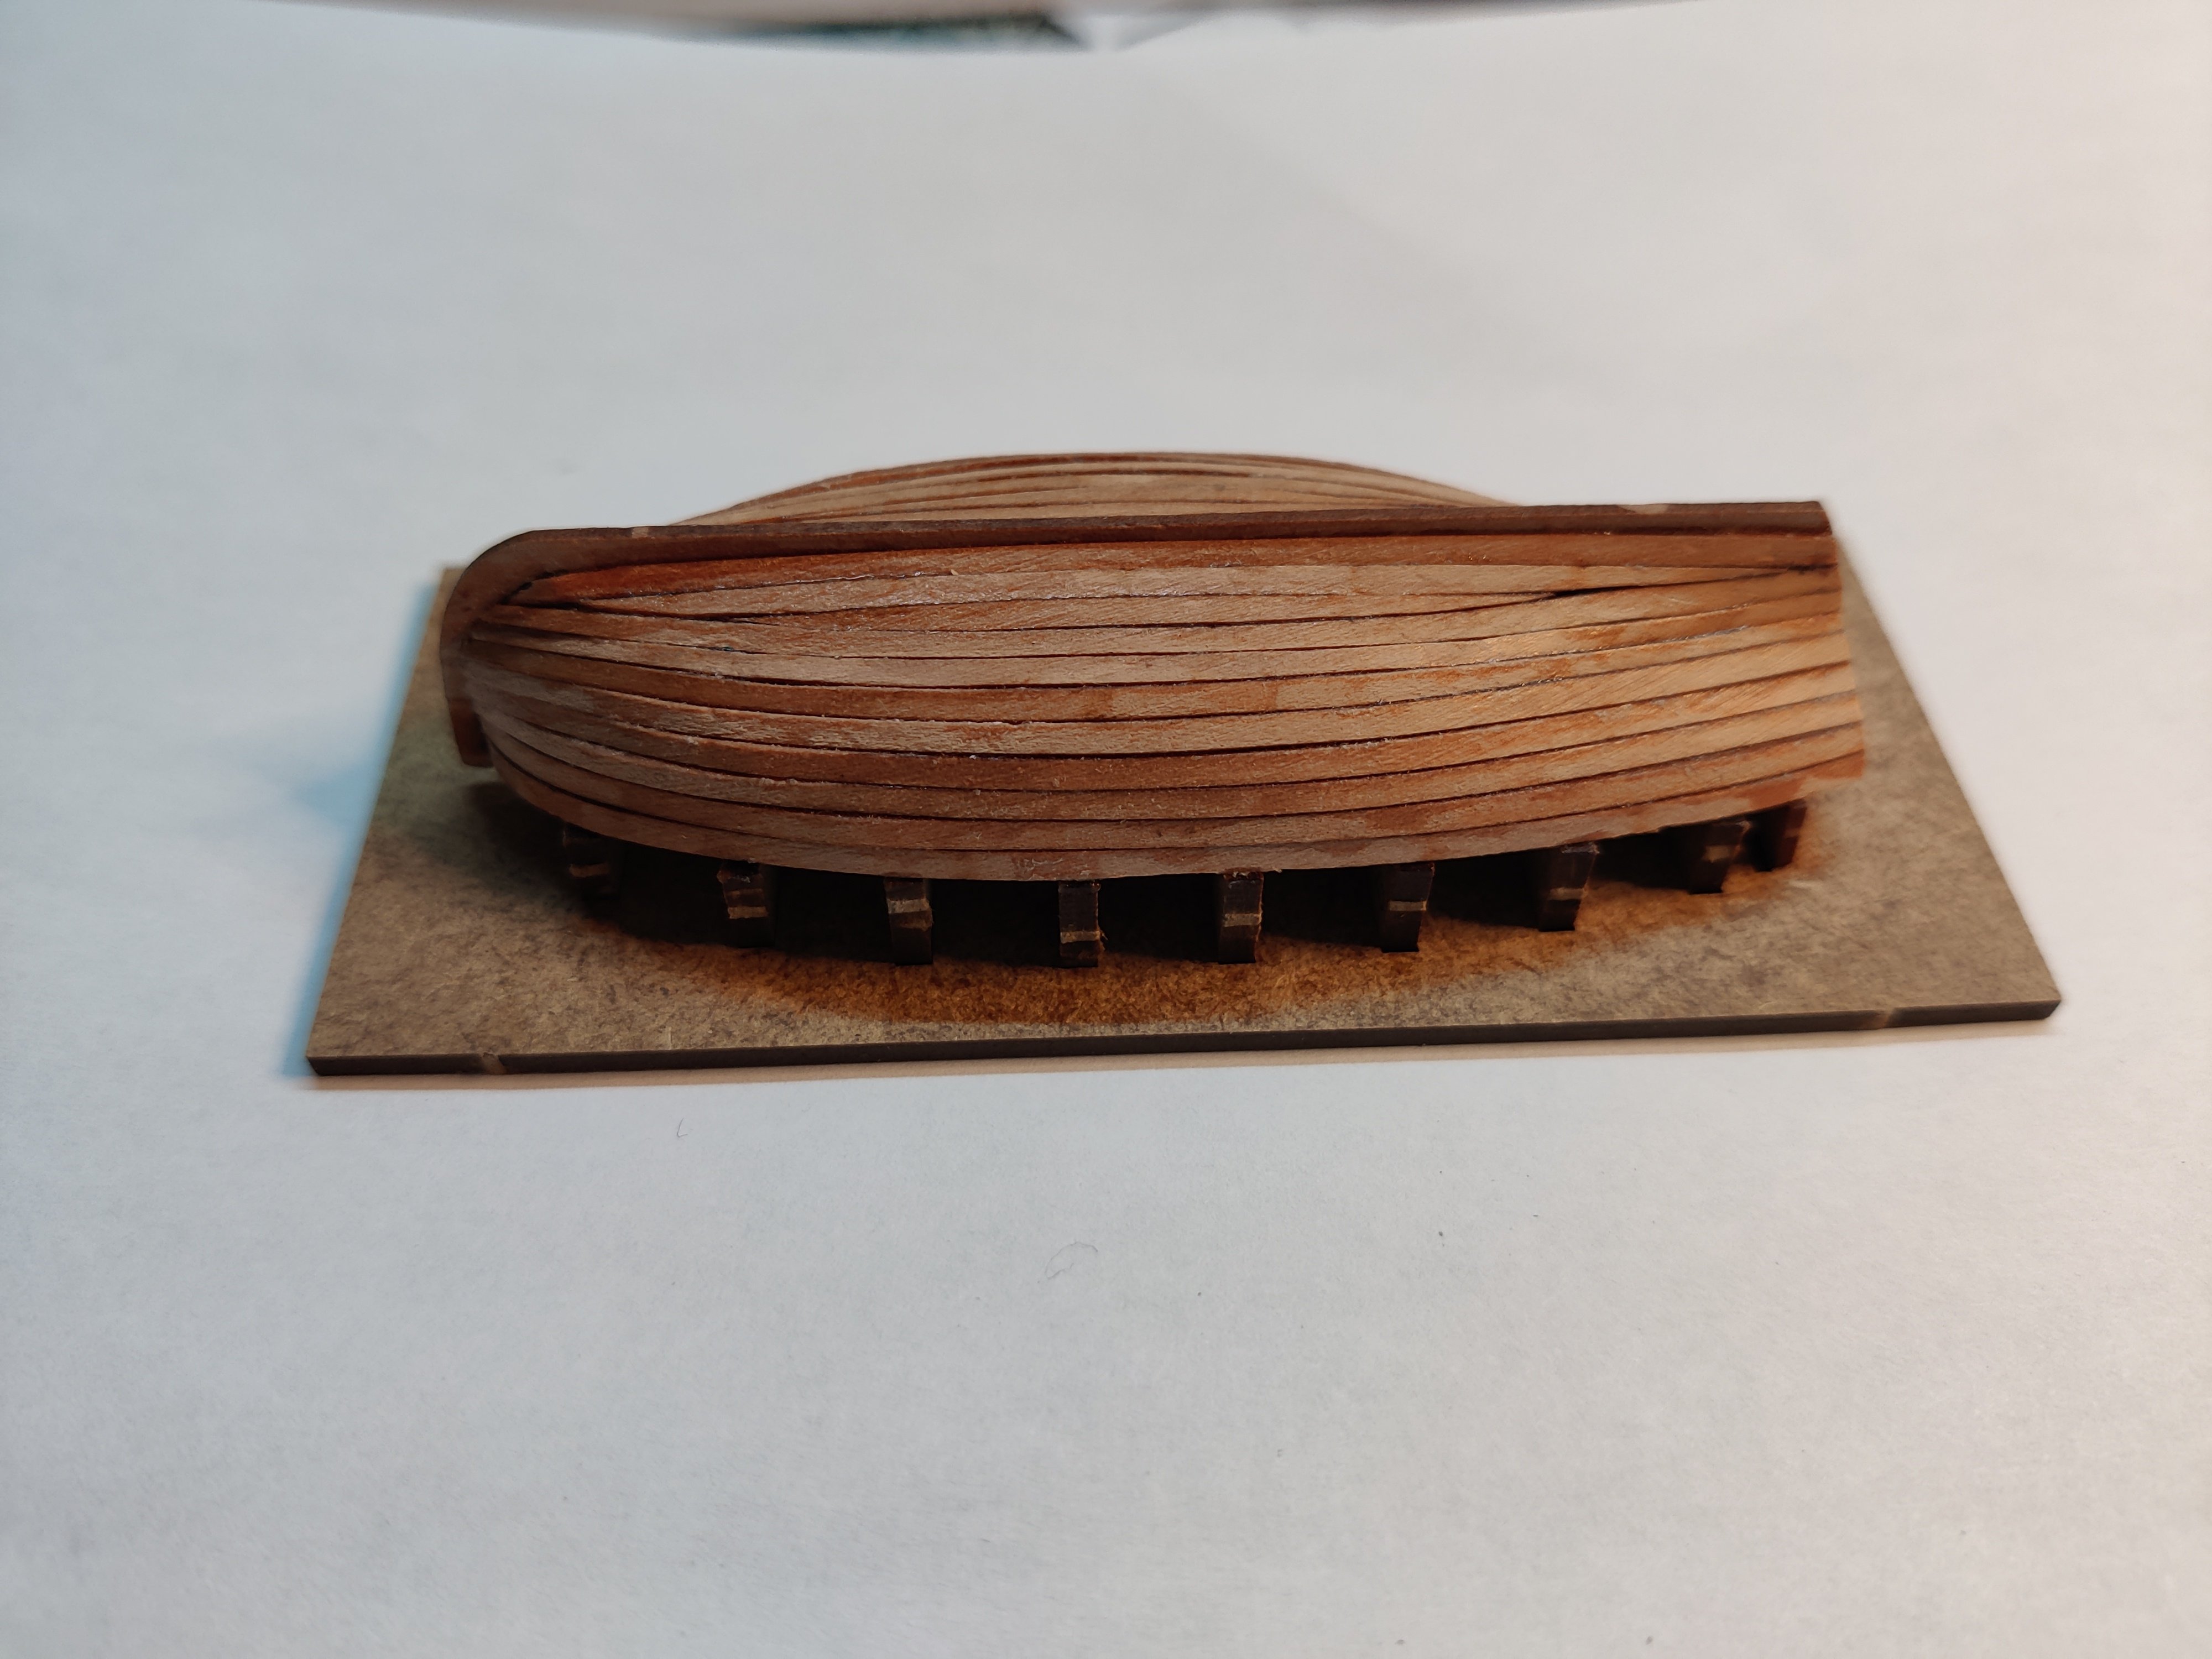
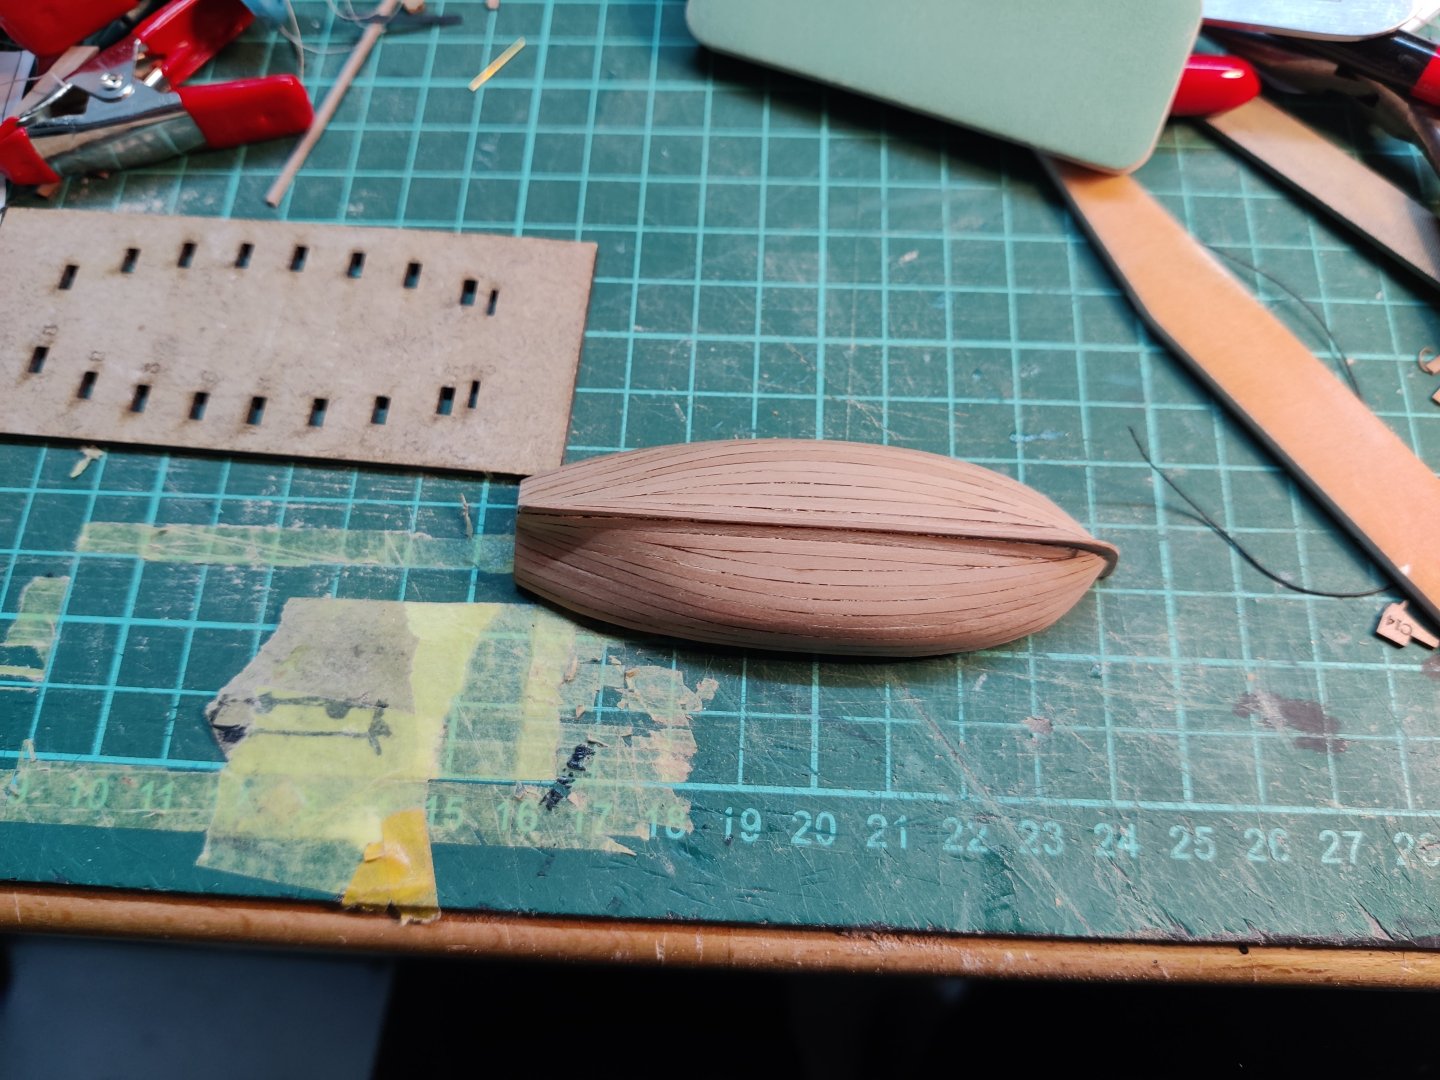
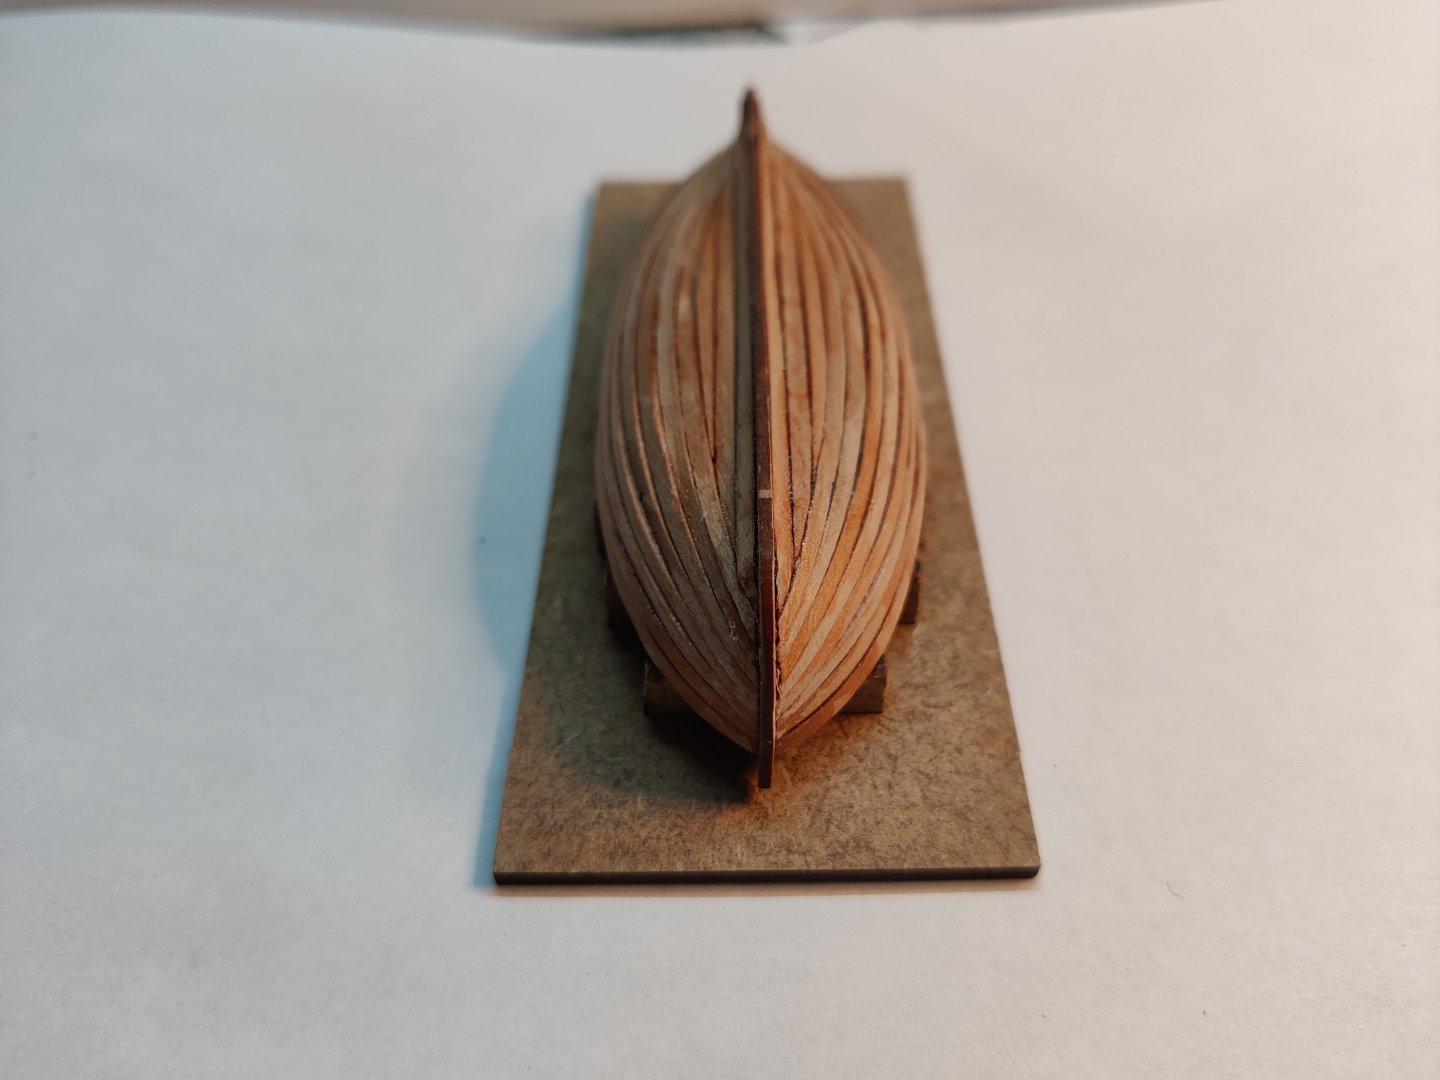
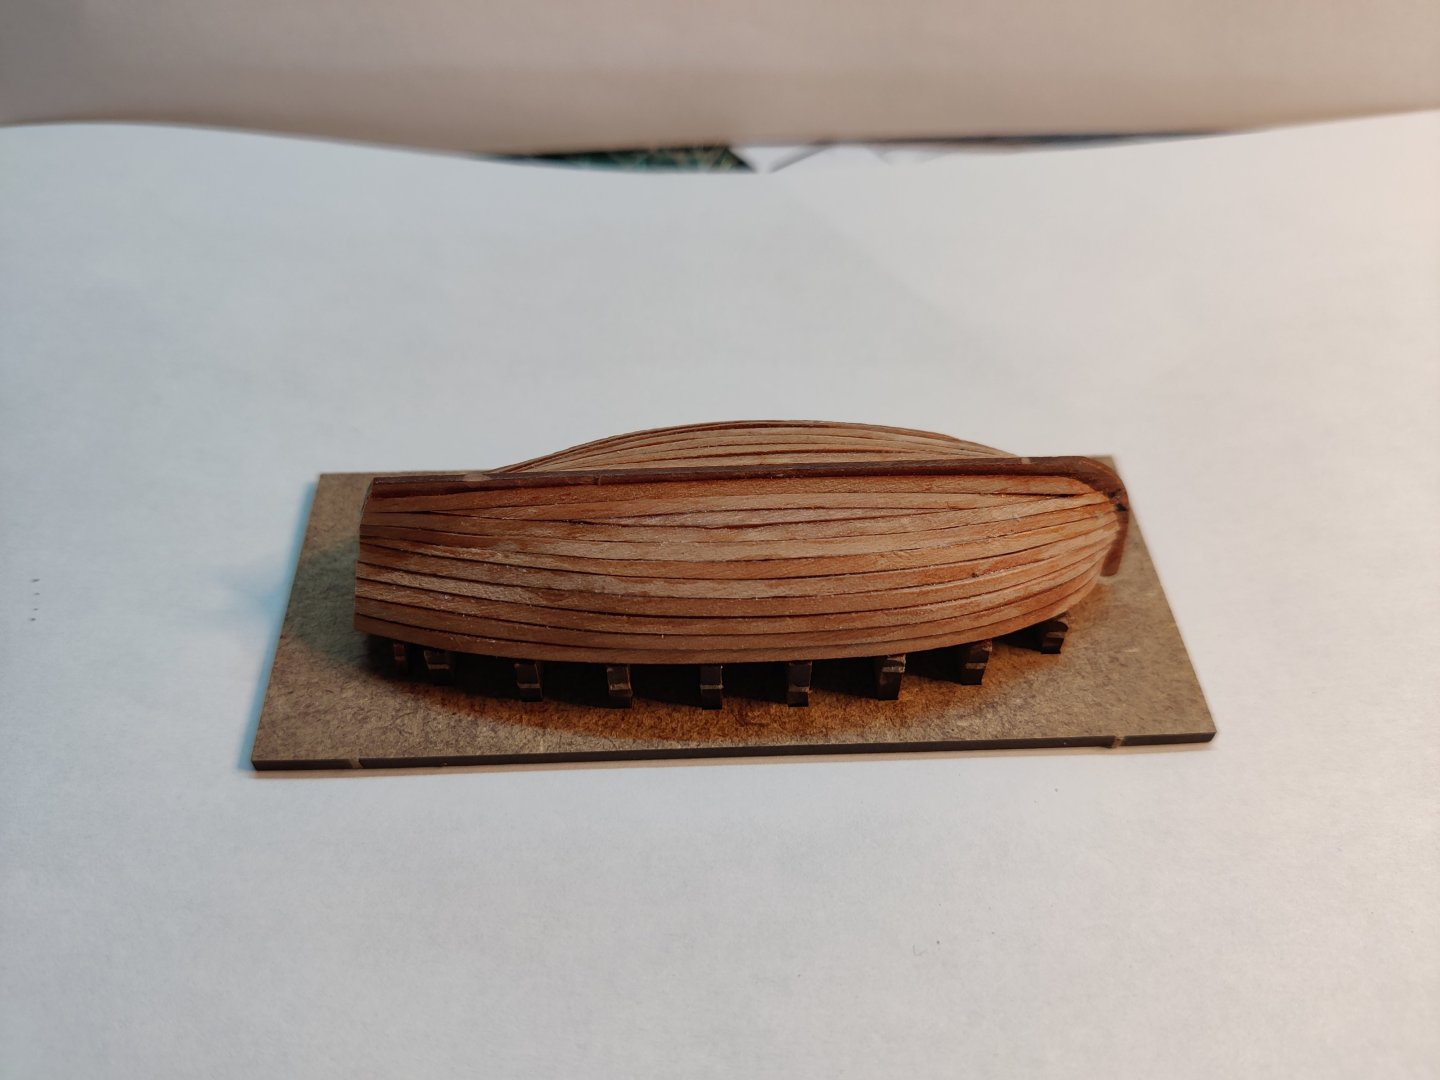
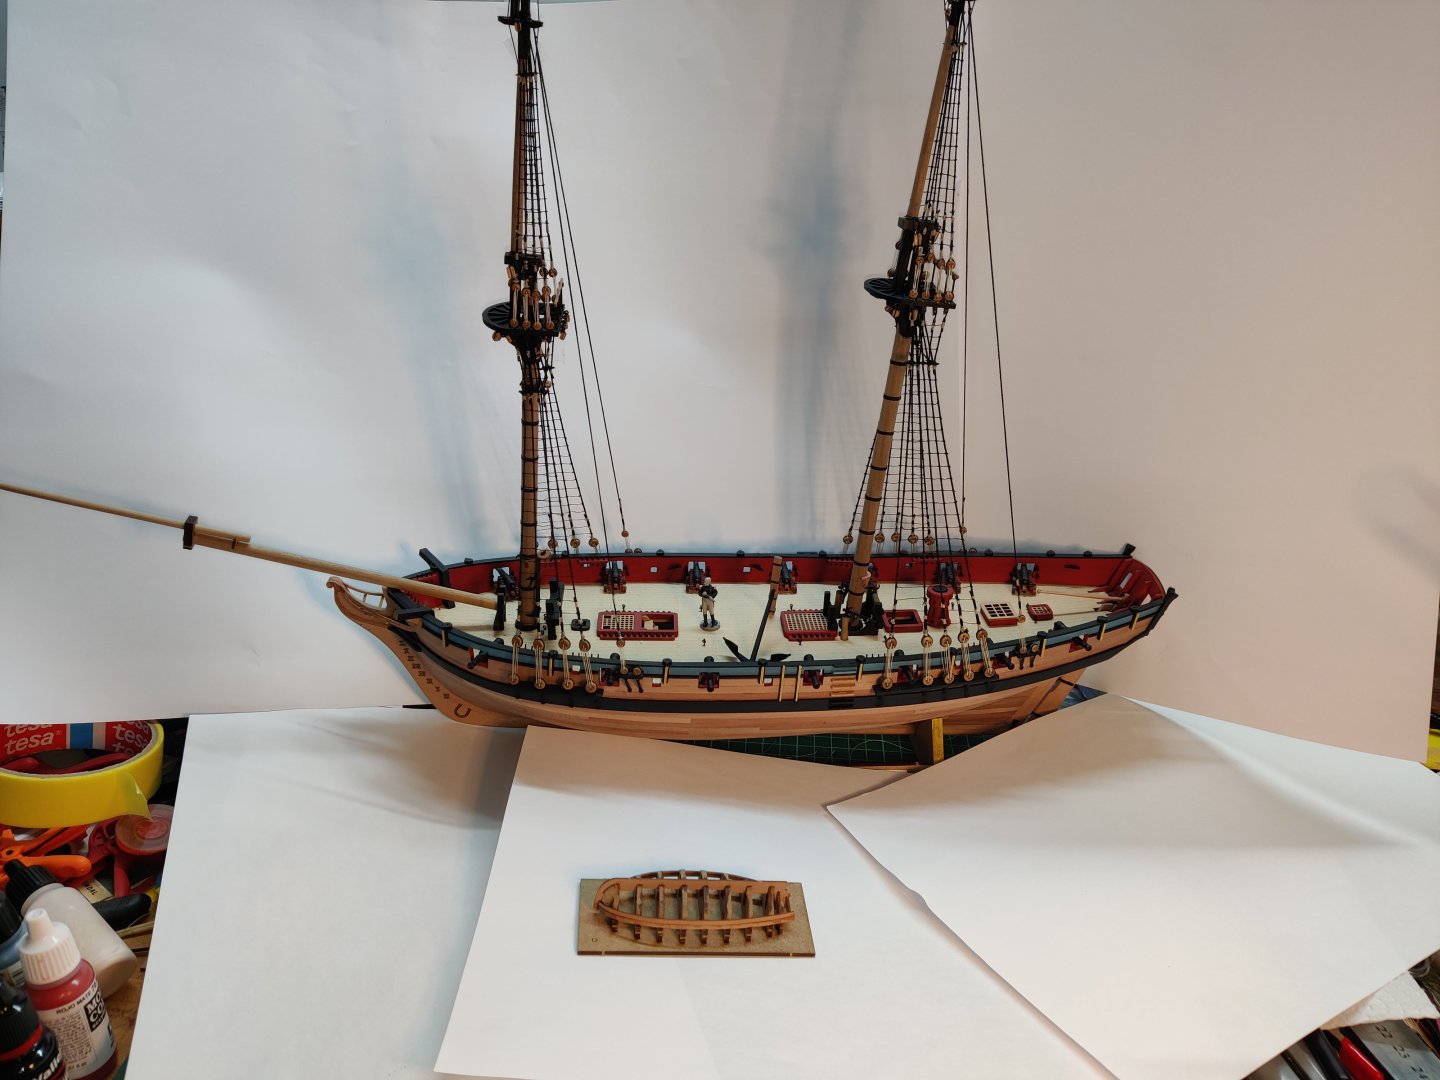
Log entry 26 I have continued to work on the 18 foot cutter. Bending an fitting the tiny planks proved to be easier than I expected! Here are some pictures of the finished hull before sanding: I am quite happy with how it looks so far and with a little more taper of the first 3-4 planks it would have been possible to avoid using stealers altogether. I managed with just two. The plan is to paint the hull below the waterline as per the instructions, so it matters little anyway. This is a really nice little mini project within the bigger build! BR TJM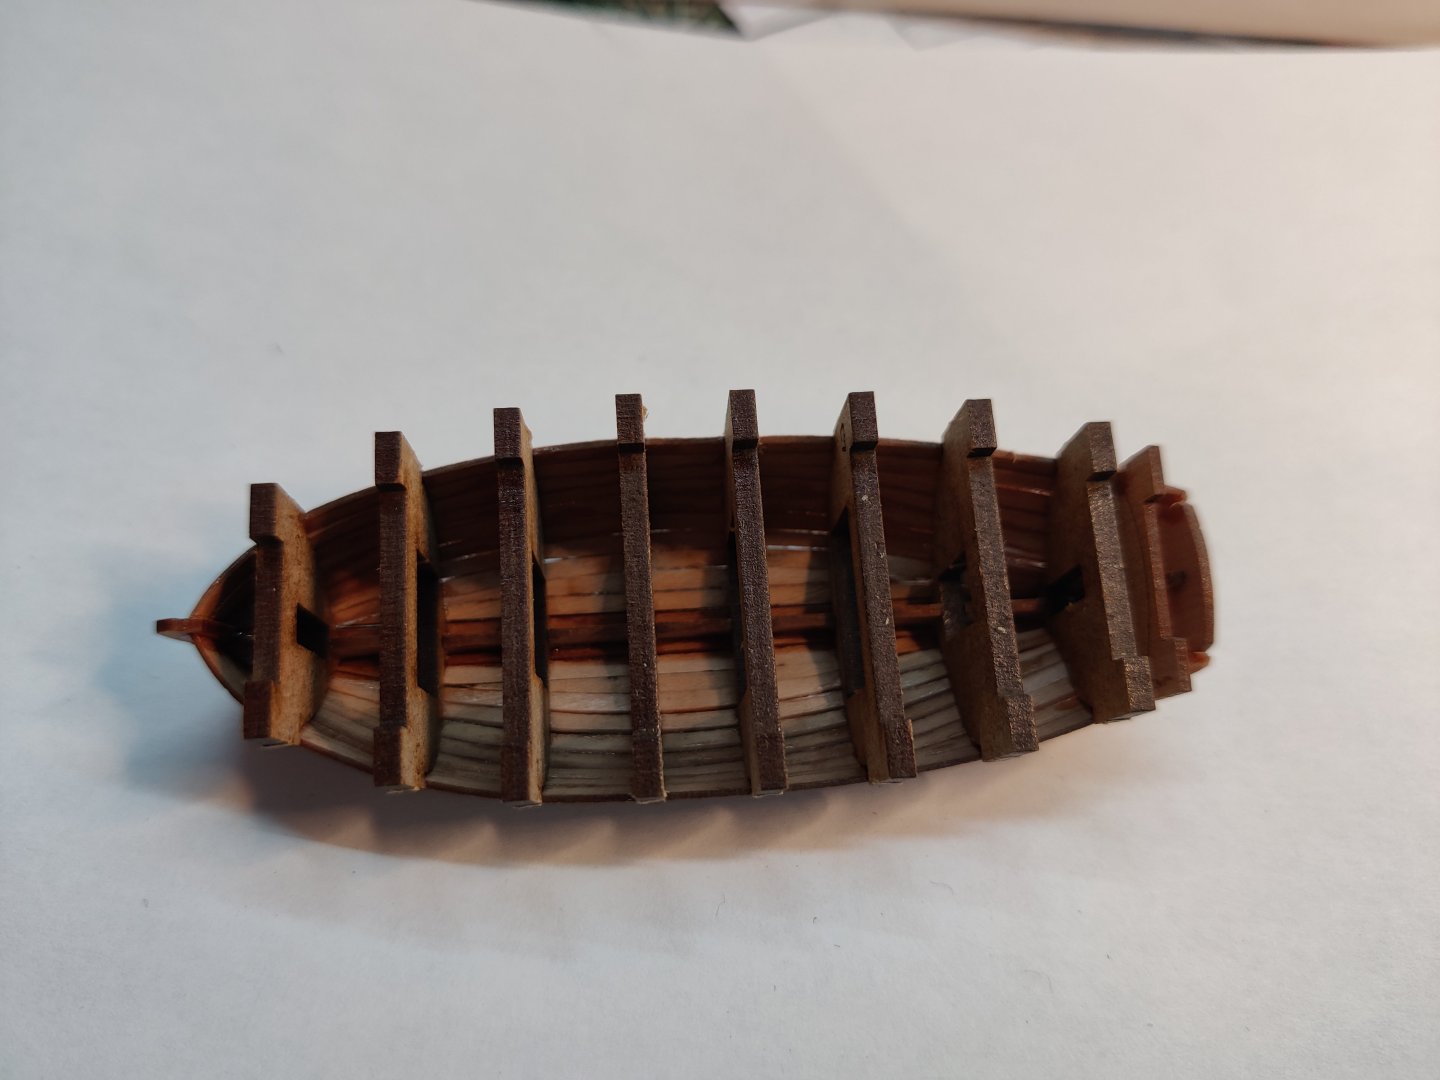


-
Those were hard to do for sure!
-
Well done! You are overtaking me now 😅! I think your ratlines look fine, btw. BR TJM
-
HMS Flirt by TJM - Vanguard Models - 1:64
TJM replied to TJM's topic in - Kit build logs for subjects built from 1751 - 1800
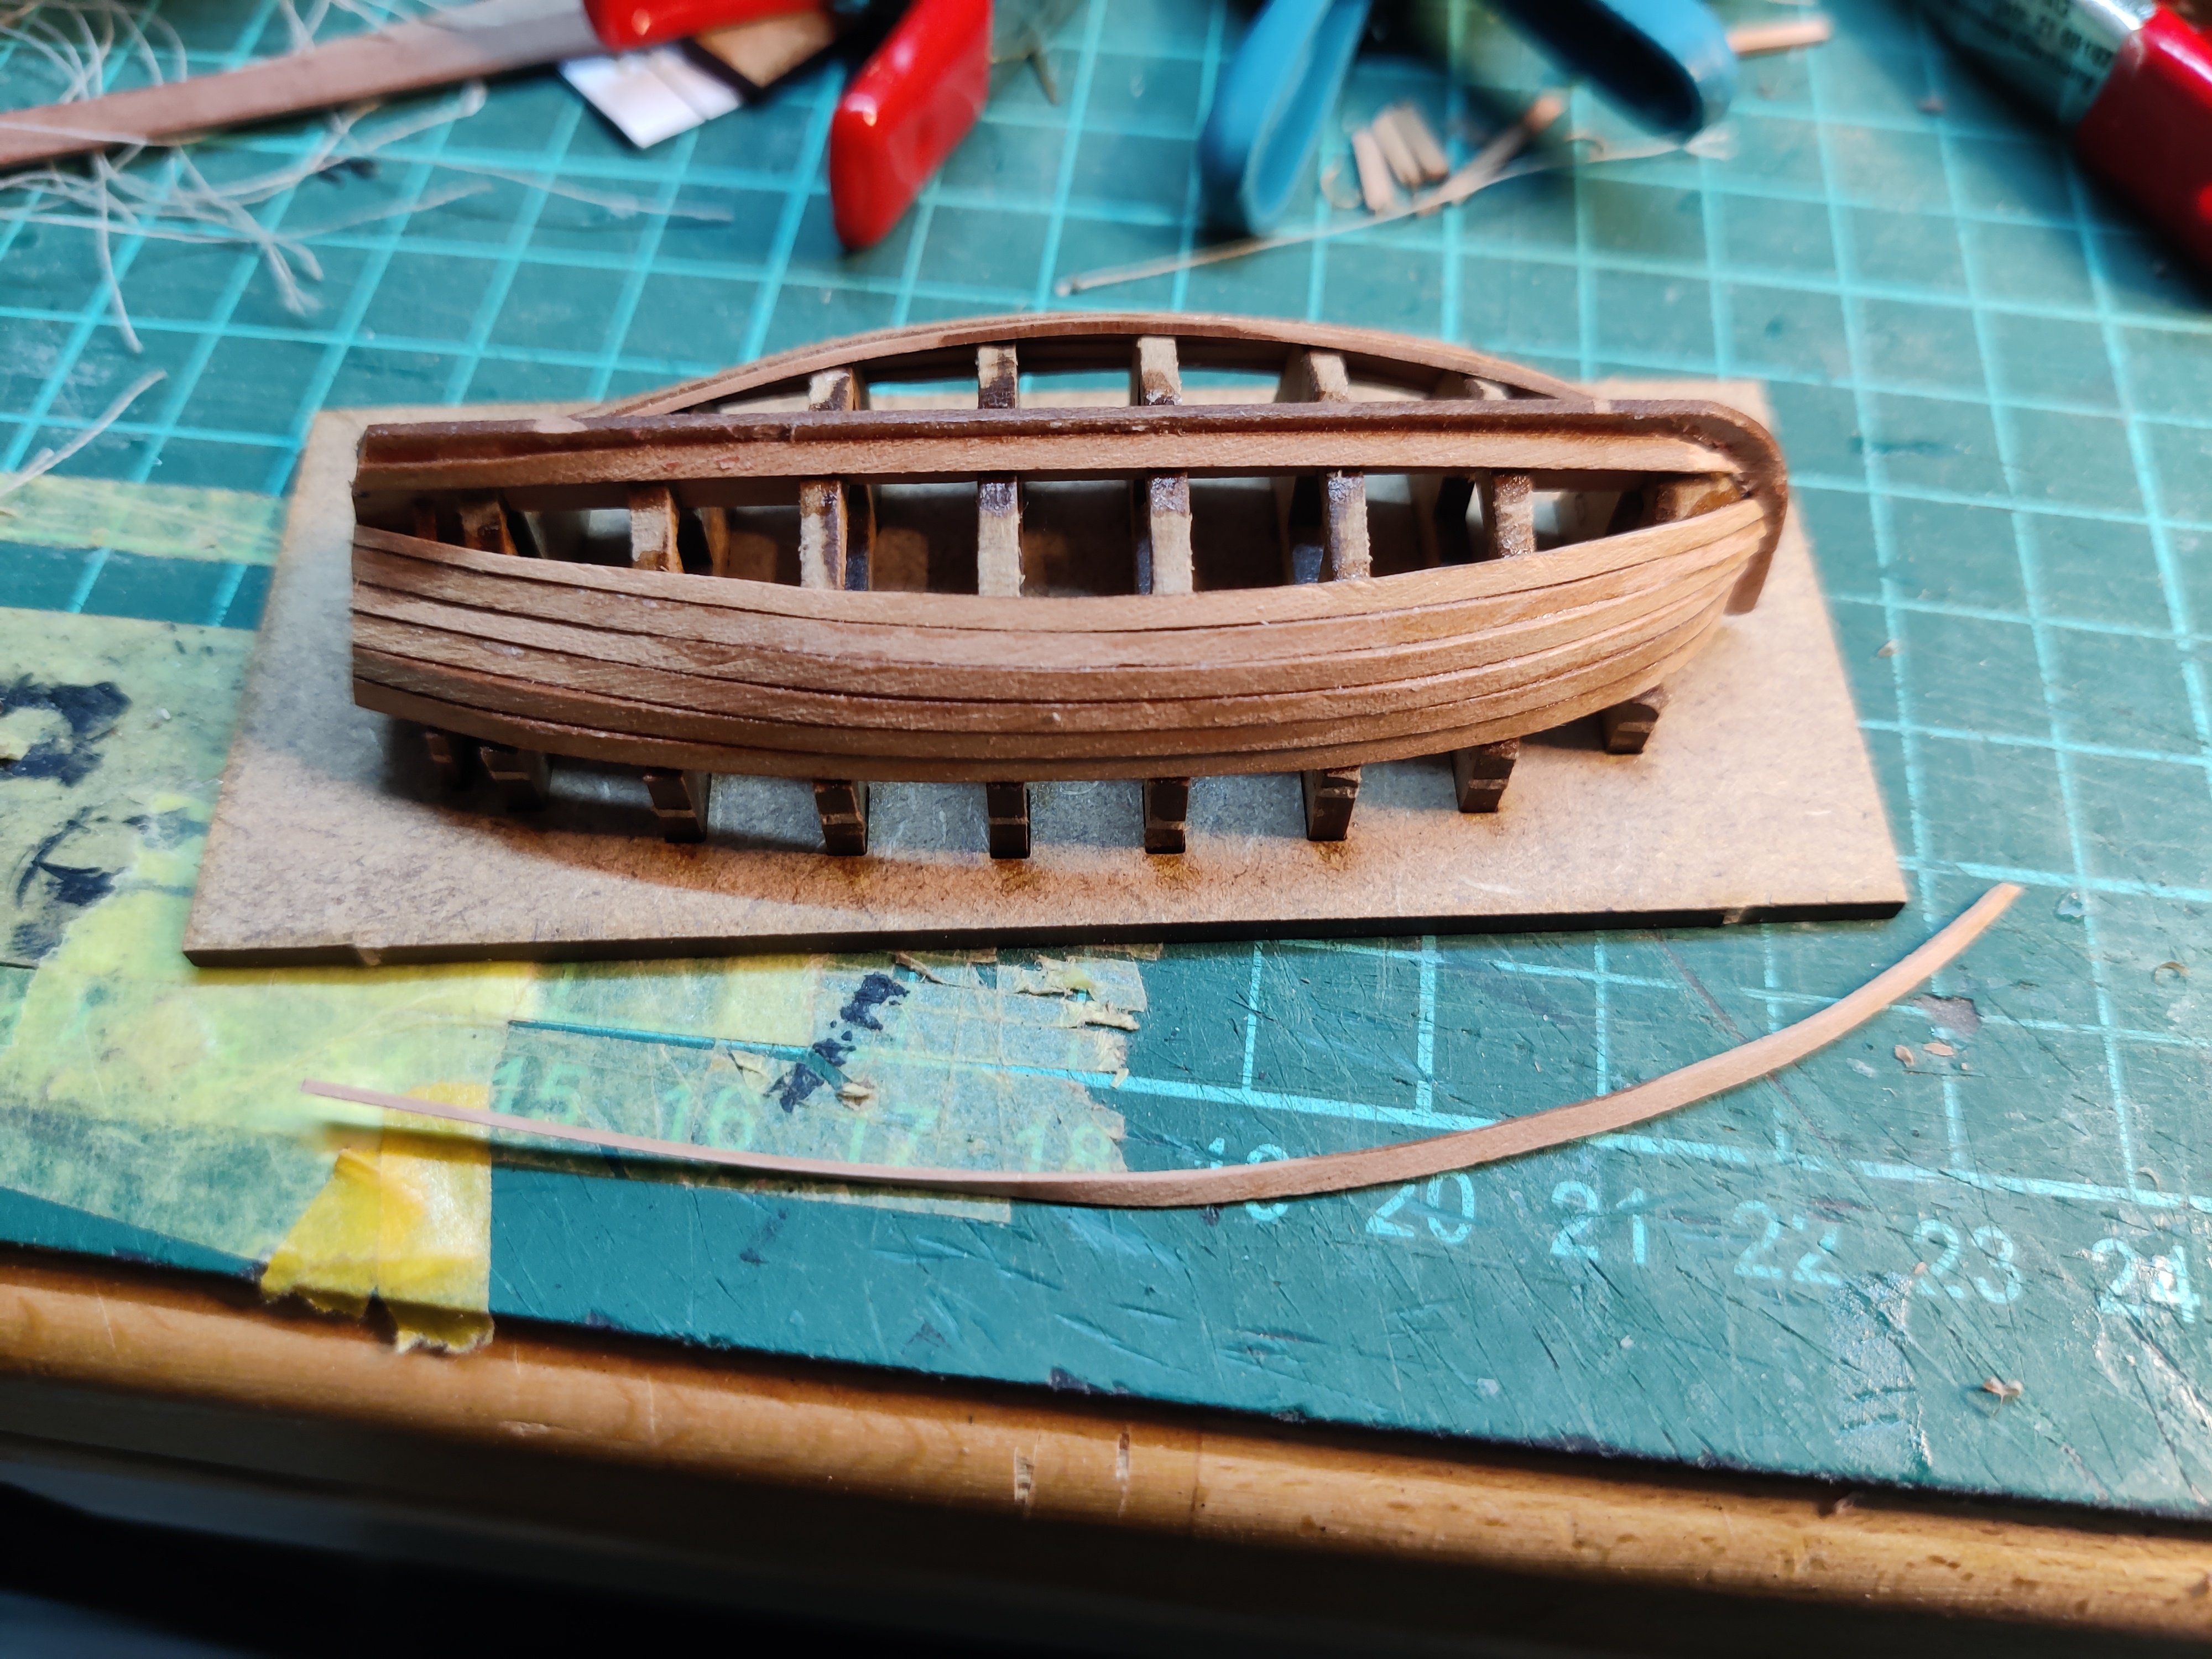
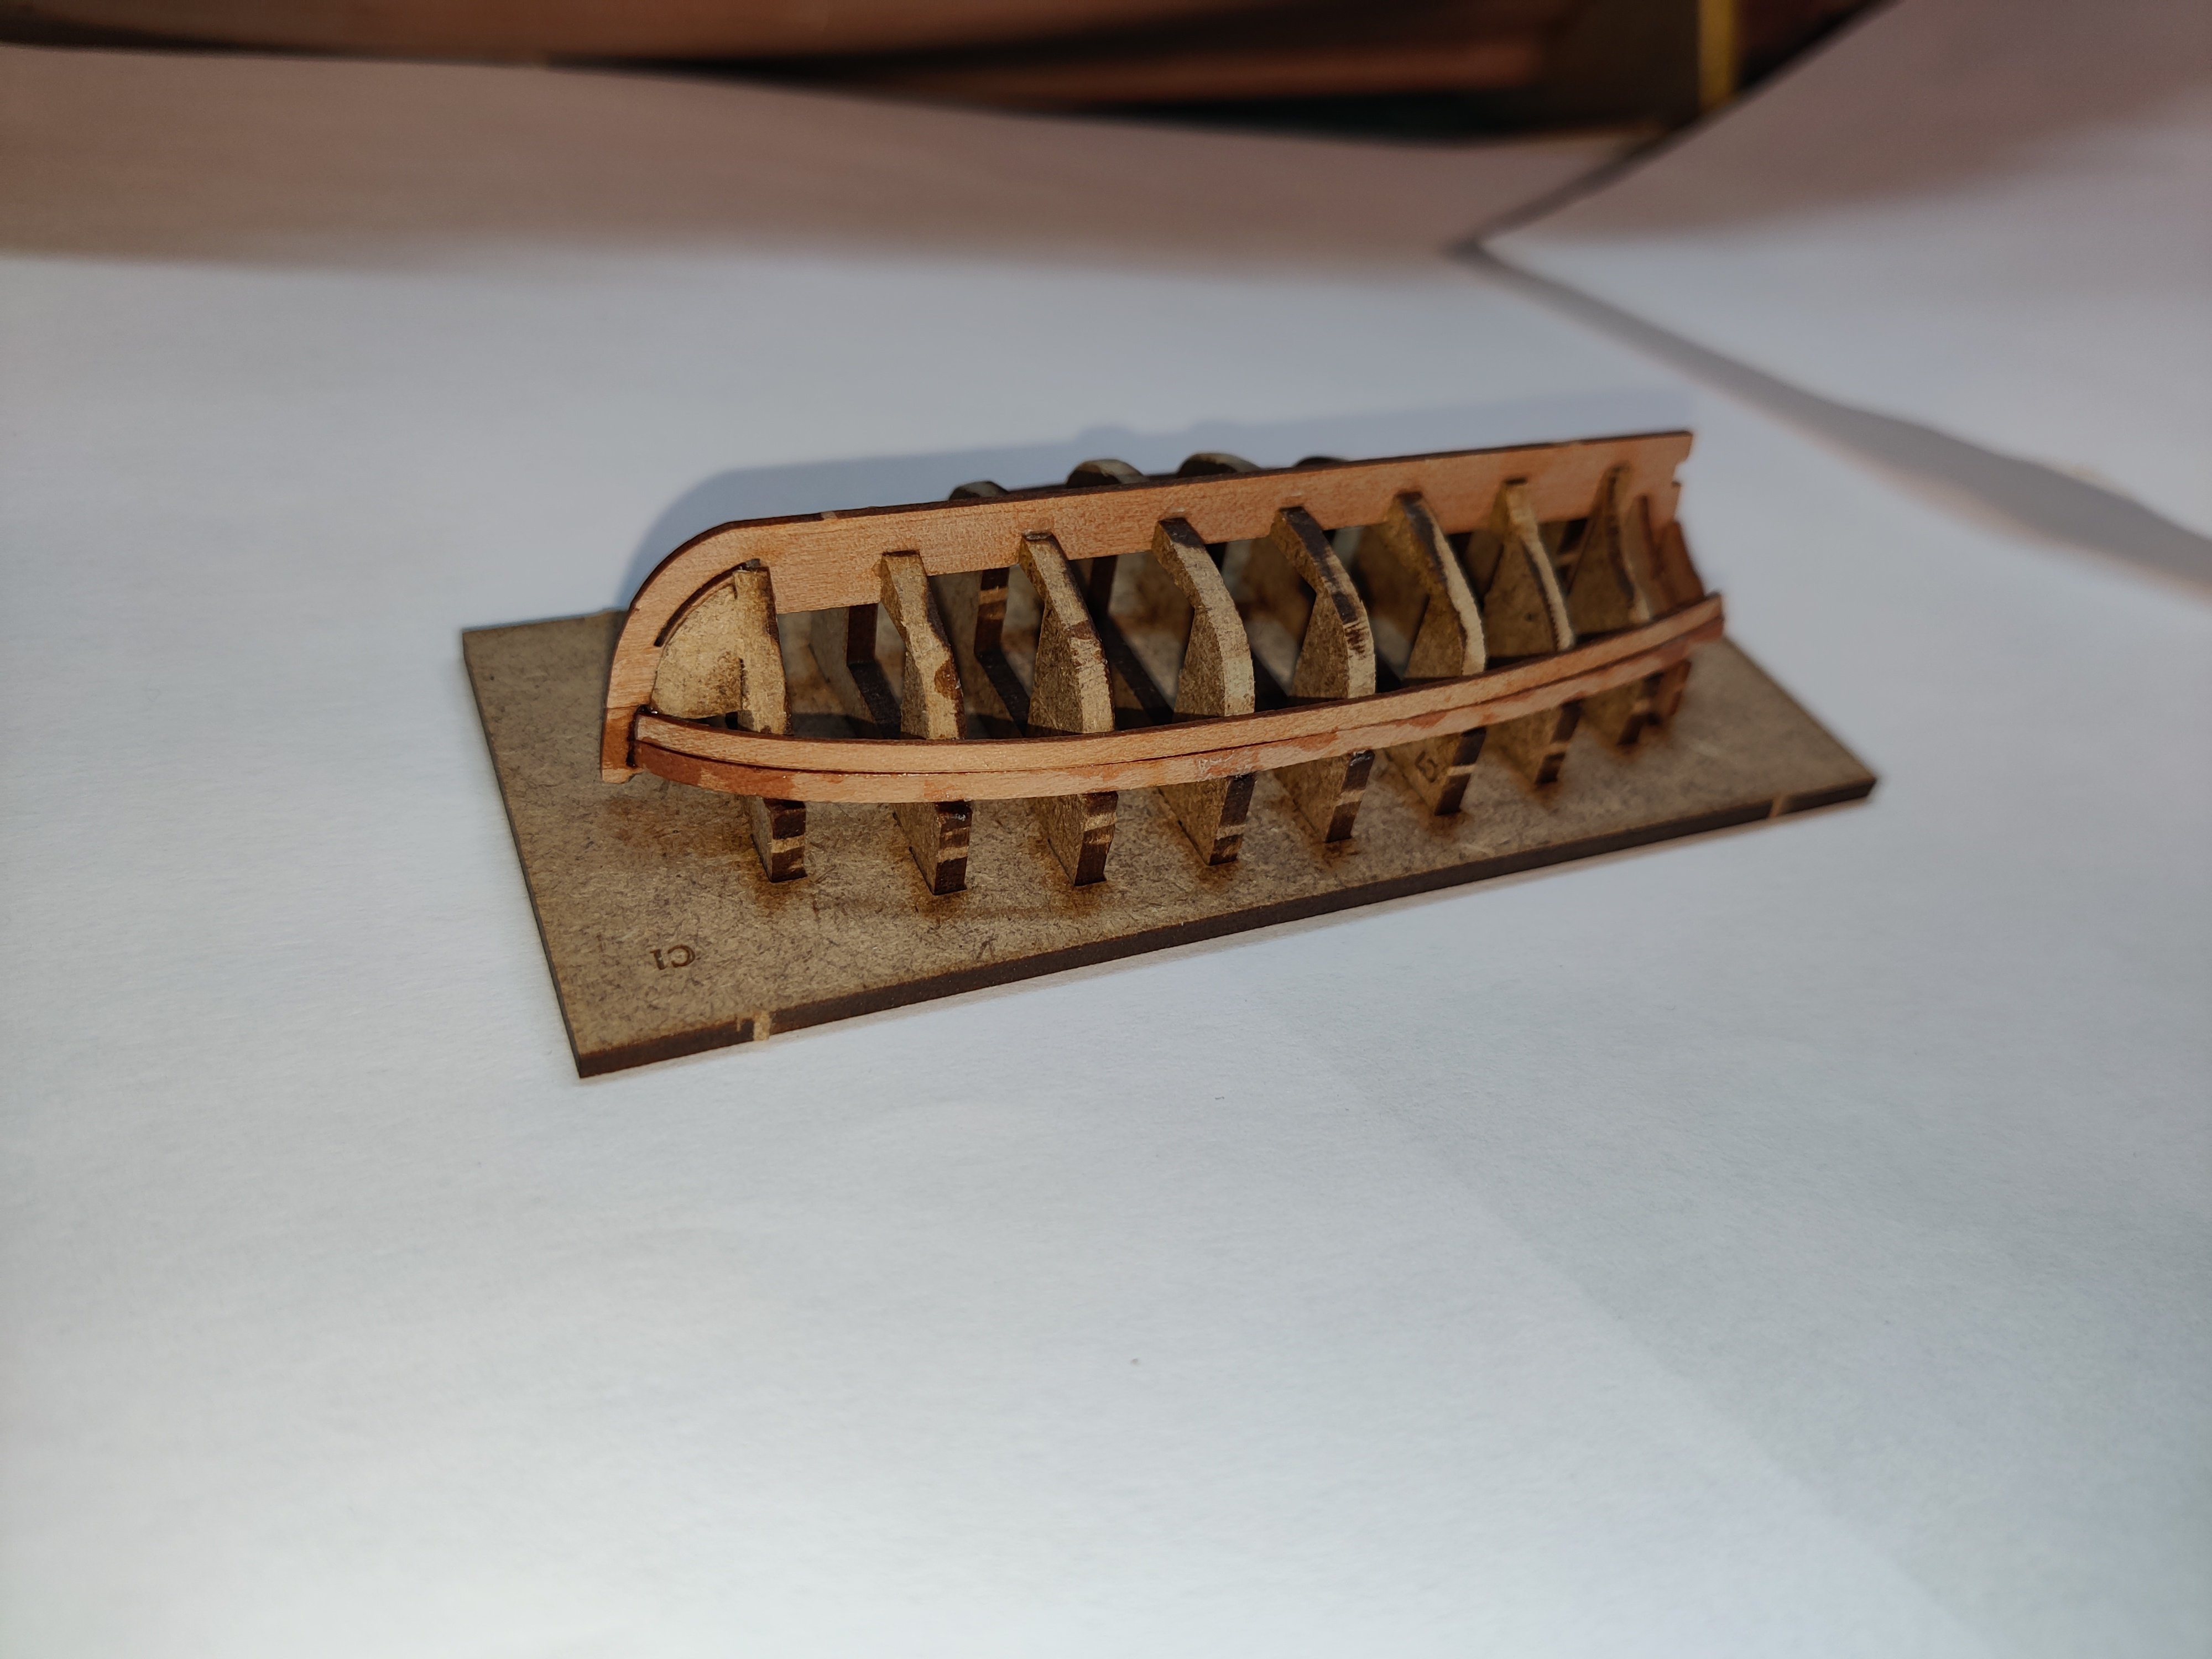
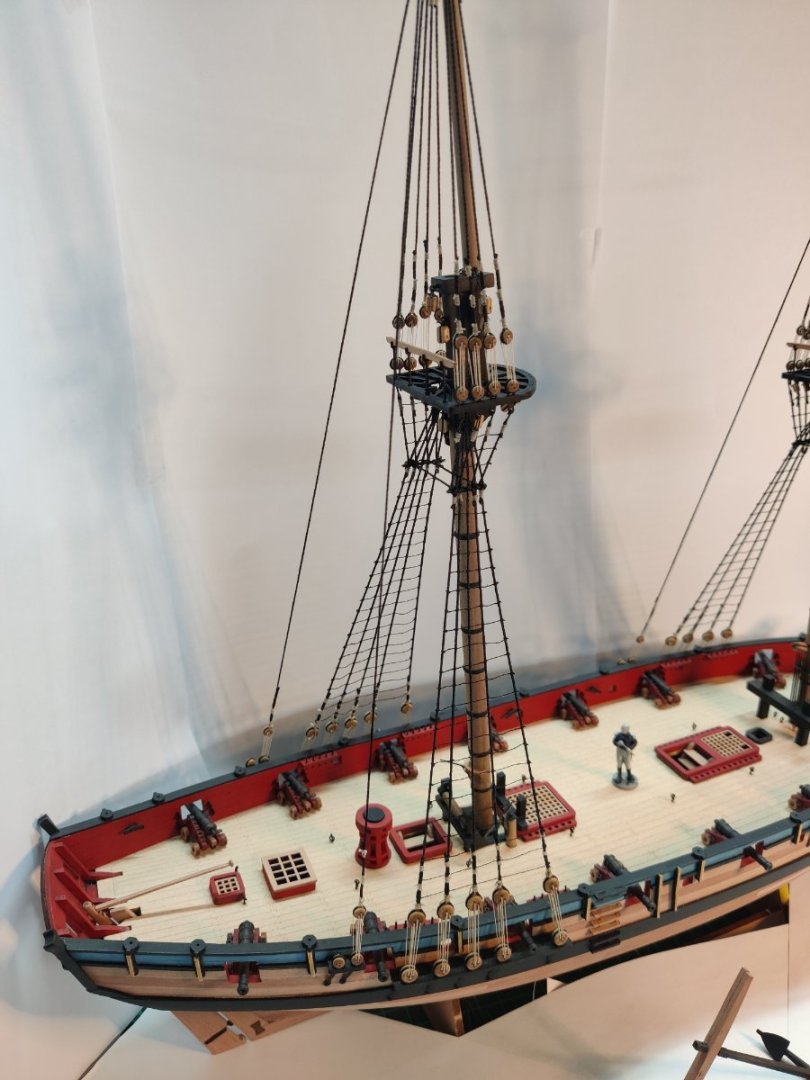
Log entry 25 All the ratlines are now done! Progress has been slow, as I have not had many sessions in the workshop lately - I was away during Easter. I am a bit relieved that this part of the build is done. On one hand, I find that I don't mind doing the ratlines while I do them, but it does take a very long time and it feels like not much overall progress i made while working on them I had thought to continue with the yards, but as you may have spotted, I have ordered and received the 18 foot cutter from Vanguard Models. So now I will take a quick detour with that for a while! The first few planks are on already. BR TJM

-
Absolutely fantastic! Your work is a huge inspiration! TJM
- 638 replies
-
- 2
-

-

-
- Indefatigable
- Vanguard Models
- (and 1 more)
-
HMS Flirt by TJM - Vanguard Models - 1:64
TJM replied to TJM's topic in - Kit build logs for subjects built from 1751 - 1800
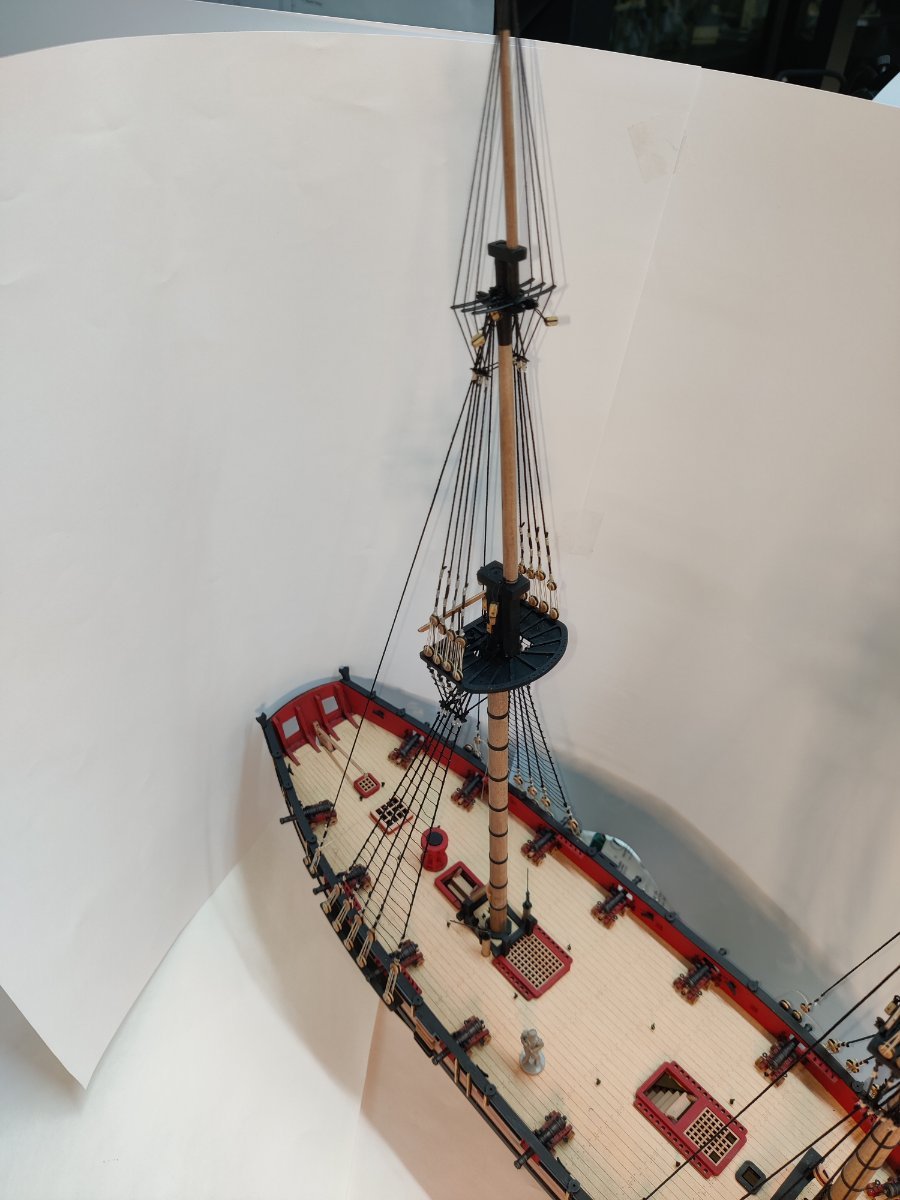
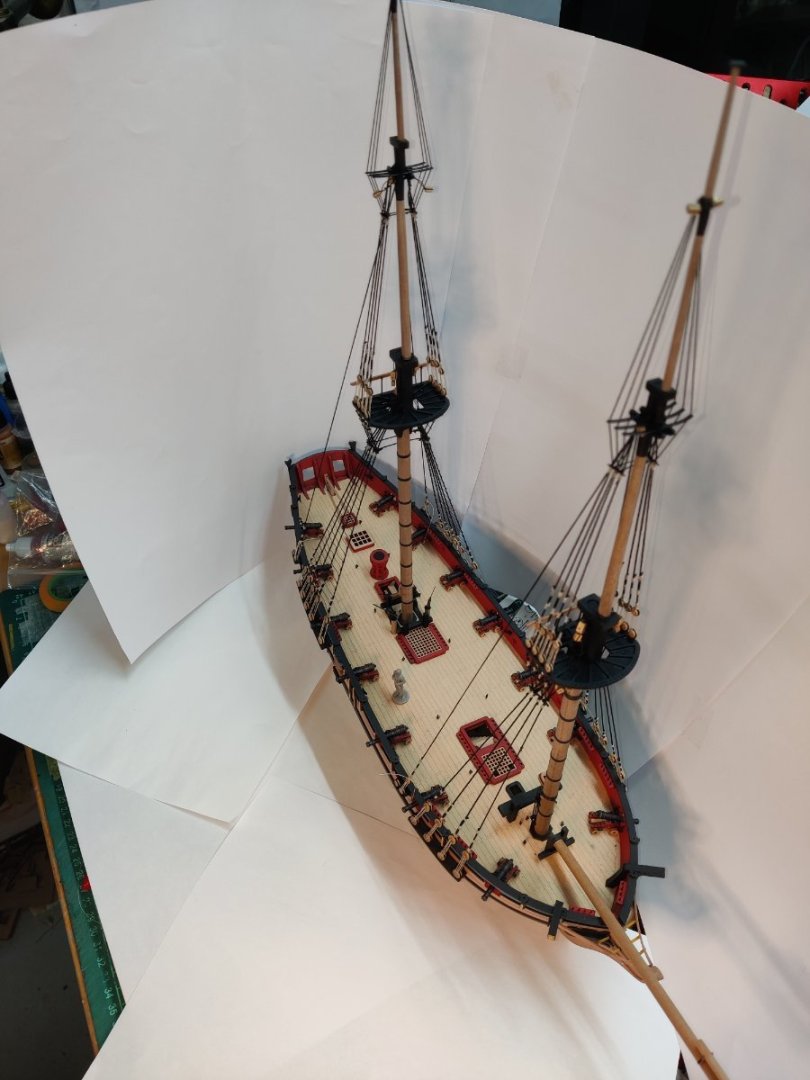
Log entry 24 All of the lower ratlines have been completed! Not much else to say - on with the top ones! BR TJM

-
HMS Flirt by TJM - Vanguard Models - 1:64
TJM replied to TJM's topic in - Kit build logs for subjects built from 1751 - 1800
Great, thanks! Both to @allanyed and @Thukydides! -
HMS Flirt by TJM - Vanguard Models - 1:64
TJM replied to TJM's topic in - Kit build logs for subjects built from 1751 - 1800
Hi Allan, Thank you for your comment! Do I understand correctly that the one hole in the blocks should be closest to where the block is attached? So that when the line runs down, it would appear to go over the (imaginary) sheave inside the block? -
HMS Flirt by TJM - Vanguard Models - 1:64
TJM replied to TJM's topic in - Kit build logs for subjects built from 1751 - 1800
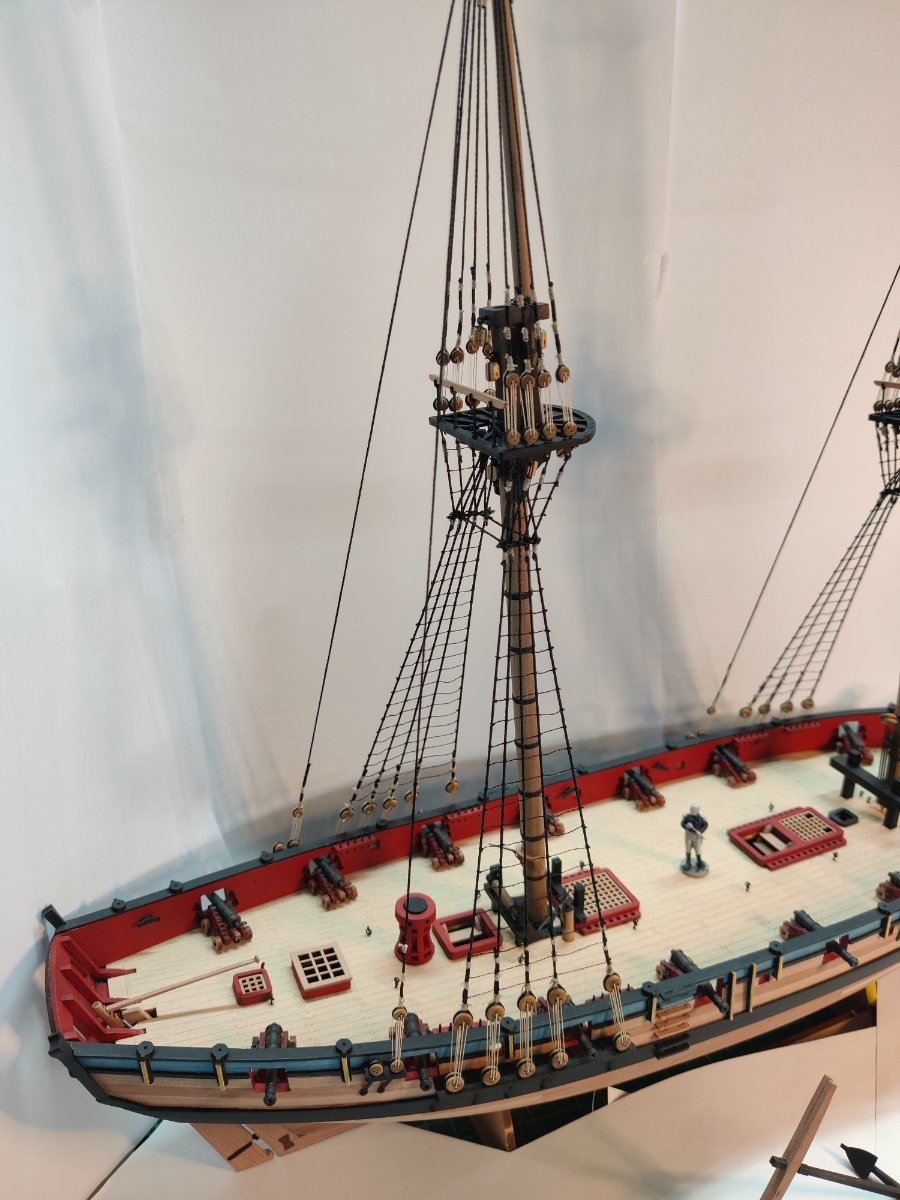
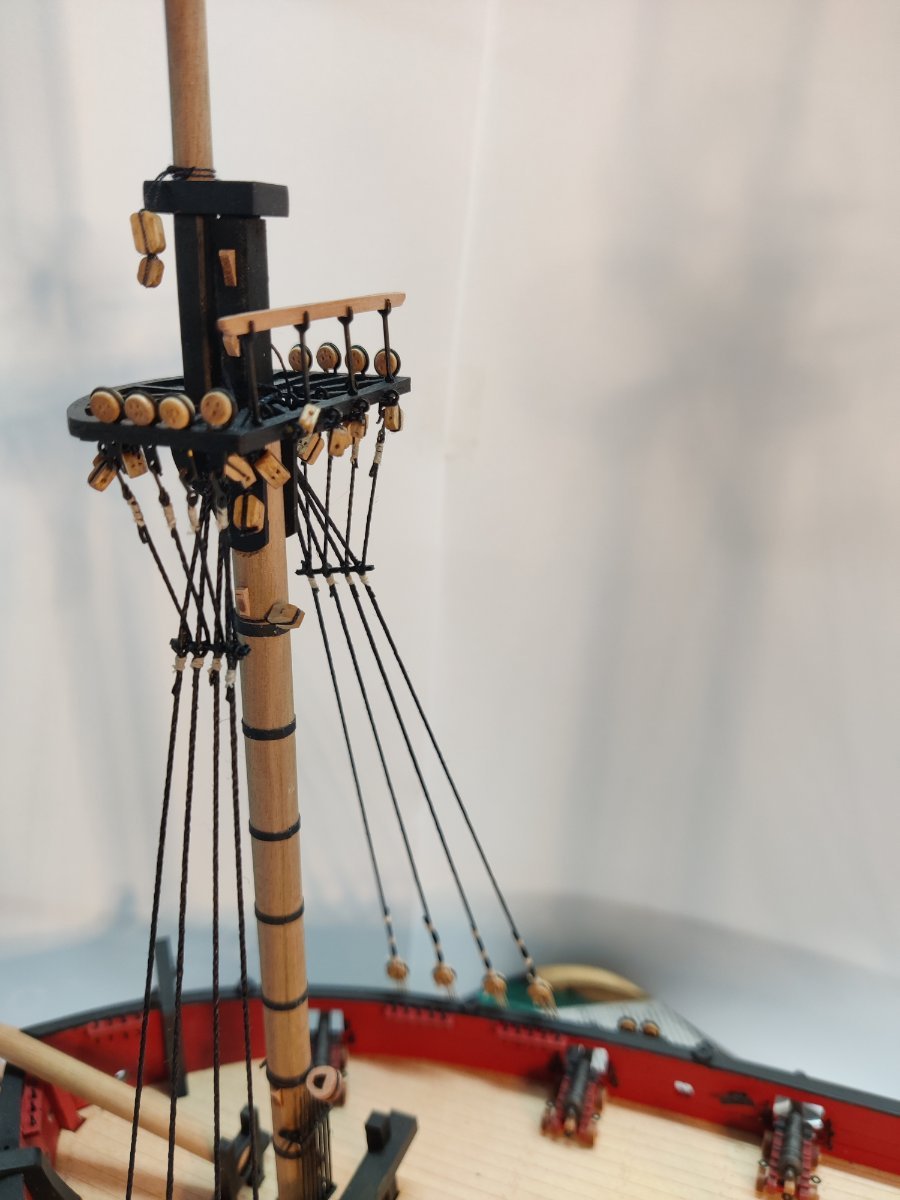
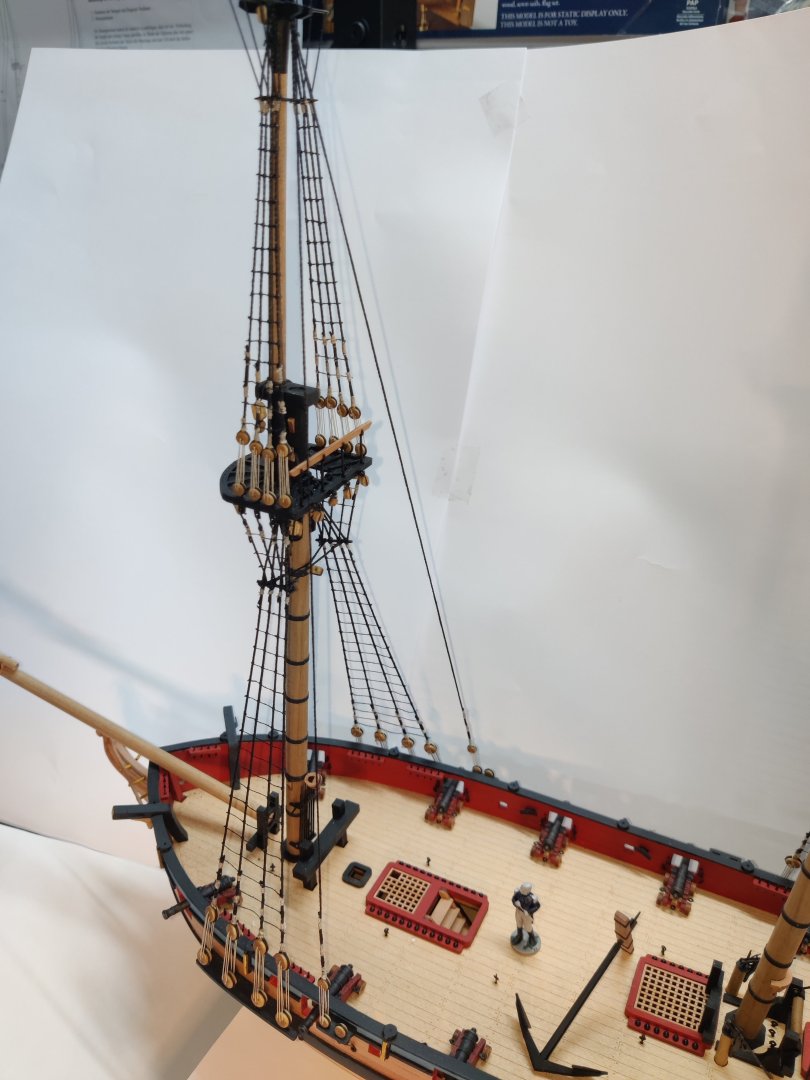
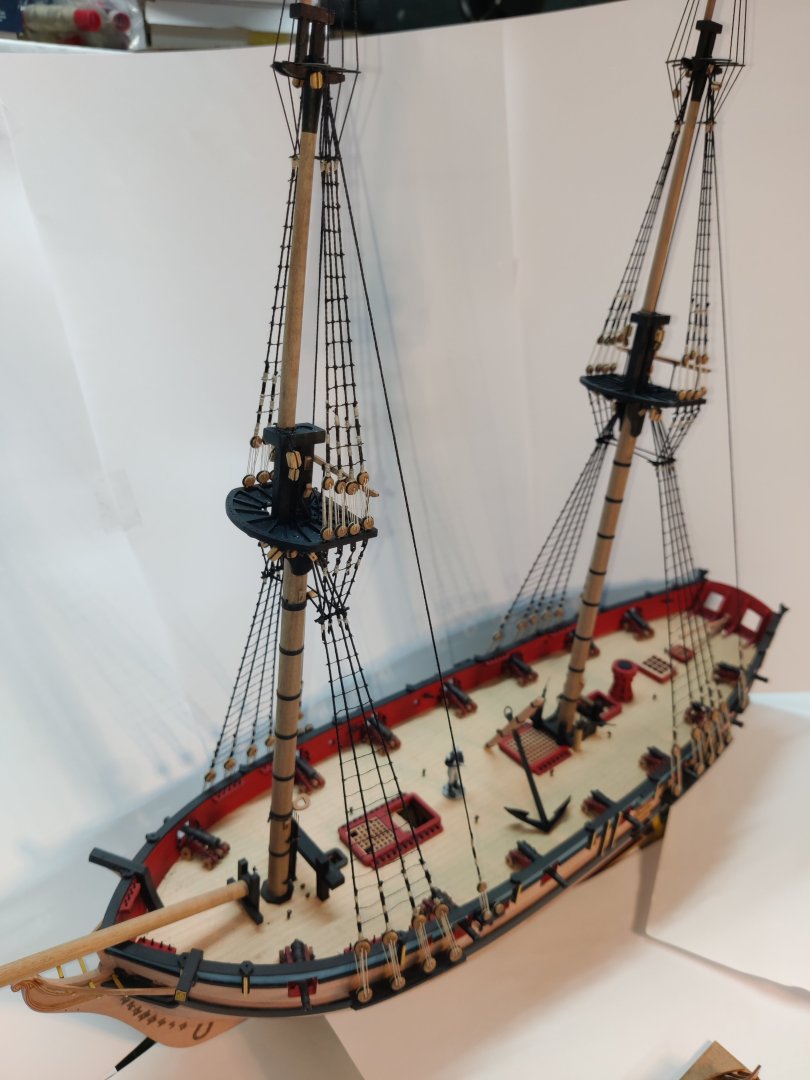
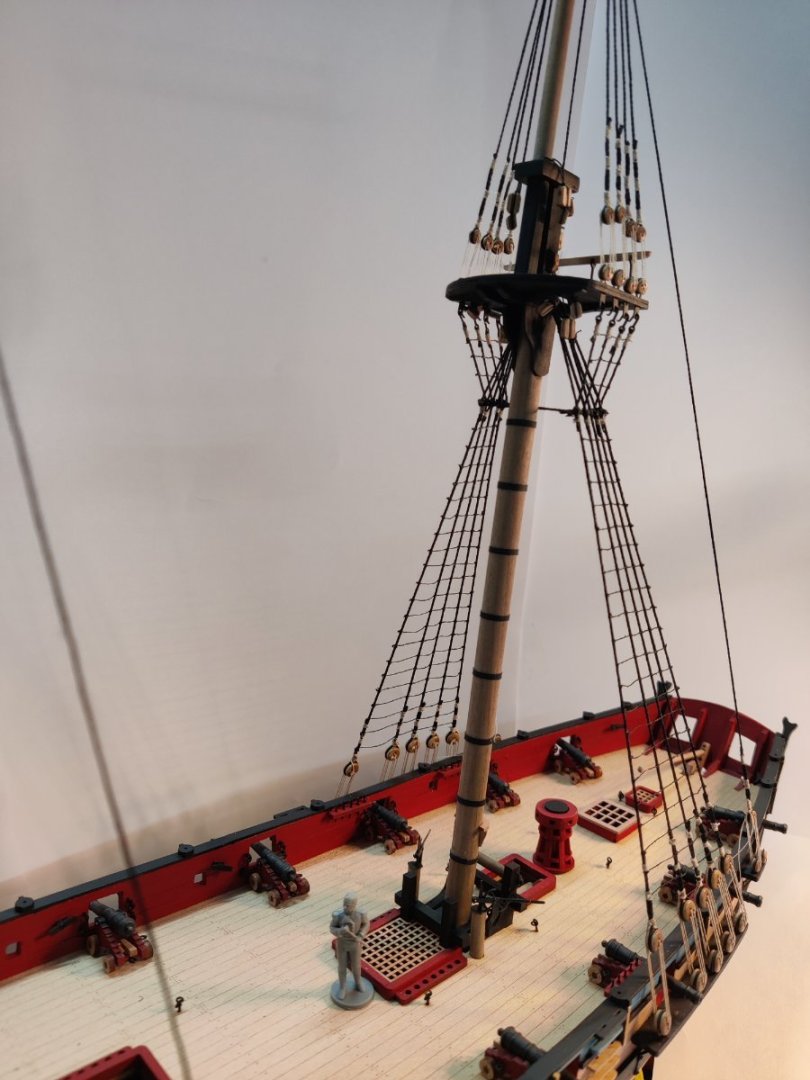
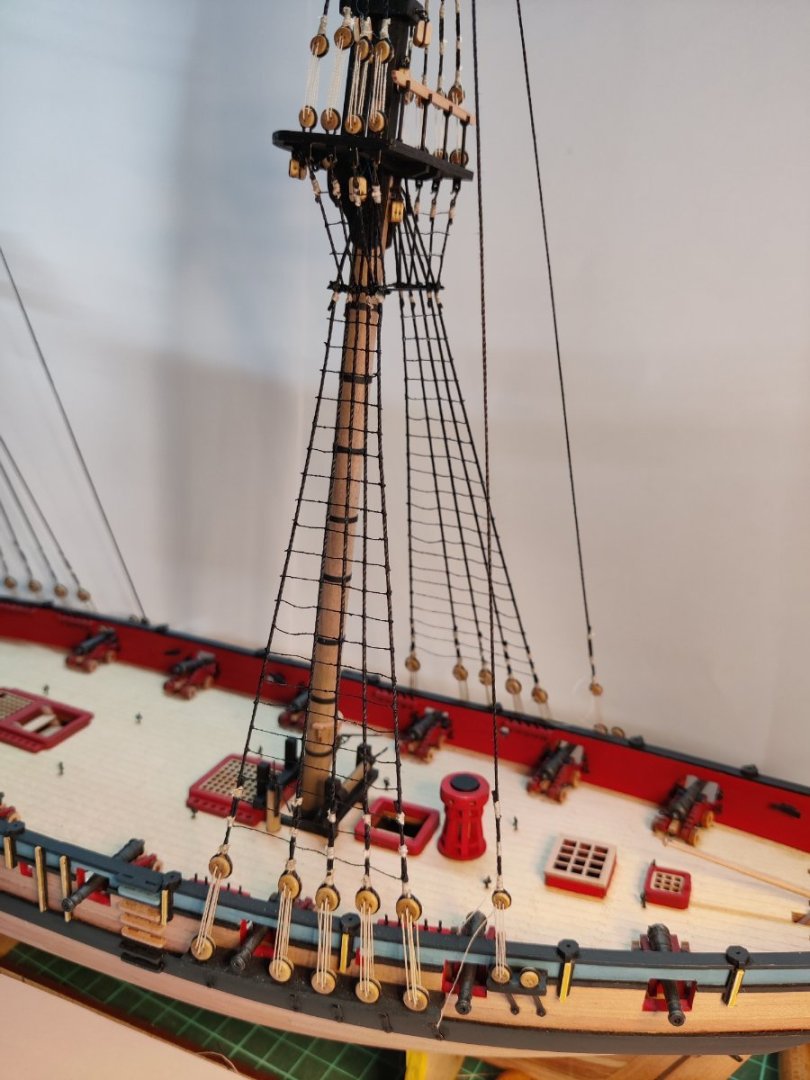
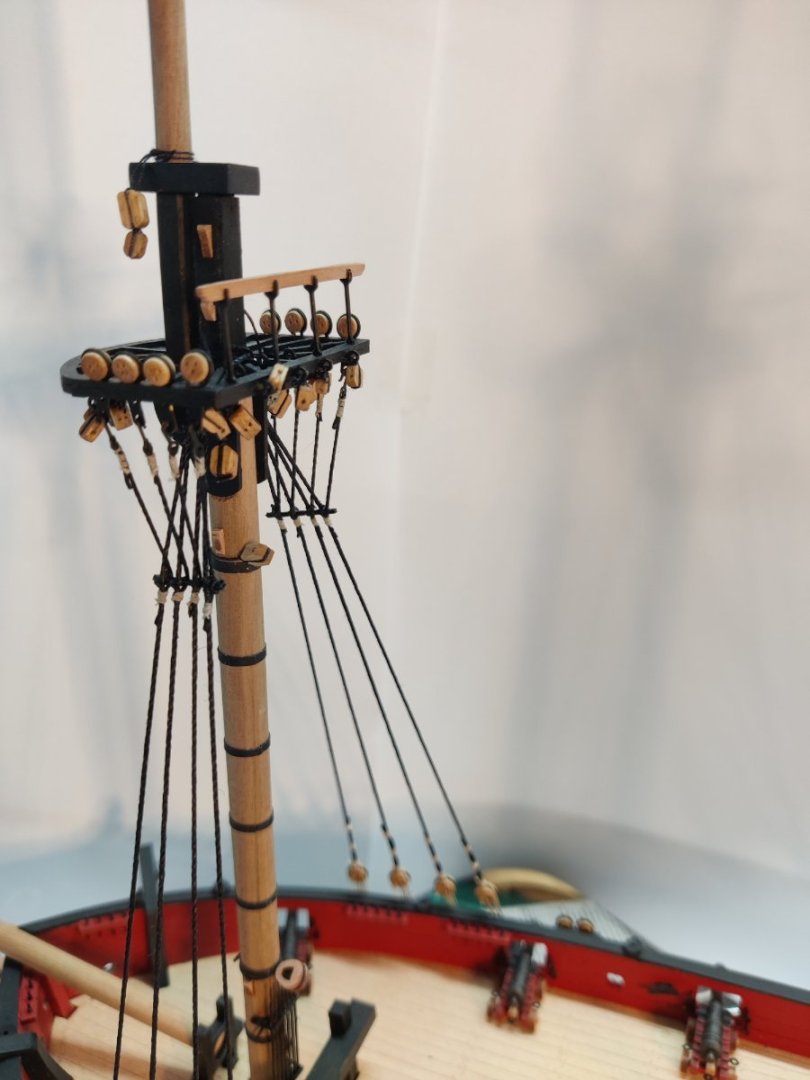
Log entry 23 I have now completed all the mast shrouds - milestone reached! I estimate that I need another 4-5 evening sessions to do the remaining ratlines. But after that I get to continue with the yards! The topgallant shrouds visually adds some much needed bulk to the top of the model, so I was very pleased with the improved look after yesterdays work! BR TJM


-
HMS Flirt by TJM - Vanguard Models - 1:64
TJM replied to TJM's topic in - Kit build logs for subjects built from 1751 - 1800
Thanks! 😊 -
HMS Flirt by TJM - Vanguard Models - 1:64
TJM replied to TJM's topic in - Kit build logs for subjects built from 1751 - 1800
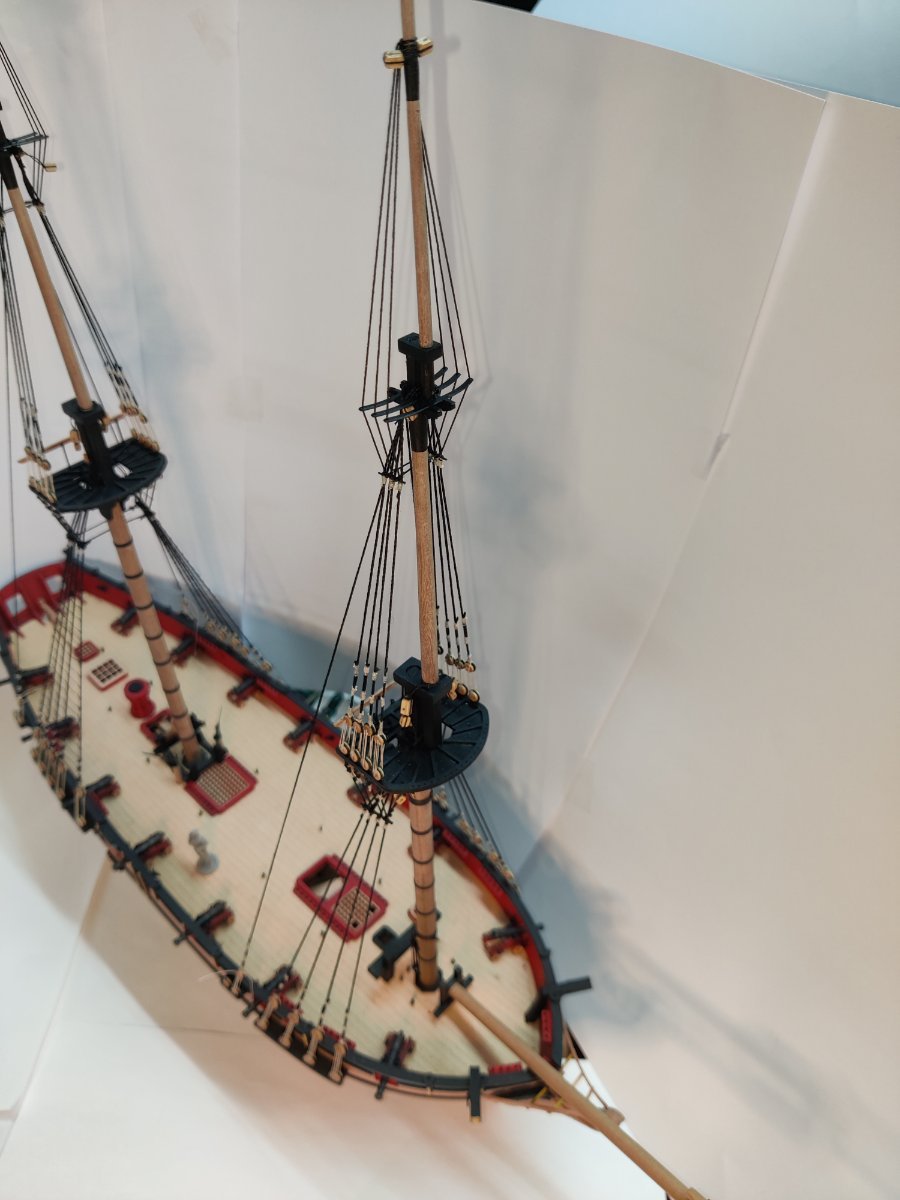
Log entry 23 I am still here! I have just had very few days where I have been able to get any work done in the workshop. I have completed the ratlines on lower main mast shrouds and sre working on the upper mizzen shrouds. My plan is to complete all shrouds and ratlines and then do the yards before continuing with the stays. BR TJM

-
I found this hard as well! So many, so small, so much re-touching! And in the end , I could not for the life of me get the thick ropes for the guns through eyes and will have to live without them on my model 🙄. I think it could be done by attaching the ropes before fixing the eyebolts to the bulwark, but I did not have the heart to rip them out and re-do it all.... I have seen many people make it work, but my fingers did not cooperate and after 2 hours of struggling on one cannon, I gave up. Next time!
-
Agree, that is really nice! Will probably do this on my next build - thanks for the idea! BR TJM
-
HMS Flirt by TJM - Vanguard Models - 1:64
TJM replied to TJM's topic in - Kit build logs for subjects built from 1751 - 1800
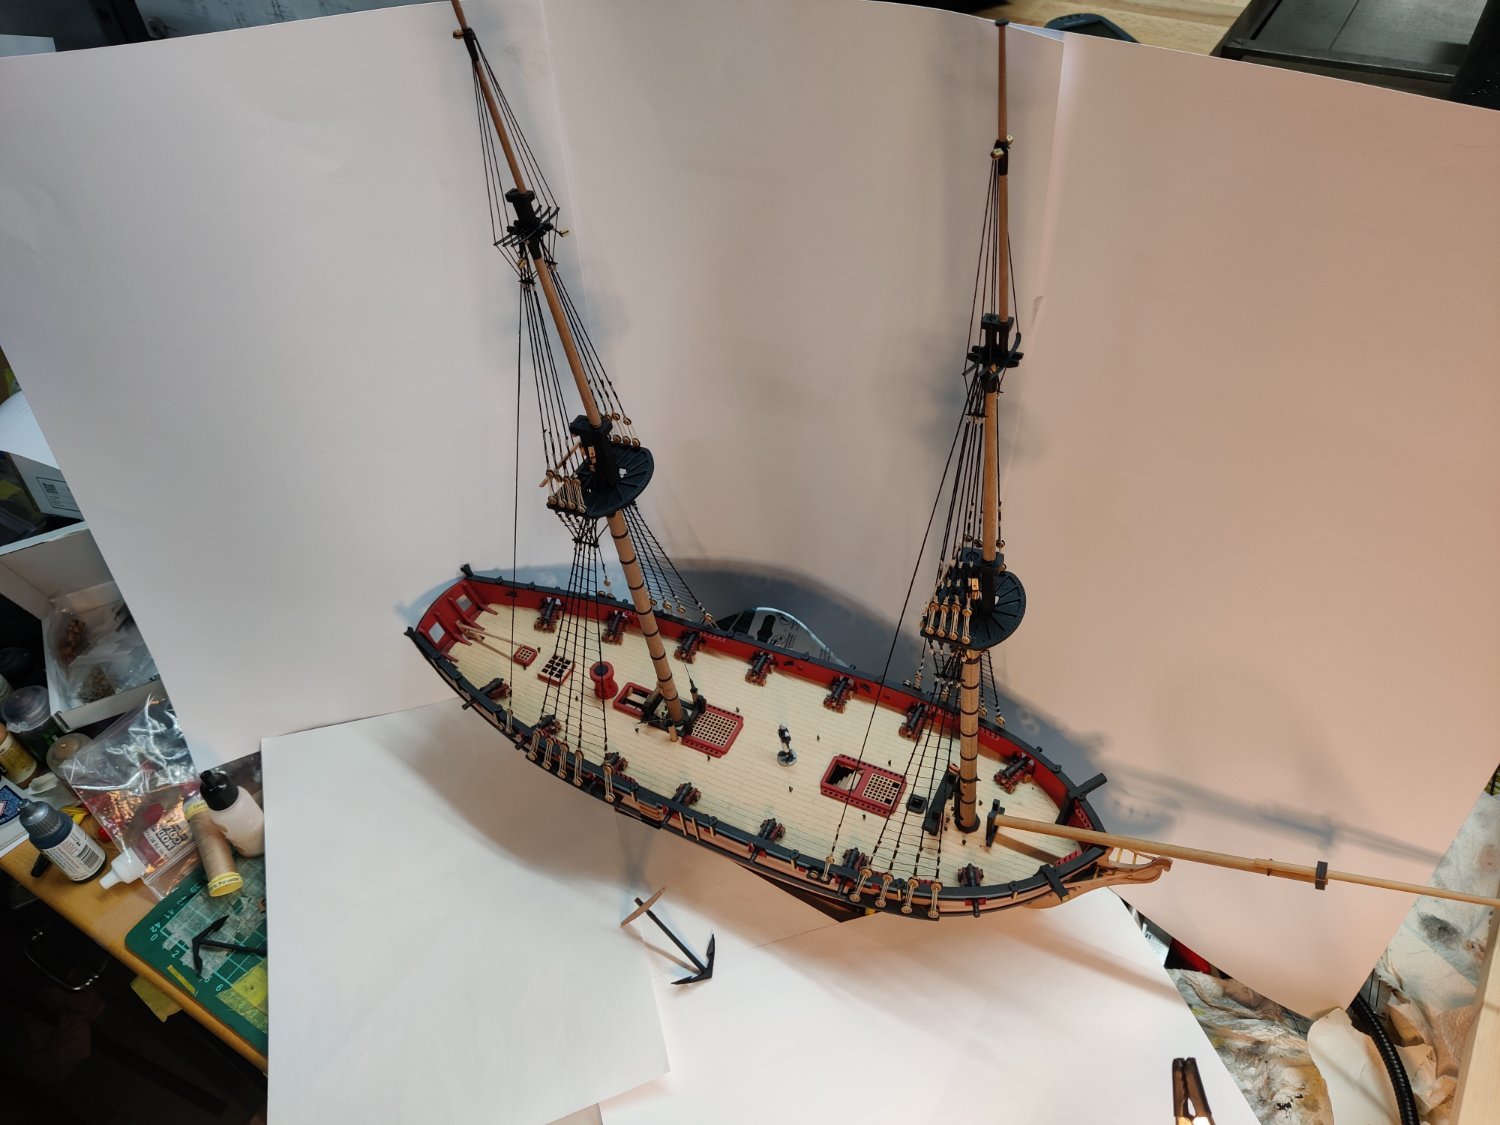
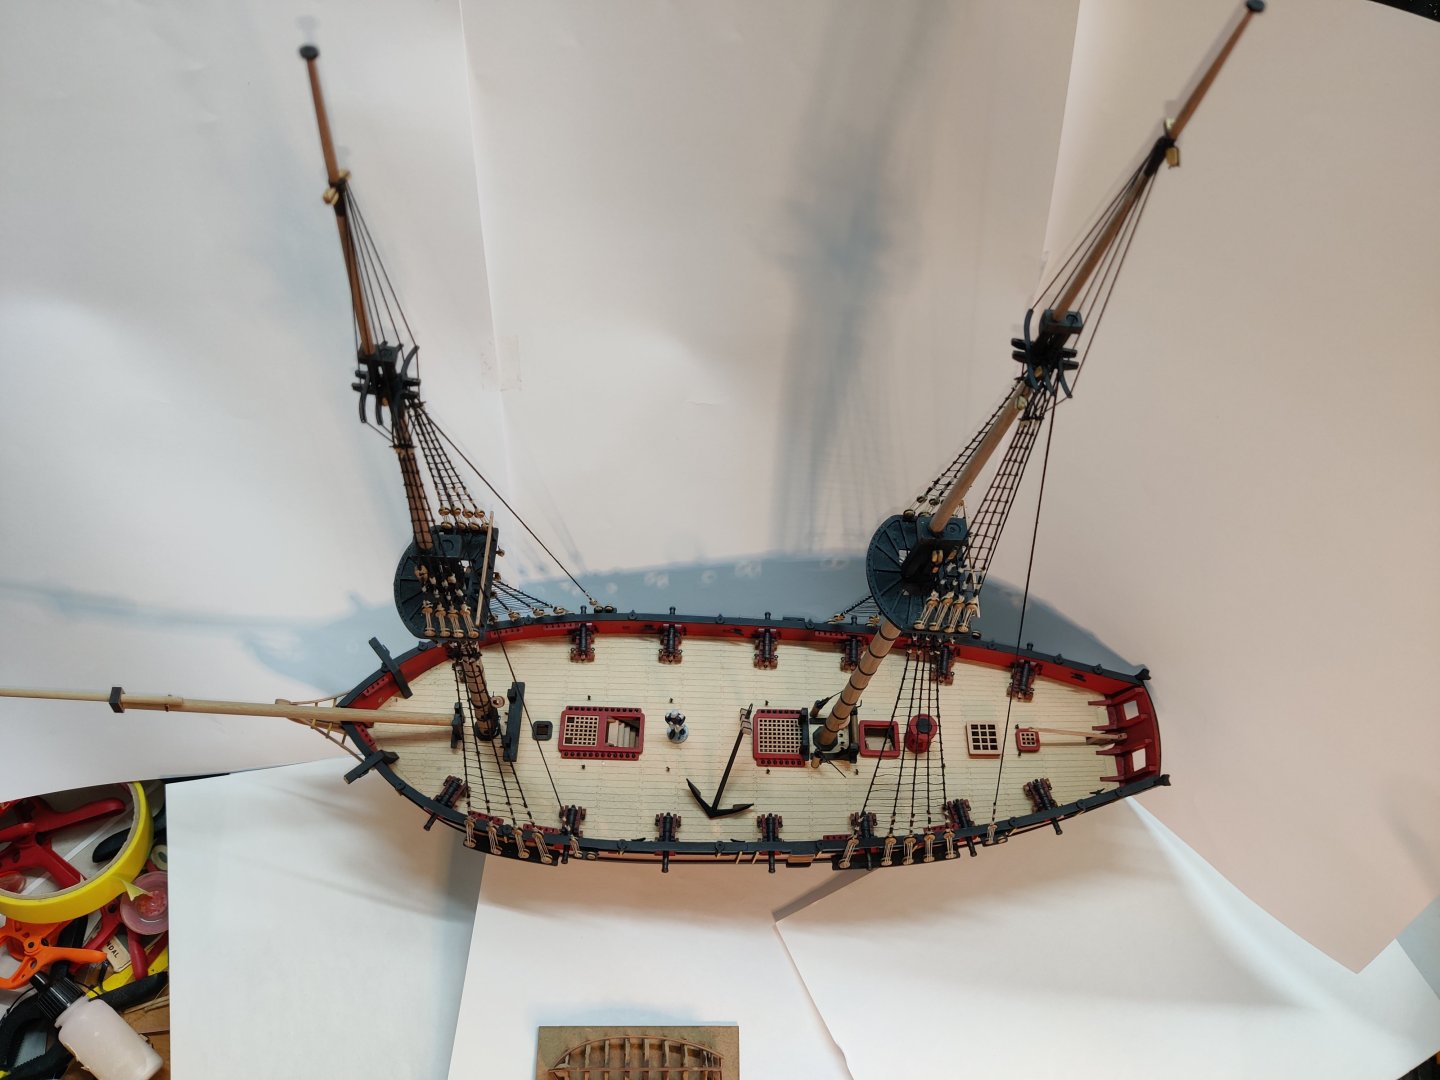
Log entry 22 A bit of progress. I have completed the lower shrouds and spent a couple of evenings with the futtock staves and shrouds. Up close, it is not the neatest work - I find it quite difficult to deal with the thin thread! From a little distance, it looks alright to me. The manual says to wait with the backstays until the yards are fitted, but I had a slight tilt to one side from the topgallant and up on the main mast, so I wanted to temporarily attach the backstays to correct this while I work on the topgallant shrouds. If I can work around them, I will leave them in place and otherwise it is not very much work to detach them and re-do the two lanyards. BR TJM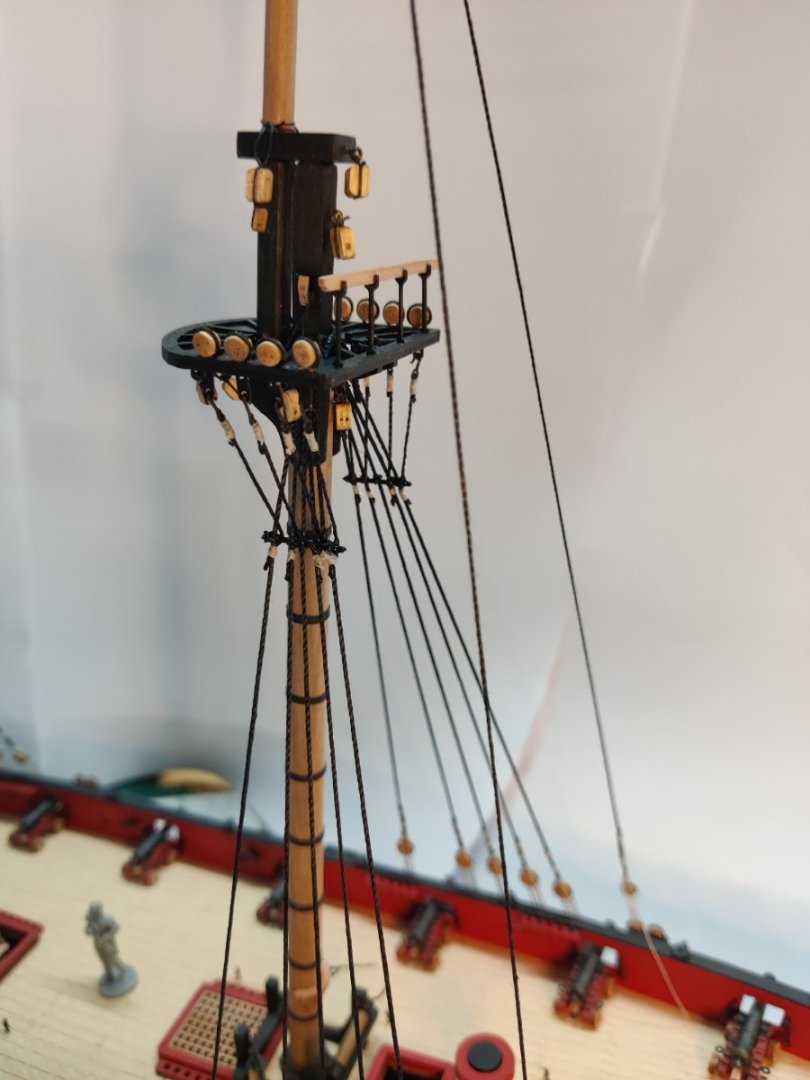

-
HMS Flirt by ECK - Vanguard Models - 1:64
TJM replied to ECK's topic in - Kit build logs for subjects built from 1751 - 1800
You are progressing unbelievably fast! Looking great as well!! -
Looking very good!