bcochran
-
Posts
615 -
Joined
-
Last visited
Content Type
Profiles
Forums
Gallery
Events
Everything posted by bcochran
-
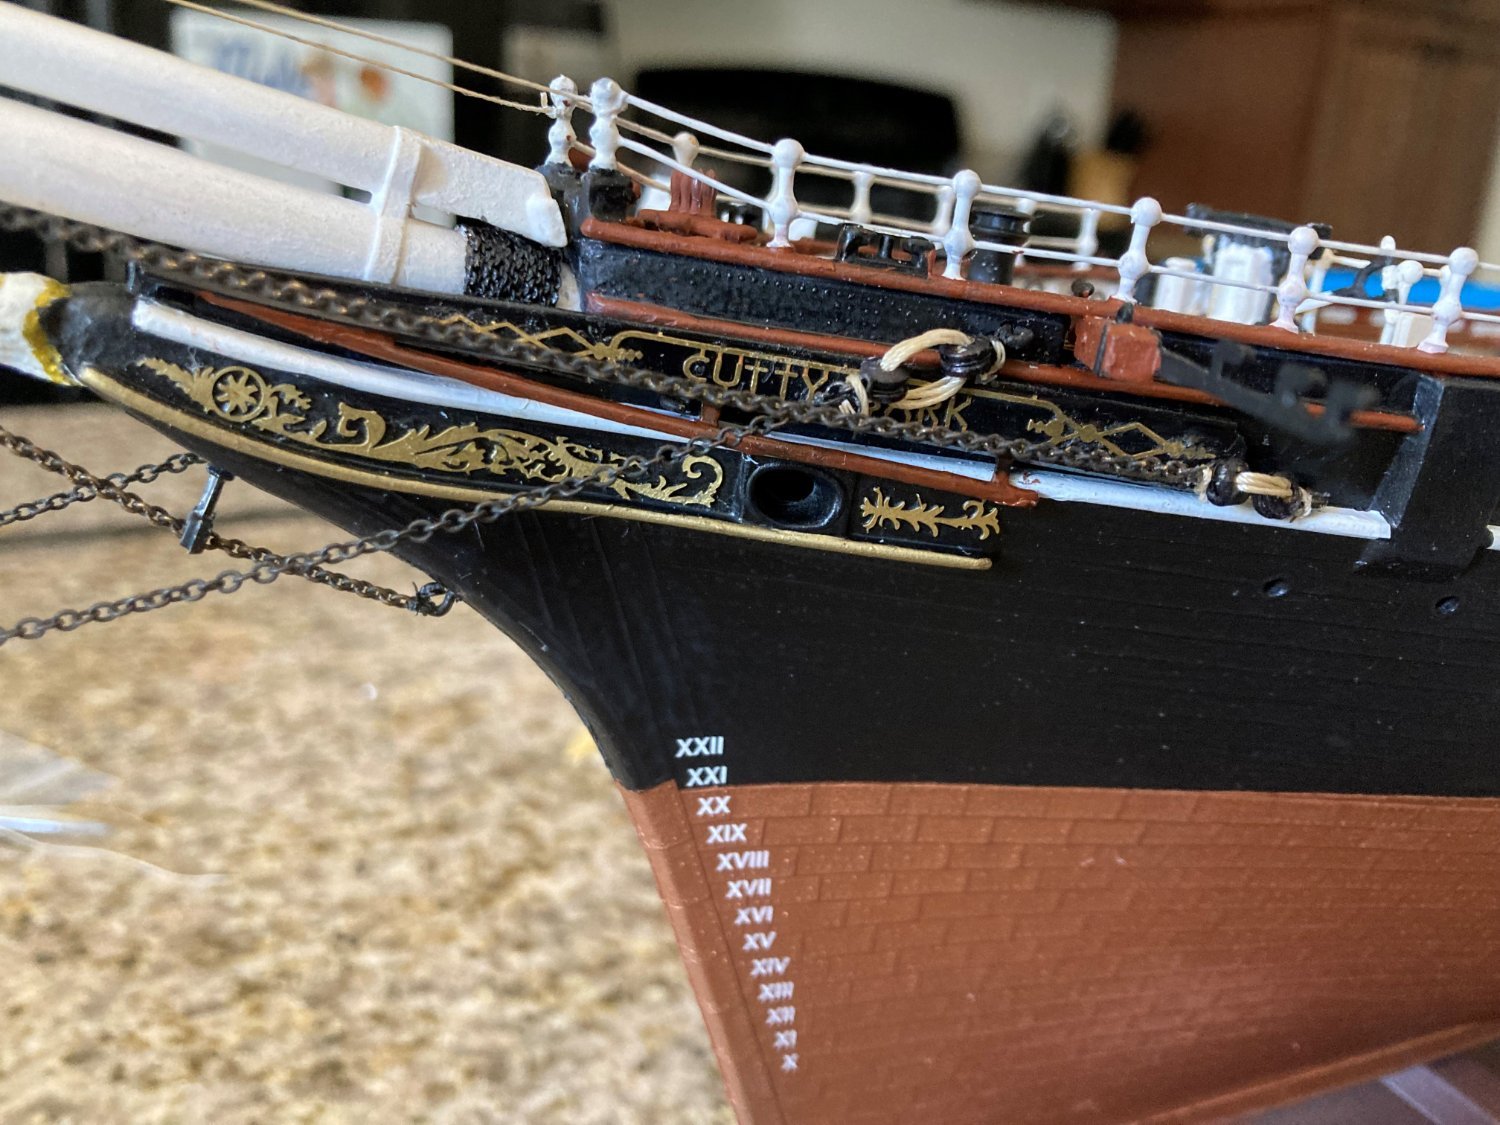
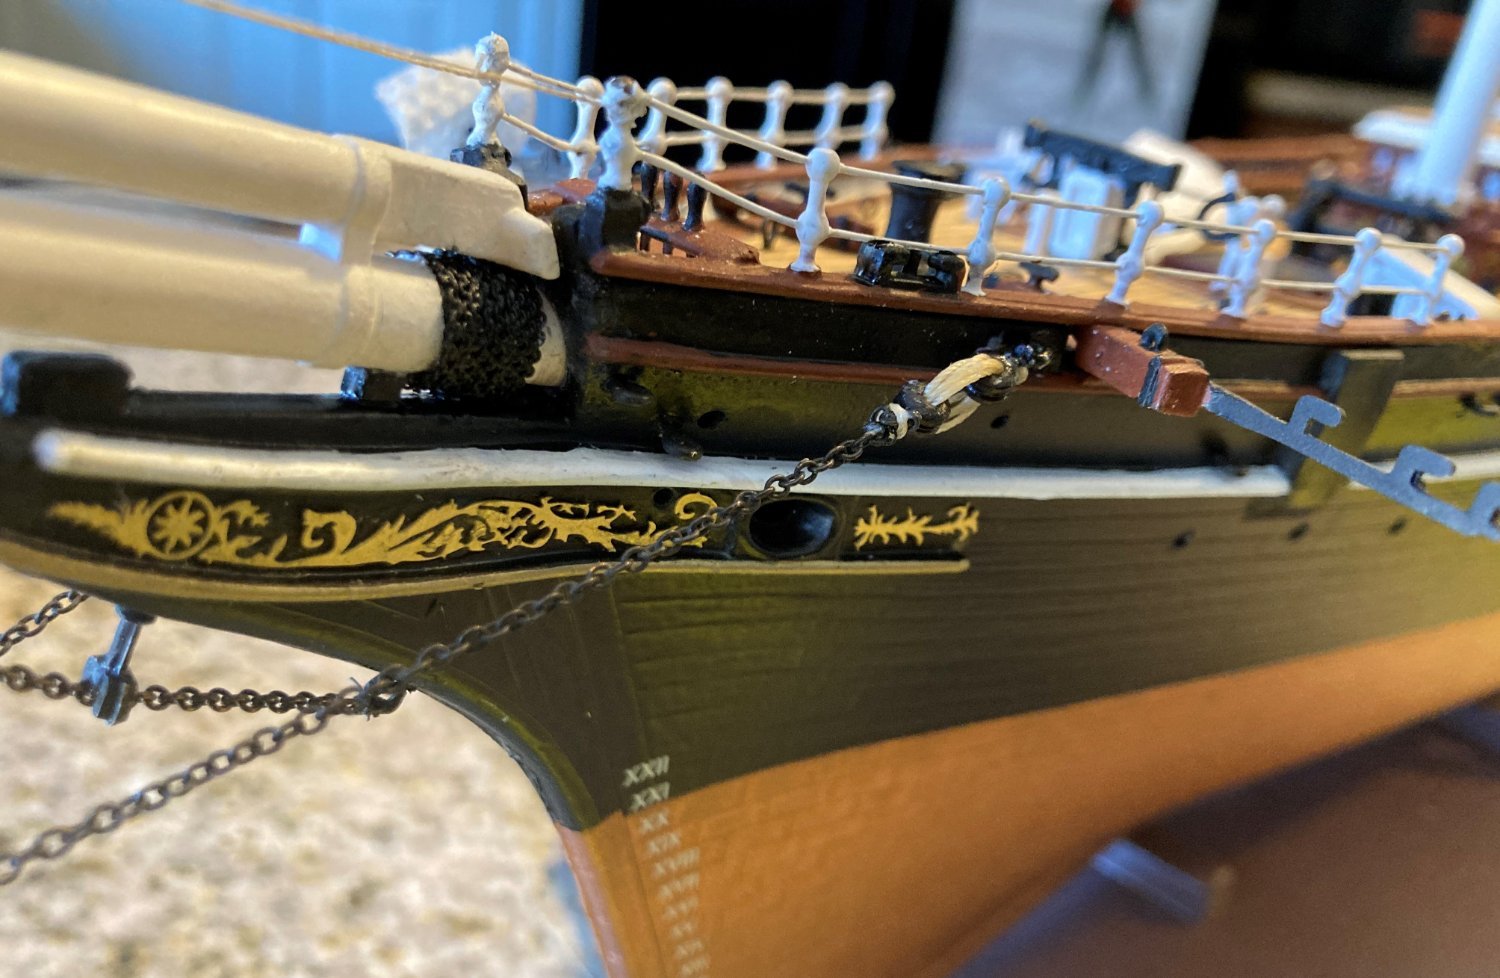
 I was able to get the photo etch decoration on the trail board. It is not as fragile as the stern decoration. I used gell superglue. It gets a bit cloudy if you goof up and move the etching around. You need to put it in the right place the first time. I still need to paint the connecting points black on the etching.
- 481 replies
-
- 2
-

-
- Cutty Sark
- Revell
- (and 2 more)
-
I have tried and failed five times to put the photo etch decorations on the stern. I am completely frustrated with it. I hope to get a set of the decals that came with the kit somehow. I am not going to try a sixth time. I am tied of removing glue and repainting the area. The photo etch is just too fragile for me to handle. I'll move on to the rigging, but I must admit I doubt my ability to complete that. I am at my lowest point since starting this model. I hope to get my confidence back soon. If anyone has a set of the decals to this kit and can part with them, I would rally like to have them.
- 481 replies
-
- 1
-
-
- Cutty Sark
- Revell
- (and 2 more)
-
Looks to me like you will have the most highly detailed Revell Cutty Sark there is online anywhere. I am envious of your skills. I know for myself, if I tried to put that much detail into my model, I would never finish it.
- 444 replies
-
- 1
-
-
- Cutty Sark
- Revell
- (and 2 more)
-
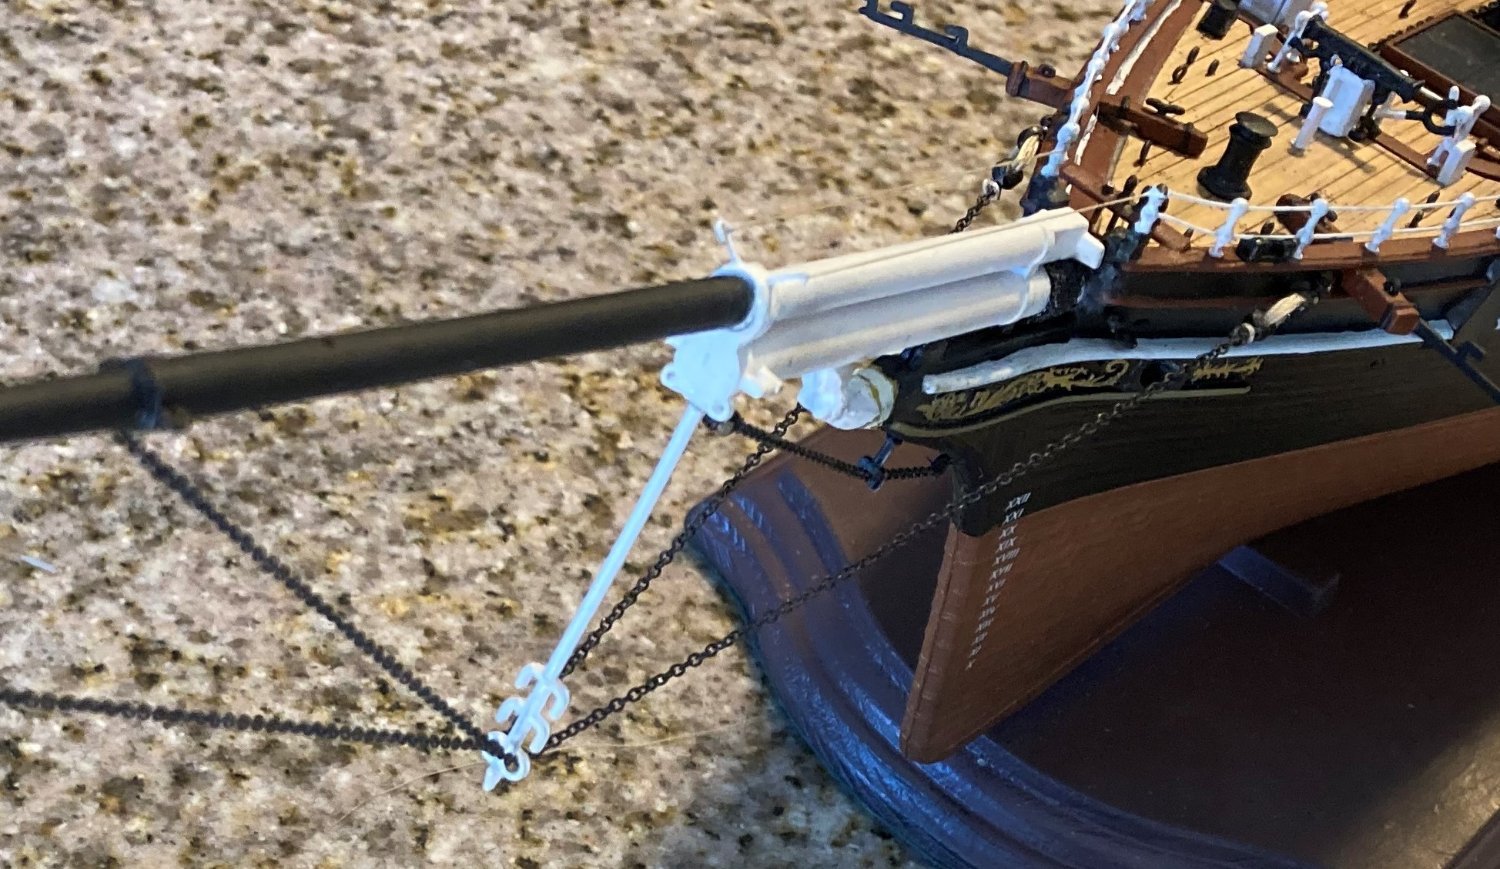
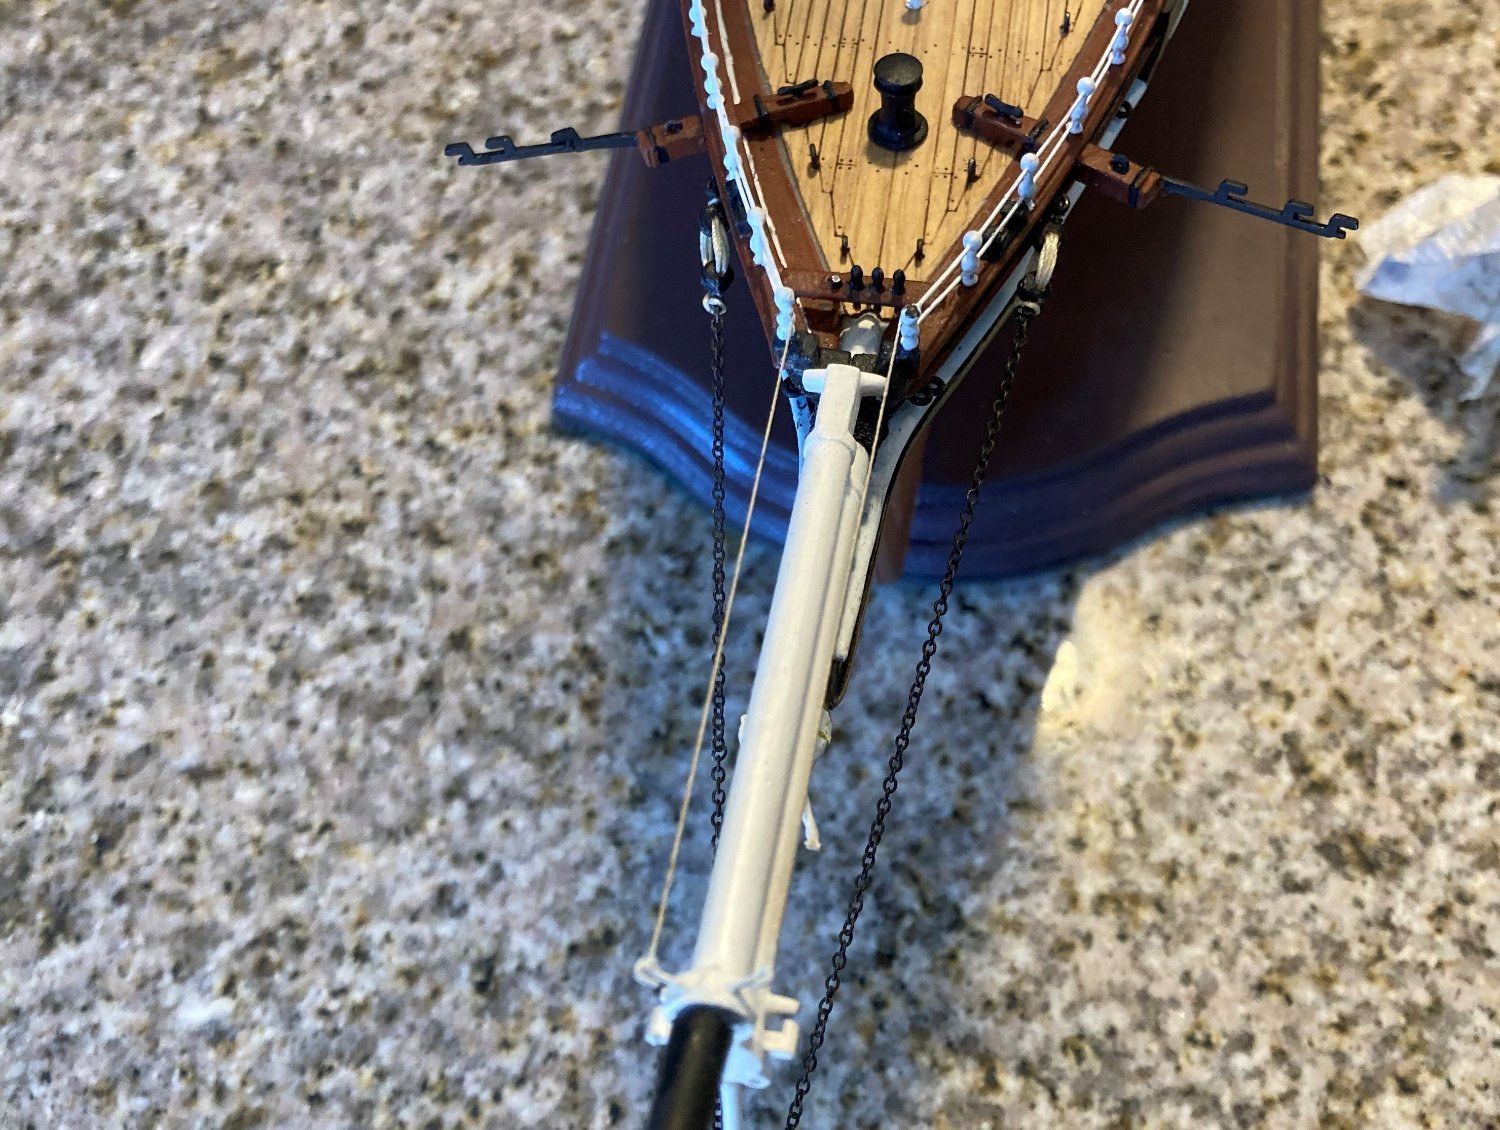
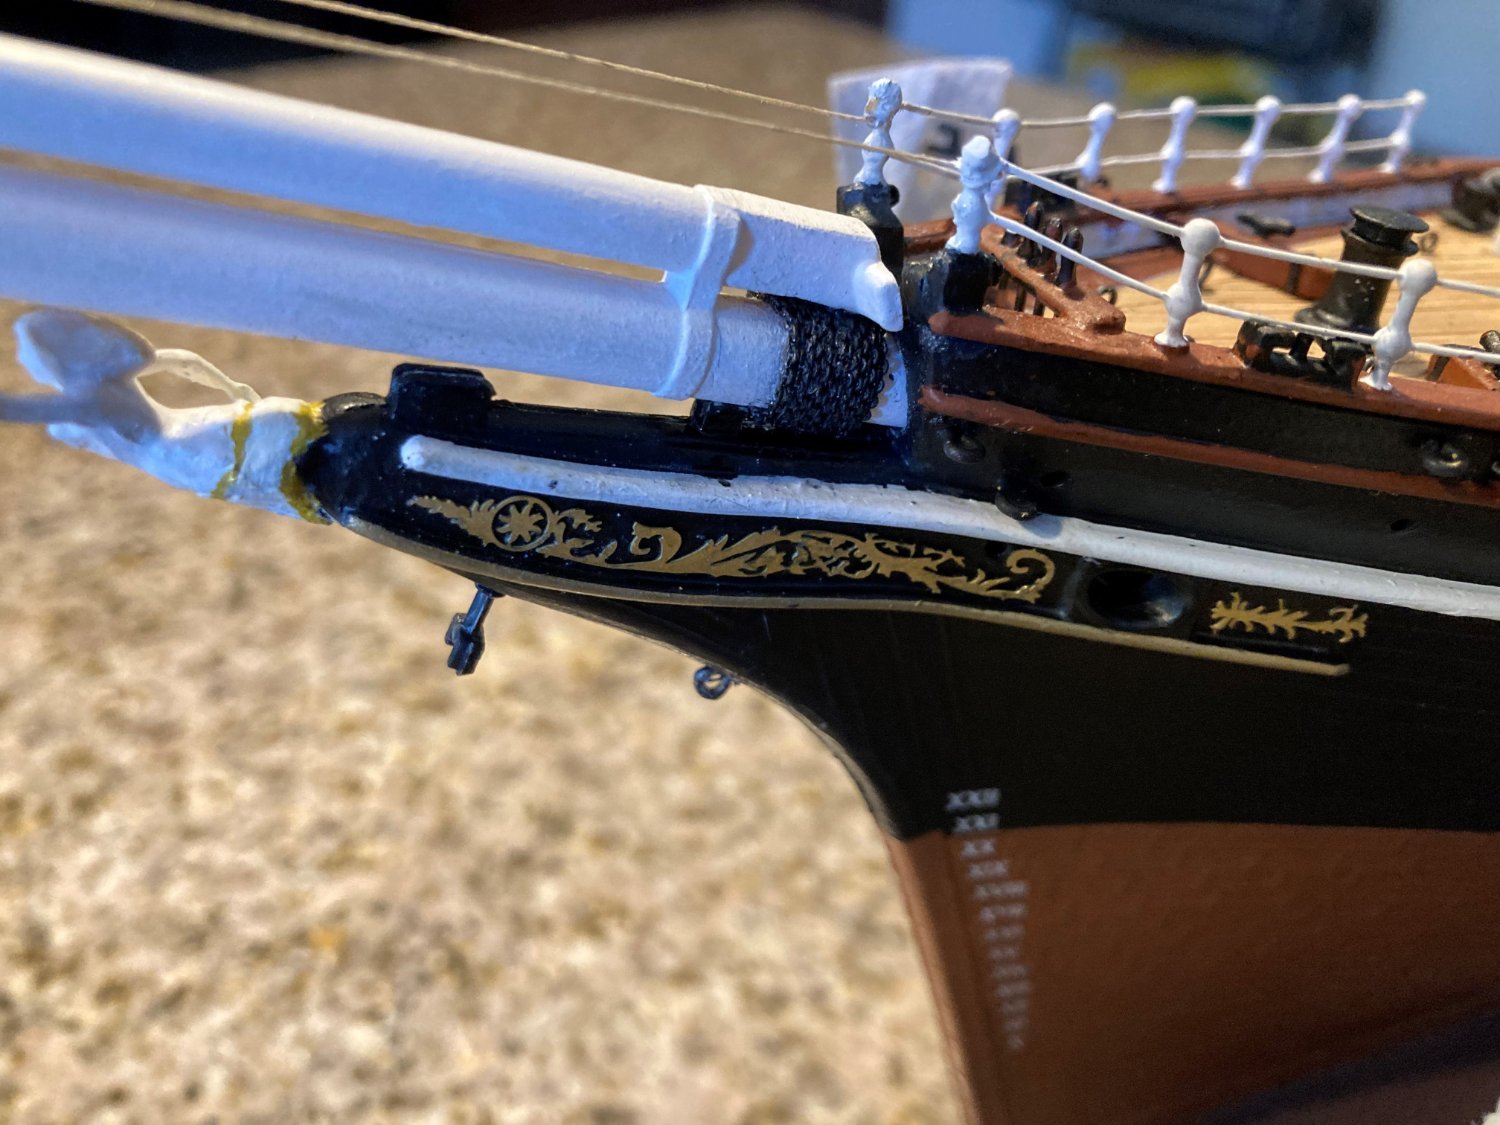
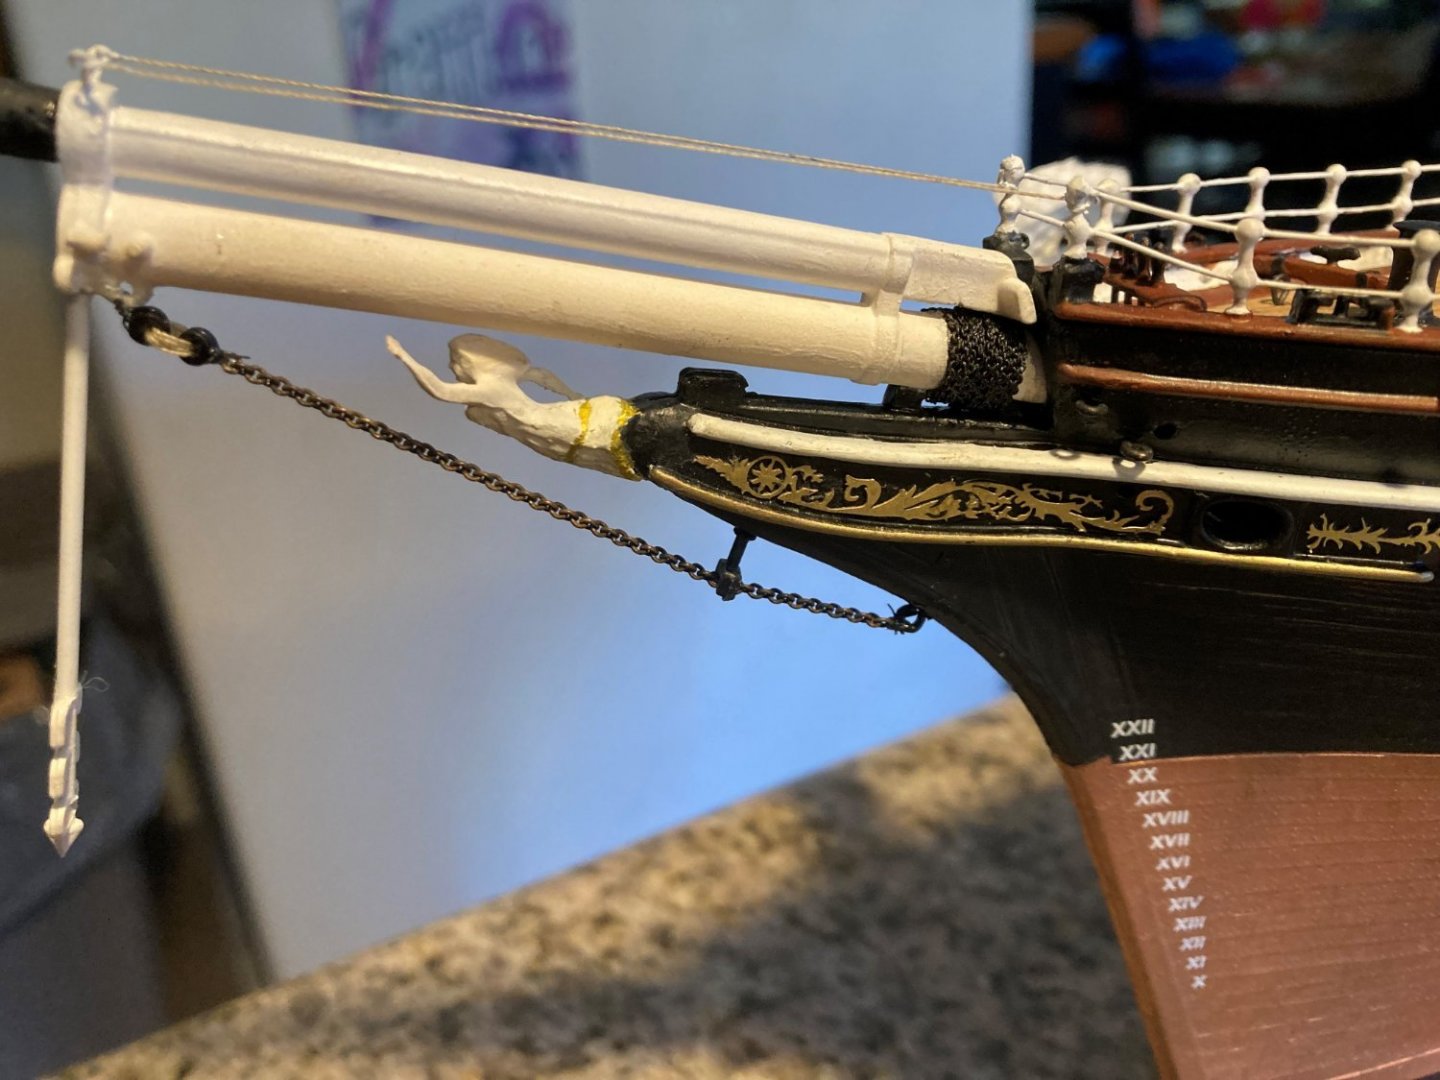
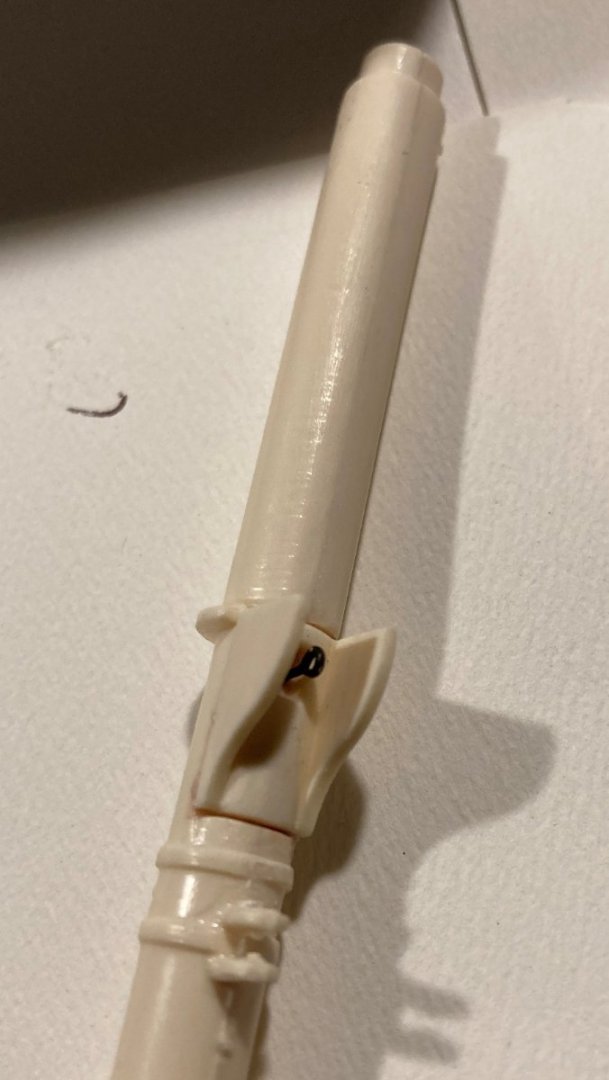
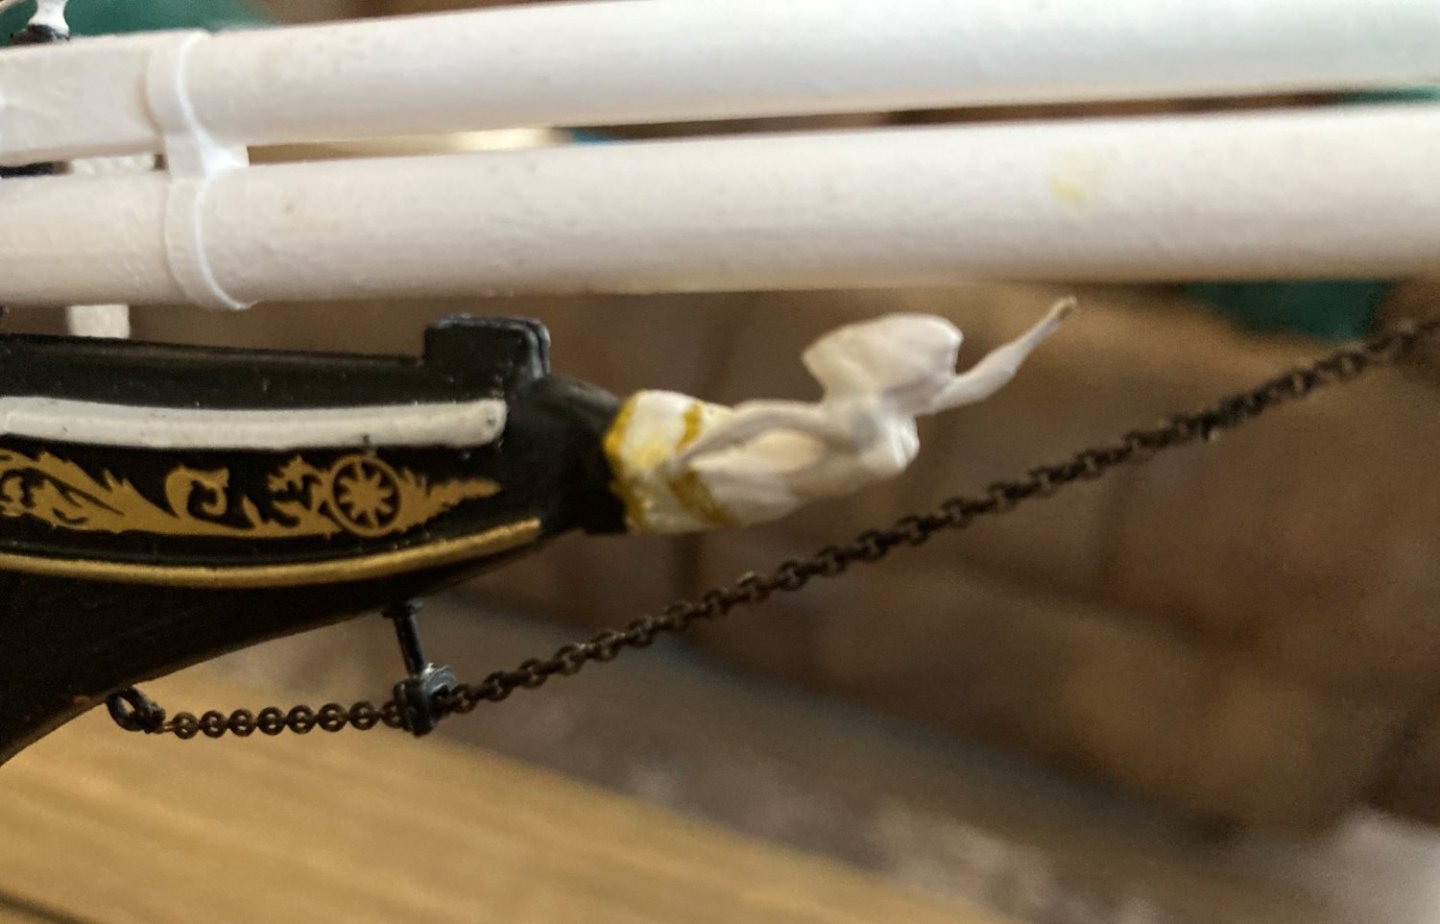
This is my first piece of chain on the bowsprit with two bullseyes. To those who have done rigging, it isn't much but to me who has never done it before it is a big deal. I added 2 more chains. I am not sure if it looks right or not. Then I did the other chain with thicker thread. I still don't know what looks right.


- 481 replies
-
- 3
-
-
- Cutty Sark
- Revell
- (and 2 more)
-
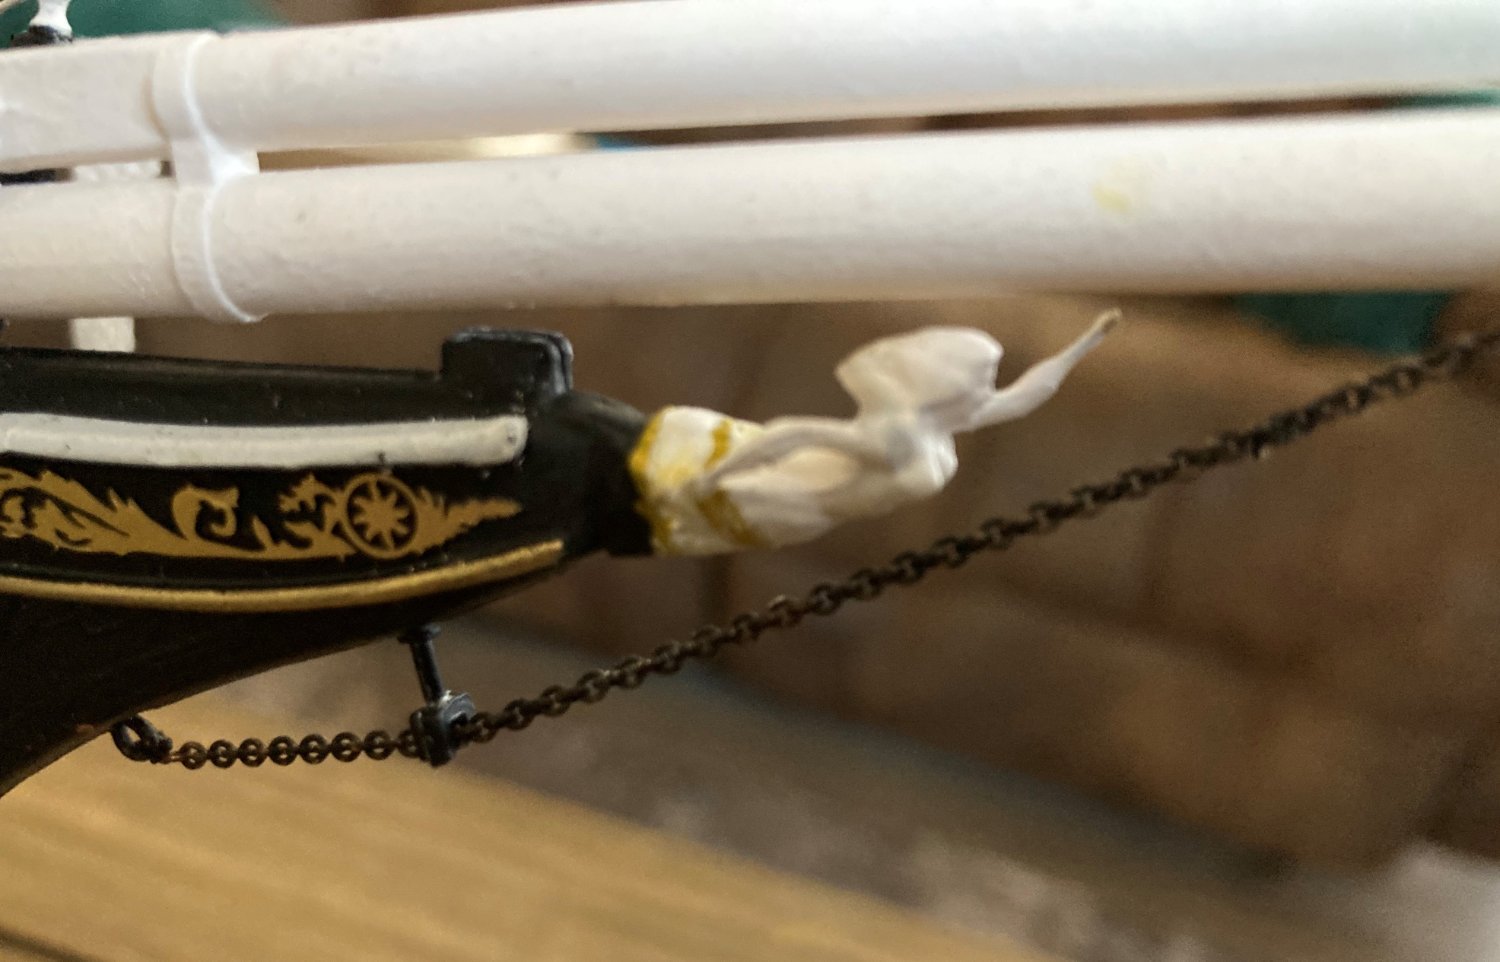
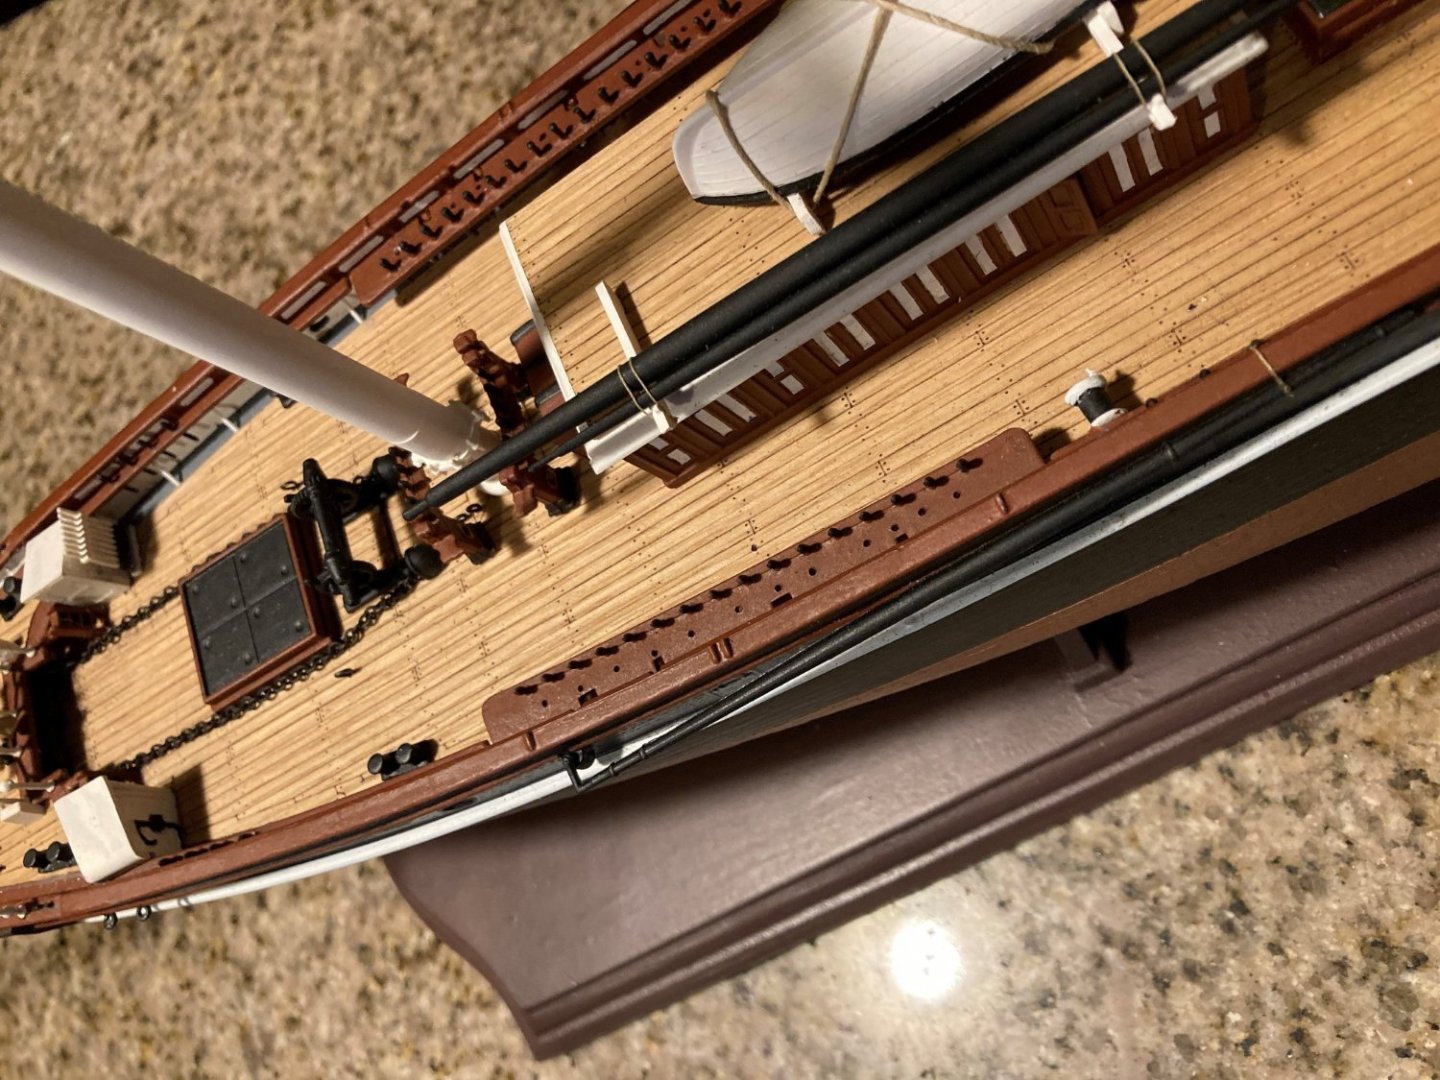
Back to my ship. I put some gammoning on the bowsprit. I added some plastic pieces below the bowsprit as the part of the ship the bowsprit is gammoned to. I used some 45 links per inch chain. It is not as good as I would have liked, but this I will keep. Some days you can't make a mistake. You just fly through the modeling that you are doing and everything comes out right, easy as pie. Then there are days like today when all I get done doing is fixing goof ups and causing more.

- 481 replies
-
- 3
-
-
- Cutty Sark
- Revell
- (and 2 more)
-
I have to put the Cutty Sark on hold for about a week. I need to get some G scale trains together for a memorial weekend train run at the Best in the West Machinery show.
- 481 replies
-
- 1
-
-
- Cutty Sark
- Revell
- (and 2 more)
-
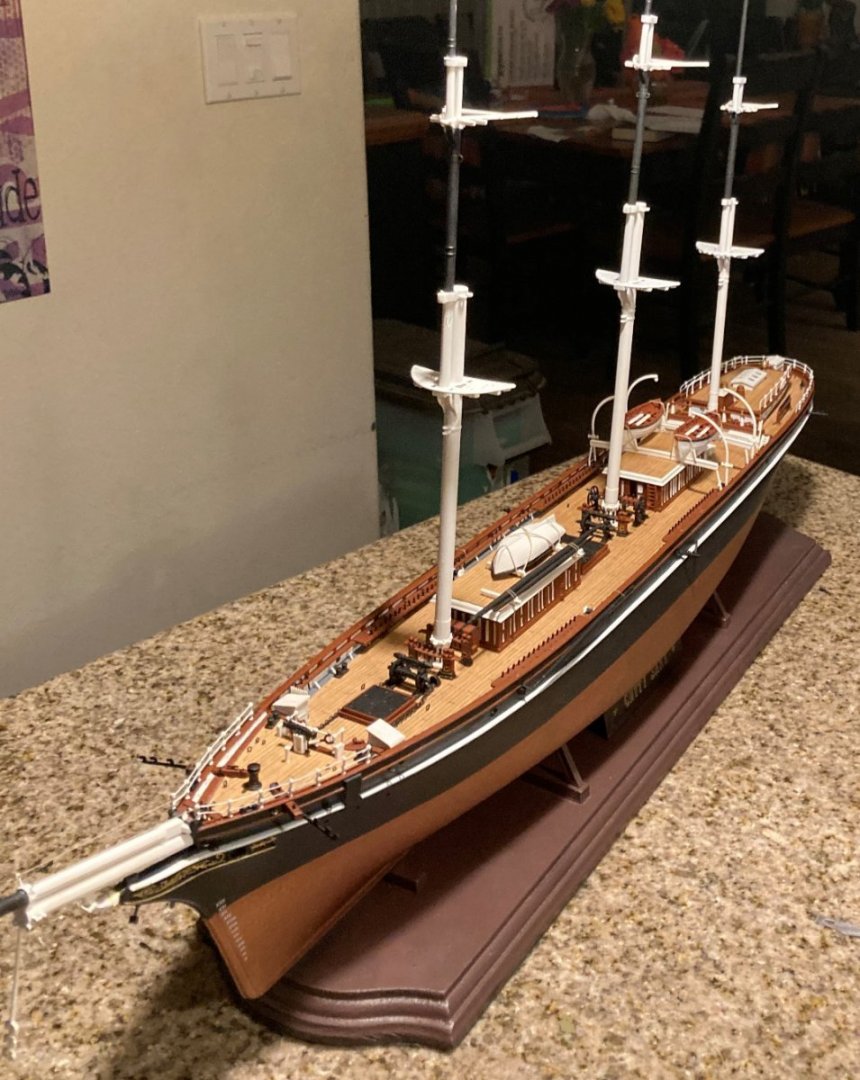
The masts are built. I'm beginning to rig the bowsprit and jib-boom. I ordered HisModel's blocks. I don't know how to strop them yet, but I will learn. At his website's photographs, there is a very good build of the Cutty Sark. My goal is to do as good or better. I am starting to feel better about rigging. I think my model is looking less and less like plastic. I am doing over things that were complete, but I was not 100% pleased with. In my mind, I have a level of quality I am willing to accept. If an area or part is not up to that standard, I'll do it over until it is.


- 481 replies
-
- 7
-
-
- Cutty Sark
- Revell
- (and 2 more)
-
And to think I am worried about rigging the Cutty Sarl in 1/96. I love to look at your pictures of your work.
-
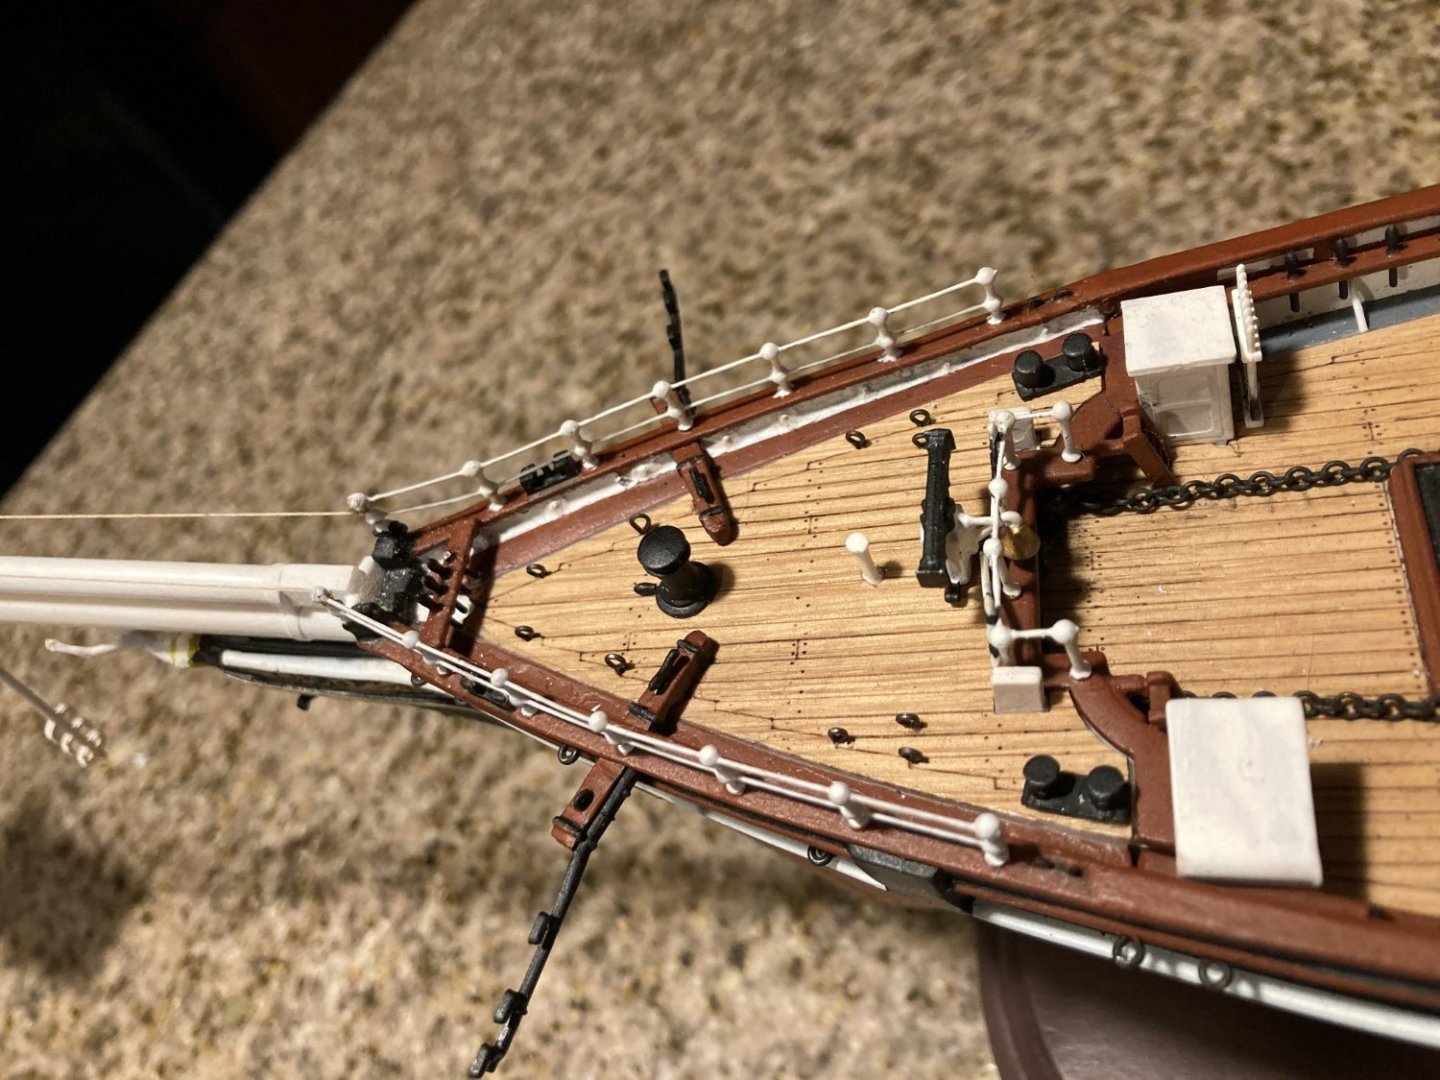
I've changed my mind about the music wire. It does not look as good as chain. I drilled a hole in the bumkins after they broke off when removing the wire. I drilled a hole in the piece left in the hull also and superglued a piece of the music wire in the bumkin and hull. Now they are mounted well and I added chain. The rear bumkin chain needs to be added after the stern decorations.
- 481 replies
-
- 2
-
-
- Cutty Sark
- Revell
- (and 2 more)
-
We are planning a visit maybe next year. Hopefully covid is gone for good then.
- 444 replies
-
- 1
-
-
- Cutty Sark
- Revell
- (and 2 more)
-
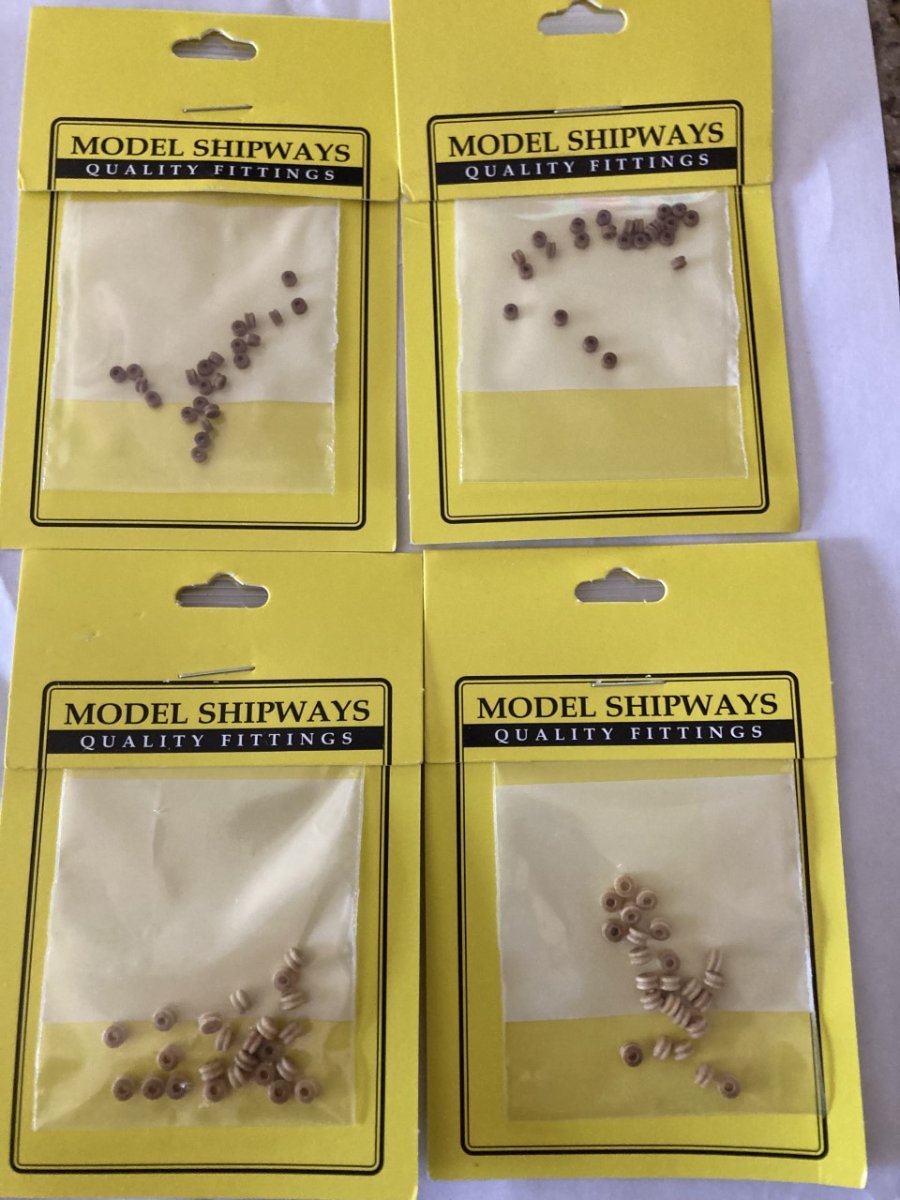
I got my bullseyes in the mail today from model expo. Now I will have to begin to rig the bow sprit and jib boom.

- 481 replies
-
- 1
-
-
- Cutty Sark
- Revell
- (and 2 more)
-
I know it was the HMS Rose. I visit it often in San Diego. The bell still says ROSE on it. The San Diego Maritime Museum calls it the Surprise. It was closed for a while until the new deck was finished. I wouldn't need the model to be called Surprise. I like that era and size of man-o-war over the ships of the line and large frigates. There isn't a plastic model of one. Lord Thomas Cochrane was the real Master and Commander. He might be my relative. My ancestors came from just west of Paisley, Scotland. Our motto is "Success Trough Endeavor". That is what I need to complete my Cutty Sark.
- 444 replies
-
- 4
-
-
- Cutty Sark
- Revell
- (and 2 more)
-
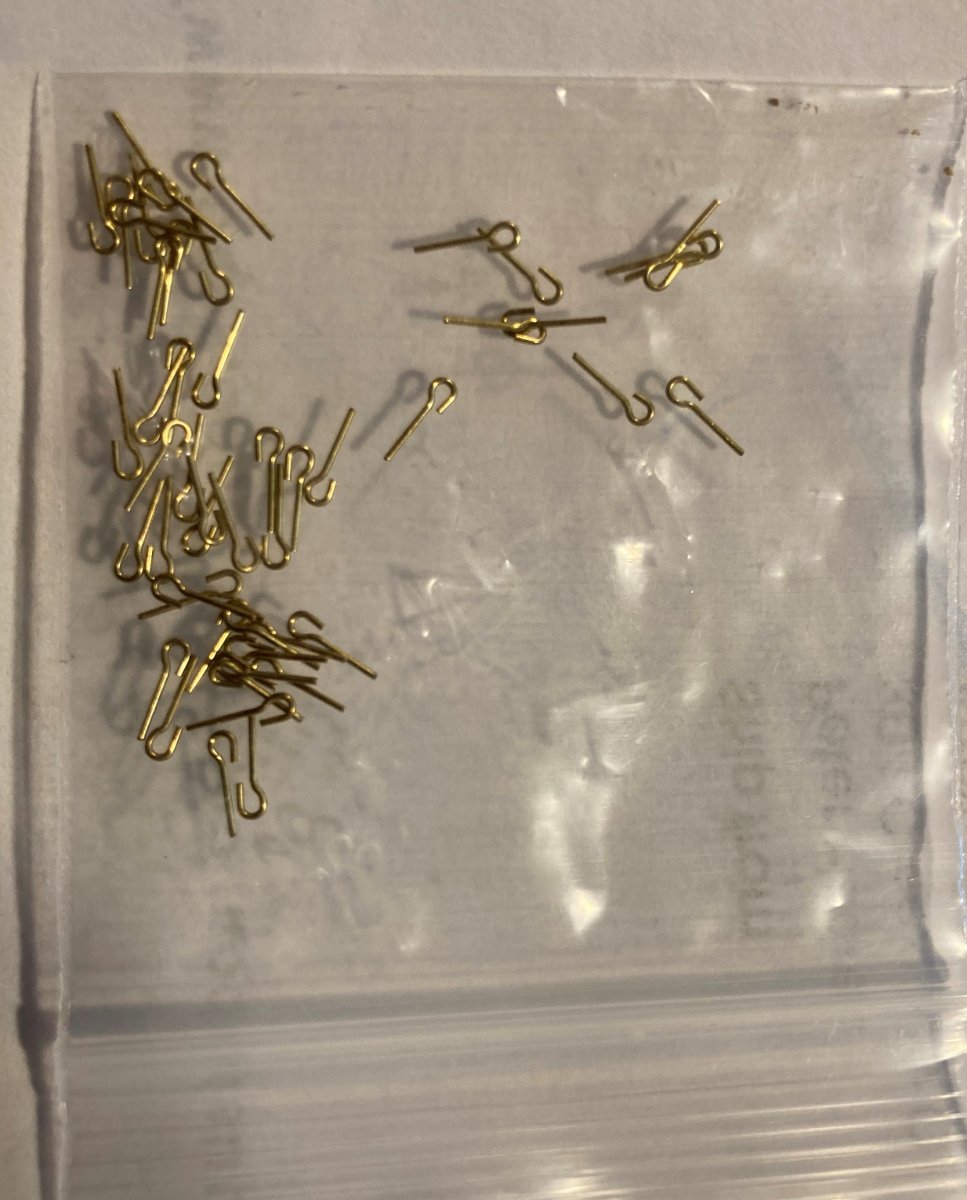
I'm making eyelets for the chain slings on the lower masts and yards. I will have one eyelet for the mast and one for the yard. I will then connect them with a piece of chain, then fix them to the yard and mast.
- 481 replies
-
- 3
-
-
- Cutty Sark
- Revell
- (and 2 more)
-
I think the tooling for the Cutty Sark was made by hand.
-
I have been playing with model trains since the 1950s. Back then, you made your equipment. You bought wheels and couplers, but everything else was scratch built, even engines. Then came crude kits and later more accurate ones. Today everything is highly detailed and comes from China and is called ready to roll. As soon as a new train car or engine comes out, the "experts" on the model train forums have listed all its inaccuracies. They couldn't begin to imagine the junk we loved to run in the 50s and 60s.
- 444 replies
-
- 2
-
-
- Cutty Sark
- Revell
- (and 2 more)
-
My wish would be that they make a model of a 28 gun ship like the Surprise from Master and Commander in say 1/48 scale. The Constitution has too many guns, as does the Victory, though I hope to work on both before I meet Davie Jones. The actual Surprise is pretty realistic, except for below decks. The gun deck has a middle isle that is lower than the level that the guns sit on, so you can stand up and walk through. I've visited it many times in San Diego and wanted a model of it. I know there is a wooden kit made, but I doubt my ability to build it well. I may try, though.
- 444 replies
-
- 1
-
-
- Cutty Sark
- Revell
- (and 2 more)
-
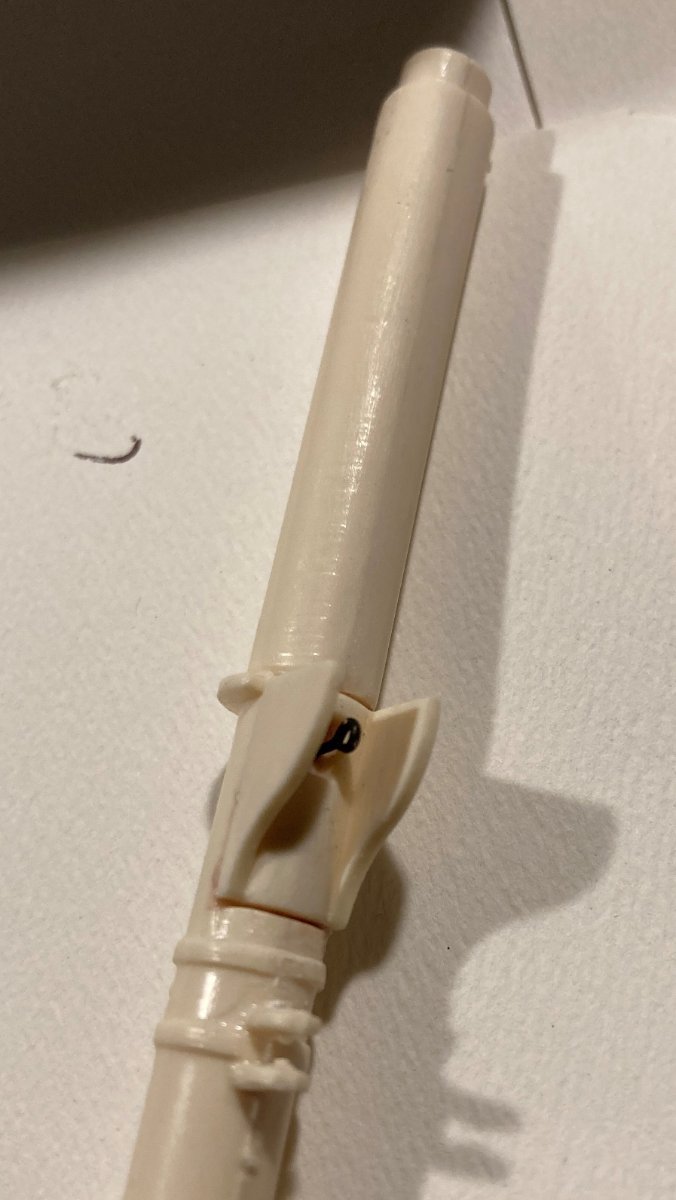
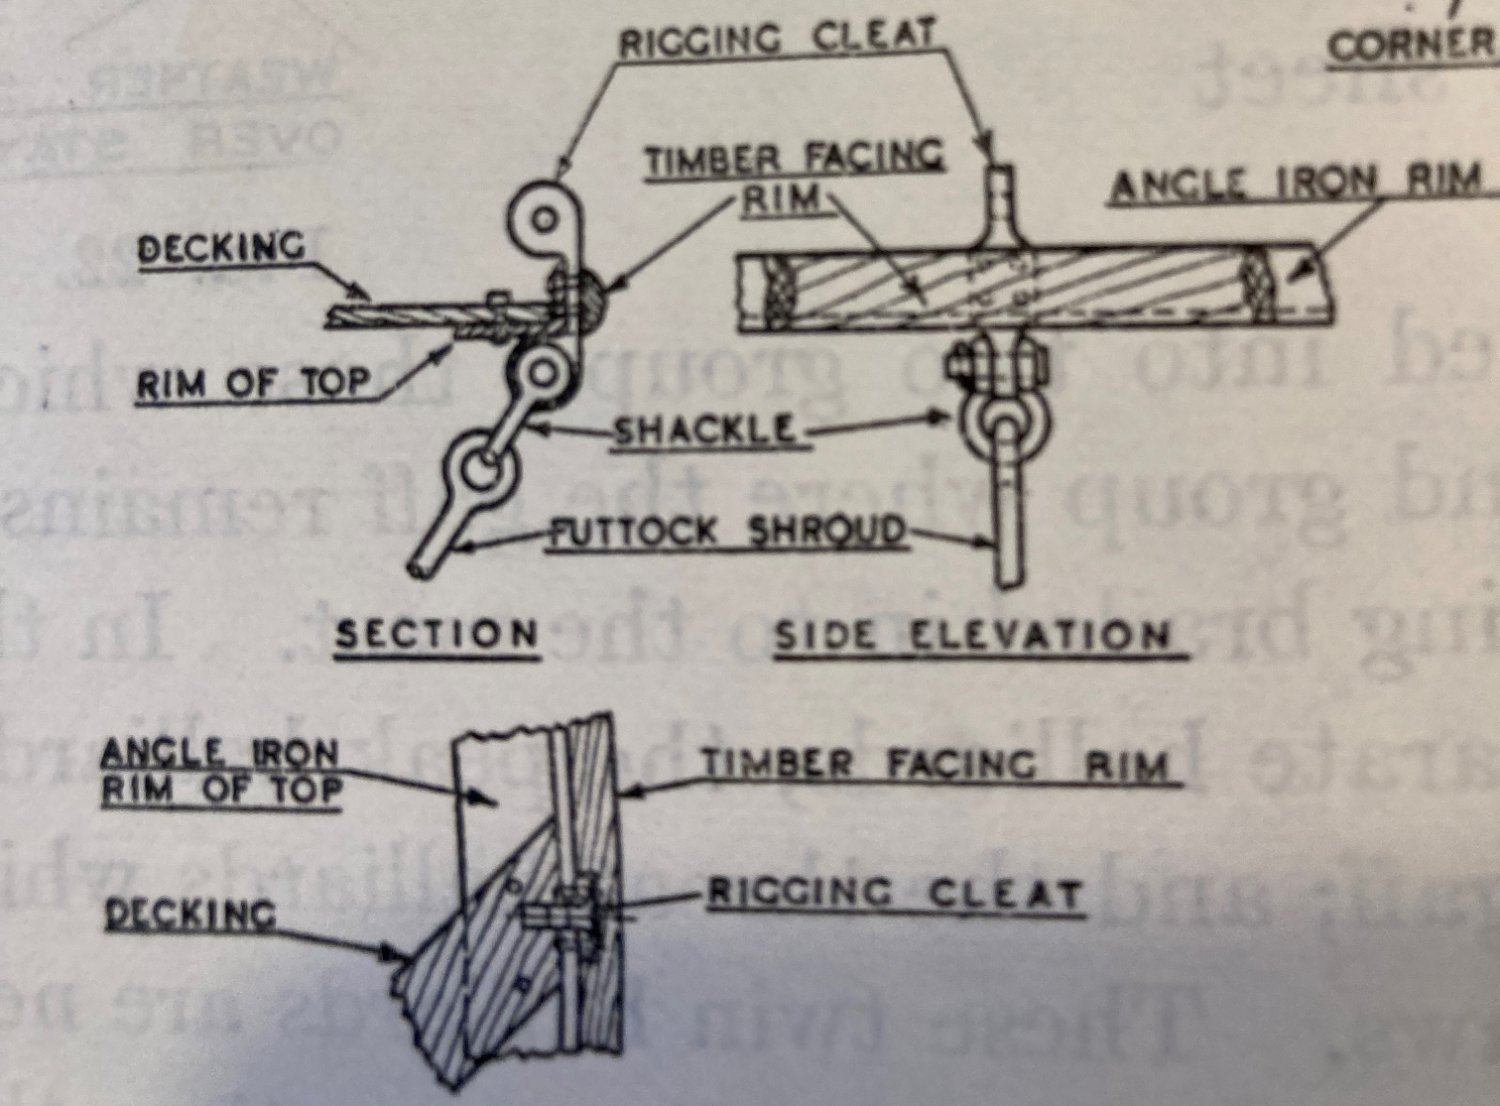
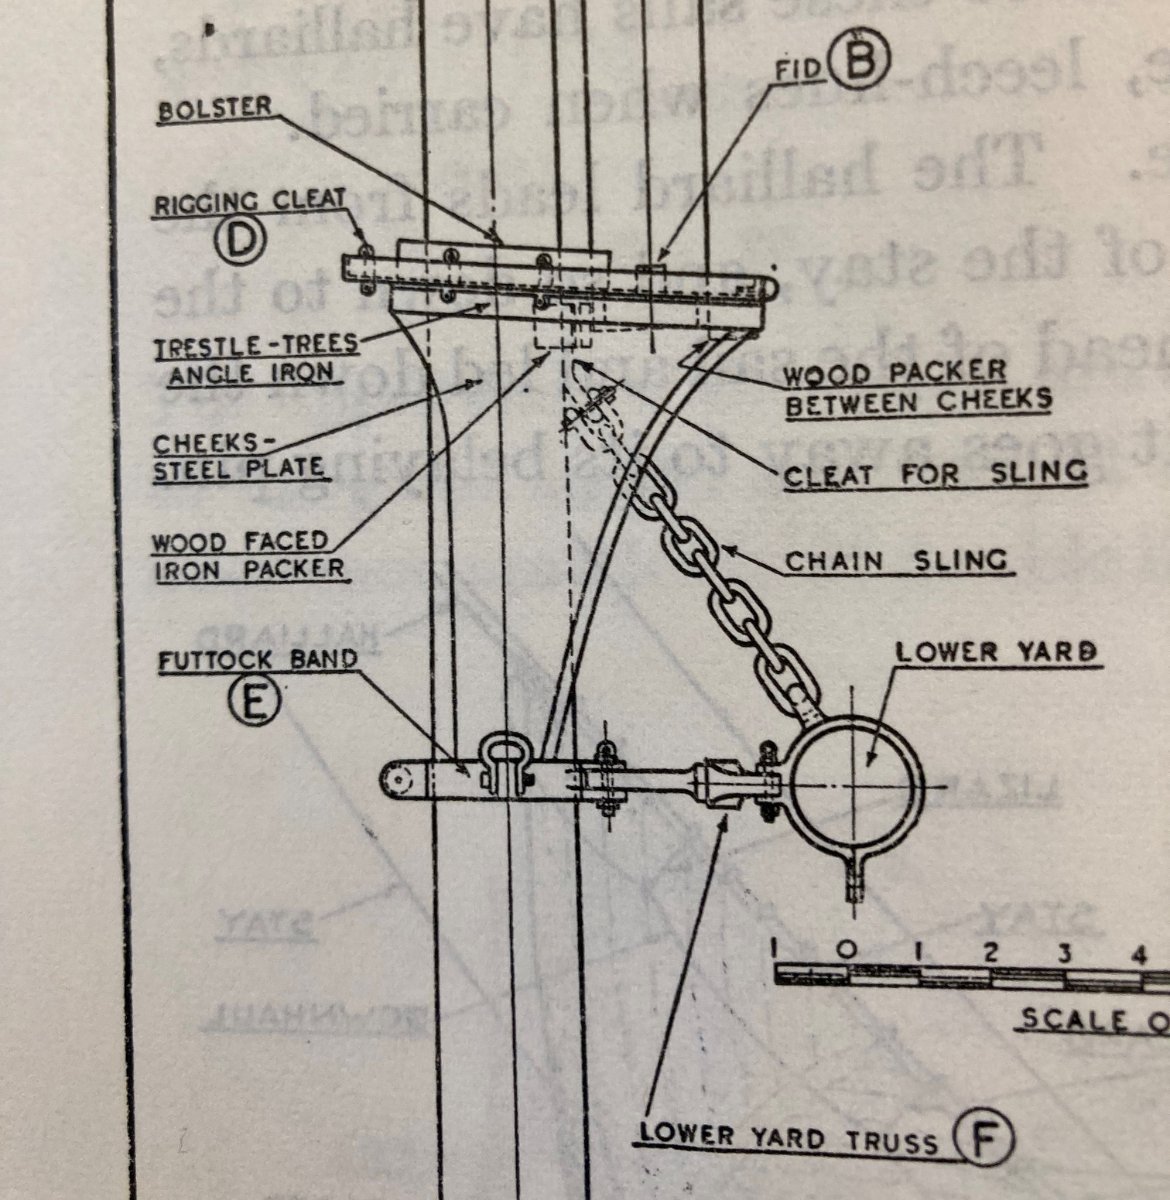
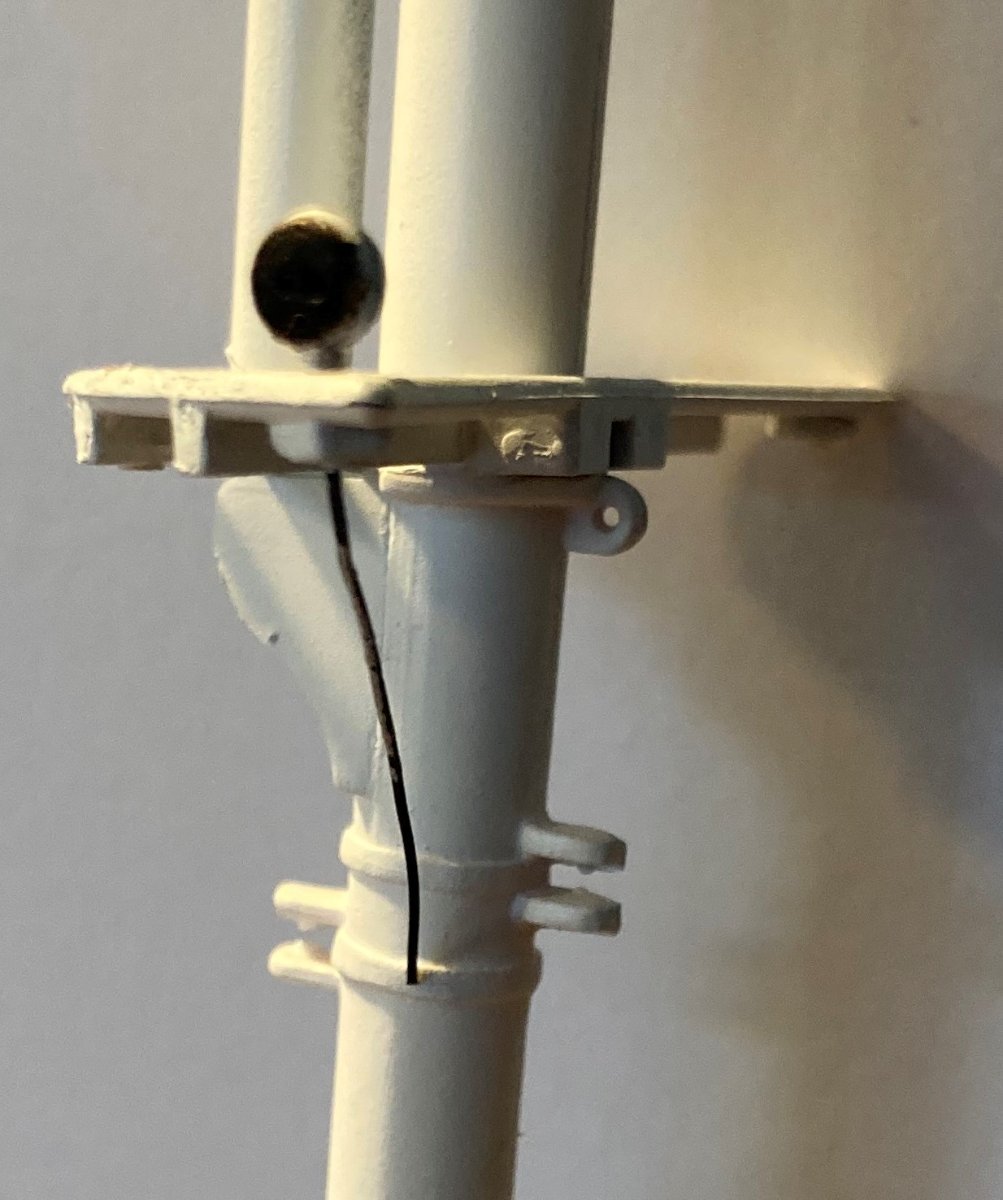
For futtock shrouds I was thinking of putting an eyelet in the band around the mast where the lower yard attaches. Underhill calls it the futtock or futter band. Or put it a bit lower as in Campbell's plan. Underhill is generic and Campbell is the Cutty Sark. Using the wire that straps the deadeye as the futtock shroud and putting its end in the eyelet. One eyelet for all three shrouds. I think it would be too much to try and represent the shackles. Here are some illustrations from Underhill's book, Campbell and the model's main mast

- 481 replies
-
- 2
-
-
- Cutty Sark
- Revell
- (and 2 more)
-
Here is an email I got from Radimir at His Model. I told him that we appreciate what he does. Thank you, for yours valuation. I've been a wheelchair-bound paraplegic for 20 years. And now I can only do the bare minimum of things on my own. I was been building models of historic sailboats since I was a kid, and I was been sailing for 25 years. Inventing and making and selling model merchandise for historic sailboats is what gives me purpose in life. I wish you a beautiful model. Radimir
- 481 replies
-
- 4
-

-
-
- Cutty Sark
- Revell
- (and 2 more)
-
Working with resin can be unhealthy if you are not careful. Sanding or sawing resin can make tiny particles that can get in your lungs. It is always a good thing to were a mask when making resin dust.
- 444 replies
-
- 3
-
-
-
- Cutty Sark
- Revell
- (and 2 more)
-
If I am not mistaken, I think the Portuguese painted her.
- 481 replies
-
- 1
-
-
- Cutty Sark
- Revell
- (and 2 more)
-
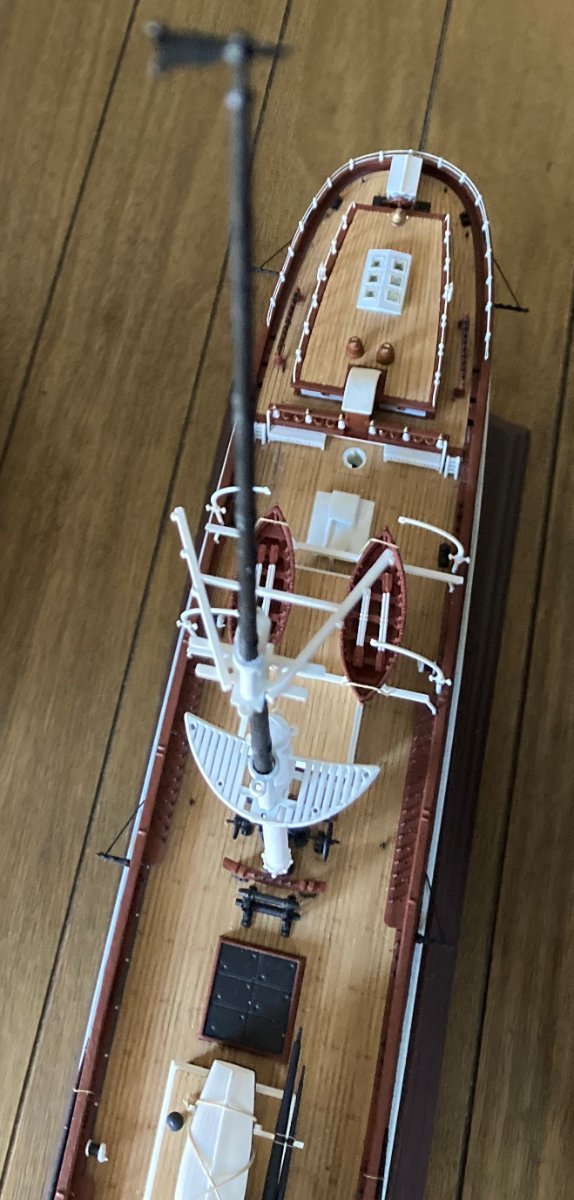
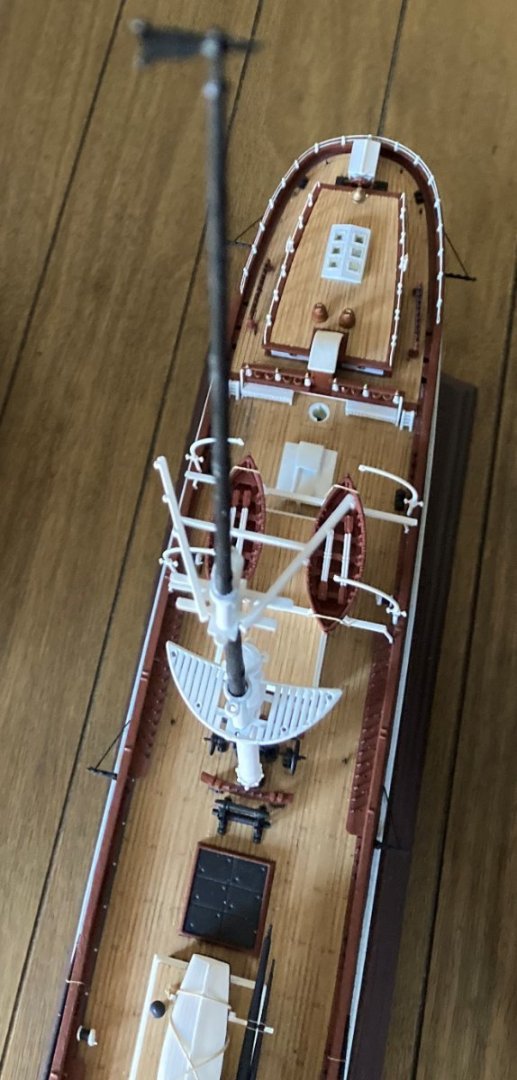
Main mast complete and temporarily stepped and Nanny the witch.
- 481 replies
-
- 2
-
-
- Cutty Sark
- Revell
- (and 2 more)
-
I put the download link on my post here it is again: https://www.hismodel.com/_filemanager/download.php?Id=110
- 481 replies
-
- 1
-
-
- Cutty Sark
- Revell
- (and 2 more)
-
About Campbell deadeye placement, if you look at the rigging plan, look at the main mast lower deadeyes. Below the ship outline he has 11 deadeyes and a place for a cap stay. There are 6 large deadeyes and 5 small deadeyes. Now if you look at the rigging plan for the main shrouds and stays he has 5 large dead eyes and 7 small dead eyes just as Revell has, plus what I think is the cap stay.
- 481 replies
-
- 1
-
-
- Cutty Sark
- Revell
- (and 2 more)