bcochran
-
Posts
615 -
Joined
-
Last visited
Content Type
Profiles
Forums
Gallery
Events
Everything posted by bcochran
-
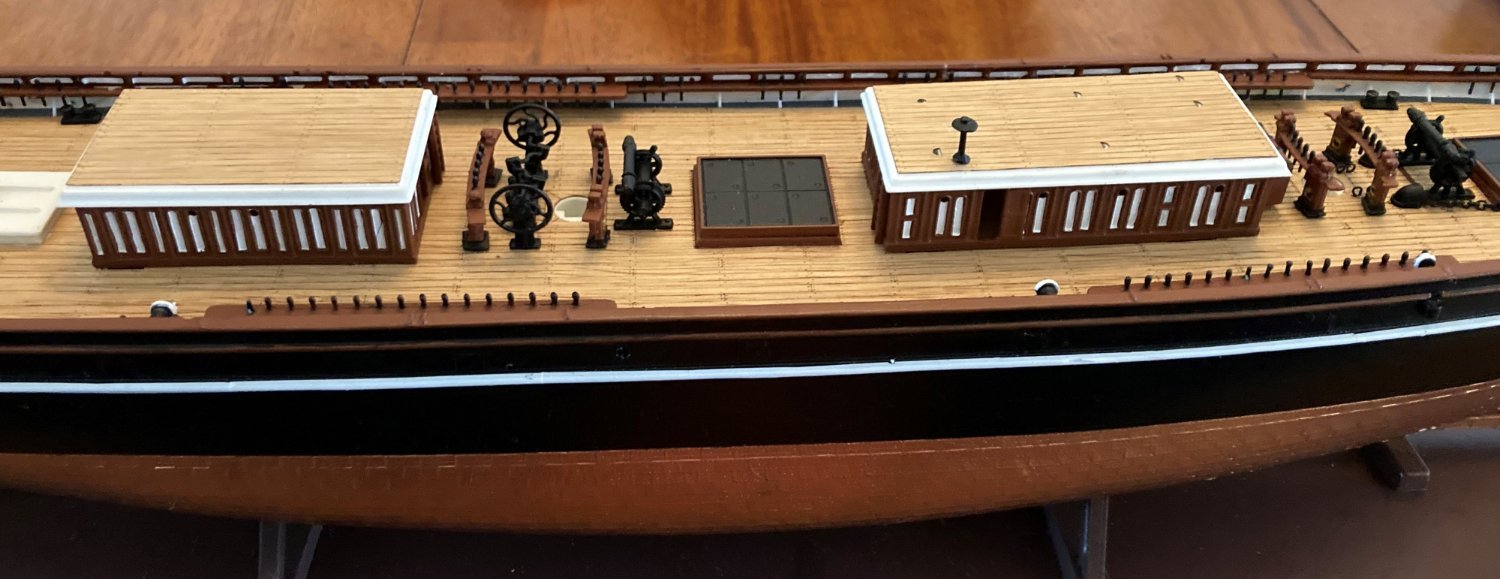
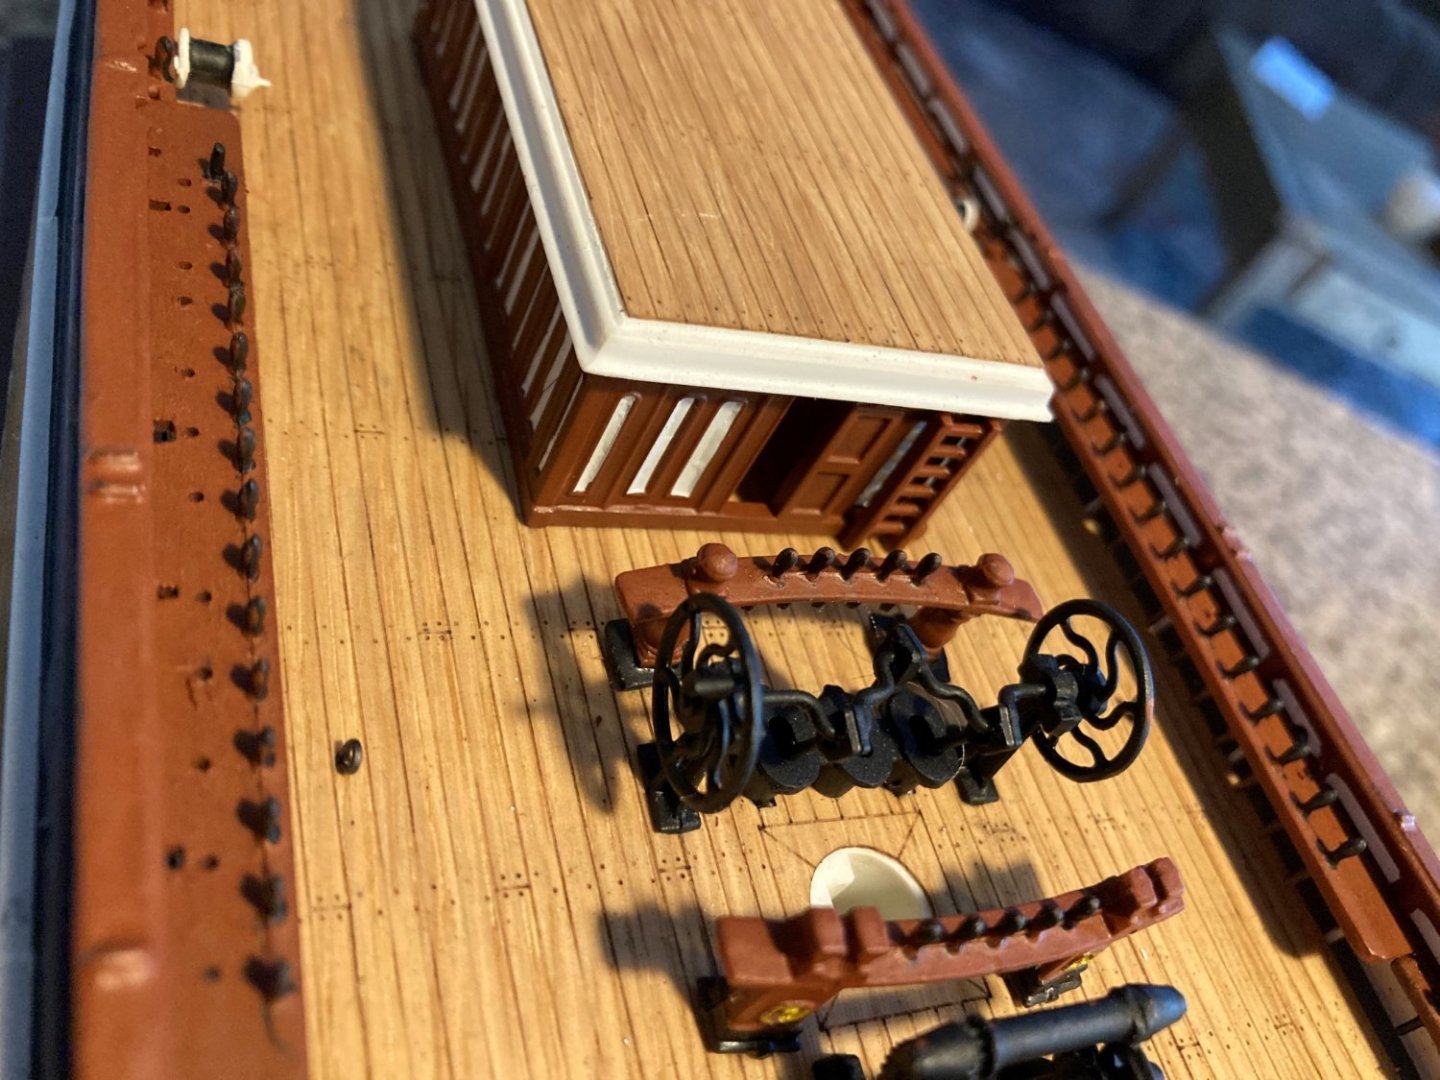
 The deck today. I hope to finish up the rest of the plastic parts this weekend and start rigging next week.
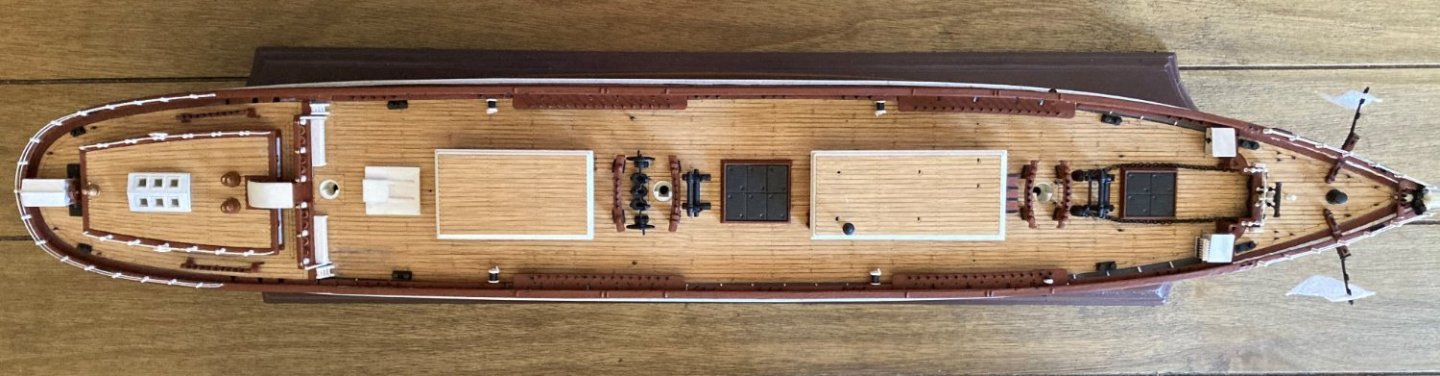
- 481 replies
-
- 1
-

-
- Cutty Sark
- Revell
- (and 2 more)
-
What do you think we should use for bulleyes? I was thinking about using Revell's by drilling them out and replace the plastic rope with real.
- 481 replies
-
- 1
-
-
- Cutty Sark
- Revell
- (and 2 more)
-
When you start your Cutty Sark we'll have another log going!
- 481 replies
-
- 1
-
-
- Cutty Sark
- Revell
- (and 2 more)
-
The white panel on the aft cabin is covered by the ladder, and in the center is an open door. I did not know if the door had white panels or not. I think I remember reading that it didn't. Also, on the stern side the door is hinged and on the bow side it slides open. In the picture, it looks like the door has white panels also. I think I will add that touch. In the picture it looks like the door opens to starboard while Revell has it open to port.

- 481 replies
-
- 2
-
-
- Cutty Sark
- Revell
- (and 2 more)
-
Well, the bulwarks are done. This is a milestone for me since I have been putting off completing them. I have the boats to add, and a few small parts, then comes the masts and yards. For me, rigging is new. Even without studying ships, I knew about deck fittings and such, so building that part of a ship was not a very hard mental process. But I know virtually nothing about rigging. I am studying it, though. My plan is to read the reference books I have and compare what I learn with Revell's directions. I feel I don't want to go ahead with anything until I thoroughly understand why I should be doing it a certain way. I am sure to learn from Burma, Kevin, Rob, Shipman and anyone else who feels like helping out. I really appreciate all of you.


- 481 replies
-
- 2
-
-
- Cutty Sark
- Revell
- (and 2 more)
-
Thank you Bruma nice to see you here. I have been following your build, and you have given me very much help and inspiration. As you are probably very aware, the Revell Cutty Sark has a lot of inaccuracies. The one I noticed recently while watching YouTube videos of the real ship is that the bulwarks on the model are very shallow. In the videos, the deck house roofs are just visible above the bulwarks, looking at the ship from the side. Knowing that, when I look at the model, the deck houses look way out of proportion to the kit's bulwarks. Accepting that and all the other inaccuracies, I can find, you might say I am using Revell as my ship's plan. Kevin has pointed out that Campbell's plan can be critiqued also. If you look at his forecastle, how would you get from the main deck to the forecastle? He has no steps there. He has pin rails where Revell and the actual ship have steps. Even Longridge points out where he has taken liberties with his model due to the difficulty of making certain parts. His deck house panels are one example. Knowing all that, I am comfortable living with my model's inaccuracies. I could make a pretty long list of them.
- 481 replies
-
- 2
-
-
- Cutty Sark
- Revell
- (and 2 more)
-
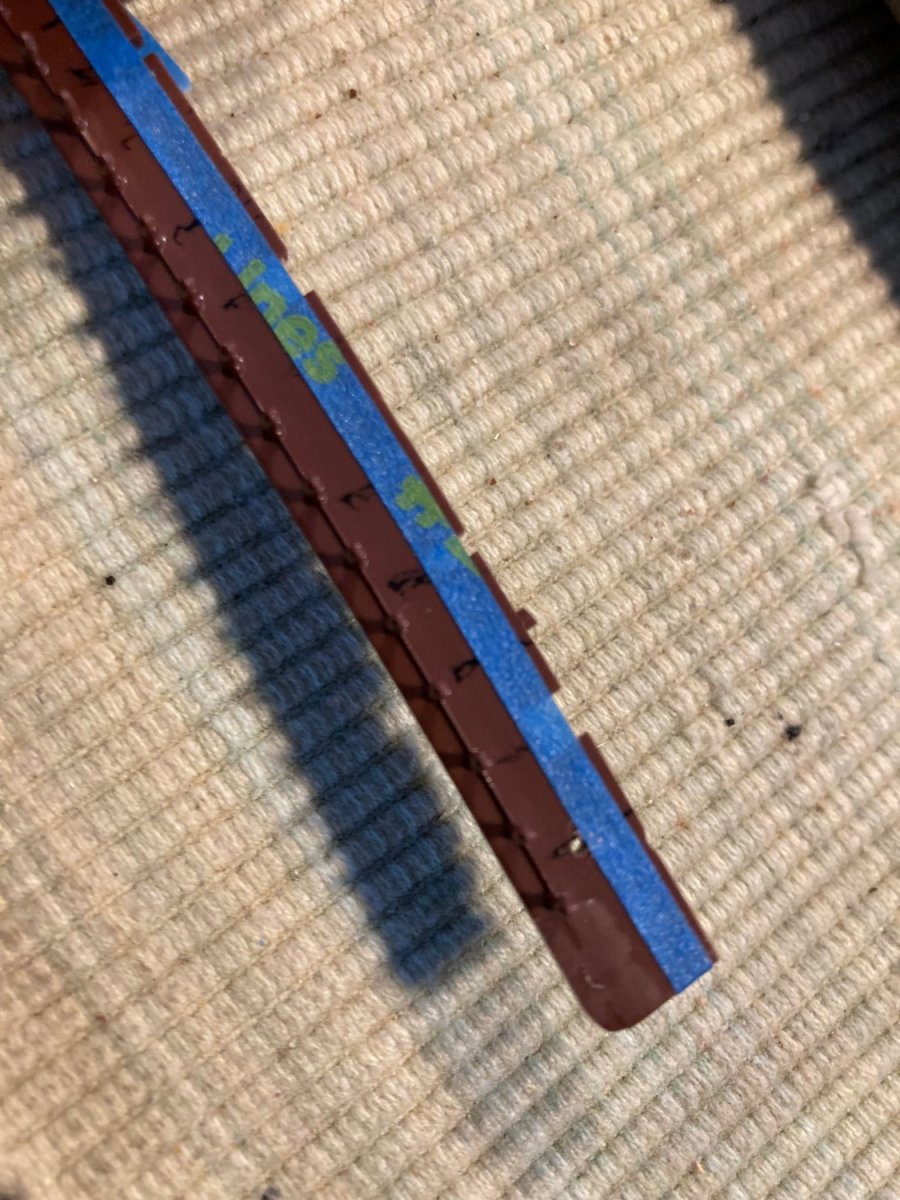
Here is how I drilled the rails for the deadeye placement. I marked the rail using the kit deadeyes where to drill. Using the blue tape to keep the holes in alignment, I drilled with a .pin vice.

- 481 replies
-
- 1
-
-
- Cutty Sark
- Revell
- (and 2 more)
-
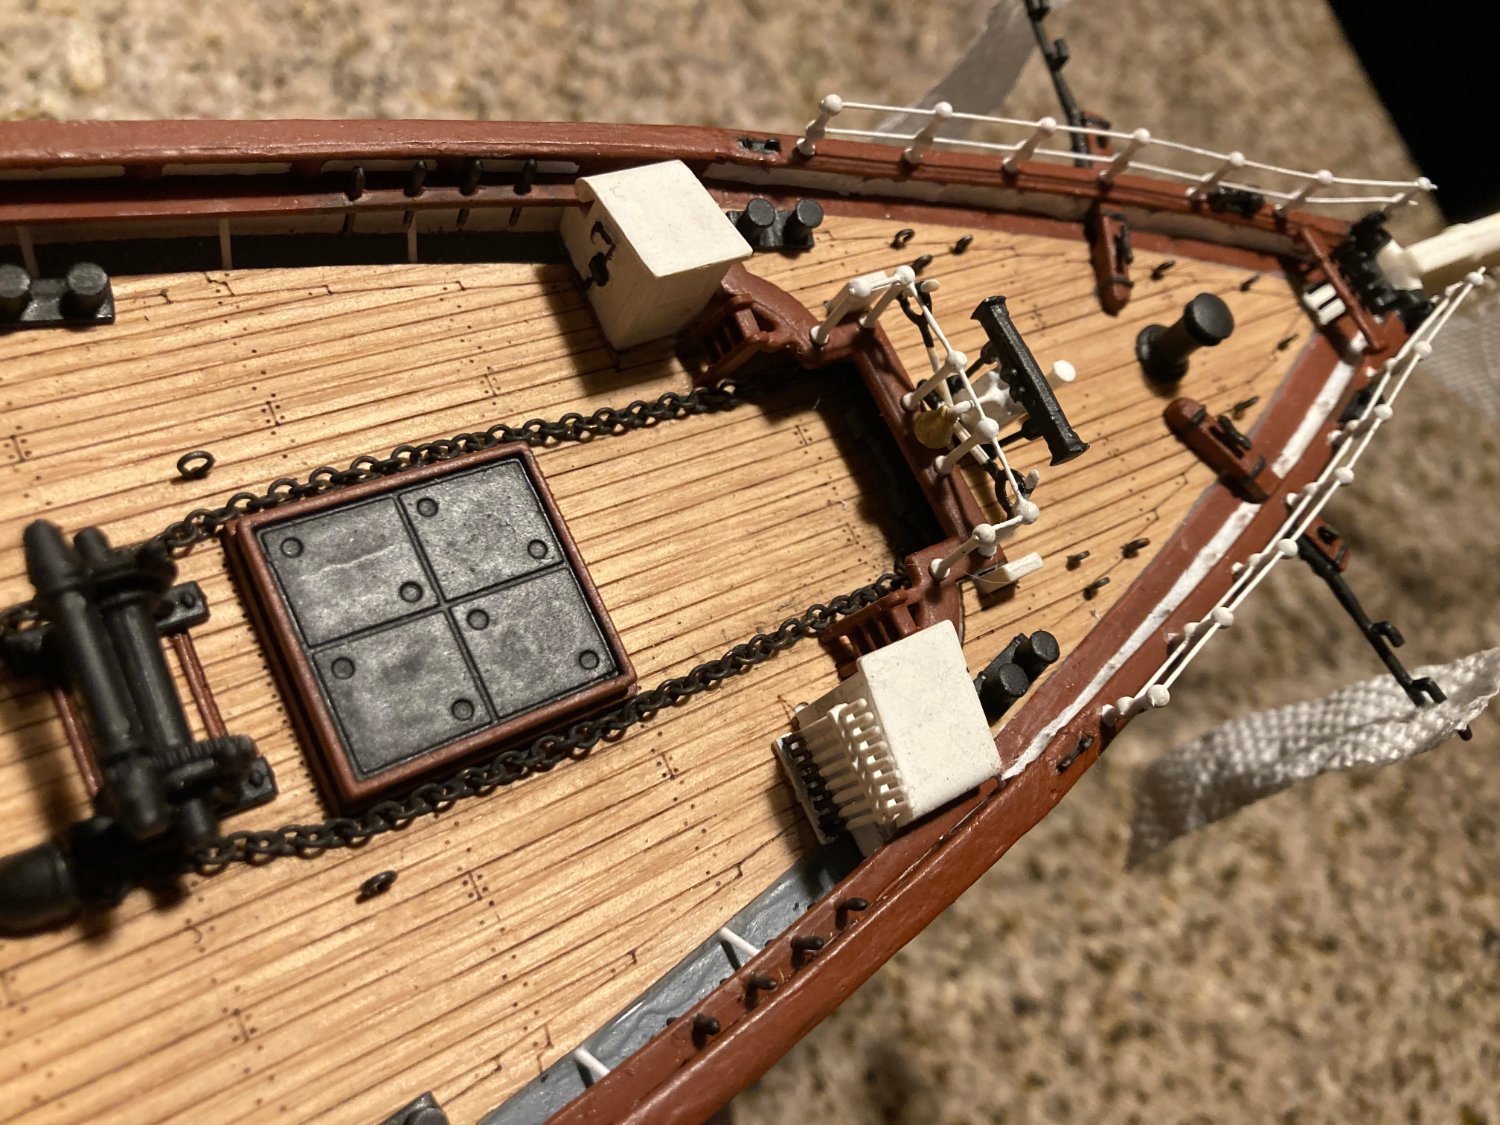
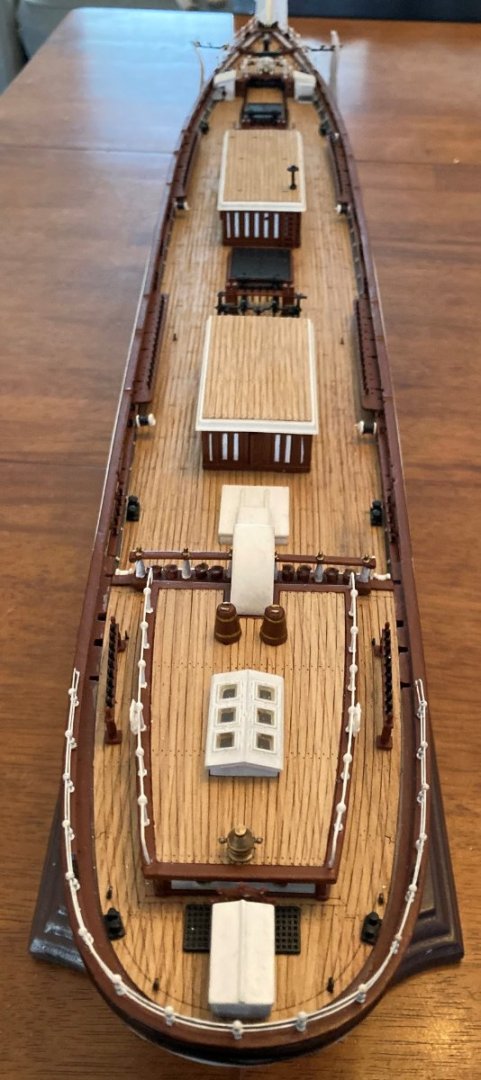
Finally getting the port pin rails attached. The boats and a few more items and the ship without rigging will be complete.
- 481 replies
-
- 3
-
-
- Cutty Sark
- Revell
- (and 2 more)
-
The lower deadeyes on the Cutty Sark pin rails are against the bulwark if placed correctly. That makes them very hard to work with. Also, the 2.5 mm ones look almost impossible to work with to me. I haven't worked with real deadeyes before, and I know others have, so I have that to look forward to.
- 444 replies
-
- 2
-
-
- Cutty Sark
- Revell
- (and 2 more)
-
I was told the name poop deck comes from the idea that in old times, statues of saints were placed on that deck for good luck. The statues were called pupae or something similar, I am not sure of this word. But that word comes from pupil because your reflection in someone's pupil looks like a statue or pupae. The statue deck became the poop deck. So a cabin on the poop deck is a poop cabin to those in the know. Of course, it is also the Liverpool cabin on the Cutty Sark.
- 481 replies
-
- 1
-
-
- Cutty Sark
- Revell
- (and 2 more)
-
Thanks, I am not that knowledgeable on ships as you can tell.
- 481 replies
-
- 2
-
-
- Cutty Sark
- Revell
- (and 2 more)
-
I'll see if I can get more and mail it to you. I emailed him asking if he will have more. I just bought 10 ft. for you. $24.51 USD How do I get it to you? I sent you a message.
- 481 replies
-
- 2
-
-

-
- Cutty Sark
- Revell
- (and 2 more)
-
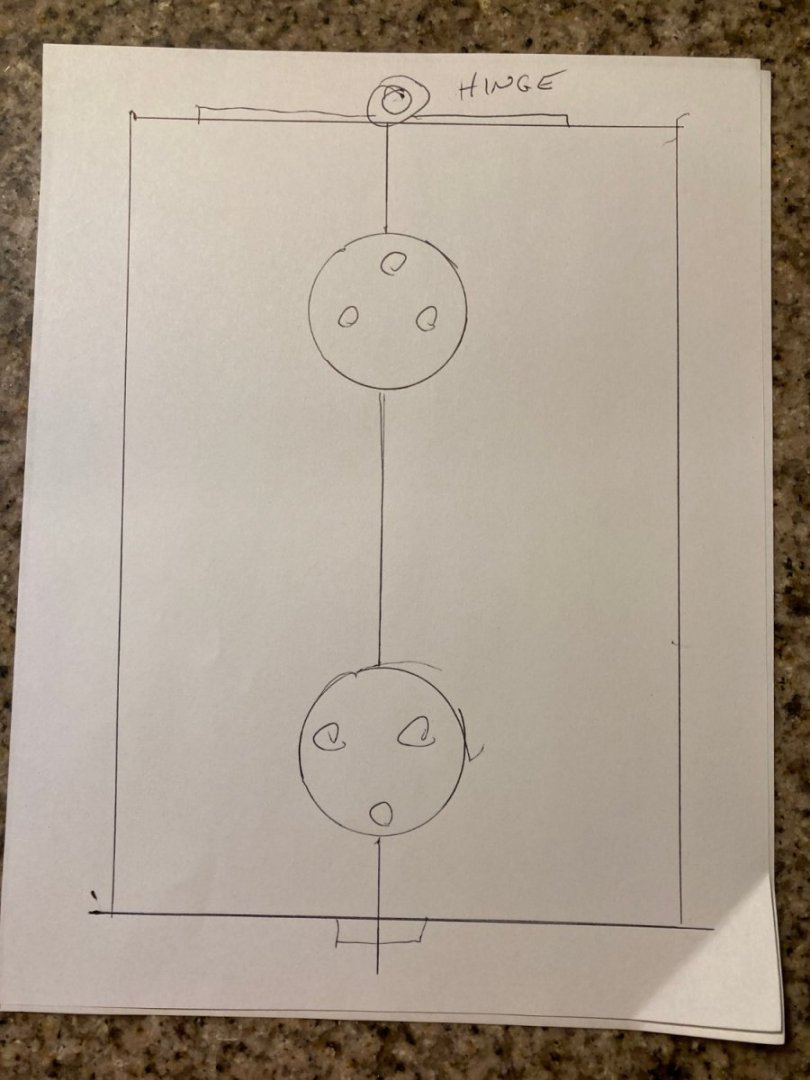
I've thought about making a fixture or jig for reeving deadeyes off the ship like this. It is two pieces of plastic or wood that holds the deadeyes the proper space apart during reeving. You could hold it in the third hand clamps. You can make one for any size deadeye. Just drill out the proper size holes, the proper distance apart, then saw it in two with a razor saw. When done reeving, you open it up and take out the finished deadeyes. You would need to be sure when closed the jig holds the deadeyes securely, so they don't move. That would happen if you drilled the hole so the deadeye fit snug, then when you saw them apart the two halves would fit together closer than before the cut. When finished, you then strop the lower deadeye with the method of your choice.
- 481 replies
-
- 2
-
-
- Cutty Sark
- Revell
- (and 2 more)
-
So nice to hear from you, Bill. Your Victory is very inspiring. I find everyone's build enjoyable. I like to see the different interpretations each modeler has. We aren't in any kind of competition, I think we share the hobby and the fun and the exchange of ideas. I will be 76 on Saturday. I am not sure if I can handle rigging at my age, finger dexterity and frustration you know.
- 481 replies
-
- 1
-
-
- Cutty Sark
- Revell
- (and 2 more)
-
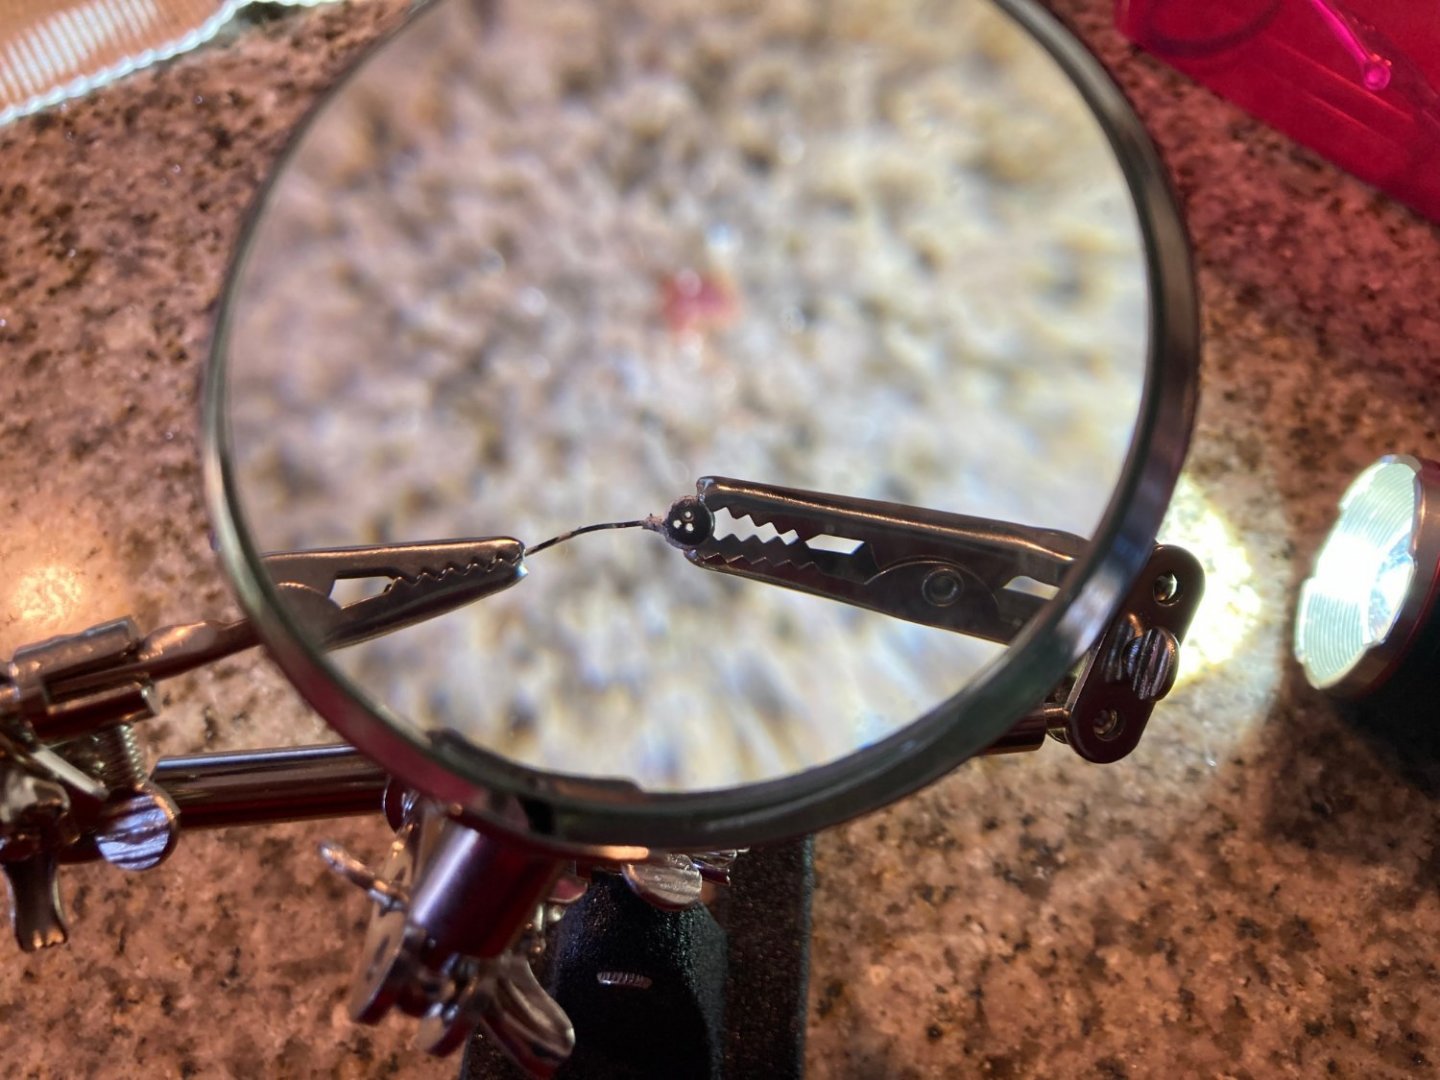
The alligator clips seem too strong for them, you are right. I think MIcro Mark may have something better.
- 481 replies
-
- 2
-
-
- Cutty Sark
- Revell
- (and 2 more)
-
I got the chain on Ebay in the HO model train auction place. https://www.ebay.com/itm/185281815105?ssPageName=STRK%3AMEBIDX%3AIT&_trksid=p2060353.m1438.l2649 He is out now, but more may show up soon. You can contact the seller. No I am not volunteering. Isn't there some software that recognizes words that could do it?
- 481 replies
-
- 1
-
-
- Cutty Sark
- Revell
- (and 2 more)
-
That is much like Revell's forecastle. Do you have the whole ship plans?
- 481 replies
-
- 1
-
-
- Cutty Sark
- Revell
- (and 2 more)
-
I may try something like this to reeve (is that the right word?) deadeyes off the ship. I'ts a third hand from micro mark.
- 481 replies
-
- 1
-
-
- Cutty Sark
- Revell
- (and 2 more)
-
I am presently working on Revell's Cutty Sark which looks like child's play next to your Victory. I love looking at your pictures of your model.
-
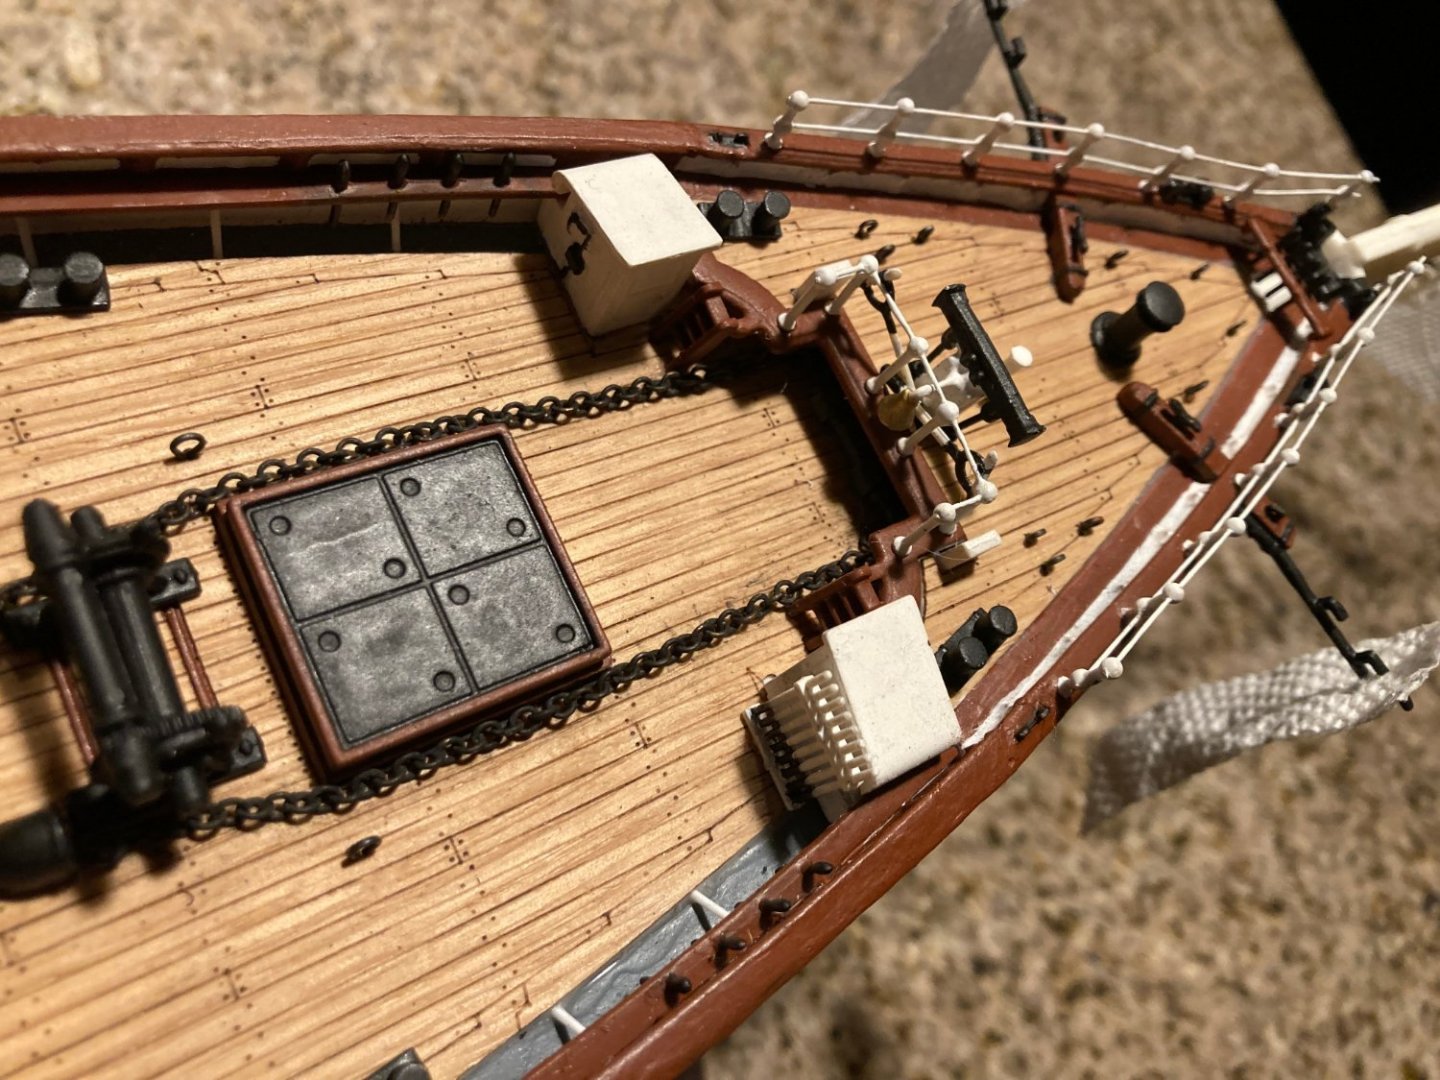
Wouldn't it be great if we had the date of these pictures and where they were taken? What is the large rope along the lower area of the bulwark for? It is hanging by ropes tied to the rail, I think. It might be some kind of protection against things crashing into the stanchions and such during rough seas. I read in Lubbuck's book of several times when the deck as completely underwater and all that could be seen from above were the masts sticking out of the foam. Items not tied down must have crashed into the firm stationary parts of the deck. I notice from reading other logs of the recent past that we seem to be discussing the same issues over again. I'd like to see a compilation of all the discussions sorted by topic from all the different logs, such as all the forecastle discussions. One item talked about more than once was the anchor chain. The chain had to be laying on the deck from the windlass to the pipes going down to the chin locker when the hatch was open for loading and unloading I'd think.
- 481 replies
-
- 1
-
-
- Cutty Sark
- Revell
- (and 2 more)