HOLIDAY DONATION DRIVE - SUPPORT MSW - DO YOUR PART TO KEEP THIS GREAT FORUM GOING! (Only 13 donations so far - C'mon guys!)
×

PvG Aussie
-
Posts
402 -
Joined
-
Last visited
Content Type
Profiles
Forums
Gallery
Events
Everything posted by PvG Aussie
-
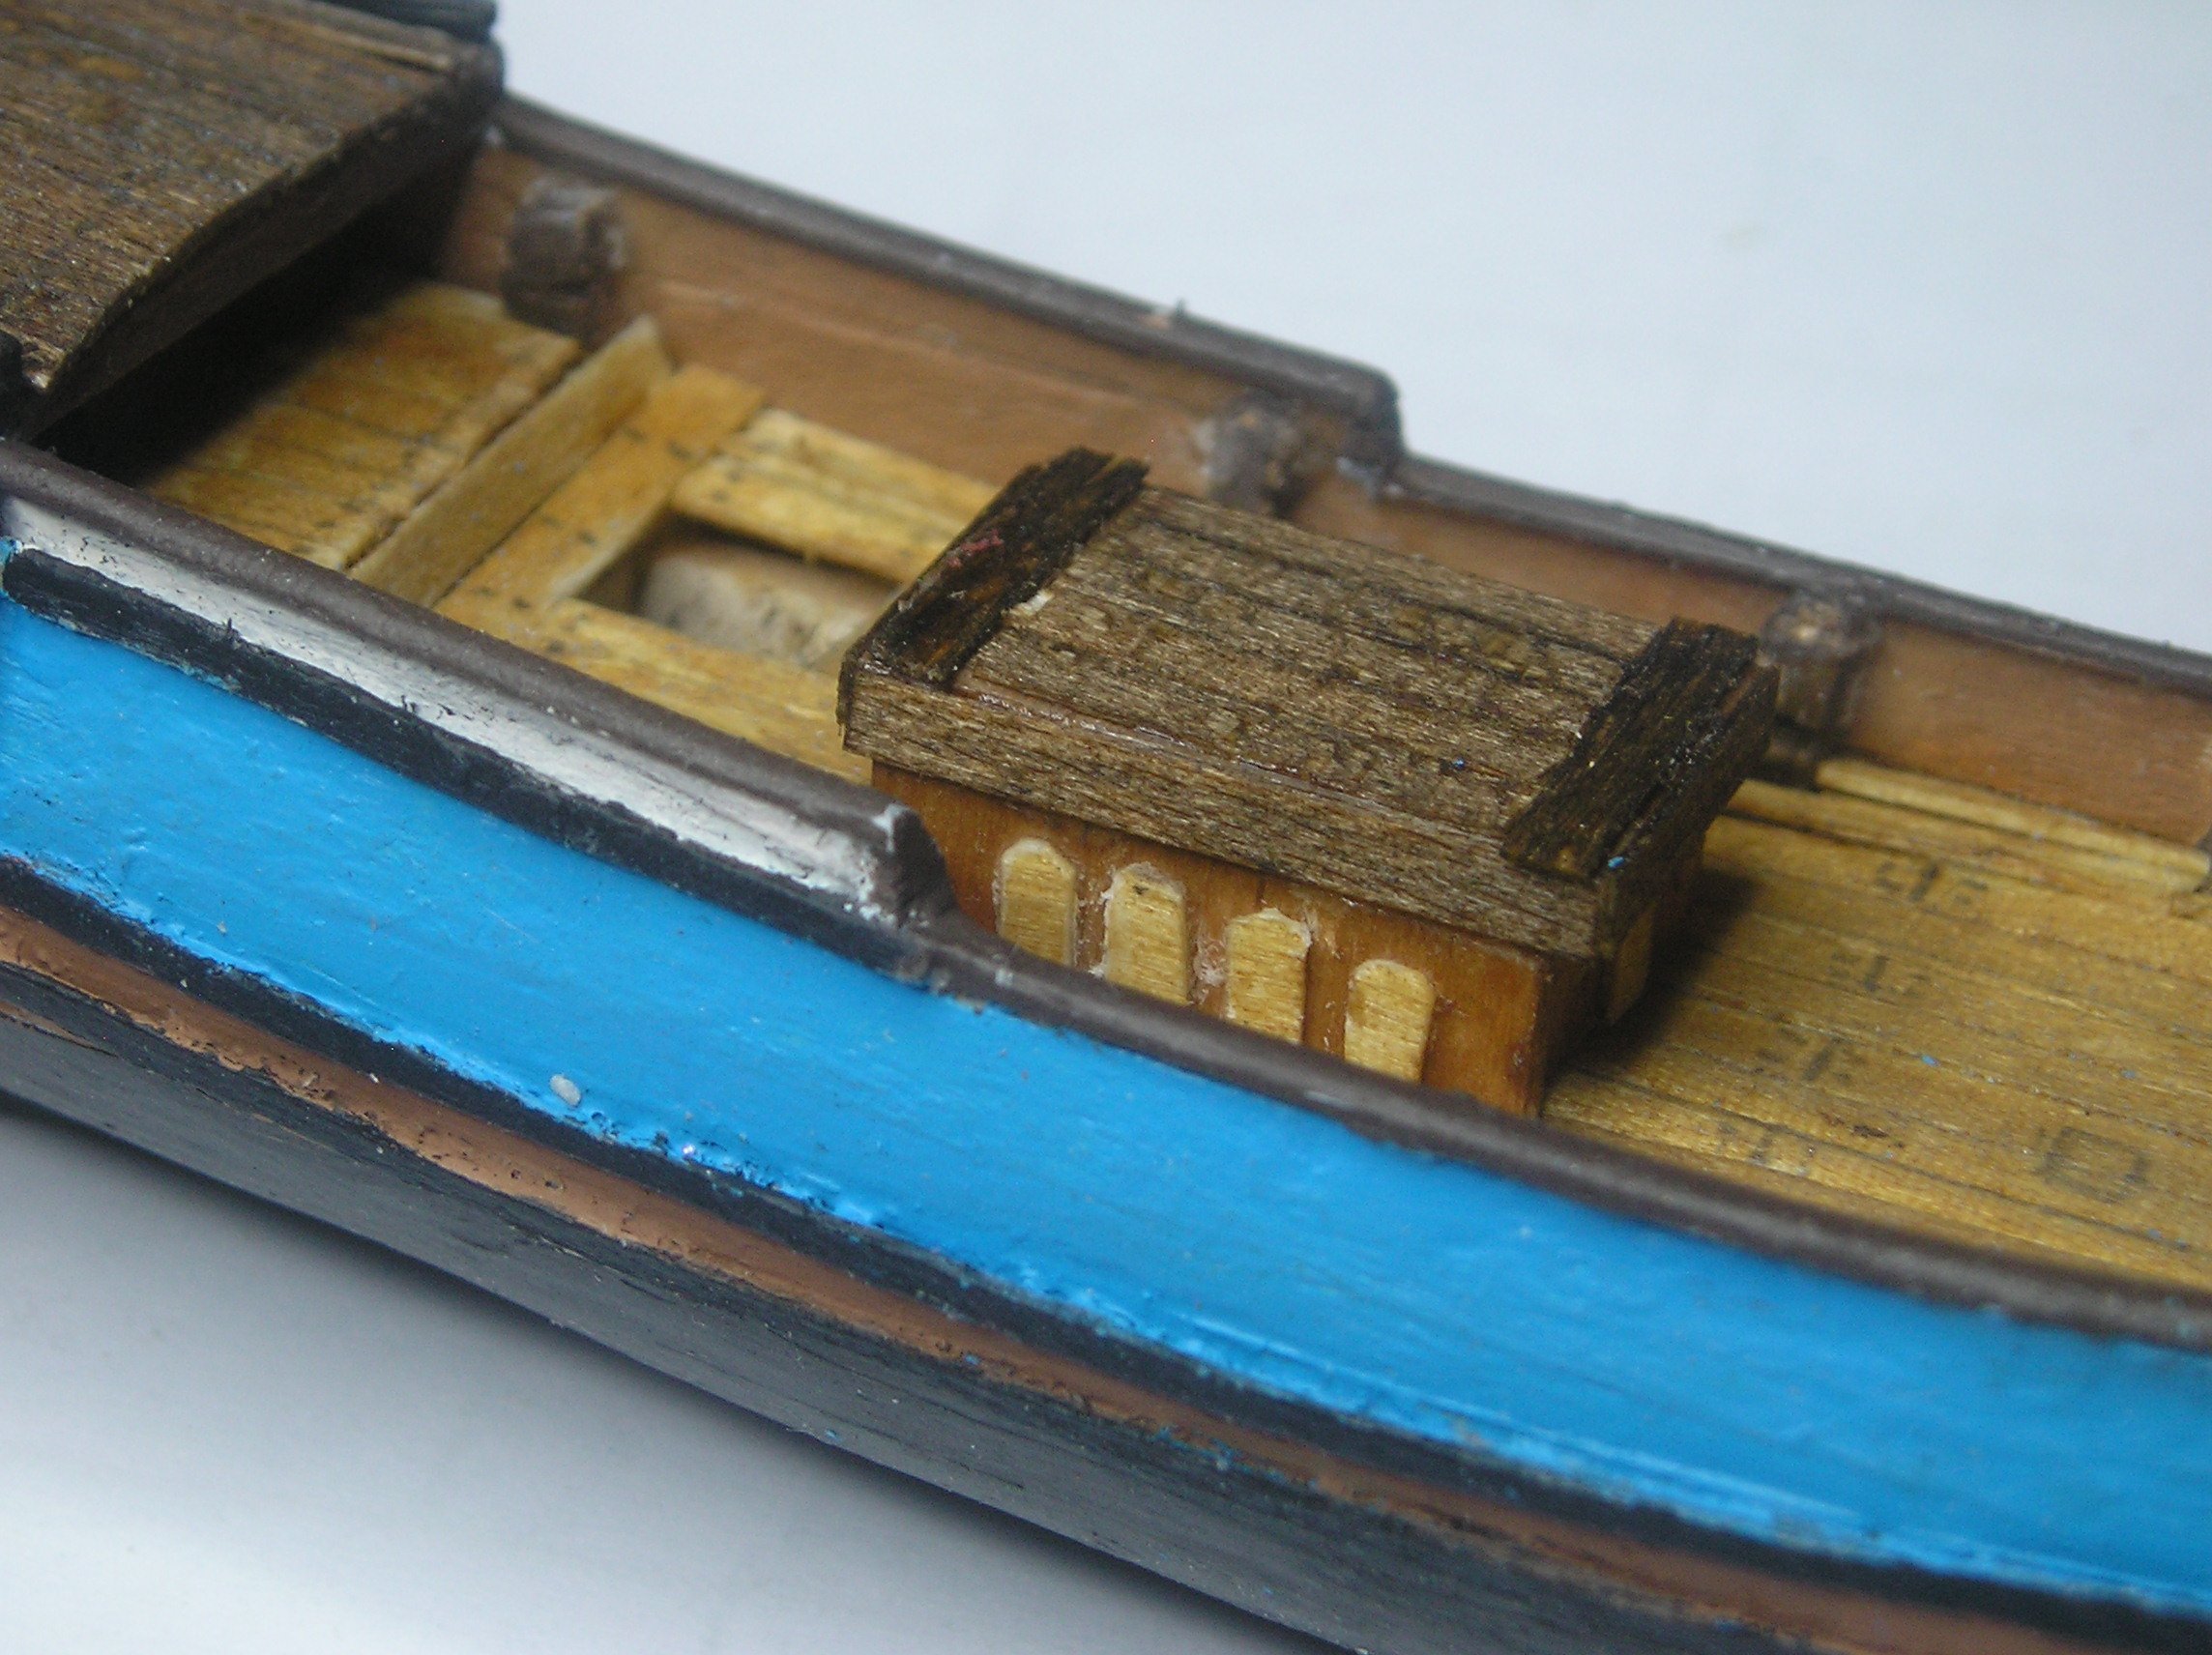
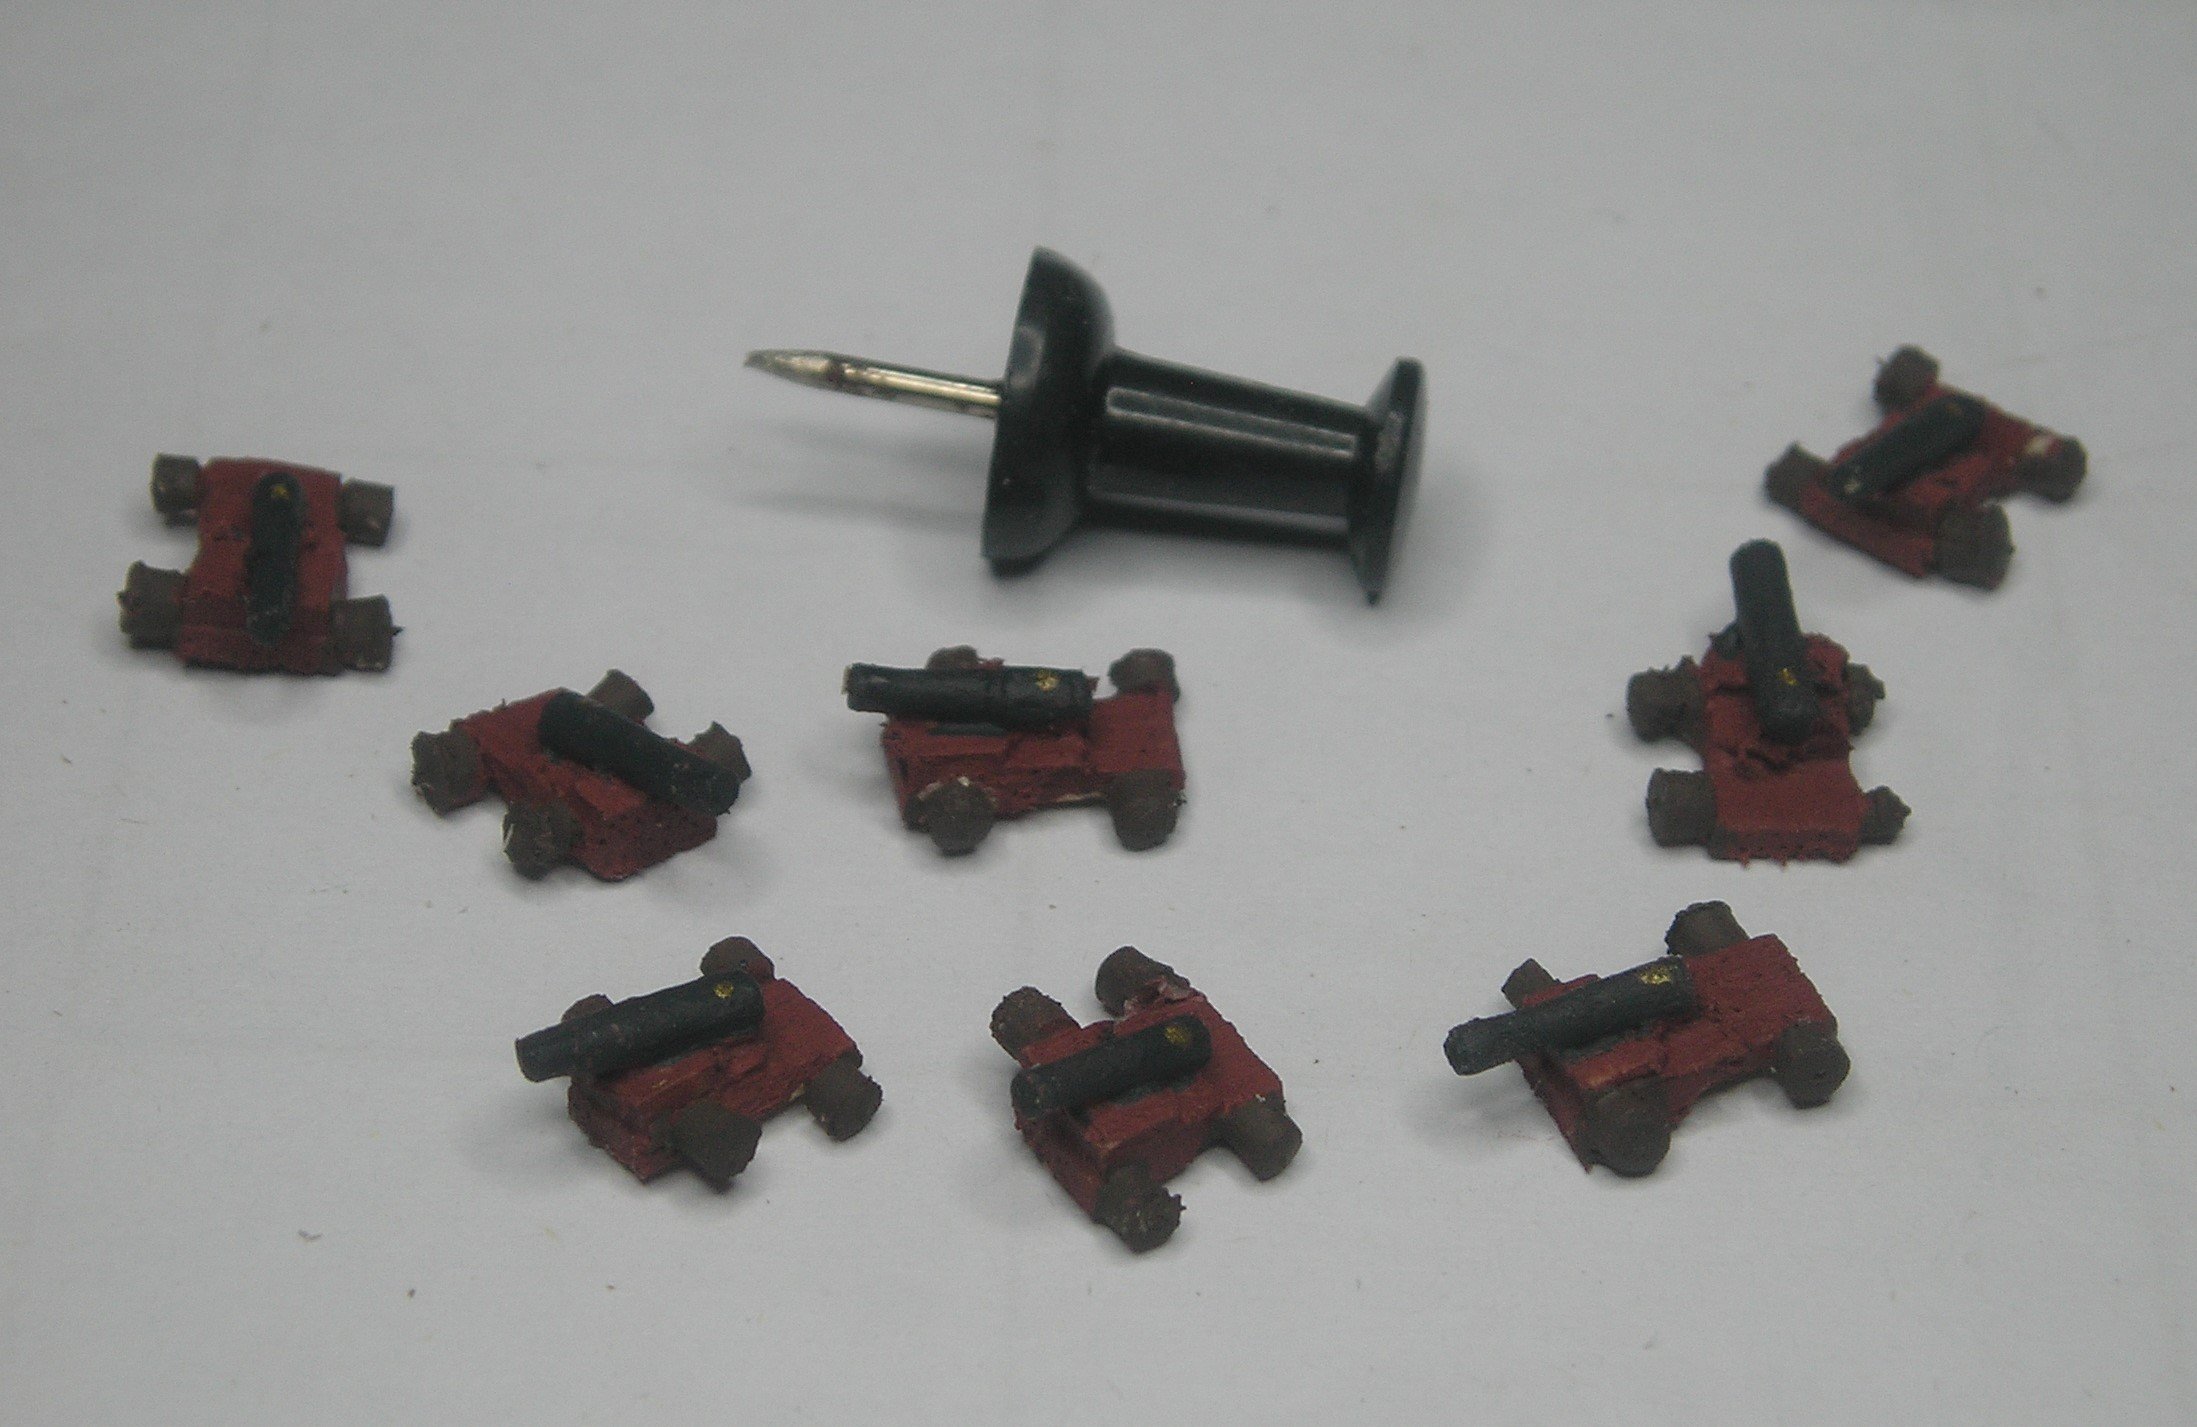
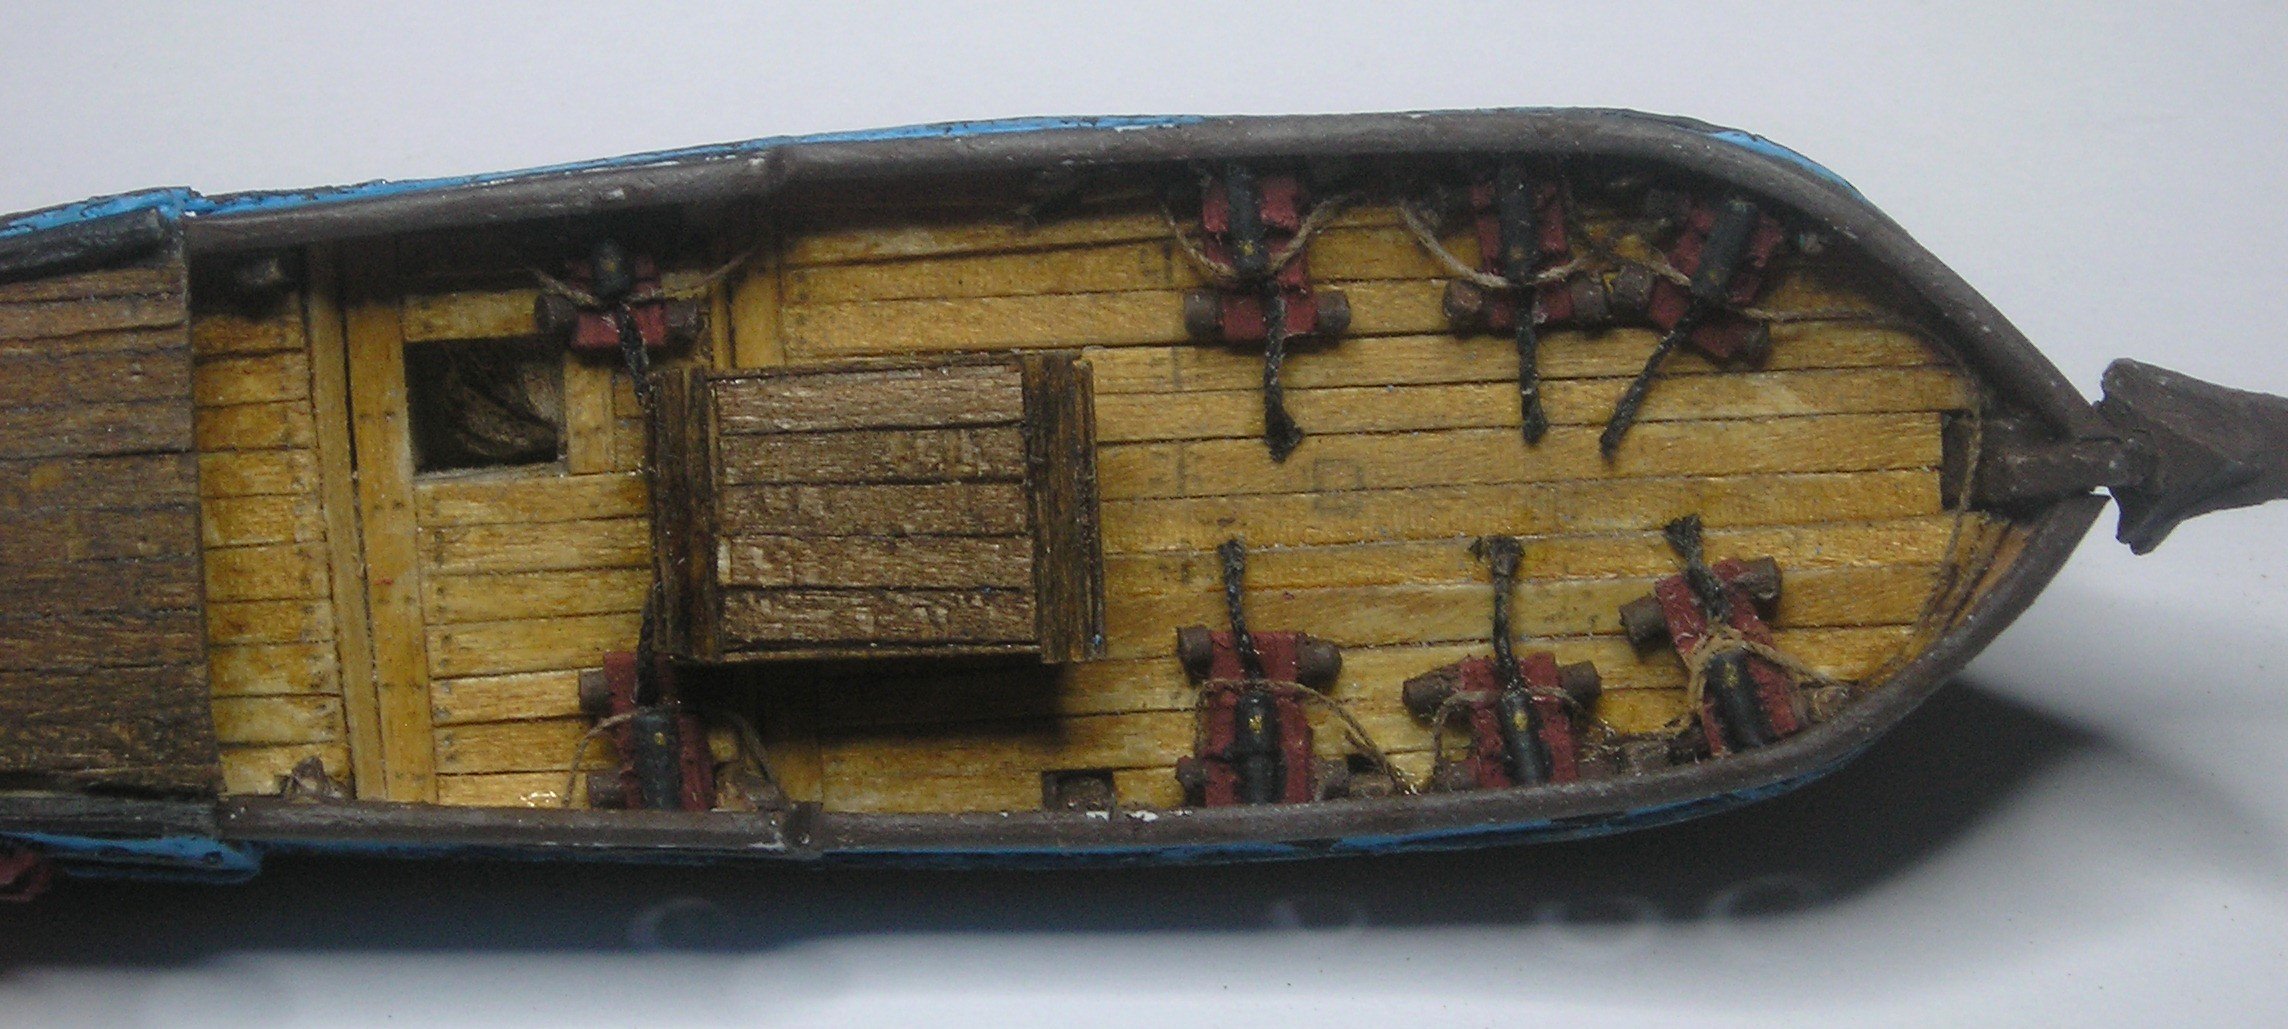
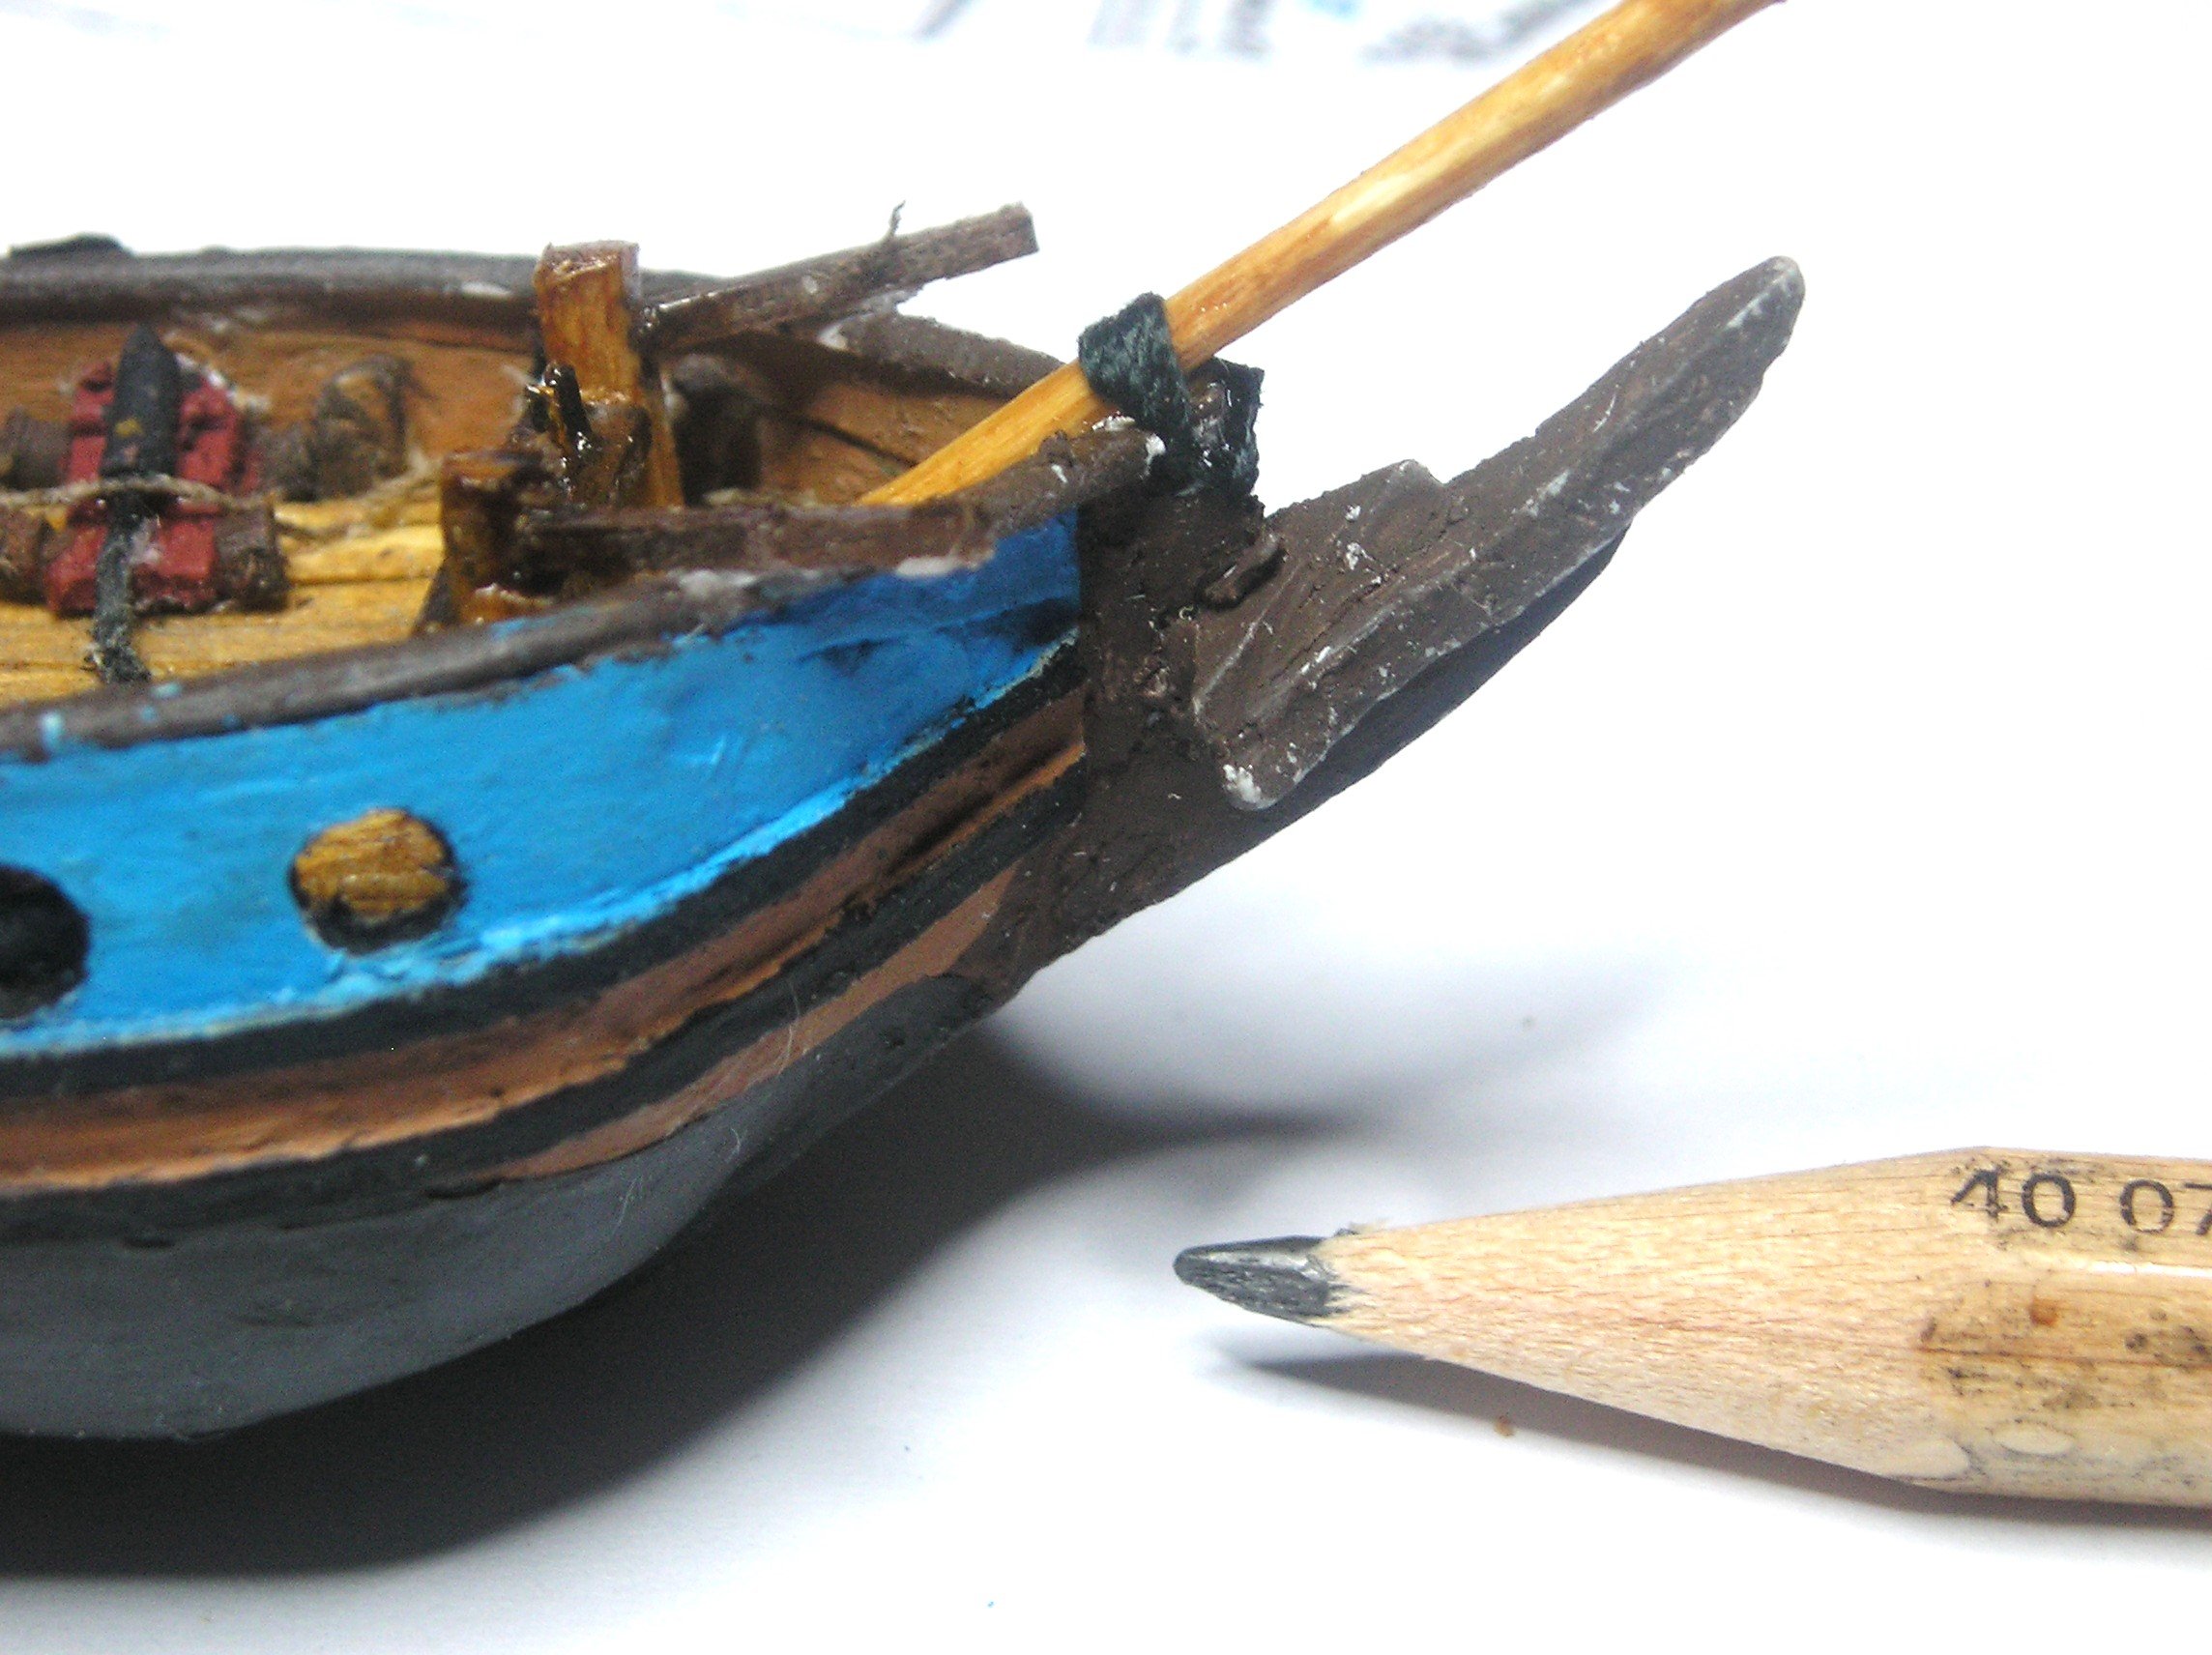
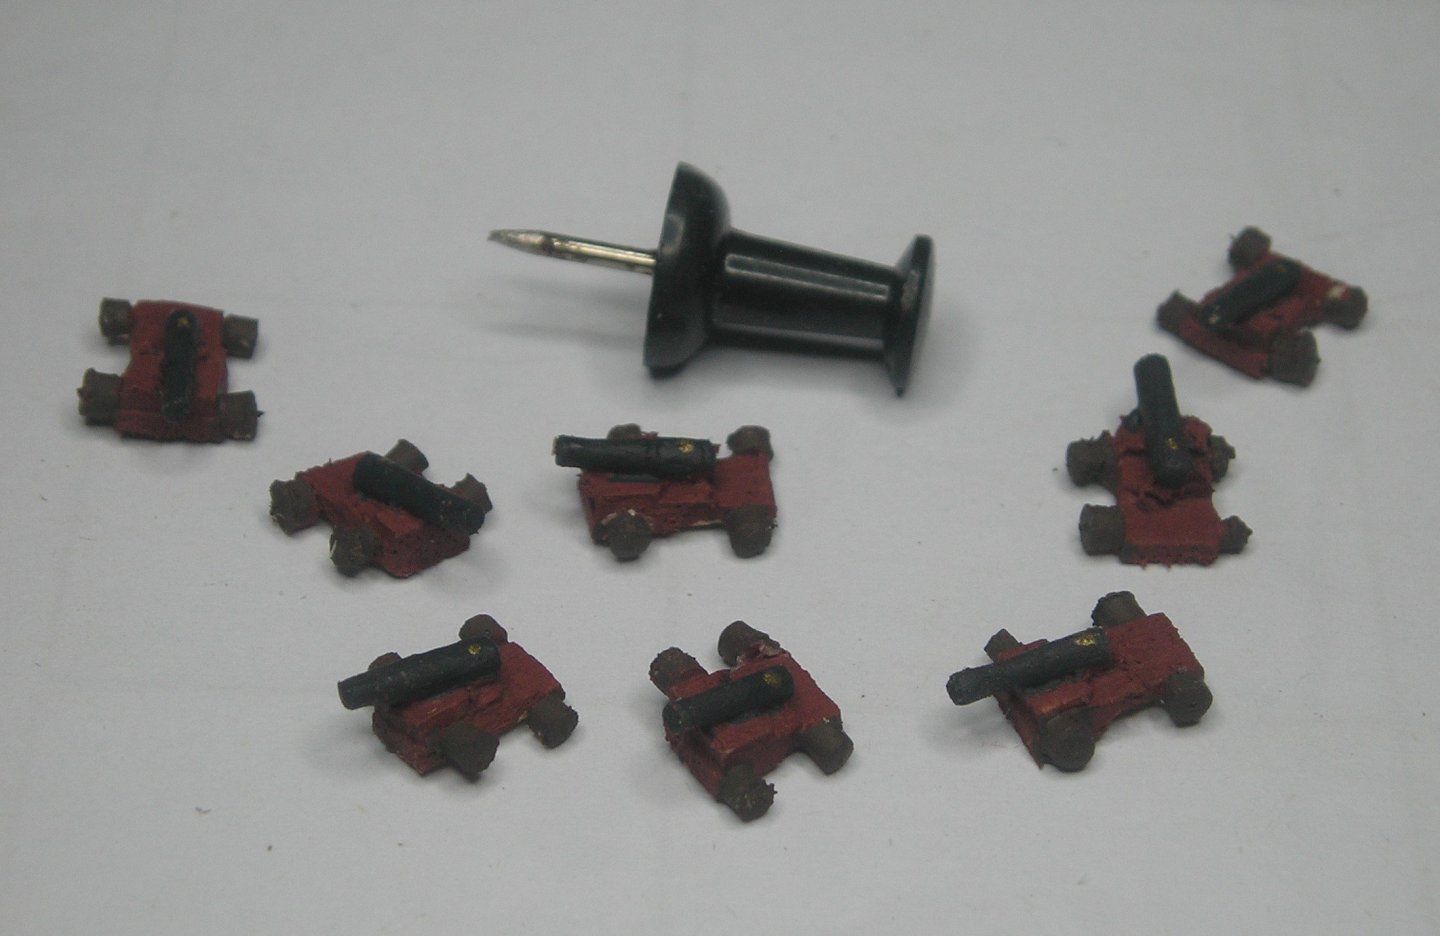
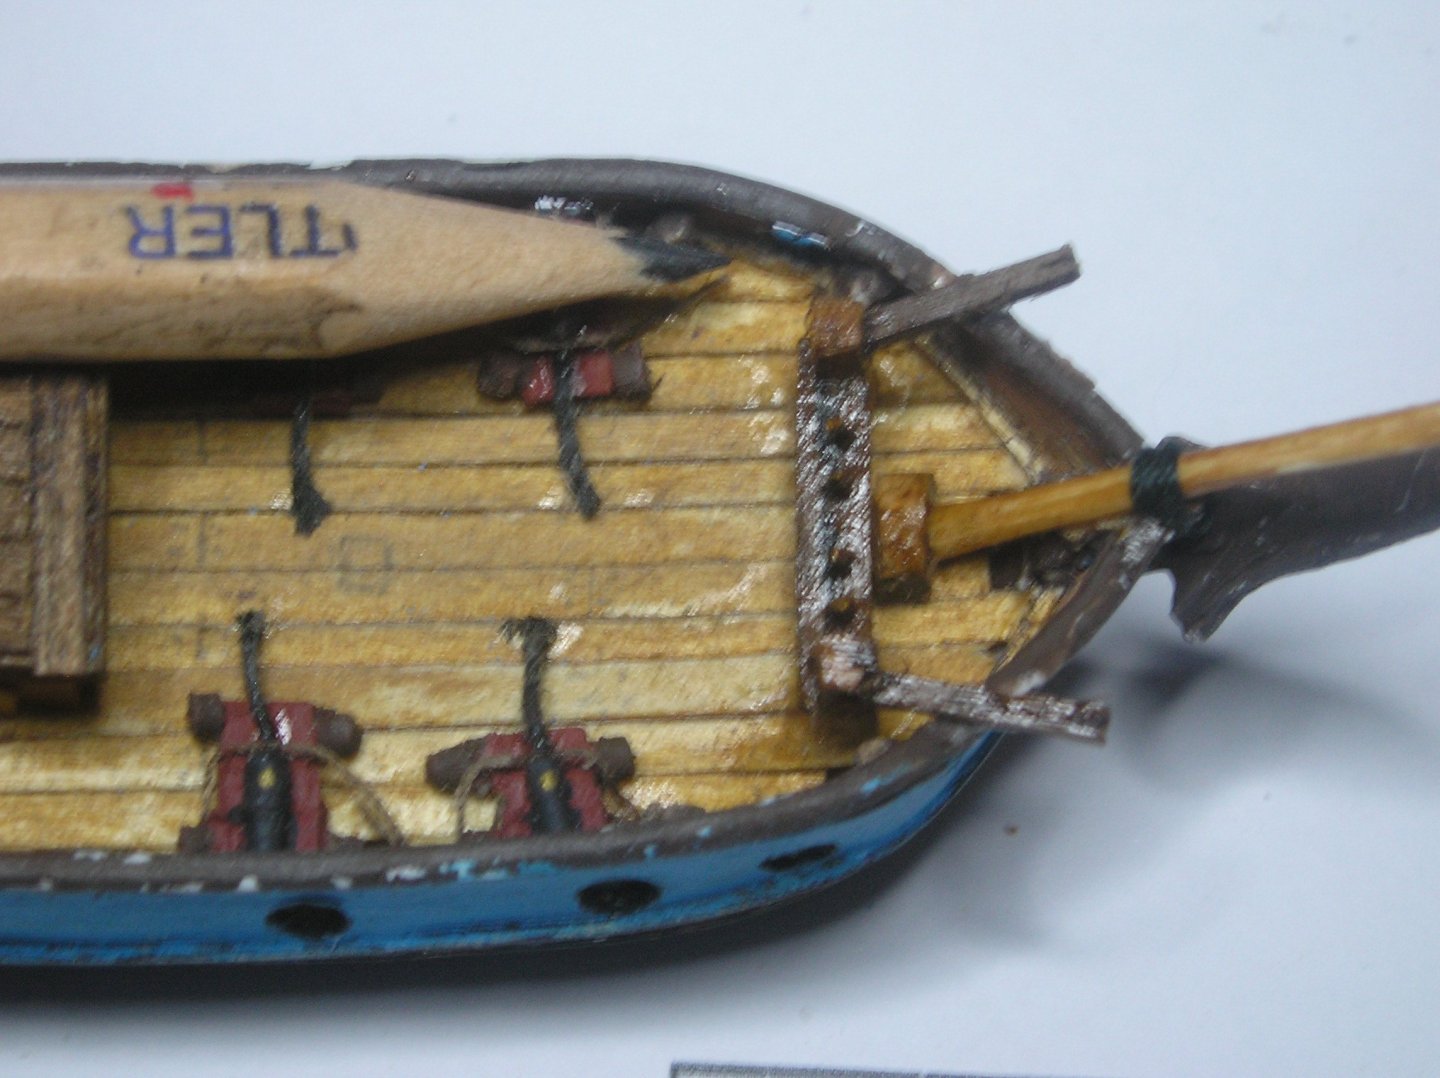
 Greetings all, 1/200 scale scratch build and I'm still going. Nothing has been impossible ... yet! 🤞 This weekend I made, painted and weather: the central cabin, eight tiny guns, even glued and secured them onto the deck, and after a day at the beach, I did some work on the bow, including a bowsprit and pin rack. (The stain is still wet.) Among other things, tomorrow I will do the capstan, fancy paintwork on the sides and more pin rails. Thanks for following and giving your comments. Much appreciated!


- 55 replies
-
- 8
-

-
- miniature
- Brandenburg State Yacht
- (and 1 more)
-
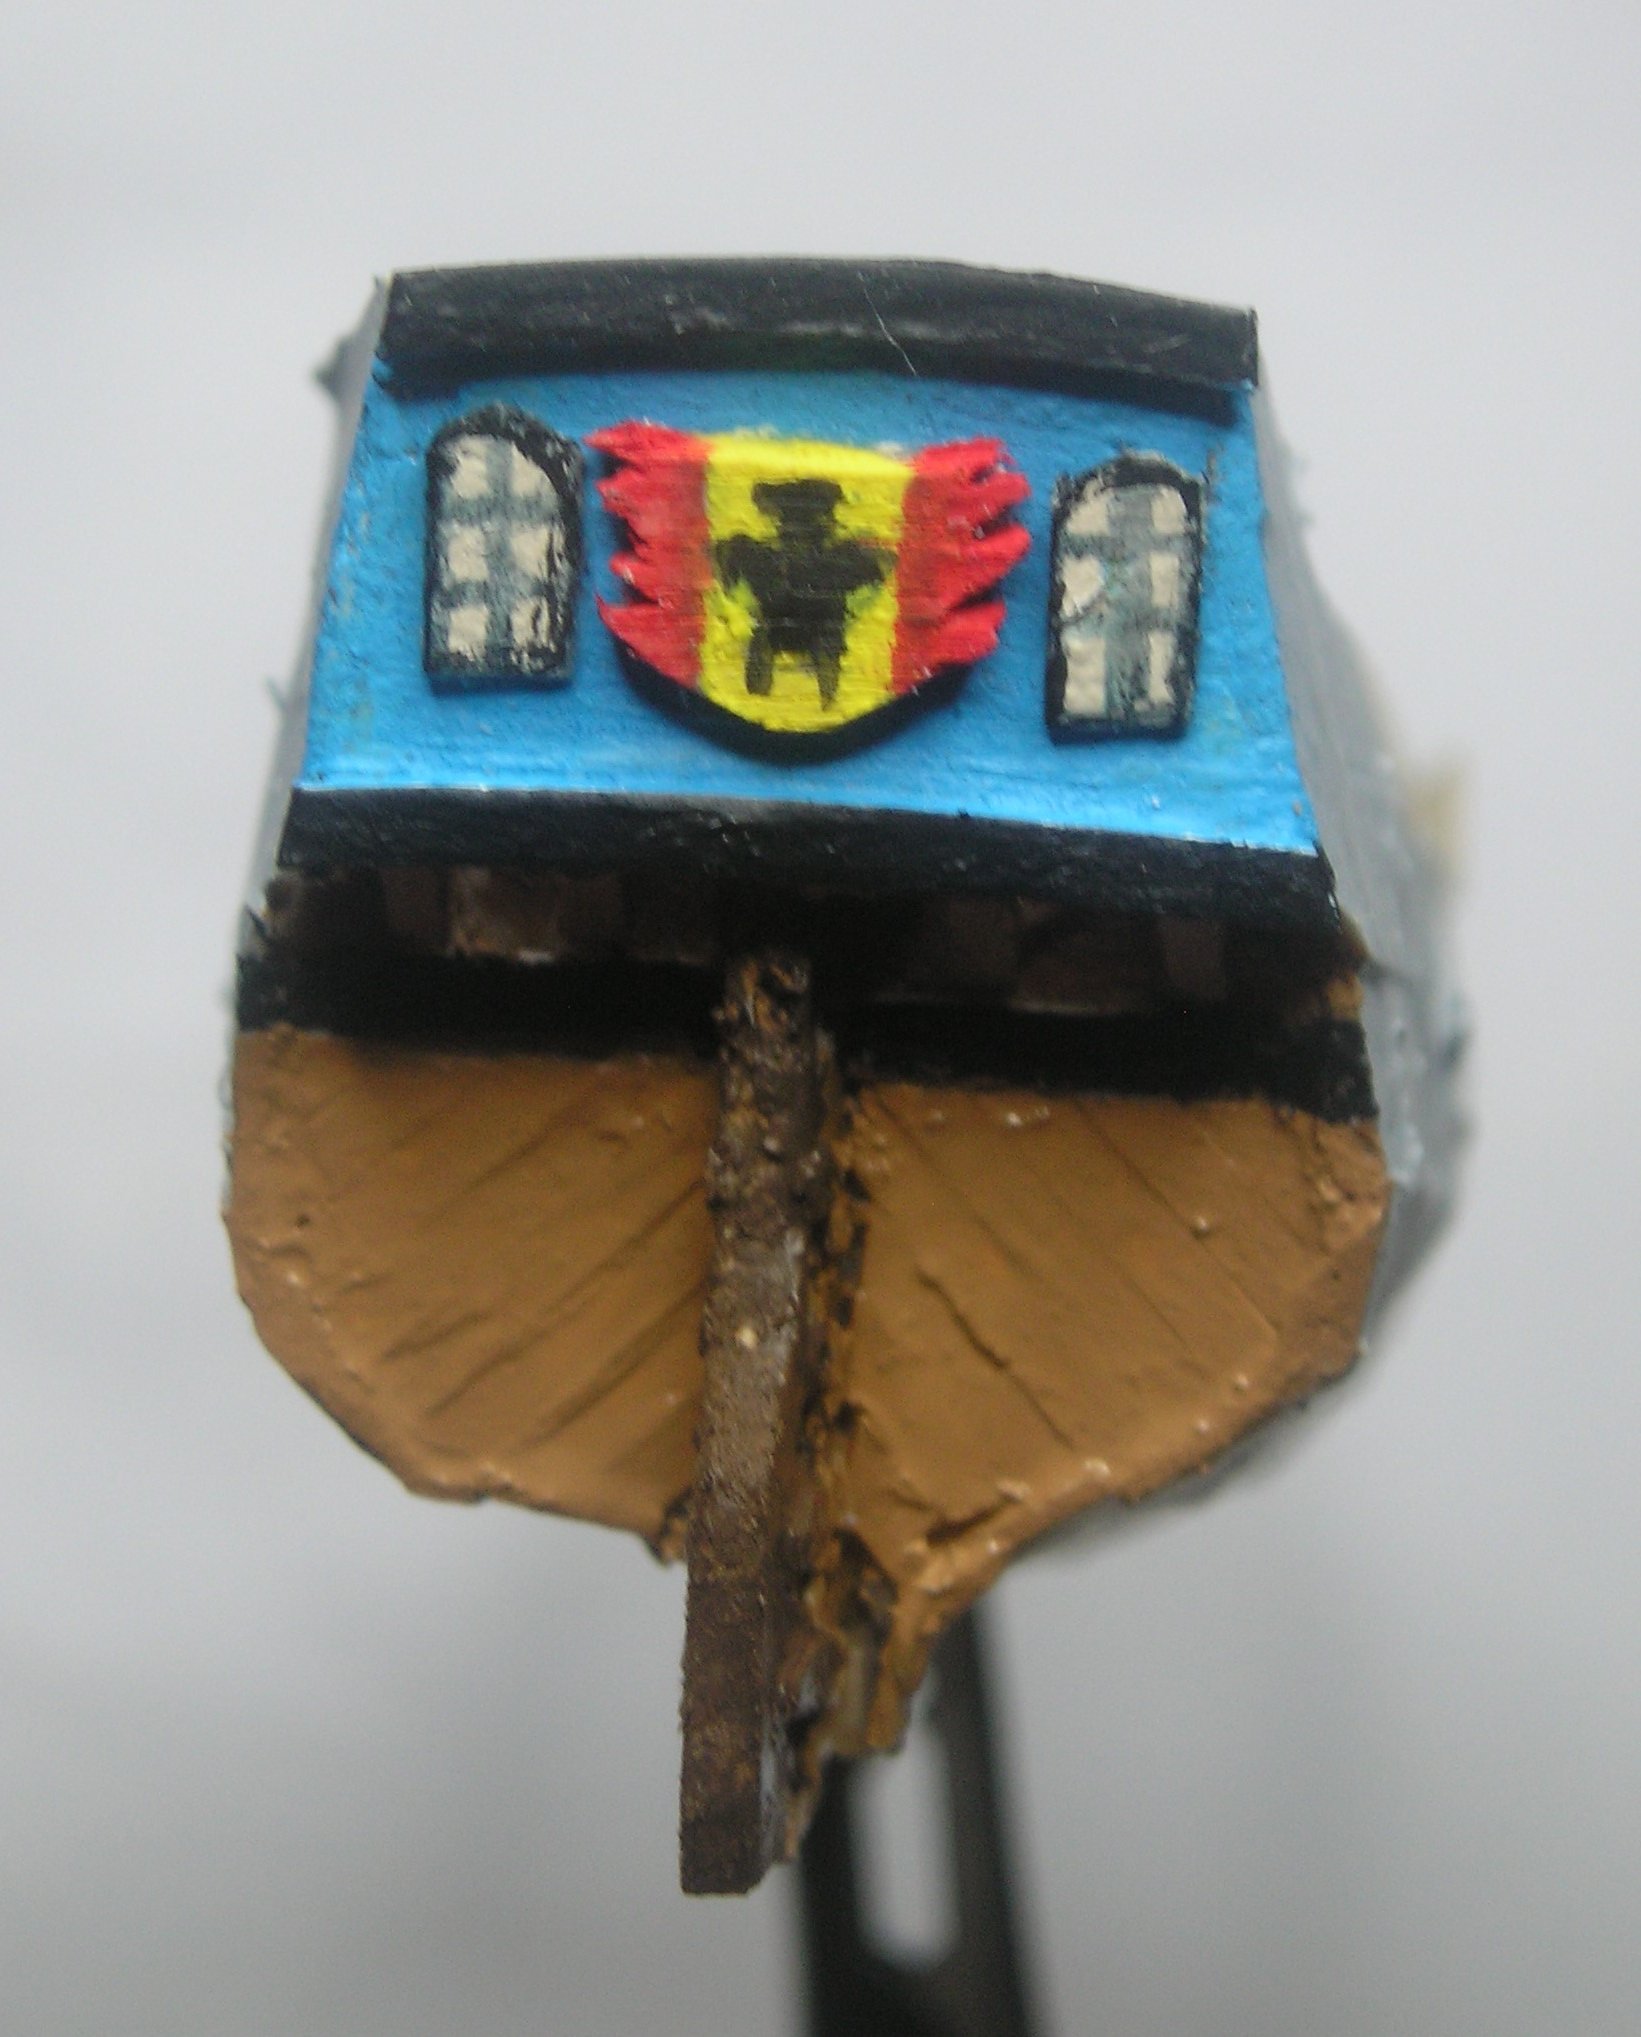
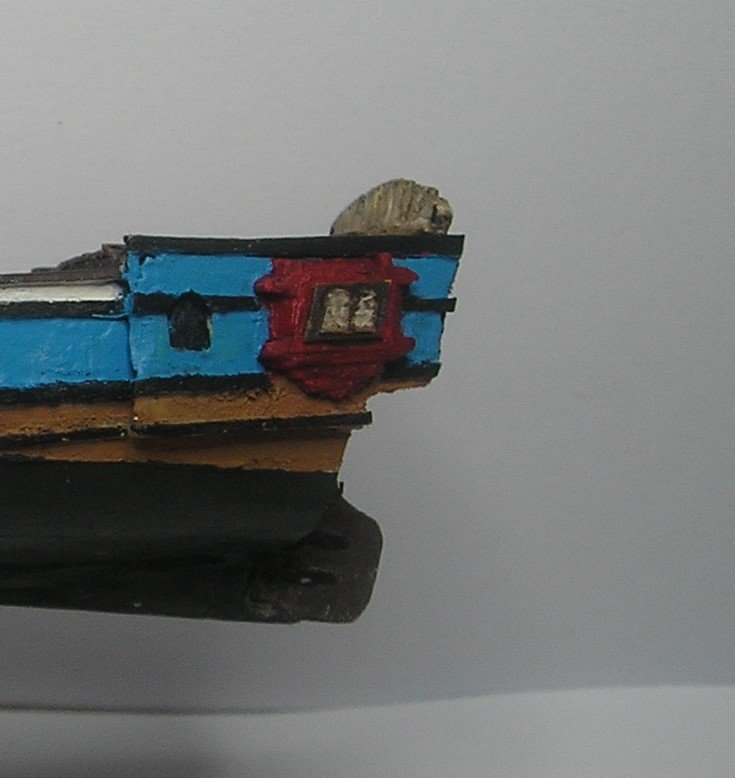
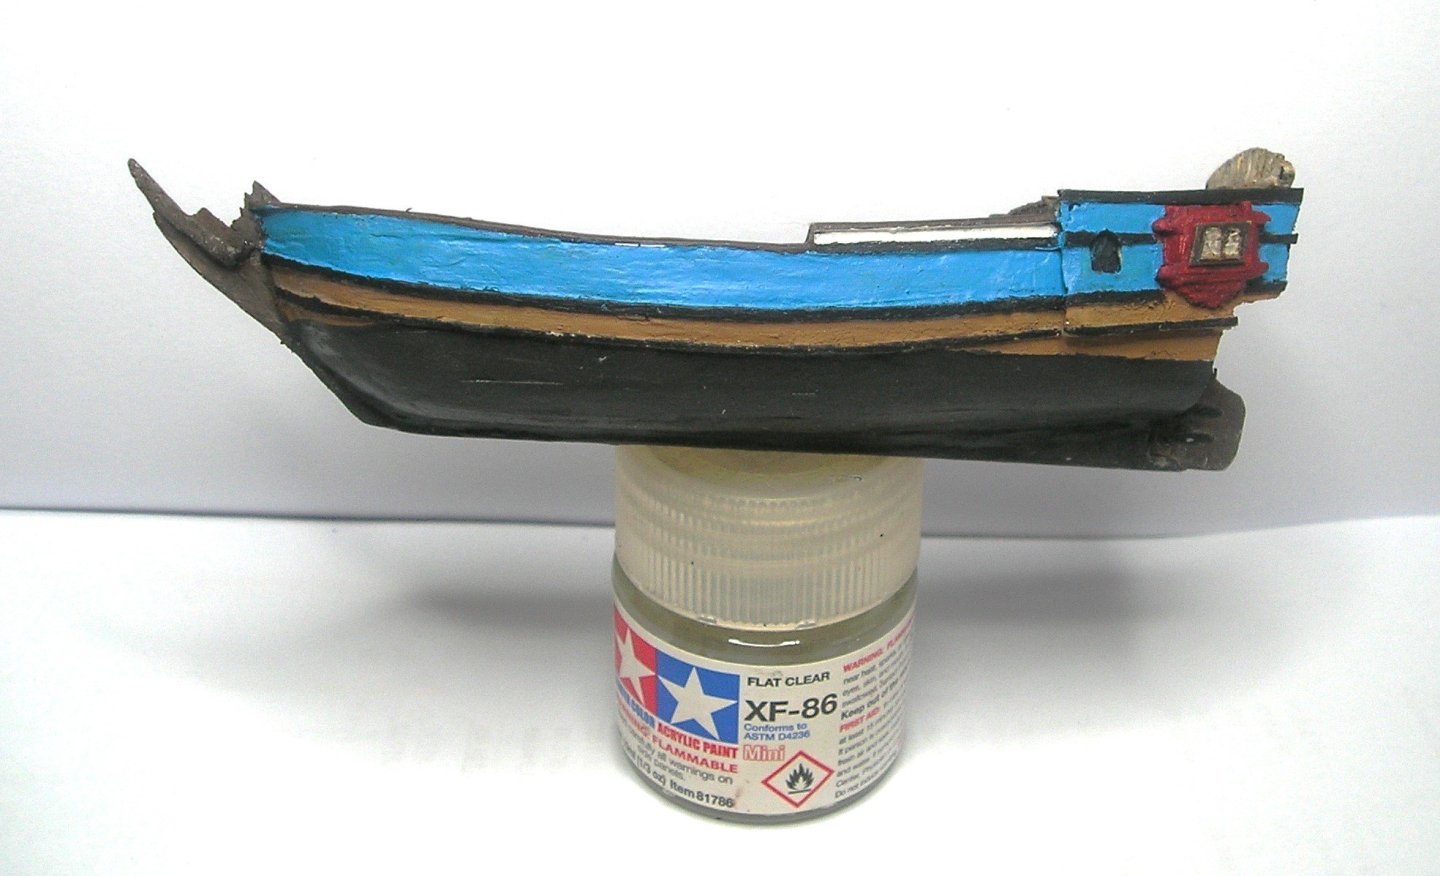
Two days later and progress has been made. It goes to show how support from you wonderful followers spurs me on. I worked on the cabin side windows. (No, they are not the ten commandments!) Added the wales on the side and the gunwales. This was a difficult task as things weren't adding up. 🤔 I worked out the waterline and then did the basic painting (minus the frilly bits which depend on the canon porthole locations). With the help of a few bull ants, I even 'nailed down' the decking. 😉🐜 I think the next job will be to add the items on the deck. Cheers,


- 55 replies
-
- 7
-
-
- miniature
- Brandenburg State Yacht
- (and 1 more)
-
@cotrecerf, thank you for the text of ship colours. I thought I would have to rely on my limited knowledge of the Dutch language to translate the German text, but I have been lucky enough to use modern technology to understand what is written. The text is most useful in colour choices for my ship. Cheers
- 55 replies
-
- 2
-
-
- miniature
- Brandenburg State Yacht
- (and 1 more)
-
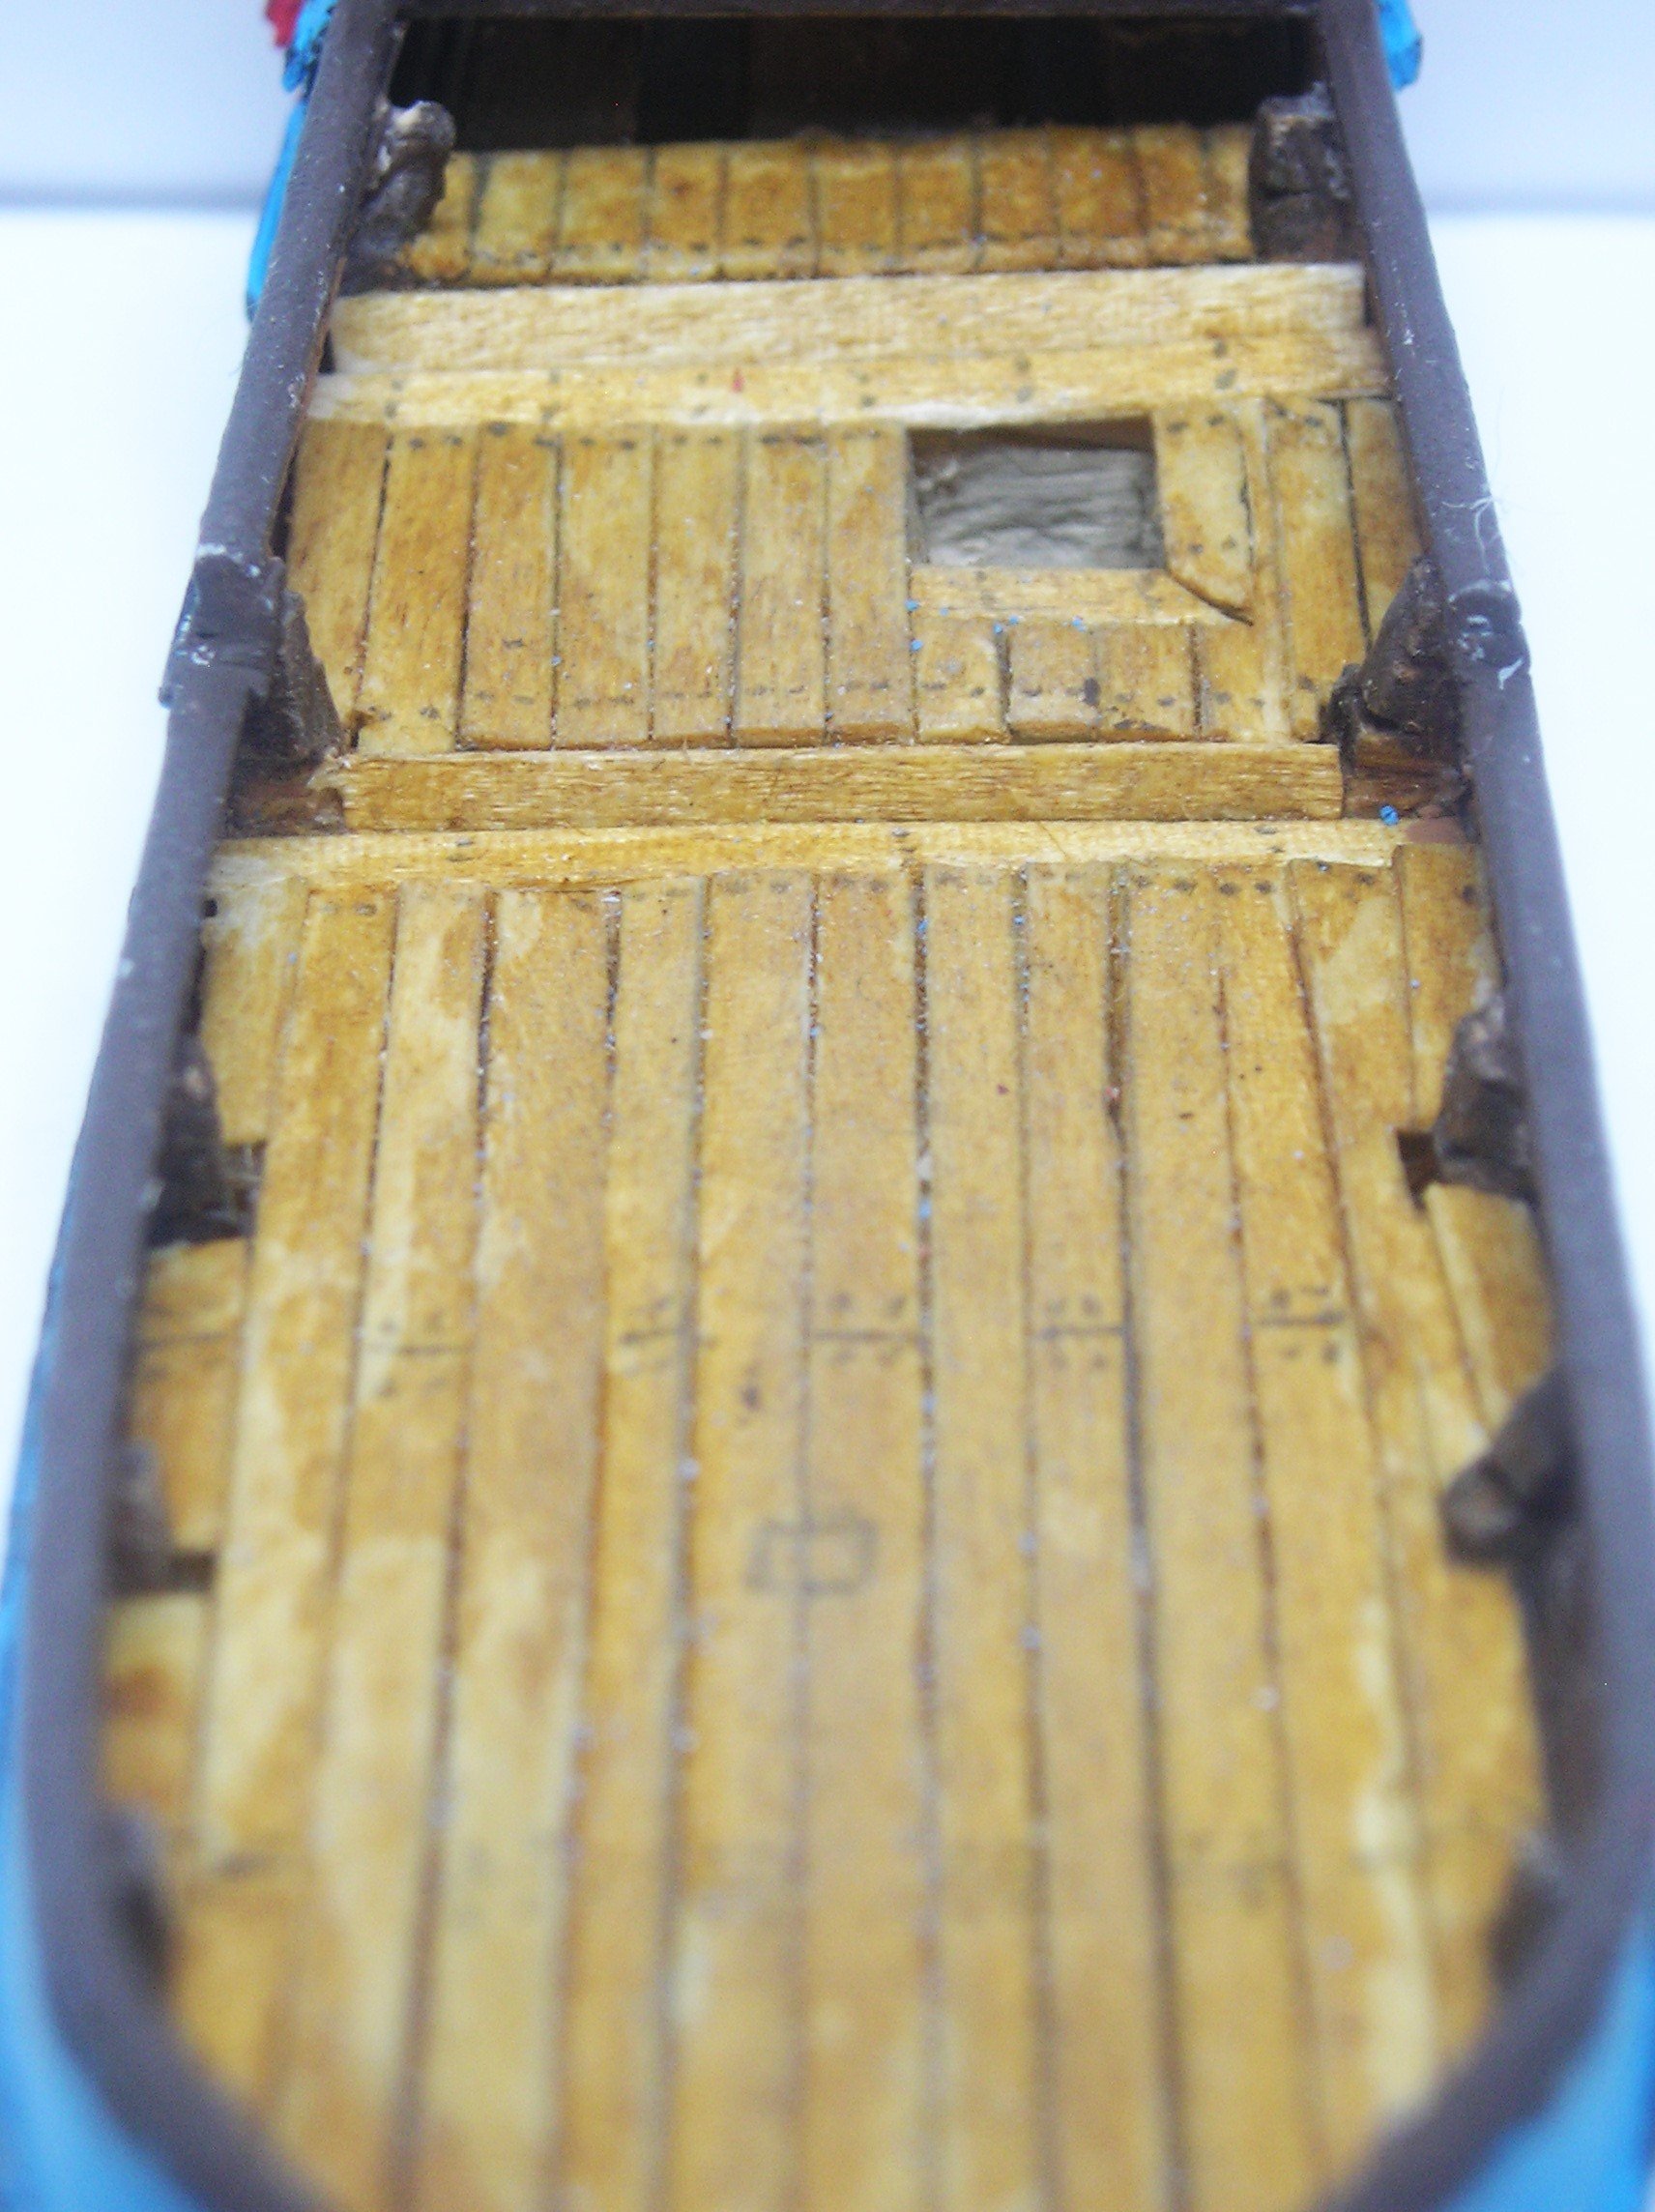
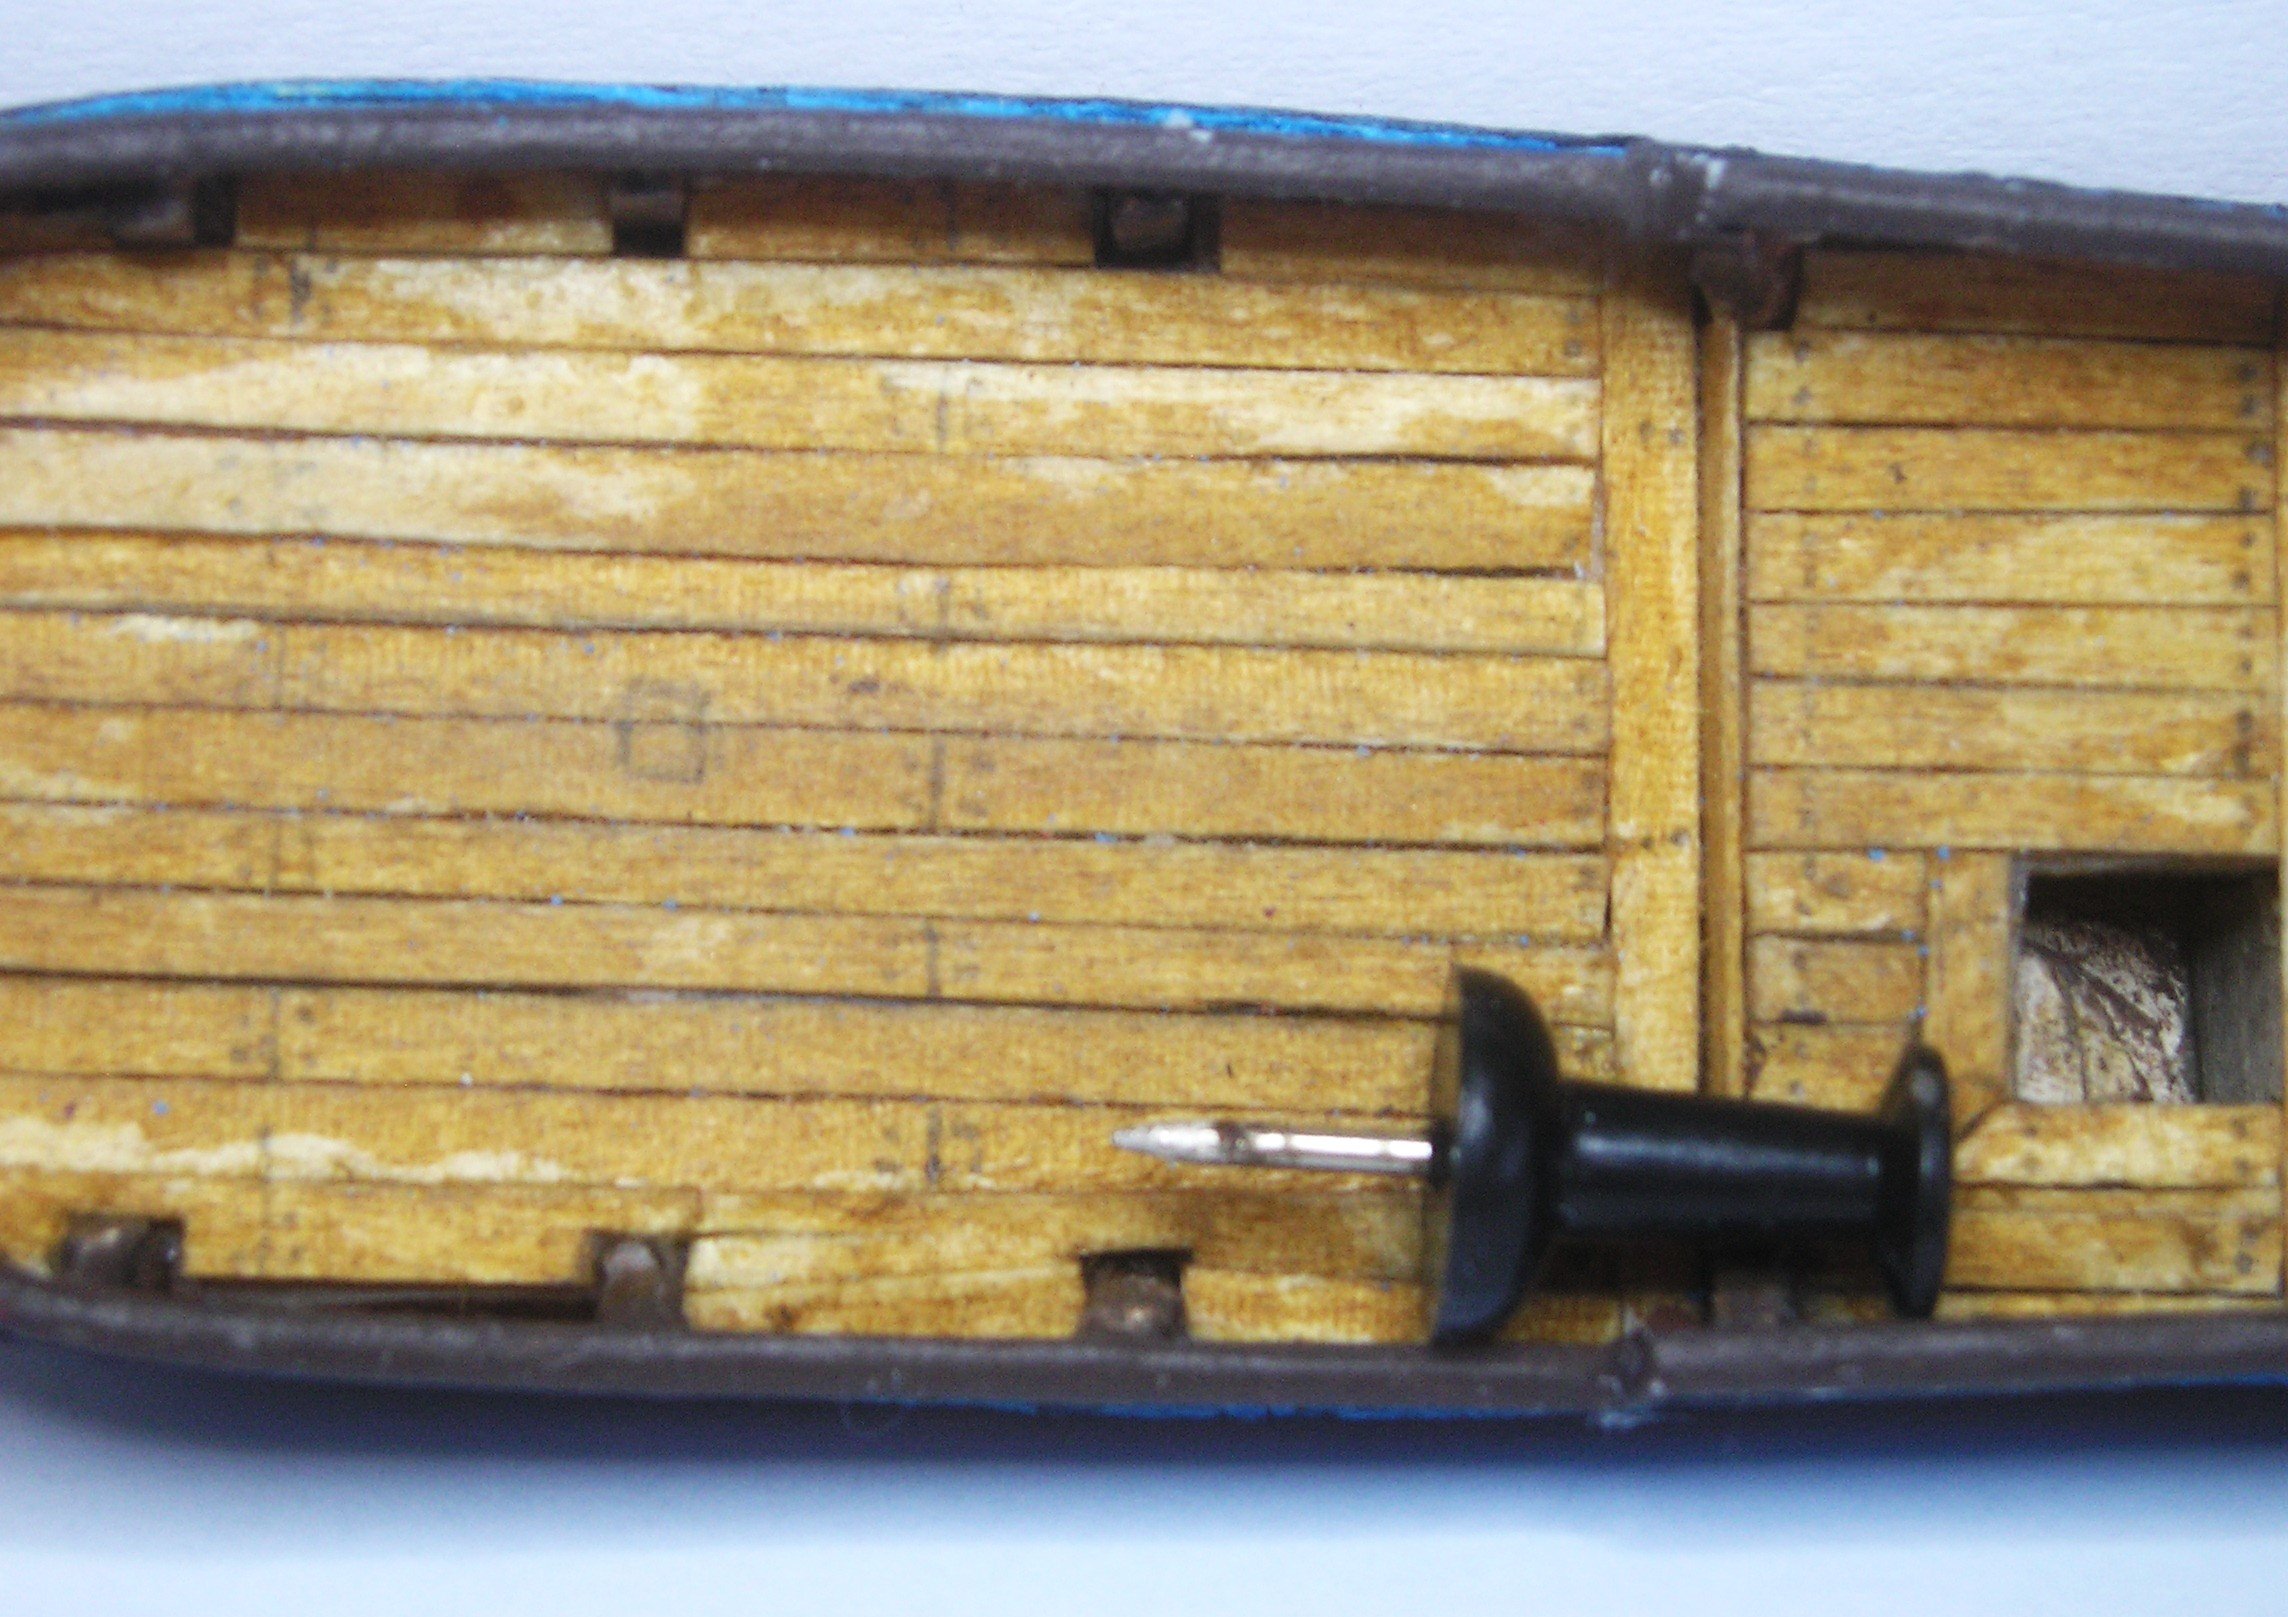
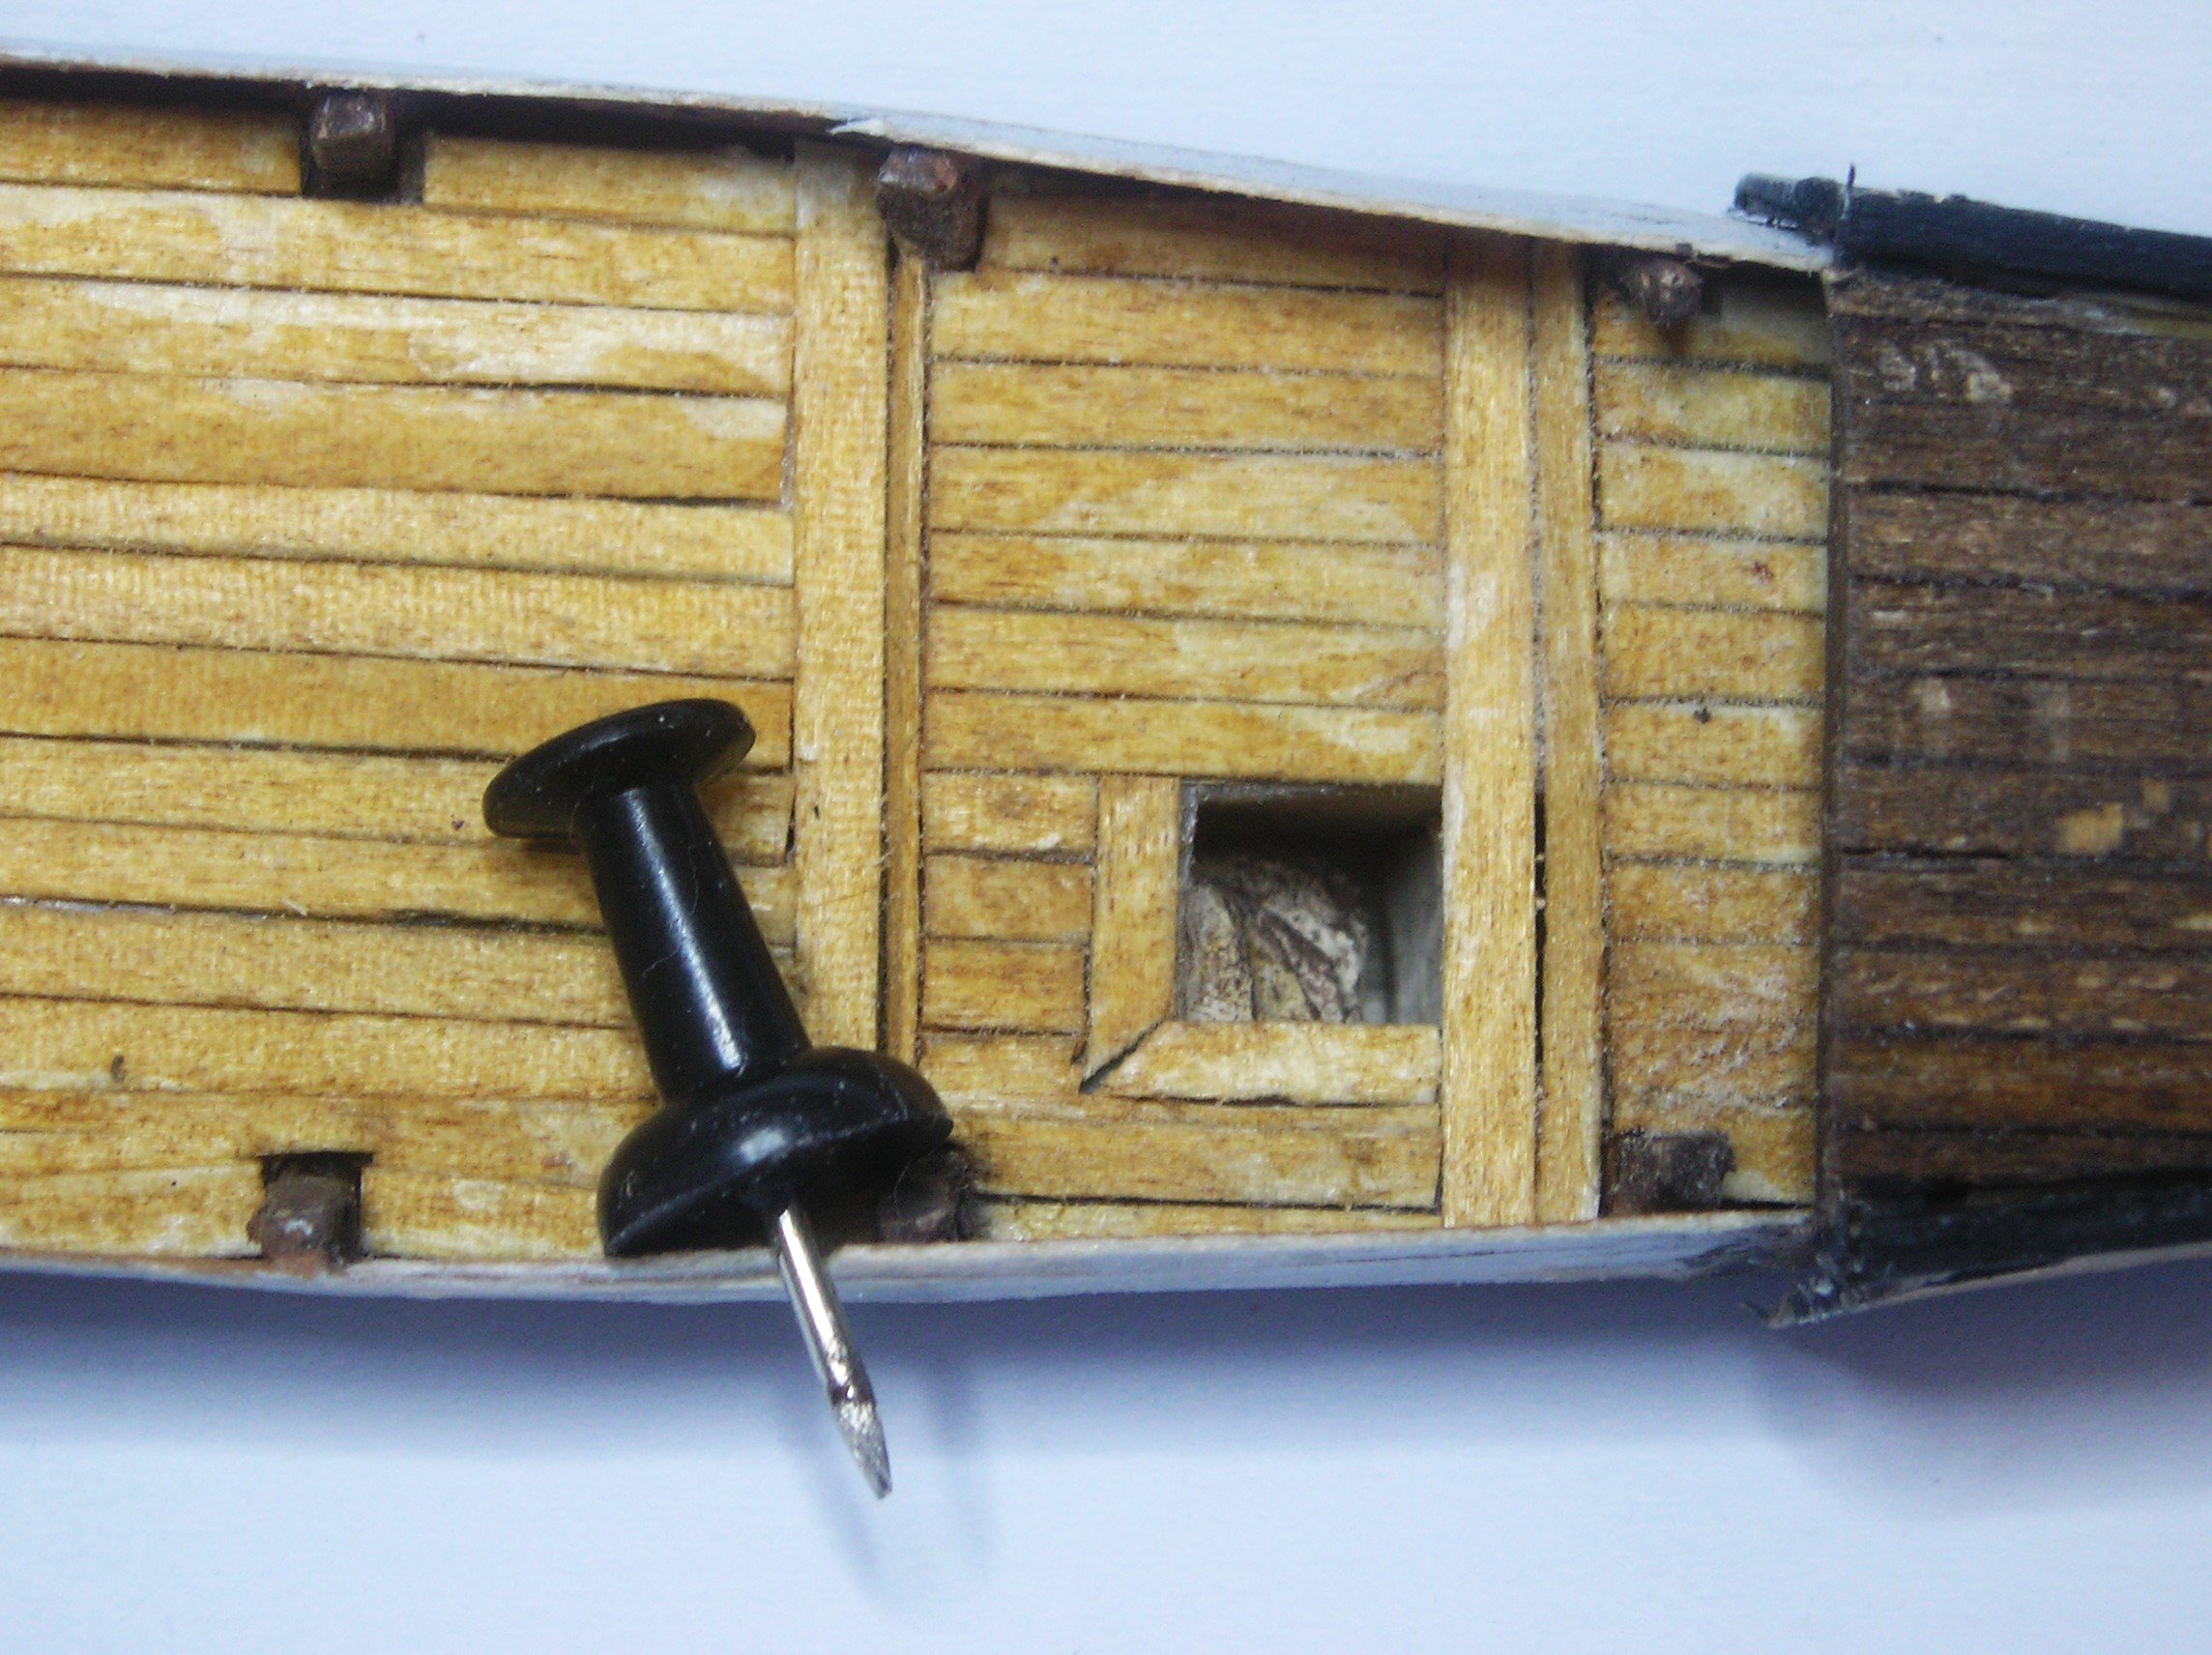
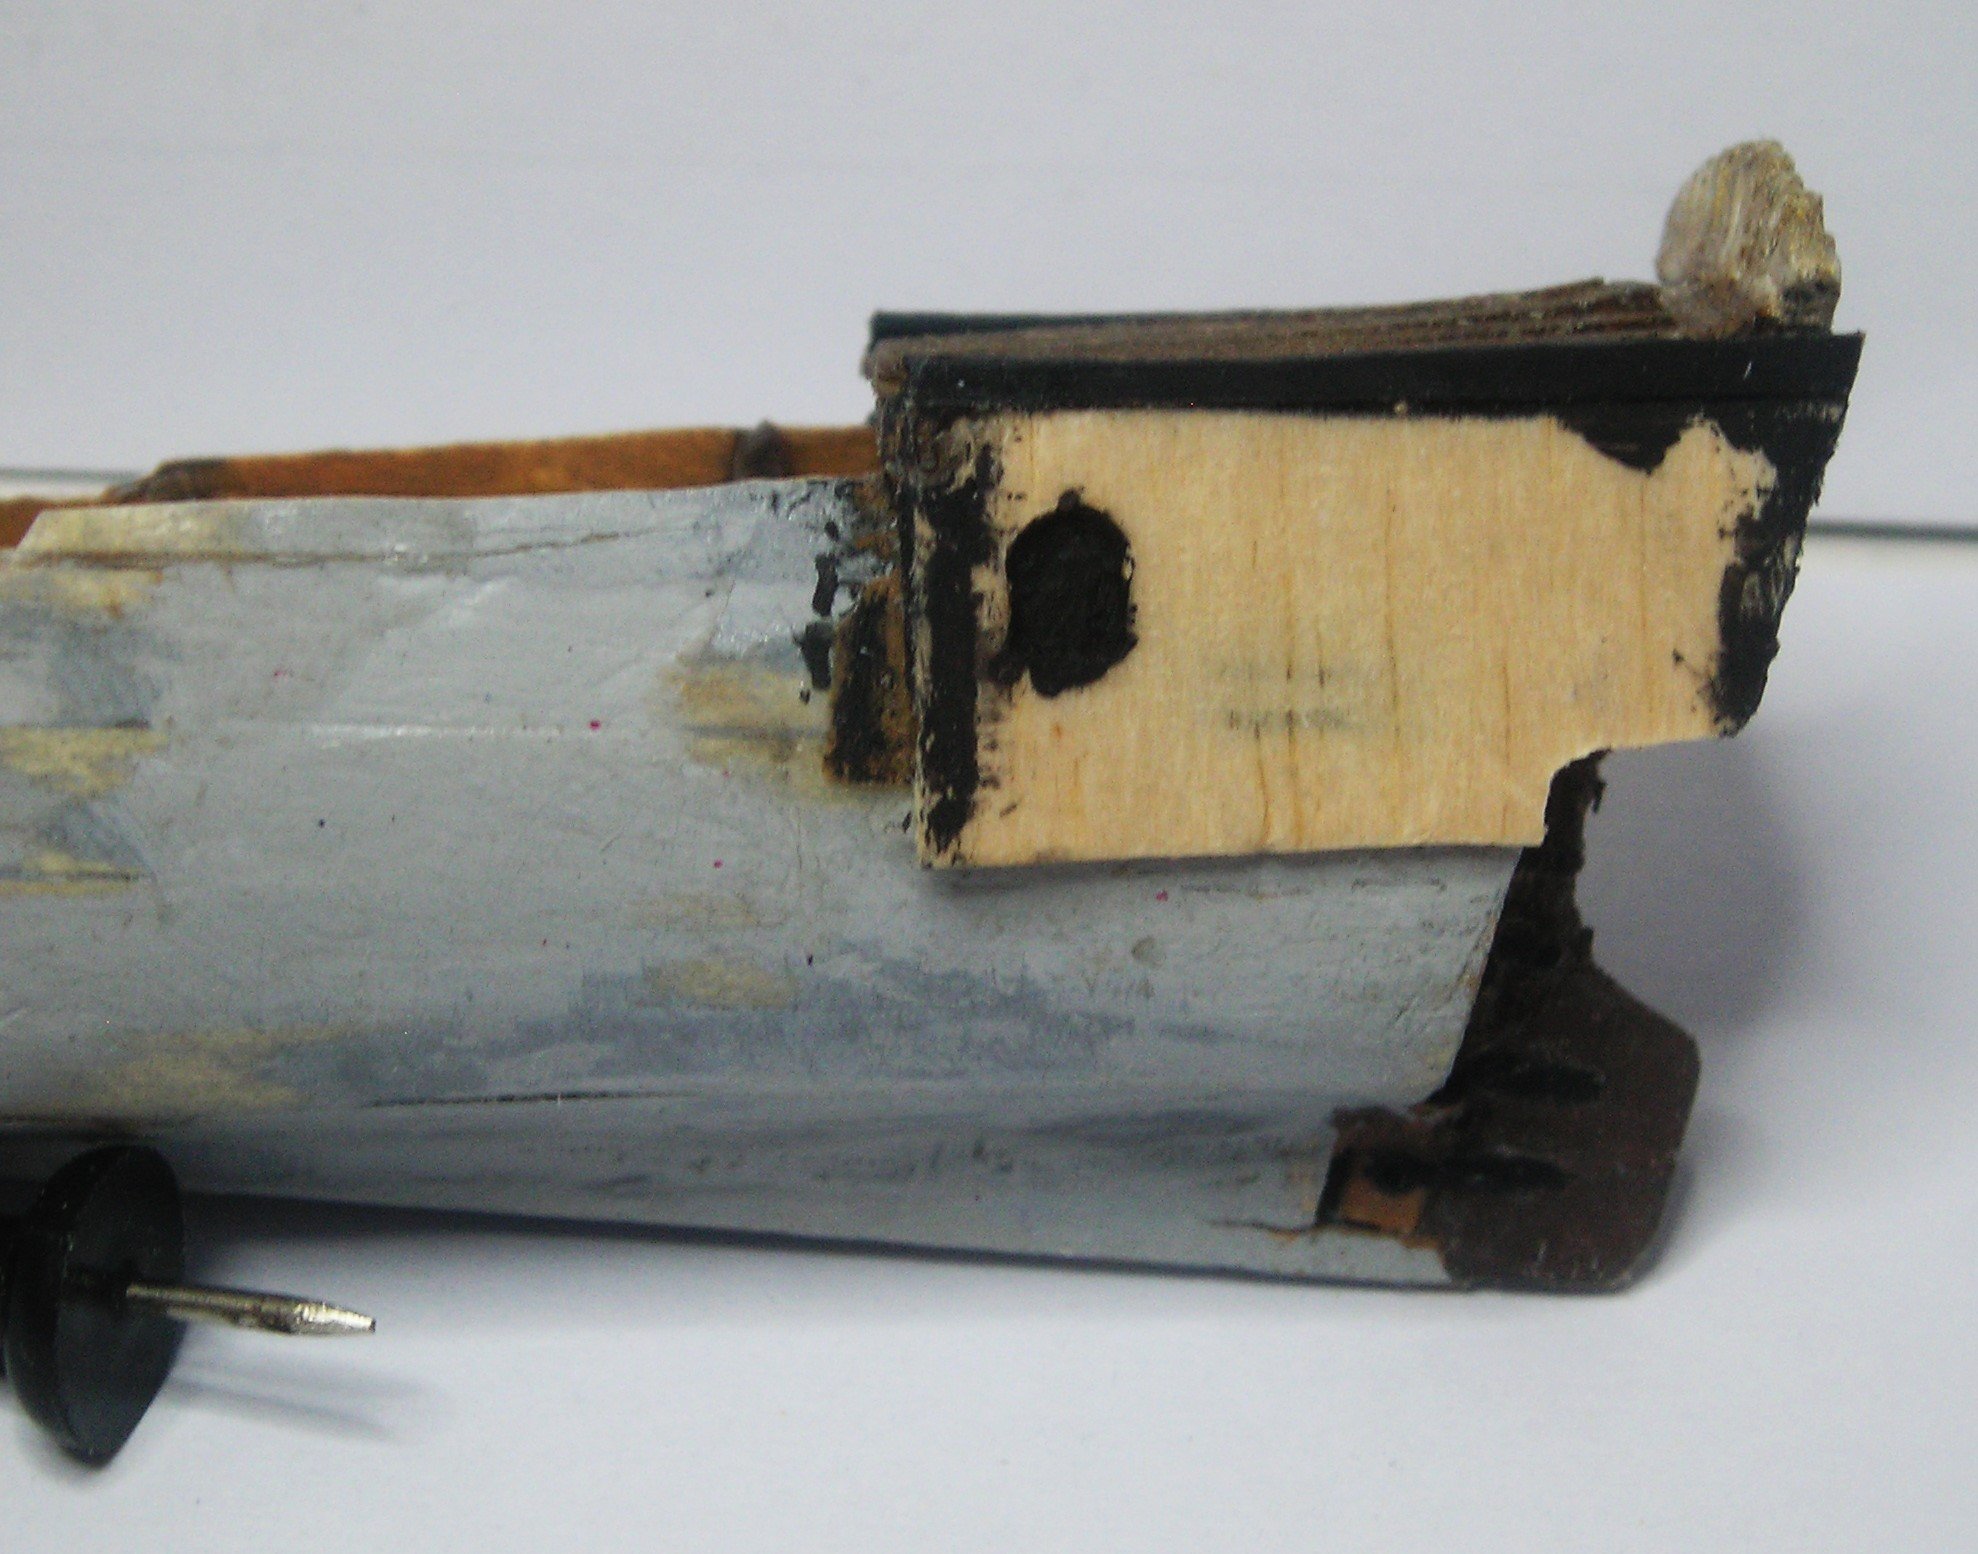
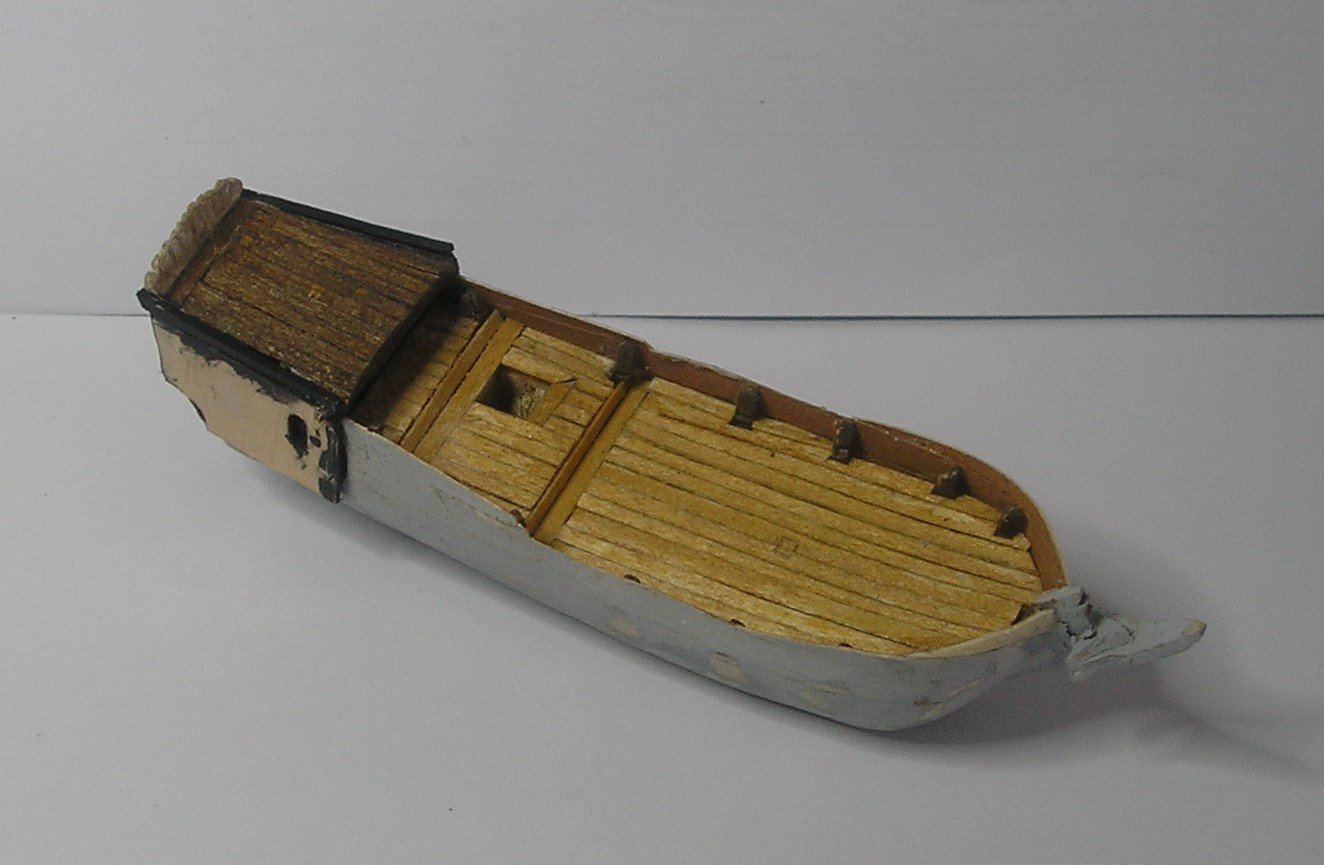
It's great to get the encouragement and 👍s from my peers and 🐧 friends. Thanks. What a challenging two days! I started with covering the roof of the aft section and the decks. It even has an internal stairwell. Then I realised the rear structure needed to be removed as the angle of the roof was not steep enough. I fixed it up and made an untidy mess. It took ages. I hate the sound of cracking wood! Till next time, Cheers


- 55 replies
-
- 6
-
-
- miniature
- Brandenburg State Yacht
- (and 1 more)
-
Thank you @Strelok for sharing your experience. It is always good to see how plans can be made into reality. Cheers,
- 55 replies
-
- 2
-
-
- miniature
- Brandenburg State Yacht
- (and 1 more)
-
Chris, the interest raised by this build is most amazing! As far as the name change is concerned, I just had to go with the clear identification of the ship made by some worthy modeling scholars. Do you have any personal preferences for a name change? Perhaps "Cameleon Cheers,
- 55 replies
-
- 3
-

-
-
- miniature
- Brandenburg State Yacht
- (and 1 more)
-
Thanks Ferrus, You must appreciate that this miniature model is very much under construction. I greatly admire the work of these two modelers but will take most of my inspiration from the work of @Javier Baron. Don't forget that apart from making various larger scale models and approximately 14 ships in bottles, this is my first miniature. I'm enjoying myself too much accepting the challenge of this build to have a break ... yet. 😁
- 55 replies
-
- 2
-
-
- miniature
- Brandenburg State Yacht
- (and 1 more)
-
Patrick @Baker, the images in your linked site are invaluable to me! I have to remember that I can't achieve the impossible when comparing 1/50 scale and 1/200 scale builds. 'Nothing ventured, nothing gained'.
- 55 replies
-
- 3
-
-
- miniature
- Brandenburg State Yacht
- (and 1 more)
-
Great reading thanks Joachim. Arguments for changing the name are very convincing. It's getting a little late here. Cheers, 😴
- 55 replies
-
- 2
-
-
- miniature
- Brandenburg State Yacht
- (and 1 more)
-
Thank you, Joachim @cotrecerf, for your comments and advice. I agree with you fully about the obvious origin of the plans I have. Given the Hungarian source and lack of clarity of my three pages of plans, I very much appreciate the sketches you have attached. Any suggestions regarding the ship's colours would be excellent as the only hint I have is this Ships of Scale Post (Click here to see). Ordering the Hoeckel et al, book would take ages as things move slowly when ordering from overseas. As far as the scale is concerned, calculation always involves some assumptions. I assumed the ship is approximately 21m in length. Thank you for your help and encouragement. Cheers 🙂
- 55 replies
-
- 2
-
-
- miniature
- Brandenburg State Yacht
- (and 1 more)
-
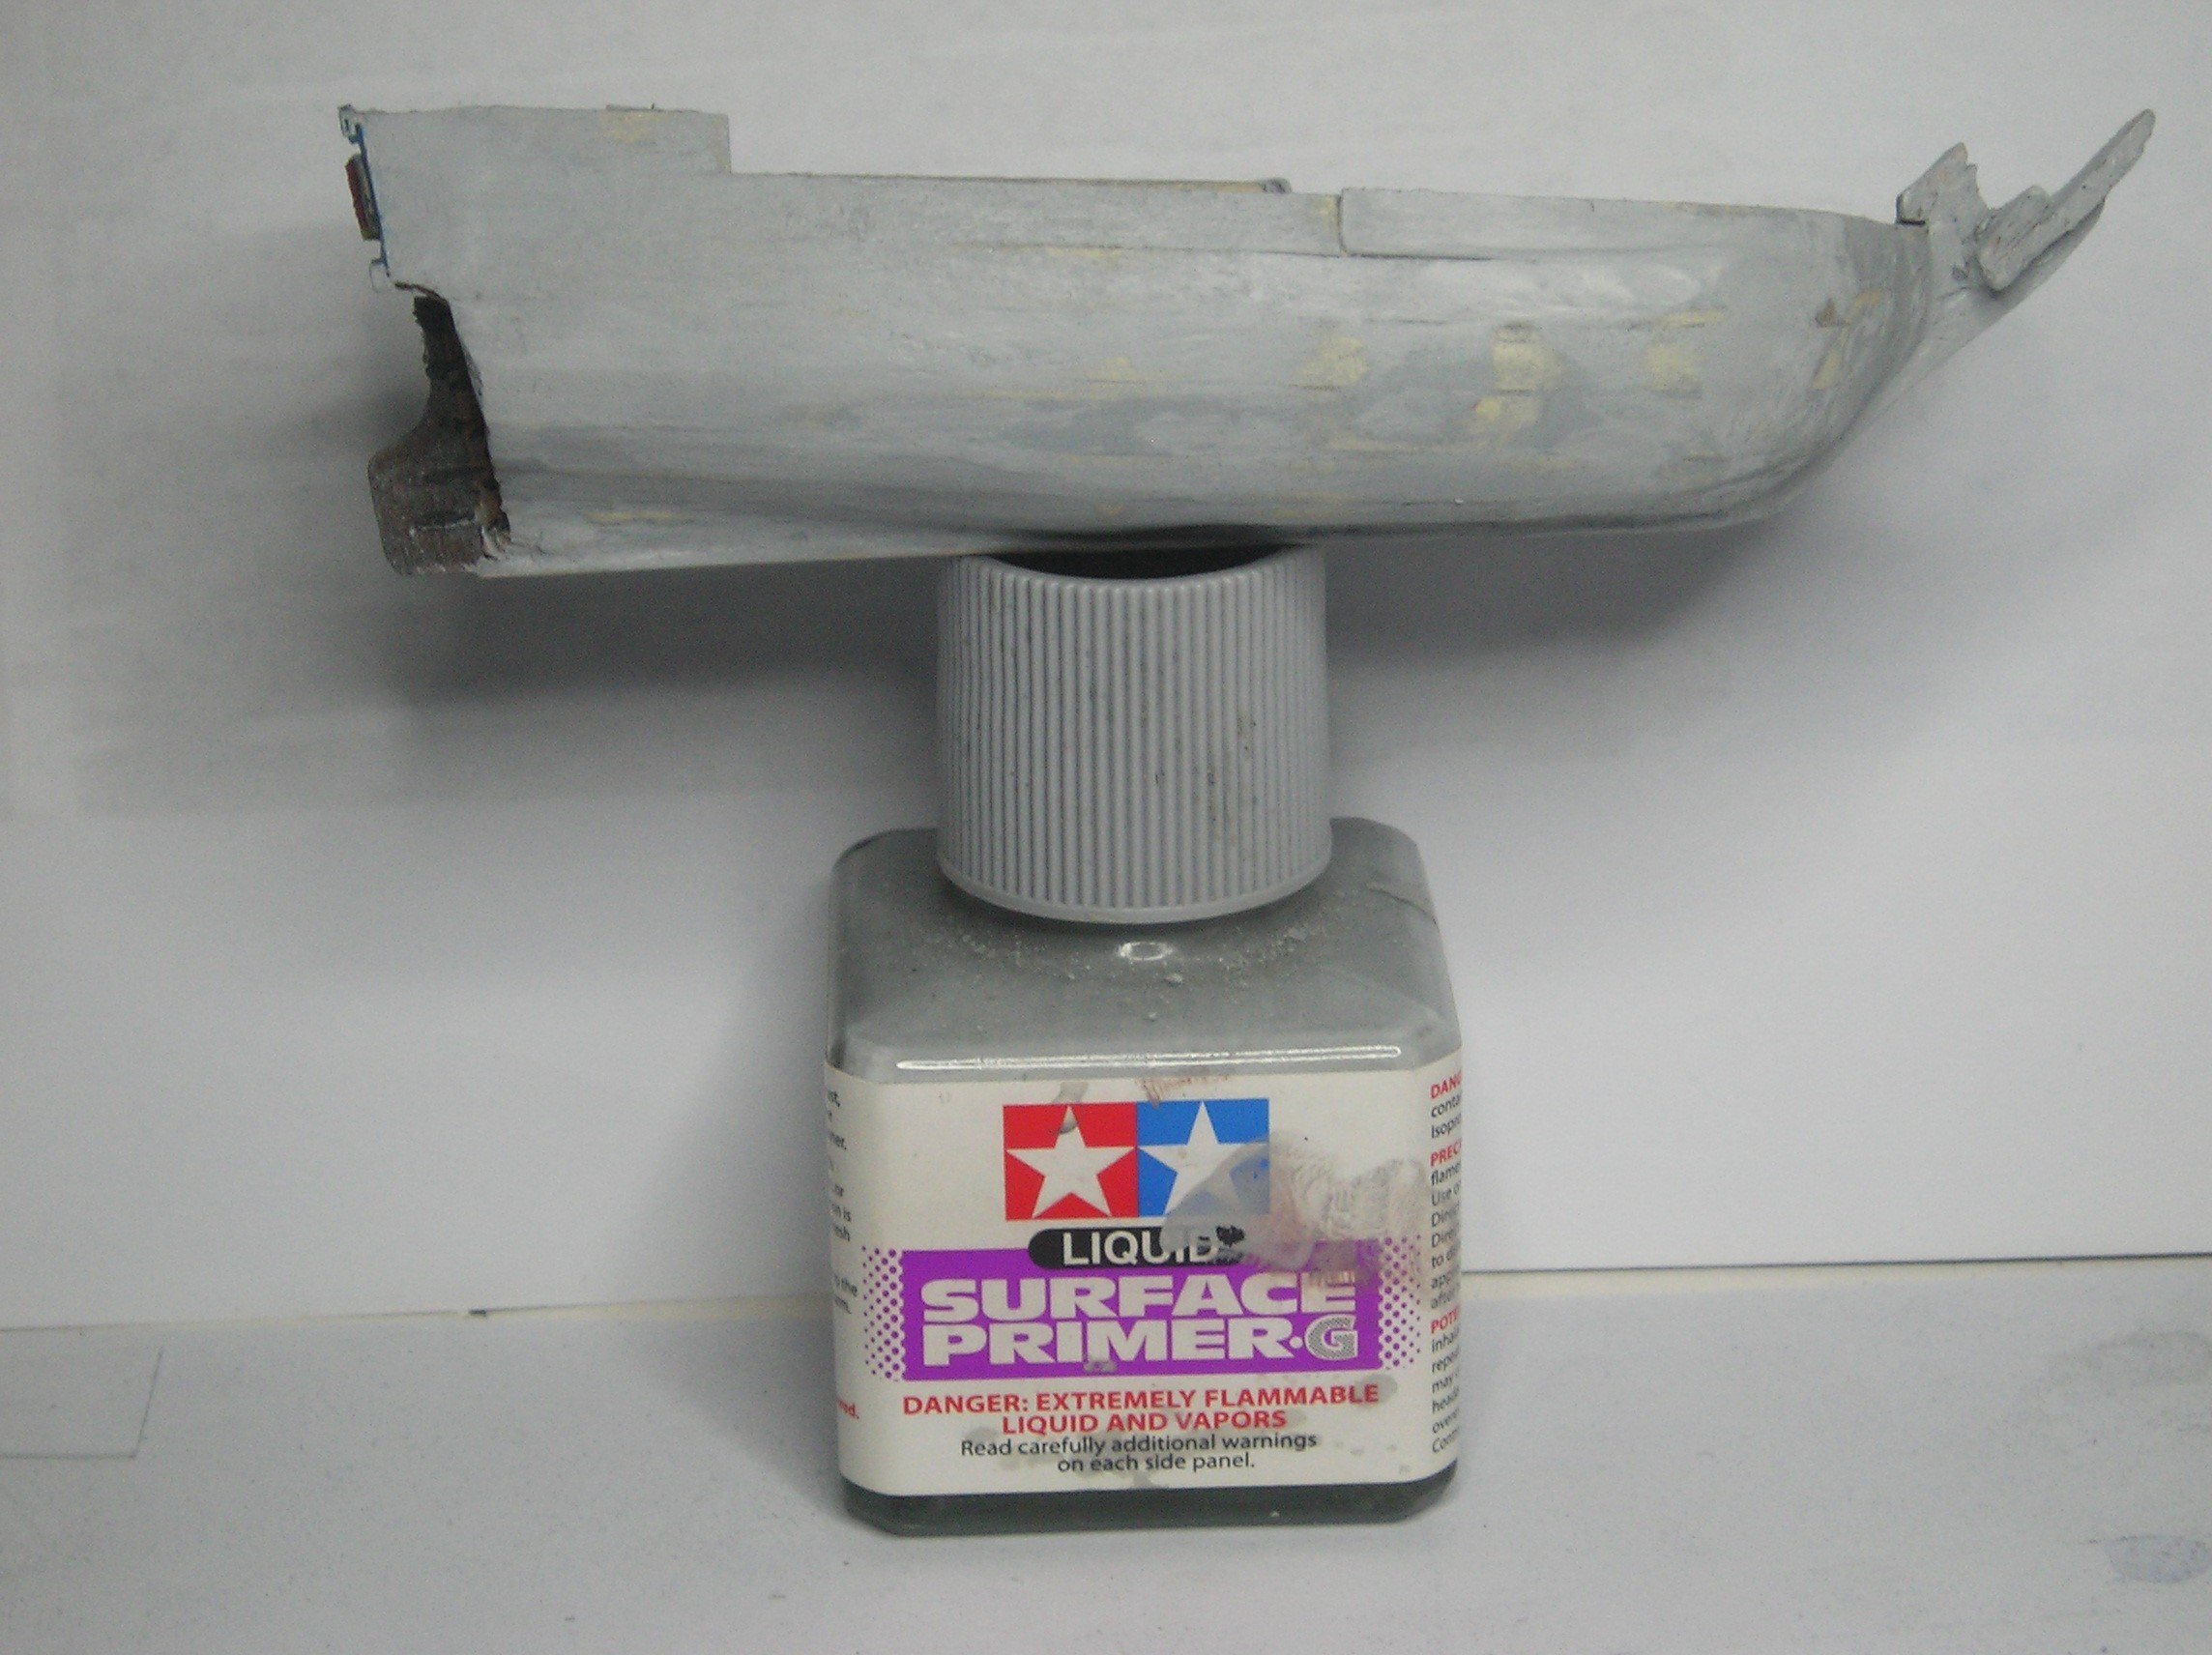
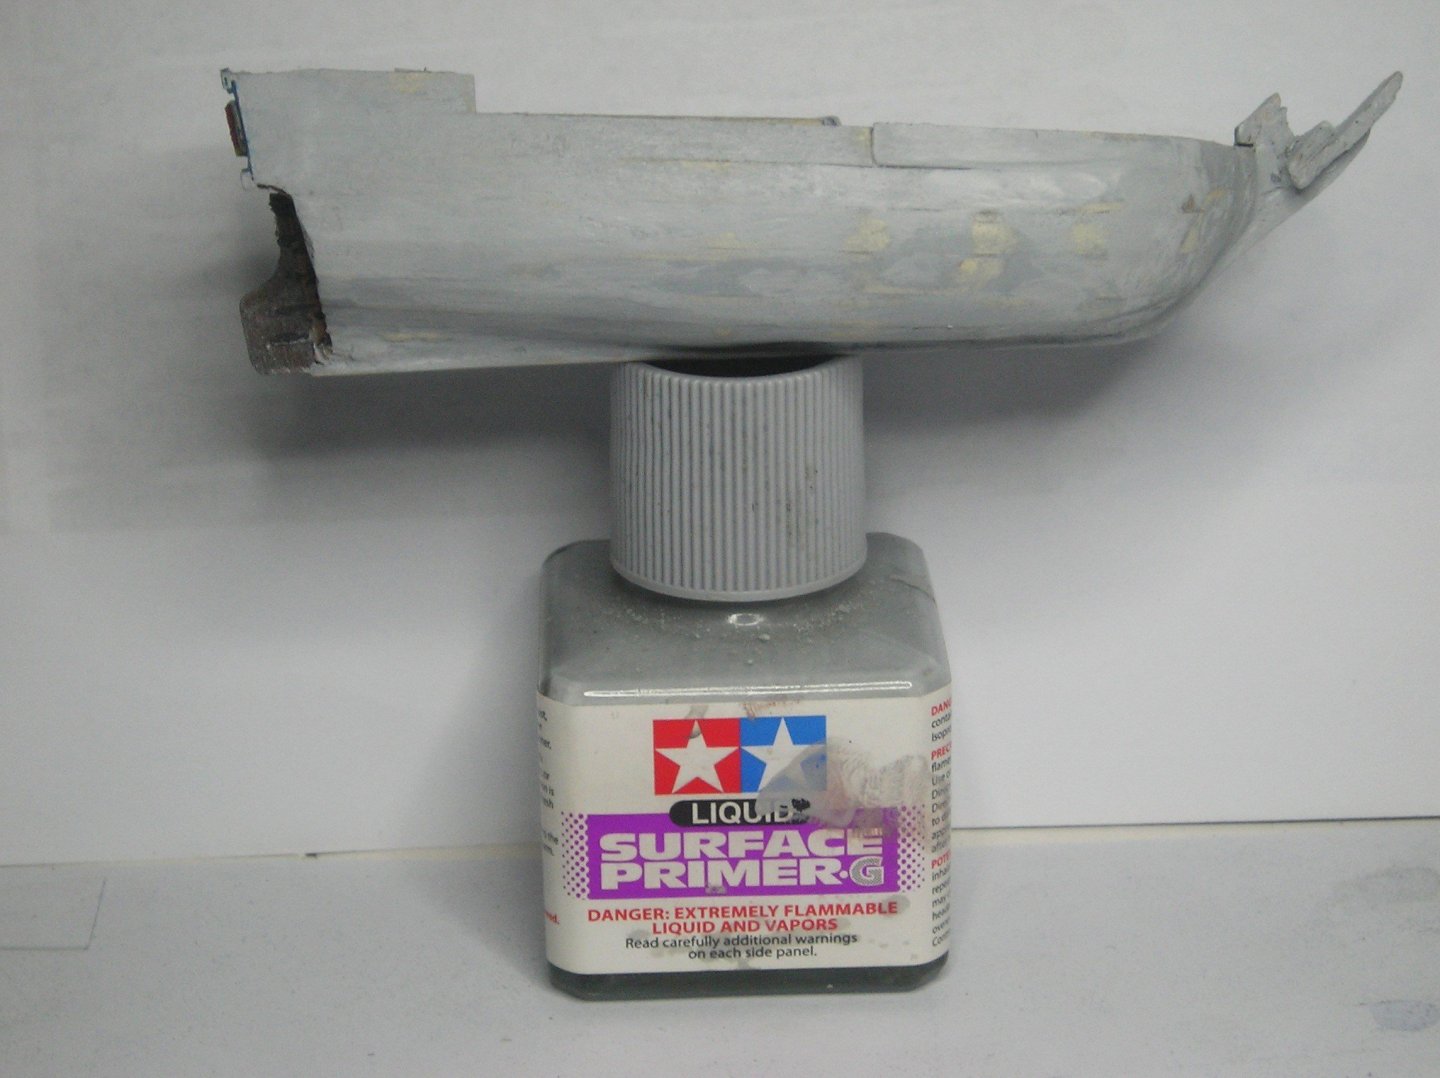
G'day all, Progress is very slow on this miniature model. Time and care needed is the same and avoidance of errors is crucial as they are very obvious. Never-the-less it is still an enjoyable build. Yesterday I finished the planking, applied some primer, and did some work on the stern (it looks much better in reality than it does in the enlarged image). Today I planned the decks, painted the gunwales, and started on the staircase going down below. Because of the tiny scale, I think I'm going blind, but I'm still 'living the dream!' Cheers,

- 55 replies
-
- 5
-
-
- miniature
- Brandenburg State Yacht
- (and 1 more)
-
Ronald, even though I have done plenty of planking, I would still like to learn more from Chuck's video. Can you provide a link so I can find it? Cheers,
-
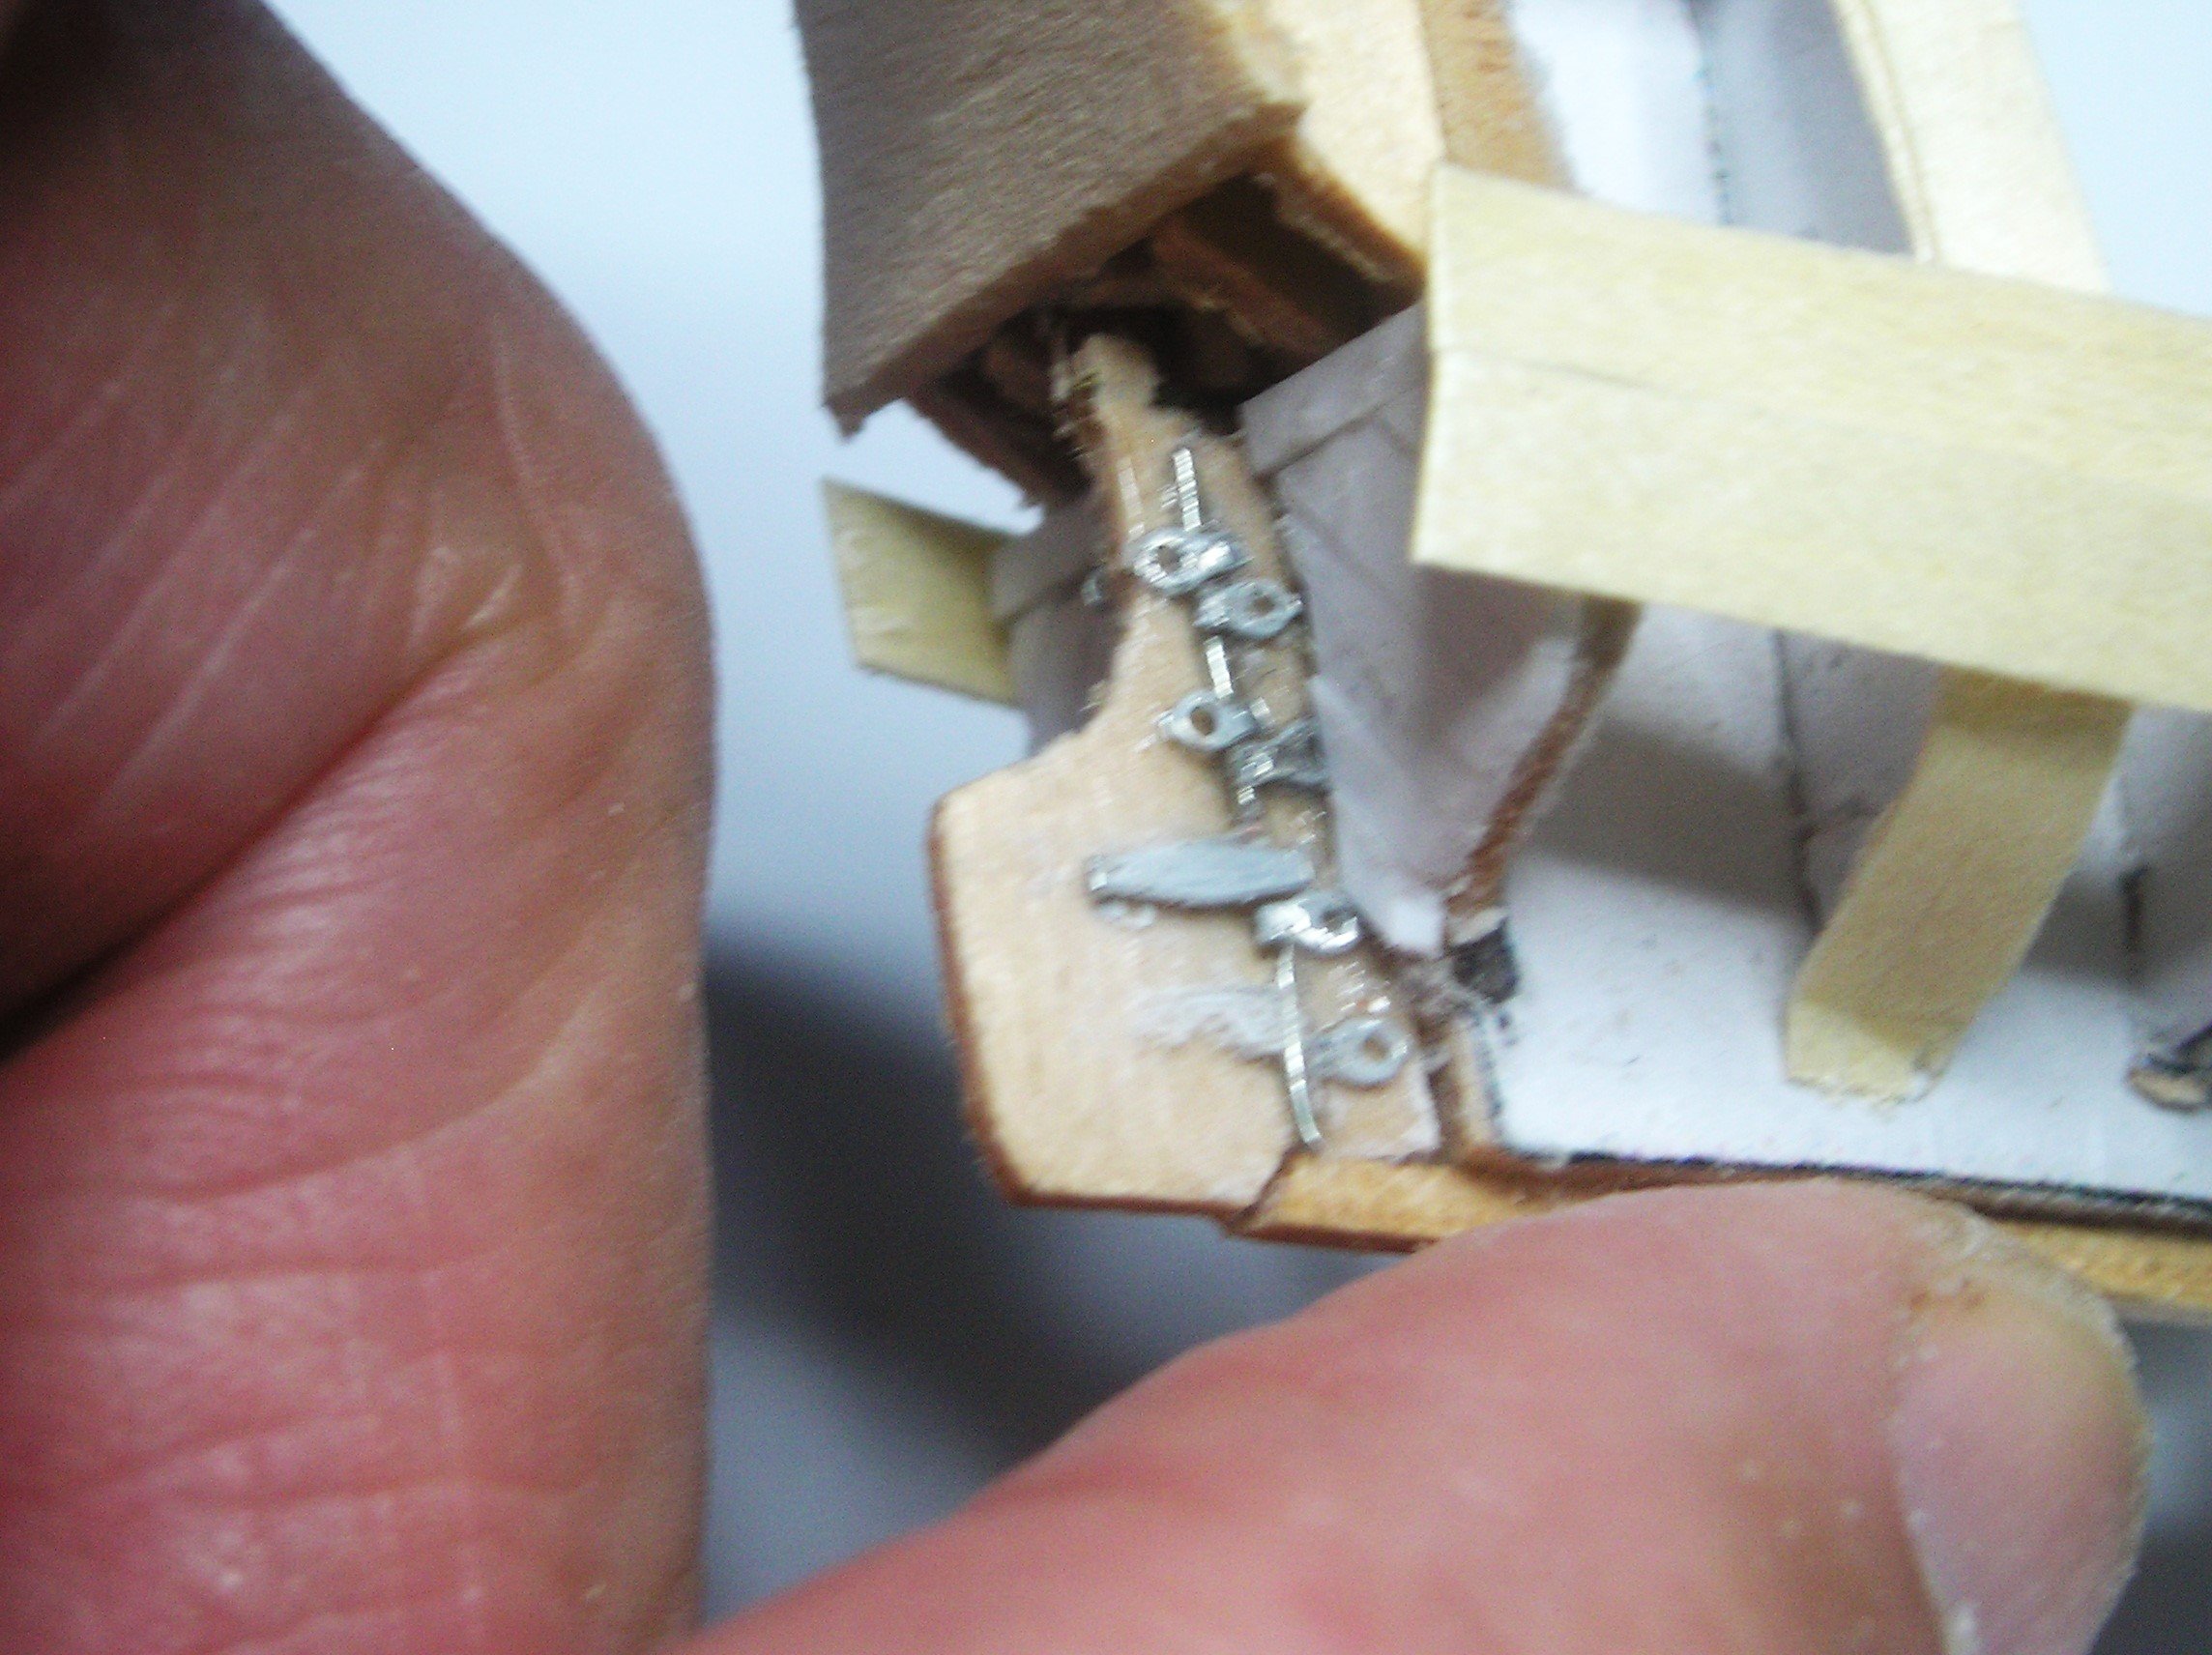
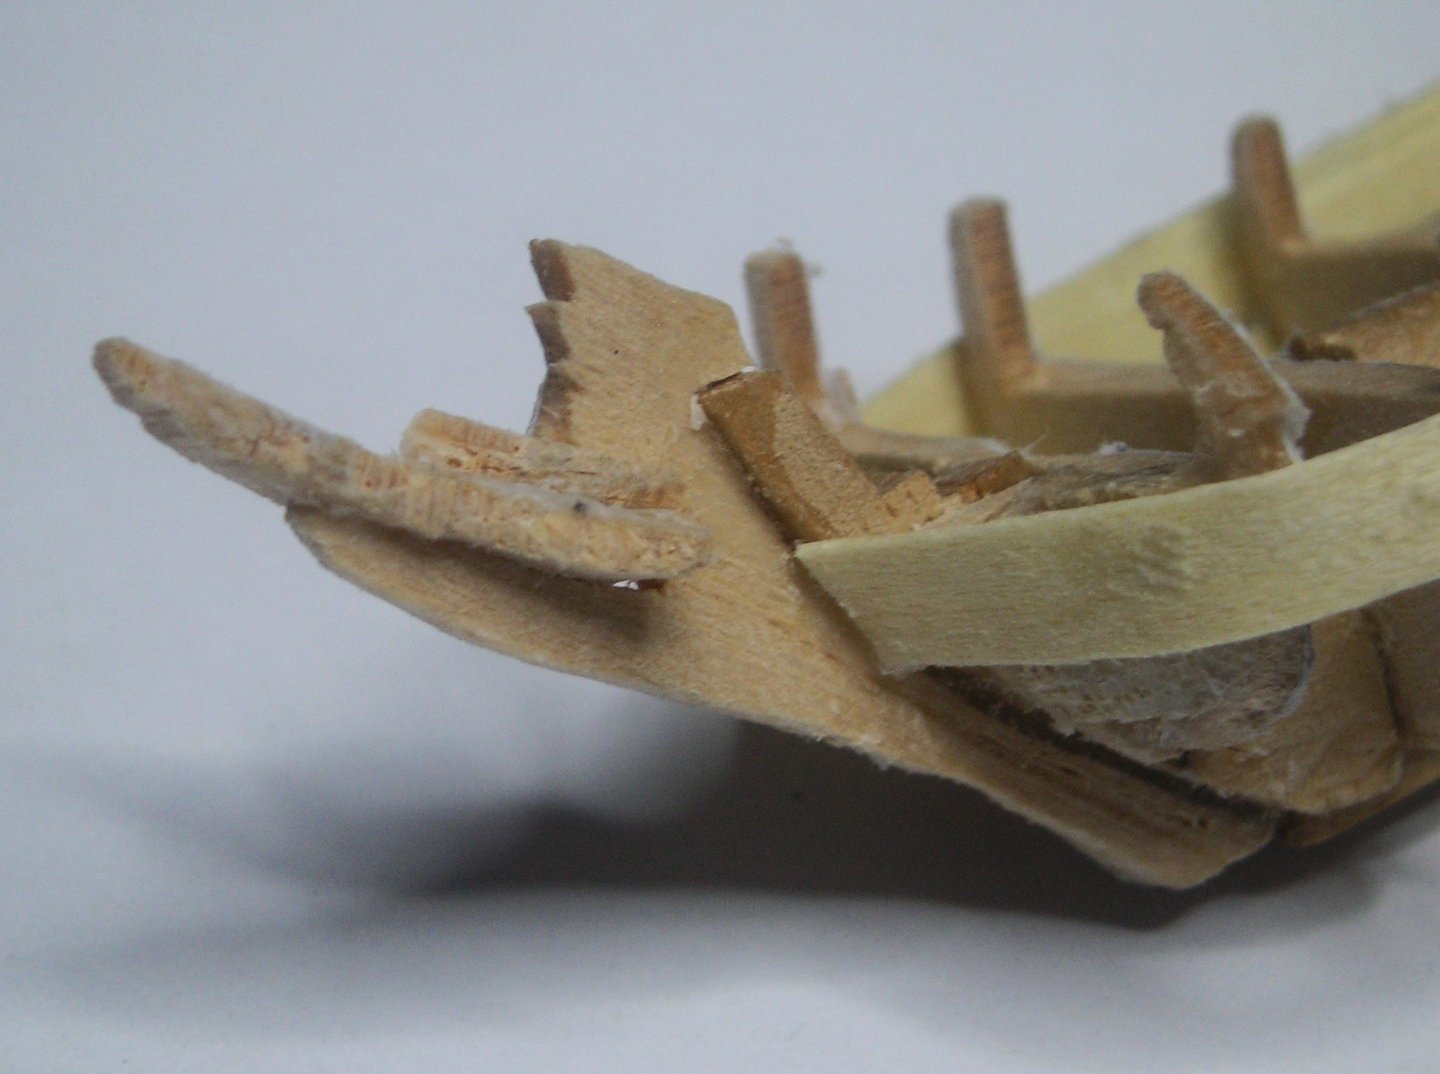
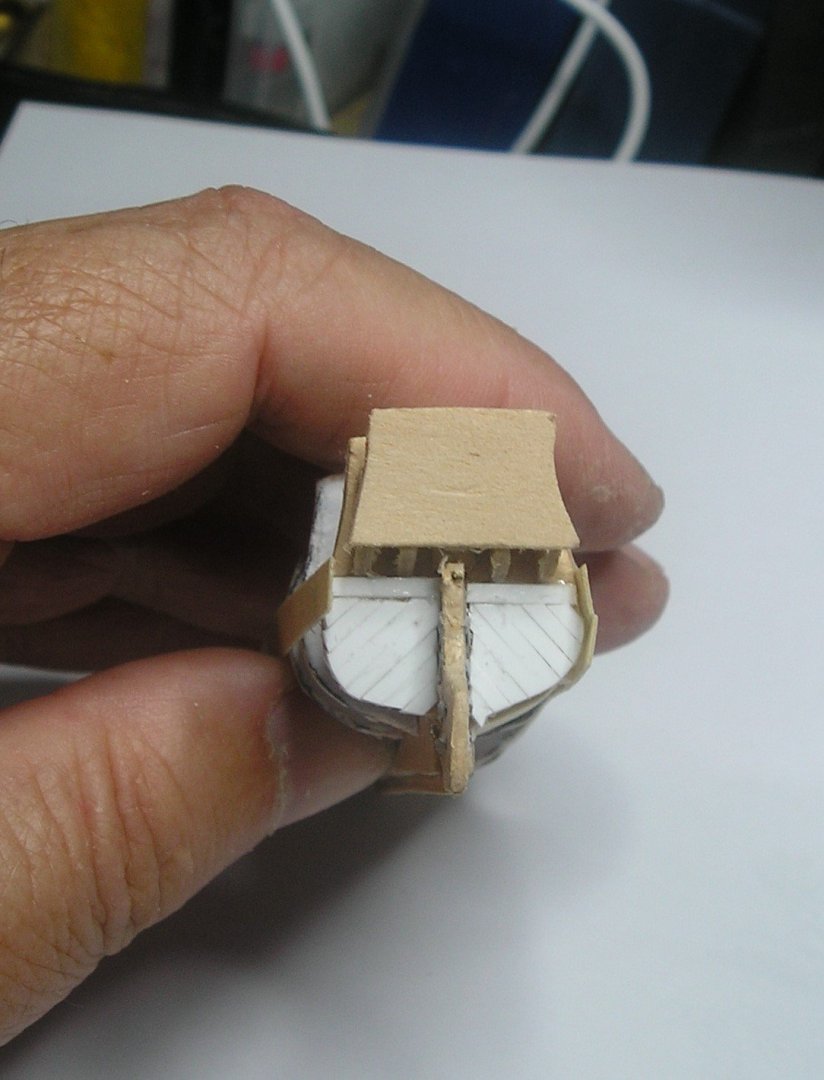
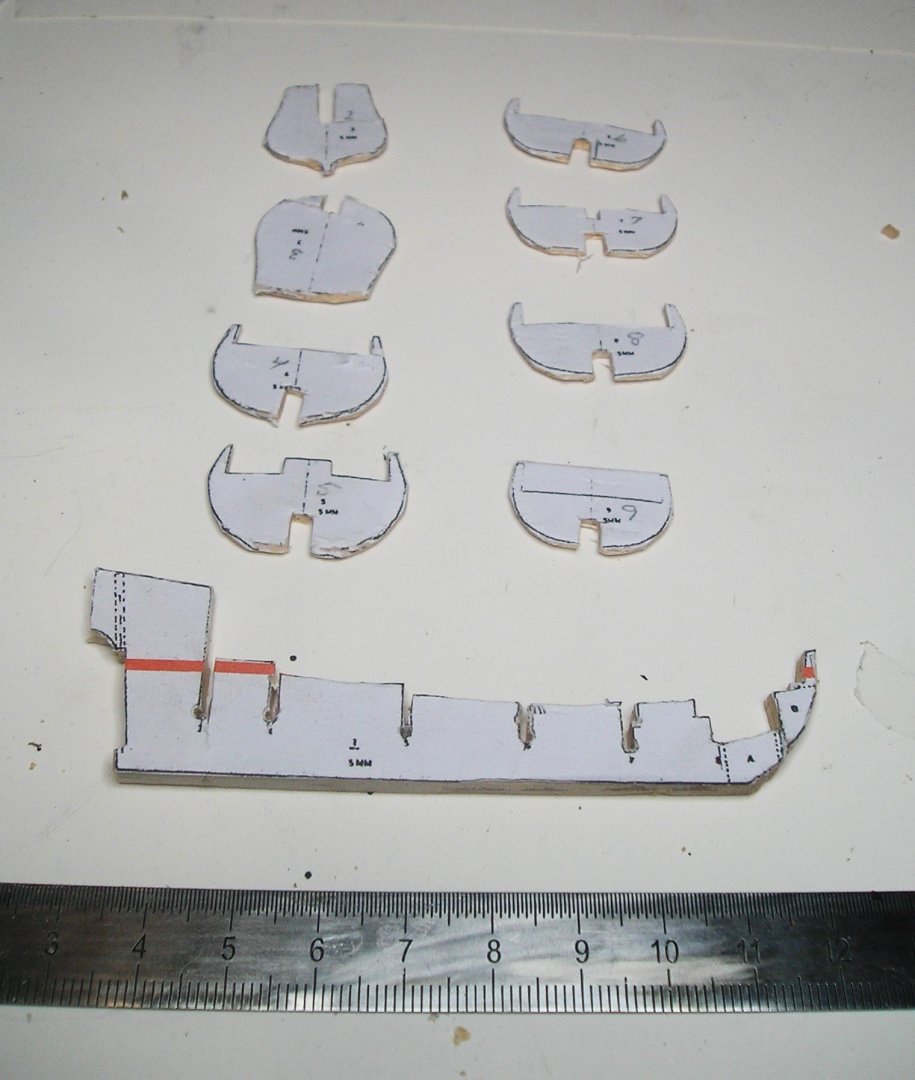
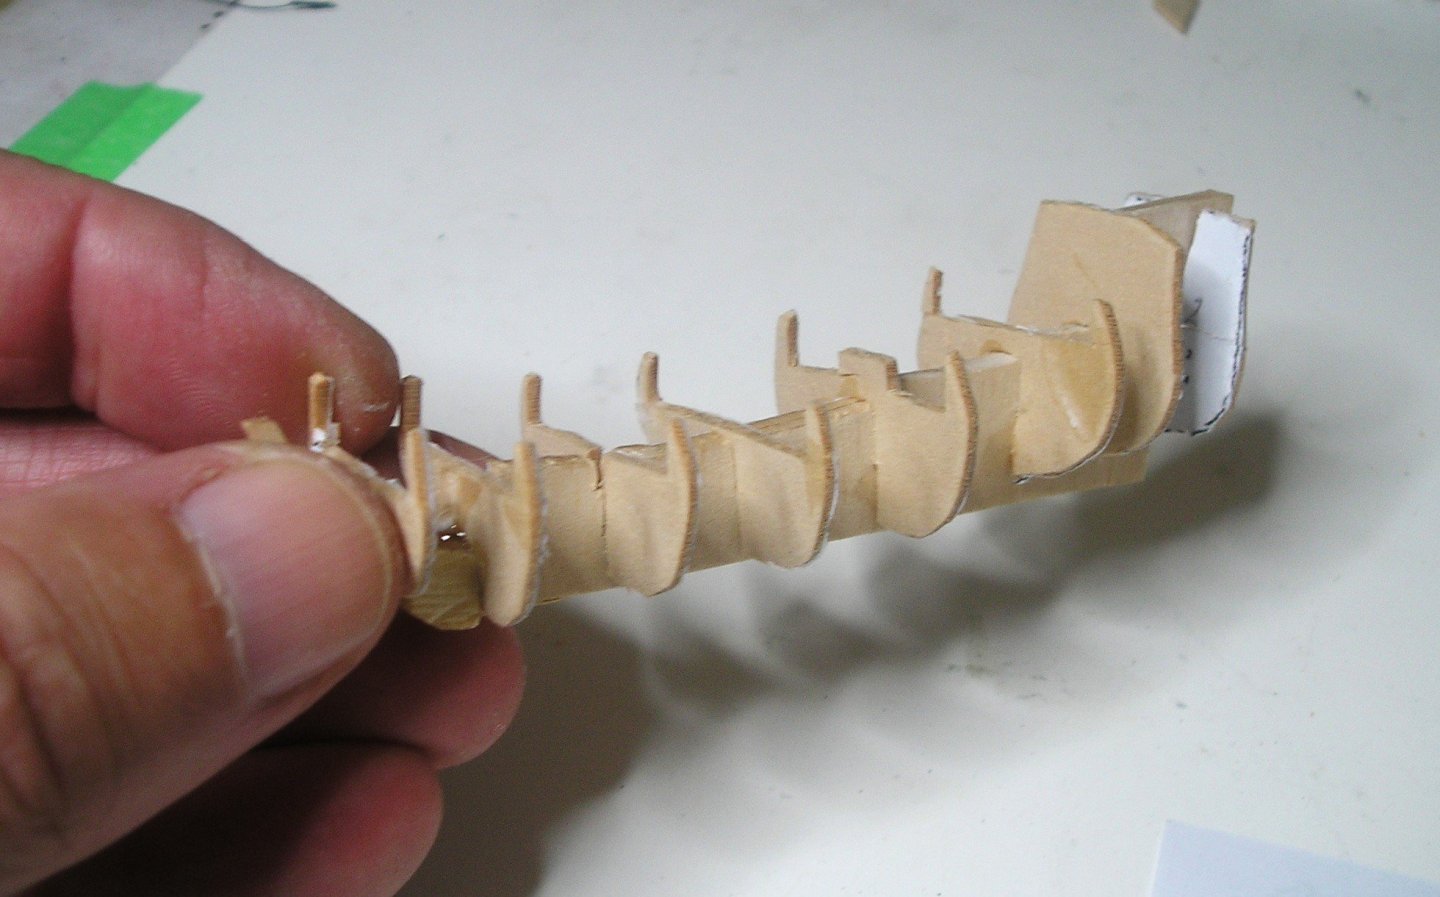
Two days of fun. Nothing exciting for Day One. Just scaling back the plans. Cutting parts and putting the main structure together ... nothing new, just very small. 🧐 Day Two. I worked on the bow, rudder and stern. All that was essential, was a sharp pointed blade. 🗡️ I also started a little planking. (Continuing tomorrow) Breaking parts and sticking things to fingers was the order of the day. Cheers,

- 55 replies
-
- 8
-
-
- miniature
- Brandenburg State Yacht
- (and 1 more)
-
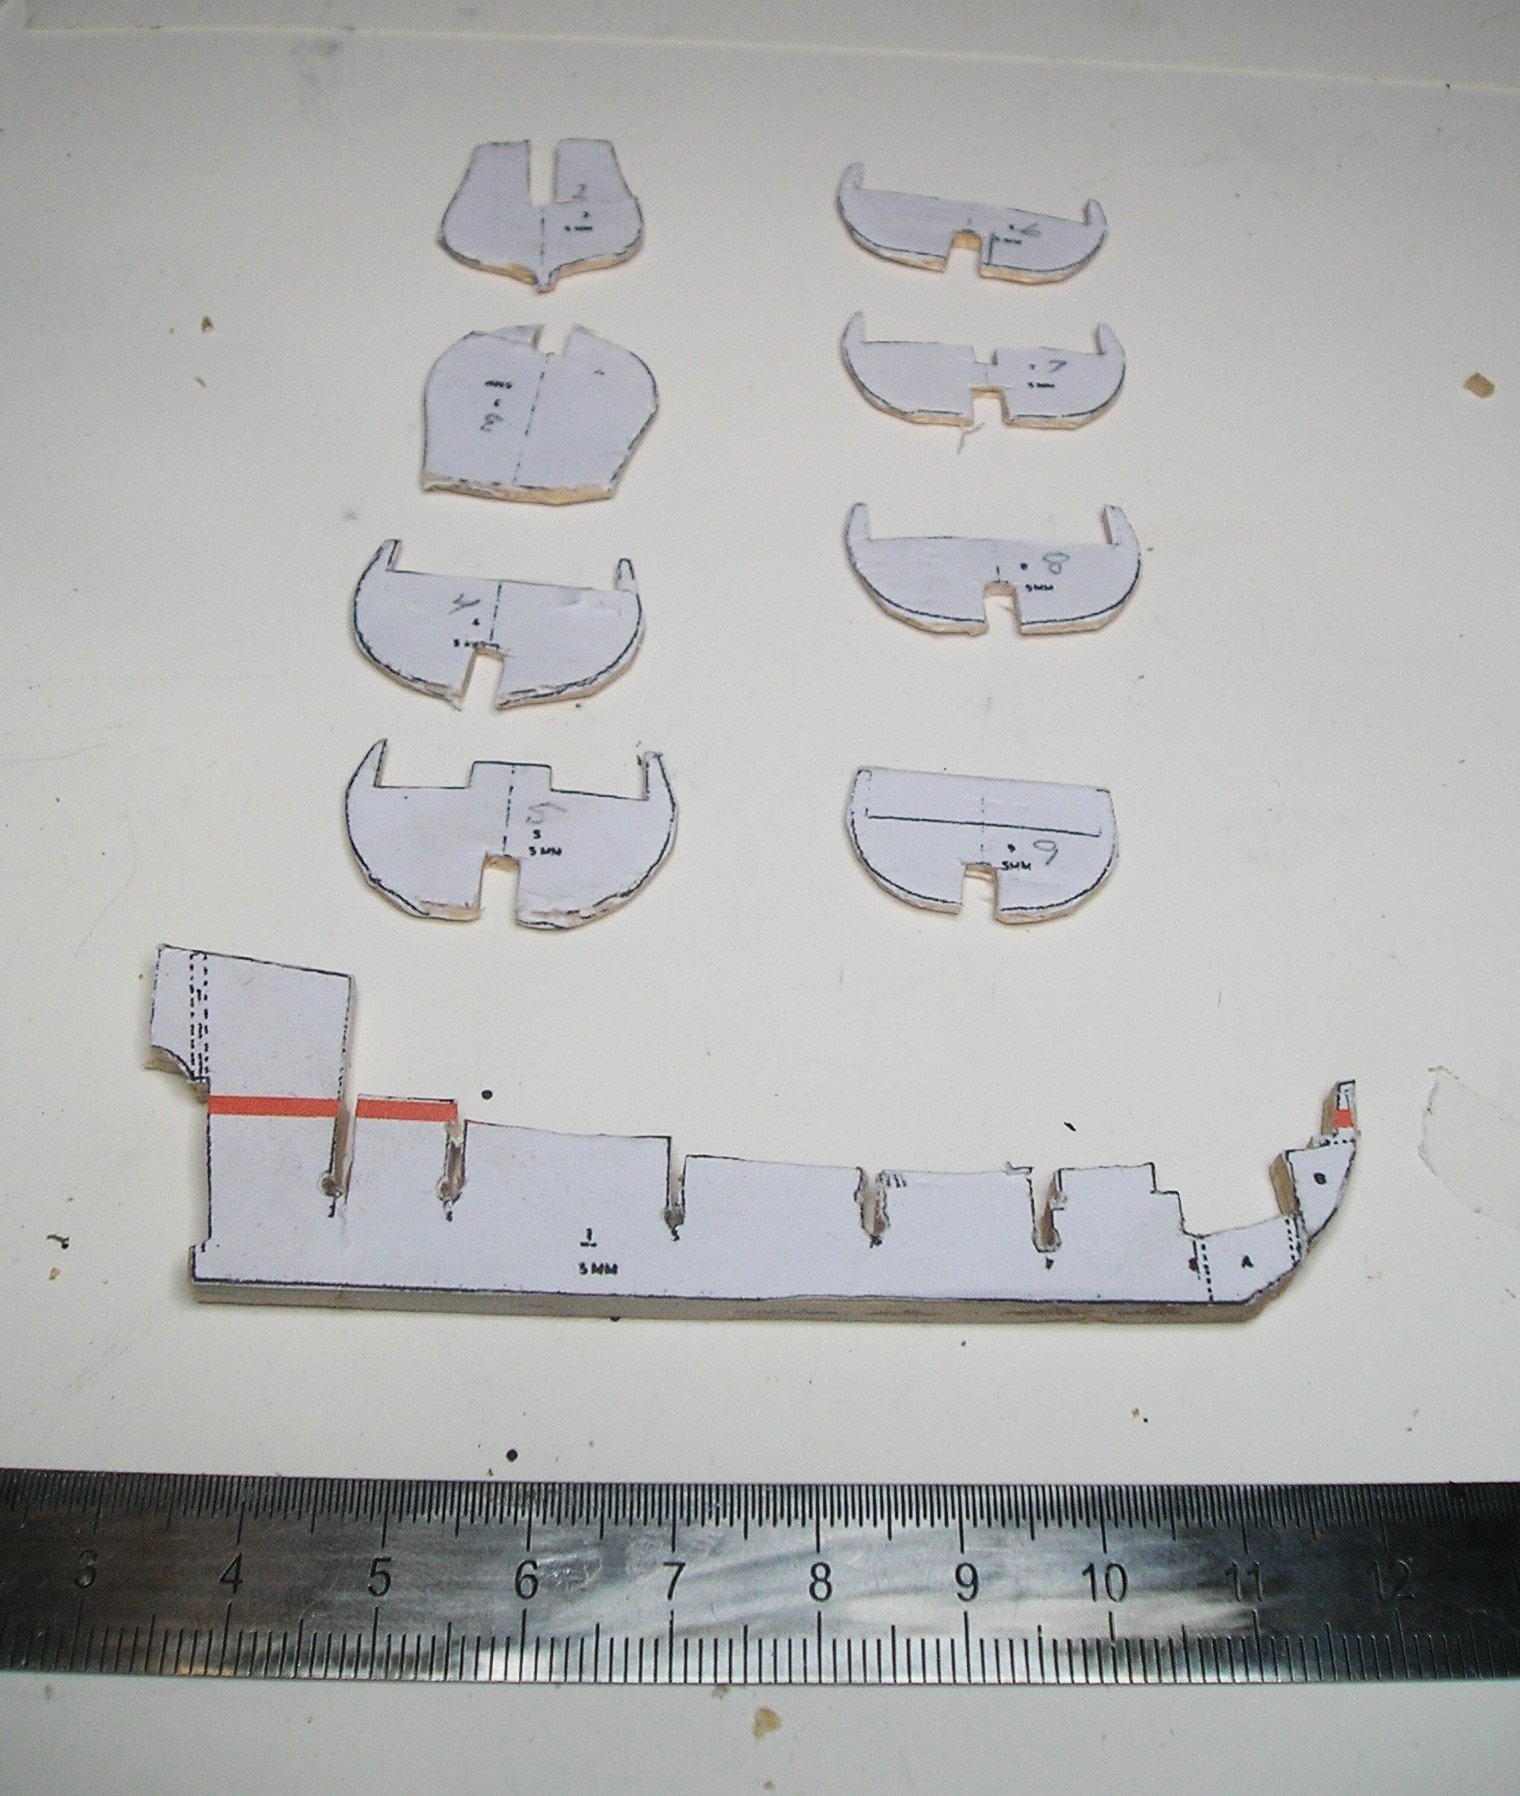
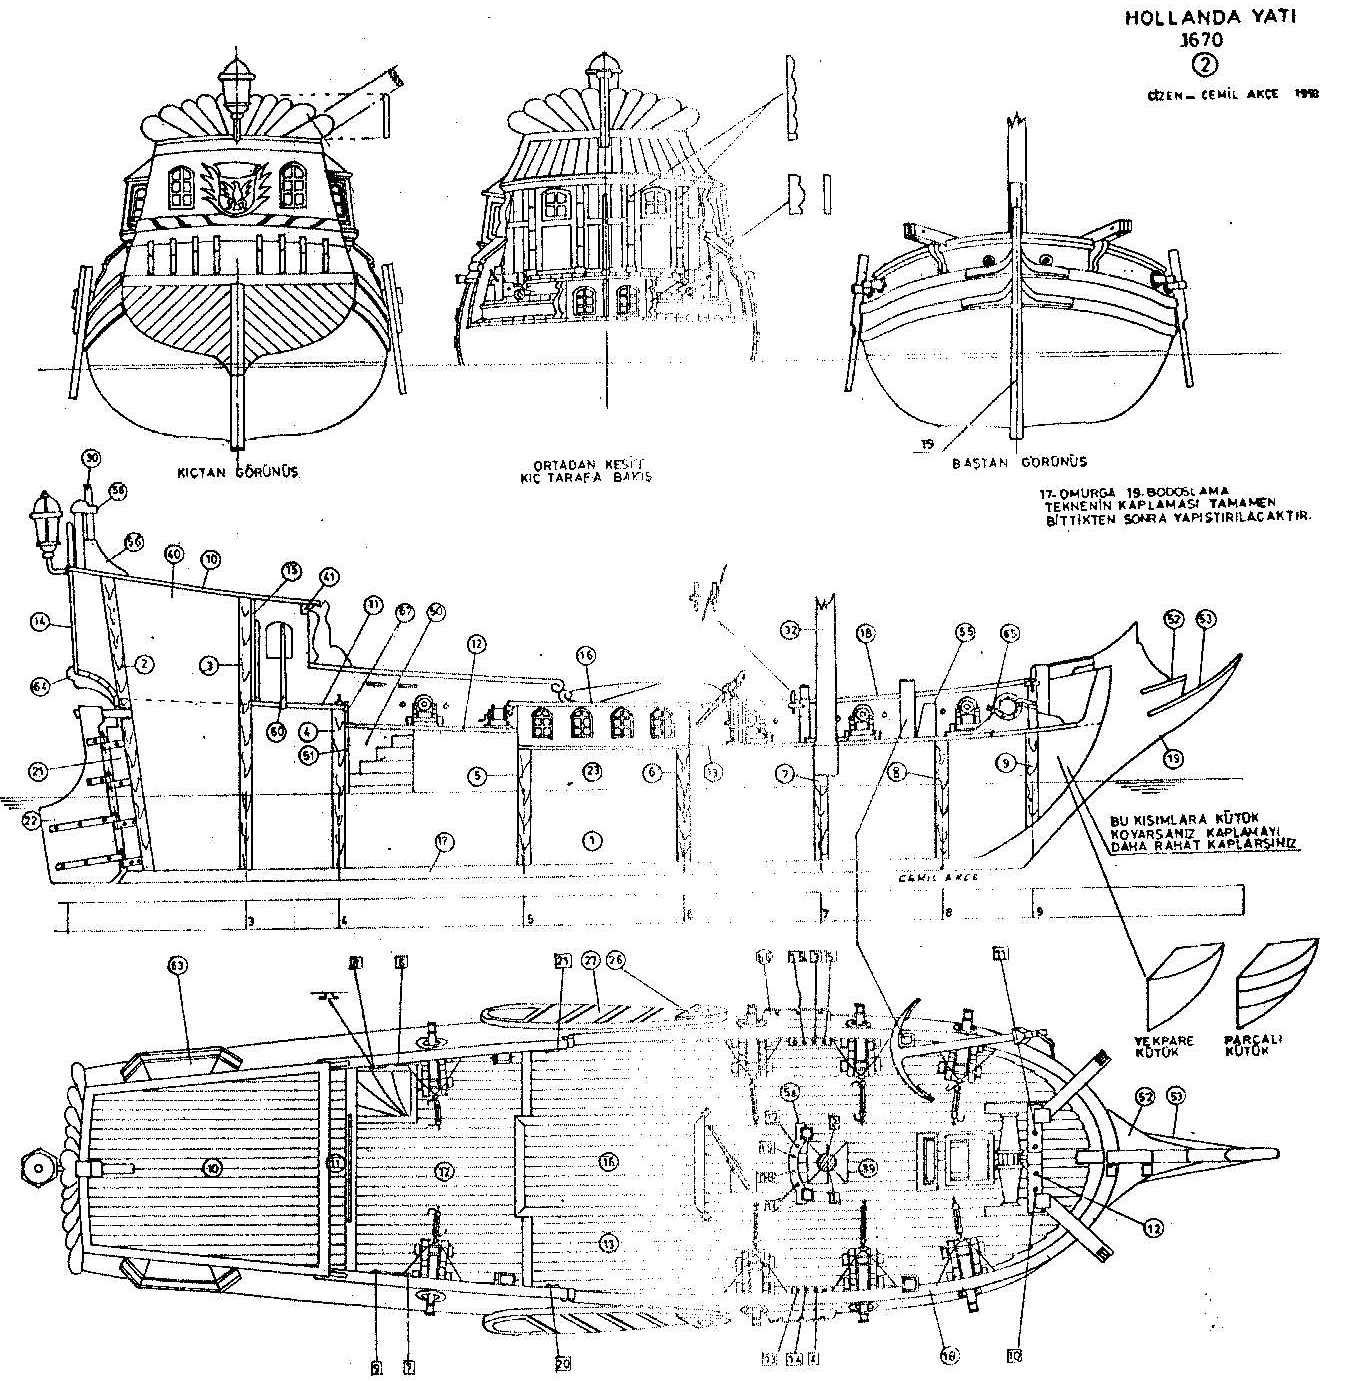
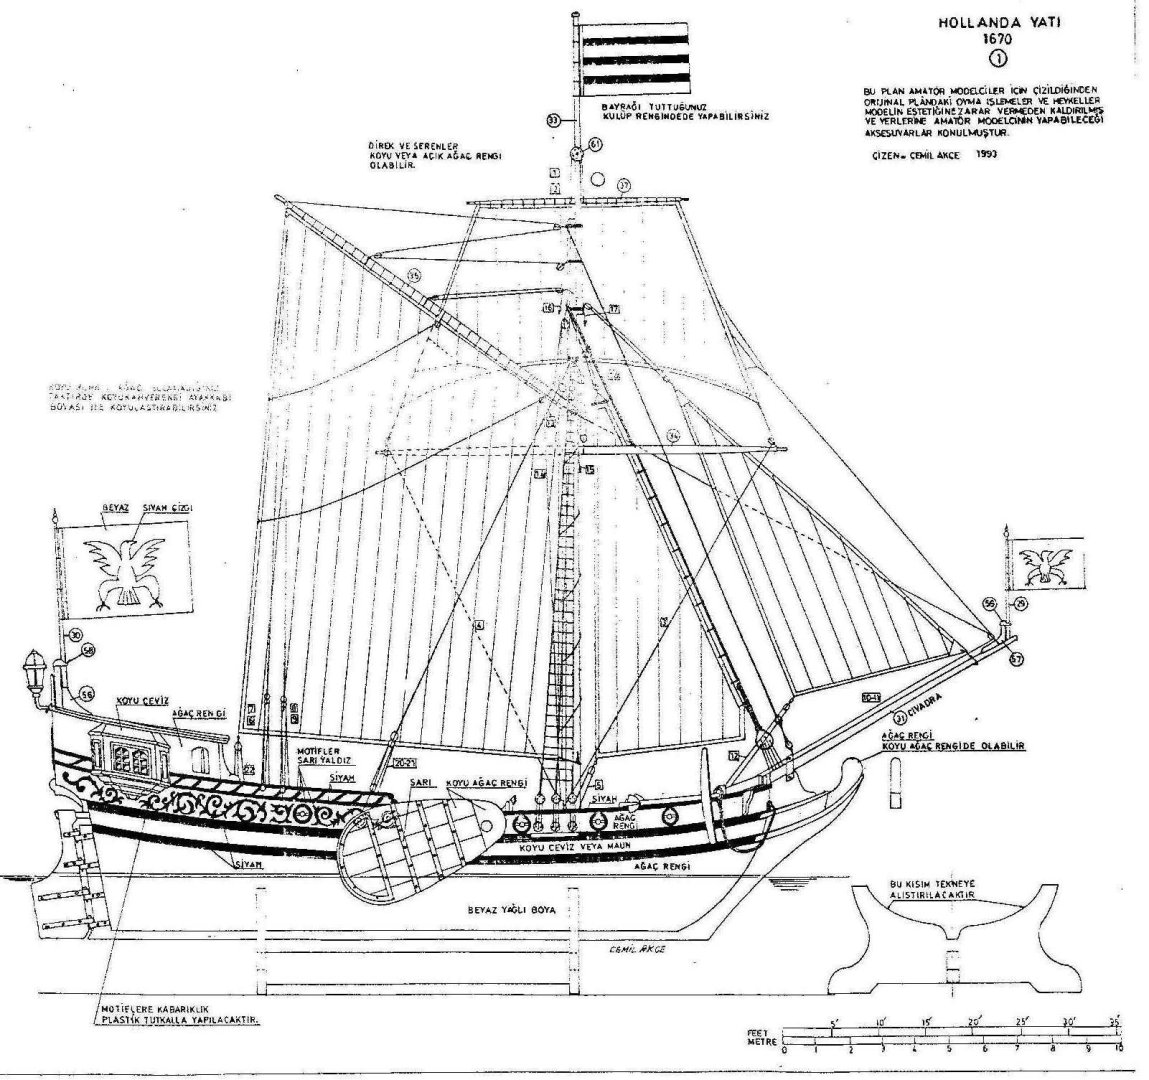
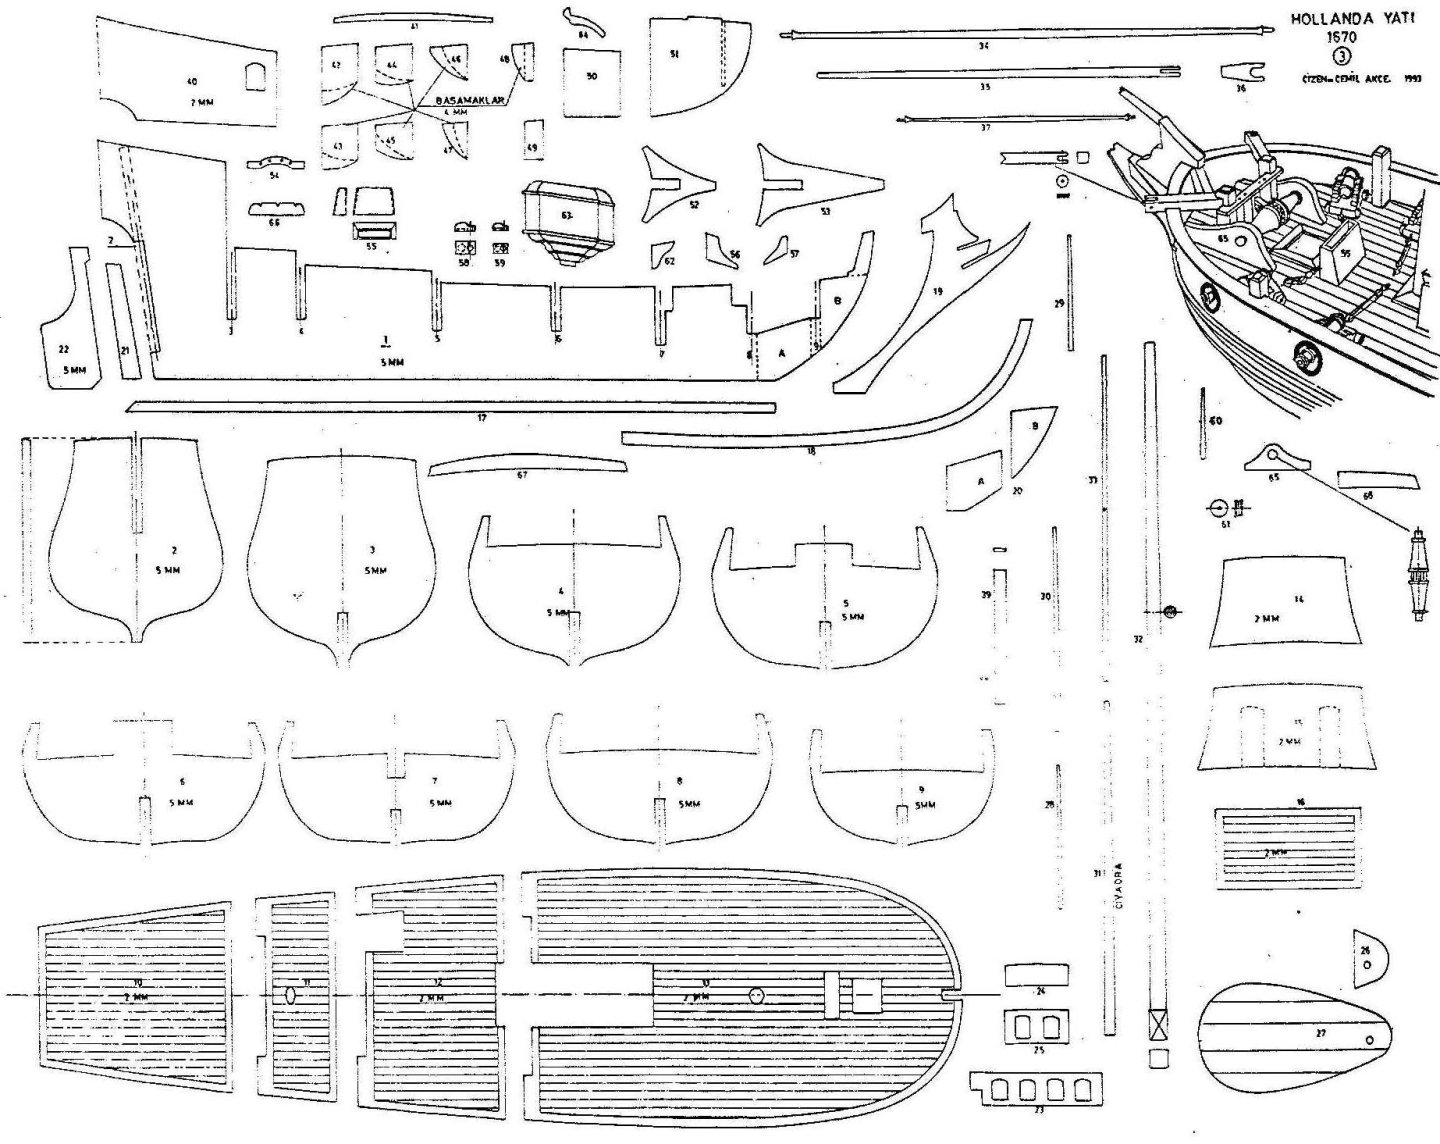
Having run out of space in my work room, and also discovering the wonderful work done by @Javier Baron, I am going to have a crack at a miniature build myself. The ship I plan to build is a 21m/69' Dutch yacht which will be reduced in length to 107mm/4.212". Plans for this ship are fairly detailed but written in Turkish and are not very clear so I anticipate a bit of fun along the way. I don't mind challenges.😯 Wish me luck as I 'go on my way' down a possibly rocky road. Cheers,

- 55 replies
-
- 12
-
-
- miniature
- Brandenburg State Yacht
- (and 1 more)
-
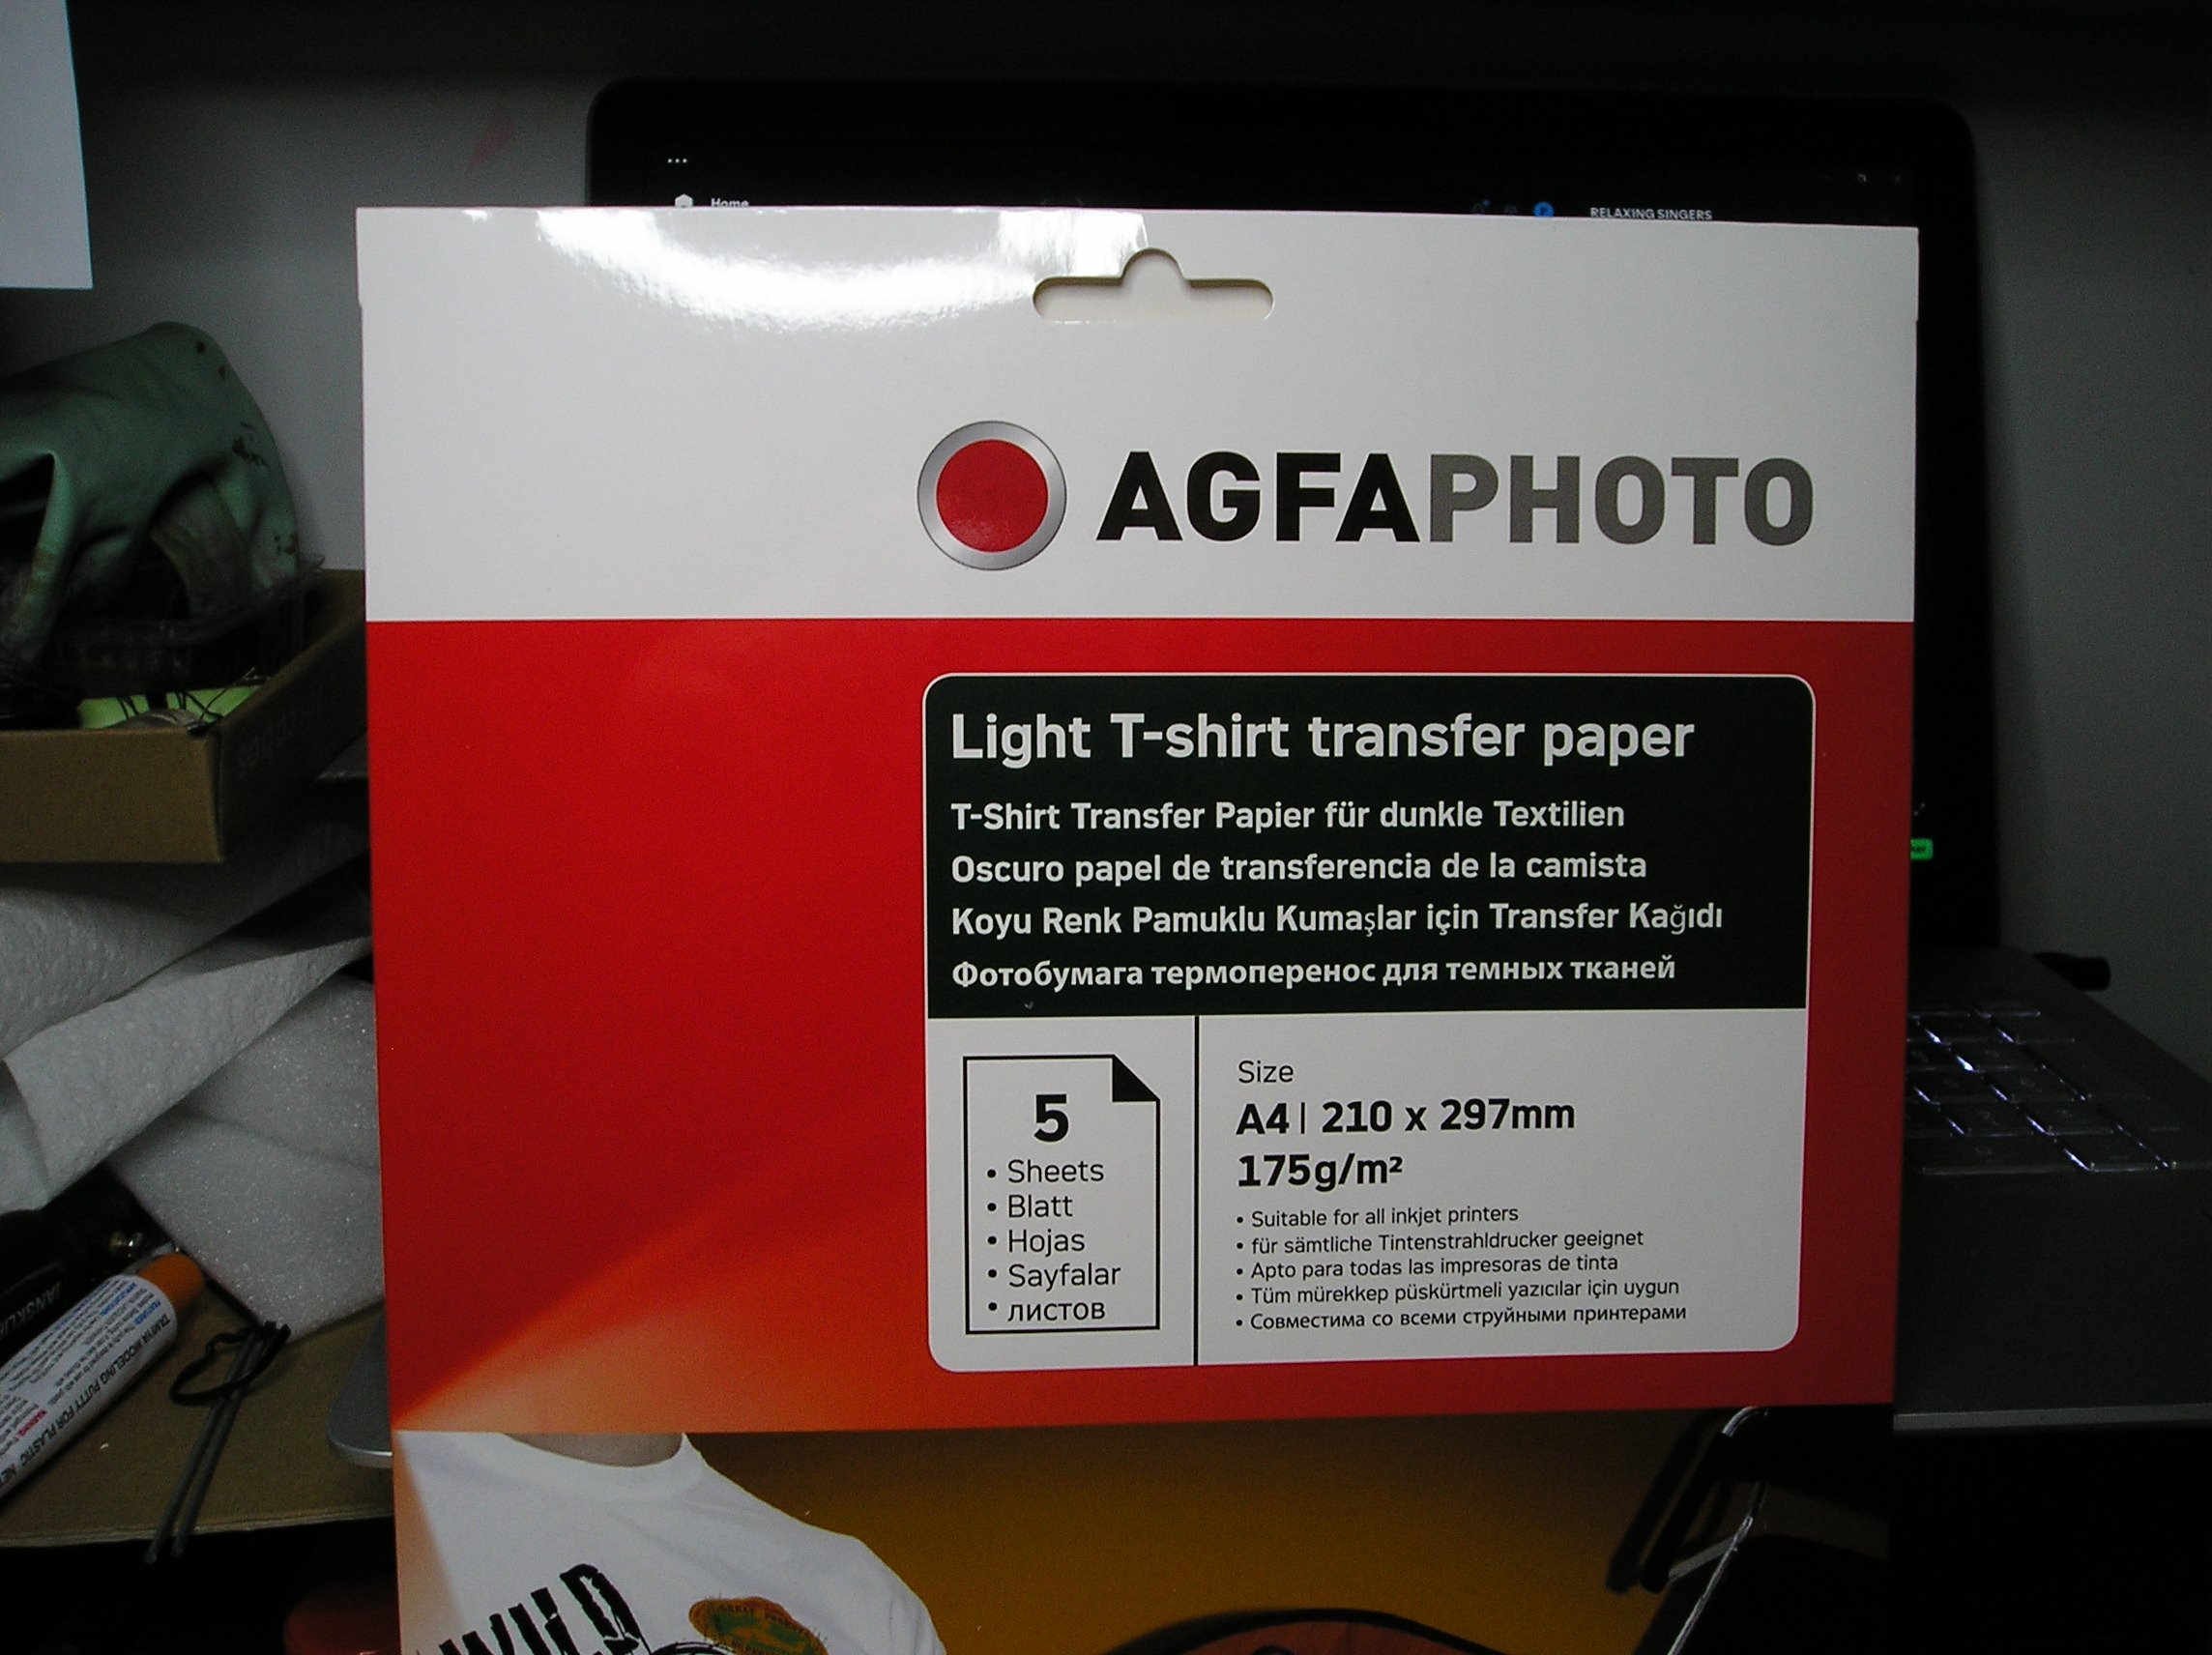
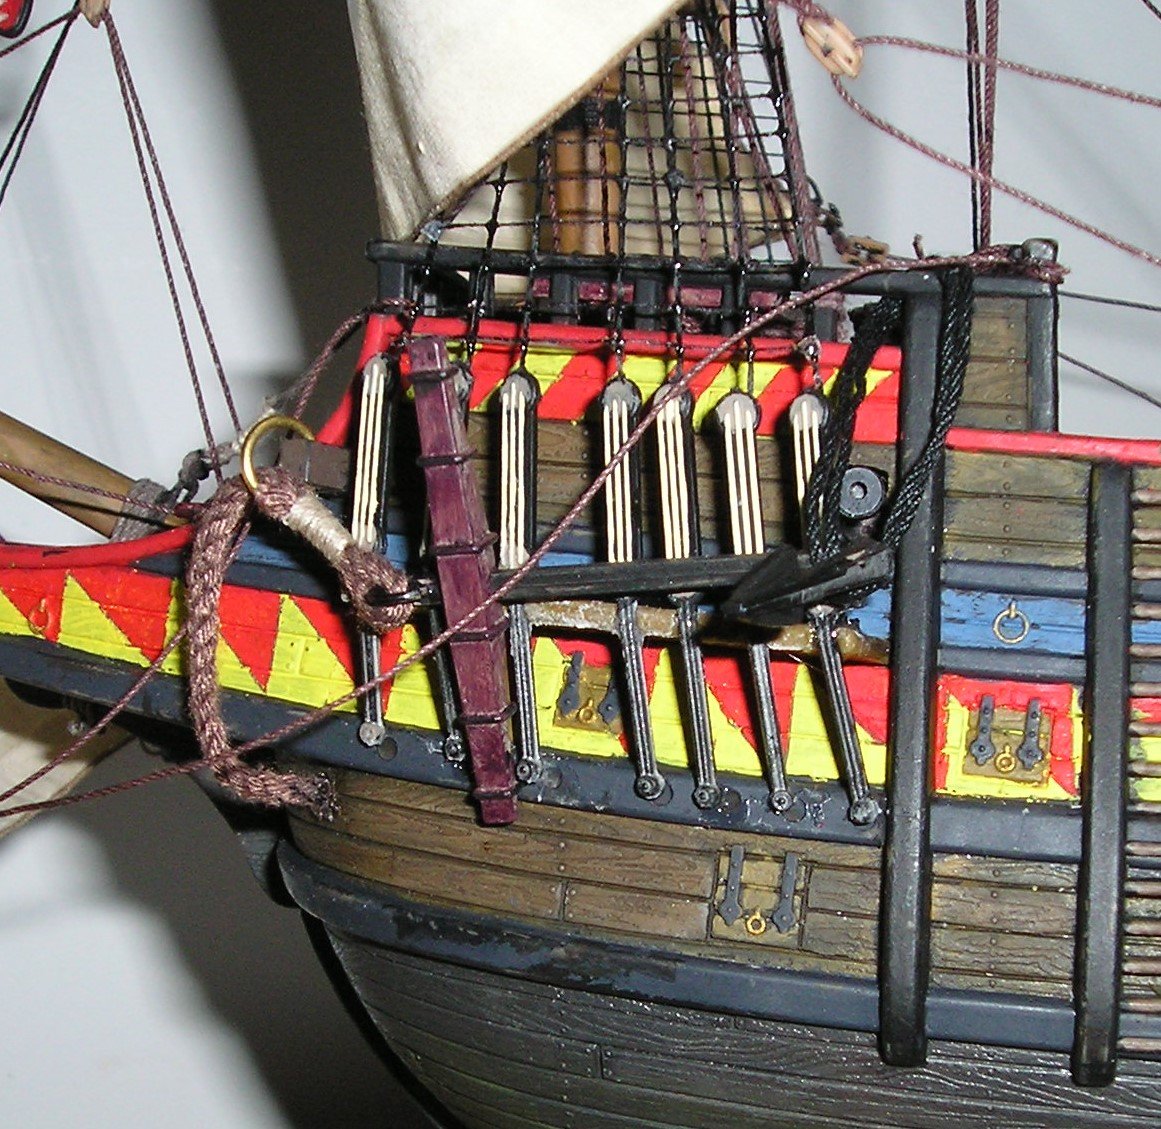
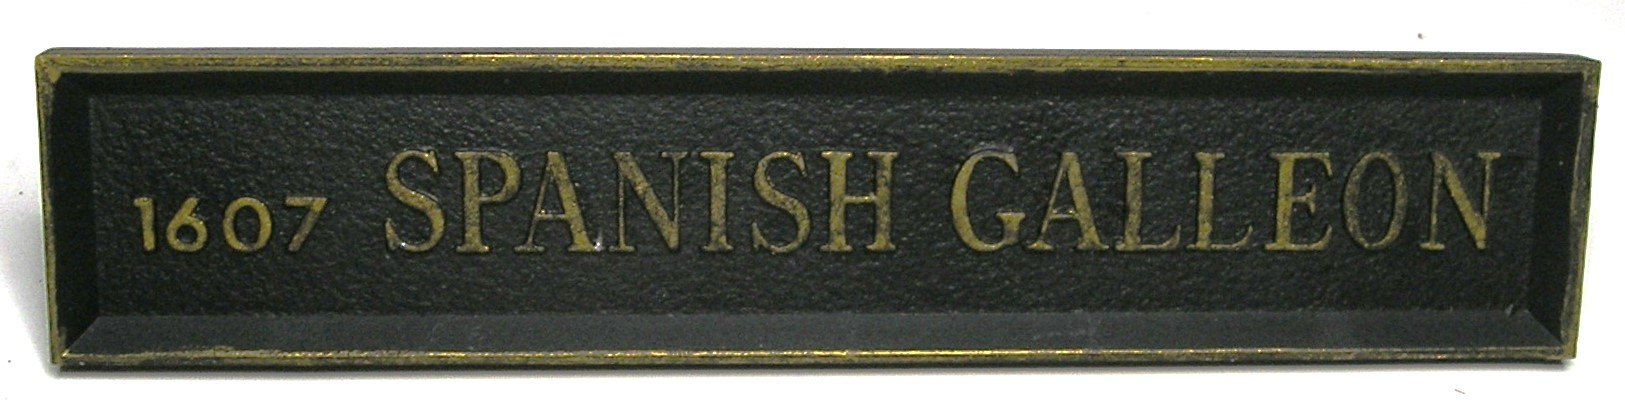
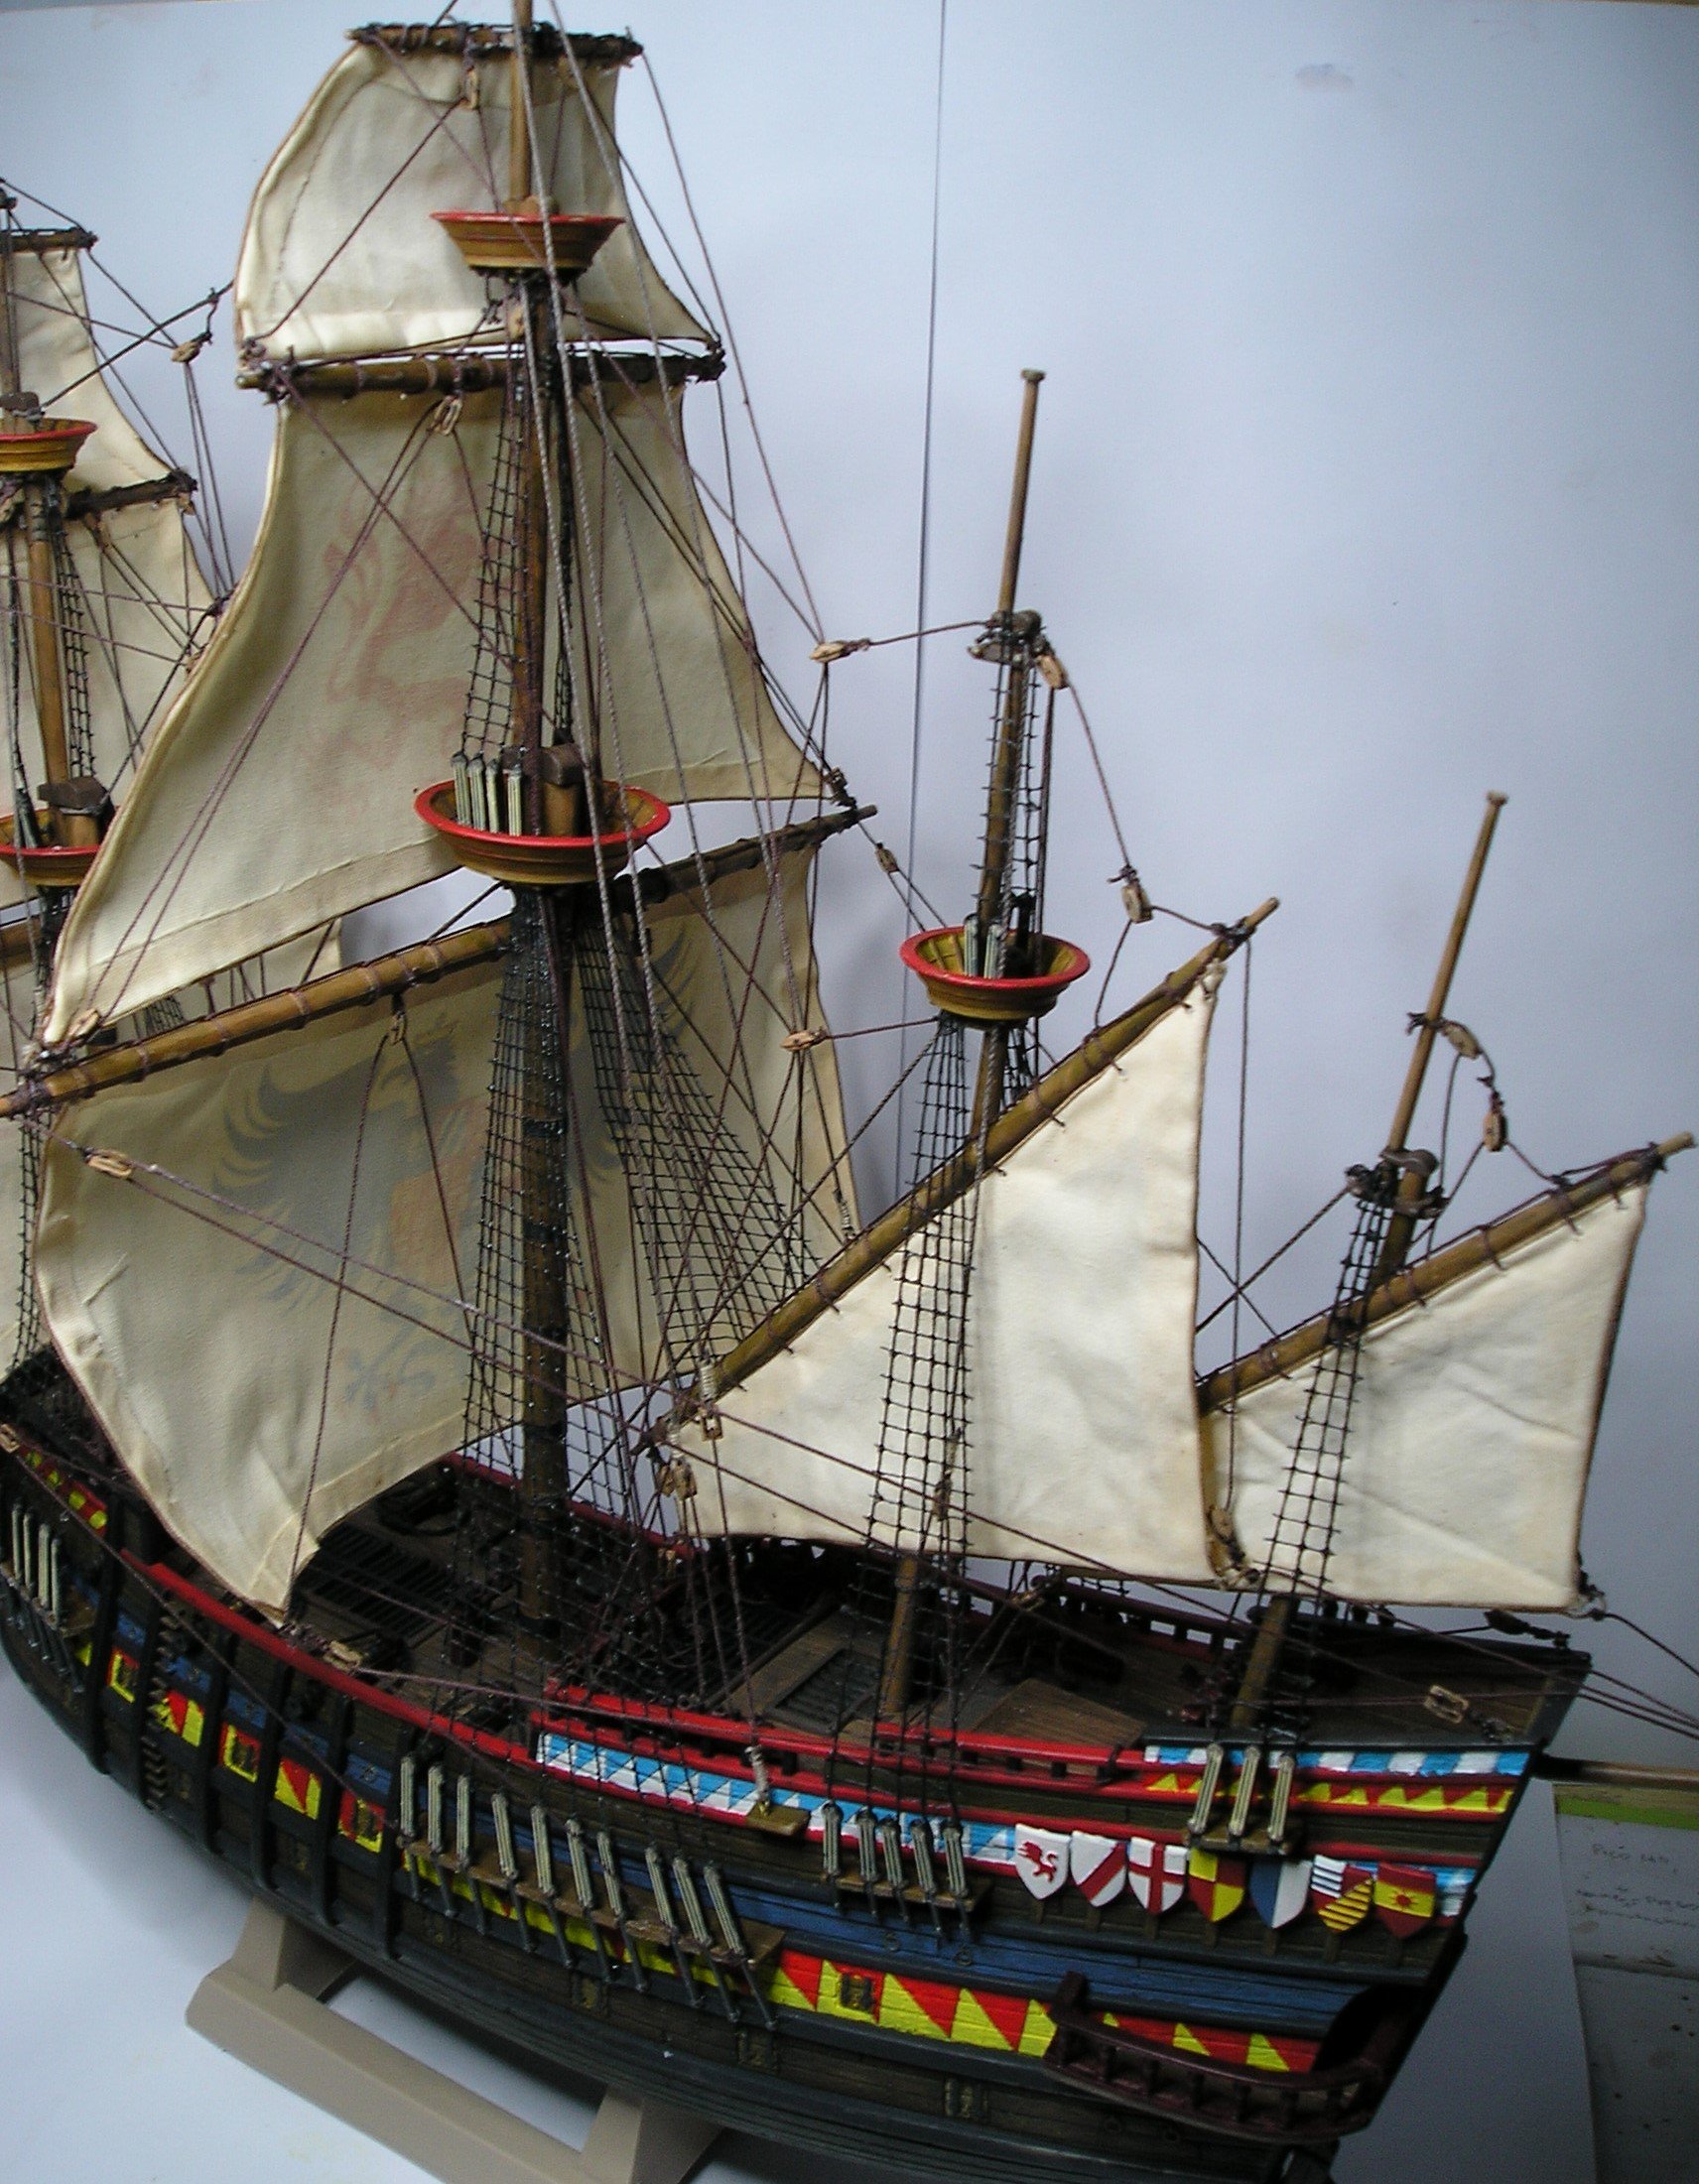
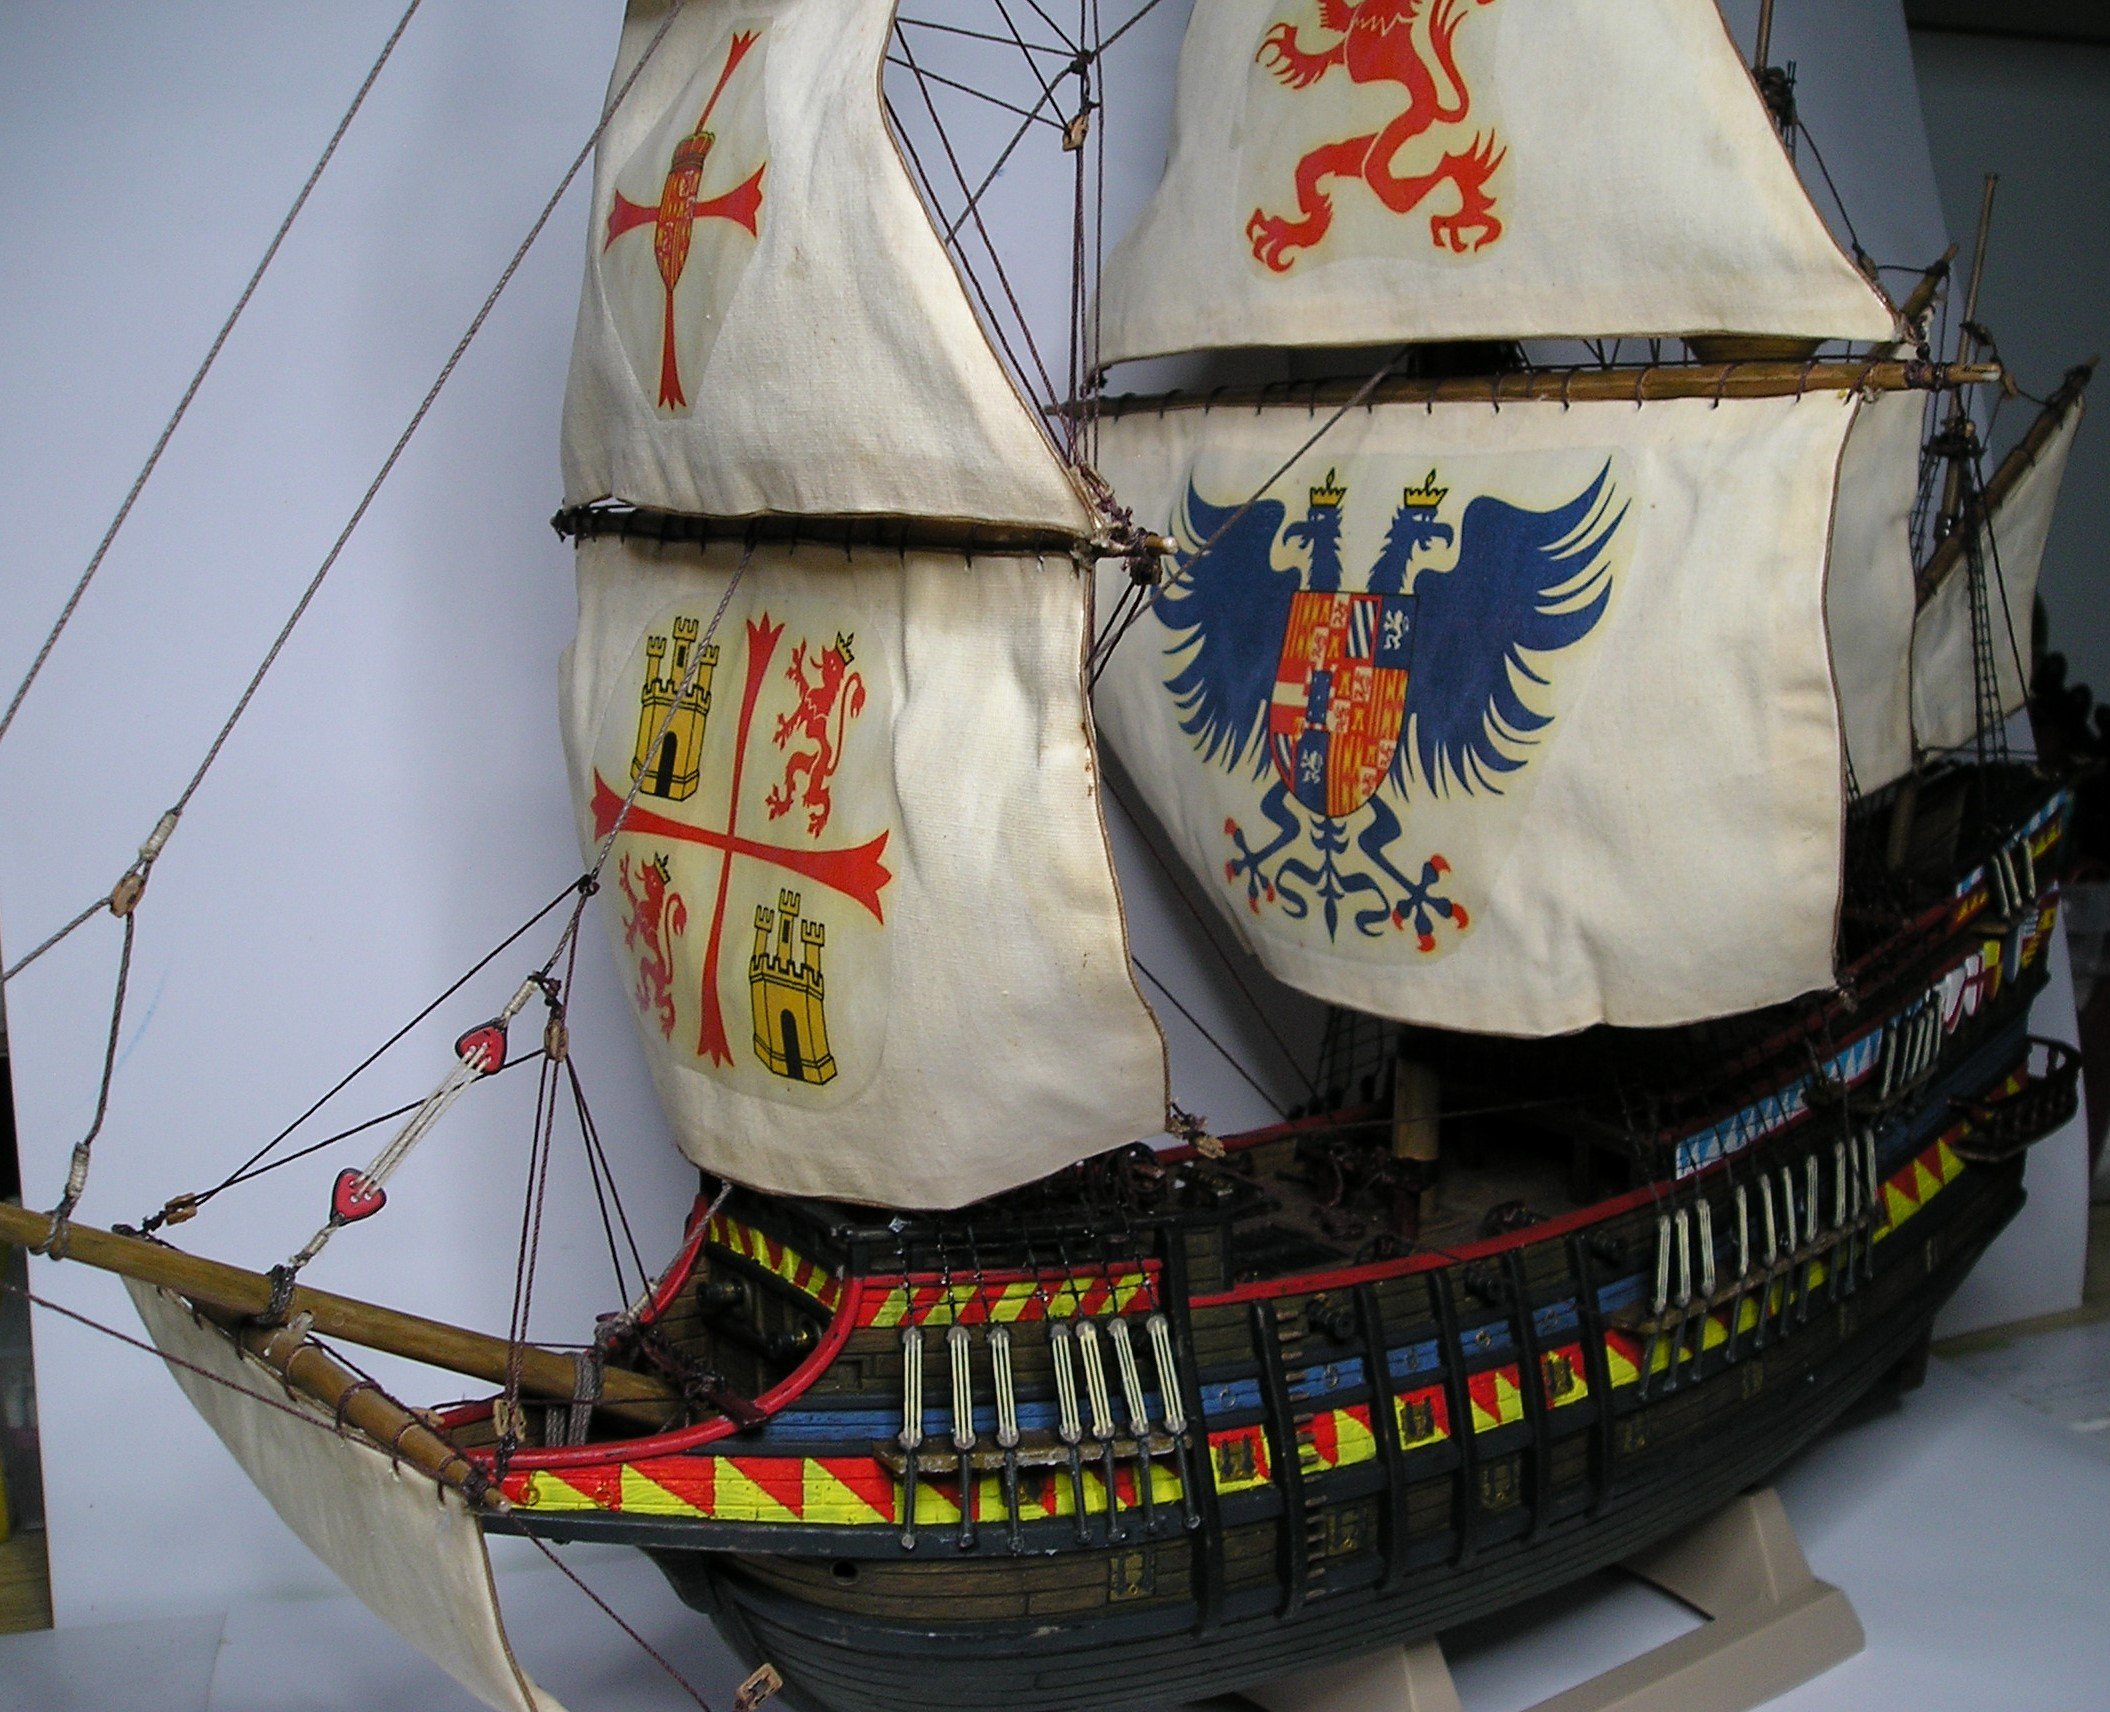
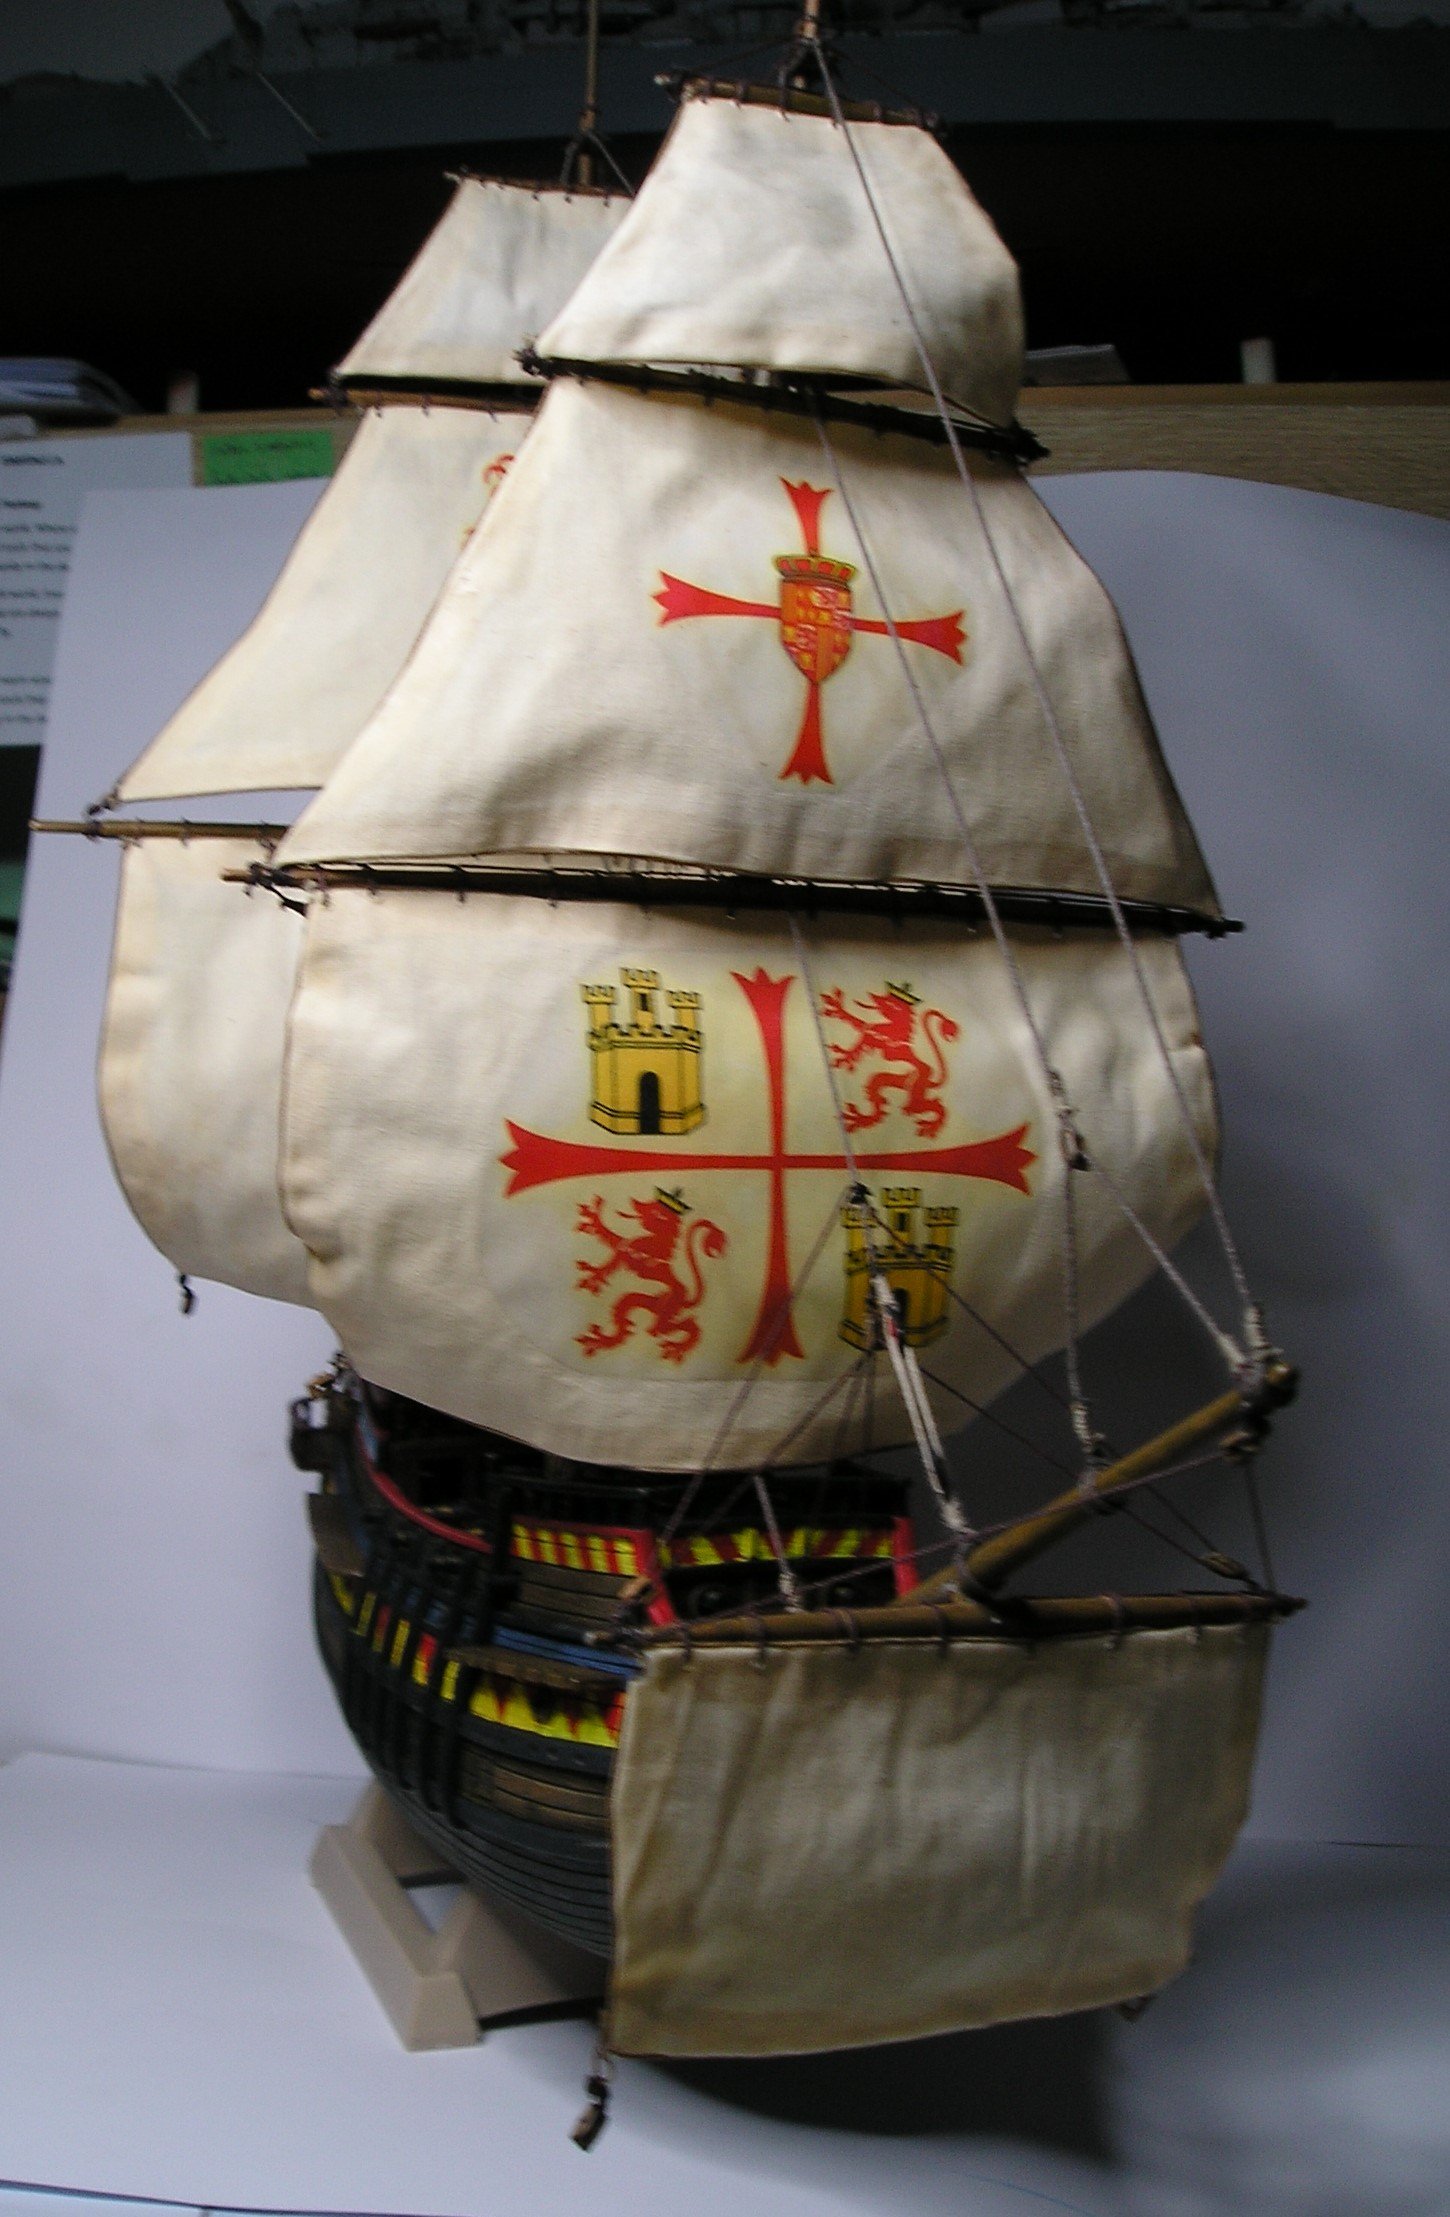
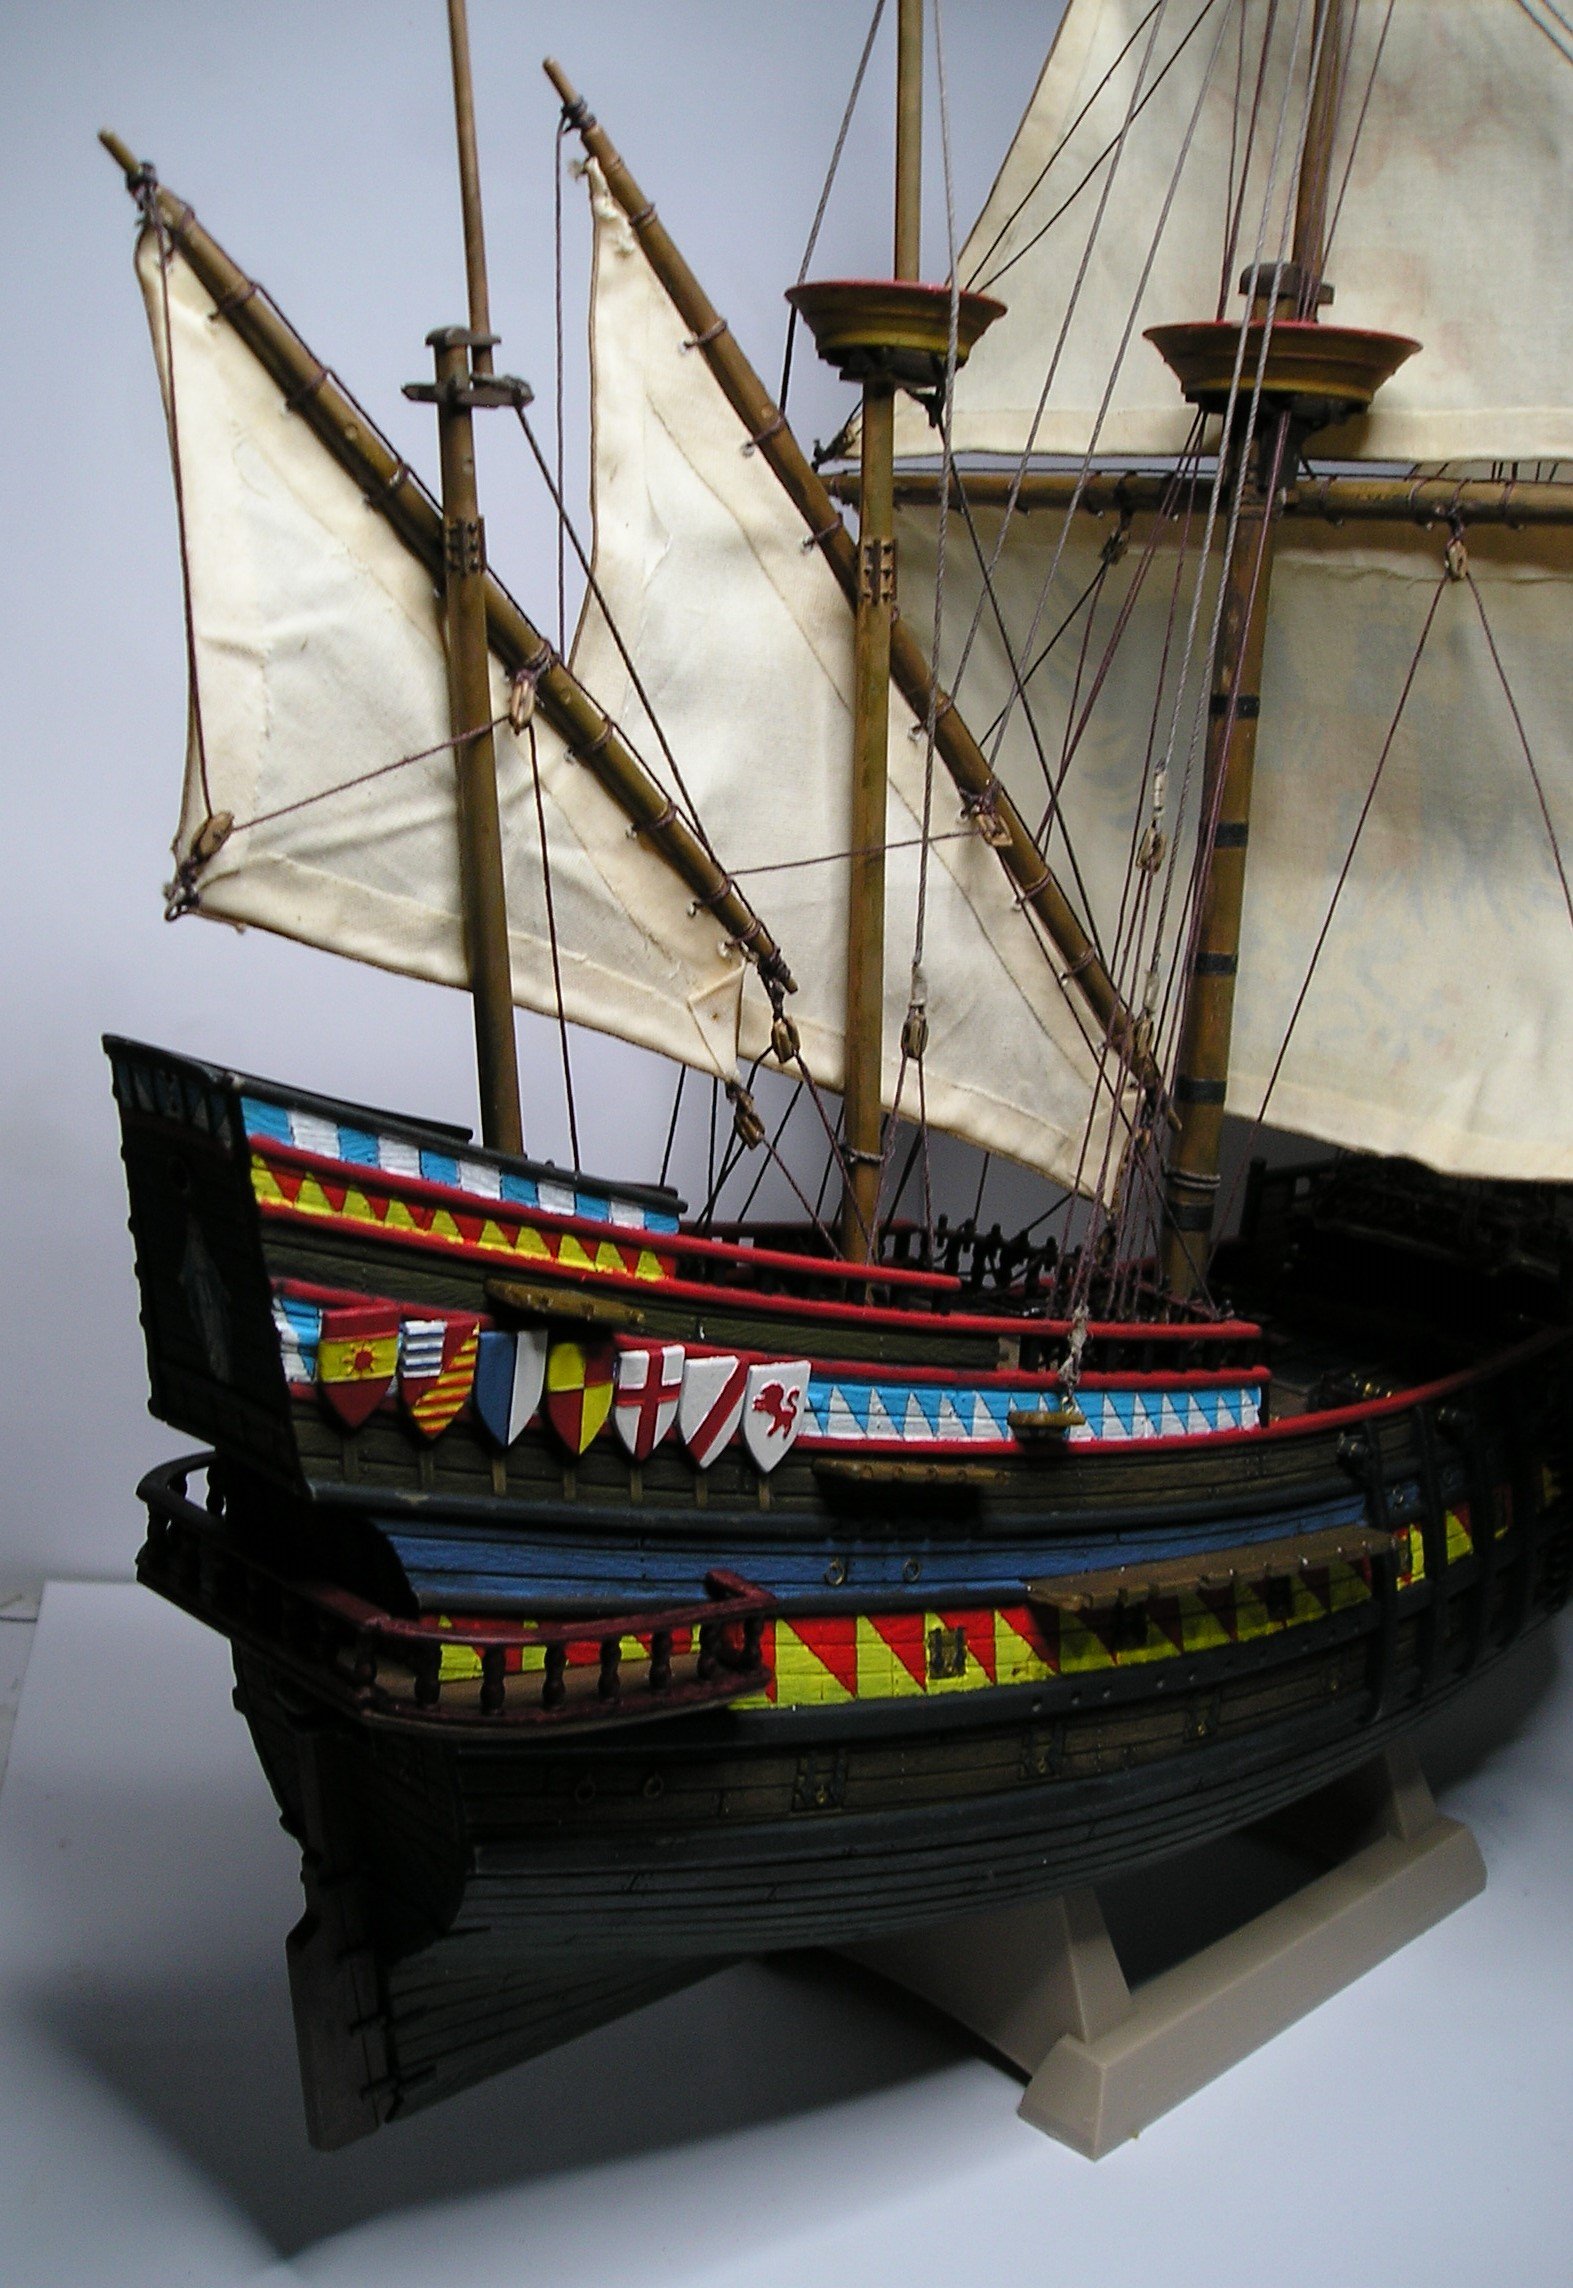
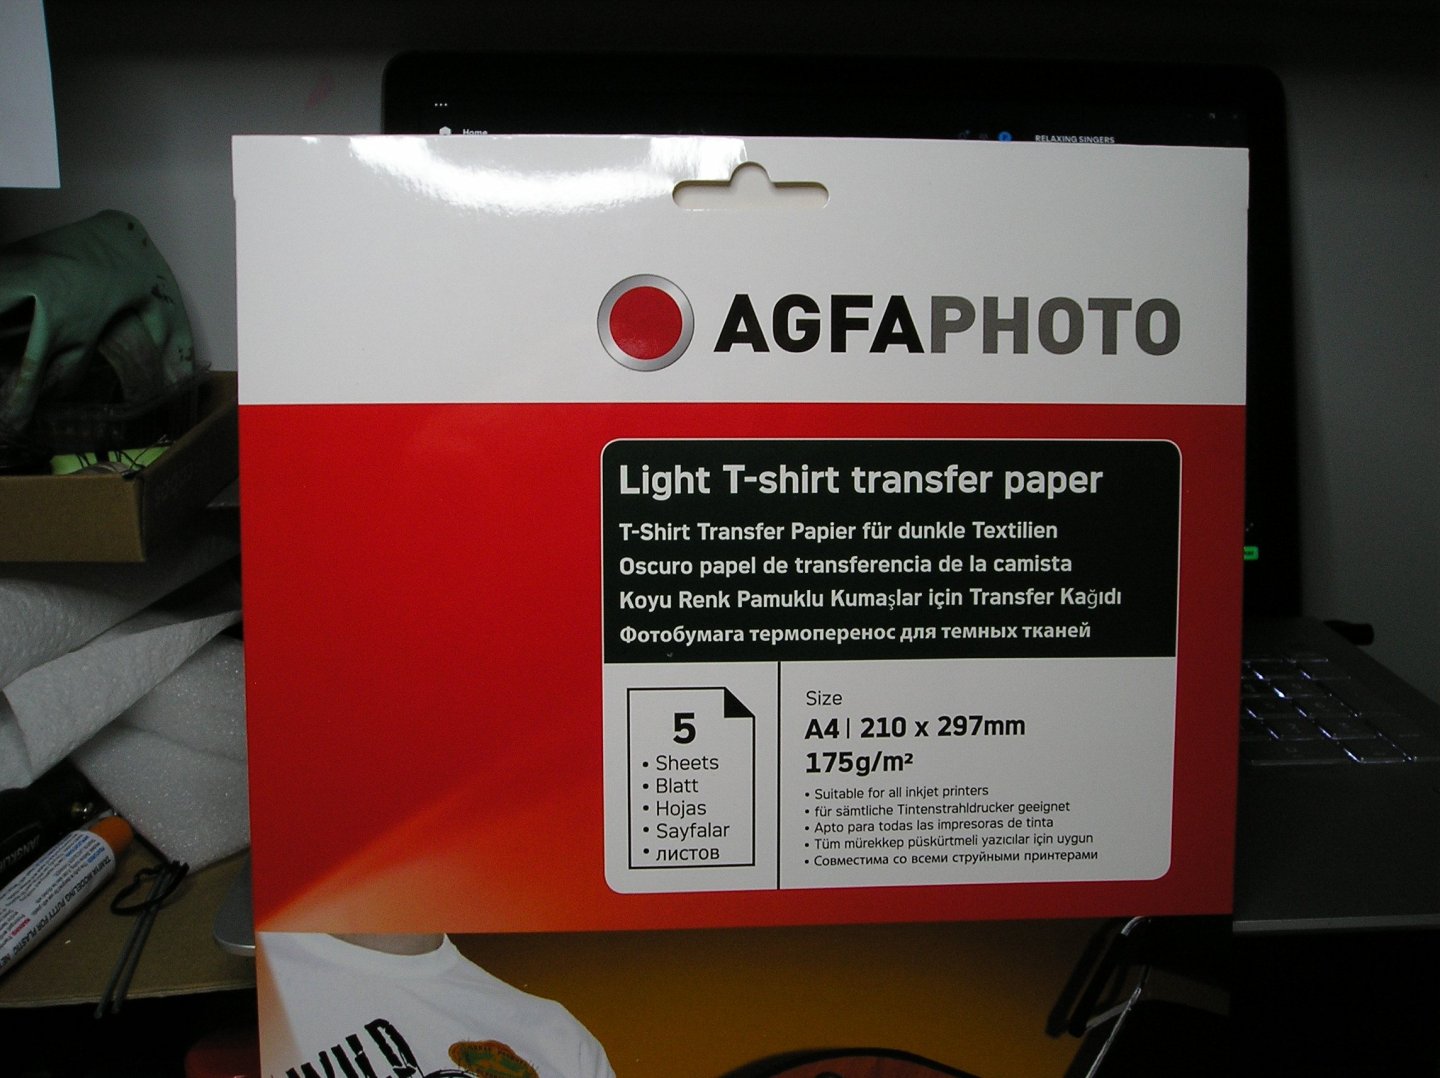
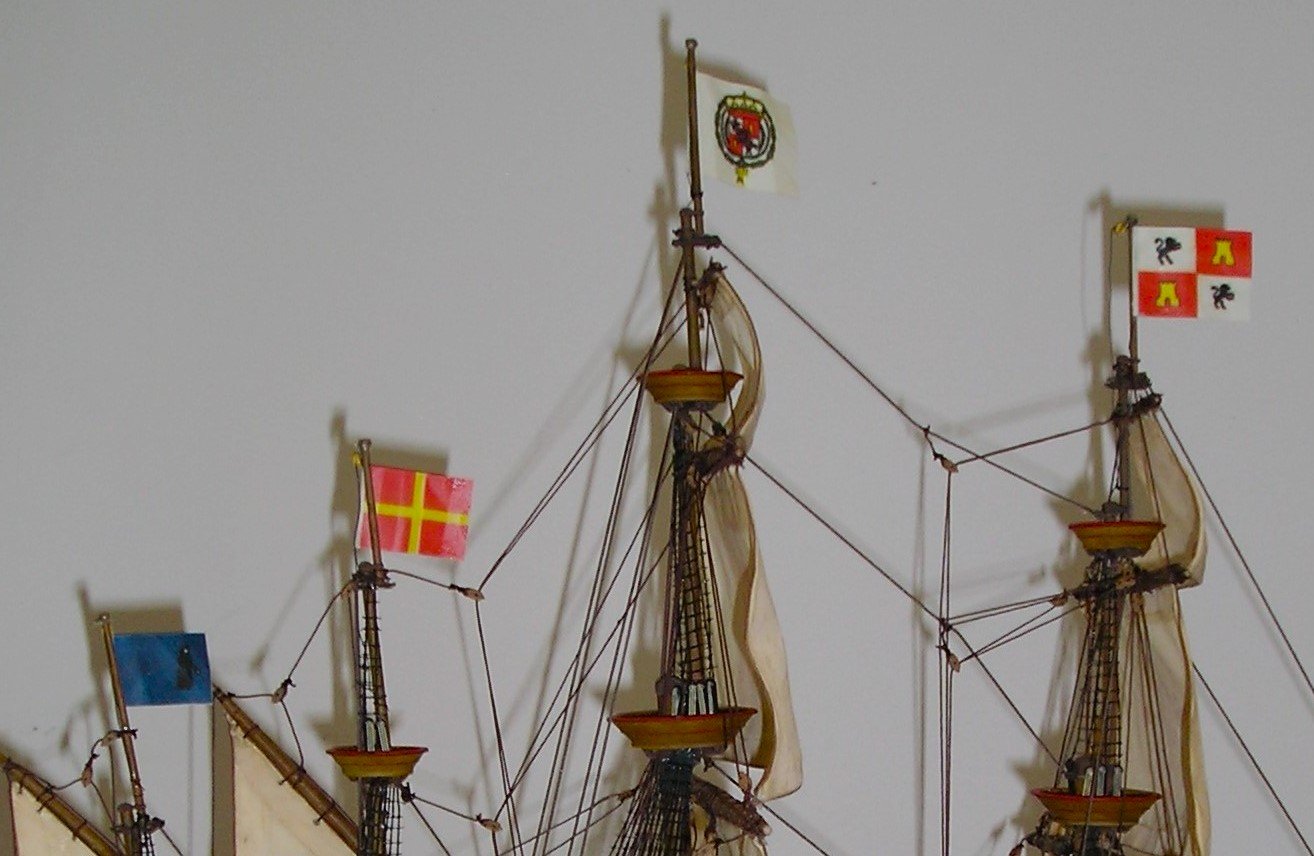
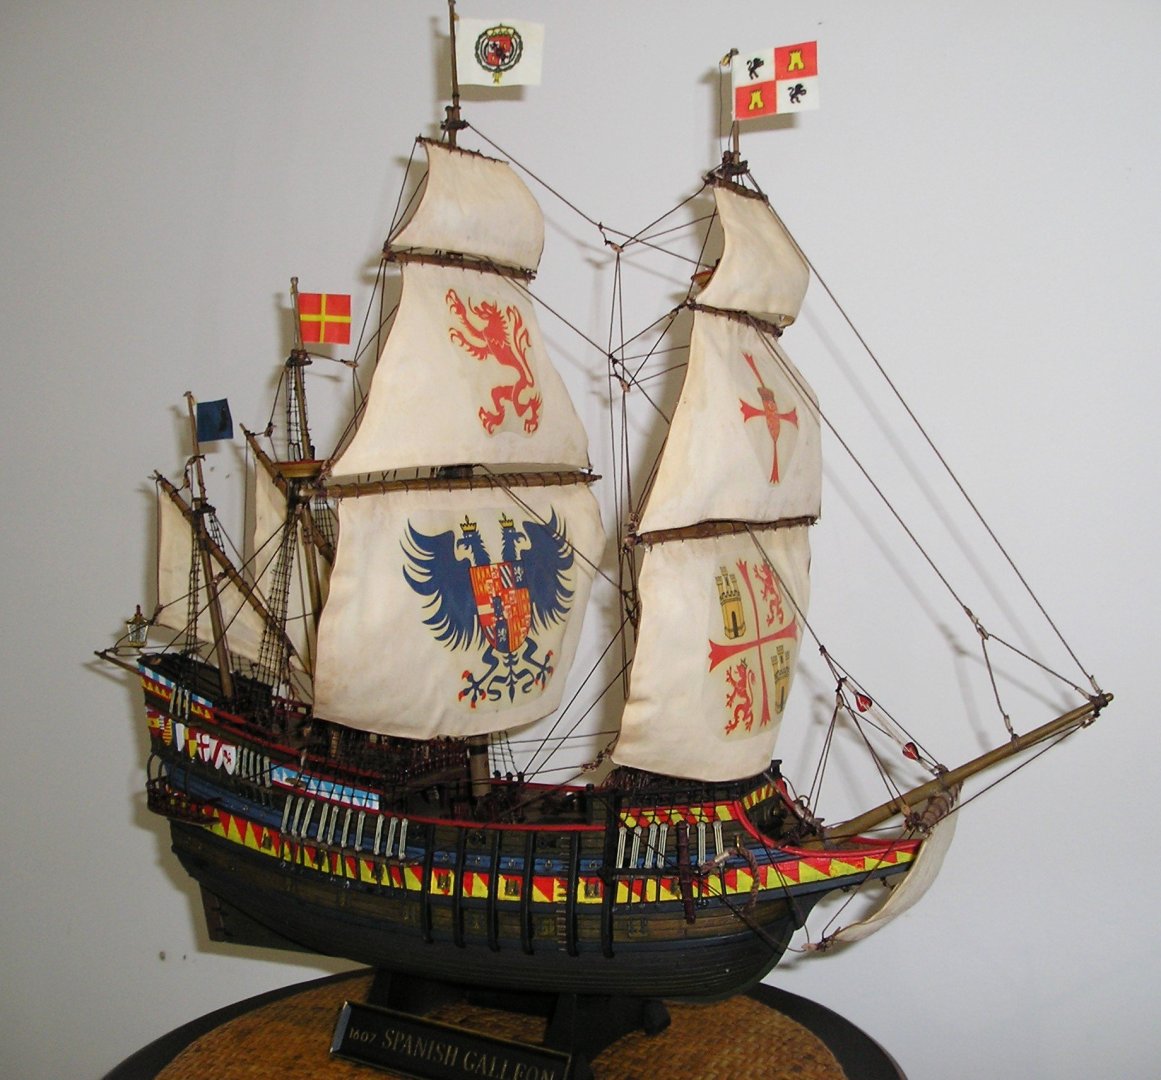
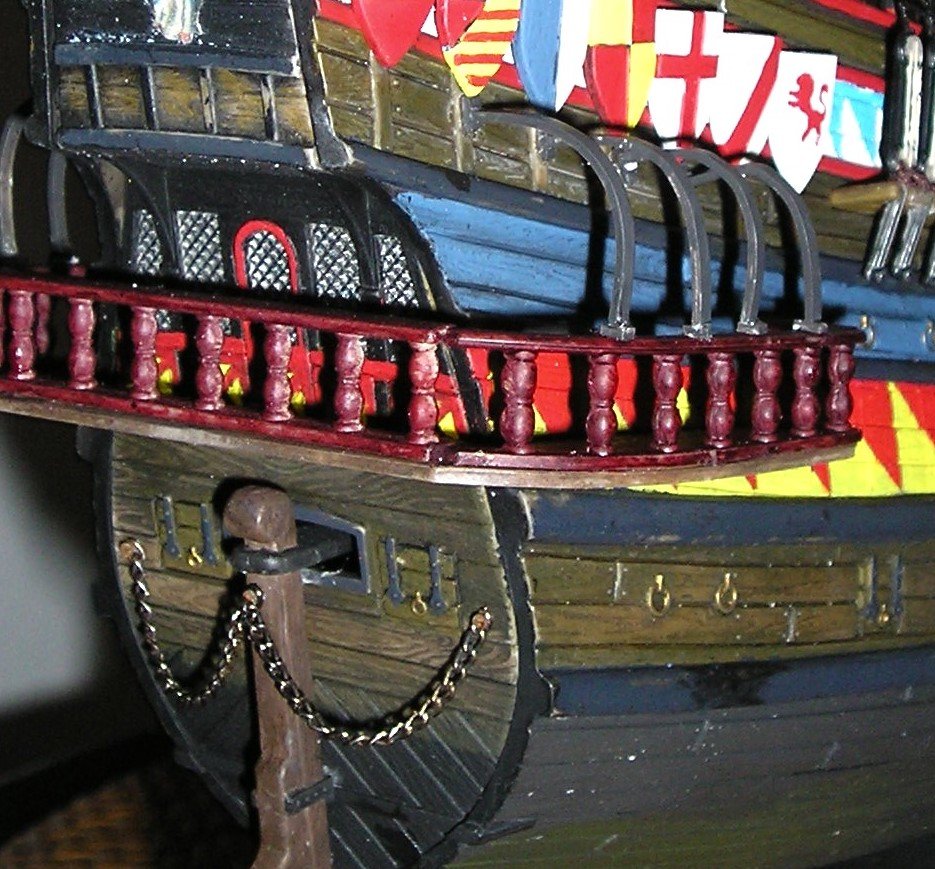
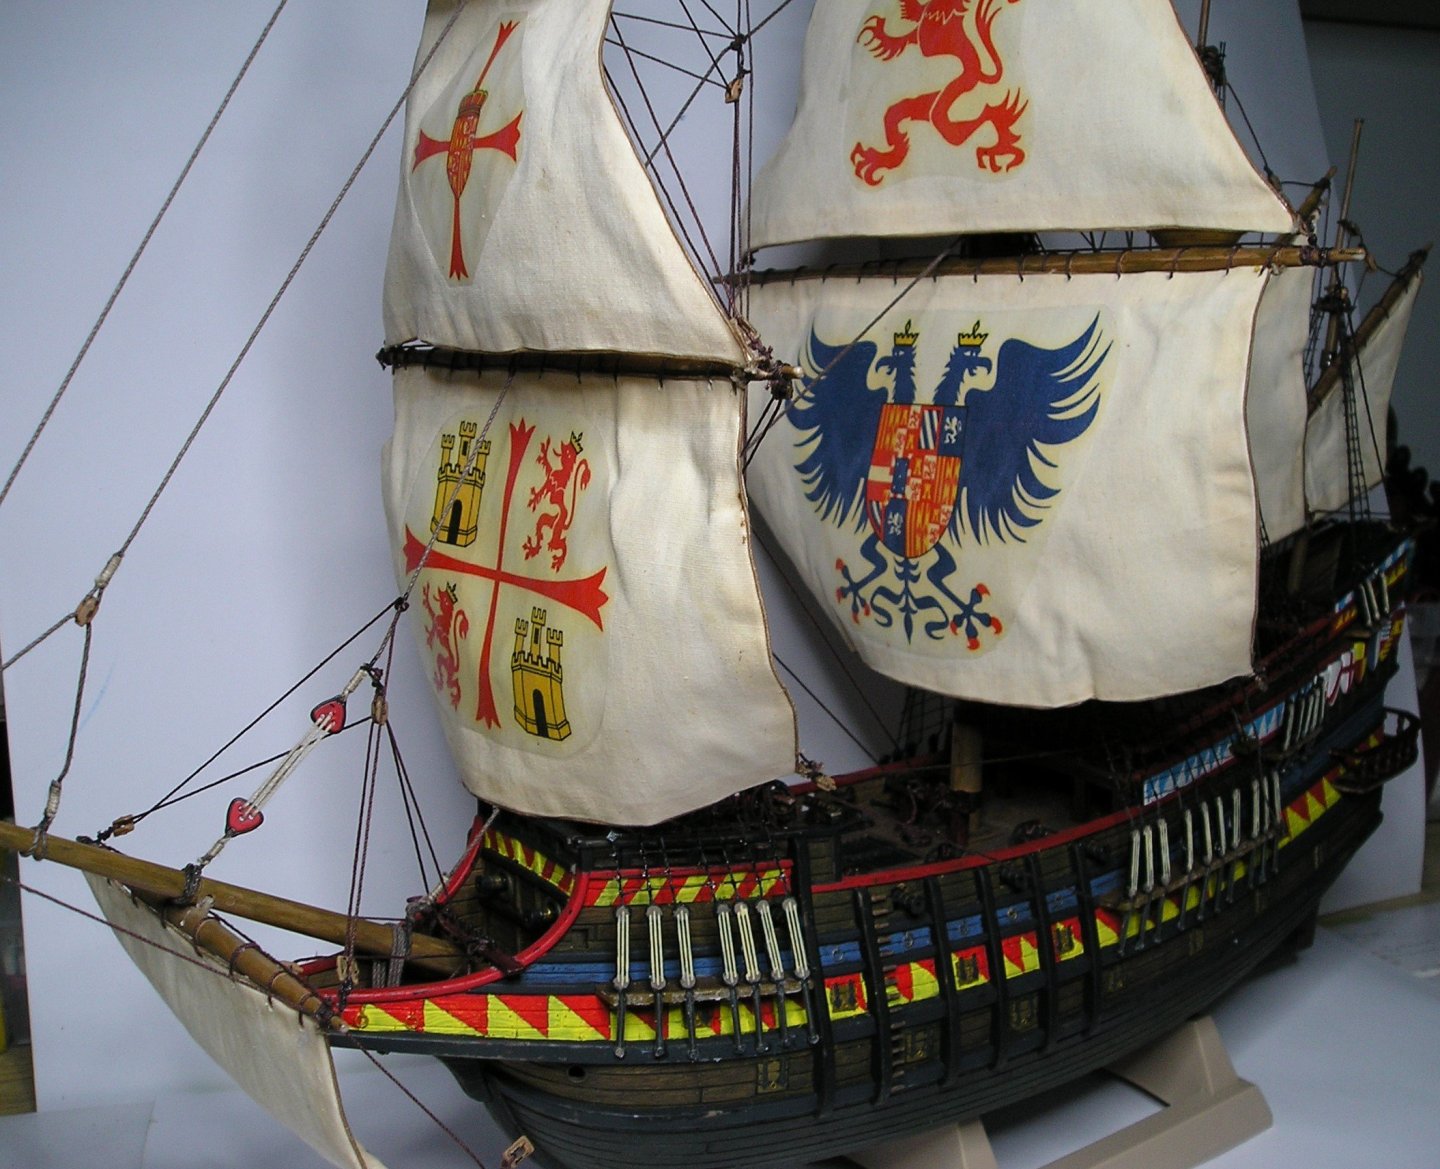
Finishing touches are all done. These included: Flags The supplied flags were very unevenly coloured when I compared both sides, so I made computer generated mirror images and ironed them onto a transfer paper and then onto both sides of a light cotton material. Anchors Name Plate Lantern Arches (idea compliments of @kirill4) and stern rudder chain (name unknown to me) Alterations/additions to original 1979 Spanish Galleon Kit include: Cotton sails (not plastic) Natural thread shrouds and ratlines (not plastic) Transfer paper sail images (not decals) Arches Rudder chain Thanks to all those who followed this build, gave advice and encouraged me along the way: @mtaylor @Bill Morrison @Ferrus Manus @Louie da fly @Baker @Knocklouder @ccoyle @GrandpaPhil @kirill4 @Bob Fraser @Marcel1981 and others Cheers, Finished Posts can be found here


- 69 replies
-
- 8
-
-

-
- spanish galleon
- Imai
- (and 1 more)
-
Staining looks better and is easier to do at this stage. 👍 Cheers,
-
Barbara, I agree with the clove hitch knot. There are plenty of sites on the web that show you how it is done. Cheers,
-
Steven @Louie da fly, it's very imaginative what we do at times when we have to. For example, I don't know how acceptable it is to go through shrouds with lines, but I have done it once or twice on my larger builds. Maybe I'm breaking the rules but I'm sure nobody notices! Cheers
- 69 replies
-
- 2
-
-
- spanish galleon
- Imai
- (and 1 more)
-
G'day all and thanks to those who continue to support my build. That choice of doing the rigging before the one-piece shrouds worked out well. Because of the 1/100 scale of this ship, it would have almost been impossible to get to the bailey pins if the shrouds were in the way. Adding the self-made shrouds was not an issue as I only had to cut one line on each of the port and starboard sides. I was able to fit in between all other obstacles. So that you don't get the wrong idea ... I am not recommending this approach for all ship builds, just this one because of the scale and kit provided plastic shrouds. Besides, shrouds are essential for steadying and straightening masts in normal builds. Thanks again for your support. Cheers,

- 69 replies
-
- 3
-
-
- spanish galleon
- Imai
- (and 1 more)
-
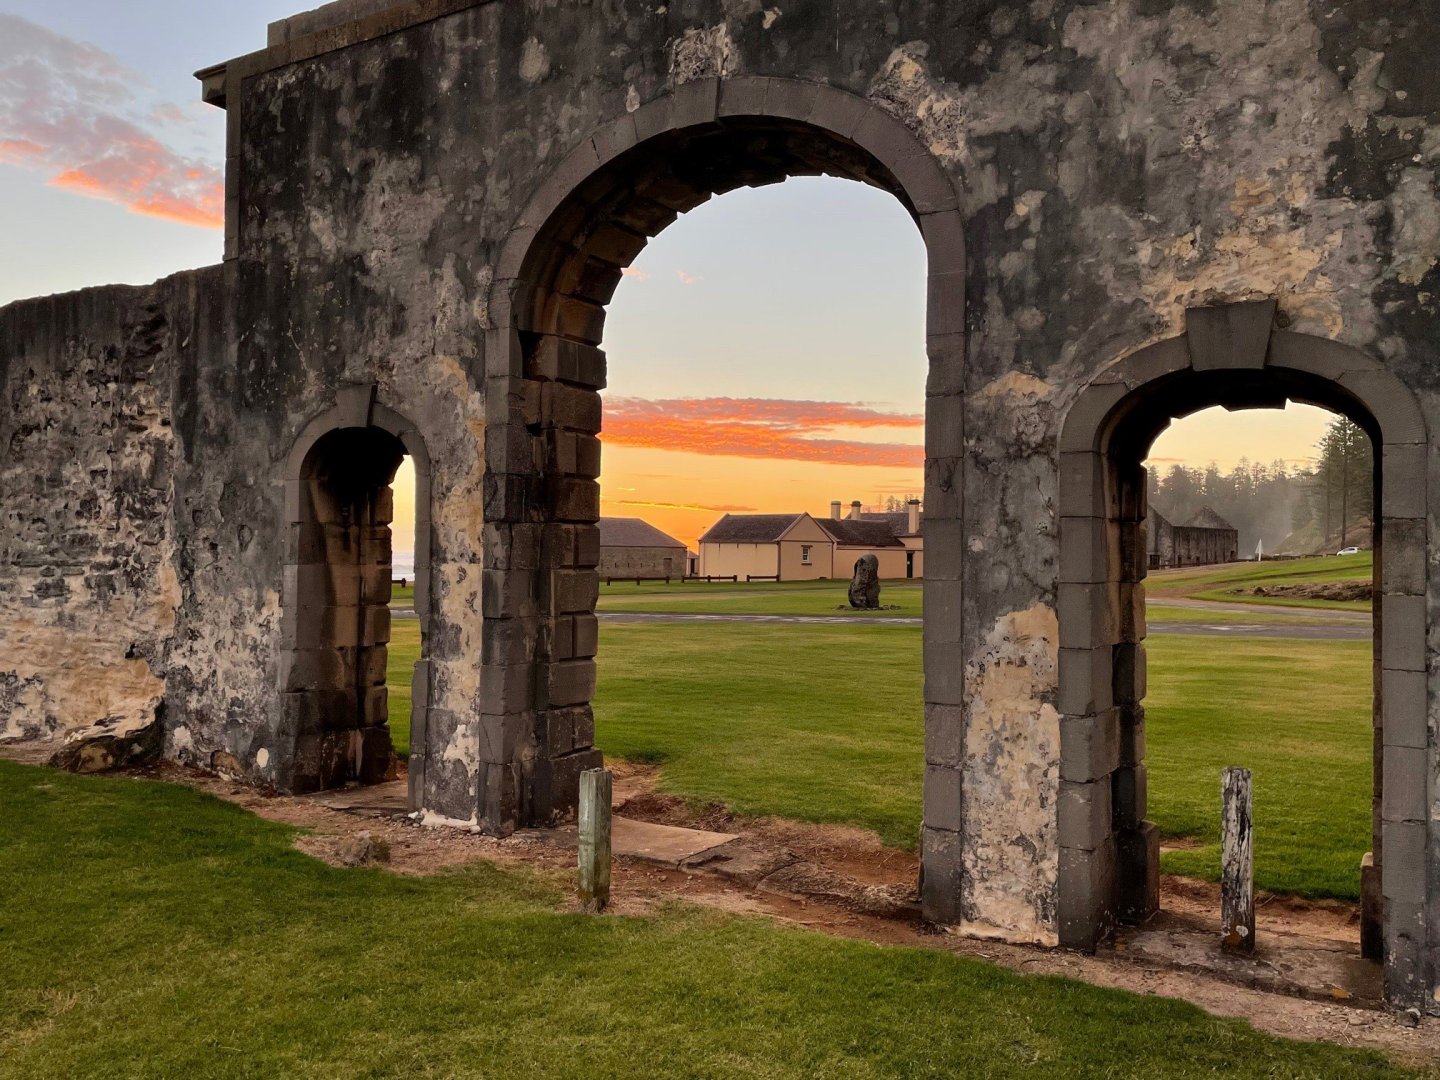
Norfolk Island is intriguing. It has history, nature and beauty all rolled up in one place. No penguins though. 🐧🐧🐧 Cheers,
- 235 replies
-
- 8
-
-
-
- Banshee II
- Bottle
- (and 1 more)
-
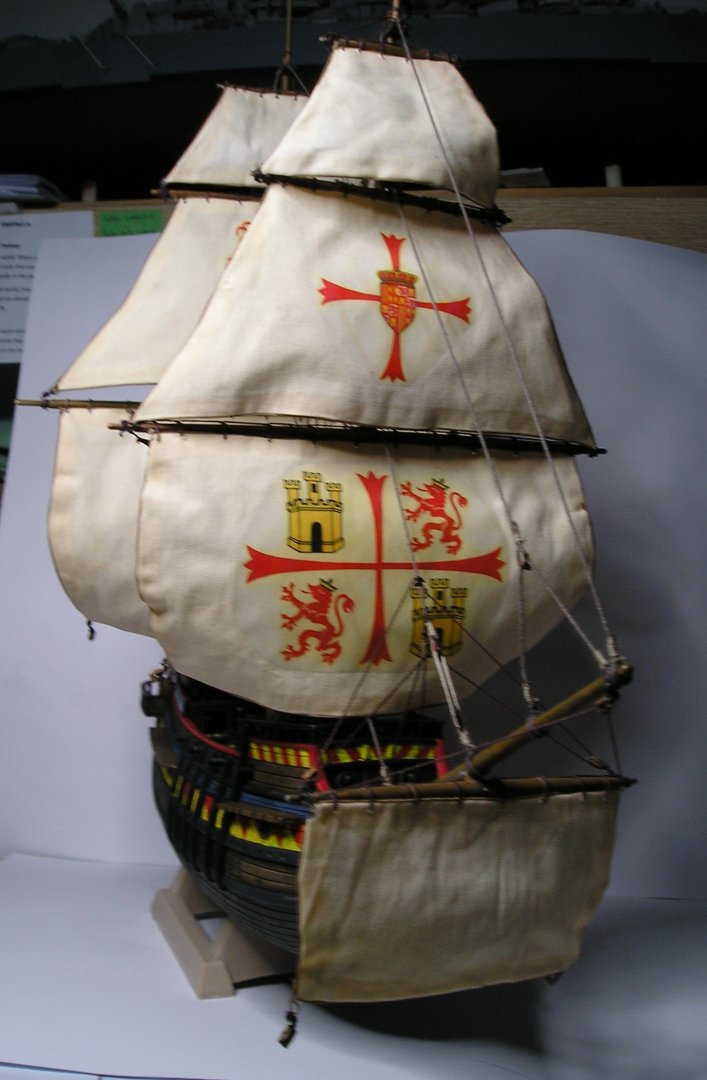
Greetings! It's been a few days, but I have managed to add all the sails as well as complete the rigging for the fore, mizzen and jigger masts. The sails were easy but the 1/100 scale rigging onto minute bailey pins was a real challenge. I'm pleased that I have left the shrouds till later as they would have made the rigging even more difficult. Tomorrow, I hope to rig the main sail and may even add the shrouds! 🤯 Thanks again to those who follow and support my efforts. Cheers,


- 69 replies
-
- 4
-
-
- spanish galleon
- Imai
- (and 1 more)
-
Ik ben het helemaal eens Patrick. I would love to be able to answer in Dutch without a translation program, but i would embarrass myself! 😊 As far as the shroud/rigging debate goes, the shrouds are already in one piece so therefore each one only needs fastening to the channel and one place on the mast. I think that will work to my advantage. Tot ziens, Prost, 😉
- 69 replies
-
- 4
-
-
- spanish galleon
- Imai
- (and 1 more)
-
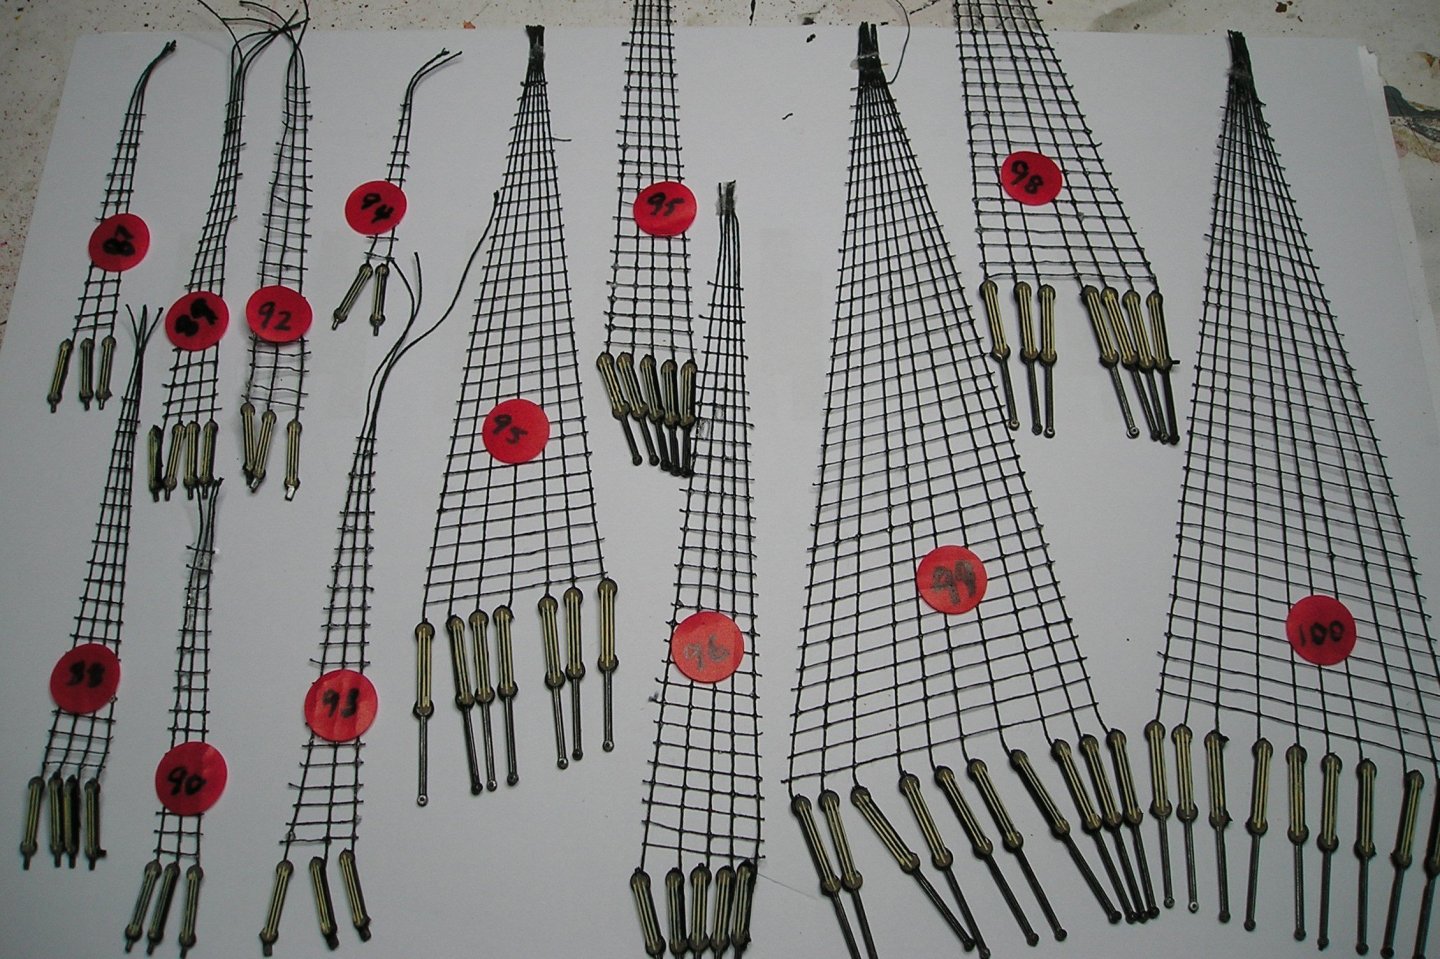
Thanks to those who are still with me on this build. 👍👍👍 I have not had too much time today, but I did manage to glue (CA) my previously made shrouds and ratlines to the kit provided shrouds, lanyards and chains. Cutting away the old, attached plastic shrouds was not as difficult as I had expected. I'm quite happy with the paint job of the sixty-six lanyards considering the small scale of each. Now that I have both the sails and shrouds ready to go, I have decided to do the sails before the shrouds because then I should have easy access for doing the rigging. Besides, the shrouds are on the outside of the model and should be easier to add later. Thanks again for your support. Cheers, 🍻

- 69 replies
-
- 4
-
-
- spanish galleon
- Imai
- (and 1 more)
-
@Snug Harbor JohnnyI remember regularly travelling from Sydney to Canberra on a steam train when I was a little tacker, about 3-9 years old. The dark steam would come in the window when you stuck your head out to see the engine. Great stuff!
- 69 replies
-
- 1
-
-
- spanish galleon
- Imai
- (and 1 more)
-
Today I had a great day. After I added small loops, lines and blocks to the bottom of most sails, I attached them to their corresponding yards. Now I have to decide whether I attach the yards and complete the rigging, OR do I finish the work on the shrouds in readiness for their attachment. It all depends on which will leave the least congested area of access. Rigging then shrouds, or shrouds then rigging. 🤔 Cheers,


- 69 replies
-
- 3
-
-
- spanish galleon
- Imai
- (and 1 more)