HOLIDAY DONATION DRIVE - SUPPORT MSW - DO YOUR PART TO KEEP THIS GREAT FORUM GOING! (Only 53 donations so far out of 49,000 members - C'mon guys!)
×

Pfälzer
-
Posts
371 -
Joined
-
Last visited
Content Type
Profiles
Forums
Gallery
Events
Everything posted by Pfälzer
-
 This is triggy
 -
Upps

-
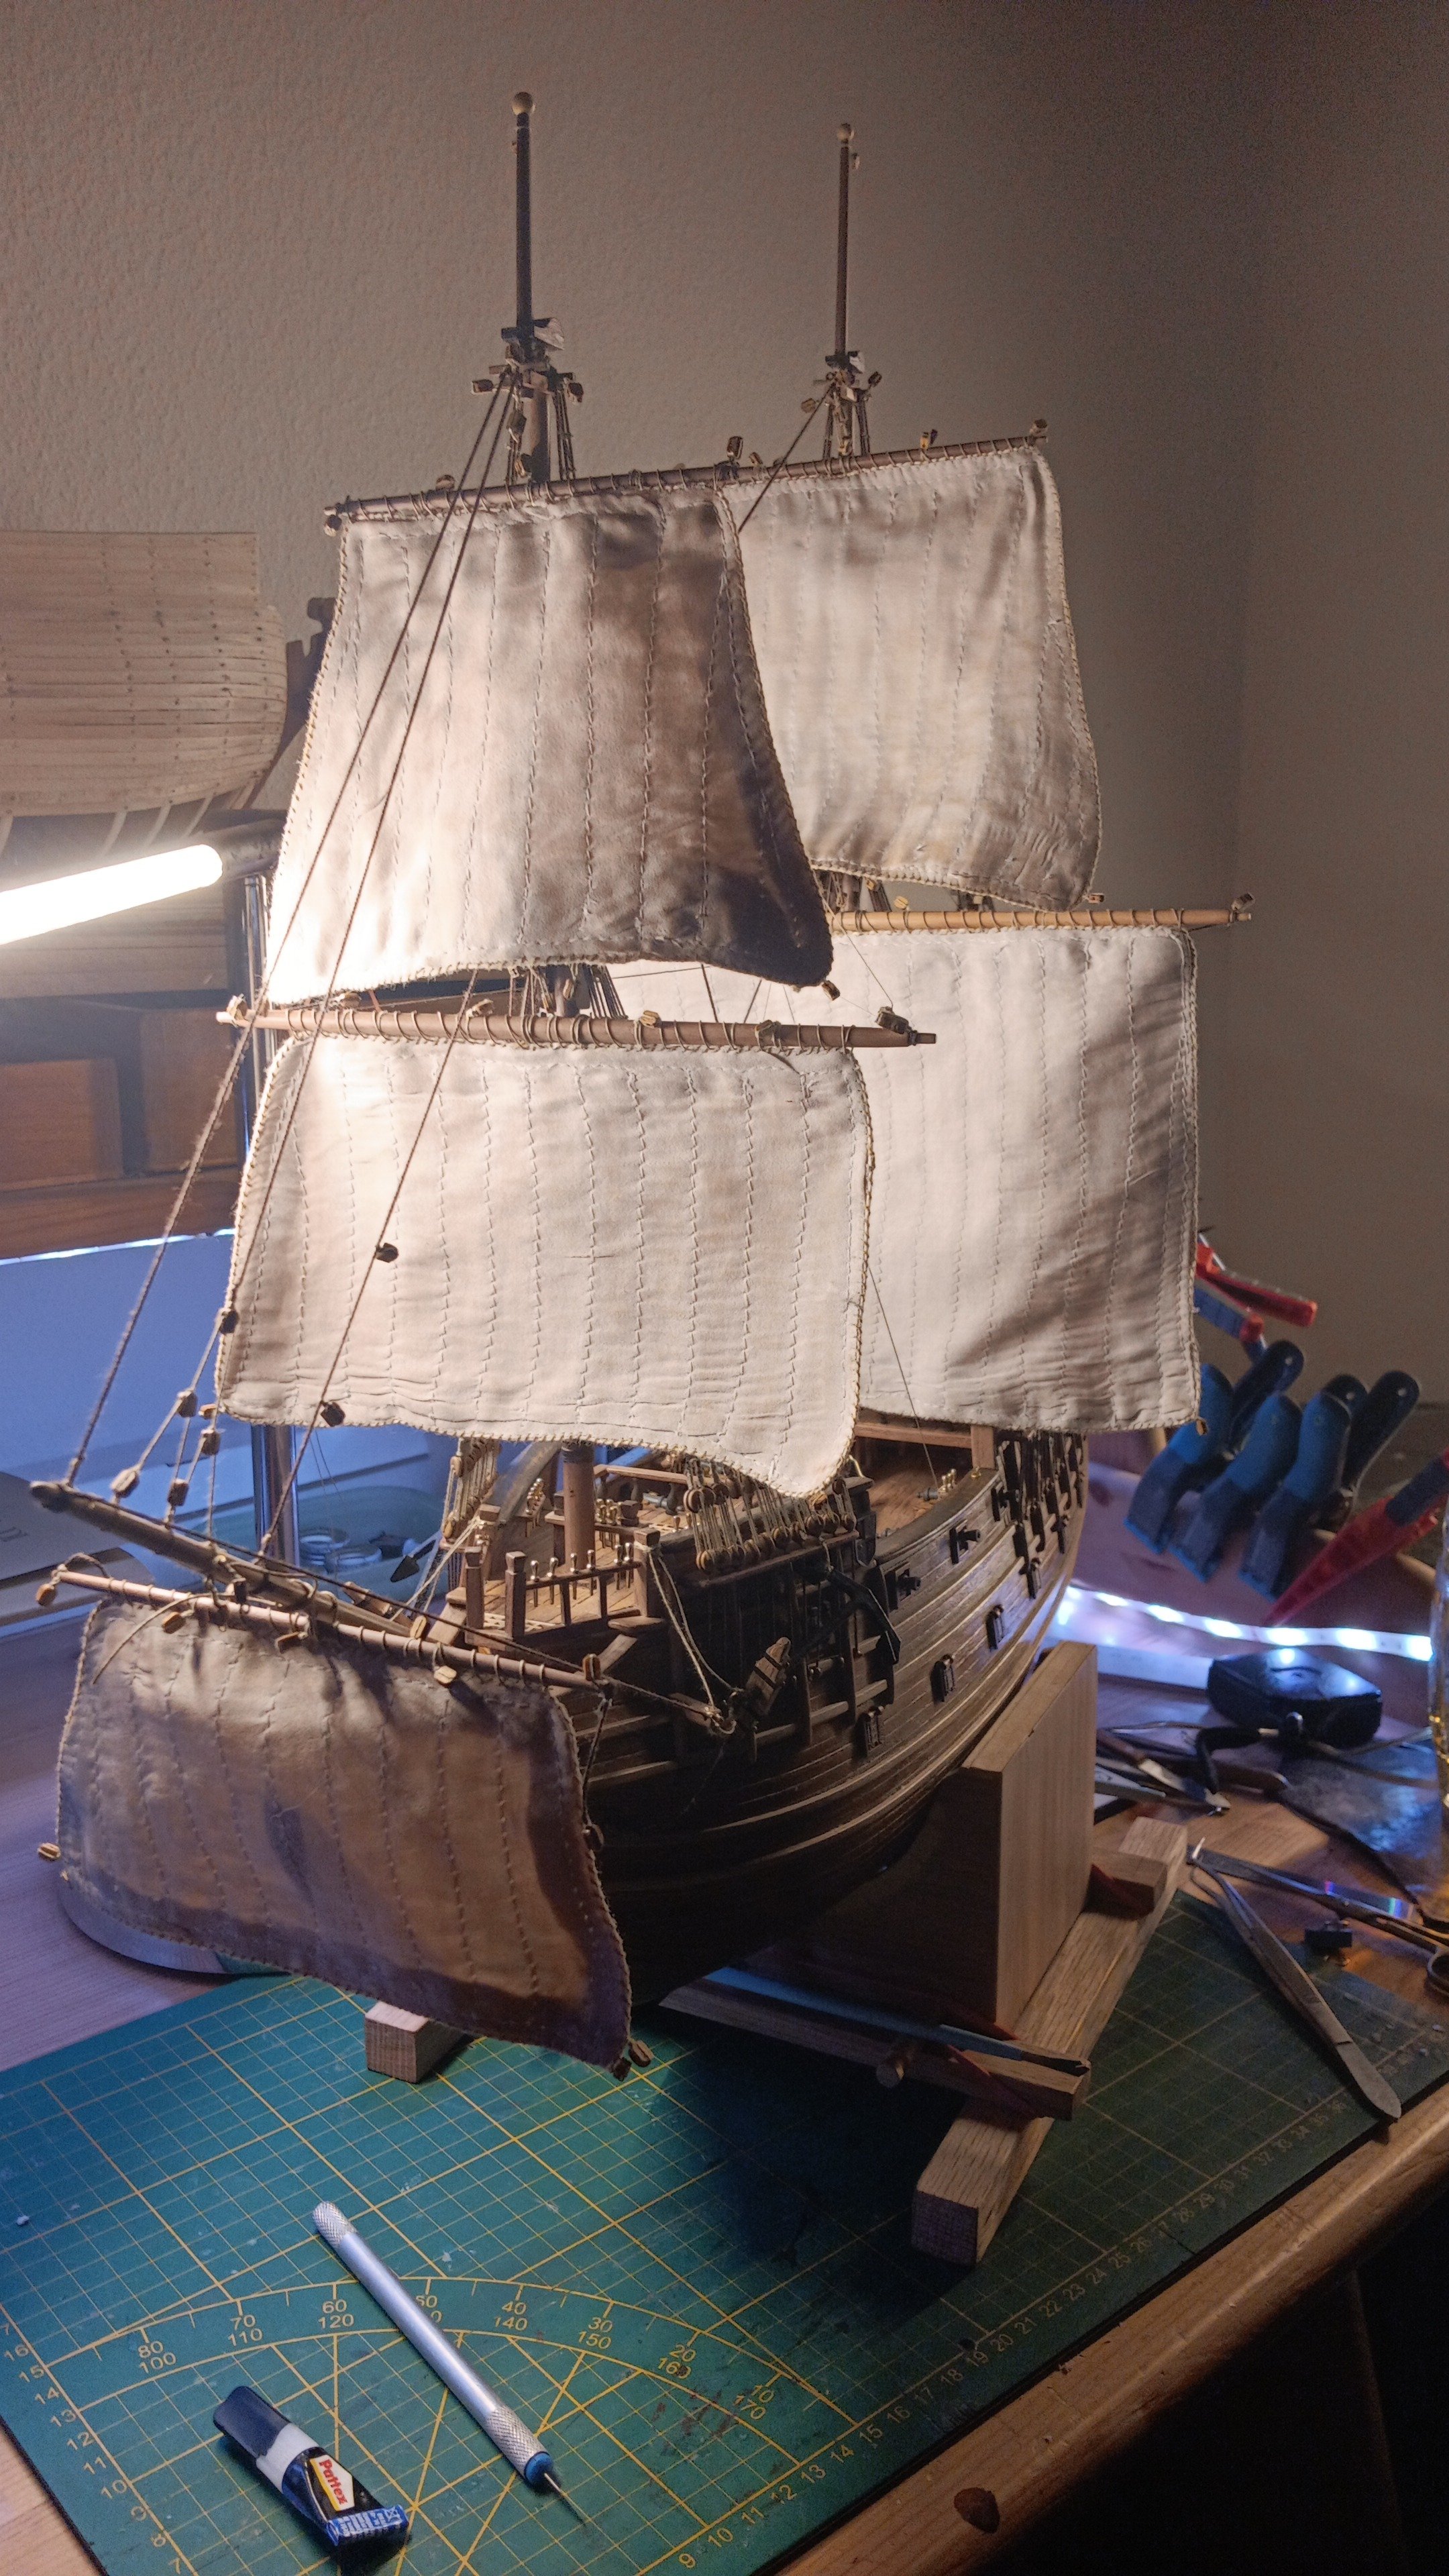
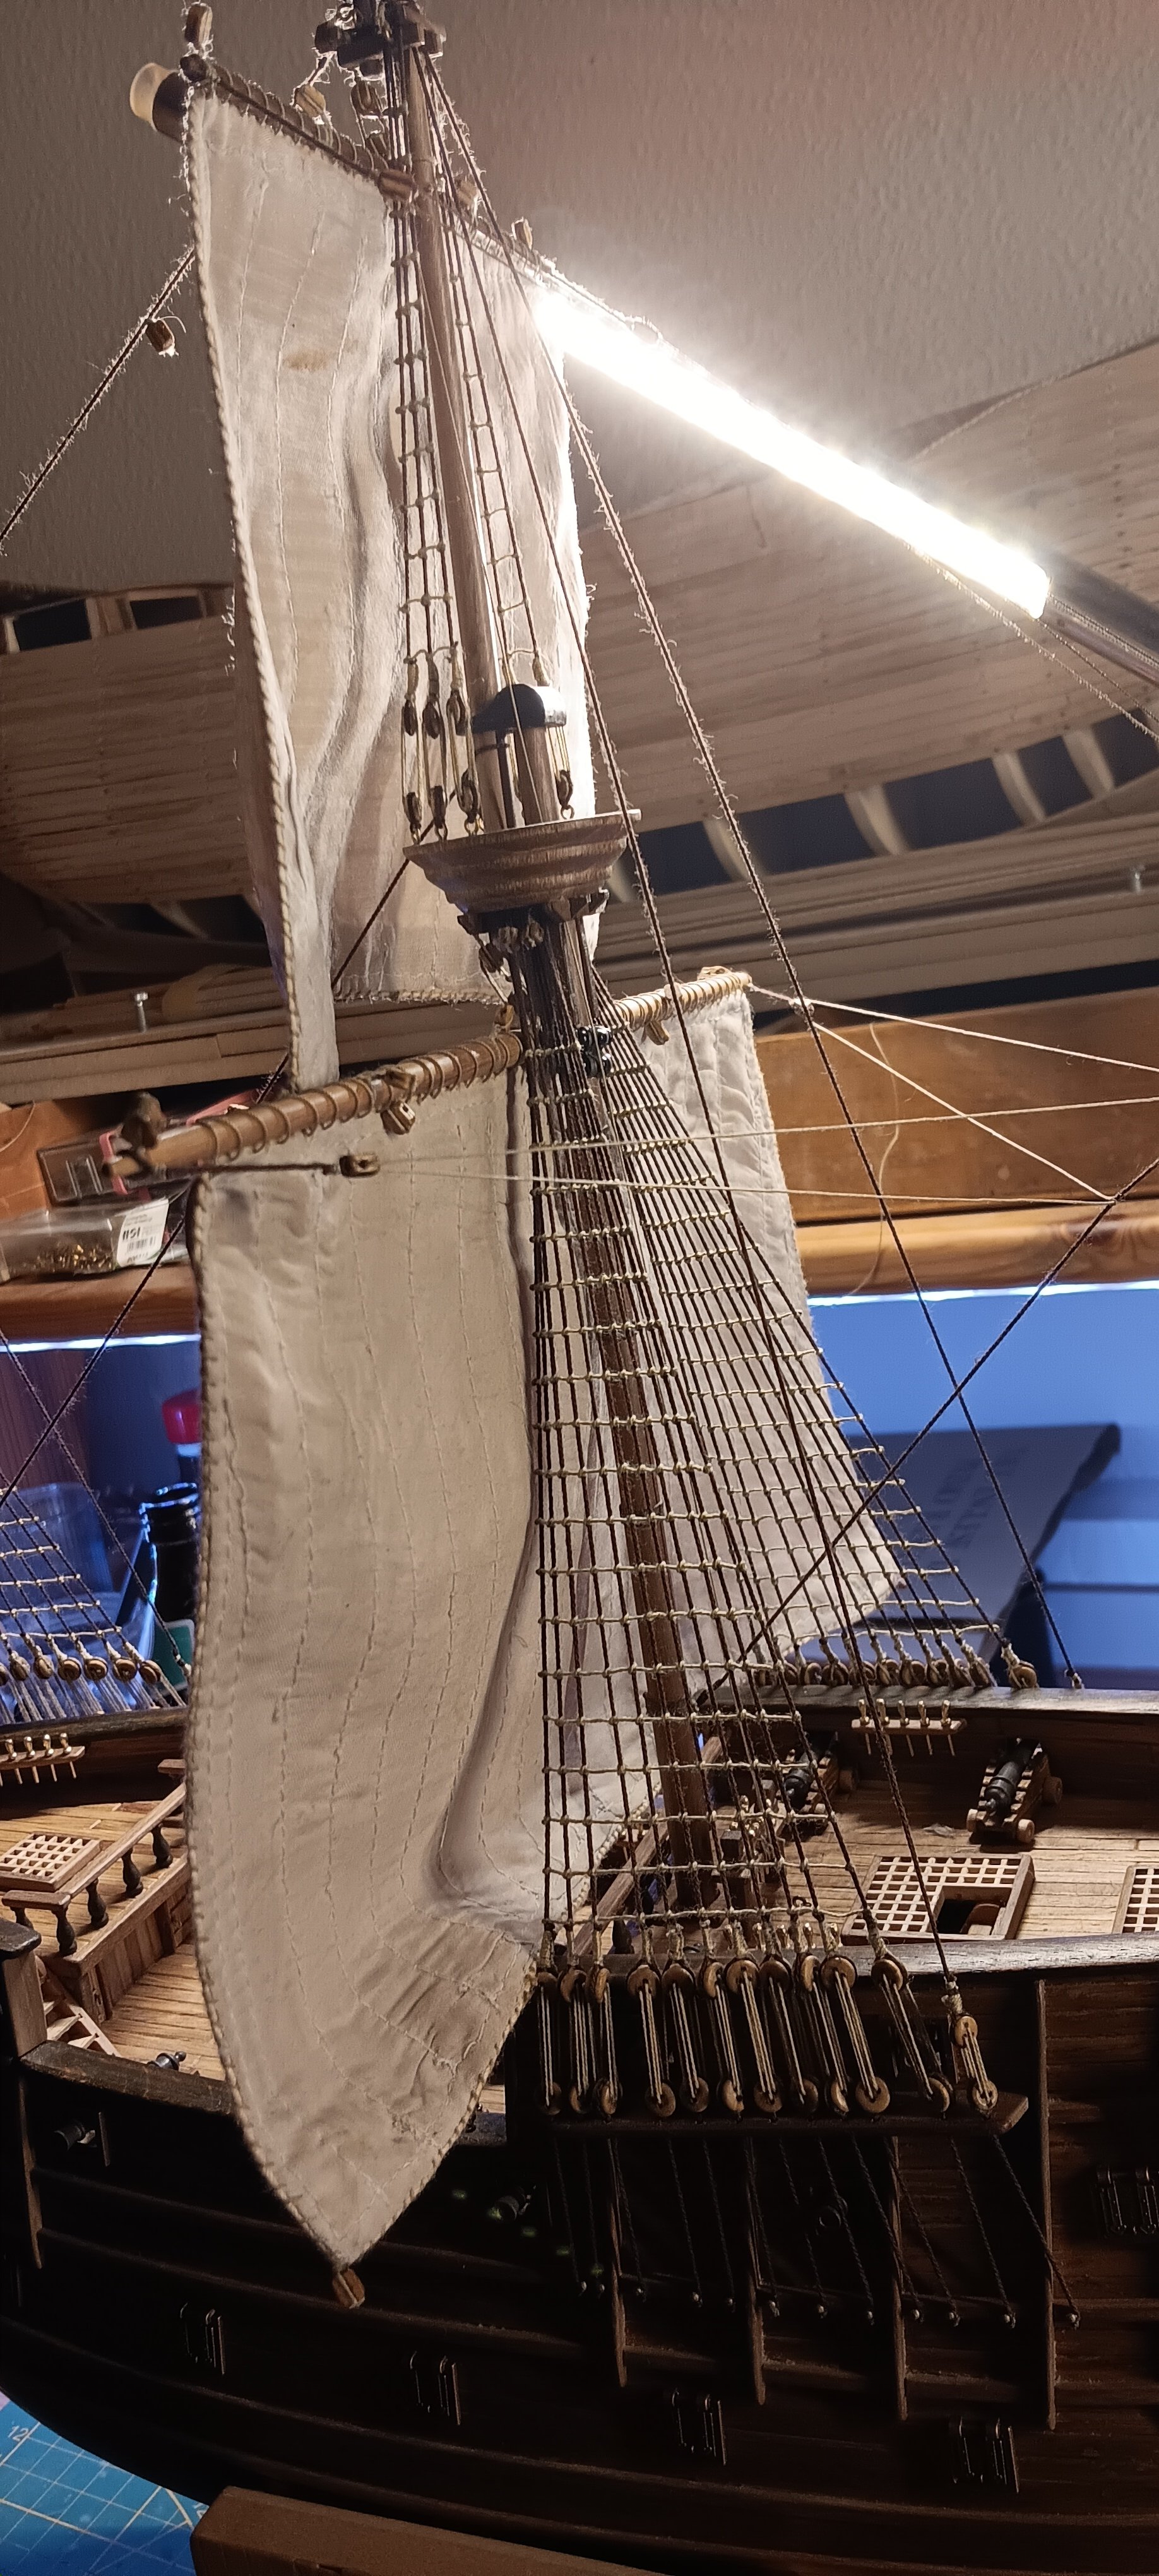
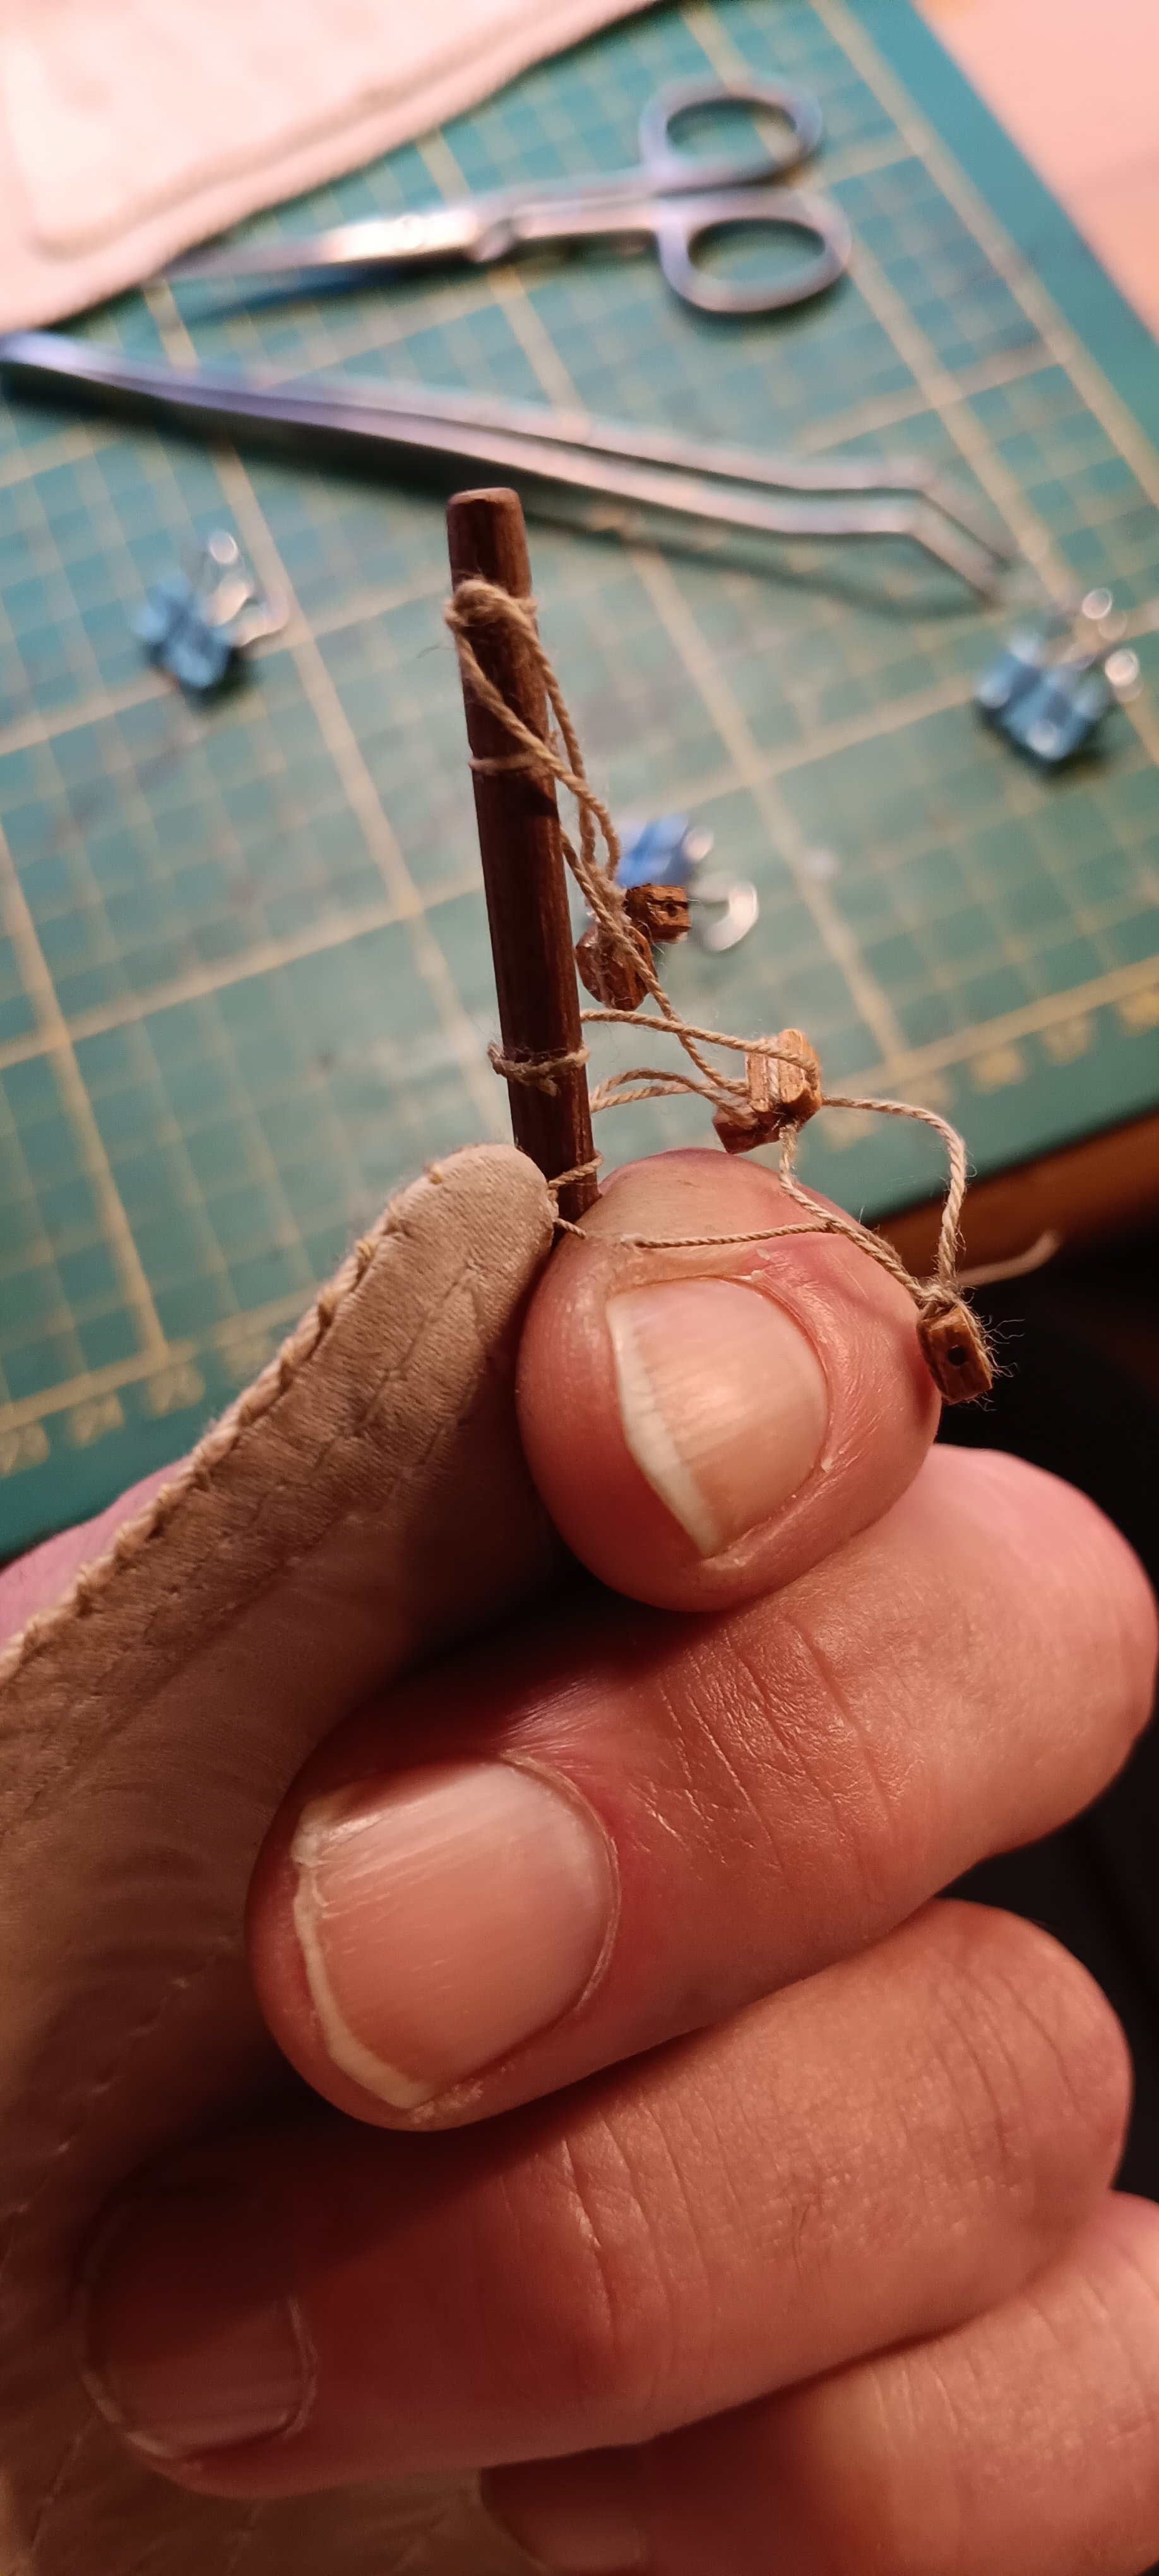
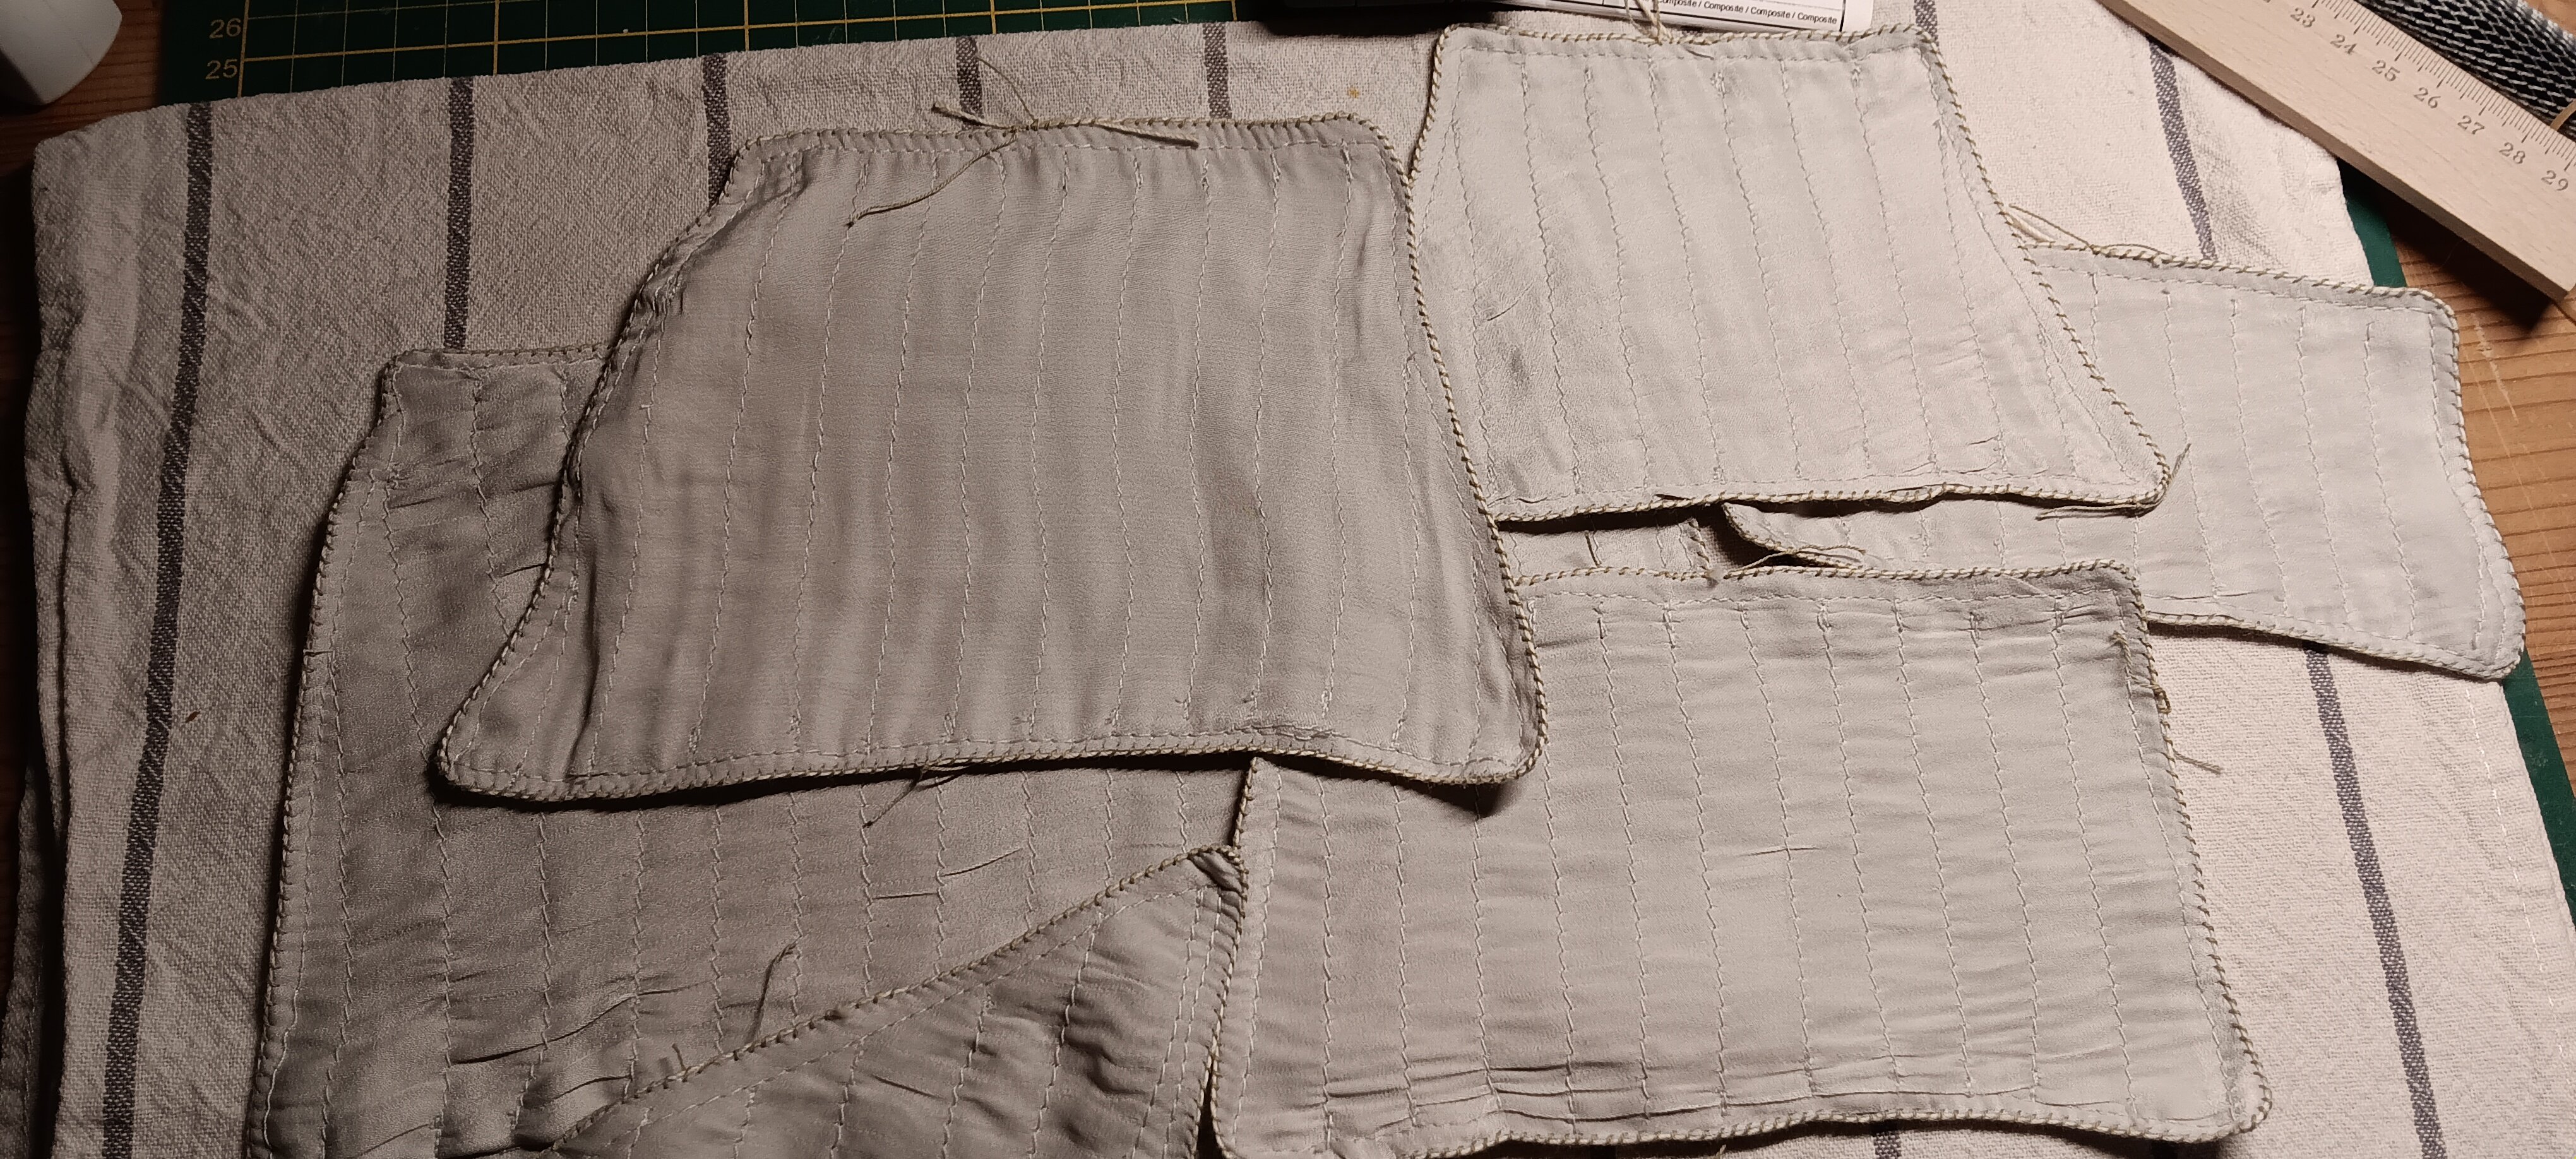
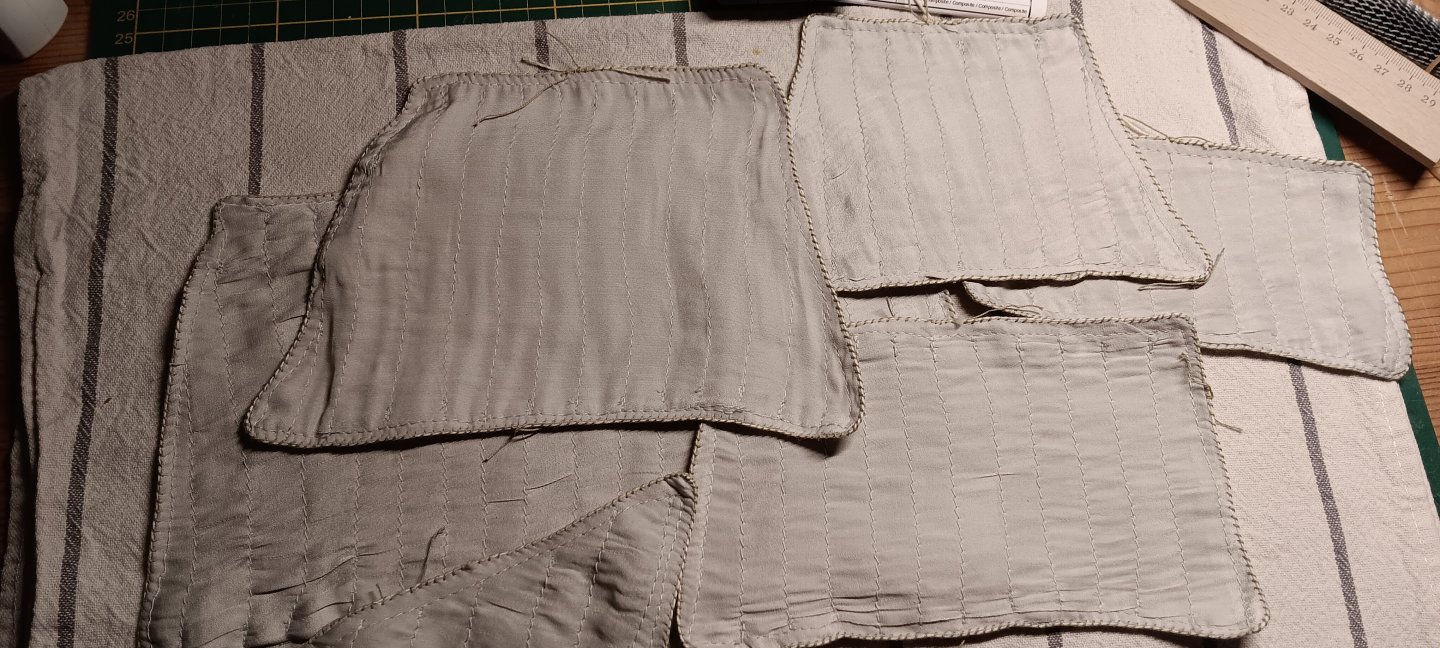
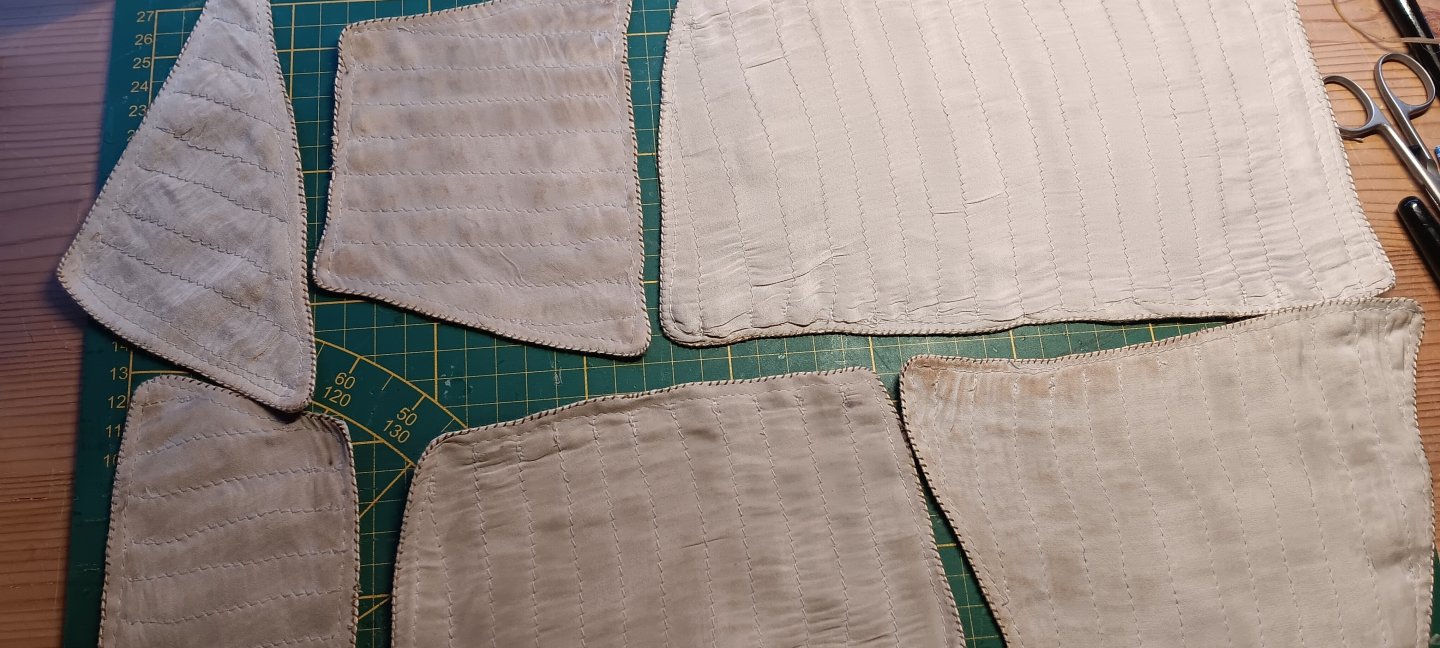
Hallo ihr Lieben, ich habe die letzten Tage an den Segeln gebastelt. Zuerst muss ich feststellen, dass die Schneiderin die Form ziemlich vermasselt hat, aber das seht ihr ja selbst. Die meisten sind auch nicht breit genug, nur zwei passen richtig auf die Rah. Also habe ich erstmal Spitze aufgenäht. Ich habe eigentlich handelsübliche Paketschnur verwendet, das war das Einzige im Haus, das die richtige Dicke hatte. Da die Segel keine Ecken hatten, habe ich die Schnur nicht zum Formen der Halteschlaufen verwendet. Das muss ich mir anders überlegen. Anschließend habe ich sie mit etwas Tee behandelt und gewachst, damit sie im Licht etwas schimmern. Also werde ich in den nächsten Tagen die Segel hissen. Pass auf dich auf Übersetzt mit DeepL.com (kostenlose Version)
- 210 replies
-
- 2
-

-
- San Martin
- OcCre
- (and 1 more)
-
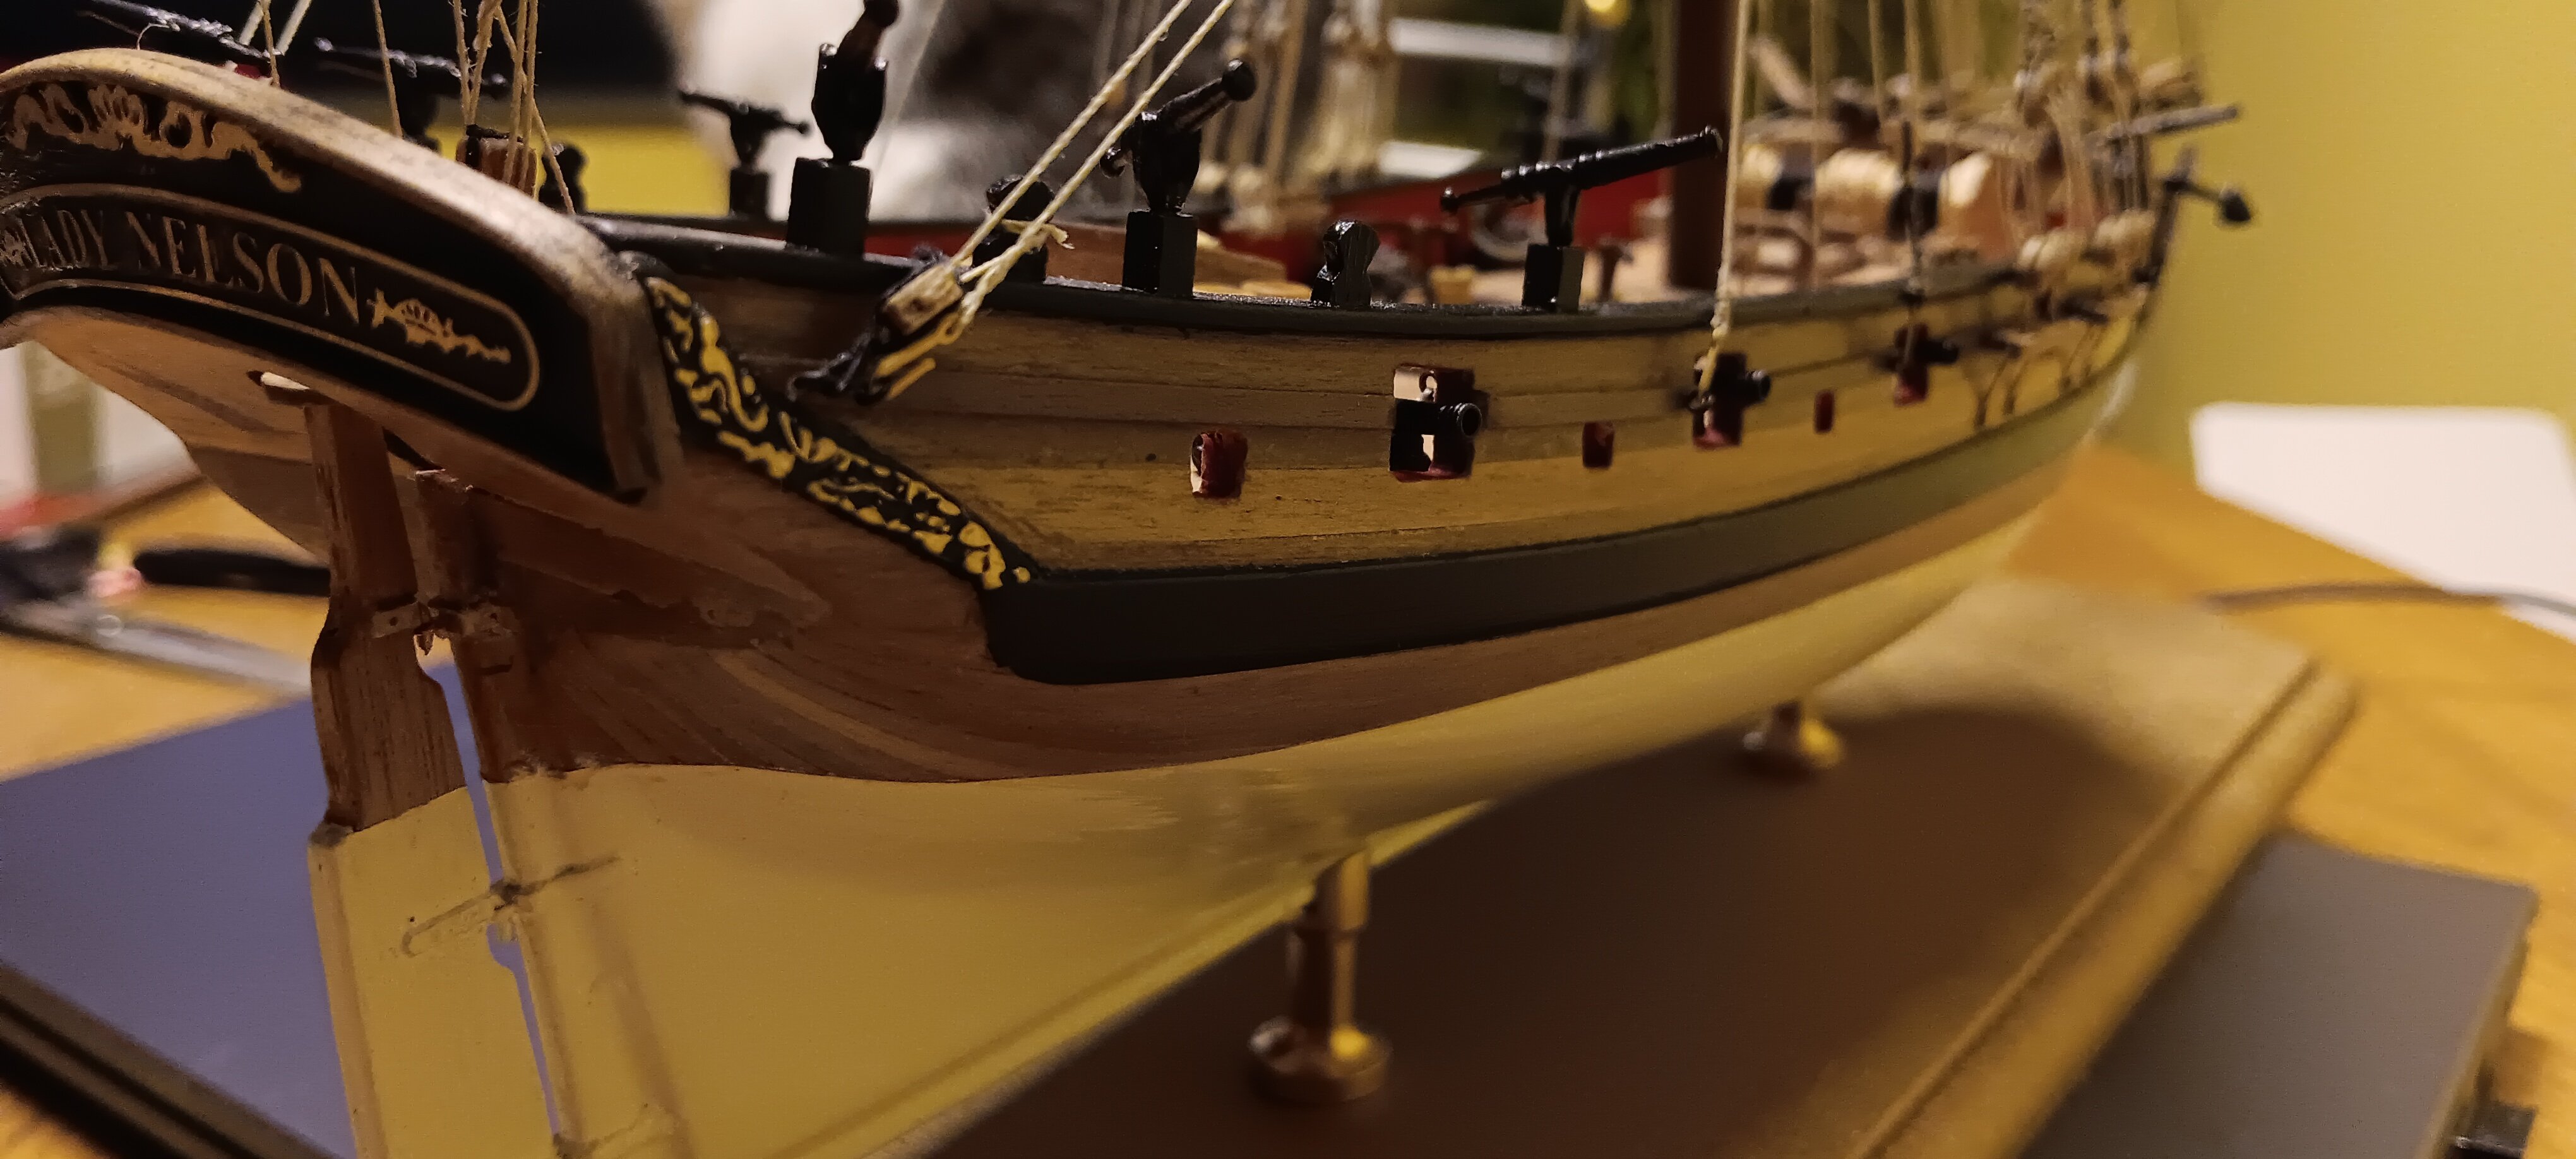
Hello Bob, thanks for your suggestion. It wasn't actually planned to be completely open. Occre envisages half open in the construction plan, probably to have a view of the deck. That's why I had the sails made from silk, which is easier than the original cotton sails. However, I also like the idea of using a small fan to generate wind in the display case. I will simply test both variants, I will not stiffen the fine fabric under any circumstances. Greetings to cold Canada Translated with DeepL.com (free version)
- 210 replies
-
- 2
-
-
- San Martin
- OcCre
- (and 1 more)
-
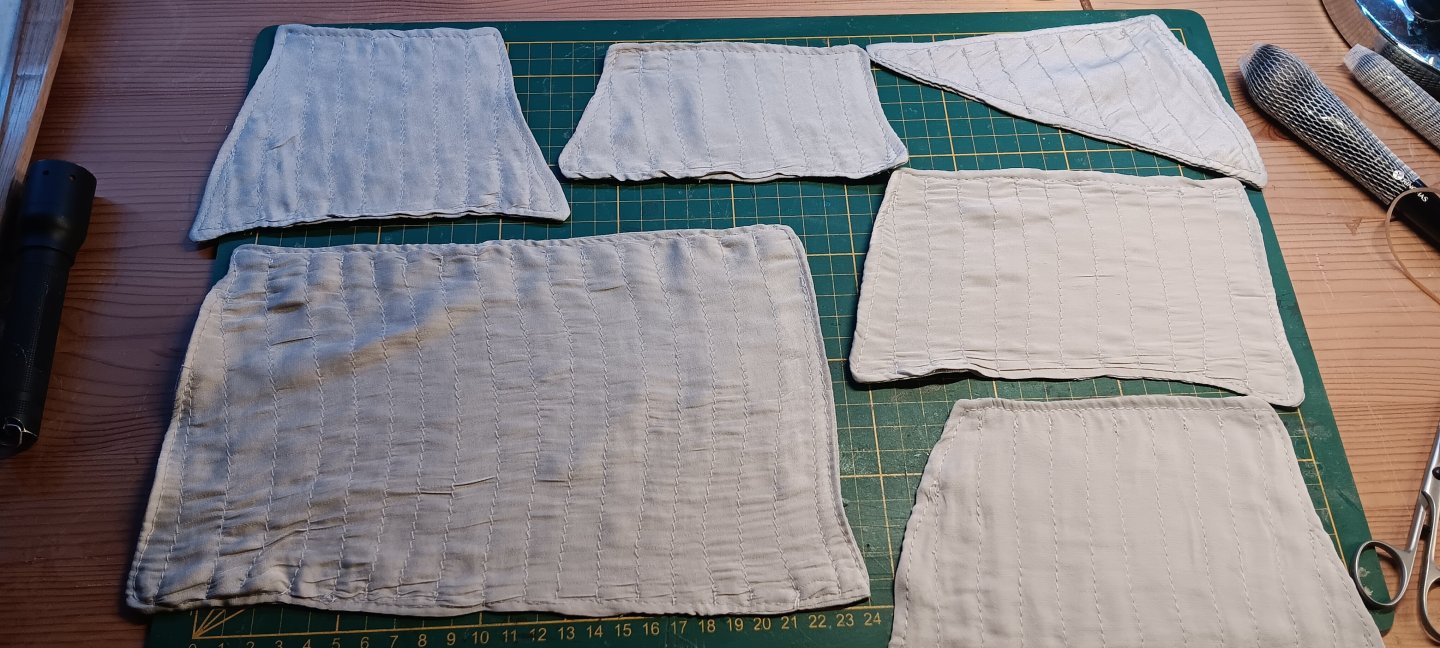
Guten Morgen, ihr Lieben, nach vielen Wochen konnte ich endlich die Segel von der Schneiderin abholen. Tja, das Ergebnis ist nicht ganz so, wie ich es mir vorgestellt hatte. Mal sehen, wie sie nach dem Färben und Anbringen der Vorlieksleine aussehen. Sie sind auf den ersten Blick ziemlich schief und schief. Ich habe sie gestern kurz eingespannt und mit dem Föhn eingeblasen. Sie sehen echt toll aus, bei Bedarf stelle ich noch einen kleinen Ventilator in die Vitrine. Liebe Grüße Übersetzt mit DeepL.com (kostenlose Version)
- 210 replies
-
- 2
-
-
- San Martin
- OcCre
- (and 1 more)
-
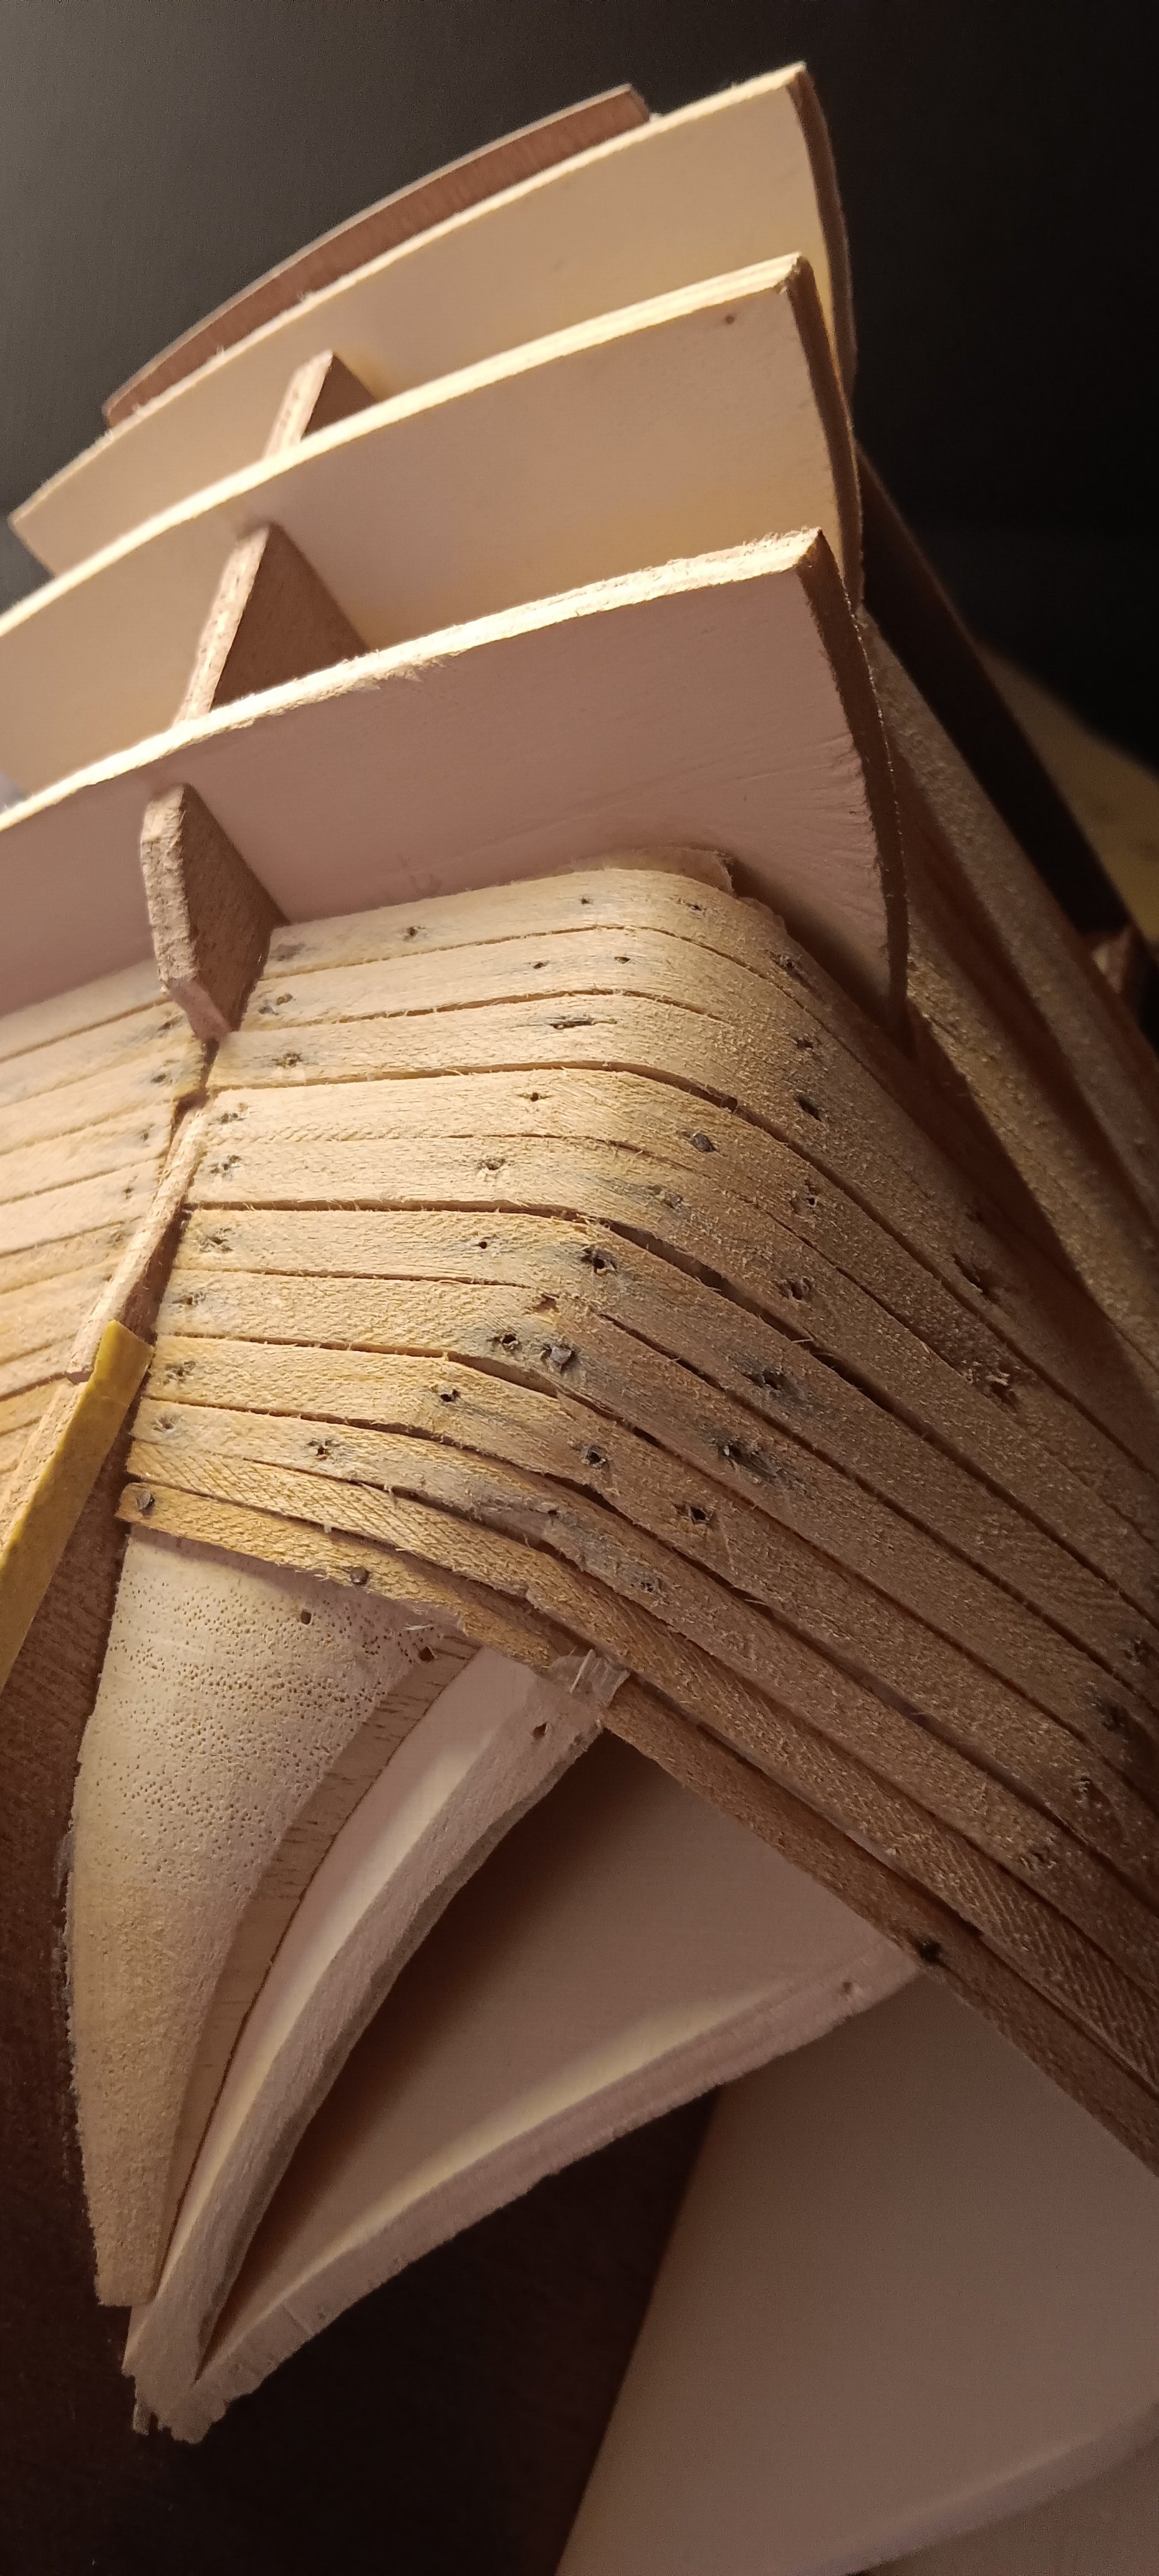
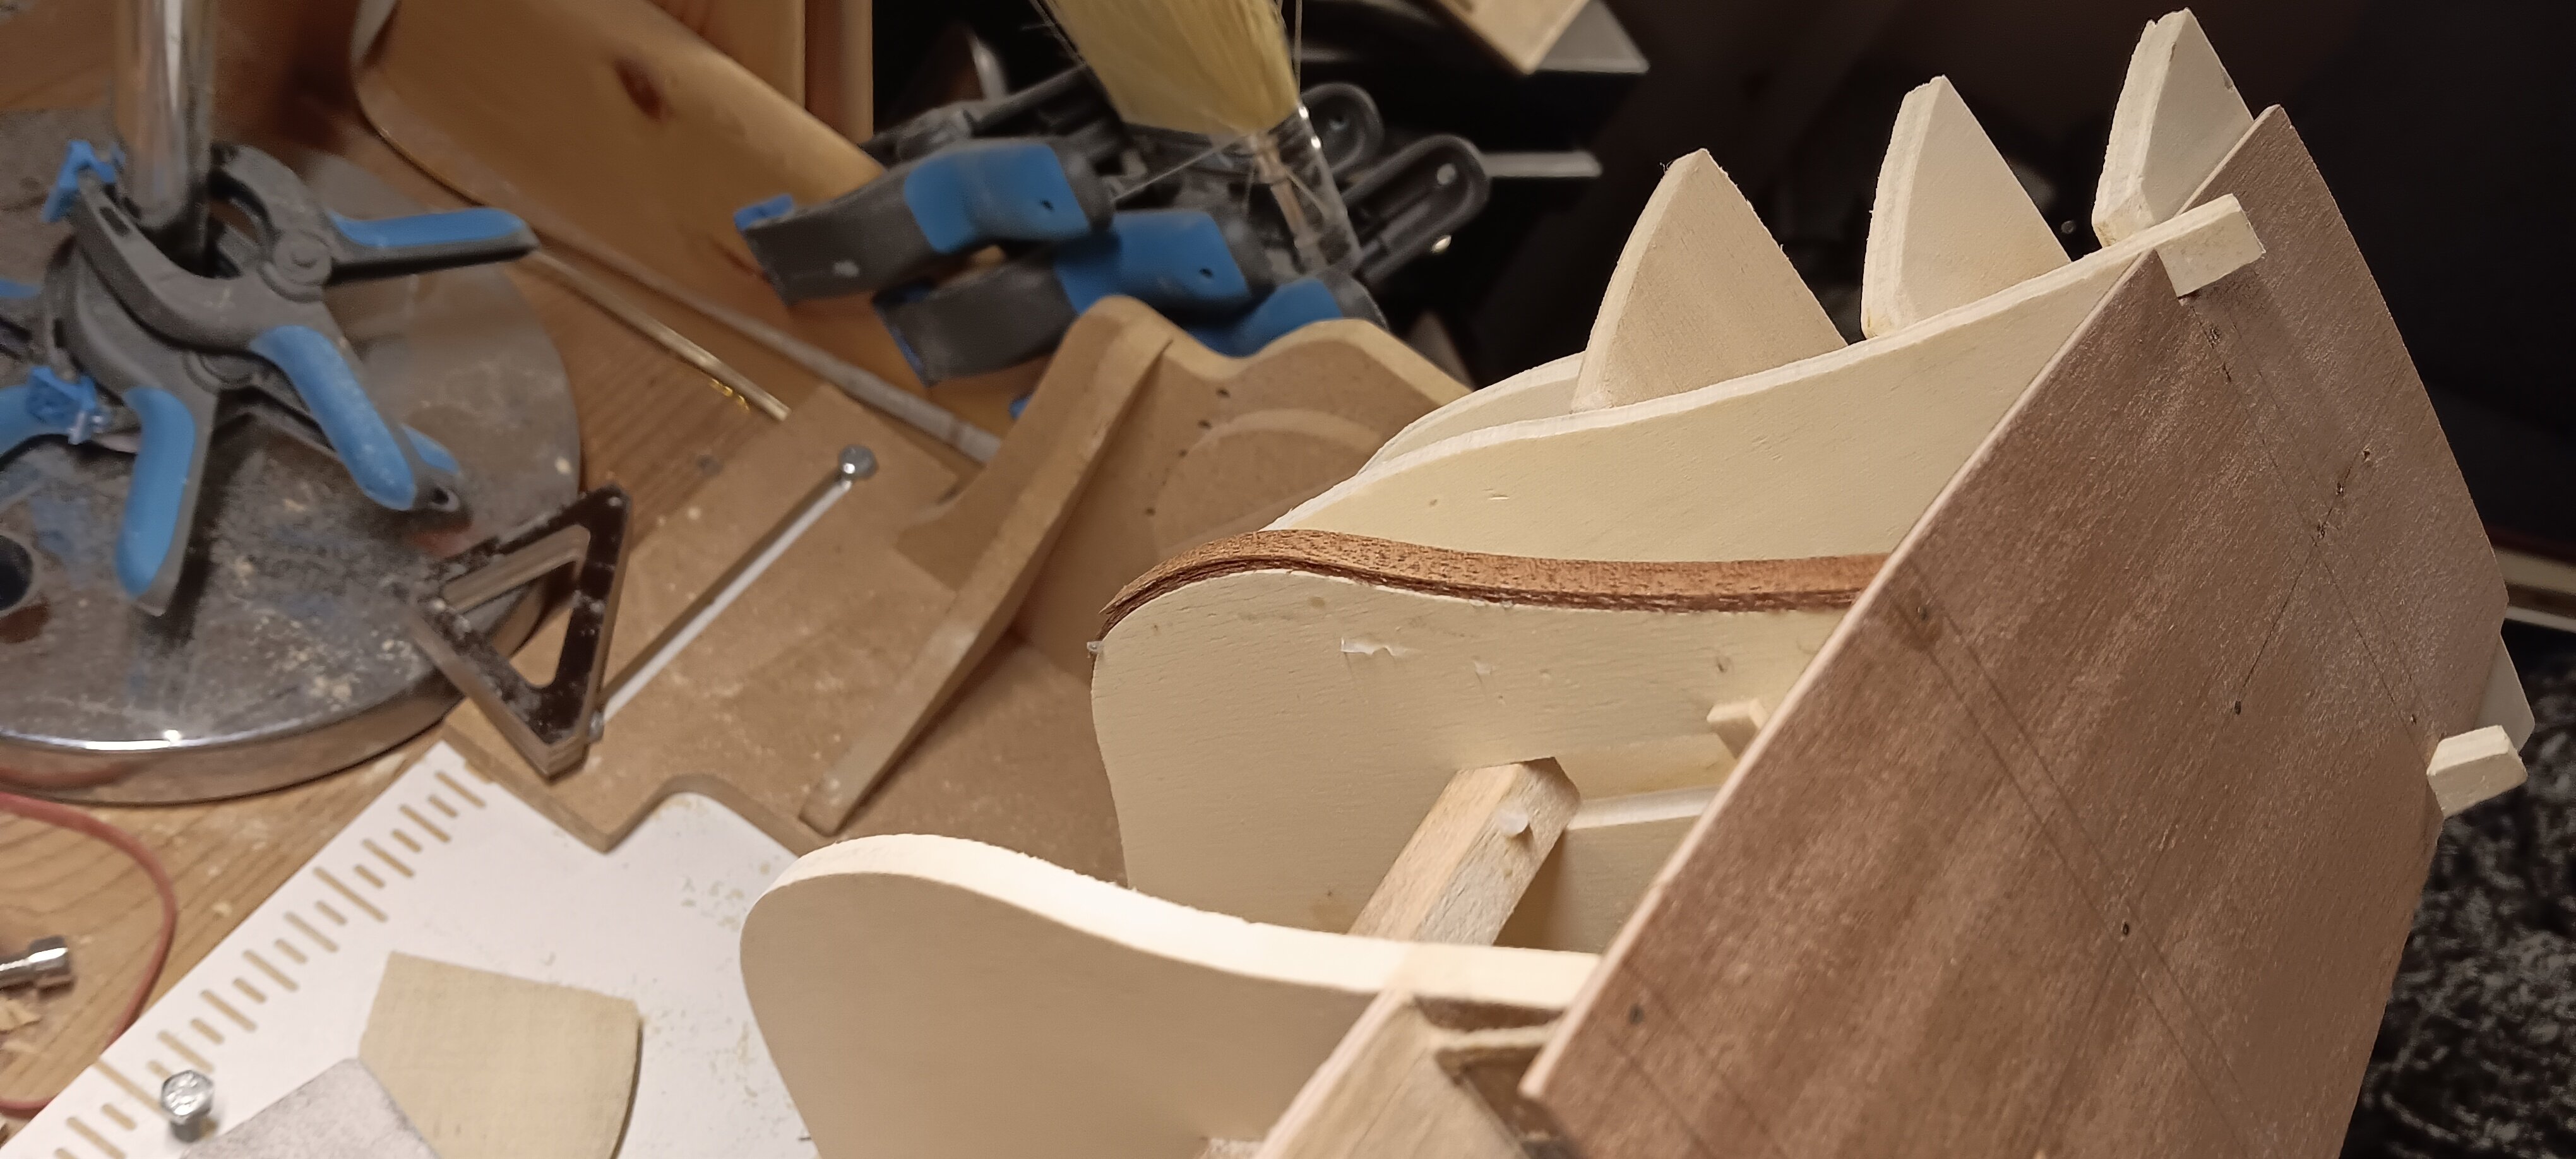
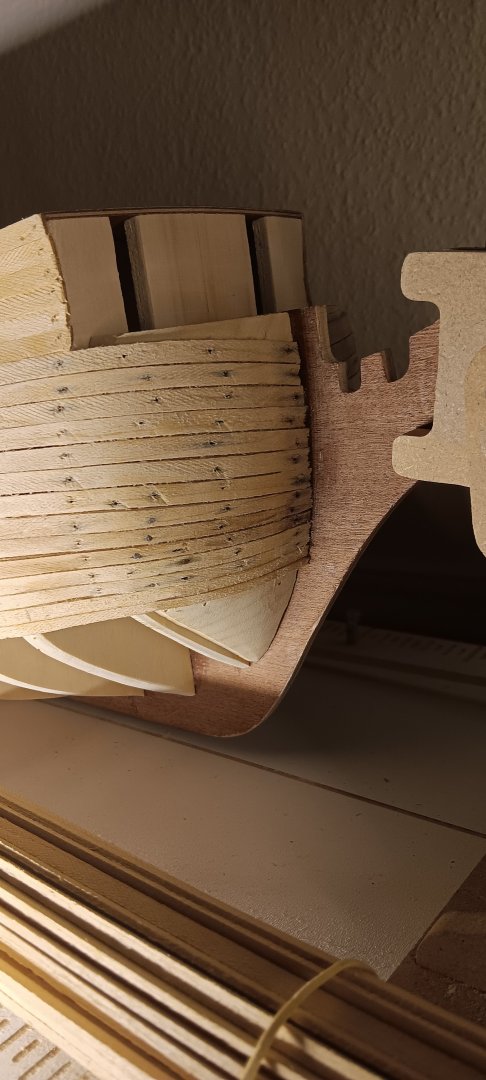
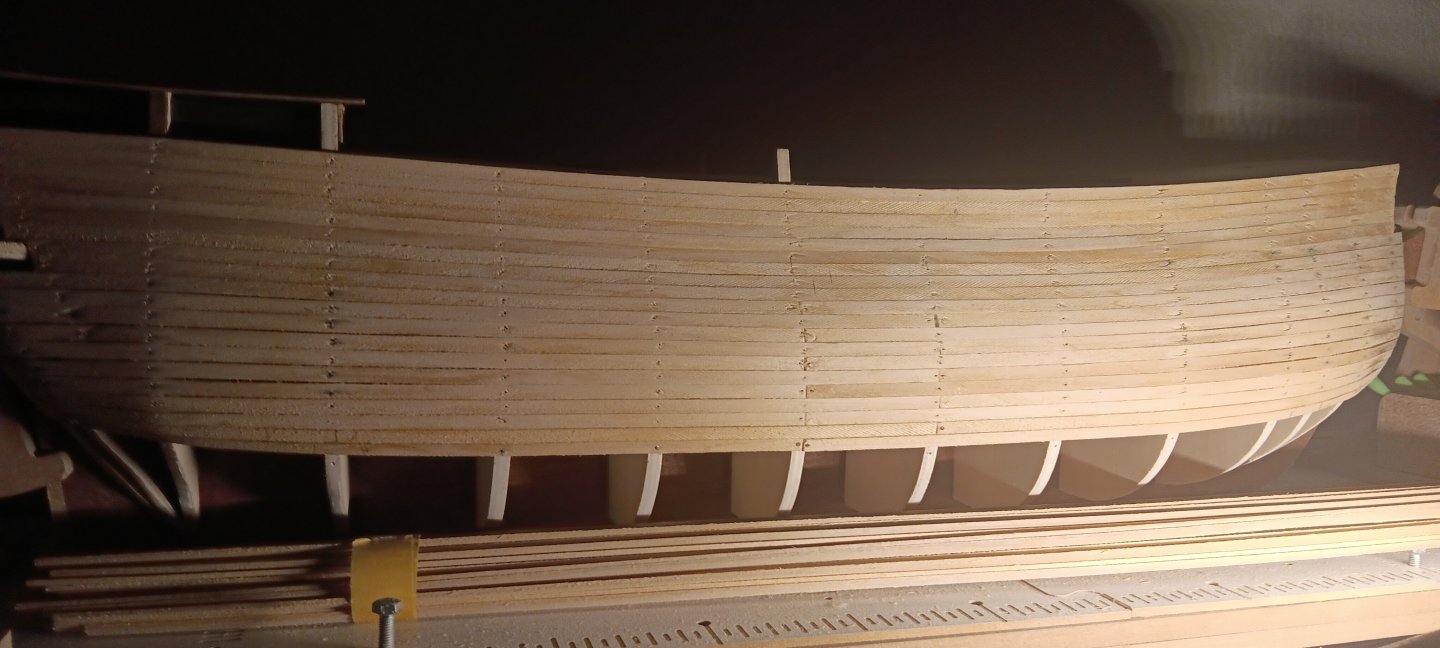
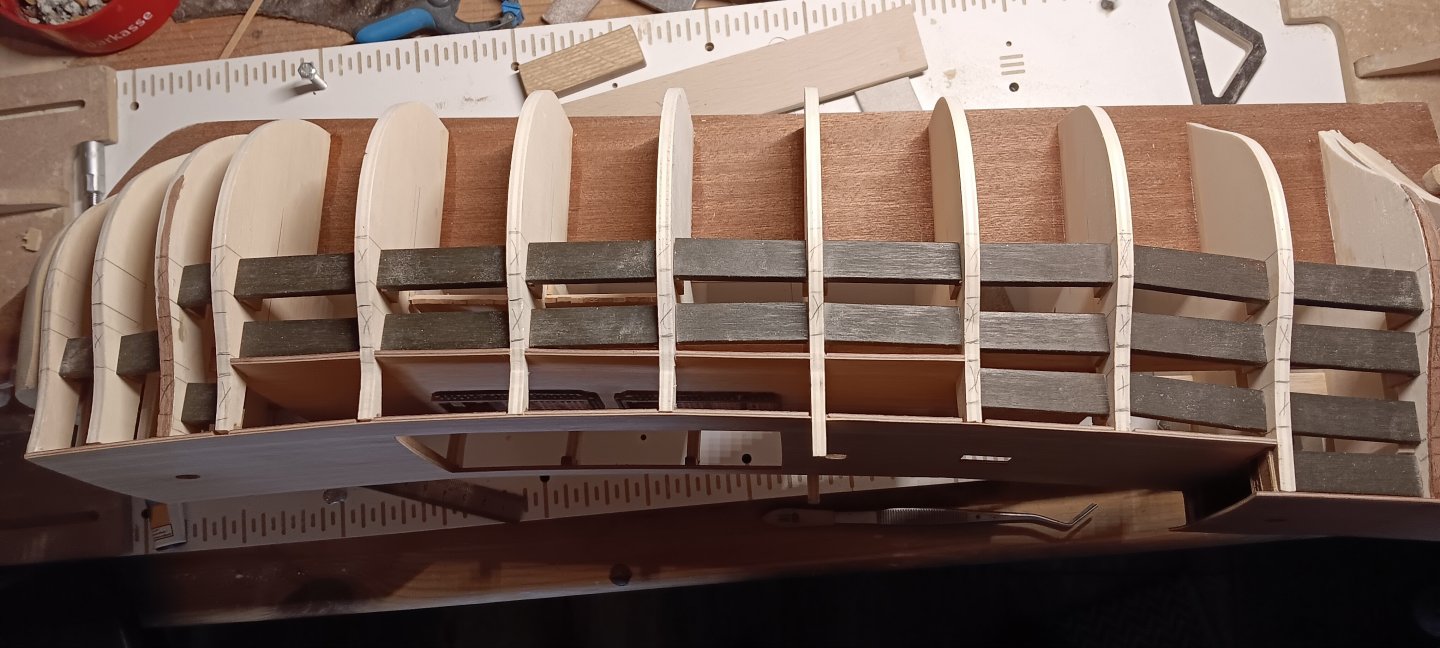
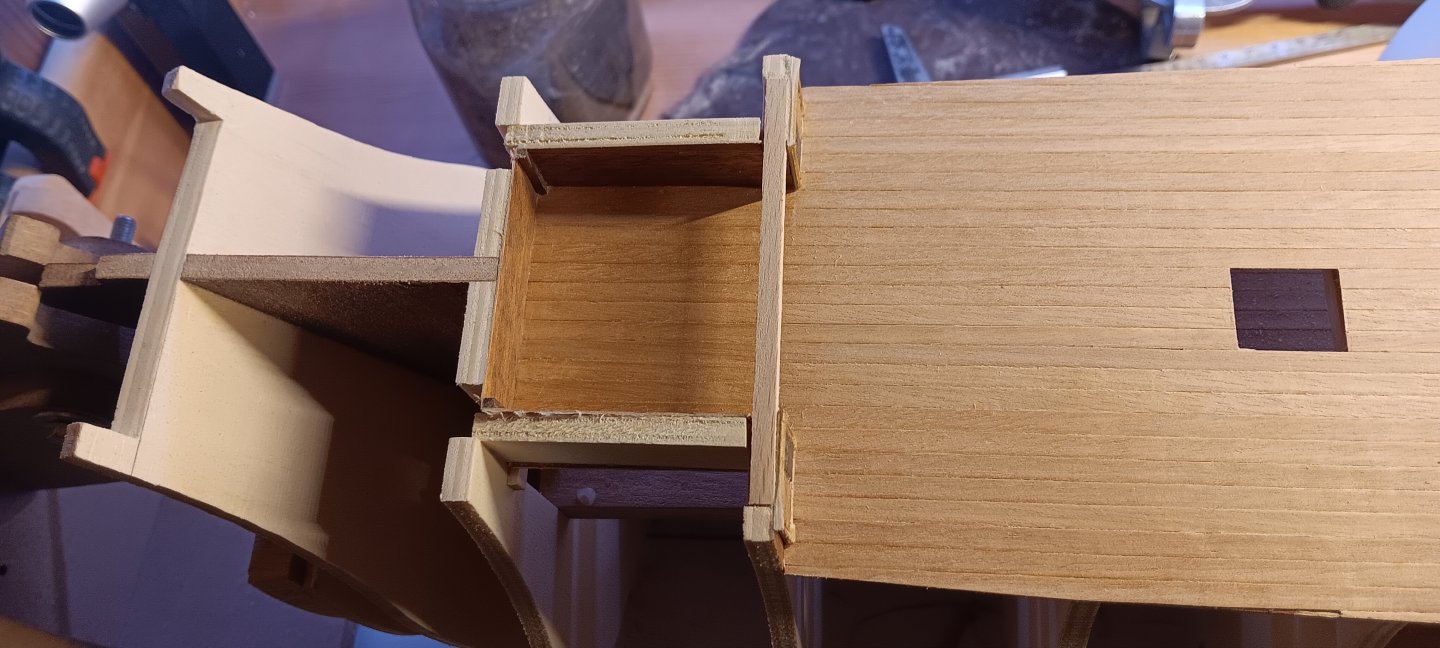
Hallo ihr Lieben, während ich noch auf die Segel für die San Martin warte, mache ich mit der Beplankung weiter. Das Lindenholz lässt sich zwar super bearbeiten, zieht aber leider im bedampften Bereich nach dem Trocknen stark ein. Hier muss ich wohl mal richtig zur Kelle greifen. Ich muss auch feststellen, dass der Funke zwischen uns beiden nicht so recht überspringen will. Bei den letzten Bauten war mein Herz irgendwie mehr dabei. Das ist also ein Paradebeispiel für die Modellwahl. Erstens wollte ich keinen so hohen Maßstab mehr und schon gar kein so riesiges Schiffsteil. Einzig der Schnäppchenpreis war ausschlaggebend für den Kauf. Aber wie die Admiralität jeden Tag so schön sagt: „Das habt ihr ja gewollt.“ Also ziehen wir es durch, komme was wolle. Der Funke kommt vielleicht noch, ich bin erst am Anfang. Liebe Grüße an euch alle Übersetzt mit DeepL.com (kostenlose Version)

-
well then you can really feel like you've been transported back in time. I got the kit from an estate and found a proof of purchase dated 14/09/1988. Greetings
-
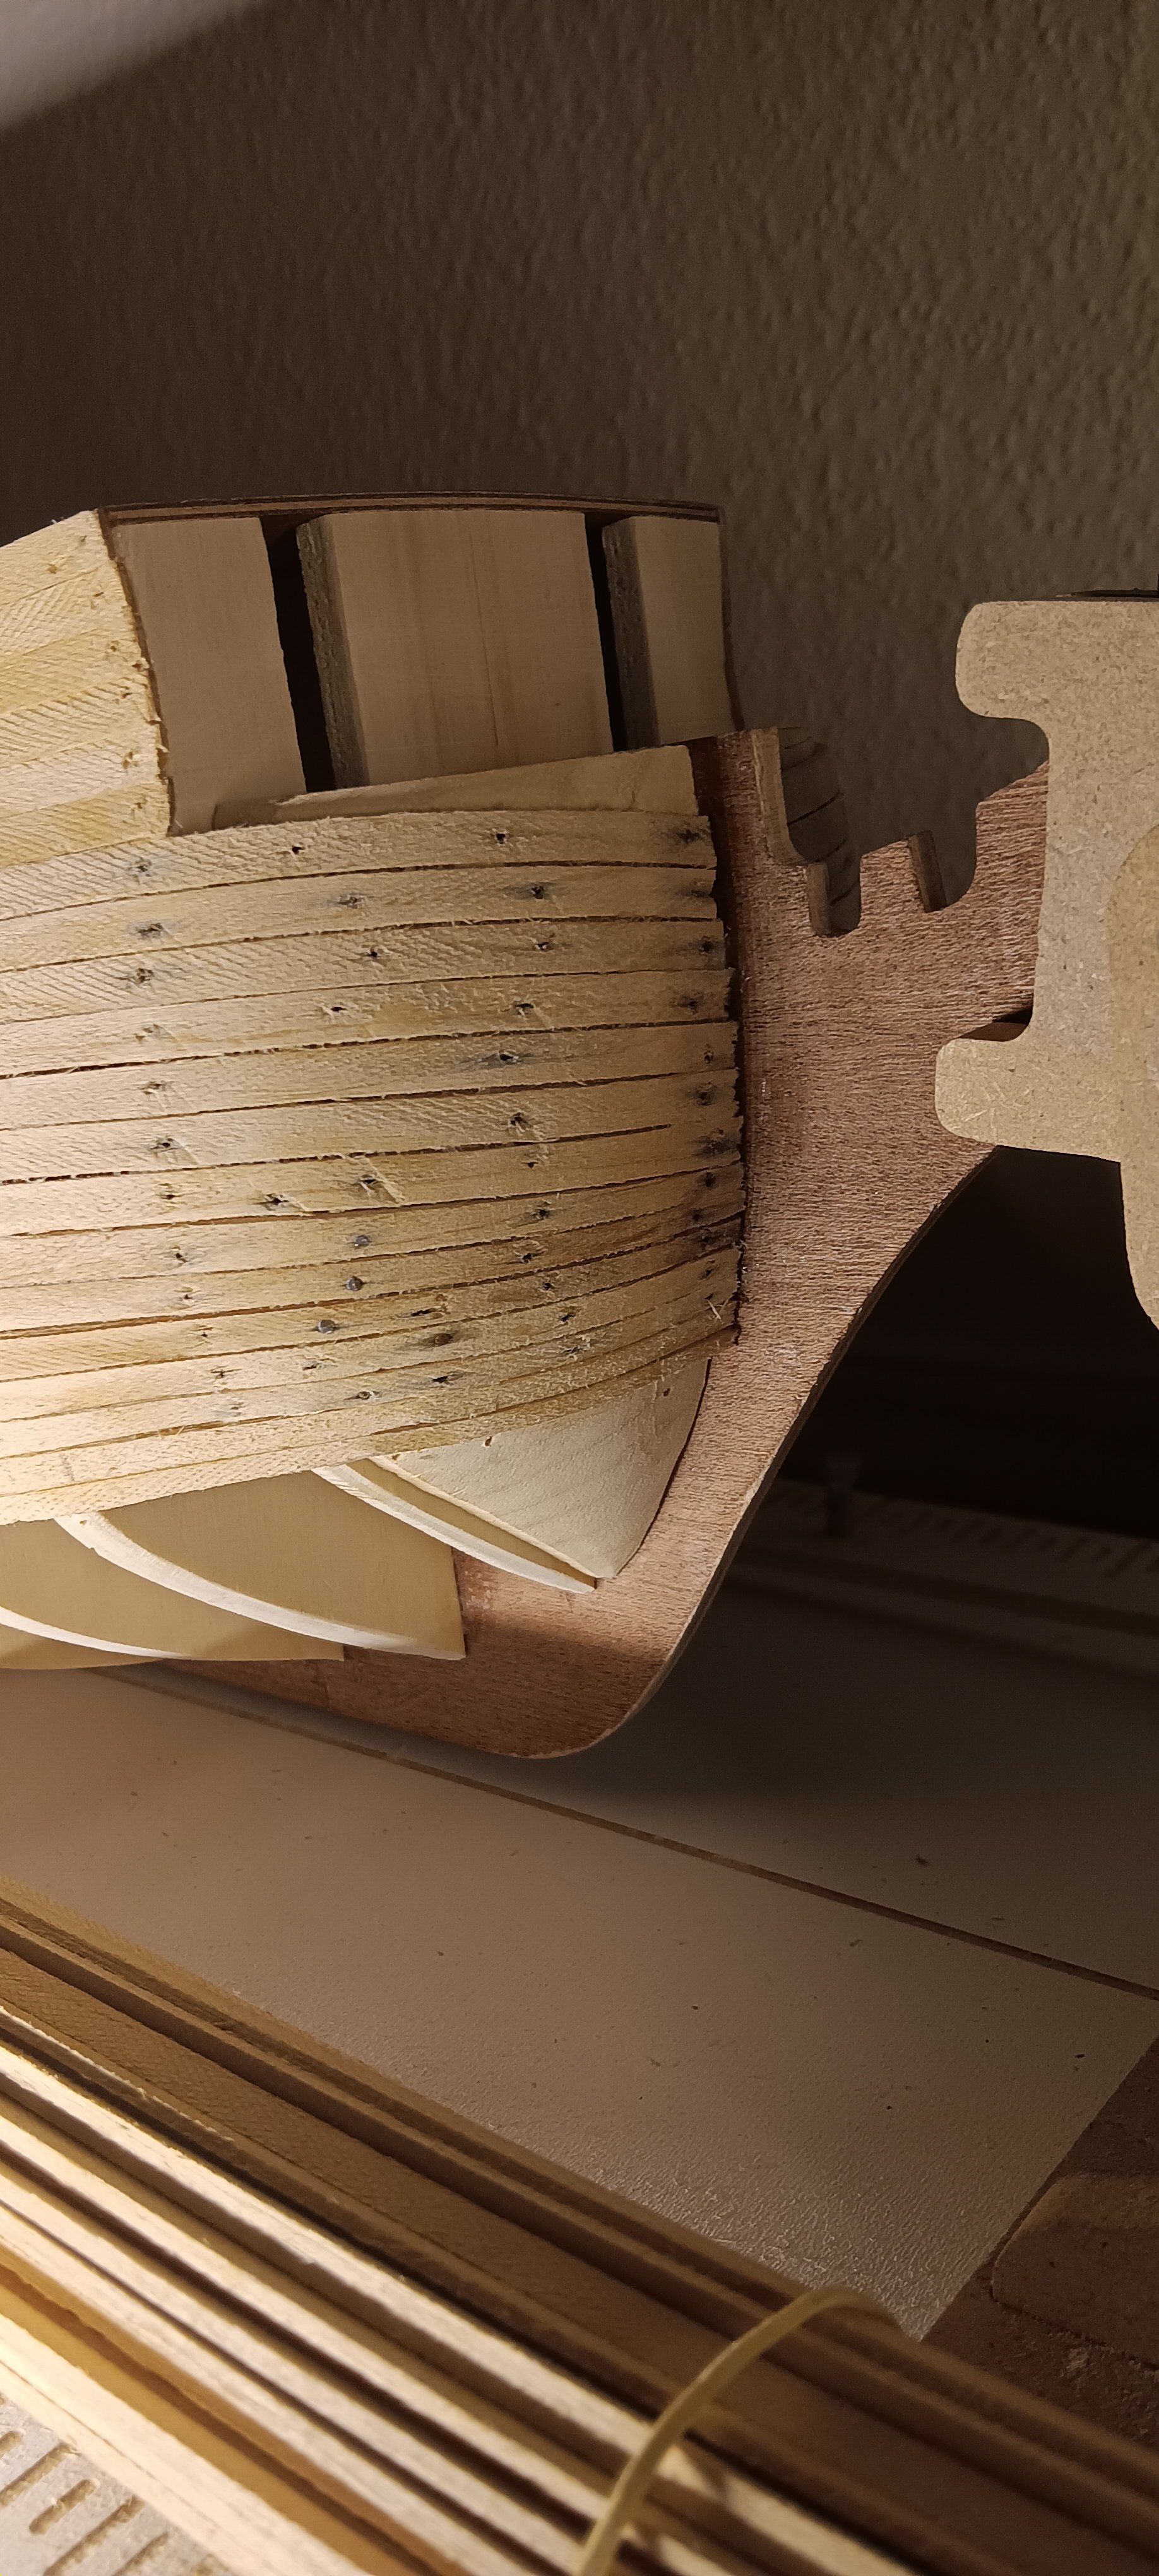
I start planking with Limewood
-
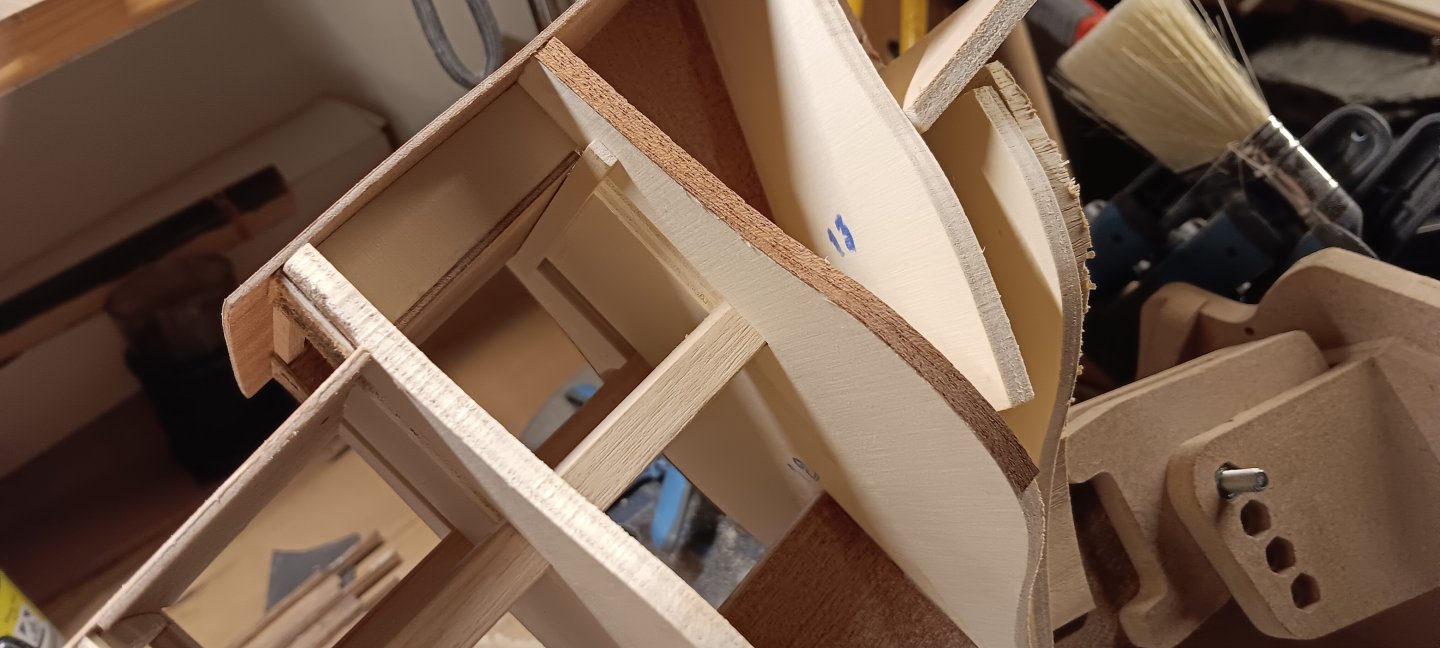
Before closing the other Side i made the Ledder and Handrail
-
Well, that's Corel. I'm currently working on the Victory from them. The plans are quite special. But look on the bright side, creativity and learning curve are definitely encouraged. I think when we're done with it we'll have mastered every kit or be ready for a scratch build. Greetings from the Palatinat
-
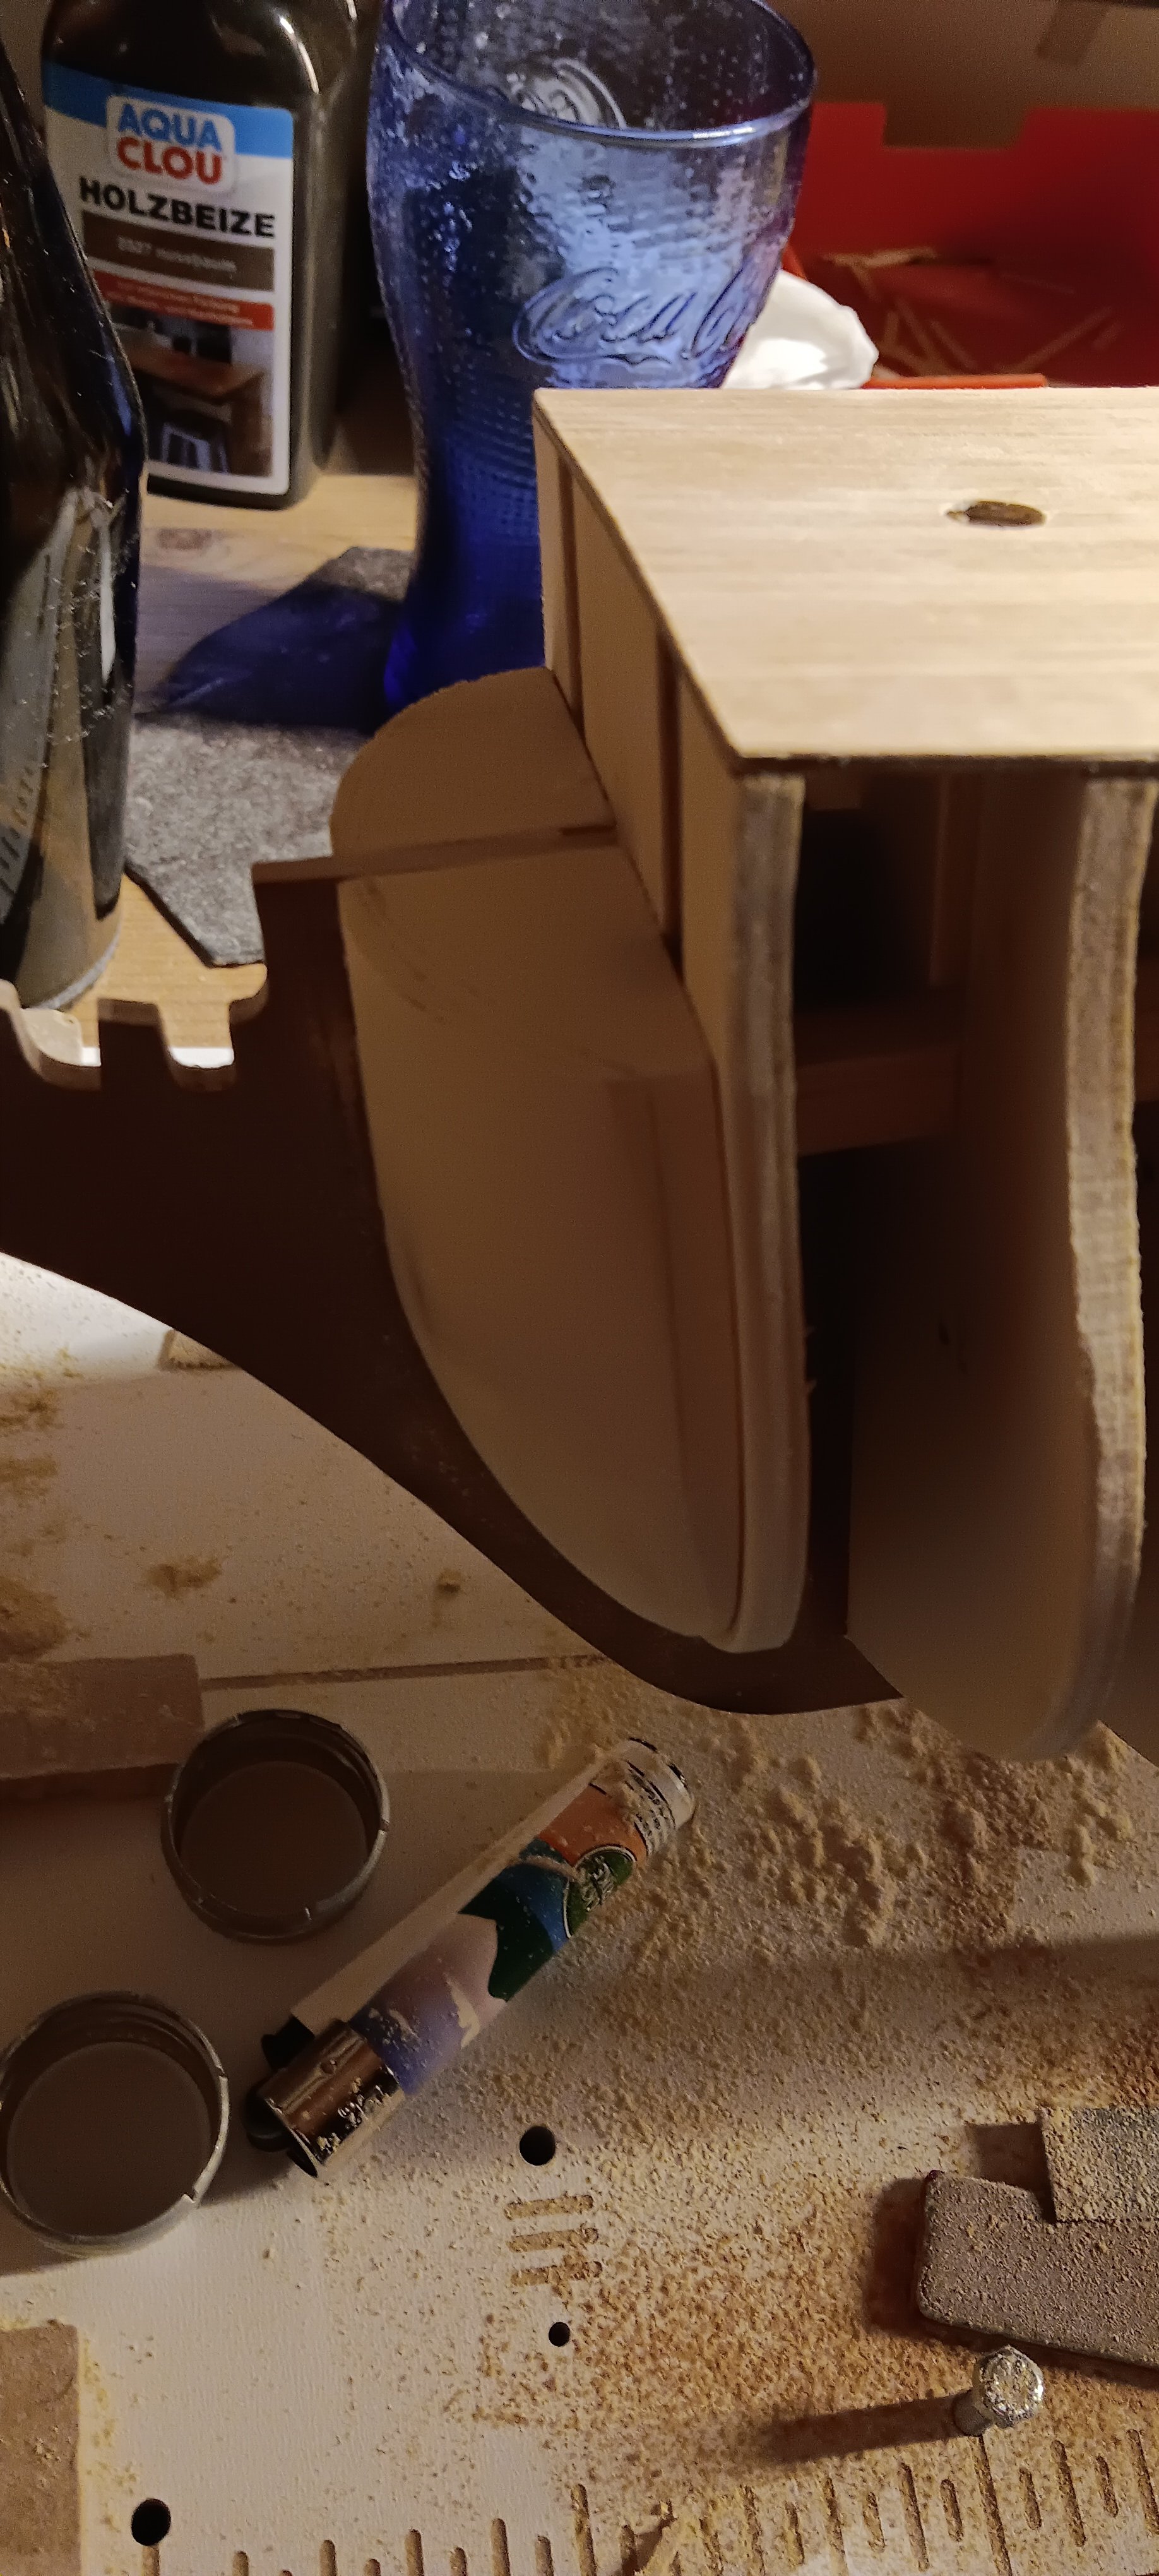
Die Formgebung des Rumpfes ist abgeschlossen, also habe ich mit den Halfpipe-Platten begonnen. Ich habe sie zuerst mit Walnussbeize dunkel gefärbt. Grüße
-
Hallo ihr Lieben, die letzten Tage habe ich mit dem Abschleifen der vorderen Blöcke verbracht, eine ganz schön schwere Arbeit, wenn man wie ich alles ohne Elektrogeräte macht. Dieses uralte Holz ist unglaublich hart und zäh. Bei drei Spanten musste ich auch die Außenkanten etwas aufrauen. Nun sind die hinteren Blöcke dran, was wohl noch ein paar Tage dauern wird, da diese aus noch härterem Holz sind. Bis jetzt hat dieser Bausatz definitiv ein erhöhtes Frustpotential. Eigentlich kann es nur besser werden. Grüße Übersetzt mit DeepL.com (kostenlose Version)


-
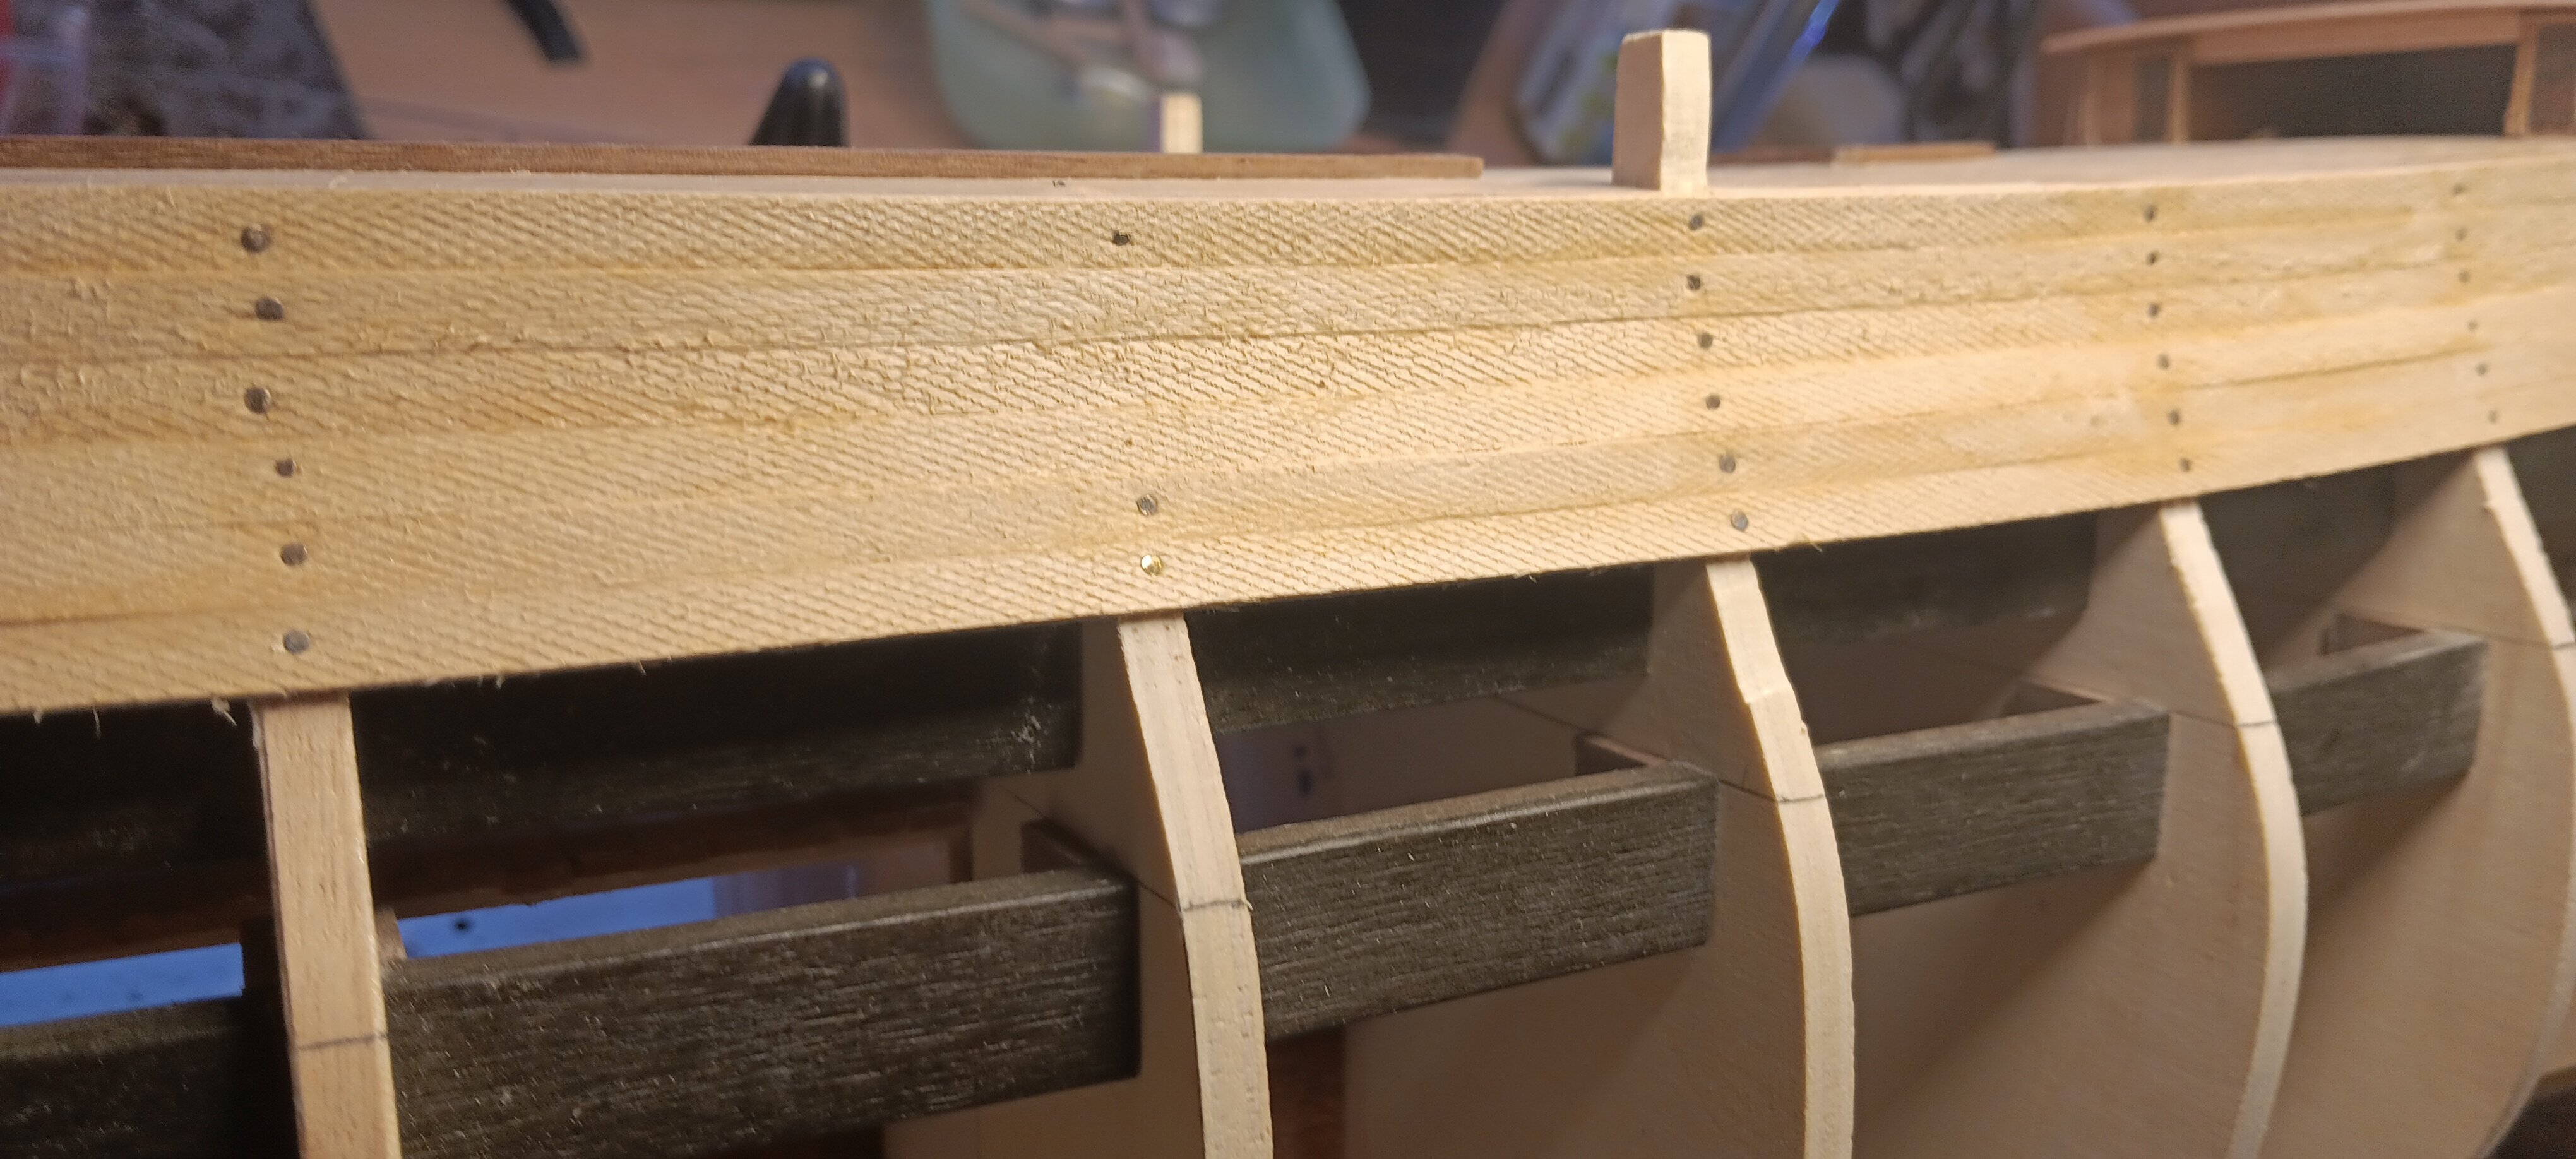
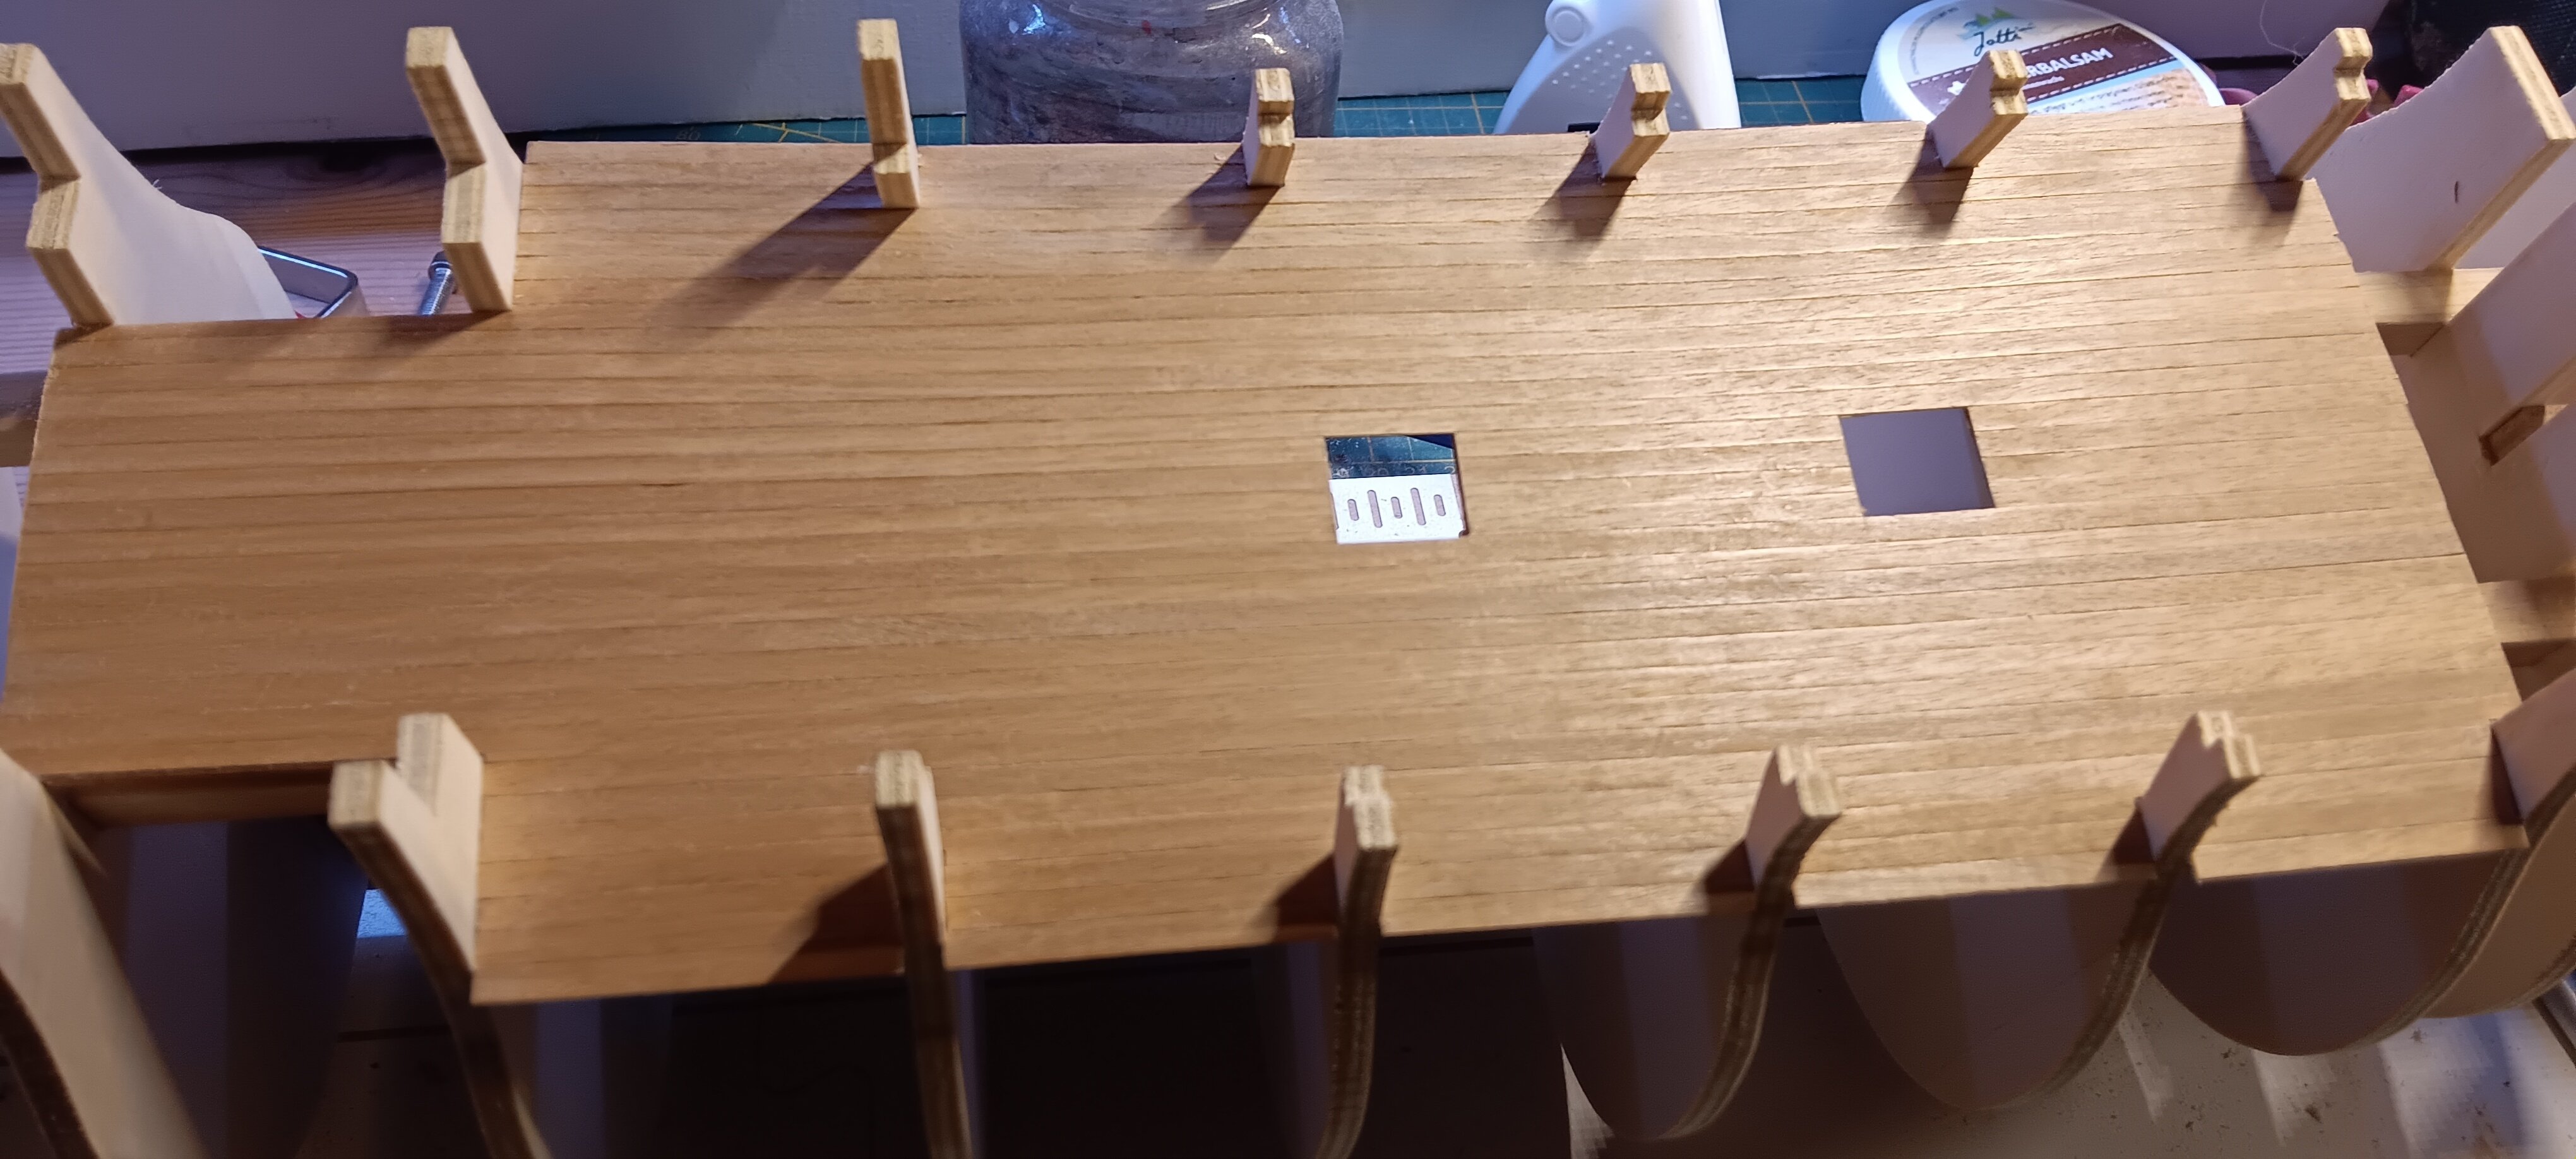
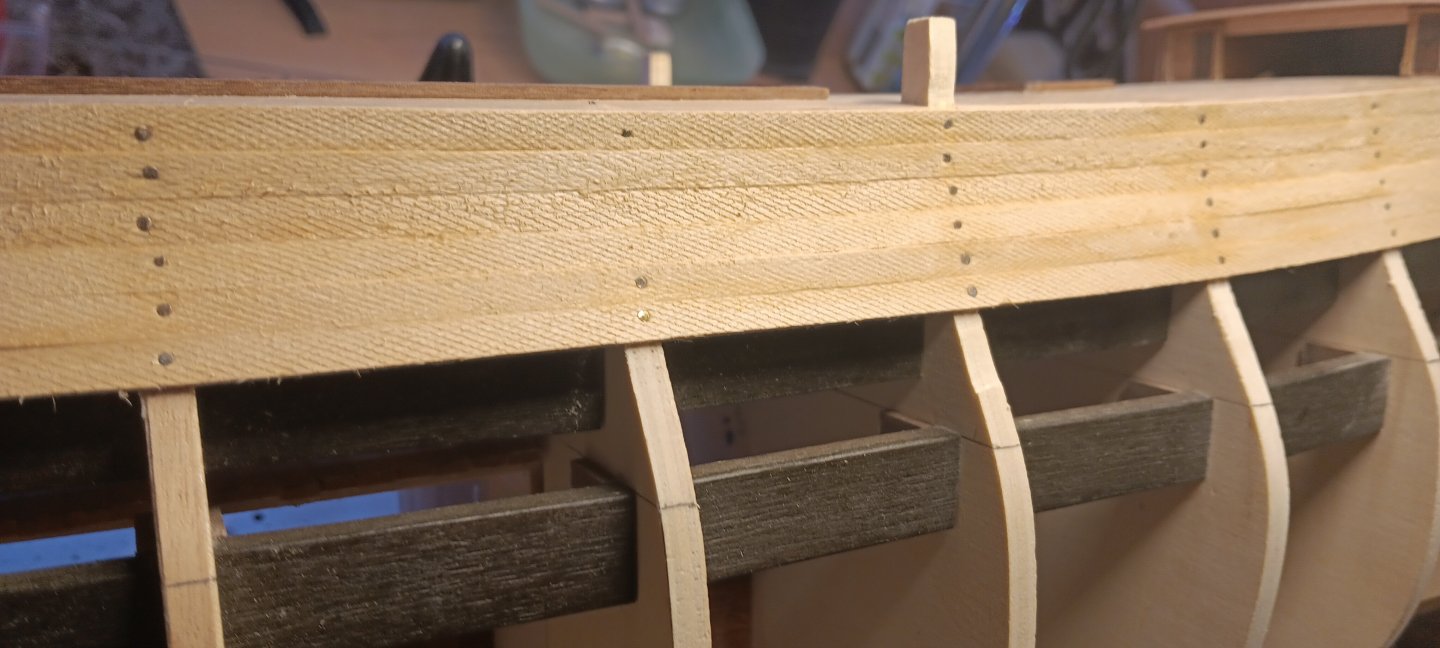
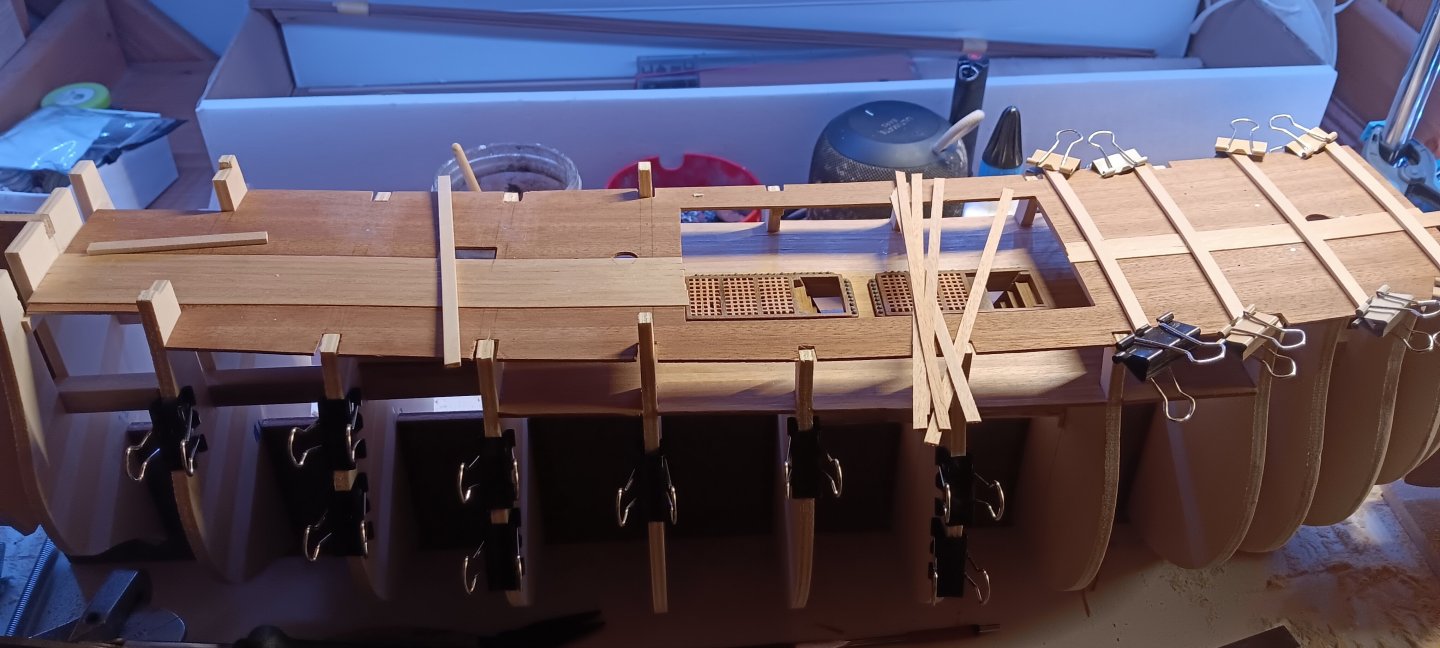
Main Deck is planked
-
Start planking the Main Deck
-
Hello lovelies, Children are great, when they love you they share everything with their dad, even the worst flu viruses. As a result, I currently have a lot of time on my hands to take a closer look at the construction plans. The last two ships had a pictorial description of how to build them, but now I have to realise that building them from plans alone is a different challenge. I am also slowly realising why I no longer wanted to work on such a large scale. But you know, I got it cheap. But my sense of honour tells me that I have to go through with it now. The Admiralty laughs every day with the comment ‘you wanted that’. Back to the subject, the design and construction of this kit are quite special, now I understand why there are only a few completed prototypes. I actually do this hobby for relaxation, now I'm suddenly supposed to start thinking in complex terms. It wasn't planned that way, but there's the matter of a sense of honour. So my creativity and I have decided to see where this ultimately leads. Goodbye, I'm going to lie down again and discuss with the viruses when they intend to leave my brain again. Translated with DeepL.com (free version)
-
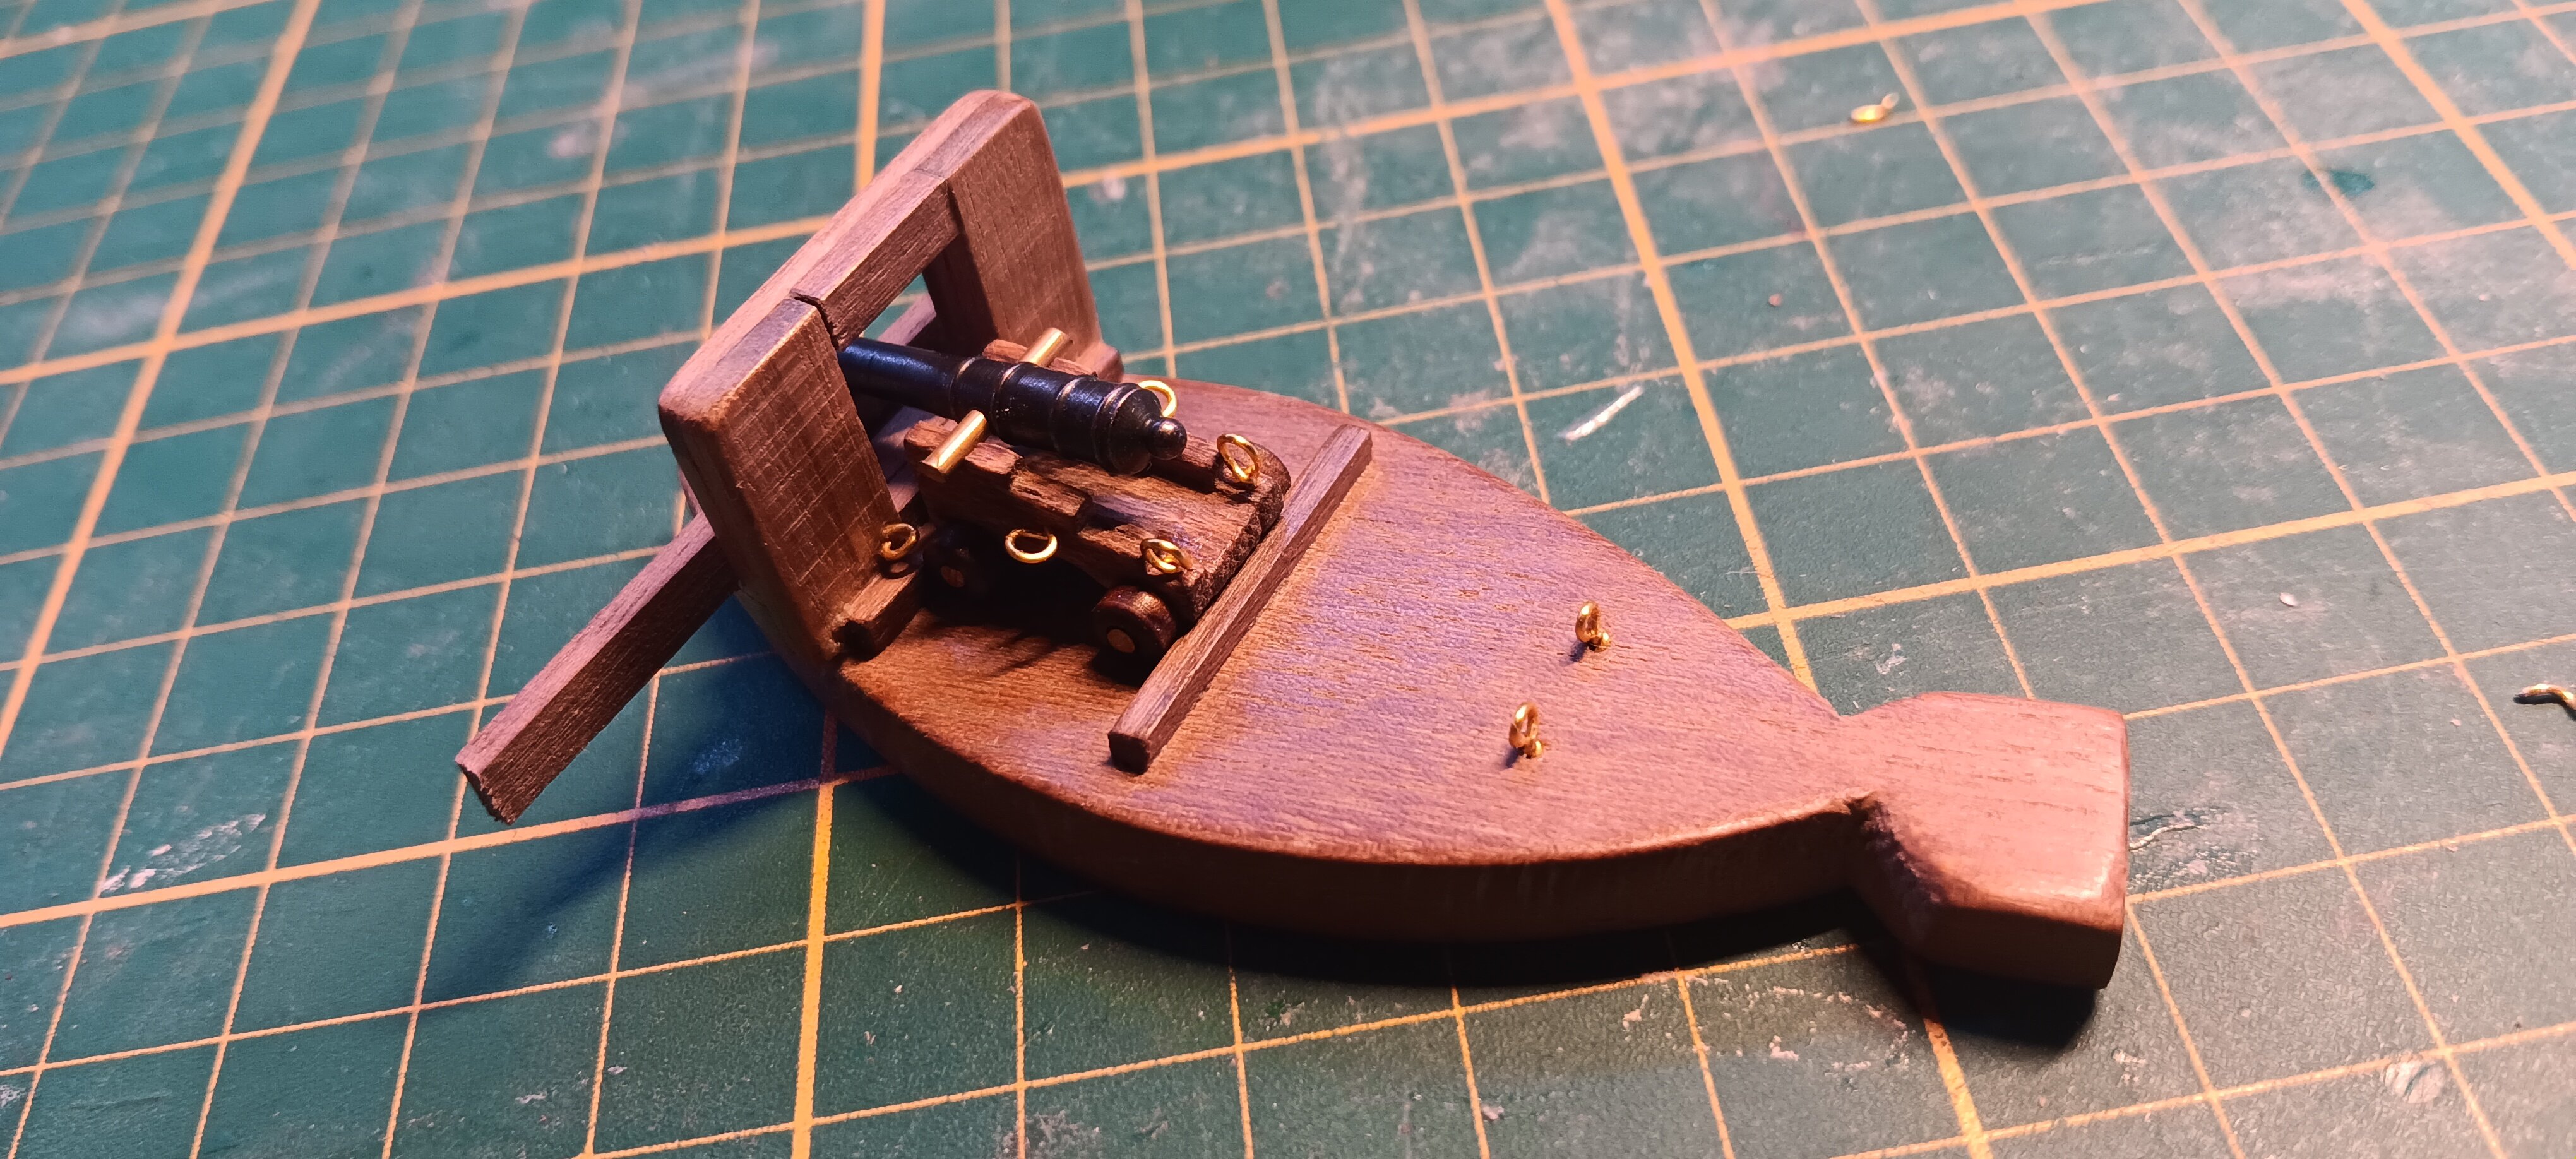
So i made me a Tool for the Takelage of the Cannons

-
very great Job
-
thank you Bob
-
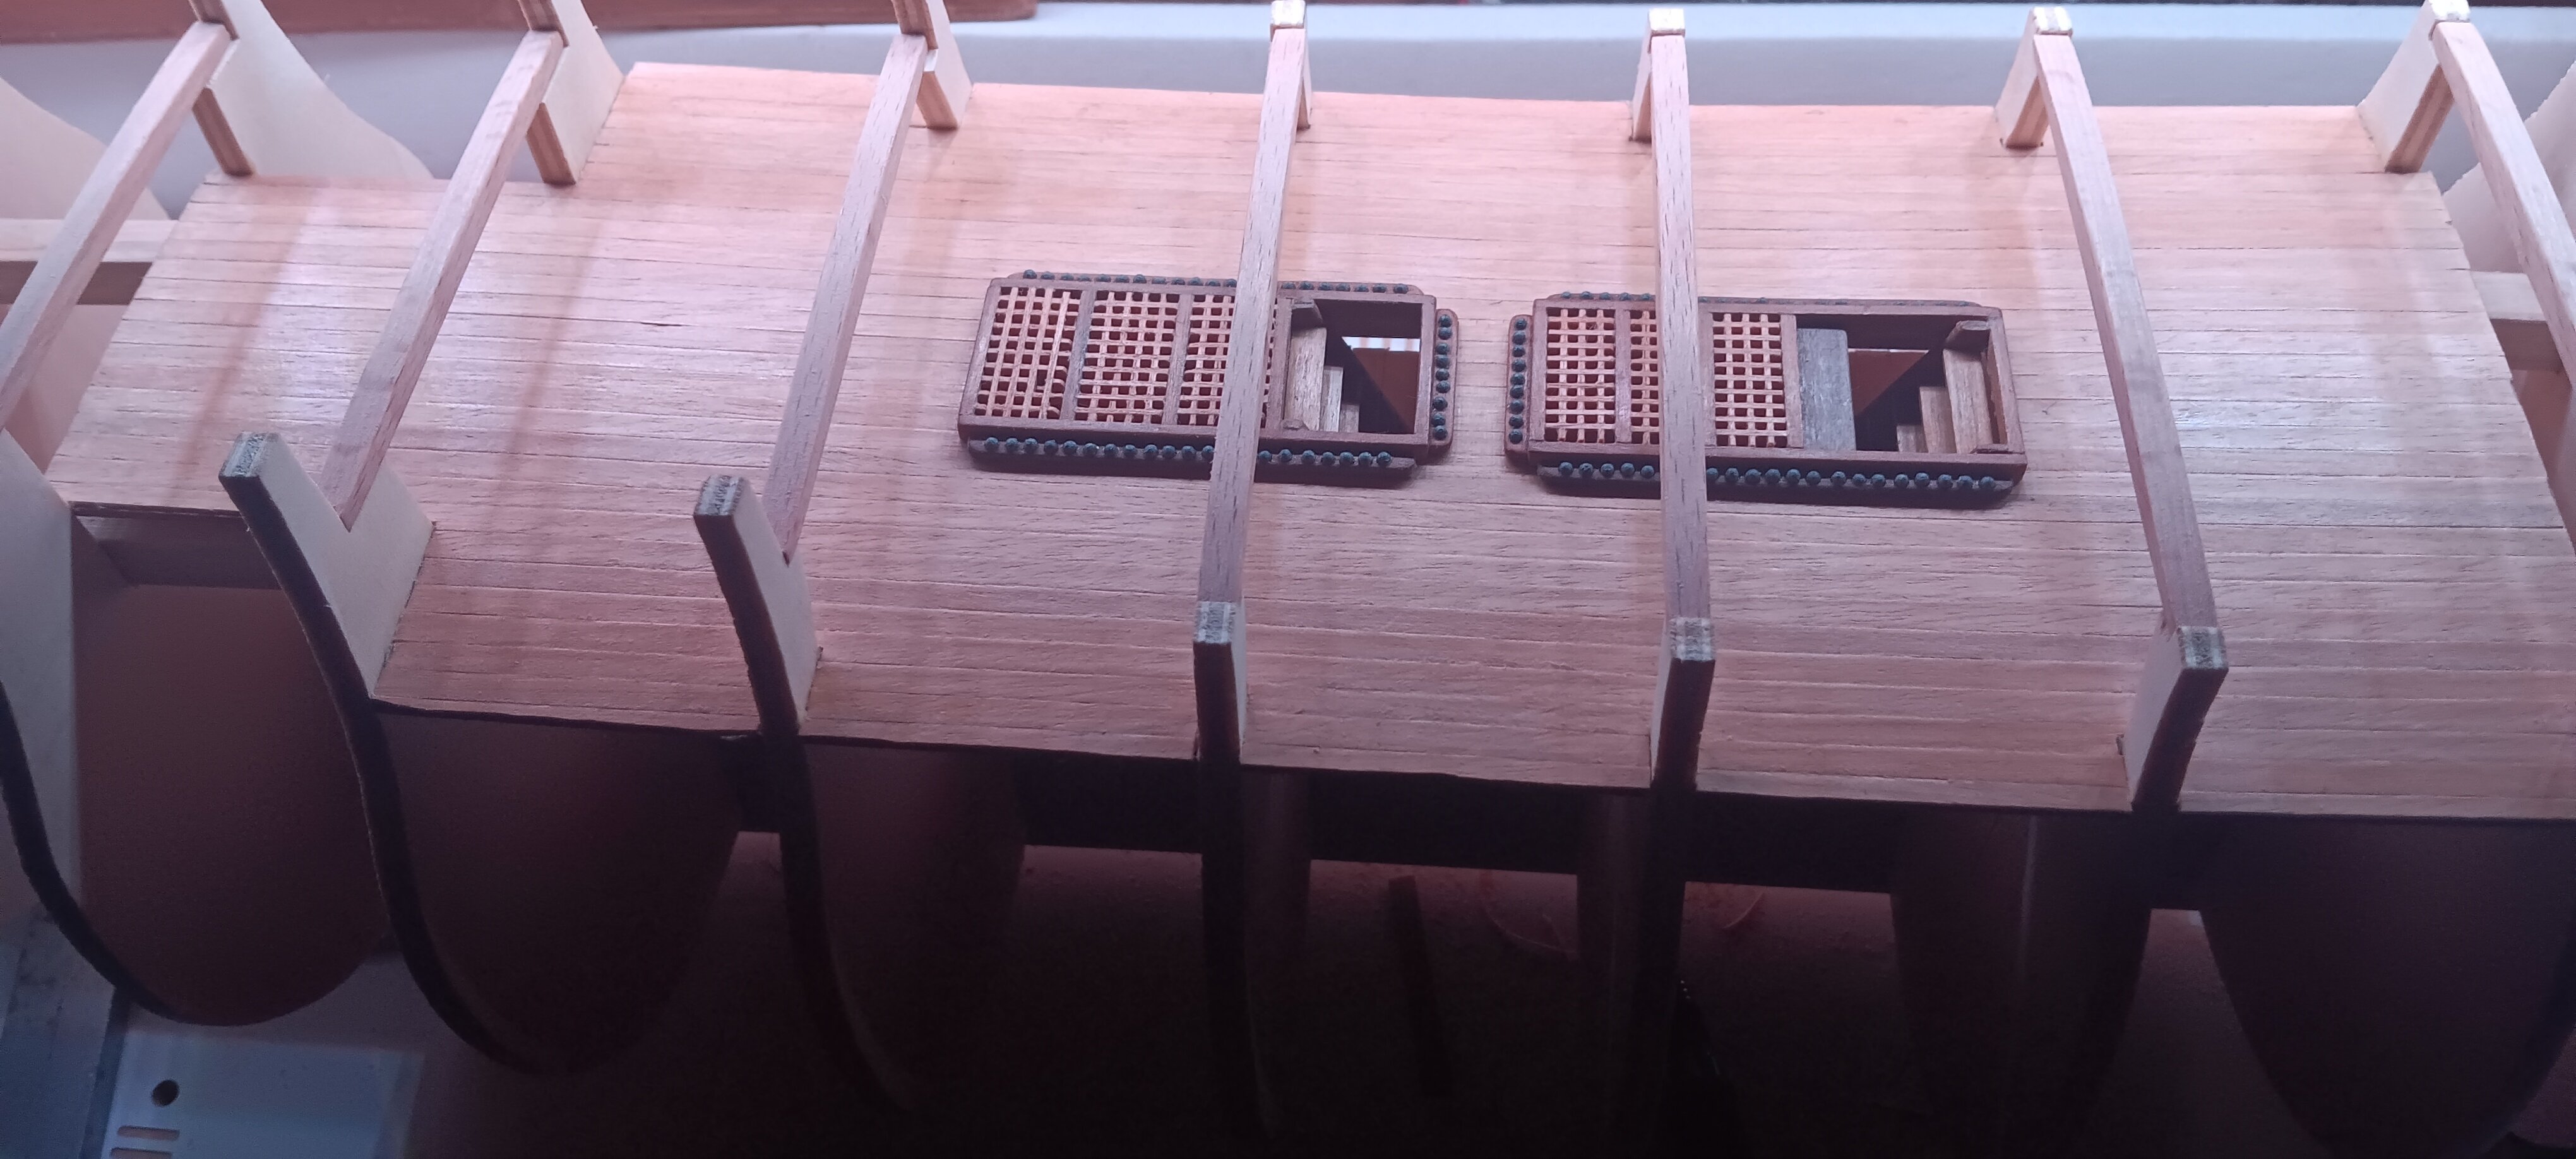
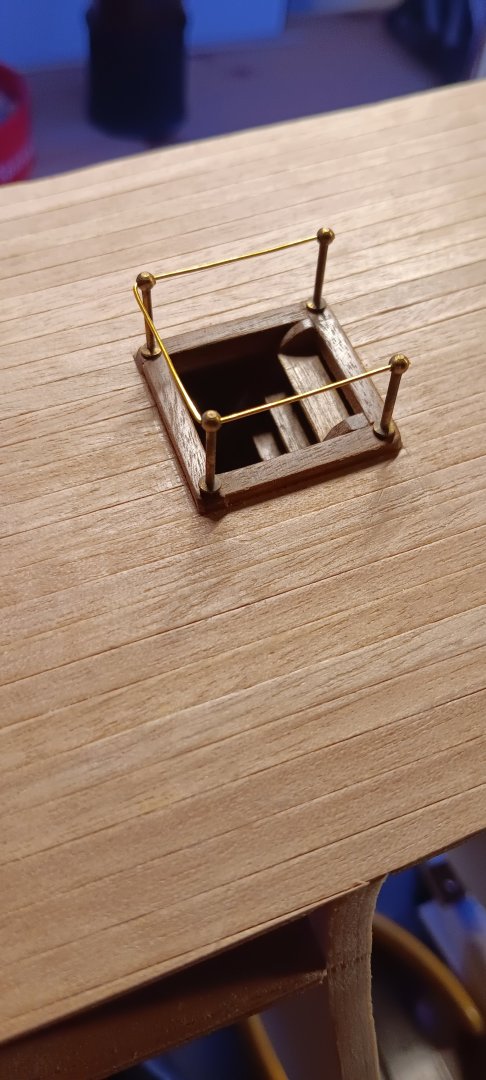
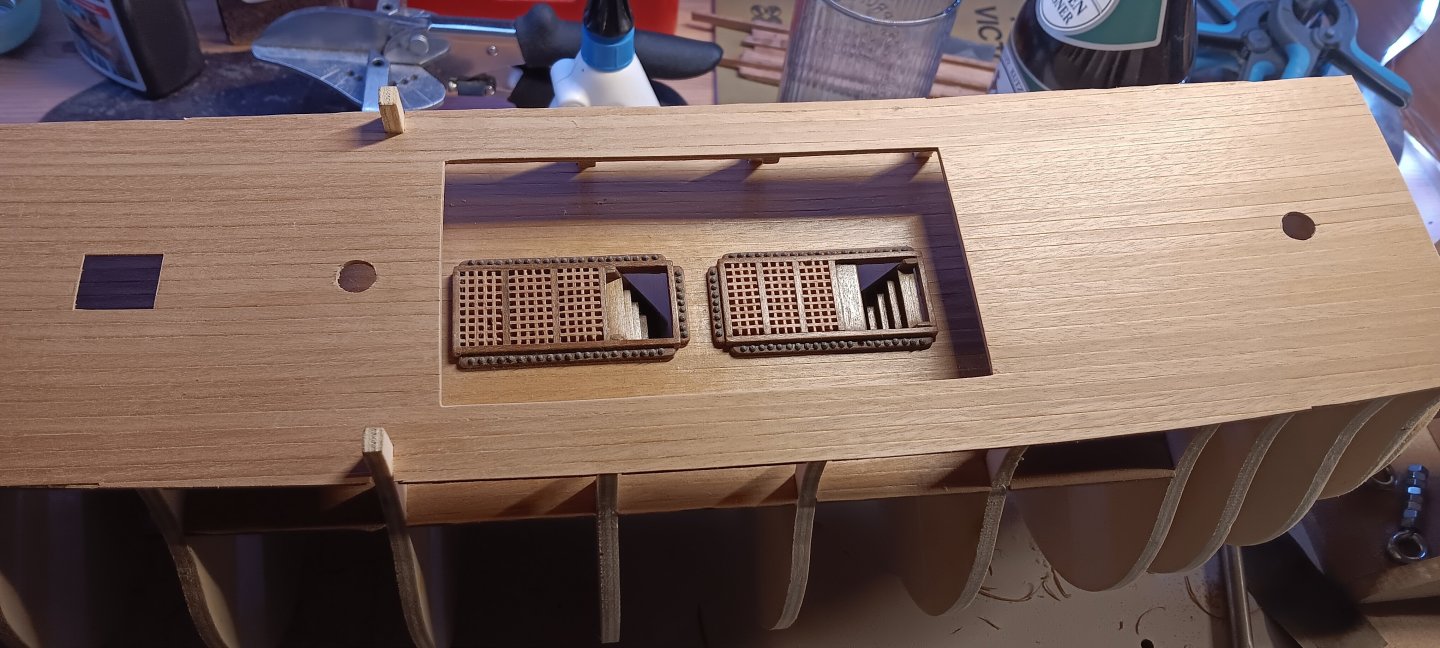
I finished the lower Deck and take the Cannonballs on it before installing the second Deck

-
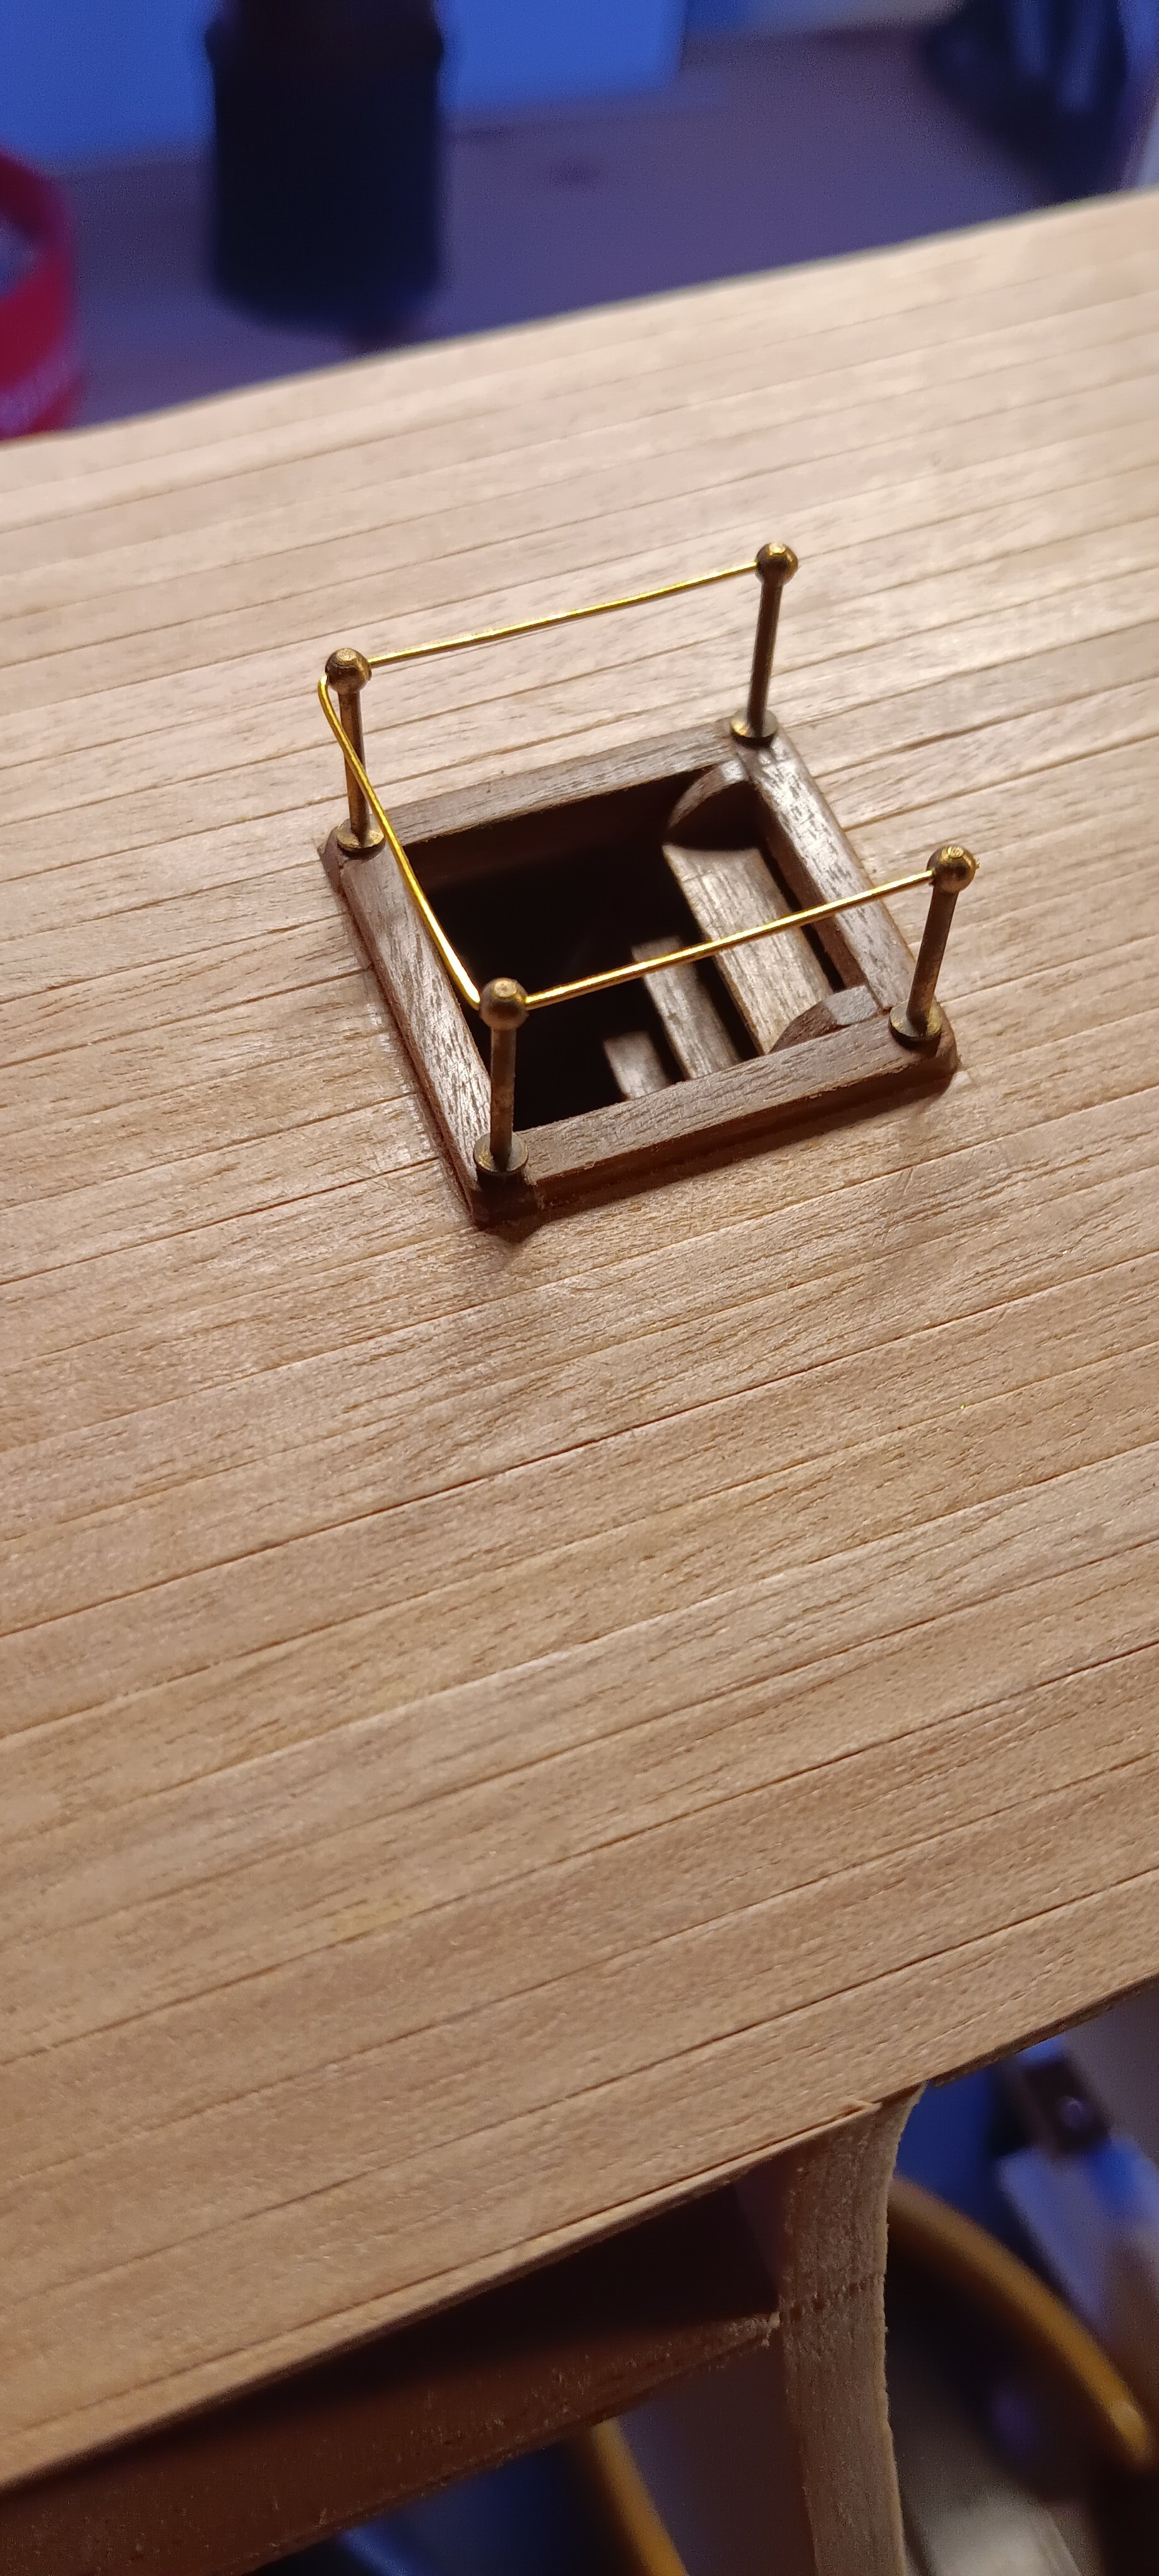
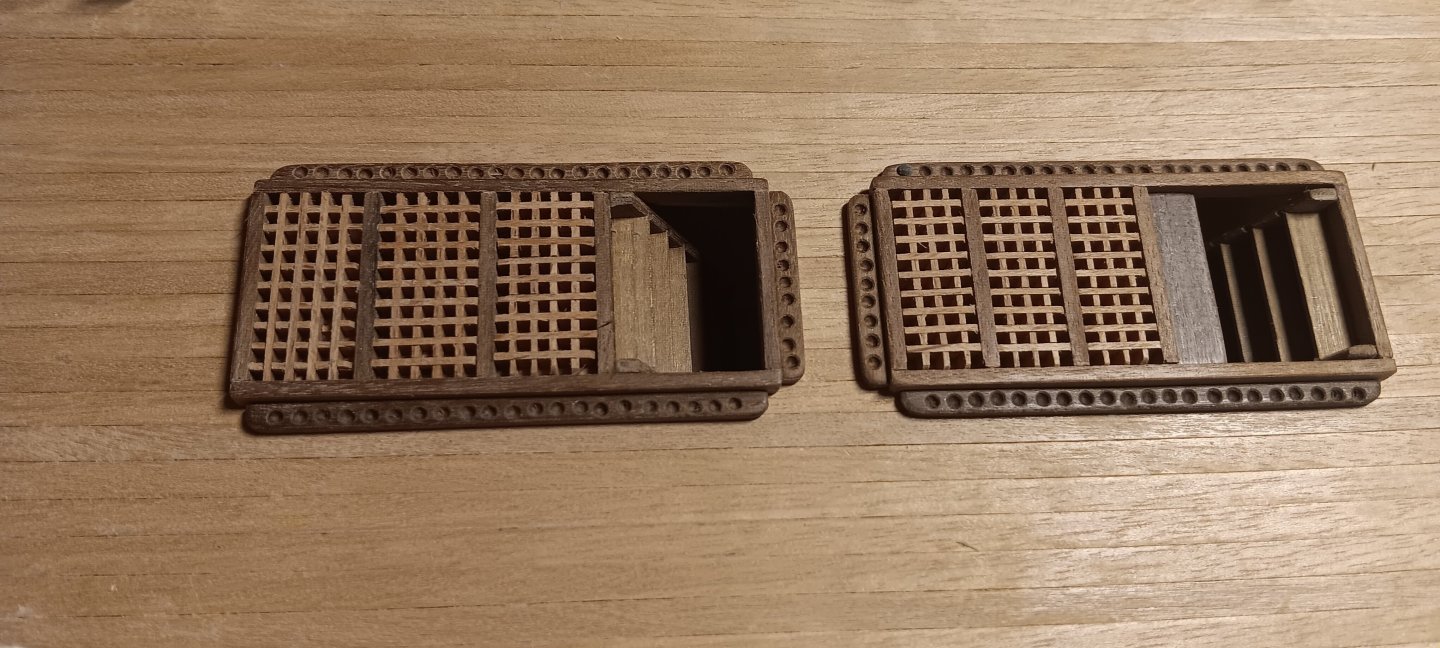
Et Voila, the Gratings on the lower Deck
-
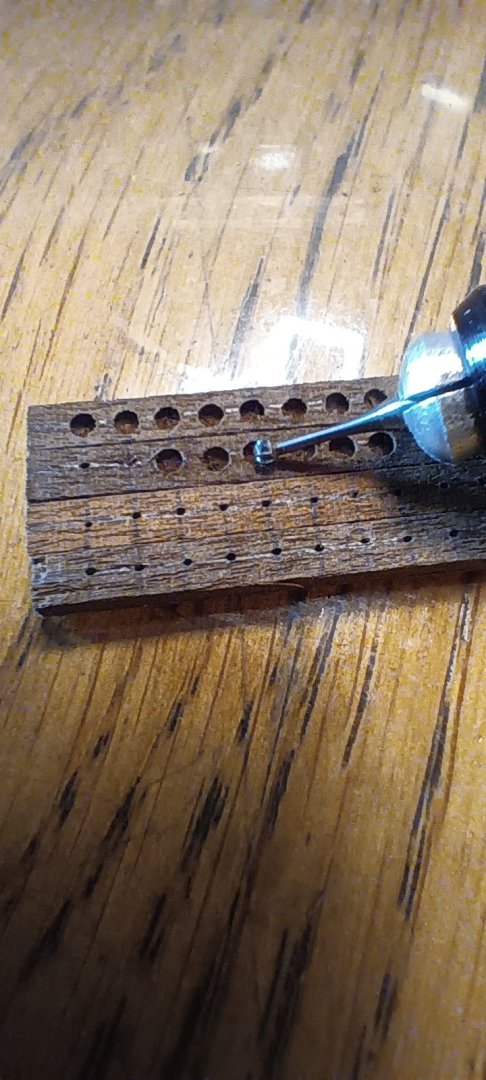
Handmade Holes for the Cannonballs.
-
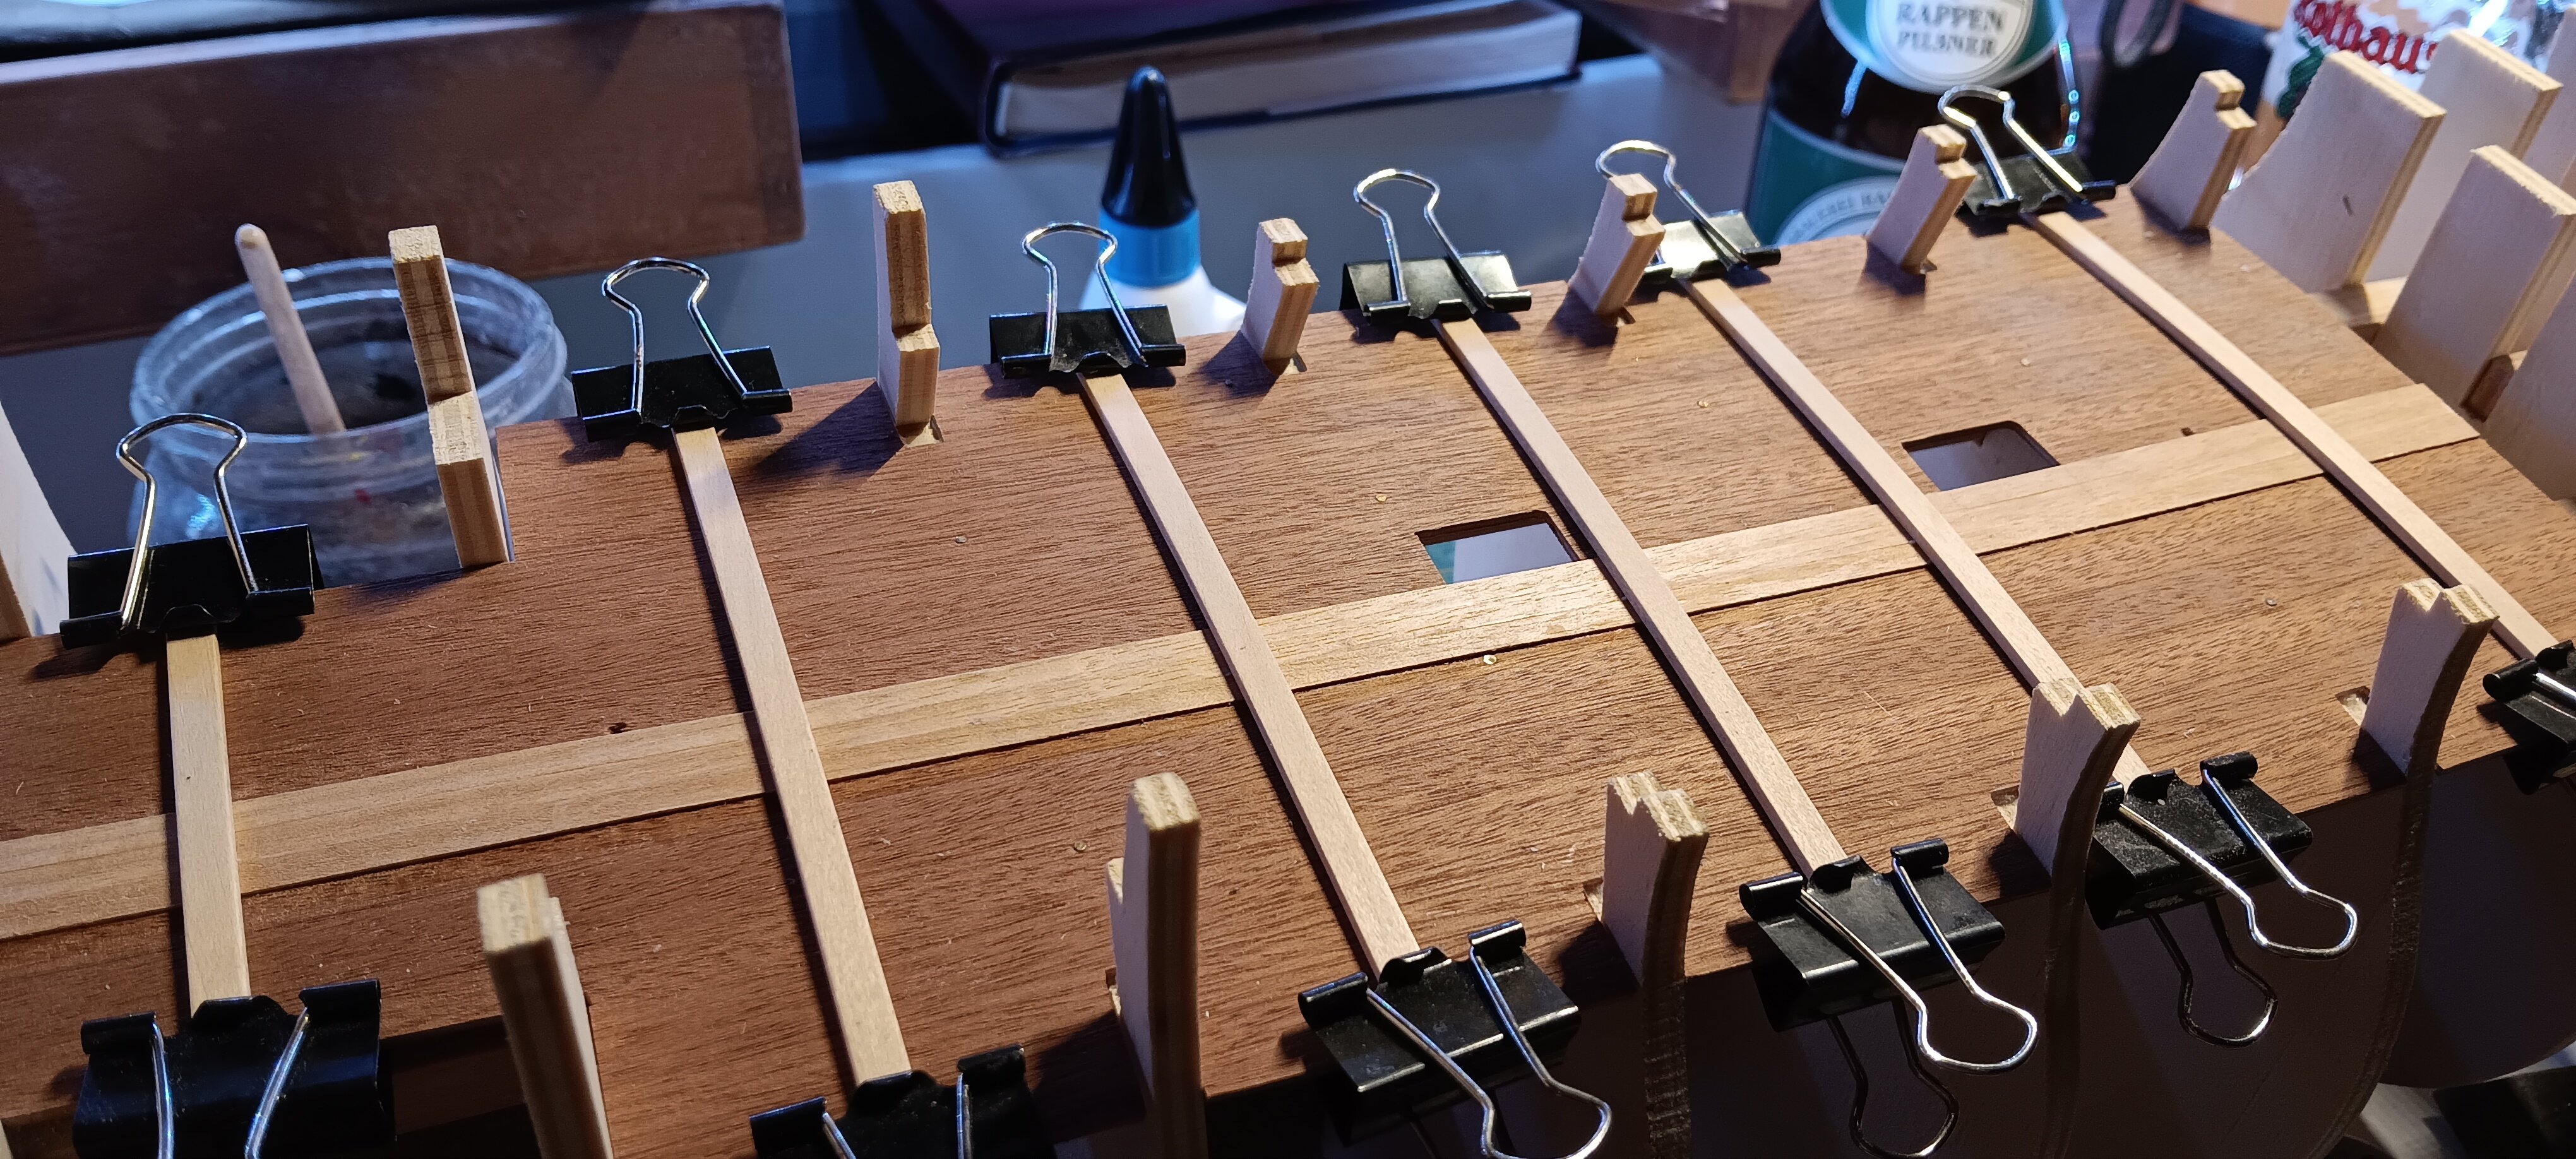
Hallo zusammen, das erste Deck würde beplankt werden. Ein wunderschönes Holz. Leicht verdreht und verzogen, aber so fein gemasert. Naja, das Holz vor 40 Jahren war ganz anders als heute. Habe neulich erst einen Bericht darüber gelesen. Ganz andere Dichte des guten Stücks Baum. Der Nachteil wird sein, dass sich das Nussbaumholz der zweiten Beplankung evtl. schwer biegen lässt, da die Restfeuchte im Holz fehlt. Naja, wir werden sehen Übersetzt mit DeepL.com (kostenlose Version)

-
Planking the Deck