


Dan Poirier
-
Posts
111 -
Joined
-
Last visited
About Dan Poirier

Recent Profile Visitors
1,261 profile views


-
 Taken Aback reacted to a post in a topic:
18th-Century Merchantman Half-Hull Planking Kit by Dan Poirier - NRG - 1:48
Taken Aback reacted to a post in a topic:
18th-Century Merchantman Half-Hull Planking Kit by Dan Poirier - NRG - 1:48
-
Taken Aback reacted to a post in a topic:
18th-Century Merchantman Half-Hull Planking Kit by Dan Poirier - NRG - 1:48
-
Taken Aback reacted to a post in a topic:
18th-Century Merchantman Half-Hull Planking Kit by Dan Poirier - NRG - 1:48
-
Taken Aback reacted to a post in a topic:
18th-Century Merchantman Half-Hull Planking Kit by Dan Poirier - NRG - 1:48
-
robert952 reacted to a post in a topic:
Grand Banks Dory by EGL - Model Shipways - 1:24
-
Dan Poirier reacted to a post in a topic:
Bluenose by rvchima - FINISHED - Amati - 1:100
-
Dan Poirier reacted to a post in a topic:
Chris Watton and Vanguard Models news and updates Volume 2
-
Dan Poirier reacted to a post in a topic:
Chris Watton and Vanguard Models news and updates Volume 2
-
Dan Poirier reacted to a post in a topic:
HM Armed Cutter Sherbourne 1763 by palmerit - FINISHED - Vanguard Models - 1:64 - First Build
-
Dan Poirier reacted to a post in a topic:
Adler IV by ccoyle - HMV - 1/250 - CARD - TERMINATED
-
Old Collingwood reacted to a post in a topic:
USS Missouri by Amphibious0311 - Very Fire - 1/350 - PLASTIC
-
Canute reacted to a post in a topic:
USS Missouri by Amphibious0311 - Very Fire - 1/350 - PLASTIC
-
Amphibious0311 reacted to a post in a topic:
USS Missouri by Amphibious0311 - Very Fire - 1/350 - PLASTIC
-
Dan Poirier reacted to a post in a topic:
Herreshoff 12 1/2 by ShippyTheShipBuilder - FINISHED - BlueJacket Shipcrafters
-
AJohnson reacted to a post in a topic:
HM Cutter Sherbourne 1763 by Kovalus - Vanguard Models - 1/64
-
Archi reacted to a post in a topic:
CA (cyanoacrylate) "super glue"
-
Dan Poirier reacted to a post in a topic:
Bluenose by rvchima - FINISHED - Amati - 1:100
-
Welcome!
-
Welcome!
-
 Looks good. It looks as if the lines are coated in something, what is that?
 -
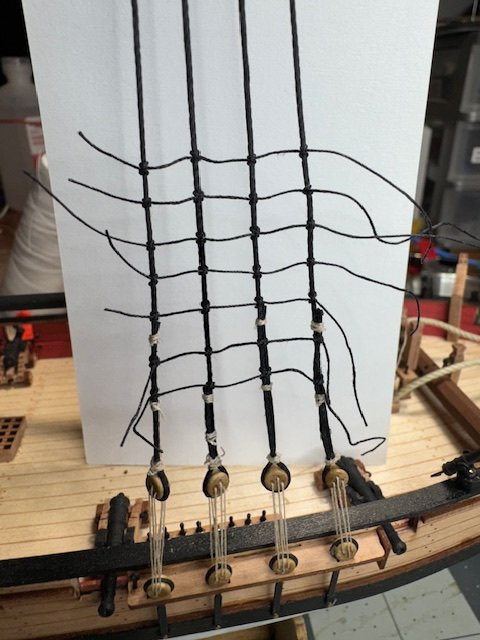
I watched some YouTube videos on how to tie clove hitches, and that was a *big* help! I can tie them a lot faster than I had been doing, too. The clove hitches don't really want to stay tied if there's not tension from both sides, but I might have found a workaround. I soaked some thread in dilute glue and hung it to dry with a weight on the end, then used that for my ratlines. It stiffens the thread a bit, enough to make it easier to work with and hopefully less likely for the knots to try to spring open.
-
I've never done ratlines before, so I did a few practice rows that I expect I'll undo and redo until I feel more comfortable. I can already tell this is going to get tedious, though 🙂
-
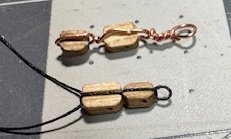
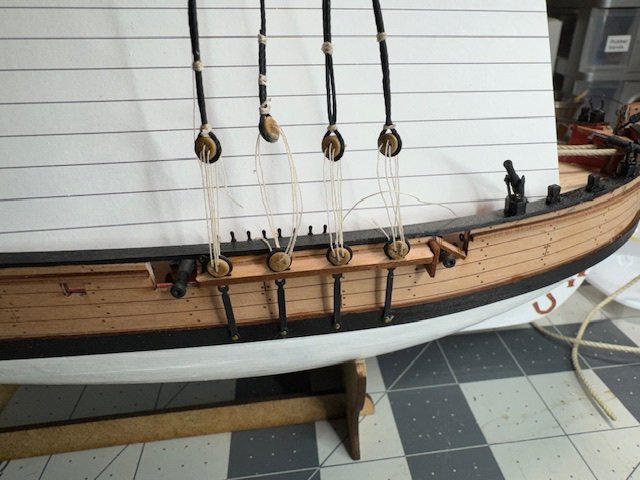
Just a quick update today. First, my 50-50 glue seems to be working better so far. Maybe my previous attempt was too thick to really soak in or something. I'm keeping my fingers crossed. Second, I started putting together some blocks for the backstays. My first try was with some wire I had, but it ended up out of scale and looked awful anyway. I'm switching to using some dark "rope" instead. And now that I see the picture, I realize I got the blocks in the wrong order there! Oh well, I'll try again tomorrow.
-
Kovalus, the Vanguard Sherbourne is a great model. I'm currently starting on the rigging on my own build. I'm sure you'll enjoy it.
- 9 replies
-
- 3
-
-
- Vanguard Models
- Sherbourne
- (and 1 more)
-
I think what'll I do is: Measure a 50:50 dilution of white glue more carefully and see if that works any better than what I've been using, which I just kind of threw together by eye. If that doesn't work, then use a tiny bit of CA on each one. Maybe if I'm careful, it won't soak through the seizing and into the shroud, and if I need to redo anything, I can just cut off the seizing.
-
The rope and seizing materials I'm using came with the Vanguard Sherbourne kit, and I can't find anything in the instructions to say what they're made of. I can't tell by looking at it. Maybe someone else familiar with this kit knows what the thread is made of?
-
CA (cyanoacrylate) "super glue"
Dan Poirier replied to Dr PR's topic in Modeling tools and Workshop Equipment
I was with you on how bad the packaging of CA was, until I tried this: I've been using it, a tiny bit at a time, for months, and the glue still comes out as well as it did when I first opened it. I don't know what magic they're doing in that nozzle and cap, but it works. (I'm not using that skinny pointy add-on spout; I just put a drop on a plastic scrap and use a pointy tool to transfer a tiny bit to where I need it.)
-
Well, I'm getting a wee bit frustrated. My seizings on my shrouds keep coming undone after I trim the loose ends. I'm tying a square knot and soaking it well with dilute white glue, then giving it a day or more to dry, so I'm not sure what I might be doing wrong. Maybe it's my dilute white glue? I keep reading "dilute white glue" but nobody actually says how dilute it should be - 50-50? 90-10 glue? 90-10 water? Or maybe something else. It tempts me to reach for the CA glue, but I'm trying to avoid that if I can.
-
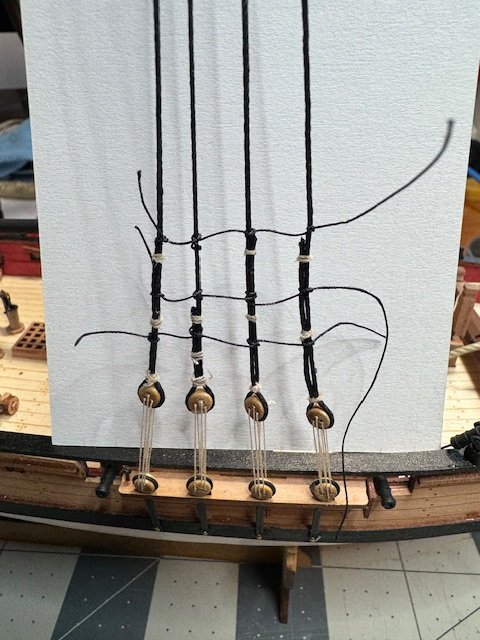
The mast is up, and I'm working on the shrouds. I'm just eyeballing the deadeyes' alignment. I just put the 3x5 card there so the camera could see the deadeyes, but those lines on the card look like they might be helpful 🙂

-
I'm just getting to this point in my Sherbourne build, and a part of me wonders if real life ships always had their deadeyes all lined up 🙂
-
Working on the rigging, I've learned something already. After tying a seizing and dabbing on a little dilute white glue, I need to wait until the glue is completely dry before trimming the loose ends. Otherwise the knots come loose and I end up doing it all over. Luckily, it seems a lot easier to fix mistakes in rigging than planking. At least, so far.