
HOLIDAY DONATION DRIVE - SUPPORT MSW - DO YOUR PART TO KEEP THIS GREAT FORUM GOING! (89 donations so far out of 49,000 members - C'mon guys!)
×


SaltyScot
-
Posts
857 -
Joined
-
Last visited
Content Type
Profiles
Forums
Gallery
Events
Everything posted by SaltyScot
-
 It's the small details that matter. Nice work.
 -
She has come along quite nicely since I was last here, Steve. You a doing a grand job on her mate.
-
Wow, this has come a long way since I have been away. You have done an awesome job on her, Terry, truly you have. As others have noted, she looks amazing on the launch, good call!
-
Hi, Pat, I had often wondered why that detail was there when I fiddled with it during my build. Nice work around mate, she is looking nice. We are (finally) back from our Outer Banks trip. We decided to extend it until the weather started getting too cold for surf fishing down there. We had a great time and will be back down there for the whole month of March.
- 27 replies
-
- 1
-

-
- Endeavour
- j-class yacht
- (and 1 more)
-
I love the idea of soldering those pins on! I am stealing that one for sure. It will save a LOT of fiddly work. Very nice.
-
It has been quite a journey, Tom. I look forward to using your blog as a "guide" for my Endurance build.
- 206 replies
-
- 1
-

-
- Endurance
- Shackleton
- (and 2 more)
-
Bluefish, Terry. The elusive rockfish (striped bass) is something I still have to add to my list of trophies
-
What a nice thing to do for your local school. Good for you, Steve!
-
Well I just sat here and read through the most recent updates. I must confess to the tension mounting too as I saw all the fine work you had put into getting the ship to its current status. That fireball you came up with is incredible, it is going to look great in the bottle. I am sending you moral support for the next "bit" mate 🫡
- 156 replies
-
- 4
-
-
-
- Queen Annes Revenge
- bottle
- (and 1 more)
-
Yep, I have to go with Alan on this one. Fine work indeed, Phil.
- 288 replies
-
- 4
-
-
-
- Card
- Pre-Dreadnought
- (and 3 more)
-
I am glad to hear you are better, Ronald. Never a good thing when you are off your game. Your progress and the standard of the workmanship is truly impressive!
-
Despite your frustrations those chain plates turned out just fine. Nicely done oh master
-
I agree, she is coming along nicely. Don't overthink it mate
-
Good evening, ladies and gents. I have just spent a week out on the shores of the Outer Banks (Ocracoke to be specific) surf fishing. It was a spontaneous visit sprung on me by an old friend. I have returned in one piece and the shipyard is open (once again).

-
Well, I just HAVE to follow this one now, don't I
-
I am with you all the way on that point. I like the bands you put around those catheads, a nice touch. I am going to enjoy watching this come together. I still have my rudder to mount too. I scratch built that too but am not quite happy with the tiller I made.
-
Sometimes taking a nice break empowers us with new ideas, Trevor. Stepping away is a healthy thing! She looks sharp through my eyes, sir.
- 167 replies
-
- 3
-
-
-
- Norwegian Sailing Pram
- Model Shipways
- (and 1 more)
-
You have the patience of a saint, Glen. Nice save. If that had happened to me (twice) I would be replacing a window about now.
- 156 replies
-
- 4
-
-

-
- Queen Annes Revenge
- bottle
- (and 1 more)
-
I agree, Phil, the detail you are adding here is quality stuff. Very inspirational indeed.
- 464 replies
-
- 1
-
-
- minesweeper
- Cape
- (and 1 more)
-
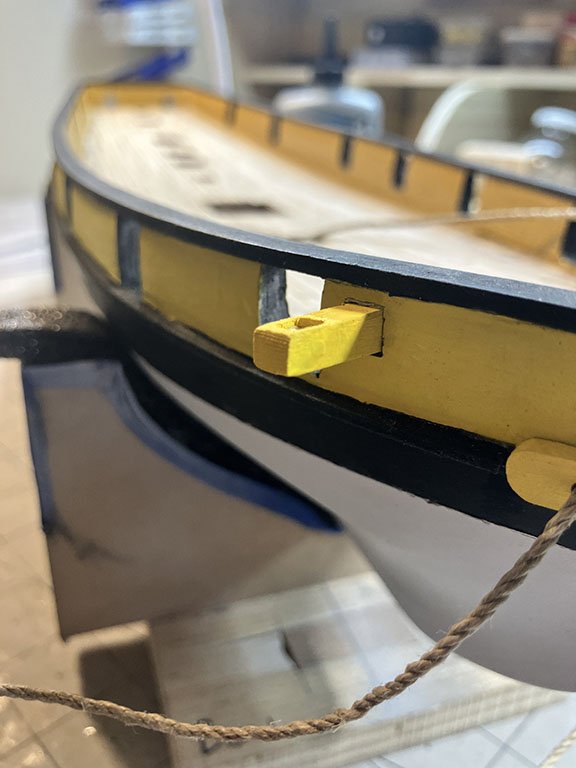
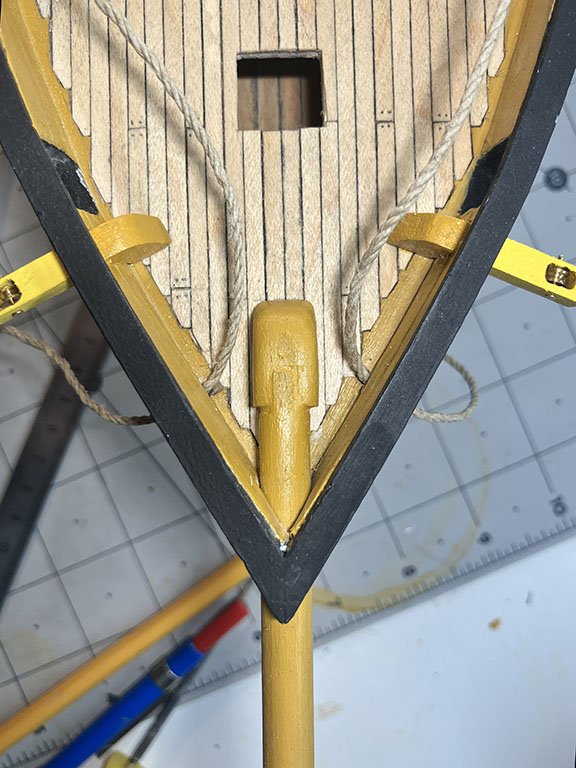
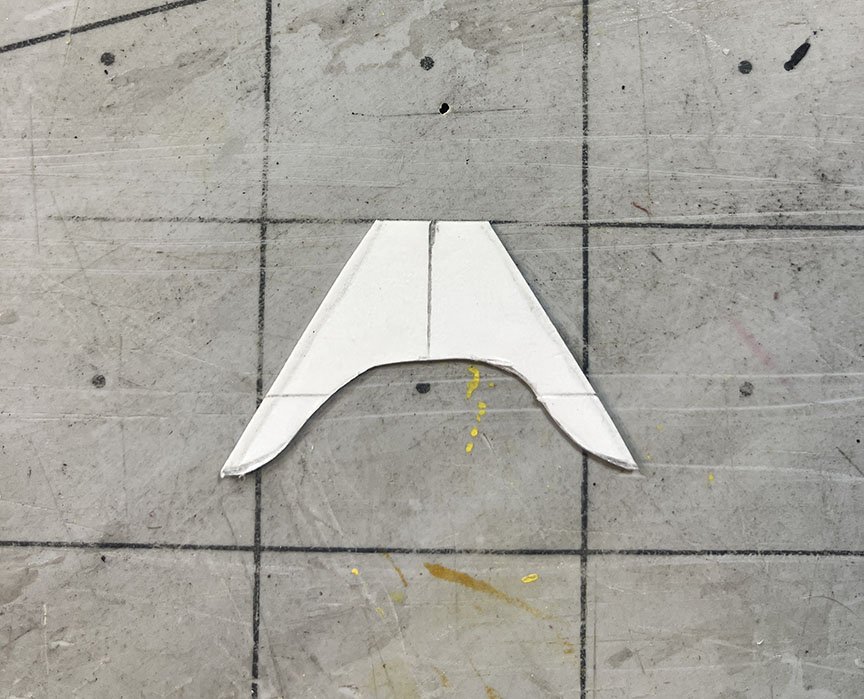
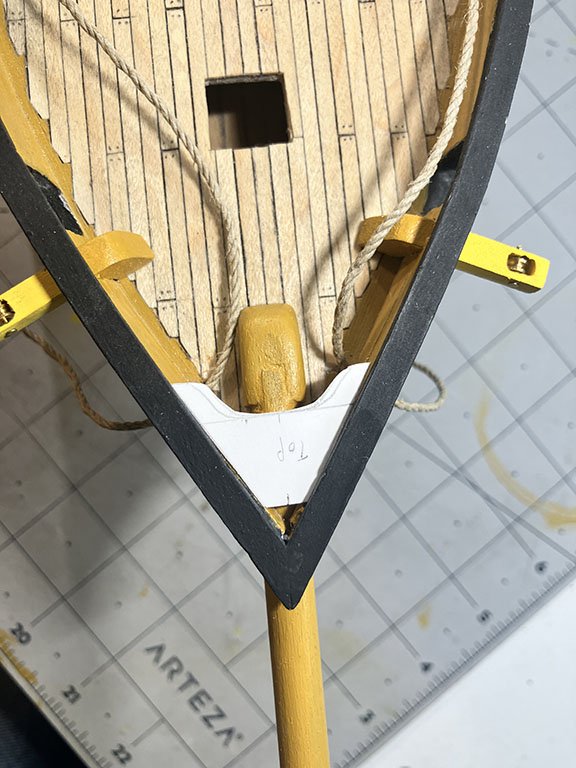
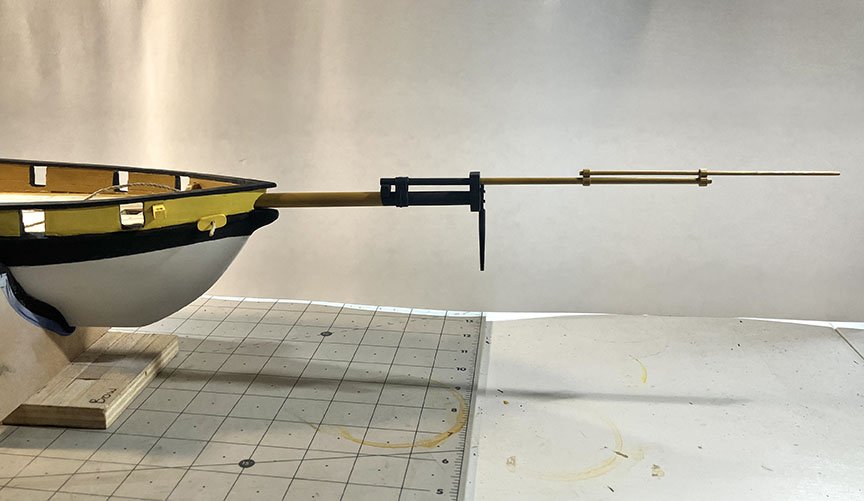
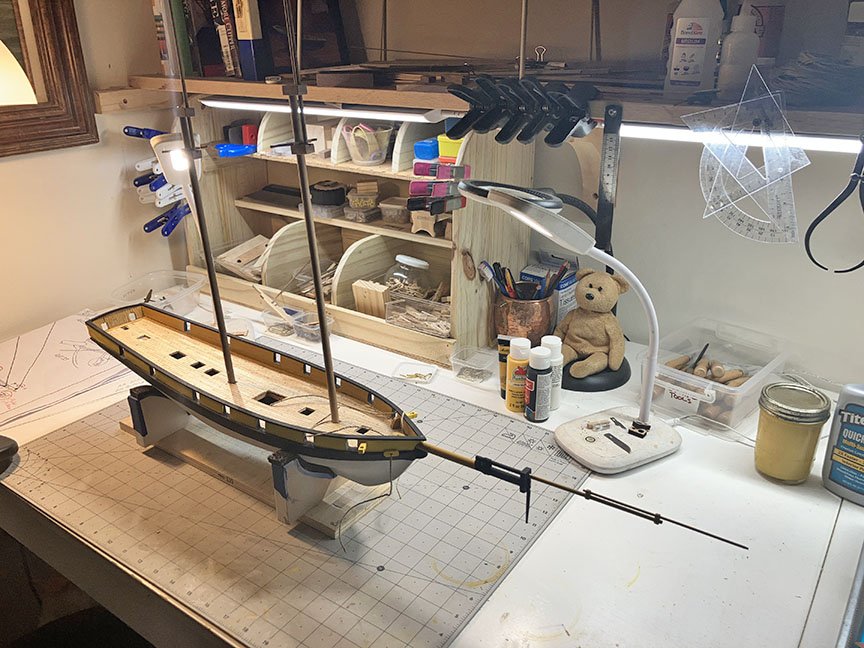
A small update on the build. I did a lot of fiddly work today, cleaning up a few things here and there. The cathead sheaves were filed down flush and the catheads were given another layer of paint: The bowsprit was finally placed and glued down. I cleaned up the butt joint and gave all that another final coat of paint. The strap will be added once the paint is nice and dry: There is a "plate" that sits above the bowsprit butt joint. I am not sure what it is called (but I am certain someone here can tell me). The plywood kit supplied one was scrapped. I will be making one out of the maple I have used on this model before. I started by making a template out of card stock: I will take this to the wood shop tomorrow and get it cut out on the scroll saw. With her bowsprit mounted she looks quite regal. I dry fitted the masts to get a good idea of how she will look. I am pleased with the progress thus far:
- 257 replies
-
- 13
-
-
Your build was the inspiration for me to even begin this project! I truly look forward to seeing how yours progresses. Glad to have you back.
