
Supplies of the Ship Modeler's Handbook are running out. Get your copy NOW before they are gone! Click on photo to order.
×
Sjors
-
Posts
5,536 -
Joined
-
Last visited
Reputation Activity
-

 Sjors reacted to rafine in Frigate Essex by Rafine - FINISHED - Model Shipways - Kitbashed
I've begun on the fore mast running rigging by making and mounting the topgallant and royal yards and adding their rigging to the extent that I'm going to do it. It's my intention to do the yard rigging ( trusses, parrels, halliards, foot ropes, lifts, braces) and certain of the sail rigging ( clews, sheets, but no bunt, leech or reef lines). This has been my practice for quite a while and is entirely arbitrary, based upon my feelings about appearance and feasibility. I am also not doing any of the headsail and staysail rigging on this build.
These first two yards, like the previously done spritsail and sprit topsail yards, are relatively simple, since they are round in section throughout. I added the cleats, foot ropes (on the topgallant), clew and sheet blocks, lift blocks (on the topgallant), halliard ties, one end of the parrels and brace pendants (on the topgallant) before mounting the yards on their pins on the mast. I then added blocks for the lifts at the mastheads and various blocks for the braces at the main topgallant mast, main topmast stay and fore top.
I then ran the lifts, clews, halliards and royal sheets and tied off those that are belayed in the fore top. Rope coils were added for each belayed line. Lastly, I ran the braces, but didn't tie them off at this point.
I'm now in the process of making the topsail yard and lower yard.
Bob
-
Sjors reacted to popeye the sailor in Andrea Gail by popeye the Sailor - FINISHED - 1:20 scale
OK........so I made these ladders...... the shorter one is for the mani deck, abd the longer one will go from the fore deck to the roof.
the way the plans show the ladder to the roof of the pilot house would look weird, if I were to put two curved pieces of brass rod in the top of the uprights.......you know.....drill a hole and insert them. I decided that I would bash them a little......sounds funny in relation to a scratch build........don't it. well.....it can be done.......I added grab rails. drilling all the holes......I set in some support bars for the rails.......and then the rails over the top of them. in hindsight, I probably should have made them entirely from brass rod and solder.......but this was more fun {I'll have to play with the other idea}.
I had set them in place and drilled holes in the decks for the placement........in the bottoms of the ladders, small pieces of rod was cemented in, to serve as locators. I put the main deck ladder in place to see how this one would look.......it's not supposed to have grab rails.
the other grab rail was cemented in place on the roof ladder.
once both sides looked somewhat even, as far as the curve goes, it was set in place to make adjustments.
when I was happy with it, it got a coat or two with primer.
I looked at the roof ladder..........then I looked at the main deck ladder.......and then started to think how I would pull off doing the grab rails to the main deck ladder, especially when it reaches the fore deck. there are railings on both sides.
I'll worry about that later on went the support bars!
....and the rails themselves!
setting it in place..........yea....I might be on to something
I also made up another bracket for that pulley.........it's a little crooked......I'll have to fix it, but it's on there. there are also guide blocks filling in those holes I drilled, in that piece off of the gangway.
I would have gone further, but I was rung out...... so I climbed into me bunk..........sad to think the work week {end} is here. I'll finish this off and continue on Tuesday. thanks for looking in
-
Sjors reacted to texxn5 in Charles W Morgan by texxn5 - FINISHED - Model Shipways - 1:64
Snuck in a couple of hours today so I managed to rig the Boom Topping Gaff and Boom Sheet. Aft end is shaping up, more to go maybe I'll catch a couple of hours tomorrow.
-
Sjors reacted to DCIronfist in Corsair by DCIronfist - FINISHED - OcCre - 1:80 scale (First wooden ship build)
Ok so I have posted anything of substance for a while........I wanted to wait for the big reveal and here it is......
-
Sjors reacted to mobbsie in Bomb Vessel Granado 1742 by mobbsie - FINISHED - 1/48 - cross-section
Hi Guys,
Been a bit backward in coming forward with my latest update I'm afraid, all I can say is that it's been an eventful couple of weeks and this old geezer doesn't usually do eventful.
Things have moved on a step or two since my last post and I can be accused of getting carried away, I promised to show the making up of the Shellroom but unfortunately this is now not possible. So I'm afraid we have from component parts to completed item in two pictures, If anybody wants to see how the Shellroom is constructed then may I suggest you pay a visit to Grants log in this section and he will most likely show how it's done, he's very good at that sort of thing.
So, we now have our Shellroom completed and all polyied up it's on to the next stage.
First up is the make up of the Mortar Pit Beams and Planking, it strikes me that with the dimensions of the Planking they should be referred to as Boards, they are quite substantial pieces of wood when taken in scale.
Here are the component parts for the Mortar Pit Beams and Planking
The Beams are not difficult to make up and are pretty straight up unless your me that is, the cut outs for the Shellroom supports were not quite lined up and so each had to measured up to fit, not difficult but a lot of too-ing and fro-ing. This shot is of the Beams being glued into place.
All Beams are now firmly glued into position
Next up we have the Mortar Pit Planks, These are made up of two different size Holly Planks, the Primary Planks are made from 1/4 x 3/16 and the Secondary Planks are 3/16 x 1/8 with the outer Planks being 1/4 x 1/8. I also used black paper for the caulking.The centre of the Secondary Planking was cut out using a hole cutter, the Treenails were drilled and made up from dust gained from sanding down the planks and using the slightly darker material, I think it works.
The two planking's offered up to each other
The Mortar Pit Boundary Timbers were made up from 5/16 x 1/4 Pear and routed on my trusty Proxxon Router.
The Primary and Secondary Planking have now been fitted into the cut outs on the Boundary Timbers and the Upper and Lower Deck Clamps have been glued into position.
So there we are guys, your right up to date now. It seems a pretty good place to stop for the time being as I have now been given the job of restoring a Harwich Bawley which is a Shrimp Fishing Smack. I was looking for a secondary build and now I have it.
I also have to repair my Thames Barge which was damaged by the decorators during pre season work at the museum.
I will be starting a new log for the Bawley and hopefully restarting my old log for the barge, if it still exists, the damage to the barge is quite extensive and will require a full breakdown of all masts and rigging. Oh deep joy.
Hope you enjoy the update guys.
Be Good
mobbsie
-
Sjors reacted to augie in USS Constitution by Hipexec - FINISHED - Constructo - 1:82
She looks just terrific, Rich. Don't fret the 'almost invisible' stuff. You, and most of us, know it's 'there'.
WELL DONE, MATE!
-
Sjors reacted to HIPEXEC in USS Constitution by Hipexec - FINISHED - Constructo - 1:82
As requested....here's some pics of the completed Connie. I have to laugh...all the work we put into the deck and guns, etc....and they wind up barely visible. Just like the hull planks....nobody (but me) looks down there.
-
Sjors reacted to HIPEXEC in USS Constitution by Hipexec - FINISHED - Constructo - 1:82
I finally mounted the jolly boats. This effectively completes the ship.....but ...you know....and I know....I'll be "tweeking" her until I start a new ship. I still have to get or build a case.
-
Sjors reacted to HIPEXEC in USS Constitution by Hipexec - FINISHED - Constructo - 1:82
I've just finished the rowers seats.
-
Sjors reacted to HIPEXEC in USS Constitution by Hipexec - FINISHED - Constructo - 1:82
I just installed the "VIP" seating on the jolly boats. The rowers are next. Notice my self drawn pencil sketched plans. Constucto doesn't show boats hanging from davits, so I'm on my own. I looked at several books on ship's small boats and came up with this plan.
-
Sjors reacted to HIPEXEC in USS Constitution by Hipexec - FINISHED - Constructo - 1:82
I started building two jolly boats for the port and starboard davits. Even though I started with two aluminum cast shells from BlueJacket, There's a lot more work than meets the eye. The shells were a perfect size and shape with nice detail, but they required some "Dremel sculpting" to get them just right. I just finished the floor decking and will start on the seating, oars, block and tackle etc.
-
Sjors reacted to rowand in HMB Endeavour by rowand - Artesania Latina - 1:60
Happy Sunday All,
I'll offer my meager excuses for my absence - It's been a pretty busy time for us over the last several months with a new job, the Admiral on extended shore leave and Christmas in the mix. I'm pretty happy to say that the Admiral received good news from her Dr and is back on deck now and at the con.
I realise it's been a while since my last visit to MSW but I haven't been too idle. I've managed to complete the modifications on the stern and refit the rubbing strakes as well as weather the decks. I uhmmmmed and ahhhhed over what to do with the decks for quite a while, sought some inspiration and then got a rush of blood, masked the boat up and did it. The finished product is growing on me, I wasn't completely satisfied but after a few days and a few more looks at it, I've decided to leave it alone now. I'm happy with the additional work on the stern as well and can continue on with the build now. Here are the photos.....
Have a good one,
rowand
-
Sjors reacted to robert22564 in HMS Victory by robert22564 - Caldercraft - scale 1:72
Port & Starboard wales completed "that was a challenging job". .......now onto lining the gunports
-
Sjors reacted to robert22564 in HMS Victory by robert22564 - Caldercraft - scale 1:72
That's the 8 gunports without lids lined starboard & port, continued with the planking covering these gunports & now I'll move onto the wales.
-
Sjors reacted to robert22564 in HMS Victory by robert22564 - Caldercraft - scale 1:72
After careful consideration I've decided not to tree-nail the decking.
So I've moved on and fixed into place the camber beams, glued and pinned down the gun deck (445).
Lined up and glued into place the inner bulwark gunport patterns(275) making sure the alignment top, bottom and sides are good.
Lined the 8 gunports without lids and continued with planking the hull as far as i could go on one side.
This is where we get problem no 2 as those guns just about fit through the gunports, they're definitely to low which means either the deck needs to be raised by at least 2mm (I think it'll be a complete disaster trying to rip it out and raise it from the camber beams, don't want to do that) to get away with it, or we put false axles on all the gun carrieges on that deck raising them up by 2mm. Eeeeek
It's looking like i'll have to put in a false deck of at least 2mm.
-
Sjors reacted to robert22564 in HMS Victory by robert22564 - Caldercraft - scale 1:72
Just a quick update, the gunport linings of the port side have been completed, I've also primed the hull to show any imperfections needing attention before the dreaded copper plating, the port side has been given a first coat of yellow ochre and will be rubbed down before a top coat is applied.
Also as you all know i've bee working on the cannons.
-
Sjors reacted to gjdale in Bomb Vessel Granado 1742 by gjdale - FINISHED - 1/48 - Cross-Section
I've been away for the last couple of weeks, but did finally manage to get some shipyard time in this weekend. When last we met, I had decided to go ahead with the Deck Clamp Bolts. Here are a few pics of the final product – the pics appear somewhat streaky as the Wipe-on Poly was still wet when the pics were taken.
With this job out of the way, it was time to make a start on construction of the Shell Room.........
Shell Room Construction
Construction of the Shell Room begins with the fitting of the lower support beams, made from 5/16” square Pear, across the Floor Riders, with cross beams added in situ to ensure a proper fit.
Once the glue had dried, the frame assembly was removed from the model for further construction and fit-out. The next step was to install the deck planks. These are made from Holly, 1/16” x 1/8”. I opted to simulate caulking using black paper as I wanted to see how this would look, knowing that once the assembly was completed, this deck would hardly be visible. I also added treenails, using the drill and fill method as described previously.
In the above photo, you may notice three filled holes towards the left hand end (one in each beam). This was where I incorrectly transferred one measurement before drilling. I have filled the incorrect holes with a mixture of Pear sawdust and diluted PVA. Once the assembly is complete, these will be barely visible, so I’m going to live with it. I've also just noticed that a couple of "treenails" in the Holly decking have come adrift and need replacing......
The pillars to support the shell racks were the next to be made. No particular rocket science here, but a great job for the Sherline Mill after cutting the blanks on the Byrnes saw. I constructed a small jig to hold all 18 pieces, then cut the dados (which are 2mm deep) in two passes of 1 mm each, using a 5/64” end mill cutter. The only issue I had in this job was caused by operator error when I failed to ensure that the cutter was securely held in the mill. The net result was that I destroyed half of my blanks in one pass. No biggie – just whipped up some more blanks on the Byrnes saw and replaced the duds. (Did I mention I love my Byrnes saw?.........and my Sherline Mill?)
The pillars were also drilled in each end to take one end of a 1.5mm diameter brass locating pin (to match the holes drilled in the support beams).
Finally, here is an overall shot of all the components of the shell room. The Shells themselves are ¼” diameter beads – they may be just a tad undersize, so I’m holding off on drilling out the shell racks until I find out whether I can source some slightly larger beads of the same type.
-
Sjors reacted to Angarfather in Pinco Genovese by Angarfather - FINISHED
Thanks to all!
Some pics from the dinghy.
Cheers Hartmut
-
Sjors reacted to Angarfather in Pinco Genovese by Angarfather - FINISHED
Thanks to Nils, all the Likes!!!
Tody I had to takel Giannas jibsail. Before that I had to turn some belaynails. 3mm ramin is a good material for this job.
And here the nails in place
Gianna with all sails
Next days I will modell all the little parts like cargo and finish the dinghy.
Cheers Hartmut
-
Sjors reacted to Ulises Victoria in Royal Louis 1780 by Ulises Victoria - FINISHED - Mamoli - Scale 1/90 - French 126-gun ship
Small update. I placed the three strips of wood that form the main wales on both sides of the ship.
You will see a very simple jig I'm using to further locate the exact place of the upper strip with respect to the cannon frame, in this case. Not truly necessary, though.
I don't like how the walnut spills and breaks when inserting nail near the ends, even though I pre drill a hole for the nails.
So I ordered some 2 x 5 mm boxwood strips from Crown Timberyard. (See add in home page)
Remember these wales are placed here temporarily and only to determine the shape and line of the wales. They will be further adjusted when final gluing and nailing is done.
By the way I have to send kudos to Jason of Crown. I sent an email asking for a quote on 2 x 5 mm boxwood in the morning, and by around 3:00PM the order was in the mail.
These wales, by the way, are going to be blackened using a product called Rub'n Buff ebony color. This is a paste that you... well..
rub'n buff and gives a very nice satin finish and does not penetrate the wood.
I also got some really thin black nails. I won't be using the brass shown in photos.
-
Sjors reacted to Tallshiptragic in STS Leeuwin II by Tallshiptragic - 1/56 - as she appeared in 2015
Just wanted to see how the masts would look
All lower masts are steel and only the top masts are wood. The foremast is a little different as compared to similarly rigged vessels, the fore lower and top masts are one single mast, with the t'gallant mast a separate piece. The first futtock is still just above the fore course yard but the mast continues up to the base of t'gallant.
-
Sjors reacted to PMG in HMS AGAMEMNON by PMG - Caldercraft
Hello All friends,
After a (very) long absence, I am back on this log (thanks to Martin who waked me up).
I realise I didn't post the last pictures of the second planking of my Aggie as it was at the end of June 2014.
Actually, I didn't any work on since June 2014, but I am well decided to restart next week.
See you soon,
Pierre
-
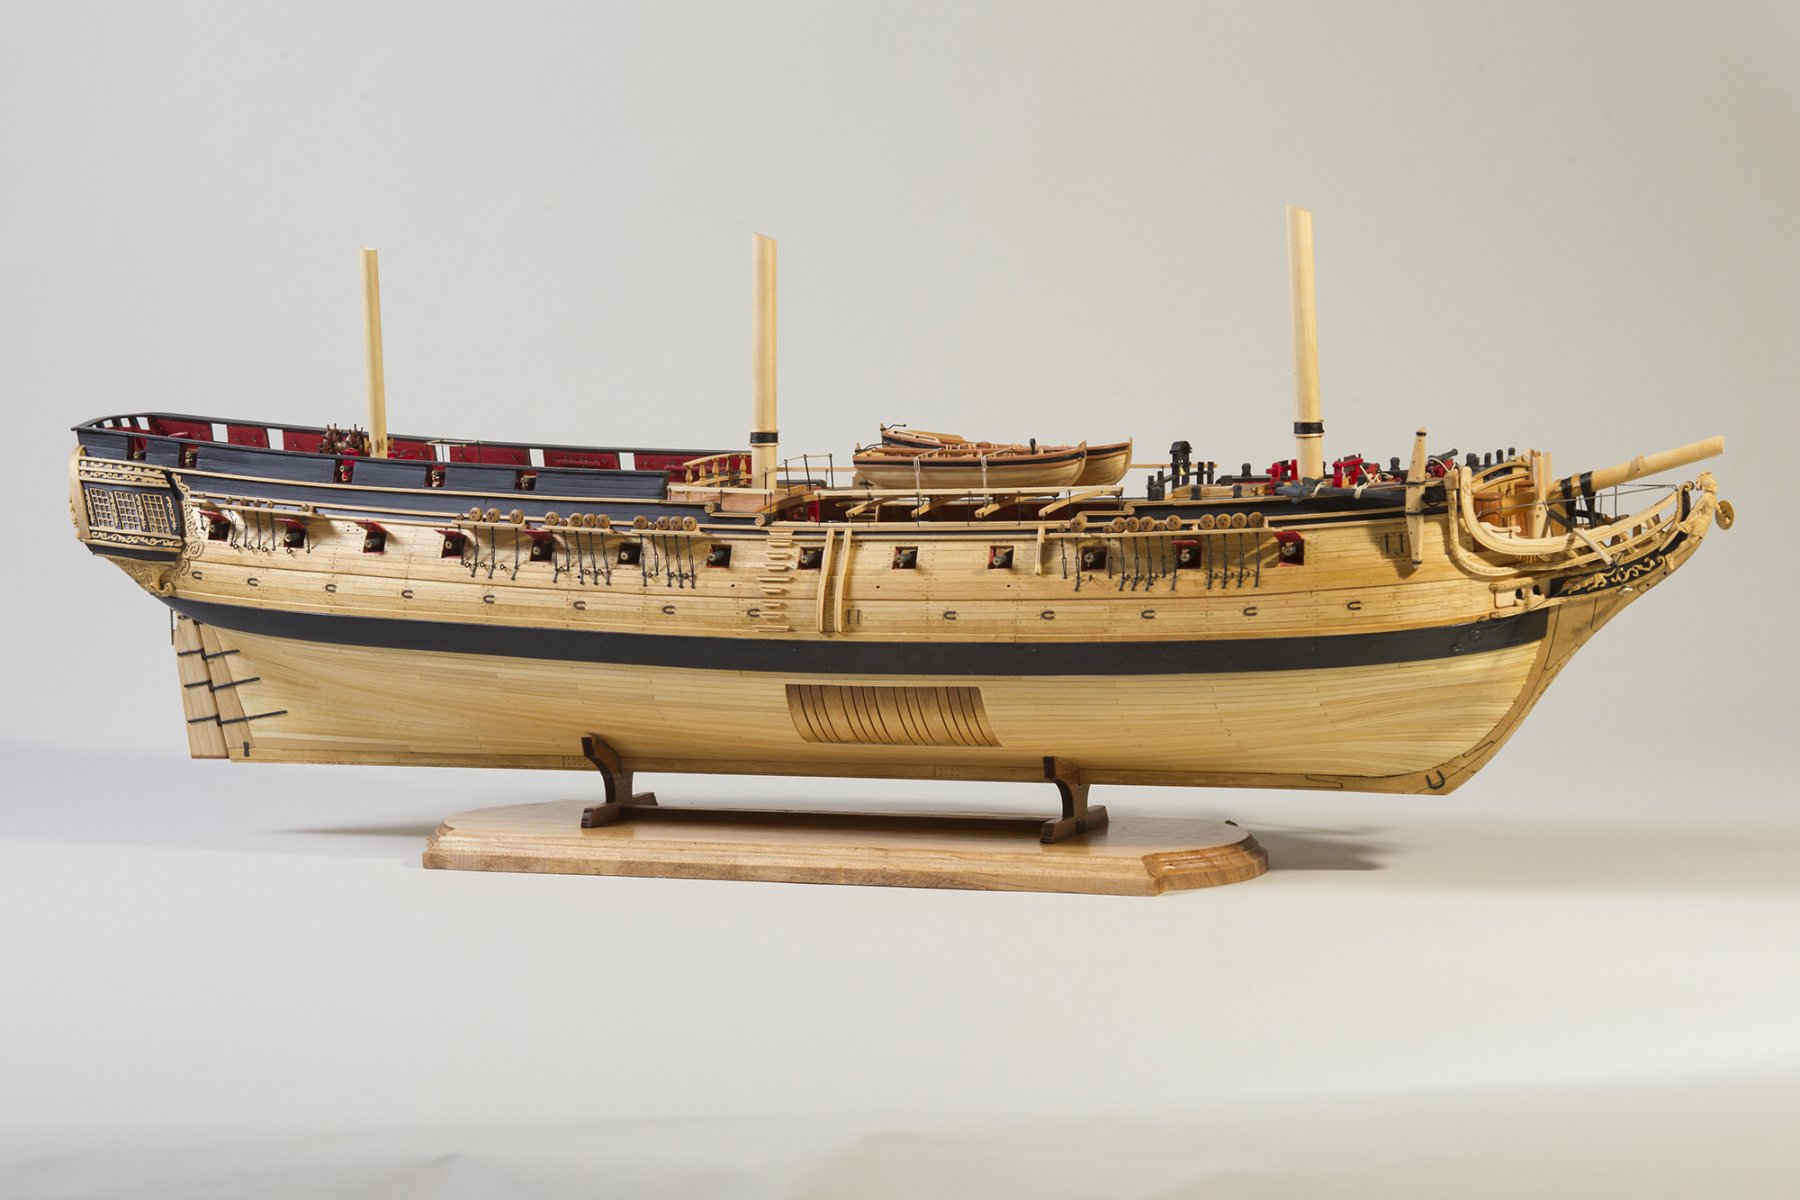
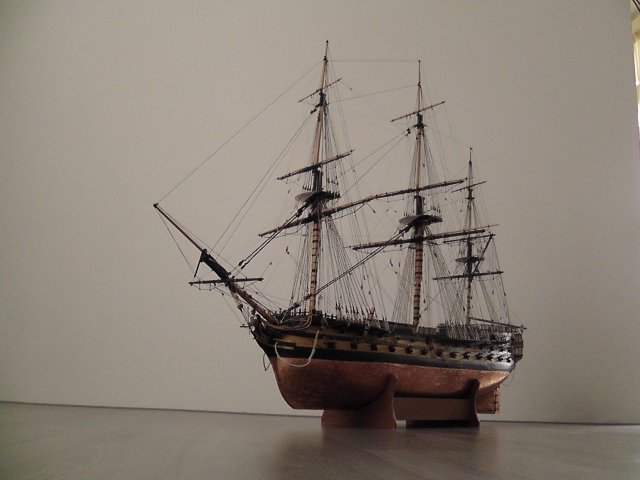
 Sjors got a reaction from DCIronfist in USF Confederacy by Augie & Moonbug - FINISHED - Model Shipways - 1:64
I don't say a thing....just watch and enjoy !!!!!!
Sjors
-
Sjors reacted to Tallshiptragic in STS Leeuwin II by Tallshiptragic - 1/56 - as she appeared in 2015
Thanks for your comments Nils and Patrick. Her deck is starting to look busy, and amazingly she has no guns! Haha
Two more boxes done. The first is the 'spud' locker (potato locker). The coaming over the door is extra protection against wash from getting inside. There is also a fluted back. Originally this was to allow air flow, though water would get in and the spuds and onions that where kept inside would be water damaged, so a plate was welding inside as a backing. To solve the air flow in hot weather we open the door and its latched open.
The second is for our backup gen set. The gen set slides out on the starboard side on a secured rack which locks in place with the help of two 'lackies' (elastic) straps either side. Surprisingly works very well. I think I've pulled it off.
-
Sjors reacted to Tallshiptragic in STS Leeuwin II by Tallshiptragic - 1/56 - as she appeared in 2015
Funny just a little touch of colour, adds so much.