

minimini
-
Posts
56 -
Joined
-
Last visited
Reputation Activity
-
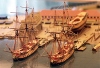
 minimini reacted to albert in HMS ANSON 1781 by albert - 1/48 - 64 guns
Thank you Al, another photo.
-
minimini reacted to albert in HMS ANSON 1781 by albert - 1/48 - 64 guns
Thank you for your welcome comments, I start to build the keel.
-
minimini reacted to Forlani daniel in Chebece 1750 by Forlani daniel - FINISHED - 1:48
Ciao e grazie a tutti, altre foto delle coste.
Hello and thanks to everyone, more photos of the coastline.
Un Saluto.
-
minimini reacted to Forlani daniel in Chebece 1750 by Forlani daniel - FINISHED - 1:48
Ciao e grazie a tutti, altre interminabili coste....
Hello and thanks to everyone, other endless coasts....
Un Saluto.
-
minimini reacted to Chuck in Medway Longboat 1742 by Chuck - FINISHED - 1/2" scale
No its scraped off the model see below. You can see the profile. And some pictures with better lighting. I had the brightness up too high on the last ones.
-
minimini reacted to Chuck in Medway Longboat 1742 by Chuck - FINISHED - 1/2" scale
I added the inboard sheer strip which is also laser cut to shape. It is 1/8" wide and really finishes off the cap rail. Then rather than paint the top of the cap rail red which would have been smart, I decided to work more on the frieze. Once that was added I can use the bottom edge of the frieze to align the molding strip below it. The molding strip is 1/8" x 3/64" and it is scraped to a simple profile.
The interesting thing you might note is that the molding strip below the frieze is NOT yellow cedar. The molding is actually boxwood. I find it is the best material for scraping moldings. I will post an illustration of the profile I chose soon. But if you look closely you wont see any real difference in color or appearance in the boxwood strip in comparison with the yellow cedar planking. They work really well together.
The frieze itself is an exact copy of the one on the contemporary model. I took the image of the cont. model and cropped and sized the frieze strip from it. After printing it out I went back in and cleaned it up with some paint and color pencils and scanned it again. That was cut out and applied to the model.
I am still working on the frieze for the transom.
-
minimini reacted to Forlani daniel in Chebece 1750 by Forlani daniel - FINISHED - 1:48
Ciao e grazie a tutti, altre foto.
Hello and thanks to everyone too kind, more photos.
Un Saluto
-
minimini reacted to Chuck in Medway Longboat 1742 by Chuck - FINISHED - 1/2" scale
Thanks Dirk,
Moving right along, the cap rail was added. It is made of 4 laser cut pieces. They are made over sized and we will thin them down considerably later.
A few things worth noting are the cut-away for the roller at the bow. This is on the port side only. So I had to remember to put it on the right side. A 50-50 shot of screwing that up.
Anyway, you will notice that I penciled in some reference lines to show everyone what this will eventually be shaped like. But this will happen gradually as we need to take this in steps. There are many details to be added which are easier with an over sized cap rail.
At the stern you will notice how the cap rail goes UNDER the wings of the transom. This is important to note as you are planking. There will be a gap between the plank and the transom and that is normal and as designed so the cap rail will fit. It is 1/16" thick.
The reason why we cant just start thinning down the cap rail as usual is because this longboat has an interesting feature at the bow we must complete first. Normally we would sand the cap rail flush with the outboard planking. But before we can do that, we have to fabricate the bolsters at the bow. There are two bolsters on each side of the stem. This "beefs" up the stem and helps support the area with the roller. In addition, it strengthens everything up there to help support the bowsprit iron and bowsprit.
You can kind of see the bolsters in this photo of the contemporary model.
Here is what ours will look like.
On every model that I make there are at least one or two parts that are quite a challenge to make. On this model, it will be these bolsters. There are many compound angles to consider. But if you plan it out ahead of time it will go smoothly. You will start with a laser cut blank. Because these parts have the potential for many attempts to end up in the trash....I will provide everyone with eight blanks so you will have plenty of fun.
But I will explain step by step how I shaped these bolsters and hopefully it will become clear.
First, I recommend starting with the starboard side which has no roller. The blanks are all the same so it doesnt matter which ones you choose. Below you can see that if you hold the blanks against the stem tightly that the aft edge will need to be beveled quite a bit so it sits flush against the hull planking. This is the first thing that you should do and dont worry about any gaps at the top too where the bolster sits under the cap rail. Just concentrate on the getting a snug tight fit against the planking first.
I have guestimated the amount of bevel required below by marking it in pencil for you guys. Note how there is more of a bevel towards the bottom of the bolster.
I used sand paper and files to create the bevel. I stopped and tested its fit dozens of times as I tweaked it. The photo below shows that its almost there. There is plenty of meat on these blanks so you can sand and reshape quite a bit. So just keep going until it fits good against the planking.
Once you are satisfied, You can do the same thing with the top edge and how it fits under the cap rail. It should also be a tight fit here. In the previous photo you can see it fits pretty good without any tweaking. But I will give it a few passes anyway.
Next you want to draw in the line that represents the concave shape of the bolster on its outside face. It will taper down to just 1/32" thick at the bottom. This line should follow the run of the sheer and planks. You should place the line even with the bottom of the first plank. I placed mine a bit low in the photo below...so adjust yours to be even with the plank line.
Once completed the two bolsters will look like this. And after you create the concave shape you can trim the bottom so it lines up with the bottom of the third plank. Its over-sized and will need to be trimmed. In addition, the front edge will eventually be sanded flush with the stem. But right now it hangs over quite a bit. That is OK. Just deal with shaping them and trimming the bottom edge right now.
Note how you will need to make a matching pair of these. The only difference is that a small notch needs to be carved out of the top of the one for the roller. You can see that below. It adds more room for the roller itself. Its shown on the left.
Glue them into position and then sand the front face of both flush with the stem. Thats all there is to it......easy-peasy right???
Dont worry its not too bad. JUst go slow and take your time. You will be able to adjust the shape a bit after its glued into position as well. This will make it easier to get a matching pair port and starboard. Dont sand the side of the cap rail yet!!!! Other than the front edge, leave it as is near the bolsters. We will be sanding other parts of the cap rail first.
-
minimini reacted to Chuck in Medway Longboat 1742 by Chuck - FINISHED - 1/2" scale
Thank you so much guys. It was time for the fun part.....to remove the buildboard and break away the frame centers.
The first step was to remove the braces for the stem and stern post. At the stern post I just pushed them free from the bottom. Then I shook them out.
After I removed the tape holding both halves of the buildboard together, I carefully and gently coaxed one half of the buildboard free. Dont rush this and slowly pry it off a little at a time working one side then the other. It will be tricky to get it started especially on a humid day. But once it starts wiggling free it will come off readily.
Then using your special tool of choice (everyone has their favorite) you can carefully and slowly cut through the tabs on each side of the frame centers. Then bend them back and forth to snap them out. Do this one at a time. Dont worry about breaking any frames because that will not happen if you have glued the top of your frames securely to the sheer plank. If when you start cutting the tab you see that the entire frame is loose and not secured to the sheer plank, stop and apply some CA. Let it "wick" down to glue the frame to the plank. Then resume cutting that tab.
I used the thin saw on the left this time but often use a simple file as well. Whatever you are comfortable with.
Here is a shot of a frame center on the barge being removed as I didnt take any of the longboat. Same principle. So I didnt want to duplicate in order save some time.
And finally some pictures of the model after removing all of the frame centers.
The next step will be fine tuning the sheer. I will sand the tops of the frames flat to the sheer and also sand the sheer so it has a good smooth run. I dont want any dips or high spots. These can be seen by viewing the hull head-on and stern -on at various angles. Once satisfied I will add the caprail which is laser cut. Hopefully over the next day or so. 😊
-
minimini reacted to Chuck in Medway Longboat 1742 by Chuck - FINISHED - 1/2" scale
Today was a lazy, hot summer day. I am pretty caught up making rope and blocks so I decided to spend the day finishing the external planking.
The last two strakes along the sheer were completed. As mentioned earlier, these are thicker planks than those below them. The second strake being the wales. I contemplated doing these two last strakes several ways. One I thought about was to just use thicker planks. This is a good solution but I kept thinking about some of the guys I know who have trouble bending and twisting heavier planks. The hull is pretty sturdy at this point but being forceful with a heavy plank could be problematic for some, especially if they dont take the time to properly pre-bend and twist it to shape.
So in the end I opted for a modelers convention of simplification. Just as I add the wales on my other builds, I decided to use two layers. The 1/32" thick planks bend and twist very easily. This is especially true with the yellow cedar. A second layer of 1/32" planking will be laid right on top of the last two strakes and nobody will be the wiser.
Here is the hull with the first layer of planking completed. I was quite happy with the results. Once both sides were done I could see that the port side was less than 1/64" lower at mid ship than the starboard. Nothing that cant be adjusted with the second layer. This is one of the benefits of using a second layer. You can make small adjustments to correct any issues with the ring of your planking at the shear.
The second layer is also 1/32" thick. But this is actually slightly thicker than I would like. It is better to sand them down slightly afterwards so they are a bit thinner and not standing so proud of the planks below it.
On addition note. At the bow and stern, the planks are actually not thicker. They should gradually reduce in thickness so they are the flush with the planking below them. This is easy enough to do after both strakes are completed. At the stern, I just sanded the last 1/2" of planking so it gradually reduced in thickness and matched the other strakes when viewing the transom head on. You can see this feature on the contemporary model attached. You can also see where I shifted one layer to correct the run. This wont be seen under the painted frieze.
The same thing was done at the bow, but I find it easier to use a sharp chisel to slice away the thicker plans along the stem to reduce their thickness. Then I feather that back with some sandpaper so its gradual as it should be. This is all very similar to clinker planking on the barge but we are cheating perhaps and using two layers to simulate the same look.
Heres the contemporary model...which is simalar because it was carved and hollowed out from a solid piece of boxwood. The wales and sheer strake were then added as a layer on top of the solid carved hull. Can you imagine basically hollowing out a block until it was thin as an eggshell!!!
And one last photo of my hull. All the exterior planking is now complete. I could leave it on the baseboard.....so I could nail the planks (not treenail because they were actual nails). BUT I think it will be easier to do after the cap rail is in position. I also find it hard to see the frames down by the keel now and I dont know where to place my nails. Removing the frame centers and the hull from the baseboard will allow me to hold it up to the light and see the frames clearly. The planks are so thin it is quite easy to do. I will hopefully mark the locations of the frames this way so I dont miss when I drill the holes for the little nails. Hope that makes sense. So tomorrow I will remove it from the baseboard and break-out the frame centers. I have already removed the braces at the bow and the stern that helped hold them stationary. They weren't glued into the slots, so I just popped them out. Even the two center ones at the stern. It will make removing the baseboard easier.
-
minimini reacted to Forlani daniel in Chebece 1750 by Forlani daniel - FINISHED - 1:48
Ciao a tutti, questo è il sistema che ho adottato per incollare i vari pezzi della costa.
Hi everyone, this is the system I followed to glue the various pieces of coastline.
Un Saluto
-
minimini reacted to marsalv in Pandora by marsalv - FINISHED - 1:52
So finally, after about 3750 hours, I got to the finish.
Thanks to everyone for watching my log and I would like to invite you to watch my next building log - Le Gros Ventre POF.
-
minimini reacted to Siggi52 in HMS Tiger 1747 by Siggi52 - 1:48 - 60 gun ship from NMM plans
Thank you Marc,
I'm not very busy these days, because we have here a super summer. The drawback is, it is much too dry. It burns everywhere. But after the last years summer, or was it winter the whole year, I'm not so often in the basement at the shipyard.
But now and then I'm at work, planking the gun deck walls.
-
minimini reacted to marsalv in Pandora by marsalv - FINISHED - 1:52
Thank you guys.
The boats are finally completed. It is now still to finish the oars, masts and spars and install everything on the model.
-
minimini reacted to Stuntflyer in HMS Winchelsea 1764 by Stuntflyer (Mike) - FINISHED - 1/4" scale
The lower counter has been planked and sanded. I used a #2b pencil to darken the plank edges. Decorative molding will cover the notch in the lowest plank.
Mike
-
minimini reacted to Jeronimo in Chebece 1750 by Jeronimo - FINISHED
Manufacture and assembly of the barrels.
Karl
Part 35
-
 minimini got a reaction from archjofo in HDMS Perlen 1804 by minimini - scale 1:30 - 46-gun Danish frigate
Hi
just a small update , the knee parts and keel ar done ,one last thing that needs to be done is tapering the knee of the head.
Below is a dry fit of the bulkheads except frame nr. c
Michael
-
minimini reacted to Maury S in Centerboard Schooner C. Chase 1846 by Maury S - FINISHED - Scale 1:48
This is my first attempt with cant frames. Lofting them was only a minor challenge but could not have been accomplished without Wayne Kempson's "Drafting Ship Plans in CAD" posted on this site.
I pasted the patterns on 1/8" (6" at 1:48 scale) box wood, cut them to the outside lines and trimmed them back for the bevels. The first set of cants lie at 70 degrees so careful sanding was required for a good seat. Holding them in place while glue sets is another challenge. I assembled a jig using one of my small machinist squares and a piece of clear acrylic.
This allows me to keep the frame plumb at the same time as it is lined up on the building board.
The frame piece is clamped to the acrylic plate and everything is lined up with the plan on the board. (The front braces for the stem had to be removed to allow room to maneuver.).
End result of the first set shown below.
They were allowed to dry over night before removing the jig. The next set will be done in a similar manner. I think some scrap spacers need to be applied at the tops between the frames.
Maury
-
minimini reacted to Forlani daniel in Chebece 1750 by Forlani daniel - FINISHED - 1:48
Ciao e grazie a tutti,
In queste foto ho iniziato la realizzazione della battura.
Hello and thanks to everyone, In these photos I started the realization of the hammering.
Un Saluto
-
minimini reacted to johnhoward in USS ST LOUIS by thorn21g - 1:24 - POF - Civil War Ironclad - Gateway Model Shipcrafter's Guild
USS St. Louis update for April 2018
Seven of our original 9 Shipcrafter build team gathered to commemorate our 3.5 year milestone on our City Class "USS St. Louis" Ironclad Project and the departure of Scott, third from the left, upon his retirement to Wisconsin. Scott will continue support of the project, remotely in his original research capacity.
One of our main accomplishments this month was fabrication and successful dry-fit of the "Hog Chains" which span from the aft end of the wheelhouse on the port & starboard keels to the forward face of the boiler/firebox. The "chains" are actually a combination of cables, solid links and turnbuckles, modeled after those recovered with the USS "Cairo". They fit in a remarkably confined space within the hull structure, penetrate the roofs of the "Hurricane" deck houses, and are supported on four stanchions "footed" on the engine room floor. Another dry-fit of the completed paddlewheel successfully resolved several minor issues. Tom displayed his initial brass machinings for each of the 5 different types of cannon barrels which will make up the 14 cannon carried on the USS St. Louis at the end of September 1862 which our model represents.
Completed details of the "Hurricane Deck" were assembled to verify spacing with the new "Hog Chains". Initial sketches have been made for fabrication of our "Doctor" Auxiliary Steam Engine which was lost during the "USS Cairo" recovery. Materials are being gathered for this interesting mechanical contrivance. Bill has continued modeling of the insulated steam distribution and exhaust system. Ten of the 13 wooden Naval cannon carriages were dry-fit at their gundeck stations. The 14th carriage, which will be brass, is for the 12-pdr Boat Howitzer and will be carried on the "Hurricane" deck.
johnhoward
-
minimini reacted to Chuck in Medway Longboat 1742 by Chuck - FINISHED - 1/2" scale
Thank you gentleman. Planking continues.
I have completed 4 of the 9 strakes. Each strake has two sections. A forward and an aft plank. For the first 3 strakes working up from the keel, I started at the stern post and then added the bow section of the strake. Each section is made a bit longer after adjusting the ends that tuck into the rabbet. You need to cut the ends to length so they fall on a frame. When placing the second plank in each strake, you must cut it to length so it butts into the first cleanly and tightly.
But now that I am working on the fourth strake I have switched and start at the bow. The aft section of planking can now be run off the transom and sanded flush later. You might see in the photos that I have yet to sand the last section of the fourth strake on one side. I will continue up to the shear in this fashion. Only five more strakes to go. But even when you havent planked in a year it does come back to you quickly and get easier with each strake.
Here are some photos of how it looks today. These photos show the Alaskan Yellow cedar really well.
-
minimini reacted to JOUFF in La Renommée by JOUFF - 1/48 - French Frigate - by Patrick JOUFFRIN
Hello everyone and thank you !
After some modifications, here is the definitive version for this part of the hold.
Have a nice day !
Patrick
-
minimini reacted to albert in HMS Naiad 1797 by albert - FINISHED - 1/48
Thank you very much for your comments and your liking, place the last photos, the model of Naiad is over, thank you so much for following me during construction and I thank Ed Tosti so much that with his magnificent drawings allowed me to build this beautiful frigate. Greetings to everyone and thanks again.
-
minimini reacted to Forlani daniel in Chebece 1750 by Forlani daniel - FINISHED - 1:48
Ciao e grazie a tutti, in queste foto ho realizzato le sedi delle coste sulla contro ruota.
Hello and thanks to everyone, in these photos I realized the seats of the ribs on the counter wheel.
Un Saluto
-
minimini reacted to Chuck in Medway Longboat 1742 by Chuck - FINISHED - 1/2" scale
Yes actually...but not many pictures. But here are the images for setting the garboard strake in position. The garboard and all of the other planks are laser cut. They will already be spiled to shape. Even so, they will need to be pre-bent to fit without forcing them into position. Unlike the MS longboat kit, this model will be planked from the keel upwards. The garboard strake is made up of two sections. It is important to start with the aft section first. Below you can see the aft section of the garboard strake with quite a bend in it. This is needed and its important to do so before gluing.
The plank is 1/32" thick and was bent using the same method I always employ. I used a hair dryer to heat it up while I twisted it to shape. Here is an image from the barge construction but its the same technique used here. If its not twisted and bent enough....then just clamp it again and continue to shape it. The one difference this time however, was that I used a sacrificial piece of scrap wood on top of the plank when I clamped it to the table. The Cedar is very soft and the clamp would dent it easily. So placing a piece of wood on top of the plank and then clamping it to the table prevents it from being dented. This is just an arbitrary plank from the barge kit and not the garboard but you get the idea.
Before gluing the aft section of the garboard in position, you must test it on the model. Tweak it if needed but it shouldnt need much work. One thing that will need to be done is to cut the forward end to length. Because each model might vary slightly, I made this section extra long so it hangs over the frame as shown. Just mark the plank on the center of the frame and cut it to length. Do this AFTER twisting it to shape. Then glue it into position.
The second forward section of the garboard doesnt need to be adjusted in length at all. This section is pre-bent and twisted and glued into position. It is worth noting that you should bevel the edge of the garboard along the first 5 frames where it sits against the keel at the bow. This makes for a tighter and cleaner fit in the rabbet. Remember to test it before you glue it on the model after you bend it. You should be able to see where the bevel is needed. Here is a photo of the garboard completed with both sections glued onto the model. The butt seam between the sections was darkened with a pencil on one side.
Here is a look at the forward end of the garboard. You can see how nicely it fits into the rabbet. I repeated this on the other side making sure they match. It isnt too difficult when the planks are laser cut. Remember that there are only 9 strakes per side. So only eight more to go!!! The garboard is the trickiest though because it sets the run for all of the other planks above it. But if I wander slightly from my tick marks, I can correct those little issues as I move forward. It is worth mentioning that you guys wont have any tick marks to rely on....unless you go through the exercise of lining out the hull as well. I absolutely recommend it. Your tick marks may not line up with mine exactly but if you wanted to give it a try with only nine strakes vs. 25 for a frigate......its good practice.