HOLIDAY DONATION DRIVE - SUPPORT MSW - DO YOUR PART TO KEEP THIS GREAT FORUM GOING! (Only 24 donations so far out of 49,000 members - C'mon guys!)
×


cdogg
-
Posts
380 -
Joined
-
Last visited
Content Type
Profiles
Forums
Gallery
Events
Everything posted by cdogg
-
Thanks, I have never used beeswax. Do you think it's ok if I put flat polyurethane on the lines
-
Quick question, anyone know If I can use beeswax on a line and also use GS Hypo fabric glue on the knots? Will the beeswax block the glue, or possibly will the glue seep into the knot more stronger enforcement? Any help would be awesome, thanks!!
-
 Awesome news! Ala carte parts would be great, also maybe you could bring back the pre colored wood for the Golden Hind kit, they switched to cardboard. In any case thanks for saving the Mamoli Kit line!
 -
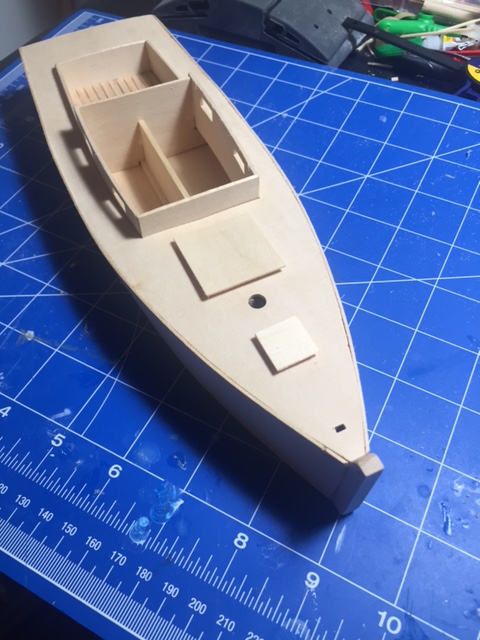
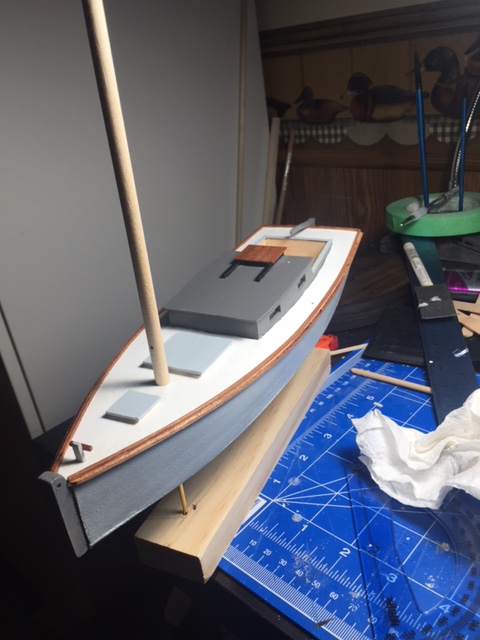
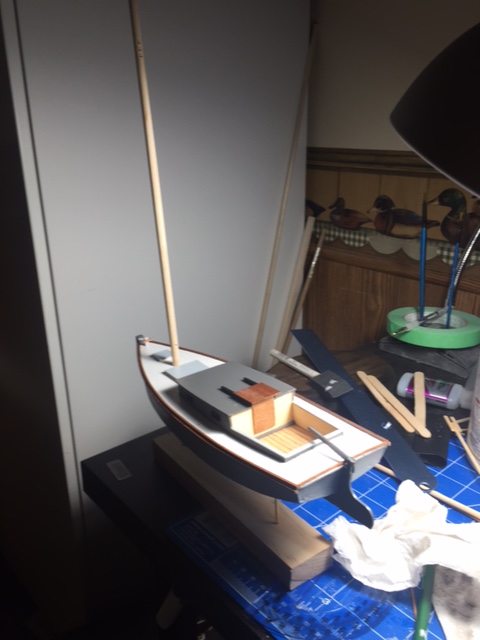
Got around to finishing the deck. Now fitting the mast.
- 34 replies
-
- 5
-

-
- chesapeake bay flattie
- Midwest Products
- (and 1 more)
-
Just noticed this last night reading the manual, the 0.5mm string needs to be painted black according to Corel. Not going to happen. Looks like I am going to go shopping for some rope.
-
Need Community's Input on Best Kit Manufacturer
cdogg replied to Bandue's topic in Wood ship model kits
You are probably going to get about 100 answers all completely different. If you want to go into favorite kits, I say Midwest. Too bad they discontinued their boat series.- 10 replies
-
- 1
-
-
- Kits
- model kits
- (and 1 more)
-
#18 is for if you decide to use the metal decorative stand that comes with the kit. It will help stabilize the ship on the stand. I skipped it all together and have brass pedestals.
-
Apostol San Felipe by costeo - OcCre
cdogg replied to costeo's topic in - Kit build logs for subjects built from 1501 - 1750
Look great! How big is that thing? -
Your ship is looking awesome, I have my eye on this kit for someday. Can't wait to see more posts, keep up the great work!
- 608 replies
-
- 3
-
-
- la couronne
- corel
- (and 1 more)
-
I know, all the work put into the wood only aspects, the thought of ruining it with one brush of paint is truly agonizing.
- 34 replies
-
- 1
-
-
- chesapeake bay flattie
- Midwest Products
- (and 1 more)
-
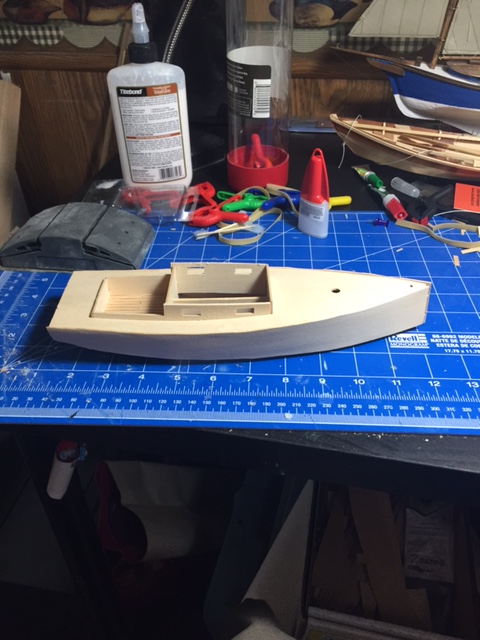
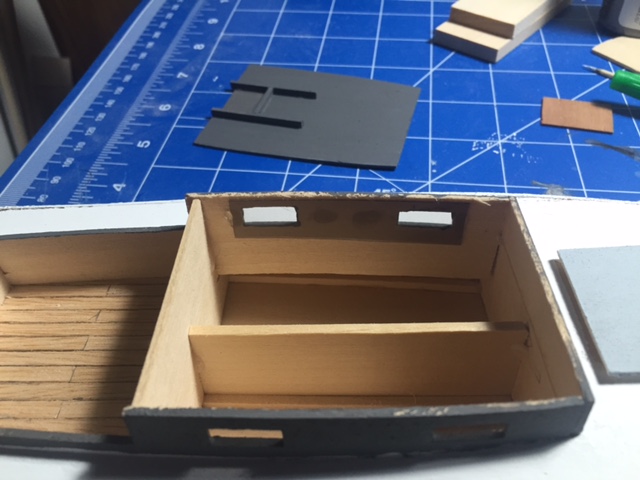
As I did with my other boats, I throw in a thin dark plastic cover for the windows.
- 34 replies
-
- 6
-
-
- chesapeake bay flattie
- Midwest Products
- (and 1 more)
-
Decided on a paint scheme, went with three types of gray. Good old Folk Art acrylic from the craft store.

- 34 replies
-
- 6
-
-
- chesapeake bay flattie
- Midwest Products
- (and 1 more)
-
Thanks Cap'n! I checked out your Flattie log before I started, very nice. The rigging is awesome. I hope don't mind if I borrow your scupper idea for the rails.
- 34 replies
-
- 2
-
-
- chesapeake bay flattie
- Midwest Products
- (and 1 more)
-
I'm not stressing the gaps right now because the rails go over the edges
- 34 replies
-
- 2
-
-
- chesapeake bay flattie
- Midwest Products
- (and 1 more)
-
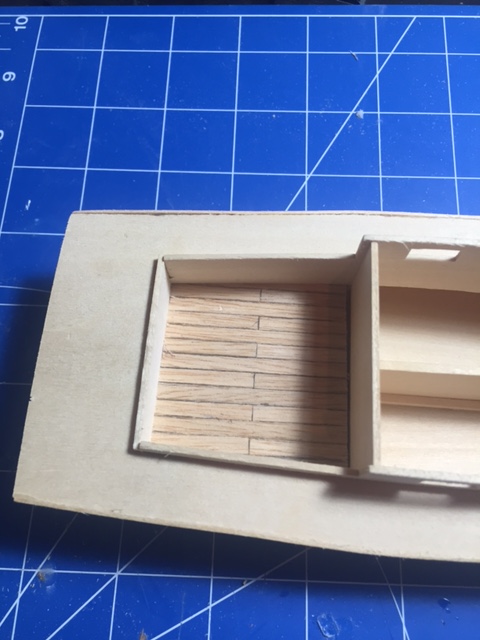
lol, I have no idea what 1-2 really means either, I couldn't find a name, here is an example from my flat boat build. You can cut the planks with a scalpel, just draw a template on the deck and place the planks, http://modelshipworld.com/index.php/topic/13331-chesapeake-bay-flattie-by-cdogg-midwest-kits/?p=410628 Sorry to post a pic on your log, I meant to place the link, edited.
-
Looks good man. The book is not very good. I made a few copies of each page on a copier so I didn't damage the book. Those deck guides get really tight, on mine they pushed a few bulkheads off center so you may end up adjusting a few. Also don't worry about pencil marks cause you'll be planking over them anyway. At this point you will want to decide what plank pattern you want. I went with the simple 1-2 because the deck isn't very big.
-
I am going to build this one straight forward, probably make a scratch one in the future and get a little creative. This is a fun one.
- 34 replies
-
- 3
-
-
- chesapeake bay flattie
- Midwest Products
- (and 1 more)
-
Brad, I left a post on your first thread. Basically start taking pictures of your build and I can try to help you out.
- 98 replies
-
- 1
-
-
- baltic ketch
- corel
- (and 1 more)
-
I must admit this build has been tougher than I expected. The parts are very small and very difficult to work with at my level of experience. The positive is that I am learning a ton from this build, can't wait to get it set for rigging. That will be quite the challenge.
-
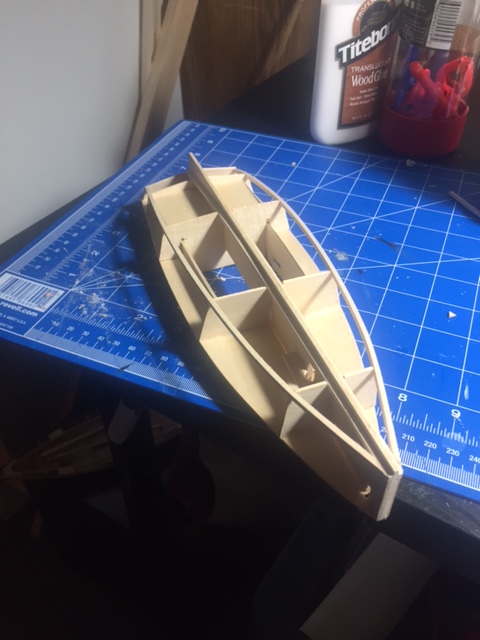
Got the sides on, now I need to straighten the edges some more, build going pretty smooth so far. The bottom strip are next. After that the agonizing step of choosing a paint scheme will follow.

- 34 replies
-
- 7
-
-
- chesapeake bay flattie
- Midwest Products
- (and 1 more)
-
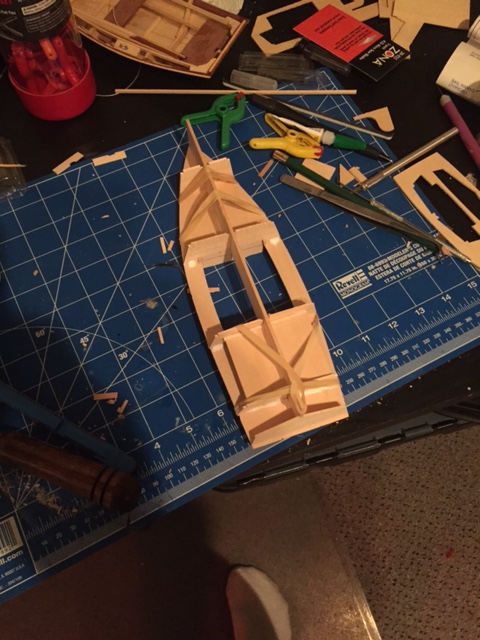
Now that the deck is in place it was time for the keep strip and the chines. Pretty straight forward, the basswood works great for this step, soaked them in water for an hour and they went in perfect. Sanded each end to flush with the frame.

- 34 replies
-
- 5
-
-
- chesapeake bay flattie
- Midwest Products
- (and 1 more)
-
I got the deck attached pretty easily. Good old rubber bands and wood work their magic

- 34 replies
-
- 5
-
-
- chesapeake bay flattie
- Midwest Products
- (and 1 more)