HOLIDAY DONATION DRIVE - SUPPORT MSW - DO YOUR PART TO KEEP THIS GREAT FORUM GOING! (Only 20 donations so far - C'mon guys!)
×


cdogg
-
Posts
380 -
Joined
-
Last visited
Content Type
Profiles
Forums
Gallery
Events
Everything posted by cdogg
-
 Next I decided to plank the cabin deck with some extra Tanganyka wood I had from another kit, this pic is just the beginning, I will post the finished one later, it's already installed in the boat
- 34 replies
-
- 5
-

-
- chesapeake bay flattie
- Midwest Products
- (and 1 more)
-
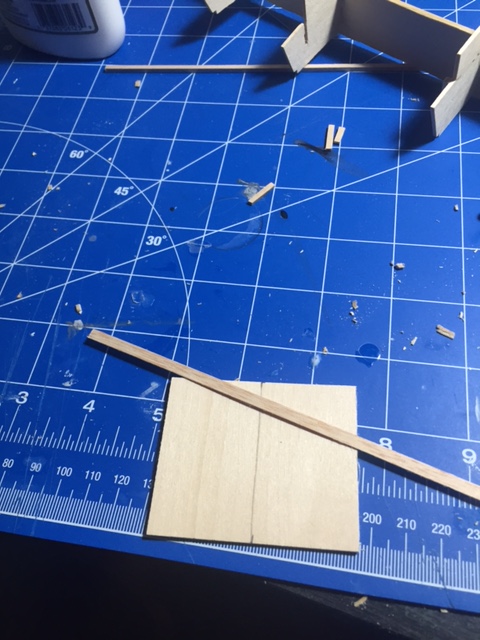
Here is the beginning, put down the foundation. the wood was not very straight so I had to make some modifications.

- 34 replies
-
- 5
-
-
- chesapeake bay flattie
- Midwest Products
- (and 1 more)
-
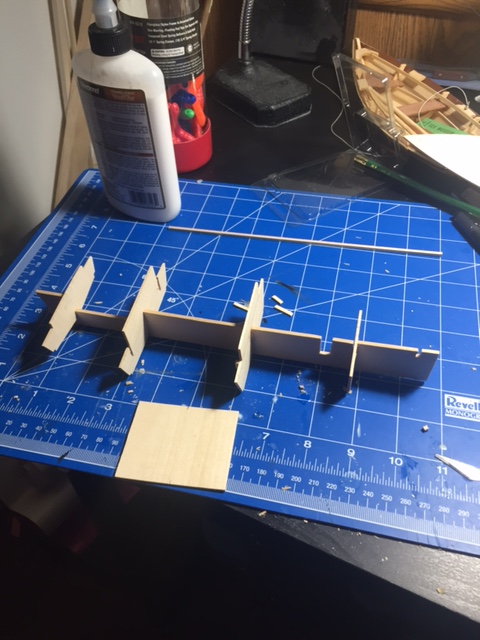
After a year away from my hobbies, I needed a simple kit to get my brain working again. I pulled this off the shelf and dusted it off with excitement, I hope this goes well!!
- 34 replies
-
- 3
-
-
- chesapeake bay flattie
- Midwest Products
- (and 1 more)
-
Finally after a year I can start back on the ship! I have made some vast improvements since my last post, here is one where I am almost done with the cabin. I am not too happy with the doors but my scratch wood ones looked too much like a toy, so I am going to paint the metal stock ones.

- 98 replies
-
- 2
-
-
- baltic ketch
- corel
- (and 1 more)
-
I have never used Model Master paints, I am using Vallejo, I have a bunch from painting model WW2 planes. Sure a step up from Wal Mart Folk Art Acrylics, which not to bash them because they work great on wood. But the way the Vallejo brush on and finish is amazing, but they are $3 a 17ml bottle, $$$
-
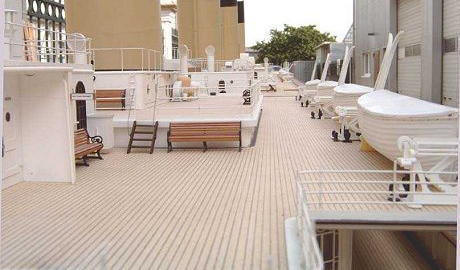
I think the decks were a pine wood color. i was going to use like 1 drop of yellow to every 3 drops of white acrylic for my airbrush.
-
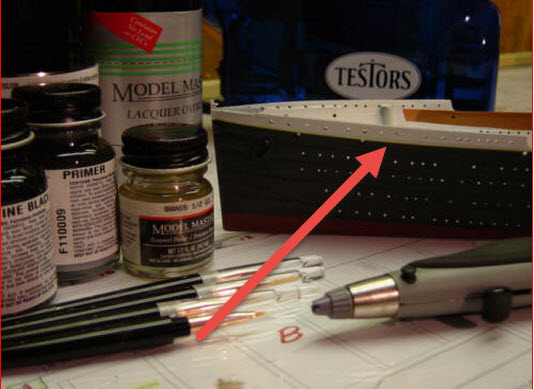
Thanks, I found that site too, I am building the 1/570 plastic model. I do not have a build log, I should fire one up. Here is a good picture of the stripe I mentioned from the site you linked. Its very tiny but apparently it's a huge must to get it right from what I have read in forums about people building Titanic models.
-
Nice job Popeye. I am in the middle of building the Revell version, I am trying to figure the best way to get that gold/yellow strip on the side. It is much harder than I thought, I need to make it like 1mm all the way across
-
Tasanhalas,It should match the width of the false keel, here is a pic http://modelshipworld.com/index.php/topic/4284-scotland-baltic-ketch-1775-by-cdogg-corel-164/?p=130455 I think there are about 5 of us building this ship now, I'm on the deck structures right now.
- 33 replies
-
- 1
-
-
- corel
- first build
- (and 1 more)
-
I sealed the metal with poly. As for the wales I taped them off during everything so they didn't get too messed up. I'll post more pics this week
-
the drill size you want is 1.5mm i just found a yellow i liked and went with it, it was Sunflower Yellow. i bought it at Michaels in the cheap paint section acrylics
-
I clipped the rudder hinges down to size. No biggie about the look,if you paint over. I used a needle nose pliers to clip and shape the hinges. They a flexible so you can adjust them to go flush with the hull. Super glue will work, I clamped them to the hull after putting on the glue. Pretty easy and looks good.
-
I on,y use primer on plastic so the paint sticks better. No need for it on wood in my opinion. I use one coat of satin polyurethane on all my ships (4 beginner kits so far) Gives them a protective coat and doesn't look too shiny. Don't know about varnish, it think it's more of a general term for a lacquer. I would check out the forums here or maybe start one with specific questions. Some of the guys on here should be able to get you a better answer. I am still learning these things as I go.
-
Looks good, have you built the rudder yet? Let me know how the rails go, they should fit right over the sides. Also, you might want to drill the holes for the rails before glueing them on, it's easier. I found out by breaking them off and drilling. Much easier.
-
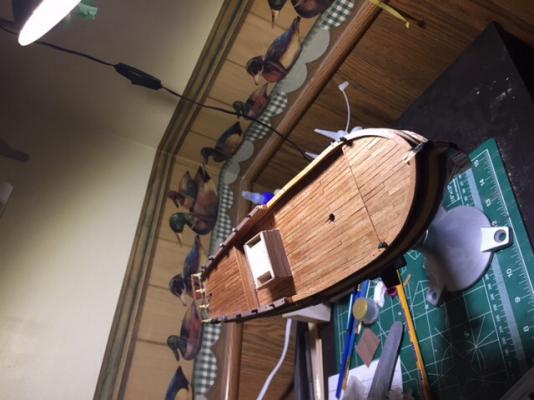
the bow will look elevated once the bow spirit is attached I am guessing, I have to paint more on the front yet. I think I am going to paint the whole this black instead of leaving the unpainted strip. I still have figure out what to do with the railing ends with the walnut.
-
Working on the rails. Slight error on the deck by the main mast hole. Still a lot work to do Also, I can't get this pic to upload portrait on my ipad, it will only post sideways!!!
- 98 replies
-
- 2
-
-
- baltic ketch
- corel
- (and 1 more)
-
I left the bottom rail as is. I messed up the top,rails so I put a layer of walnut over them. Doesn't look too bad.
-
I took a slab of balsa wood and drew the outline. Then I put nails around the path and slid the water soaked pieces in. Worked like a charm. I'm also at a loss with the direction for the deck fittings. I'm going to wing it a little.
-
I did that and the airbrush will send the pieces flying without a good hold on them. So I went back to brush painting them. I did them in standard black.
-
I recently started getting back to my build. I'm doing the deck furnishing now. I'll put up some pics this week
-
Ship is looking great. For the beechwood rail I made a jig and soaked them in water for a few hours. Then I used CA to fasten them to the middle of the bulwark. After they dry they should be pretty good easy to place. It was easier than I thought. Are you going to paint?
-
I've only planked two models, it was easier to do the deck before putting on the side planks, sanding off the rough edges.
-
Nice work!
-
I did for the white, the yellow and black I used a brush. This the third time I've brush painted a wood ship, it looks pretty good. For plastic and metal parts I only use airbrush. Brush strokes don't show up as much on wood. Also, the small areas are more accessible with a brush unless you want constantly tape off the wood sections. Just my preference though.
- 98 replies
-
- 1
-
-
- baltic ketch
- corel
- (and 1 more)