-
Posts
1,513 -
Joined
-
Last visited
Content Type
Profiles
Forums
Gallery
Events
Posts posted by Mike Y
-
-
Floyd, no worries! I am happy to help, if I can, so questions are welcome!
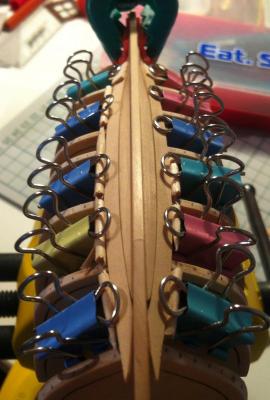
Both bents are done at the same time - soaking plank, curving it with fingers a bit (to make it softer), and then clamping to the hull. So just one soaking, snd leaving it until the next day clamped, to dry and keep the shape.
When unclamped, it bounces back just a bit, and you can glue it without any problems.
First I glue the stem part lf the plank - where it is inserted into false keel / stem, and few top frames.
Then I glue next part of the curve, 2-3 next frames.
Remaining part is close to be straight, and the last gluing is near transom. So around 3-4 gluing stages, with 10-15 min between them.
Since I also edge glue planks, it is hard to glue whole plank at once - need to make sure it is properly pressed to all frames and previous plank, to avoid gaps.
Please let me know if you want some detailed pictures of some stage, I can make them without any problem.
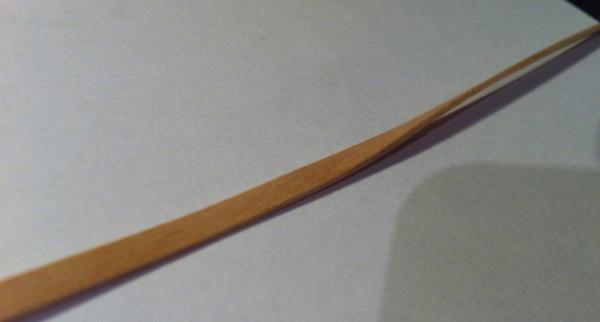
Pops, boxwood does twists easily, it is very elastic! Surprisingly
 Bending boxwood is as easy as bending basswood. The important thing is that it's still hard, so you can't just smash one plank into another and let it be glued - need to shape edge of the plank to tightly fit into edge of the previous plank.
I failed to join edges of 2nd and 3rd plank without gaps, so decided to let 3rd plank run on a smooth line, and added a filler plank between them.
Probably a proper solution would be adding a filler wood pieces to the bottom side of rear frames, to smoothen a joint between false keel and a frame.
-
Here is a shameful workaround for a tricky area, where false keel meets with rear frames:
And also not sure why I have that stealer plank there... At some point I forgot about shaping planks to reference lines at the stern, and decided that it is a good idea to practice a proper stealer plank

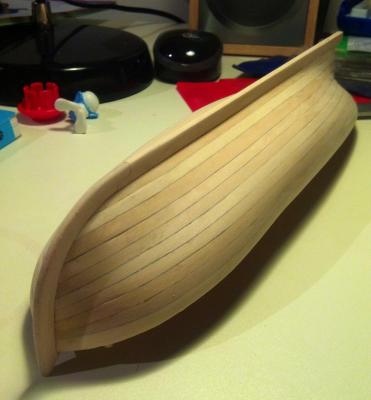
Current state of the hull, around half of planking is completed:
Discovered that scraping the boxwood hull is much better then sanding it. The more I plank with boxwood, the more I like it!
-
Heh, I have an great wife who also have a hobby (knitting), and mostly I do modelling during 1-2 hours when kid is already sleeping, and I'm not

And I thought it's moving very slow!
No picture of fairing from the stern, unfortunately. All pictures are in this log... Stern shape is smoother then in a bow, so just a light fairing required.
Main problem I faced was around 2-3-4 planks from the keel, right on a stern. If I build a longboat again - will definitely add some fillers to smoothen the transition from false keel to rear frames. They are pretty smooth in Pinnace, but on Longboat you will either have a gap between frame and plank, or planks will meet on some extreme angle

So before you plank it, try to dry fit a few planks there. Maybe you will want to add some fillers

-
It looks amazing! Thank you for a detailed photos of the process! Preparing for my Hahn's build, and trying to catch every detail

-
Very interesting build! That archiepelago ships have their charm

Would you mind if I pull the chair? Oh, glad midsommar, btw!

-
Stupid question related: where the oars were stored? I'm looking on Pandora's anatomy book, and oars look ridiculously long if you think how to store and move them inside the ship... Or they were made out of a multiple sections, that could be assembled and locked together?
-
Yes, I added transom before the false deck, why not
 Used same jig to level transom, as I used for frames.
Transom is basswood, because I'm going to plank the external surface of the transom, with boxwood planks.
-
Have you stained the wood? Interesting color! Or it had that color out of the box?
-
Looks good! Looking forward to see it sanded!
Just be careful, use lamp to see where the hull is already too thin, and extra sanding will just make a hole in it.
-
Yes, still look good!
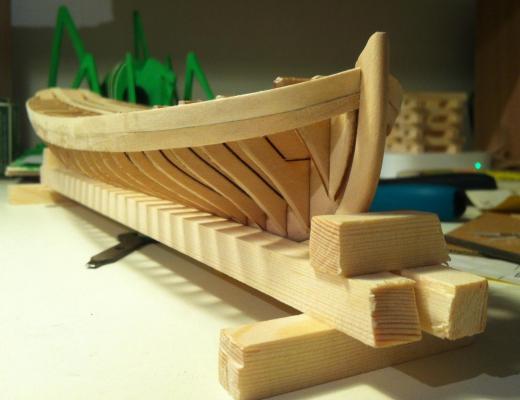
 especially the tricky bend in the rear part of the hull. I failed there, will show my workaround later
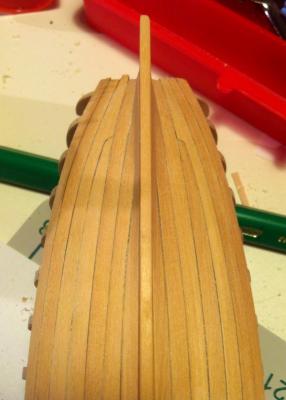
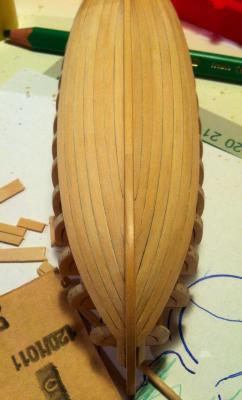
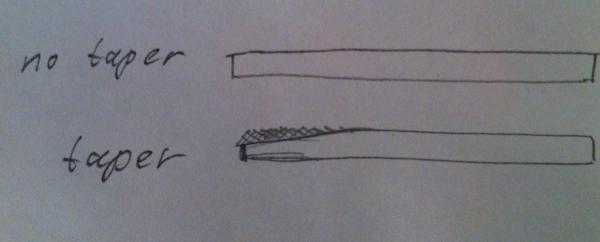
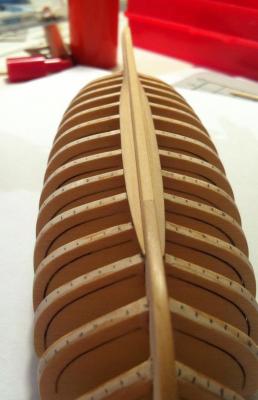
The front photo confirms that planks are not tapered. A bit of taper will make them really better! Chuck recommended it in my pinnace log, see the first pages. Like this:
(Sorry for spoiling your log with my photos, but it's just for illustration - sometimes simpler to show them, instead of explaining the theory).
- fnkershner and mtaylor
-
 2
2
-
It looks pretty good actually! No, seriously. No gaps between planks, should look amazing when finished and sanded smooth!
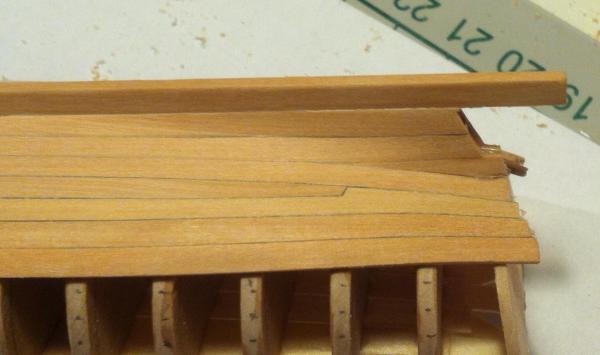
Just one thing to mention - there is a problem around second planking streak (from top of the hull, so on your photos - second from the bottom), the place where it is attached to first bulkhead. It should be tapered, to smoothly follow the curve of the hull. Then you will avoid that "warping" around first bulkheads.
Tried to illustrate it..
Or maybe it's just a camera angle? Can you make a photo looking on a stem, instead of a side photo?
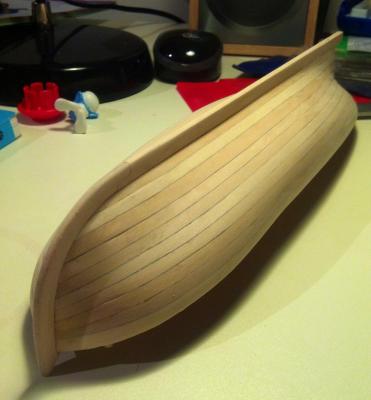
Here is an example, looks not very good, but illustrates the point. Notice that plank is getting narrower around a stem:
- mtaylor, fnkershner and Mirabell61
-
 3
3
-
Both options are possible - I planked Pinnace with a perfectly straight gardboard plank, no bending. It just forces to taper planks heavily, because there is less room for planks at the stem

Terminating gardboard plank earlier gives you more space, hence less taper.
-
-
-
It is in my build log, here: http://modelshipworld.com/index.php?/topic/6801-18th-century-longboat-by-mike-y-model-shipways-148/page-2#entry201485
I just made a jig that makes sure that
* keel is 90 degrees to the table
* bulkhead is 90 degrees to keel in all projections
That is enough to get a proper alignment. No need to mark bulkhead centers, they will automatically match if all angles are straight.
But, again, any kind of 90deg jig will work!
Or I misunderstood the question? What alingment is problematic? Do you have some photos illustrating it?
-
About edge bending. Conventional method (clamping under glass) do not work very well for me, because planks remain pretty wet even after a day of being clamped. Which is reasonable, moisture have no way to escape if it's under glass. And when you lift the glass, planks kicks back and loose half of the bend.
Probably this is the point where hair dryer would be useful, but I don't have one. I only have a heat gun, which I use to start the grill. Used it once, it accidentally melted my clamps

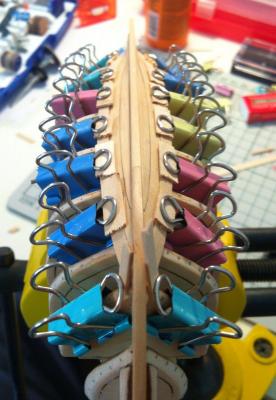
So instead I'm doing edge bending by simply clamping soaked plank to the previous plank and leaving it overnight:
Works pretty well with boxwood. Jeff mills them with a good tolerance, as a result - planks are thicker then the kit ones. So it bends evenly, without warping up or down. That will not work really well with basswood (tried it), or with big bends probably.. But there is no kickback, next evening it's fully ready for final installation. And if you need to have a very severe bend - that something is not right anyway.
I guess that next update will take a few weeks, so far it's just a iterative process, where I install one-two pair of planks per week... Happy summer!
- Cap'n Rat Fink, Nirvana, mtaylor and 3 others
-
 6
6
-
There should be at least 10 right ways to align the bulkheads properly
 That is a good part of our hobby - each builder solves the challenges in a different way, very interesting to compare the solutions from different people!
- Nirvana, Ryland Craze and mtaylor
-
 3
3
-
Yes, as I wrote in the first post - I use castello boxwood from Hobbymill, for all parts apart from false keel and frames.
-
Toni, thanks for an advice!
I count mostly on edge-bending, just a bit of spiling to have a good fit in the end of the plank.
Using Castello.
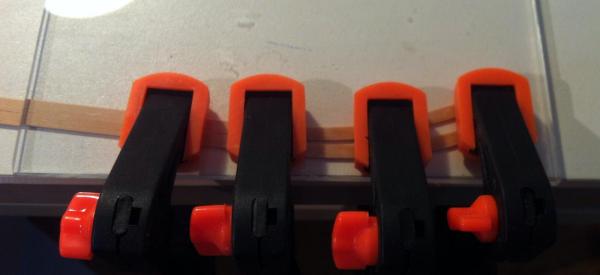
So far had no problems with it, soaking in boiling water for 15sec, then clamping under a glass:
Then fitting to the hull and clamping until it's dry:
Bends well, pretty elastic, no cracks. Just a pleasure to work with it!
The main problem is actually on a stern, there is an extreme bend due to the angle of rear bulkheads:
It's different from Pinnace, bulkheads there have a smooth curve in the bottom, even the rear bulkheads. Thinking on adding some fillers..
-
Interesting deck planking, with non-rectangular planks. Is that correct, or just for beauty? If it's correct - then would appreciate if you can shed more light on it, when such type of planking is used instead of rectangular planks?
-
Floyd, sorry, but I have no tricks there - just traced the shape of the stem to a piece of boxwood, using same grain direction. Then used table saw and dremel to shape it, then sand-sand-sand - and you have a stem!
 Same for keel
The only thing is that you need to use sanding block to have a straight edge on a consistent 90 degrees.
"Decoration" on top of the stem was done with a round file, with stem clamped in a table vice.
So no tricks to share..
What is the problem with the stem and keel? Maybe I can help if you show the photos?
-
Thanks everybody for comments! I now found where the problem is. Exactly as Grant said, number of ticks should change for smaller bulkheads. Then you will have taper and less edge bending.
On Pinnace I had no reference marks, and just planked ad hoc. As a result, there was just a tiny edge bend, planks were tapered, and gardboard plank was straight, no curve at all:
Decided to continue with wrong reference lines and see how it looks. Should be a significant bend, and very small taper.
Then will compare results, and redo the planking if it will look bad

Luckily Jeff supplies double amount of wood for planking, so there is a room for experiment

- fnkershner, Cap'n Rat Fink and mtaylor
-
 3
3
-
David, you are right. I was thinking about adding taper, but how to calculate it? And why is it needed? Then traced all streaks - hm, number of streaks should reduce enough to avoid taper.Mike, I think you aren't seeing any taper because you are using the tick strip you used for the longest bulkhead to mark plank widths for all the other bulkheads. Bear in mind, I have never done this myself and am just giving you my impressions based on what I read. I could be completely wrong!
However, I see that lots of edge bending is required to terminate bottom streaks earlier. With tapering less edge bending is required. So it is kind of compromise.
I did Pinnace with taper and practically no edge bending, but will do Longboat with edge bending, but without taper. Let's see what is better!

Thanks for a feedback, please feel free to critic and comment! That is the only way for improvement

-
Yep, Pops, I share your confusion. Spent some time fitting next planks and trying to find what is wrong. So far nothing is wrong, or I lack experience to spot the problem. Whats good with that build - it is just 12 strakes, so if I made a mistake indeed - not a big problem, have enough spare planks and PVA-based glue, which is easily dissolved with water.
It is a great planking training platform indeed! And much easier then pinnace - bulkheads are much wider.
Anyway, installed the gardboard plank. The curvature is quite smooth, it should help to reduce edge bending.
- fnkershner, fatih79, Cap'n Rat Fink and 1 other
-
 4
4


18th Century LongBoat by jburchfield1 - Model Shipways - 1/4" scale - SMALL - 1st ever build
in - Kit build logs for subjects built from 1751 - 1800
Posted
Amazing! Are going to add a hole in the hull, to imitate the boat that hit the rock, and hence require the service?