


Mike Y
-
Posts
1,513 -
Joined
-
Last visited
Content Type
Profiles
Forums
Gallery
Events
Posts posted by Mike Y
-
-
-
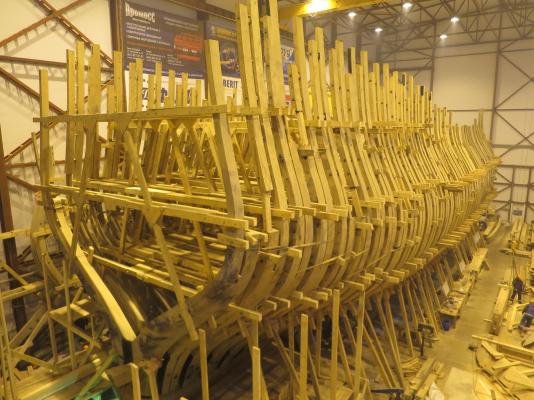
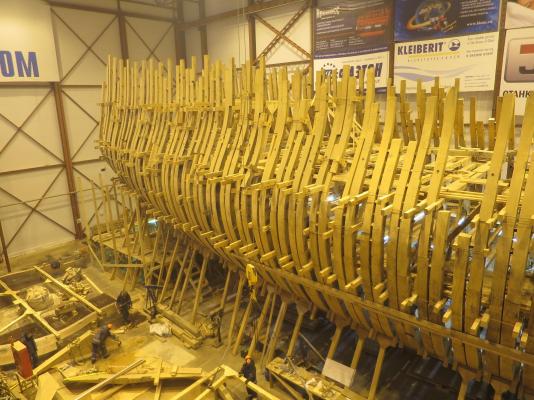
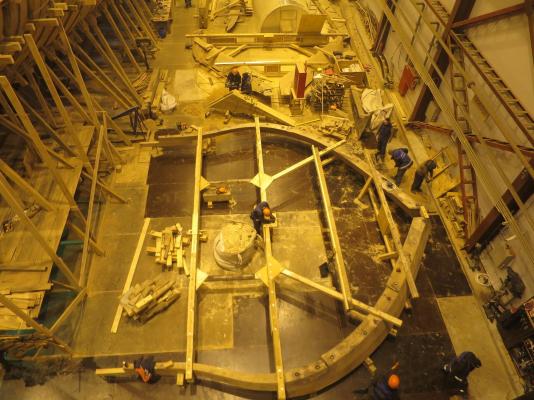
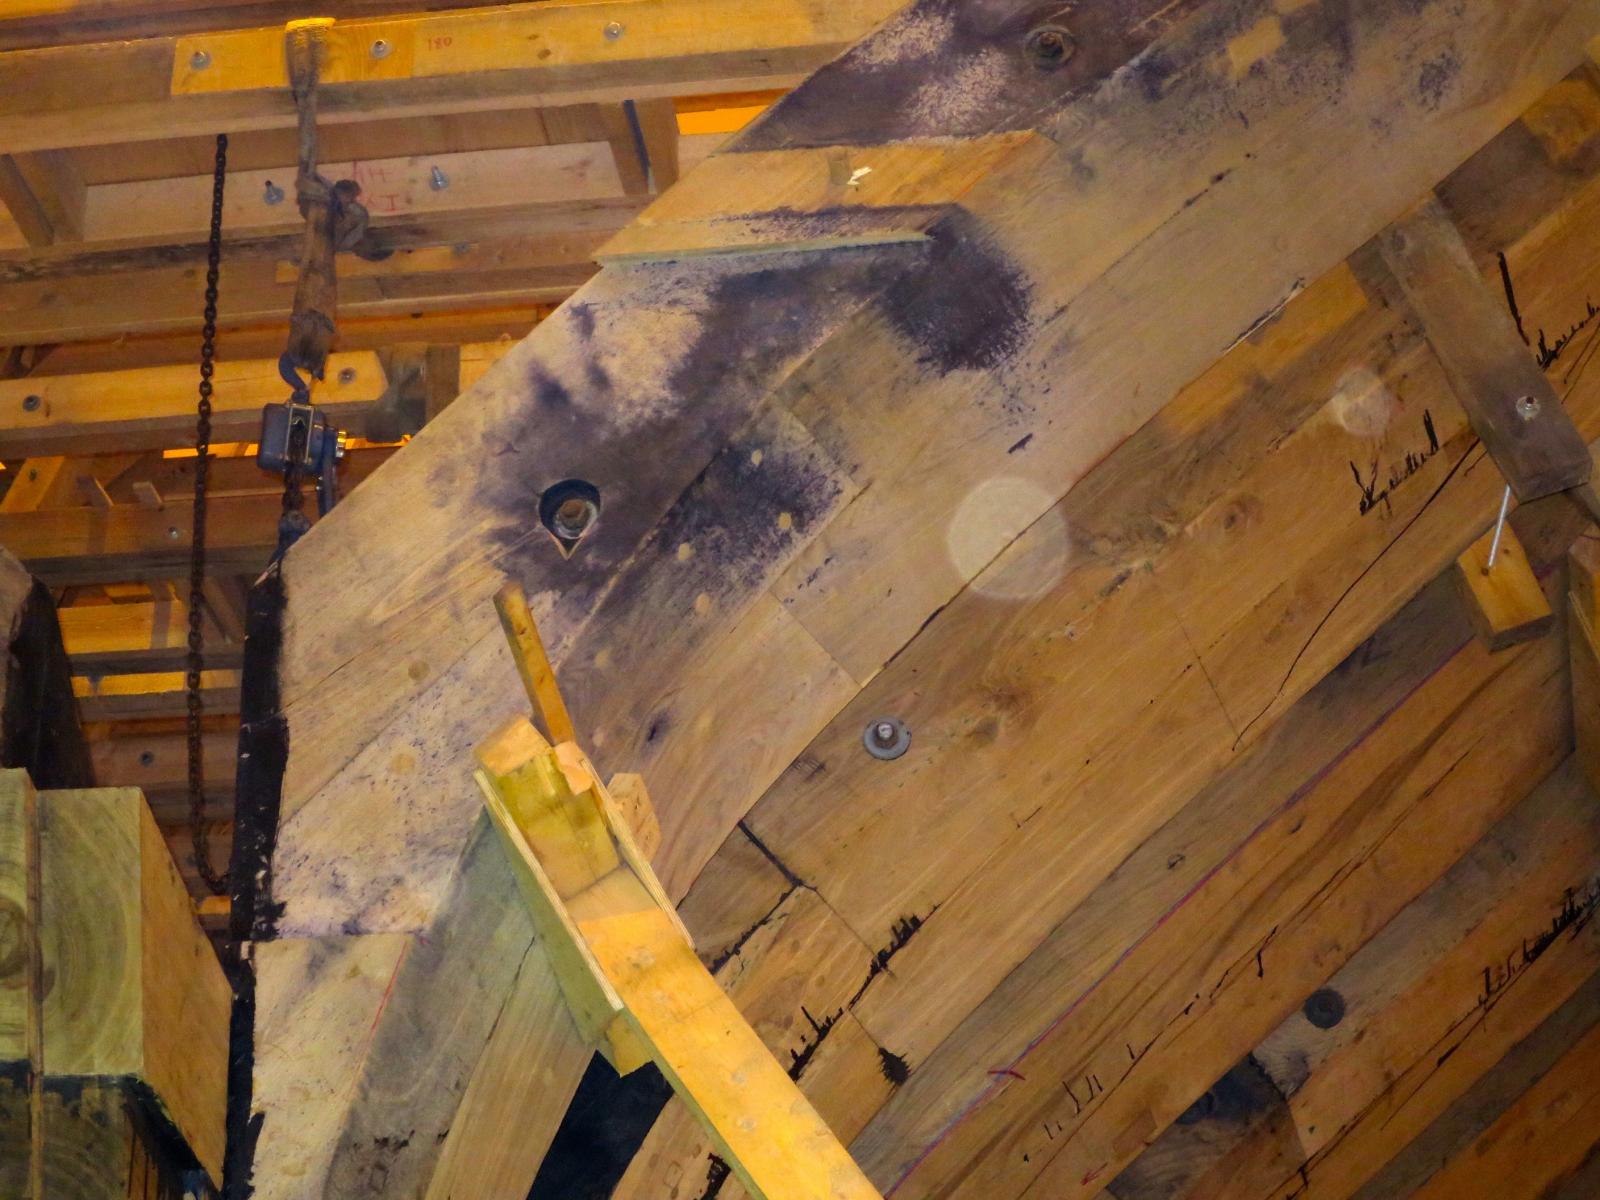
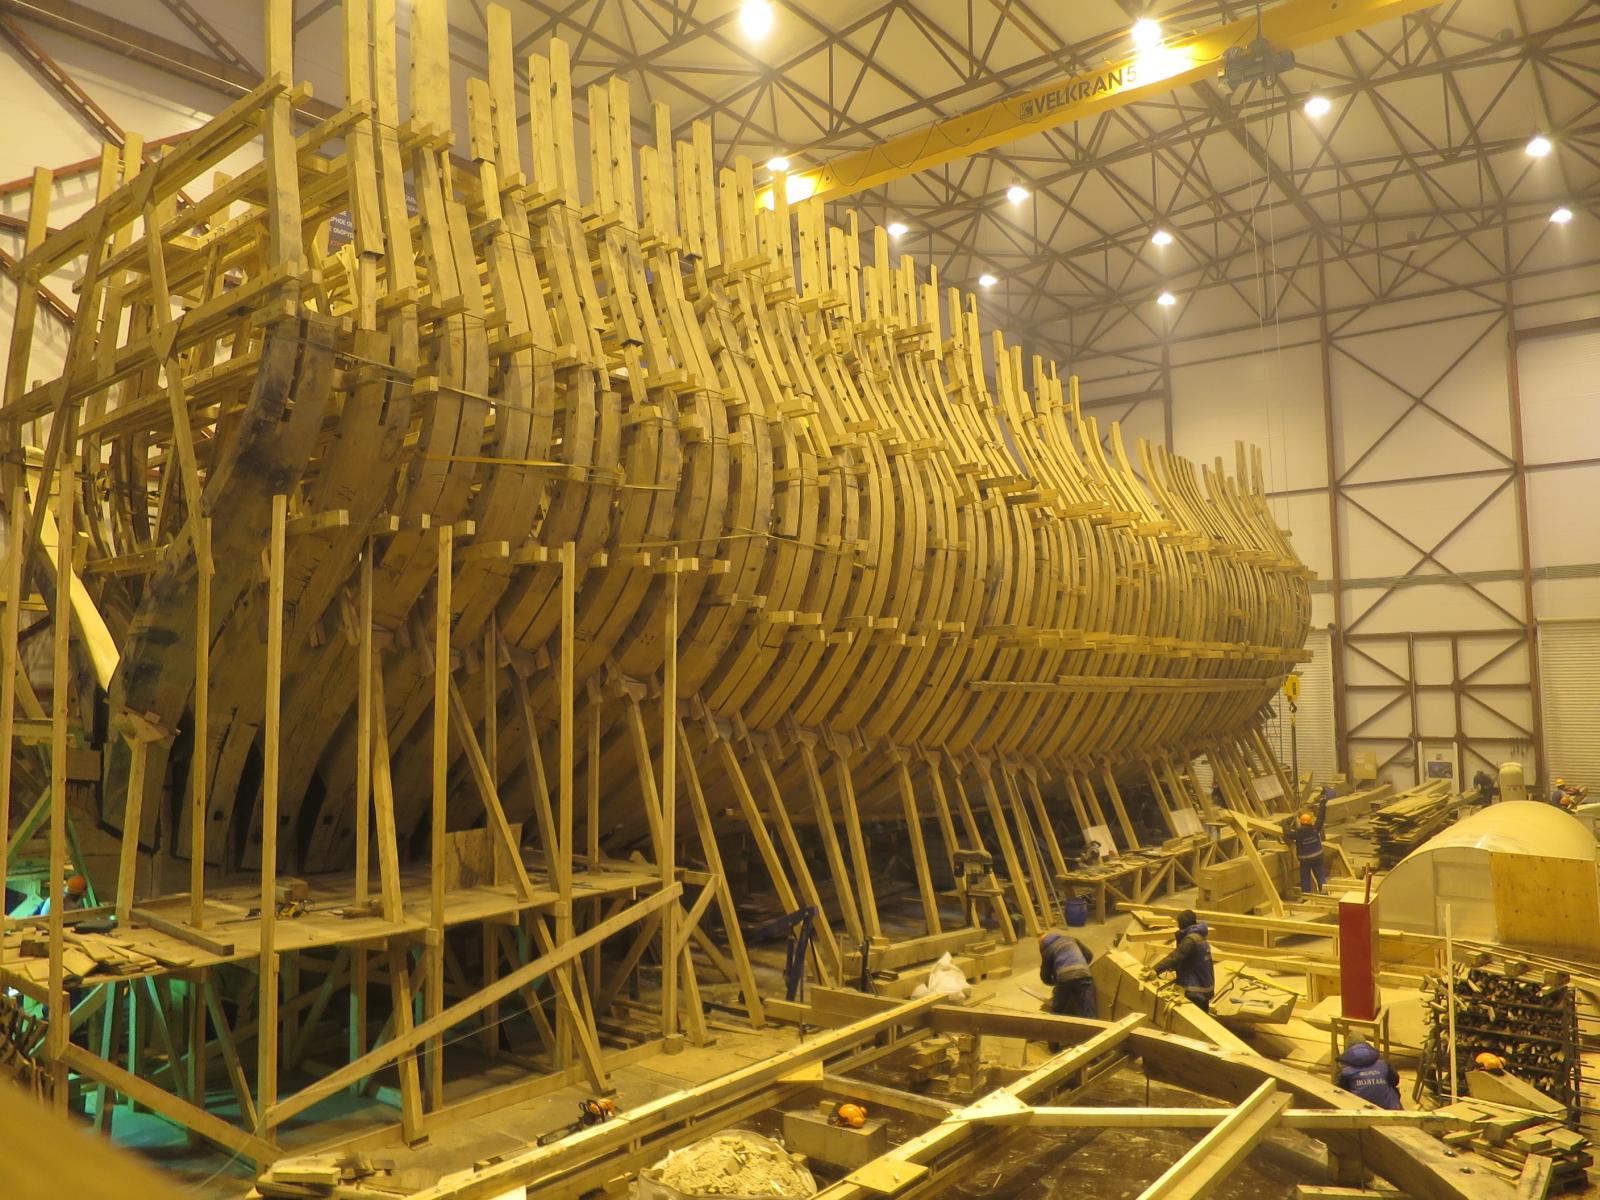
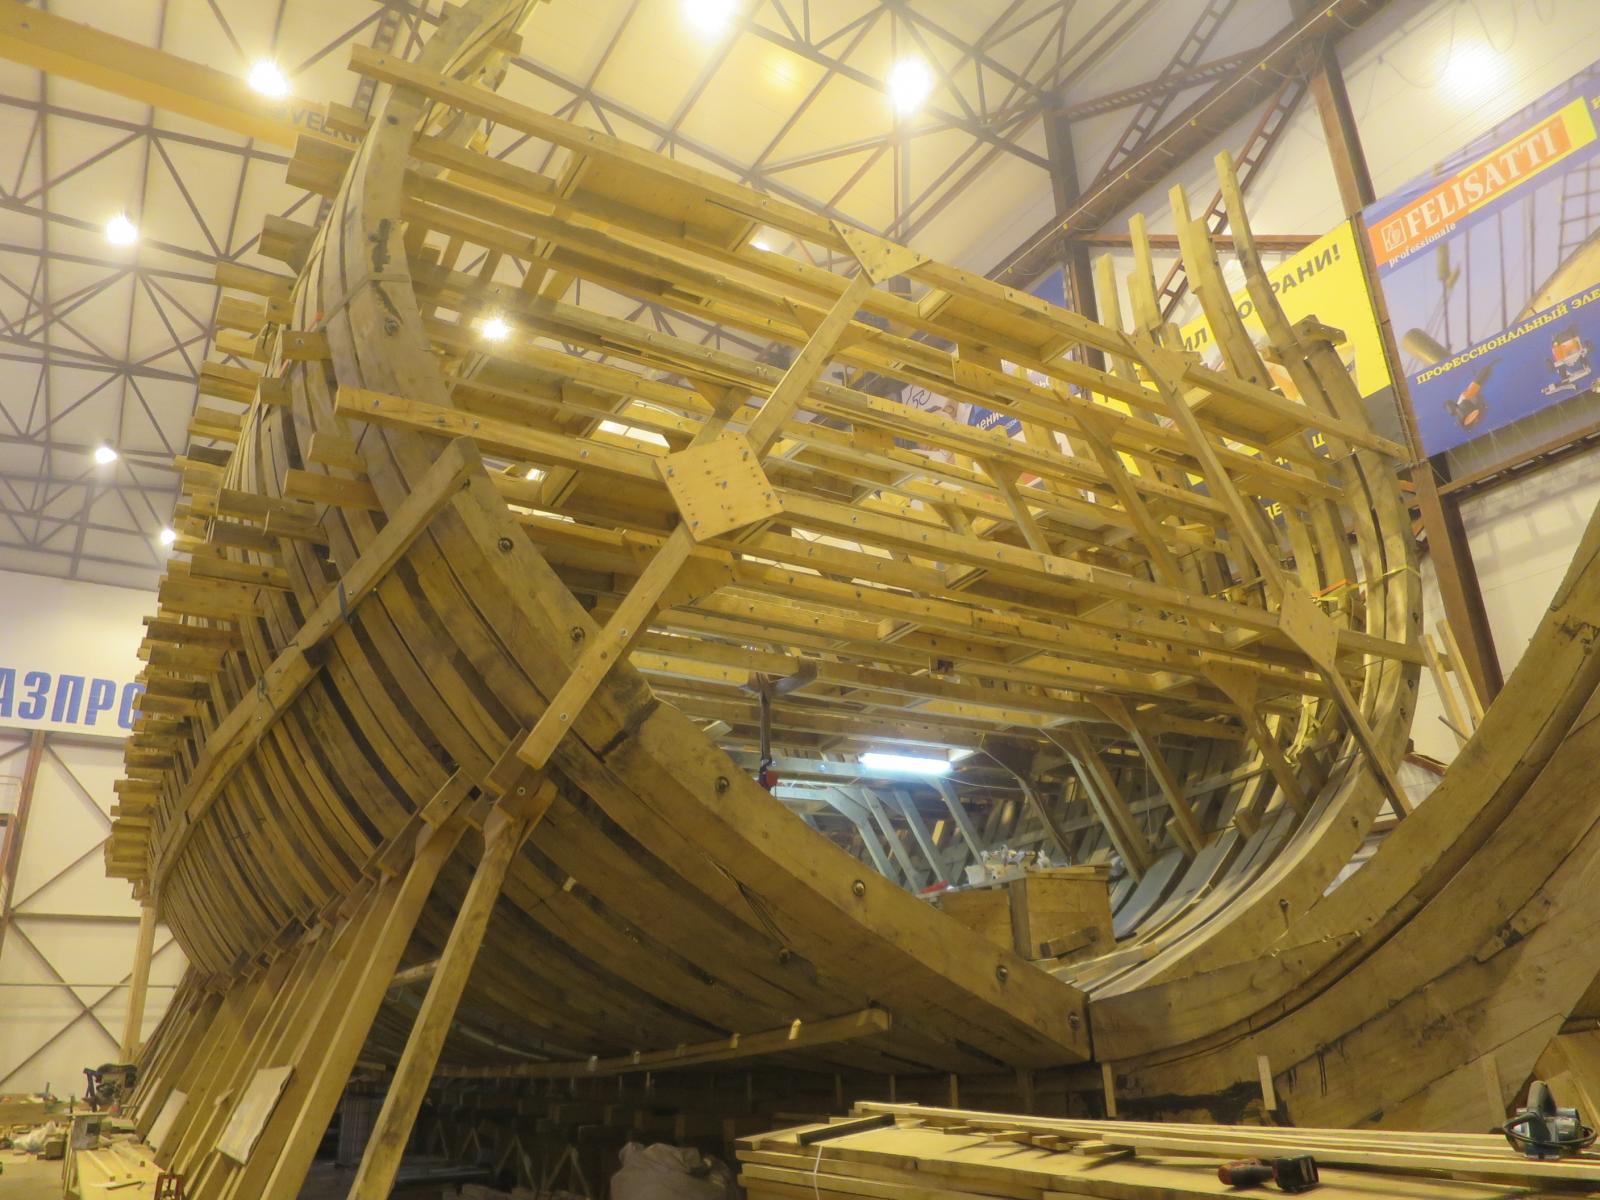
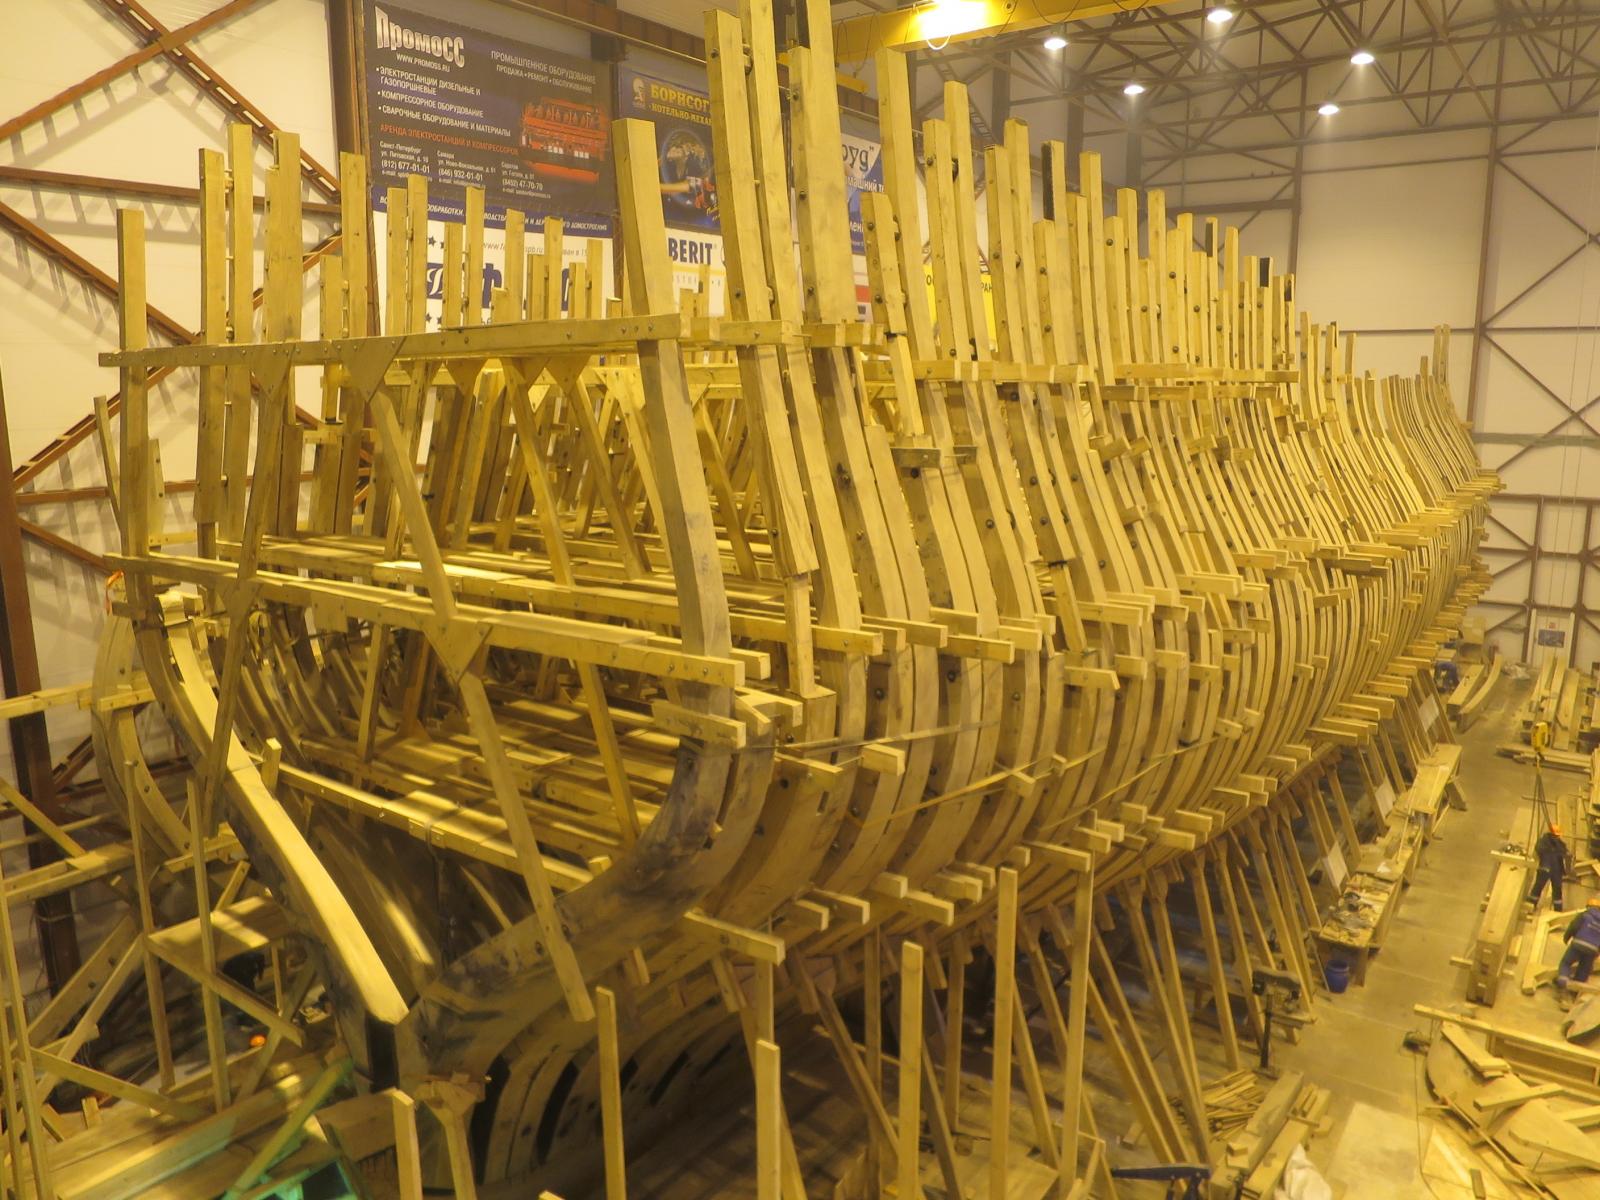
The project is moving really fast - the construction was started just 9 months ago!
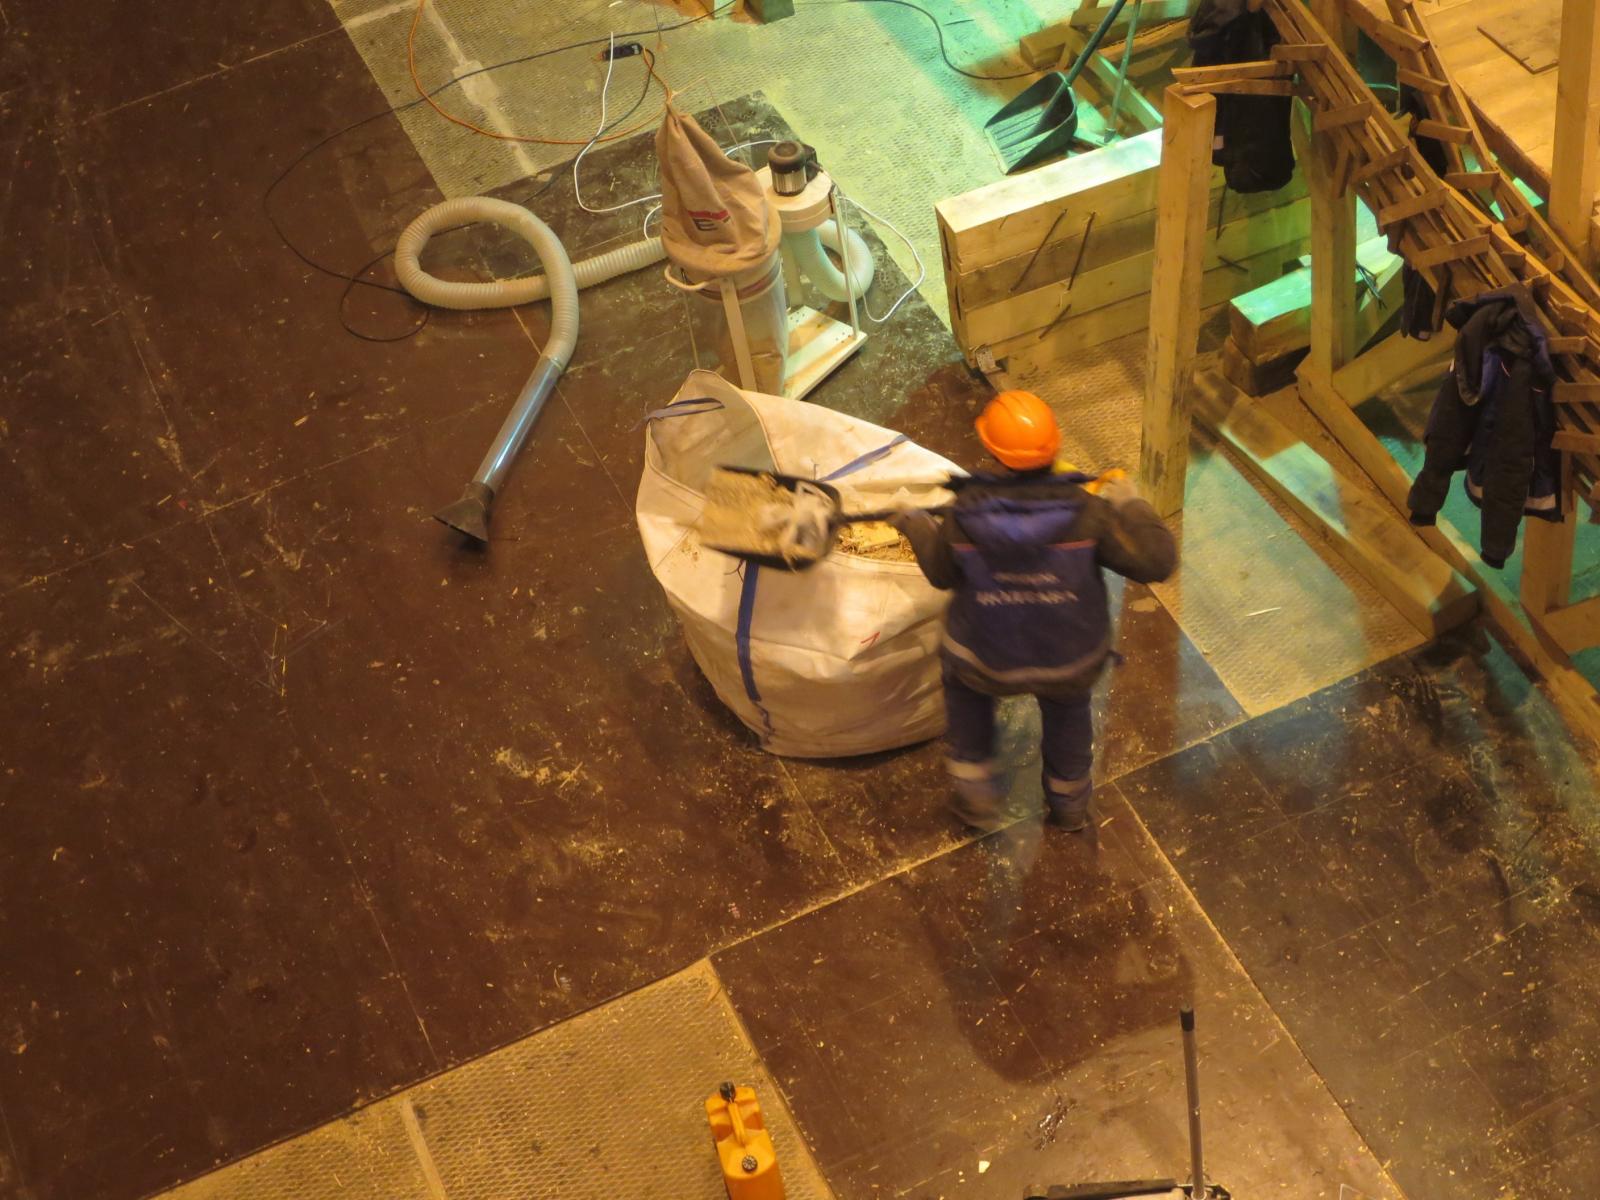
All carpenters are professionals, and there are around 100 carpenters working on a project 5 days a week (and today was a small weekend shift).
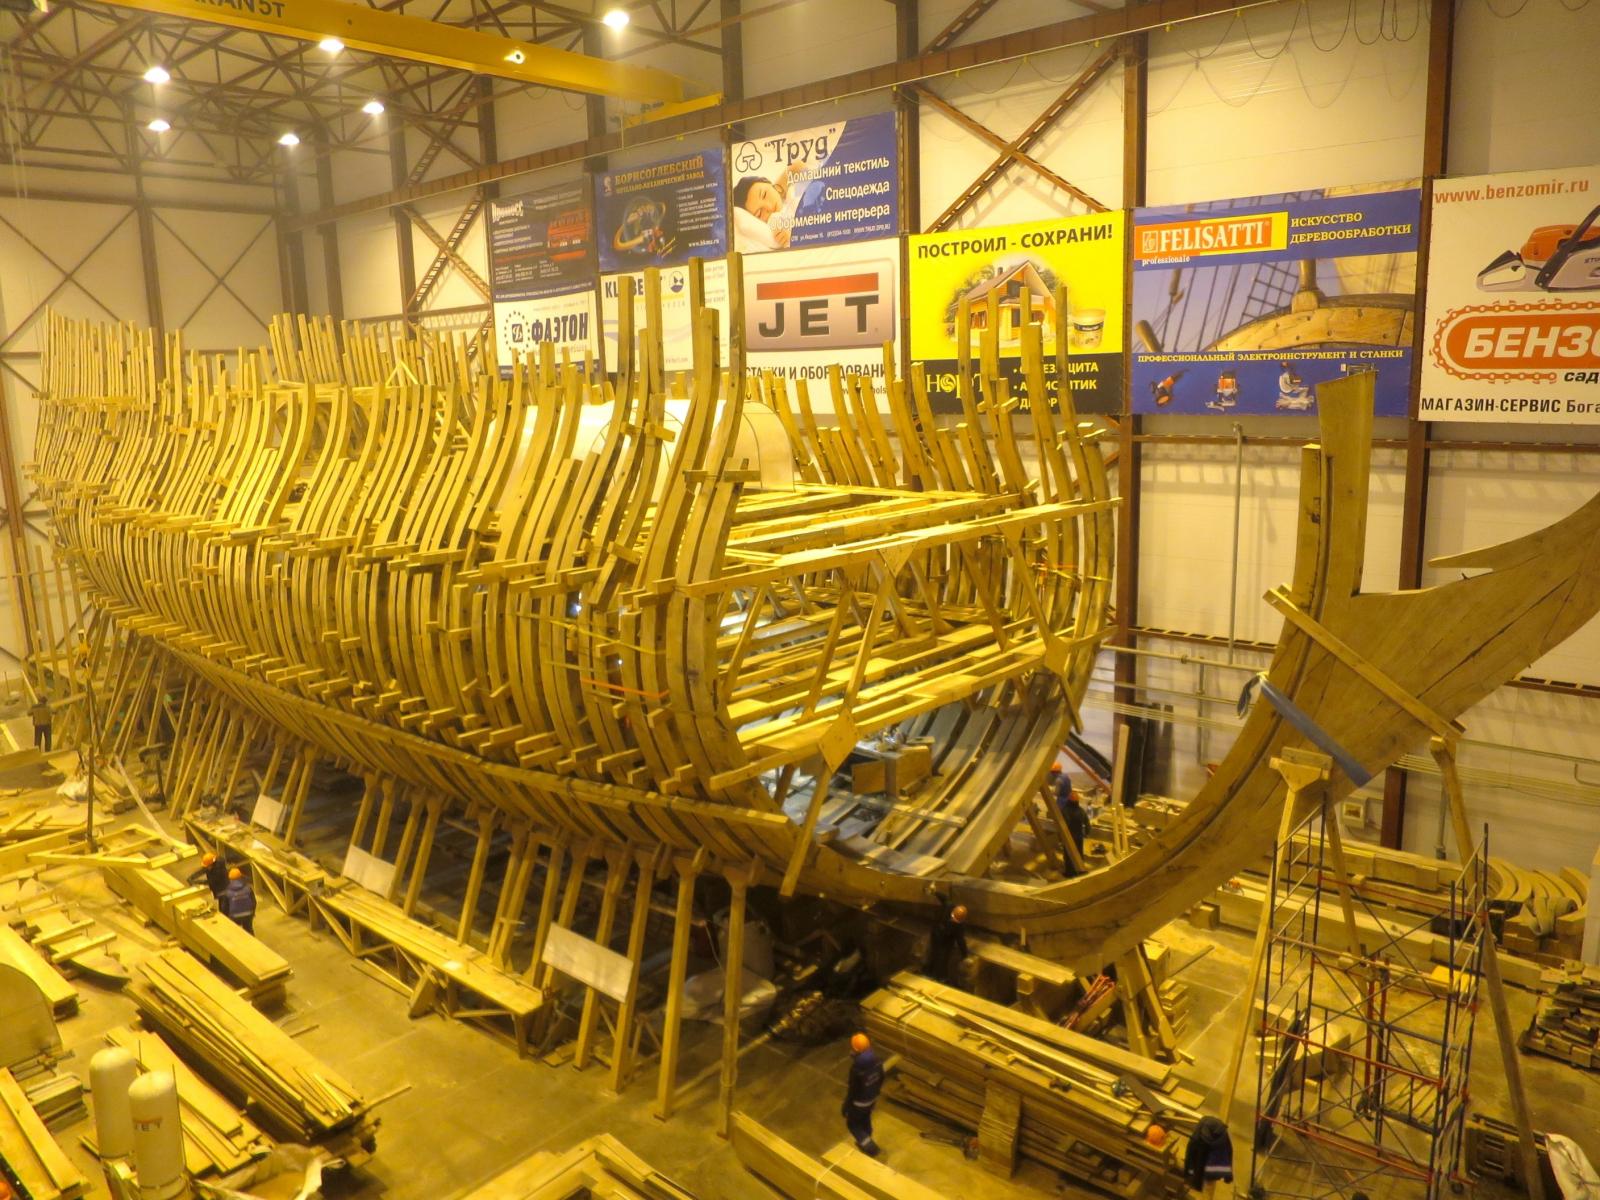
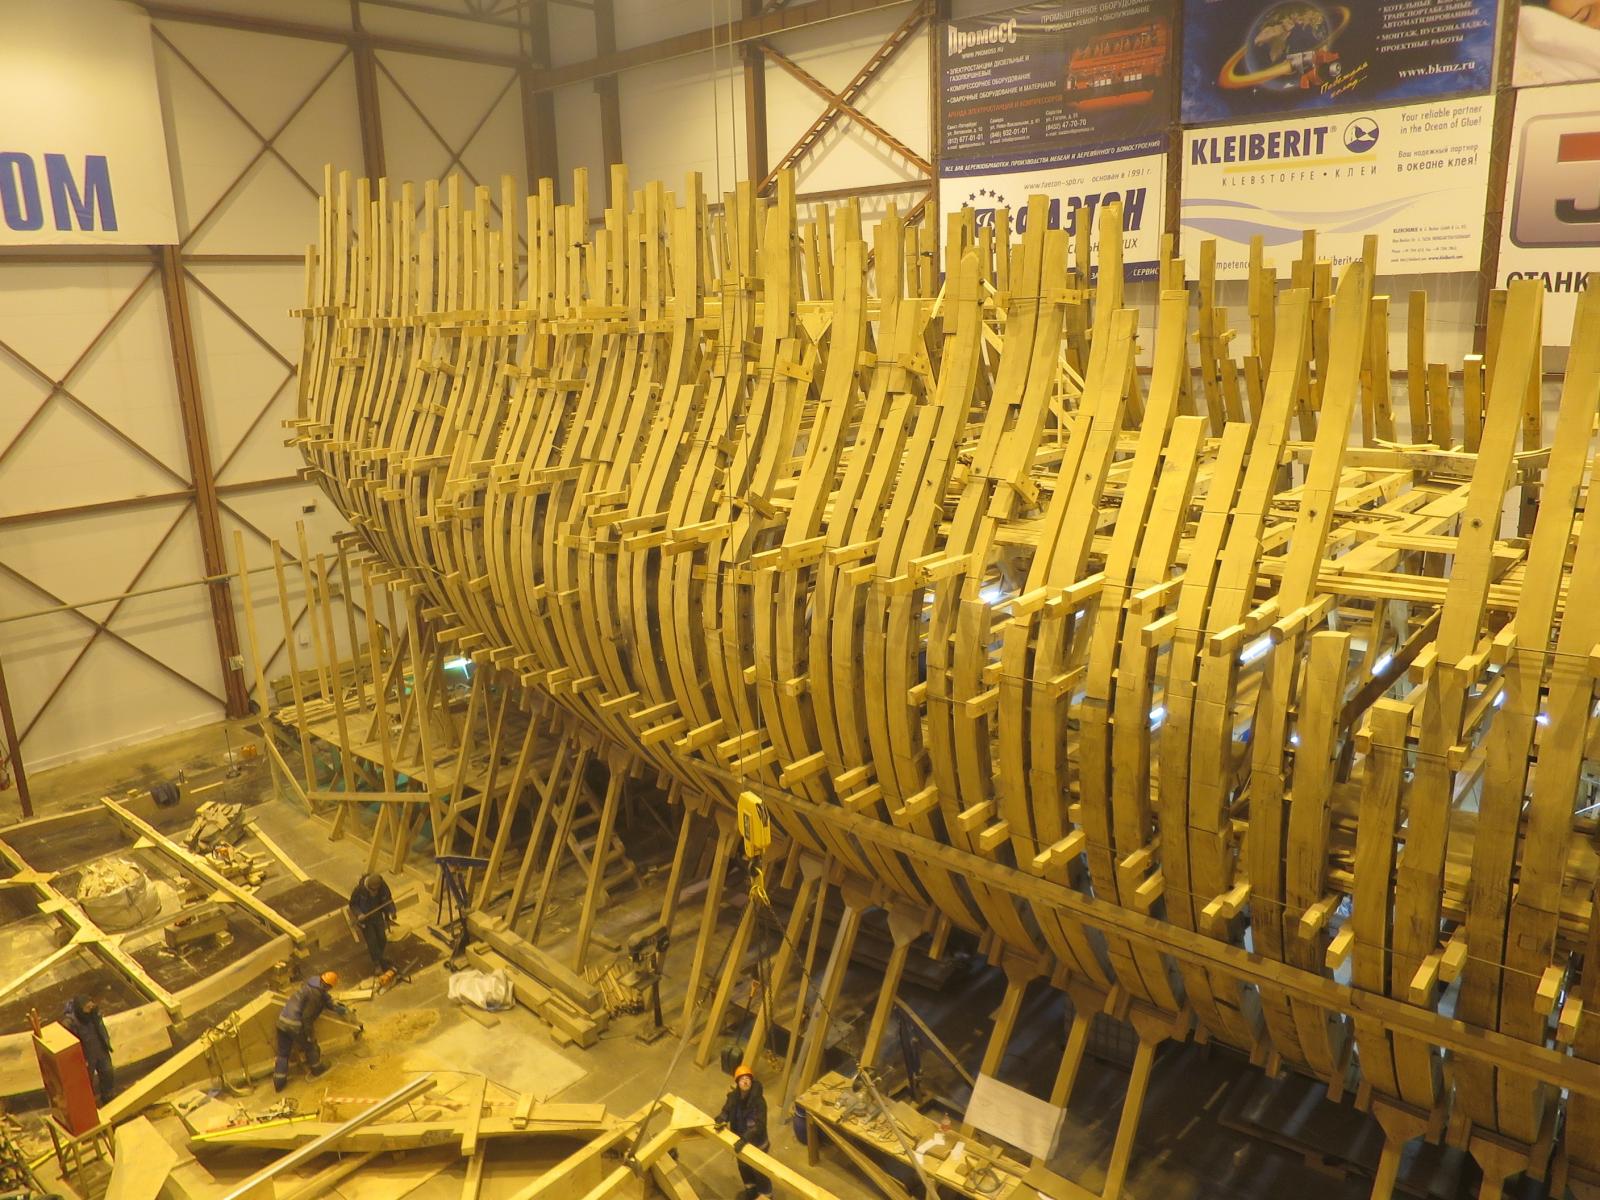
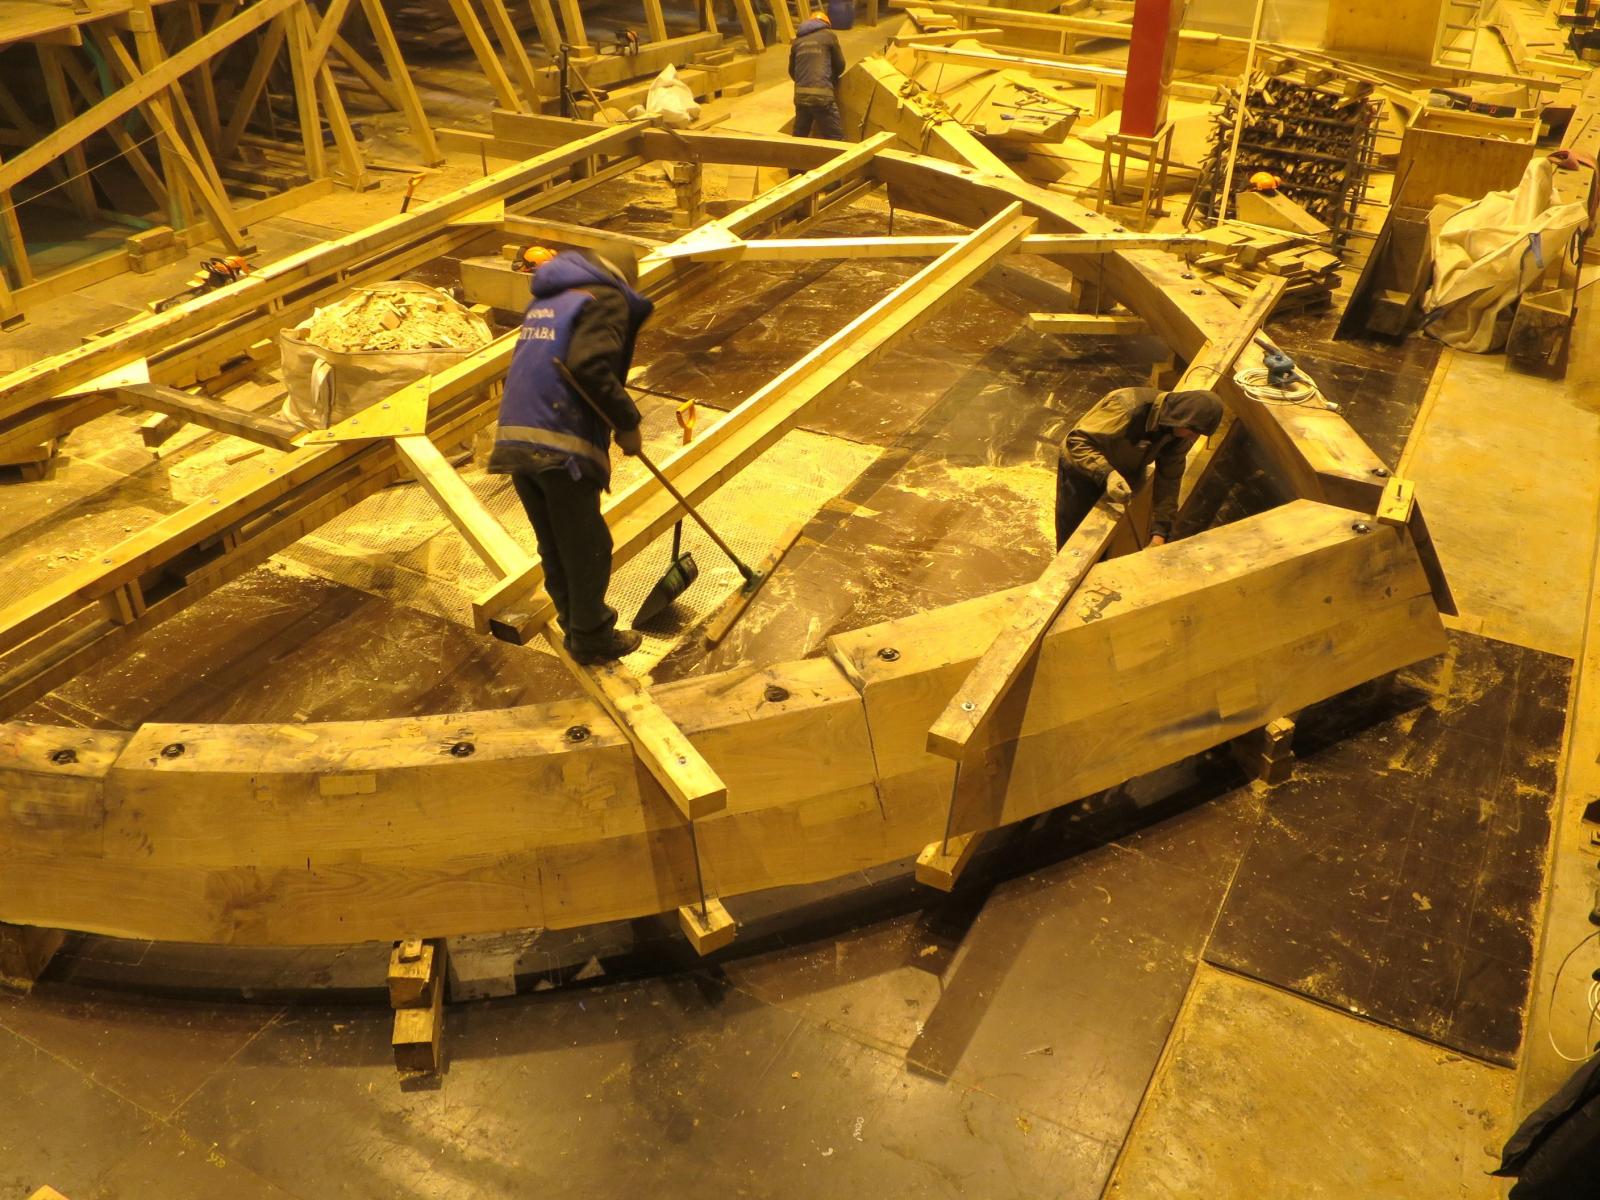
The hull is huge! Hard to show the scale on a photos, but just look on how small the people are near that hull:

- Saburo, Cap'n Rat Fink, Mfelinger and 4 others
-
 7
7
-
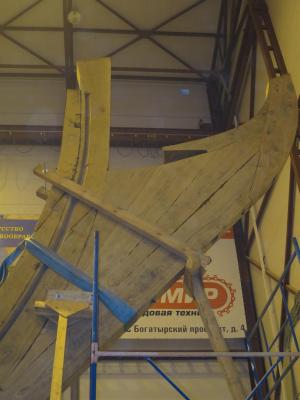
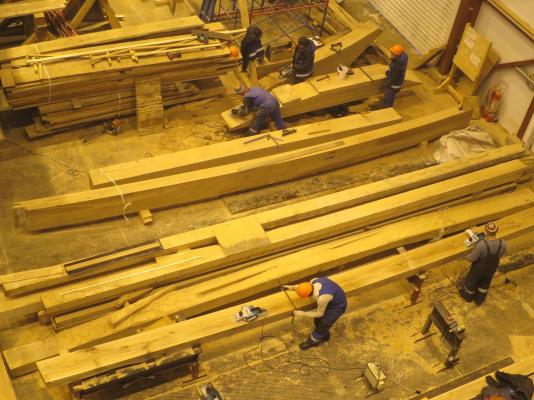
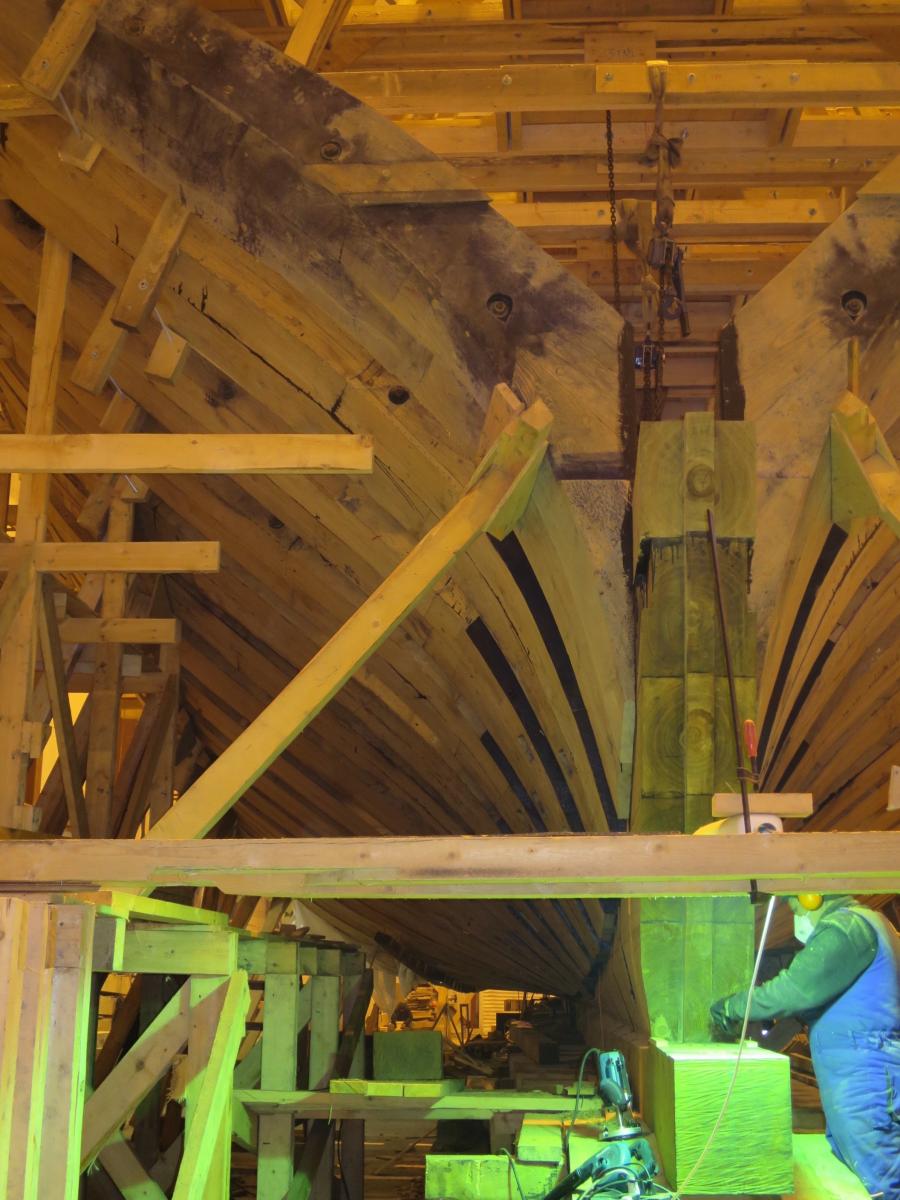
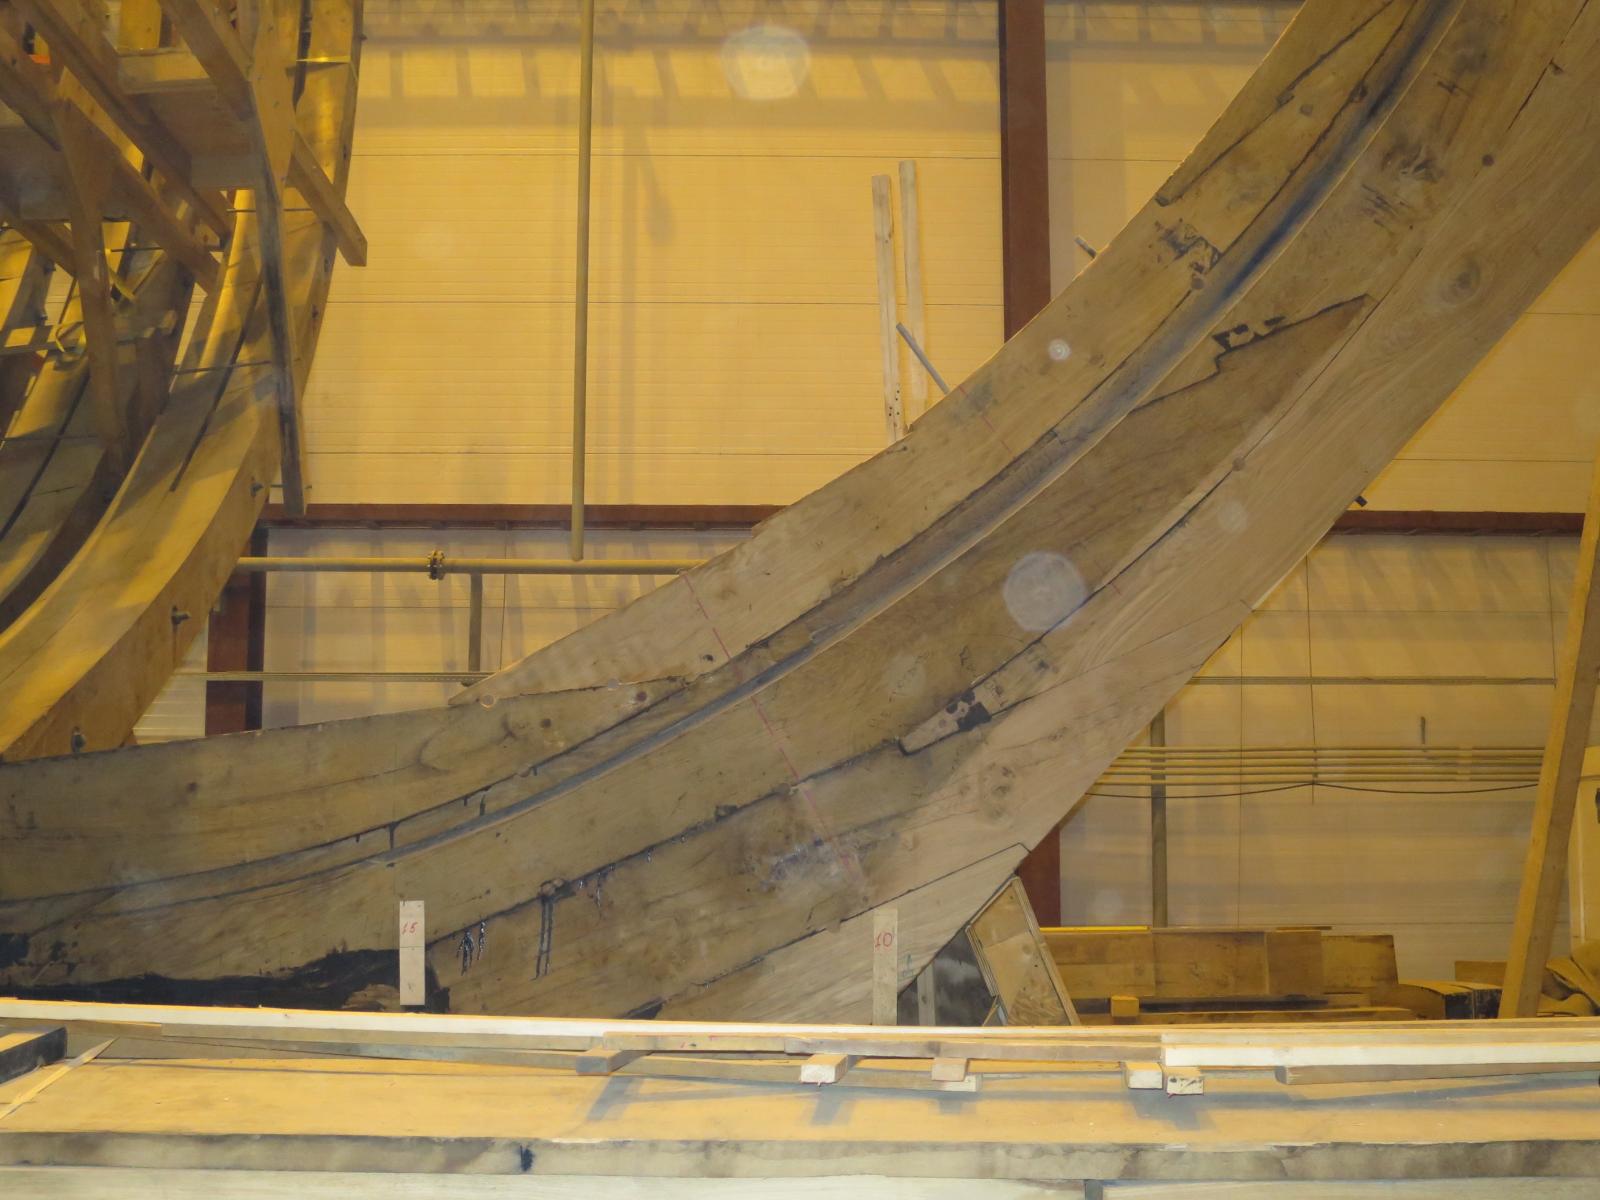
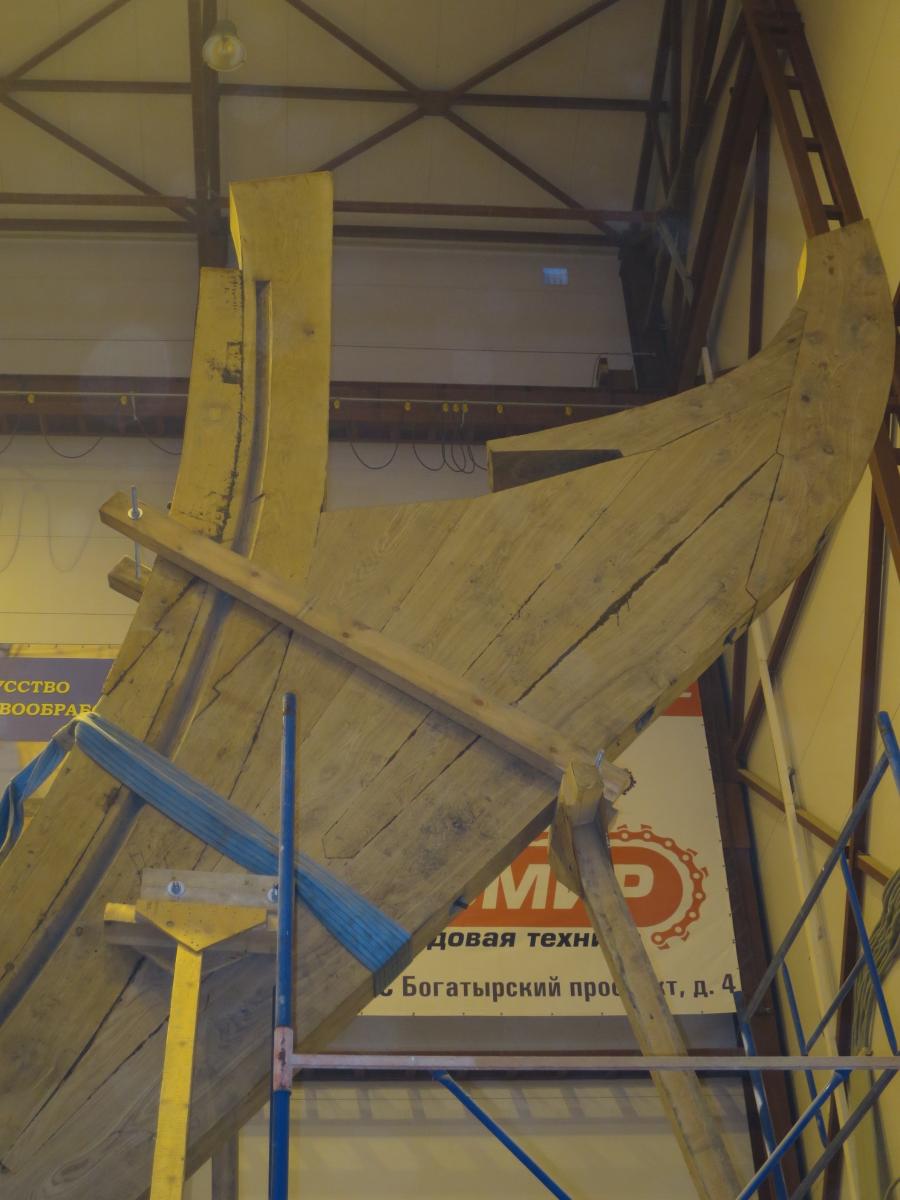
Stem:

Sistered frame construction:
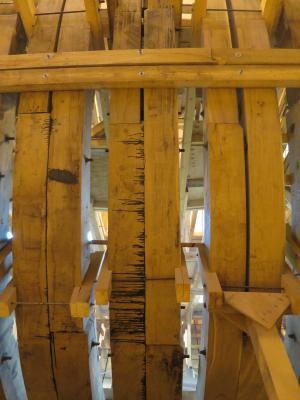
Frames are lofted and assembled right on a floor, and later fitted to the hull:
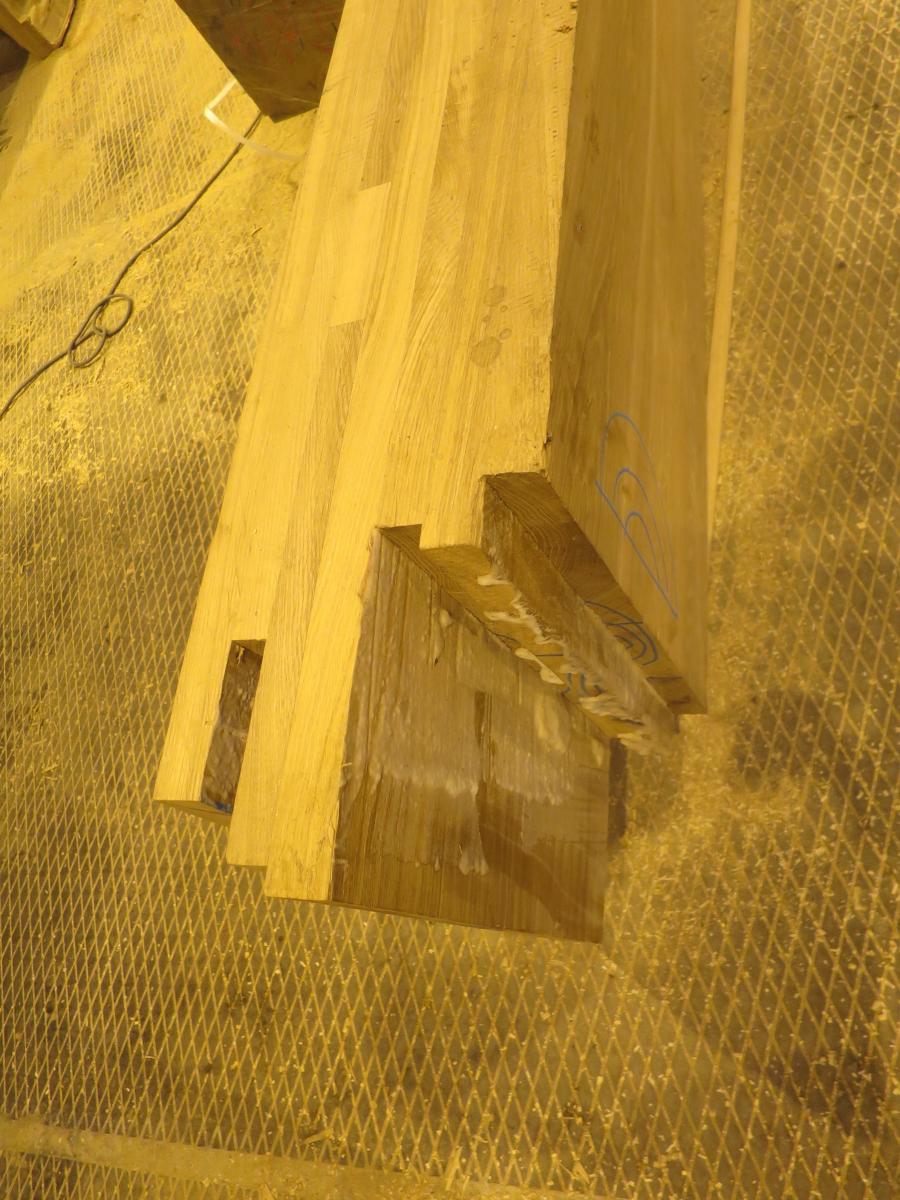
Joinery:
- AON, CiscoH, Elmer Cornish and 5 others
-
8
-
Pardon, just another offtopic
 Not so much to tell about the build itself, holidays, no time to build...
Spending New Year holidays with my parents in St.Petersburg, Russia, where I visited the construction site of 1712 frigate replica, Poltava.
Some links:
https://twitter.com/Poltavawarship
https://www.facebook.com/poltavaship
https://www.youtube.com/channel/UCQ-9kJyalp7_pm72J4Yb9_Q
The construction is sponsored by the symbol of russian corruption and inefficiency - Gazprom
Project has quite a fat funding, and there are around 100 carpenters working on the hull right now.
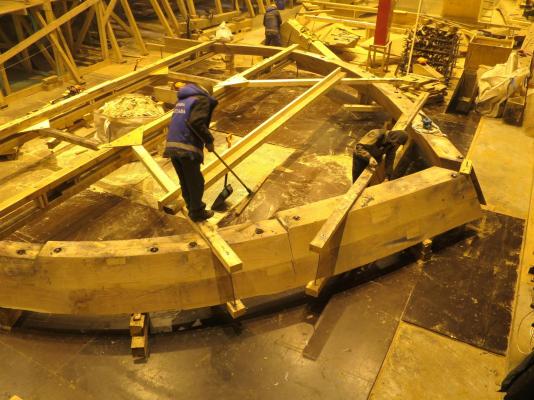
The big hangar here is the place where hull is assembled:
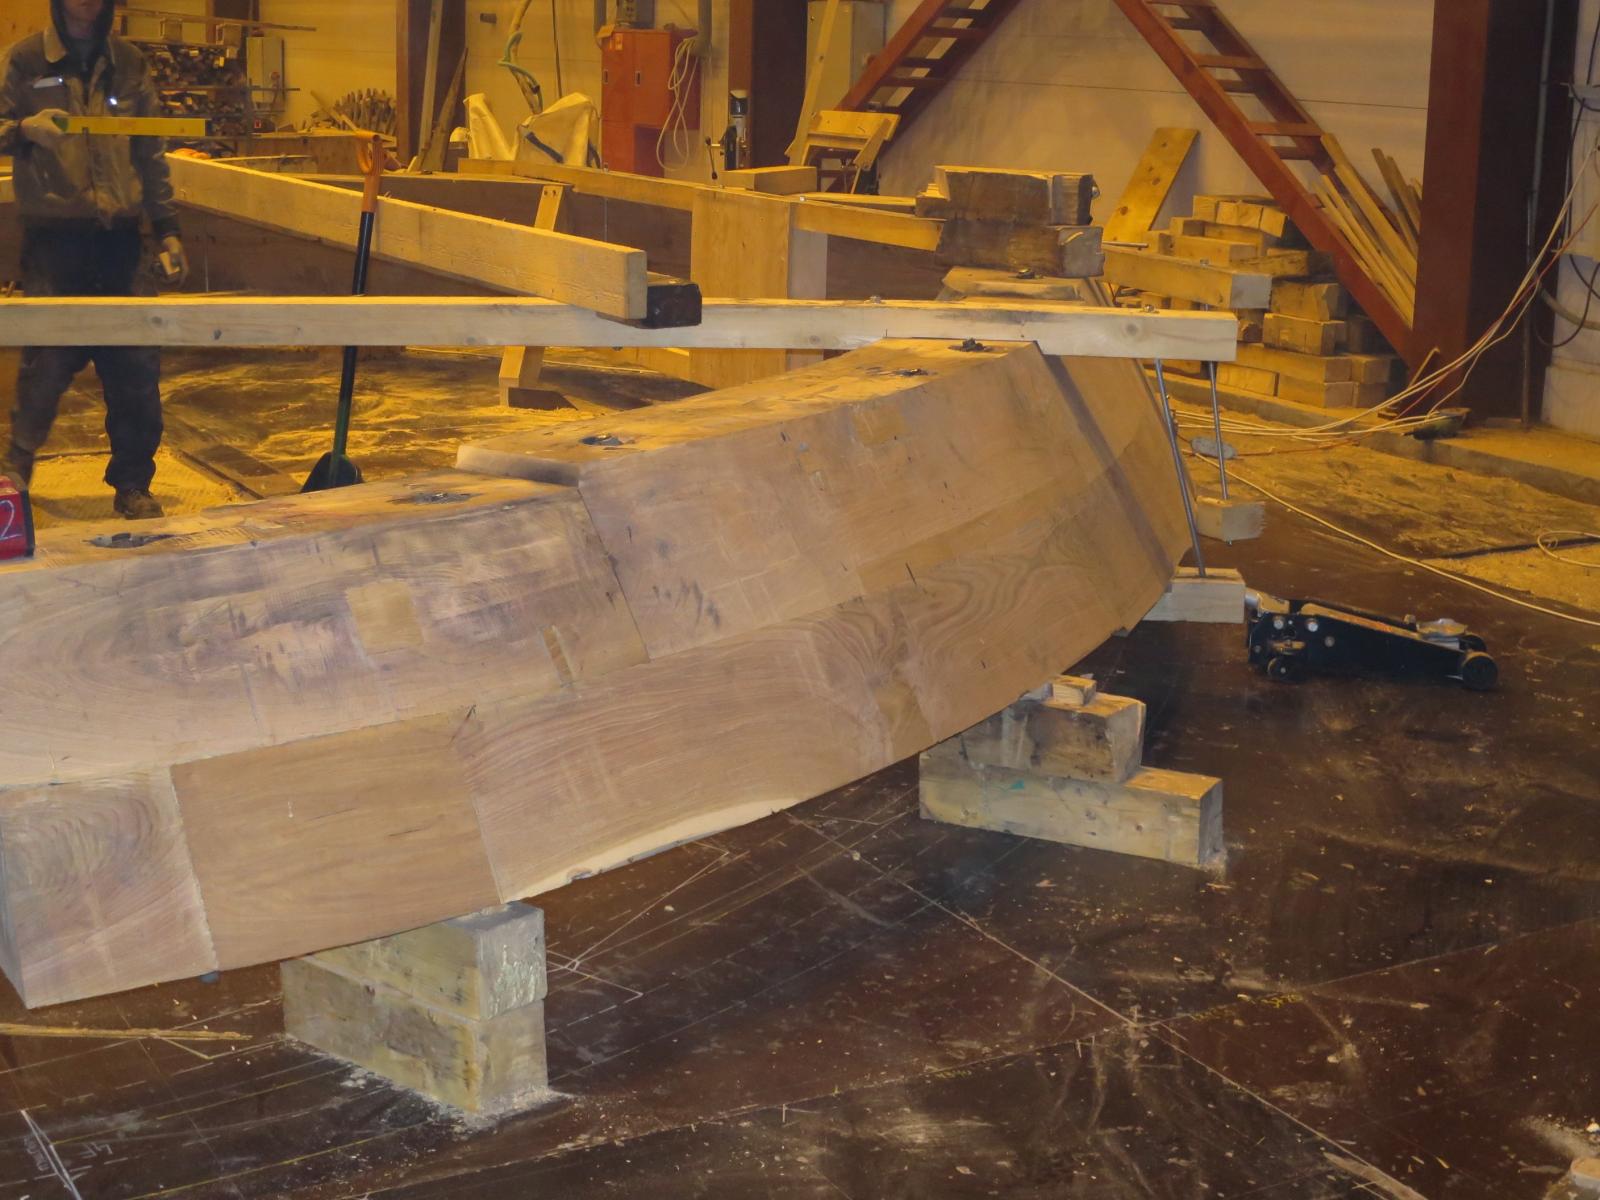
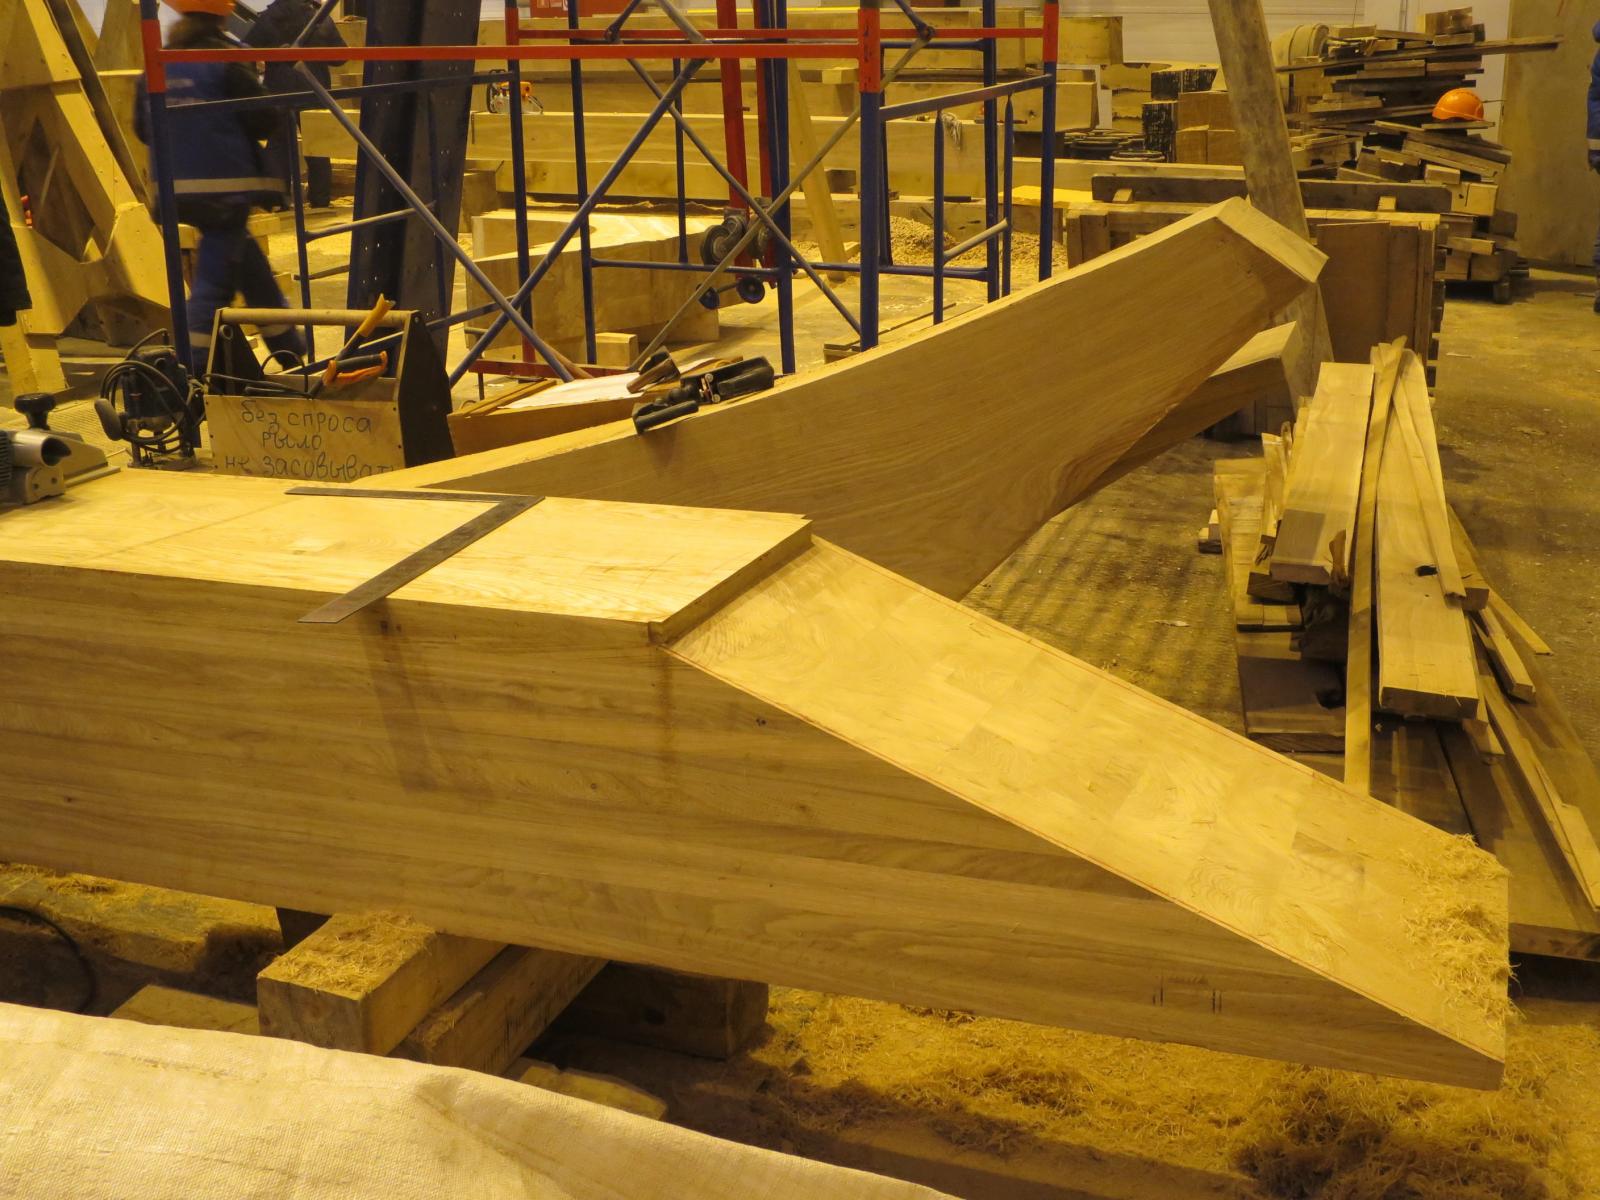
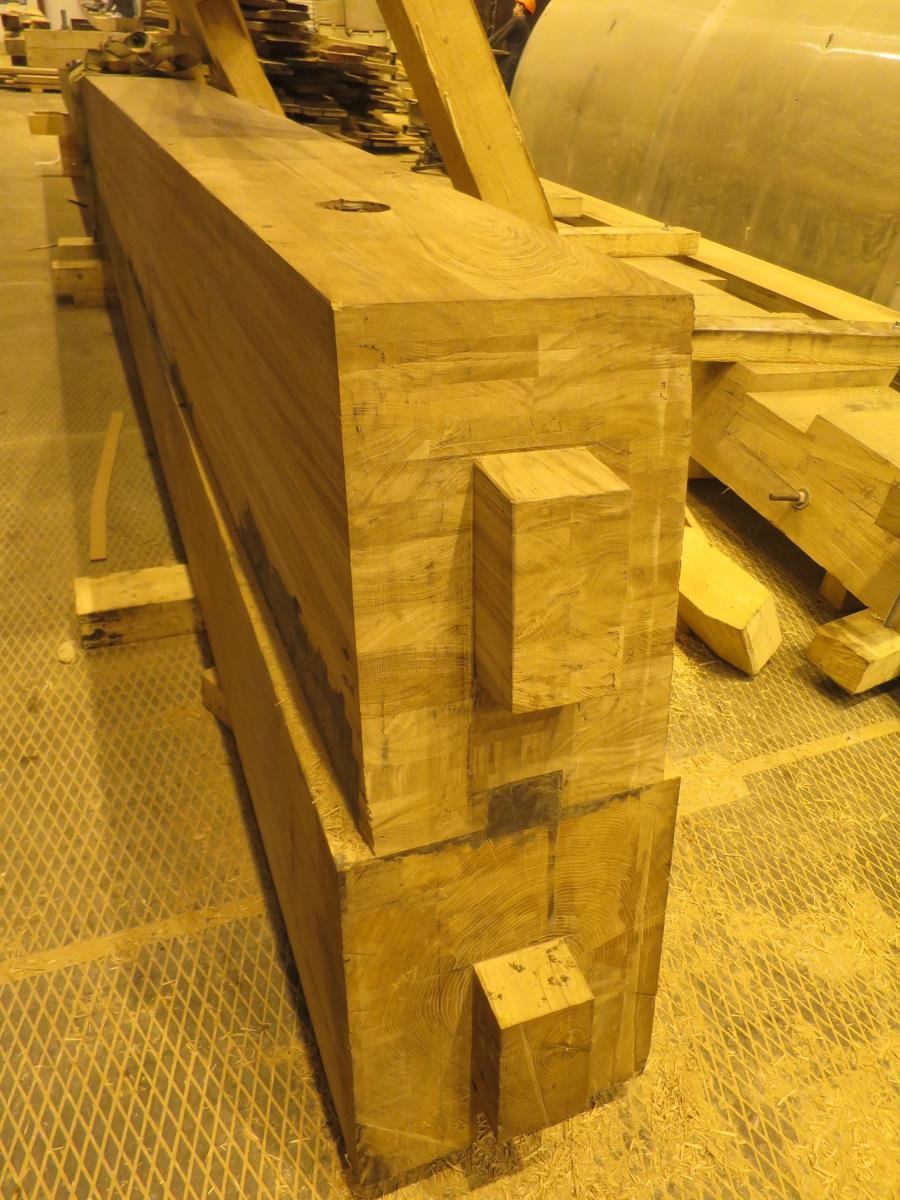
 Wood storage (oak):
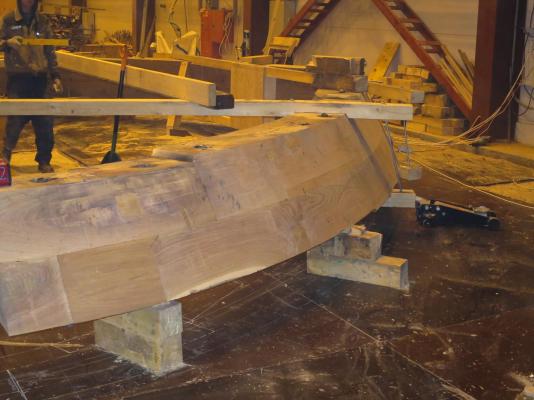
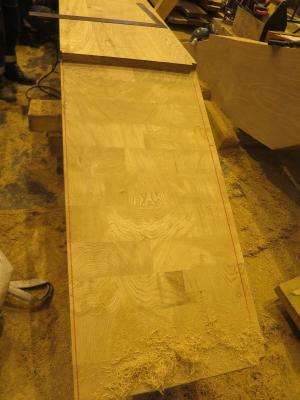
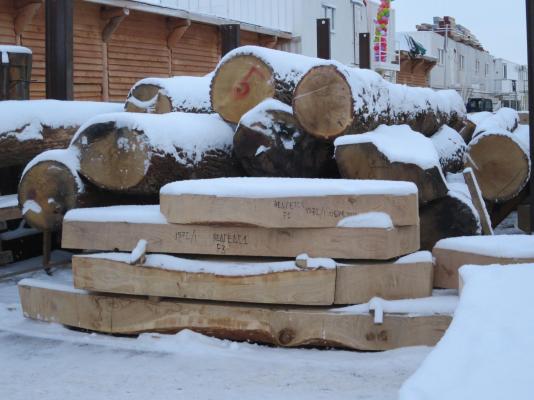 Interesting fact that wood is not dried or aged - instead, they make everything just from the "green" wood, but later apply some chemicals to reduce the moisture level and prevent rot. Unfortunately, I could not find out the names of the chemicals.The engineers of the replica faced the same problem as Peter I, the russian emperor who was managing the construction of the original ship. It is extremely hard to find a big enough oak tree in a good condition, without any major defects or rot. The wood for that ship is purchased from a very wide region, basically all european part of russia.To workaround it, some really heavy parts (like keel structure) are assembled using a laminated, multi-layered slabs of wood. It is close to impossible to find an oak of that size nowadays... You can imagine how hard it was to find and process such a wood in 1712!I was surprised that you can laminate and glue a part that will carry such load and weight.


- mtaylor, aviaamator, Cap'n Rat Fink and 2 others
-
5
-
-
The build is going slow so far - had guests, then few trips, had no chance to build for some weeks. But progress is quite boring anyway - producing frame by frame.
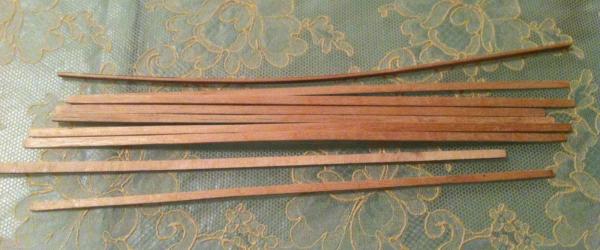
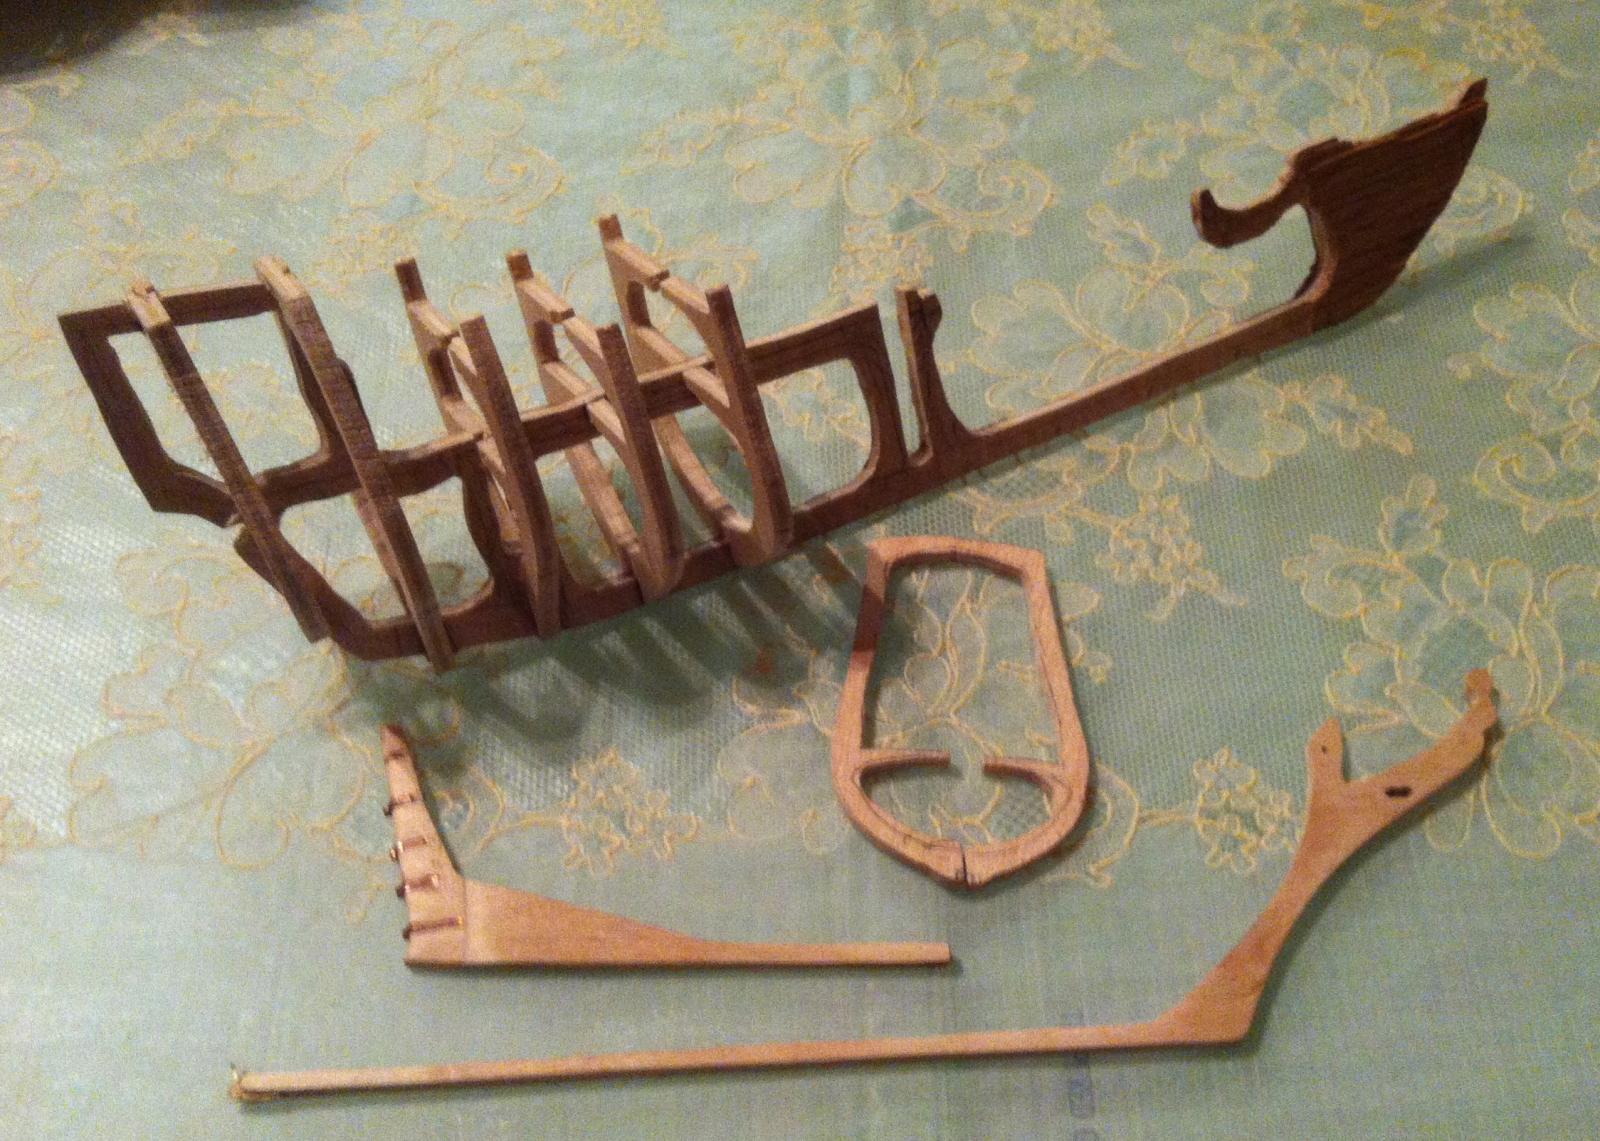
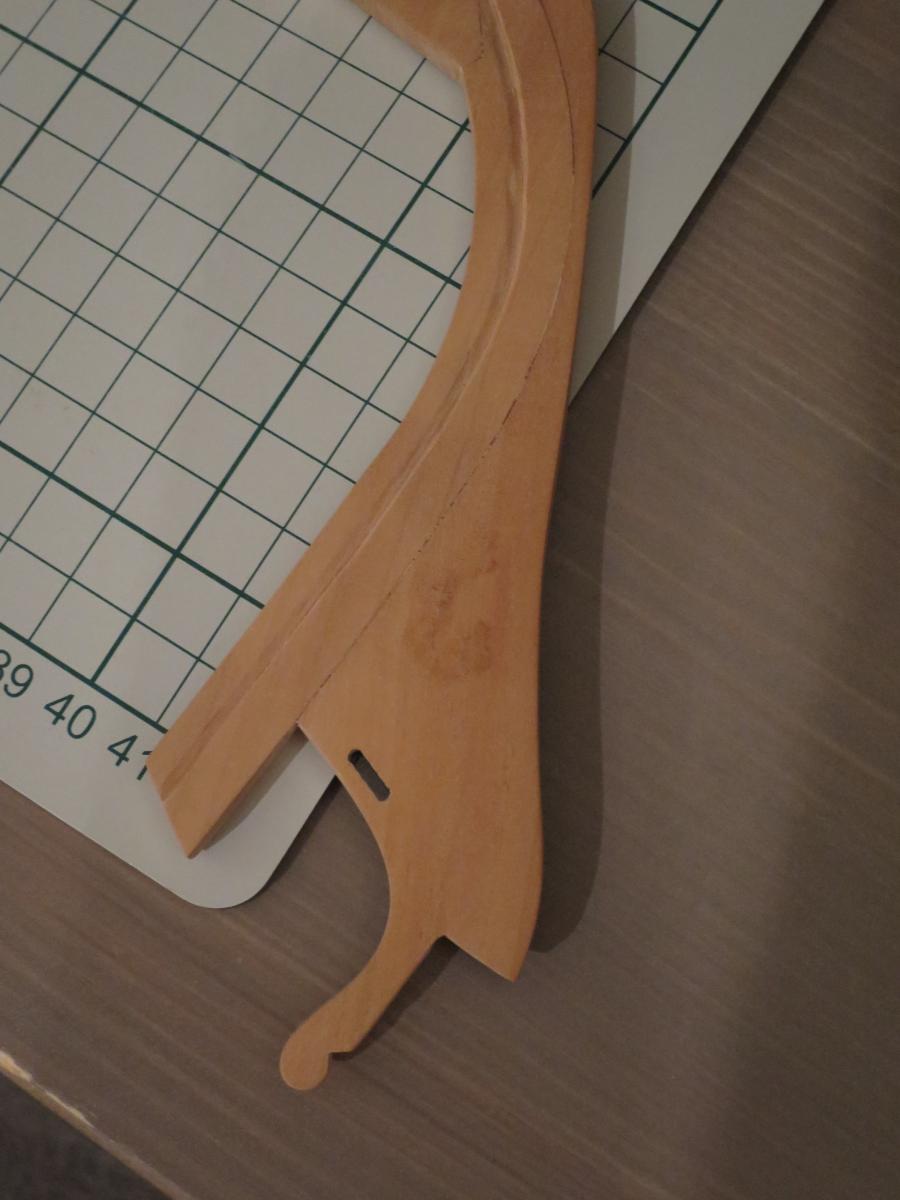
Found a thing in my parents' basement - a model that I tried to build when I was around 12 years old.
Locked in a summerhouse, with some plywood, sandpaper and a manual scroll saw
ok, I also had a book and some blueprints.Full scratch, I had no internet at that time, and havent heard of any kits. No modelling societies aither.
Looks veeery ugly, but hey, the only tool was a manual scroll saw.

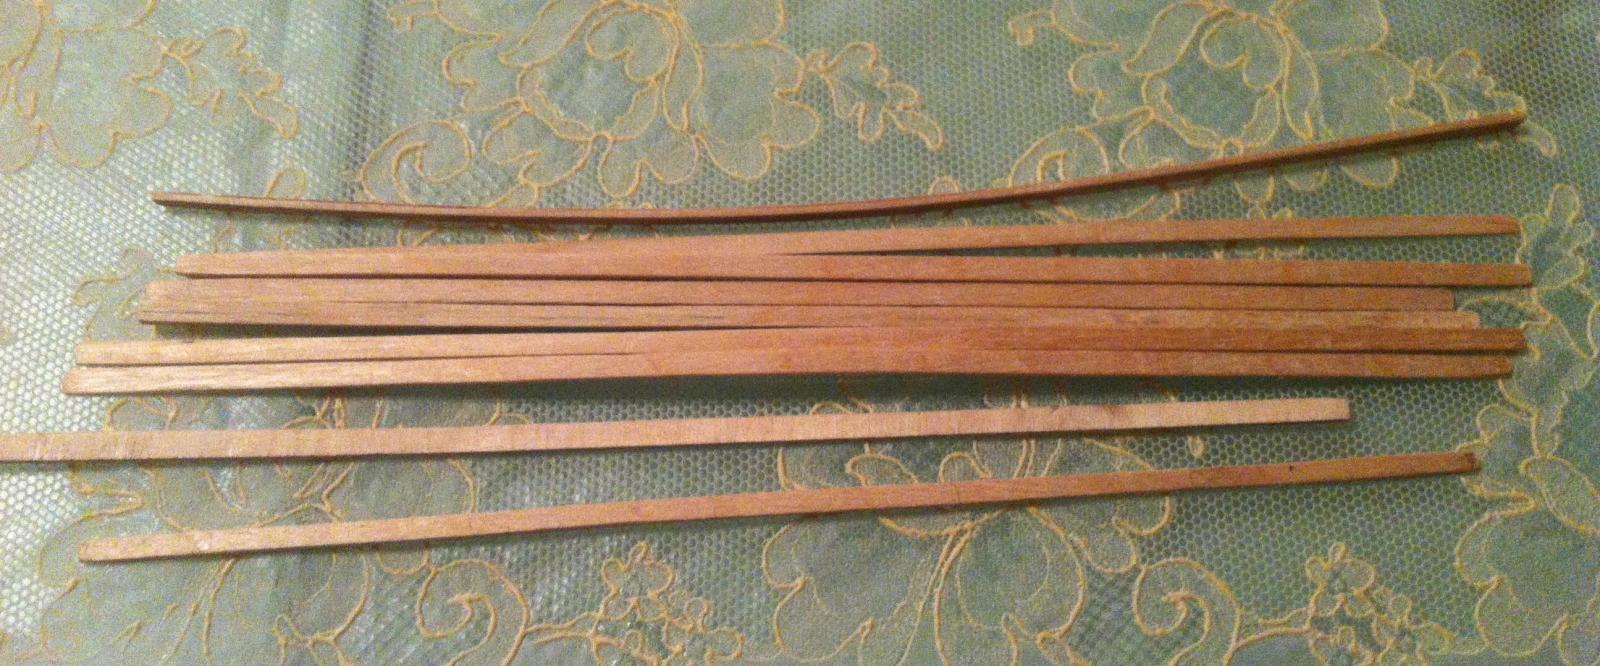
Planks were also cut with a scroll saw: draw a straight line, cut the wood, smoothen with sandpaper.
If only I can have soooooooo many free time as I had when I was 12...
- Mfelinger, Cap'n Rat Fink and mtaylor
-
3
-
Ok, got the toy: http://www.proxxon.com/en/micromot/27060.php

Thanks everybody for the comments, now making a straight and correctly angled edges is soo easy!
And it will definitely help with making a keel parts that tightly fit together
- AON, Elmer Cornish, Brucealanevans and 3 others
-
6
-
Ok, sanding block is not precise enough, and takes a very long time to sand..
So bought Proxxon 125 disk sander:
http://www.proxxon.com/en/micromot/27060.php
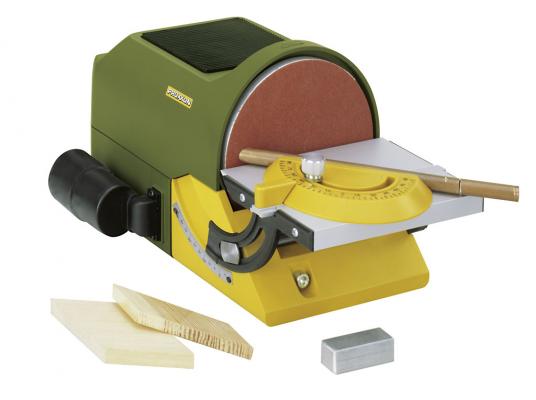
I am really happy with it, and it is very quiet on a low speed! Surprisingly.
I literally used it while my wife and kid were sleeping in a next room. Wow!
So I think I answered my own question... It is the cheapest disk sander, and also extremely quiet (on a low speed, that is more then enough for gentle woodwork).
-
Hi Daniel,
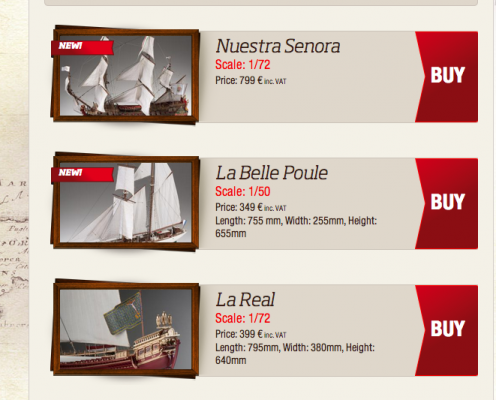
Thanks for sharing, those are very interesting kits!
Especially pleasing to see such a big selection of Viking ships.
Best wishes, hope you will get lots of happy customers here!
Minor piece of a feedback: it would be probably better to center photos in catalogue so the hull is in the center. Right now for most models the big part of hull do not fit into the small picture:
-
-
-
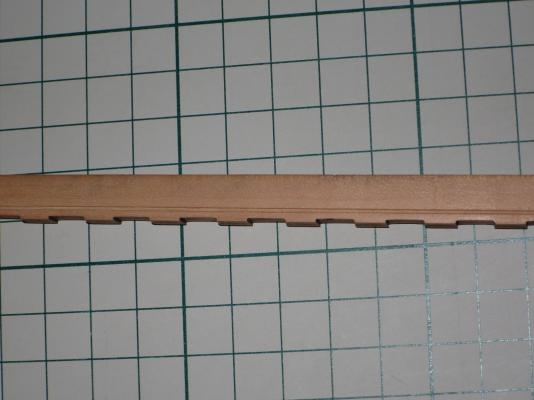
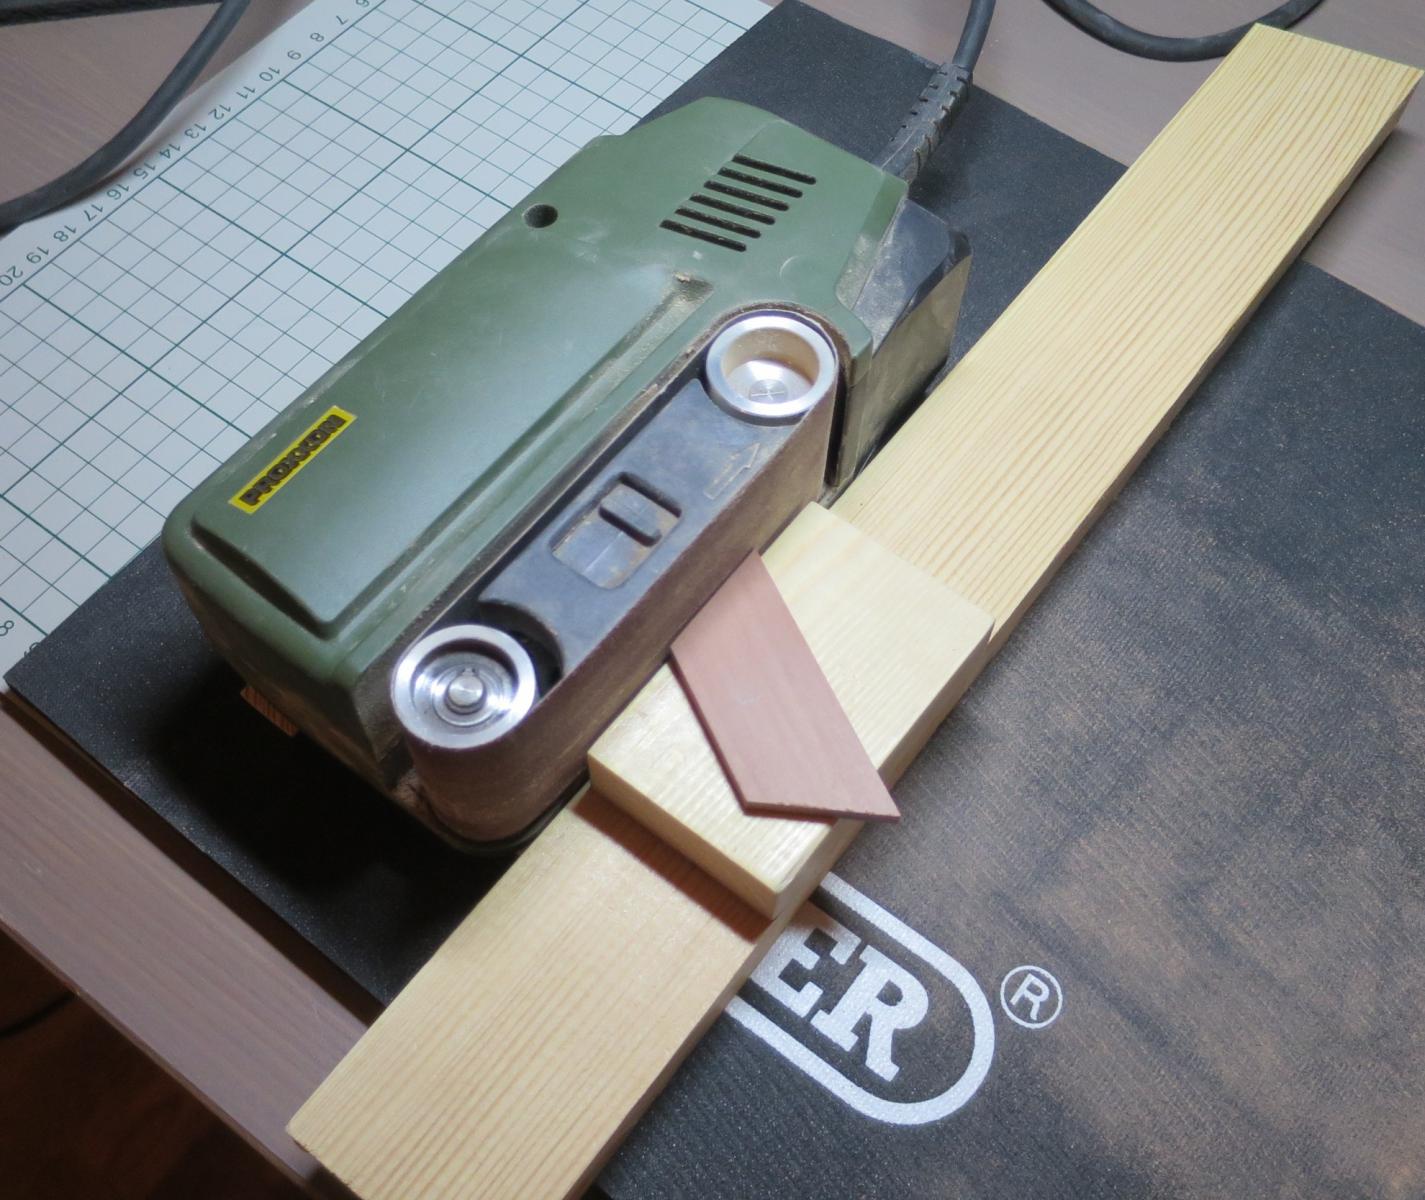
Cutting frames...
Using belt sander to make sure that edges of frame blanks are straight. it is not very suitable for that job, but do not want to buy disk sander just for that..

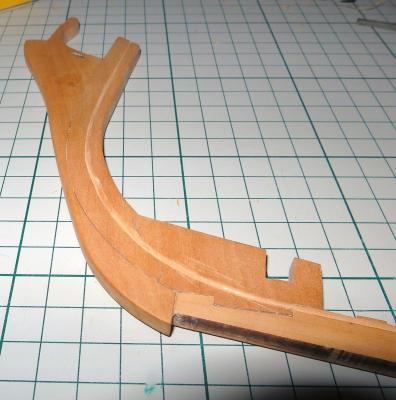
In a meanwhile, looked critically on a laser cut keel. It has some grey spots (that are not dirt, but wood defects)
And some funny shaped "stain" inside the wood right on the stem:
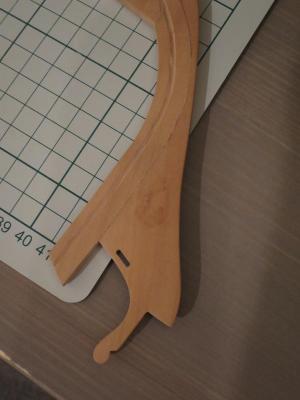
And more important - it looks too simplistic / unrealistic for my taste. You really can't build a ship with a stern made of two giant pieces of wood. I miss a complex joints, tar simulation using black paper, etc.. Stem would be very visible, and it should be done right.
So decided to re-do it using new pear (to match the colour of the frames)
Since I had no drawings of keel structure for exactly that ship - I made a mix based on some photos from other build logs, AOTS book about Pandora, etc.
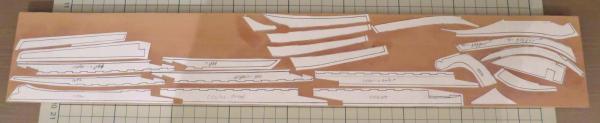
Loooots of sanding ahead! Maybe I really need a proper disk sander

- kees de mol, Saburo, Mirabell61 and 5 others
-
8
-
-
-
John, as far as I know, Hahn did have any rigging plans for Oliver Cromwell.
So you will need to do some research, like finding a similar frigate with rigging plans (for example, Pandora is quite close, and there is Anatomy Of The Ship book for it).
There is a very little documentation about Oliver Cromwell, so I doubt you can find a precise rigging plans...
-
Tried Arkowood (https://www.arkowood-lossburg.de/). Was looking for a high quality wood supplier in EU, who have at least pear, Castello boxwood and ebony. Looks like I found it!
Wood quality:
- Colour variation - very small, wood is finely selected.
- Thickness deviation: not more then 0.05mm!
- Finish: very smooth finish, feels like sanded with 300-400 grit.
Other:
- Custom size milling: no problem with that, if you do not see the right size in their catalogue - just mail what sizes do you need. The price level for custom milled wood looks the same as for the standard cuts they have in catalogue
- Communication: excellent, I received a reply to my mails in a few hours!
-
Wood cost - looks ok. Hard to compare, but looks on the same level as in US suppliers. However, you save some money on not paying VAT, customs, postage fees and extra shipping, that you are usually paying if ordering from US
- Payment methods: paypal is accepted.
- Delivery cost: quite moderate, regular postage price from Germany to other EU country. No feeling like you are getting overcharged for delivery.
- Processing time: they promised 1-2 weeks, I got the wood in 2 weeks. So quite fast, with correct estimations
- Packing quality: ok, no damages
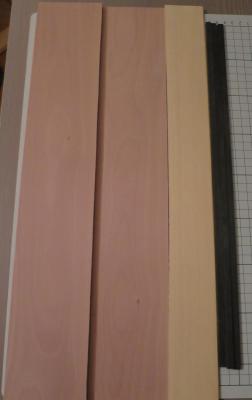
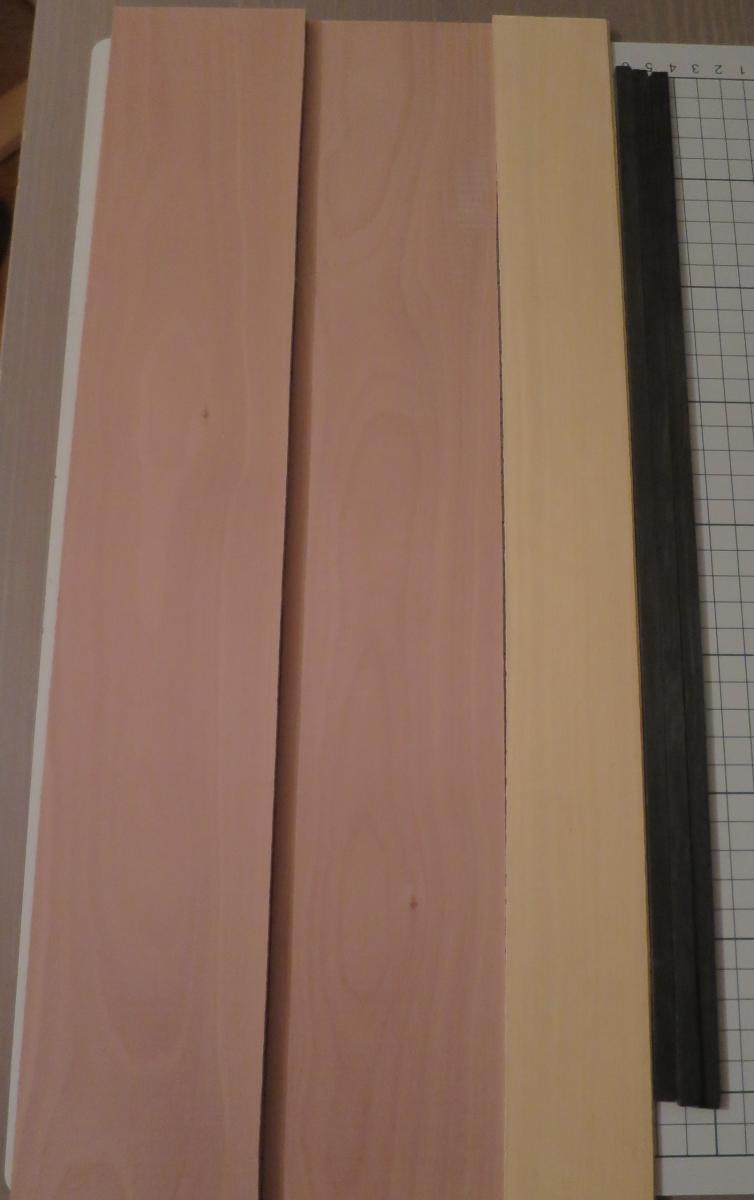
The photo of what I received.
Left - swiss pear (steamed pear), center - castello boxwood, right - ebony:

- Rolfg, mtaylor, zoly99sask and 8 others
-
11
-
Hooray! Received my new wood for frames.
- The colour variation is much smaller.
- Arkowood one is creamy and pink. Same colour as on Lumberyard laser cut parts, where the "prime grade" pear is used.
- Maximum thickness deviation is around 0.05mm (0.002 inches). My micrometer have a 0.05mm precision, so it is basically as correct as I can measure..
- Number of planks with defects (grey spots, etc) - 5 planks out of 60 (just 8%), which is quite ok
- Wood is already sanded with a fine grit
- Small wood deviation together with fine finish means a lot of time saved on sanding the frame to the uniform thickness and smooth surface.
- Planks are perfectly straight and not curved - saves some efforts when trying to cut the frame blanks on a proper angles.
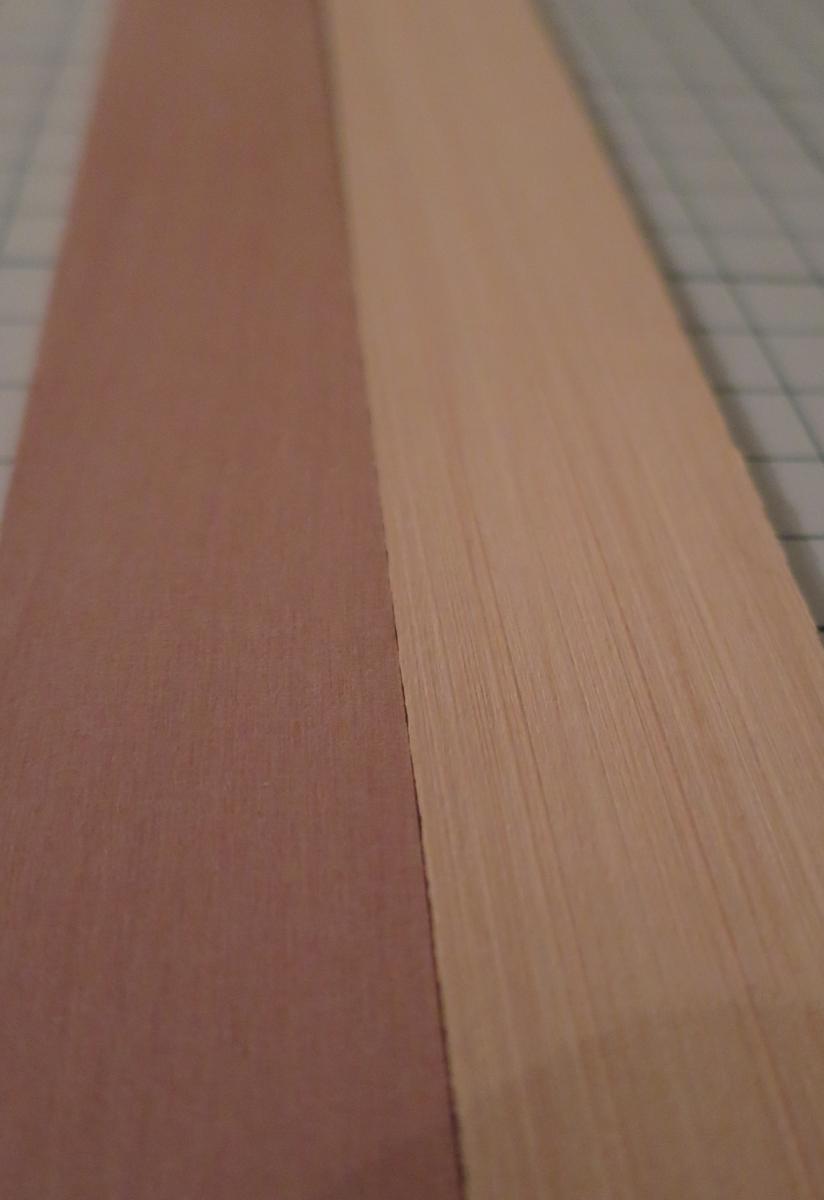
But better look on pictures. Both woods are called the same, it is swiss pear aka steamed pear.
Box on top - Lumberyard, box in the bottom - Arkowood.
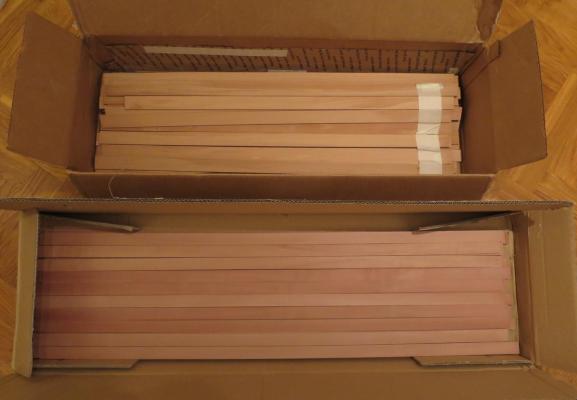
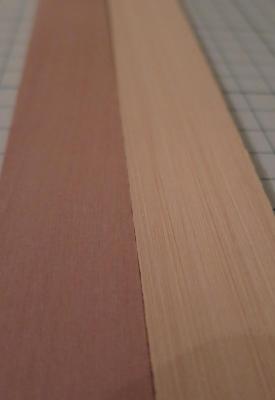
Left - Arkowood, right - Lumberyard. Notice the finish difference, Lumberyard wood is very rough, looks like sanded with 60 or 80 grit. Arkowood looks like sanded with 300-400 grit, or maybe even higher. It is very smooth!
Also ordered some sheets, just to try.
Left - pear, center - Castello boxwood, right - ebony
Ok, now I am finally happy with the wood I have, time to redo 9 frames that I already assembled
-
Great carving!
And an interesting wood color, soft and creamy.
Can you tell more about other projects that you have? Looks like you are making three fully framed models in parallel! Wow!
-
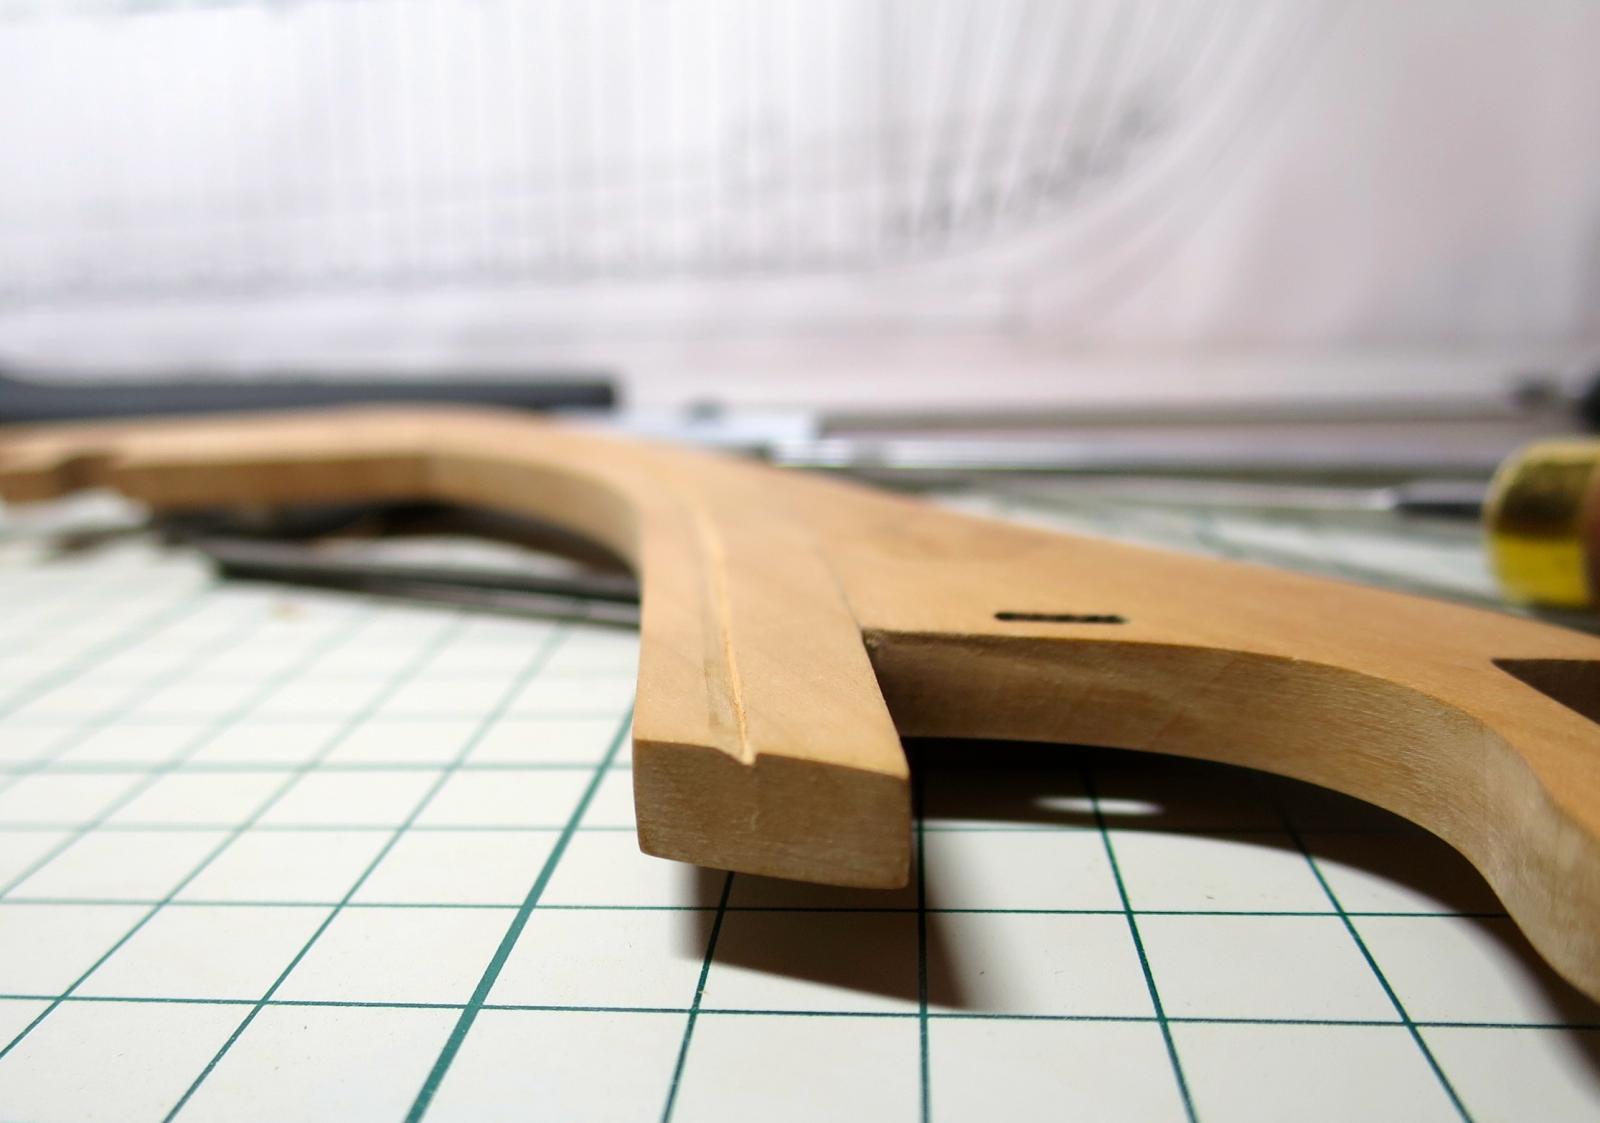
Looks like I am becoming a hand tools fetishist.. There is something nice about working with a high quality chisels and knifes - no noise, no sawdust, and you feel like making a pinocchio
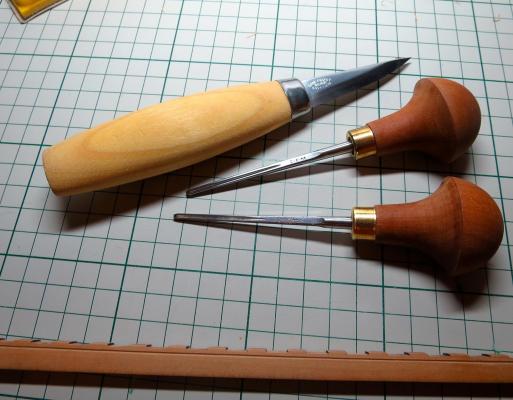
Especially surprised with the knife - it is the sharpest knife I ever held, it make a clean cut without any pressure, and it is heavy and sharp enough to ignore the grain direction!
But it reminds that as with any hand tool - you need to practice and learn a lot to use it nicely...
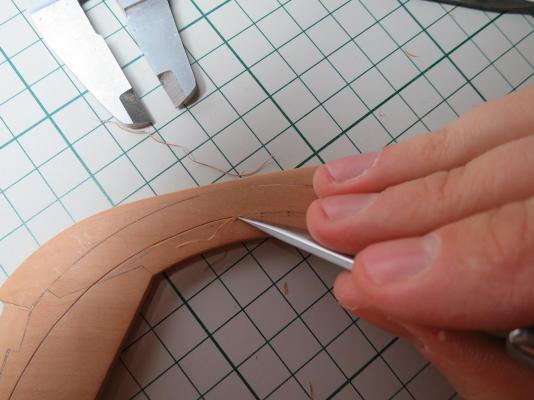
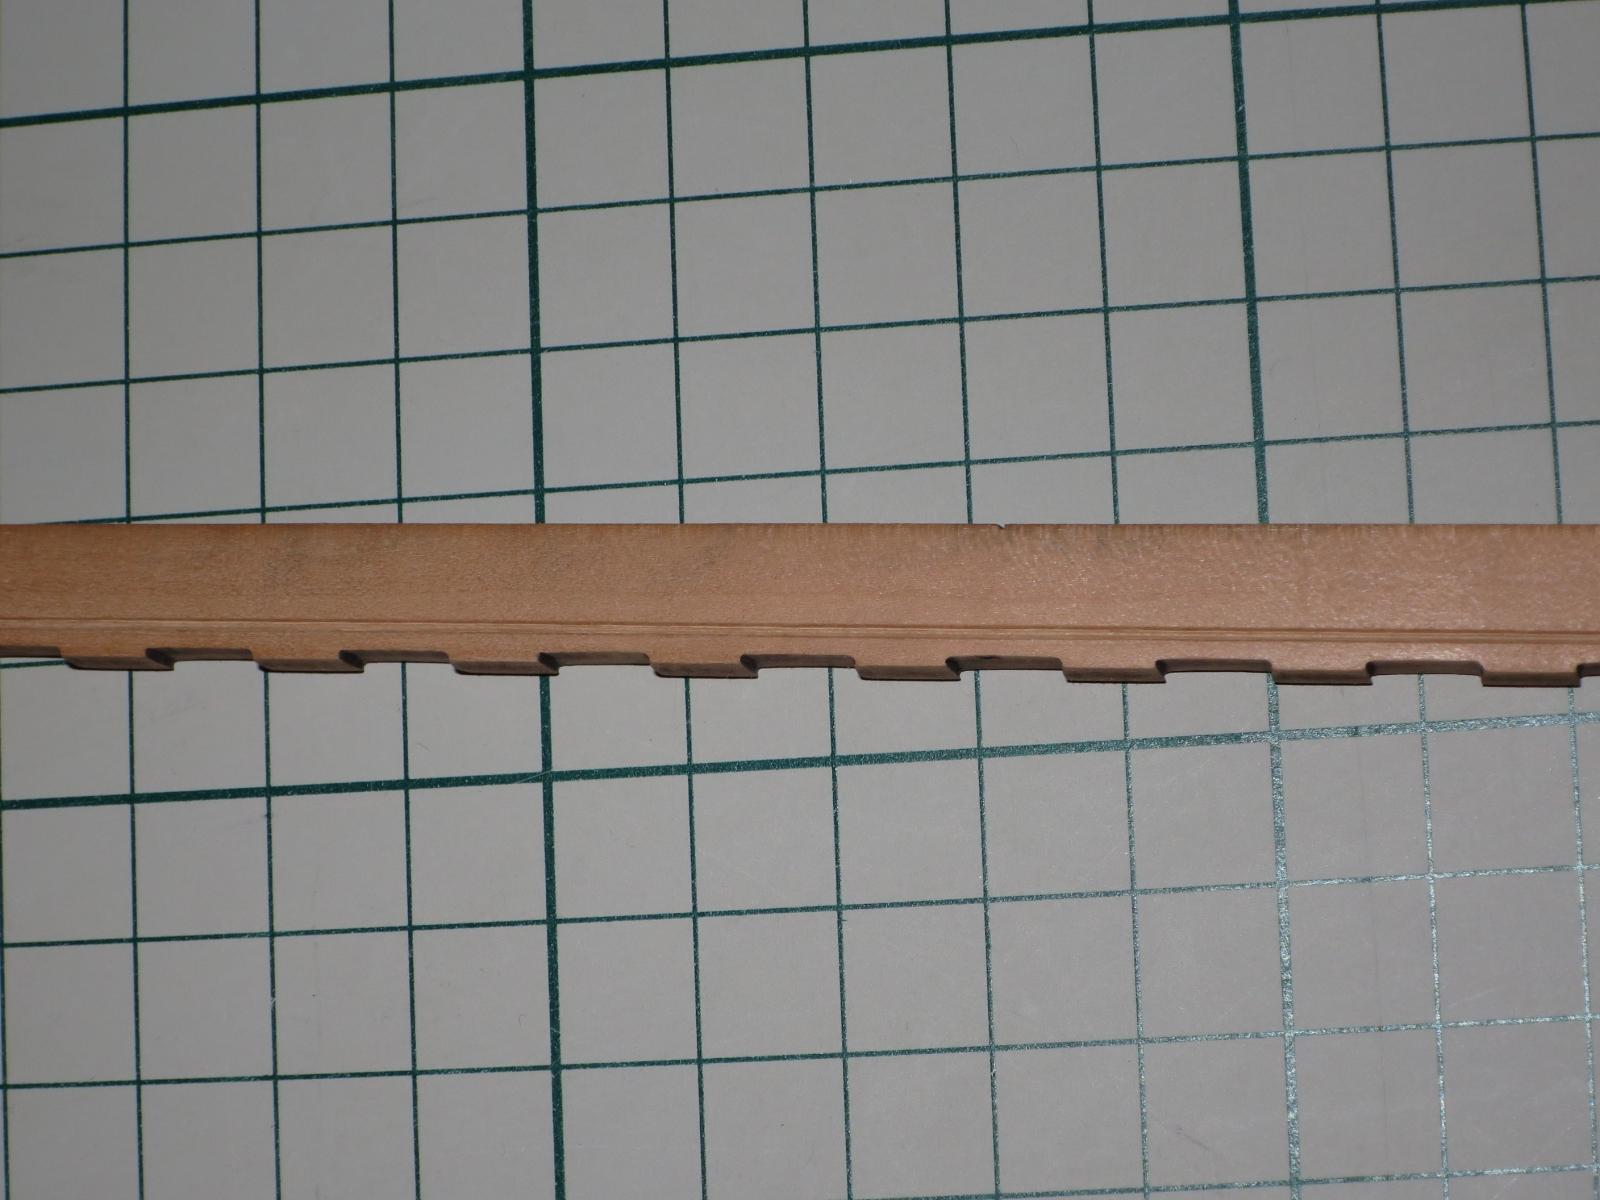
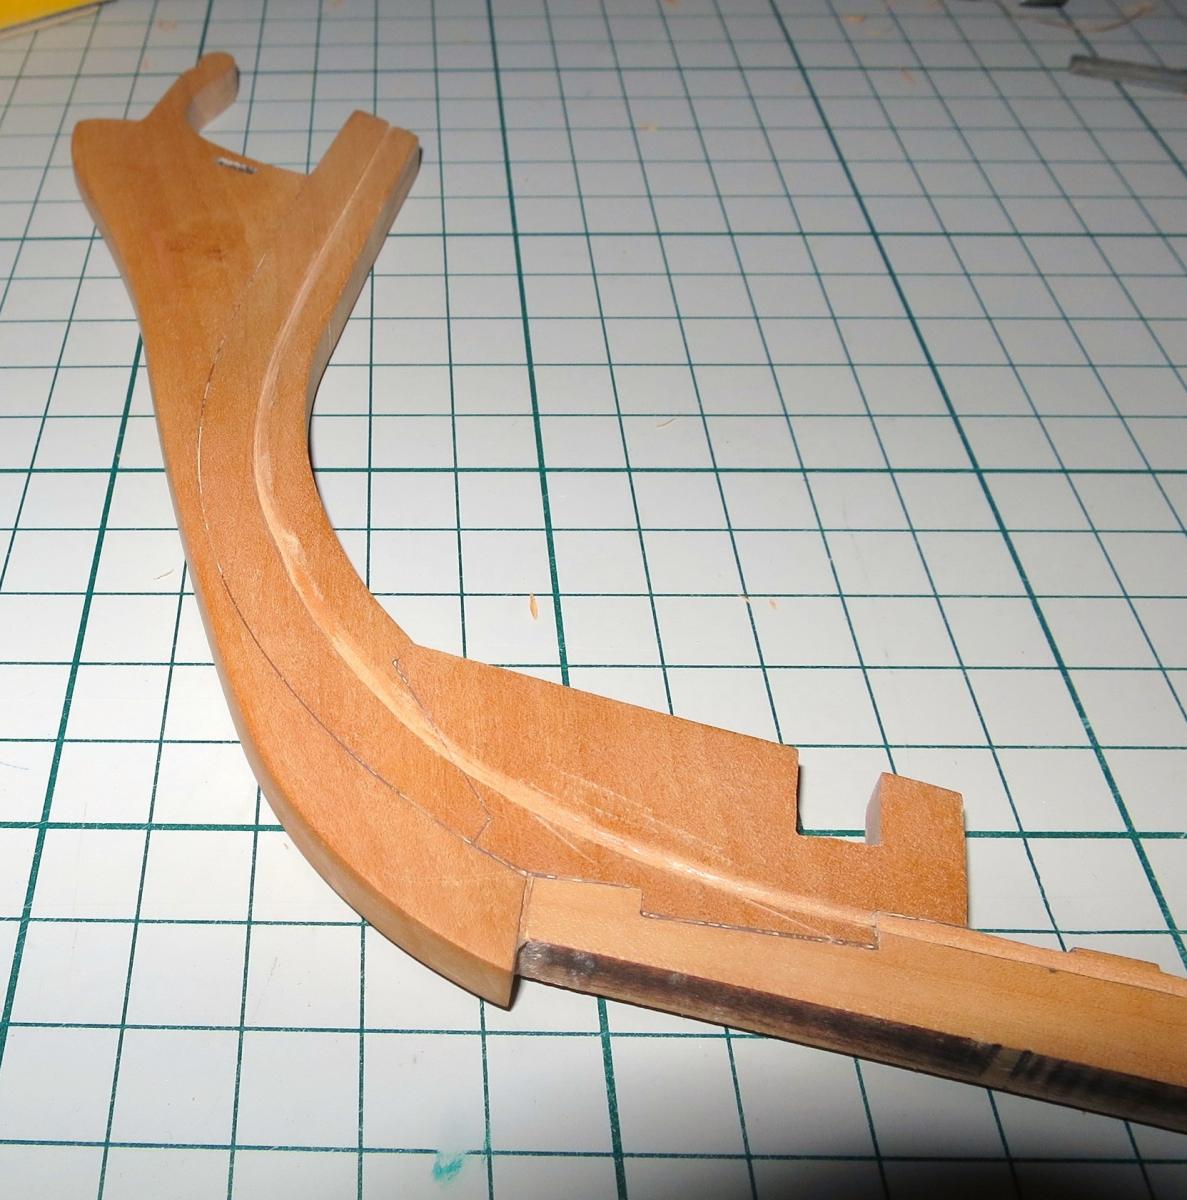
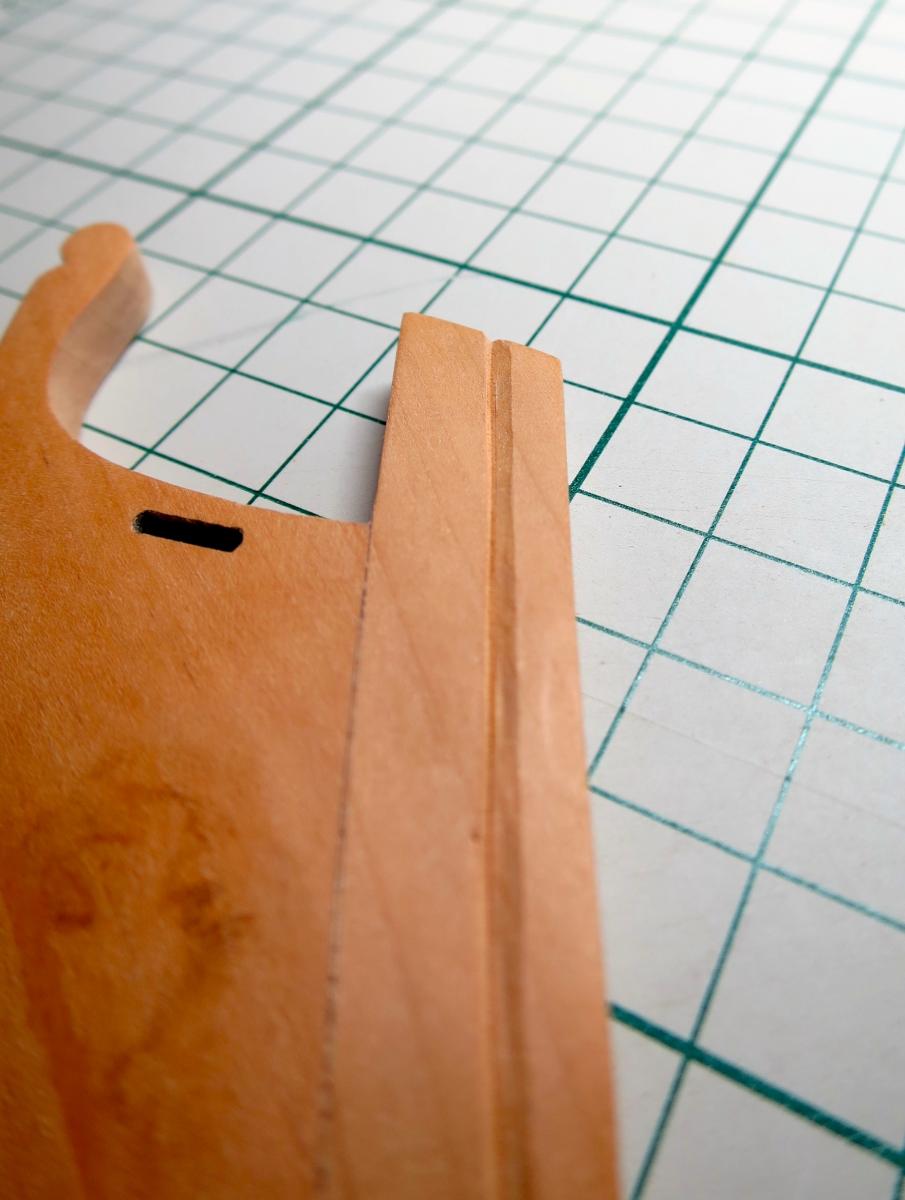
The shape of a rabbet was asymmetrical to meet the planks on a proper angle:

Result is not perfect, there are a few ooopsies, luckily most of them are on the inner side, which would be invisible.
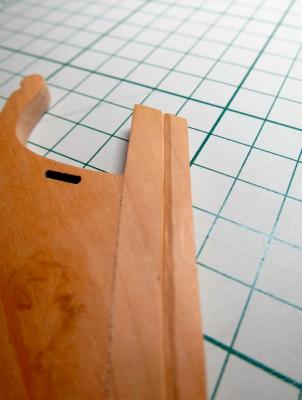
I will not cut a rabbet on a side that would be fully opened. Not able to cut it smooth enough to make it fully exposed.
- mtaylor, Mirabell61, AON and 16 others
-
19
-
Discovered an amazing tool shop that also sells a high quality Swiss made chisels
(Followers from Stockholm - it worth to visit Slöjdetaljer, but you probably already know about that place)
Got two tiny chisels - one V shaped, one U shaped, and a carving knife. Pricey, but a good quality.
Now practicing a lot to be able to hand-cut a smooth curved rabbet, and maybe even draught marks -
Nenseth, if they are shipped from Russia - 2 weeks is ok, it might take more. Russian post is mega slow, we are talking about weeks and weeks.
-
Mike on the Nautical Research Guild's web site two of the models I mentioned Polyphemus and Resolution feature in the member gallery. For Comet colour pics feature in David's book. It is worth buying for the pics alone.
Alan
Thanks for the info. It is just a bit, hmm, strange to have a model recently built, but with no pictures on the internet!
Planning to have TFFM and the Comet book as a Christmas present for myself.
-
Does anybody know where to buy Holly in EU/UK? Or it might be sold under different name?
It is also hard to google it, because all search engines are sure that I just did a typo in a word "Hollywood". Facepalm!

-


18th Century Longboat by divarty - FINISHED - Model Shipways - 1:48
in - Kit build logs for subjects built from 1751 - 1800
Posted
Congratulations! Very neat build!