HOLIDAY DONATION DRIVE - SUPPORT MSW - DO YOUR PART TO KEEP THIS GREAT FORUM GOING! (Only 20 donations so far - C'mon guys!)
×


Jerry
-
Posts
1,753 -
Joined
-
Last visited
Content Type
Profiles
Forums
Gallery
Events
Everything posted by Jerry
-
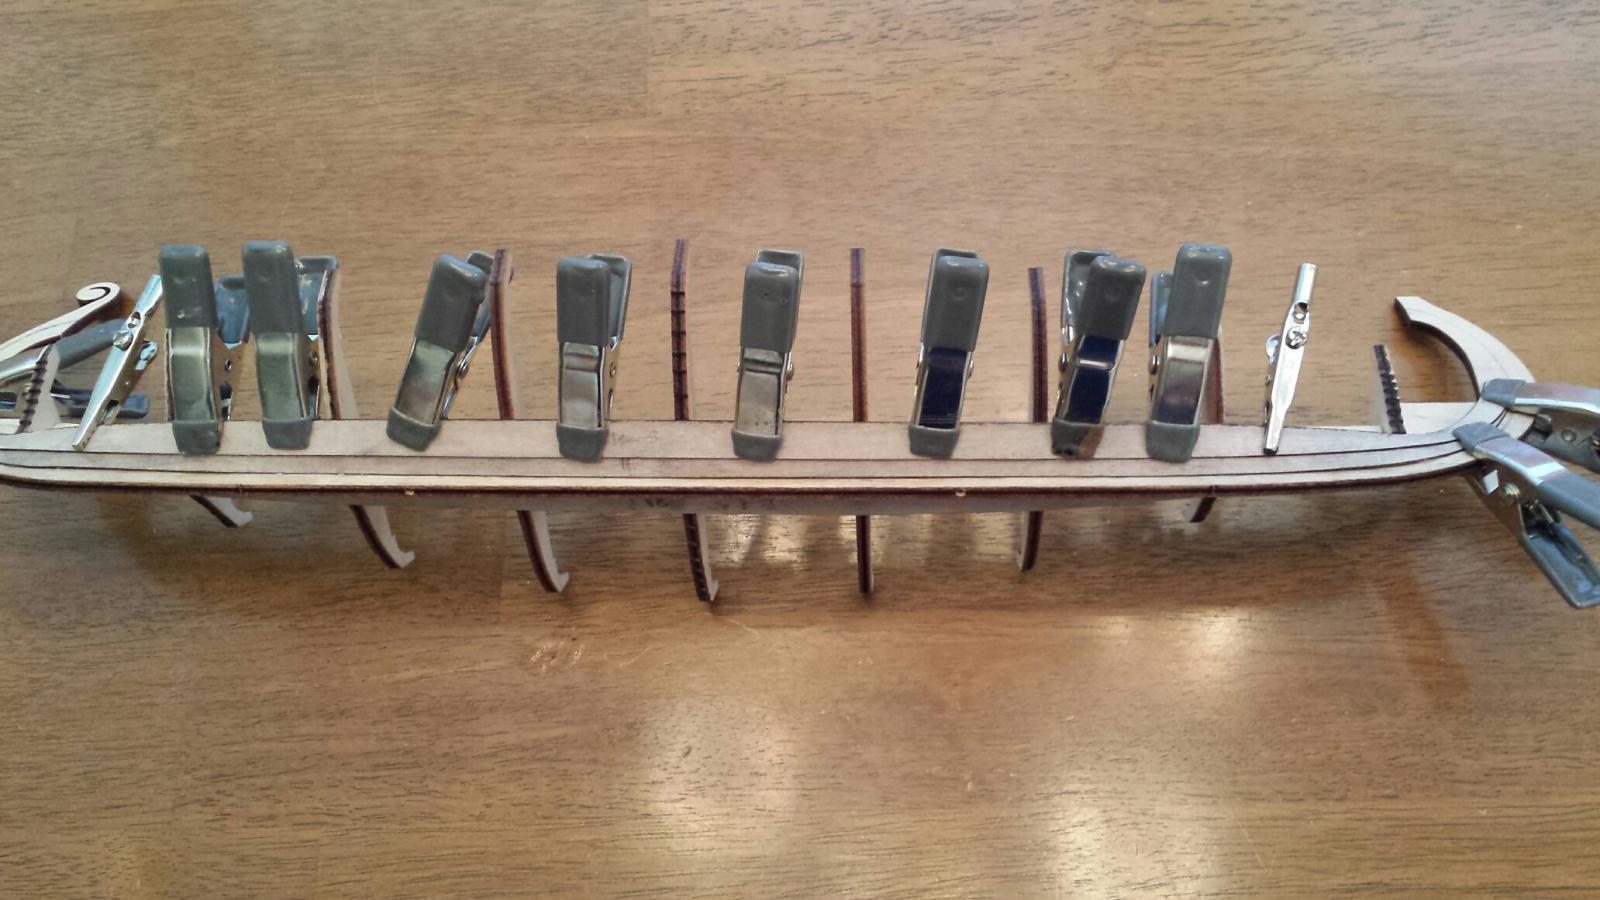
Good evening everyone... As mentioned above here are some pictures of the lapstraking process and the first 5 courses of lapstrakes. Fopr some reason I believe some of my log disappeared and I don't know why. I could swear there was a page 2 yesterday. Strange??????


-
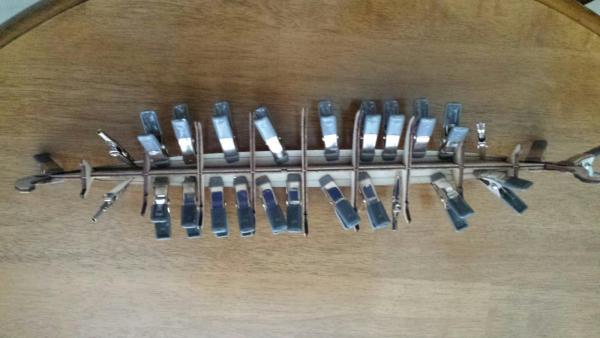
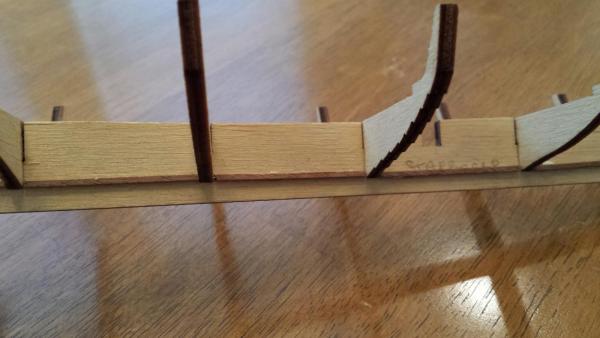
Hello Everybody... I am getting ready to lapstrake the frame but have decided to first add a 1.5x1.5 mm strip between the frames. The kit manufacturer would have one apply the bottom strake directly to the surface of the keel thereby ending up with a 1/32" edge glued to the keel. I decided to insert the 1.5 mm square strips to give the strake a larger gluing surface which I believe will make the shell stronger. I am providing a couple of pictures to help explain my idea. The actual lap straking will follow.. Best, Jerry

-
Hello Glenn.. No sense telling you how good your work is because it always is. Just wanted to mention that I used some balsa wood which i shaped for he gammoning saddles. That worked out ok. As for the bands. I ran them all the way just pass where the spiritsail yard mounts under the bowsprit. I hope I'm not misleading you. Good to see your nice job. Best, Jerry
-
Thank you Jparsley (don't know your name) for your visit to my log. I appreciate your interest and like you to know that you are welcome at any time. I look for comments (criticisms) as they are usually very helpful. My next step is to apply the strakes (skin) and I will post pictures of the process. Again. many thanks for stopping by. Best, Jerry
-
Hello Captain Steve and welcome to my log. I appreciate your visit and hope you'll drop by from time to time and offer comments and help when you wish. Yes, a clinker boat is really referring to a lapstraked hull and to prove it I checked with Wikipedia and learned that even Viking Ships were sometimes referred to as "clinkers." I agree that it's usually helpful to create a rabbet but in this case i found it unneccessary since the strakes are only 1/32" thick. Can you believe that they are 3 ply laminates and only 1/32" thick? They will be easy to feather in at the keel because they are so thin. Thanks again for the look see and stick around.. Best, Jerry
-
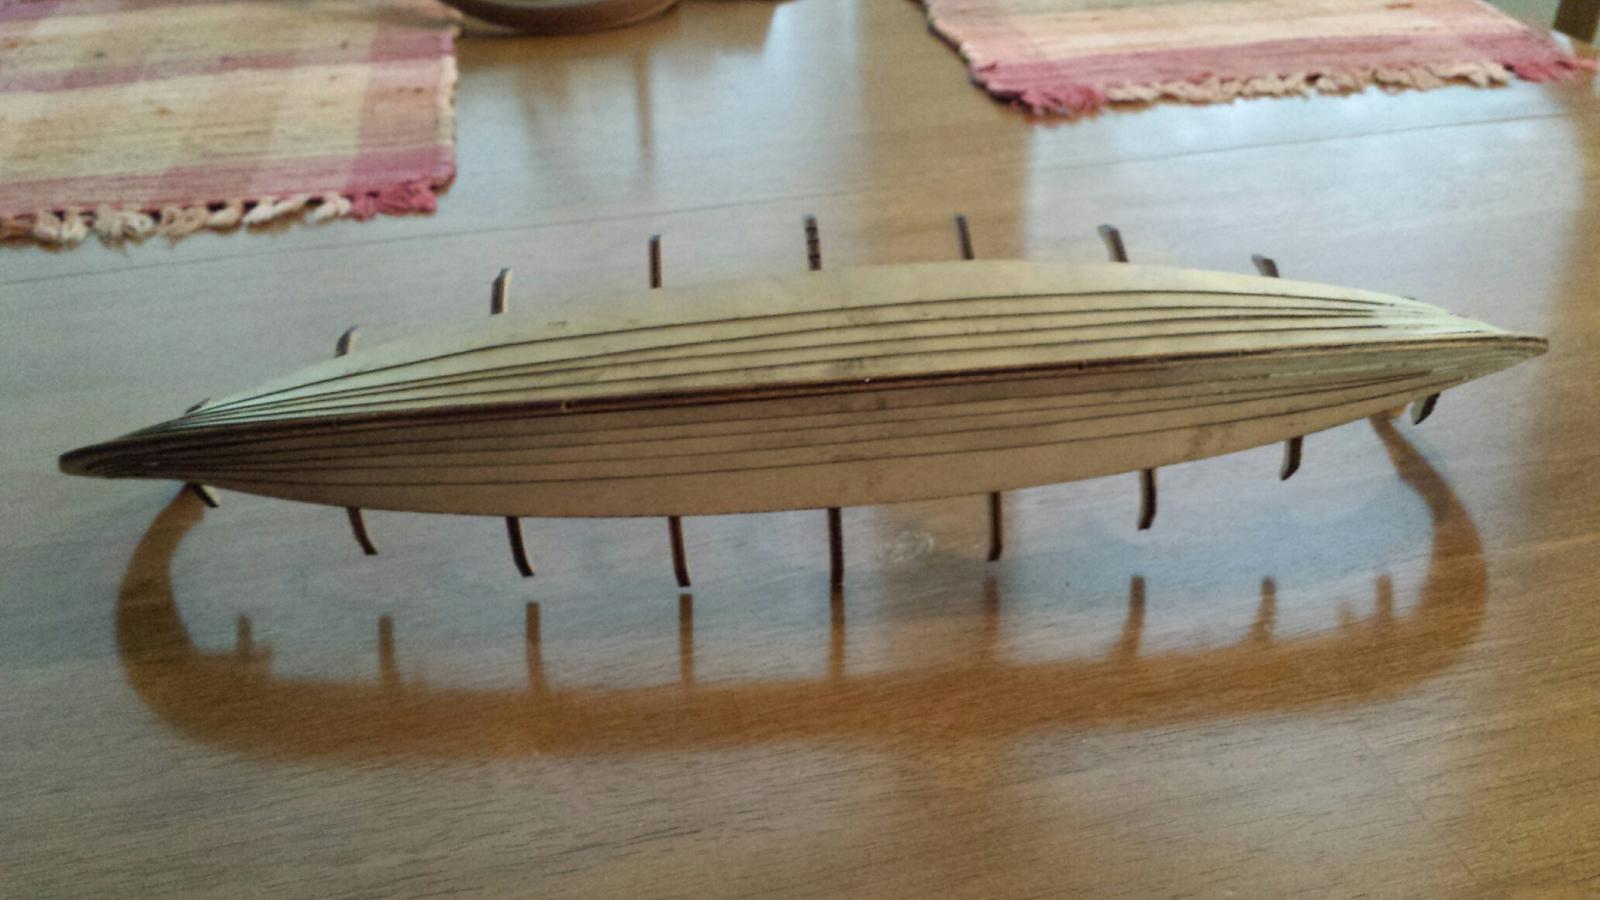
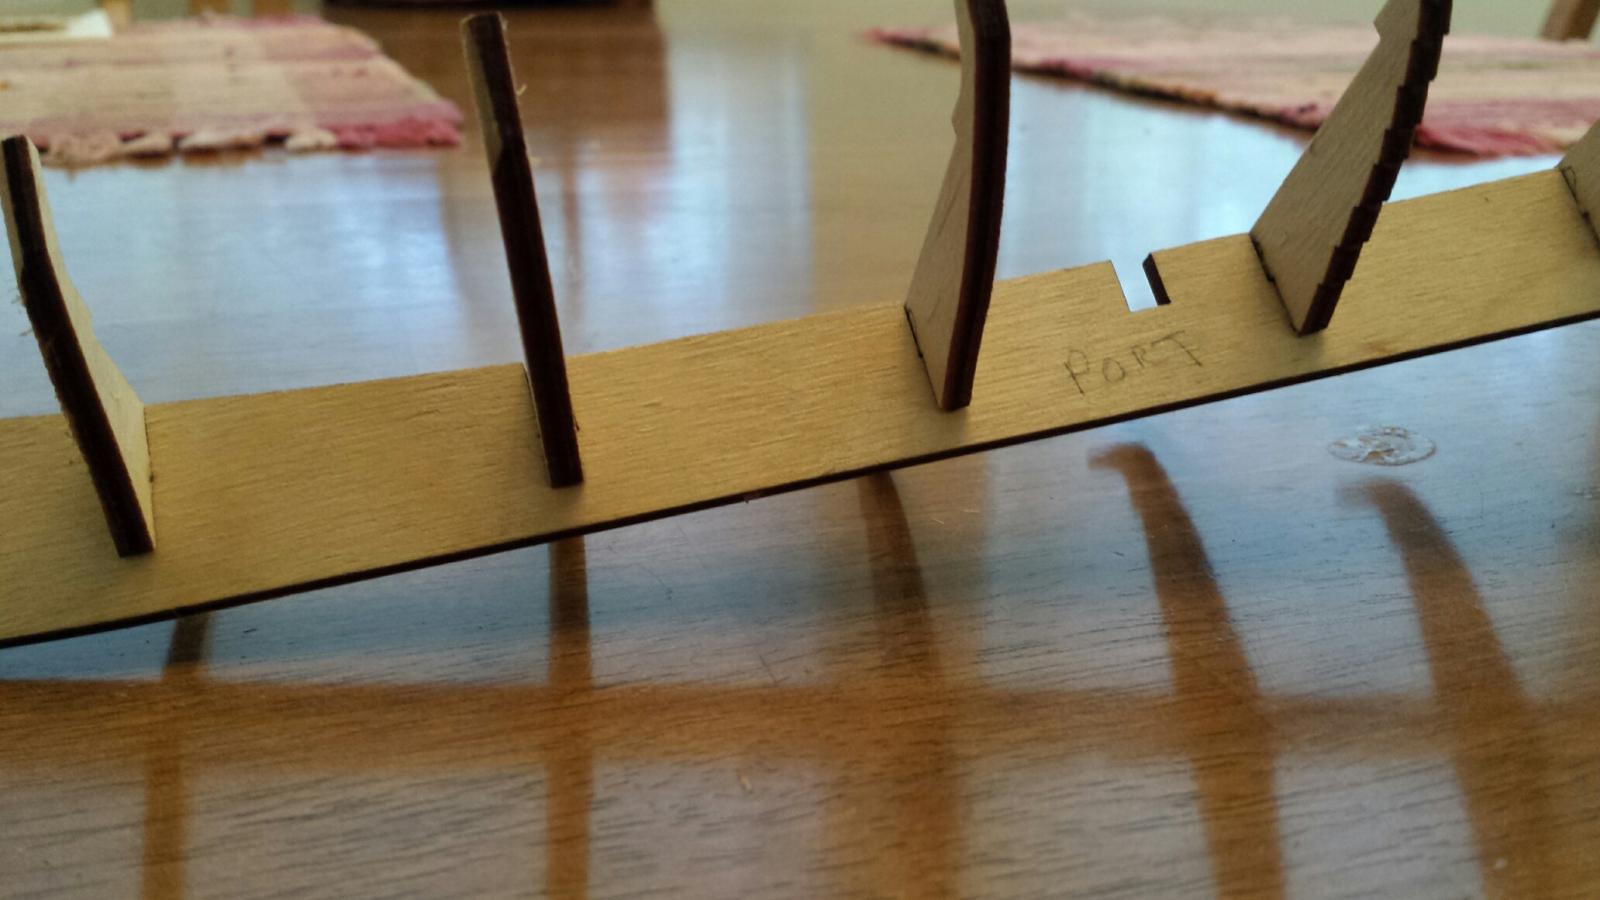
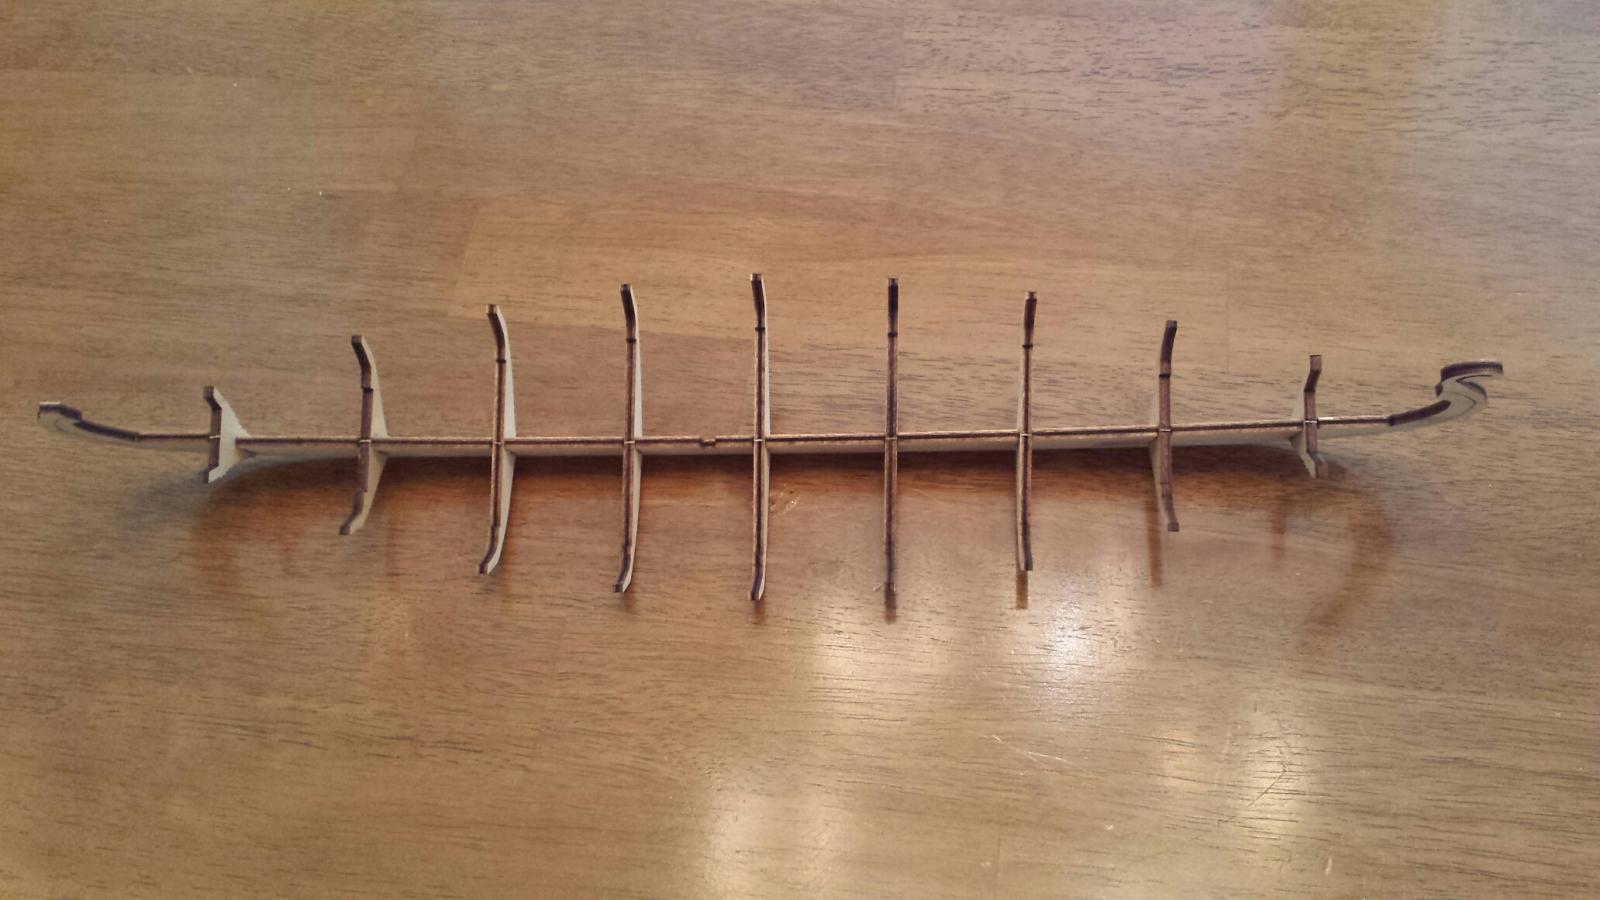
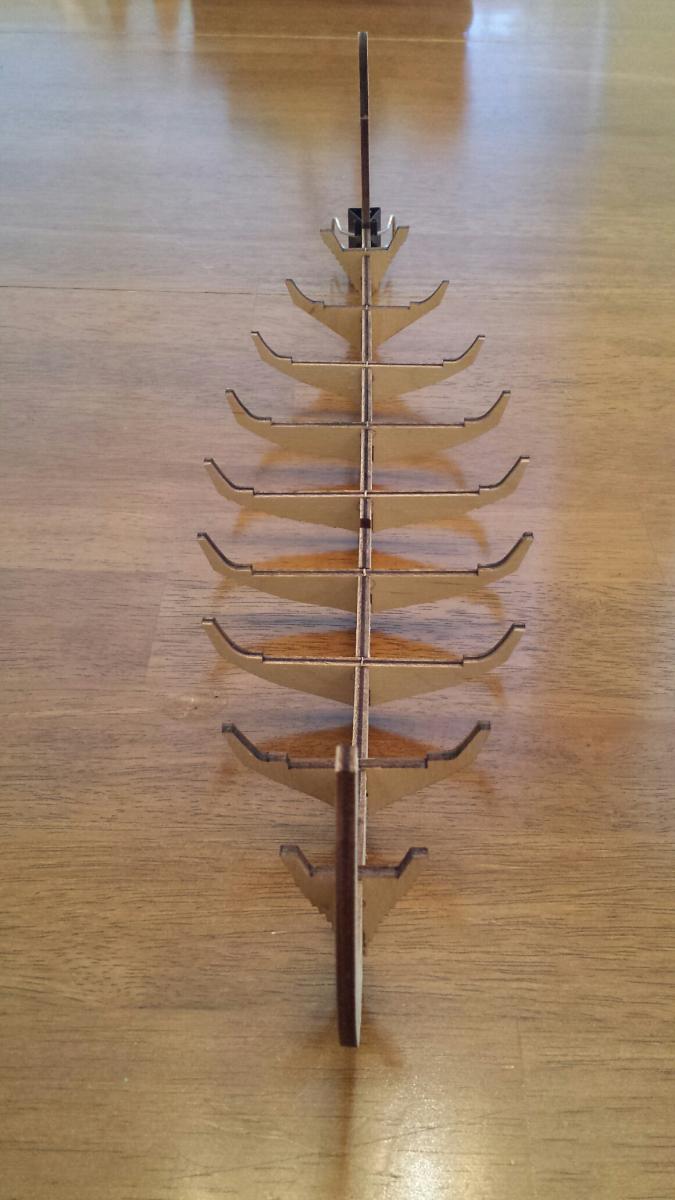
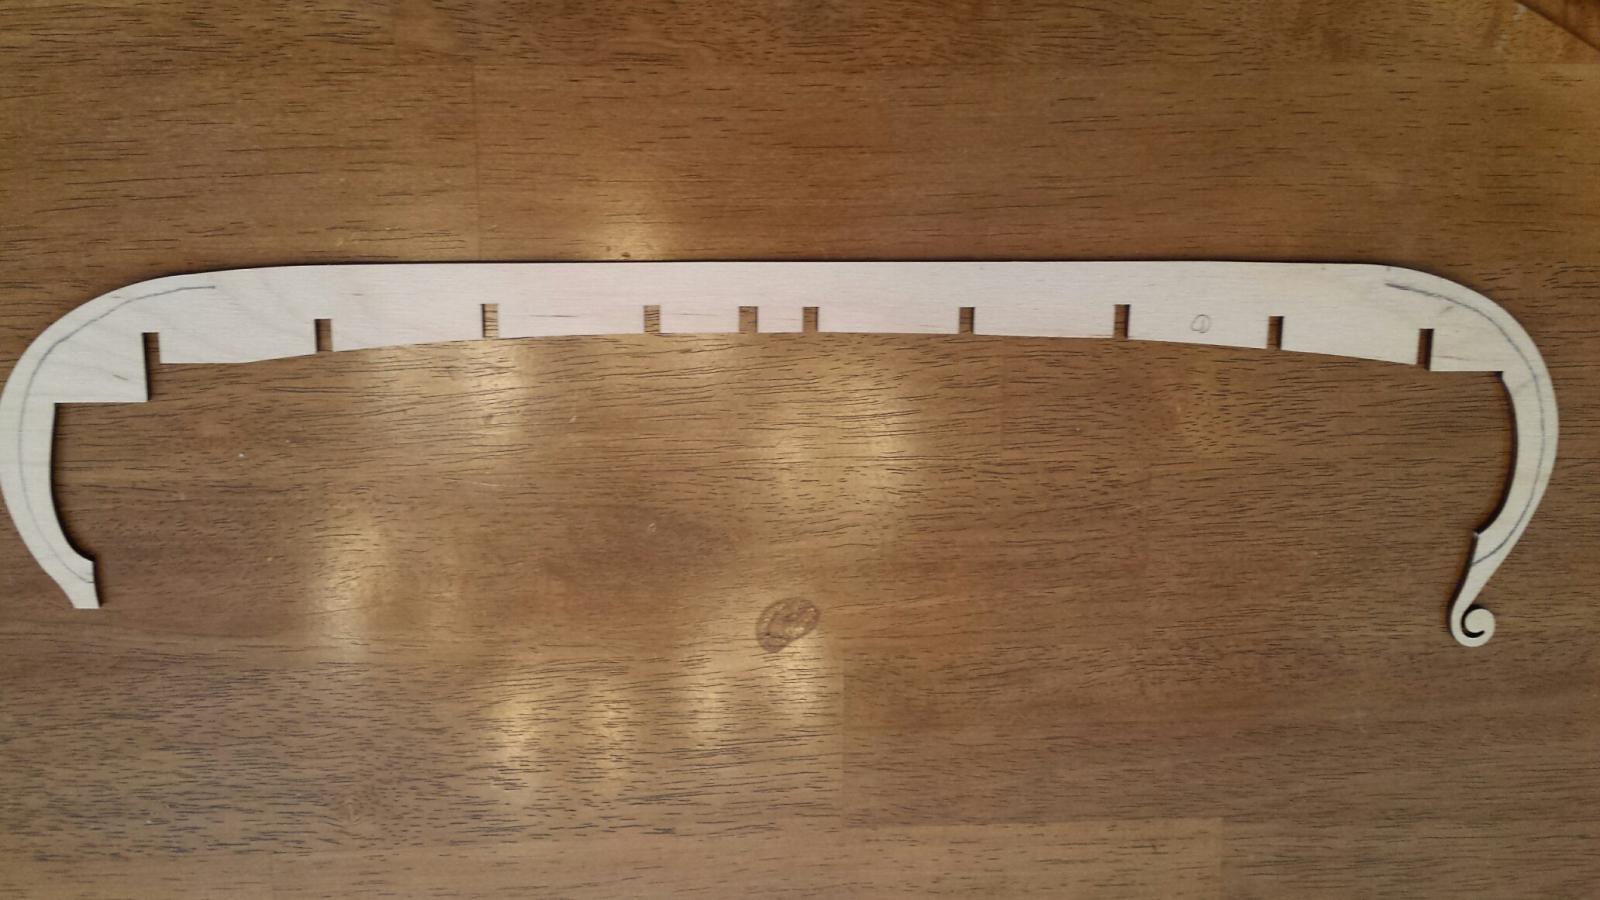
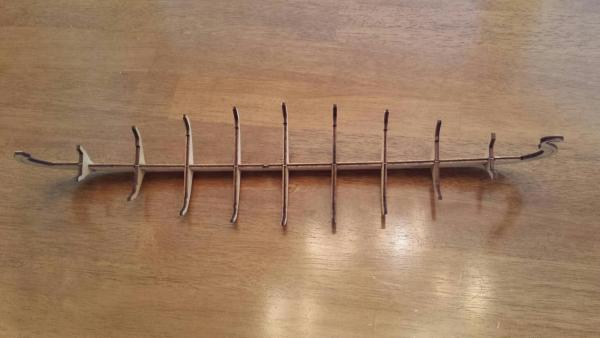
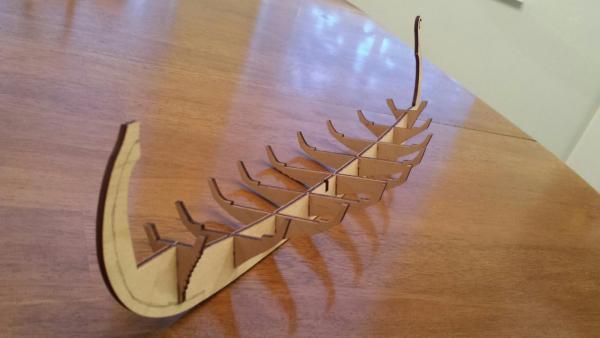
Good morning everyone... Here are three more pictures which show progress to date. There was no problem in gluing the frames to the keel but I would like to offer one word of caution. With all my other builds I found the slots in the frames and keel to be tight enough so that it required a little filing to get the frames to fit easily. With this build the frames were actually loose for the most part anf therefore necessary to support the frames in their correct position for a few minutes until the glue began to set. Here are some pictures of the keel with all the frames in proper posiiton waiting to be sanded for proper fit of the the strakes. Incidentally, I finally, after more than 60 years of boating, now know why certain hulls were called lapstraked. This model will have a lapstrake hull. There will be no strip planking but there will be strake planking, each strake lapped over the proceeding one. Please feel free to offer your comments; I learn much from fellow modellers. Best, Jerry

-
Nice to hear from you, Grant...Please do follow the build; I need all the help I can get. Best, Jerry
-
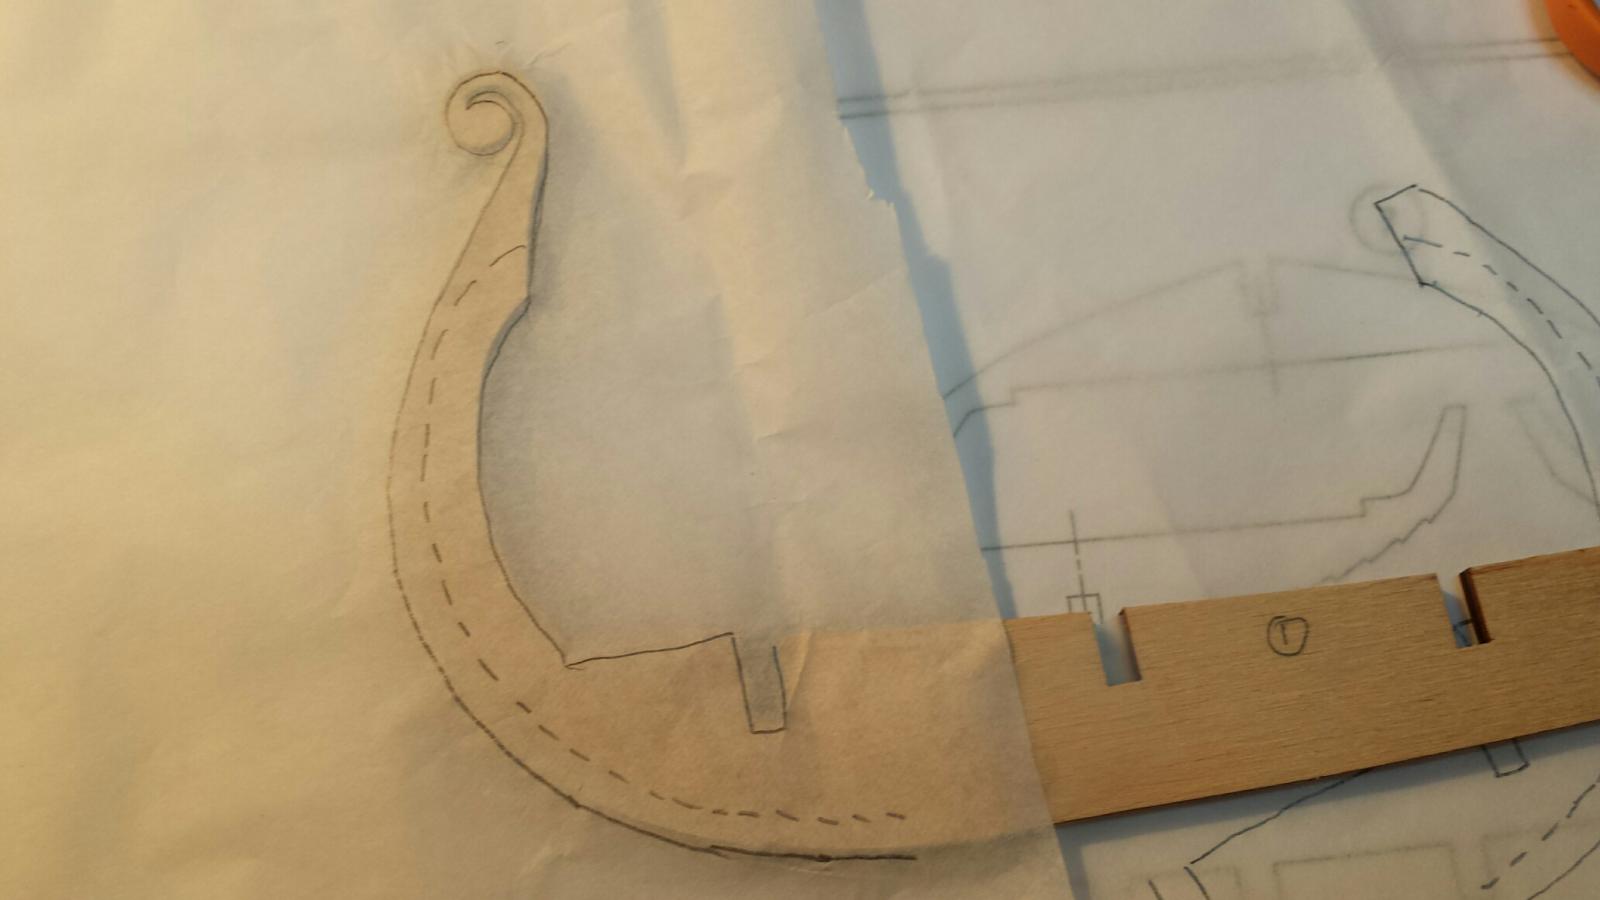
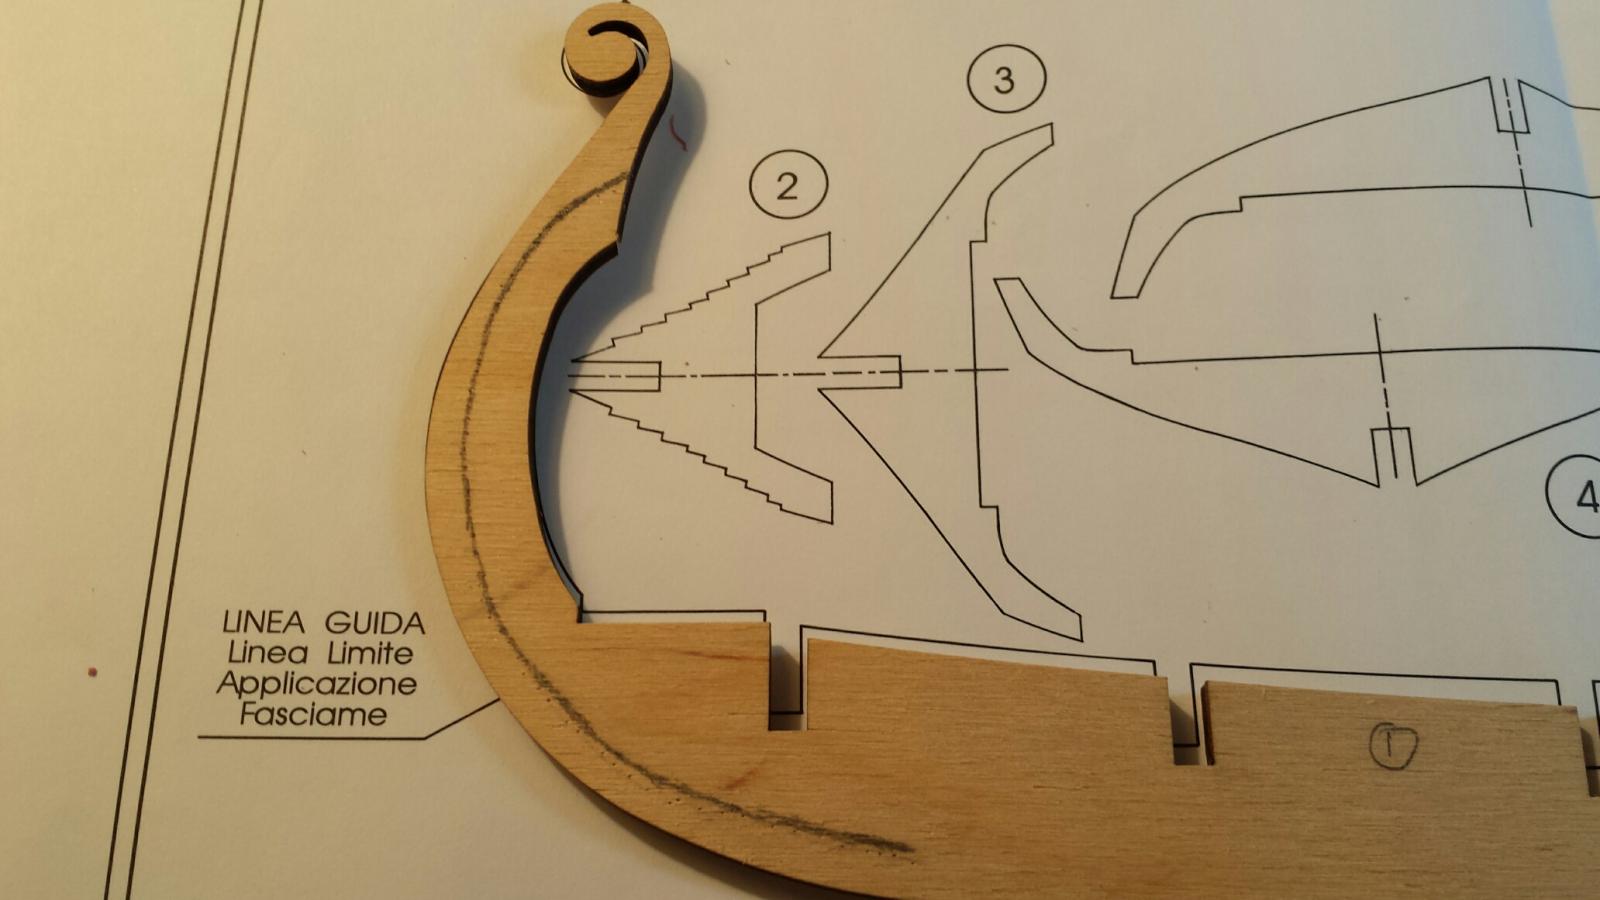
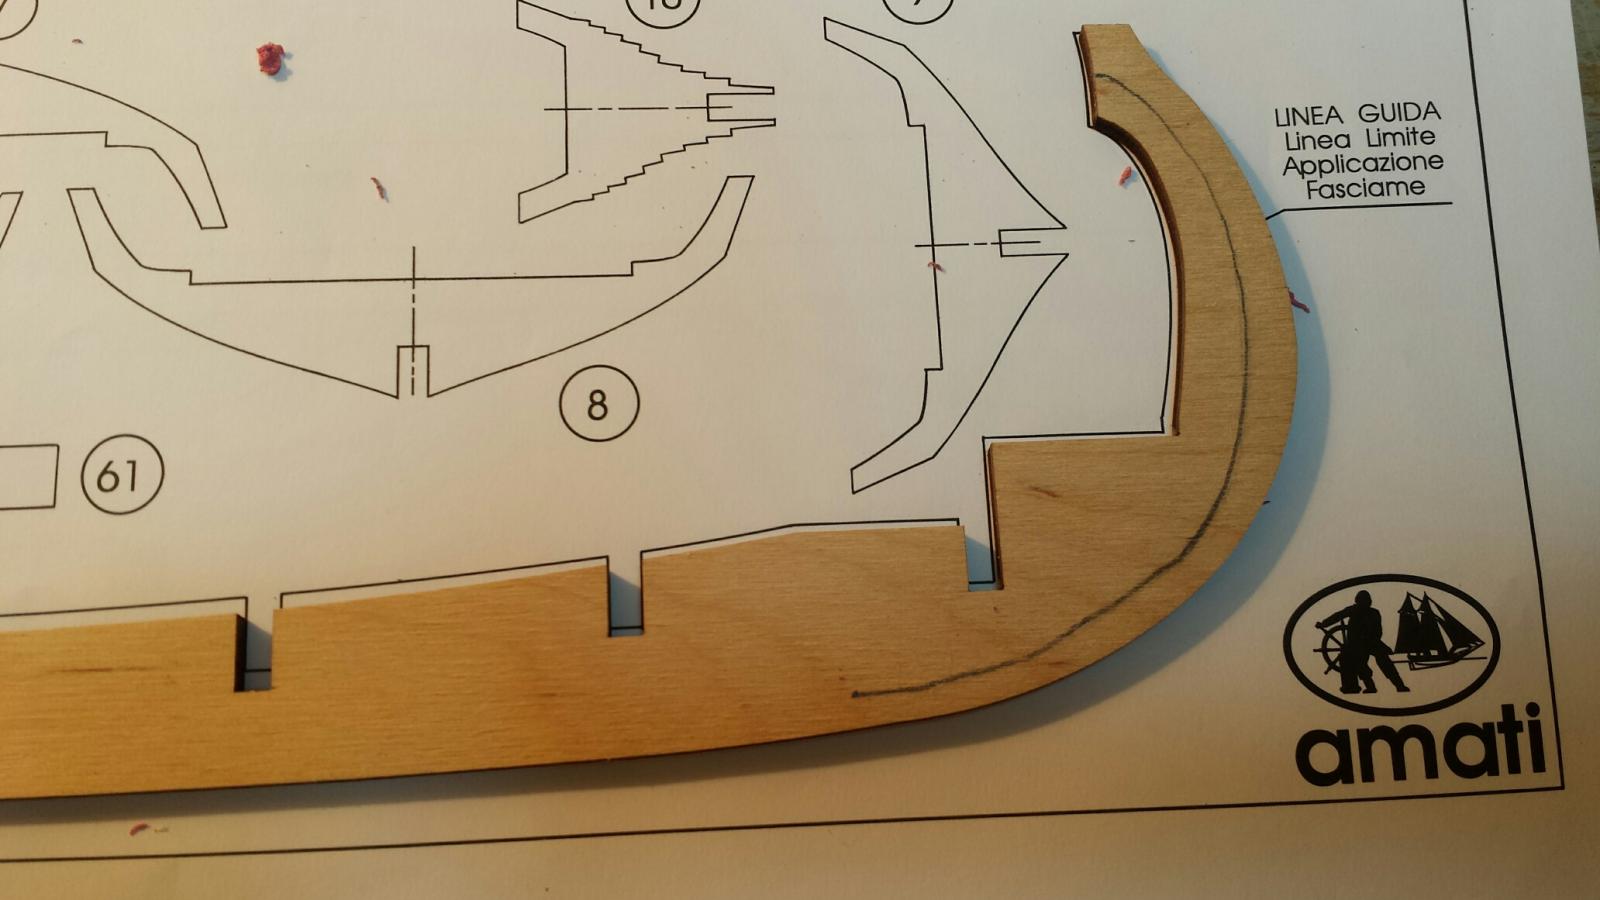
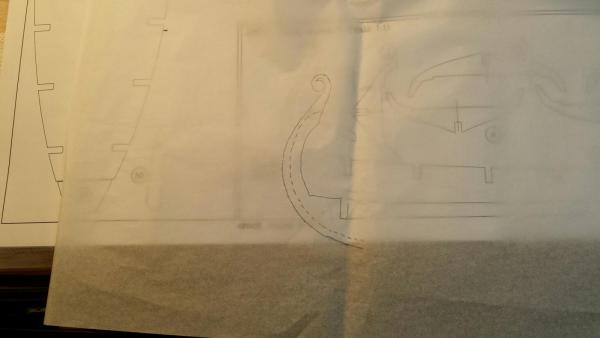
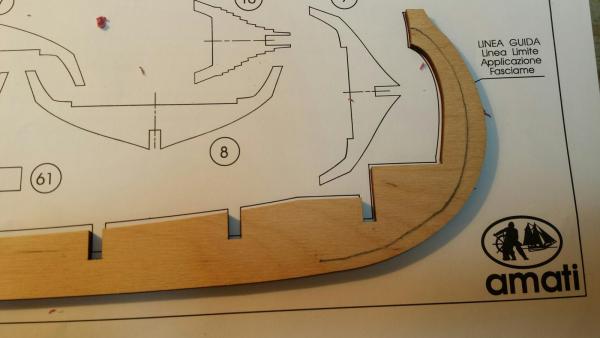
Hello again everyone... The very first step in this build called for by the instructions is to sketch a guide line at the bow and stern on both sides of the keel. This line will be used later in the construction for the correct positioning of the planking. Here are some initial pictures of the process I used to accomplish this. The first thing I did was to use some tissue paper (because of its transparency) to trace the guide line from the large plan sheet. I then transferred this line from the tissue paper to both sides of the keel. here are the pics of that process. One can read the caption of each picture by placing the computer's mouse over the photo. Hope everyone has a great evening. Best, Jerry


-
Hello Glenn. I see you found me. LOL....Thanks for your continued interest my friend. I'll be posting the very beginning of this build a little later from now. Have a great evening.. Best, Jerry
-
Good morning, Ken... Thanks for the visit. I'm not sure if the Drakkar can be considered a long boat but I called it that just because of its shape. In any event please keep your visits coming and offer any help you can. Best, Jerry
-
Dimitrius...Hello phile....real nice to hear from you again. It seems that there's never a dull moment. I hope I haven't decided to go from the frying pan into the fire. Keep in touch. Best, jerry
-
Hello Keith... Please look again and you'll see that I have posted the complete information which is just introductory. I'm sorry if I caused you any problem and again many thanks for your previous log. Best, Jerry
-
Hello Everyone, My name is Jerry and I have decided to try and build the Amati kit of The Viking Ship Drakkar. I chose this model because of it's appeal as a different way to go from the usual tall ship models I have recently constructed. (See below) I sincerely like the idea of an open, long boat type which I hope will enhance our growing fleet of ship models. Besides the Victory and Half Moon I have previously constructed the Cutty Sark about 16 years ago. I said OUR growing fleet because my Admiral caught the building bug, so simultaneously I am coaching her as she endeavors to build Amati's HMS Bounty. I felt my work on the Drakkar would allow me some time to instruct her whereas another complicated build, such as the HMS Victory, would occupy all my time. Of course, I may be wrong and find the Viking Ship complicated enough to load my mind and give me little time to assist the Admiral. I hope not or I'll probably never hear the end of it. I also wish to thank KeithW for having posted his build of the same boat as I'm sure I'll find it very useful during my period of construction. At this time all I have done is to remove the keel and frames from their laser cut sheets and as soon as there is something, hopefully useful, I will be happy to provide photos. It is my intention to photograph every stage of the buils which I hope will be useful to others and will also provide material for anyone who I hope will use it to offer any criticsm, positive or negative, Realizing it's customary to provide pictures of the kit box, the parts and plans, I have decided to forgo this with th eknowledge that the kit arrived complete and in fine shape. I wish everyone a great day and hope to post my initial progress soon. Best, Jerry
-
If you wear a shop apron all the little things you drop will land in your lap.
-
Nice going, Glenn. Looks like your new "toy" will come in very handy for a long time to come I did shape both ends of the jibboom to octagonal profiles. I found it handy for the jibboom to sit on it's little cradle mounted on the bowsprit, and at the other end it helped to mate the jibboom and flying jibboom. It gives one more surface to glue as opposed to gluing two cylindrical surfaces. I also flattened the aft end of the flying jibboom to mate it with the octagonical shape at the fore end of the jibboom. I hope this makes sense. Jerry P.S. My Viking Ship kit has arrived.....now for more Italian interpreting....
-
Best of luck and good wishes, Glenn, with your new gimmick. Now you can go back to being precise. Looks like it's meant for a hobby like ours. Your hammock cranes look good and you're really coming along. Hope you have many happy hours with what David wants. (He wants one of those....) Best, Jerry
-
Hello Tom, Nope, I didn't see anything on the History Channel. I'm waiting for the kit to arrive. I decided to try and build it because I wanted to do somwething a little different. The hull construction is single planked with laser cut panking which are not strips. Interetsting, i think. Best, Jerry
-
Hello Harmstronginga.. Sorry but I didn't get any message from you in my Victory log; at least I didn't see one. According to the parts list, the kit comes with 2600 copper plates. I hope this is helpful. Best, Jerry
-
HALF MOON by jct - FINISHED - Corel
Jerry replied to jct's topic in - Kit build logs for subjects built from 1501 - 1750
Hello J. Just wanted to pass along my condolences on the PP's brave try. Better luck next year. This is not meant to rub it in but just another reason to see how and what you're up to. I'm waiting for the Amati Viking Ship (Drakkar) to arrive. And I had better crack the whip as the Admiral has been away from her build for almost a week. But of course, she's a teacher and therefore is a hard working girl. Hope all is well, Jerry -
You're a busy guy...regards from Olive Oyl.... Jerry
-
Hey Popeye....Great work on your Half Moon...I agree with Lawrence that your ship boats are fantastic. Real nice work. So when is the log going to continue. Or am I missing something/ Best regards, Jerry
-
test
-
Hello Everyone.. This post to show by links to my finished builds Jerry
-
Love it, Glenn...Way to go Jerry
-
Viking Ship Drakkar by Amati.. Also will you please explain how one lists previous models built at the end of a post so that they appear every time you make a post Thanks, Jerry.