pirozzi
-
Posts
843 -
Joined
-
Last visited
Content Type
Profiles
Forums
Gallery
Events
Everything posted by pirozzi
-
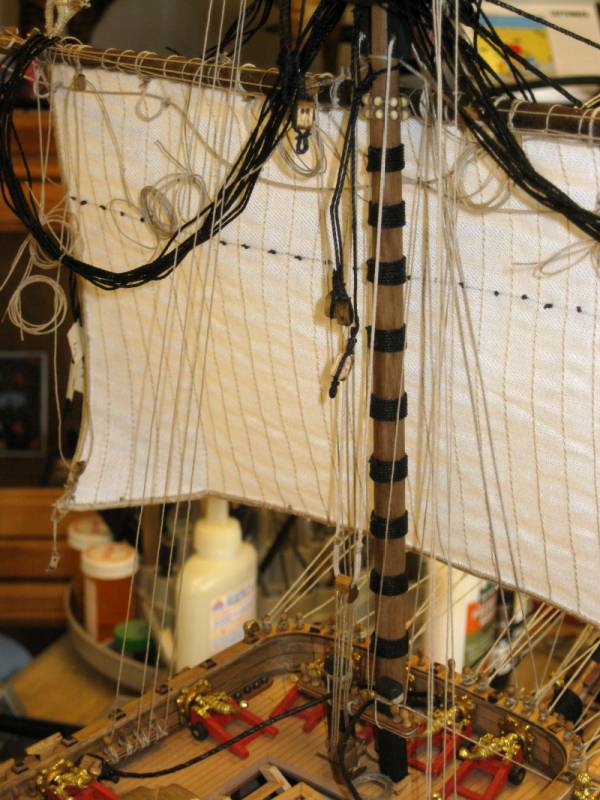
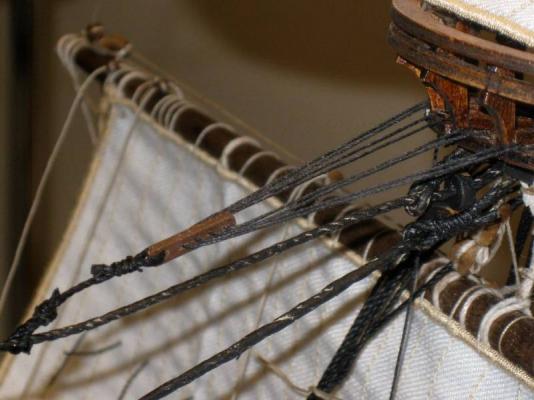
 These are crowsfeet. They were used to keep the bottom of the topsails from fouling on the mast tops. The kit does not address these but the SOS had them. I added them as per rigging diagrams of ships of the period. Vince P.
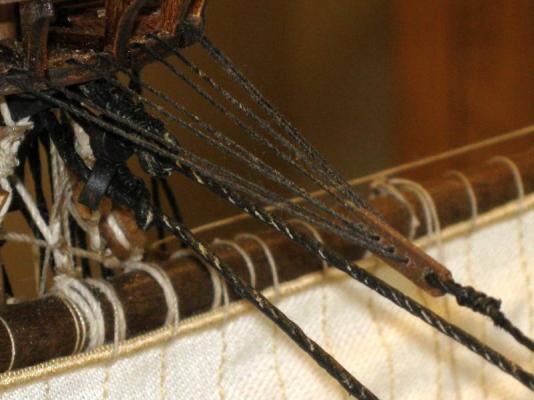
- 264 replies
-
- 1
-

-
- sovereign of the seas
- mantua
- (and 1 more)
-
Hi Jim, Balsa is easier to bend, that is true, but it does not hold a nice round bend like the harder wood does. I just planked a ship with balsa for the first layer and found this out. I had to fill in several area where the wood took uneven bends. Vince P.
-
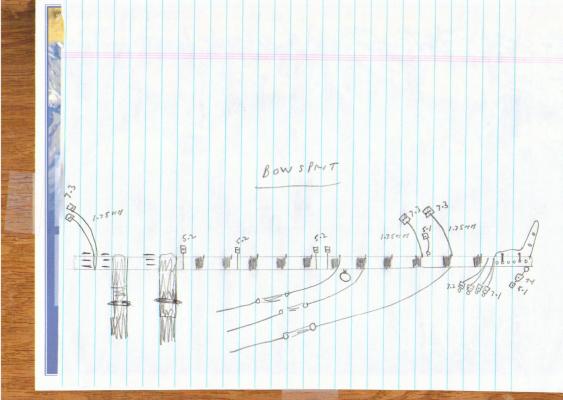
This is drawing for the Bowsprit block and lashing arrangement. Vince P.
- 264 replies
-
- 1
-
-
- sovereign of the seas
- mantua
- (and 1 more)
-
While I would love to build my SOS like this, it would take a true artist to make carvings as you have. That type and level of talent is not something the average modeller like me would have. It is certainly great to see work of this caliber. You are very lucky to have such talent. Vince P.
-
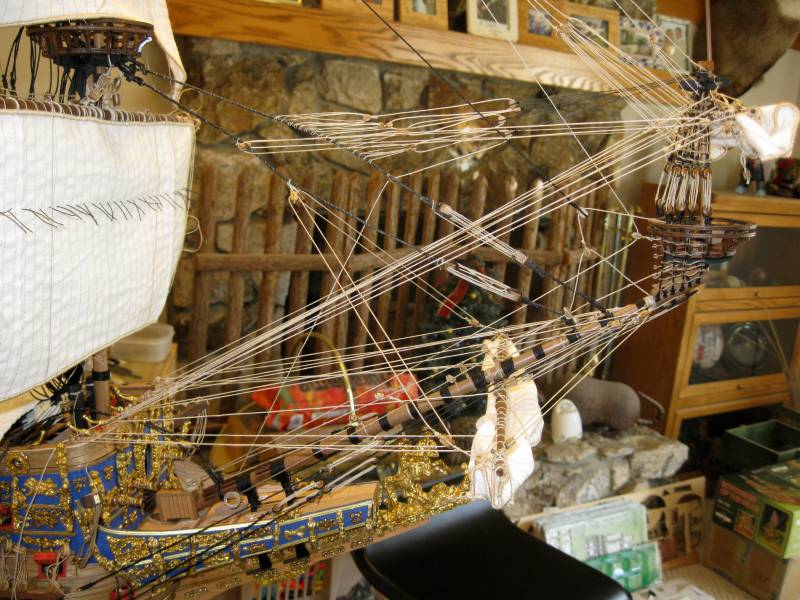
The amount of rigging for this ship with the realistic method and the sails is quite complex. Building the masts off ship and completely installing the yards, sails and starting the running rigging before setting the mast on the ship is critical. Once the foremast is set on the ship, all of the running rigging must be completely finished before rigging the shrouds. As far as I see it, doing it any other way will make it very difficult to get to the pinrails, cleats, and other belay points. This is different from the way I did it with other ship builds, but they did not have the complexity and very tight quarters in working on the rigging. This will hold true for the other masts as well. If you build the kit as the plans dictate, with the abbreviated rigging, there would be no issue, but completing it as I am doing with the more detailed rigging, and adding the sails, makes it a whole different ball game. I am almost done with the entire bowsprit and foremast. I will post photos to show what I mean. Vince P.
- 264 replies
-
- 1
-
-
- sovereign of the seas
- mantua
- (and 1 more)
-
I agree with that. It was clumsy, and did not hold the frames secure enough to square them as advertised. Vince P.
-
The Loom-a-line is not very useful. If you construct the ratlines with this, rigging the whole assembly on to the ship is a difficult task. It is much easier to rig the shrouds in pairs. The only thing good about this tool is that it does make it easier to space the rattlings more uniformly. Vince P.
-
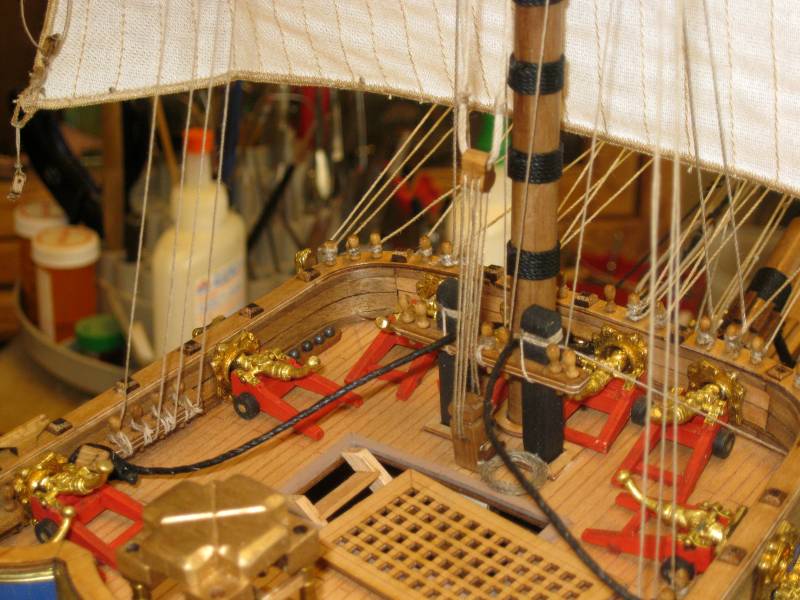
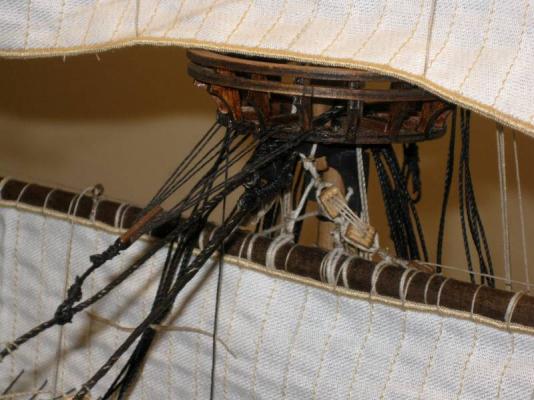
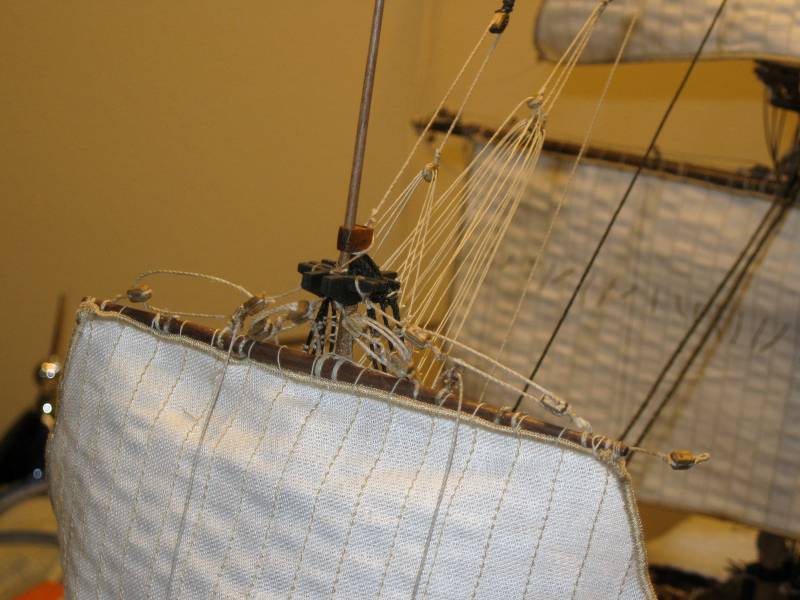
I added a feature to the rigging that is left out in the kit. Ships of the period had knights with lifts and halliards for hoisting the lower yards on the masts. This is what they look like rigged. The lift is heavy rope that is attached to a triple sister block and passes through the cheeks below the mast top trees and is lashed to the yard. The halliard is reeved back and forth through the sister block and knight and is secured to a cleat on the knight. Vince P.


- 264 replies
-
- 1
-
-
- sovereign of the seas
- mantua
- (and 1 more)
-
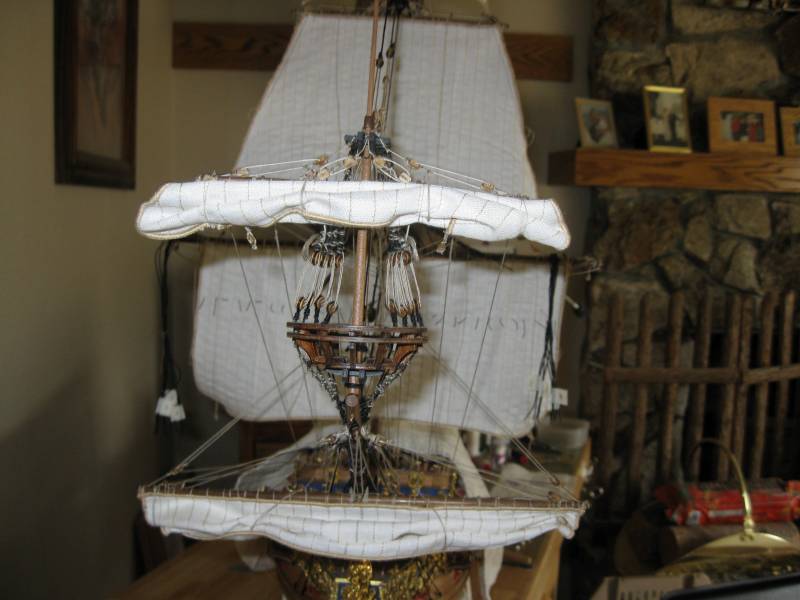
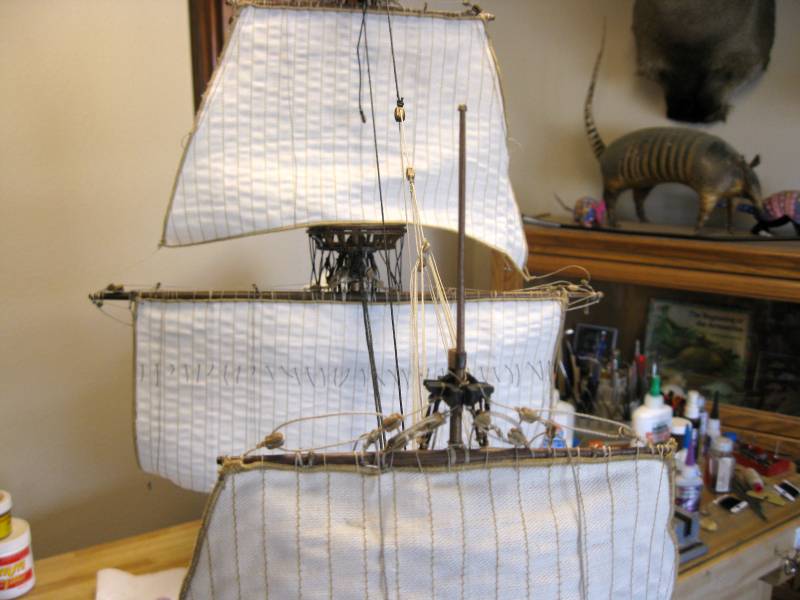
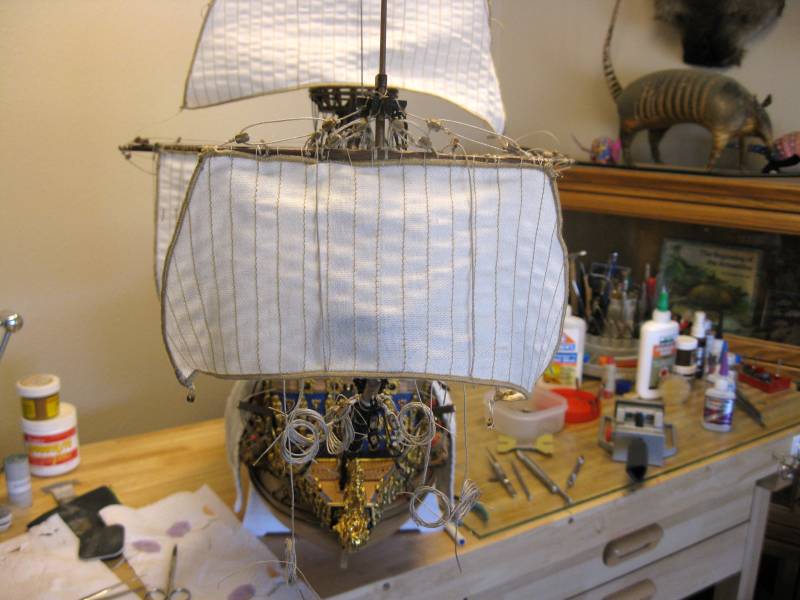
I decided to redo the furl on the Sprit Topsail. It was kind of lopsided. I think this is better. Vince P.
- 264 replies
-
- 2
-
-
- sovereign of the seas
- mantua
- (and 1 more)
-
It's just a might grayer.
-
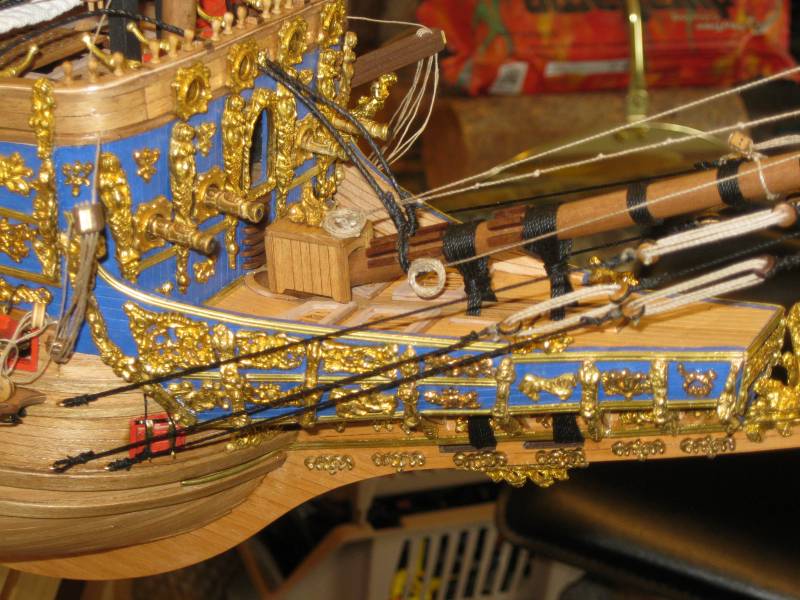
Neither. They were bright brass plated. I just polished them and sealed them with clear lacquer to keep them shiny.
-
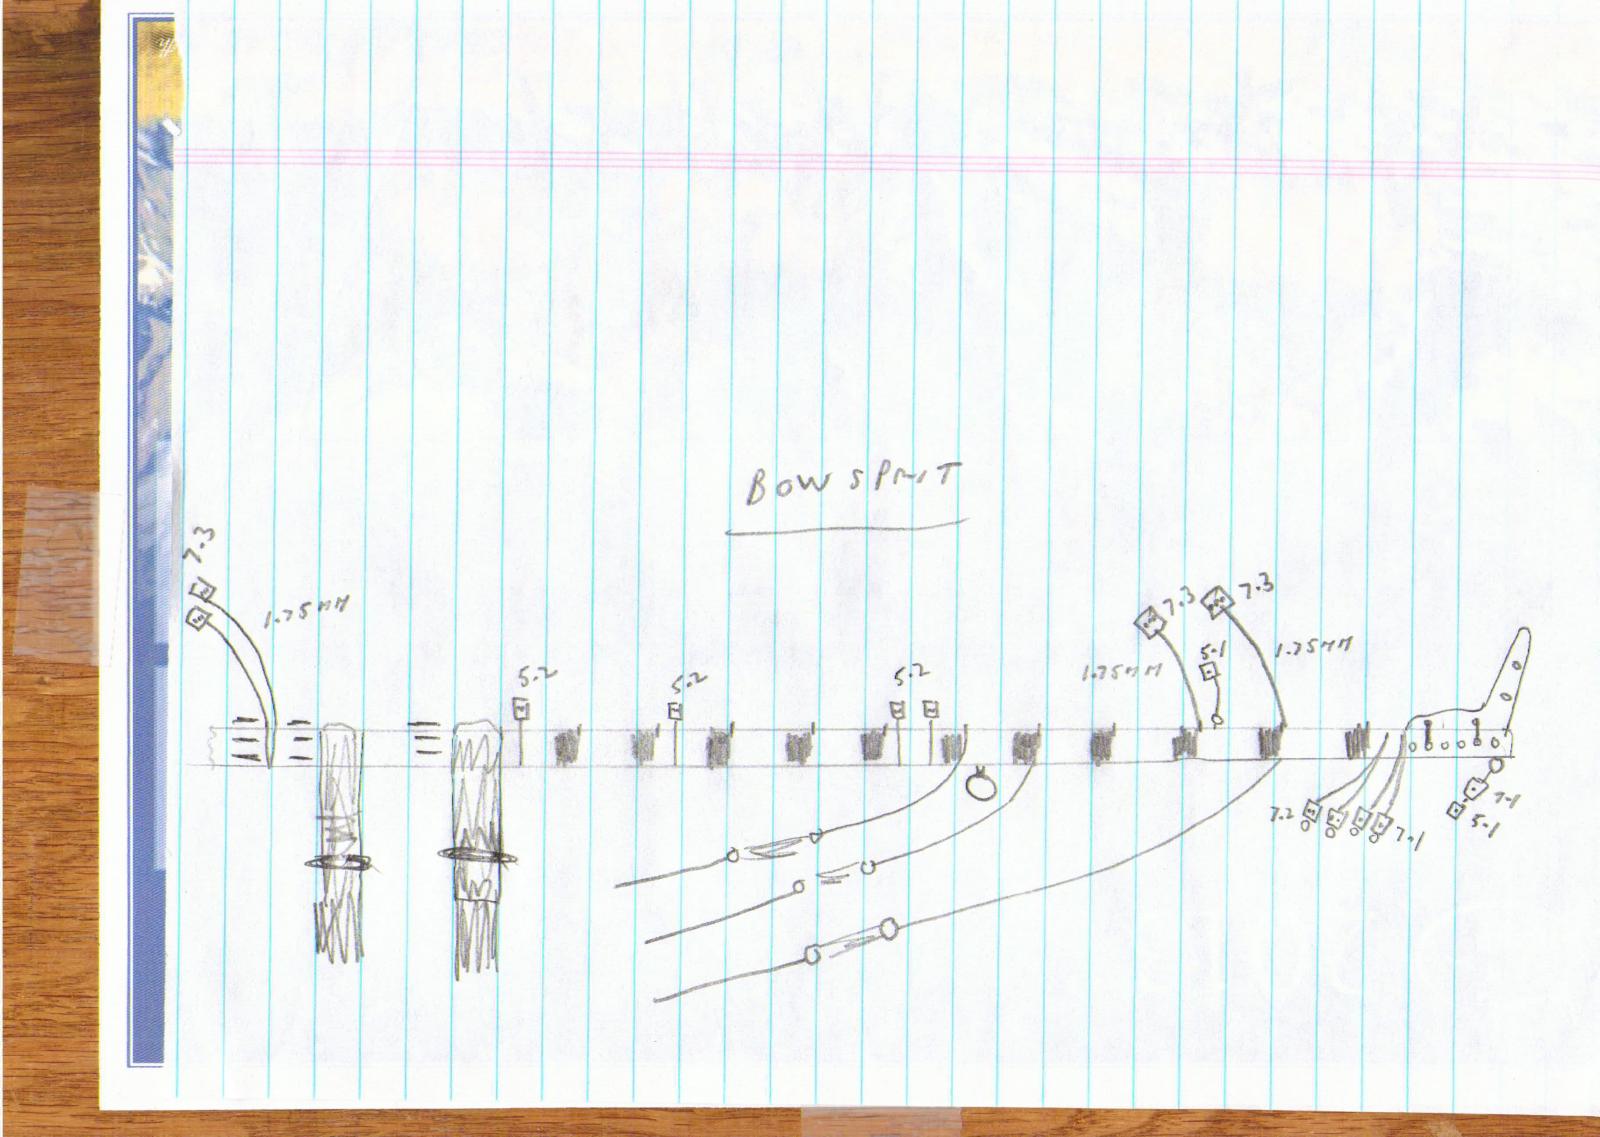
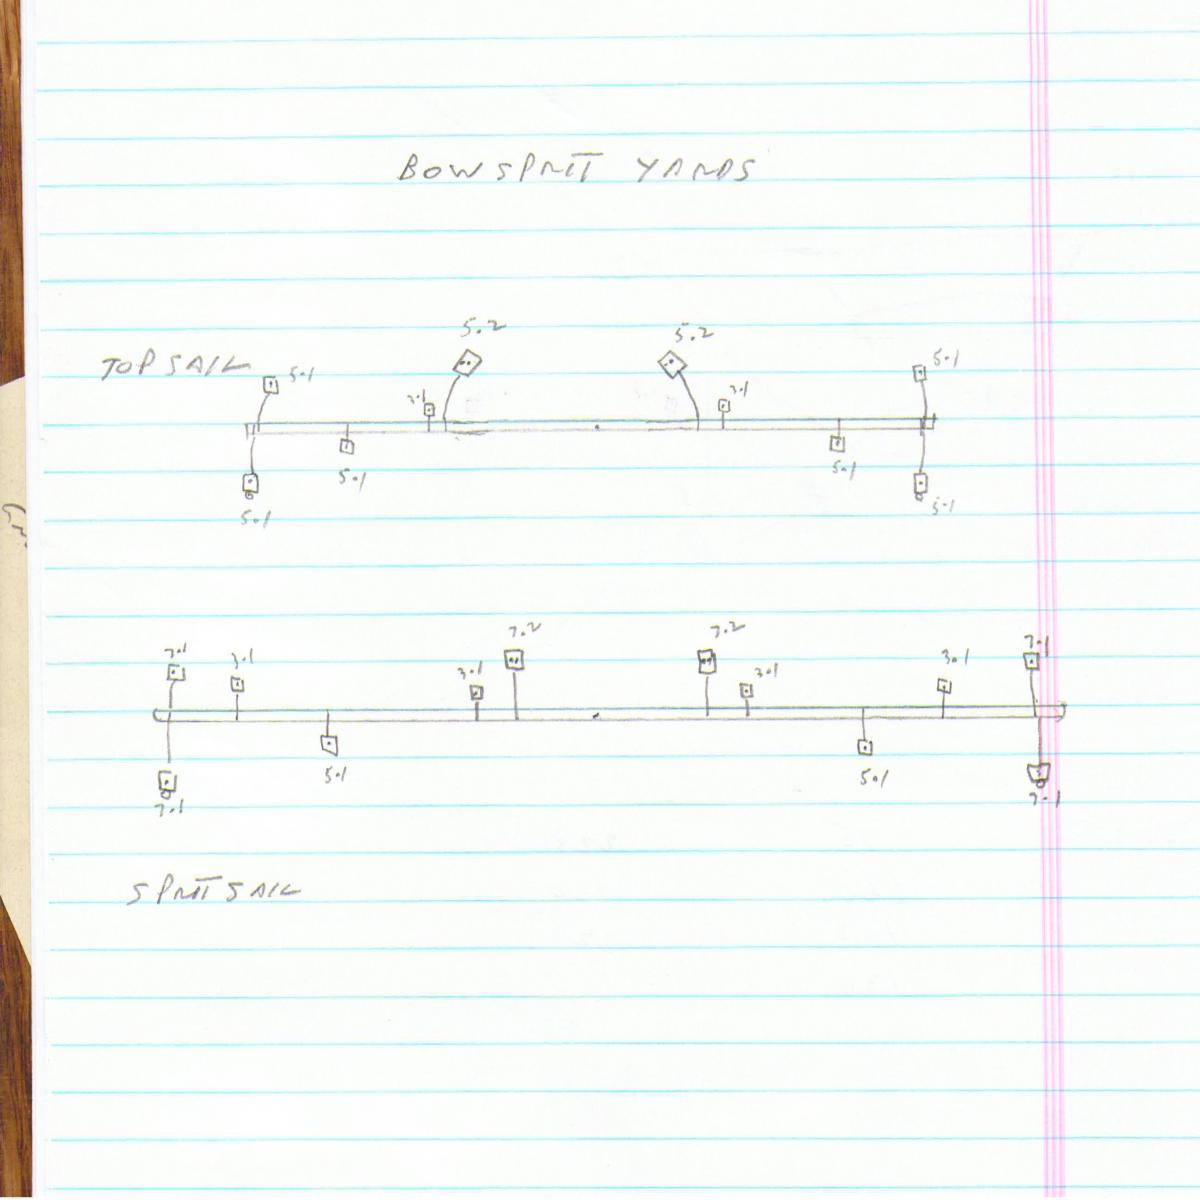
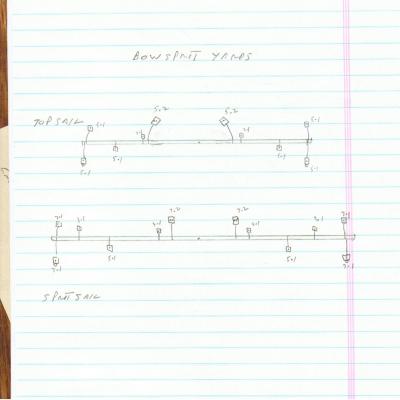
Here is a drawing of the block layout for bowsprit yards. Vince P.
-
You welcome to come by when she is done, or sooner if you like.
-
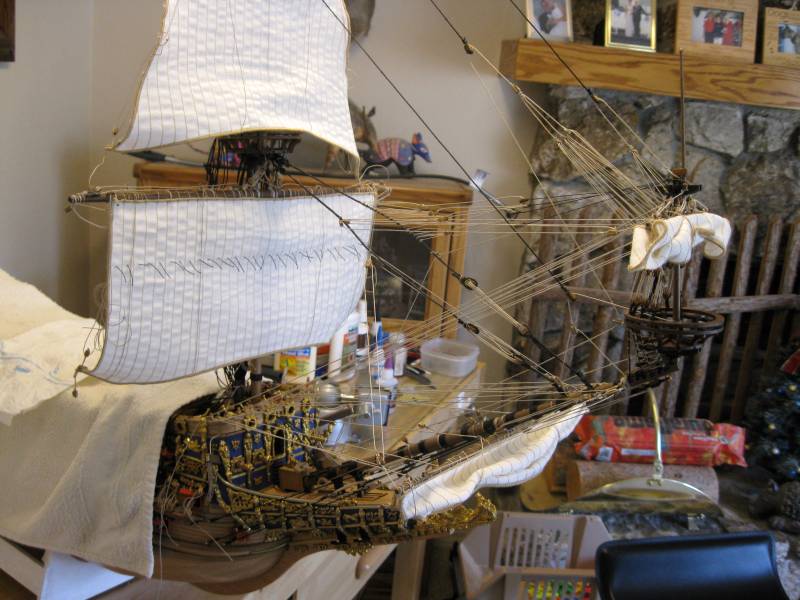
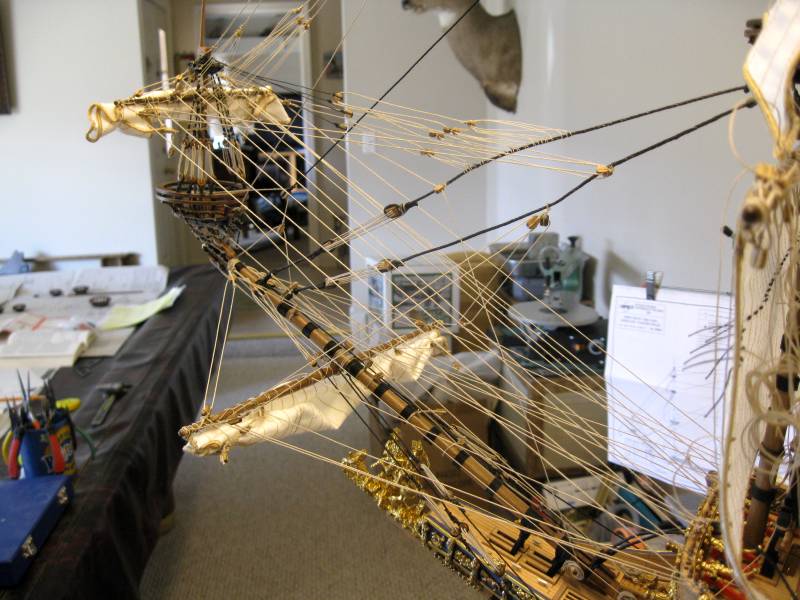
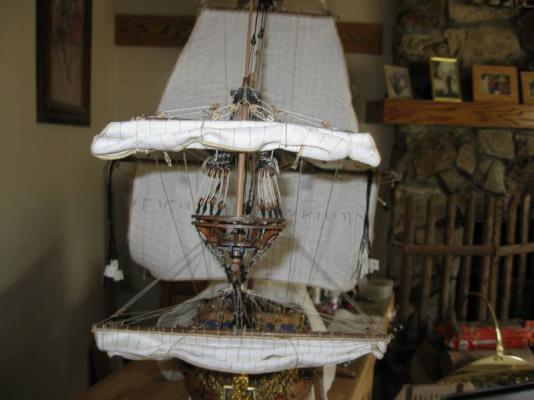
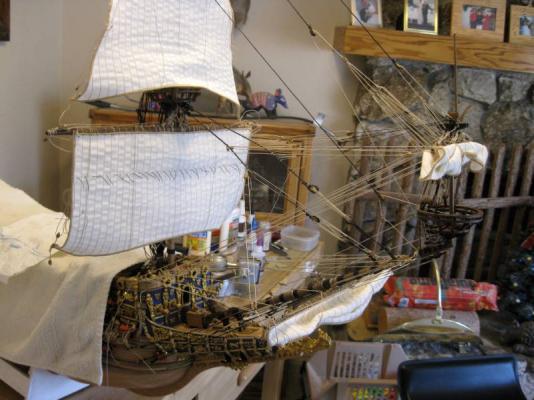
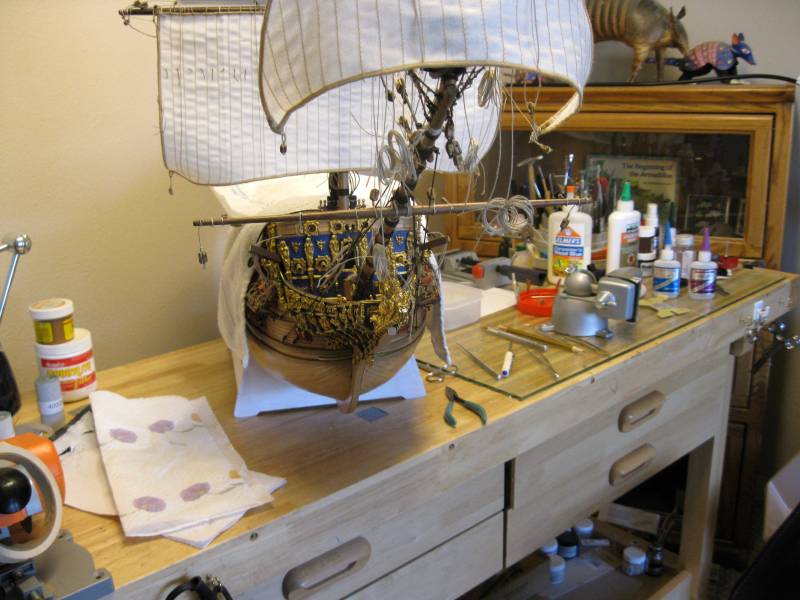
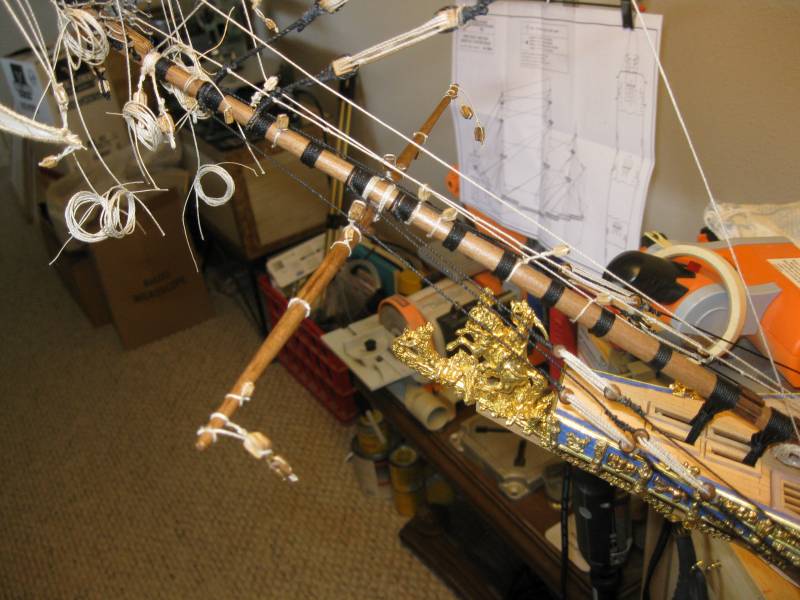
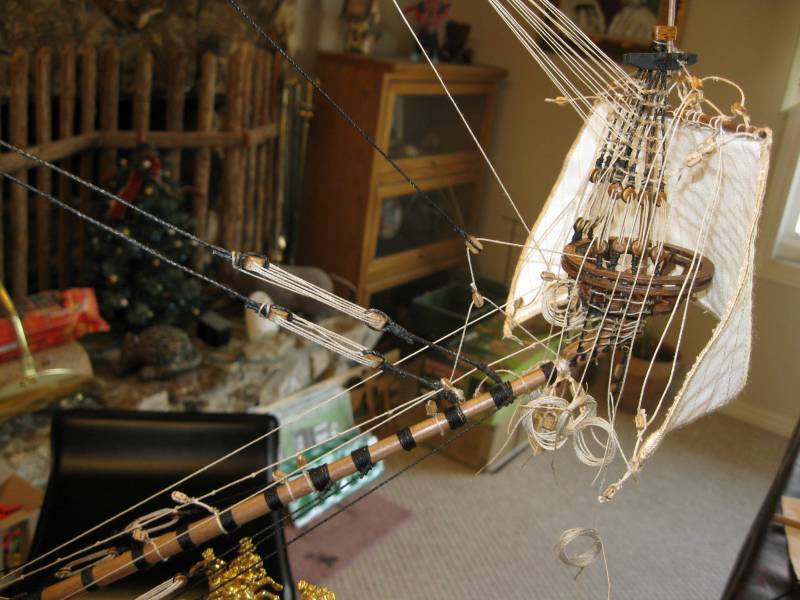
Here are photos of the completed bowsprit. I decided to do a loose furl on the sprit sails to give more exposure to the bow. It is the kind of furl they would do to trim sails with a ship under sail on the seas. I think it looks OK. The only running lines not done on the bowsprit are the sheet lines in the lower corners of the sails. Since they are way outboard on the hull, they will get in the way in rigging the foremast. I will complete them after completing the foremast rigging and the forward hull such as the gun port doors and the anchors. Vince P.


- 264 replies
-
- 1
-
-
- sovereign of the seas
- mantua
- (and 1 more)
-
Hi Gary, Got your plans ready to go. Will mail them out Monday. Vince P.
-
The Spritsail yard ready for the sail and rigging. Vince P.
- 264 replies
-
- 1
-
-
- sovereign of the seas
- mantua
- (and 1 more)
-
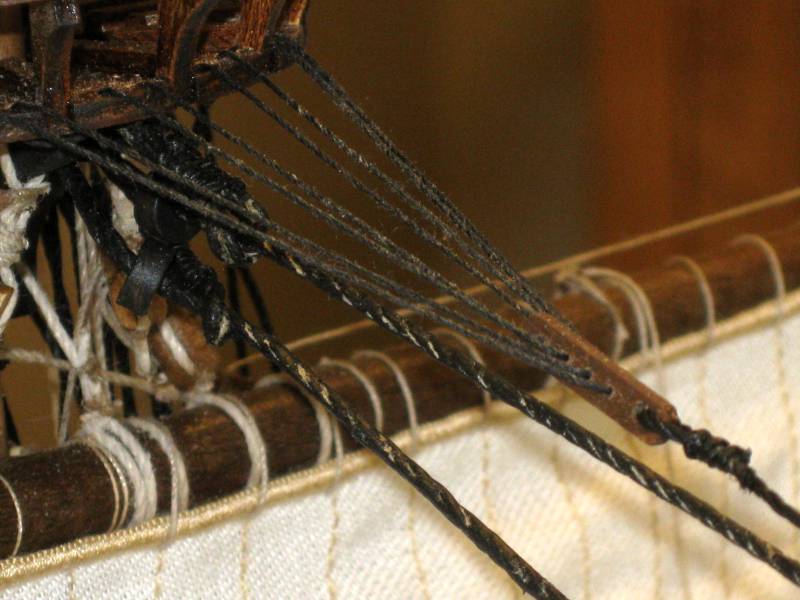
The Spritsail Topmast Backstay. This was a dilly. I had a hard time trying to get everything taut. The thing has 3 seperate sections that all connect together. I did the best I could and had to redo it twice. Vince P.
- 264 replies
-
- 2
-
-
- sovereign of the seas
- mantua
- (and 1 more)
-
Ok, here is the last forestay for the foremast. Now comes the Spritsail topmast back stay, which is even more complicated.
- 264 replies
-
- 1
-
-
- sovereign of the seas
- mantua
- (and 1 more)
-
I went on the webite. The part # for the gun port templates is: 787013. Vince P.
-
Gary, Go on to the Mantua Help Website. (www.mantuamodelhelp.com) They have drawings of all of the laser cut boards with the part numbers. You can download the drawings. Like I said you can also get the new instruction manual that matches the new plans for free as well. If you have some laser cut parts, you might have one of the hybrid kits, as the original did not have laser cut parts. I would be willing to send you the whole new plans set I had made for the cost of the shipping, which is about $15. There are 9 large sheets of plans. Vince
-
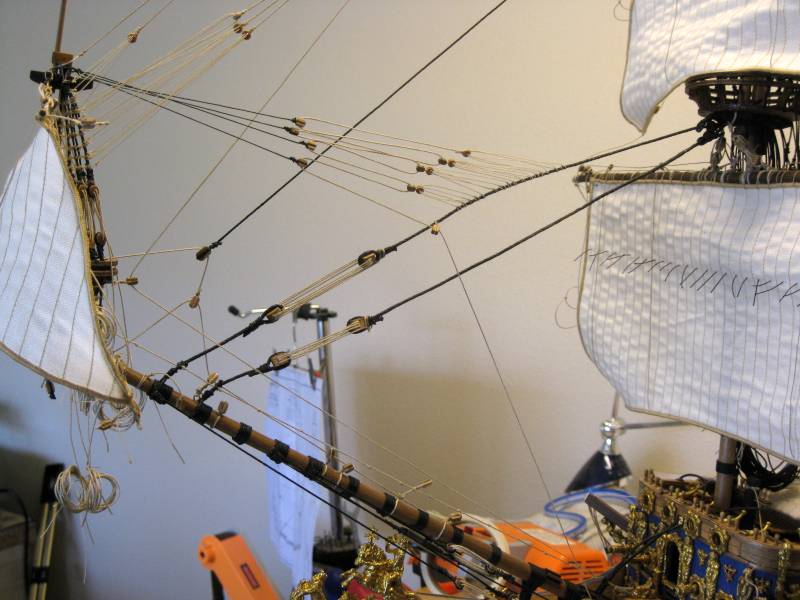
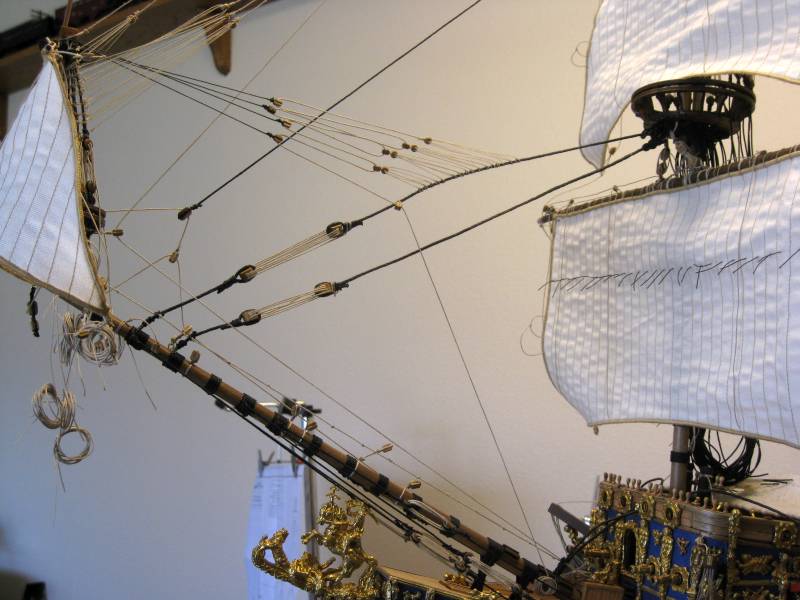
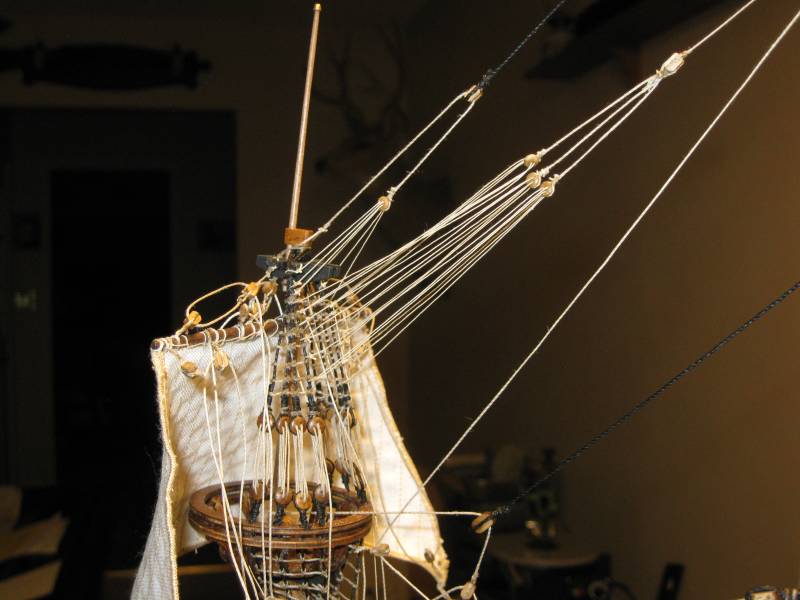
This is the fore top gallant forestay. The kit has a very abbreviated one that is nowhere near the real thing. This one is right from the prints of the real SOS. I am doing as much rigging as possible from good sources. It does however require a pretty good amount of additional rigging supplies such as deadeyes, blocks, and cord. If you are anything like me, you have built up a good stash of supplies over the years. I have been raiding my stash pretty heavily, but have not had to buy more yet, but I will eventually have to replenish my stock. The trick with this forestay was getting each level fairly taut. I started from the mast end and built each layer seperately, using weights like alligator clips to put tension on the lines while each section is rigged. There are several more stays for the spritsail topmast and the mizzen that are even more complicated than this one. It is fun however to do these. Vince P.


- 264 replies
-
- 1
-
-
- sovereign of the seas
- mantua
- (and 1 more)
-
Hi Gary, There is a huge difference in the 1970's version and the 2008 version. The thing is that the kit must at least match the plans version. They made many changes to the kit in 2008. The laser cut parts are one of the biggies. Another is the gun port templates. The older version did not these and it was very difficult to align the gun ports with the decks. The newer version came with gun port templates for each gun deck. They are actually part of the second layer of plankng and locate the gun ports very nicely, with a little issue with the curvature of the decks as they progress to the stern. I have an extra set of plans that I had made. You can also go on to the Mantua Help Website and download the whole new instruction booklet which is way better than the old one, but like I said, it still leaves a lot to be desired. They don't have the plans on line however. Vince P.
-
Hi MJD, Thanks for the feedback. As you might know, the Mantua SOS kit has been around for over 30 years. Recently, Sergal and Mantua merged and they are now the same company. The SOS kit was completely redesigned in 2008 and much for the better. However there are still kits out there that are the old version, or hybrids of the new and old. The new kit, which I was fortunate to purchase does have top quality materials. A friend of mine bought his kit after me and he got a hybrid. It was full of defective parts and had many missing altogether. The plans were dated 1979! I had to send him copies of the new plans, which are dated 2008. Mantua is not known for customer service. He tried contacting them with no response, and even the dealer could get no answers. So, if you do want to buy this kit, my suggestion to get it from Ages of Sail out of California. They are the main distributor for Mantua in the USA, and their prices are as good as any. They also seem to have them in stock, since all of the other dealers have to get their kits from them. The one weakness of the kit, even the new one, is the instructions and plans. They are full of inaccuracies and omissions. I don't know how much experience you have in building complex ship kits, but you will certainly need it with this one. I have found a wealth of books, websites, and others who have built her to help me along. I would be happy to give you everything I have if you decide to give it a go. I can tell you that it is the most fun project I have ever tackled, and she is coming along nicely. I have about 18 months into her by now and being retired, I spend considerable time each week working on her. Best of luck, Vince
-
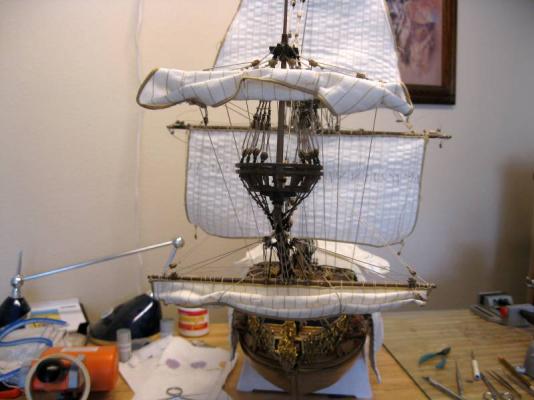
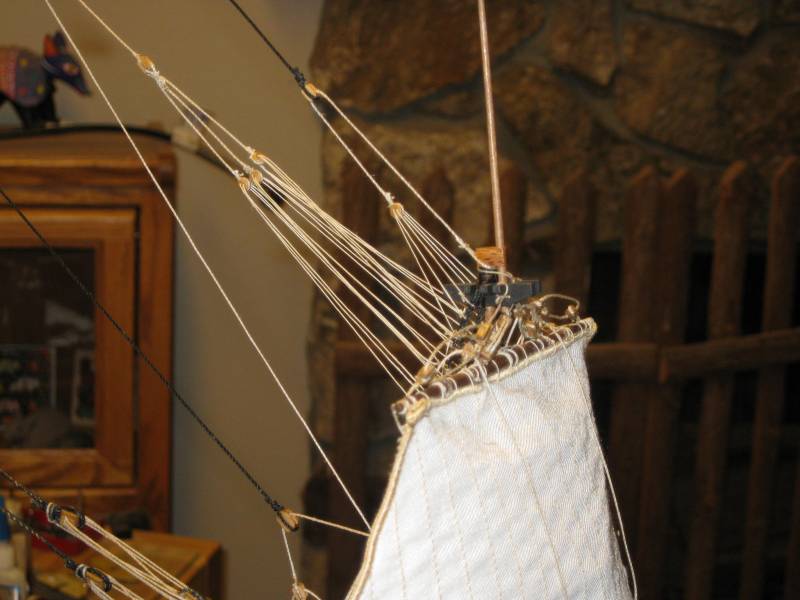
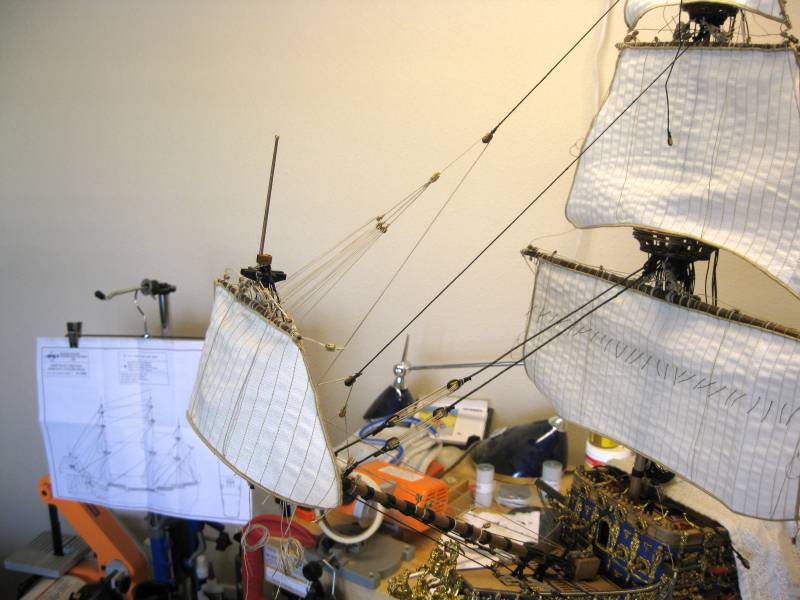
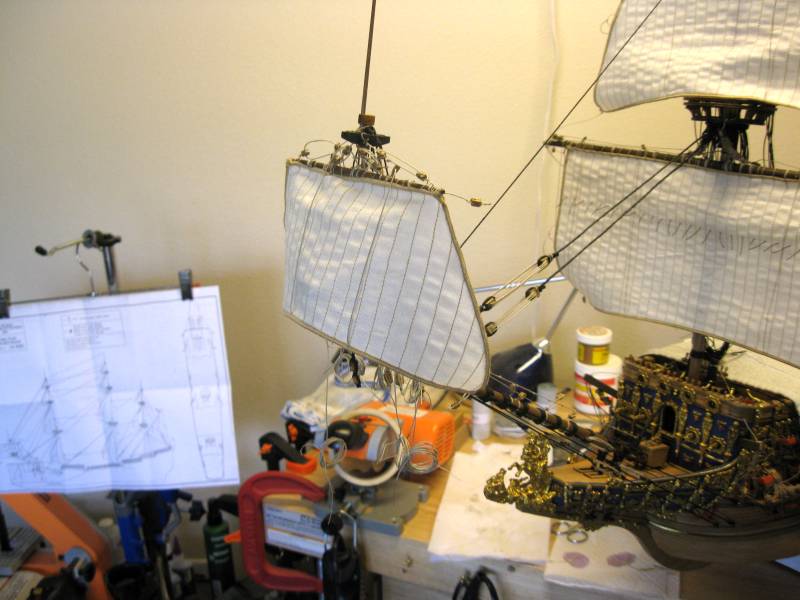
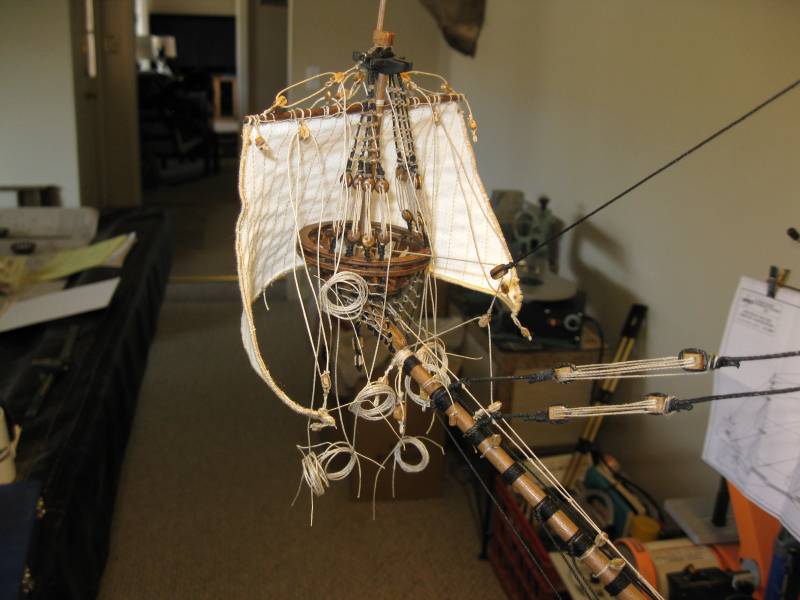
The sprit topsail in place and ready for rigging. I figured to place this yard and sail before attempting the upper stays for the foremast. They are complicated and will clutter up the areas of the topmast top and trees, which would make rigging the yard and sail difficult afterwards.. Vince P.
- 264 replies
-
- 1
-
-
- sovereign of the seas
- mantua
- (and 1 more)
-
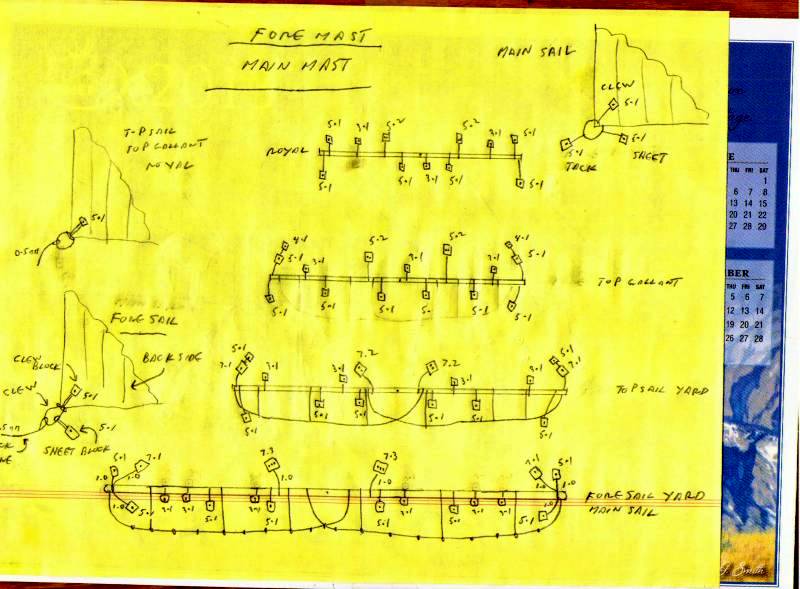
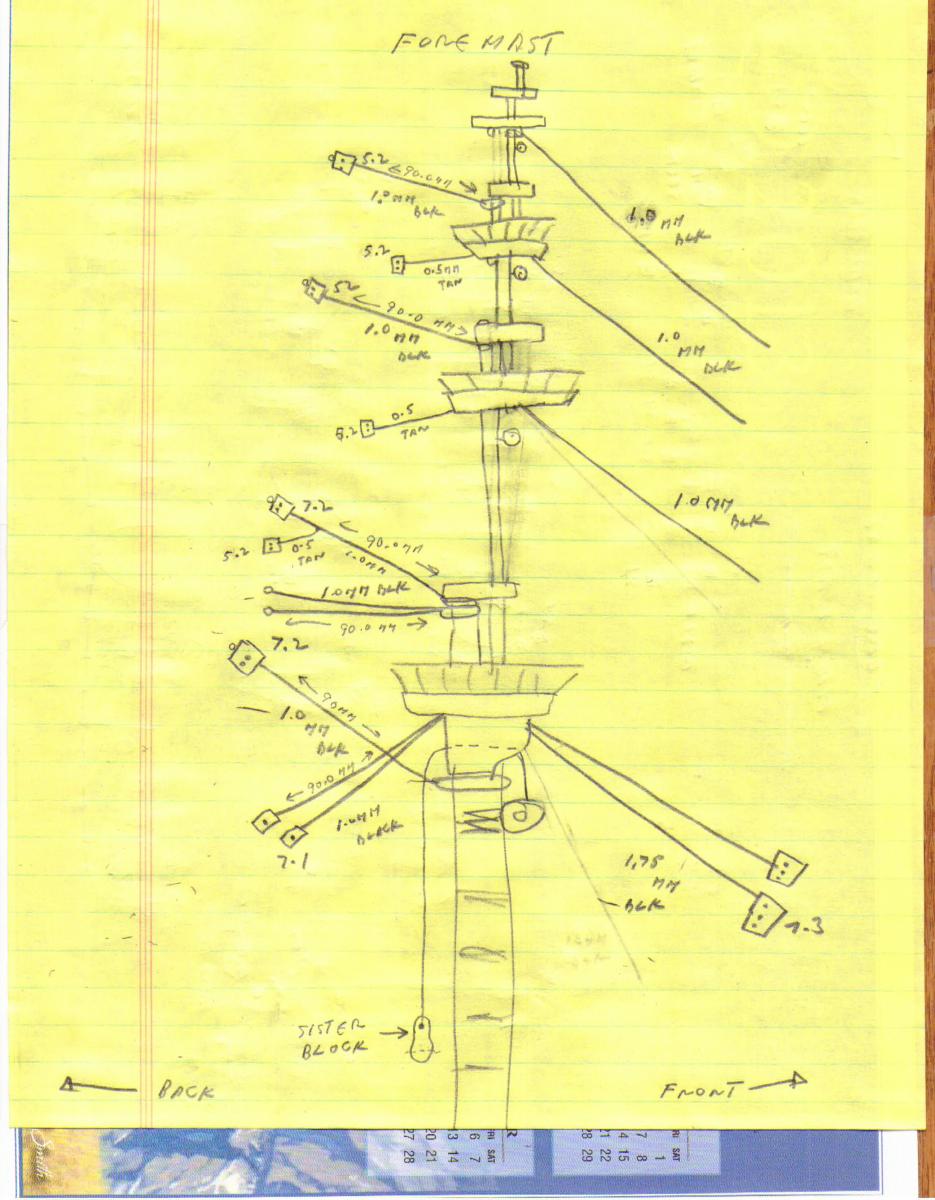
Here are some drawings for the stays, blocks, and lashings for the foremast, if you want to rig her with sails and more accurately than the kit provides. Vince