pirozzi
-
Posts
843 -
Joined
-
Last visited
Content Type
Profiles
Forums
Gallery
Events
Everything posted by pirozzi
-
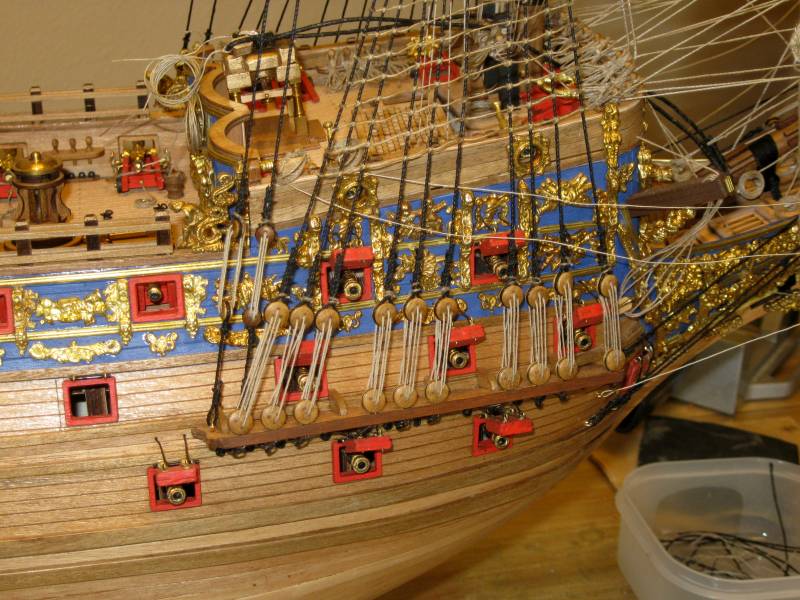
Hi Roger, The way I do the shrouds and deadeyes is to first do the deadeyes and reeve the lanyards and attach them to the chain wales. I have a reeving tool that sets the length of the lanyards evenly, you can use a wire jig that you put in the holes of the deadeyes to set the spacing. I attach the shrouds to the mast tops before the masts are set into the ship. Once the masts are set, I just feed them through the top deadeye, tighten it up and lash them to the deadeye, one by one. The shrouds are rigged in pairs from the mast tops starting on the starboard side from the bow, then to the port side, and then back to the starboard towards the stern. I have a build log :Sovereign of the Seas by Vince P. It has photos of the complete process of rigging the shrouds. Vince P.
-
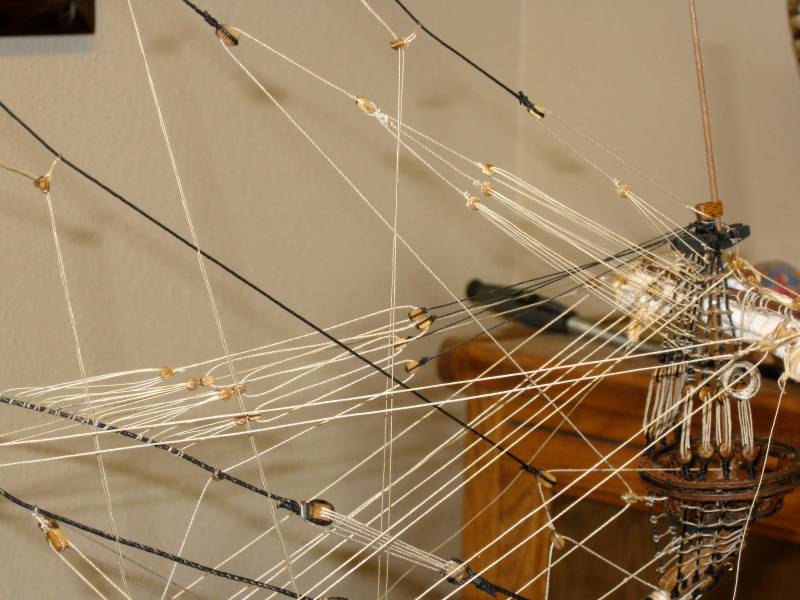
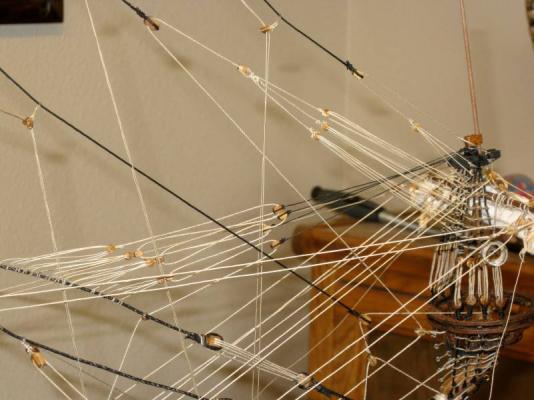
 Rattling the main topmast shrouds. Clove hitches and more clove hitches. Only 600 more to go.
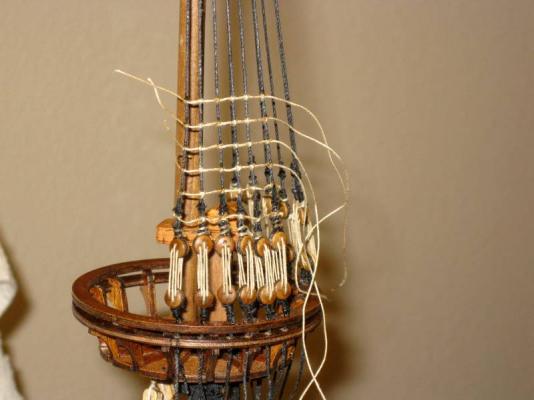

- 264 replies
-
- 1
-

-
- sovereign of the seas
- mantua
- (and 1 more)
-
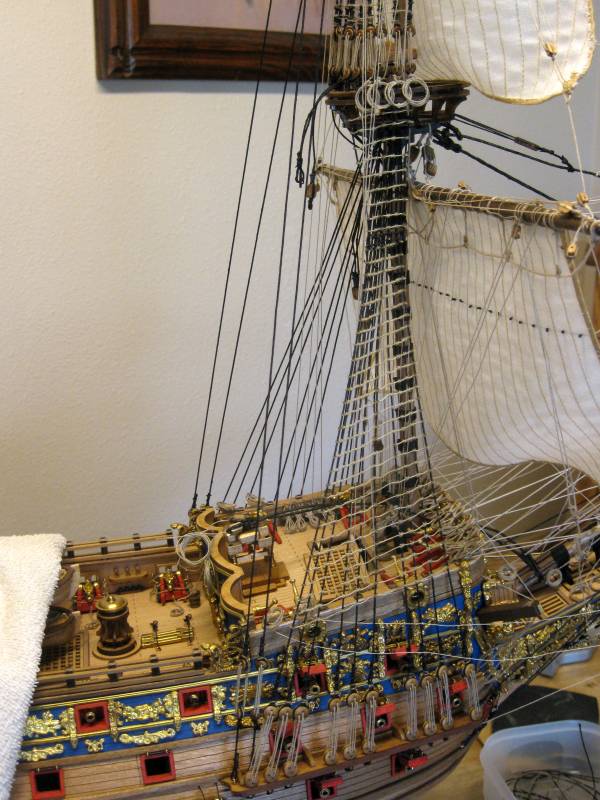
Hi Kevin, Since I am completely rigging the mast with all of the running rigging, yards, and sails before setting on the ship, it will get very crowded around the crowsnest and it also requires working on both sides of the mast. After it is set on the ship, I only have to lash the ends of the shrouds to the deadeyes and rattle them. All of the uppers are already completed and rattled beforehand. I did it this way for the foremast and it workrd out very well. Vince
-
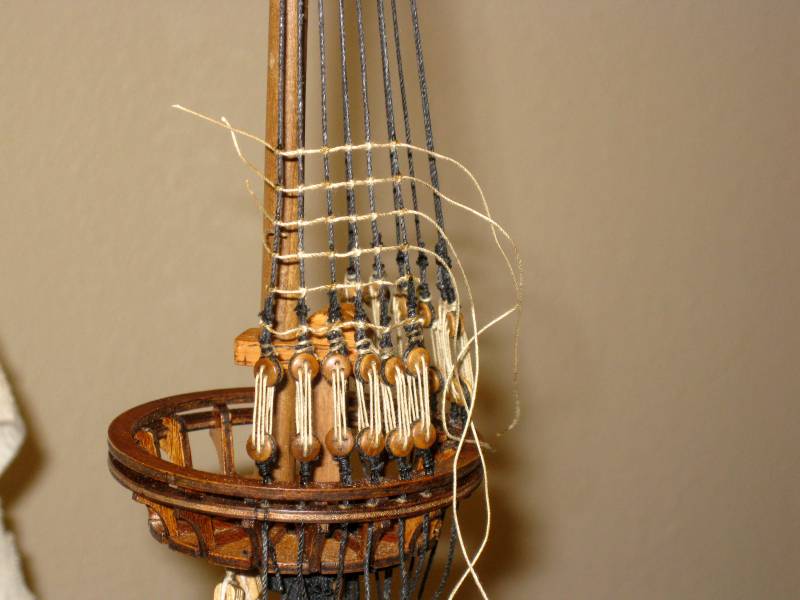
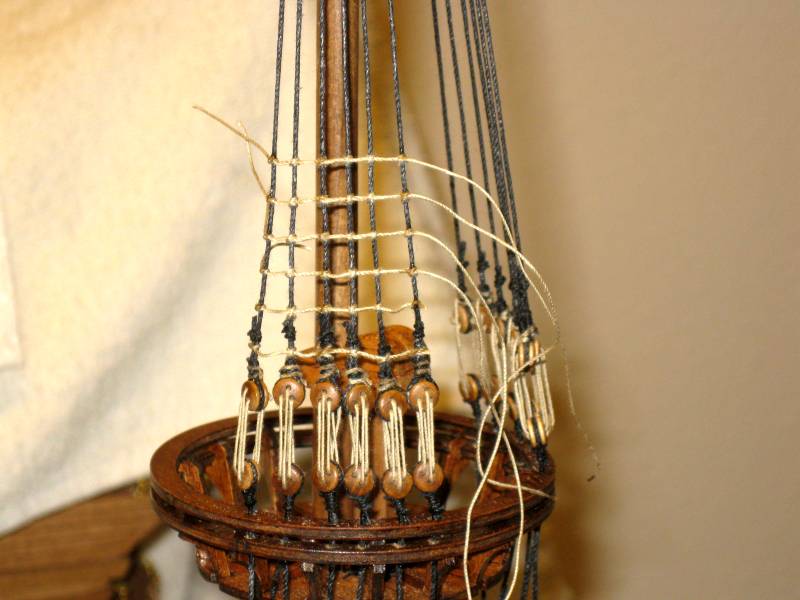
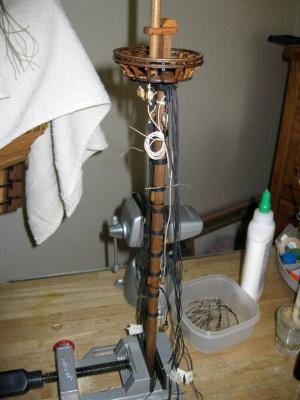
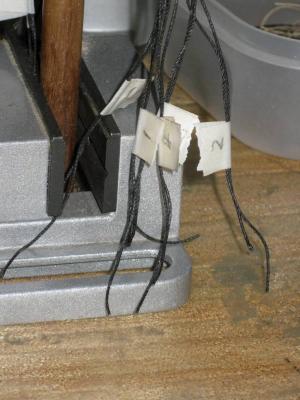
Since I am completely assembling the masts off ship, I wrap the lower shrouds to be rigged later on the ship. The shrouds are wrapped in pairs. One piece of rope goes around the mast top from fore to aft to make a pair. Usually the pairs are wrapped starting on the starboard side and then the port side and back to starboard and so on. This ship has 10 shrouds on each side which is 5 pairs to a side. Later when rigging them to the deadeyes, they must be rigged in the correct order starting from the starboard side, pair 1, then to port, pair 1, and back to starboard pair 2, and so on. Also, the shroud in each pair that wraps from the fore side of the mast must be rigged first and then the other in the pair. This is necessary so the shrouds do not bunch up and cross each other at the mast top. You will really see the mess when rattling towards the upper end of the shrouds, if it is not done this way. I simply number the pairs on each side as they are wrapped, and make the forward one of each pair a little longer. Later when rigging them just take them in numerical order and the longer of each pair first. Vince
- 264 replies
-
- 1
-
-
- sovereign of the seas
- mantua
- (and 1 more)
-
For those of you that might build this kit from Mantua, here is some info on errors in the plans: After I set the completed foremast on the ship, I started looking into the mainmast. The plans call for cutting the lower section to 360mm. I set this piece down into the ship temporarilly and something did not look right. According to other completed models and some drawings of the actual SOS, the lower crowsnest of the mainmast should be slightly higher that the same on the foremast. The top rail of the crowsnest on the foremast is about even with the tree on the mainmast. With the mainmast section cut to 360mm as detailed in the plans, the crowsnest is considerably lower than the foremast. In order for the mainmast crowsnest to sit at the correct level, it was necessary to increase the lower section to 407mm from 360mm. Along with this, it is necessary to adjust the mizenmast to correspond to the change in height of the mainmast. The plans call for the lower section of the mizenmast to be 320mm. Increase this to 385mm. Then all of the mast tops are in correct alignment. Vince P.
- 264 replies
-
- 1
-
-
- sovereign of the seas
- mantua
- (and 1 more)
-
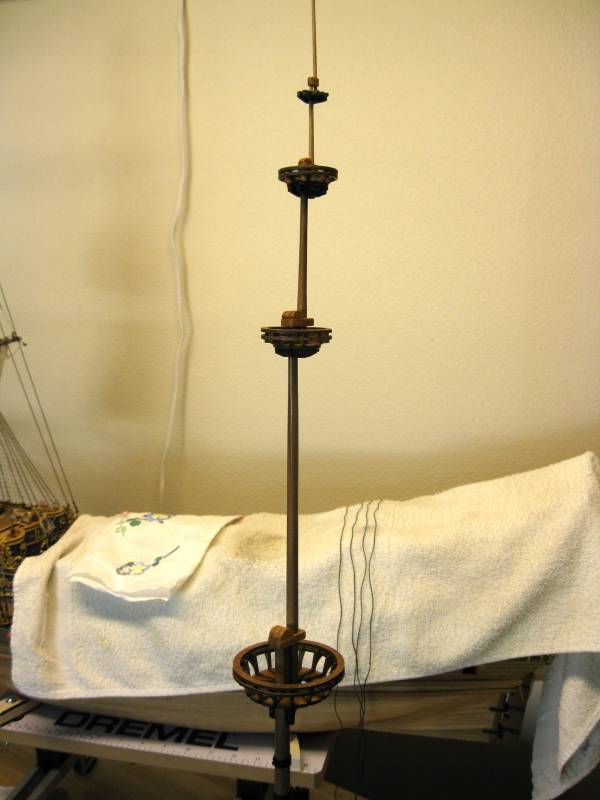
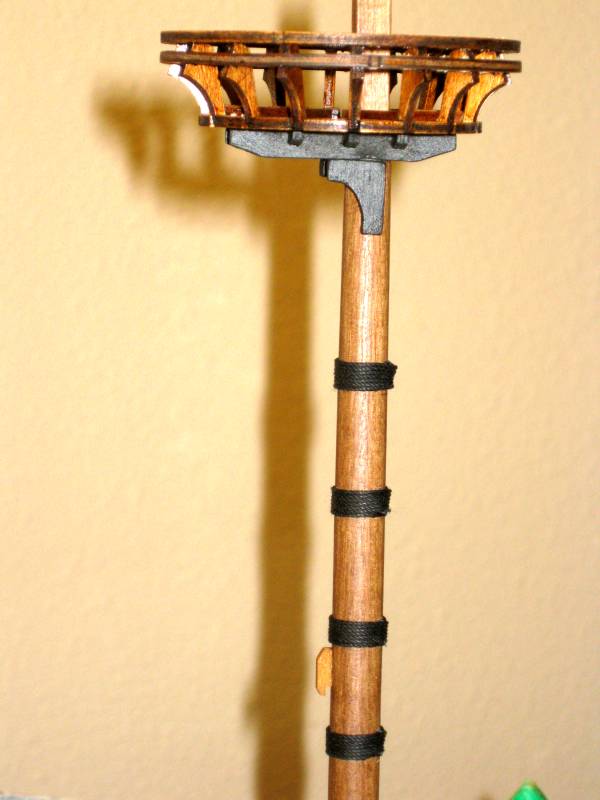
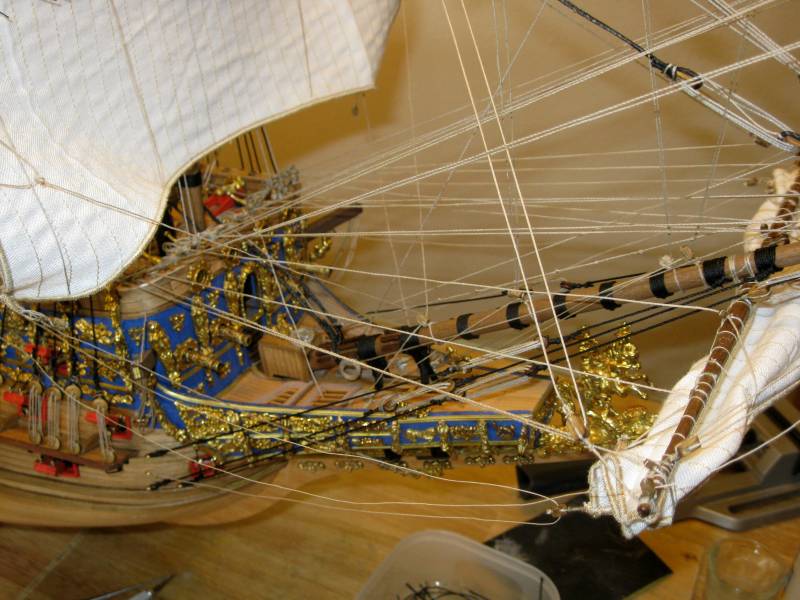
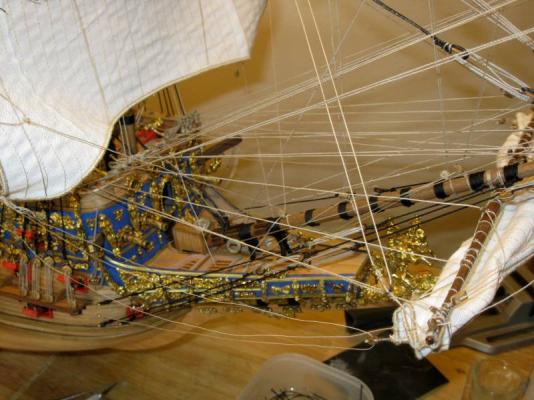
Installing the blocks for the lifts and jeers on the mainmast tops. Also the lift and sister block for hoisting and lowering the lower yard, and the forward halves of the mizen stays. Vince P.

- 264 replies
-
- 2
-
-
- sovereign of the seas
- mantua
- (and 1 more)
-
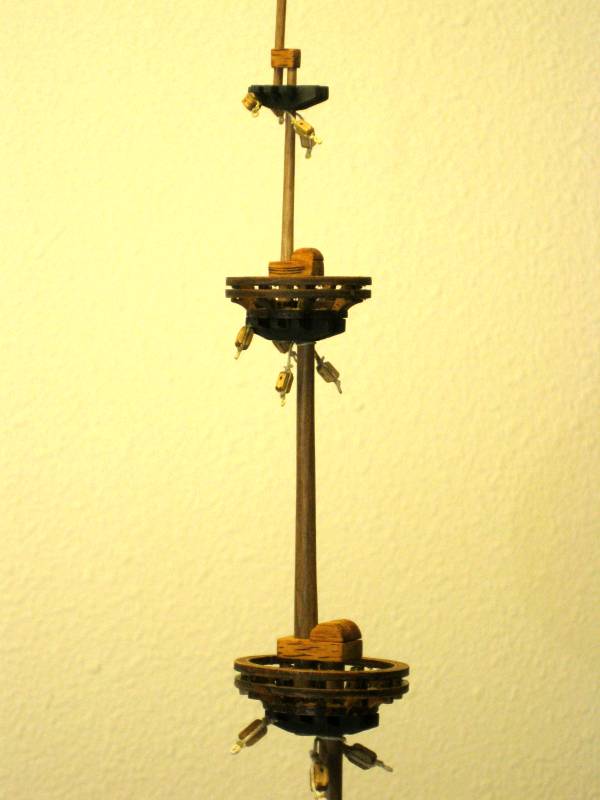
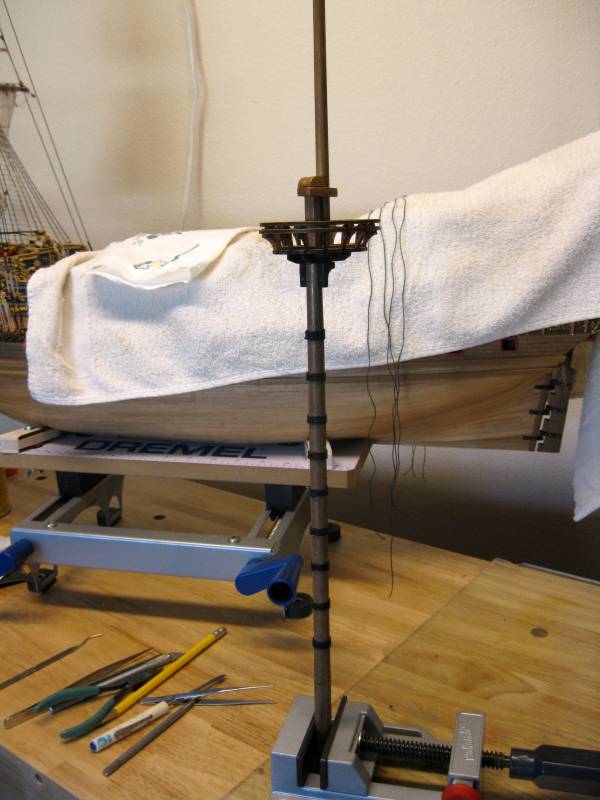
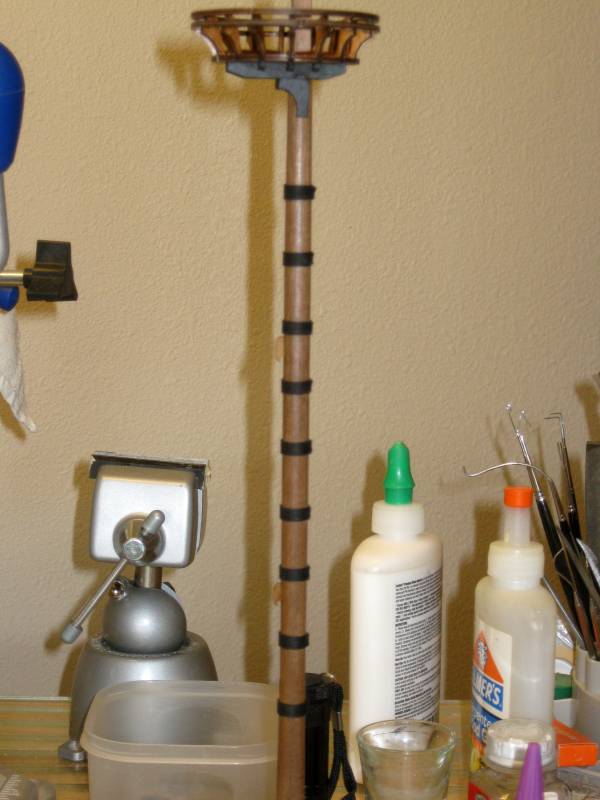
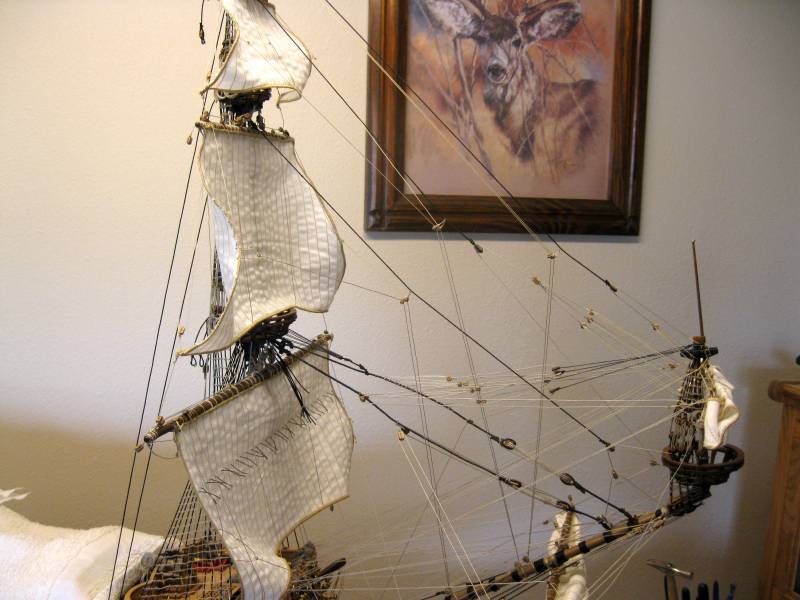
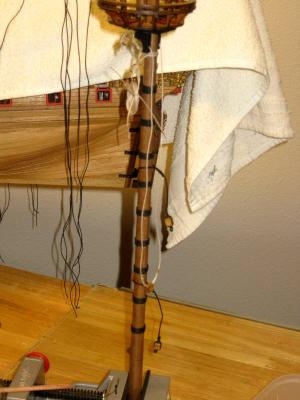
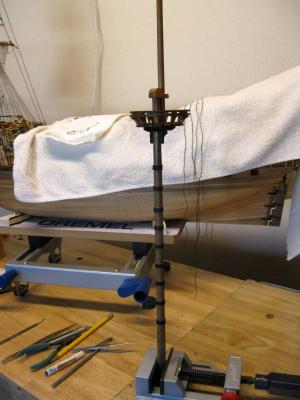
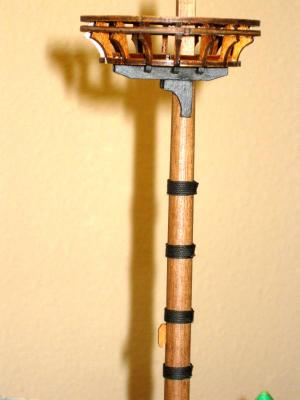
Constructing the mainmast. Since this is the tallest mast, you can get an idea how big this ship will be. Like the foremast, I will build the entire mast including the yards and sails and all corresponding rigging before setting it on the ship. Next up is installing the needed blocks to the trees. Vince P.

- 264 replies
-
- 3
-
-
- sovereign of the seas
- mantua
- (and 1 more)
-
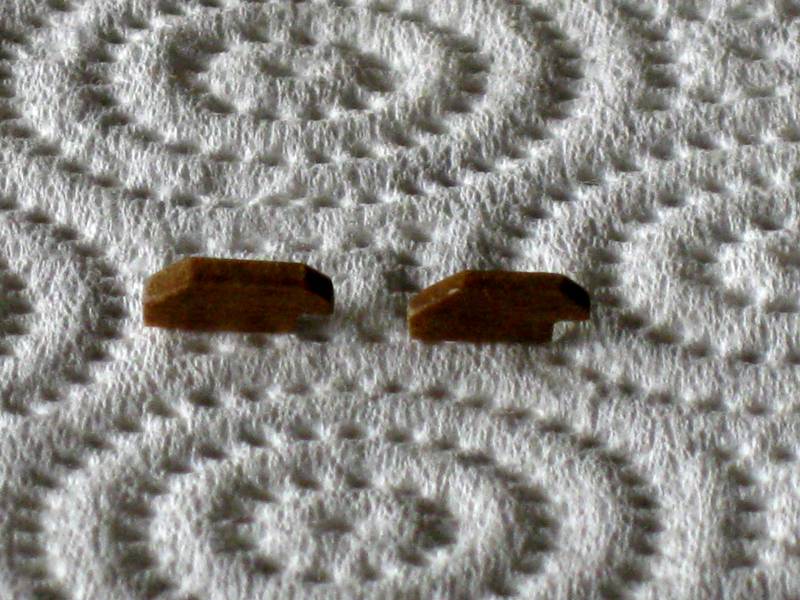
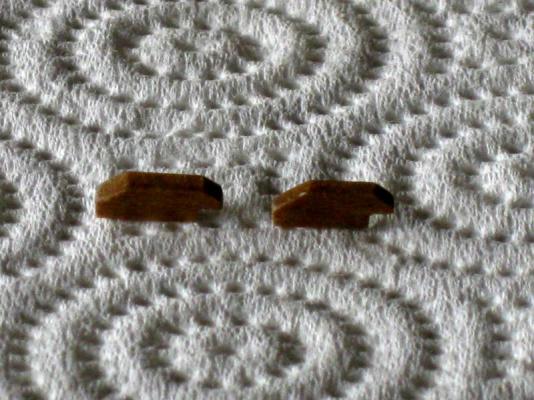
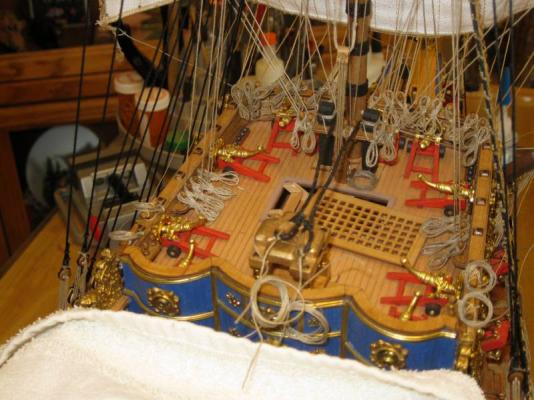
Half cleats. I am constructing the main mast and two of the fore stays from the mizzen mast are lashed to the main mast. While the kit does not address these, cleats were needed to keep the stays from riding up under tension. Vince P.

- 264 replies
-
- 2
-
-
- sovereign of the seas
- mantua
- (and 1 more)
-
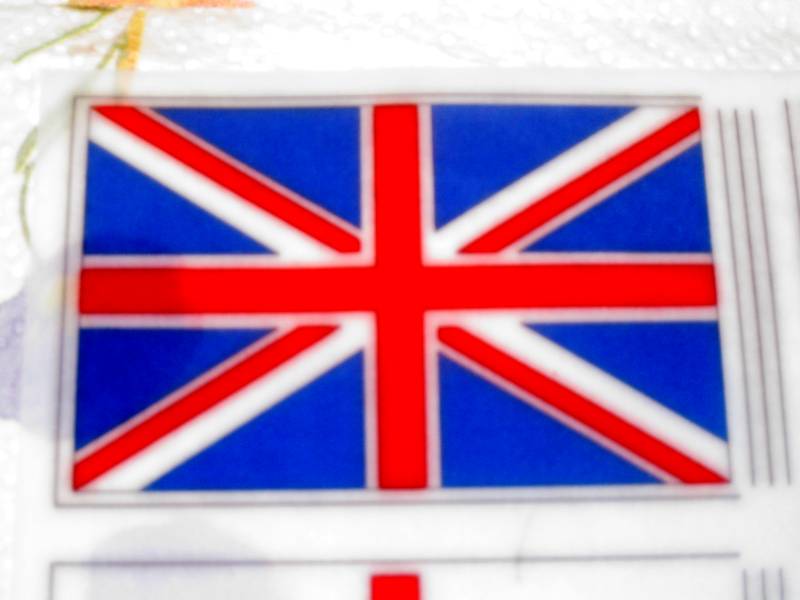
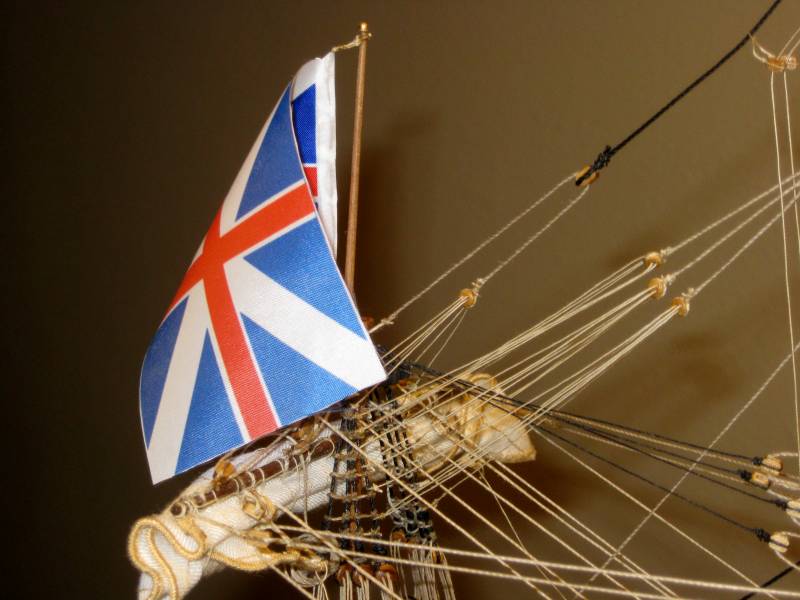
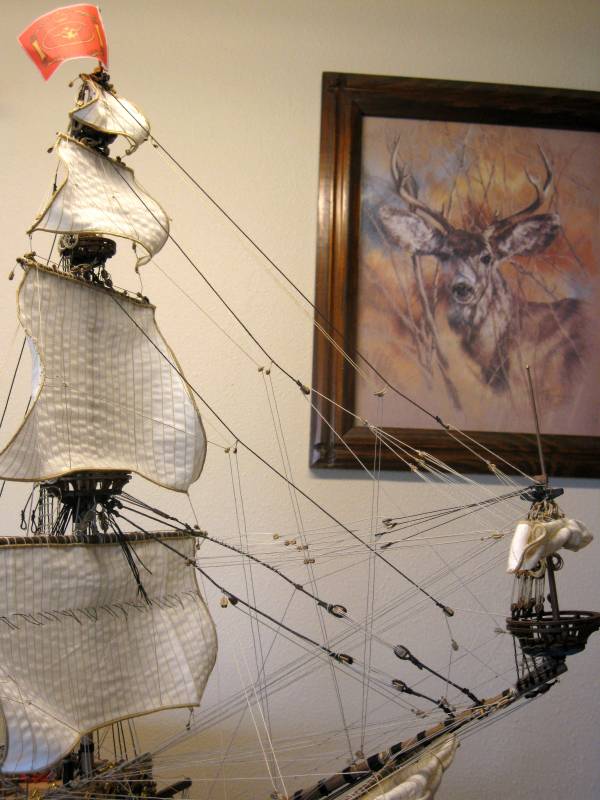
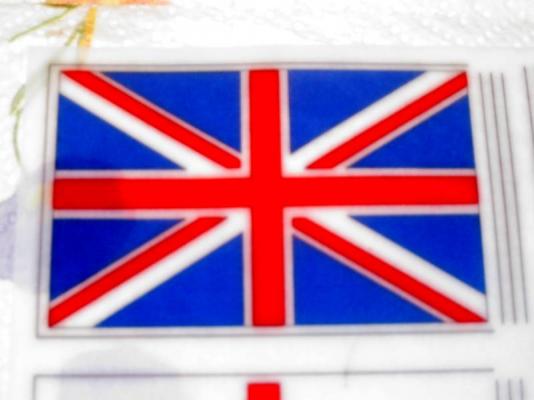
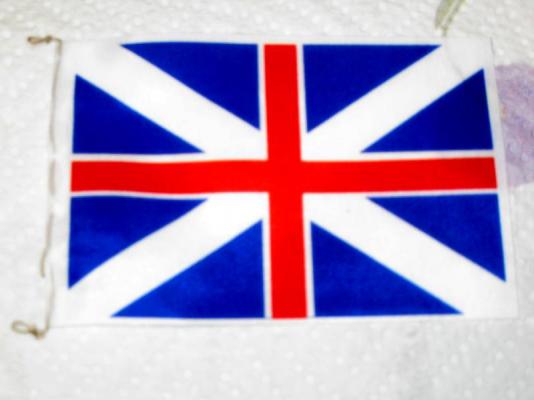
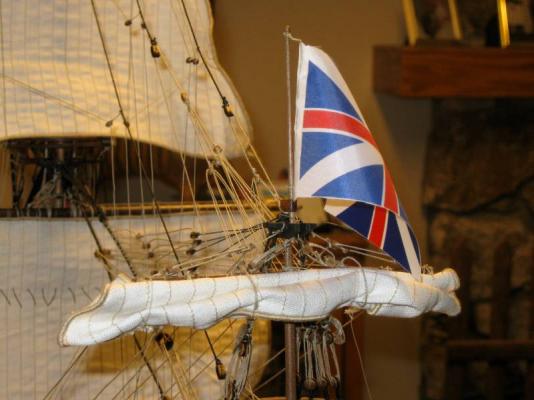
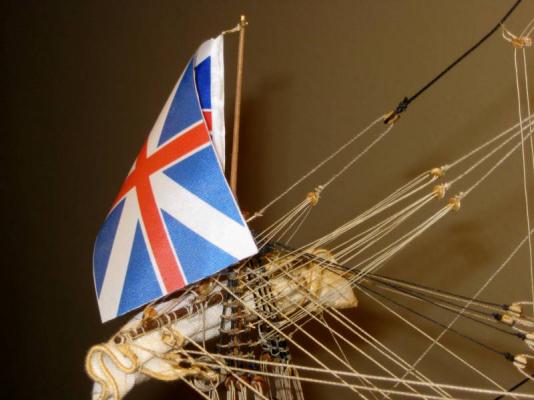
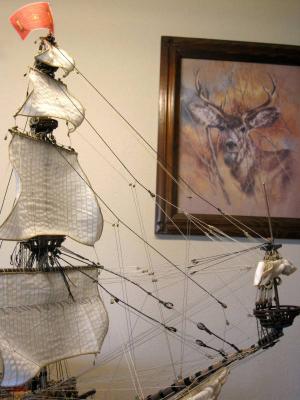
Here is the Union Jack raised on the bowsprit pole. The flag provided in the kit is not authentic in that the Union Jack was not correct for the time period. The one provided was a later version flown long after the SOS was sailing. I am not that efficient in English history to know that, but my friend Denis is from the UK and picked up on it right away. He was nice enough to have some correct flags made and he shipped me some for my ship. The first photo shows the incorrect flag and the second the correct one. Vince P.
- 264 replies
-
- 4
-
-
- sovereign of the seas
- mantua
- (and 1 more)
-
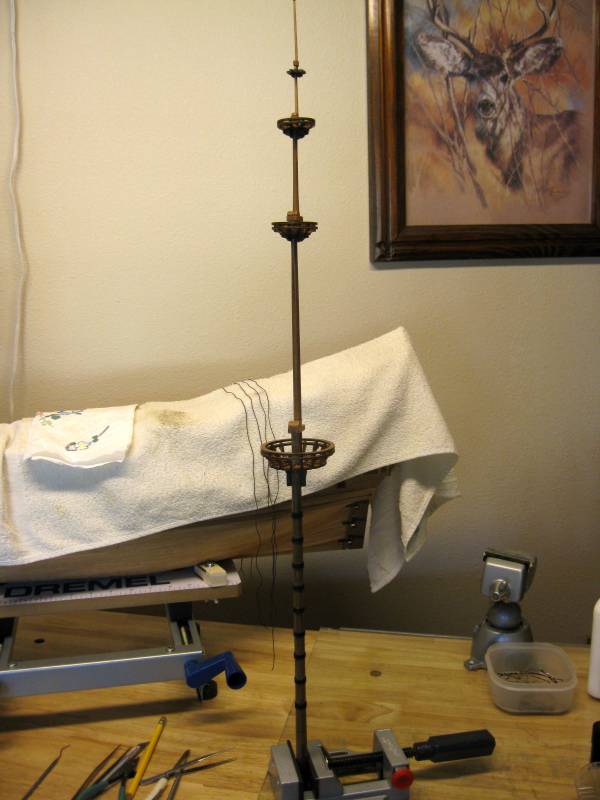
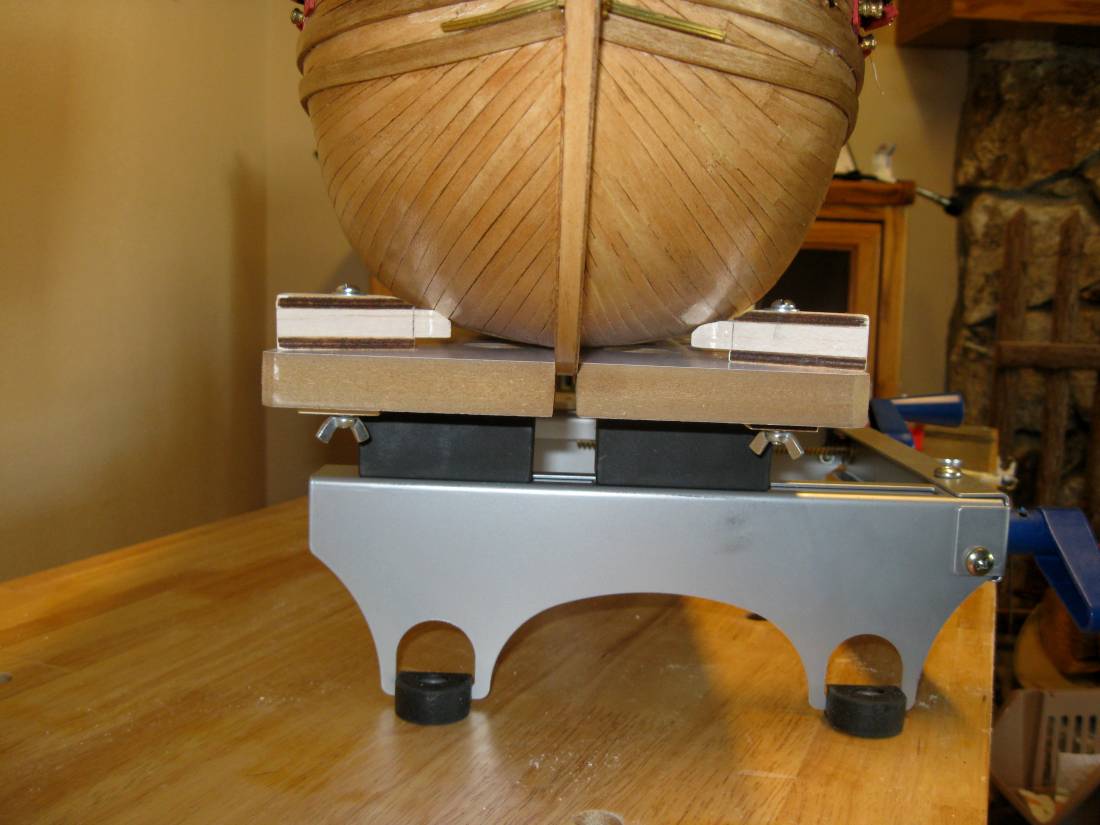
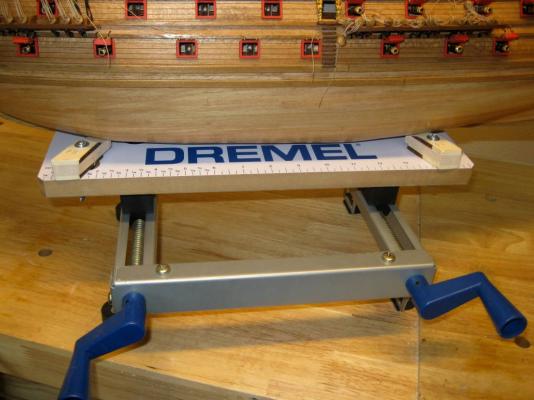
I bought this little work table made by Dremel to hold the ship on the table while allowing it to be moved around and rotated for access to the rigging and such. The keel clamps inside the gap in the table top and I made some custom chocks to cradle the hull. It holds the ship quite securely. I saw this little table on Anja's build log and asked where she got it. She gave me some info. It seems that Dremel no longer makes this, but the TGM Shop from Amazon still sells them. It came all the way from Germany. This will make it much easier to get all around the ship for the rigging. Vince P.

- 264 replies
-
- 5
-
-
- sovereign of the seas
- mantua
- (and 1 more)
-
Slowing down the Dremel Rotary tool
pirozzi replied to JPett's topic in Modeling tools and Workshop Equipment
Micro-Mark. Part # 82694. Price $43.95 US. Vince P. -
I just found another glitch in the kit design. The main mast at its base is 12mm. When it is stepped into the ship, there is a cutout in the keel that that the bottom of the mast sits into. Well I don't know how I missed this but when I placed the mast temporarily before planking the hull, to make sure it would sit straight up vertically and not tilt to either side, everything looked good. Turns out that I must not have pushed the mast all of the way down to bottom in this slot. I am now starting construction on the main mast and again placed it in the hole to make sure it was true but I could not get it down far enough without tilting it slightly to port. I figured that the decks were slightly off, so I started filing the hole to get the mast straight. As it turns out, it had nothing to do with the alignment of the decks. They were right on. The damn slot in the keel is only 9.5mm and the mast is 12.0mm. So, I had to shave off both sides of the mast base about 10.0mm up so it measures 9.5mm across. Now the mast fits correctly. If you are going to build this kit, fix the slot by making it 12.0mm before constructing the hull. Vince P.
- 264 replies
-
- 1
-
-
- sovereign of the seas
- mantua
- (and 1 more)
-
I fimished all of the running rigging from the bowsprit to the foremast and the foremast to the deck. The starboard side has the shrouds of the foremast rattled as well. I added all of the little rope coils to the belay points on the deck and the mast tops. I am having nightmares about making clove hitches and still have to do a few hundred in the port side. Vince P.


- 264 replies
-
- 2
-
-
- sovereign of the seas
- mantua
- (and 1 more)
-
Slowing down the Dremel Rotary tool
pirozzi replied to JPett's topic in Modeling tools and Workshop Equipment
Let me look it up for you. -
Slowing down the Dremel Rotary tool
pirozzi replied to JPett's topic in Modeling tools and Workshop Equipment
Dremel makes a foot pedal accessory with a built in speed control. This would do it. Vince P. -
Model Expo will replace that tool free of charge. It must just a defective one, because I think I have the same one and have used it many many times without a problem. Is it the one with the round head and comes with wood curve forms? Vince P.
-
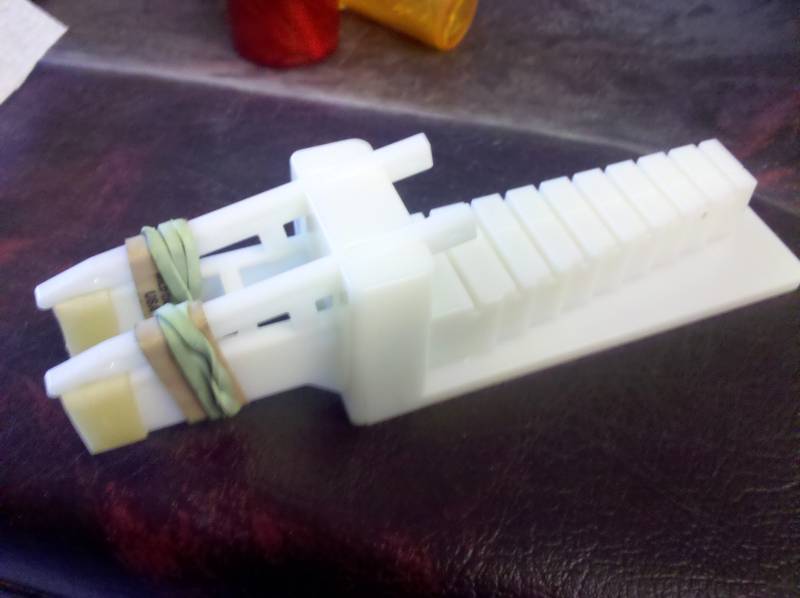
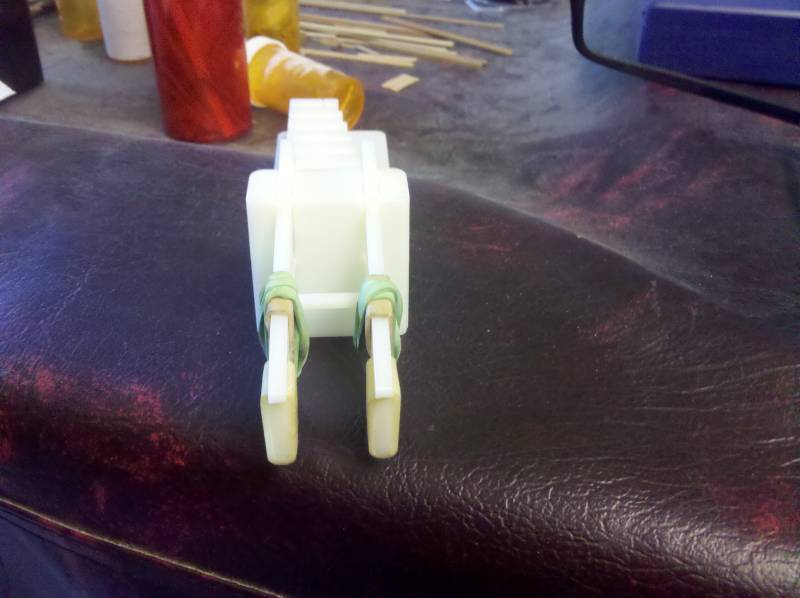
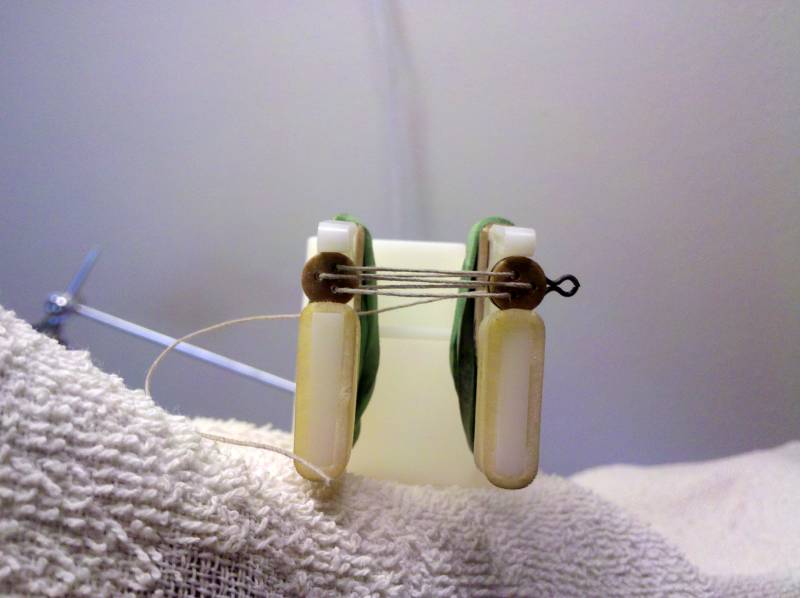
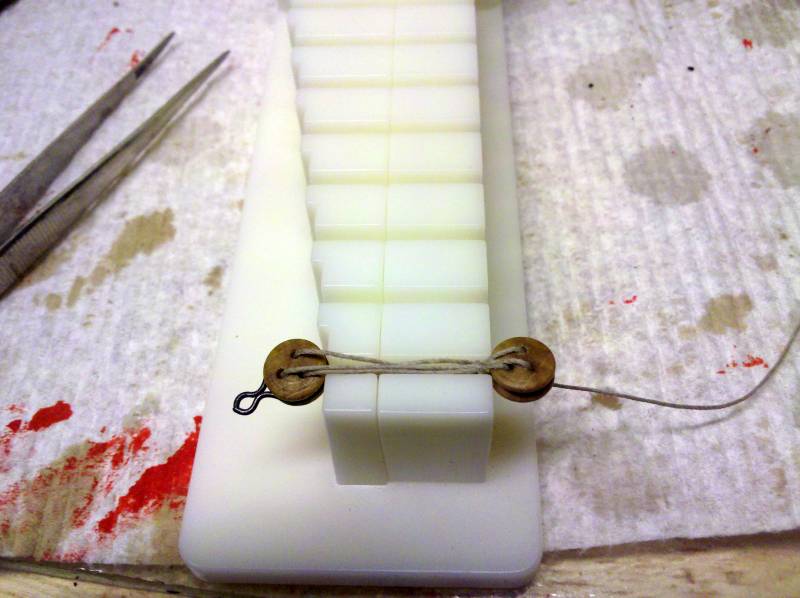
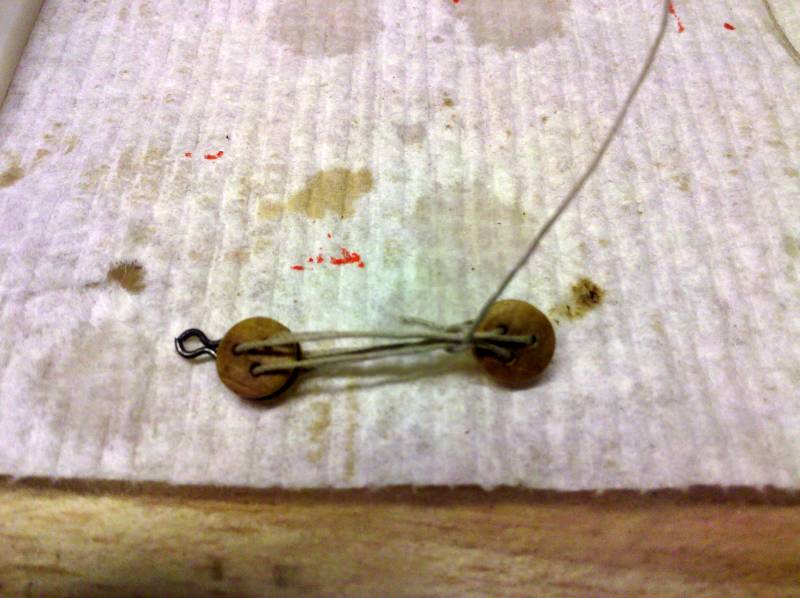
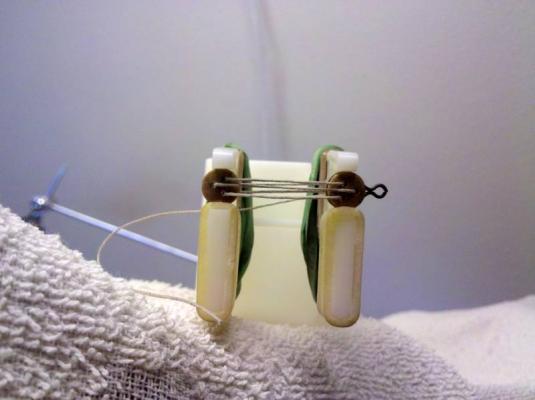
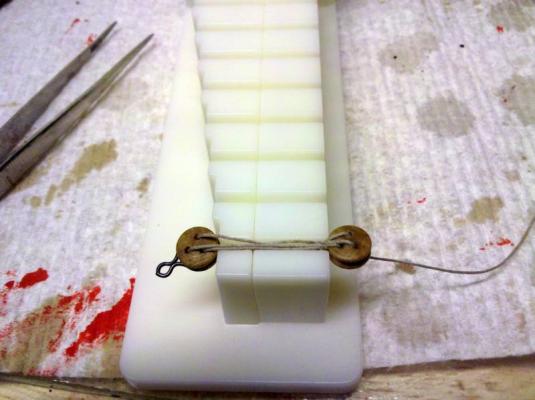
I disagree about the reeving tool. It is one of the most useful tools I have ever purchased. Sure, there other ways to reeve deadeyes, but this makes it easier and more uniform. Vince P.
-
This is just a general thank you to all of the modellers that have posted nice compliments on my log. Vince P.
-
I have several power tools and many hand tools from Harbor Freight. Even my work bench is from them. I have not had a problem with anything I have bought there. Vince P.
-
Posting etiquette
pirozzi replied to dvm27's topic in Using the MSW forum - **NO MODELING CONTENT IN THIS SUB-FORUM**
I don't mind as long it is relavent to by build and in good taste. I personnaly would just send them by private message to the builder just in case there could be a problem. You never know! Vince P. -
Hi Bryan, I know I bought this tool from Model Expo about 4-5 years ago. I don't see it listed in anybody's catalog now. Maybe it was discontinued. Sorry. Vince P.
-
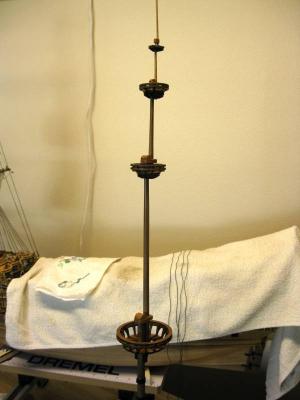
One of the most USEFUL tools I ever bought was this reeving tool for deadeyes. I have used this many times over the years and still use it. It makes rigging deadeyes a snap. Vince P.


-
Enough already with the Imperial/Metric issue. What the heck does that have to do with "Tools" anyway? Besides, I don't know of a smart phone or computer that can't convert one into the other in seconds. Vince P.