pirozzi
-
Posts
843 -
Joined
-
Last visited
Content Type
Profiles
Forums
Gallery
Events
Everything posted by pirozzi
-
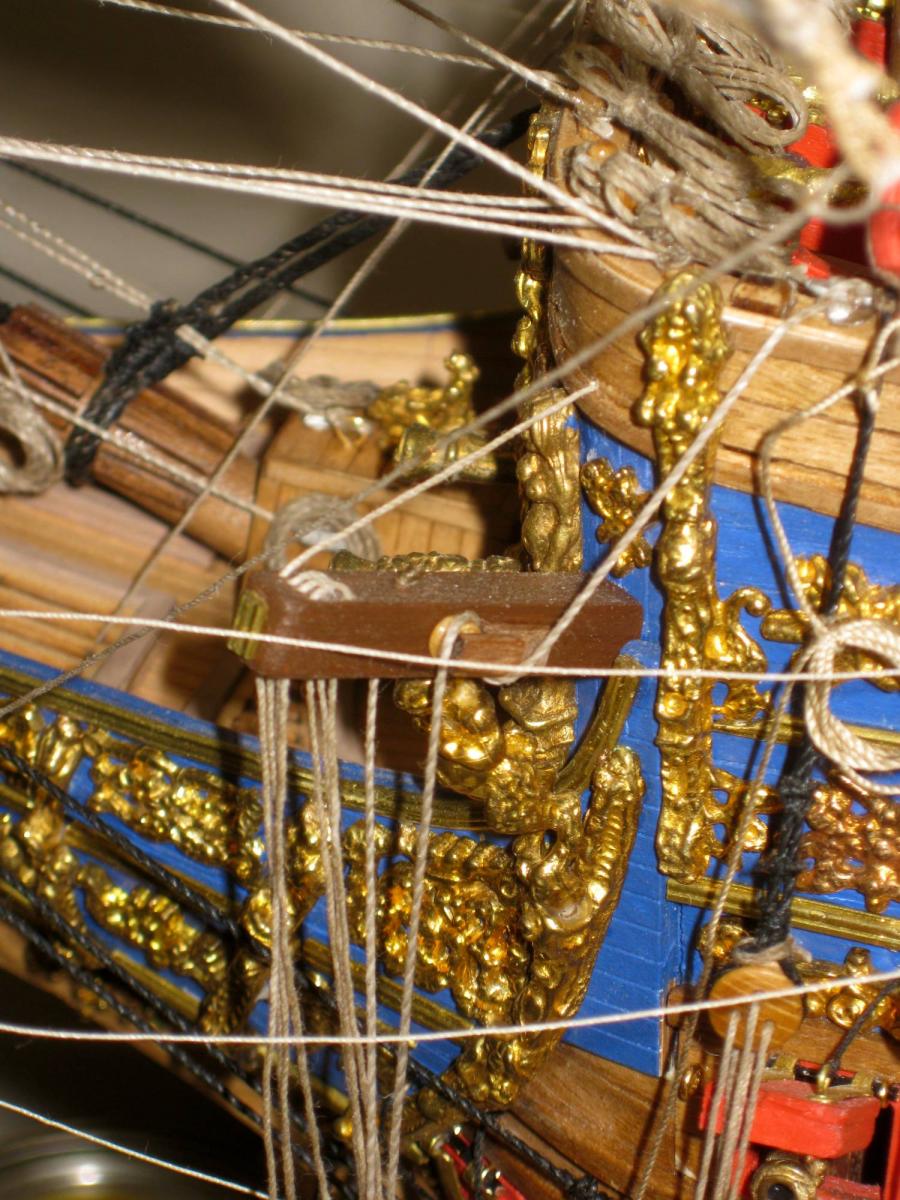
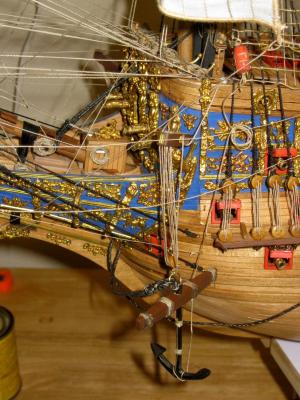
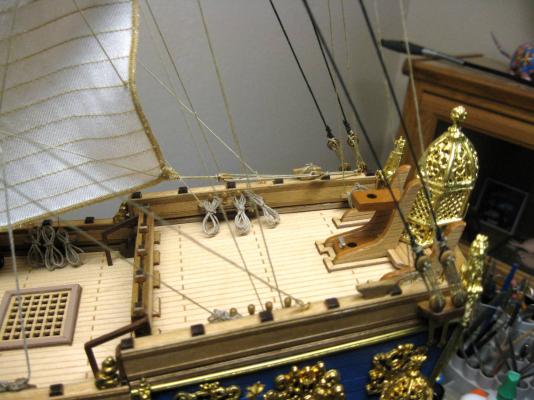
 One last bit of kit bashing. I did some research since I am going to rig her with the bow anchors hanging from the catheads. Since the only thing holding these anchors is an open hook on the tackle block, there had to be a better way to secure the anchors from jarring loose. Ships of this period did have a solution. There was a half cleat with a sheave mounted on the side of the cathead. A rope called a "cathead blocker" was rigged by securing through a verical hole in the cathead, passing through the anchor ring, up through the sheave in the half cleat, and finially tied off at the forward forecastle railing. I made the half cleats from some 4x4mm walnut stock, with a 3mm deadeye as the sheave. Vince P.

- 264 replies
-
- 2
-

-
- sovereign of the seas
- mantua
- (and 1 more)
-
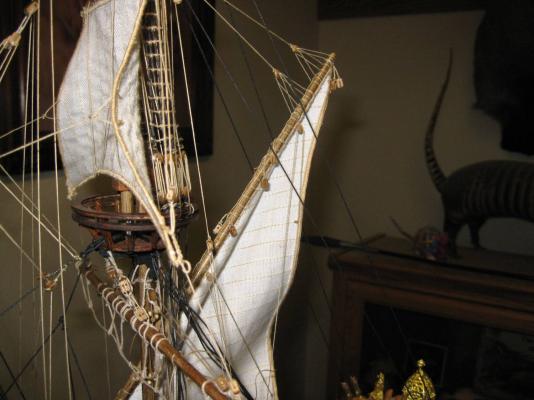
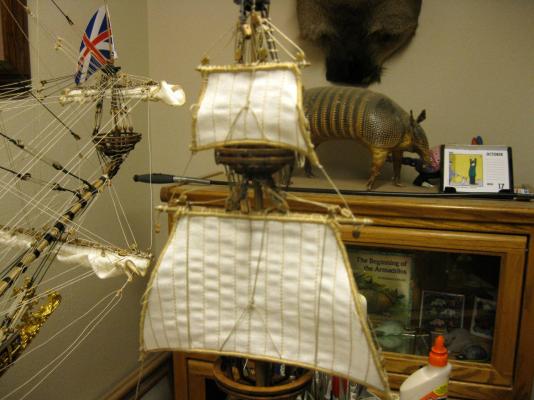
Hi Amfibius, I got the sails to shape by just adjusting the tension and slack on the running rigging attached to each sail. It is not perfect but is better than just limp sails. Vince P.
-
Hi Sailor, My next build is the Royal William by Euromodels. I already have it and I am doing research on her now. Vince P.
-
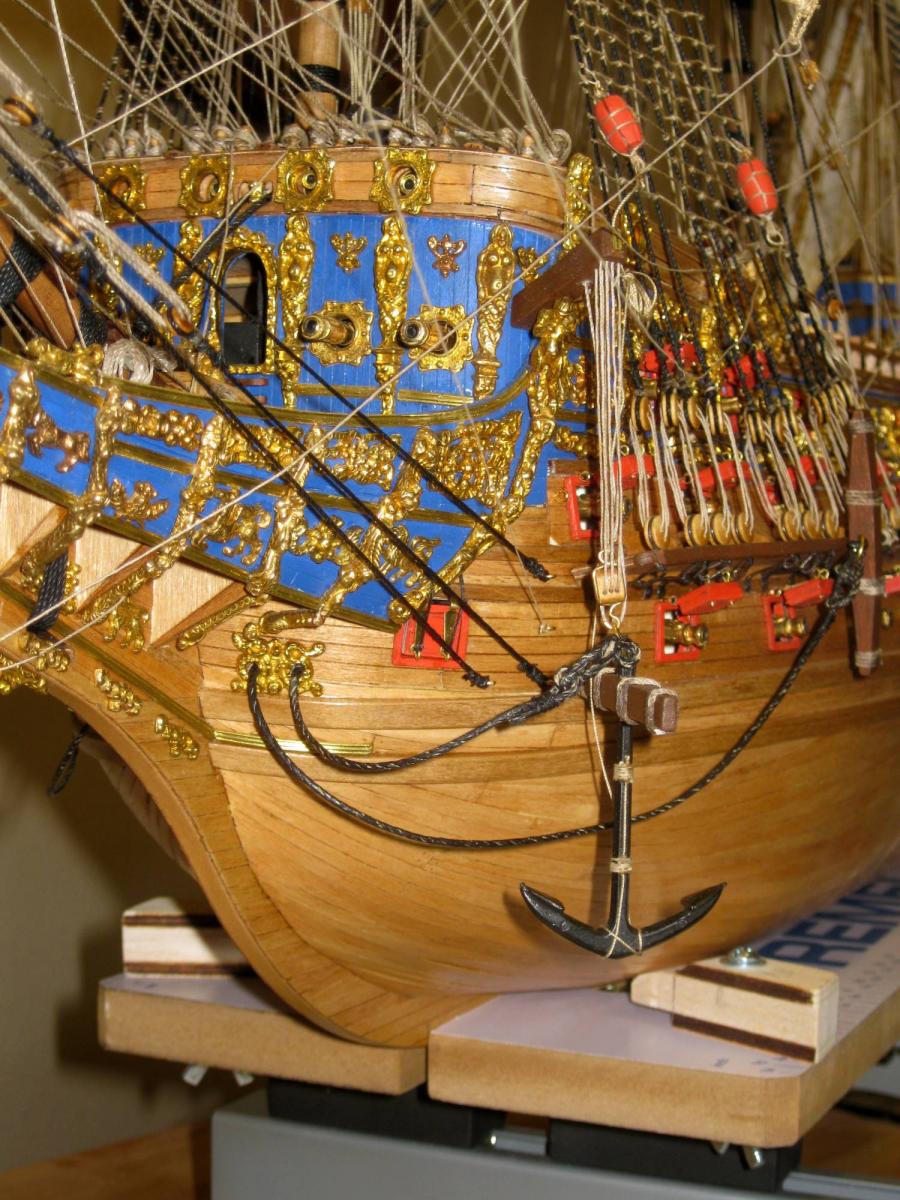
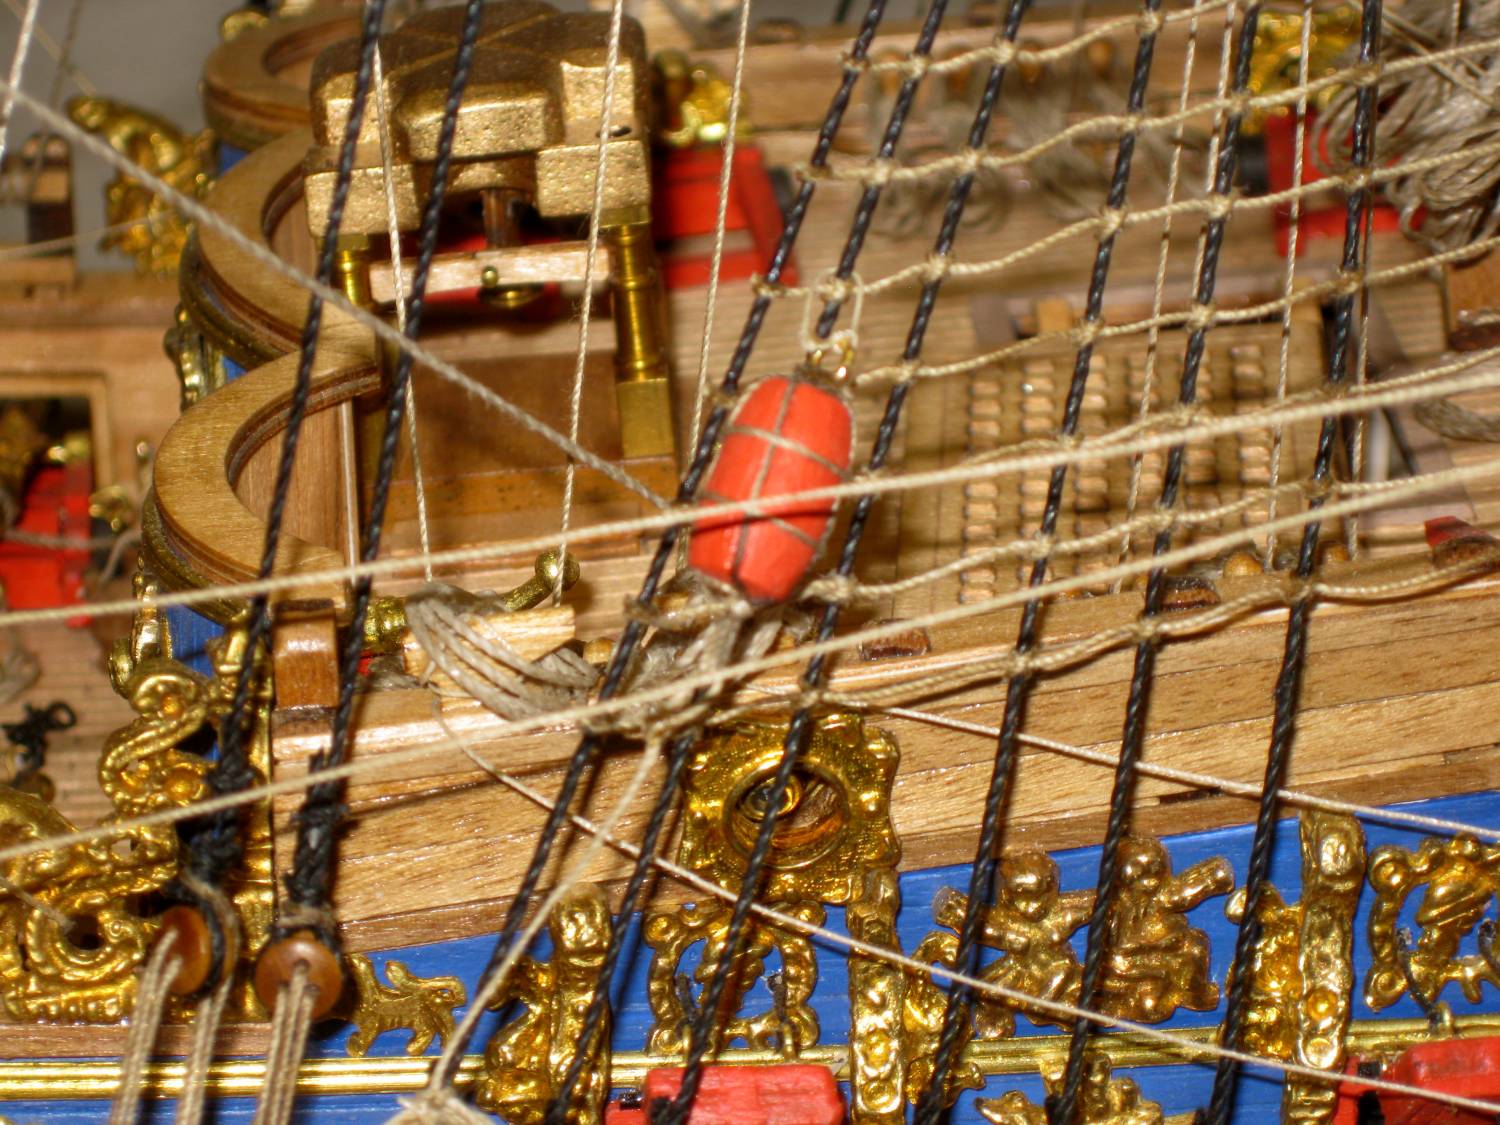
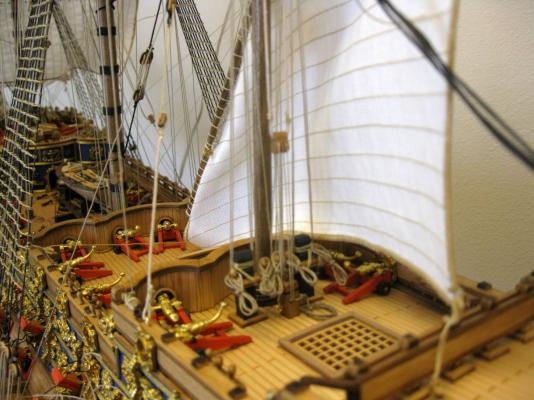
The last step in fishing the anchors. The kit does not mention anchor bouys, but ships had them to locate submerged anchors. I made some from 8mm round stock and rigged them with a sling I found illustrated in "The Period Ship Handbook #1". Shown is the rearmost starboard anchor secured to the channel. The forward anchor will be rigged hanging from the cathead just to illustrate stowing the anchors both ways, even though both would be lashed to the channel under full sail. Vince P.

- 264 replies
-
- 2
-
-
- sovereign of the seas
- mantua
- (and 1 more)
-
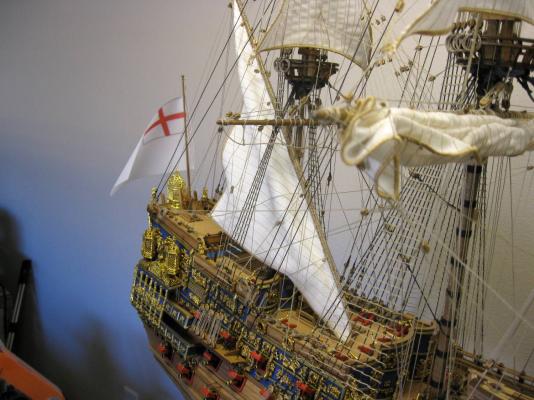
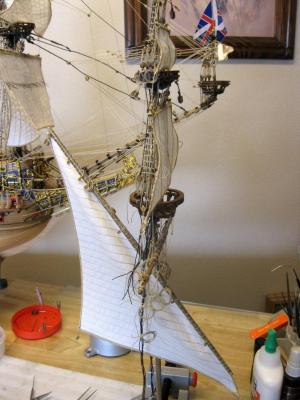
The mizen mast rigging in complete along with the flag, poop deck flag, and any remaining running rigging not previously completed. I have tied my last clove hitch on this baby. The only thing left is to fish the anchors and maybe add some crew members (not decided yet). I have to research what the color scheme was for clothing. Vince P.

- 264 replies
-
- 4
-
-
- sovereign of the seas
- mantua
- (and 1 more)
-
I ordered the Euromodel Royal William from "Ages of Sail", 5 days ago and it was delivered yesterday! That has got be a record, since it took 6 months to get the Sovereign of the Seas. Anyway, it looks like an impressive project and I am impressed with the quality of the parts and the plans. There was one broken part in the box and I E-mailed the Euro helpline. Once again, they replied in a half hour and this time all the way from Italy. They said they would be glad to replace it, but that the small piece broken off would not make a difference since it had to be trimmed anyway and was an internal part that would not be exposed. They gave me the choice. I told them I would work with it and if it did need replacing I would contact them back. I really am impressed with this company so far. Once I finish on my SOS, which should be in about 2 weeks, I will start another build log for this one. Vince P.
-
Using the cap of the pin is a good way, but even better yet is to use miniature railroad spikes. They have a larger head on one side and are made to hold down with the long side. You can buy them at any hobby store. Vince P.
-
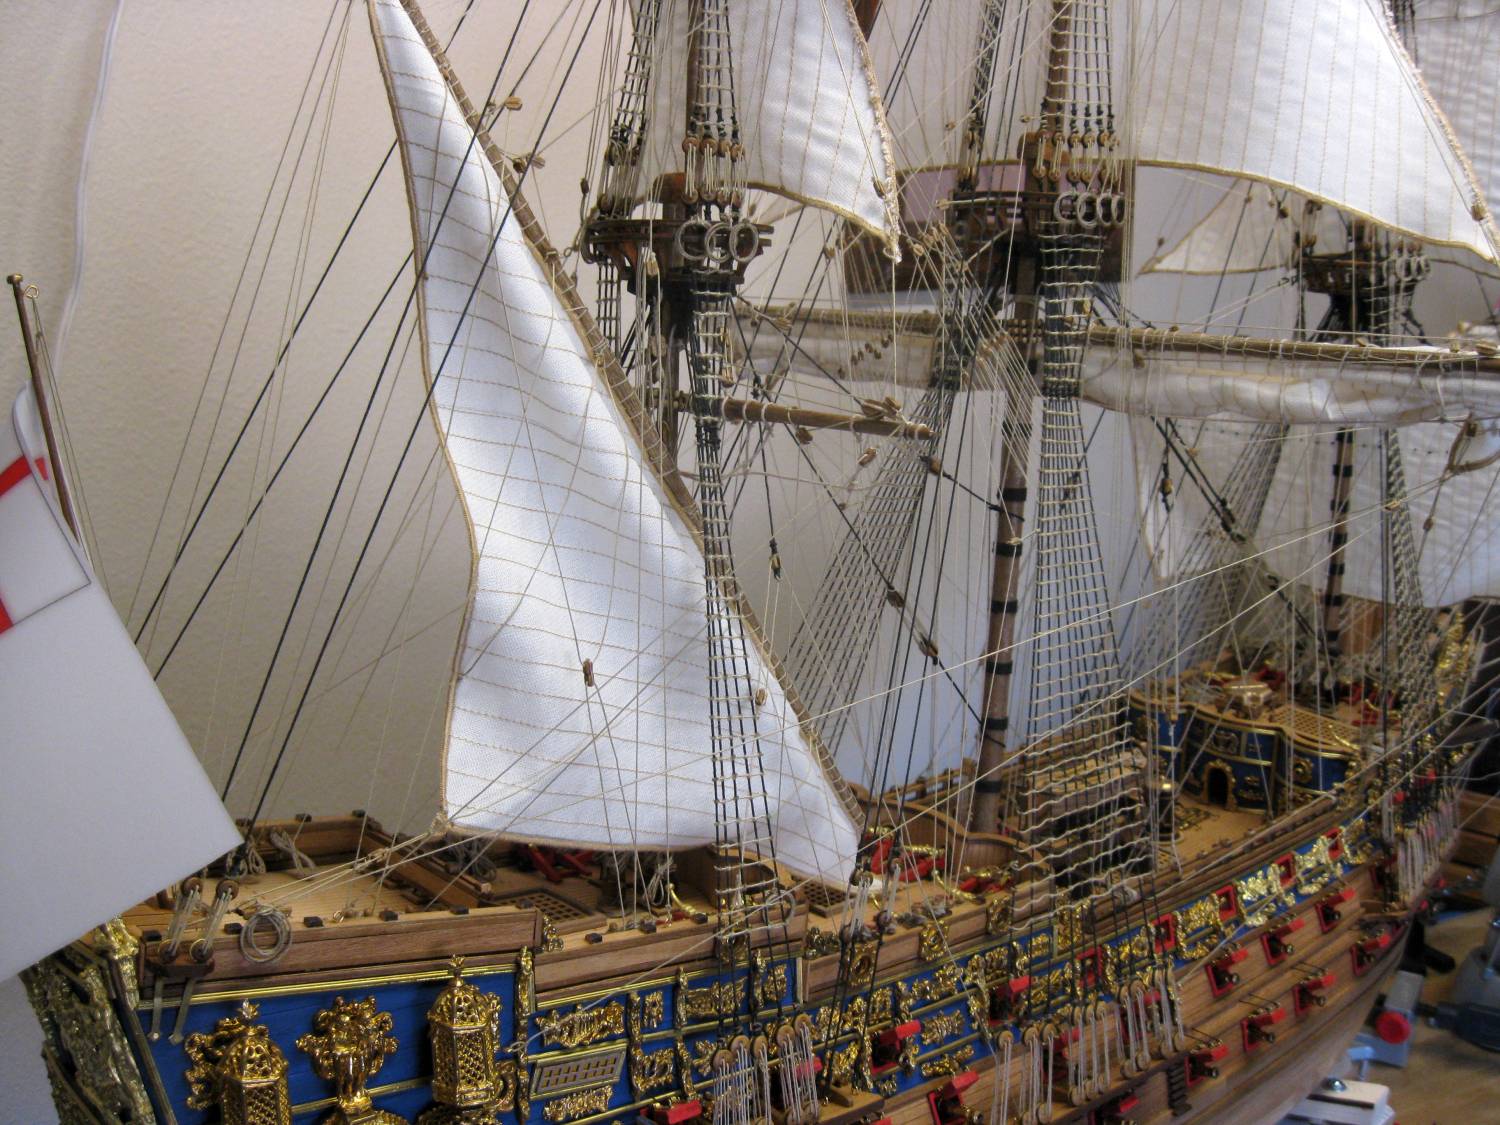
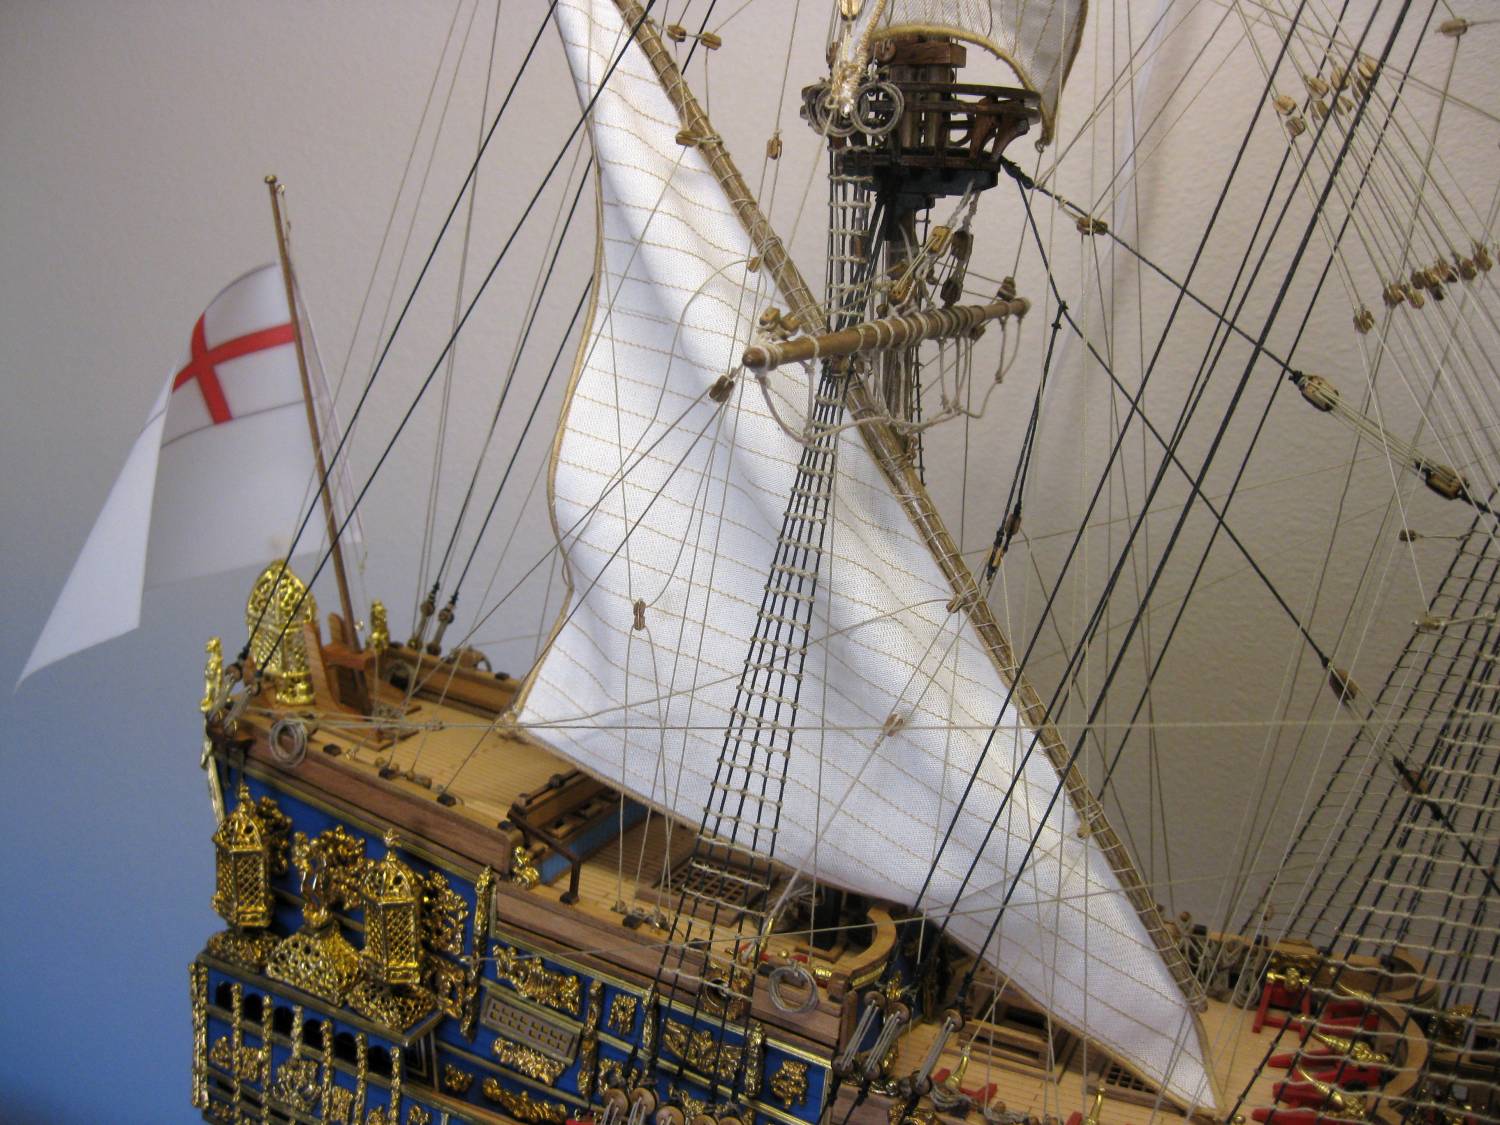
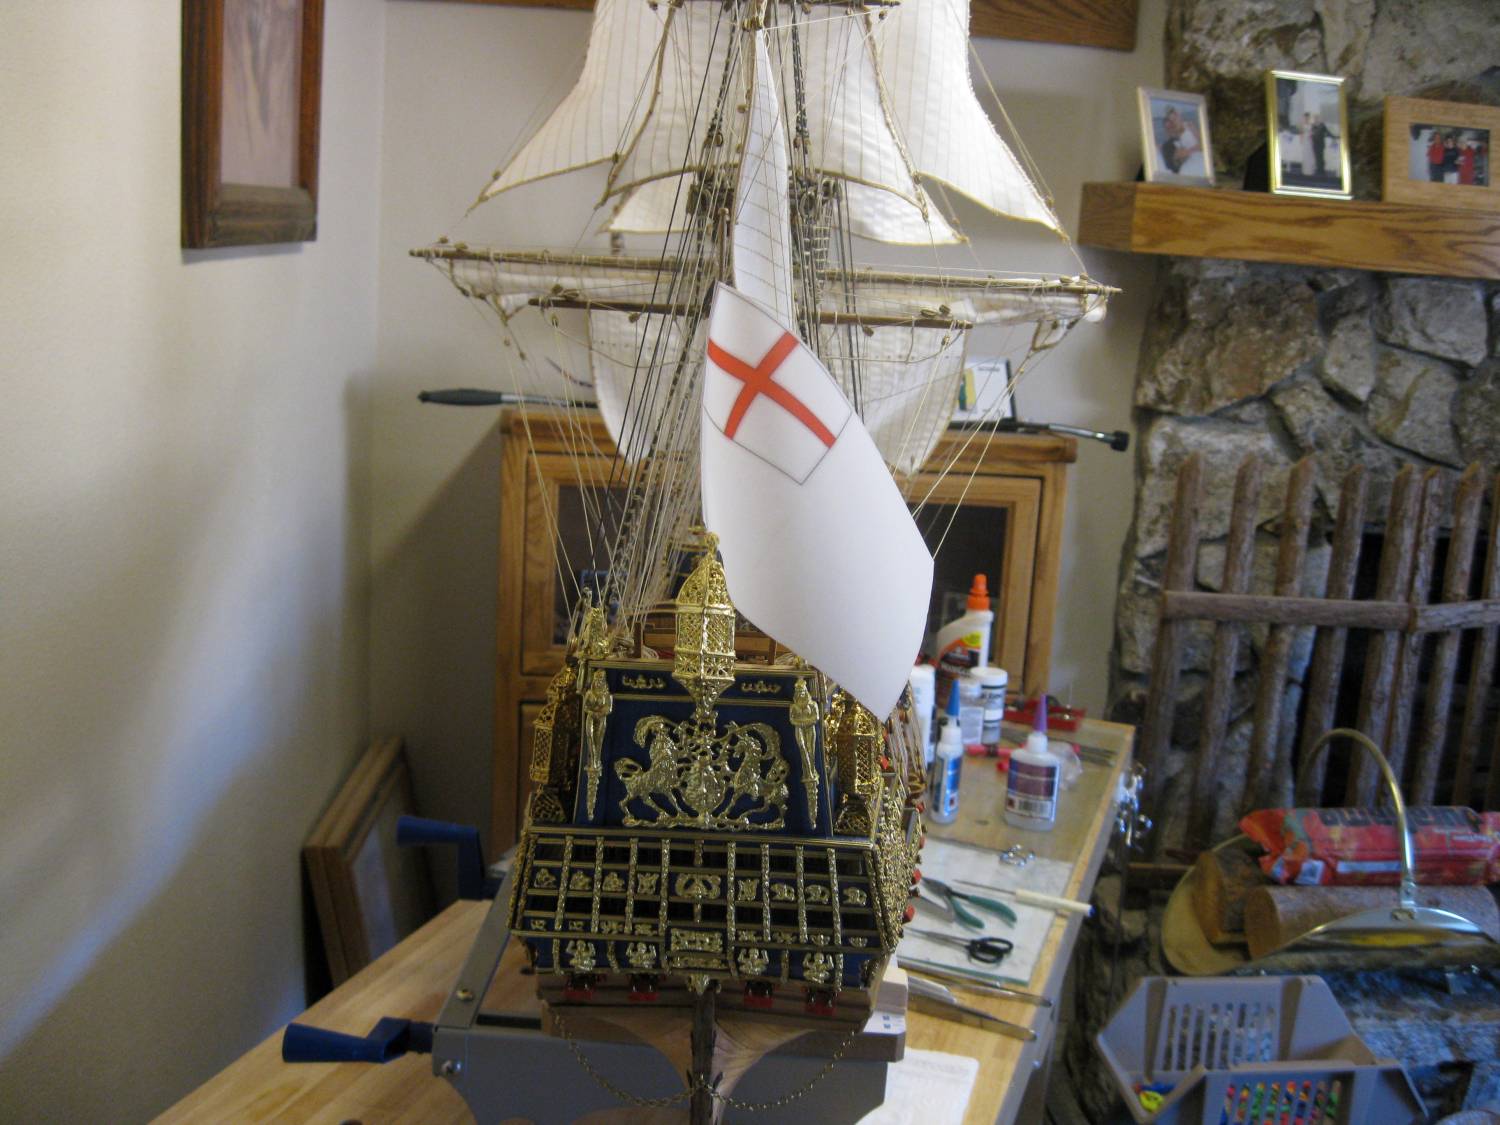
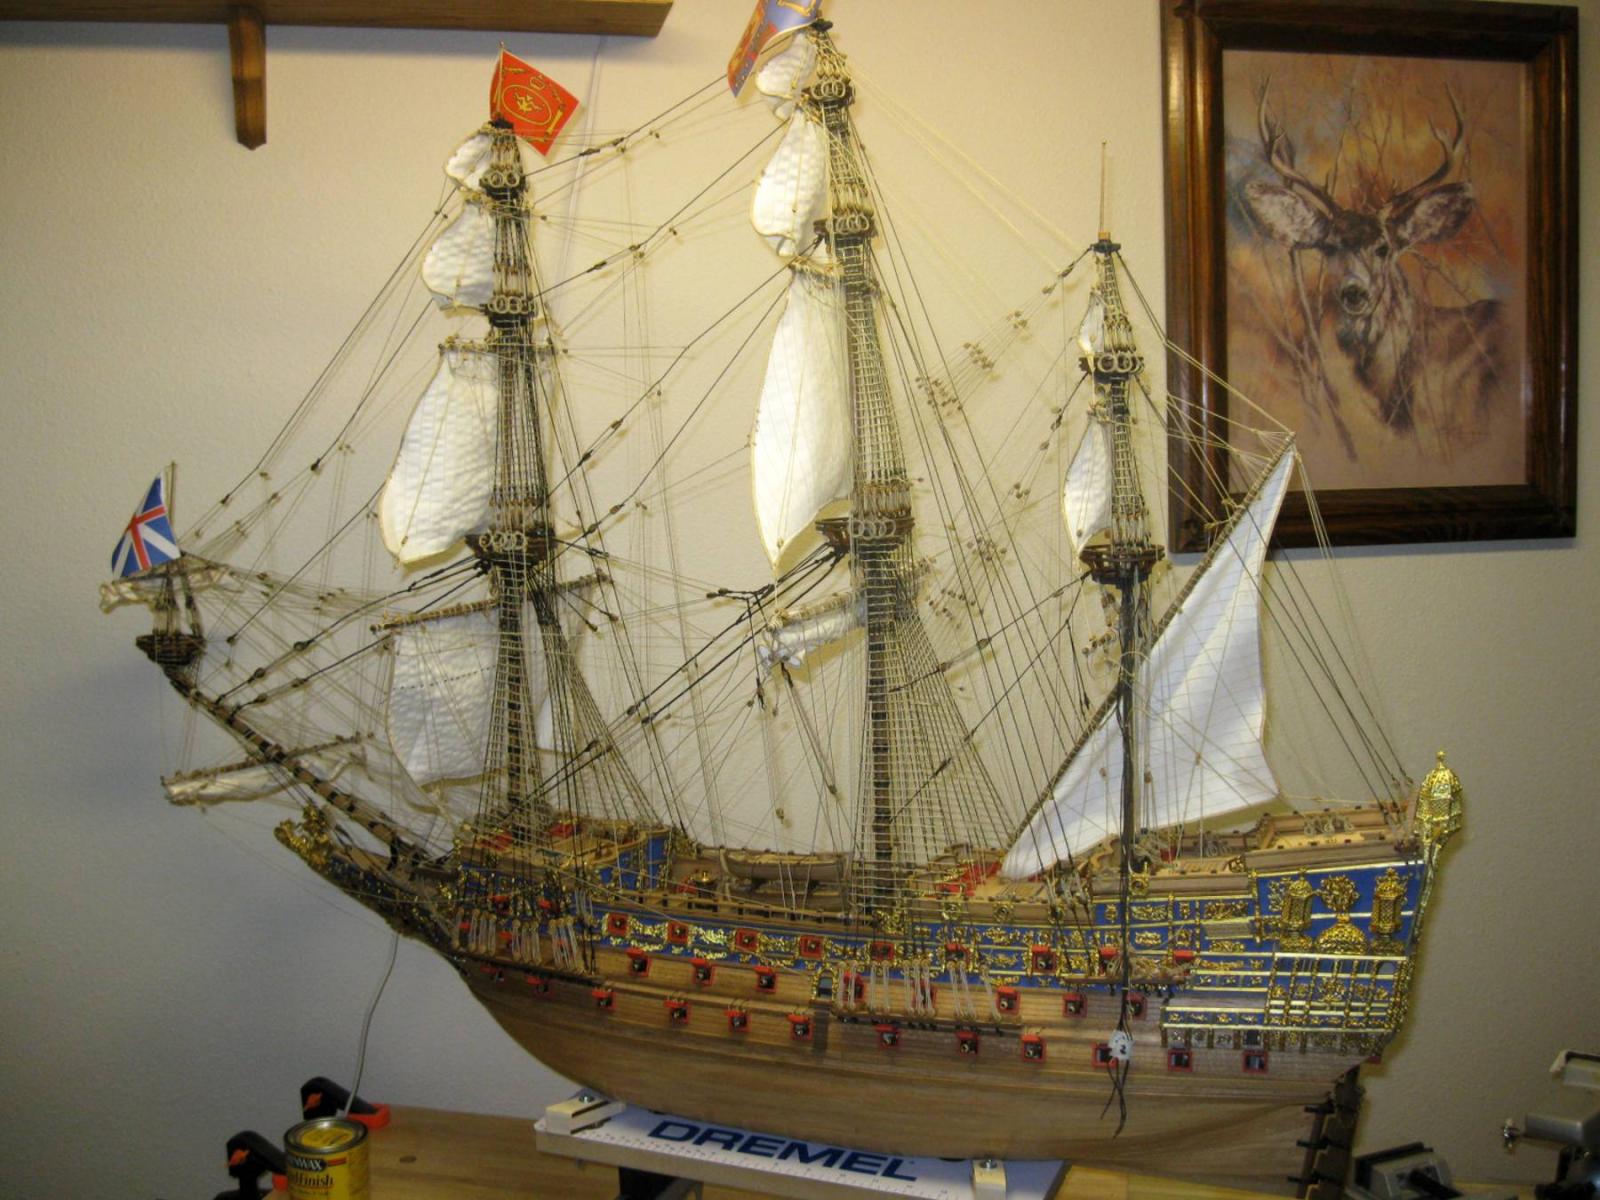
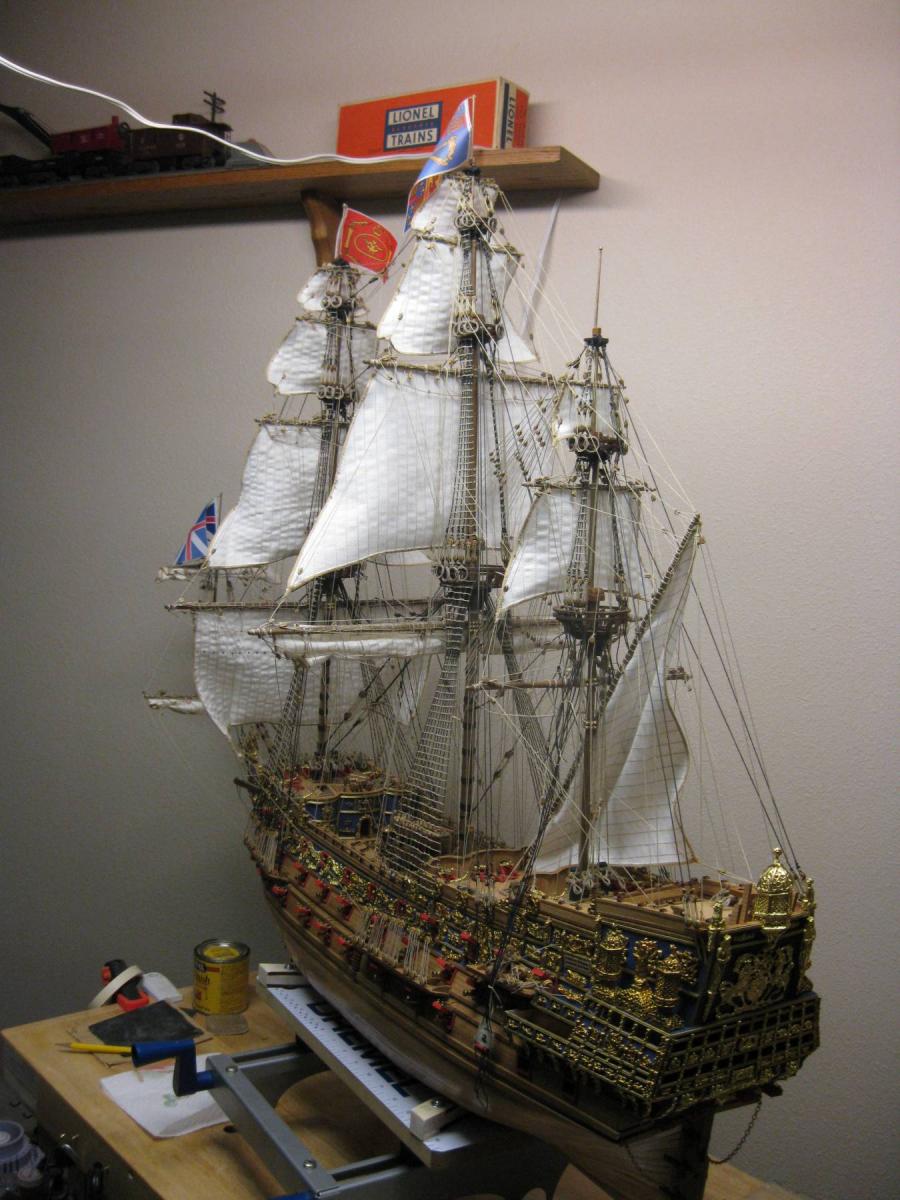
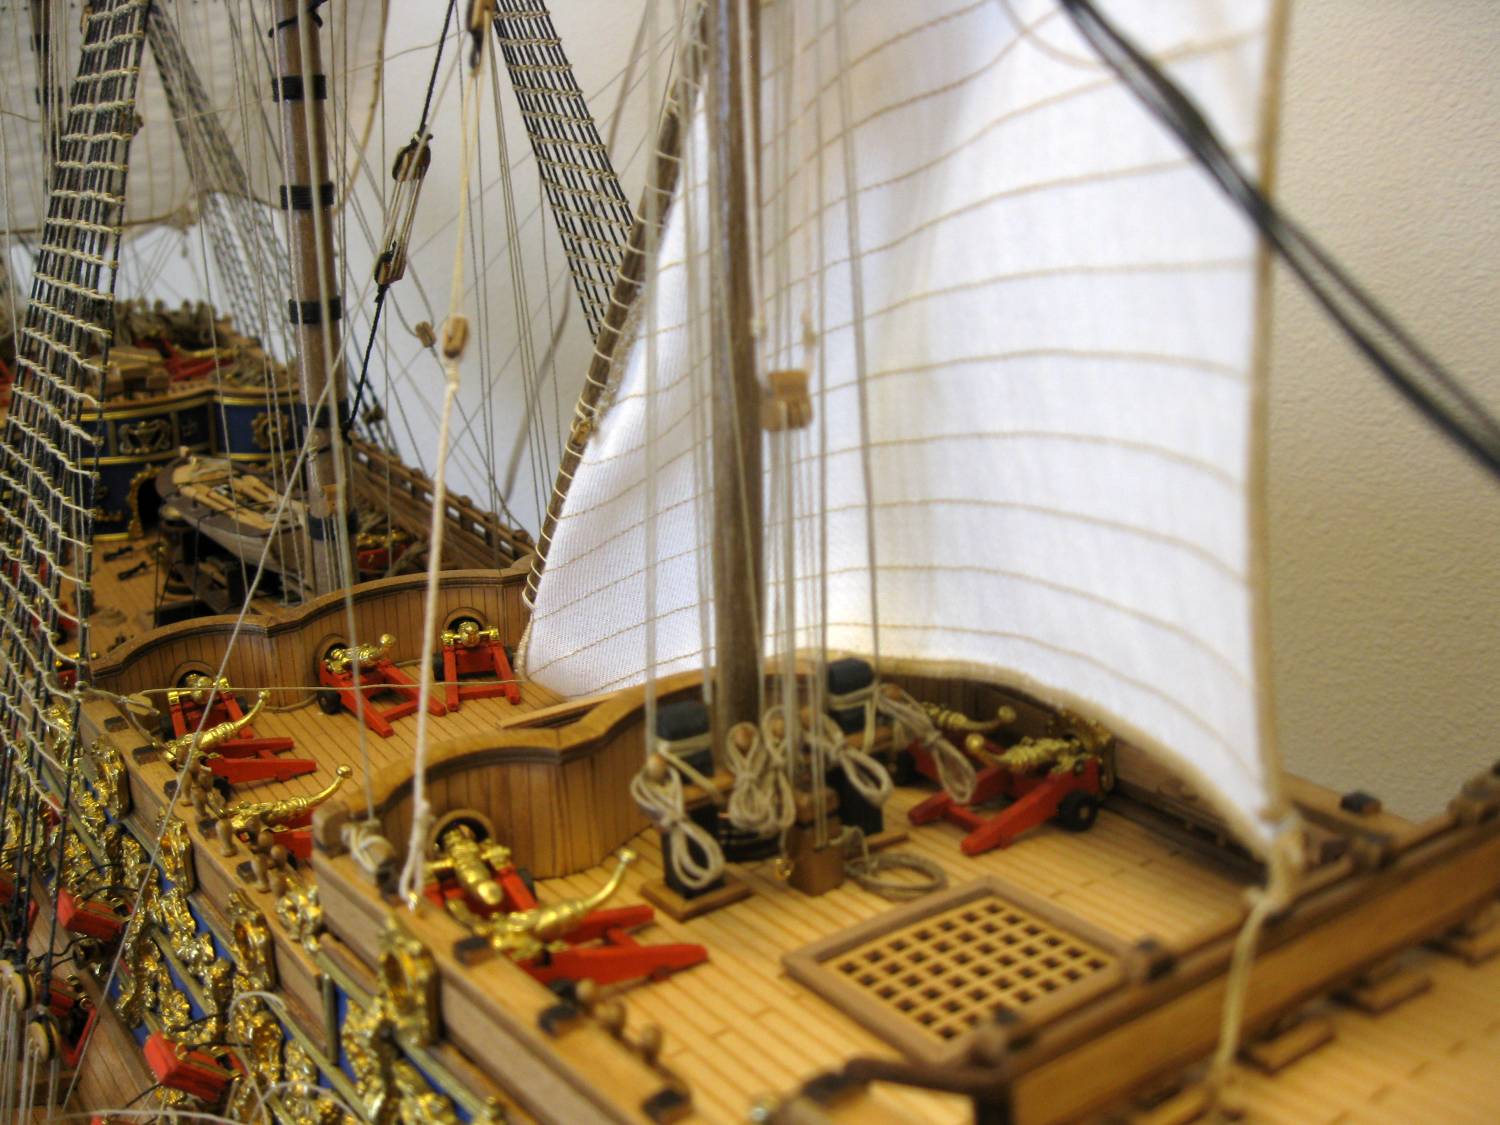
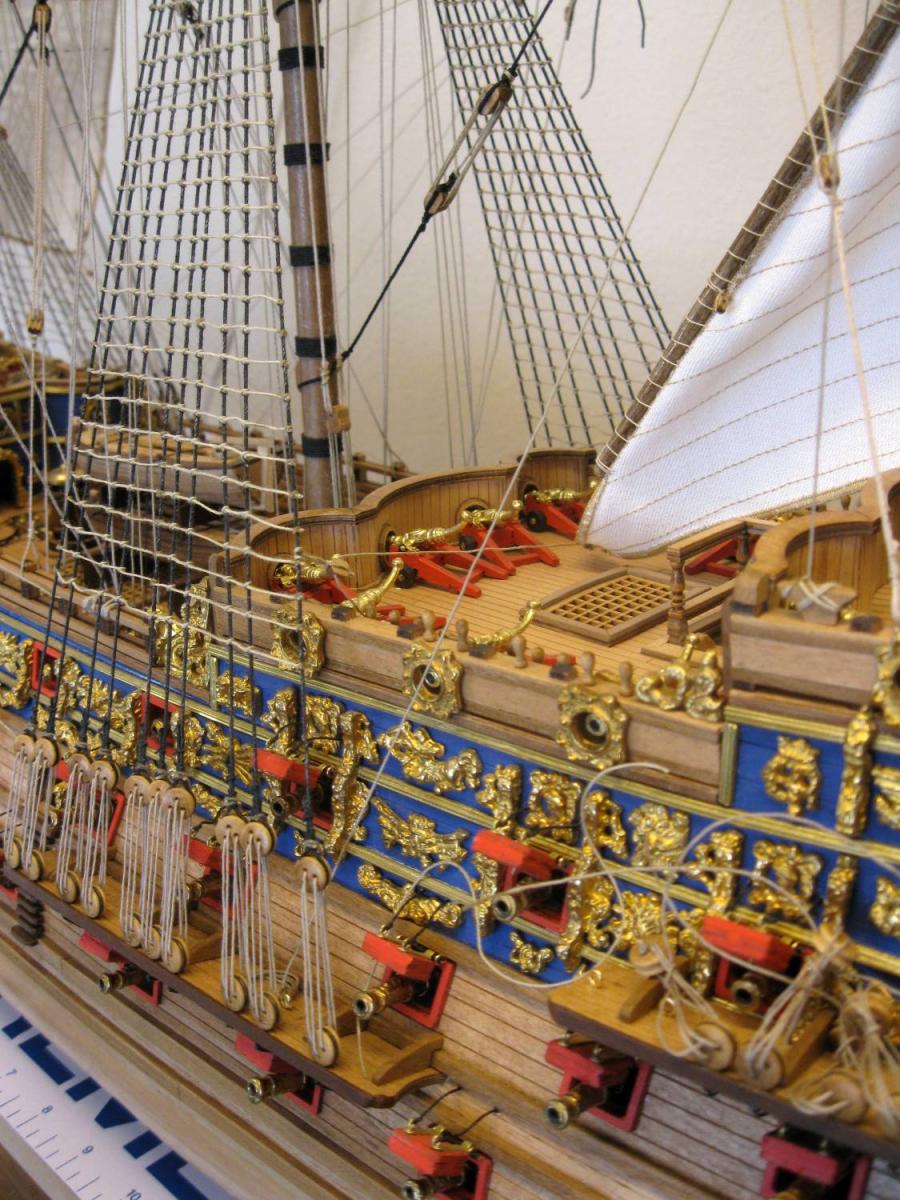
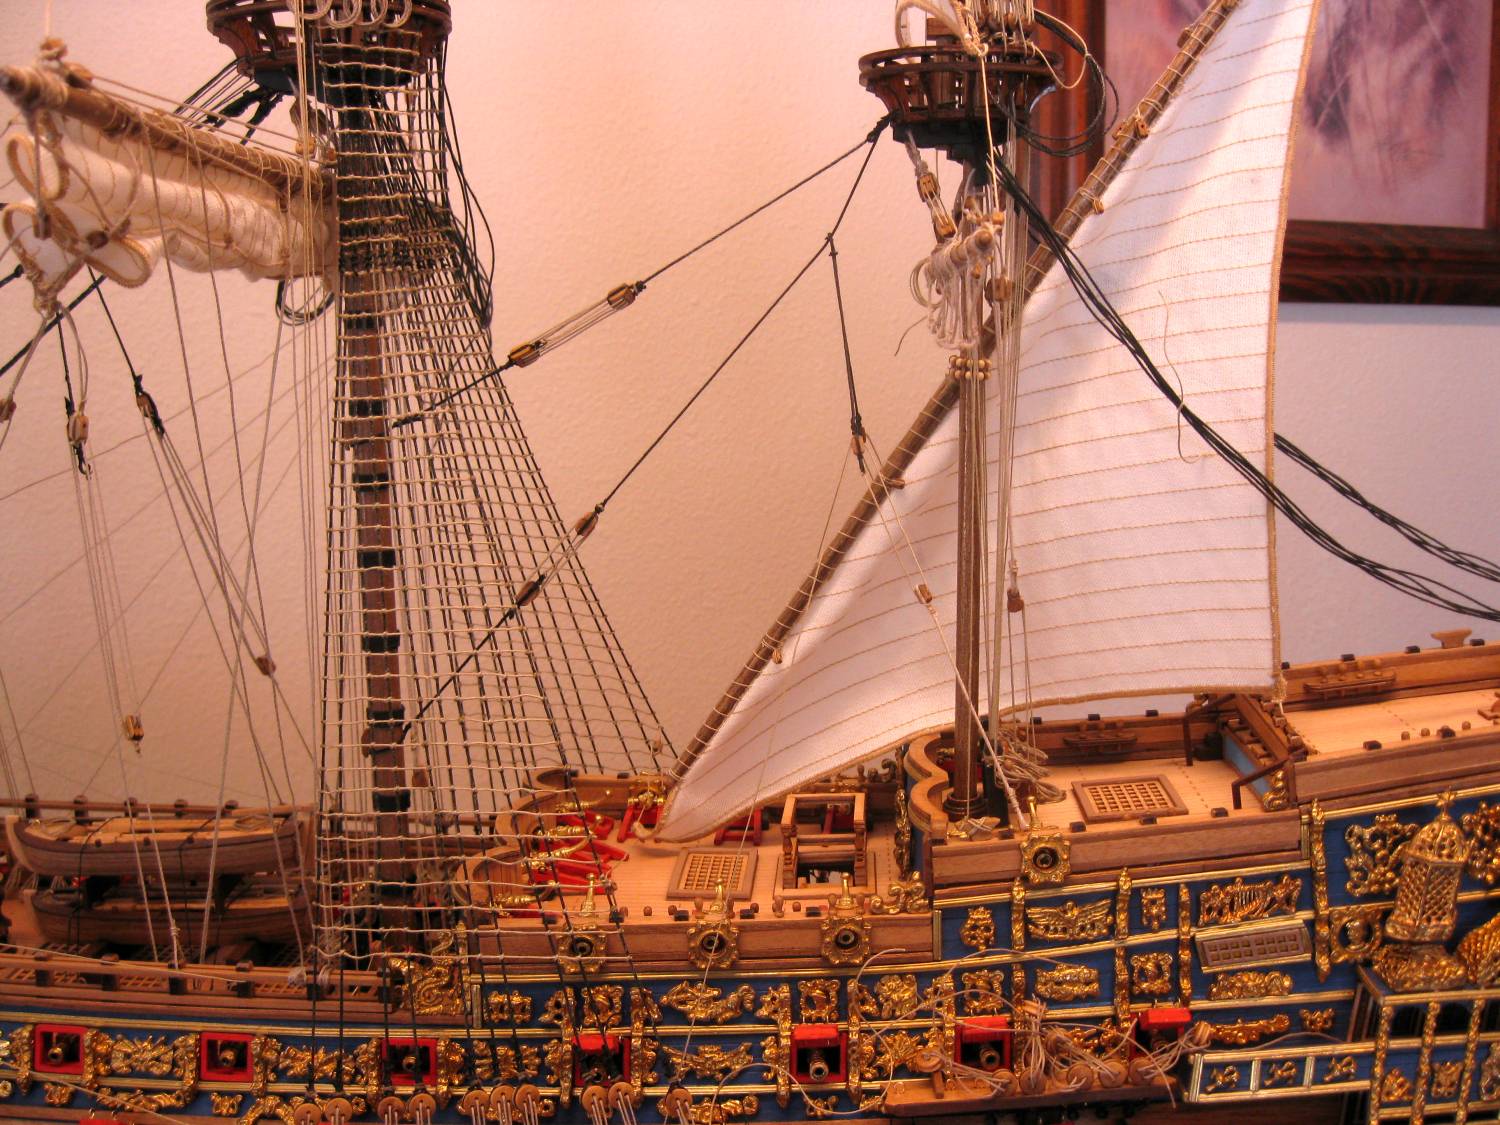
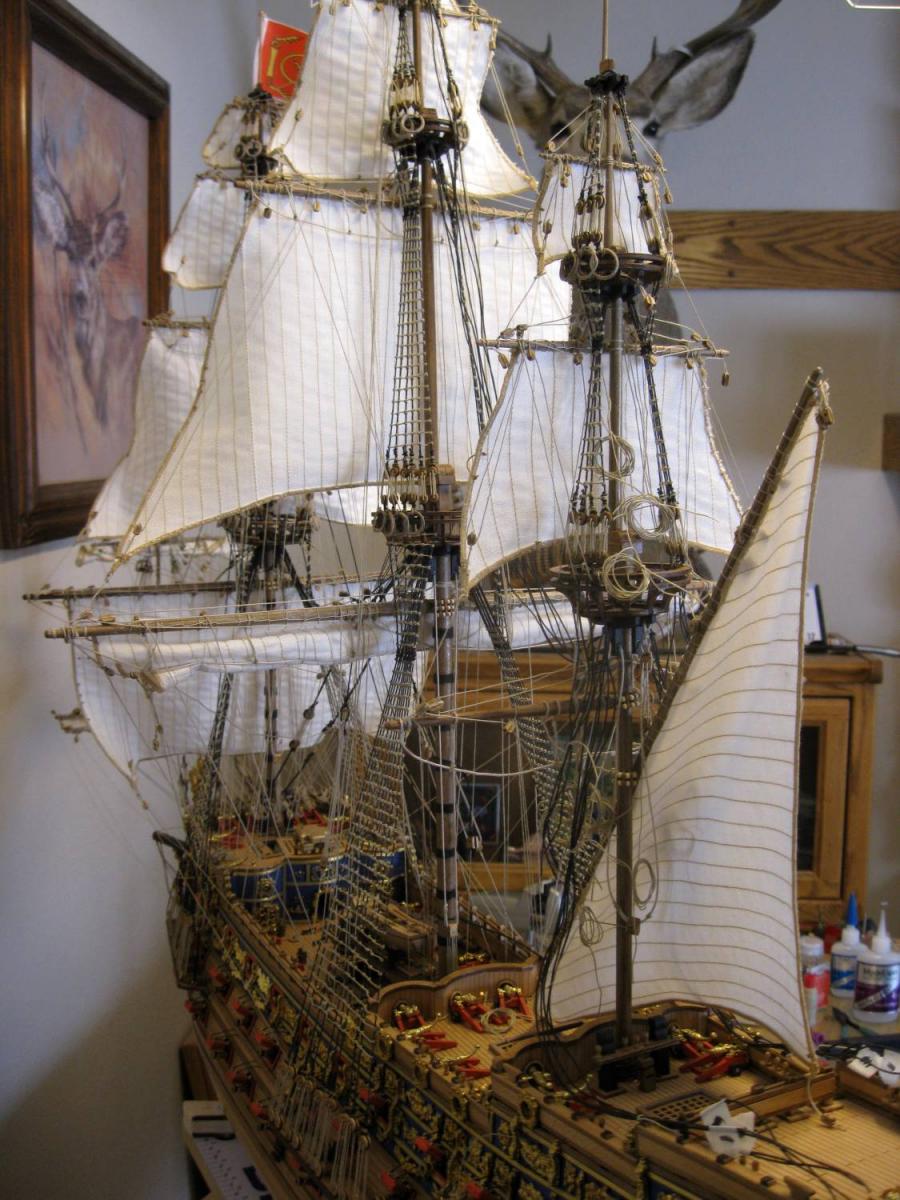
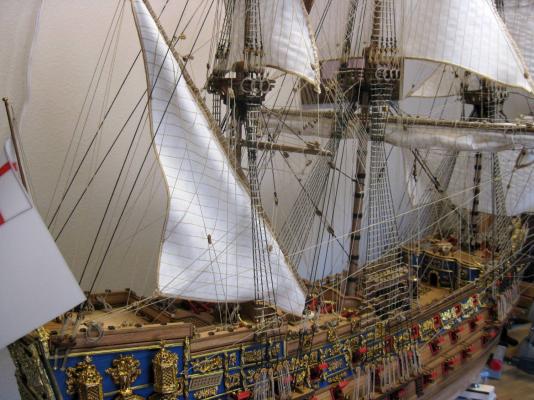
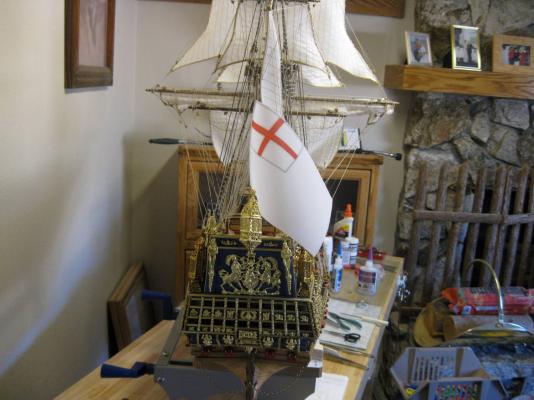
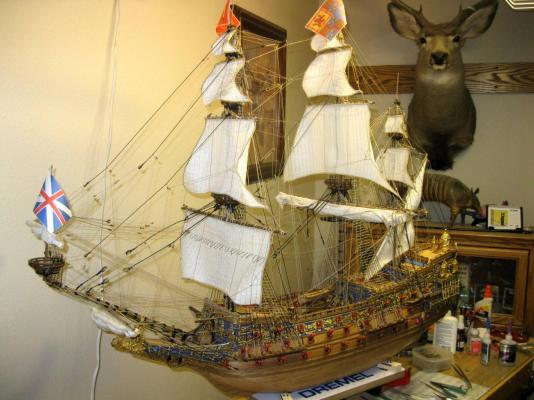
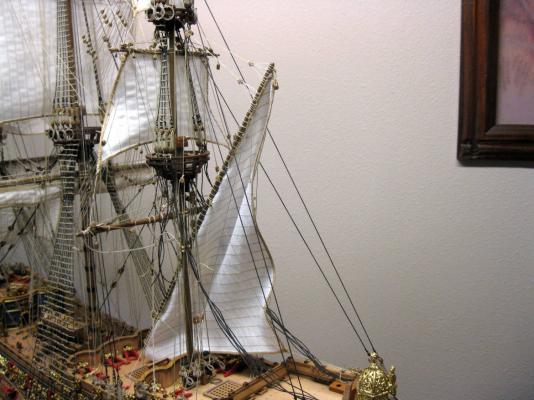
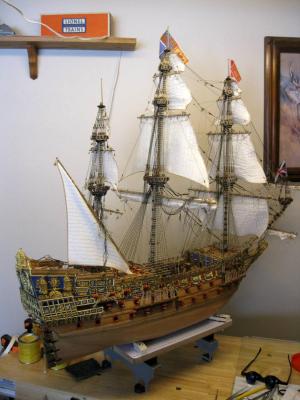
Here are a few photos of the whole ship. Vince P.


- 264 replies
-
- 4
-
-
- sovereign of the seas
- mantua
- (and 1 more)
-
The mizen braces and all of the running rigging associated with the lateen yard are completed. Next up is the mizen top flag and the poop deck flag pole and flag. I can see the light at the end of the tunnel. She is very close to completed. Maybe 2 weeks or so. I need some help. This model is VERY heavy and I need some sort of cradle for the display case. All of the pedestals and hull brackets like dolphins and the sort are either way too flimsy or too small. The wood cradle that came with the kit is pretty bad. Anybody got ideas where to go for a nice cradle? I have checked all of the supply companies and none have anything that will do. Thanks, Vince P.


- 264 replies
-
- 2
-
-
- sovereign of the seas
- mantua
- (and 1 more)
-
The mizen lifts are rigged. The kit only shows a single lift that terminates at crowsfeet on the top of the lateen yard. I did some research and according to Anderson's book, English ships of war for the period that the SOS was built, had two lifts on those larger ships that had long and heavy lateen yards. The SOS certainly had the largest. I used 3mm deadeyes for the hub of the crowsfeet. A look at Doris's build log also shows double lifts. Vince P.

- 264 replies
-
- 2
-
-
- sovereign of the seas
- mantua
- (and 1 more)
-
I would be lost without them. They serve all sorts of holding purposes. I have several different types. They even make ones with rubber jaw inserts. I was a medic and had a whole set of these. When I retired, I kept them. Now instead of holding flesh together, they hold model parts. Vince P.
-
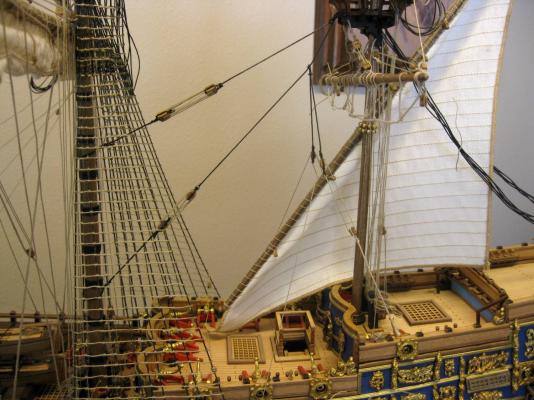
The standing rigging is now complete except for the lower mizen shrouds. All of the running rigging for the mainmast and the forward running rigging for the mizen is complete as well. This part was the most complex of the rigging by far. Next up is the aft running rigging for the mizen and lateen yard. I must say that rigging is my favorite part of a build. Vince P.


- 264 replies
-
- 4
-
-
- sovereign of the seas
- mantua
- (and 1 more)
-
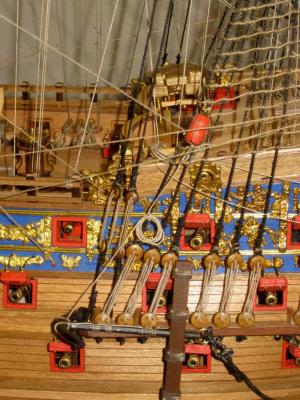
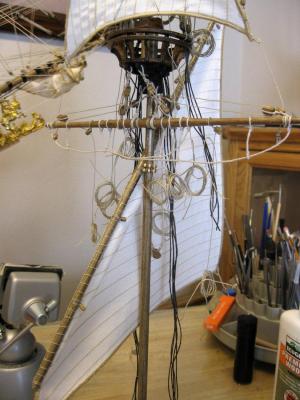
I rigged the mizen topgallant forestays after building them on the jig. It was a piece of cake to keep them straight and tight. I think they turned out OK. I still have to build and rig the topmast forestays which are of the same construction. I also had to rig the topmast and topgallant backstays now because in order to pull the forestays tight, there had to be a counter force to keep the masts straight and the rigging taught. The kit does not address the backstays correctly and it is necessary to build little platforms like chain wales to attach to the stern end of each side of the ship. 5mm deadeyes and laniards are rigged here to hold the backstays. Vince P.


- 264 replies
-
- 4
-
-
- sovereign of the seas
- mantua
- (and 1 more)
-
Since I am rigging her as authentic as possible, the mizen topmast and topgallant forestays will be some of the most complex rigging of the whole ship. There are 4 stays and each has 4 sections. The trick is to get all of the blocks even and the whole thing as tight as possible. Assembling the stays on the mast would be very hard, so I decided to build them on a jig first. It was not too difficult this way, and they are coming out pretty uniform. Vince P.

- 264 replies
-
- 6
-
-
- sovereign of the seas
- mantua
- (and 1 more)
-
Hi Andy, Looking very nice. I too had to modify many of the ornamental pieces because they did not fit. In some cases it was necessary to rearrange the metal striping in order to make the spaces larger because they were so far off. I also found that the diagrams provided that tell you where each piece goes were incorrect in several places and had the wrong pieces in places. I referred to other museum models to get the correct locations. Watch out for the stern pieces as the instructions are way off. The metal strips are not correct and the pieces will not even come close to fitting. Again, I used other models on line to get the proper design for the metal strips, and then the pieces did fit perfectly. Vince P.
-
I have started the rigging of the mizen mast now that it is on the ship. I have completed the lower forestays, the ties and halliards for the lower crossjack yard, all of the jeers and lifts for the square yards, and the tacks for the lateen sail. This may seem like a patchwork of addressing the rigging, but there is method here. This explanation is intended for the beginner, and especially those who have not attempted rigging, or are afraid of doing so. When real ships were rigged, they generally built the masts from the bottom up, one section at a time, and attached the standing rigging for each section to keep it upright and secure. Once all of the masts were in place and built up, the yards were attached and the running rigging was completed to secure the yards and make them functional. Many kit instructions tell you to do it exactly this way, and that would be fine except for one thing. Once all of the standing rigging is in place, access to the decks becomes very limited and completing the running rigging and belaying all of the lines can become very difficult. This is especially true if you are rigging with full sails. I am sure that some expert builders can tackle it this way and have little trouble. I do not consider myself an expert by a long shot and had to develop a method to suit my limitations. I complete the rigging from the inside out and from the bottom up. It does not matter whether it is standing or running rigging. As you work from the middle out and up, the rigging is completed one step at a time, and it mixes up the standing and running rigging by where on the ship is happens to be. By that I mean that sometimes part of the running rigging may be completed long before the standing rigging on the same mast. That is one reason why I complete the lower shrouds at the very last. Once they are rigged, it really limits access to the decks. On a ship as complex as the SOS when she is full rigged ( not the abbreviated version as the kit provides), and adding a full set of sails as well, this is the only method that has worked for me. Again, this is just my way of doing things, but it sure has worked for me on this ship. Vince P.


- 264 replies
-
- 3
-
-
- sovereign of the seas
- mantua
- (and 1 more)
-
Hi Gary, I am using 3 different text books: "The Rigging of Ships in the Days of the Spritsail Topmast 1600-1700" - R.C.Anderson (This one is the primary source I am using) "The Period Ship Handbook #1" - KeithJulier "Sovereign of the Seas, The Seventeeth Century Warship" - James Sephton Between all of these, everything about the rigging of the SOS is covered, explained, and illustrated. Vince
-
The mizen has been stepped into the ship. Next comes the complicated rigging of this mast. She is really getting to look like a ship now. Vince P.


- 264 replies
-
- 2
-
-
- sovereign of the seas
- mantua
- (and 1 more)
-
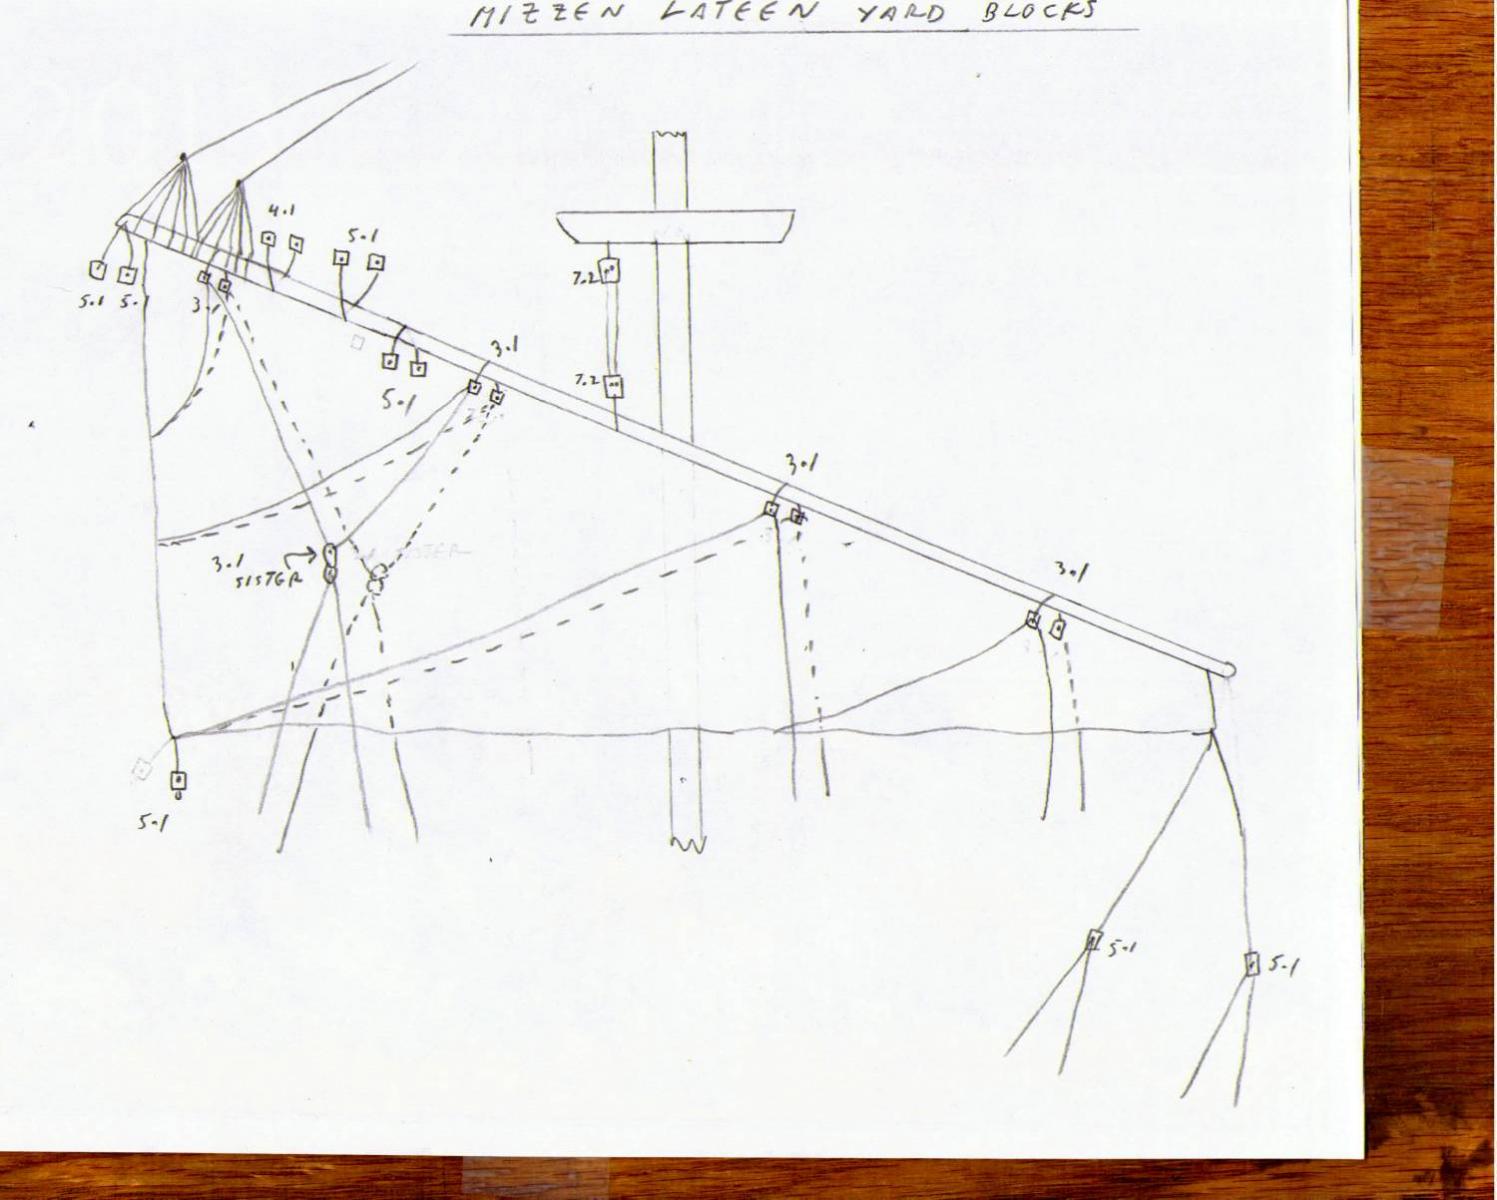
The lateen yard block arrangement with the sail rigging. Vince P.

- 264 replies
-
- 1
-
-
- sovereign of the seas
- mantua
- (and 1 more)
-
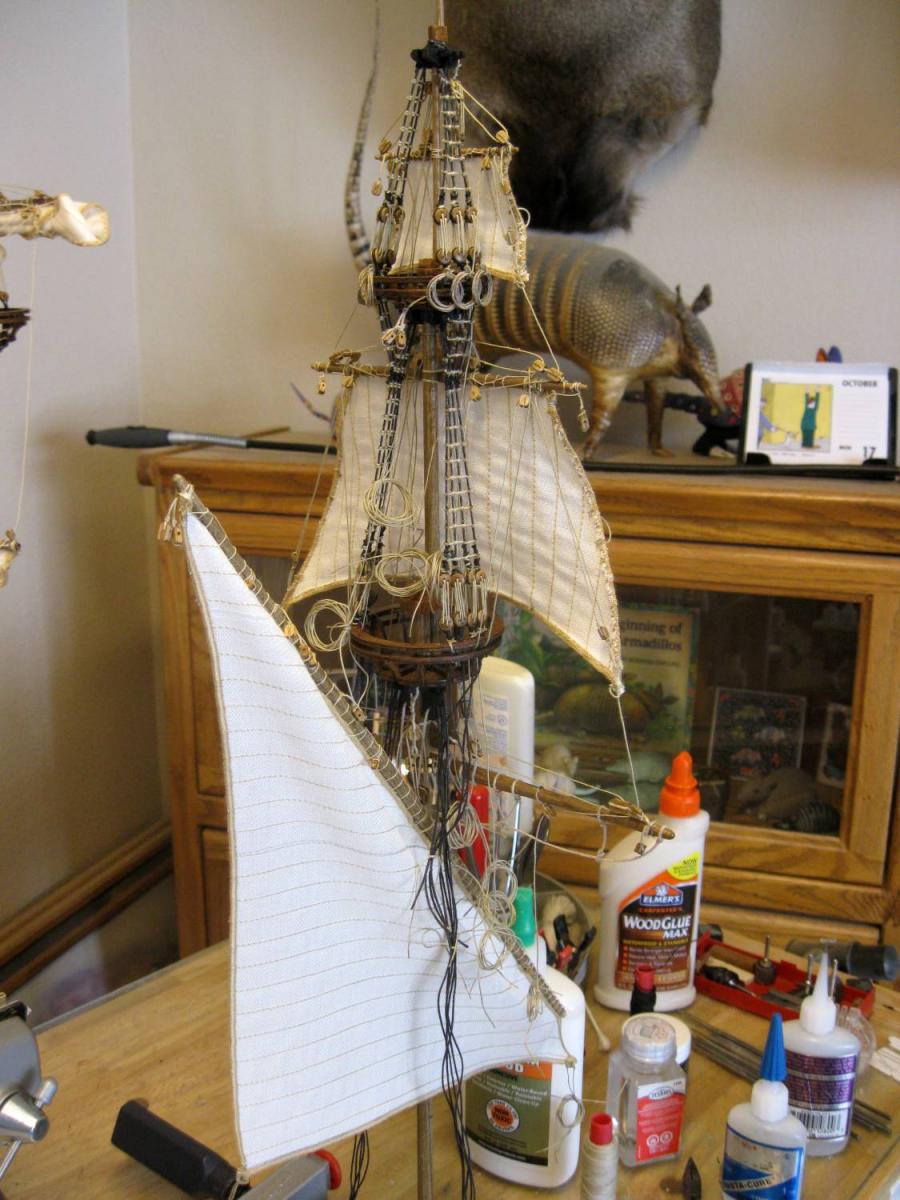
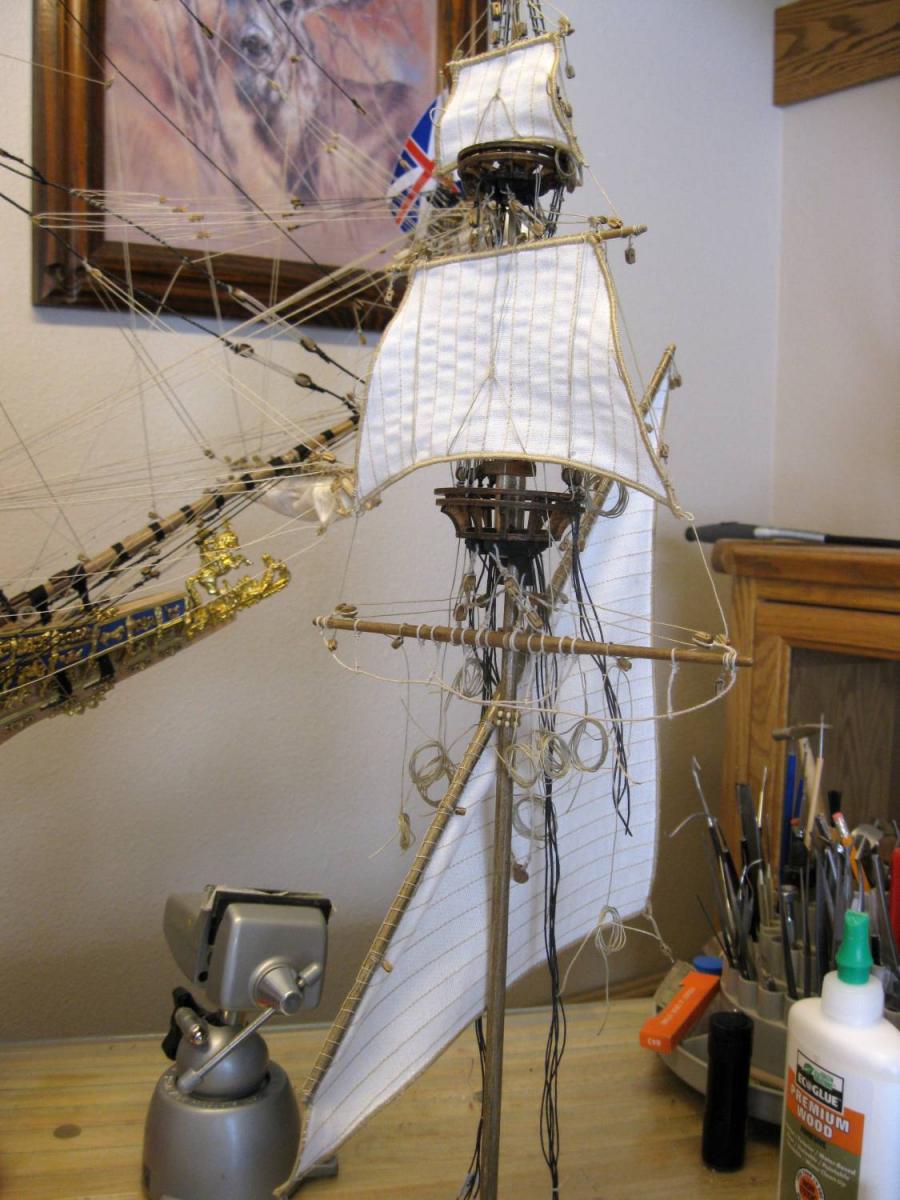
The mizen mast is completed with the lateen yard and sail rigged. The mast is now ready to be stepped into the ship. Vince P.


- 264 replies
-
- 1
-
-
- sovereign of the seas
- mantua
- (and 1 more)
-
I found this out the hard way with my SOS. I tried moving the chain wales every which way and still had some overlap of the gun ports. I did the best I could. Never thought about modifying the chain wales with moving the deadeye slots. Well I learned something new again, which is why this site is tops. I can assure you that my next build will take this into consideration. Vince P.
- 555 replies
-
- 4
-
-
- sovereign of the seas
- mantua
- (and 1 more)
-
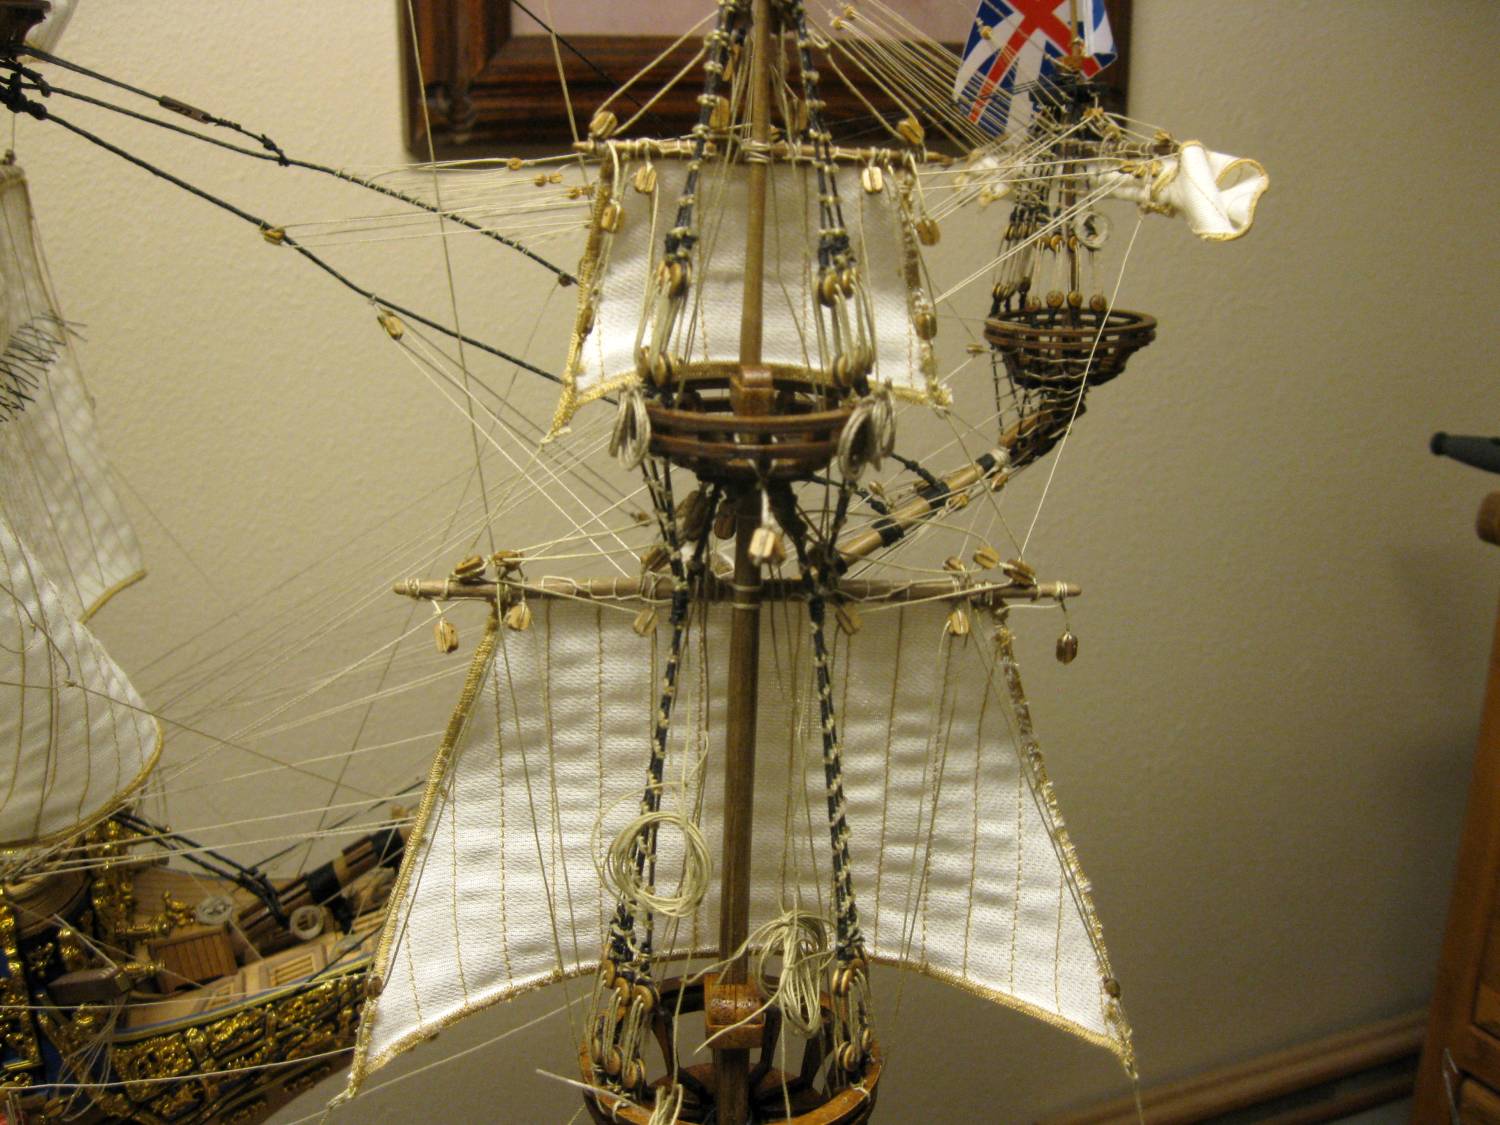
The mizen topgallant sail rigged. Only the lateen sail is left to do on the mizen mast. I am not sure if I will rig it full or furl it. I will hang the sail on the yard and then place it on the mast to see which way looks best. Vince P.

- 264 replies
-
- 2
-
-
- sovereign of the seas
- mantua
- (and 1 more)
-
Since I am going to build the Royal William as my next project, I asked our members if anyone had some good info on this ship. Brian C. responded and told me about a book "The Period Ship Handbook" which had a whole section on building this ship. I bought the book and indeed it has half the book devoted to the build. But, I got a bonus with this book. If shows in detail how to rig brails on the mizen lateen sail. The SOS has a lateen sail and I am up the point of rigging it, but have no good information on how to properly do it. The instructions are horrible. Well I now have a detailed explanation from this book which I will use on my SOS. Thanks Brian C. Vince P.
-
Hi Nigel, I received "The Period Ship Handbook #1" and it is excellent! The whole first half of the book is devoted in detail to building the Royal William. I bought it used on Amazon for only $16. And as an added bonus, It shows in detail how to rig brails on the mizen lateen sail, which I need to complete the SOS I am now working on. Thanks Much. Vince P.
-
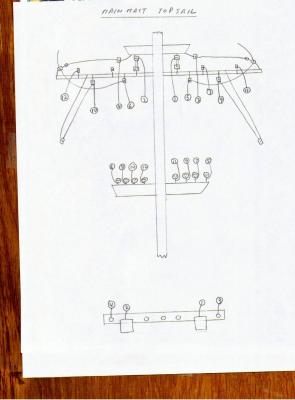
The mainmast topsail belay diagram. Vince P.
- 264 replies
-
- 1
-
-
- sovereign of the seas
- mantua
- (and 1 more)