HOLIDAY DONATION DRIVE - SUPPORT MSW - DO YOUR PART TO KEEP THIS GREAT FORUM GOING! (Only 68 donations so far out of 49,000 members - Can we at least get 100? C'mon guys!)
×


pirozzi
-
Posts
843 -
Joined
-
Last visited
Content Type
Profiles
Forums
Gallery
Events
Everything posted by pirozzi
-
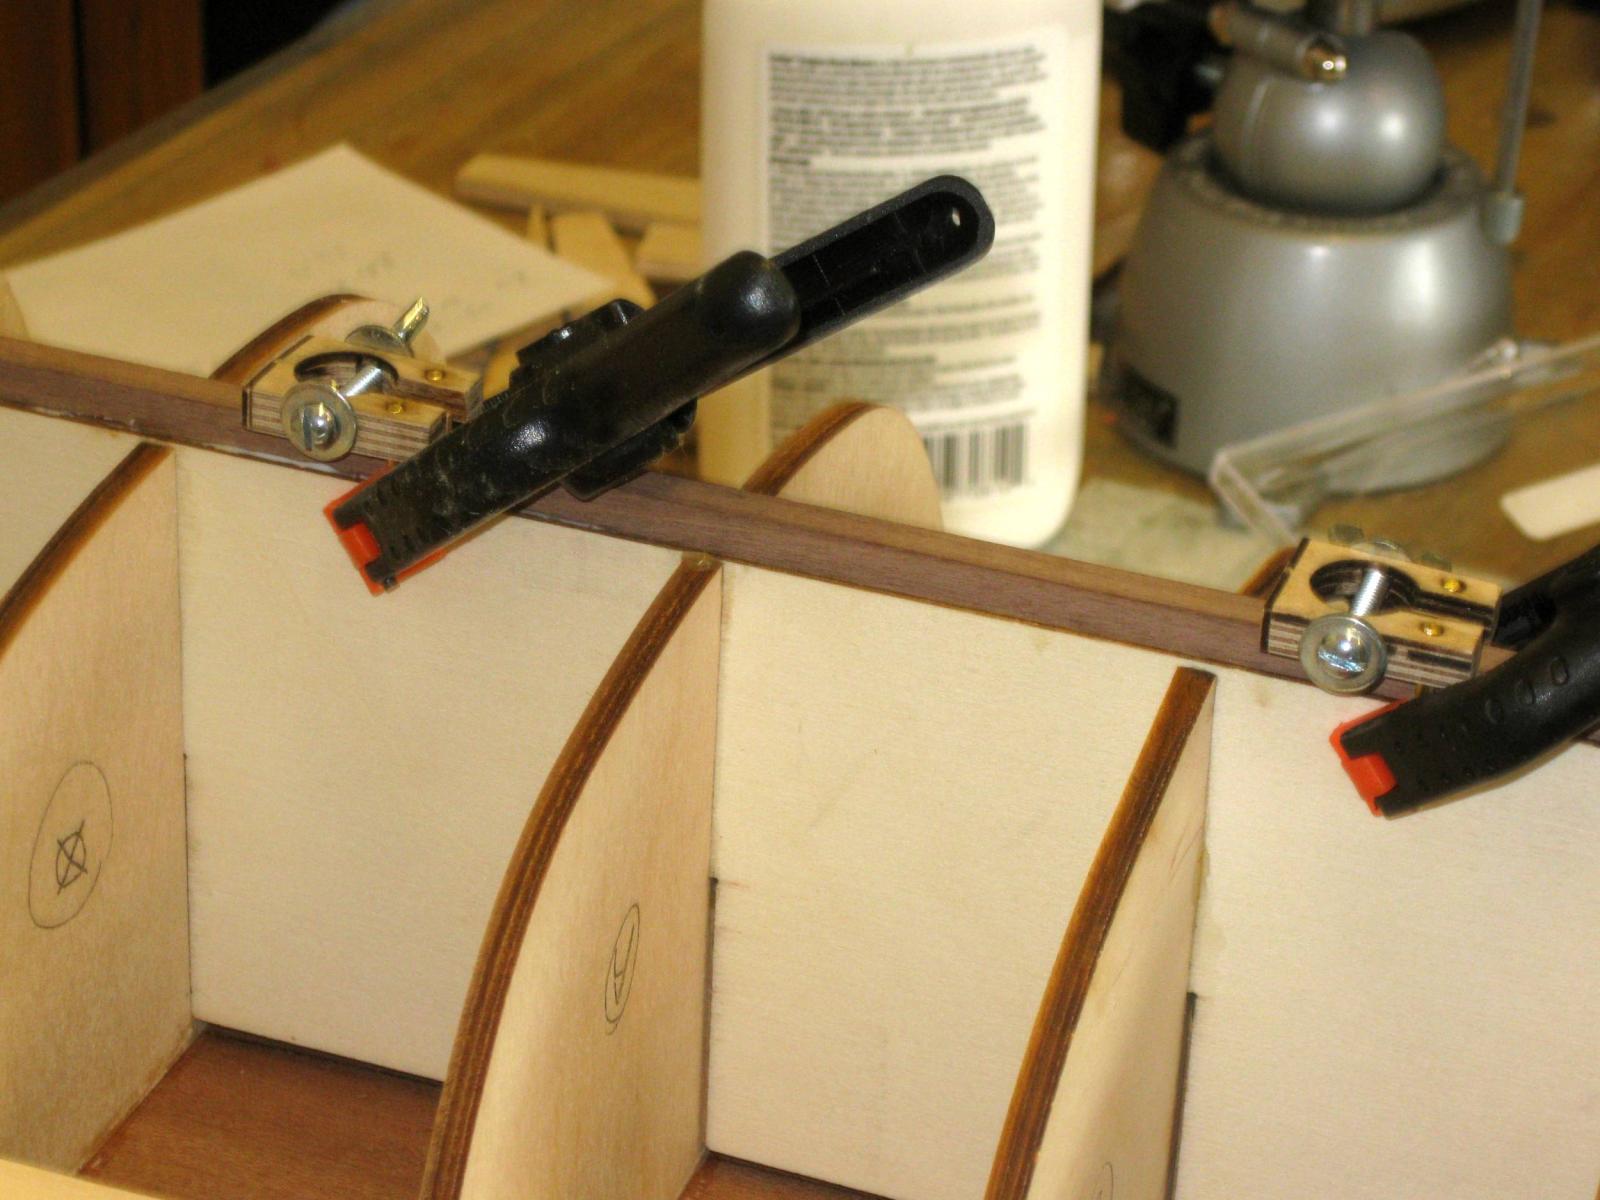
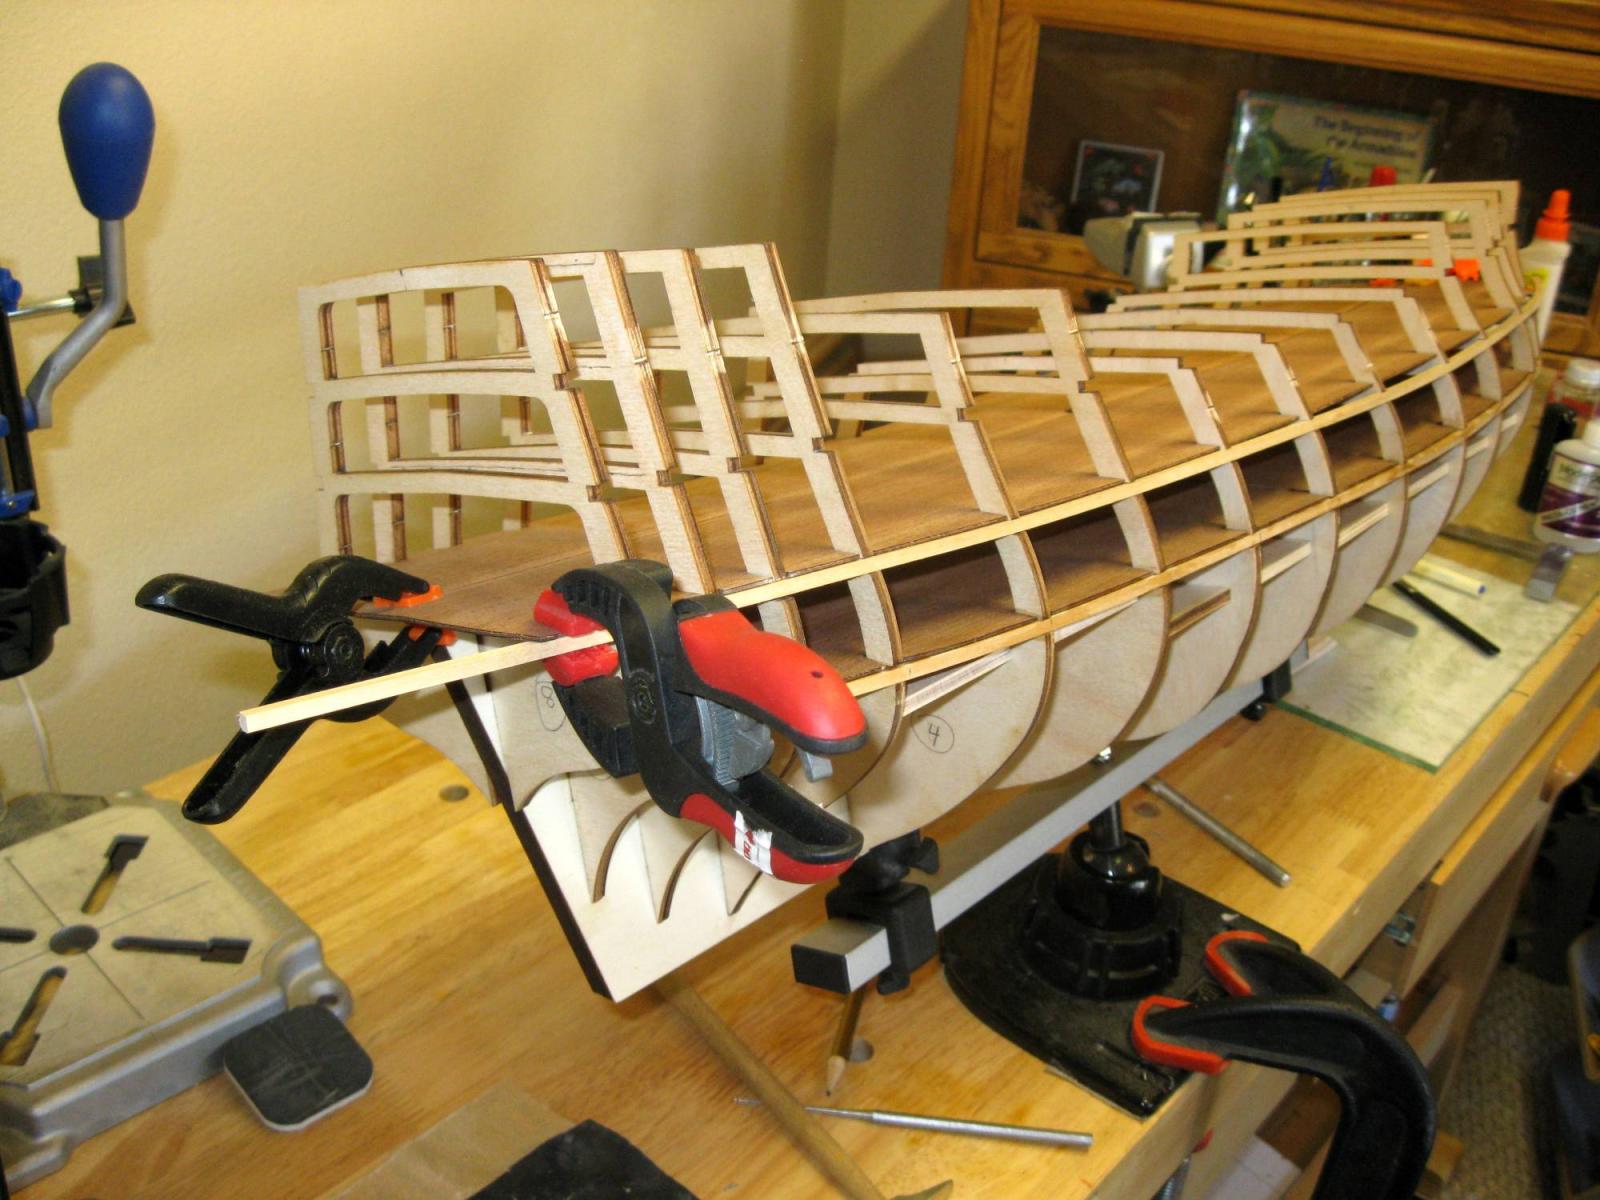
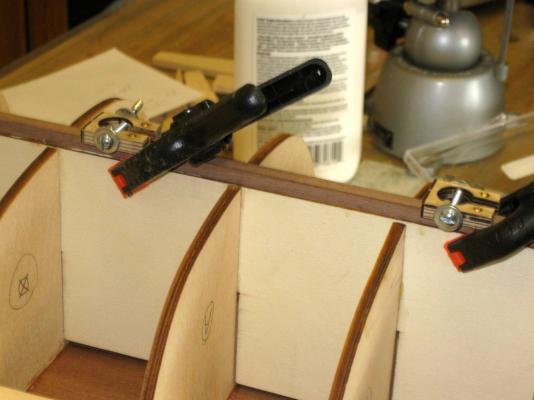
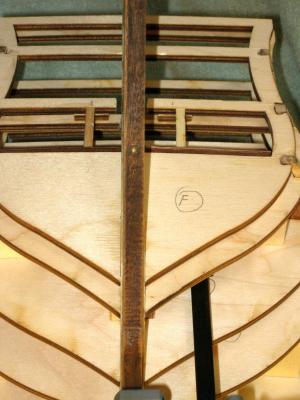
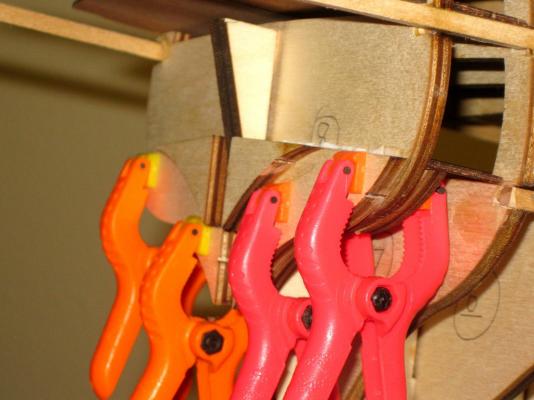
 Placing the stem and the real keel. The stem is solid walnut and 7mm thick. It is heavy and I didn't trust just a glue joint to hold it on, since much will be hanging off this piece including very large metal figures. I drilled 1.6mm holes from the outside into this and the false keel about 30mm deep. I inserted 1.5mm brass rods at the top, middle and bottom and drove them in below the surface with thick CA glue. If you look at the last photo, you can see one of these pins just below the surface. I did not worry about glue stains or the holes for the pins because the whole thing will be planked with walnut strips later on. A very small amount of adjusting using a sanding wheel was necessary to match the curves of the false keel and the stem. I also placed the 1.5mm pins in the keel piece as well. Since there was nothing to hold clamps to, I used some planking clamps I had bought which I could never get to work correctly. They did work for this however, so I got my money's worth afterall. It is important to note that the plans call for making the keel from 3 pieces of lumber, but the kit comes with a single 6x7mm walnut board instead, that must be shaped into the keel. The last thing to do here is to attach the sternpost, but some shaping of the keel is necessary first. Vince P.
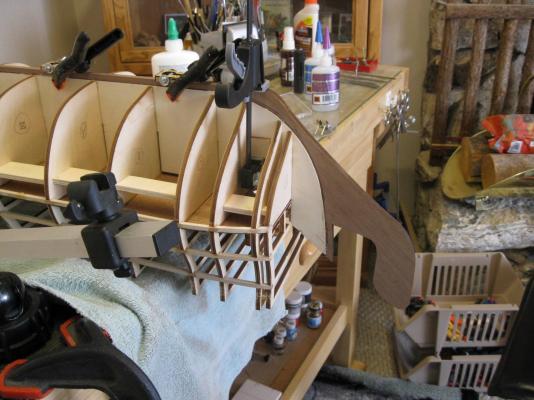
- 593 replies
-
- 5
-

-
- royal william
- euromodels
- (and 1 more)
-
Hi Max, There is really no problem with the bowsprit. It is just that the Euro kits are set up more for builders that have some scratch building experience. You must really examine the plans (which are superb, thank goodness) and then plan an overall course of action before building anything. It is actually much more fun and challenging this way. Vince P.
- 593 replies
-
- 4
-
-
- royal william
- euromodels
- (and 1 more)
-
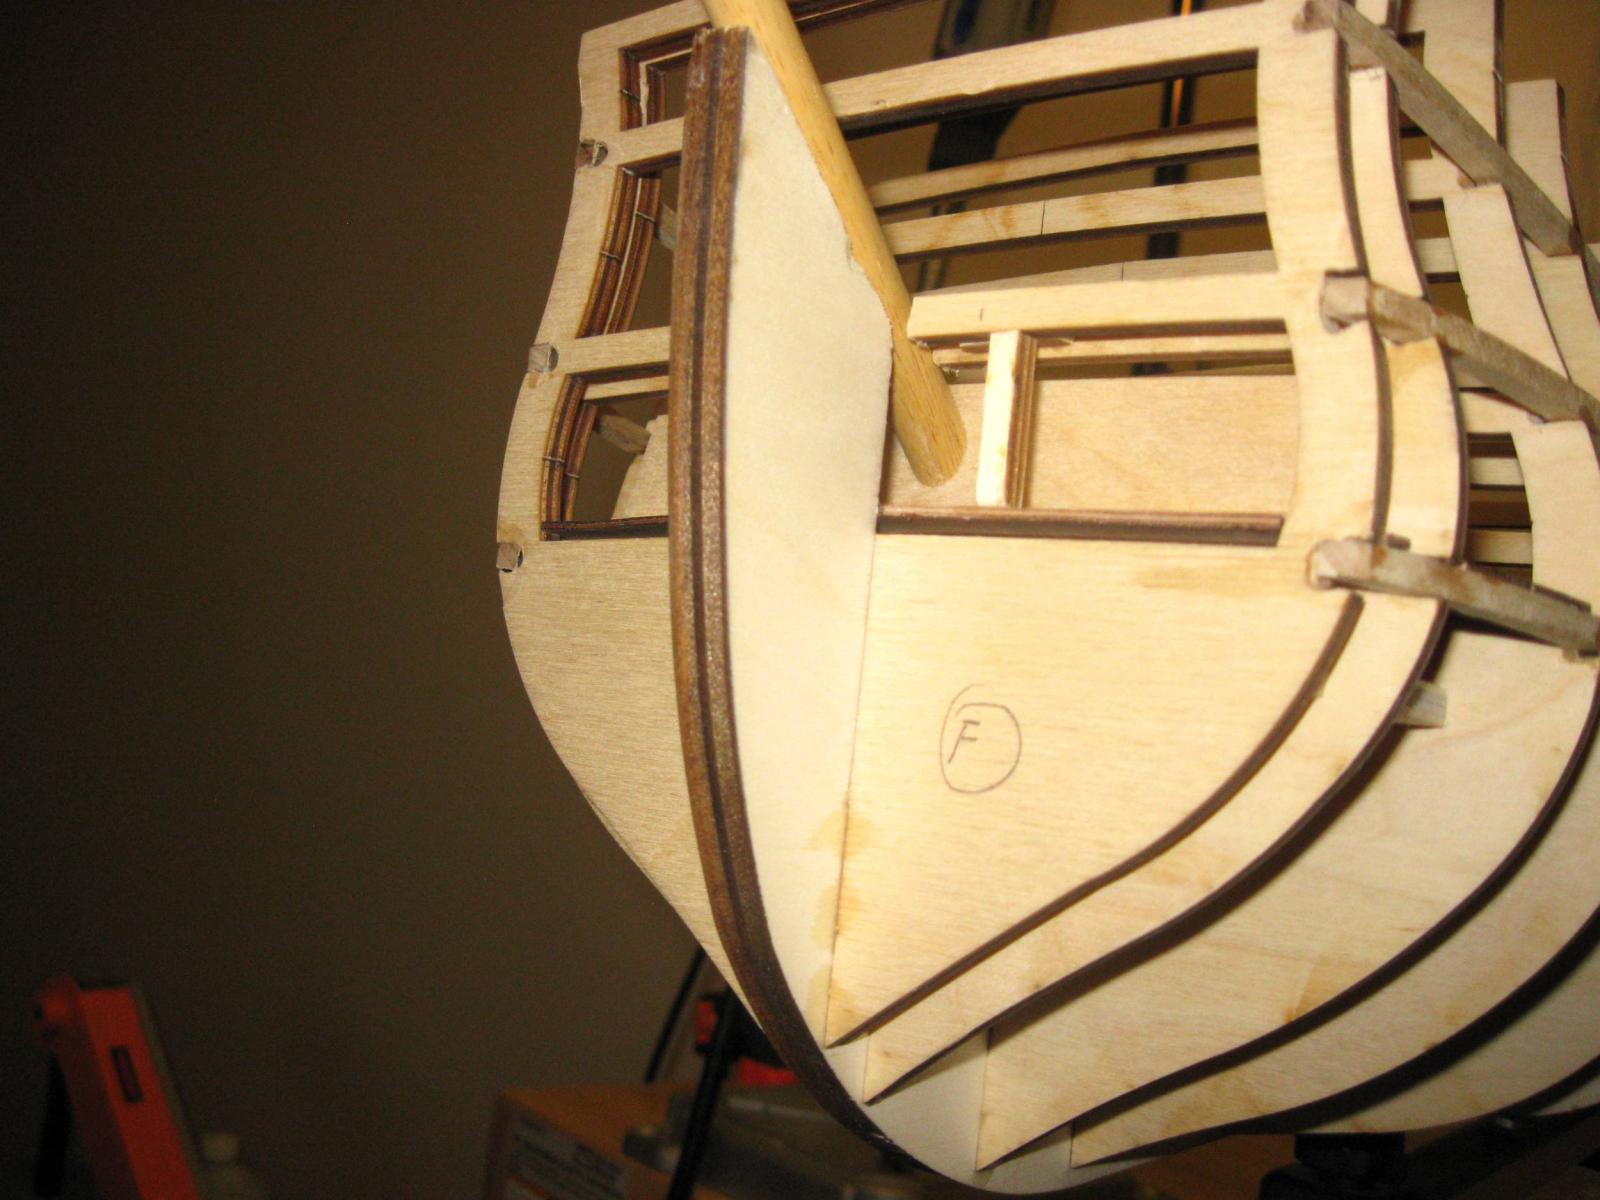
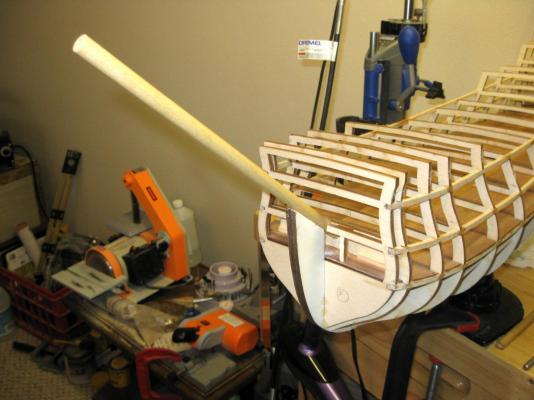
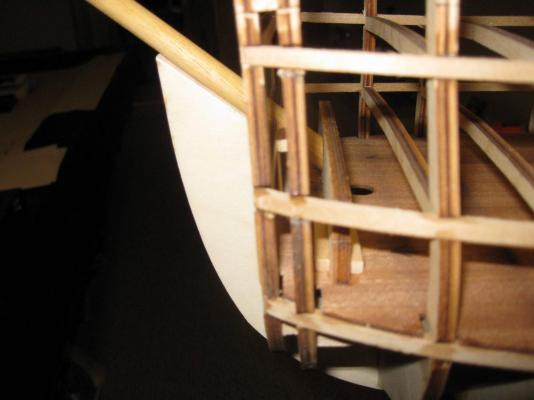
As I said, this kit is closer to a scratch build than a kit build. Most kits come with provisions in the precut parts of the false keel and bulkheads for installing the bowsprit later on. This one does not. There is a certain point while constructing the hull that this must be addressed before things get covered up. Now is the time, even before placing the solid bow section, any planking at all, and before working on any of the decks above the lowest gun deck. With the bottom gun deck secured in place and the hull stringers secured, it is time to deal with the bowsprit. The plans show about a 40 degree angle running on top of the stem and down to a quasi bulkhead just behind bulkhead "E". This bulkhead must be fabricated and secured to the lower gun deck just behind bulkhead "E". A line is drawn on the stem where the bowsprit will rest and then a big piece of the stem has to be removed above this line. In addition, parts of bulkheads "F" and "E" have to be cut away to allow the bowsprit to pass through. Some supports have to be added to shore up the bulkheads that were cut. The bowsprit can now be dry fitted and beveled at the end to butt up against the added bulkhead and then removed and put away. Next up is to fit and secure the real stem, keel, and sternpost. They don't address these until way later, but they must be in place before the first planking, as the planks have to terminate on them at the bow, stern, and bottom of the hull. Vince P.

- 593 replies
-
- 7
-
-
- royal william
- euromodels
- (and 1 more)
-
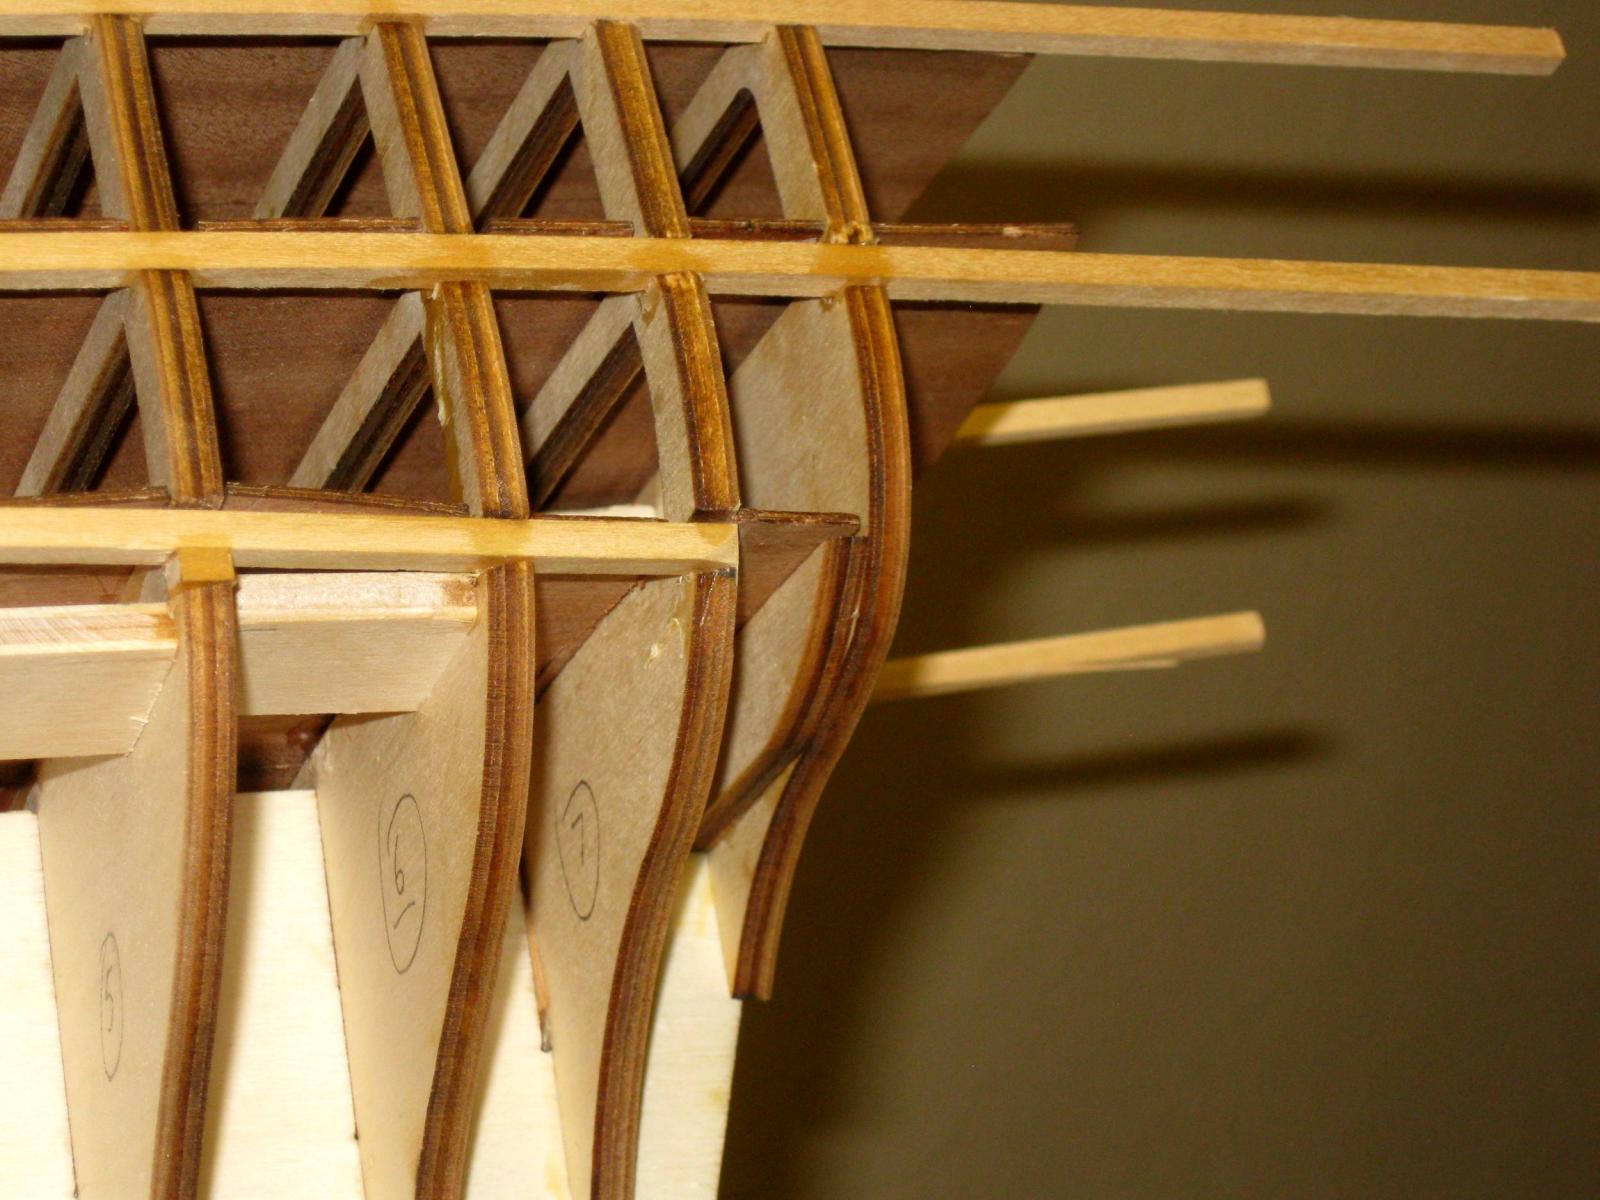
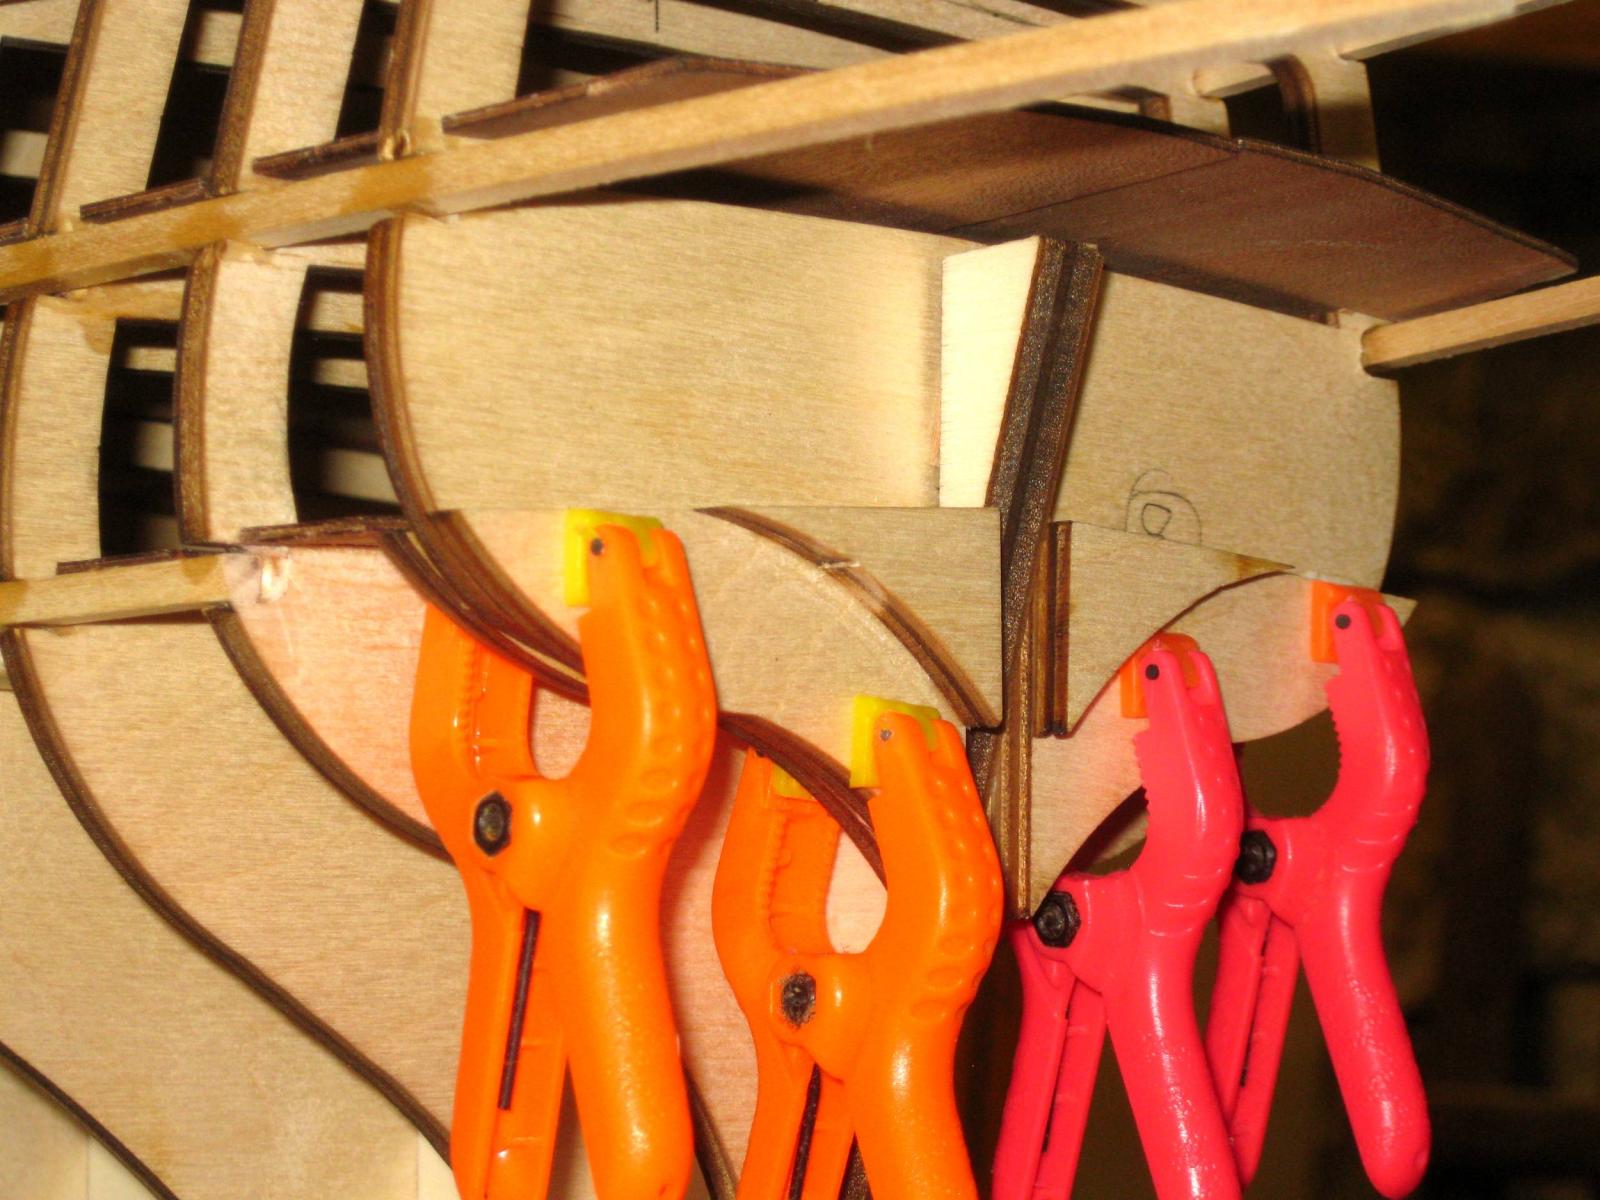
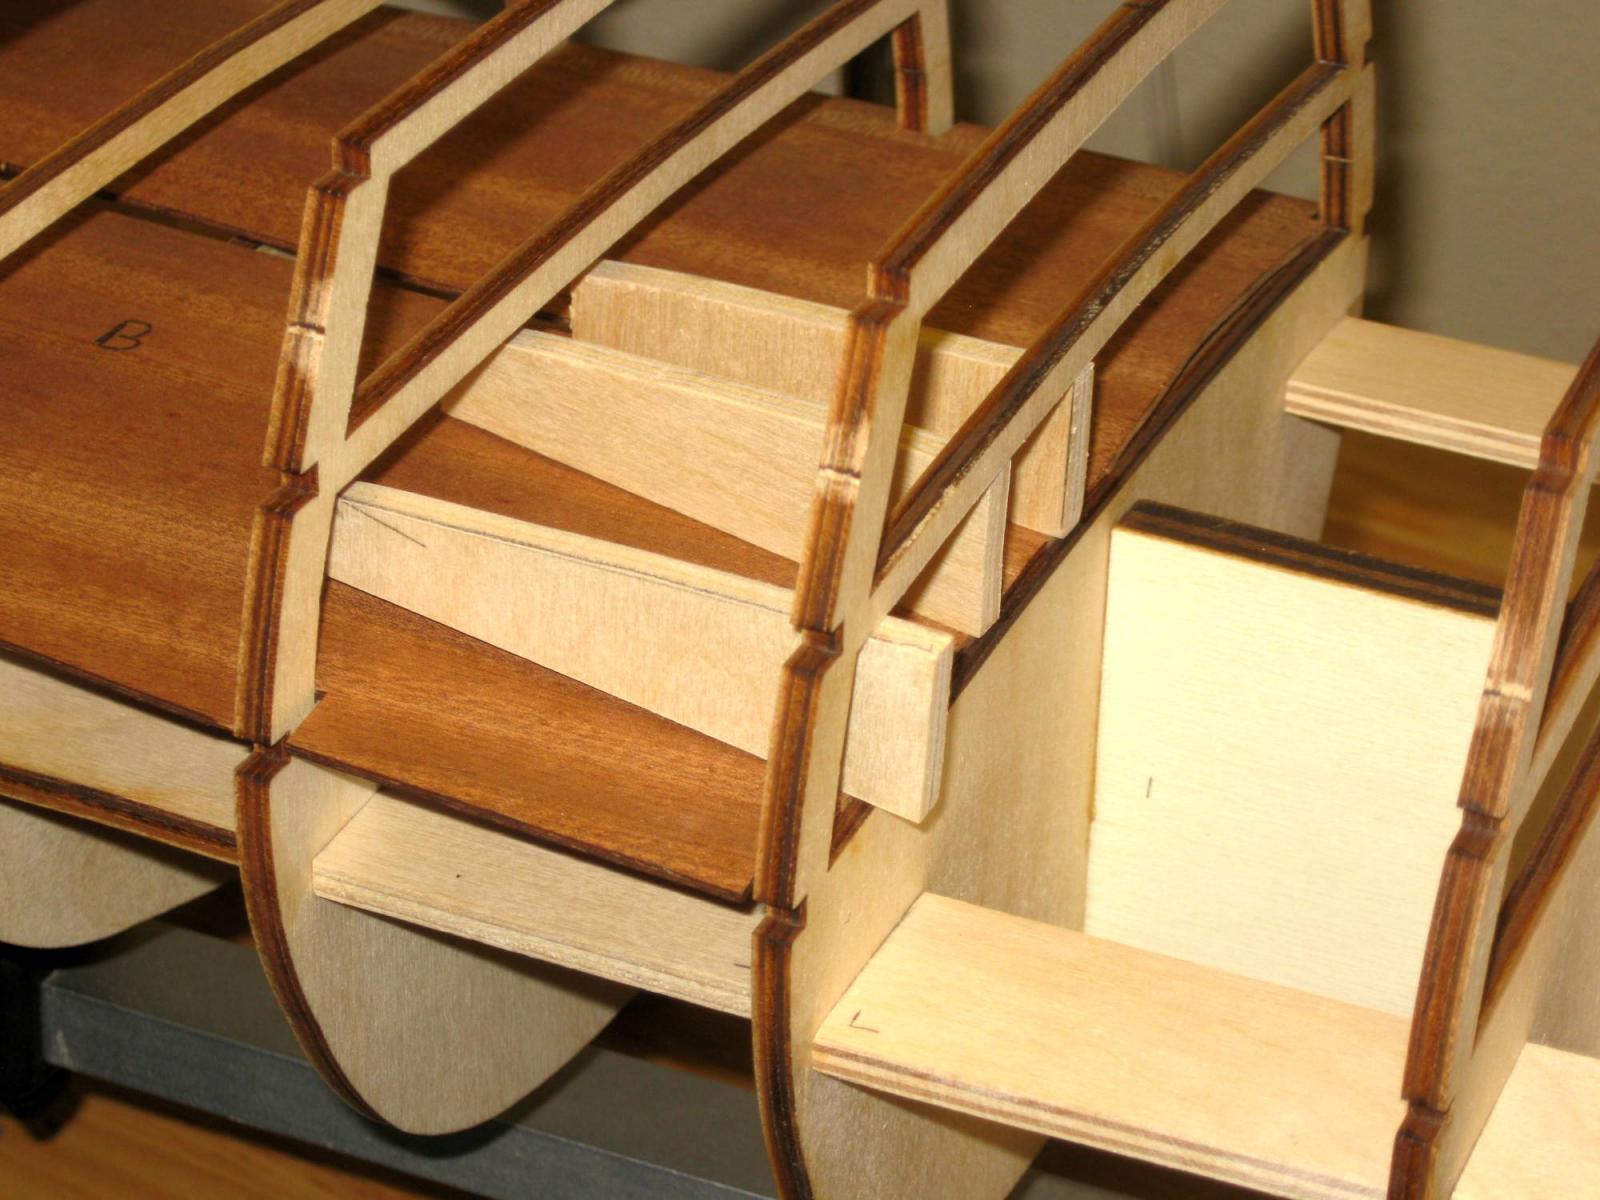
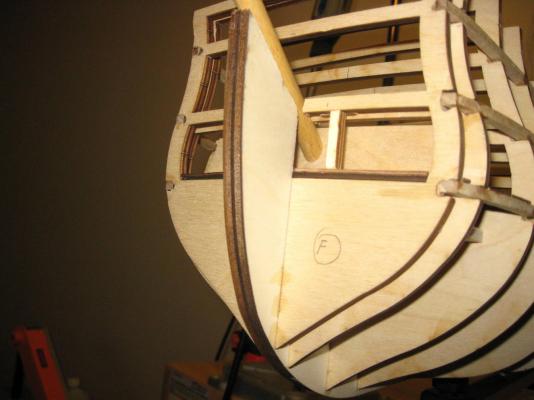
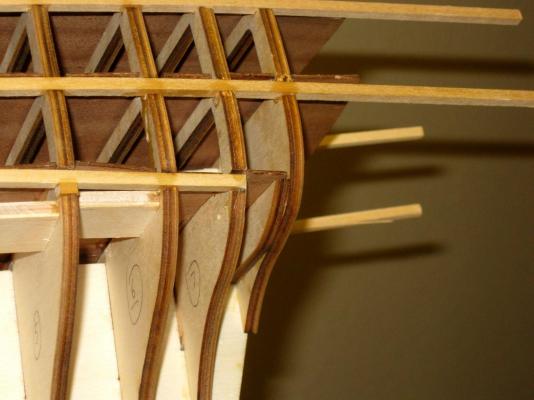
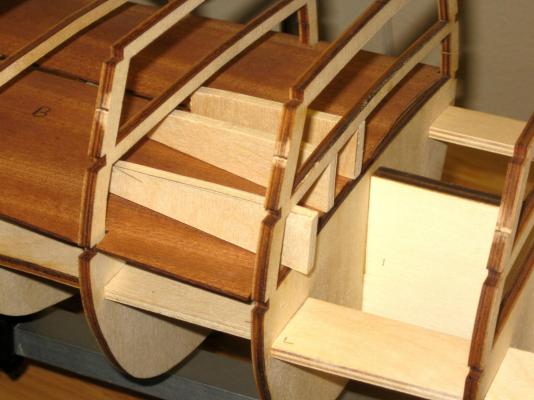
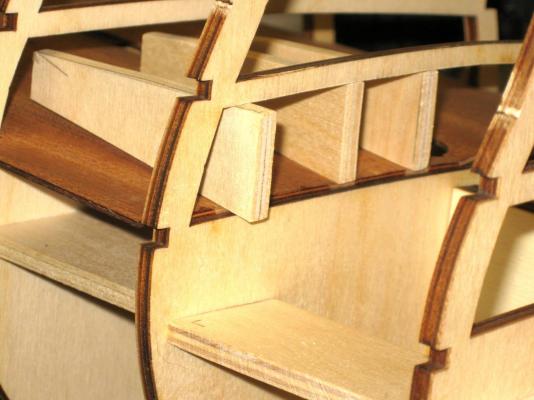
There are contoured blocks of plywood that are fastened to the rearmost bulkhead. Part #18 attaches to the front of bulkhead #8, one on each side of the hull, and parts #28 and 29 are first glued together and then attached to the rear of bulkhead #8.The purpose of these blocks is to increase the cross section of the bulkhead to support the planking as it takes the sharp turn upward to end at the transom. The positioning of these blocks is not very clear in the plans, but is very important because of the planking and the transom construction. Part #18 and its location are shown on plan sheet #4 and can be placed by taking a measurement right from the plans. Parts 28 and 29 which are now glued together should be parallel and butted up against the sternpost and even with the lower contour of bulkhead #8. Obviously these parts and the last 3 bulkheads will have to be beveled considerably to allow the flow of the planking. Once they are shaped properly, I will post more photos. Vince P.

- 593 replies
-
- 9
-
-
- royal william
- euromodels
- (and 1 more)
-
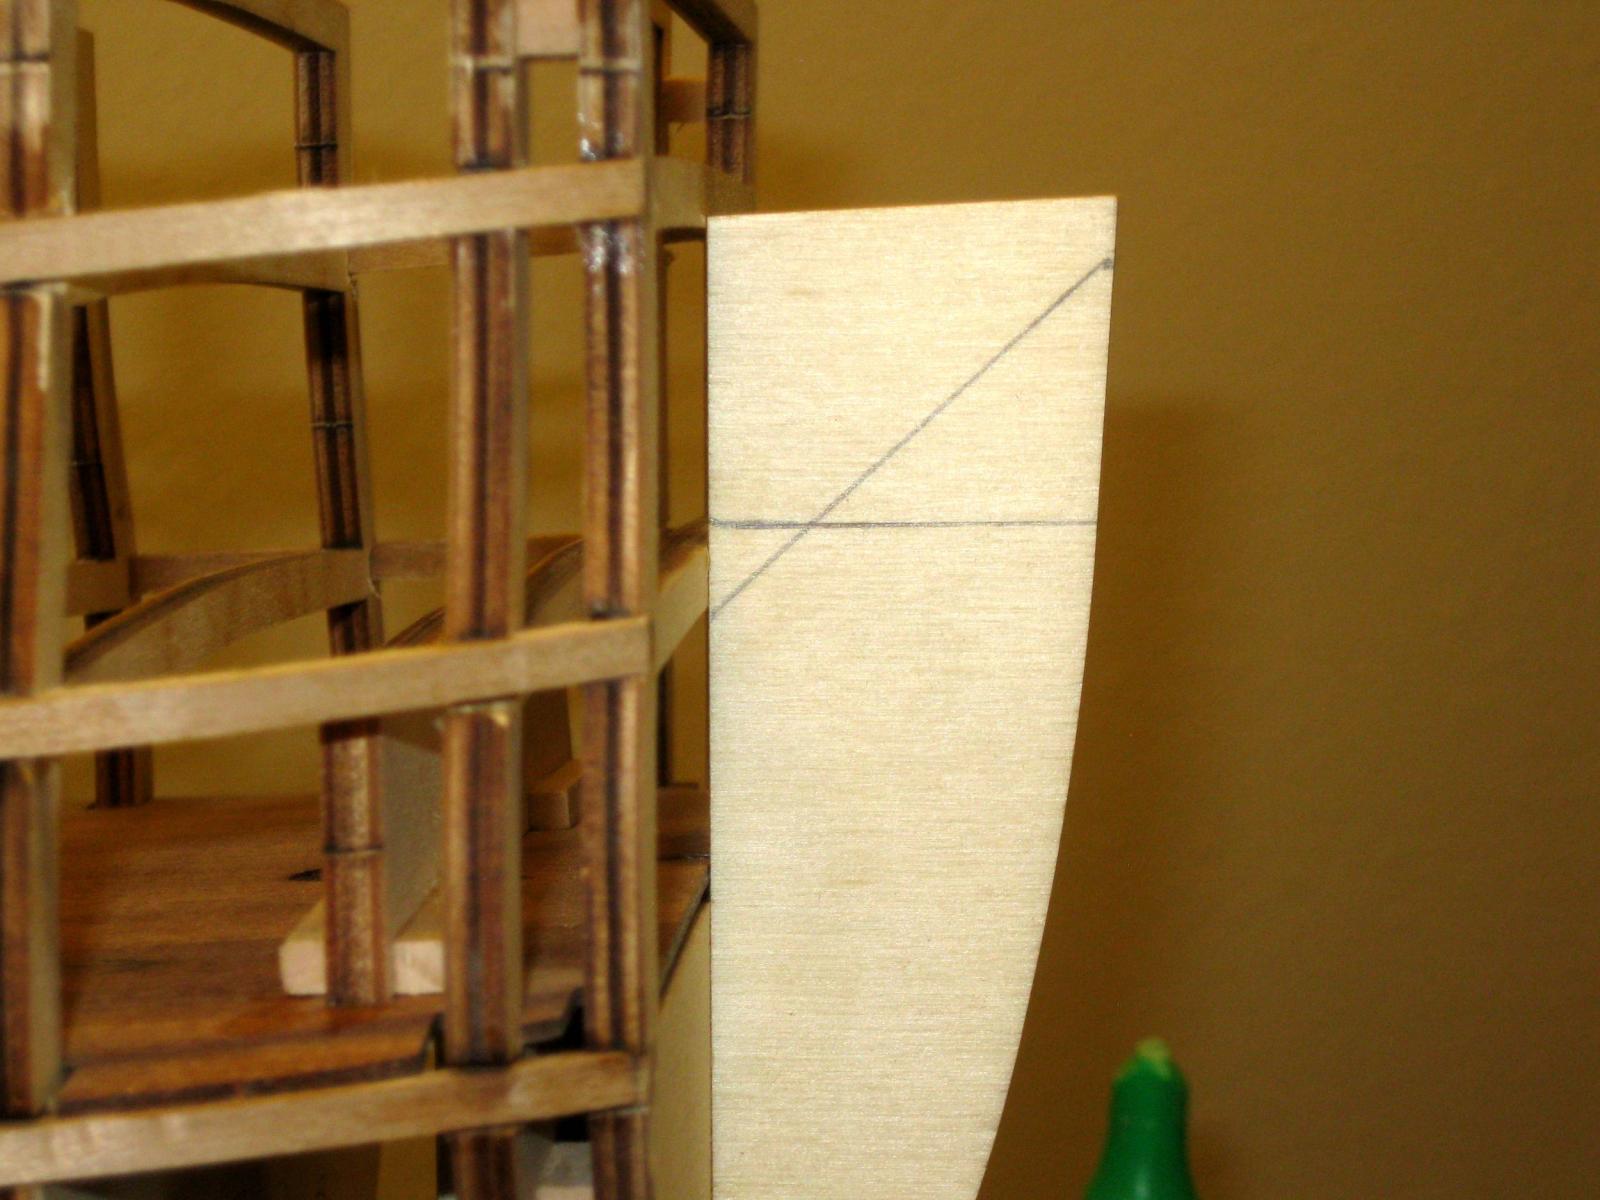
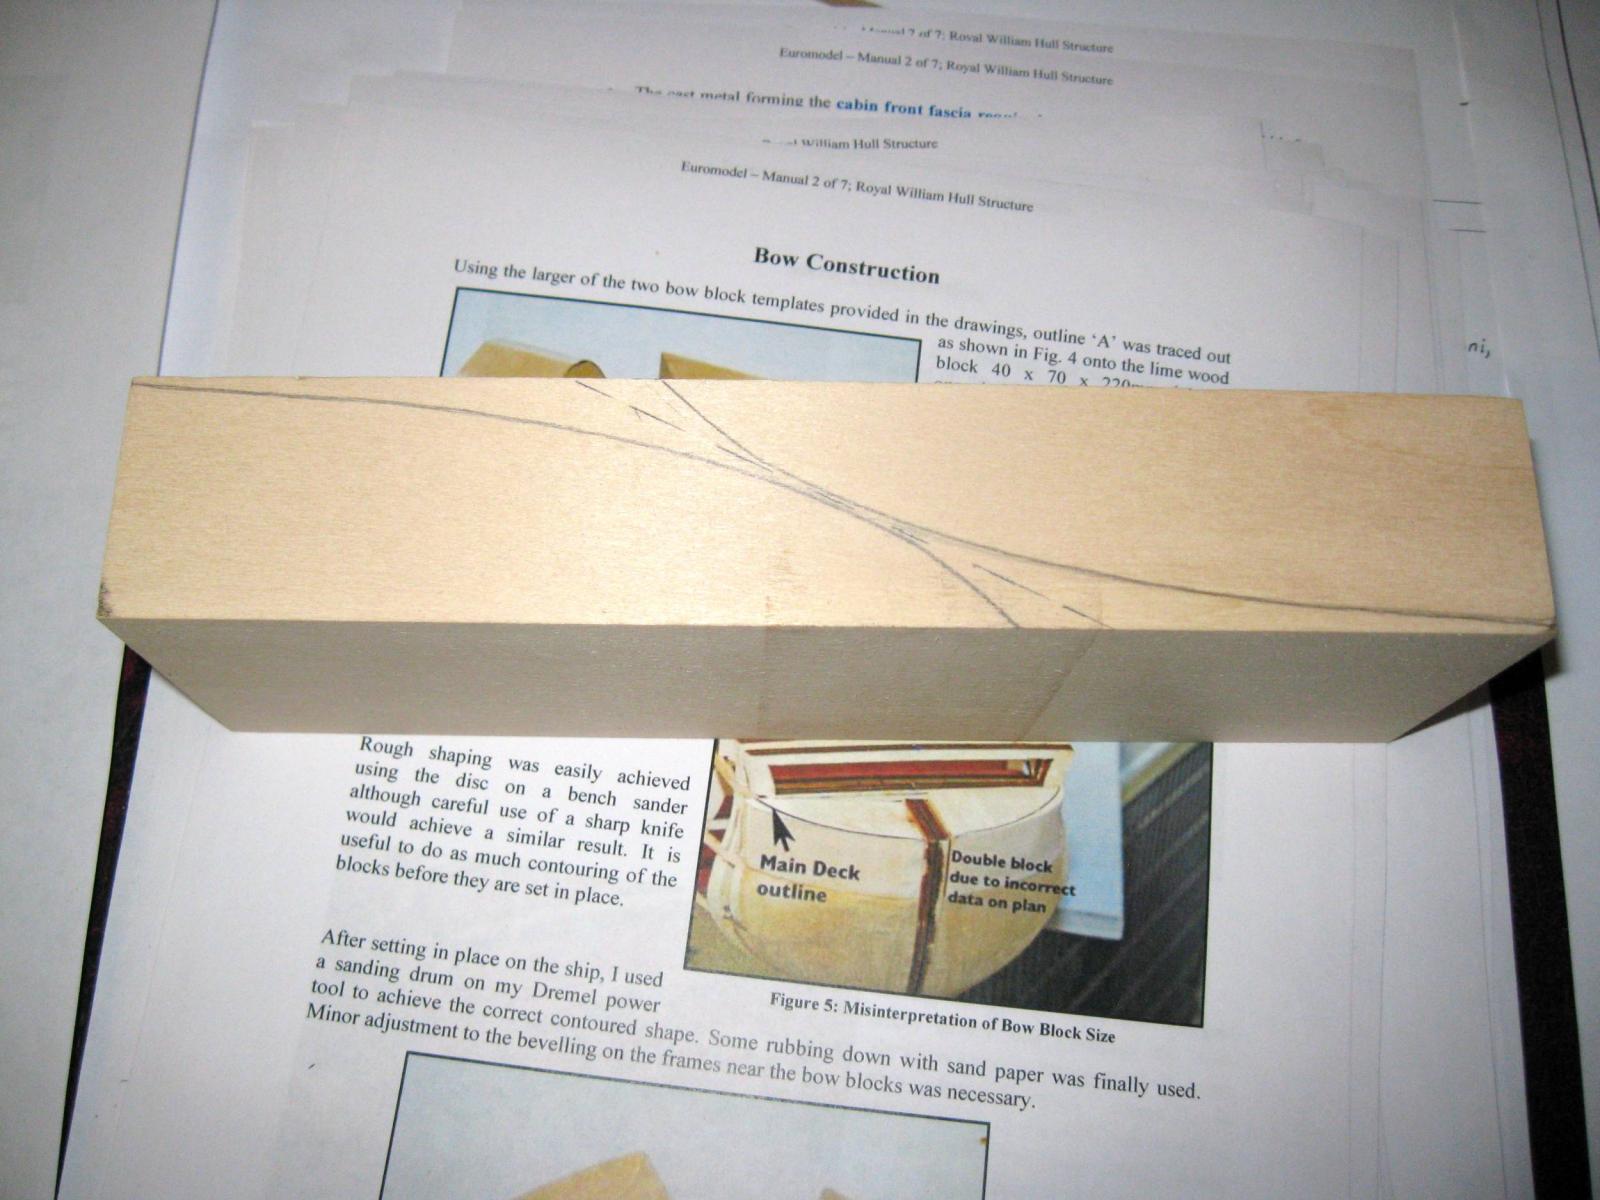
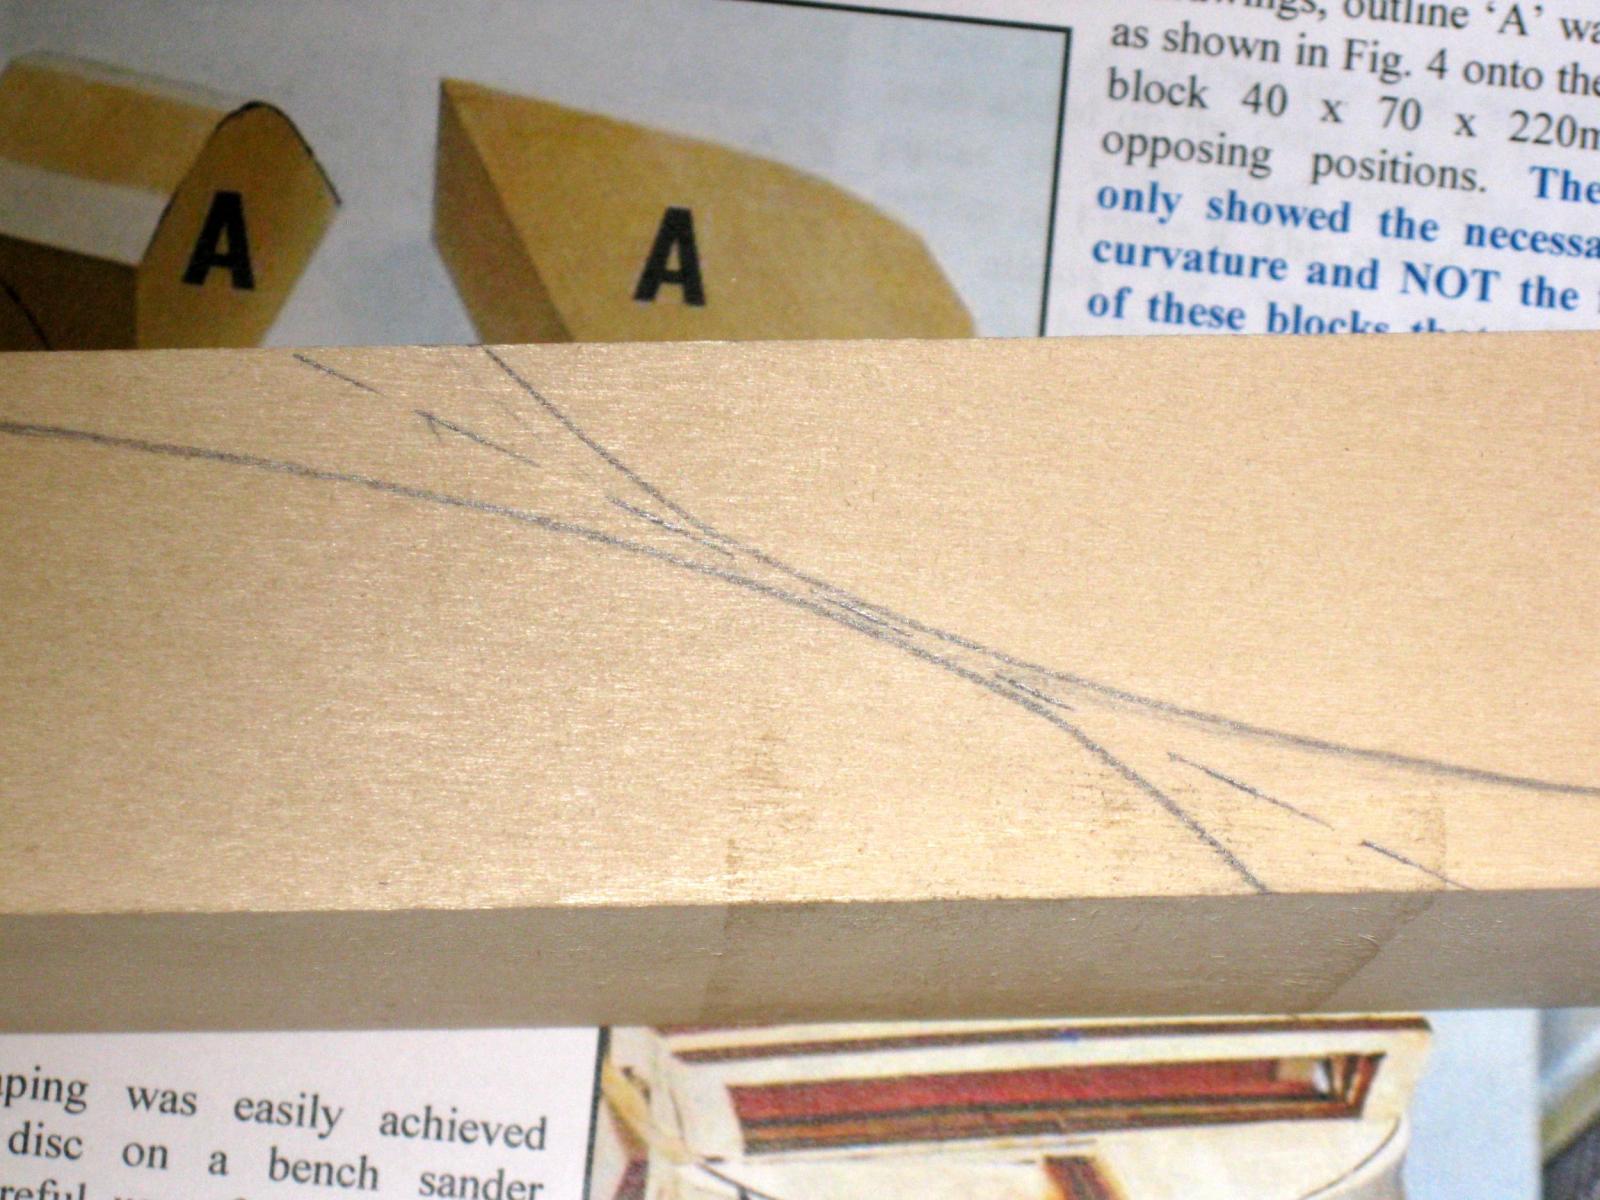
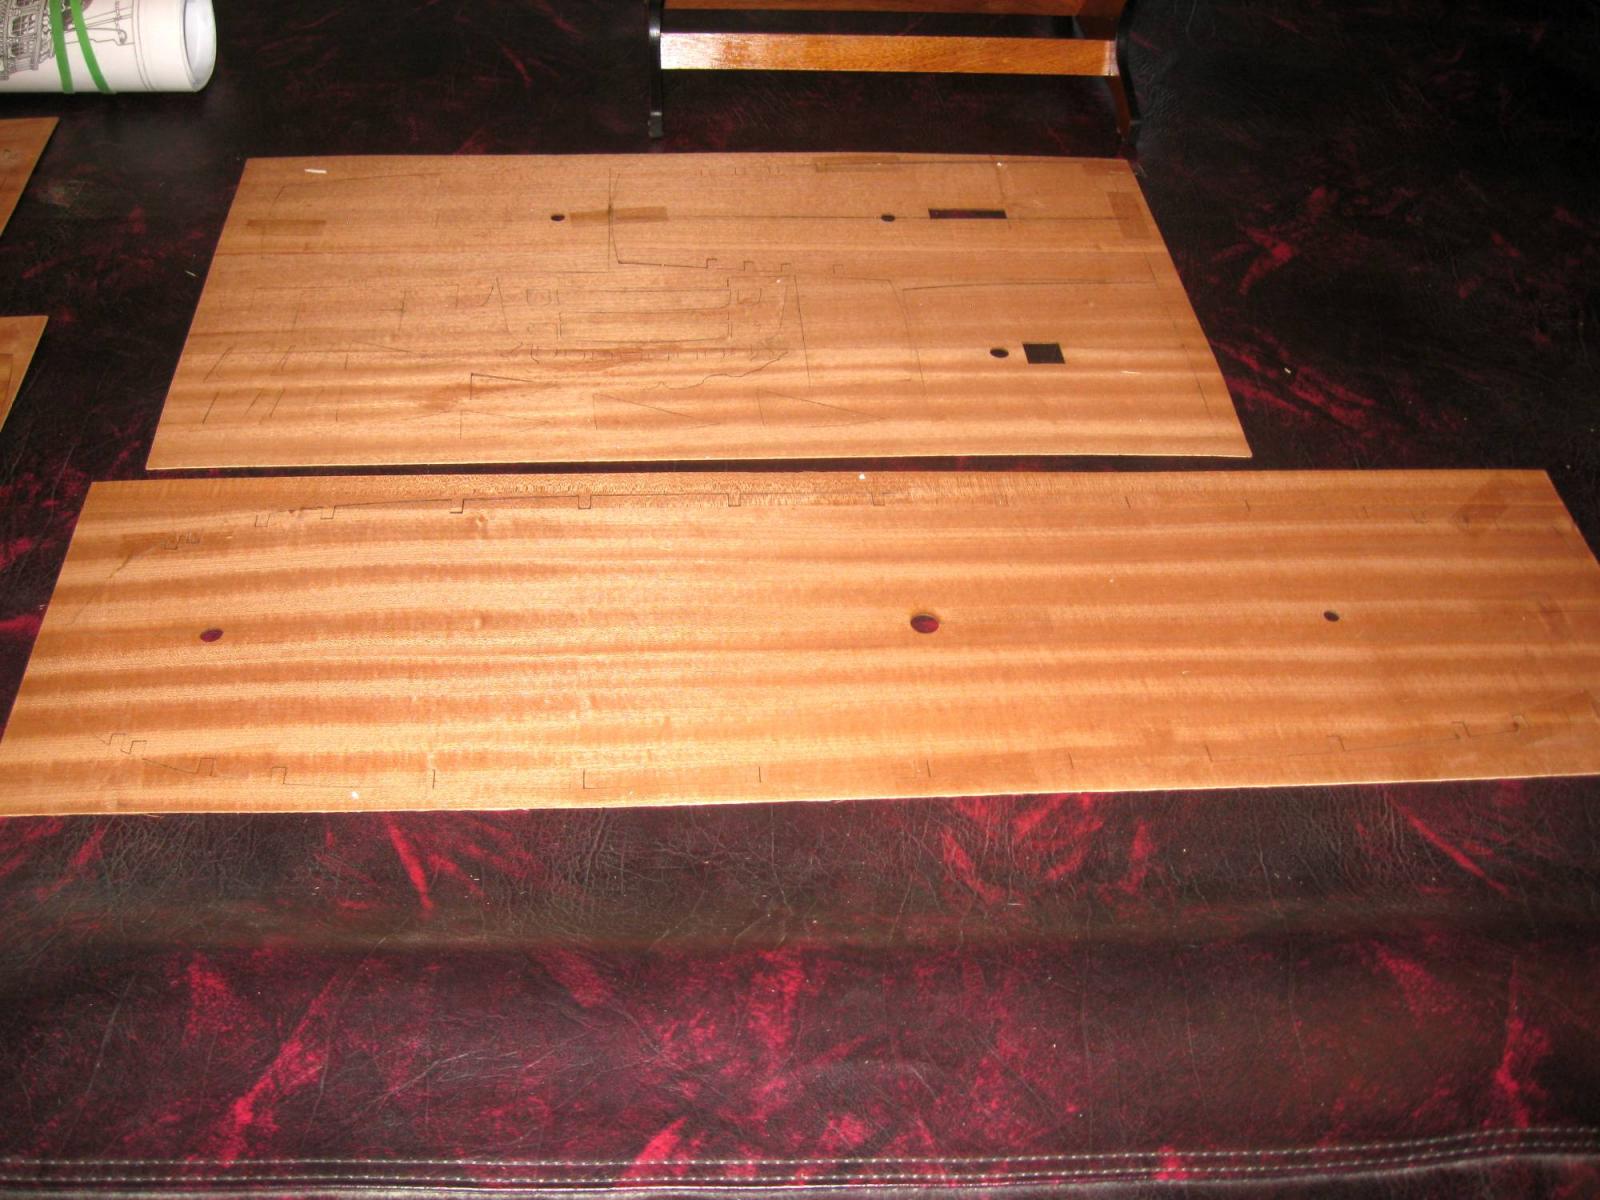
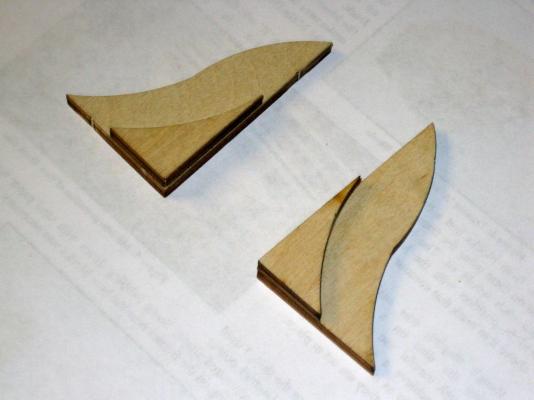
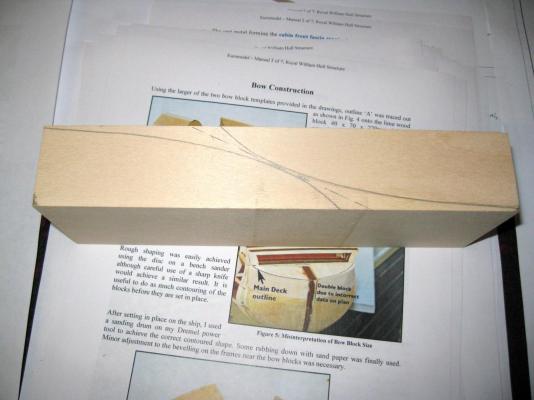
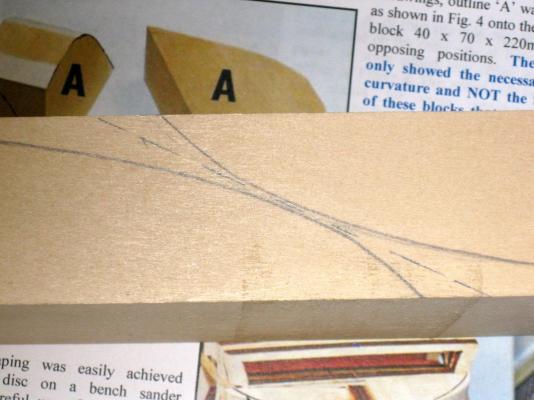
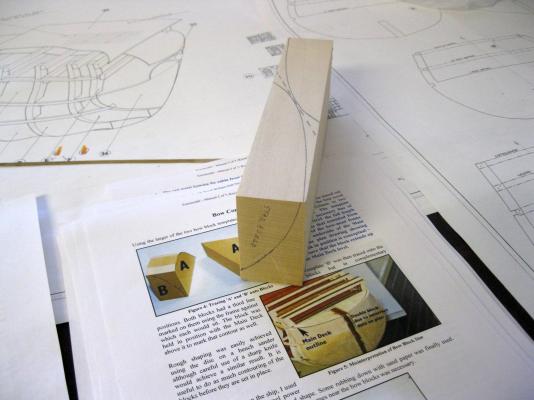
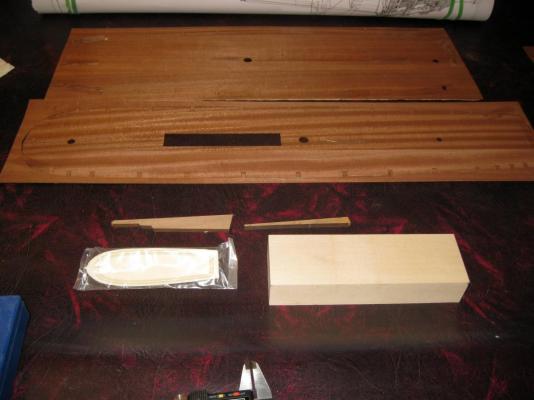
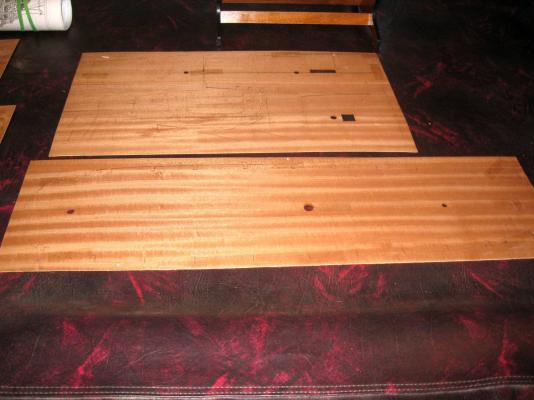
The solid bow contour block has to be cut into 2 pieces, one for each side of the hull. You would think to just cut it in half and then apply the contour to each piece. If you do that, there will not be enough lumber to make both pieces. You have to carefully place the whole block on the hull and trace the contour lines. I guess they were really trying to save lumber here. Even another 1/4" added to the length would have made it much easier. Once the contour lines are marked for both sides of the hull, you cut the block on the dotted line. (See attached photos) You have at best only about 1/16" to make the cut. :o I don't have a saw that will cut that sized piece very accurately. I will have to bug one of my carpenter friends. Vince P.
- 593 replies
-
- 5
-
-
- royal william
- euromodels
- (and 1 more)
-
Hi Grant, Thanks for the info. I looked at the website and they have most anything. I will definetely keep them in mind if I need to order wood. Vince P.
- 593 replies
-
- 1
-
-
- royal william
- euromodels
- (and 1 more)
-
Hi Brian, The second planking is 6mm x 1mm and is a redish colored wood. It may be tanganyka, but I am not a wood expert. The deck planks are 4mm x 0.5mm and are definetly walnut. It is too dark to use as deck planking. Like I said, I bleached it and it looks like real decking. I am going to use it and not buy any extra wood. Your ship is looking very nice. Vince P.
-
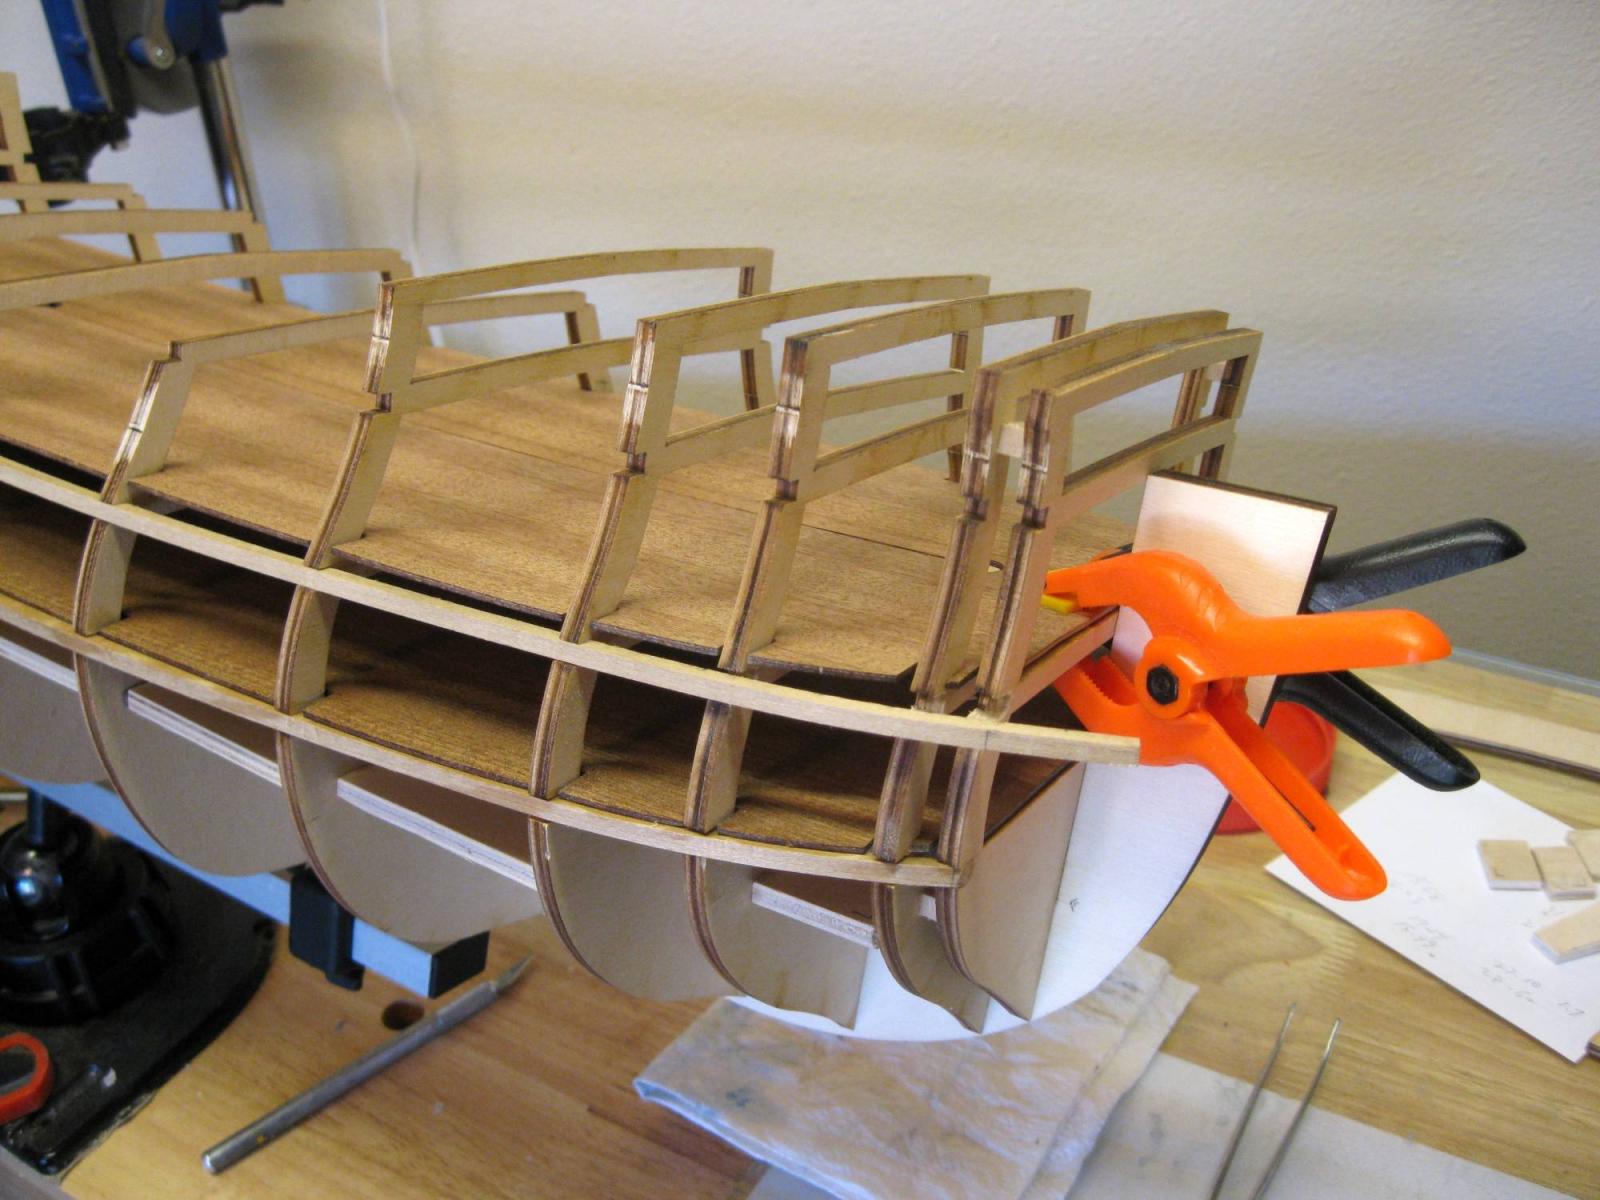
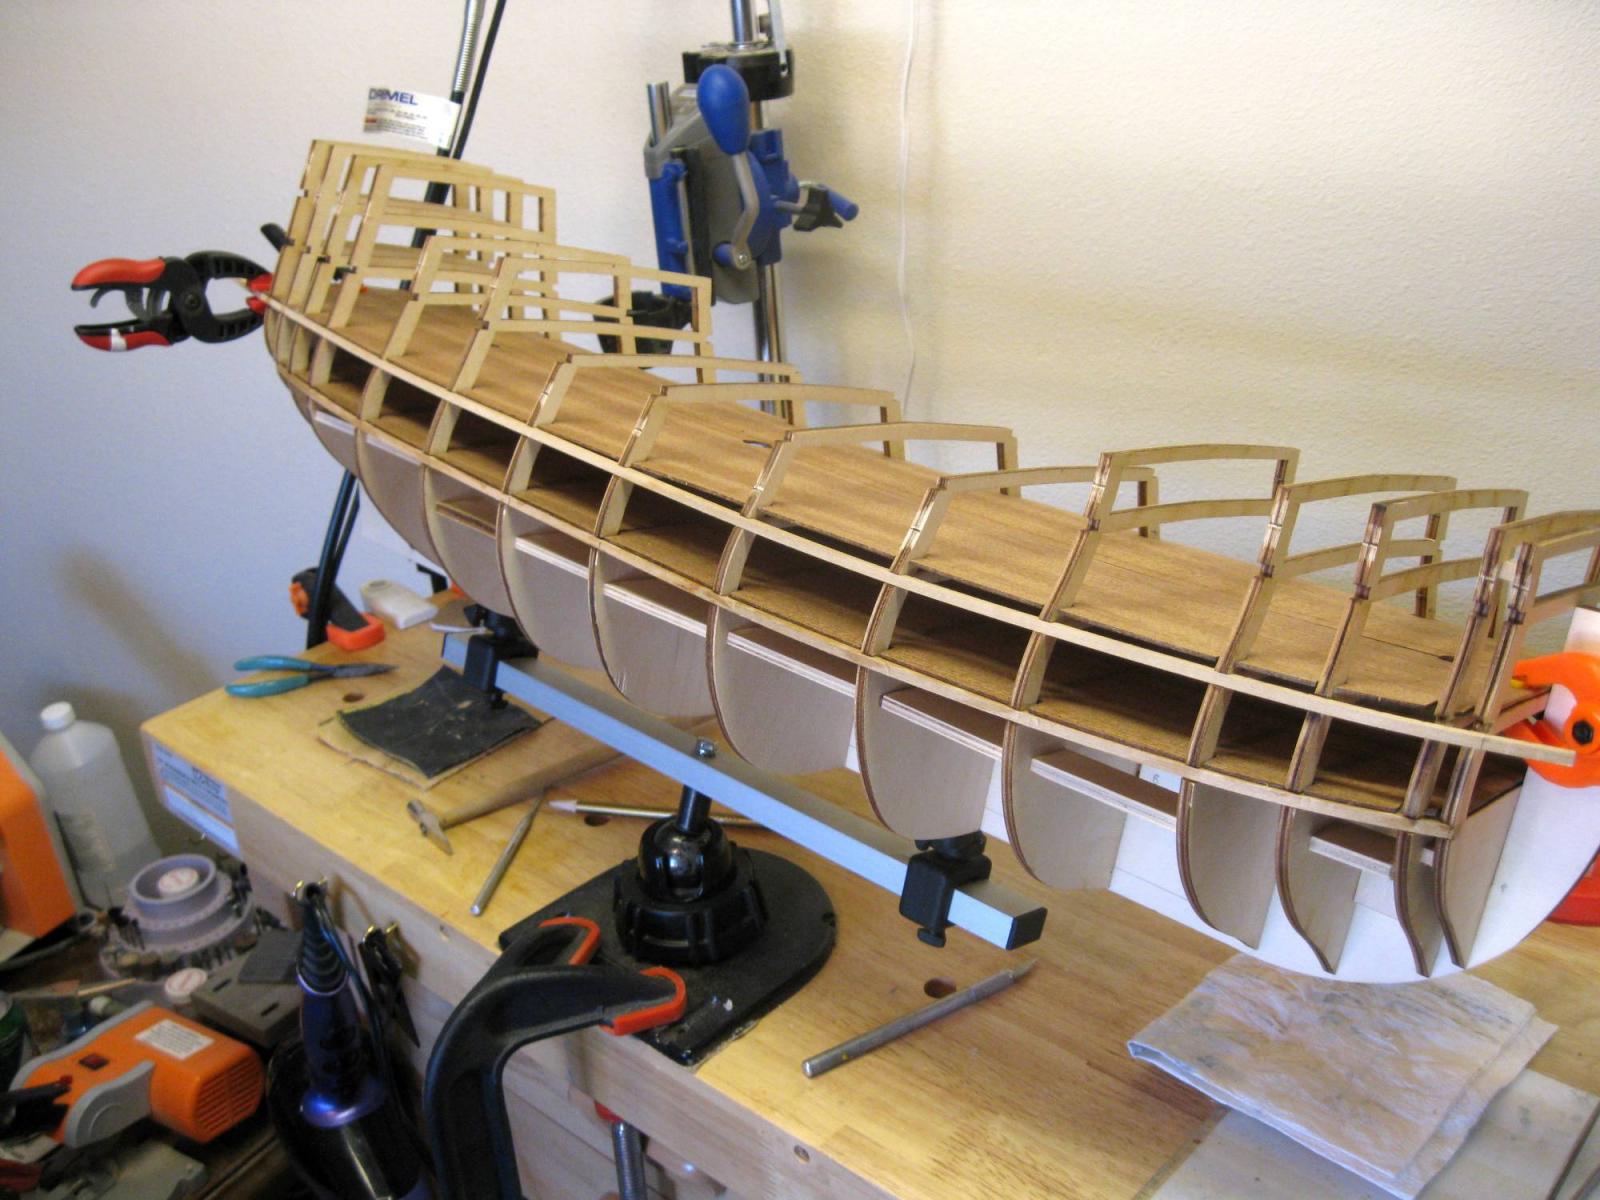
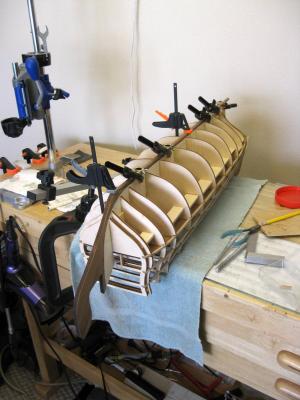
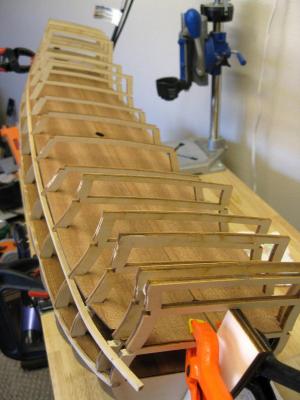
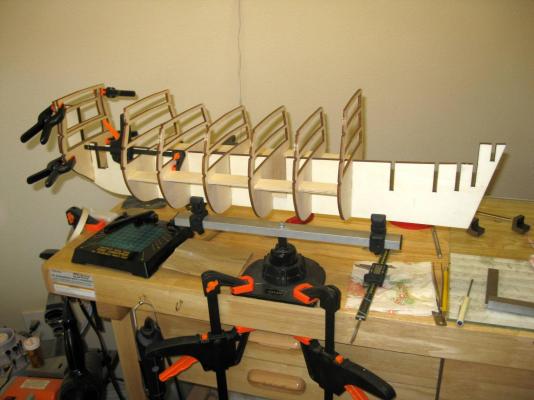
I am dry fitting the lower decks and placing the hull stringers. When I first placed the bulkheads, I marked a center line on the top of each in order to help keep them all in line when fixing them permantely. When dry fitting the decks that are cut in half lengthwise, it is necessary to adjust the depth of the slots that fit around each bulkhead. You need a reference point to know how much to adjust them. A center line on every deck platform on all bulkheads is just the thing. You then simply line up the center edge of the deck half with the center line mark and adjust the slots until the deck seats down. Both halves then line up correctly and are also in line with the deck below. When placing the stringers, the slots in the bulkheads need some adjusting and the first 3 at the bow and the last 3 at the stern need beveling to alow the stringers to wrap around the curve of the hull. Also, I was doing a little planning ahead and noticed that the deck planking strips supplied are walnut and a little too dark for authentic planking. Ships had decking that was pale and weathered looking. A friend suggested wood like tanganyka is more like that. I agree and ordered some from my supplier. It seems that there is a limited supply here in the states and they are not certain of getting any more from overseas. There is a supplier in Australia however that has a good supply of tanganyka and other woods as well. You may want to keep them in mind if you run into wood supply problems. www.modelshipyard.com.au/ I did some experimenting with the walnut and by soaking the strips in Clorox household bleach for exactly 20 minutes, the color changes to a pale and weathered look. It is perfect for the realistic deck planking and will save me about $150, since I won't have to buy extra wood. Vince P.


- 593 replies
-
- 8
-
-
- royal william
- euromodels
- (and 1 more)
-
Yes, I have a drone that is watching you so I can copy your stuff.. Vince P.
-
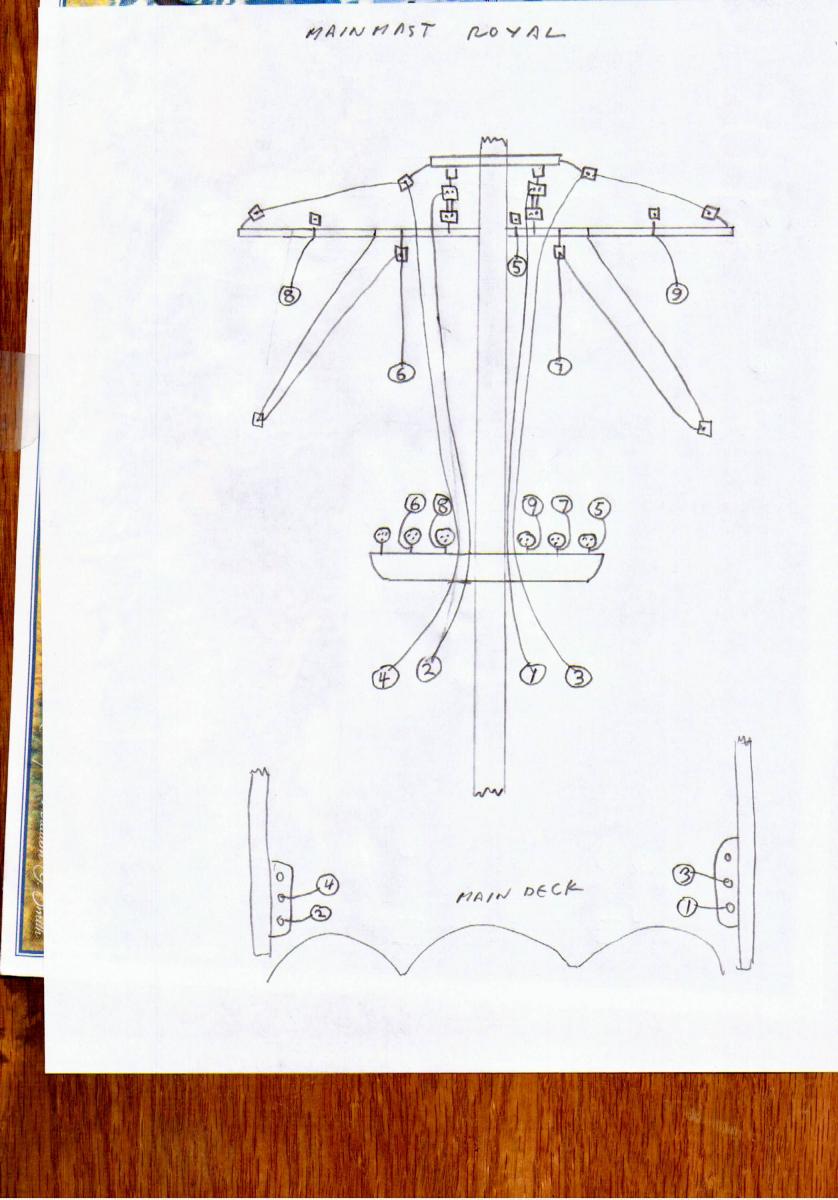
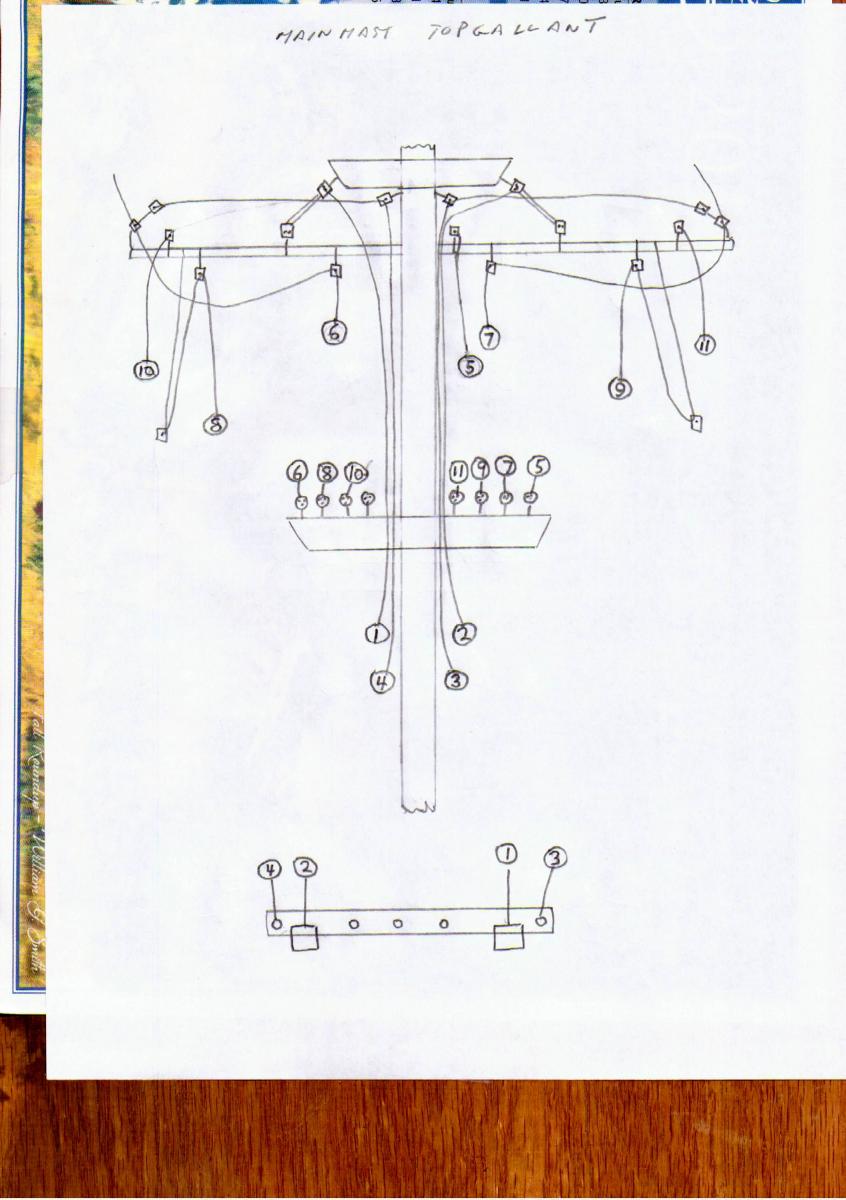
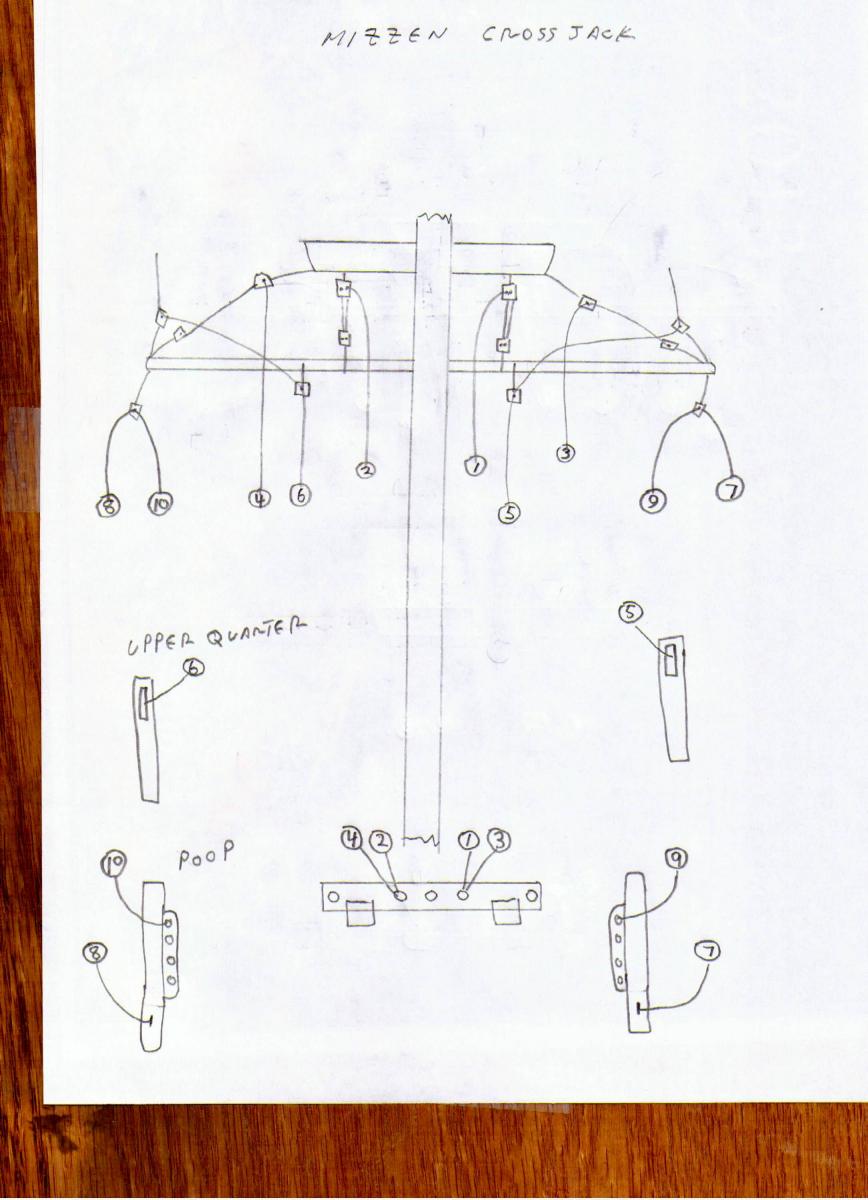
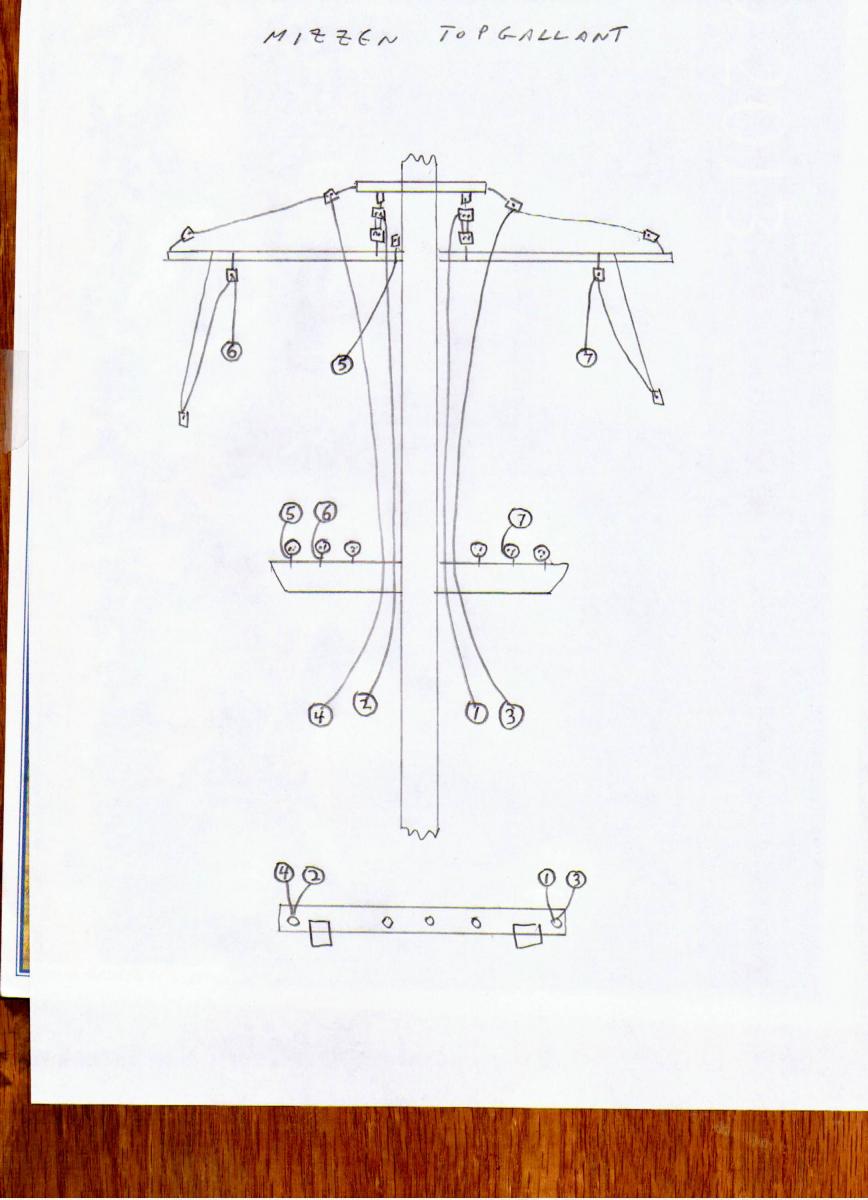
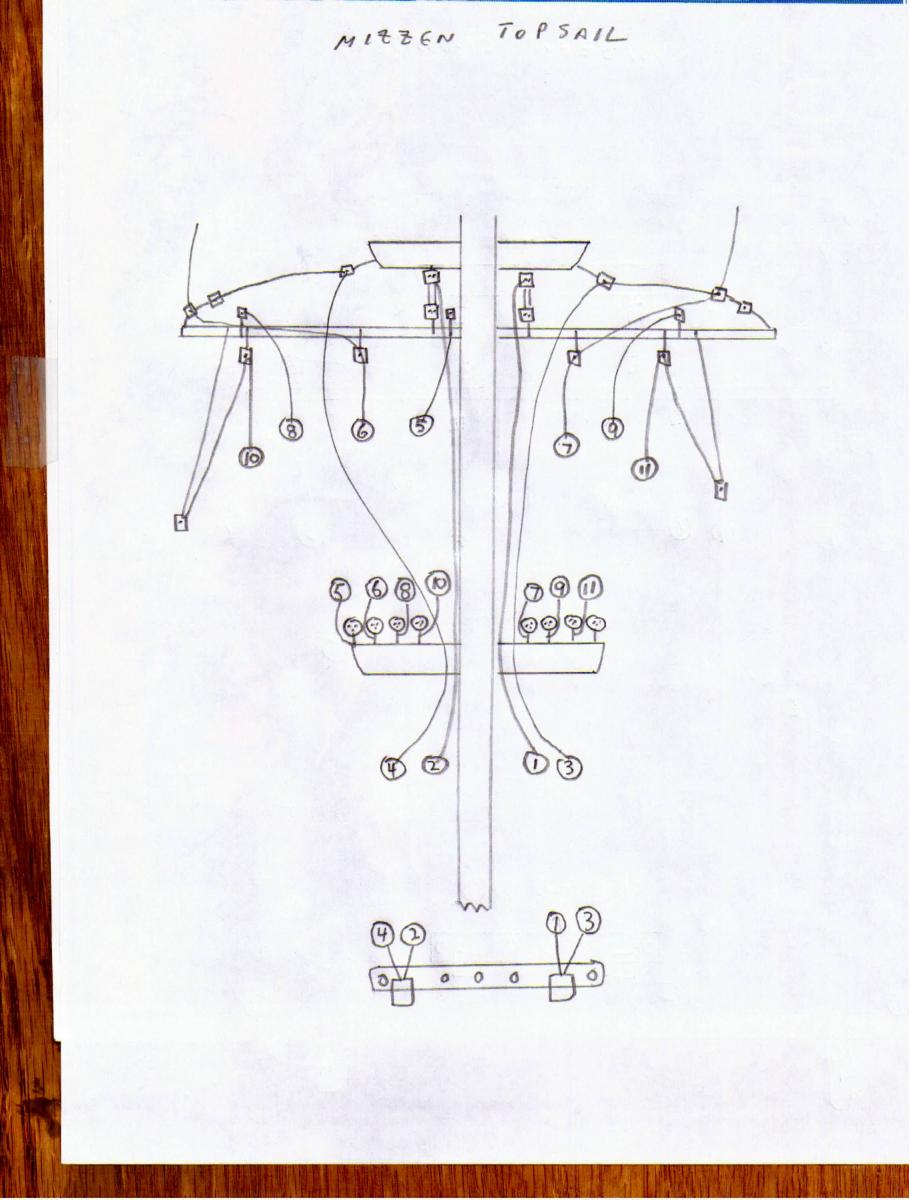
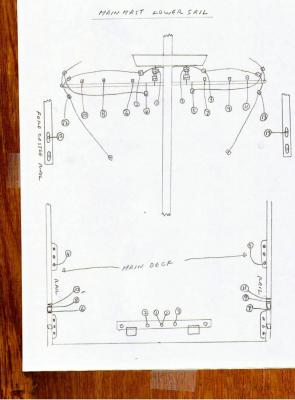
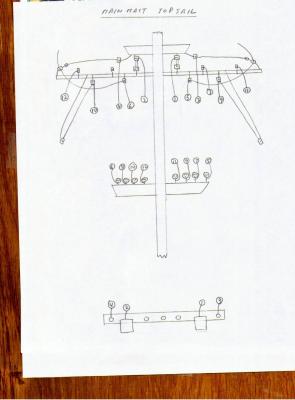
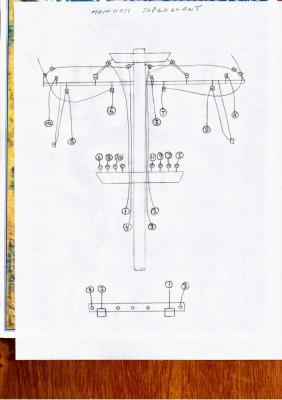
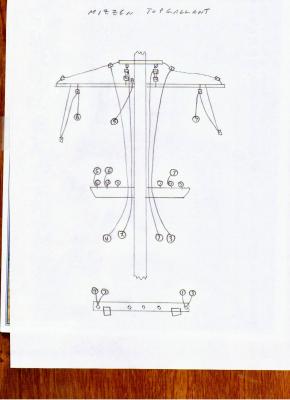
Here are the rest of the sail belay diagrams except for the mizzen lateen. That one will be done in a few days. Vince P. ** For some reason the photos I posted here disappeared. I have re-posted them. Vince P.


- 264 replies
-
- 3
-
-
- sovereign of the seas
- mantua
- (and 1 more)
-
Hi Moflea, Thanks for the tip. It worked using the hair dryer. My wife also suggested that. Vince
-
Thanks Augie, I will try it. Vince P.
-
Does anybody know how to undo good PVA glue? I glued something made of plywood that needs to be undone. The glue has set for about 3 days. Vince P.
-
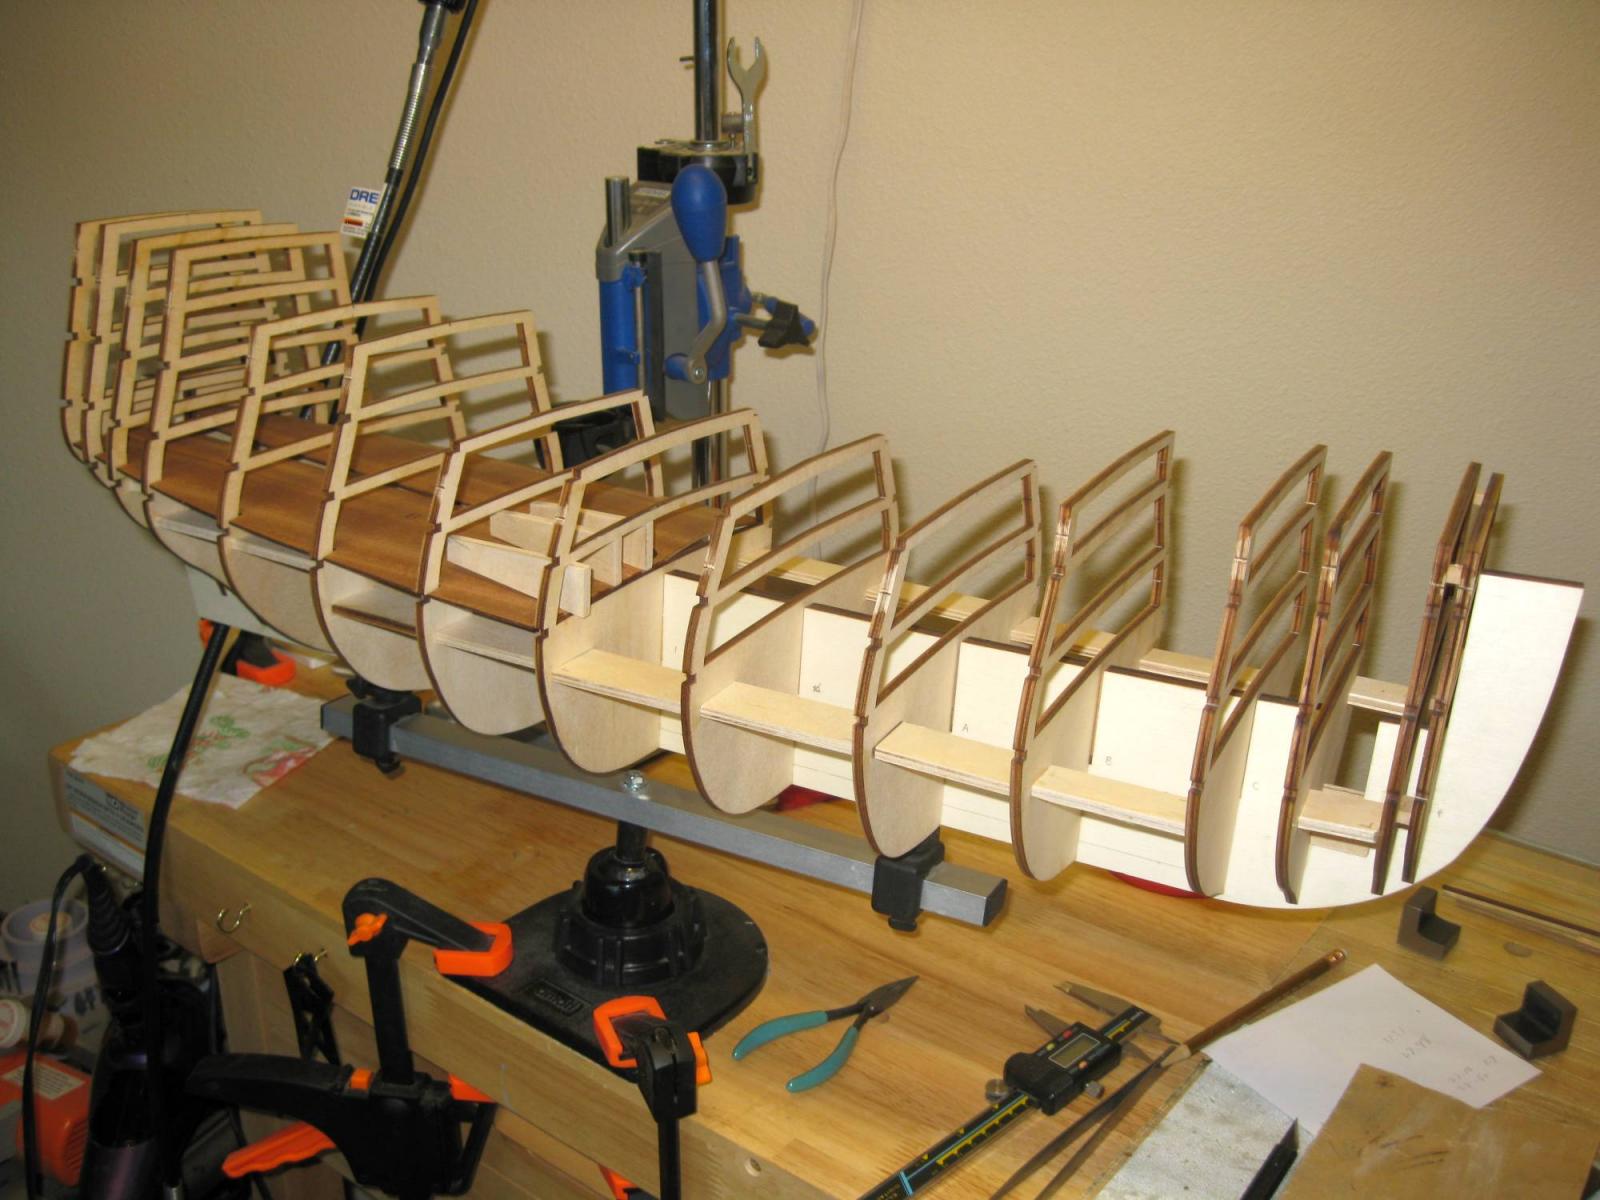
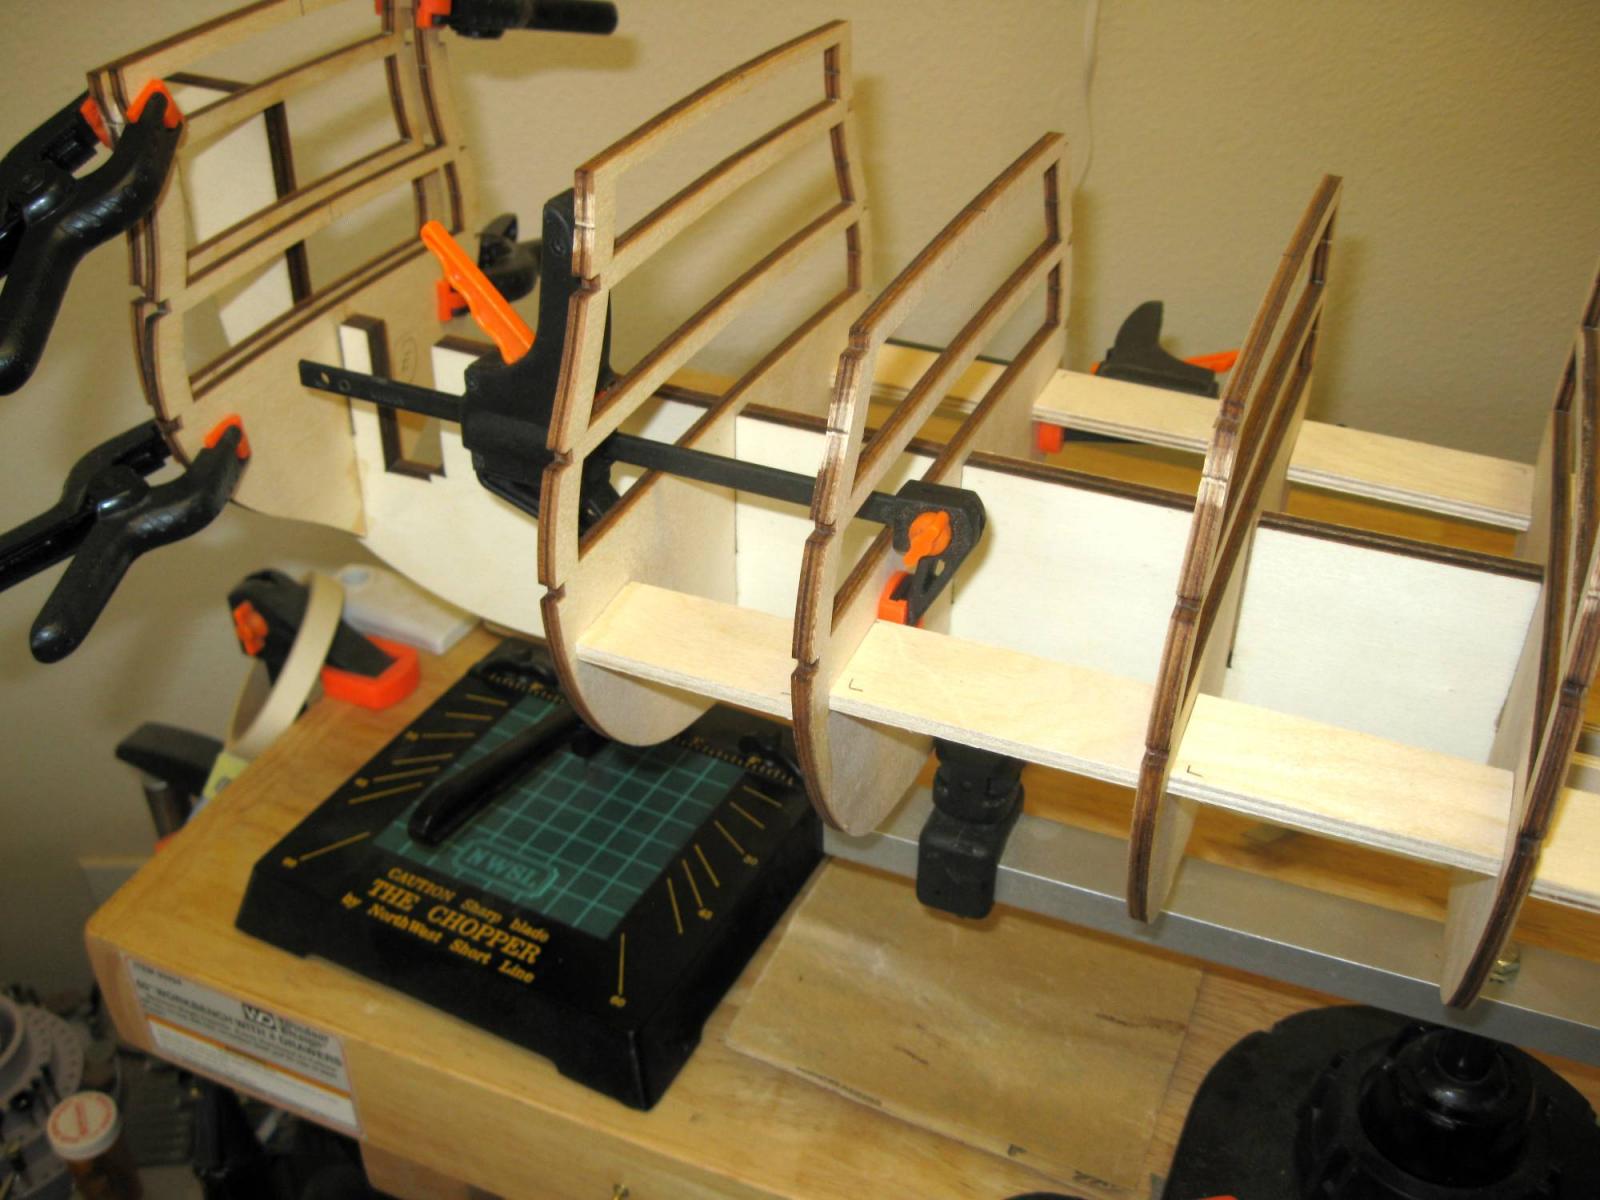
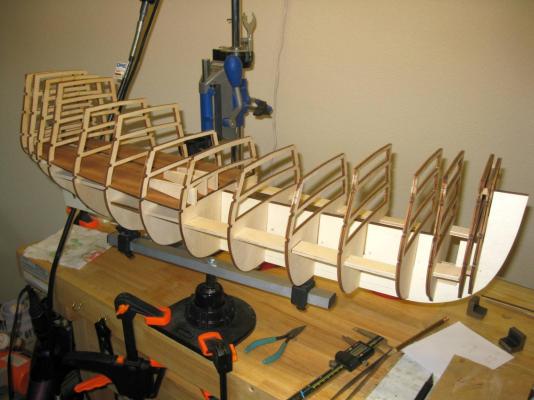
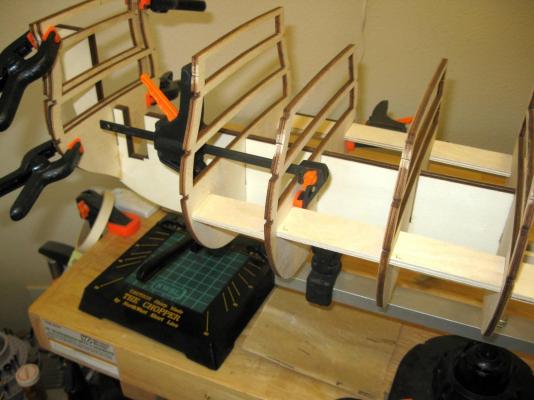
All of the bulkheads are fixed in place and squared to each other and the false keel. Placing the lower deck comes next. The deck is precut into two halfs cut along the length. Each half has to be cut again into two pieces across the slots for bulkhead "1" There is no way to get the deck threaded into the bulkheads and down to the lower most supports without cutting it. Each quarter is then treaded through the upper bulkhead slot in the bow and slanted down until it gets to the bottom support at the stern. It is necessary to adjust the little slots to fit the bulkheads, but not much. Squaring the bulkheads made the difference here. Once both rear halfs are threaded into place, each half is secured to the forward bulkhead using wedges to hold them down to the curved deck supports while the glue dries. Both halfs are done together, one bulkhead at a time towards the stern, in order to keep the halfs butted together. Vince P.
- 593 replies
-
- 9
-
-
- royal william
- euromodels
- (and 1 more)
-
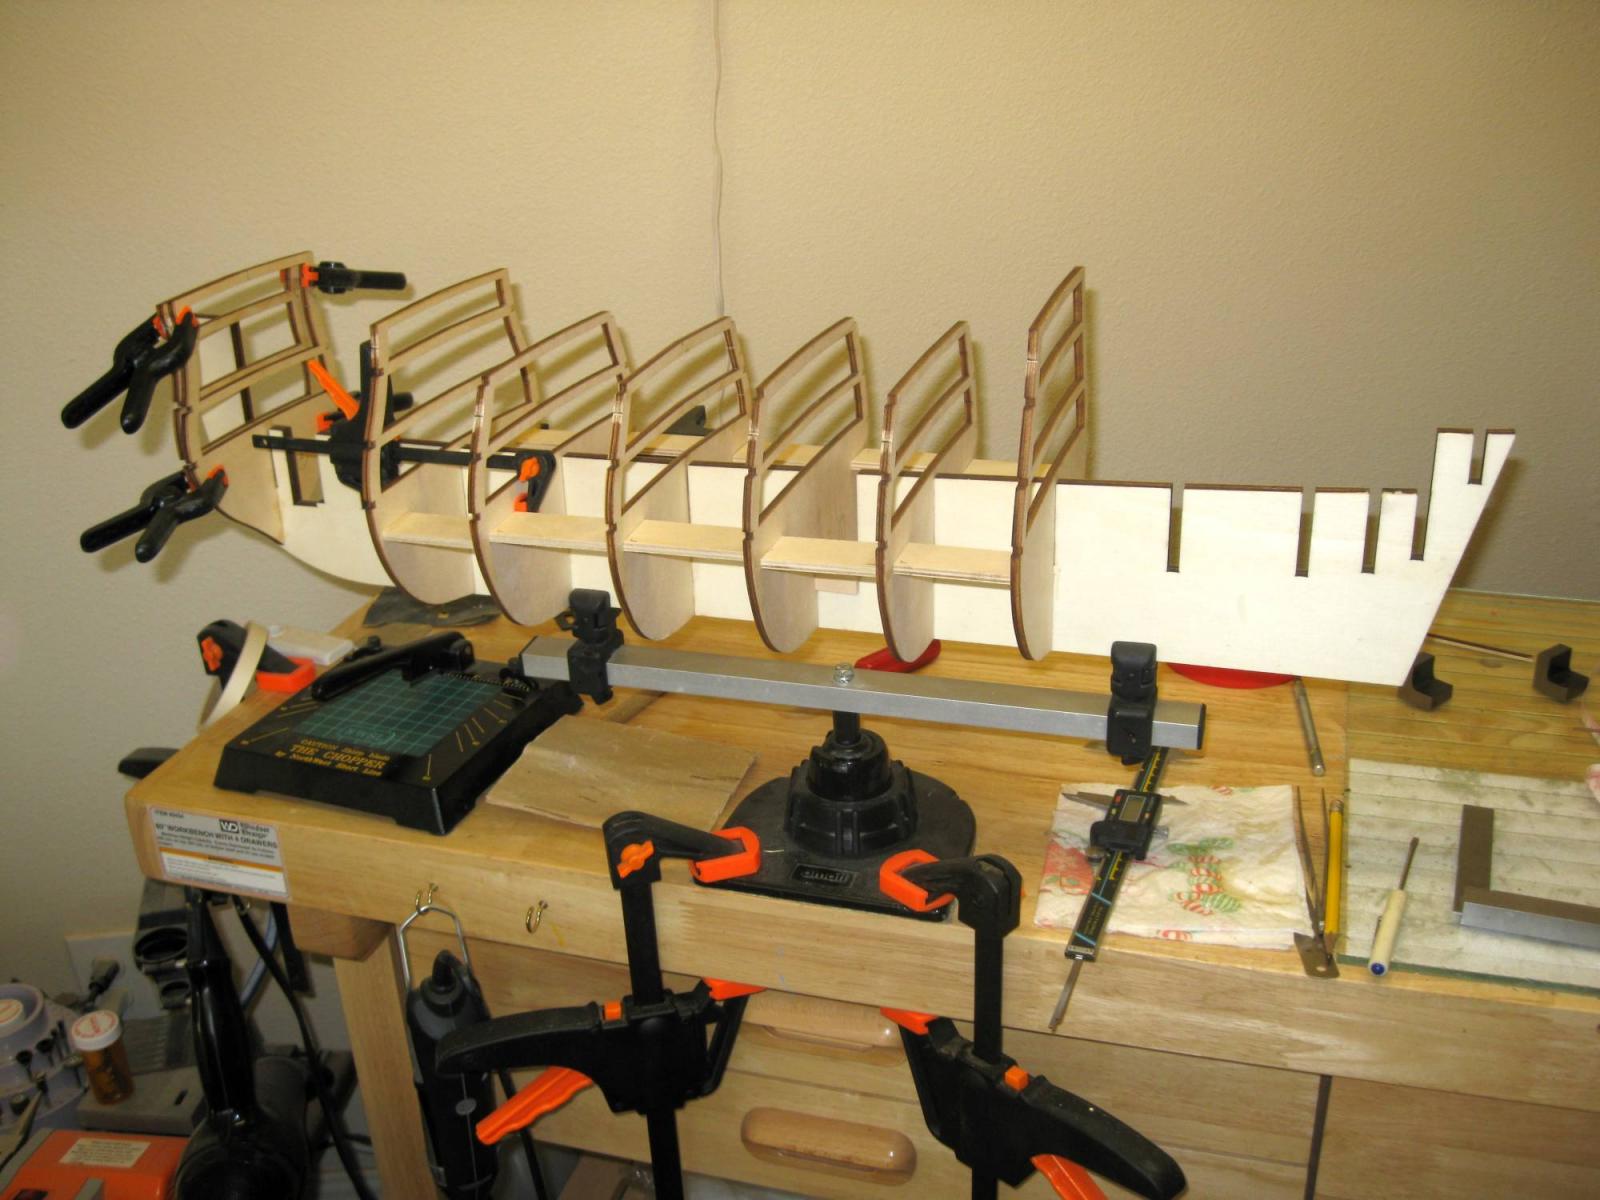
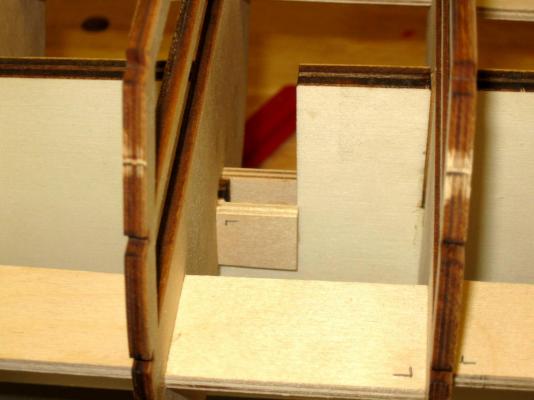
The bulkheads on this ship are so wide and tall and they initially are only held in place where they join the false keel. It is impossible to keep them perfectly square in the 3 dimenesional planes because they warp under there own weight. The Euro interpretive notes suggest placing pieces of wood in between each bulkhead on both sides. This is a great idea, and using a square and digital caliper you can micro cut the wood pieces to make the bulkheads square in all directions. It also make the whole structure very rigid and strong. This all is extremely important when it comes time to lay the decks and plank the hull. Also, there are 2 slots cut in the false keel between the bulkheads which serve as a platform to step the fore and main masts. By adding a piece of wood on each side of the slot, it makes a perfectly square and upright space to set the masts. They will sit perfectly vertical from port to starboard and still allow canting them front to back if needed. This also came from the Euro notes. All of the extra wood pieces were made from scrap from the plywood bulkhead sheets. Vince P.

- 593 replies
-
- 11
-
-
- royal william
- euromodels
- (and 1 more)
-
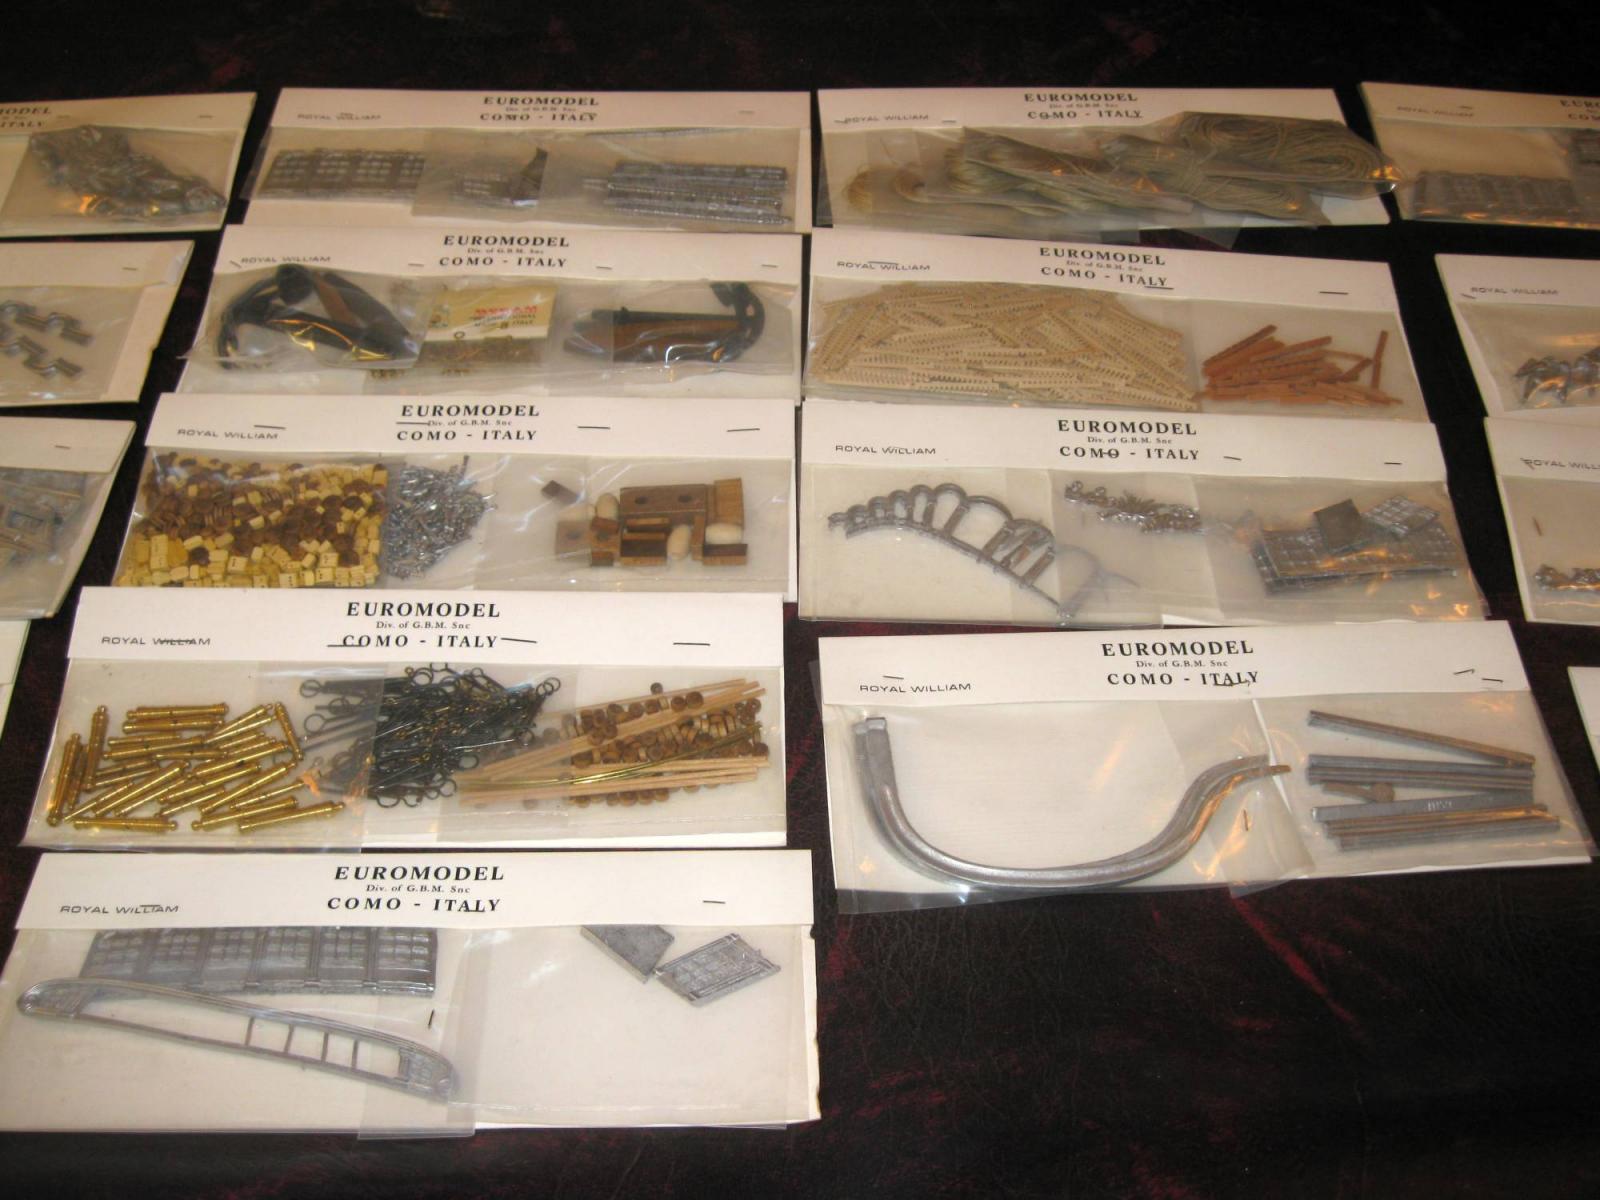
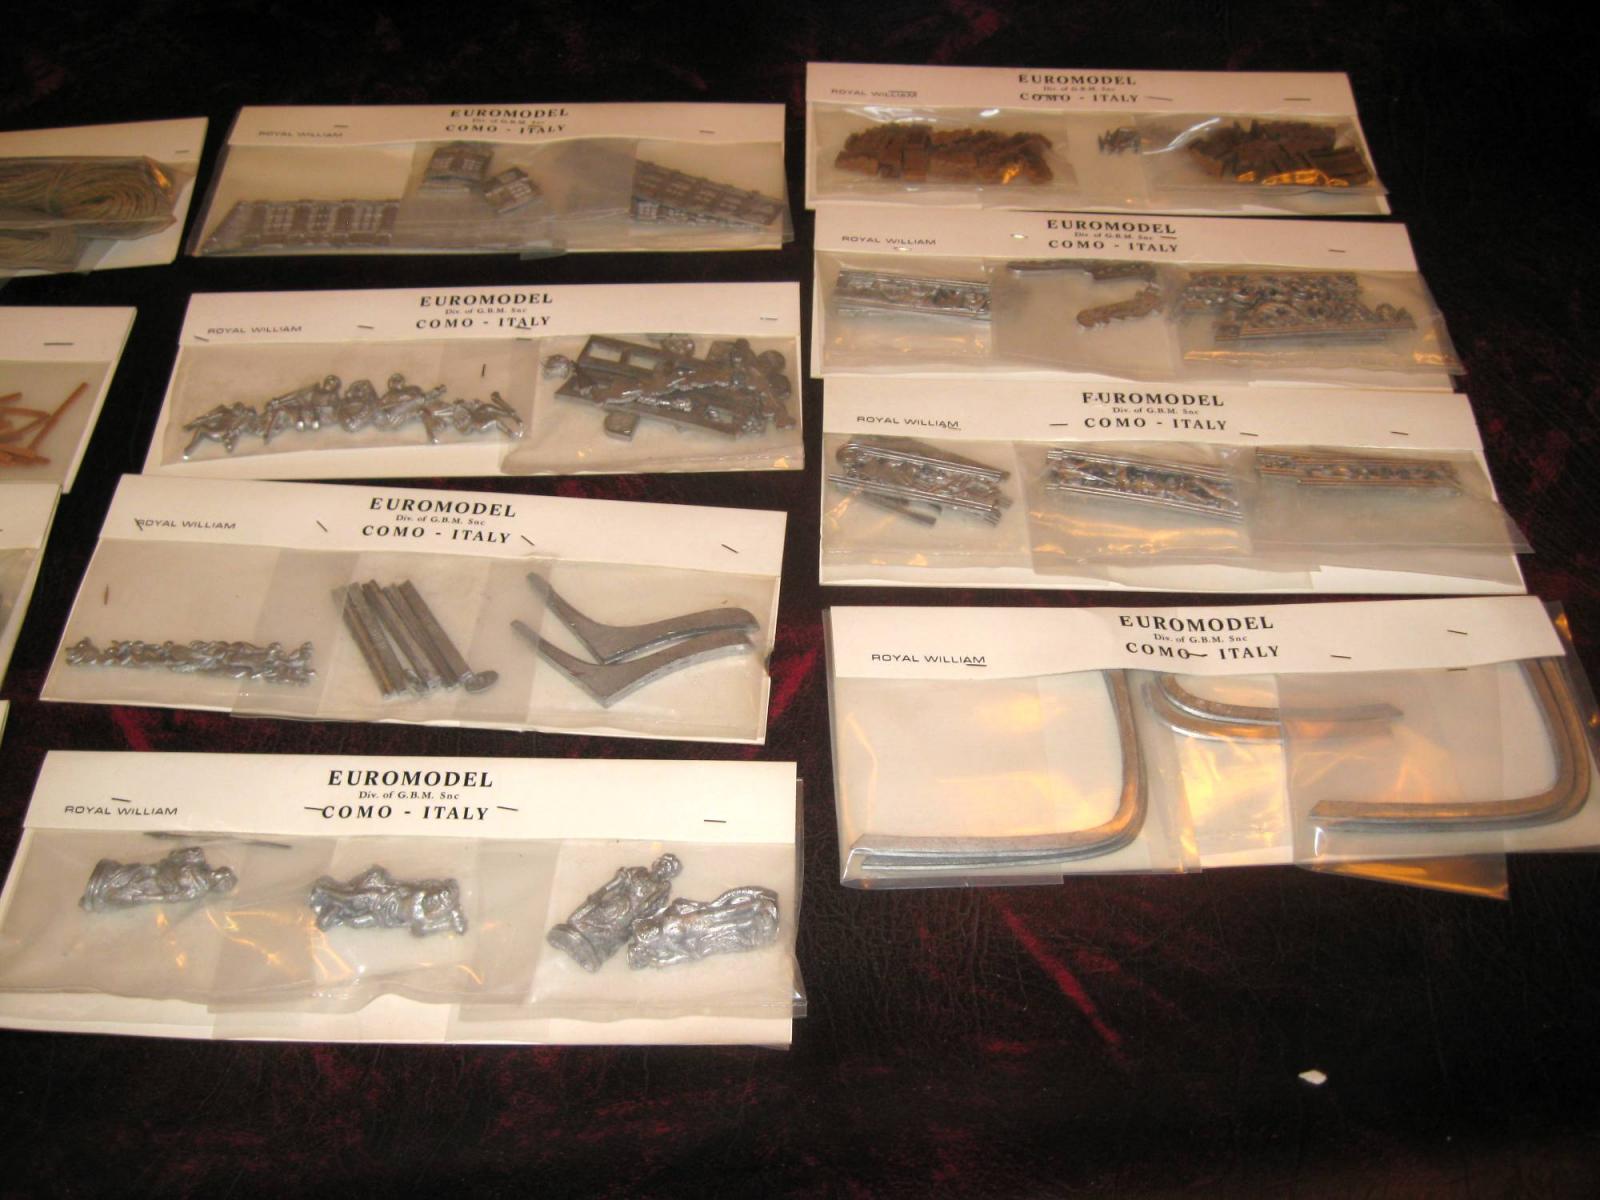
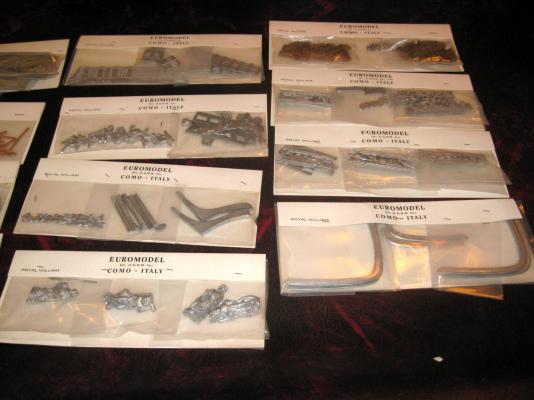
Hi there, After building the SOS which had over 600 metal castings, this one is not so bad. Looks to be just a couple of hundred. One thing here is that each of those pieces will have to be painted or guilded. The SOS came with the fittings already finished. Vince P.
-
Hi Nigel, The false keel is exactly 10.0mm. Their kits do require some manual fine work. I like that because it is more challenging and fun to make some things from scratch. Regards, Vince P.
- 593 replies
-
- 1
-
-
- royal william
- euromodels
- (and 1 more)
-
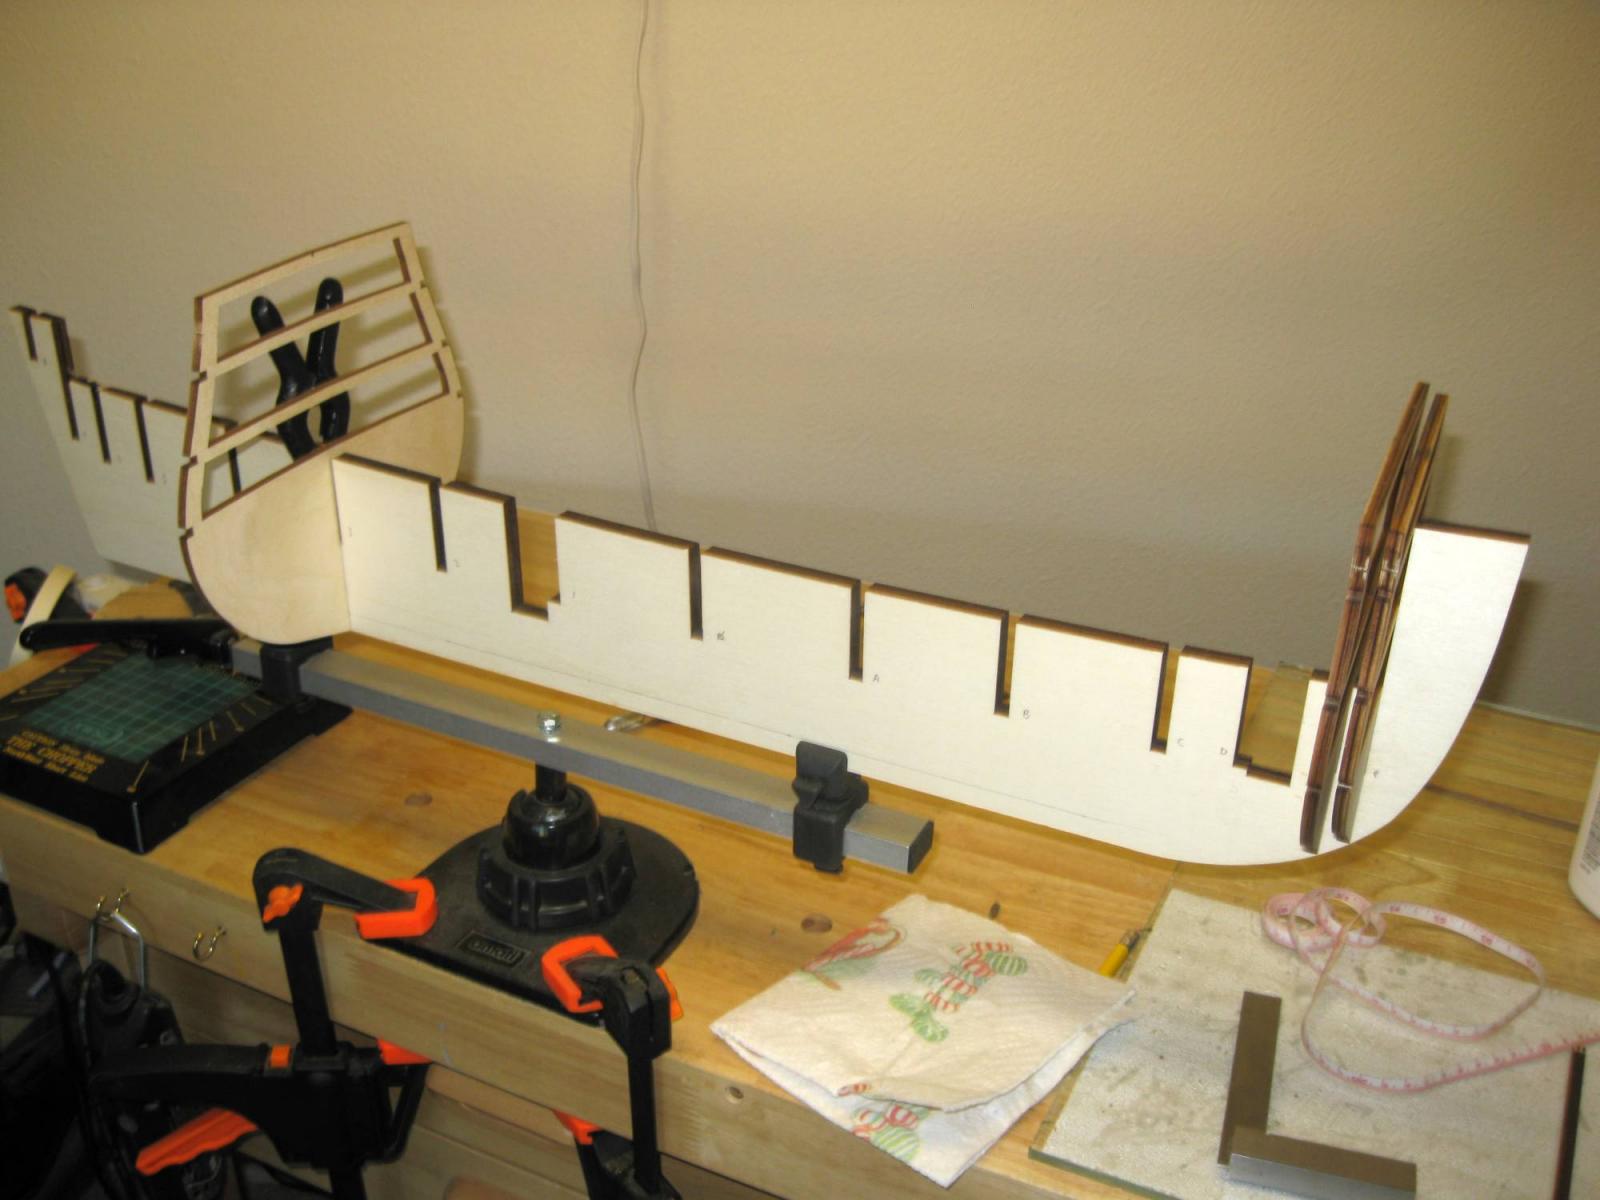
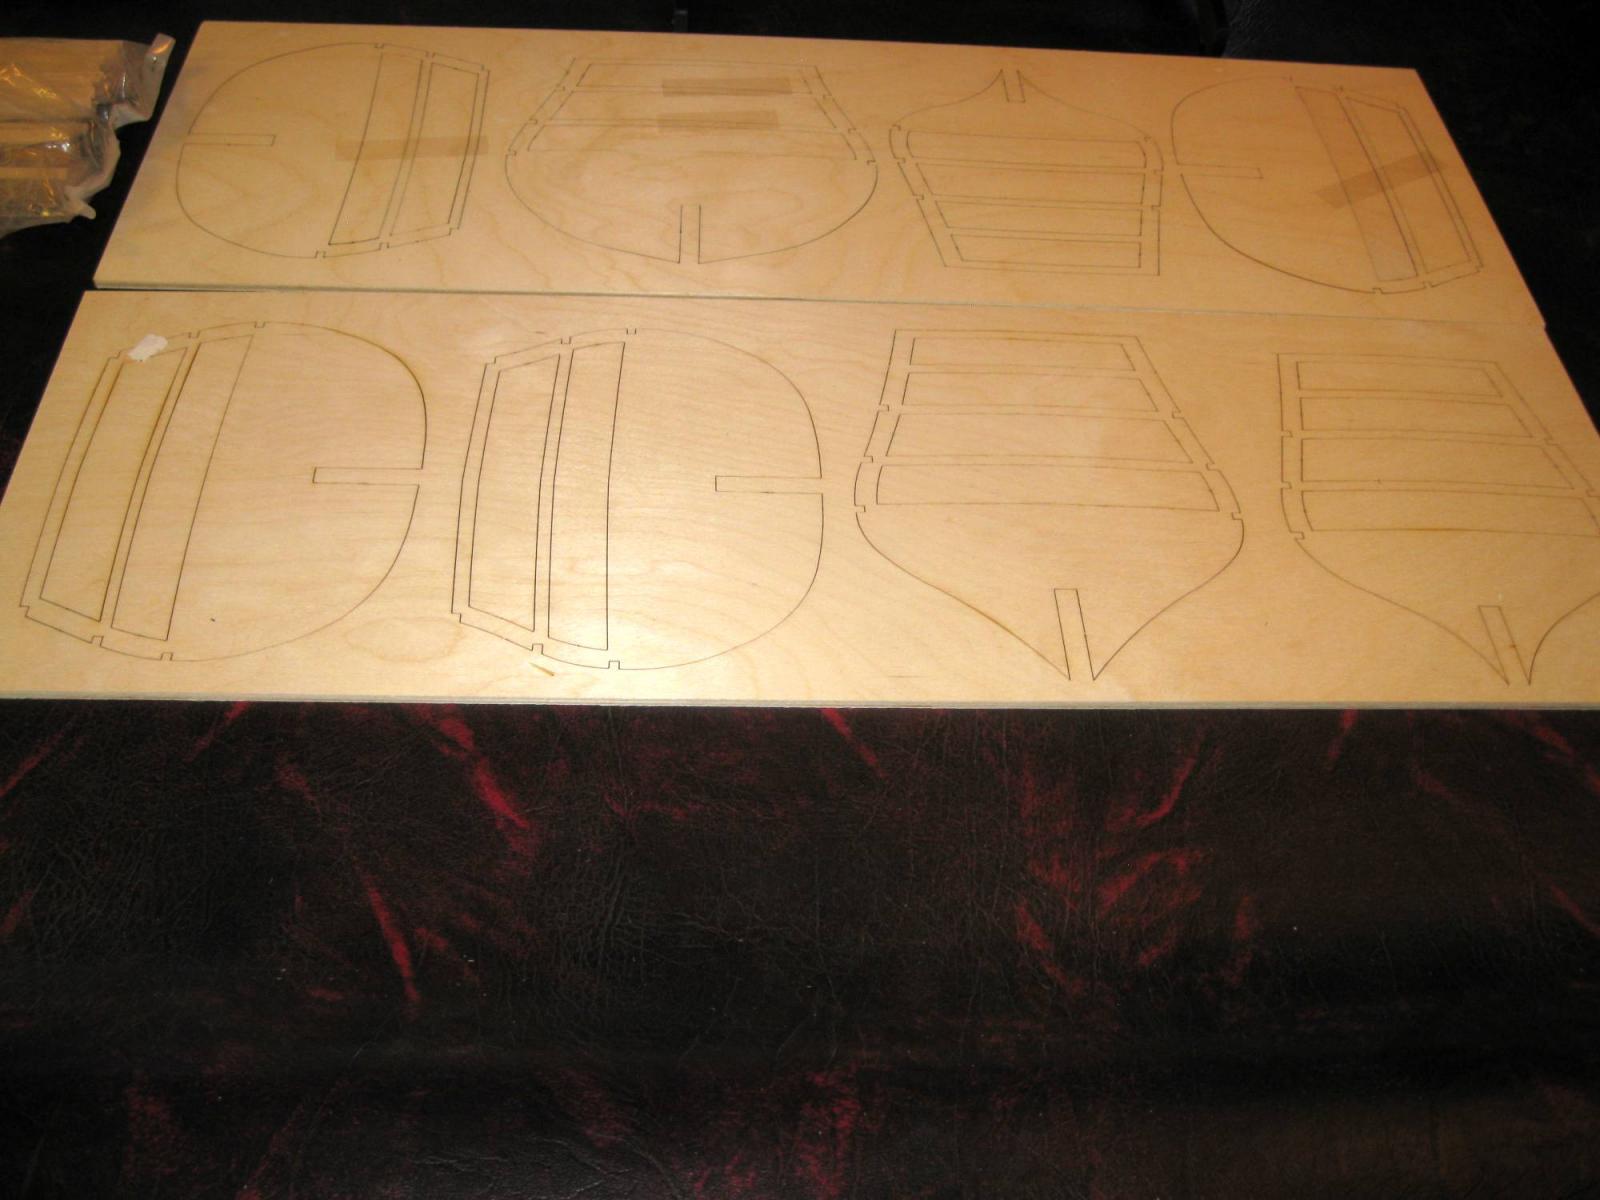
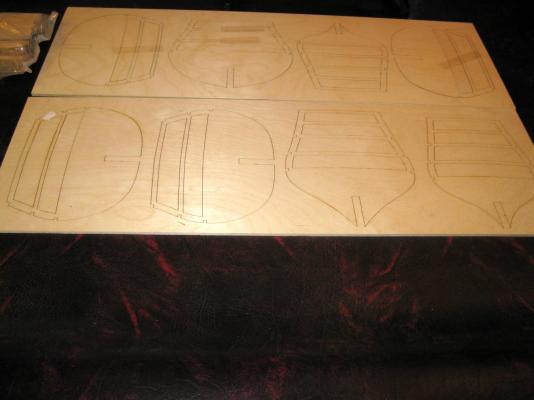
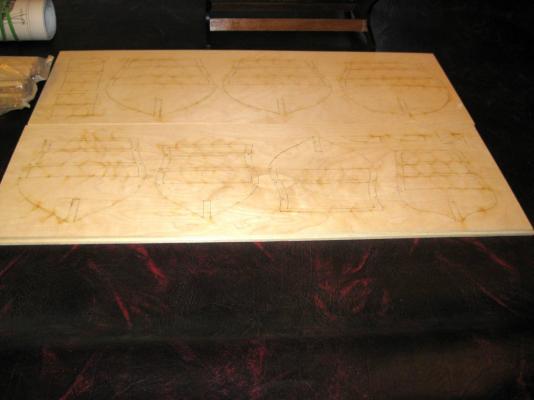
Starting on constructing the bulkheads and keel. Euro has a different way of identifying the 15 various bulkheads. They start at midship with the number "0" and go towards the stern with increasing numbers to bulkhead "8". They they start from midship and go to the bow with letters "A" through "F". It would have been simpler to just start at the bow with all numbers or letters. I did find that on the plan sheet #4 where they illustrate placing the bulkheads, they mislabled bulkheads "E" and "F". Following the plans, Bulkhead "E" would be first at the bow and then "F" behind it. If you dry fitted them first, which I strongly recommend, you would see something is wrong following the plans and notice that they are reversed. Also another thing, some of the bulkheads, especially around midship are very similar. Even placing them on the plan sheet, it would be easy for someone in a hurry to switch them up. If you are careful and observant, which you should be anyway, there would be no problem getting them in the correct places. A simple addition for the plans would be to have diagrams of the plywood boards with the bulkheads still attached and labeled. As poor as the plans were for Mantua, they did have this feature. Some of the bulkheads fit sloppily into the keel slots and need a shim to make a snug fit. A piece of 5mm x 1mm wood works perfectly here. VinceP.

- 593 replies
-
- 7
-
-
- royal william
- euromodels
- (and 1 more)
-
Yes. Michael, this ship and the builder are featured on the Euro website. Vince
-
The way this kit is designed, you can full rig all of the guns if you desired. I am going to full rig the two upper gun decks and leave the lower first deck with false half guns. Vince P.
- 593 replies
-
- 2
-
-
- royal william
- euromodels
- (and 1 more)
-
Hi Andy, I thought about thinning the covers also. Now that I think about it, maybe you could just leave the middle piece out and just use the two outer parts with the planking lines on them. On the ropes, I used black because they stood out better against the light color of the hull. I notice however that your hull finish is darker than mine and the tan colored ropes would look good on your ship. You are correct however. The real ropes would not have been tarred since they were moved alot during opening and closed the ports. Vince
-
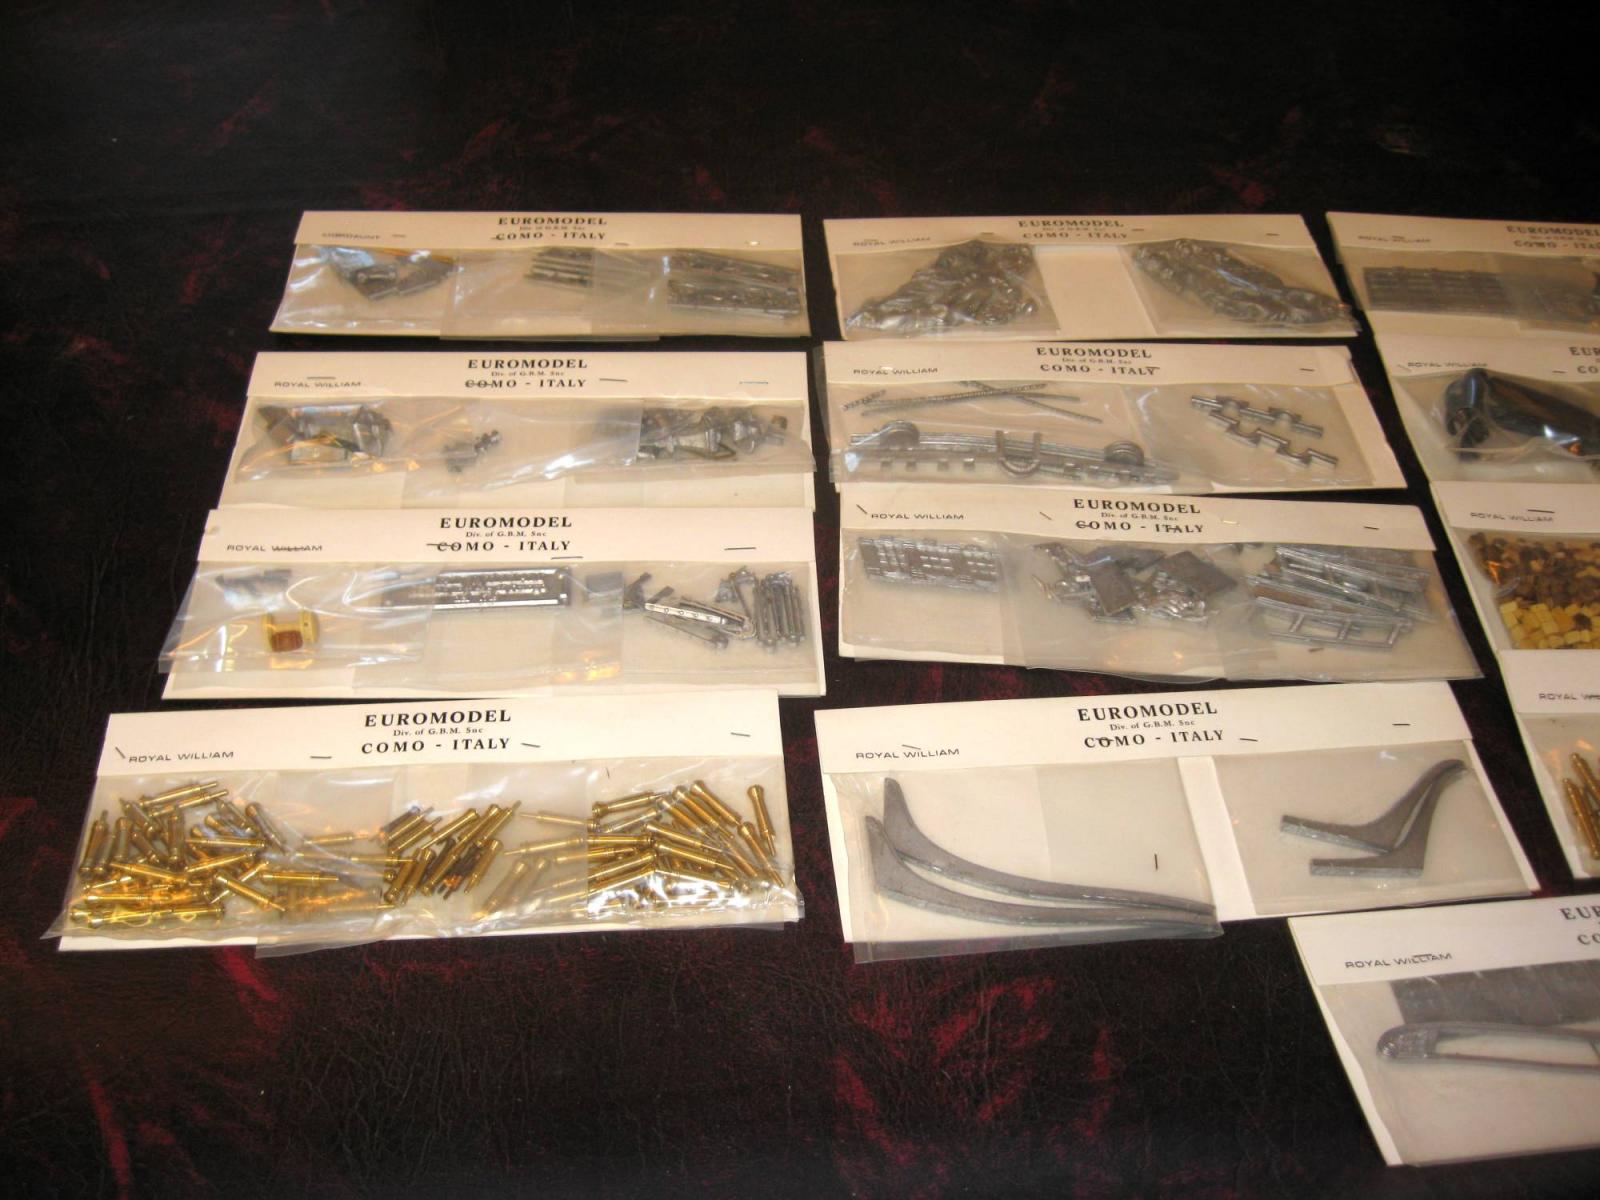
Hi Nigel, Yes the box was filled with those little things. Stuck to everything and the admiral was picking them up everywhere. I am really excited about getting started with this project. Vince P.
-
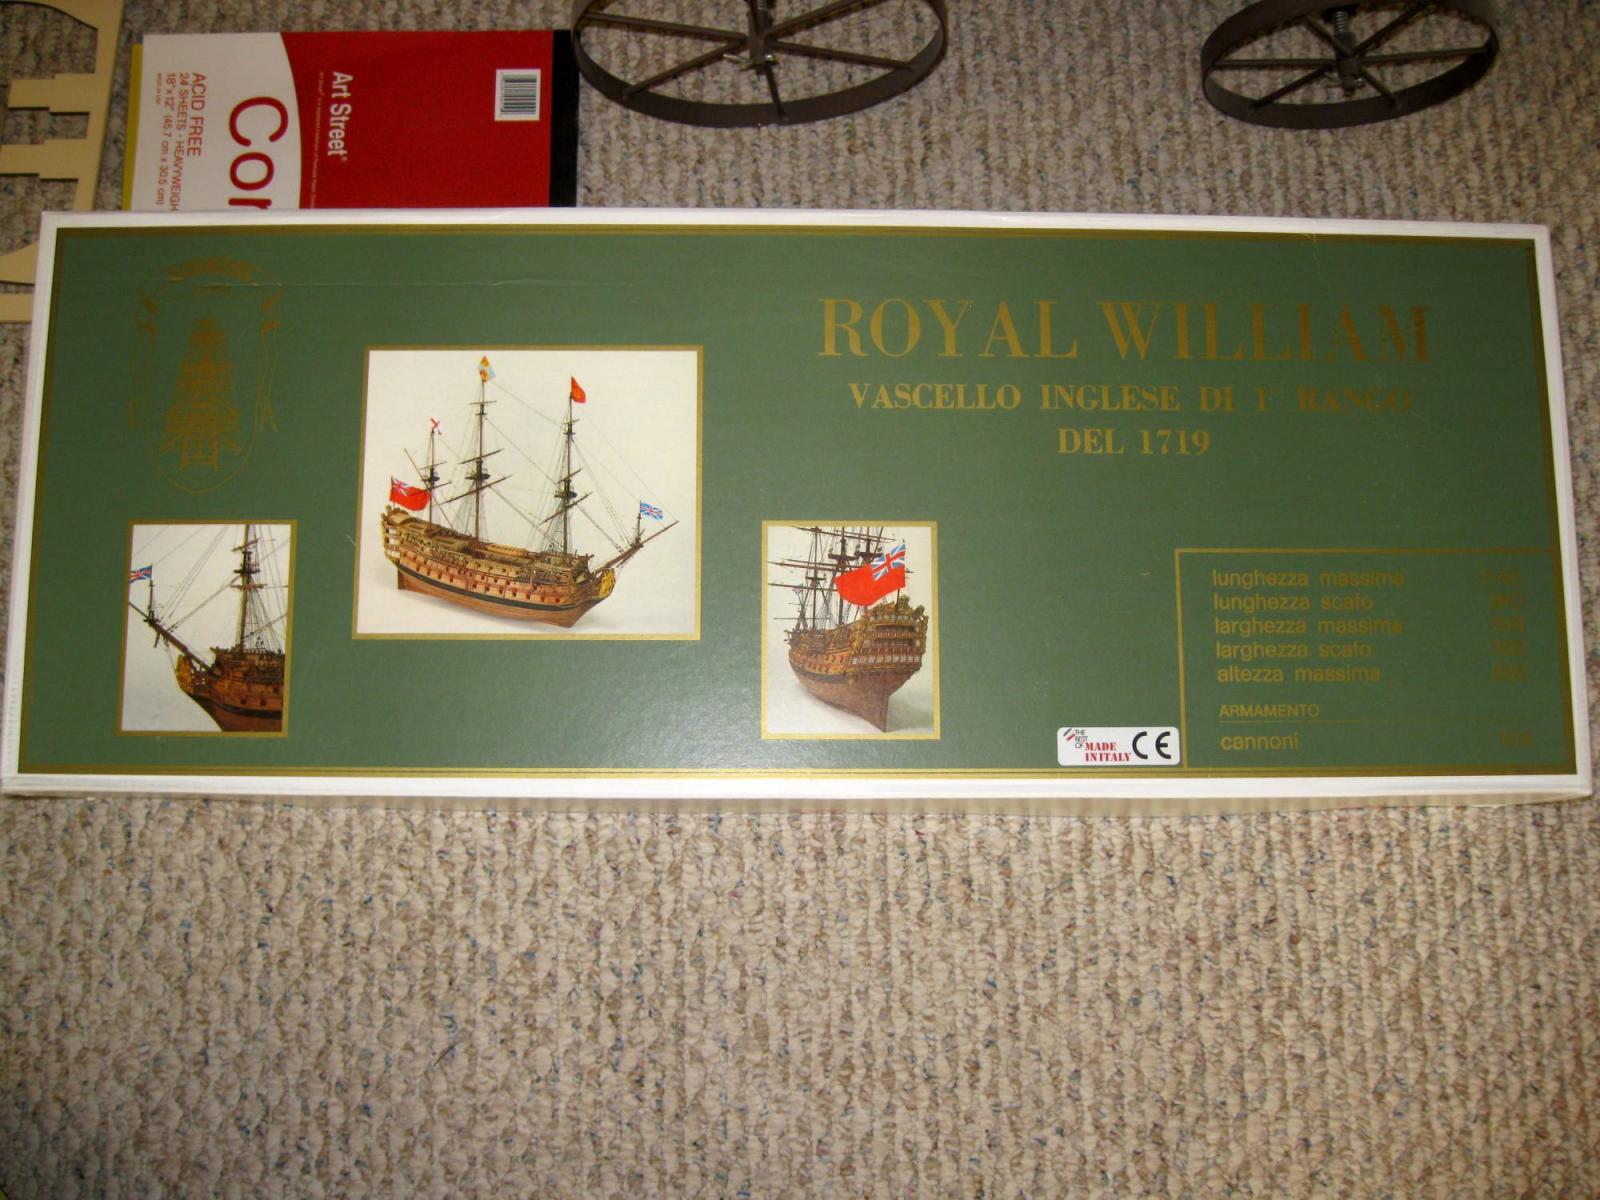
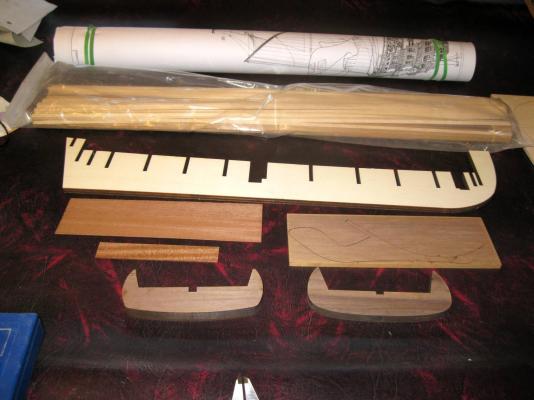
I am starting my next build after the SOS. It is the Royal William by Euromodels. First inspection of the kit contents is impressive. The quality looks good and the plans are great. The basic instructions that come with the kit are OK, but the Euro website has what they call Interpretive and reference notes. There are literally hundreds of pages with contruction notes, color photos, and illustrations. It is organized in chapters and is actually more like a build log of the entire construction. It starts with the basic kit and opens it up for as much kit bashing as you might want. It gives several levels at each stage and allows the builder to expand in detail to close to a scratch build. I have never seen anything like this before. It is outstanding and allows the builder to add as much challenge and complexity as one could want. The basic kit itself is no piece of cake by any means, but I am going to have much fun taking this build to the limits of my building skills and then some. What I learned from building the SOS will certainly help here. I am starting the build as we speak. Vince P.


- 593 replies
-
- 9
-
-
- royal william
- euromodels
- (and 1 more)
-
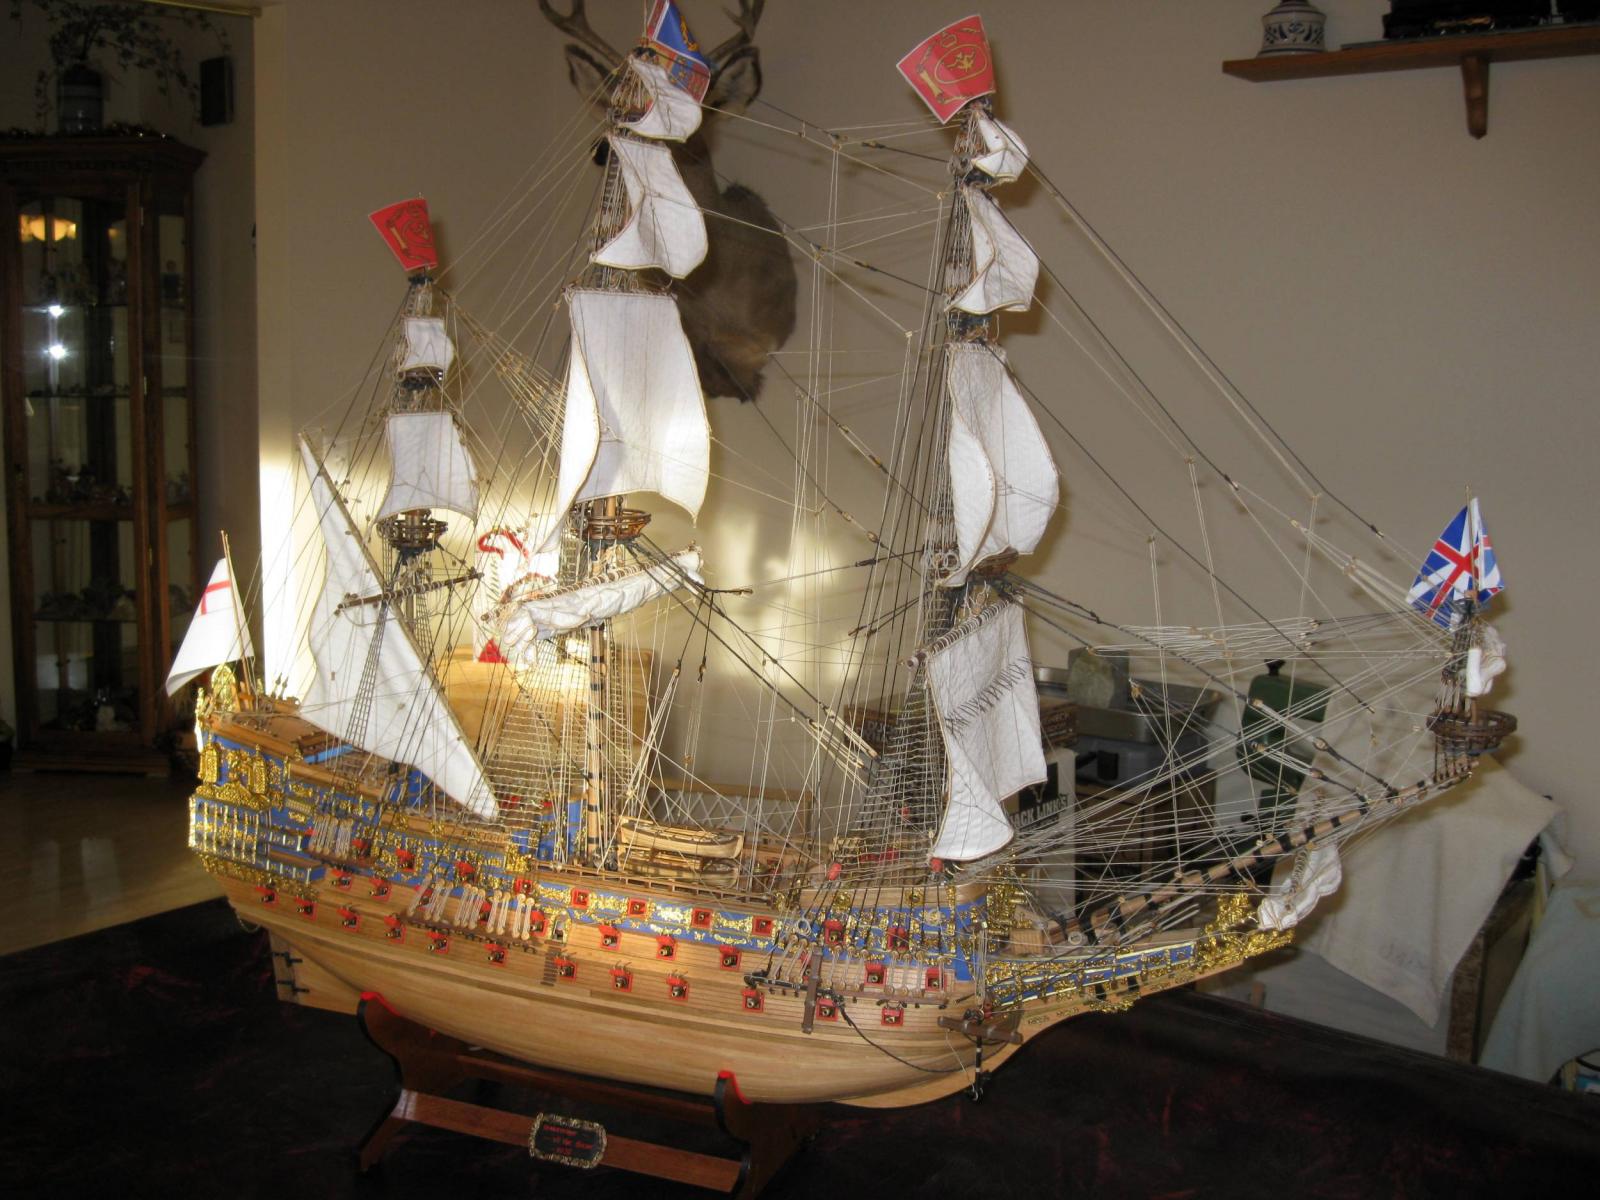
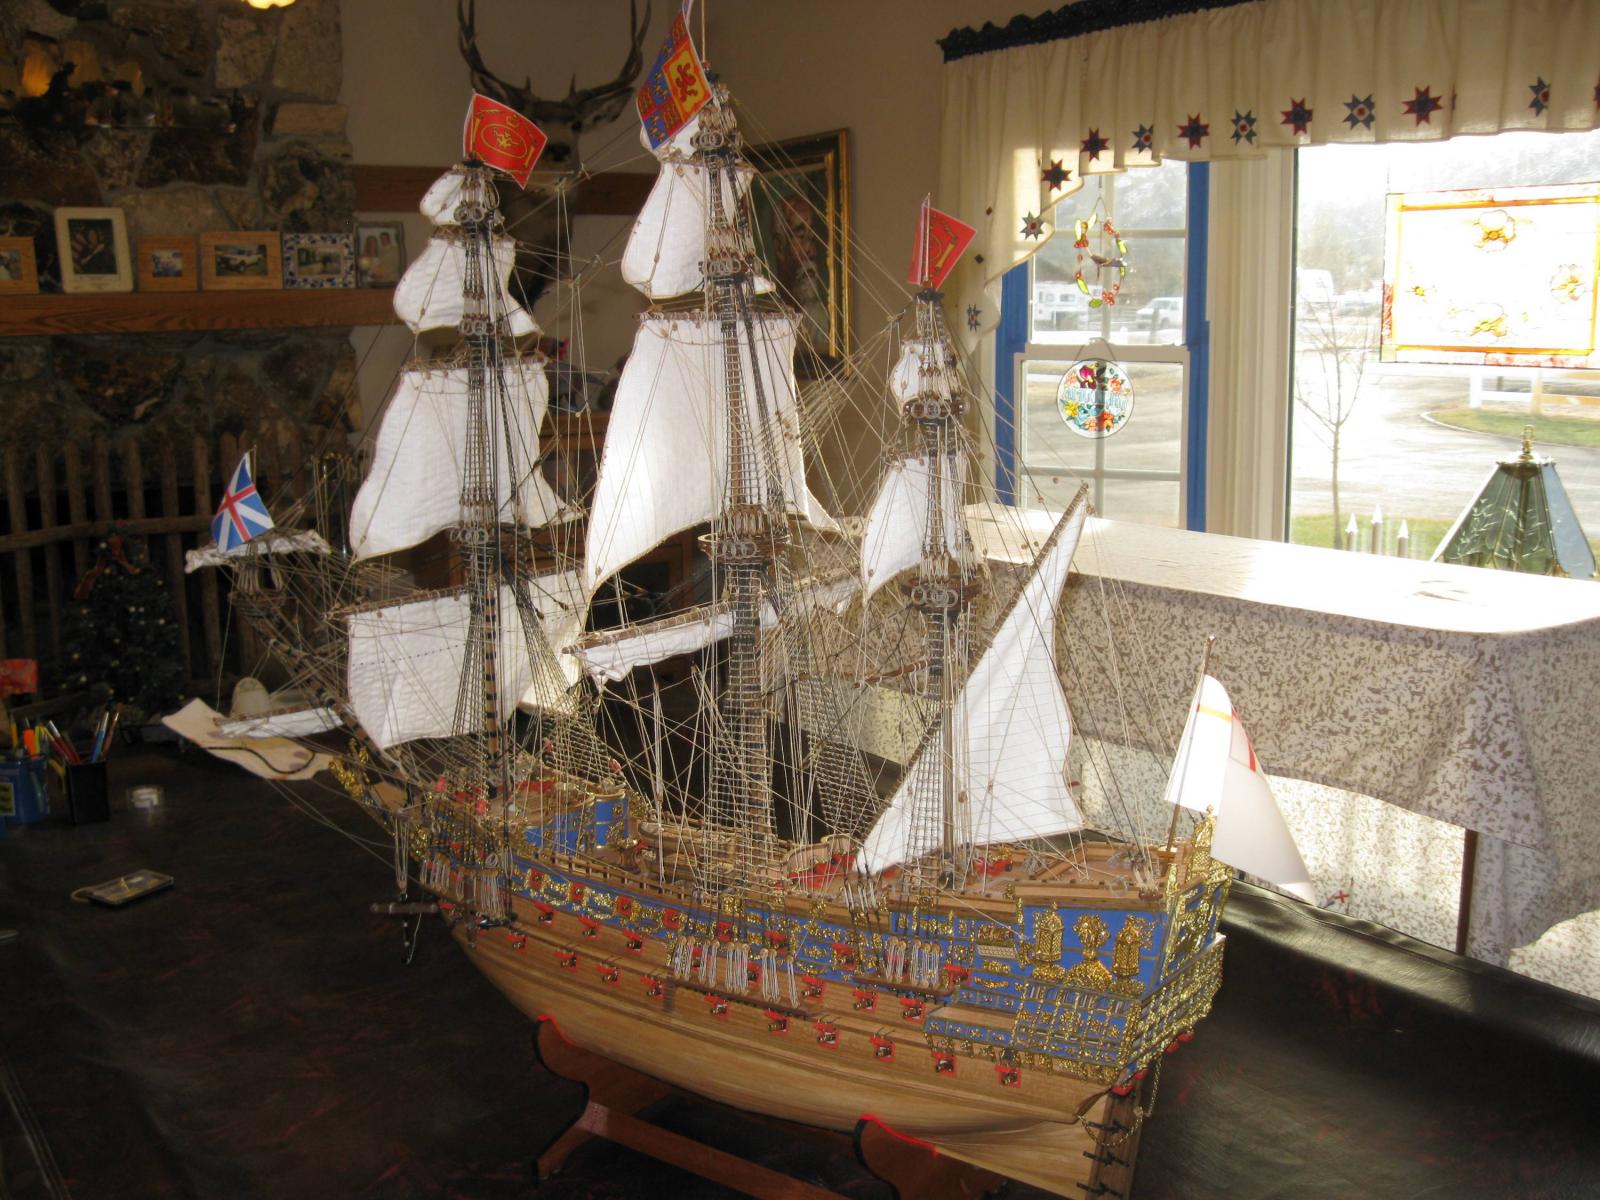
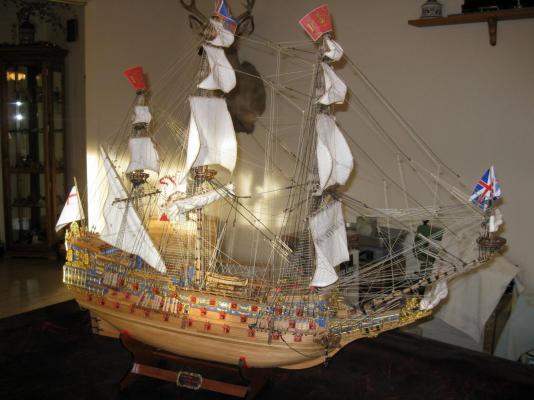
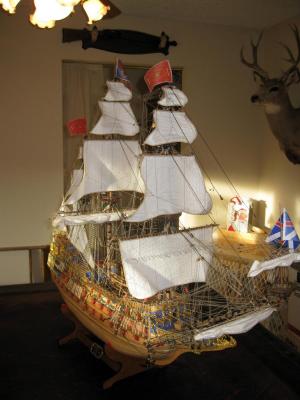
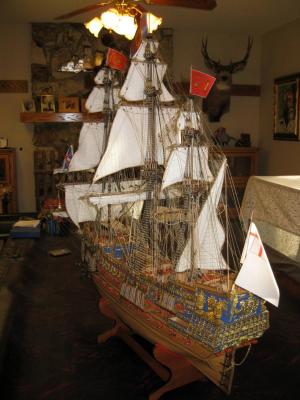
I AM DONE !! SHE IS COMPLETED AND LOOKS PRETTY GOOD TO ME. I still have to post the rest of the belay diagrams on this log. I will try and get my hands on a good camera and take a bunch of various photos to post on the completed ship gallery. I am a little sad since she has occupied my every day for over 2 years. Woo Woo !!

- 264 replies
-
- 14
-
-

-
- sovereign of the seas
- mantua
- (and 1 more)
-
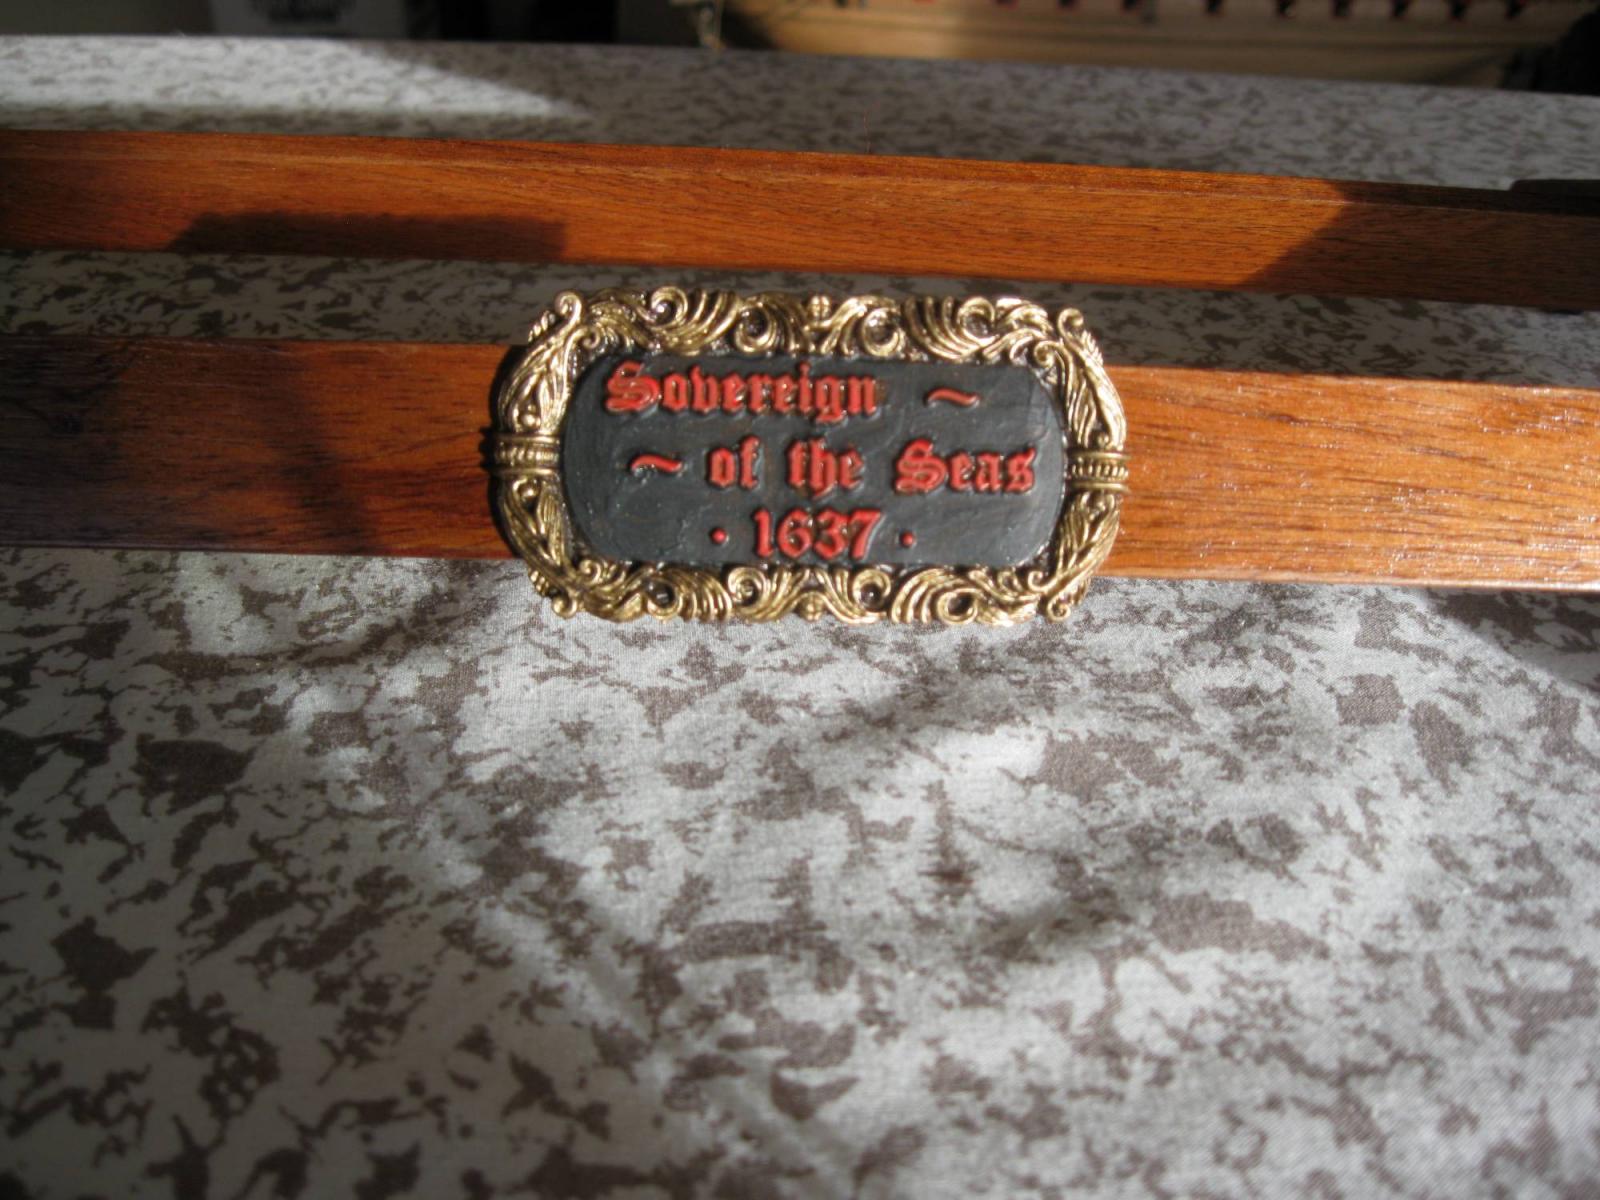
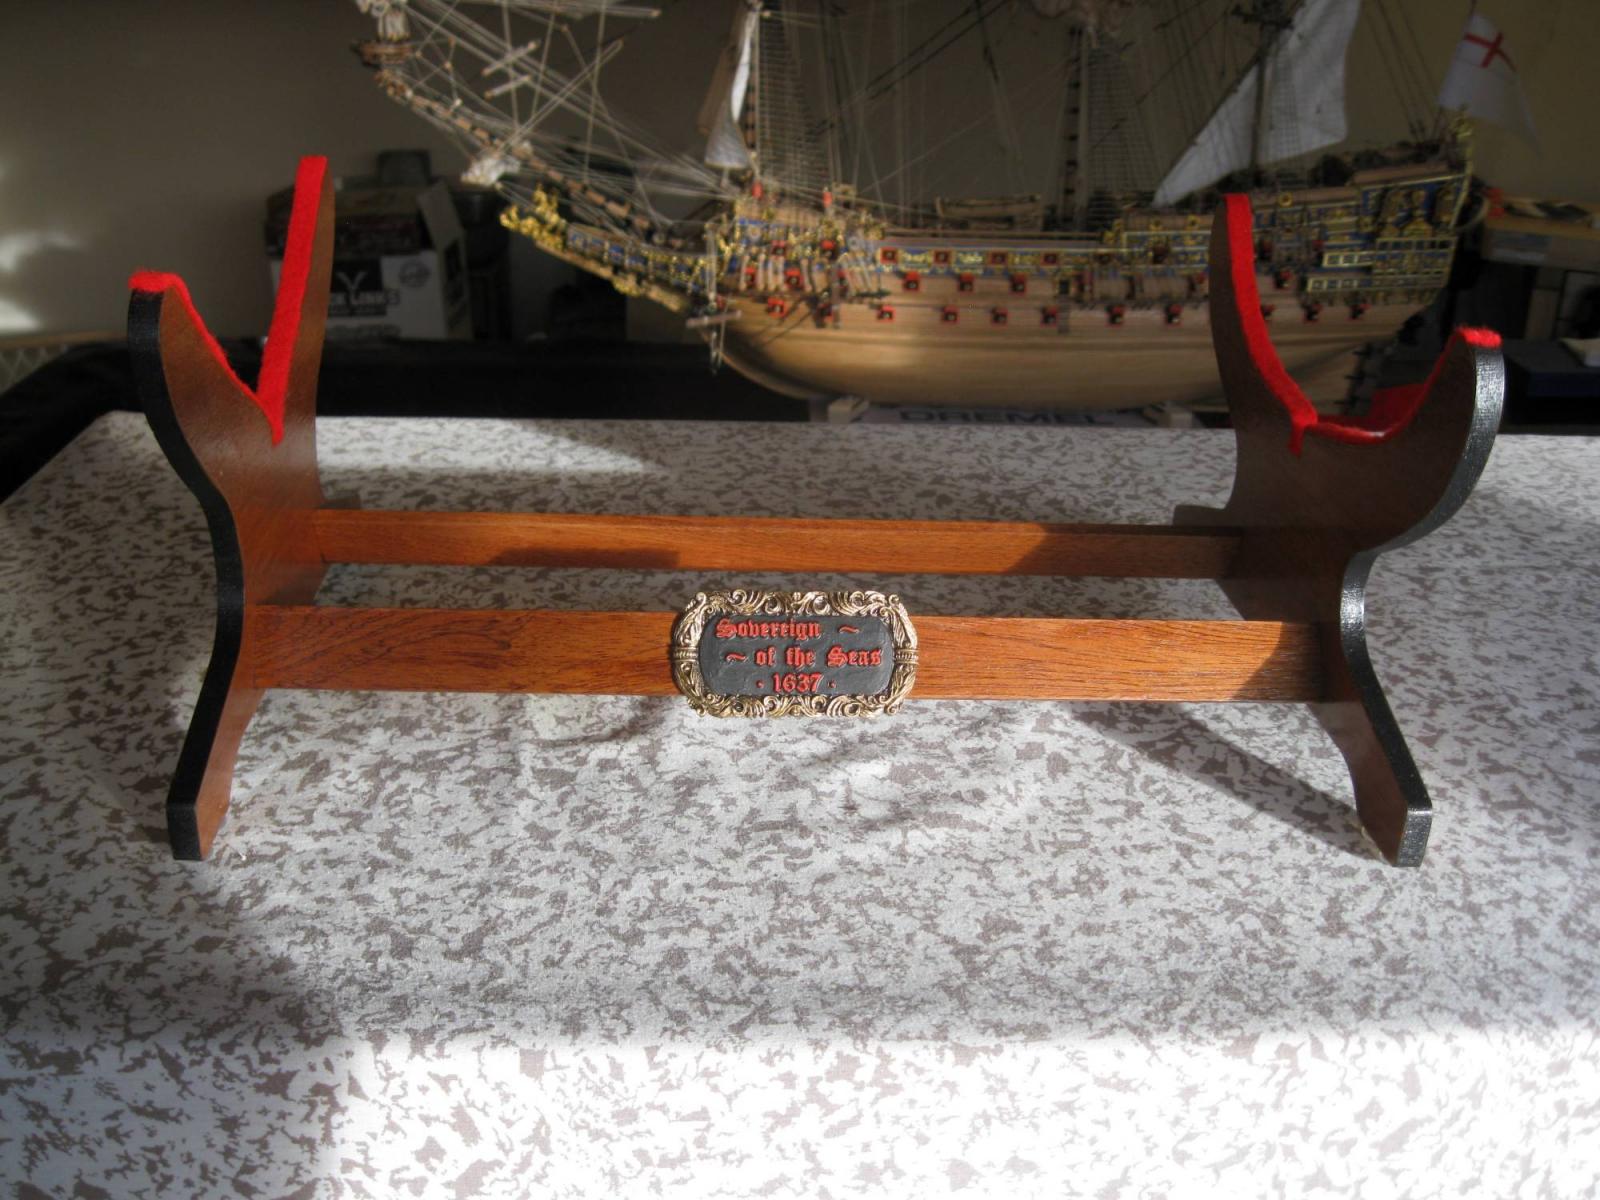
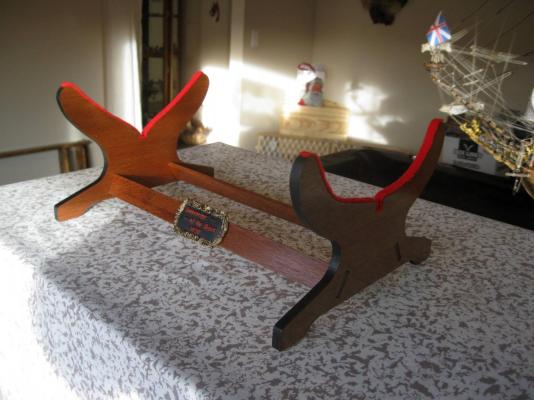
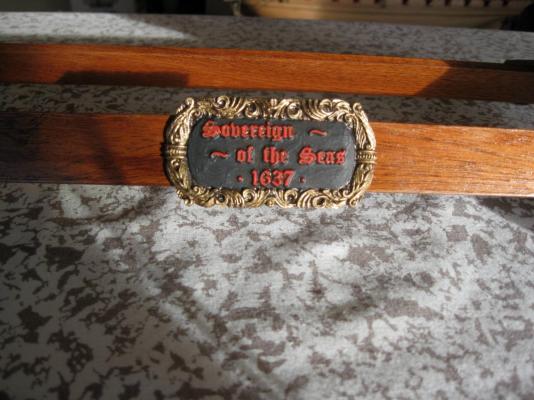
I solved the cradle problem. The new kit "Royal William" from Euromodels which I just purchased for my next project, came with nice Walnut to make a cradle. I just recut it slightly to fit the SOS hull better and added red felt and a bronze label. It fits perfectly and is very stable and strong. I will use the template to make another for the Royal William. Vince P.

- 264 replies
-
- 5
-
-
- sovereign of the seas
- mantua
- (and 1 more)