samueljr
-
Posts
340 -
Joined
-
Last visited
Content Type
Profiles
Forums
Gallery
Events
Everything posted by samueljr
-
try wood bleach. it's a powder mix available at most any home improvement big box (Home Depot / Lowes)
-
That I'd post a few more progress pics. It's really just straight from the manual building at this point. Sam
-
Mike, Great job on the LONGBOAT. Sam
-
Essex - Process and corrections to the new Model Expo Kit
samueljr replied to samueljr's topic in Wood ship model kits
Terry, We're in the process of re-working some of the parts for ESSEX. The process is not quick by any measure. This includes coordination with the manual and plans. Hold on for a little bit and the new parts will be available very early in the new year. In the mean time if you have any questions you can contact me directly here on MSW. Sam Designer, ESSEX kit -
Jay You know as soon as I hit post on my last entry I was wondering how long it would take for you to pick up on the "sail thing"! You're like a shark who smells blood in the water!!!! As far as bashing is concerned as long as it's not my head on the work bench I should be OK. We need to catch up, I'll PM you later this week Sam
-
Thanks Drux I think it will be. It's definately different than what I'm used to. Sometimes it's good to get out of our "comfort zone" so to speak. Hope to see you at the meeting this month Sam
-
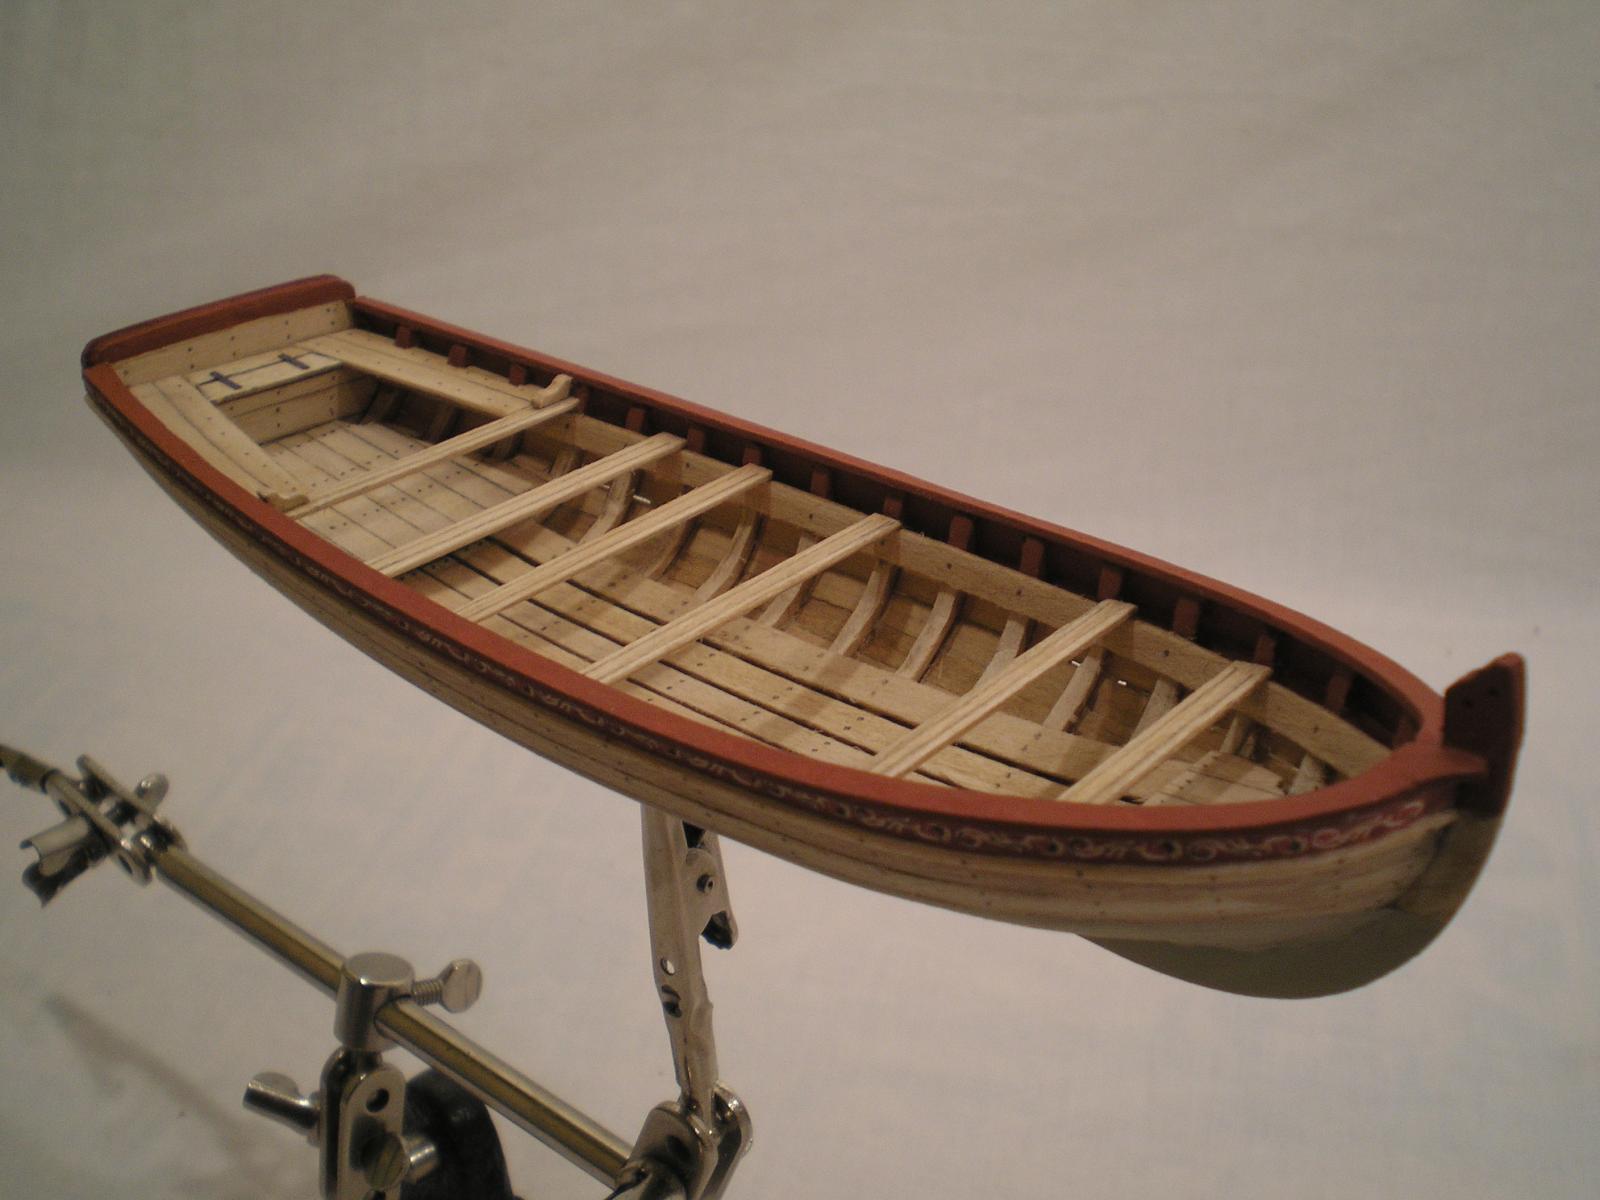
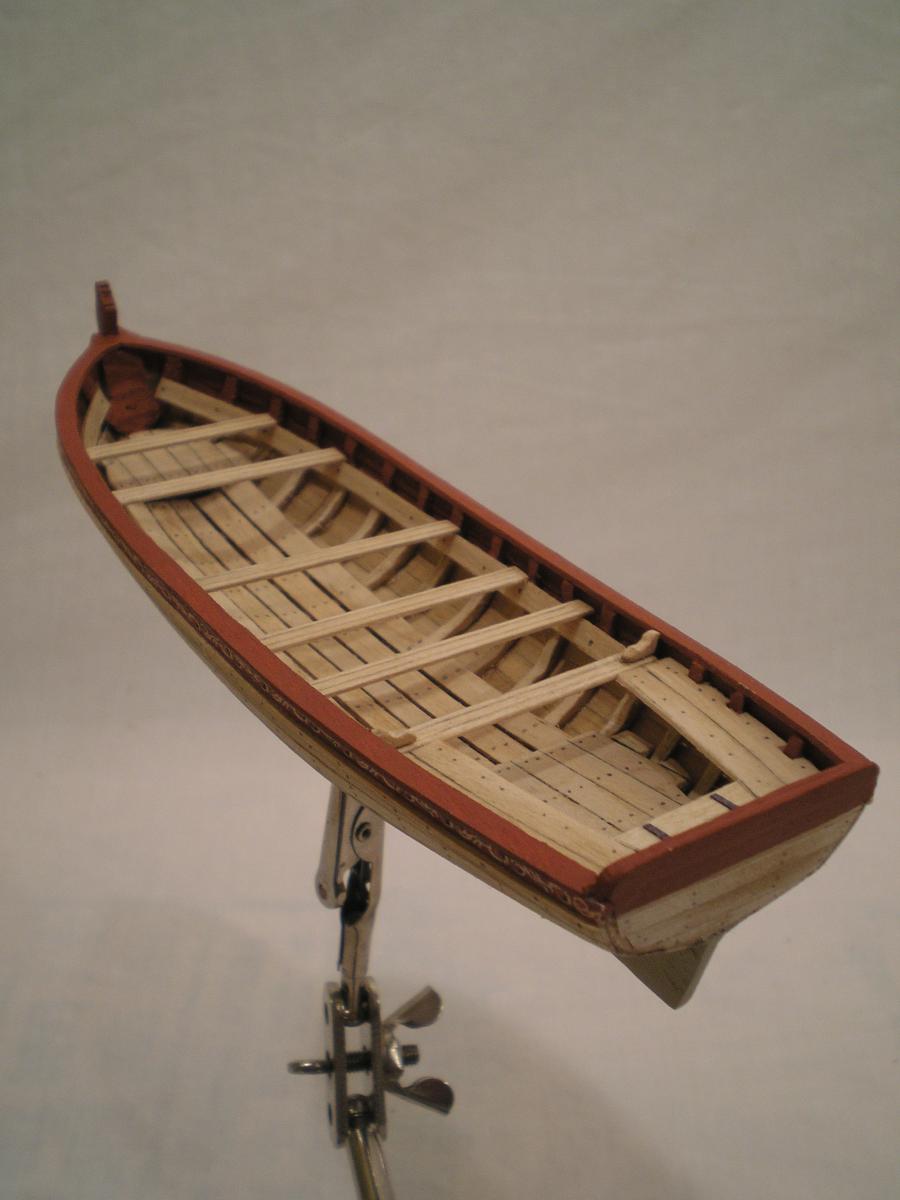
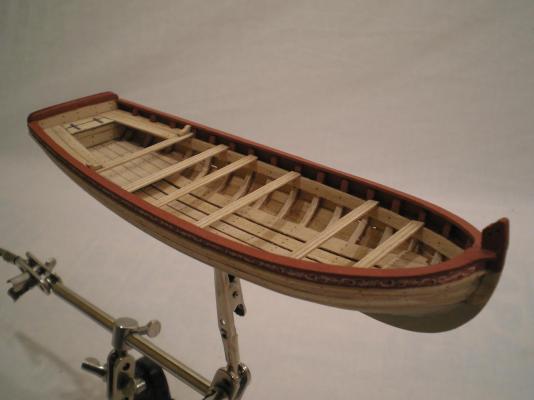
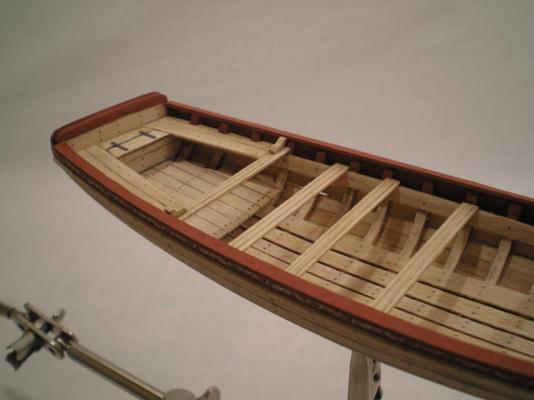
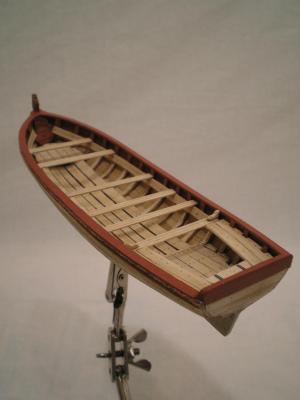
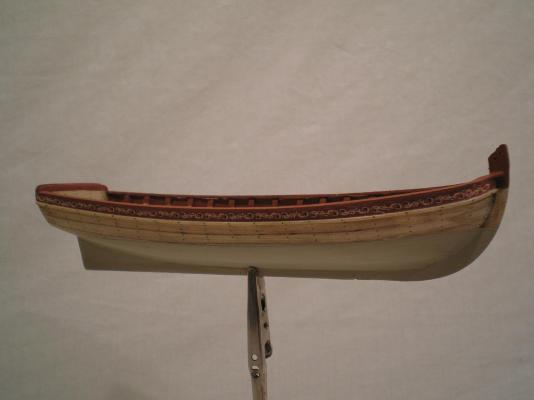
I seem to be attracting projects that I'm not interested in as of late (BOUNTY bashing) so here I go again................ After purchasing the LONG BOAT (LB) as a present for a freind I found it returned to me for lack of interest and skill on their part. For some unknown reason I've decided to build it myself but thought I'd have a little bit of fun with it. After confering with Chuck I proceeded forward. I will be not following the finish schedule provided as the kit is based on an existing (generic) model of a class of boat(s). I read through Lavery, May and Steel and will be painting the hull differently and will be rigging the boat with a Cutter rig as per Lavery and Steel. I will be adding furled sails and possibly a few more detail elements. I want the boat to look like it works and is not a ceremonial craft. I am using Admiralty paint Read Ochre for the details. I took Chuck's friezes and having the same drawing program I switched the blue background to red. I've omitted the stern frieze all together. The white bottom is about 8 coats of Floquil grime paint. I've also gone for a more natural wood look. The stock was sealed with a coat of wipe-on poly and then given a coat of cut 50/50 MiniWax Natural and Golden Oak stain. When dry this was sanded off leaving a patina of sorts to the stock. The nail heads are simply done with a sharp #2 pencil. I "cheated" with the railings and just took a photo copy of the plans and glud them onto the 1/32" sheet and cut the rails that way. Next up is the inboard details. I'll post more pics ASAP. As I've told Chuck, I've glued my fingers together twice (already) burnt another on a plank bender and broken the stem off. It's a delightful little project (diversion) from my other projects.............LOL Sam

-
Dan I've done it a couple of times with varying success. I think it has quite a bit to do with the plates themselves. I've had it come out beautiful and another time the plates became very rigid afterwords and actually flaked a bit. I'm guessing that the flaking may have been some type of coating from production I was unaware of. The plates came from different manufacturers so it's plausable. I'd run some tests to develop a process and finish you're comfortable with first. Mine was straight forward - I took a propane torch and after laying out a handful of plates I just "cooked" them until I liked the color. Post some pics when you're done Sam
-
Where Do You Keep Your Working Plans
samueljr replied to BubbleHead's topic in Modeling tools and Workshop Equipment
pinned to a board in front of me or on a table to my side plans are kept after completion in a large (24"x36") portfolio envelope (the kind you find in office supply stores) -
Graet work Bob. Gives me hope for the kit..................... Sam
-
Looks great Bob! Are you going to continue with the boxwood below the wales or switch to something different? With all the treenailing can I assume you'll be omitting the exterior painting and going for a more "styleized" version of ESSEX? Are you going to copper? Sam
-
JD I built the RED DRAGON 20 years ago as commission project straight from the box. it makes a nice display piece. It's not overly difficult but if you're looking to bash (for a more realistic appearence) it I don't think it offers much in that way. Sam
-
Chuck Good luck with the Conference - I know it will be a first class affair with you involved Wish I was there.......... Sam
-
Essex - Process and corrections to the new Model Expo Kit
samueljr replied to samueljr's topic in Wood ship model kits
I have no idea what has happened to my spell check?............LOL! SC -
Essex - Process and corrections to the new Model Expo Kit
samueljr replied to samueljr's topic in Wood ship model kits
Update time.............. Jax (who has been great) had to take a few days off to attend the Admiralty Workshop conducted by David and Greg in Baltimore and is now back on the case. Jax will be trying out the test bh's I sent him and we'll move forward from there. Bob (Raffine) who's out in front a bit has also been super in letting me know what's potentially coming down the pike. In the mean time I'm going to start to take a look at the other laser cut parts of the kit. Model Expo has also asked me to take another look at the latest version fo the manual. So folks we're doing all we can to make this the kit you've expected. Also I'll be attending Dave and Greg's workshop on spars and blocks in Niagara On The Lake, Ontario in a couple of weeks. I hoe I'll be able to apply some of what learn to the (future) spar and rigging componants of ESSEX. As always - thanks and I'll be back soon................... Sam -
Essex - Process and corrections to the new Model Expo Kit
samueljr replied to samueljr's topic in Wood ship model kits
You're welcome guys. I wish the process was faster but just trying to be as methodical as possible through this. Also trying to identify the cause of the problem as well. I've got my "CSI" hat on............... After bulk heads it should go a little quicker (I hope) Thanks for your patience Sam -
Essex - Process and corrections to the new Model Expo Kit
samueljr replied to samueljr's topic in Wood ship model kits
Reporting in as promised. In addition to #'s 19 & 21 I've also re-drawn #20 and #4. Jax has graciously agreed to test them out as well. A second set of eyes is always a good thing. Still haven't been able to find a reason for issues throughout the kit -YET. Should take a couple of days for answers on the bulk heads. If theses are Ok then I can move through the kit and plans. I'll be posting a PDF of the manual (as originally written) out here next week as well. Dont have an answer on how Expo will be addressing the new aspects of the kit yet as we don't know in full what they are or how much. Sam -
Essex - Process and corrections to the new Model Expo Kit
samueljr replied to samueljr's topic in Wood ship model kits
Update, I've lofted two new BH's #19 & 21. I'll try reporting in tomorrow night. Sam -
Essex - Process and corrections to the new Model Expo Kit
samueljr replied to samueljr's topic in Wood ship model kits
No, you really didn't........................ -
Essex - Process and corrections to the new Model Expo Kit
samueljr replied to samueljr's topic in Wood ship model kits
Just wanted to touch base with everyone out here......... I have the hull assembled with the exception of the stern framing and will have a report within a couple of days on the bulk heads. I can see issues already. They're pretty eveident. Not all is bad....... The time to report is me trying to figure out what happened (if possible) so as to prevent it in the future. Sam -
Essex - Process and corrections to the new Model Expo Kit
samueljr replied to samueljr's topic in Wood ship model kits
KB (Bill) Good to hear from you, it's been a while. Thanks for checking in. Yeah we've got a few issues here. I'll get them figured out soon enough. I've got some really good people helping me. In the mean time - safe travels. Jay, I liked it better when you were quietly following now that you've mentioned sails........LOL!!! Sam -
Essex - Process and corrections to the new Model Expo Kit
samueljr replied to samueljr's topic in Wood ship model kits
Sjors, Sorry you're coming a little late to the party - long story short - parts don't fit - we're fixing them........... Come on along, should be fun Sam -
Essex - Process and corrections to the new Model Expo Kit
samueljr replied to samueljr's topic in Wood ship model kits
Well I've started the process.......... ME sent me an entire kit as produced and two additional sets of bulk heads / formers so I've decided to take the following approach; I will release all the bulk heads, formers, stern frames, spacers, keel, stems, stern posts. I will randomly draw pieces to produce a single set. Although not highly scientific, this should exclude the likely hood of a bad "run" of pieces. I will also be constructing the set as the builder would including the rabbet strip and stern framing, blocking and fillers. I will take the selected pieces and compare them to the drawings prior to assembly. This will start to define (hopefully) where a problem of a bad file may exist. This will also give me the opportunity to check the fidelity to scale / production from the drawings to the piece(s). So for tonight I'm cutting out bulk heads and building a former. Some of you have taken it upon yourselves to begin to check the drawings for (believed) errors - by all means please continue. If you see something you feel is off PM me. It's the best way to make sure I see the message. I'll check everything out. Your findings may or may not be correct but it will keep me sharp as I review everything. Thanks - Sam -
Bob, Different approach should deliver the same results. A couple of things, obviously you'll have to cut back the false deck - no problem it's only 1/32". The Knight Heads were clear of the deck beams on the proto-type so that shouldn't be an issue. I used a ledger strip to pick up the plank ends of the Fore Deck. One thing I would take a look for is the final elevation as it relates to the rough tree rail and the splash boards as they tie into the KH's. if it looks tight I'd just swap out the pieces you have now with unfinished ones and let them run "wild" a bit in height and then shape them down once you can pull a more accurate elevation. I started the proto-type's planking at the gun deck level and went up first. Sam
- 1,477 replies
-
- 1
-

-
- essex
- model shipways
- (and 1 more)