HOLIDAY DONATION DRIVE - SUPPORT MSW - DO YOUR PART TO KEEP THIS GREAT FORUM GOING! (Only 13 donations so far - C'mon guys!)
×


7 Provinces
-
Posts
190 -
Joined
-
Last visited
Content Type
Profiles
Forums
Gallery
Events
Everything posted by 7 Provinces
-
 I did some research regarding the colors of the Bluenose because this is one of the most obvious things Billing Boats got totally wrong and one of the easiest things to correct. Apparently the color of the hull below the waterline was "anti-fouling red", i.e. the color of the anti-fouling paint which I think is still used (the color suggested by Billing Boats being gold-bronze ). I have been searching for anti-fouling red and came to the conclusion that it should be quite close to RAL 3005 or "wine red". I think I am going to try that when I ever get to that stage although, to be honest, I have doubts that it might be a bit much on the "brown" side for my taste. You could always mix a few drops of brown or black into the red and paint a scrap piece of wood just to get an idea.
 -
Hi Julian, great progress again! I wish I was as fast and fearless as you are. Which color red are you using? I am still looking for the right one. Is it the pictures or is it quite a bright red? Regarding the parts: great to hear that at least they have a decent service and of course it is kind of interesting that it is like predicted: the parts of the 1/75 model have the same size as the ones from the 1/65 model. In fact, the size of the model is very close to the Model Shipways 1/64 model but according to my calculations in fact closer to 1/59 or 1/57, depending on which length you measure. For my calculations I keep it to 1/60. Cheers, Jan-Willem
-
Keith, that method works fine when everything is absolutely in line, the ship is 100% horizontal, you have a good cradle, no warps, etc. etc. I do not want to make any injust assumptions about anyone's model, but I for one am not going to be able to use this method on my Bluenose. The Billing Boats cradle is too flimsy, for one thing. I have give this a lot of thought and I probably will use the same method as Julian did, as much as I would have liked to use the method you described. Anyway, just my 2 cents
-
Bob, you're amazing. I had a look at the photo and see what you mean: the deadeye behind the rope definitely is smaller. Actually I did look at this photo before (in fact I downloaded and printed them all on A4 size ) but I missed the small deadeye because you cannot zoom in that far on pictures which you downloaded (the downloads are of a lesser quality). Also I looked at another picture (http://novascotia.ca/archives/virtual/Bluenose/archives.asp?ID=197) which shows two deadeyes of the same size. Seeing the four deadeyes on the picture you mentioned and the two on the other picture I concluded that they are all the same size. Of course I must have missed the chainplate underneath the small deadeye... I have seen these pictures so often now that I start to miss details Thanks for taking the effort to measure the size of the deadeyes. I am relieved that I can now look for these sizes (which I prefer) instead of the really small ones. For the upper deadeyes I am thinking of "enhancing" normal deadeyes with a little triangular piece of wood. This seems to be the easiest method to me, especially when they are not that small Did you blacken the chainplates or did you pain them (the part which is not covered by the paint on the hull)? Thanks! Jan-Willem
-
Hello Bob, Thank you very much for your help. Yes I noticed on old Bluenose pictures that the chainplates are flush with the hull, even more so than on the Dunton (I have seen your pictures). In fact, the chainplates on the Bluenose are almost invisible on the pictures. I also noticed on the Dunton pictures that the middle deadeyes are smaller than the other 4 on a "set". This is consistent with what you write about the MS kit, but I do not find evidence for this on the Bluenose pictures; on the Bluenose pictures all deadeyes seem to have the same size. I have also seen on the pictures that the upper deadeyes are not exactly round but drawn into the shape of a drop. Are you sure about these pointing down? From the pictures I got the feeling that the "points" are facing up to match the "noose" they are in? To be honest I am a bit surprised by the size of the deadeyes. Looking at the pictures in your build log (page 2) I would guess the chainplates to be about 3/32" wide and the deadeyes around 1/4" and 5/32" respectively. This would also be more or less consistent with my guesstimate from the pictures where the deadeyes seem to be just a little bit bigger than a man's head. But anyway, there you see how hard it is to guess size from a picture unless you have a reference in the same picture Something else which caught my attention is that Chuck's blocks as well as yours from the kit have a groove running on both sides, for stropping is my guess. Now I do not find that on the pictures of the Bluenose (the few that I have with blocks on them) nor are your blocks stropped that way. In fact, the Bluenose blocks seem to have had the metal rings/eyes/bolts directly attached (screwed?) onto the block itself, much like you did it. Did you do this for practical reasons or because it was the way it was on the Bluenose? Are you contemplatingfilling or sanding the grooves? Lots of questions and thoughts, I know. My mind seems to be exploding with it This is my first build and I know next to nothing about rigging. The plans by Billing Boats are no help either. For instance, Billings plans show 6 chainplates, deadeyes, etc. at the main mast Just trying piece by piece to find out what is realistic and what is not. Thanks again for your valuable input! Jan-Willem
-
Hi Bob, If you like I can PM the picture to you. In the meanwhile I have another question, this time concerning deadeyes and blocks: As you may have seen in my build log the deadeyes and blocks in my kit are made of brown/tan plastic. These are all 6mm. in size and there are only single and double sheave blocks. So I want to replace them with wooden parts and I am thinking of ordering these from Chuck's Syren Ship Model company or maybe I’ll build them myself. I am thinking of this now, since I want to place the chain plates before painting the hull… My problem now is that I do not know which sizes to order or build. As for the deadeyes, on the pictures these seem to be about the size of a man's head, so 25 – 30 cm diameter if I had to guess. At a scale of 1/55 – 1/60 I would probably go with 5 or 6 mm deadeyes. At least this goes for the 40 deadeyes at the chain plates and lanyards. However the kit contains 65 deadeyes and I see on the plan that another 16 are needed for the topmast shrouds (I hope this is the right terminology) and I do not know these are to be the same size since I have no pictures on which I can make these out (or the shrouds for that matter). Maybe this is just another of these “little inaccuracies” of the Billing Boats kit? I do not have many good pictures showing the blocks. And from the pictures the sizes are hard to distinguish. I know that there were at least a few fairly large triple sheave blocks, maybe 50 cm large or 8 mm in 1/60 scale. The kit supplies 46 single sheave blocks and 18 double sheave blocks, all 6 mm. According to the MS instructions, there are 3/32” (2.4 mm), 1/8” (3.2 mm), 5/32” (4 mm), 3/16” (4.8 mm) and 1/4” (6.4 mm) blocks in the kit, not specifying whether these are single, double or triple sheave and how many there are of each. I wonder if it makes at all sense to use blocks as small as 2.4 mm though. To me this seems very small and on the real Bluenose this would represent a block smaller than 15 cm or 6”. I did not find this information anywhere until now. Also in your build log I do not find where the deadeyes and the blocks came from and which size they have. Did you make them yourself? Did you use the ones from the kit? Which sizes do they have? Can you generally categorize the blocks in groups, like a certain size for standing rigging or something alike? Thank you very much in advance for any information on this topic! Jan-Willem
-
Thanks Julian. BTW see how bad the print is? Just look at the gaffs
-
Thanks guys for your valuable input. I tend to agree with you but still the idea won't leave me. So I will build a test stand this weekend. There is more than enough wood in the kit anyway :-) I want to test trenailing (or treenailing or tree-nailing (sorry I am not a native english speaker and I have seen these 3 spelling varieties), varnish (gloss and semi-gloss, possibly a mix and do some further tests on cutting the planks to size. I am thinking of planking a piece of scrap wood with an area of around 5 x 20 cm for this sole purpose this weekend. Let's see what happens...
-
Oh I forgot: nice progress by the way! And you said you were going to be slow ;-) Nice work
-
Hi Julian, I just PM'ed you the scan. I hope it helps. Let me know if there is something else I can help you with.
-
Haha no worries mate ;-) And no need for hinting as well, I got the idea long before you *hinted* Maybe a small comfort (or not): my kit was new and missed a few parts as well, most notably the main masts... Anyway I will send you a scan of the parts. It is the 4mm abachi sheet with the gaffs on it, isn't it?
-
Hi Julian, What do you mean not to worry about the trenails? Would you say the scale is too small to consider doing these? I was wondering: with a pin vise and a 0.3 mm. drill it would be easy enough to drill the holes and the size would be about right. I read that the holes can be filled with way as well but I have no experience with that (or any other technique for trenailing for that matter ). Looking forward to your update!
-
Thanks Julian. Yes the deck planks are bothering me a bit. It's a lot of work to sand down to the thinnest planks, I can drill holes for trenailng but what do I use as trenails when the deck is so dark, etc. ... But not the color. I would have chosen a lighter color if I had to choose right now, knowing that the wood used was Douglas Fir. But, apart from the fact that I like the mahogany color I have seen a lot of pictures of the Bluenose and the deck always looked black or close to black on the B&W pictures. I may be wrong but I attribute this to influences from weather, sea, lots of fish (she was a fishing vessel after all) and a lot of scrubbing and waxing or whatever wasdone to clean up and preserve the deck. Then, there are pictures of the Bluenose II. Not quite the same ship, I know, but on the Bluenose II the deck looks quite dark as well. Not quite as dark as mahogany maybe, but the hue is definitely not that far off. No, I am not doing anything to change the wood, I like it.
-
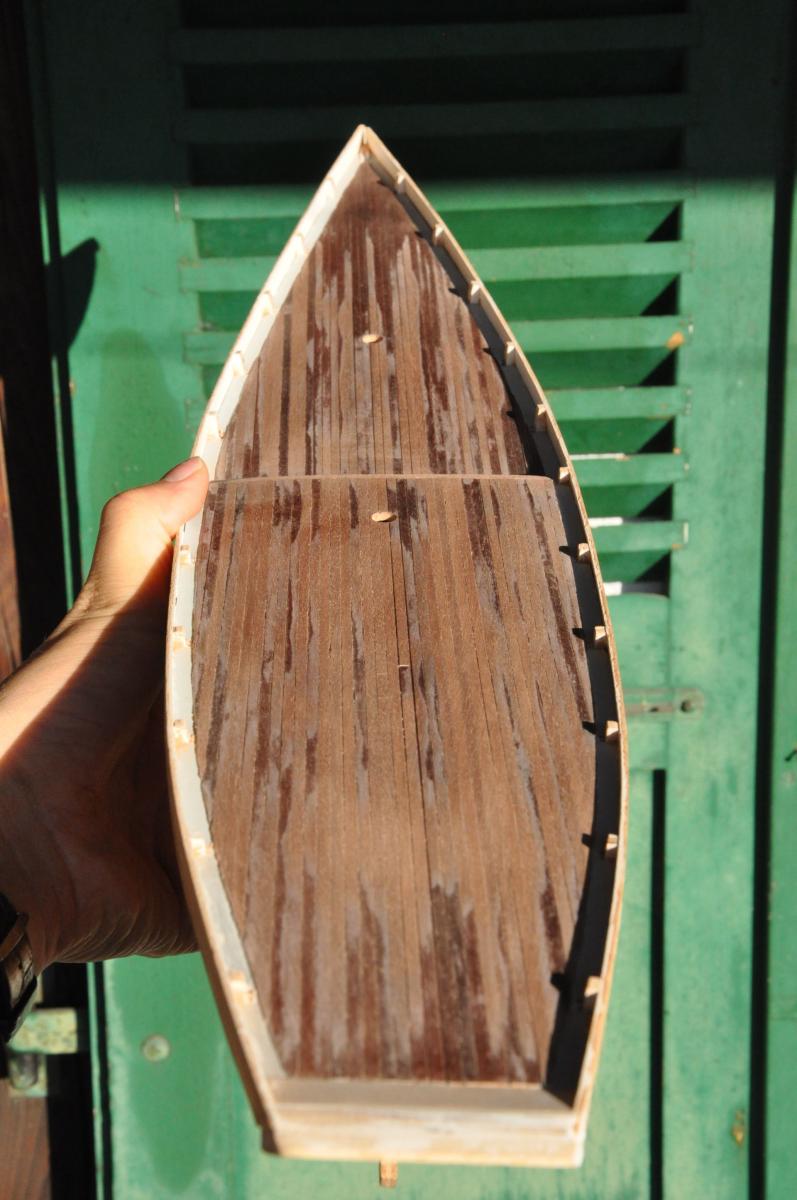
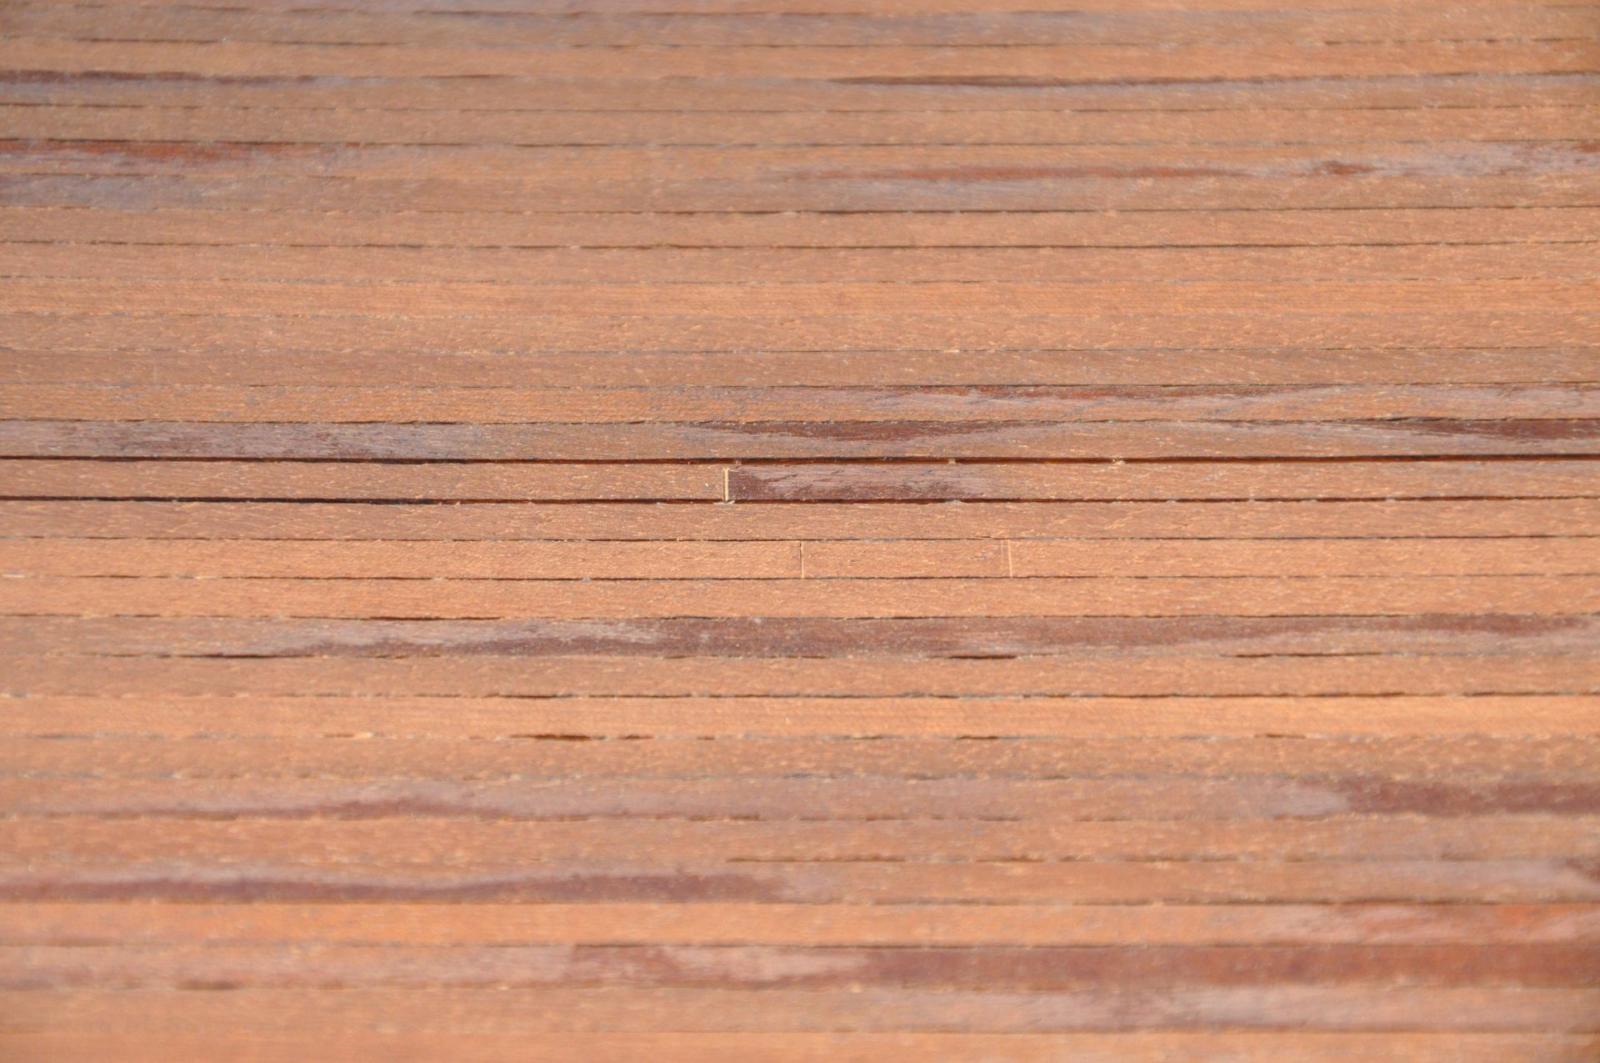
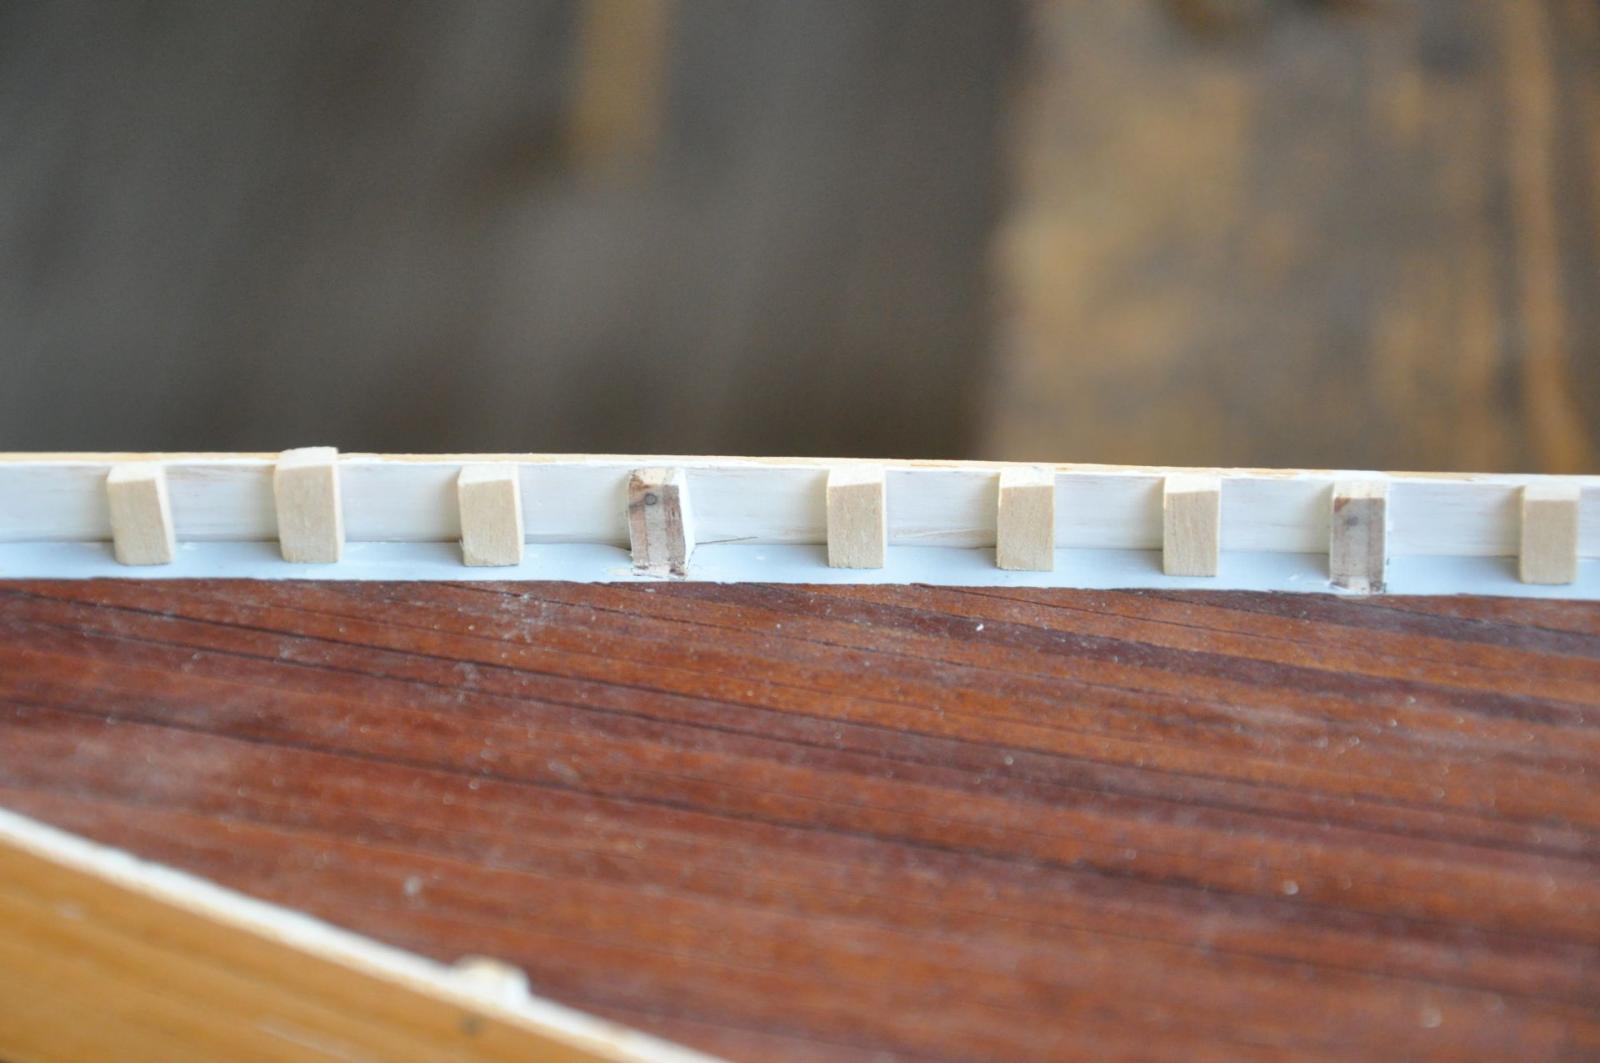
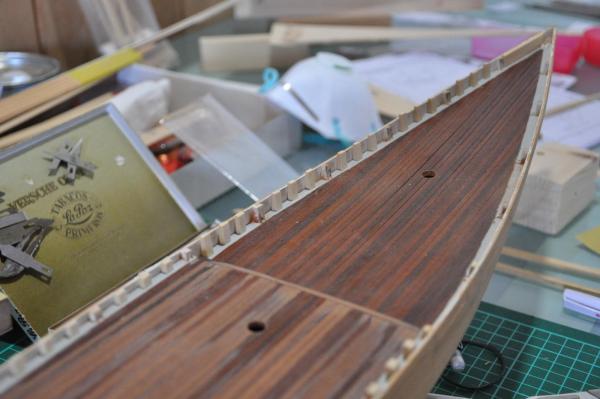
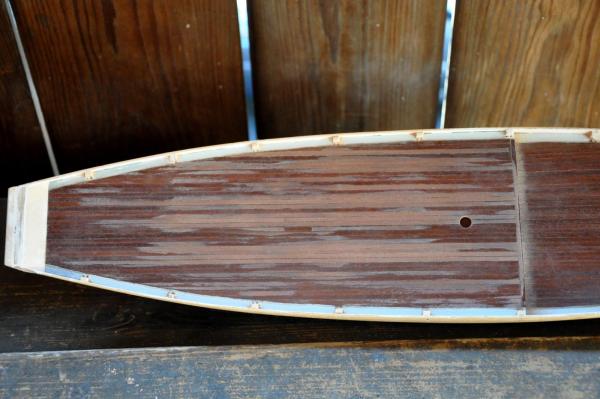
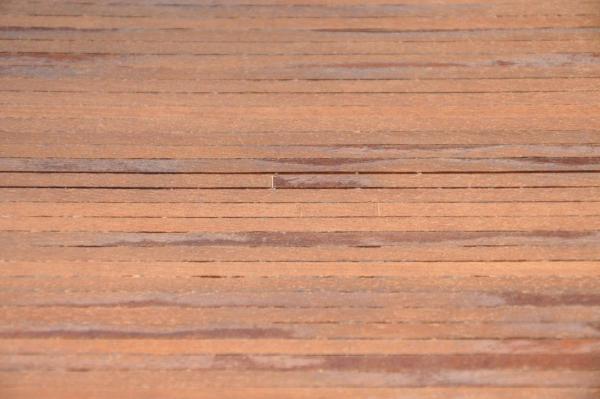
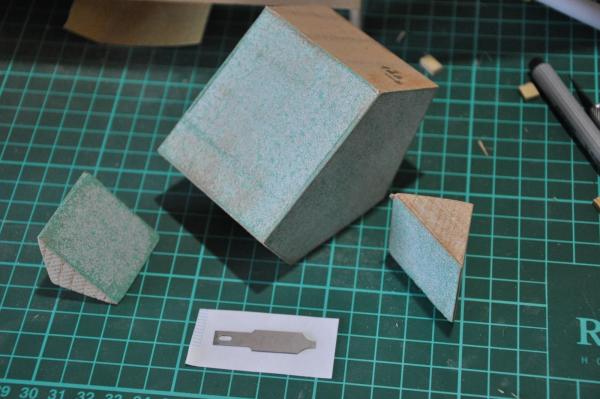
Over the past weeks I have been busy with two things: creating the fake stanchions (three between each pair of bulkhead stanchions) and sanding the deck. With the stanchions I am around 2/3 done. The smaller they get the more often little edges of the wood splinter off (the wood is very dry and not so dense) which I then have to glue back on to get the right shape. This is a lot of work all in all. I have started to sand the deck next to creating the fake stanchions because I think I would damage the fake stanchions when hitting these with a sanding block, so the deck must be done before gluing the fake stanchions in place. I wanted to sand the deck not only as a preparation for varnishing, but also because the strips of wood where the deck is made of are not all of the same thickness. I discovered that some are (almost) twice as thick as others. Now first it looks better when the deck is (more or less) even, second I found out that the waterways (which are made of the same wood) are to be around twice as thick as the deck. This gave me the idea to sand down the deck to the thinnest planks and use the thickest deck planks I can find in the kit to make the waterways. The pictures show some of the sanding progress and the difference in thickness of the planks which shows through the sanding. The pictures are made between sanding when I was changing the sanding paper on my sanding blocks. While working on the deck, I also took some time to do some experimenting: I am thinking of shortening the deck planks to a more realistic length using a chisel, I need to cut out the places for the structures, I need to select a varnish (gloss or semi-gloss) and I am thinking of drilling holes for the trenails. First test I did was to cut a few planks with a chisel. For this I took an X-acto chisel and cut it back to 3 mm. with a Dremel. Then I cut a few planks with the chisel and a small hammer. The chisel however is so sharp that it goes through the deck like through butter and when I pull it out I can hardly see the cut. These are the two cuts on one plank in just below the middle of the picture. For the second try I cut twice right next to each other. This is the cut just left and above the other cuts. It shows light on the picture, filled with dust from sanding. To be honest, I do not yet know what to do with the results of this experiment… The last picture shows my sanding blocks in need of fresh sanding paper and the modified chisel. especially the small triangle shaped sanding blocks are very handy as these can be held very well in different ways and are small enough to be able to maneuver on the deck. I cut the triangles from a 30x30 mm. construction profile and glued the sanding paper on it with white wood glue like I do with all my sanding blocks.

- 127 replies
-
- 6
-

-
- Bluenose
- Billing Boats
- (and 1 more)
-
Hi Bob, just to let you know: I did a little more digging (because you wrote that you would do this part differently next time) and oddly enough I did not find any information on how other modelers had built the knighthead / hawse timber / chafe block area. I did however find an original photo of the Bluenose which I did not have yet, where this area looks just like your model: there is, quite clearly on the photo, no distiction between the knighthead, hawse timbers and the chafe block. At least the separate parts are not visible and it is a sharp picture. This may have to do with the fact that it had been painted afterwards? Anyway, I am not going to make these different parts when they cannot be distinguished on the real ship. So I am now working on the same solution you implemented. I hope to be able to post pictures soon. Thanks and regards, Jan-Willem
-
I am sure you will. I was just curious since I am not 100% sure anymore for the hull. But I think I will use a brush as well like I originally intended to. Thanks
-
Are you using a brush or are you spraying? Just out of curiosity, since I wanted to use a brush but lately am not so sure anymore, for the hull that is.
-
Very nice pictures Bob, thanks a lot! So what I unterstand is that you treated the knightheads and the hawse timbers as one block and drilled the hawse hole in it. And what I understand from the instructions and from the dictionary (I am not yet very acquainted with nautical terms) is that hawse timbers are vertically placed pieces of wood between the knighthead and (in this case) bulkhead A and the first fake stanchion. The result being about the same after painting except for the fact that you chose not to add the chafe blocks. Would that be about right? About the number of stanchions, you may very well be right. On my model, when I add 3 fake stanchions between every pair of bilkhead stanchions I have 20 between bulkhead A and the break between quarter and fore deck and 21 between the break and the stern. So I would get closer by placing 4 fake stanchions between each pair of stanchions but unfortunately this would not work on my model. Thanks again for your help, I may have more questions in the future
-
Wow Julian, looking good on the scuppers. And I agree with Alan on your sanding workplace. As for sanding between coats of primer I think I would start with 220 as well (after the first coat). You are not going to remove anything serious anymore are you? So I think what you need to watch for is that the sandpaper is fine enough to not leave scratches big enought to show through the next coat of paint or primer. This should work with 220. But as the number of coats increase the surface gets smoother (this is the idea, right ) and then you might want to get a 320 or 400 or even higher (be careful not to scratch the paint with the pointy edges of the sandpaper though). It also depends on your painting method. If you use a brush the paint layer is fairly thick (as compared to spray paint or airbrush) and the paint will flow and cover up small scratches. I used to make wooden models of products like phones, home appliances, etc. in my days as an industrial designer which I painted with a spray gun. Then the paint coat is very thin (like airbrush) and you see absolutely every irregularity underneath. For these models I could not use 220 on the primer because one wipe would clear the model of any primer. With these models I used 220 and 320 on the wood, 600 and 800 on the primer and 1000 and 1200 on the first coat of paint. If I was to airbrush or spraypaint my Bluenose, I would do the same. I hope this helps.
-
Hi Bob, I am looking forward to your pictures. I am sure they will be helpful even if not as detailed as the rest of the ship. On my model there actually is nothing so it can only get better. Unfortunately I couldn't find a picture showing this area on the NSA (Nova Scotia Archives) either and I made sure I looked at all pictures (in fact, most I downloaded and printed for reference). You actually counted the number of stanchions, that's very kind of you. However, it will not really help me I am afraid. First of all my stanchions are wider (reasons: see my build log) and I do not want to fill the waterways with stanchions only. It has to look natural is what matters most to me. Plus I cannot move the bulkhead stanchions for obvious reasons so options are limited (being the number of fake stanchions between the bulkhead stanchions). Then: even as many stanchions as you have I think is not as many as there were on the Bluenose. It's hard to tell from the original pictures but to me it looks like there were more. Last but not least I have seen on the NSA pictures that at the aft (from the steering wheel backwards) there are fewer stanchions. I recognize one but two others might be hidden behind some contraption which I cannot identify... Anyway thanks for your help, I appreciate it!
-
Hi Bob, I am building the Bluenose myself, from a Billing Boats kit. I have been on and off (more off) it for almost 20 years now, but a while ago I picked up the work and started a build log. I have also started to read the other Bluenose logs on this site which I found very inspiring. After reading your log I was a bit taken aback by the amount of detail which you have put into it and how great it looks. Billing Boats did not add much detail to the model (details which I find on original photos) and from the downloaded instruction manual (unfortunaly no drawings!) from the Model Shipways kit I see that Model Shipways does this to a somewhat greater extent. So also in your log I see more details than on my drawings. I am trying to add some more detail to my model (and correct a lot of things which the kit got wrong. Right now I am adding fake stanchions to the model, a feature left undiscussed by Billing Boats. This brought me to the question of what to do around the bow. My instructions as usual do not mention this in any way but in the MS instructions I see that knightheads, hawse timbers and chafe blocks are mentioned. I would love to add this detail to my model but I am lacking information on how and where. If it is not too much trouble, could you maybe make a picture of your bow section showing these details? Thank you very much in advance! Jan-Willem
-
Julian, re. the instructions: I downloaded the instructions for BB576 from the billing boats site about a year ago in the hope they would be improved over the course of the last 20 years. However, these proved to be identical to the printed version in my kit. But I notice they do not mention a scale. Are your instructions for kit nr. 576? As to your decision about the stanchions, I fully understand that, as I too have made the decision not to change the work done before and only enhance the kit where it makes sense (enough information at hand, not too difficult and enough "gain").
-
Julian, re. scuppers I would cut a piece of wood from a plank which has the right thickness and glue it in. It is fine when the plank sticks out on the outside of the hull (easier to place the piece) and it is ok when the plank does not fit 100%. Try to get it flush with the inside of the hull however, since this side will be difficult to sand since you have the rails already in place. Then when the glue is dry cut or sand off the excess plank on the outside of the hull and fill the gaps with filler. Other methods will surely work as well but this would be my choice since it is easy and fail-proof (in my opinion).
-
I have started to create and shape the fake stanchions. So far I have created around a quarter of the stanchions I need assuming 3 fake stanchions between two bulkhead stanchions. I have placed them where they should go but did not fix them yet, just to see what the effect is. I think it looks better with 3 fake stanchions between two bulkhead stanchions than with 2. I will adjust the height when they are mounted and before putting the rail in place. Unfortunately I have no pictures of the stanchions on the front of the ship (in front of the first bulkhead) In the instructions of the MS model I saw a drawing of a knighthead, hawse timbers (what are these?) and a chafe block. However, I have no idea where exactly to place them. I do not have a drawing to scale or even a rough plan. Ideas around this would be greatly appreciated! The stanchions, 3 fake stanchions between two bulkhead stanchions:

- 127 replies
-
- 2
-
-
- Bluenose
- Billing Boats
- (and 1 more)
-
Hi Julian, I see that you got your hands on a Billing Boats manual after all Not that it is of much use but at least for the deck structures it might be handy. And wow, you are speeding forward! Looking good on the transom and on the deck structures! Please be aware that the grate at the wheel is located starboard of the wheel, not in front as suggested by the drawings! On the BB drawings the scuppers are oversized. I understood that there is one on each side of a stanchion (makes 2 between 2 stanchions). From pictures of the original I would say they cannot be larger than 1 mm (height) and 3-4 mm long. That said, I think sometimes small items must be a bit out of proportions to make them visible. And the proportions of the ship are not right anyway... As to the stanchions: since you have placed a fake stanchion in the middle between each bulkhead stanchion, you still have the option to add 2 addional ones, one on each side of the fake stanchion, bringing the total to 3. I have been experimenting the past few days and I think I will do 3 fake stanchions between each 2 bulkhead stanchions. To me this looks best. As to the original, it had even more stanchions, judging from the pictures... Cheers, Jan-Willem