HOLIDAY DONATION DRIVE - SUPPORT MSW - DO YOUR PART TO KEEP THIS GREAT FORUM GOING! (Only 13 donations so far - C'mon guys!)
×


7 Provinces
-
Posts
190 -
Joined
-
Last visited
Content Type
Profiles
Forums
Gallery
Events
Everything posted by 7 Provinces
-
 Hi Jon, Thanks for the comments. As written in the beginning of my log, I try to do what is within reasonable effort to "enhance" the model. I'll readily admit that the term "reasonable" is very stretchy and subject to my mood and inquisitiveness When buying this kit in 1994 I must admit that I did not think it was cheap, even compared to others, and I think the kit is at this time more expensive than the Model Shipways kit. Explain it who can I have no experience with other BB kits but I think next time I will try my luck with another brand or build from scratch alltogether. I would love to finally finish the fish hatches and then the deck and the hull... but unfortunately it is hard to find the time.. I did try to find you on Model Boat Mayhem but I did not find you, or your project. Is it the .co.uk site?
 -
Nice job Julian, the blackened parts look great!
-
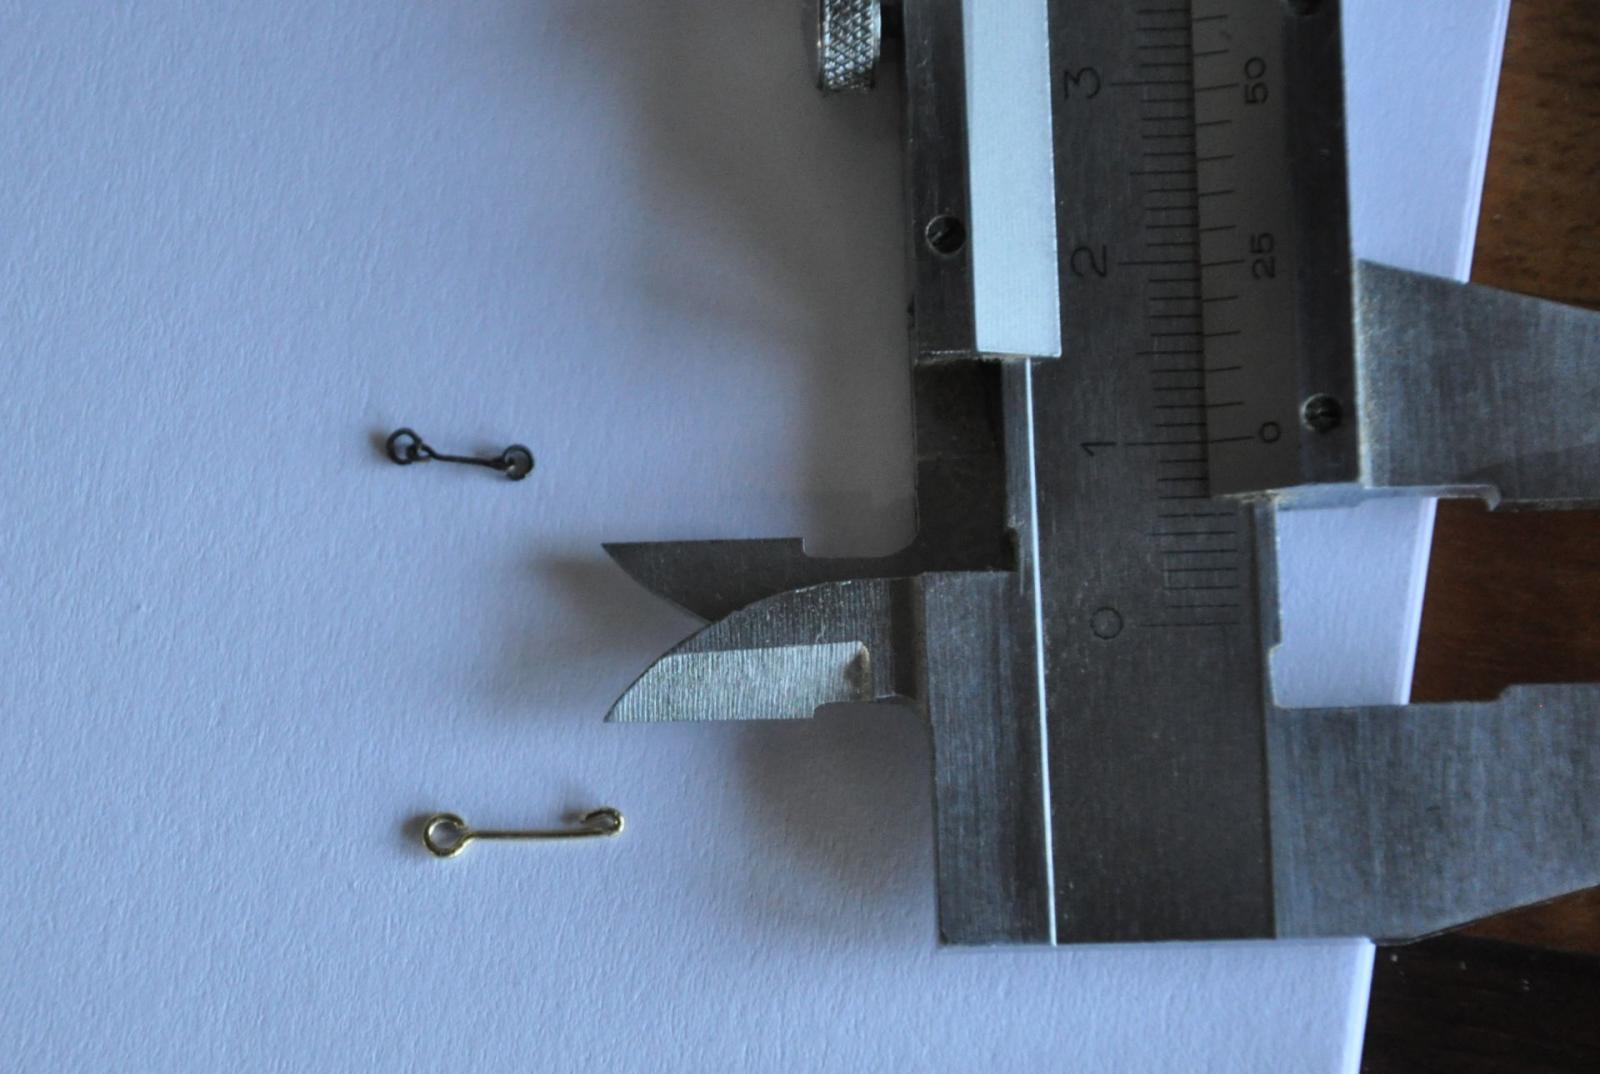
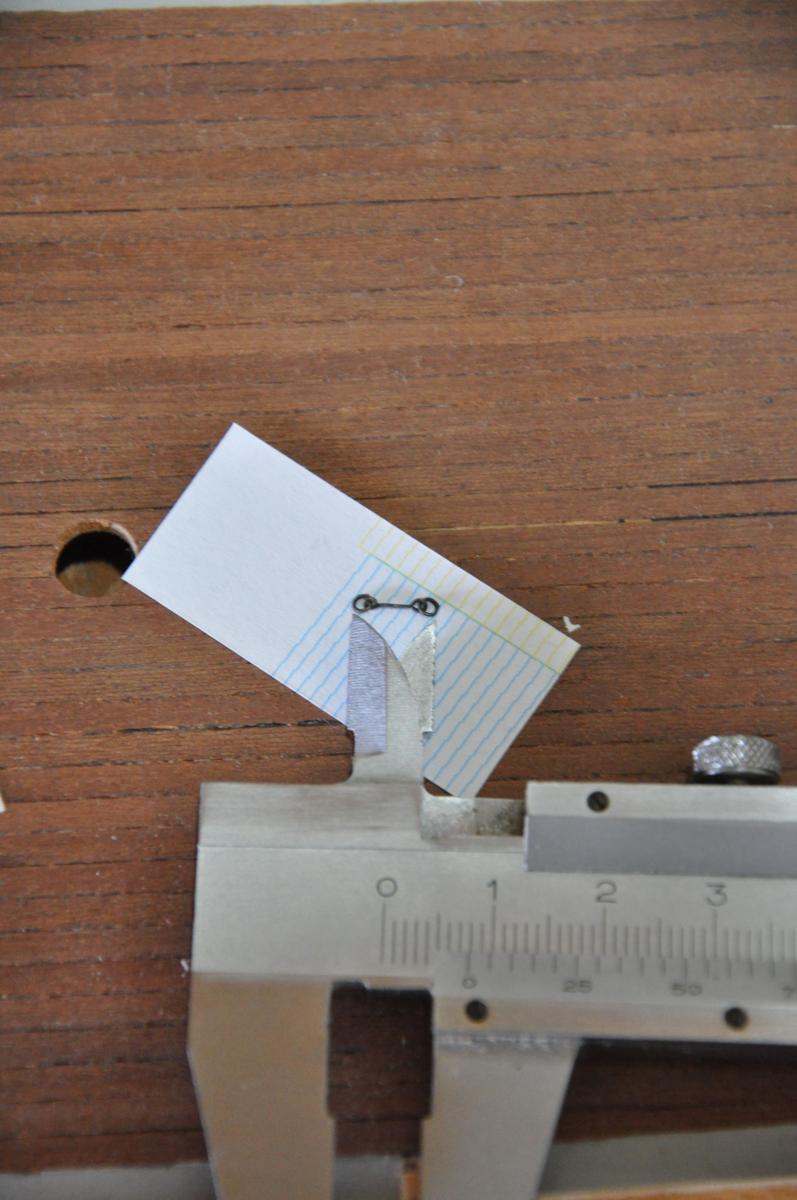
Thanks Jean-Luc! Yesterday I’ve been having a go at the ringbolts and the hatch cover bars for the fish hatches. I found out that where it is fairly easy to make ringbolts from wire (I used 0.4 and 0.6 mm), it is not so easy to cut a straight strip of brass sheet (for the hatch cover bar; I use 0.2 mm sheet). Somehow the snips (shears) displace the material to the side, causing it to bend in the lateral direction which is problematic since it is not easy to bend back. In addition, the snips leaves marks on the metal from the fine profile on the blade (for grip on the metal). This is unfortunate since it seemed to be the easiest way to cut sheet metal: make a score line along a ruler with a knife and then cut along the score with snips. Next I will try to cut all the way through the metal with the knife. The alternative, using a Dremel with a cutting disc just seems not precise enough and wasting a lot of material (when you cut a 1.5 mm wide strip). Picture of the ringbolts: Picture of the hatch cover bar blank: In the picture you see that the sheet strip bent away from the cutting line (below) and that the cutting line is rough. It'll be easier to try to cut the metal with a knife, it's only 0.2 mm. brass after all. Other ideas are welcome of course


- 127 replies
-
- 2
-

-
- Bluenose
- Billing Boats
- (and 1 more)
-
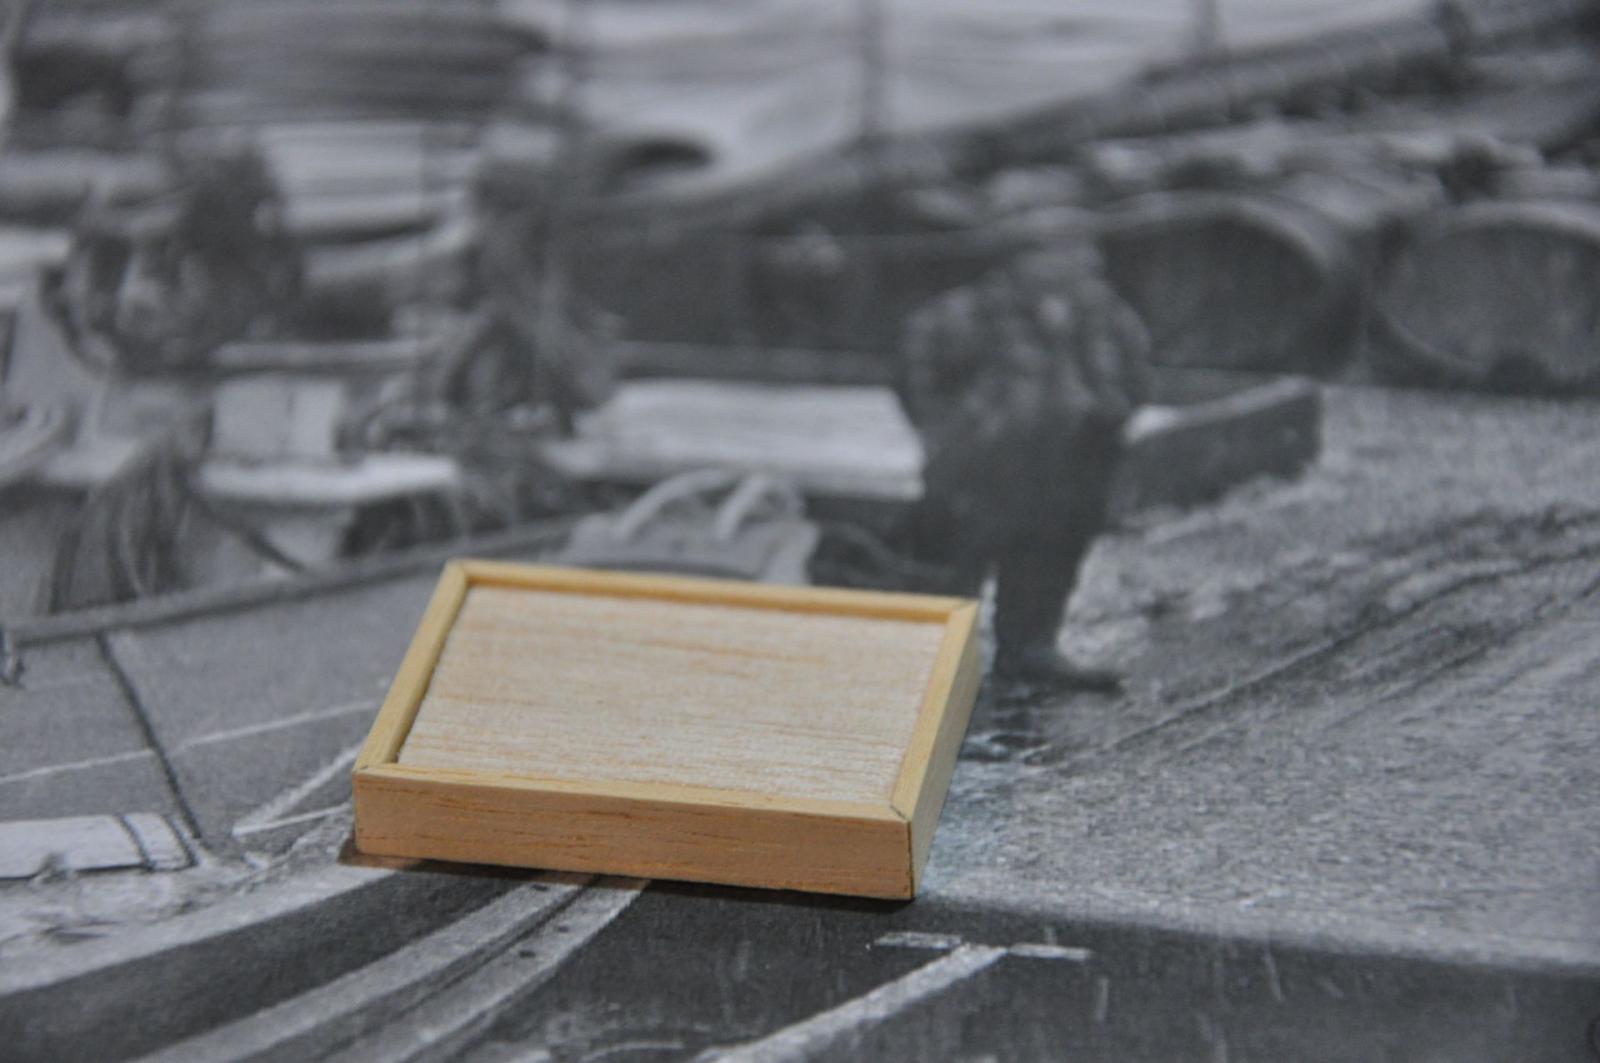
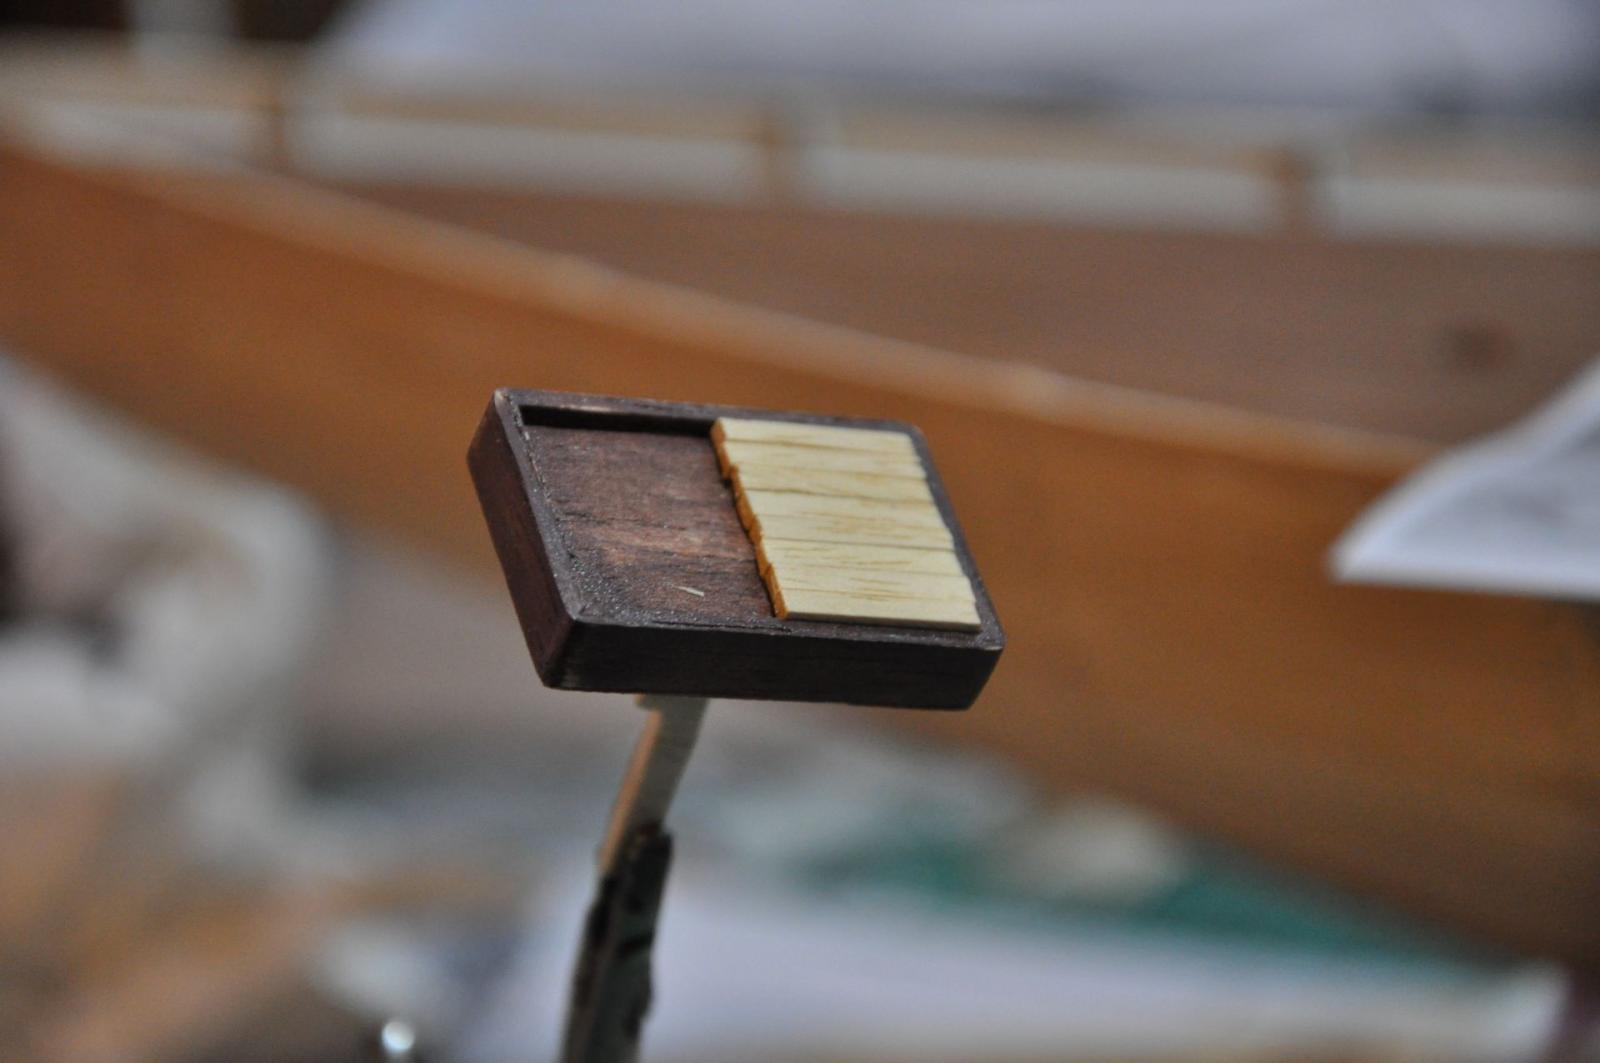
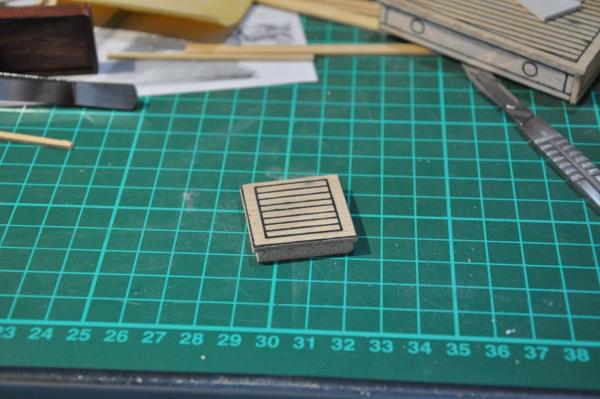
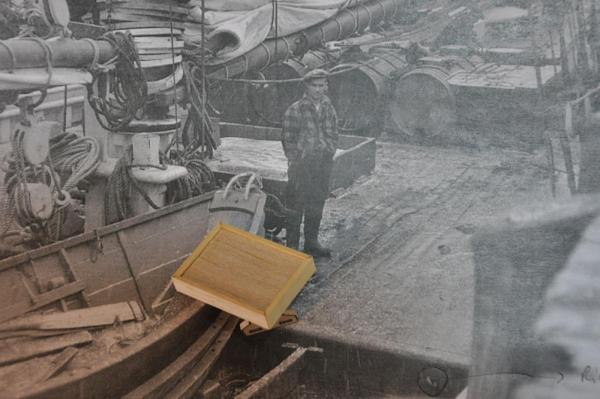
The fish hatches. The kit’s hatches are square 30x30 mm with the hatch itself slightly smaller than the lid. Overall height: 6mm. Using Matija’s plans and converting to scale 1/64 (3/4 of 1/48) which I assume is about right, I come to hatch sizes of 40x29 mm (main deck) and 35x24 mm (quarterdeck), 5 mm high. From the old photos (there is only one from the 1940’s showing a fish hatch) I am not sure that these sizes are accurate, but it’s the best I have to go on. According to Howard Chapelle the coaming of the hatches was 19”-24” high. From the photo I would guess this to be a bit on the high side for the Bluenose. My guess would be 30-40 cm, which translates roughly to 6 mm. above deck. So I took 7mm strips for the coaming with the intention to sink them into the deck (0.7mm) and go with that. According to Chapelle the covers were seated in rabbets cut on the inside of the coamings. I am going to simulate this by gluing a block of balsa into the coamings and let the covers rest on this. Coamings were natural wood (weathered = dark like the deck), the covers were made of planks painted white on a frame. Unfortunately I have not found a photograph on which this can be verified for the Bluenose. Two pictures of the basic fish hatch (coamings with the balsa, but without the covers) I made compared to the real one on the Bluenose (the man is standing in front of it): Picture of one of the fish hatches being constructed. It is painted with a mix of “chocolate brown” and “mahogany varnish” and here I test-fitted the strips of which I make the covers: Now on to creating the covers, painting everything and doing the metal work. I am a little bit reluctant to start on the metal work (hinges, etc.) since I have no experience with this whatsoever. I am eager to start, but I don’t want to rush it into 15 minutes of free time..


- 127 replies
-
- 4
-
-
- Bluenose
- Billing Boats
- (and 1 more)
-
I use a product called "Nerofor" made by a company called Ballistol. This is a producer of gun maintenance products like oils and blueing/blackening products. They also make what they call a "cold degreaser" (Robla) which I use but it smells like acetone so it is probably at least similar. I used their oil (called Ballistol as well) to rub the brass after blackening to give it a nice satin shine and for protection. There are some youtube films about this product which basically show how it works and the results. I was able to reproduce this without trouble. No hassle with muric acid, having to dilute the product or sweating of the brass afterwards. I am very happy with the results
- 127 replies
-
- 1
-
-
- Bluenose
- Billing Boats
- (and 1 more)
-
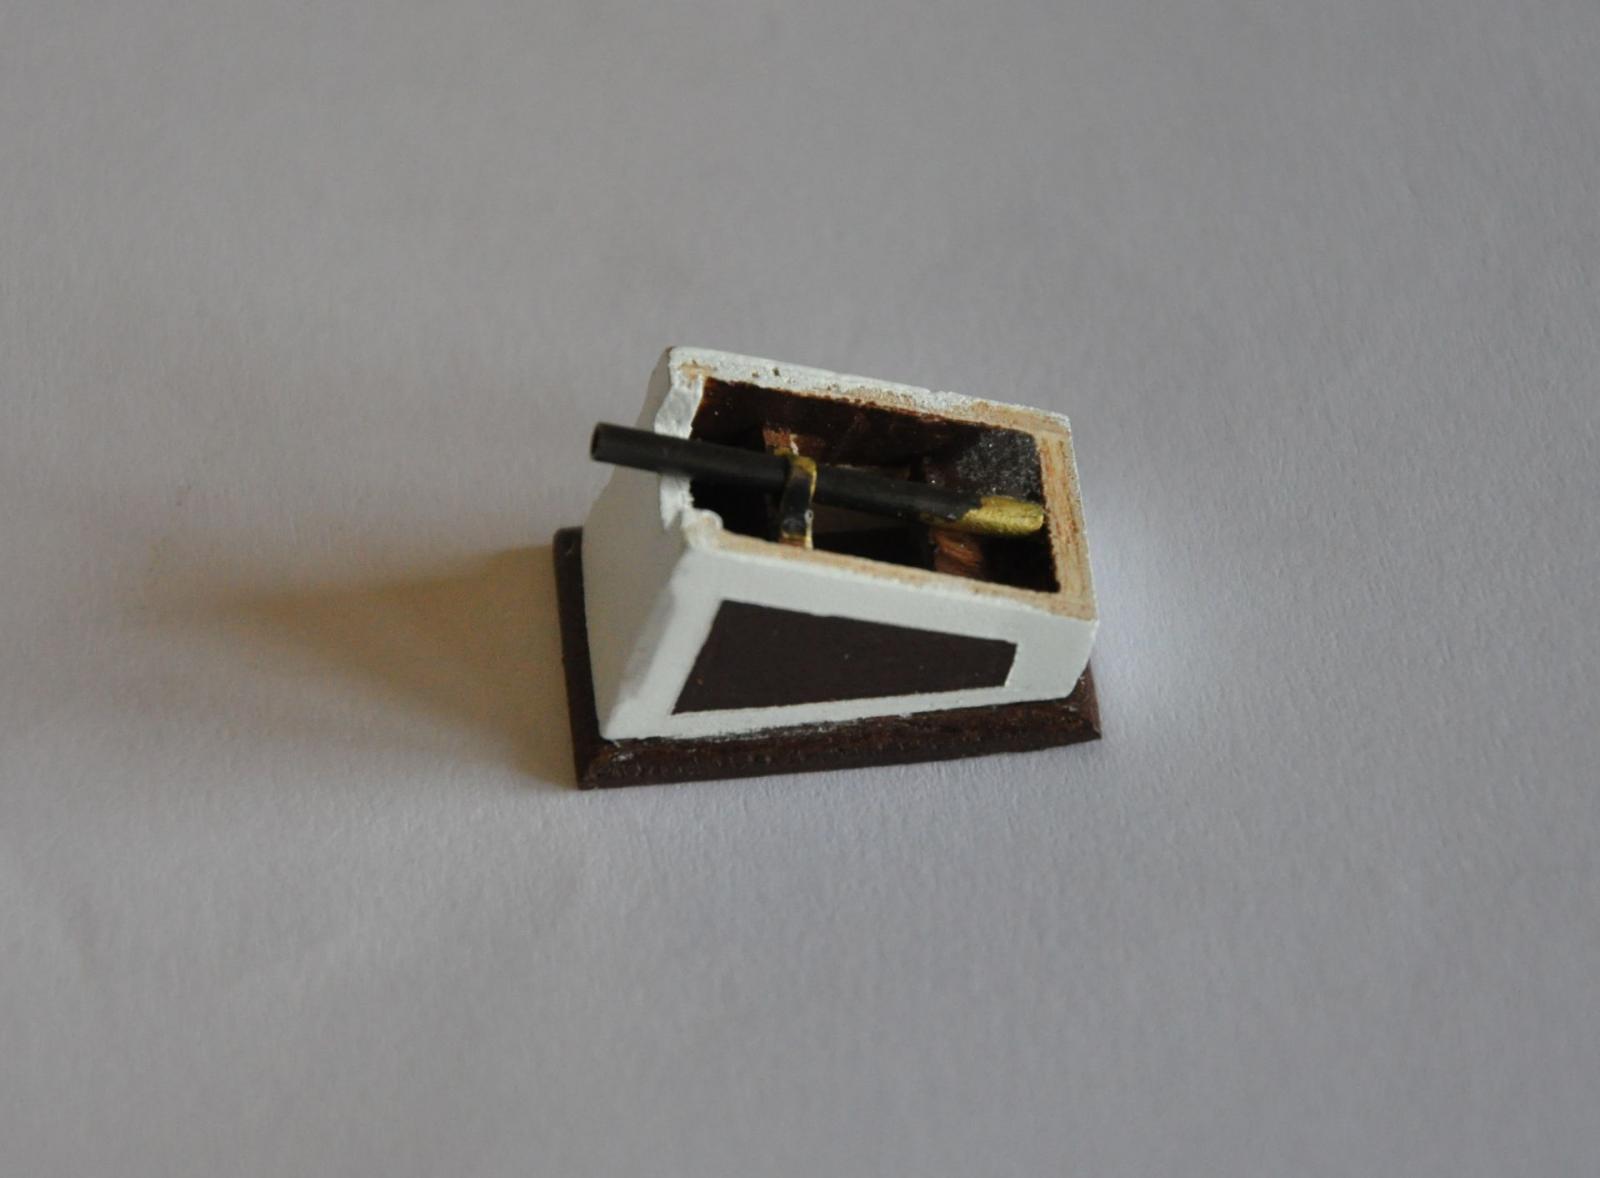
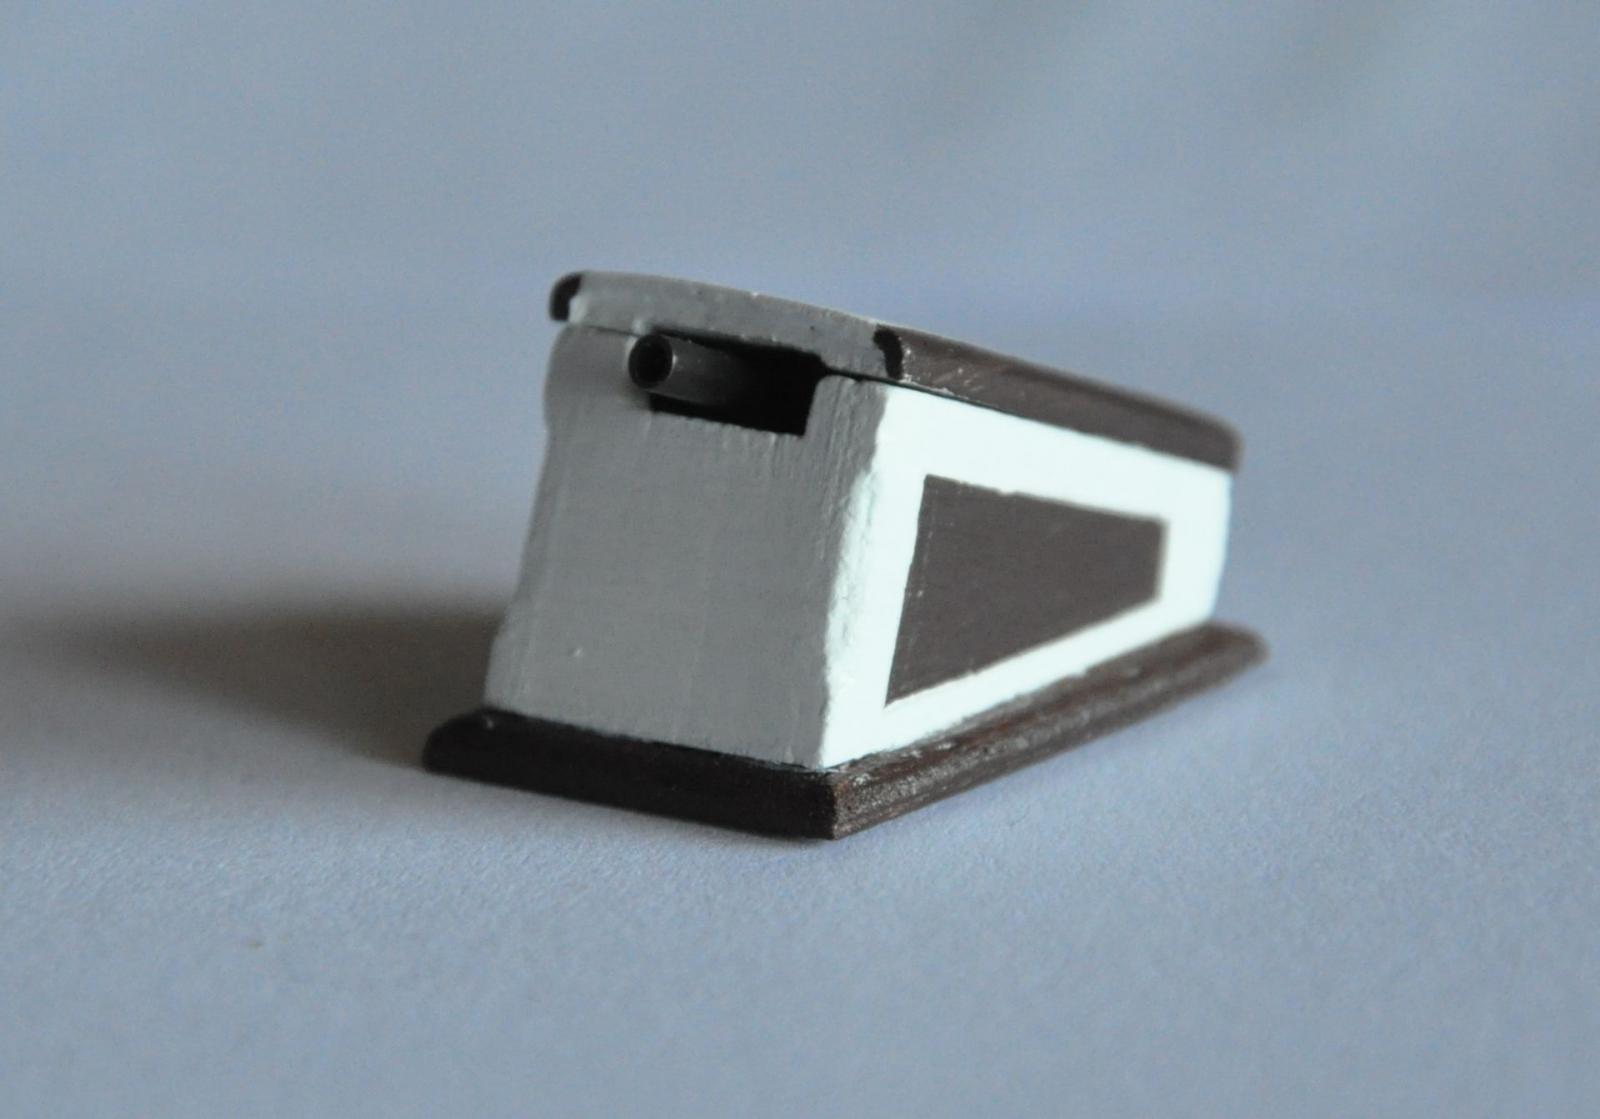
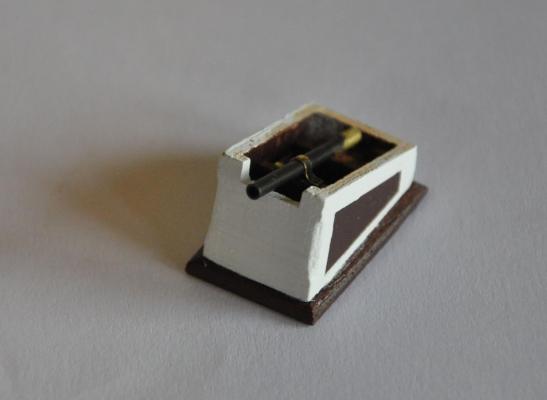
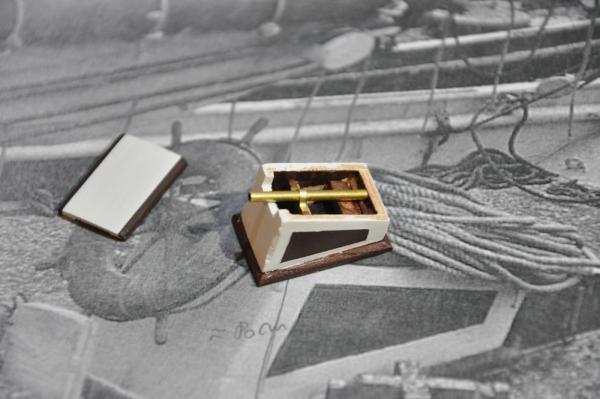
After not being able to do anything on my Bluenose since 4 months I now managed to order a blackening solution and finish the wheelbox. After reading some articles about blackening brass, including the THE BLACKEN-IT TRIALS by E&T, I was under the impression that blackening is a very difficult procedure involving several toxic chemicals which requires meticulous preparation and cleaning work and precise work during the whole process and even then still yielding uncertain results. On top of that the blackening solutions I read about did not seem to be readily available in Europe. Then I found a blackening solution from Germany, saw some tests/instructions on Youtube and ordered a bottle. Just like on Youtube, it worked like a charm. Polish the brass part with steel wool (optional), degrease with acetone, brush on the blackening solution with an old brush, wait a few seconds and watch it turn dark-brown/black. Put more blackening solution on when needed, rinse with water when satisfied. Then it can be buffed, waxed, oiled, or coated with varnish to enhance / preserve the effect. I oiled my wheel tube, see the results on the pictures below. The blackened tube in which the axle of the wheel will sit: The almost finished wheel box still without the lid: The wheel box with the lid on:


- 127 replies
-
- 4
-
-
- Bluenose
- Billing Boats
- (and 1 more)
-
Well, unfortunately I haven't been able to do anything really since New Year. There are some other priorities in my life which in itself are very good but make it quite impossible to work on my Bluenose from time to time. I am working on some of the things which are going to be placed on the deck in order for me to be able to cut out the shapes from the deck. Very very slowly I am trying to restart with the fish hatches now. I hope to write a new log entry soon. Keep up the good work!
- 58 replies
-
- 1
-
-
- la candelaria
- occre
- (and 1 more)
-
Hi Jean-Luc, I have made a first test with Nerofor, which arrived yesterday. I set it up quite quickly, just to test it out, so I did was not very meticulous about cleaning and sanding (steel wool) the metal. In the past days I bent a little piece of 0.4 mm brass wire into 2 ringbolts (they are still attached in the middle so it still is one piece). I brushed some Robla on it (which smells like acetone, so it probably is a comparable product) and then repeatedly brushed a tiny bit of Nerofor on it. After a few minutes it got a nice dark tan. Not exactly deep matt black, but a very dark blackish brown, looking very old. I rinsed with water and it still looks the same. Let's see if it stays the same over the period of a few days I will be trying some more in the near future. For me, the result looks promising though. Here' s a picture:

- 58 replies
-
- 1
-
-
- la candelaria
- occre
- (and 1 more)
-
Hi Jean-Luc, After searching for blackening fluid (which is available in Europe) for quite some time I have just ordered some blackening fluid (schwarzbeize) from Germany. After reading several logs on products like Blacken-It and others I got kind of sceptical about the whole procedure. Then, after some searching I found a German product called Nerofor, made by Ballistol. Ballistol makes a lot of products for the weapons industry, including degreaser (Robla), blackening fluid for colored metals (Nerofor), blueing fluid for iron/steel and gun oils, plus a lot more. There are several instructions, comments and movies in the internet which testify that the product works very well. See for example: https://www.youtube.com/watch?v=7JfVvCYGubw Also, it seems to be very easy to use as compared to other products: apply the product with a brush and then rinse with water. First the object has to be clean of course which can be done with the degreaser. Afterwards you can rub the object with a bit of oil. As soon as I get my products I will try it out and let you know the result. Hopefully this weekend.
- 58 replies
-
- 1
-
-
- la candelaria
- occre
- (and 1 more)
-
Nice going Jean-Luc. You know you can collect the dust and mix it with white wood glue and use it as a filler. Works very well.
- 58 replies
-
- 1
-
-
- la candelaria
- occre
- (and 1 more)
-
Thanks Julian, very helpful!
-
Hi Julian, I envy you for your progress. I haven't been able to get anything done since New Year. A question: those deadeyes and blocks do not look anything like the original ones from the kit. Did you make them yourself or when not may I ask where you sourced them? As you may have read elsewhere I think I will order replacements but I just did not get around to it yet. Thanks! Clever idea with the mast hoops. And I like your cardboard strip solution!
-
Julian: ok now I understand what dry etch is. I used those a lot as a kid, but I totally forgot about their existence. Excellent idea!
-
Because it was blocking the view. Of course I did (need to) make some room, otherwise I wouldn't have been able to make the pictures with the lights and the drawing to show the effect of the light table. But I was hoping to put a lot of things back in their places instead of just shoving it aside
- 396 replies
-
- 3
-
-
- Idea
- Bright Idea
- (and 1 more)
-
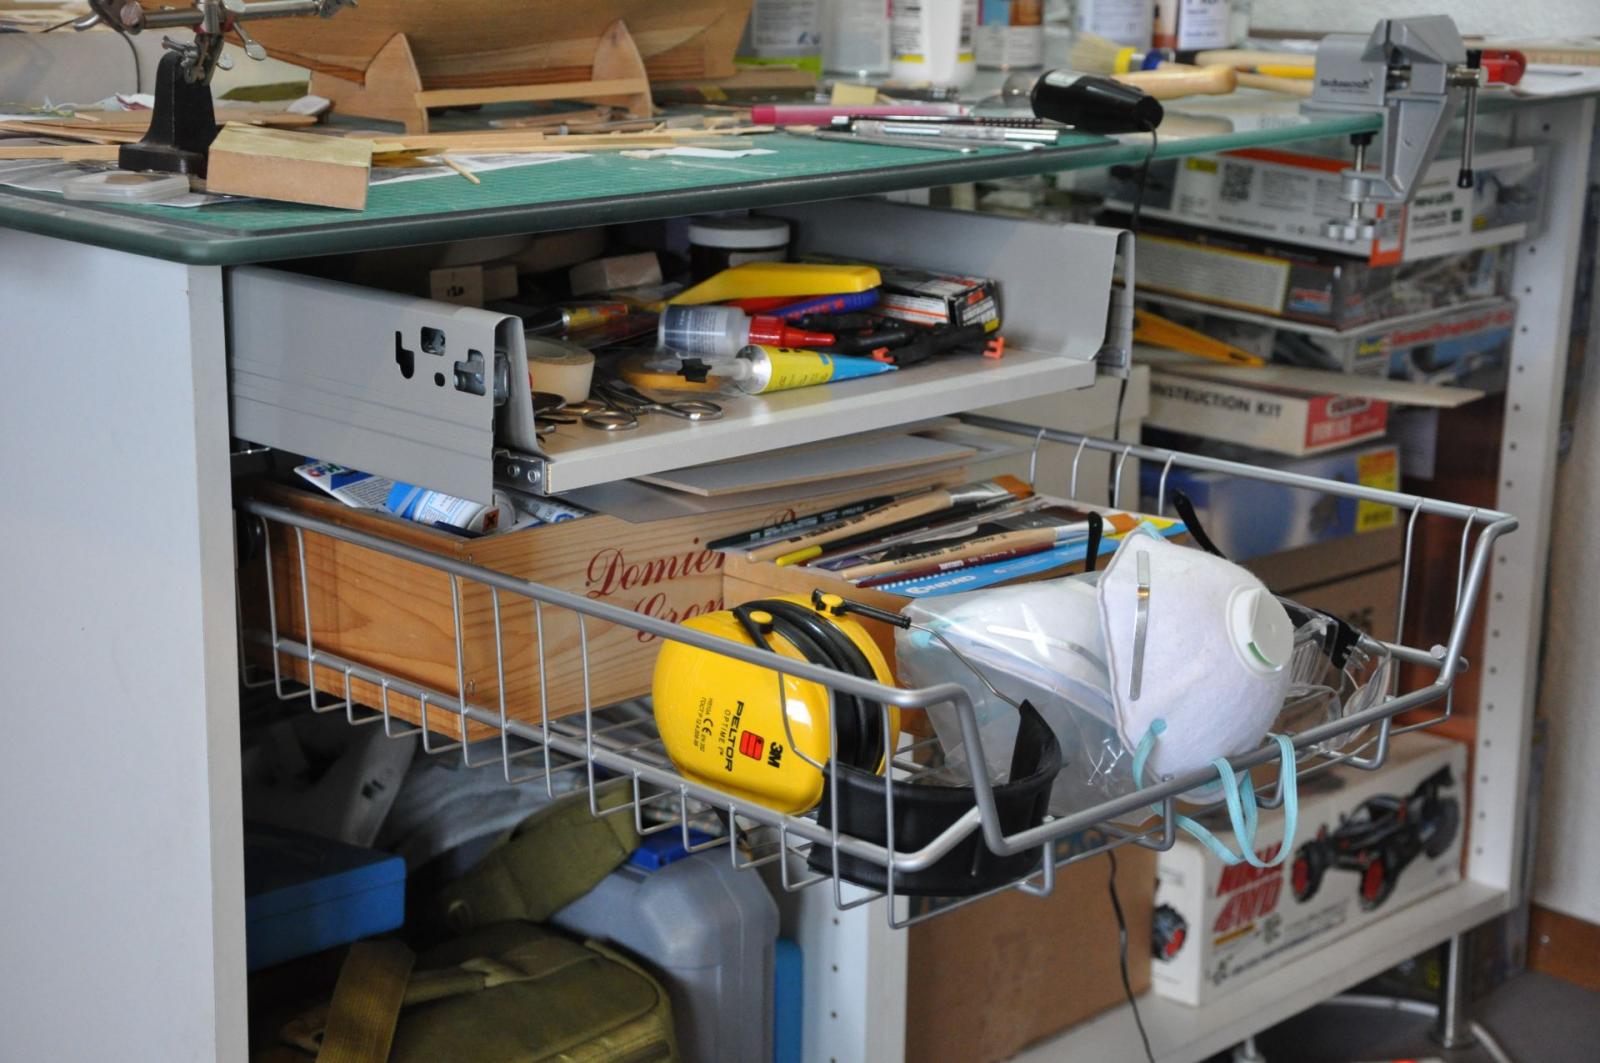
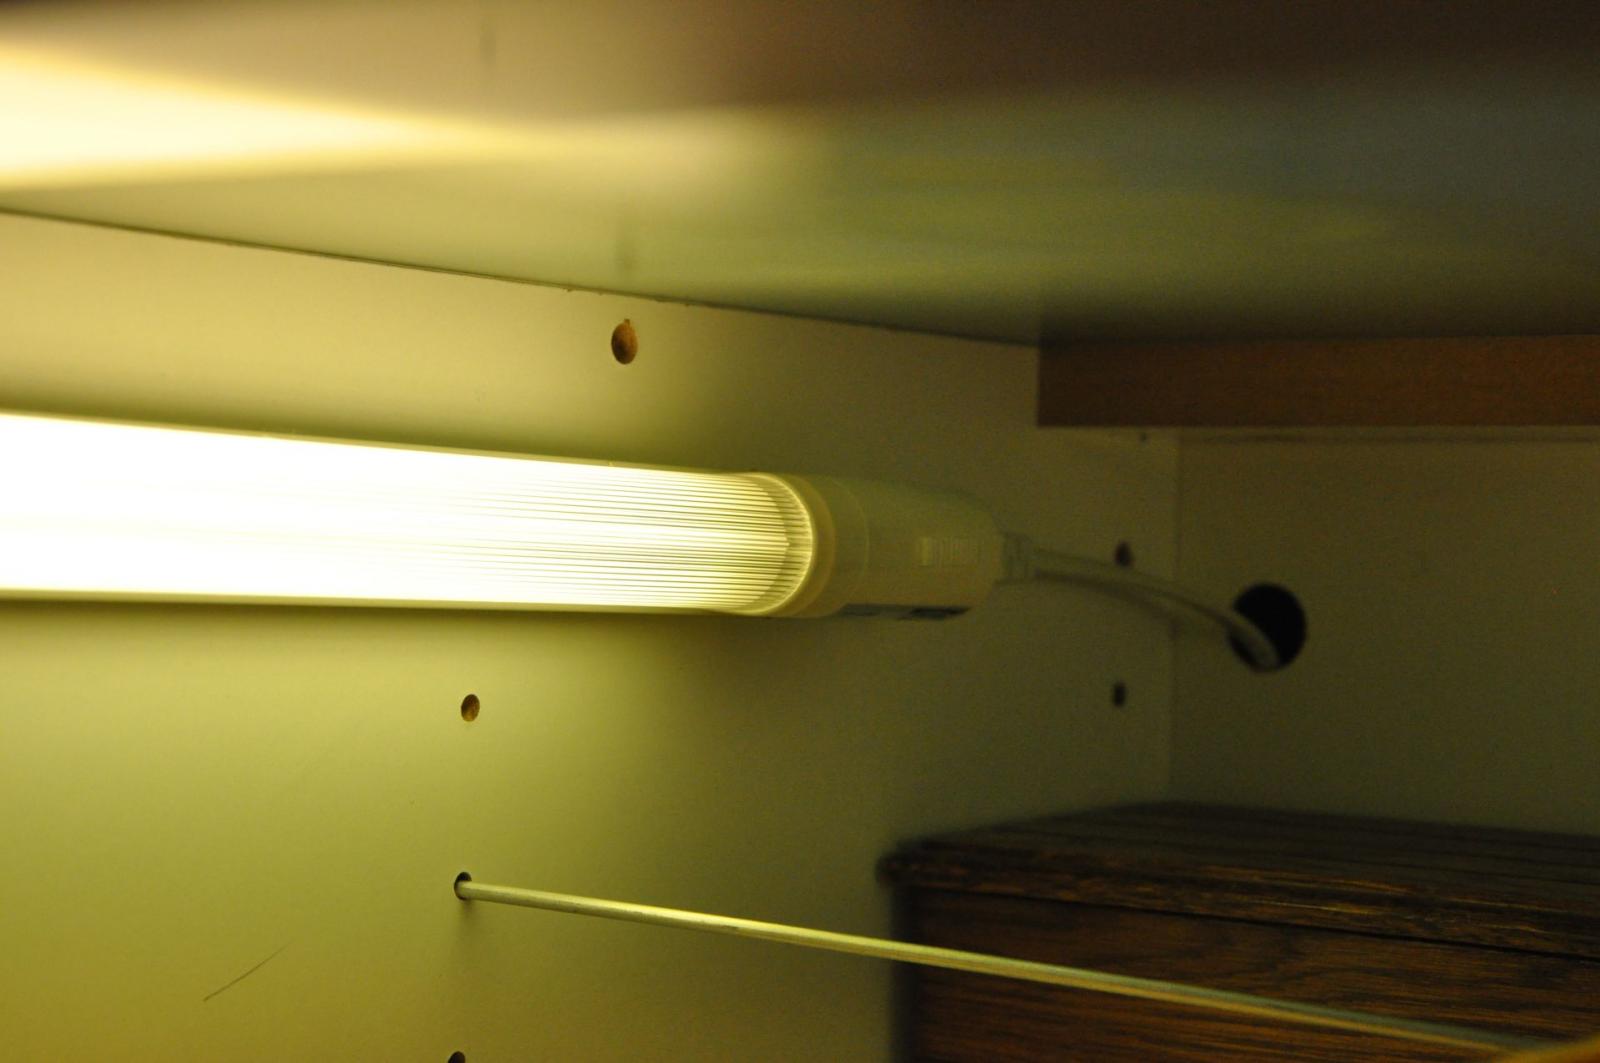
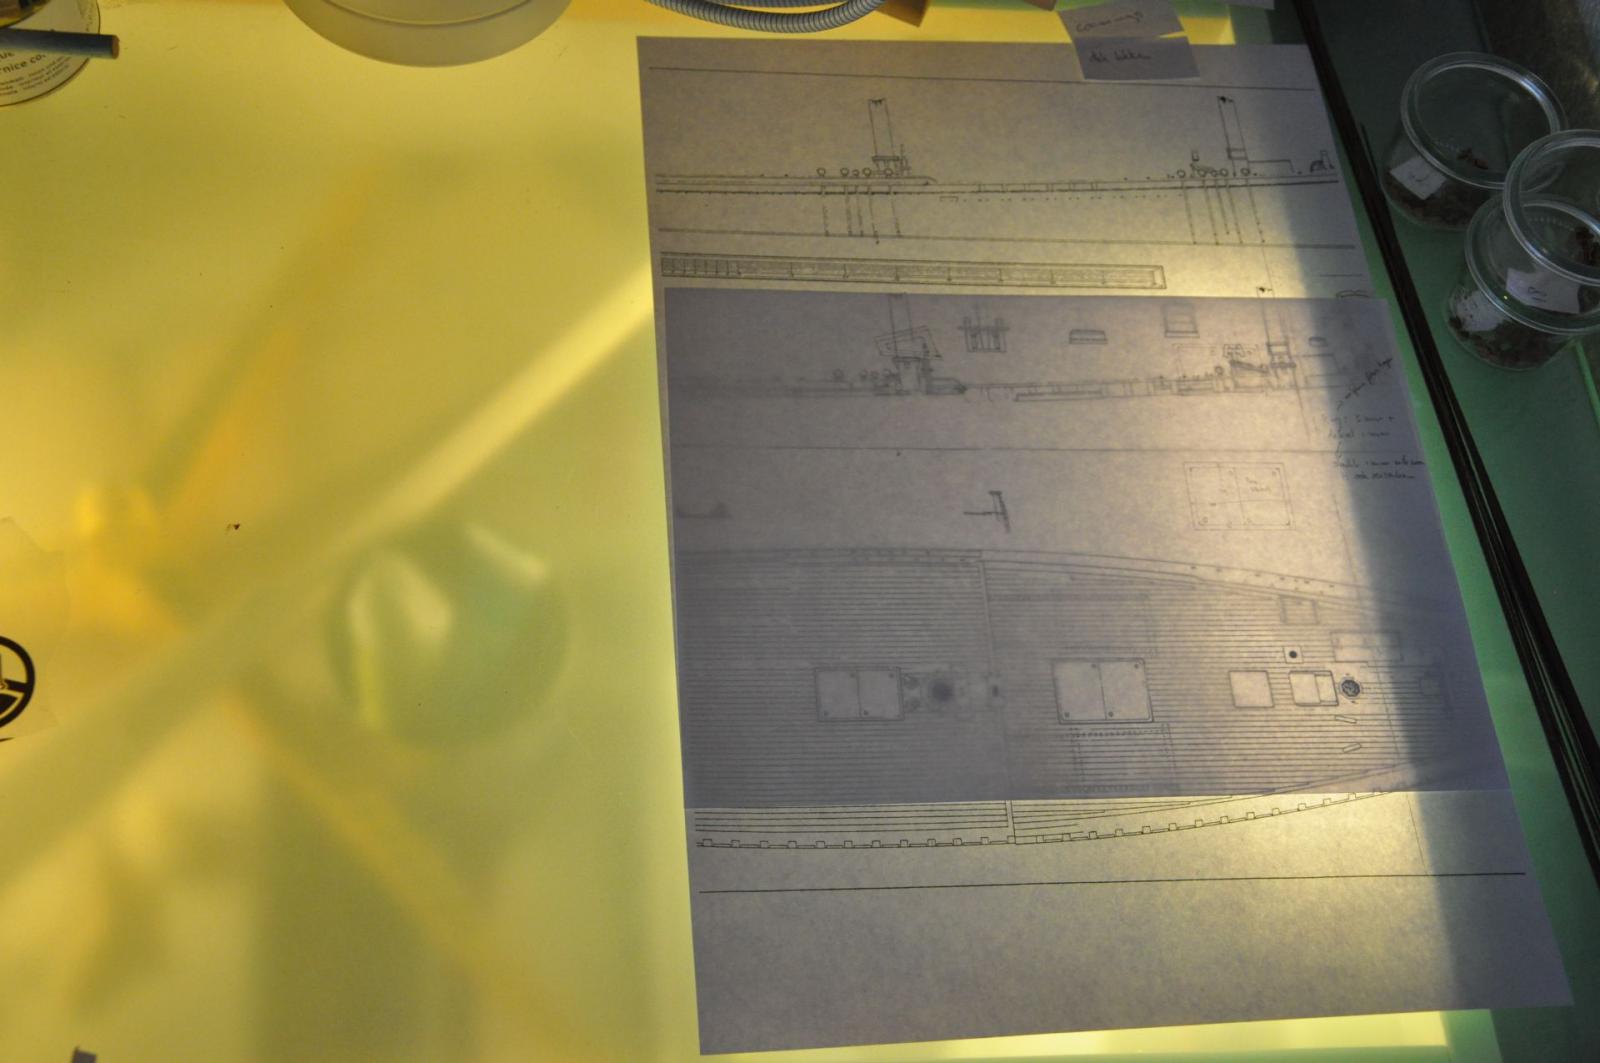
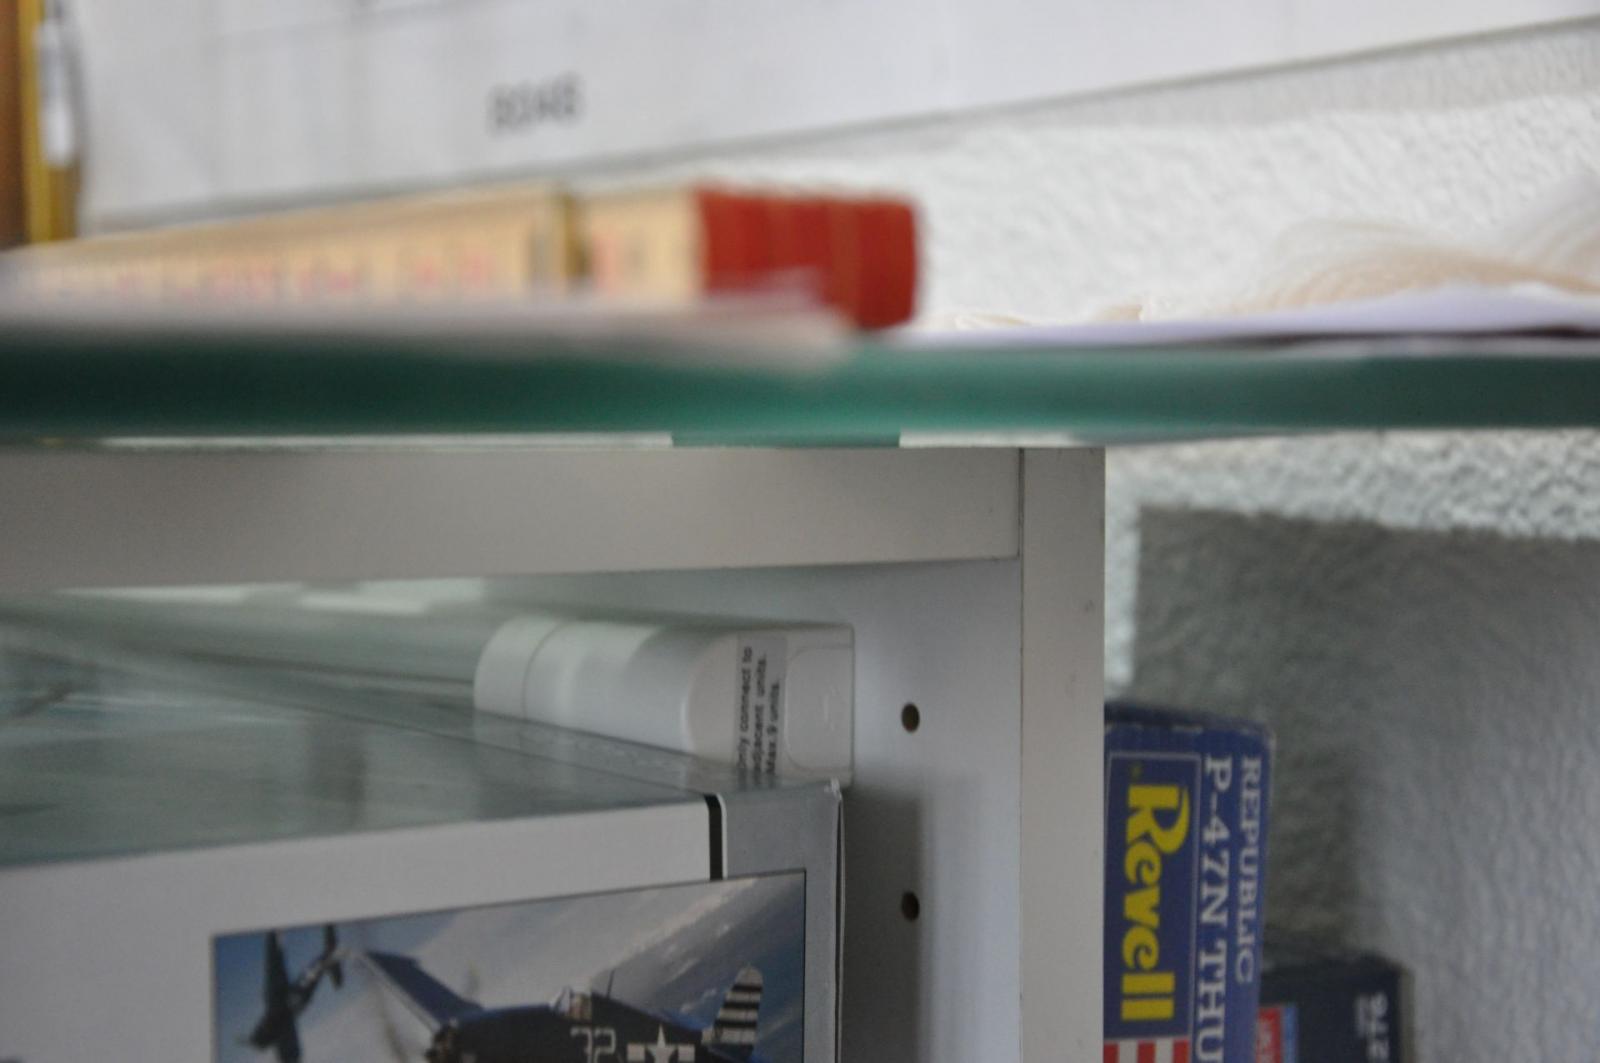
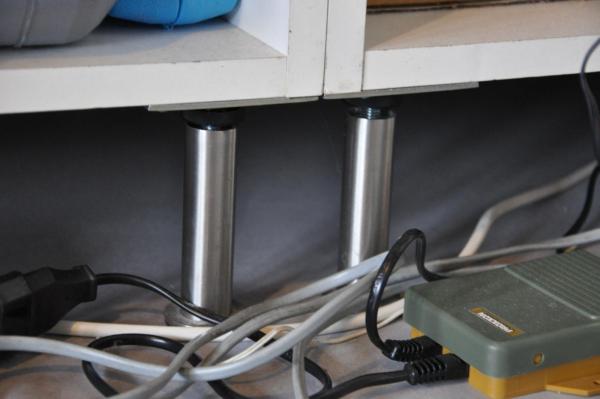
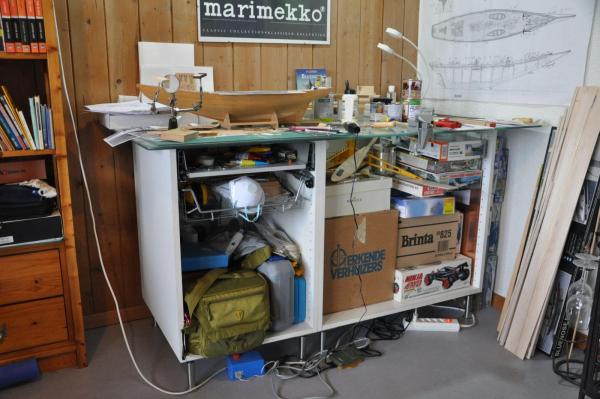
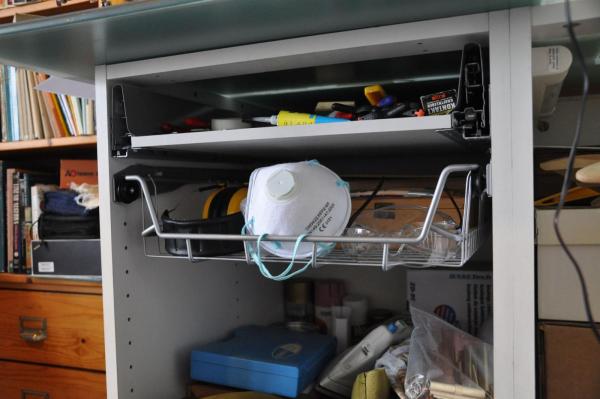
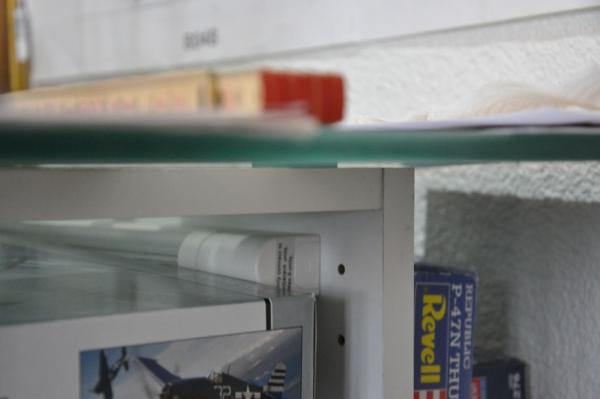
Ok people, I did not get to clean up my desk as I hoped I would, but here are a few pics anyway. Hopefully they will still show the essentials... First picture is an overview of the desk: Two cupboards (standard 58 cm deep) of different width attached to eachother with screws which come with the package. I chose not to use doors, because these are expensive (hinges!), get in the way when you need something and are just not very practical here. All the stuff inside doesn't look great but it gives you an idea of the storage capacity I added two drawers for the smaller stuff. I may alter this configuration later on. The drawers have no front for easy access and reduced cost. The drawers can be attached at any position following the pre-drilled holes. Easy construction with 6 screws each. Stainless feet can be adjusted in height by rotating them. In this way the cupboards can be levelled exactly before attaching them to each other. The tabletop is made of 800x1500x10 mm hardened glass and is matte on the bottom side. I have put self-sticking felt pads on the cupboards corners which increase the friction between the glass and the (otherwise smooth) cupboards. The weight of the glass (30 kgs) together with the friction ensures that it stays where it is. It is however still possible to slide it a bit when necessary, but it requires more pressure than it normally would get from working on it. I have attached two 30 cm tubelights to the sides of the larger cupboard to create an area for drawing and tracing. That's basically it.


- 396 replies
-
- 8
-
-
- Idea
- Bright Idea
- (and 1 more)
-
Nice work Julian! Are these decals for self-printing? Or how does it work? I like your shoe-polish-approach. Nothing like the use of everyday things around you to enhance your model. I think your name plate and scroll work really came out well. Are you going to cover the whole ship in varnish? Or parts of it? Why exactly? I have read that others do this as well but I have not figured out why exactly. Is it because the paint might crack? Or to protect it from damage?
-
haha, so true. Only I wish it was dust on my table, not all kinds of other stuff
- 396 replies
-
- 2
-
-
- Idea
- Bright Idea
- (and 1 more)
-
Wow, thanks for the reactions! I must admit I was a bit afraid the question for pictures would come. Fact is, I built this table like this for another reason: I currently have no and never did ) dedicated place to work so the table/bench is in the corner of the same room where I have my "office". Means all my modeling stuff in in and on this table (and a bit in front of it ). Can you imagine the mess? Currently it is not possible to see much of the table. But I will try to clean up and shoot a few pictures this weekend . Have to clean up anyway to be able to do some modeling.
- 396 replies
-
- 5
-
-
- Idea
- Bright Idea
- (and 1 more)
-
Hey people, I made my own hobby table from different parts of furniture which I got at IKEA. I got myself a set of cupboards which are normally placed under a kitchen bench. These are cheap and have holes drilled on the inside to attach drawers, doors, or to attach them to each other. I used these to attach them to each other, put in a few drawers and to put two tube lights. On top I put some felt pads (normally used under furniture) and a table top of hardened glass which is matte on the bottom side. This gives me a very stable desk with a 100% flat top, some drawers for tools, lots of space to store other stuff and, when I turn on the lights I have a light table which comes in handy sometimes when I need to trace drawings or plans to make templates.
- 396 replies
-
- 7
-
-
- Idea
- Bright Idea
- (and 1 more)
-
Thanks Schnu for the kind words. No I have not contacted them yet as I was busy with other stuff (I am a bit chaotic sometimes ) and I did not have time to go to Zürich anyway. Plus I saw on some of the old photos that the roof of the cabin actually is made out of thick planks which are separately visible. You understand that with this knowledge I can hardly put a one-piece plywood roof on it... So this ended my search for thin plywood (for now).. But I have saved the page and surely sometime in the future I will give them a visit.
-
Thank you all for the likes and the kind words. Knowing that this model will always be limited because of some aspects of the kit and several mistakes made earlier which I do not want to correct anymore, I use this model to test how far I can go when it comes to being true to the original. All more or less in a playful way. After all this is my first build and I want to test and improve my skills as well of course. The likes and the nice words support me in my feeling that I am heading in the right way. Thanks!
- 127 replies
-
- 1
-
-
- Bluenose
- Billing Boats
- (and 1 more)
-
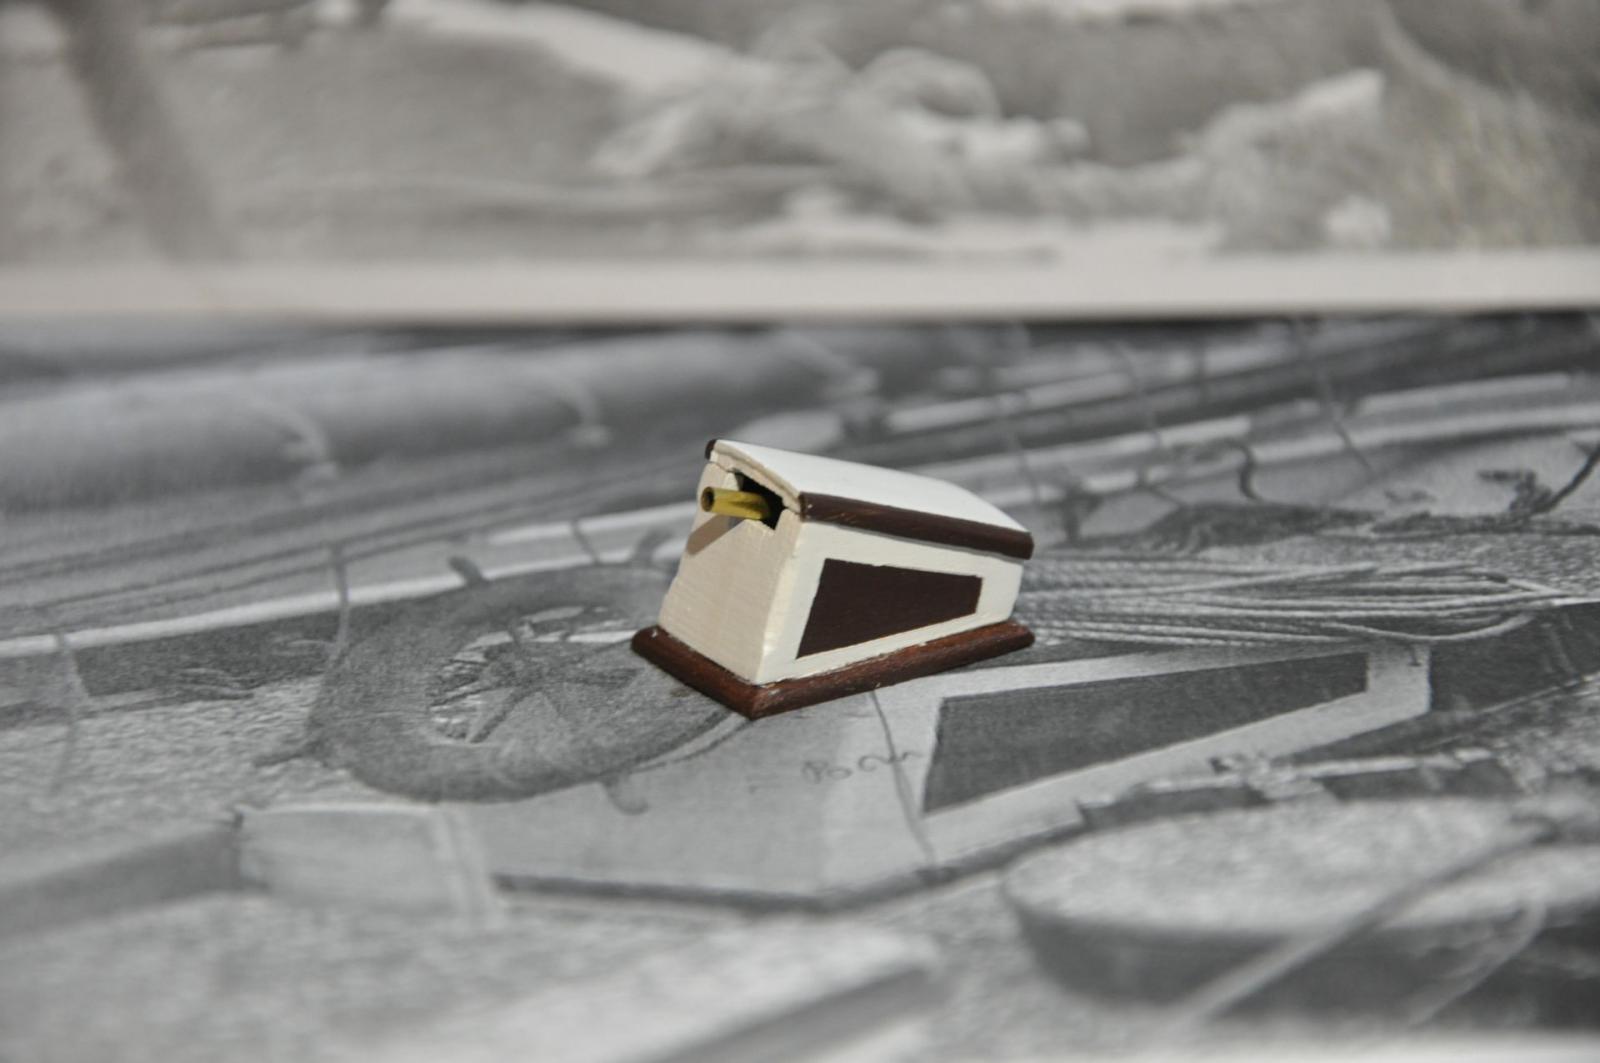
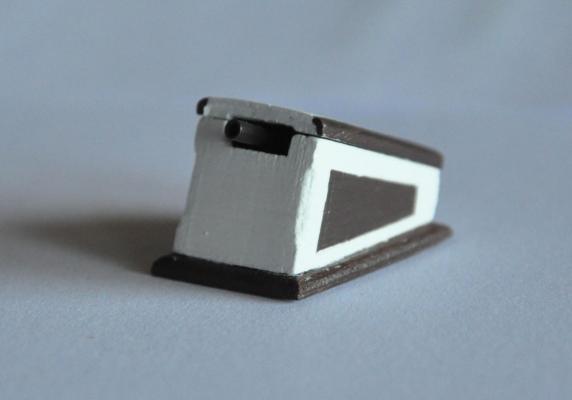
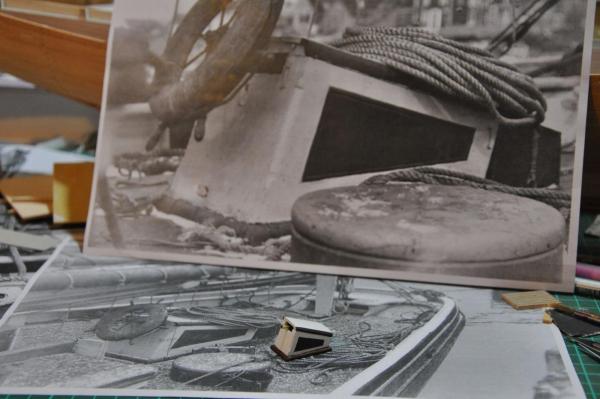
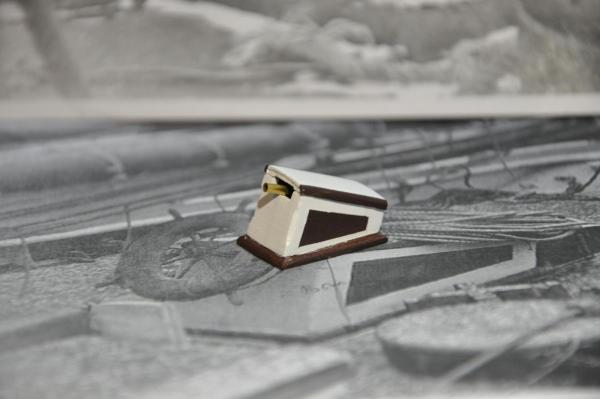
I have now painted the wheelbox. The coaming is mahogany pickle mixed with chocolate brown, since this seemed to match the deck as well as the photos (as far as this can be judged from B&W photos). The sides have chocolate brown inlays and stripes, the main box is paintes in “old white” which is an off-white in a grayish (cold) hue. Fitting of the tube: Lid closed and compared to the photo of the real wheelbox: Close-up
- 127 replies
-
- 5
-
-
- Bluenose
- Billing Boats
- (and 1 more)
-
A disc sander is very handy. Maybe not the tool most people choose when they can choose only one powertool (there is a thread about this), but very handy to sand angles or flat surfaces. Careful with your fingers though, these things are very hungry . I used to work with the big ones (80 cm diameter) back in the days when I was studying Industrial Design Engineering and making mockups and working prototypes of designs. Hoping to see some of your work again soon!
-
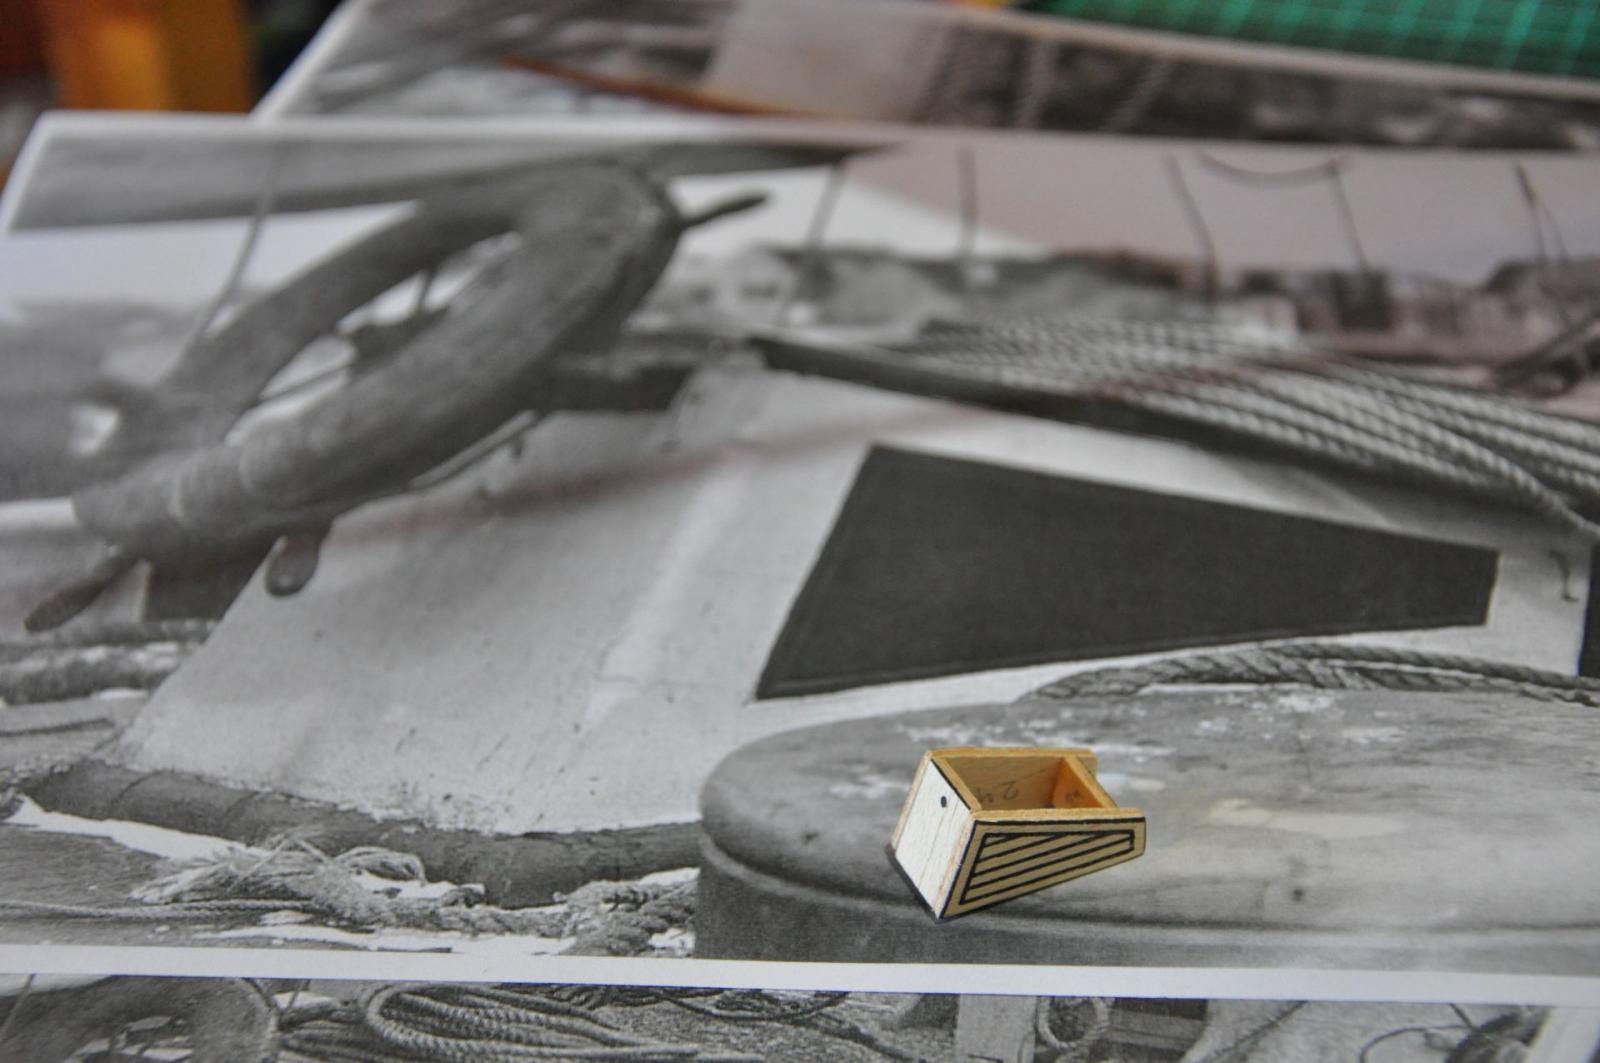
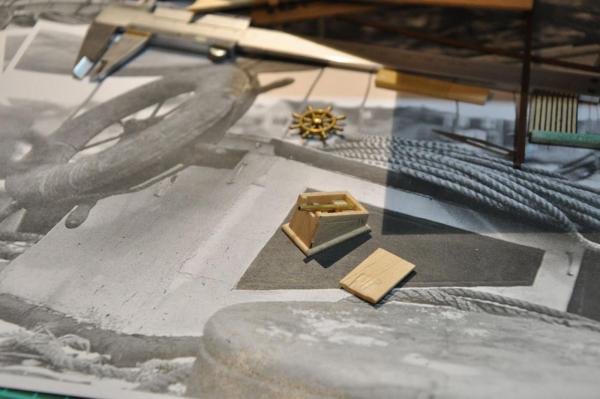
Last weekend I have started the construction of the wheel (gear) box. As to be expected the parts included in the kit have to be changed, some parts have to be added as well. This is the original wheel box from the kit: As can be seen from the picture I have glued the rear end not to the end but a bit forward and in the same angle as the front. This is where I will do a “cabinectomy” (thanks to Bob Ross for this term), which is in line with the photos and drawings which I have at my disposal (except the ones from the kit of course). This picture below shows the new wheel box. I have changed the shape, made a new lid, cut a square hole in the front and added a tube for the wheel. The wheel will be mounted on a rod which fits snugly in the tube. I faked the coaming by mounting the box on a plate, because from the photos it is visible that the coaming was very thick and not so high in that place which I found easier to represent in this way. Also I used the blunt and rounded end of a scalpel to press the relief in the sides. Now I still need to paint it.

- 127 replies
-
- 4
-
-
- Bluenose
- Billing Boats
- (and 1 more)
-
Hi there Tuffarts, I think you have the same kit. I have answered in your thread including why I think your kit is the same. If you need some help or advice about the kit or a copy of the instructions then please PM me. I'll try to help where I can. Cheers!