HOLIDAY DONATION DRIVE - SUPPORT MSW - DO YOUR PART TO KEEP THIS GREAT FORUM GOING! (Only 13 donations so far - C'mon guys!)
×


7 Provinces
-
Posts
190 -
Joined
-
Last visited
Content Type
Profiles
Forums
Gallery
Events
Everything posted by 7 Provinces
-
 Hi Grey Just so no misunderstandings occur: I meant to say that the resemblance of the Billing Boats kit (see also my build log) with the real thing is shaky at best. I did not intend to comment the resemblance of your model, since your model is yours and you build it any way you like to. Your model should give you the satisfaction of building it and possibly of looking at it afterwards (depends on what you do with it), so it is entirely up to you to do it any way you like to. We are here to support you to realize it or with opinions, if you like, but not to criticize.
- 30 replies
-
- 4
-

-
- bluenose
- billing boats
- (and 1 more)
-
Hi grey seal, I am pretty sure that you have the Billing Boats 576 Bluenose Kit, which is the Bluenose 1 But to be honest, the resemblance to the original is "shaky" at best. From your pictures I recognise various details which look exactly the same as in my kit (most of which I do not plan to build ) I'll take a seat in your shipyard!
- 30 replies
-
- 3
-
-
- bluenose
- billing boats
- (and 1 more)
-
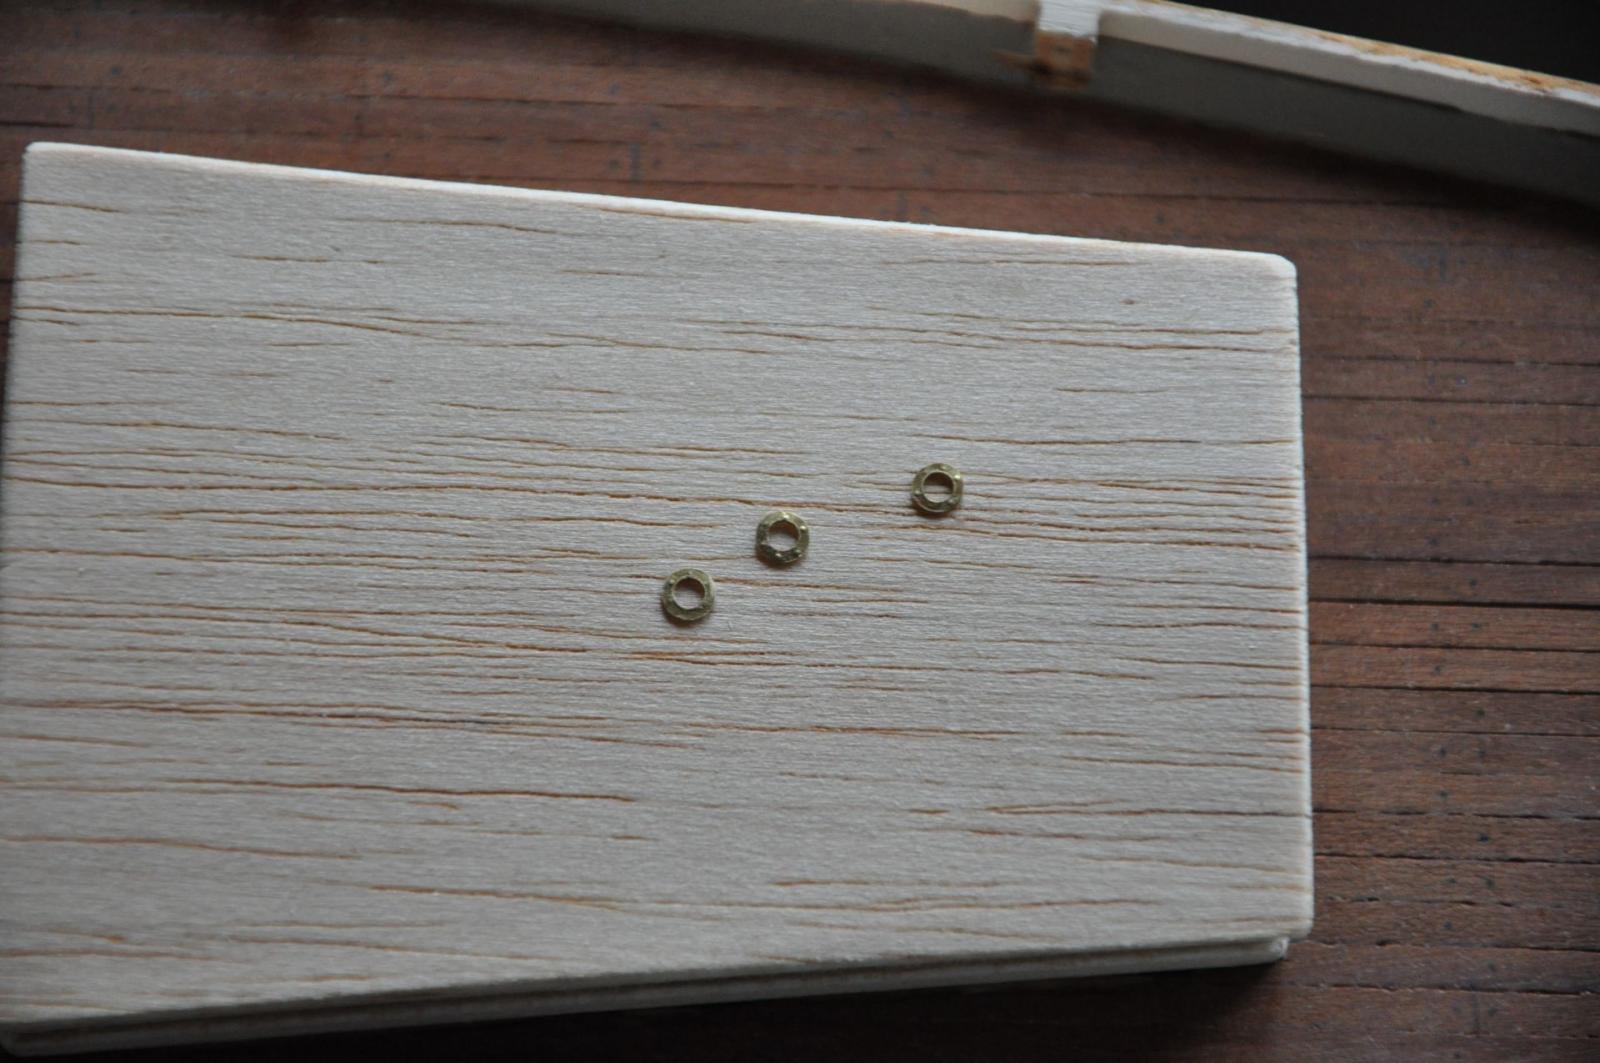
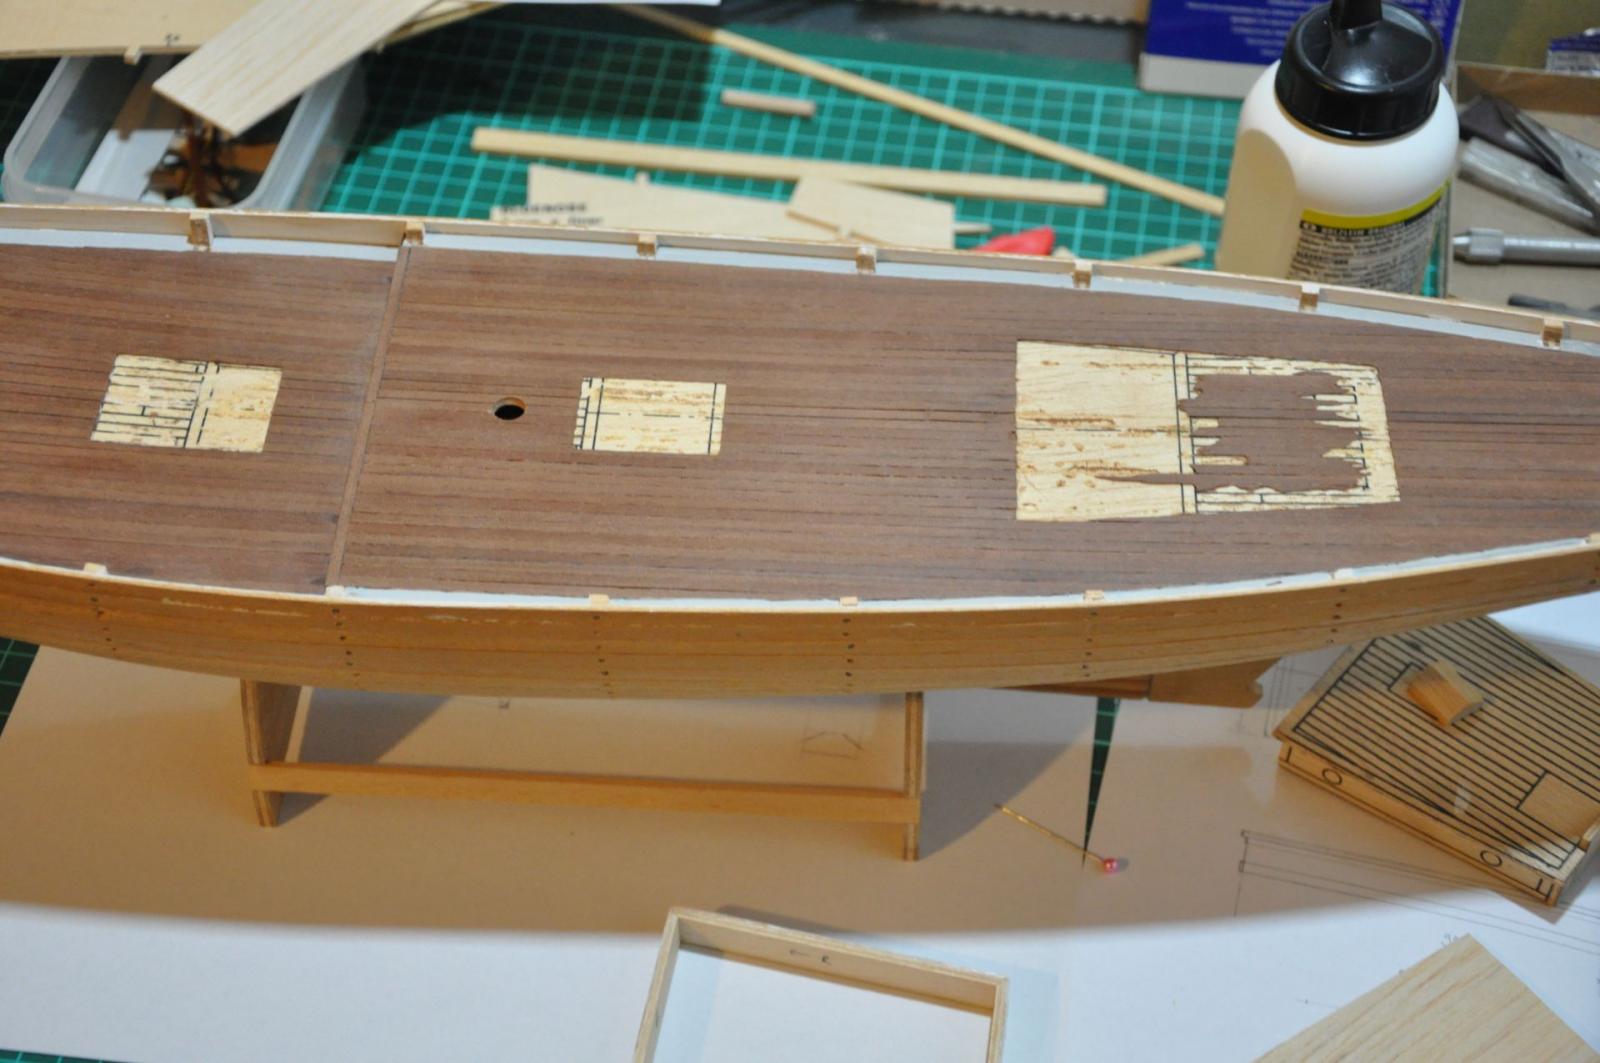
So here are two pictures from today, a picture of the aft deck with the pencil markings: And here is one of the 3 portholes I made out of brass sheet. Basically I drilled 3 holes, clipped then out (roughly) and sanded them into shape (about round). Then I hammered a few dents in them to represent (on the flip side) the bolts.

- 127 replies
-
- 4
-
-
- Bluenose
- Billing Boats
- (and 1 more)
-
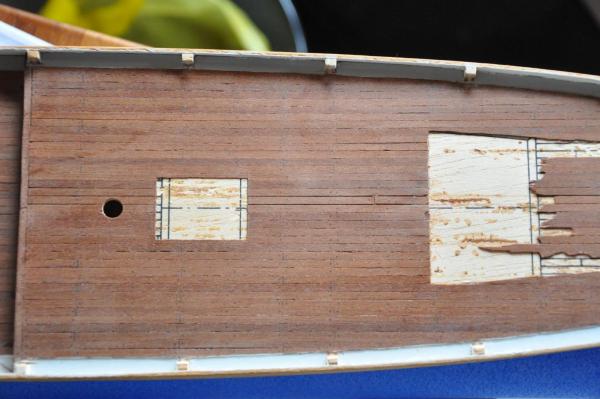
After spending some time this morning to clean and fire up my old Gaggia Coffee Classic espresso machine, opening a pack of the “always great” Lavazza Qualità Oro coffee and making a nice espresso, I decided it is time to work a bit on my model and write an update. By now you probably have guessed that the admiral and the little sailors are not at home this morning A few days ago I made the decision to do the trenails on my version of the Bluenose after all. They’re not really all that visible and in fact it is so much work that I almost regret my decision already, but I thought “why not, while you’re at it”. By now I have drawn with a pencil on the deck where the planks will be separated and where I will drill the holes for the trenails. I spent a considerable amount of time on that and by now I have only done the aft deck. That’s what I meant with almost regretting the decision, but hey, now that I started it I am going to finish it. On the other hand I am going to continue on the cabin. I have noticed 2 peculiarities which are boggling my mind for quite some time now: On the plans (John R. Stevens, 1961) there is a chimney on the cabin. I have also seen this appear in several builds. I would love to build this chimney, but with the best of intentions I cannot find any hint of it on any of the NSA pictures. These pictures range from the building of the Bluenose until she was sold just before WW2. I have checked the pictures several times. Any hints are appreciated! On the plans (any plans that I have seen), the cabin has 4 portholes. Oddly enough I can only find pictures of the port side of the cabin. There must be a dozen or so but only port side . Anyway, the pictures show only one porthole, at least on port side this is. So I am inclined to make three, one on port and 2 on starboard side. In fact I prepared 3, but will not attach them until the cabin is almost finished. Any hints on this topic are also appreciated! I will post some pictures later on.
- 127 replies
-
- 1
-
-
- Bluenose
- Billing Boats
- (and 1 more)
-
Hi Chris, just out of curiosity: do you exclusively use Citadel paints? Do you brush these on or do you use an airbrush (as well)? Thanks!
-
Thanks Bob, that's very kind. I may come back to you about some details later on. I am not so sure what scale my model is but it is definitely not 1:75. That is only the number on the box but a newer edition shows 1:65 which is closer. I calcualted it is around 1:57 but since the relative sizes of width, height and length are not in proportion I guess no-one can tell. For all I know the model is based on "any" fishing schooner in scale 1/64 and some "bluenose" detail was added (but not too much). In fact, there is a striking lack of resemblence such that one might call it the "anonymous schooner". Still it is fun to build Yes I know, models can be patient Still, if you don't take care of yourself then how to take care of others? One must find a balance to stay fit and to me, modelling is a great decellerator. The trick is to model enough to gain energy for the family and the job and not so much that you lose track of everything else..
- 127 replies
-
- 2
-
-
- Bluenose
- Billing Boats
- (and 1 more)
-
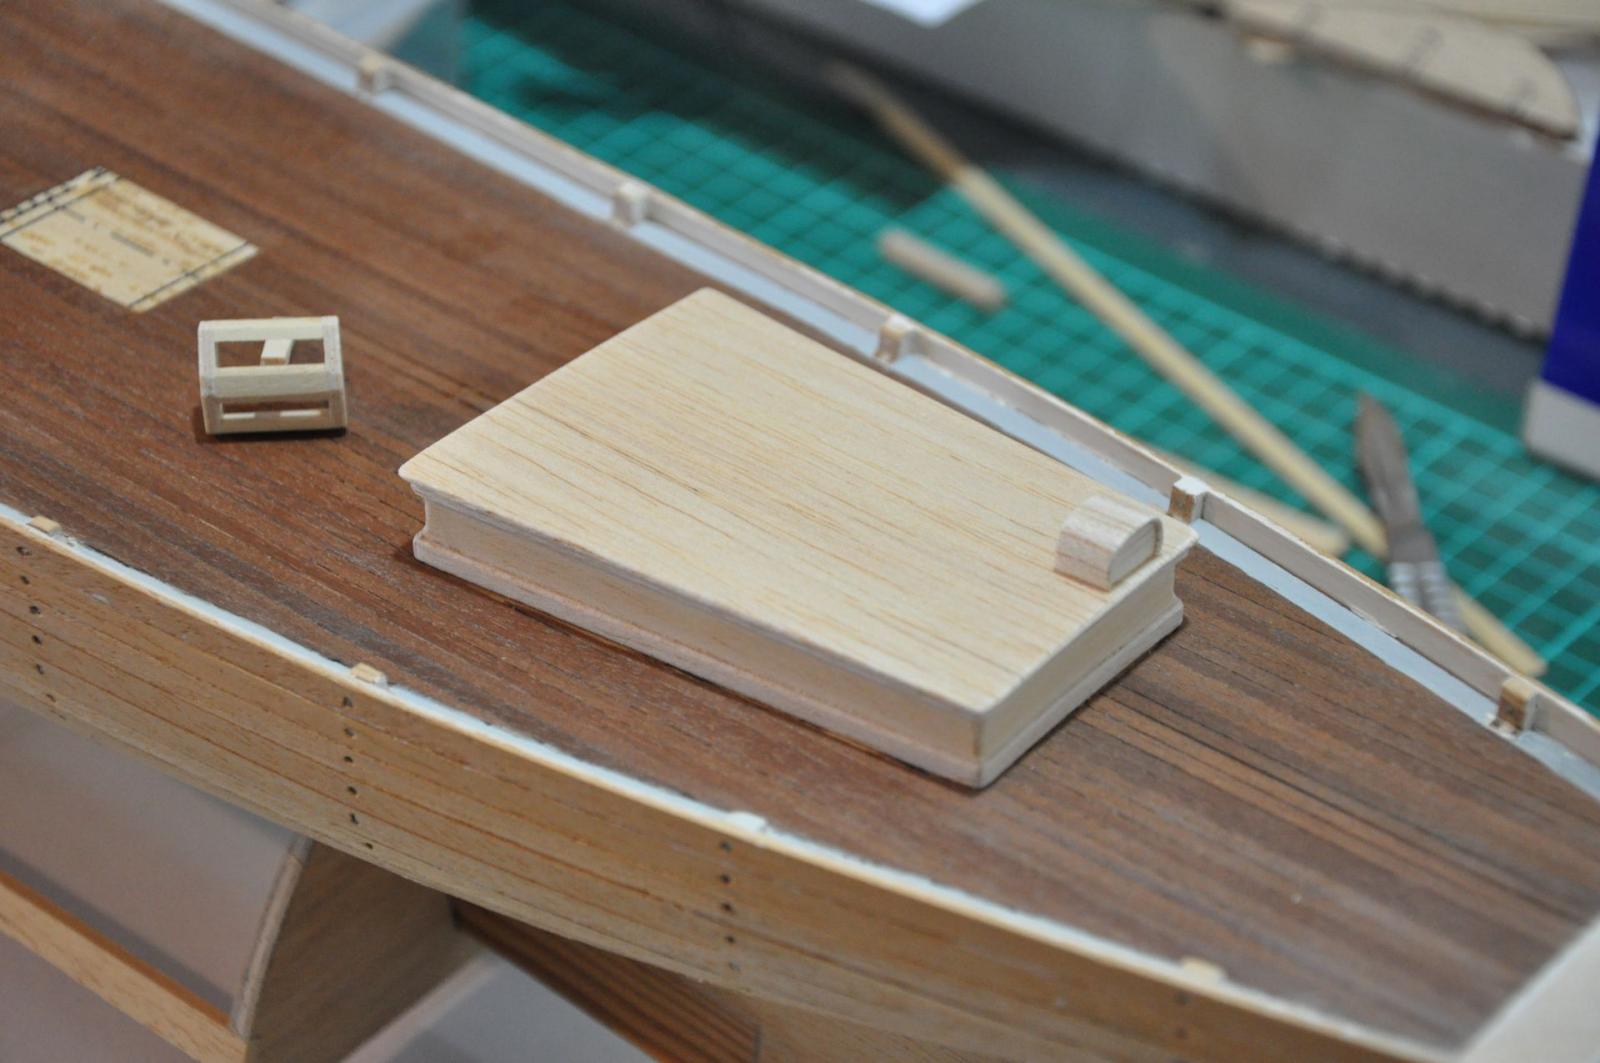
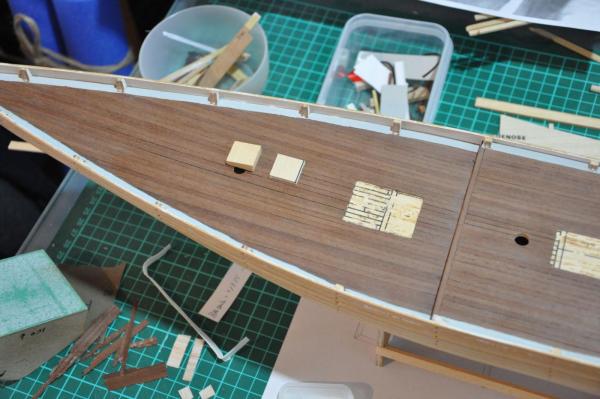
There’s the new cabin with the compass. All still in a premature state. Next to it the skylight, lying on the side because of the stick I glued underneath to hold it while painting. So with the cabin outlined and the fish hatches done I have the main shapes I need when cutting the planks to length (that is, in retrospect cutting the already laid deck planks). The front hatch and forecastle are represented by spare blocks which seem to fit the plan. As you see from the picture below, I found out at this point that the foremast according to the Billing Boats plans is about 15 mm. further towards the stern than on the 1961 plan (and probably than on the Model Shipways plans but I cannot check this since I don’t have these) and so the hole that I already drilled according to my Billing Boats plan is right underneath the forecastle. Well, what can I say? It fits the overall picture even when it does not cease to be a bit disappointing every time this happens. Anyway, it could have been worse. At least this hole is covered up by the forecastle.

- 127 replies
-
- 2
-
-
- Bluenose
- Billing Boats
- (and 1 more)
-
… and this is what I build the cabin etc. for… Not the nicest thing to do, cutting up a perfectly fine deck.. While doing this I found out that the Billing Boats cabin, hatches, etc. not only have different shapes but also different locations. A feat which I do not really appreciate so much since I did some test cuts in the middle of where the cabin was going to be and they’re not visible in front of the cabin Not to mention the loose planks (I didn't glue them where the cabin and the hatches were goin to be (22 years ago)... Oh well..

- 127 replies
-
- 2
-
-
- Bluenose
- Billing Boats
- (and 1 more)
-
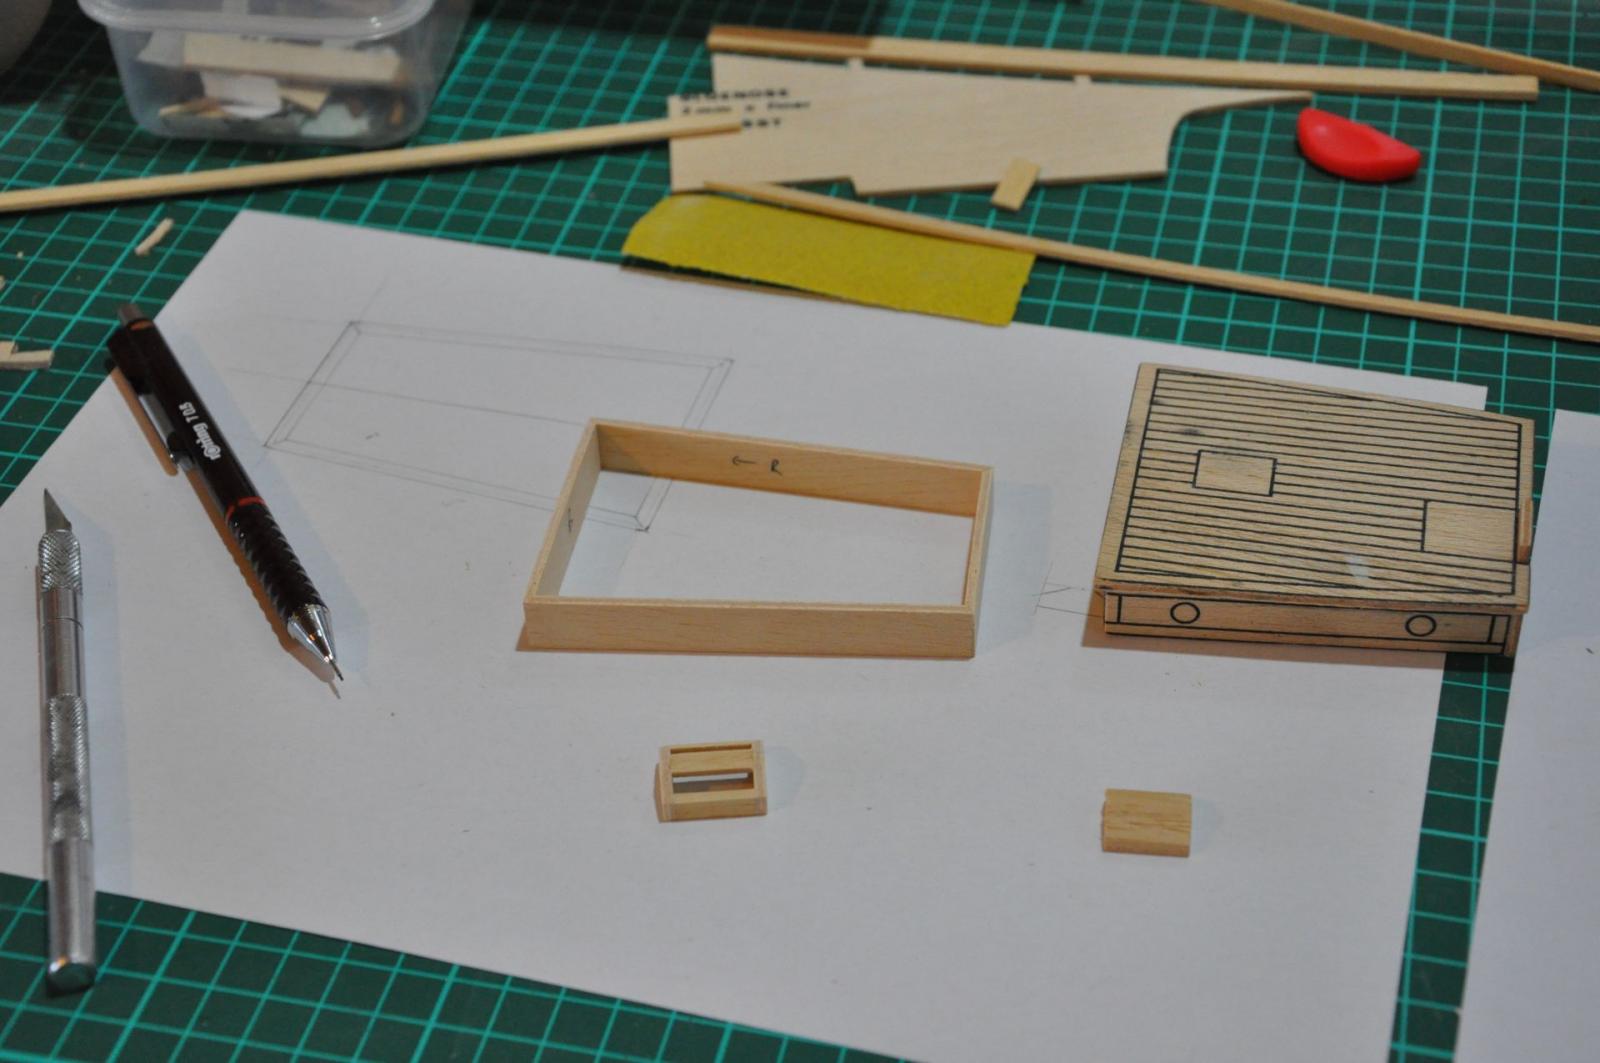
Unfortunately due to other obligations I have not been able to work on my project for exactly half a year now (just realized this while writing this entry in the log). This has become a growing discomfort and now I have found a way to make some time and do a little work again. Progress is small, as always, but these days I got to take what I can get Since a long time already I want to finish the deck. I made a plan for this. It involves several steps to be carried out in a certain order (which I changed a few times over the years) to make sure the latter step has minimal chance of damaging something produced in a former step. Right. Anyway, it means that to be able to finish the deck (like varnish it or alike as the last step) I would have to do the trenailing and cut the overlong planks into shorter ones. but before I can do that in a sensible way I need to know which space is going to be occupied by structures like the cabin and the fish hatches. Hence I have been working on that since about a year. After having done a test with the Billing Boats cabin and having a look at the 1961 John R. Stevens plans I decided to have a go at this first. Not necessarily to finish it right now but to at least make the outlines so I can cut it out of the deck. I took the measures from the plan and had a look at the pictures I have of the real thing (plan and pictures show some differences) and decided to go with the plan (but not too accurate) where the plan seems ok or where I do not have any pictures and eyeball it from the pictures where I notice a difference to the plans. On the left the cabin walls as from the plan and on the right the Billing Boats version (a bit shorter and significantly wider). Below that on the left my own skylight and on the right the original Billing Boats version.

- 127 replies
-
- 5
-
-
- Bluenose
- Billing Boats
- (and 1 more)
-
Wow she's really looking good Julian, almost finished. Very nice looking sails and rigging!
-
You are fully in your right to feel proud Julian, I think your hard work has resulted in a beautiful model.
-
Hi Julian I see you have some nice progress again and I see your point with the cleats. I took a minute to look through the photo archive and found a picture showing one of the cleats: https://novascotia.ca/archives/bluenose/archives.asp?ID=203 I hope that helps...
-
Hi Chris, interesting tutorial. Unfortunately I can only see part (1, 5, 6, 9) of the pictures. The others (2, 3, 4, 7, and 8) seem like a broken link.. Just where it gets interesting...
-
Phil, if my eye is not deceiving me from your picture I see that you are going to replace the ply with balsa. Just a word of caution here: balsa can be very practical but it is much more fragile than the ply so I would think twice before using for rails or any outside parts which can get dented or otherwise damaged easily. Also, in my opinion, it is harder to work exact with it, like making (and keeping) sharp edges, straight lines, etc. because it is so soft and fibrous. It is not always easy to get a nice sanded surface like you can with other woods in my opinion. On another note I concur with the other comments that it is normal to have some setbacks. To me one of the beautiful and most rewarding things is how our minds can overcome these setbacks with solutions.
-
Good point Skip, it is not ideal I cannot think of any good reason for static ship models but when you have an RC model ship I can see the advantage in thin ply. Even more so for RC model planes. There is very light and strong and very bendable 1 or 1.5 mm birch plywood available, very suitable for sailing ships, speed boats or planes. When you don't want to build your RC boat using a plastic vacuform and still it needs to be light and strong, then this is a good alternative in my eyes.
-
Wow, wicked pace you have! About bending plywood: in my experience soaking does not good. At best you get back the same shape it was before once it is really dry again. This also has to do with the relative humidity of the environment where the wood is. The best experience I made was to treat it as if it were a thermoplastic: bend it a bit and relax the material by applying heat. Like so it will stay more or less in shape since there is no tension anymore. Repeat this in increments depending on what the wood can take. However, where this technique works well to bend wood, it is not easy to straighten already bent wood like this. This will only work when you fix the wood at one end and apply heat when bending it straight and then fix the other side. I use an old iron to apply heat. A bit big for most purposes, but it works
-
Nice work!
-
Something I see through the whole log: some mighty nice tools you have there. I not only admire your work but your tools too No really it seems that it is with great ease that you create these wonderful objects. Great to see!
-
Funny, neither my kit's plans nor my instructions mention that.. But that happened before Popeye showed me a scan of his kit's instructions (also Billing Boats) and there were significant differences, also in the sizes depicted I am not surprized anymore
-
The book "The American fishing schooners" is very informative when it comes to how these ships were generally build and what was customary during which period. Unfortunately this is not ship-specific knowledge, so there is always the chance that it was different for a particular vessel. Or that it was changed / replaced after so many years of sailing
-
Julian, did you have a look at the pictures from the Nova Scotia Archives? I just browsed through these and must say that I would guess the rat lines to be no more than 10-15 mm. diameter. This makes for a circumference of 1.23 - 1.85 inch. At 1:64 this would be between 0.15 and 0.25 mm. Also, the shrouds appear to be approximately three times thicker (diameter) than the ratlines. But I suggest you have a look for yourself, the NSA really is a great source.
-
Interesting point Bob. I must admit I did not read that far Now I did: according to Chapelle the standing rigging of American fishing schooners was hemp until 1883-1884. After that, this was made of iron and steel wire. So this applies to the Bluenose as well. Reading on it say that instead of 6 3/4" hemp 3 1/4" wire was used for the fore and main shrouds, so roughly haf the size. To scale this means 0.40 mm. Ratlines were 2" circumference, which means .637" diameter. At 1:64 this is 0.01" or 0.25 mm. Of course this does not really mean much when it doesn't look right...
-
Yes I agree. Billing Boats: 0.25 mm, Model Shipways: 0.23 mm. Chapelle says Ratlines were 5/8"-3/4" diameter hempline which would mean 0.0098" - 0.0117" or 0.25 - 0.297 mm. I would probably go with 0.25 mm or anything close to that.