


keelhauled
-
Posts
778 -
Joined
-
Last visited
Content Type
Profiles
Forums
Gallery
Events
Posts posted by keelhauled
-
-
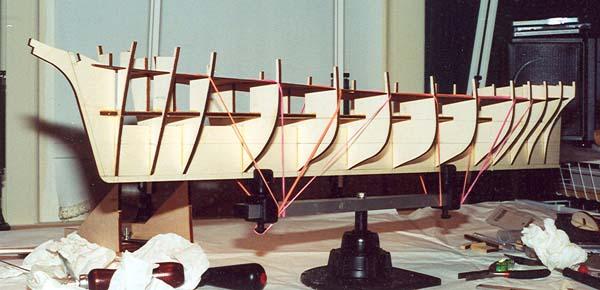
PLANKING THE FRAME
The model kit has attaching the sub decking into place as
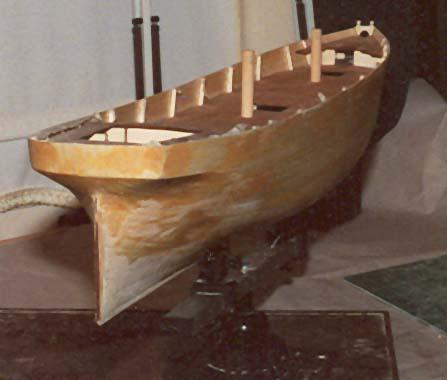
the next step. So with the frames having been securely glued into place I tried placing the sub decking into place. I found that the decking would form to the contour of the bulkheads without requiring any soaking in water. I dry fitted everything and then glued the joints. To secure the deck to the bulkheads I used an amazing clamp – the rubber band! I love these as a clamping device and use them when I can.
I followed the next step in the instructions which was to plank the frame. I’ve since learned that life would have been much easier if I had planked the deck! In fact, many professional modelers suggest planking the deck before the hull. I wished that I had. Such is learning.
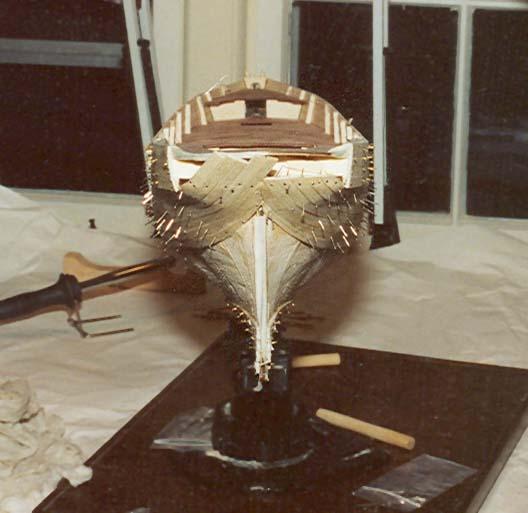
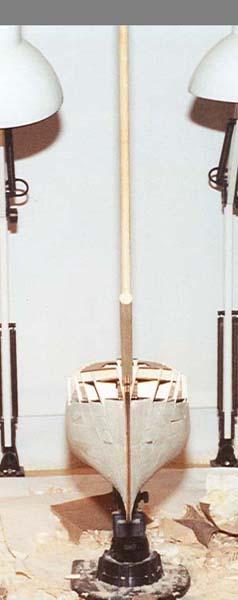
The Amati ship vise is holding the ship in the following pictures. It is by far one of the best investments that I’ve made. I highly recommend it. It clamps to the keel. If you place dowls into the mast steps, you can clamp the hull upside down. The clamp swivels and tilts. It’s awesome.
Before planking the ship I follow a recommendation found in several articles that were written by Robert L. Evans for Ships in Scale (Upgrading the Kit Part 1, May/June 1994). One suggestion was to use balsa wood as a filler to make up for the lack of an adequate number of bulkheads supplied with kits. I found in other articles that the lack of an adequate number of frames or bulkheads in the models often results in concave dips in the hull, especially with ships that have flat runs such as clippers! So two solutions were put forth create additional bulkheads or use balsa as a filler. I chose to use balsa filler blocks per Evans example.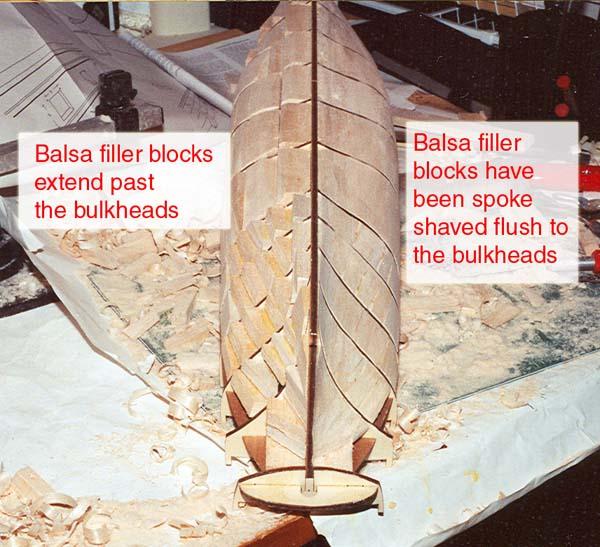
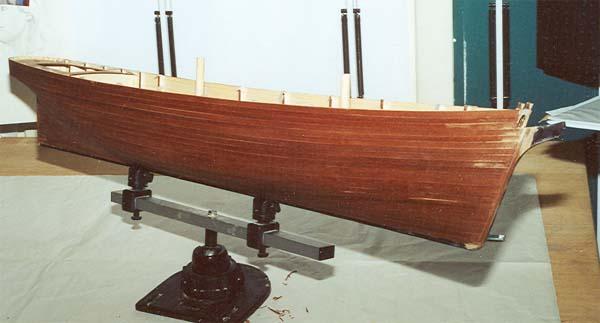
This model is double planked. The nice part about double planking is that you can practice on the first planking. Since there are numerous sources for planking, I won’t go into any detail. I used a palm nailer and lil-pins to do the first planking.
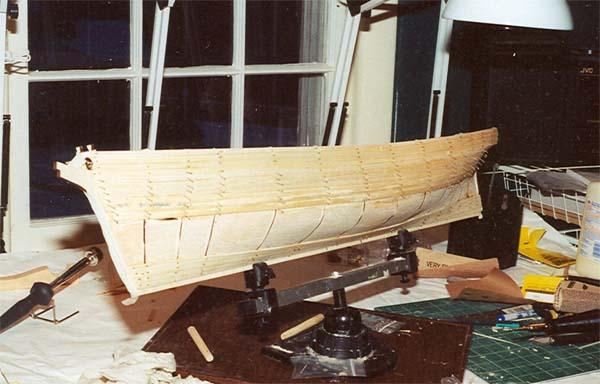
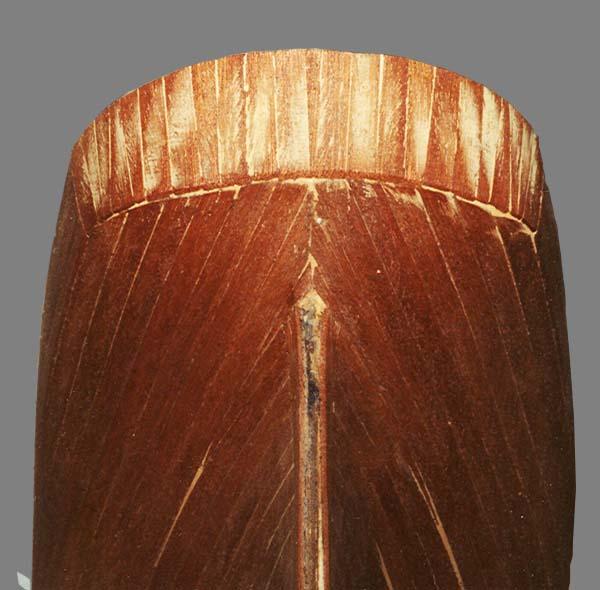
The second planking went very fast. I used contact cememt to secure the second planking instead of pins/nails. The model kit used vertical boards to create the curve of the counter as opposed to creating the curve with bending planks around the curve. Since I was going to paint the ship and the fact that the counter was iron, I wasn’t concerned with how the curve was made, just that the it was made accurately.
-
BUILDING THE KEEL AND BULKEADS
The keel and bulkheads are hardwood plywood and are laser
cut. I checked their mirror image and
against the plans. They needed very
little adjustment. The keel is provided in a single sheet, so
you don't have to gule separate sections together - which is nice. The sheet that the keel was on was straight
and required no straightening.As I was buying my models I came across a contraption called
Fair-A-Frame, which claimed to make aligning the keel and bulkheads a simple
and fool-proof procedure.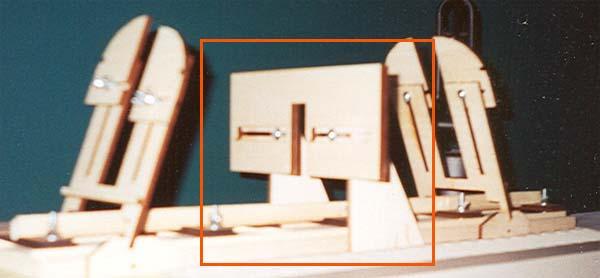
This was my first build - so I bought it. - I'd give it mixed reviews. There wasn't enough
clearance between the keel clamps and the bulkheads to use it for the Cutty. For the Cutty I had to build a
jig using wood blocks and metal beams. I did end up using part of the Fair-A-Frame which rides perpendicular along two
strips of wood which are parallel to the keel and thus when it pushes up against the bulkhead
it forces the bulkhead to be 90 degrees to the keel. – It works but I don’t trust it. I think it would probably be fine for smaller models.To build the jig I used a flat board as the base and square
sides. I used an artist T-square and marked the center. With the square in place and clamped to the board, I placed wooden triangle blocks with a 90 degree angle, up against the T-Square and srewed them in place. This way I knew that they were all parallel with each other and in a straight line. They were positioned so that they would be between the bulkheads.With the one side of blocks in place, I put the keel up against them and placed the other set of blocks tightly against the keel, clamping the keel between the blocks. I checked the alignment with an artist square “athwart ship” and with the T-Square on the backs of the blocks this time to check the fore to aft straightness. I then placed the Fair-A-Frame part which rides parallel to the keel on the keel and centered it. I then marked of the ends and used the
T-square to align two metal beams for the part to ride on. I’ll diagram it, if anyone cares. I ended up checking everything with squares anyway, so I’m not sure how much I really used it.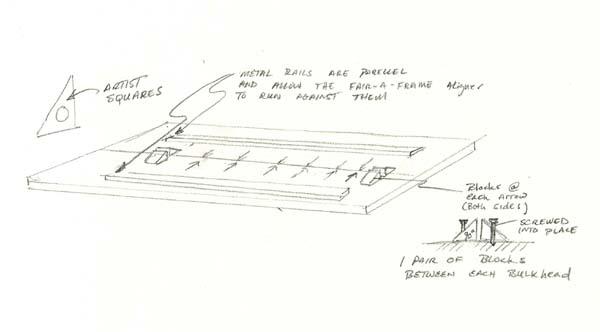
I was VERY concerned with making sure that the keel and
bulkheads were aligned correctly. I found several articles that were written by Robert L. Evans for Ships in Scale
(Upgrading the Kit Part 1, May/June 1994). Based on his suggestion, I marked parallel lines every 2mm on both the bulkheads (both sides – fore and aft) and the keel that paralleled the waterlines. This way if the lines on thebulkheads matched the keel I knew that everything was pretty close to being true. I checked the alignment by placing a square on the edges of the line markings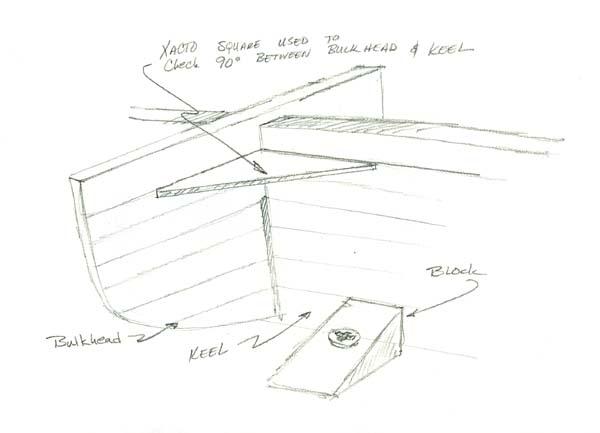
The bulkhead and keel alignment were checked in all dimensions using artist squares (triangles). I checked to make sure that each bulkhead was aligned vertically (A), athwart ship (
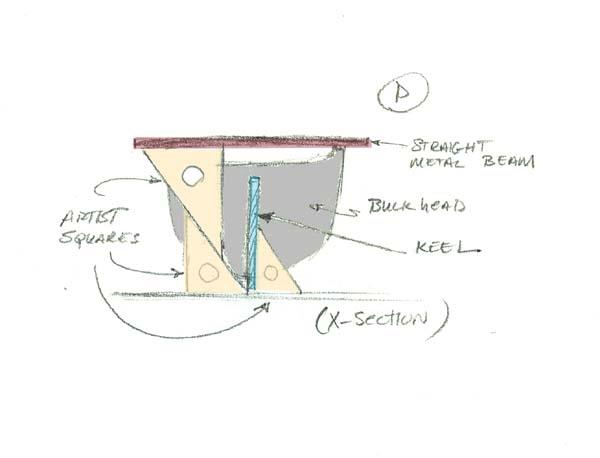
 and cross sectional (C and D)
In C, I placed a straight metal beam across the top rails on the bulkhead and placed bubble levels on the base and the metal beam. I made sure that the base was level and then checked to make sure that the bulkheads were level. In D I also used two artist squares to make sure that the metal beam was parallel with the base as a double check. After I drove myself crazy making sure the bulkhead was aligned correctly with the dry fit I removed the bulkhead applied Elmer’s wood glue to the slots on the bulkhead and keel and replaced it. I glued the seam on each side then checked the alignment all over again. I only glued one to two bulkheads a day to make sure that everything was lined up. I worked from the stern to the bow.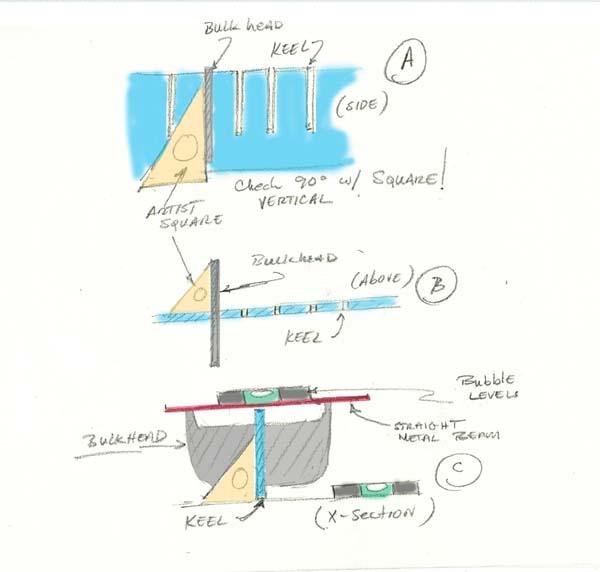
Rubber band clamps - awesome!
So here was my first mistake. Per the instructions, I glued the deck. I should have planked it first or at least planked it before planking the bulwarks. It would have made life much easier!
-
So I started building the kit per Mantua's plans. I then quickly moved over to Campbell's plans. I used Longridge as a guide, but primarily Campbell as the primary source when the two were in conflict.I ended up making much of the fittings from scratch (I'll try to include the model version along side for comparision). I also found that many fittings were not included as part of the kit, so I had to make them. Since this is my first wooden ship model, I had to learn how to make the fittings from brass and wood. Without previous experience I did the best I could. I also included details such as the interior varnished pannels on the inside of the bulwarks.
The kit makes a nice model, but I wanted more accuracy and detail.
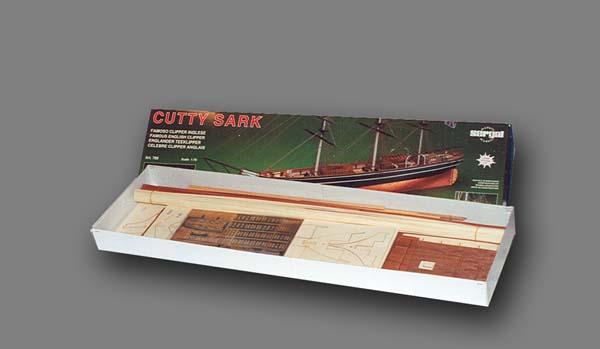
We'll start with an overview of the Kit:
THE KIT OVERVIEW
Manufacturer: Mantua
(Sergal), ItalyModel: MA 789 (Art 789)
Dimensions: Length 45” (1150mm) Height 26”
Scale: 1:78
Purchased: 2001
Price $499-$699 USD (2008)
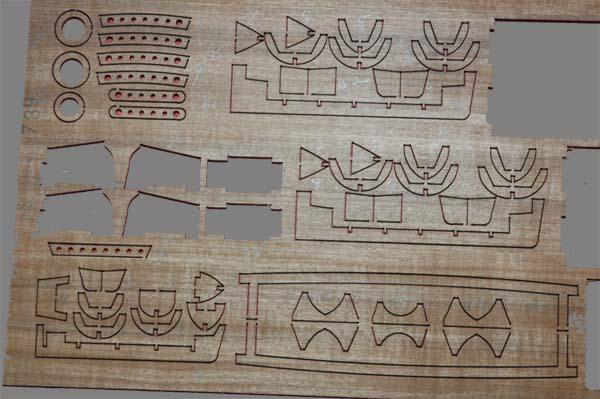
Construction: Double Plank on BulkheadPlanking: Limewood inner, Walnut outer, Maple decking
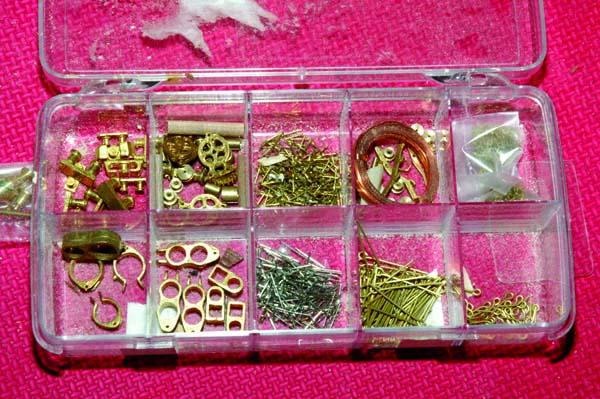
Fittings: brass, copper, bronze, copper plates, walnut dead
eyes and blocks, copper sheet with ornamentation and deck siding, bronze figurehead, black and tan cotton
rigging line, silk flag.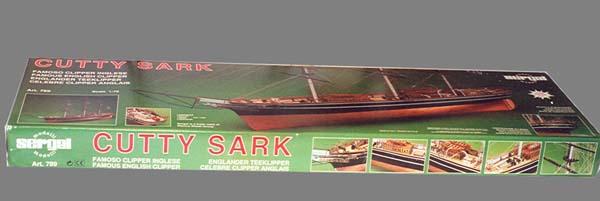
Instructions: Booklet in English, Italian, French, and
German (I think – if I’m wrong let me know).
Four pages in each language four pages of photos with two black and
white photos on each pageThe instructions are typical from what I've been told. Only very general instructions and not very useful.
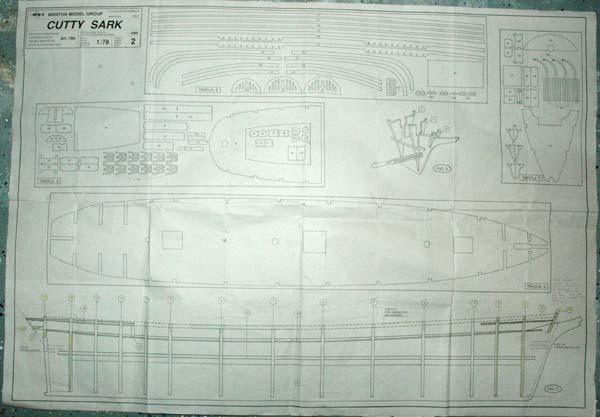
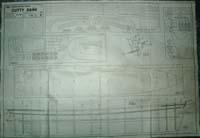
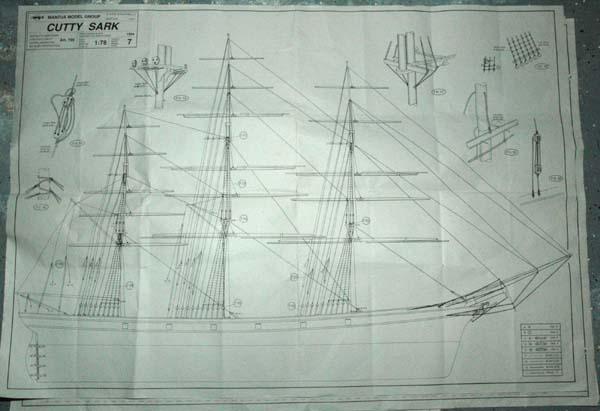
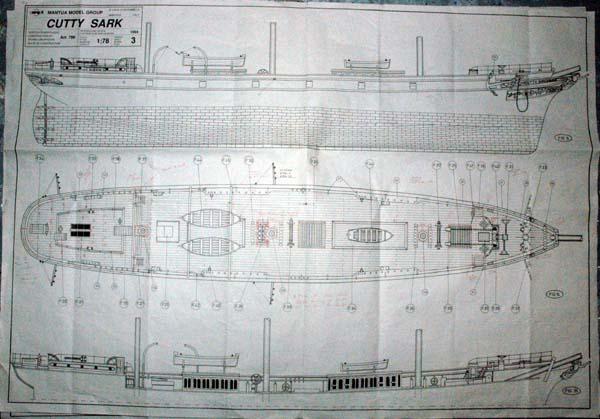
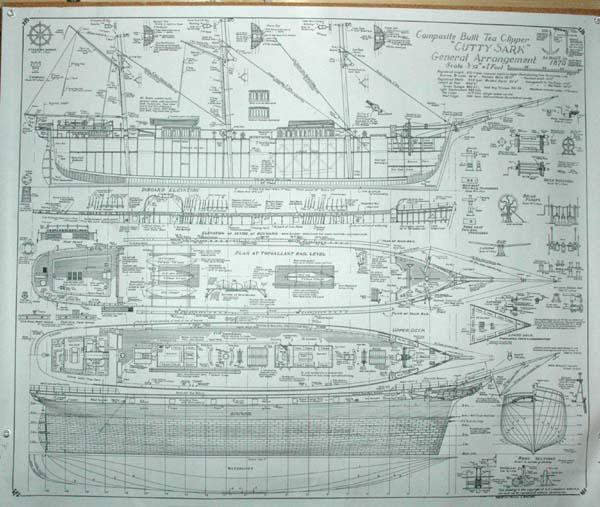
Plans: Four very large two sided sheets – Eight plans total
in four languages. 1:1 sheets for the
deck, side, standing, and running rigging.
Other sheets detail building steps.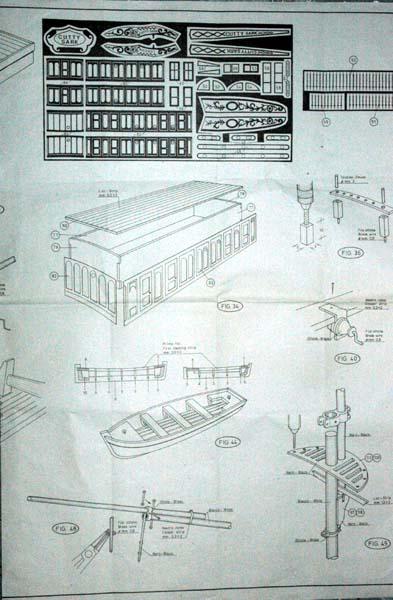
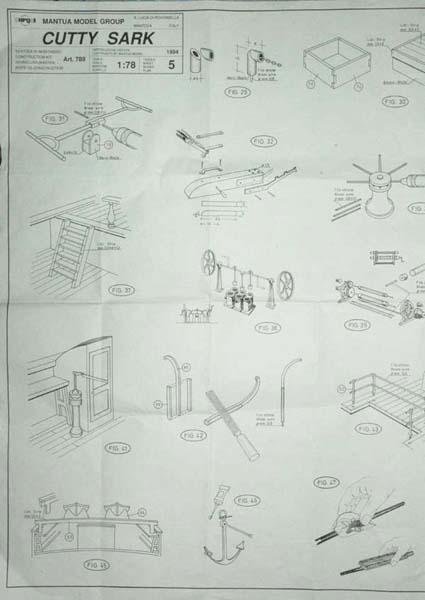
Comments:
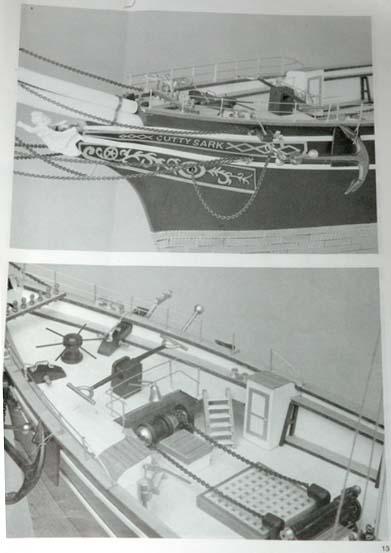
I think that overall the kit is very nice. Mine appears to be the newer version. The fittings, especially the pumps, windlass,
capstan, and figure head are very nice.
The wood was in good shape. So
far there seems to be enough. The kit is
supplied with copper plates for the hull.
I ran out. I don’t know if they
didn’t supply the amount they were supposed to or if 2700 just won’t do the
job. I didn’t count the plates – so I’m
not sure. Either way I needed an additional 150 plates. If you need extra plates you can purchase
them at Model Expo (sometimes they carry them, sometimes they don't).
The 1:1 plans were surprisingly 1:1 within a tenth of a
millimeter. I checked the plans with a
set of calipers against the cast and etched parts. I read several complaints from modelers who
had plans that were way off in dimension.
These were posts from folks with the older design kits. I don’t know if I got lucky or if their
printer is doing a more careful job.
Either way always check your plans with a set of calipers.
The newer kit has some changes from the two older versions,
such as the dimensions of the booby hatch have been corrected. The hatches of the poop deck have been
altered to the way the ship has been since the 1890’s. The scale of the inner bulwark stanchions
have been corrected – although there are too few and they are still wood
instead of metal. More Steps have been added to the ladders. One change that I don’t like is the
elimination of the copper bulwarks for the exterior.
An etched copper sheet is supplied with the kit that has the
side detailing for the deck houses and the scroll ornamentation. The scroll ornamentation is an over scale
approximation. If you want to model the
ship with the teak finish on the deck houses you can purchase a wood version of
the sheet at http://www.laserservices.net/wood.html. I’m modeling the ship as she was around 1872
and from what I can find she had white panels at the time so I’m using the supplied
sheet. For the scroll work, I sculpted it on my own (I only did the bow, wished that I had done the stern as well).
As I said overall I’ve been very happy with the kit.
Recommended References:
Cutty Sark
Lubbock, Basil: The log of the Cutty Sark, Brown, Son, and
Ferguson, Ltd, Glasglow, 1924,1974.
Hume ,Cyril and Malcom C. Armstrong: The Cutty Sark and Thermopylae Era
of Sail, Brown, Son, and Ferguson, Ltd, Glasglow, 1987.
Longridge, C. Nepean: The Cutty Sark, The ship and Model,
Argus Books, Watford, Herts, England, 1933,1975. (Comes in one or two volumes (hull and
rigging), It has full plans by HaroldA. Underhill. It is a must have!!!!)
Campbell,
G.F. Three Sheets of Plans for the Cutty in 3/32 scale. One sheet for the hull and decking details,
one sheet for standing rigging, and one for the running rigging and sail
plan. All fitting detailed out. Very detailed plans. It is another must have. These are available at the cuttysark’s
website for about 8 pounds.
http://www.cuttysark.org.uk/index.cfm?fa=contentShop.productList&directoryId=6
Modeling
(To be continued)
-
-
Looks great! How did you do the copper? is it tape or separate plates. It looks really good.
-
-
Looking great! By the way, your windows in the galleries look awesome.
-
Hi Patrick,
I'd have four times the finsihed models that I have, if I didn't have to go back and take apart what I've already built due to some issue later on. Post the photos anyway, we can all learn from your missteps. And if you are like me, I won't learn anyway and I'll have your photos to look at and know that I'm not alone!

-
She looks great. Awesome job!
-
What paints and brushes are you using? The results look great. I know that the majority of the result is the painter, but I just wondering.
Great job!
-
Hang in there with the move. I moved Virginia to Florida and back over two years. It was fun moving the models, especially those in progress. Working on the smaller pieces is a great way to stay active! Good luck!
Also, very high tech with the candles. I can't wait to see how it looks!
- GLakie and mattsayers148
-
 2
2
-
-
Your doing a great job. The pen did a nice job on the seams.
-
Thanks Helmsman! I wanted to make sure before I bought 4000 rivets!

-
Truly increadible! The detail is amazing. The interiors and lighting effects are an inspiration. Thanks for sharing!!
-
Another great example of expert workmanship by the master!

- Chuck and Mirabell61
-
2
-
-
Wow. I'm not sure what else to say. Beautiful. Can't wait to see more!
-
Really nice. I've been able to walk her decks a few times. A real pleasure and it is interesting to see the difference between her appearances before and after the last restoration from 1770's to 1850's. Pretty cool lighting!
-
Great Job! keep it up! very clean painting
-
-
Thanks for all of the pointers! Your changes make sense. It seems to me that doing all of that drilling for the rivets would be much easier off the ship.
I see that three different sizes are available for the rivets (0.20, 0.25, and 0.35) at Tichy Train which size did you use?
Thanks
Marc
-
Wonderful work. I'm going to use your technique for the treenails using the toothpicks. How did you trim them down. Did you use a fret saw?
Thanks
Marc
-
Thank you for posting the build again. I know that it is quite a bit of work, but it is truely inspiring to some of us. Really nice work and very interesting. I hope to one day build this ship. Thanks again!
CUTTY SARK by keelhauled - Mantua - kit bashed - First wooden ship build
in - Kit build logs for subjects built from 1851 - 1900
Posted
Hi Bob,
Thanks for the support. I was working on the next post when your replied and didn't catch it unitl now.
Cheers,
Marc