


keelhauled
-
Posts
778 -
Joined
-
Last visited
Content Type
Profiles
Forums
Gallery
Events
Posts posted by keelhauled
-
-
Hi Grant and Mobbsie,
Thanks for feedback! I really appreciate it.
Cheers
Marc
-
Hi guys,
Longridge's book on the cutty has a nice illustration. Unfortunately I don't have access to the book, but I've looked at that photo for hours trying to figure out how I was going to model it.
This is the boomkin and not the stun sail boom. By the way, the cutty didn't use a boom for the lowest stunsail - it was triangular. This was common with some clippers, but not warships.
The drawing in Longridge's book shows that the boomkin is square in cross section and hinged to fold forward with a stop to prevent it from going aft when deployed. The boomkin has a ring on the aft side which connects with a chain to the hull aft . From what I've read it is so that it can be folded when in port.
Hope this helps.
Marc
-
The Conny is looking great! Hated to see the issue with the rail getting pulled from the deck. I'm sure that the pin and epoxy will hold her down.
I love watching your progress.
Have a great trip!
Marc
-
Hi Popeye!
I never thought of having two building tables. I do have another model, a simple one - the sultana that I practice on before going back to the main build, but I never thought of having it so that I could easily go back and forth. May have to build another build table! My wife will be so happy!
You are an inspiration!

-
Thanks Popeye!
When I was trying to figure out whether to varnish the cabins or paint them white, I looked at historic photos and paintings. One painting, commissioned by the Ship's owner and painted the year of the launch, had the cabins finished in teak. Then I read a scientific analysis of the paints taken during the restoration
from areas on the cabin that were protected from stripping over the years . The report said the first layer had been white, then subsequent layers consisted of coasts of varnishes, and other coats of white. So were the cabins originally painted white and then the owner had them stripped back to teak and varnished as in the painting during her first year? Who knows?! I gave up and just painted the panels white.
Same thing happened trying to figure out the hatches as well as the combings. Some photos had them white, some were dark (black or reddish/orange? - I read descriptions of both).
Tons of time spend with magnifier glasses and old photos.
I think that I spend too much time trying to figure out what the ship should look like instead of just building it. Sometimes I should just make a decision and move on.
OR drink more!!!

Marc
-
Hi Grant,
I was just catching up. Sort of been out of it since my three operations. Now I find that you had some of your own! I'm glad that you've recovered well.
Despite recovering, you've been very busy. I can't wait to try your contraption for sanding blocks. looks like fun and quite a time saver.
Take care,
Marc
-
So I haven't been setting the world on fire. But I have gotten a couple of items assembled. It always amazes me how I can work for hours and not have much to show. It's the journey and not the destination! right?!
So I've assembled the ships wheel
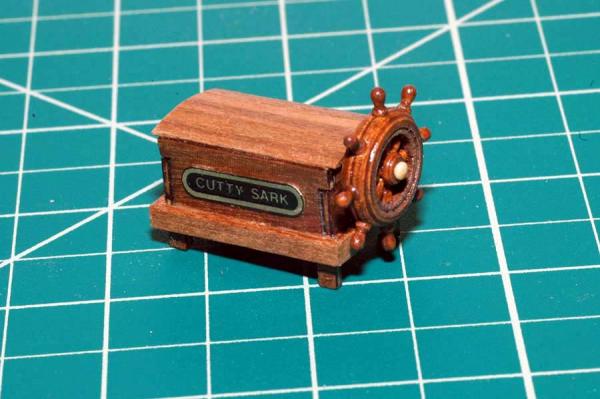
It's not pictured, but I ended up painting the brass cap at the top of the handle. The wheel was very light, so I applied several coats of dark walnut stain.
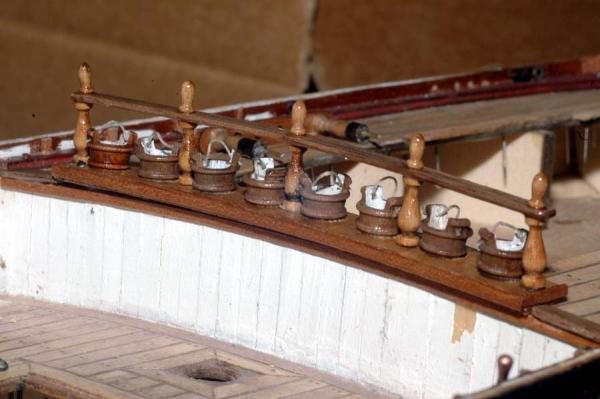
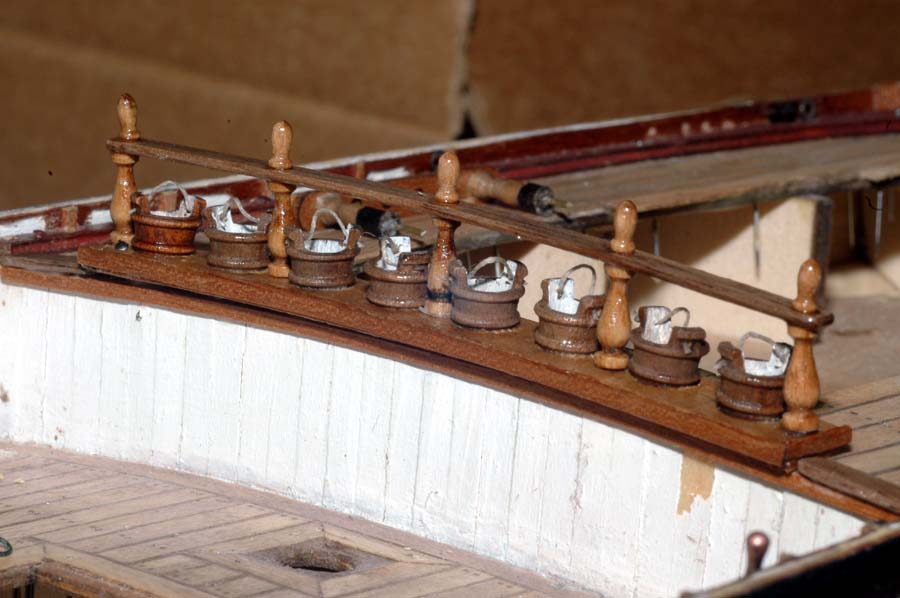
The kit didn't include the fire bucket rail, so I built one. I purchased the buckets. I made the rail as close as I could to the actual ship's rail. Different photos of the ship over the years show slightly different arrangements of the buckets as does the different plans. I went with what made the most sense based on the size of the buckets that I had. . I drilled holes through the uprights, through the rails and the tops. Then I put bronze pins through the assemblies in an attempt to give it some strength. When I was drilling the holes for the buckets I evenly spaced them. Dumb, I forgot to adjust the spacing for the spindles. I realized after it was all glued in place. It will be a mistake that I can live with.
The photo is of the assembly almost finished. The tops weren't glued in place, so there is some misalignment in the photo
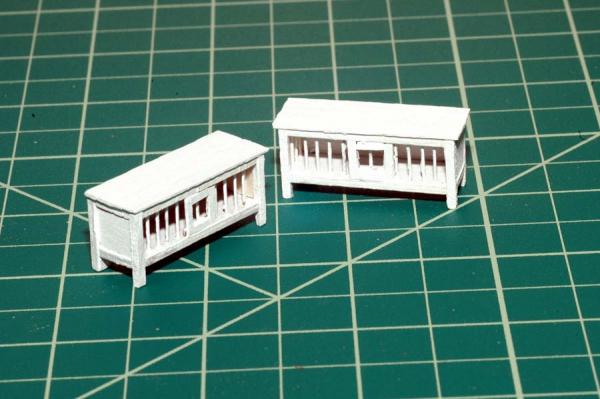
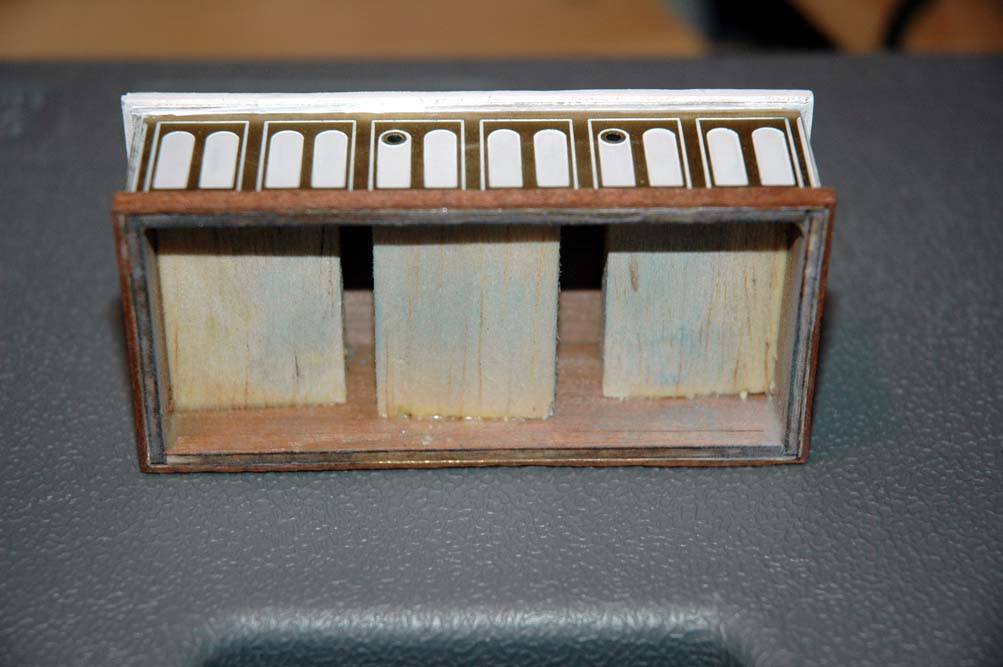
I also built the hen coops. The coops are kit bashed to match the actual ones. The kit had brass pins going around the coop with no door. The actual coops have sides and doors in the front. Although they aren't pictured here, I also put the rings on the sides which tie down the coops to the deck.
Thanks for the feedback!
-
Mobbsie, Popeye, David, and Grant,
Thanks for the wishes!! I'm feeling better, but still in pain.
Hasn't kept me from modeling. Just haven't been as active. I keep stealing away to the garage to work and the Admiral finds me and sends me back in. Now I'm back to work and just too tired in the evenings. so model work has to wait for the weekend.
-
Well, I'm finally back from medical leave. Thank God for modern science and medicine as well as my wife! She has been nursing me back to health. I had to take a month off to recover.
Now I'm back making up for lost time. I haven't had time to post - too busy building
 ,
,so here is a chance to catch up.
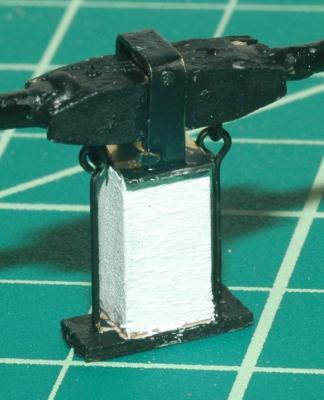
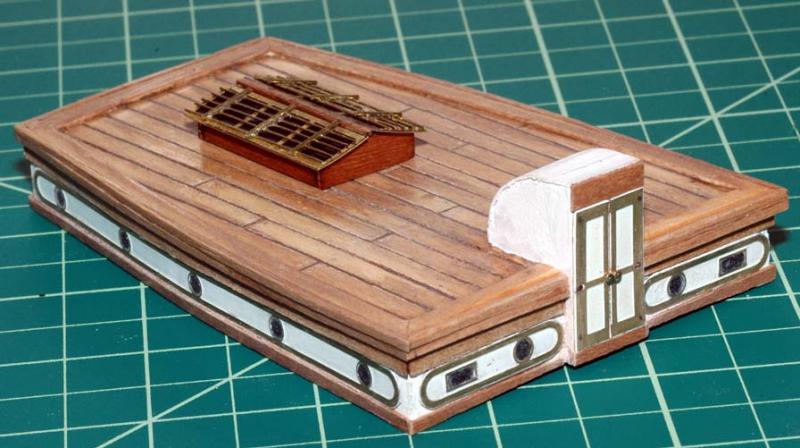
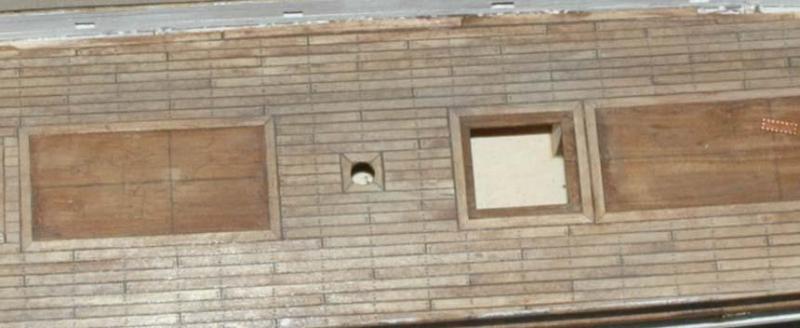
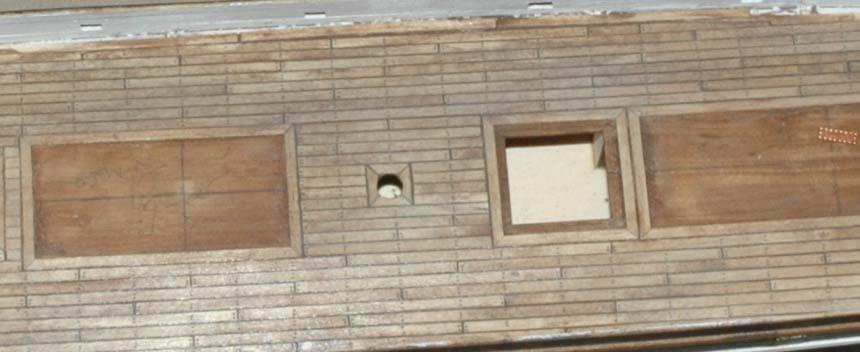
I worked on the fore castle. I created walnut molding to cap the end of the deck. I also cut through the deck and added the posts for towing the ship (sorry the proper term has slipped my mind
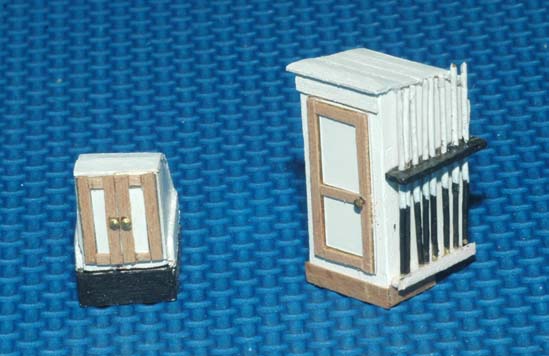
 ). I built the paint locker for under the deck on the starboard side and the pig sty for under the deck on the port side.
Here are some photos
A photo of the kit for reference.
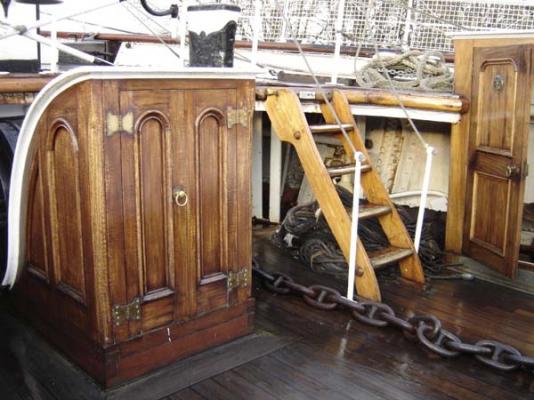
where the paint locker on the ship should be. It was missing this time, but present the first time I was there. I have a photo, but not a scanner to digitize it. Also note the towing post running through the deck viewable above the hatch (black and white post)

Paint locker and towing post on the left (forward)
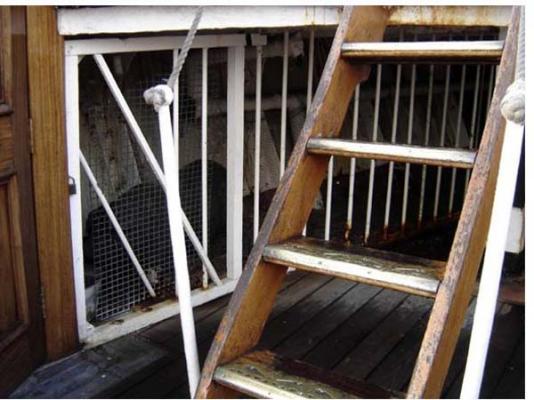
Pig sty on the ship
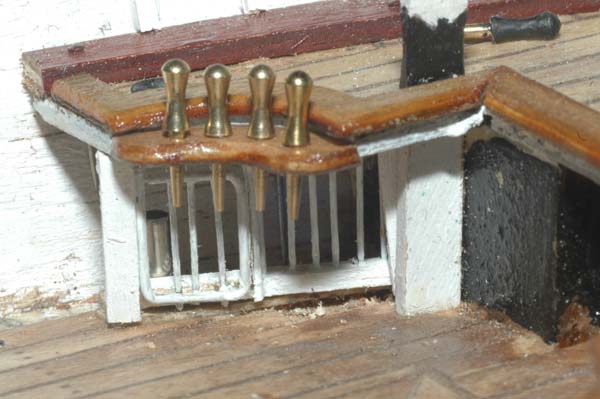
Pig sty on the model created from soldering brass wire. I also added the belaying pins per Campbell. although the pins are the same size as those provided with the kit, I think that they are too large and will most likely replace them with smaller ones.
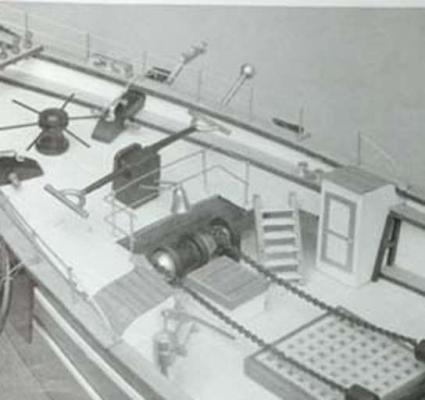
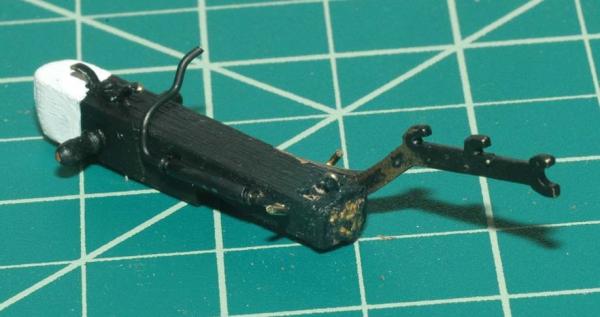
I really didn't like the windless that came with the model, so I built one from scratch. I think that it turned out really good!
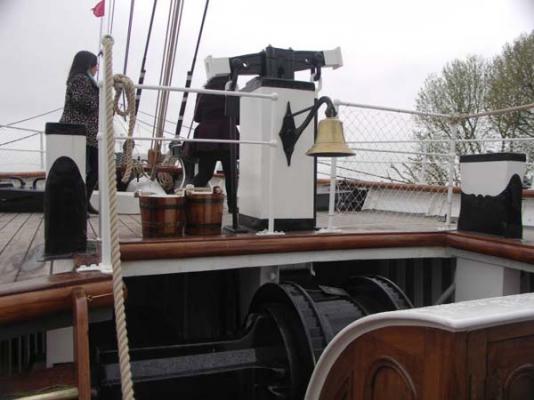
The actual ship for reference. The towing posts are on the left and right.

With the handles
I ended up taking the handles off. Since I was going to have the ship under sail, it didn't make sense that the crew would have left the handles in longer than necessary to get the anchor up. So off they came.
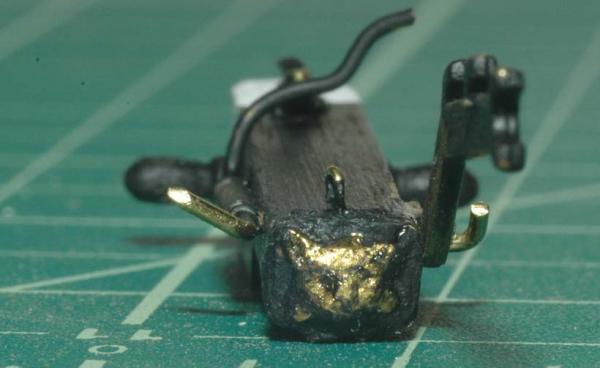
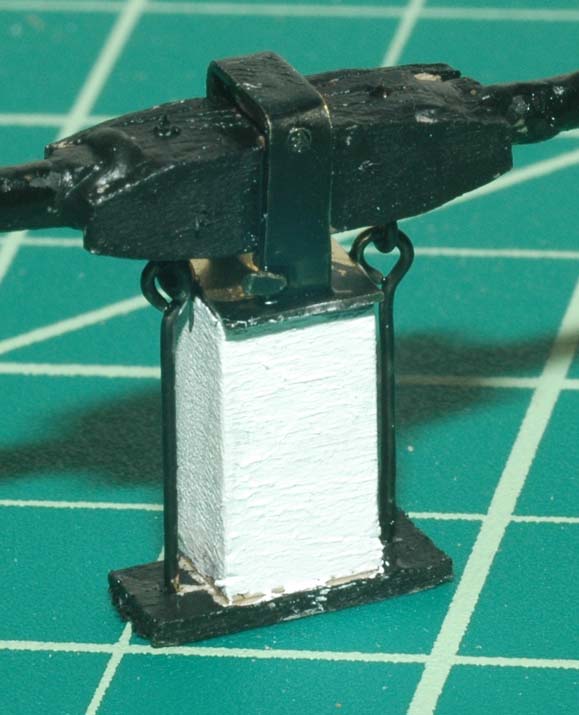
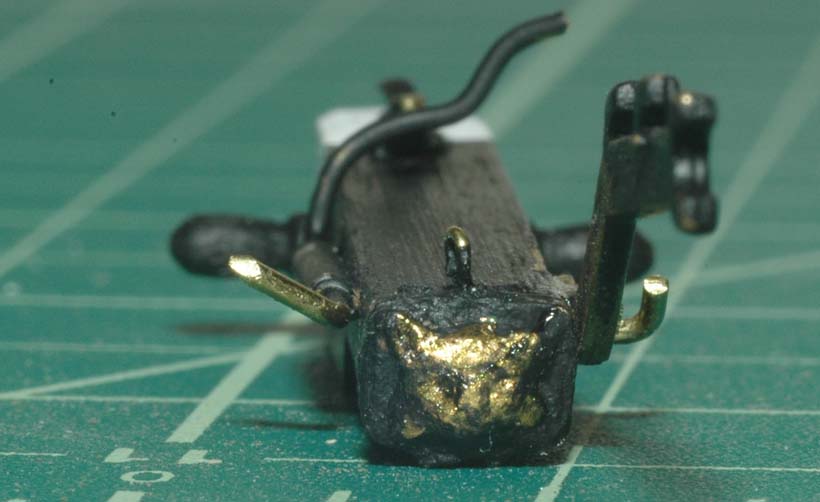
Here are the cats. I made them from scratch (except the whiskers). I made the anchor release our of brass, using the book by as a reference. The cat is actually in relief. I'm not sure how good the sculpt is but it was the best I could do.
That's it for now.
Take care and stay healthy!
-
Popeye, thanks for the wishes.
Thanks for the feedback and encouragement DCIronFist!
I should be able to start back with updates next week.
Thanks
Marc
-
"I was able to work out what was needed and make up a spreadsheet to convert all the sizes to my scale of 1:90. Adding these details at this scale presented something of a challenge, and so in some cases, there will be the "suggestion" of an item rather than the fact (for example the Snatch Blocks on the topsail yards). While I am sure that Remco would likely be able to produce a working facsimile at this scale, we mere mortals will have to settle for an approximation".
Would you be willing to share your spreadsheet? Nice work on the yards/spars!
Thanks
Marc
-
Thanks Bob,
Reading everyone's builds is what keeps me going!!
-
She's looking awesome! This was the model that changed my life and solidified this hobby for me when I was in college. You've really done a splended job. I also like your temp dust case. I'm going to build my next one the same way. It must be pretty light, but stable being out of PVC.
-
Thanks Popeye!
Unfortantely, I had to undergo an emergency surgery last week, so it might be a few weeks before I get back to modeling. I appreciate the encouragement it really means a great deal to me!
take care,
Marc
-
Thanks, As long as someone is enjoying looking at the build I'll continue to post. I really enjoy reading everyones' builds.
-
I hope that i haven't offended anyone by my comments about the kit. I think that the kit is well done and a model built directly from the kit and plans will be a very fine model. I just wanted to make some stuff from scratch and improve (at least in my mind) some aspects of the kit. I'm sorry if in doing so, I've upset you in anyway.
Marc
-
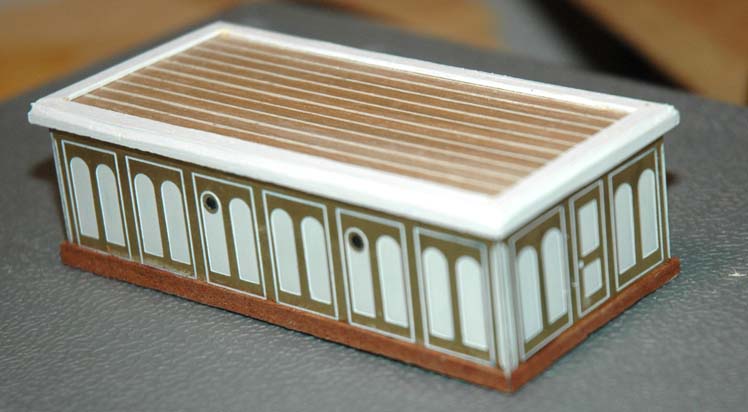
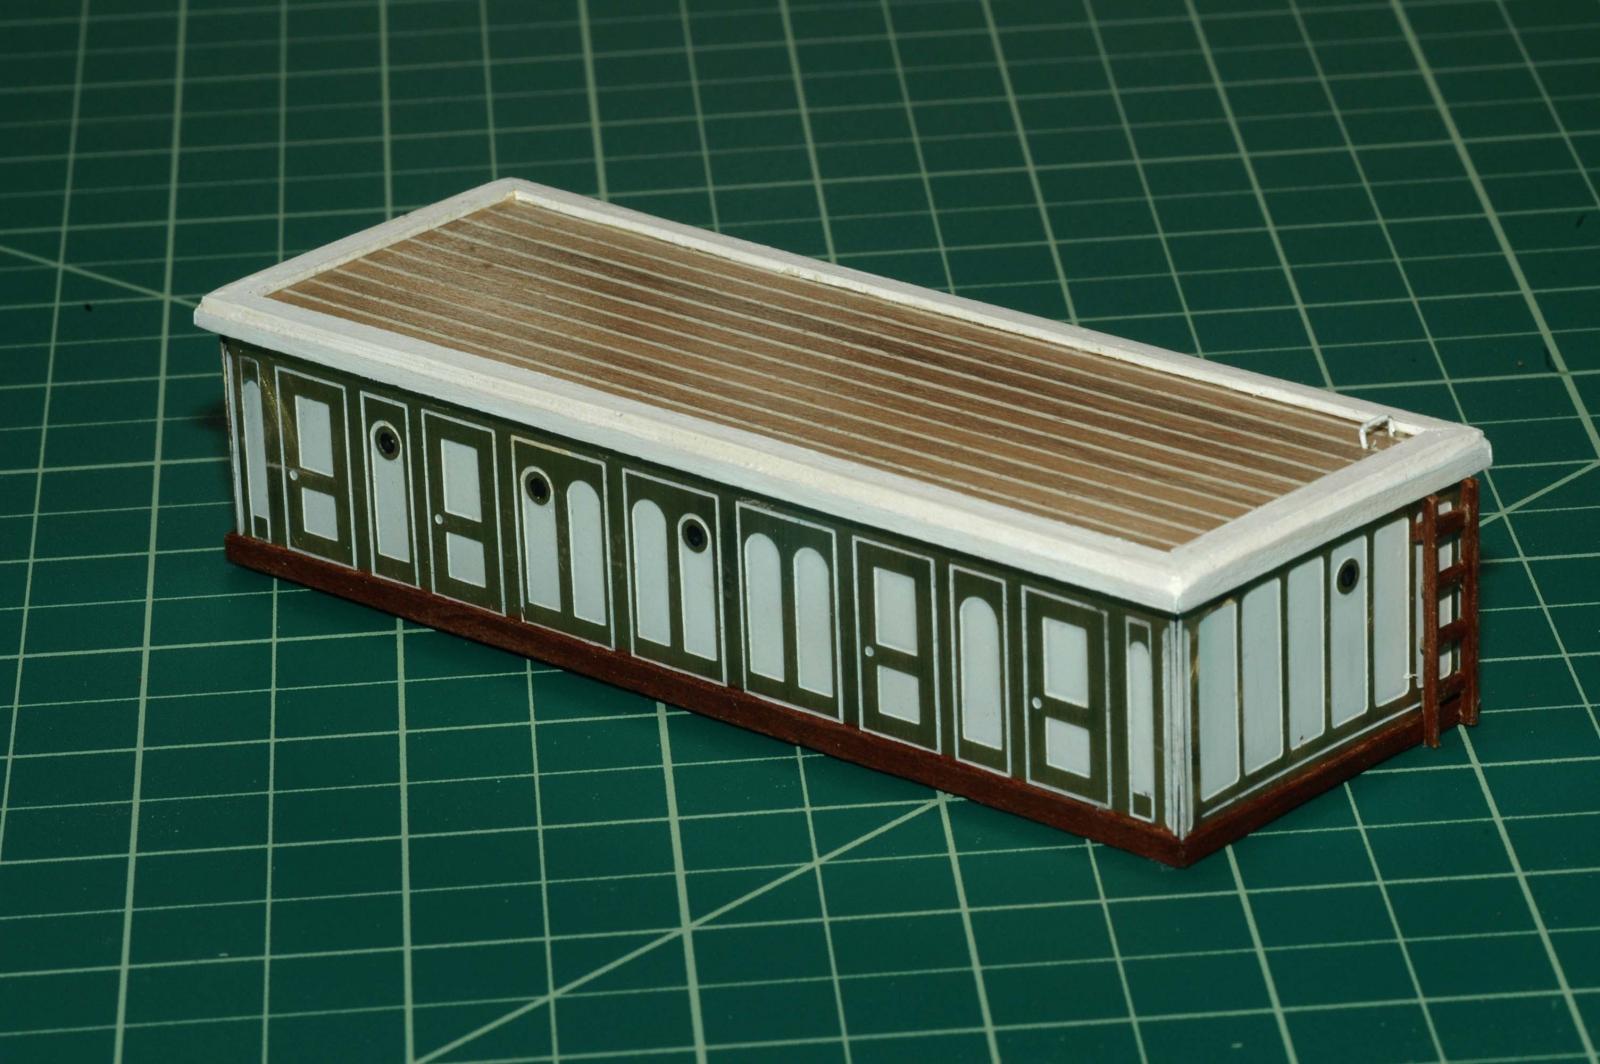
Here are some of the work that i've done on the deck houses. The foward hatch on the model was only a wooden hatch cover. Campbell had it as having doors and removable wood hatches/boards. I built the deckhouses per the kit instructions and then reenforced with wood blocks. I also made white caulking for the roofs using lil pins as spacers between the planks and then filled with white wood putty, then sanded. The kit has the bright teak as brass. I think this looks fine. I wanted to see if it looked any better with walnut. After the results, I'm not sure it is an improvement.

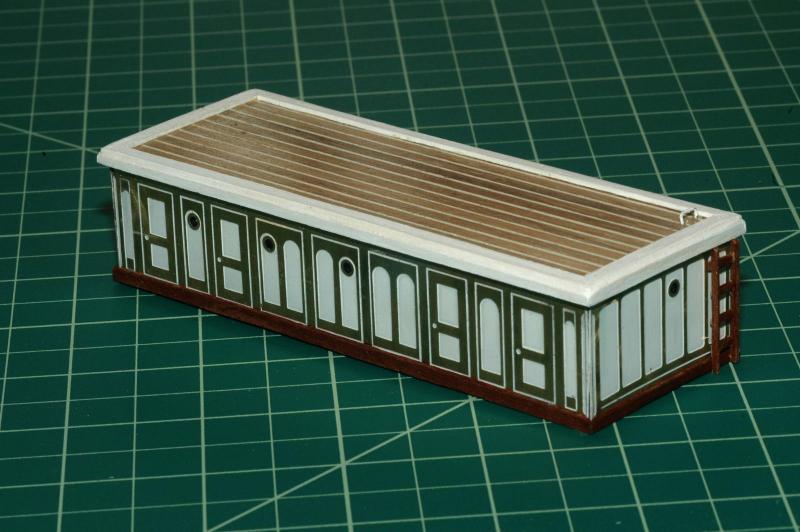
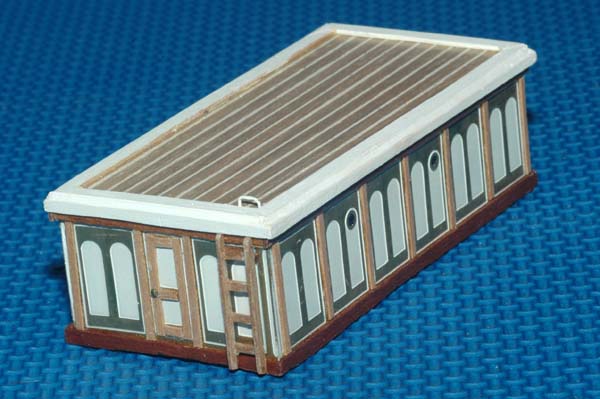
reinforecement bocks inside the deckhouses

I soldered the beams and bars in brass for the saloon skylight. I also made a smoke stack using brass tubing (it's not shown in this picture). Also to make the entrance back to its 1890s version, I made the new one from scratch and split one of the kit side doors to make the front door.
foward hatch and WC. I added the walnut bright work and the captan bar holder
- tasmanian and Mirabell61
-
 2
2
-
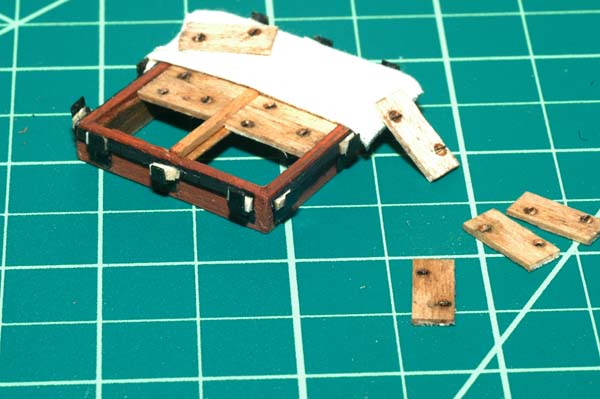
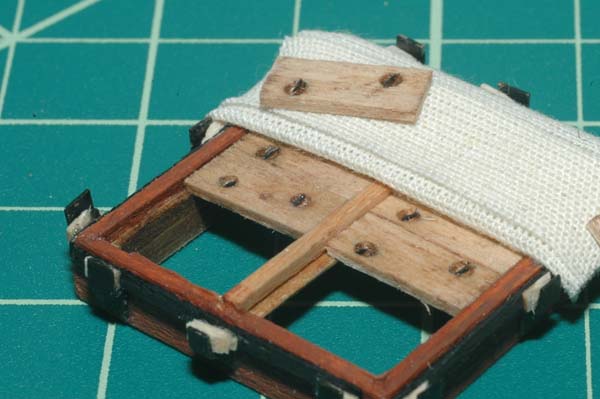
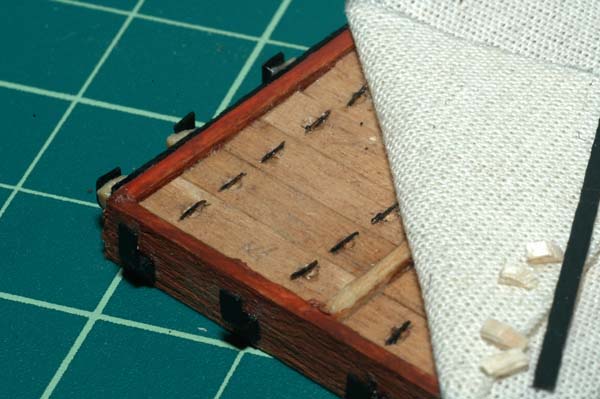
I scratch built the hatches, combings, wedges and brackets. The kit had oversized grating covers. I made the frame for the hatches complete with a removable beam (strongback) and hatch coaming. A photo I took inside the Cutty years ago clearly showed the these details as well as the wooden hatches. Likewise I had an old photo showing the wooden hatches with handholds. I created the hatch cleats and flat bars with brass. I made the handholds in the hatches by using a large drill to make the recessed part of the hold and then used a strand of speaker wire painted black as the bar. I placed the tarp in place, put the bar along the cleats and secured the wedges. I used adhesive used for locking knots in pearl necklaces to glue the tarp in place. The adhesive doesn't discolor the fabric. I think the results look good.
My attempt at the forward hatch
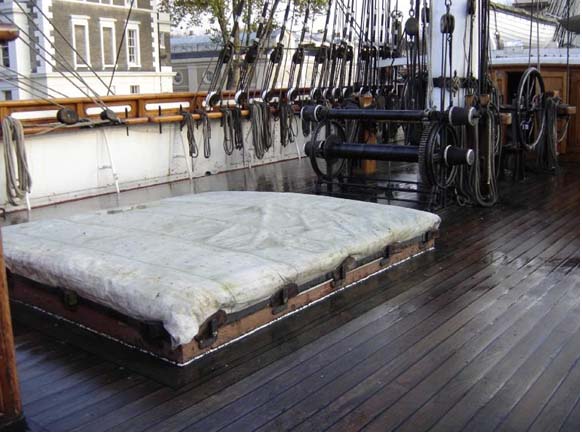
the actual Ship's aft hatch
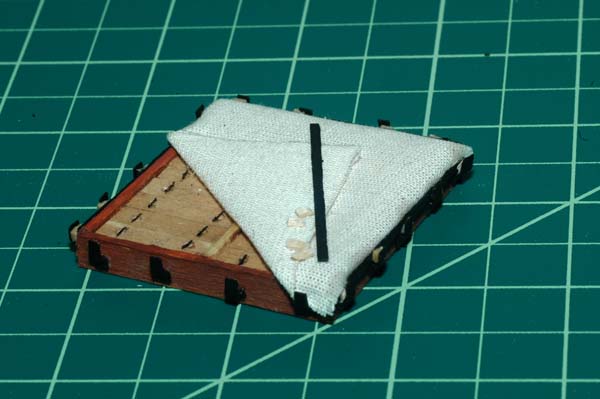
My attempt at the aft hatch
-
Great work! She's beautiful! Nice job on the rigging.
Marc
-
HI!
I started work on the bulwarks. The kit has very large wooden stanchions, which I didn't think reflected very accurately what was present on the actual ship. I had been following another modeler's build and he had replaced the kit stanchions with scratch made versions which I think looked much better. I asked him how he did it and he was kind enough not only to explain, but send a couple of extras for me to replicate. There are essentially three different types of stanchions with two main groups: those with rings and those without. I followed Longridge's book to the types and placement.
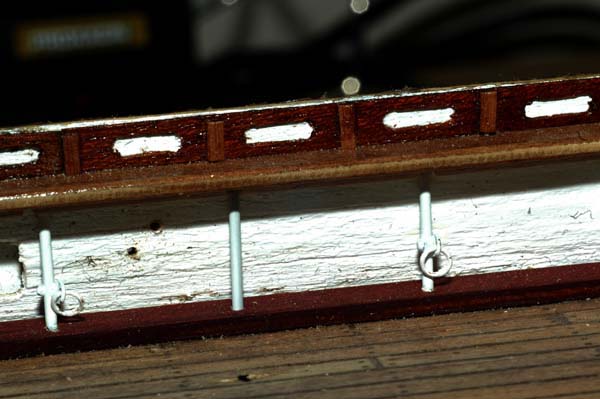
So the stanchions are mad with brass rods. Pintels are bent and soldered to the rods to make the brackets to hold the rings. To secure the rods into place, I drilled holes into the water ways and made a very small rail which fit under the main rail and had cutouts for the tops of the stanchions.
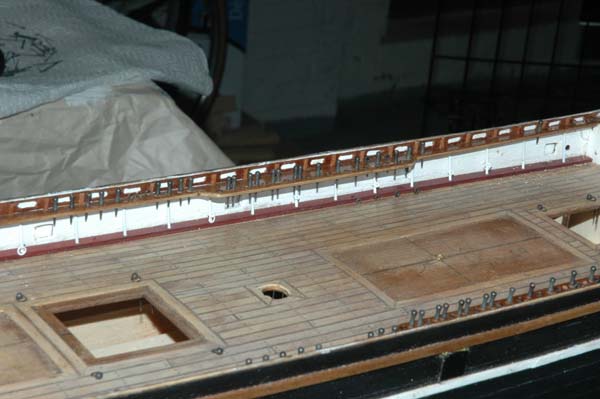
The other change I made from the kit was to include the panels between the main rail and the topgallent rail. I made the oval cutouts by making a jig to cut two holes for the ends of the cutouts and then cutting between the holes with an xacto knife. I thought that the effect looks pretty good. especially when viewed at a normal distance from the model. You can find a jpeg with the graphical explanation at http://modelshipworld.com/index.php?/topic/1000-cutty-sark-by-keelhauled-mantua-kit-bashed-first-wooden-ship-build/page-4#entry122099
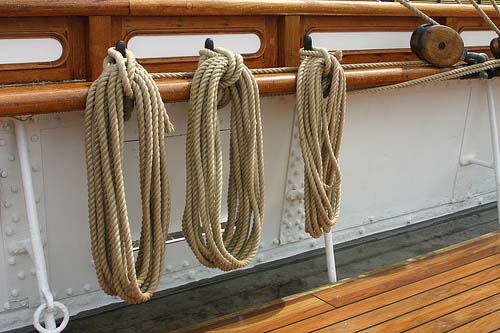
The actual ship bulwarks and stanchions
The Kit Stanchions

The model with scratch built stanchions and panels
another view. I think that the kit size of the belaying pins is too big. I'll try another size.
-
-
Thanks Hamilton! I thought that they looked better than the etched brass that came with the kit. I still need to do the name boards. Not quite sure how to go about it. Any suggestions would be helpful!
-
Wow.
Awesome work! looks like you are building most things from scratch. really nice!
Just a note, the spreaders on the trees are supposed to move the stays out and it does angle them. Just like you have it and it's the same on the real ship. modern small sail boats use the same principle.
-
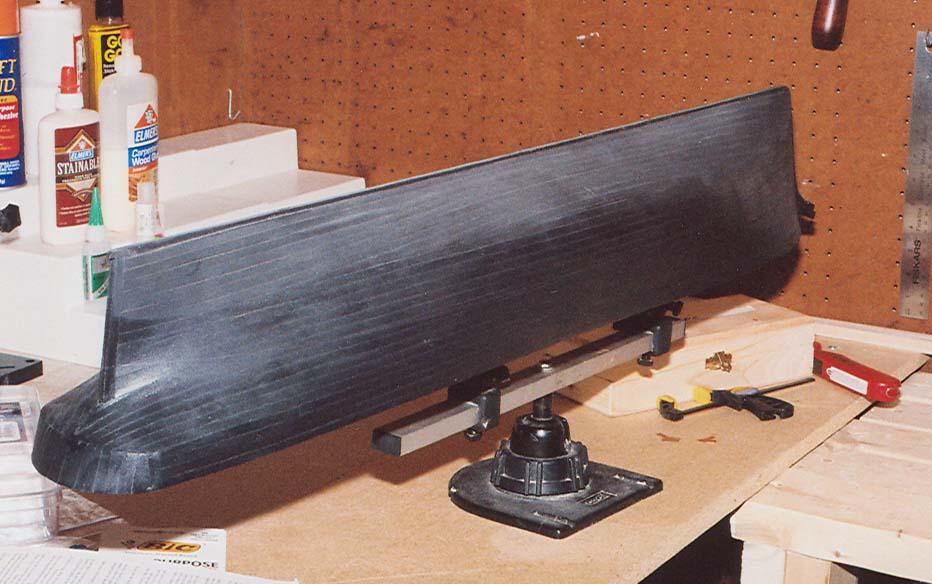
My Coppering Nightmare!
After planking, I lightly sanded and painted the hull. Big mistake number 2 - don't paint and sand where you are going to copper I did and had to go back and rough it back up. I then coppered the bottom with the supplied plates. So I looked at books and articles as well as asked another forum for input as to what glue I should use. Several sources recommended rubber contact cement. So I coppered thehull. It looked beautiful.

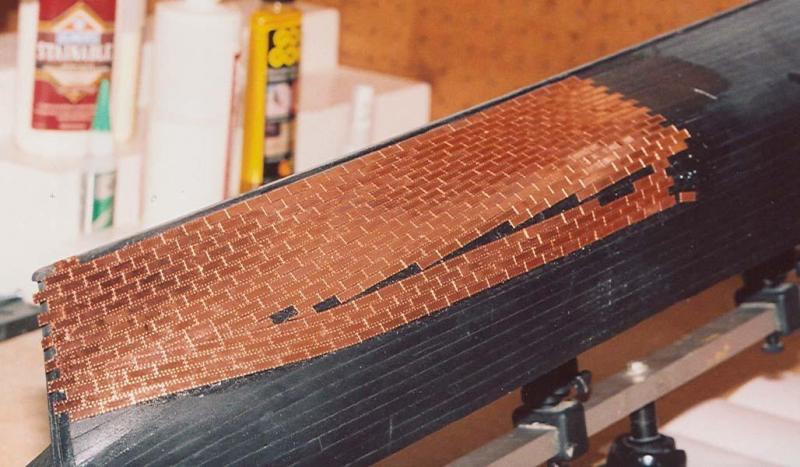
I walked into the shop one hot Florida day and the plates were on the bench and floor instead of the ship
 . They just flowed down the sides like lava .
I asked another forum (drydockyard) and the consensus was to use superglue/cyanoacrylate - the gap filler version. So after days of cleaning the two thousand plates, I sorted them into containers according to shape and then spent twice the original time to re-copper the hull. Everything once again seemed secure. Then slowly the plates started popping off the hull during the winter months in my Virginia home
 . I once again asked for help. They consensus was to roughen up both theback of the copper plates and hull on the plates that came off. Plates continued to pop off even those
roughed up. I also tried 3 different brands without any difference.
I landed a job where one of my co-workers was a fabrication engineer. I told him my problem. He told me to scrape the plates and hull and then clean with acetone to remove all cyanoacrylate. Then dig a criss-cross pattern on both the hull and the plates and then use two part epoxy. I tried it and I have never had one of these plates come off (it's now been about 8 years)
. Slowly over two years while working on the ship I would tap all of the plates knocking the cyano plates off and reattaching with the epoxy.After coppering (the initial coppering) I then painted the bulwarks and planked the
deck. I used the same planking scheme as the ship according to Longridge. I found a reference for using dark wood putty for caulking, so I used the tips of little pins and spaced the planks. I tried my hand at jogging. It turned out ok I thought.
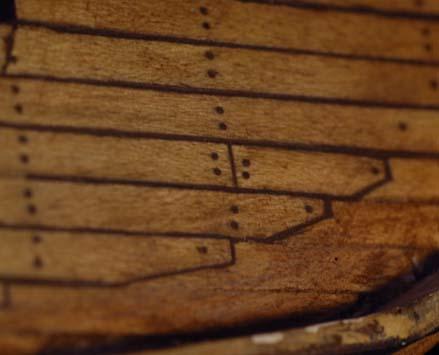
I sanded the decks and then stained them using layers of minwax stain diluted and different colors including teak and a weathered grey. I thought that the variation resembled the variation in color that you see in the teak when some of it is wet and some dry. I was walking on the deck of a ship
after the rain and the teak was drying. I thought that the result here looked similar. I then sealed the deck with two coats of clear accrylic. I also put two
coats on the hull and bulwarks. I rubbed it all down very lightly with very fine steel wool to reduce the sheen a little.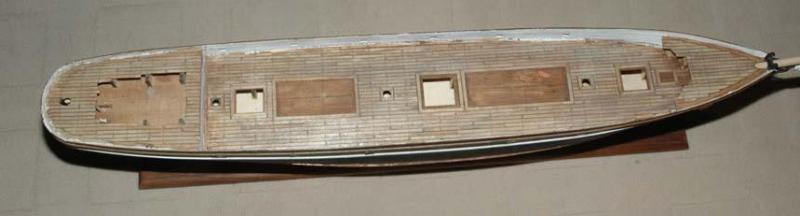
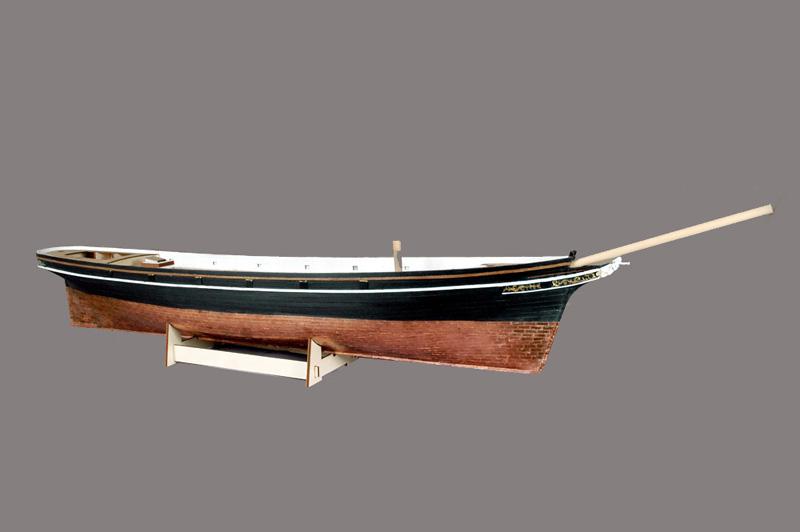
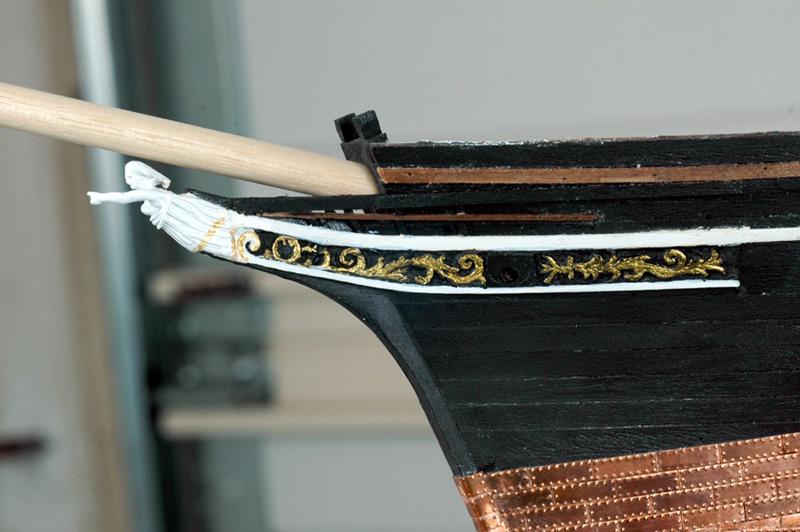
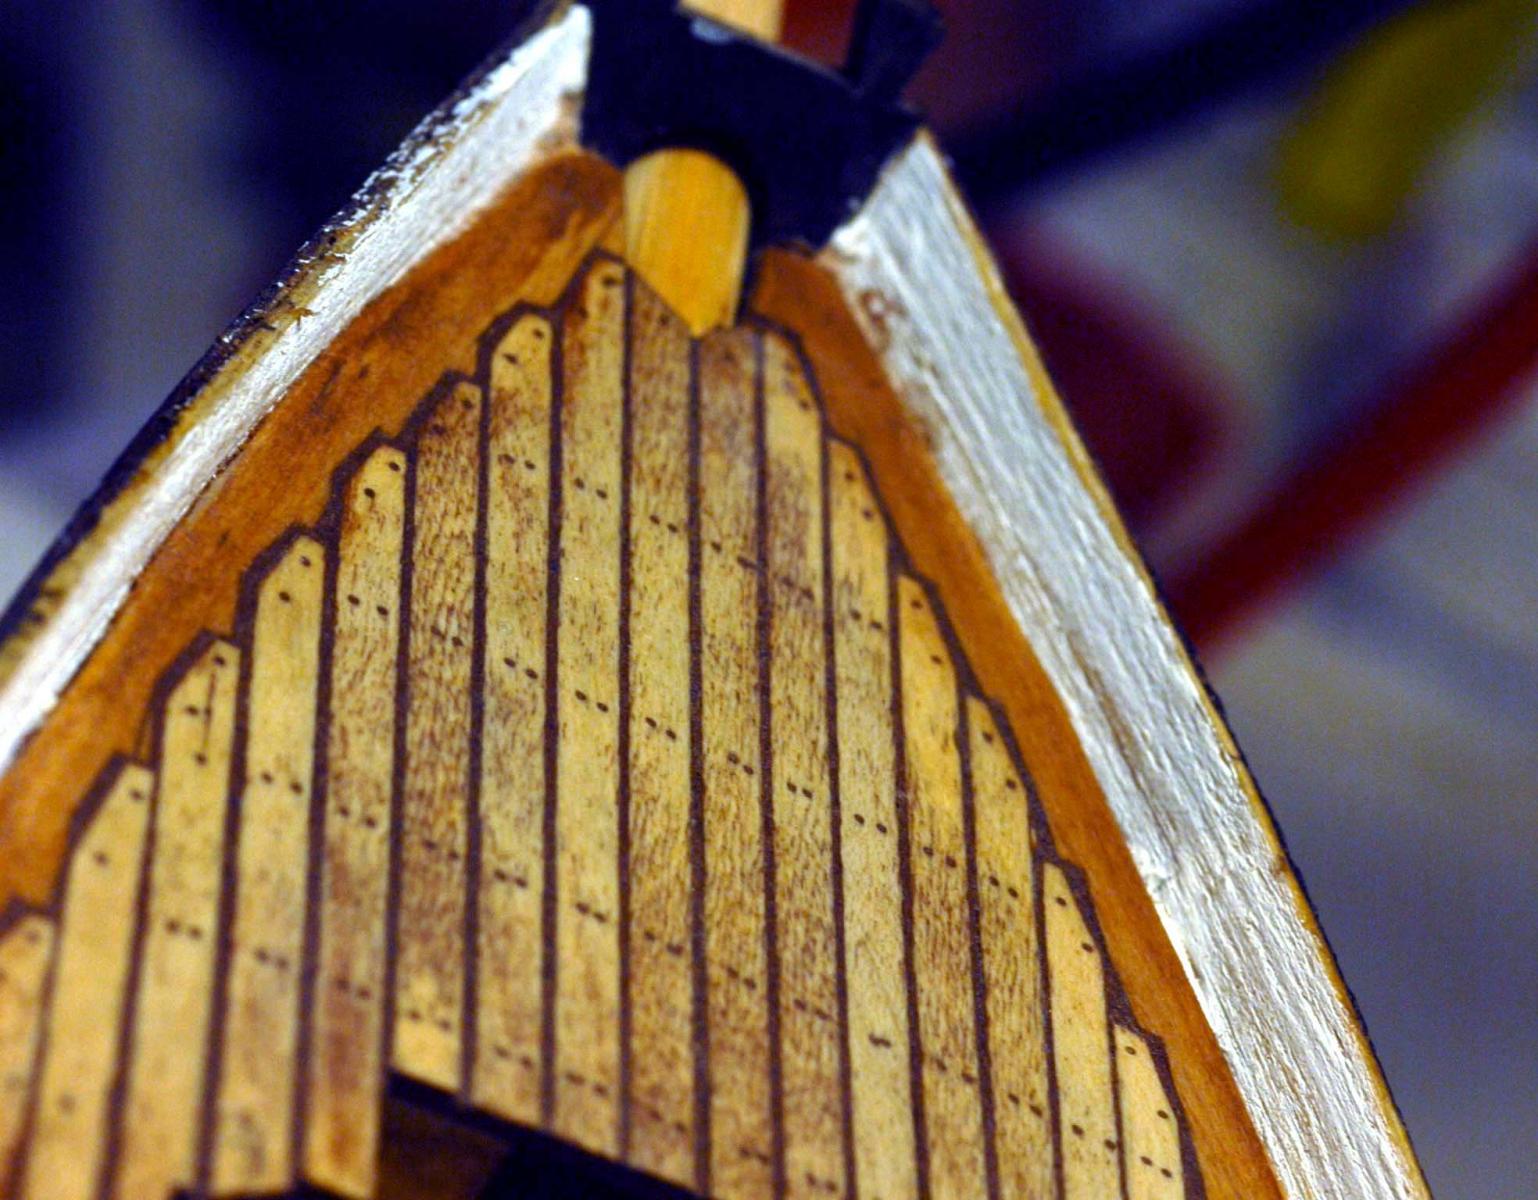
I build the knees and rail on the bow. This detail isn't in the model plans. I also mounted the figurehead and carved the scrollwork using sharpened jeweler's screwdrivers. This is the first time I've ever tried to carve. I think that it
turned out well.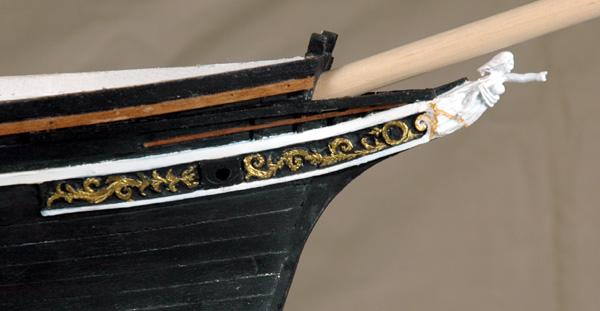
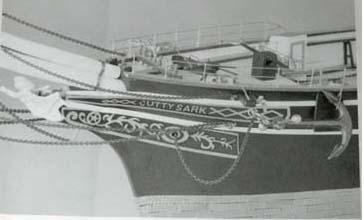
the Kit bow for reference


Cutty Sark by Sailcat - FINISHED - Revell - 1/96 - PLASTIC - Rescue kit bash morphed to Dame Tisane
in - Kit build logs for subjects built from 1851 - 1900
Posted
Your ship is looking awesome. I feel for your bowsprit mishap. When I was building the Revell Constitution, I was almost done and my roommate cut the corner of our dinning room table a little too close and broke the bowsprit in the same fashion. If it is any consolation, the repaired plastic bowsprit has stayed true for 20 years now. So you should be good. I think that it's thanks to the rigging.
keep up the great work and I'm glad that your healing! take plenty of breaks and protect that back!
Marc