


keelhauled
-
Posts
778 -
Joined
-
Last visited
Content Type
Profiles
Forums
Gallery
Events
Posts posted by keelhauled
-
-
I finished putting blocks on the Main mast. I'll post photos this weekend!
-
Hi John,
Welcome.
to answer your questions:
I would recommend cutting your bulkheads out using a coping saw. Use a block but with a "v" for the saw to move around under the plywood it to help support it as you cut. Take your time. If you break it you can always transfer the lines from the plans to a new sheet of plywood and try it again.
The copper sheets. The blue you see is called the resist. Here was how it was made. A photo-sensitive coating was applied to the surface of the copper. when light hits that resist it hardens into a polymer and turns blue. So a photographic negative is placed over the unexposed resist coating. A bright light is directed at the negative, passes through the clear parts and into the resist. The resist develops after a few minutes and becomes fixed (the polymer harden). The copper sheet is then washed with water, which removes the unexposed resist and the hardened exposed resist remains - now blue. Acid is then placed onto the surface, the resist protects the copper, while the exposed areas are eaten away by the acid. Once the desired depth is etched the copper plate is washed with water. The result is what you have in your kit.
Here is what you get to do: remove the parts using metal shears. straighten out the parts (wooden roller pin works well). file the edges. Paint the entire part black. Put very fine sand paper onto a wooden block and sand the top surface (which is blue underneath). The paint will be removed from the surface relief and will be shiny copper on a black background.
Good luck. If you need any help just ask me, Nenad, and Bob
Marc
-
-
Very beautiful work! The sails look wonderful! I really like the look of some sails set, with others furled. Looks more like an actual ship than a model.
-
Beautiful work! I look forward to the build!
-
I learn so much from you! What a great solution!
-
Deck is looking good!!
-
Thanks for the advice Nenad. I'll make sure that I'm at full concentration. Some coffee, but not too much coffee! Don't want nervous hands!
Good point Lou! Although Maybe the model can live without so much drama. Especially in the area of the bowsprit and figurehead area

I still have quite a ways to go before rigging! Still plenty of blocks to tie to yards! Still have to make the sails and bend them to the arms. Soo much work. Good thing that I find this enjoyable!
-
Thanks everyone.
Grant, if I break a mast I'm coming to you for help!!
I was dry fitting the masts (to admire my work) and had the ship on a turn table. Forgot about the lamp extended on an arm that I was using to light the deck. Spun the ship around and struck the lamp with the fore mast. Luckily no damage, but my heart missed a beat or two. I immediately un-stepped the mast and put them away.
I think that I'll have to change my lighting to make sure that there are no obstructions when I finally permanently step the mast. It will be some time though. I still have a ton of work with the sails and then the upper shrouds and ratlines.
Lou, I do have Longridge's book. It's probably a good time to re-read that section. Thanks for the reminder!
Planning on getting back to work this weekend!
-
Bob, the photo of your deck and pinrails looks great! Really nice work. I also like your waterways. I wished that I had done mine that way.
I used those eyelets for the same details! I think that they are great. They also make great portholes. I found them in the scrapbooking supplies, lots of different sizes and in black.
-
-
Thanks for the kind words guys!
Nenad, I do worry about the strength of the Masts. The part that I worry about the most is the holes that I had to drill through them for the yard lifts. I keep reminding myself that they are stronger than the plastic masts that I used on the Revell constitution and that came out fine.
-
Sorry for the delay. I was tied up trying to find a new job. Also it has been too cold to build!
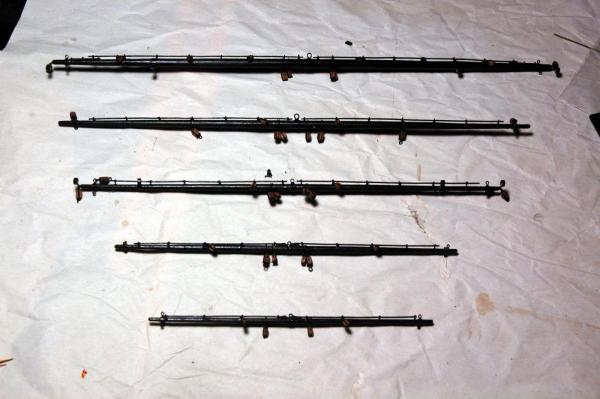
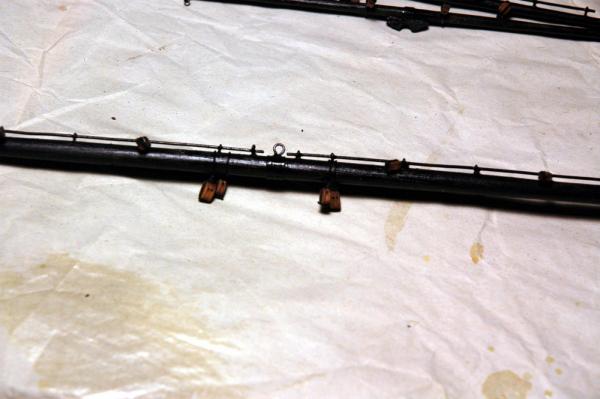
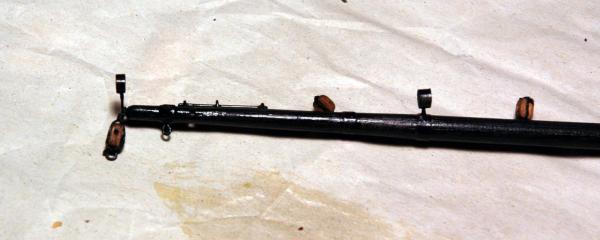
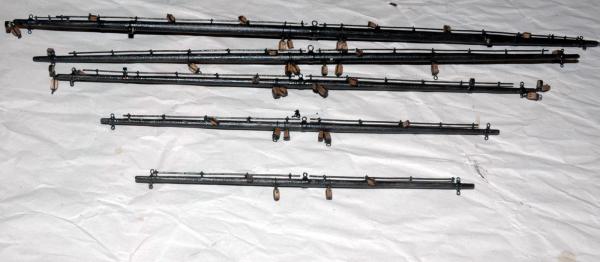
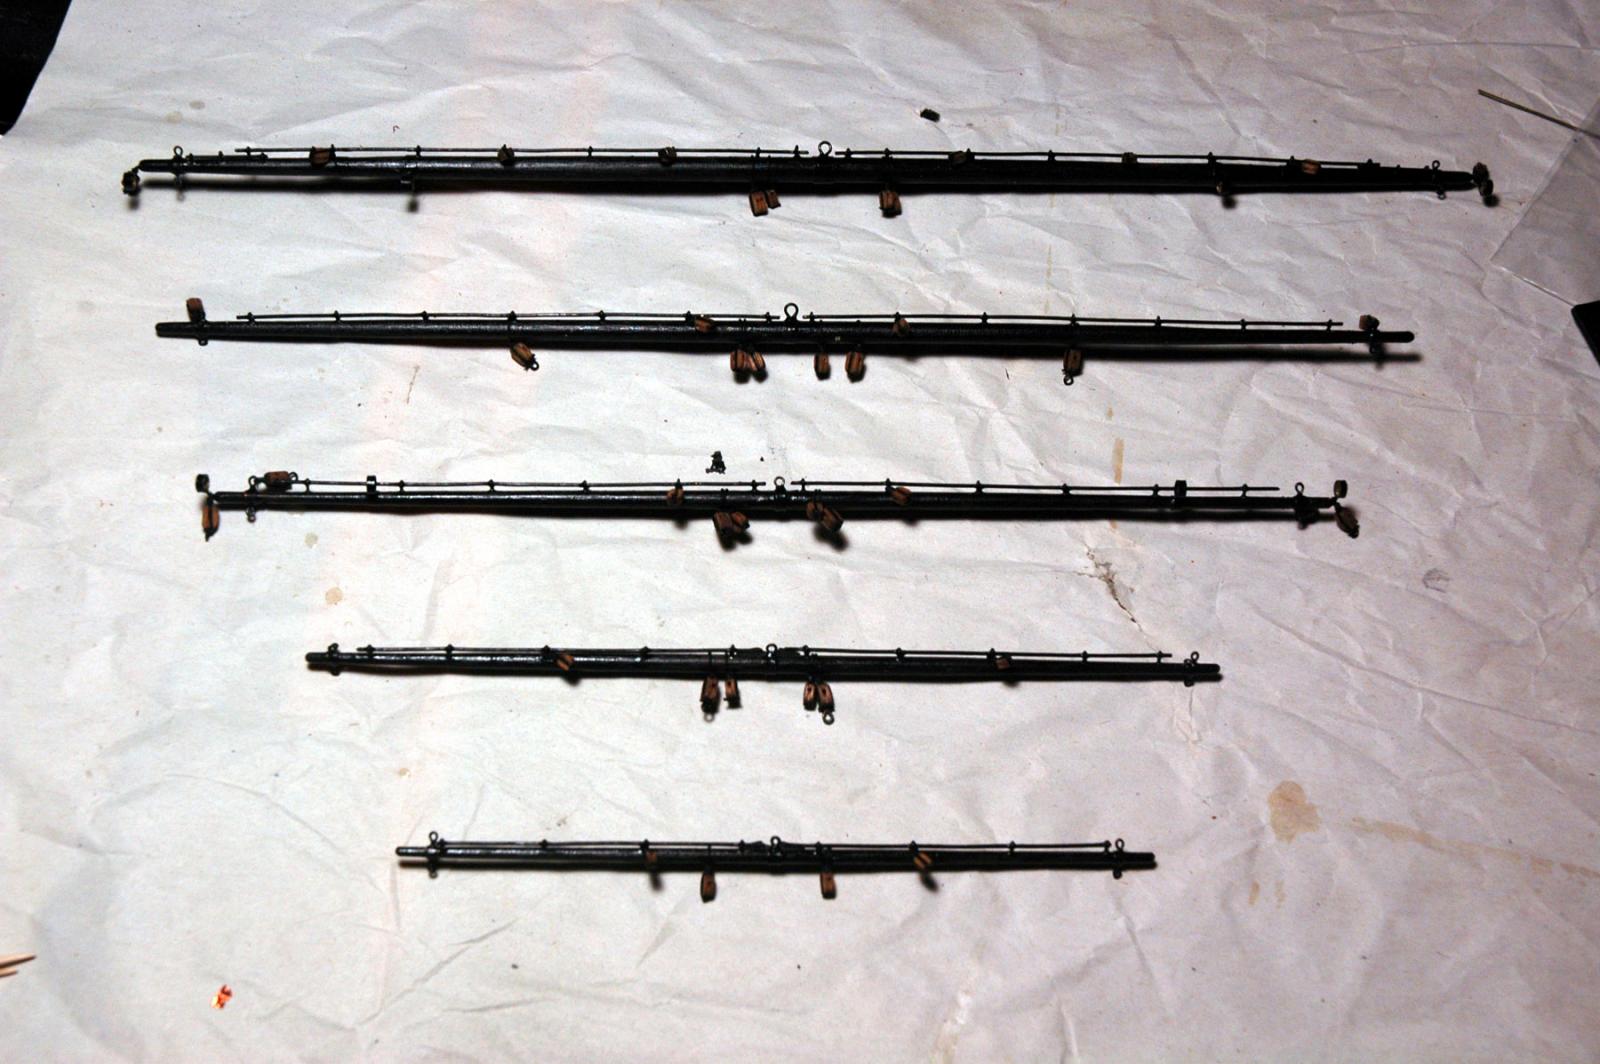
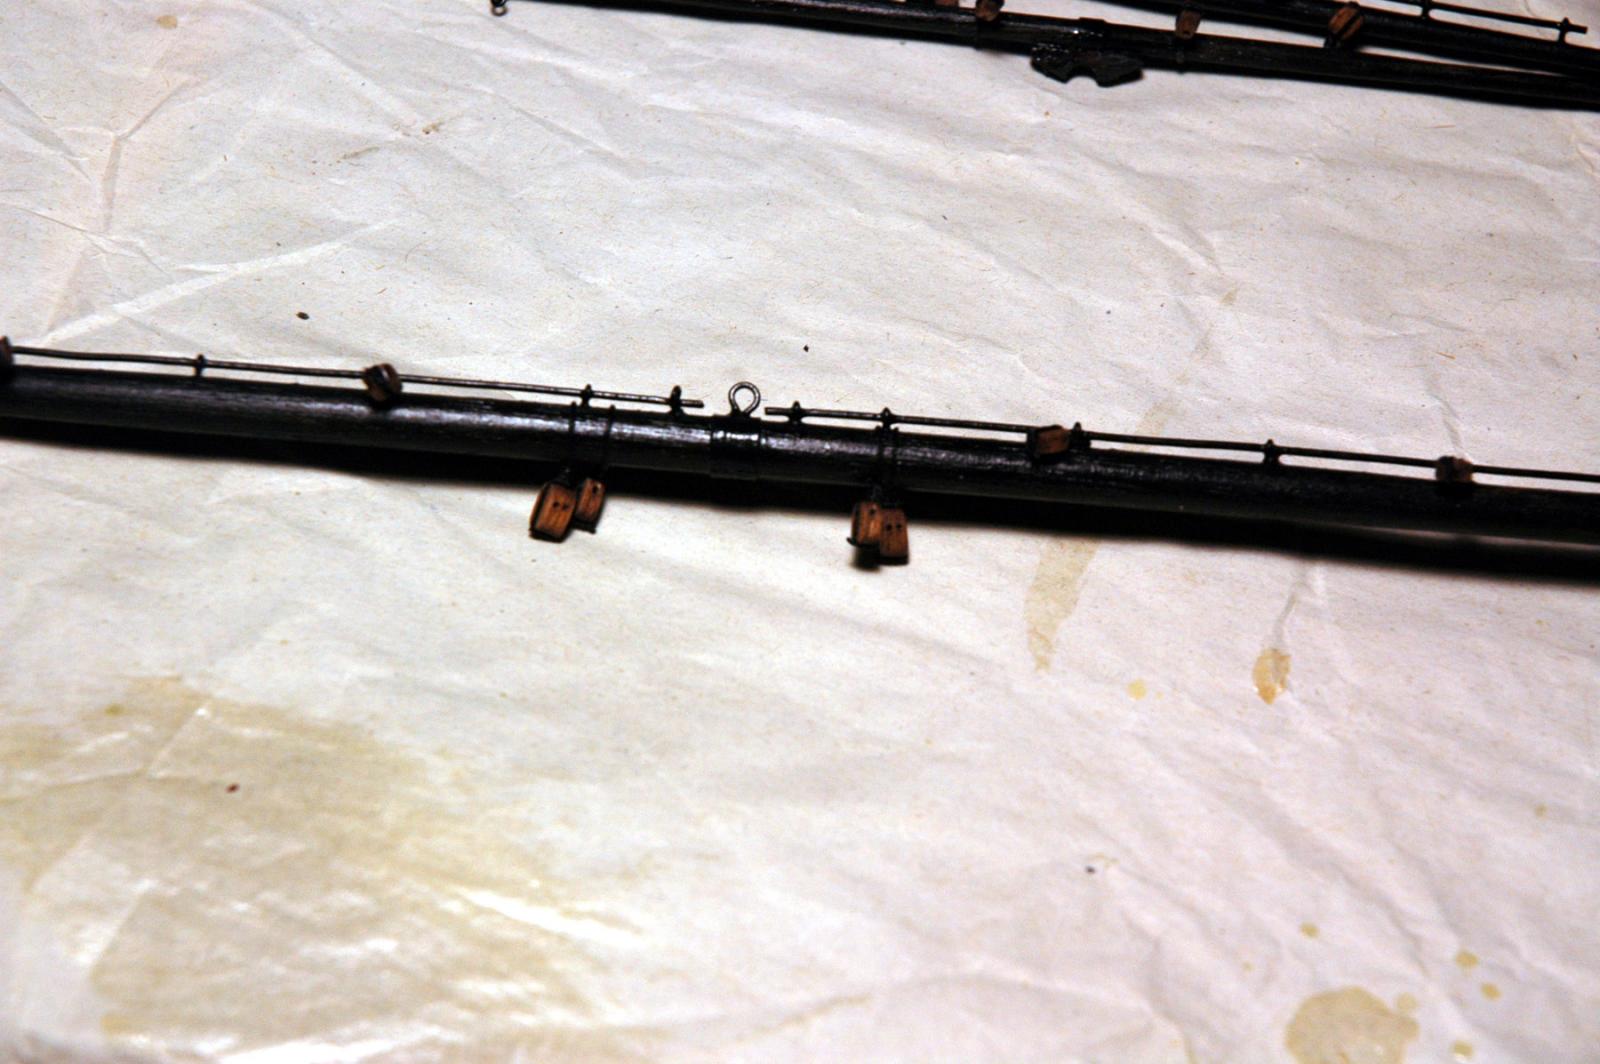
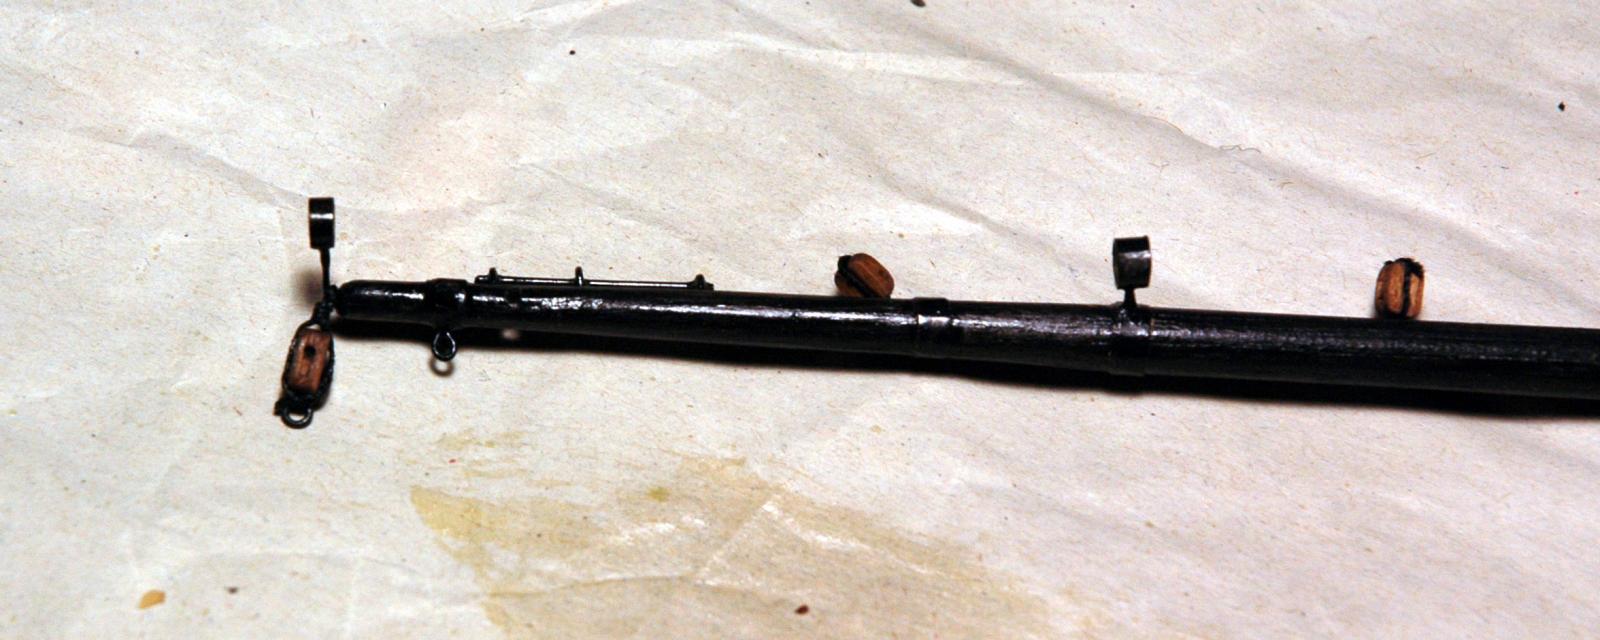
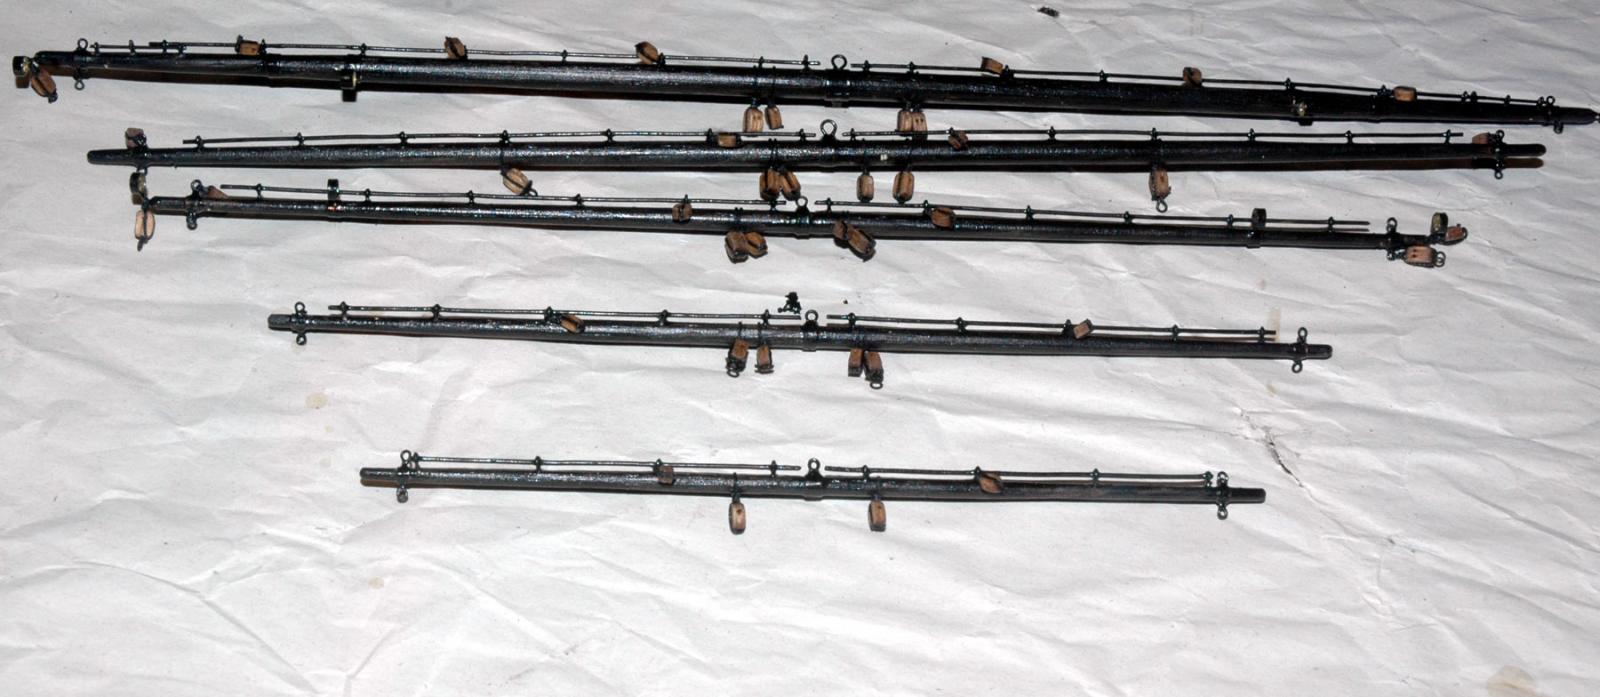
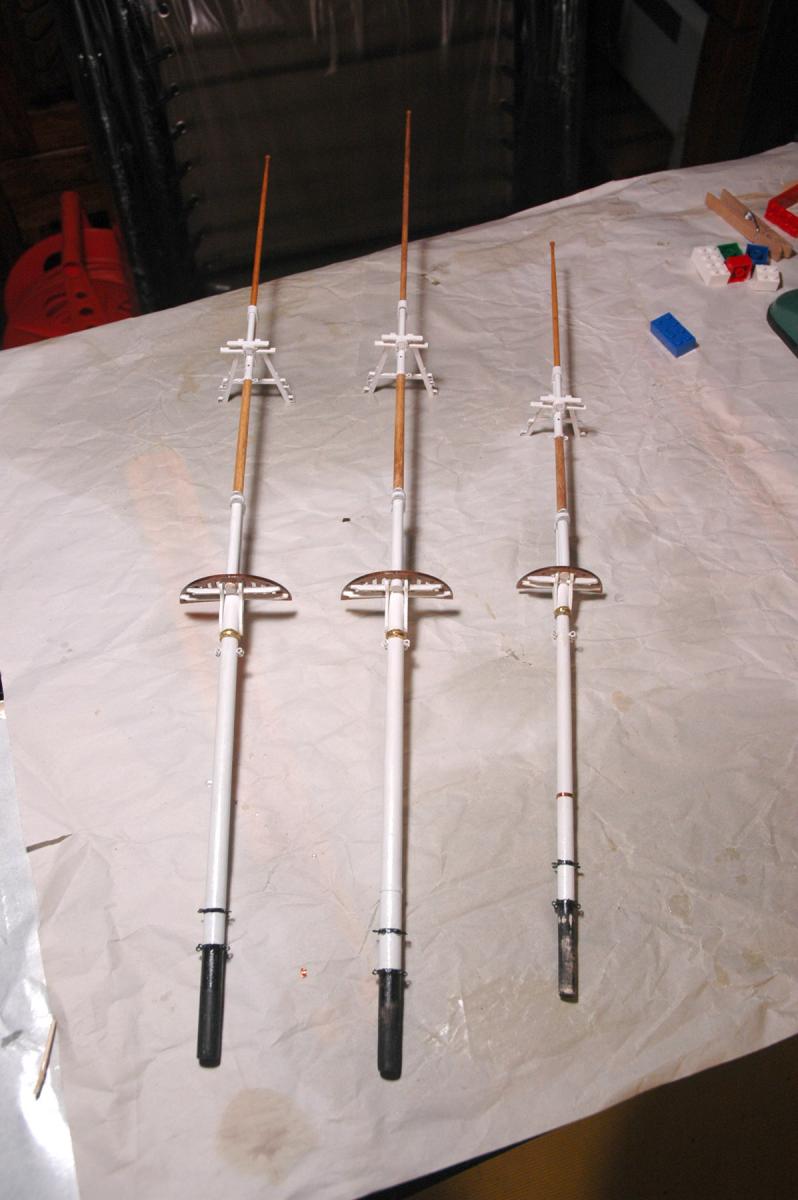
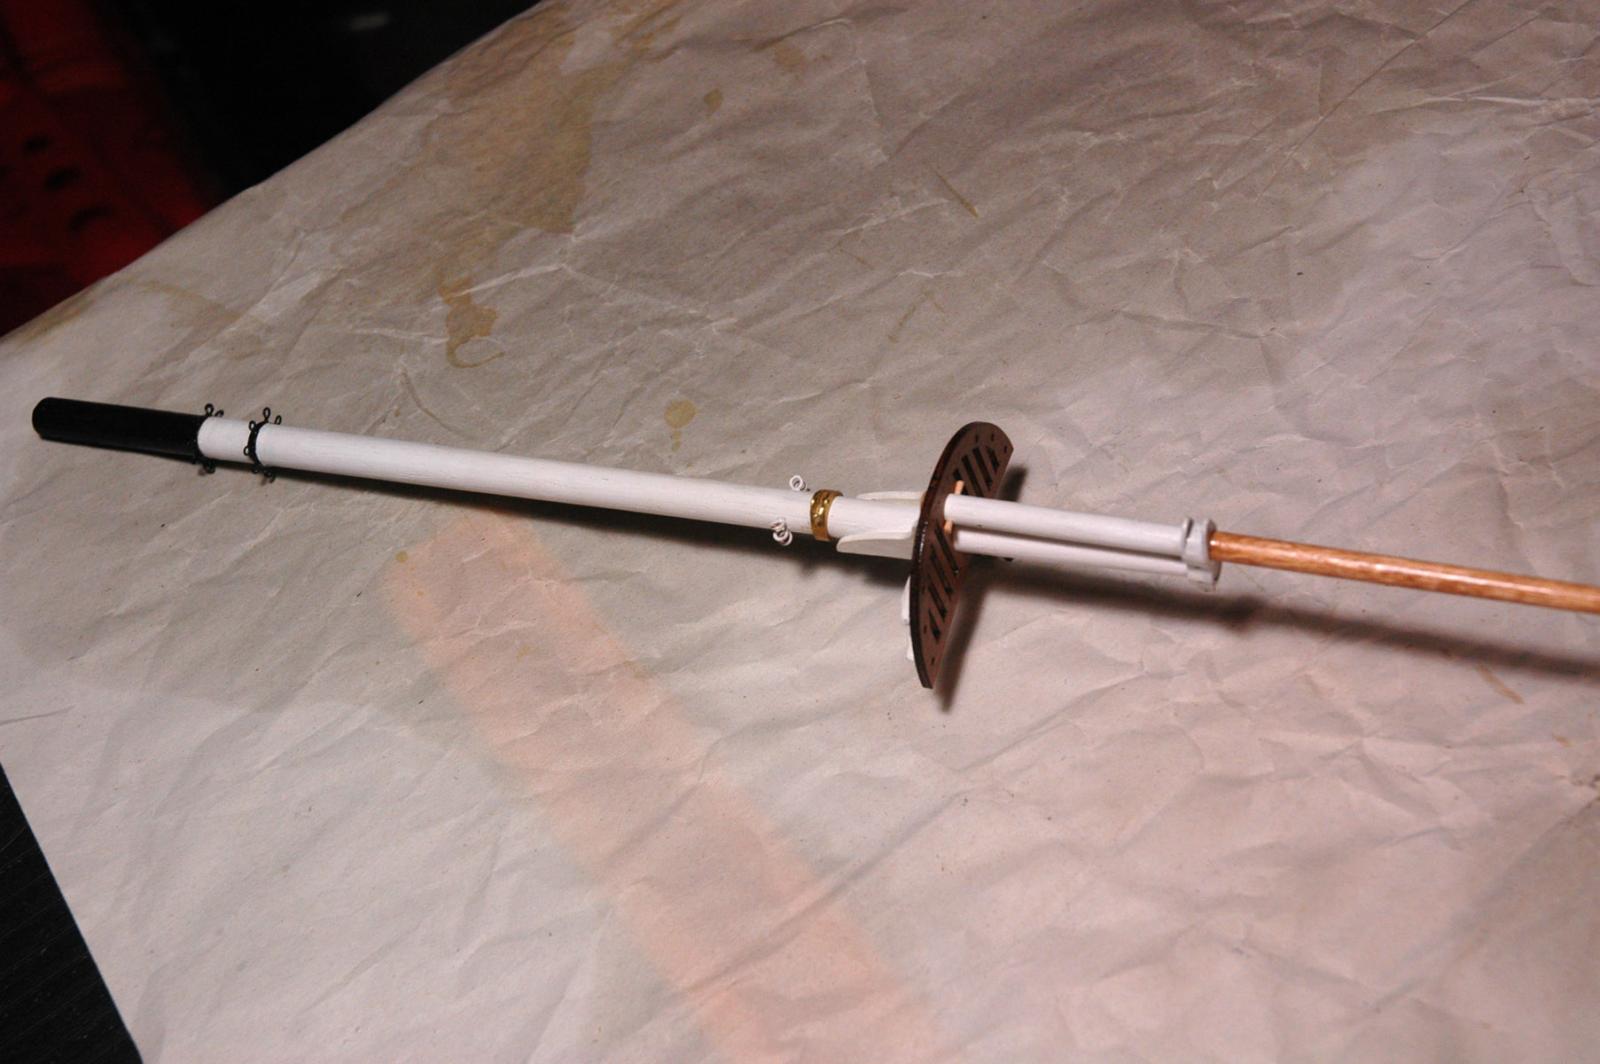
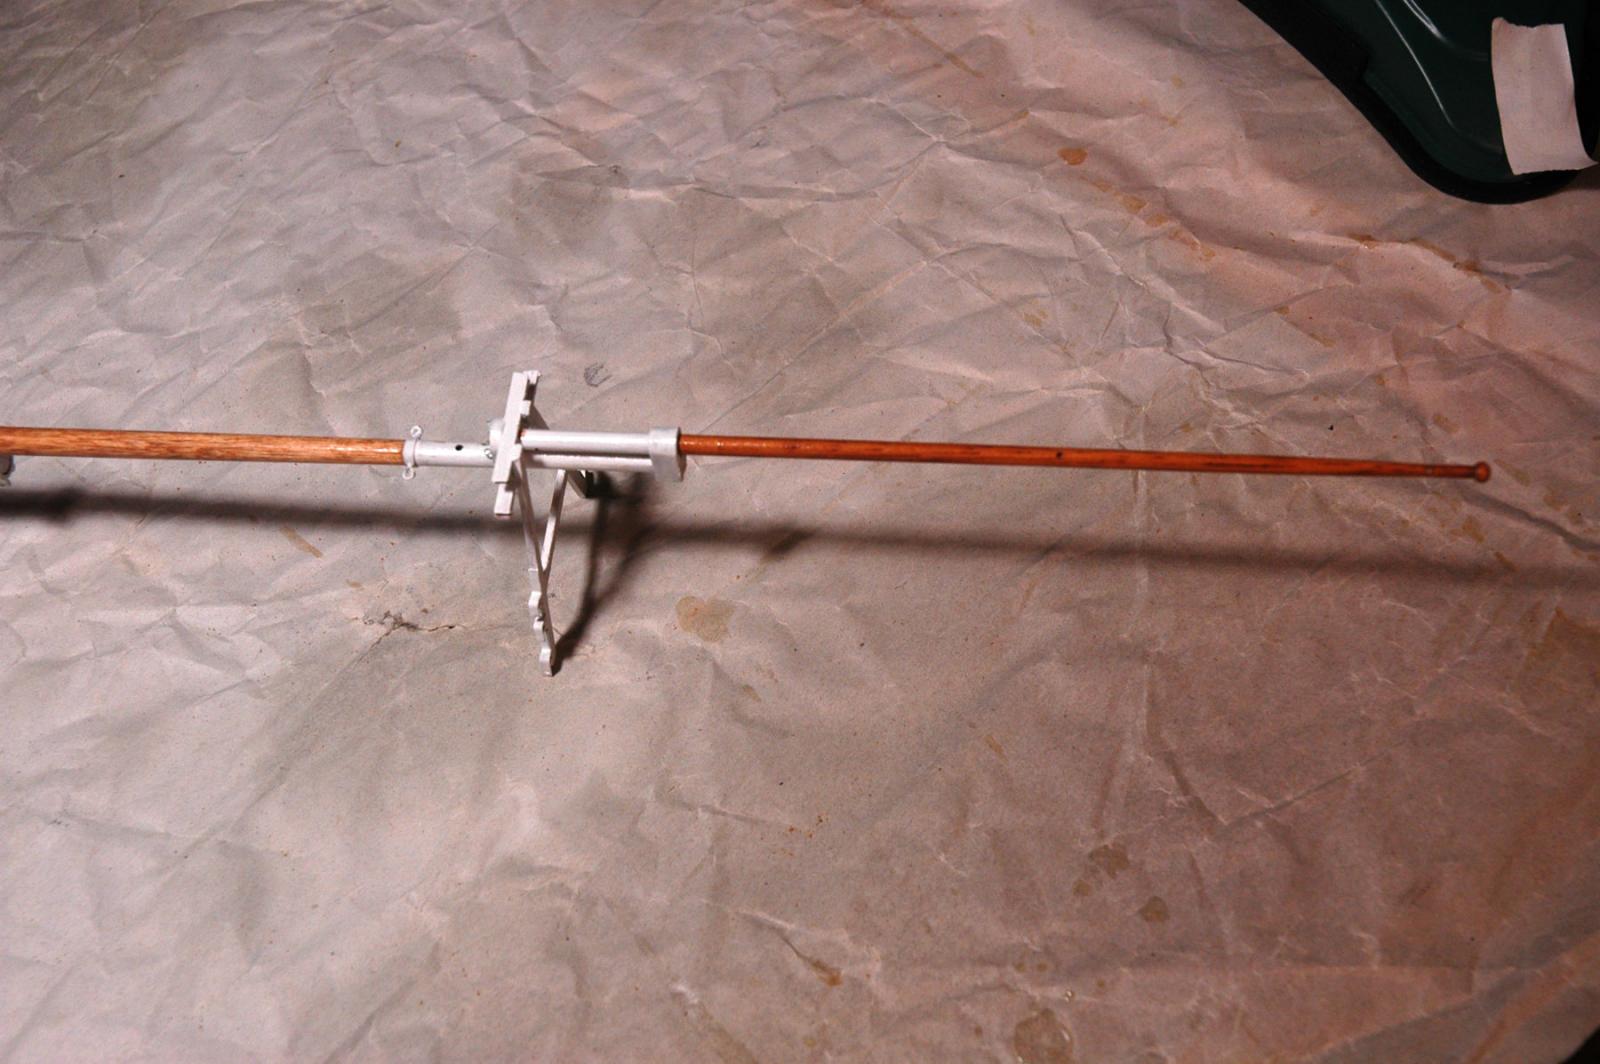
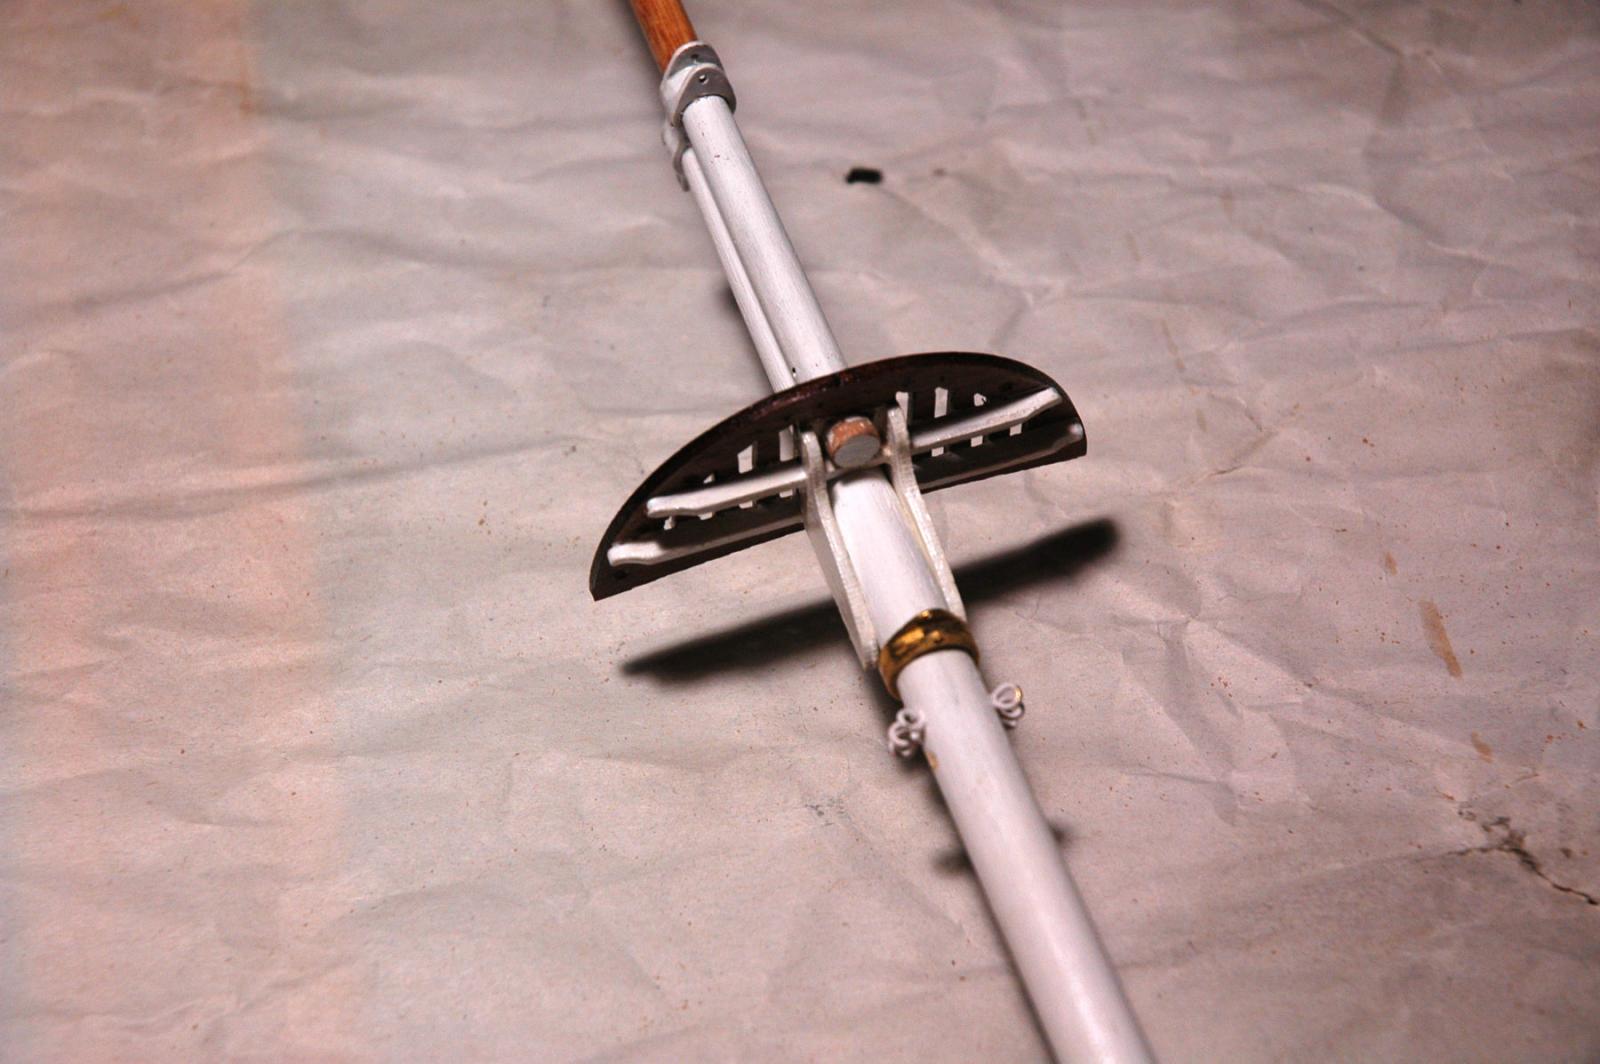
Here are some photos of the yards for the foremast. They didn't turn out too well. I'll try getting some better shots.
The yards are painted and I have the blocks attached per Campbell.
Cheers,
marc
-
-
Cutty is looking good!
-
Finally getting a chance to pop in and say hi!
I like 3 and 4. 3 is what 4 would look like when it gets wet.
I can't believe the difference in color of a teak deck when it gets wet. It goes from that grey to a deep brown. Amazing.
Great Job!
-
-
I wonder how many trees we've sanded away!? It is amazing what corrections sanding will accomplish.
Nenad, I don't see anything noticeable concerning the deck warping. I wouldn't worry about it. Once you get the mizzen masts, yards, braces, chicken coops, and the rigging lines all over the place you won't notice any slight warp. I'd be dazzled by all of the detail that you've put into the bulwarks to notice any issues.
Marc
-
Hi Nenad,
I've painted all of the yards and have most of the blocks attached to the foremast yards. I'll snap some photos and upload.
It's been too cold to work during the past few weeks. I should take your example and move the yard to winter quarters. I just don't know where I have any extra room. I've been working some on a small tray.
Marc
-
Nenad,
Beautiful work!!! She's coming along well. It's been too cold in my ship yard to do any real work on mine. Also been tied up trying to get another job. Interviews - applications, etc.
Keep up the wonderful work!!
Marc
-
Looks great! The stem has good shape
And as you said the Spice must Flow! I use that at work all of the time!

-
Great work!! I'm with you on two steps forward one back. To correct a mistake or not? Such questions drive me crazy. But I wouldn't have it any other way. The research is part of the fun.
Keep up the great build. Also thanks for the photos of the day out. The view from the tower is amazing. Also the photos of the bad weather sailing are great!
Marc
-
Nenad,
I agree with Popeye, when you get the pin rails, deck houses, and rope coils in place the difference in heights of the bulwarks won't be noticeable. Small mistake.
The details that you are putting into the freeing ports on the outside will definitely be noticeable and appreciated.
take care,
Marc
-
Merry Christmas and Happy New Year!
The freeing ports look great!!
You are making the rest of us look bad!

Marc


Cutty Sark by NenadM
in - Build logs for subjects built 1851 - 1900
Posted
The fo'cle is looking great! The molding really sets off the deck. Bindy is correct. We have to stay in touch with you continuously to keep up with your progress!