


SkerryAmp
-
Posts
809 -
Joined
-
Last visited
Content Type
Profiles
Forums
Gallery
Events
Posts posted by SkerryAmp
-
-
Thank you very much Frank, it is getting some good use so far so that is great to see. Just need to keep adding to it and finding ways of beefing it up a little bit!
-
Adam:
It is still there, but it is not that bad. I think you are making a good start.
Russ
Thanks Russ. I think you are right and it isn't TOO too bad and quite happy I found a way to mitigate it. I have read of others having that issue and just kept hoping I would avoid it.
I guess it is true, it happens to everyone eventually with something

-
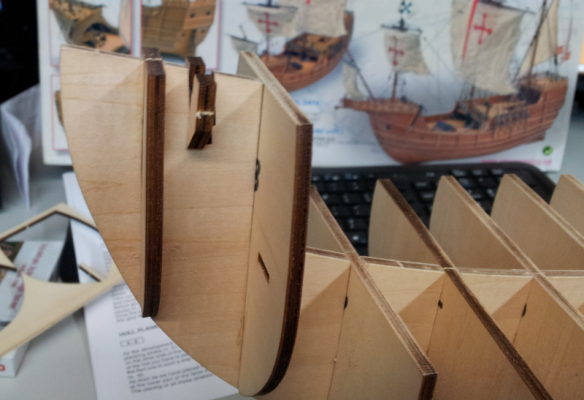
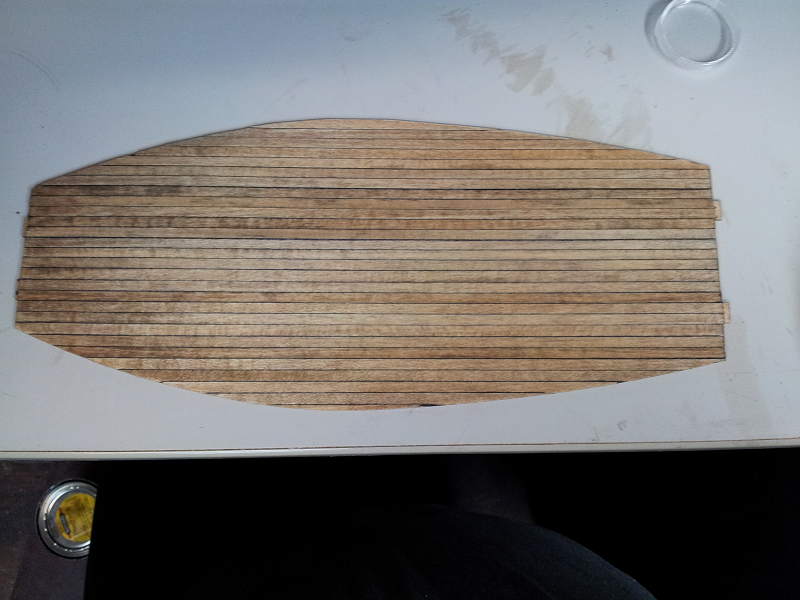
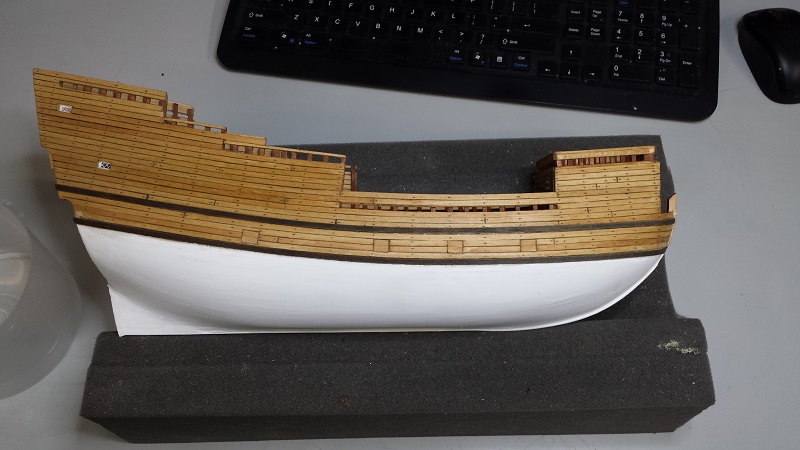
So now that the keel is set we continue to ride the wave of good feelings and get that deck down.
The false deck again like the other LC parts came right out without any issues. Laid nice and flat and with a quick sanding was ready to go.
Started by finding the center and laying the two center boards.
Then just proceeded out to one edge. The planks were laid just over the edge of the deck shape and they will be cut clean and sanded prior to installing the deck.
After doing the same thing up the other side, the edges were trimmed and sanded smooth. For this one i wanted to go a bit different with the color and go with the kit a bit. I took some minwax mahogany and cut it with natural stain with a ratio of 3 natural to 1 mahogany. This gives it a dark, but not too dark look to the deck which is kind of nice I think.

So now we mount it to the formers. And here is where the wave of happy good feeling and success come to a screeching halt.
The deck has to get bent to shape with the formers, no big deal. However I do not have the spare clamps to hold it in shape (they are being used on something else at the moment) So me, in my utlimate wisdom figured I can get it on there and just hold it in place.
So I lined up the deck, got it all set and then fipped it over while bending the deck into place. Well, holding that deck in place really cramps up the hands so decided to add a few dots of CA to tack it into place while the white glud dried.
It worked great! The deck was strong, and tight and not going anywhere.
So I flipped it over.
Sigh.
The deck had somehow slipped a bit while I was holding it apparently. I should have checked more as I worked and didn't and now have a deck that is about 1/8" off of wher it is supposed to be. QUITE solidly attached to the formers and cannot go anywhere without some serious damage.
For the stern I can sand and shape it back and the rear cabin will be going on so it won't be a huge deal. However near the bow the forward vertical planks are not thick enough to hide the gap so really not sure what to do about it at the moment.
But - that now is Issue #2. I will find a way, oh yes... just not really sure what that is quite yet.
That is all for now.
Until later.... Enjoy and happy building all!!
-
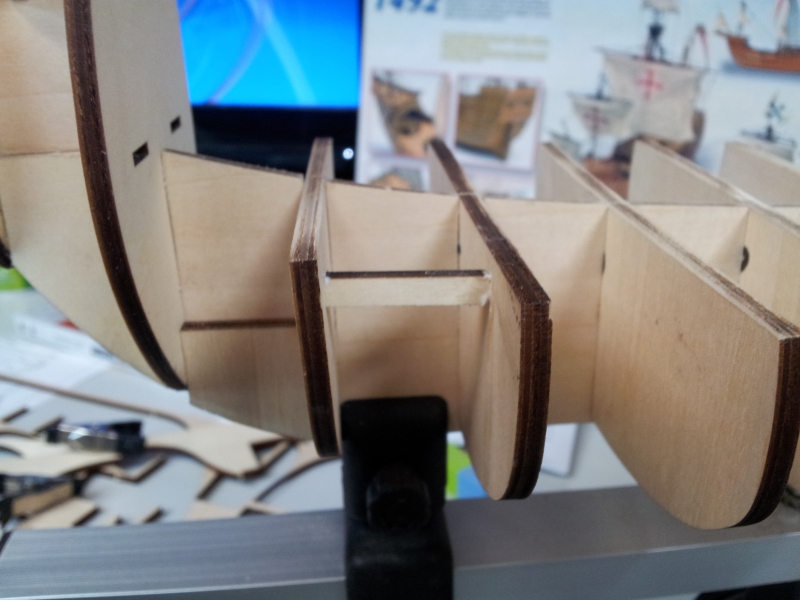
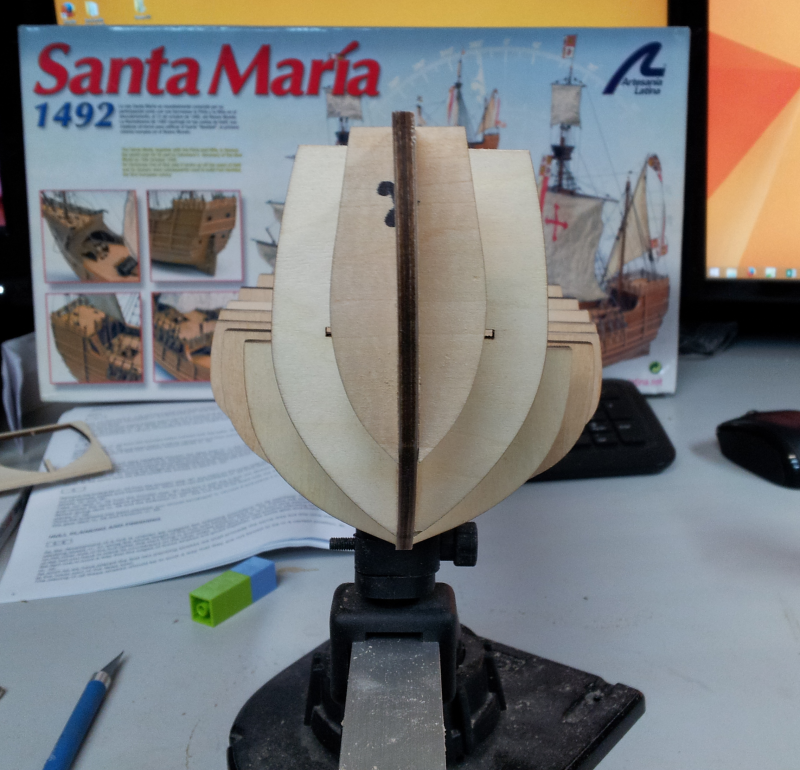
So now we have the formers in and all is dry and good to proceed. That little bend is still there but I still think my idea is going to work - at least I hope so. I am kind of pot commited at this point so...
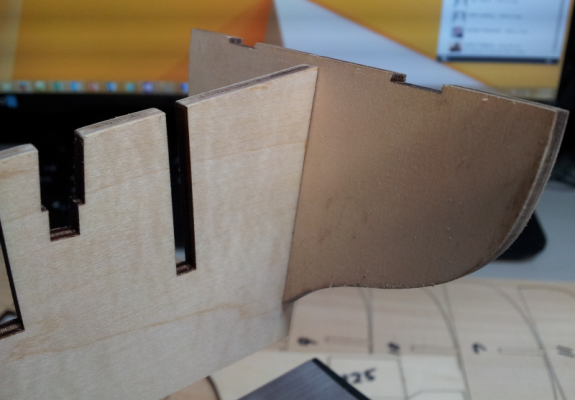
I attached the mast reinforcements as per the plans and instructions, again the laser cut parts popped out, cleaned up and went in without any fuss or heartburn.

We then move onto the bow reinforcements. Basically just little piecs of ply that sit between the formers at the bow. Oddly enough, I wasn't expecting it but adding these and forcing them in and keeping the formers parallel actually assisted a little with the keel bend. This was promising!
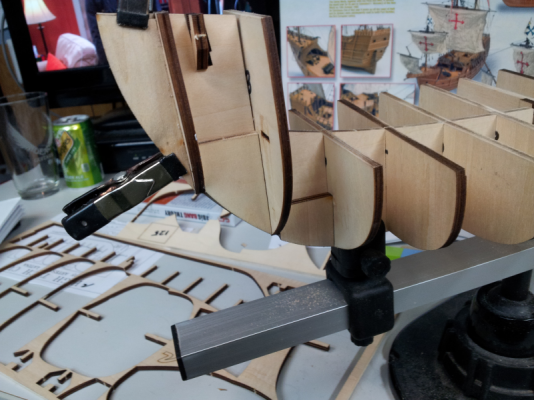
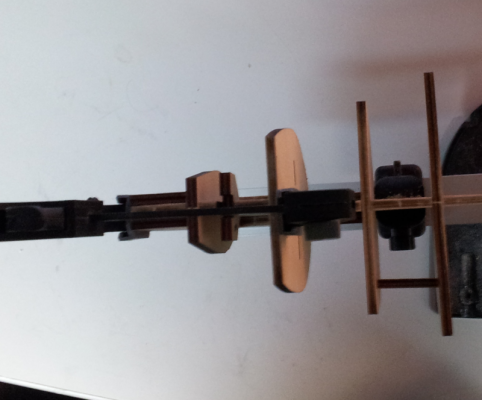
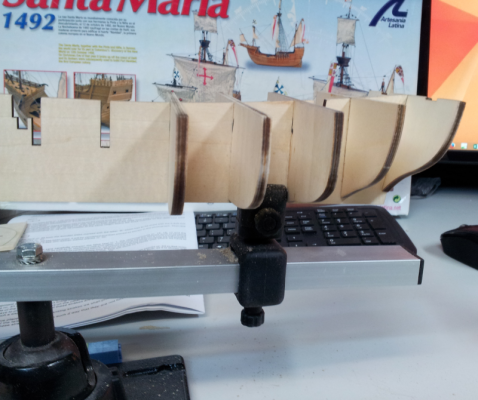
So, at this point I went through the keel and gently flexed it at various points along the formers to see where, if any, there could be applied counter leverage to straighten out the keel. Luckily I found a spot. After trying a few times to get the right sized brace and verifying that spot would help straighten out the keel, I got it in there and glued it up tight.

This helped quite a bit. There was still a slight twist, but that was easily rectified by getting a clamp on the bow with a shim to counter twist it as the support strut dried in place.
The keel looked pretty good!
-
I spent a little time deciding how I wanted to build this. I decided partly due to time and partly due to curiosity I would build this one straight up like the instructions say. I will be attempting to do exactly what the kit calls for and see how it comes out. From the pictures it looks like a pretty nice model.
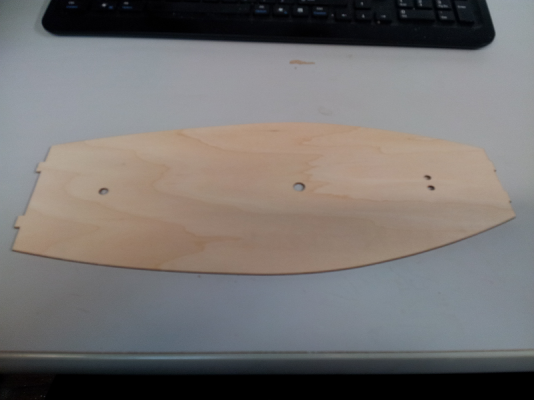
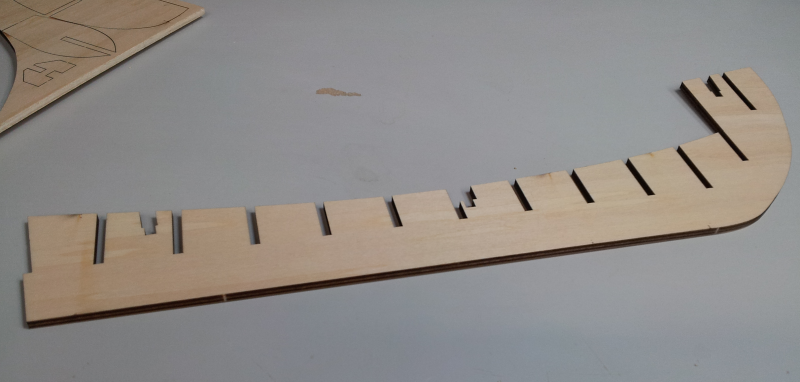
I detached the false keel and laid it on the table to check it out.
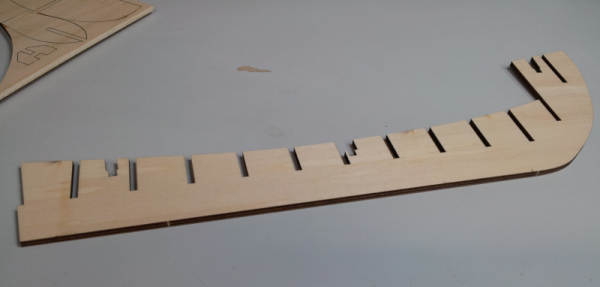
Dangnabbit! Right out of the gate - issue #1
The false keel has a slight bend to it.

I tried wetting and weighting it down - nadda. Started to get a little discouraged since this is my first time having to deal with this. But after looking at it a bit, I started to formulate a plan that I thought would work - more on that in a bit (little cliff hanger for ya
 )
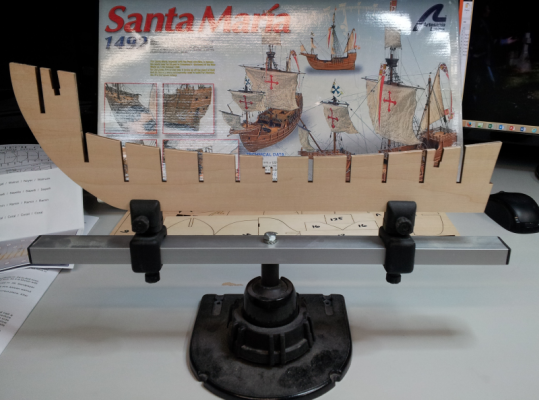
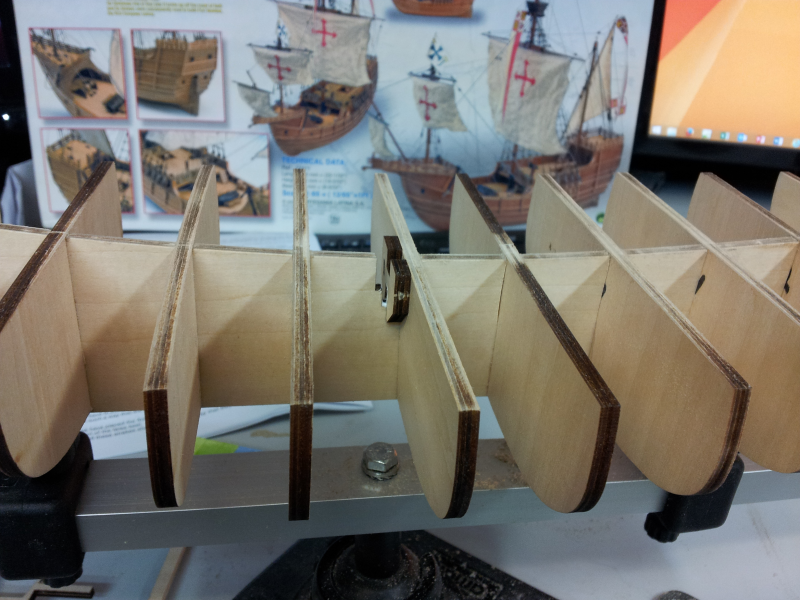
)I then went through and marked the formers according to the plans and the little inventory sheet that came with the kit in order to keep all these little guys in some kind of order.

Once all was in order and ready to go.... we mount up!!
I kept an eye on the false keel throughout the next bit of progress to keep assessing if my plan may or may not work...
The transom went on first - went on like a champ! This was going to be easy!!
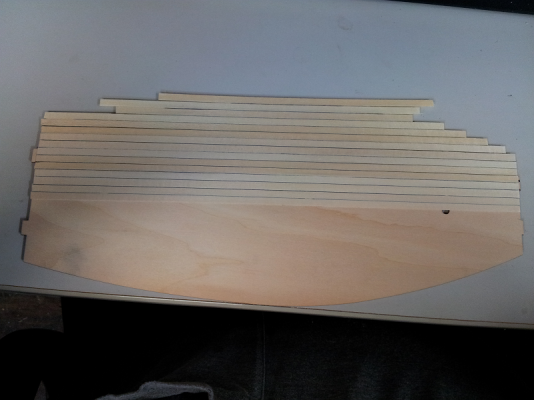
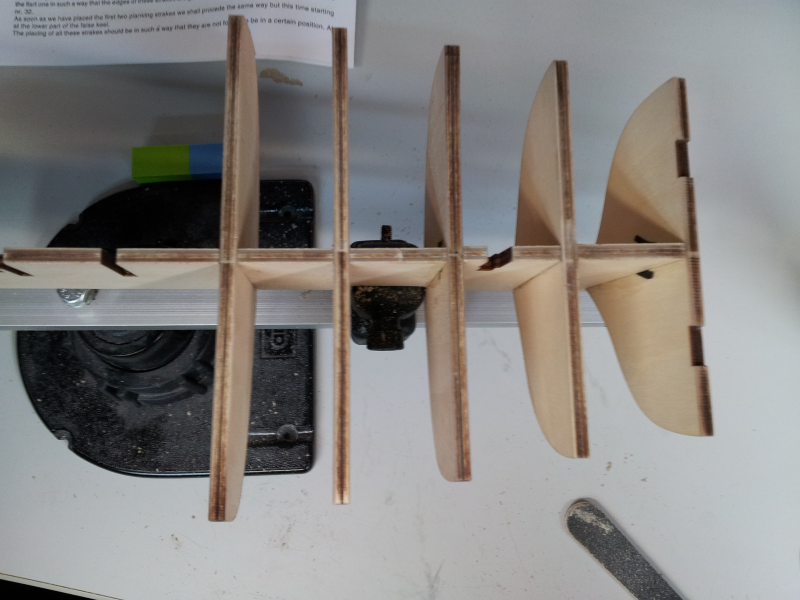
After some quick dry fitting we move on to mounting the formers!!
Quick check to make sure things are going in as expected and not making the false keel worse!!
Nope! Good to go!
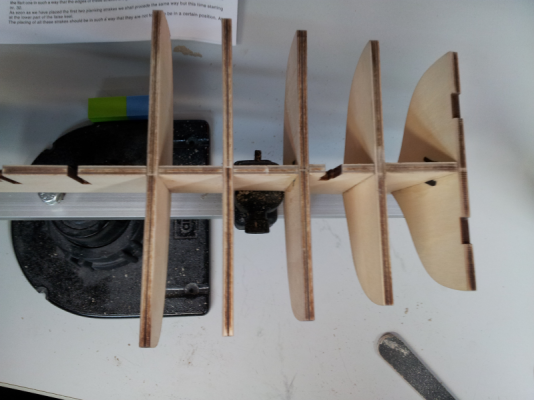
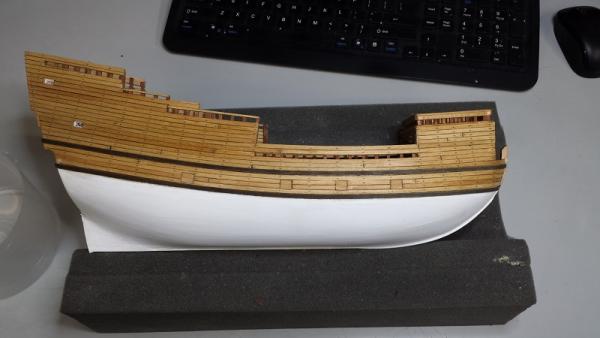
Continued with the formers making sure everything stayed nice and tight and square! I must say a few of them did need a little attention with regards to a tad bit of sanding here and there as they were super tight, but it wasn't outrageous by any means.

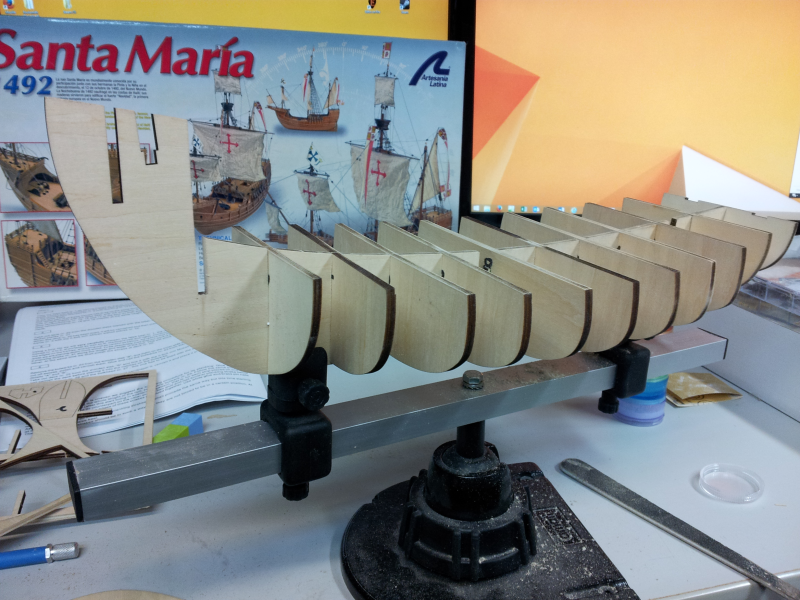
Finish off the bow formers and whew - got past that without any issues... so far so good!
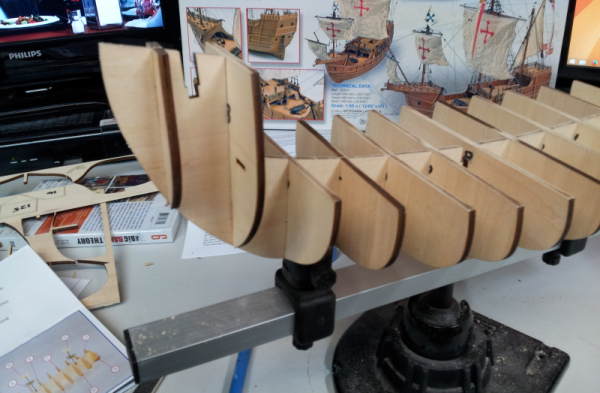
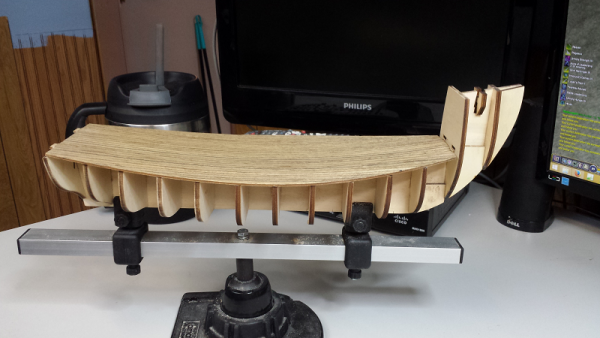
Now with the bow formers all in and everything dry lets check on that keel and see how bad it is or if it stayed as it was.

Excellent. Well not totally excellent, that would be if it miraculously fixed itself. However, it didn't get any worse so I had that going for me so far!
- CaptainSteve, edmay, riverboat and 1 other
-
 4
4
-
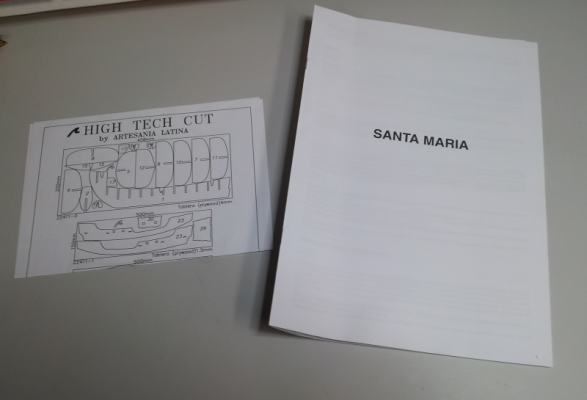
I have to admit, I really had no idea what to expect from AL. I remember a long time ago when I managed a hobby store we sold them, but I really didn't know much about ship models so didn't know quality from crumb.
Opening the box my first thoughts were - heh, this isn't to bad. The packaging was really tight, everything secure and everyting looked good! There didn't seem to be anything strange in there, and everything looked to be "ok"!
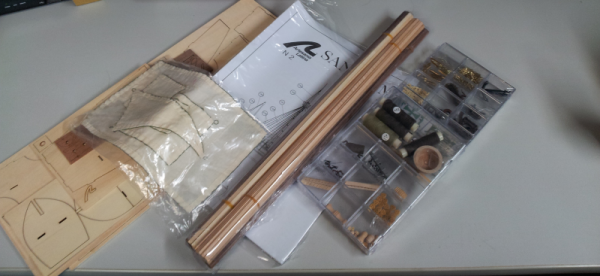
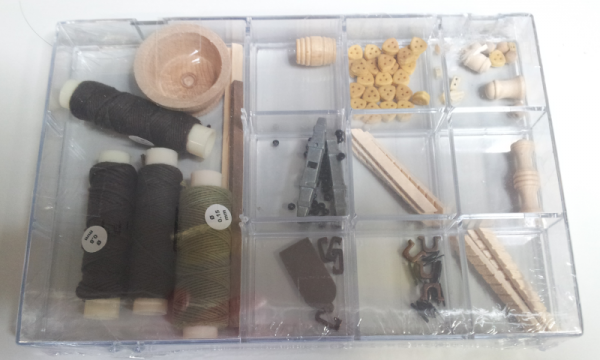
The fittings come organized in some pretty decent trays, which I must admit I have already started thinking of ways to repurpose them once the parts are out of there
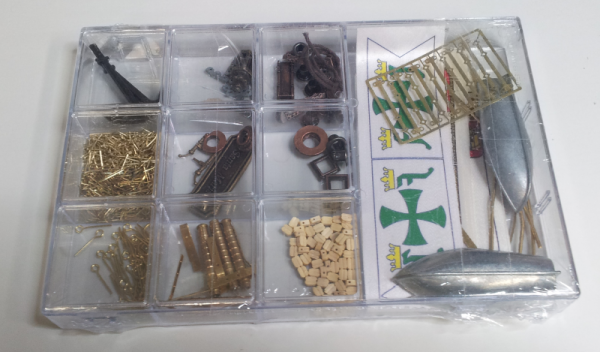
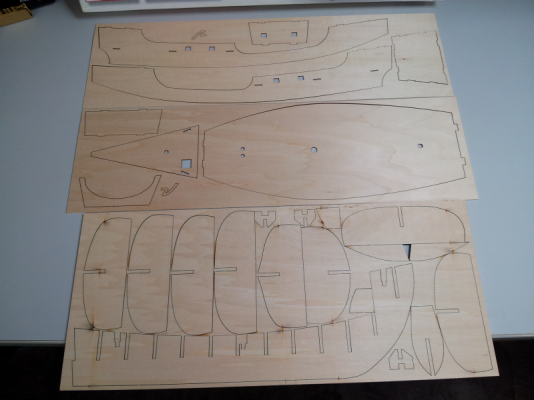
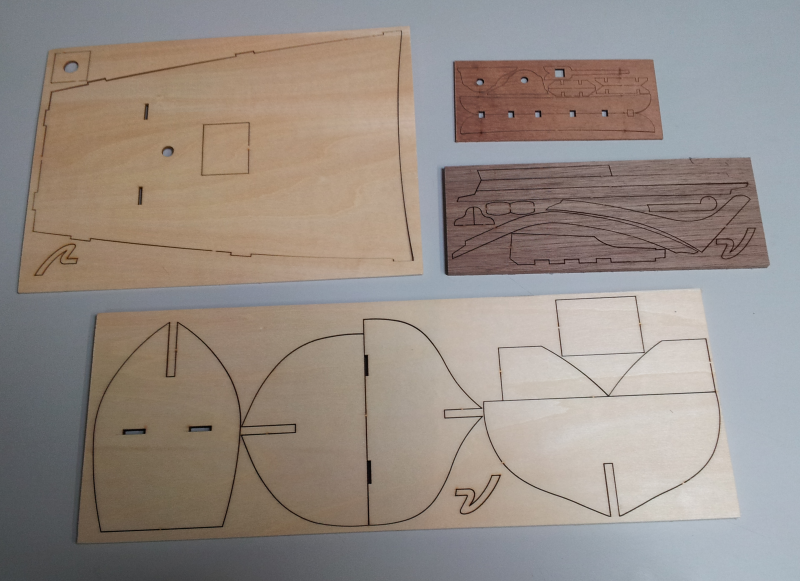
The laser cut sheets were clean, no fuzz or knicks out of the wood and the cuts seemed complete. Quite a few lc cuts, really interested in where some of these things go!

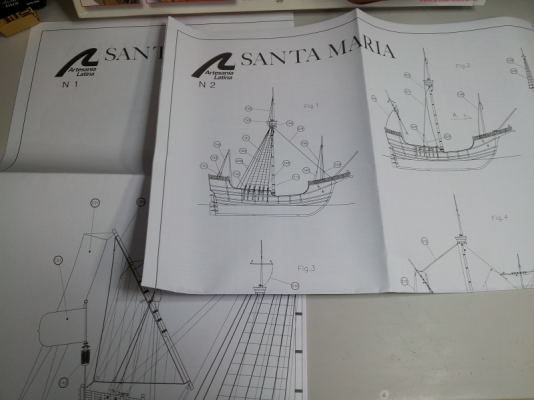
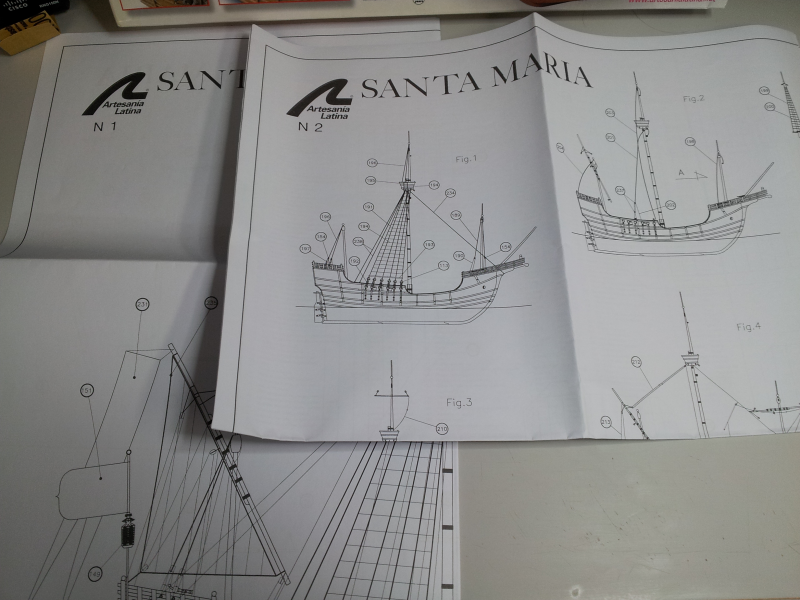
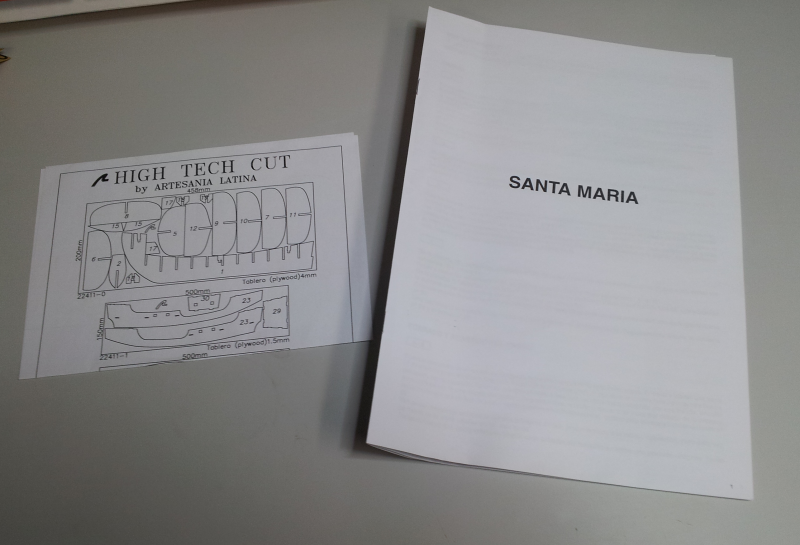
The plans to me actually were very nice, very clean and clear with what was what and what went where. Appears to be a full size to scale image of the boat itself which will come in handy finishing it off.
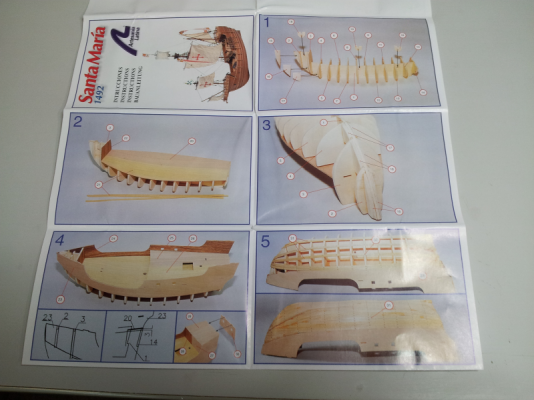
One bit of paperwork that came with it that I was really keen on was the full color panel brochure showing the major steps. Something about that I really liked!!
Then we get to the lumber supplied. I have done Model Shipways and never had trouble with their wood and then I had Mamoli and it was dry and brittle. What would AL give me - would it break the tie? Lets find out.
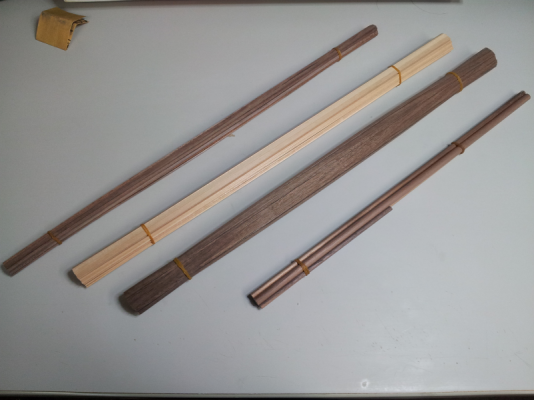
Well, looked good! I took a few sticks out and did a quick bend test on a couple to see if it would break shallow - and it flexed well! Did not feel brittle and was not all gnarly and splintered.
Nice!
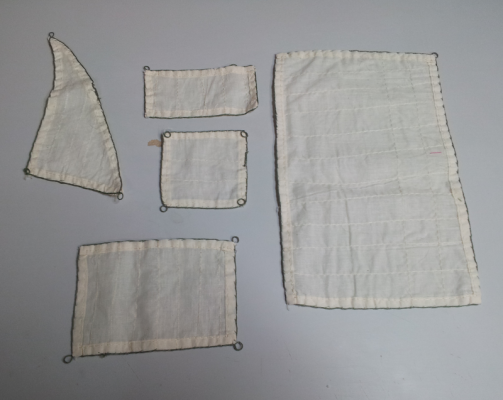
Now, one of the things on this ship that worried me was the sails. The willie has me worried as it is, so another ship was sails just didn't seem like it would help. Lo and behold.. PRE SEWN SAILS!! Okay - not so scary on this one any more!
Overall, the parts look good, the wood looks good, the plans seem good. We shall see what they are like in action!!
(While the parts do look good, I will be replacing the blocks and rigging with Chuck's. Nothing necessarily against AL's, but Chucks are really nice!)
On to the build!!
-
Okay, before we get to the customary build log pictures (the boxing, unpacking etc etc) I feel the need - no, the obligation to explain why yet ANOTHER build log.
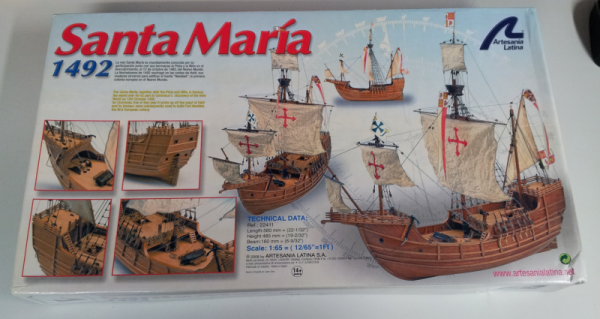
For my Birthday last month I was told I would like my present but I HAD to do something with it right away. Well, it turns out that I received the Santa Maria by Artesania Latina. It seems my lovely wife has taken an interest in the Nina, Pinta and Santa Maria and wants them in our office on display. So, we are starting with the Santa Maria. I figure if the Admiral is going to encourage another build far be it from me to say no
.So, while I had no intentions of starting a new build with 4 on the table - this became a special case and special project.
So. Away we go!
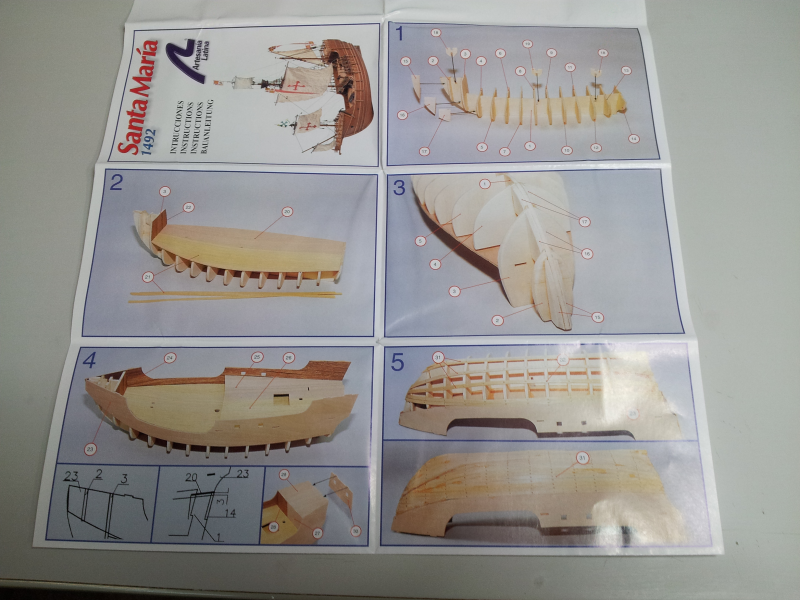
Lets begin with the customary unboxing of the Santa Maria by Artesania Latina.
(Because of the limit on uploading pictures I split this into two posts to get all pics in there).
- riverboat, popeye the sailor, edmay and 1 other
-
4
-
Egads! Can it be!
YES, yes it is... an update!
Que fan faire!
So, pulled out the mayflower and have prepped to fit the exterior trims, wales etc. The first two wales were bent by soaking them in some windex and clothespinning them to the rim of a glass to get a nice curve. Once dried,took them out and in they went. Surprisingly they went in pretty smooth.
I have a little touch up on the white to do where it meets the lower wale but other than that, I think they came out pretty good.
Once all the trim is on I will poly it all up nice and neat and give it a slight sheen which should deepen the colors and really bring out the ebony a bit more.
Looks like I will have some more time for a while to be at the bench so will be making the most of it as best I can!!!
Enjoy and Happy Building all!!
-
Really nicely done!! Looks like a real nice ship and should be a beauty when finished.
-
John & Bob...........CRAP!!!!! why didn't I think of that.......the 'Back' button! now I really feel like a dolt! I was never born for this era

thanks for the good word gents!

thanks Augie............pace?? well, let's see.........I built the Cux in 5 1/2 months.........the M&M boat in 4 1/2. kind of you to say, but I do believe I have mellowed a bit
:D I know what you mean though..........thanks for the good word! 5 months for a ship - egads!!
In 5 Months I am sure I could put together a fairly decent castaway type raft maybe, 6 months if I need to add a sail.
The holiday trio are coming along very nicely though, the platforms look great!!
-
Gee whiz Popeye, I feel like a slacker looking at your 'Boat in a Day' pace!!!!!!
Oh my, I know what you mean - but if you are a slacker, what does that make me!!
Gots to find me some time!! =)
-
Excellent attention to detail, it really is the little things that make such a huge difference sometimes!
-
Danny, the ship structure is amazing in and of itself but the finishing work!
 . I can't even imagine ever having the patience and skill to do that kind of work. Awe inspiring. Such a pleasure to watch this ship come together.
- Martin W, Mirabell61 and avsjerome2003
-
3
-
-
-
Billings has been added, as per usual there are a fair amount of blanks as I either did not readily have the information OR due to my novice nature was not sure of the information.
As always if you see a mistake or a correction feel free to let me know!
Will be moving on to Caldercraft and Corel next.
Thanks all - enjoy and Happy Modeling!
-
WOOHOO! Anja back at the table!
And looking good as usual Anja.... can't wait to see more and glad to see you back at it!
-
You are doing a fantastic job on your phantom!
-
The details continue to be impressive. LOVE the wipers (yeah a bit behind again I know... as usual ).
the skii's
And rolling from the skeletons.
-
-
Look at them go! Wood flying , planks laying, stands a building.... it is wonderful!!
Nice deal on the airbrush. I haven't been up to Hobby Lobby yet, keep meaning to see what they have in there.
-
-
-
So, catching up on the old shipyards out there, wonderful pictures. liking this..really liking that...then WHAMMO!!!!
I know I am late to the party (as is usual lately) but WOW!!! Did not see that coming.
Sorry that it came down to that but boy do I give you some kudos! I am not sure what I would do if I came to that.... you have gusto sir, gusto!
Look forward to part 2!!


Announcing the Model Ship World Ship Kit Database Project
in Wood ship model kits
Posted
Latest update (I fibbed, was going to do Caldecraft and Corel next - but did Constructo instead )
)
Constructo entered - as per usual, there are some empty fields because either A) the site didn't have the information or I am ignorant enough about maritime matters I did not know the anser or C) Both
Still working on an easy way to the existing dimension conversions in there rather than by hand mainly because there are a lot!
Also fixed whatever happened to make the images go on vacation for a bit, but they are back.
Thanks all, people are still viewing so that is great! Thanks for the support and don't forget to throw ideas my way. May take a bit to get to them but I have the little wish list sitting here on a sticky note as a constant reminder!
Till the next update...
Enjoy!!