MORE HANDBOOKS ARE ON THEIR WAY! We will let you know when they get here.
×


burnside63
-
Posts
47 -
Joined
-
Last visited
Content Type
Profiles
Forums
Gallery
Events
Everything posted by burnside63
-
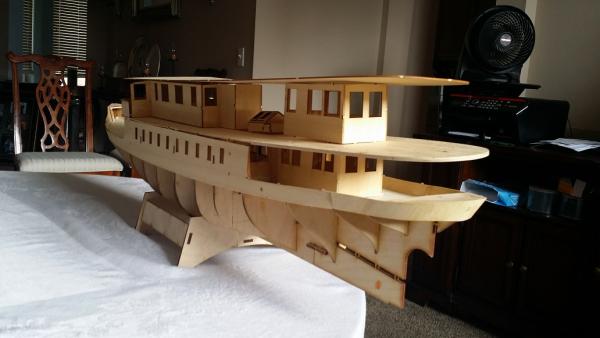
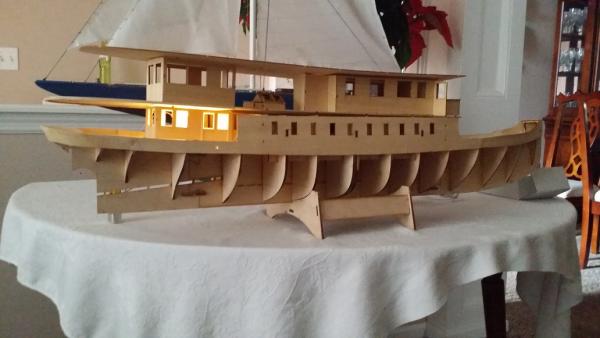
 Short update. Working on various parts. The wiring harness is done, tested, and working. First time lighting a ship. Have not used as soldering iron since my model railroad days in my teens. The control box is shown in one of the pictures. Two main wires exit the ship from the bottom of the hull and plug into the box. The switch turns the lights on and off. The 9 volt battery is in the box. I finished and painted one of the cabins. This is a bit too flat for me. I am going to top coat it. I will use matt clear. The beam at the top of the cabin will hold the LED for the cabin. Let the planking begin. I have 4 planks on each side done. Hit a fun bit. The plywood used for the frames is rock hard. To have a nail or tack or pin hold in the plywood, I need to pre-drill a starter hole for it. I will be able, fortunately, to use the clips I made using binder clips from I found in another section of MSW. I need an opinion. The main cabin is has no floor. It is open to the inside of the hull in case people want to build this for remote control. I want to block the floor off so the light does not go into the hull. I can use wood to do the flooring. I am frosting the windows of the lower cabins due to there being nothing inside them. What do you think about using aluminum foil for the main cabin floor? It would reflect the light and, hopefully, make it a bit brighter. Open for opinions/ideas.
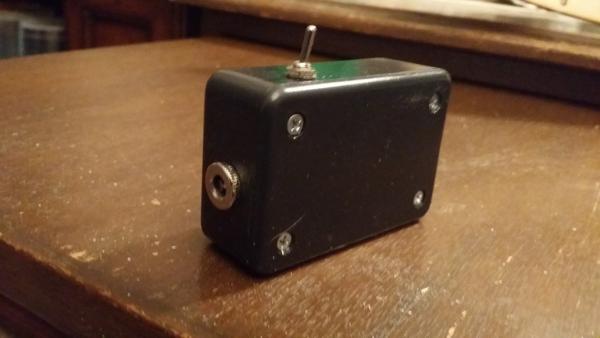

- 50 replies
-
- 6
-

-
- mariefred
- nordic class boats
- (and 1 more)
-
The goal is to run off a 9 volt battery as she will be sitting on a wall and I do not want a power cord running down the wall. Lighting her is a new process for me. I have never done this before. I started wiring her yesterday and found the LEDs ok when 2 were hooked up. They dimmed at 3 and 4 and shut off at 5. I was wiring them in series. I began re-doing them today in parallel. Works much better. I have the lower deck done. Tonight, after dark, I want to light her back up. I have 2 LEDs in the large main cabin and I do not think this will be enough. May end up back at Radio Shack for more LEDs and resistors.
-
Nirvana, thank you for the link. I will review it.
-
I cannot say enough how fun this build has been so far. I have to get my hands around planking the hull though. There are no good shots of the stern and how it should look.
-
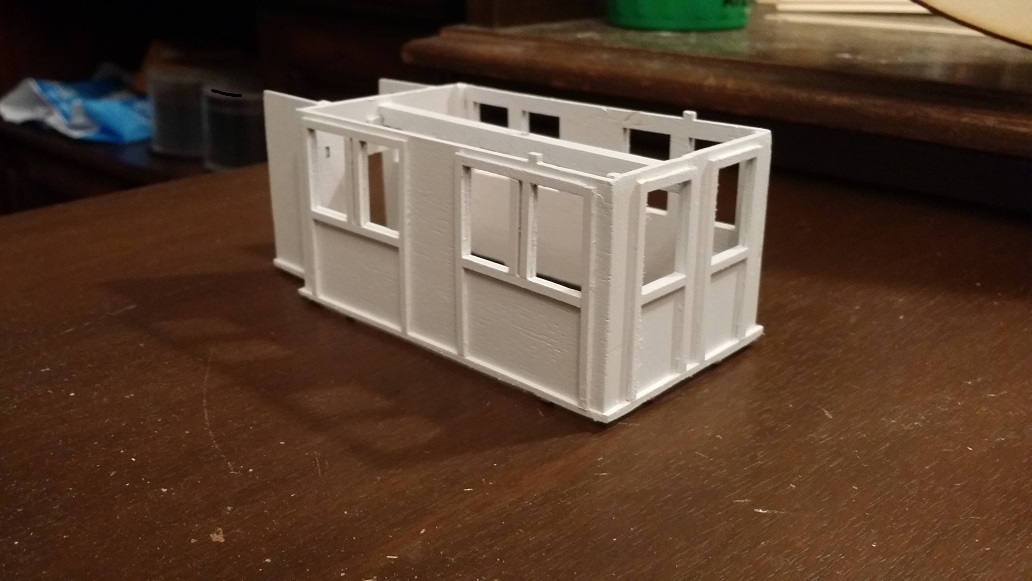
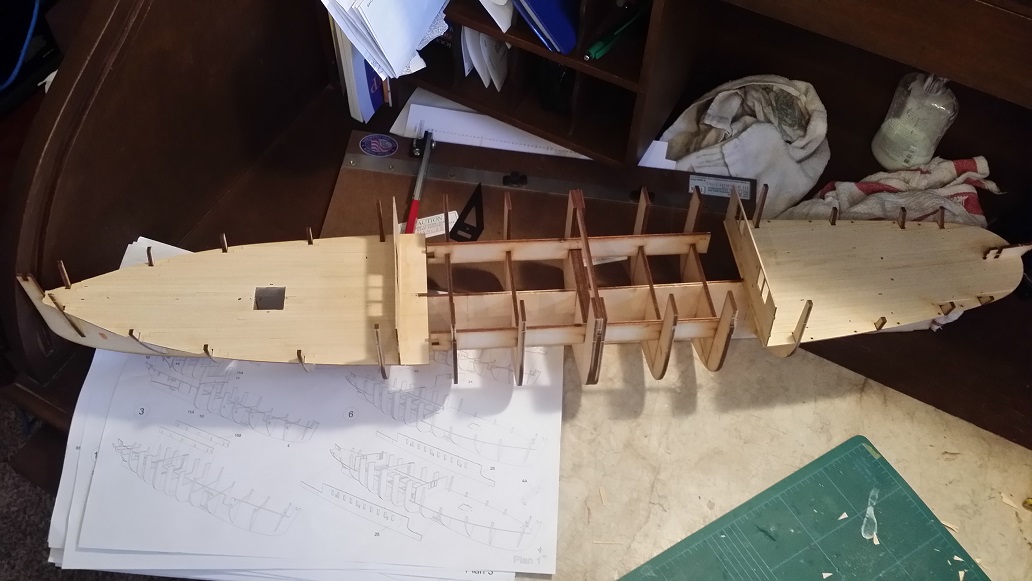
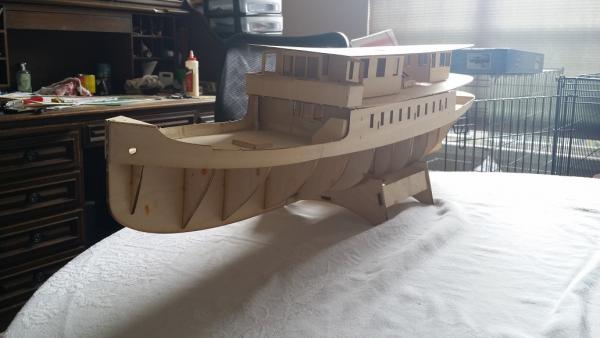
Ran into my first problems building the cabins. Every pre-cut part from the thinner plywood is warped. Fortunately, I have some large books. I soaked each sheet and pressed them with books to straighten them out. Also, if you build this, watch out for the alignment tabs. This has as more alignment tabs than a plastic model. Unfortunately, nothing is in the instructions telling you that the tabs are staggered from one side of a cabin to the other, even if the parts have the same number. I found this out after building most of the cabins. Had to sand off a lot of the tabs. Not a big deal as I will use the corresponding holes in the deck for alignment. More of an annoyance. Even with the warped parts, the fit of this is incredible. Due to all the alignment tabs, I will be going through a lot of wood putty so they do not show when everything is painted. I have all built that needs to be for the lighting mock up. The decks are painting. Once I finish the pre-wiring for the lights, I can begin planking the hull. The final picture is a test on the lighting. You will see some bleed out as the cabin is not glued to either the upper or lower decks right now.


- 50 replies
-
- 12
-
-
- mariefred
- nordic class boats
- (and 1 more)
-
Revell Queen Mary ll, 1/400, review or build needed
burnside63 replied to jbelwood's topic in Plastic model kits
Santa Claus brought this for me a few years ago. It is large. Overall it was a very enjoyable build. Very few fit issues. Instructions were good. No issues what-so-ever. Since building this ship, I have stopped building plastic models in favor of wooden ships. However, I would build this again in a minute. I have thought about re-doing it and adding lights to it. -
I love J Class yachts. I look forward to watching this one also. As with others, got the chair pulled up and the popcorn beside me.
-
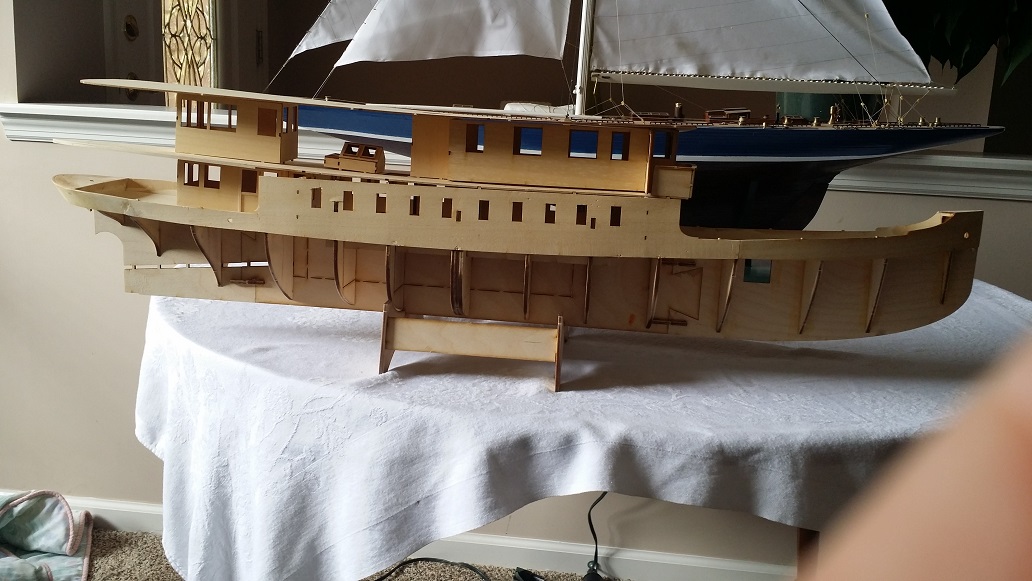
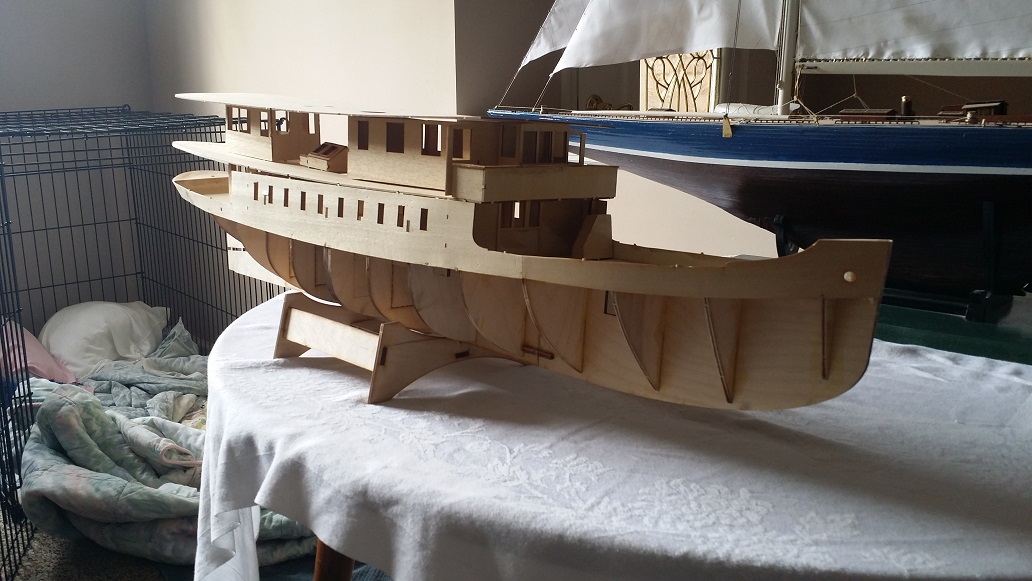
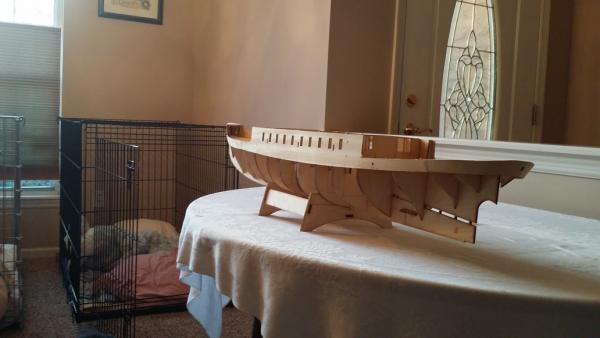
Got a little more done on it over the last couple days. I got the bulwarks on her. I need to pick up some balsa for filler blocks front and rear before planking. I am going to mock up a lot of her before beginning the planking. I am going to attempt something I have not done yet. My goal is to light her. Ages of Sail has a lighting kit for her sister ship, the Bohuslan, but not for the Mariefred. The lower deck cabins will have their window glass frosted as the cabins are empty. The 2 upper cabins and the wheel house have the proper fittings inside them, so their glass will remain clear. No guarantee that the lighting will be done as I have never lit a model before. Need to mock it all up so I can see where to run and hide the wires. Then on to planking.

- 50 replies
-
- 8
-
-
- mariefred
- nordic class boats
- (and 1 more)
-
I am truly impressed with the quality of the kit overall. The fit of the parts has been excellent. I have mocked up most of the ship and have not found any issues. The strip wood width issue is only on the deck planking. The rest is spot on. I see building more of this manufacturer's ships in the future.
- 50 replies
-
- 1
-
-
- mariefred
- nordic class boats
- (and 1 more)
-
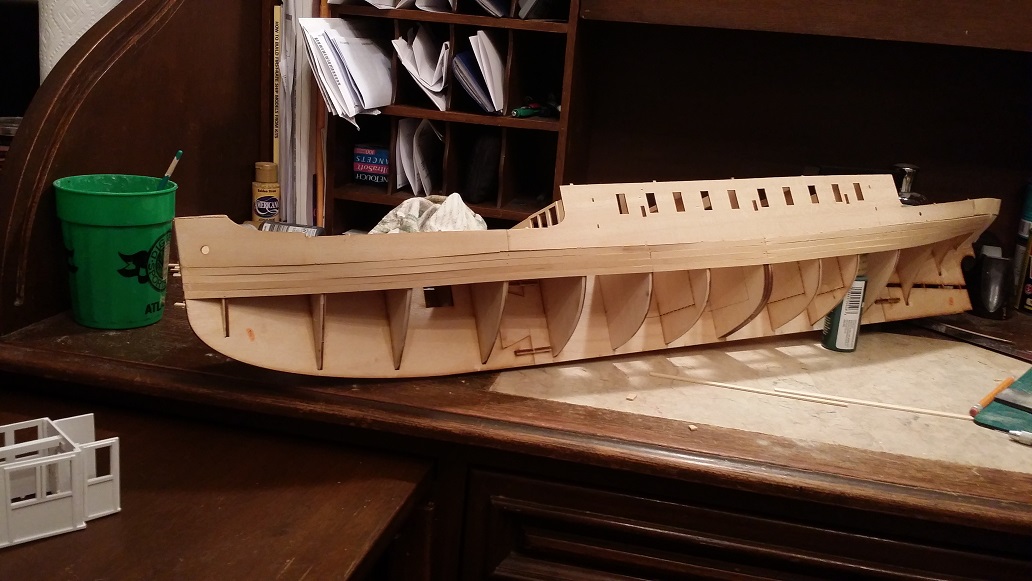
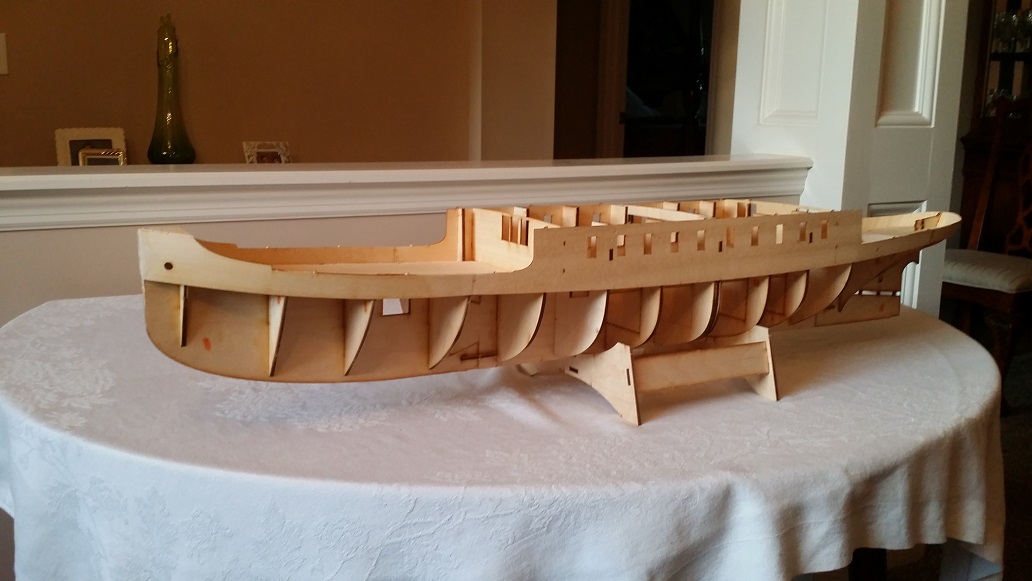
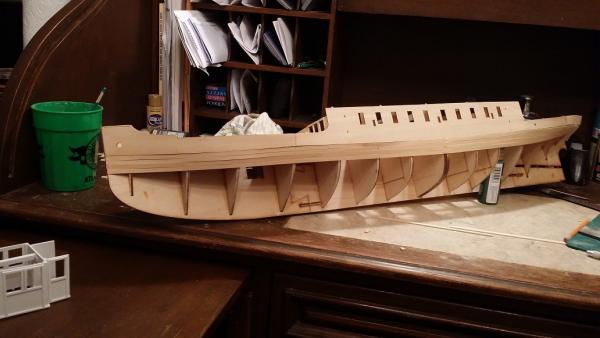
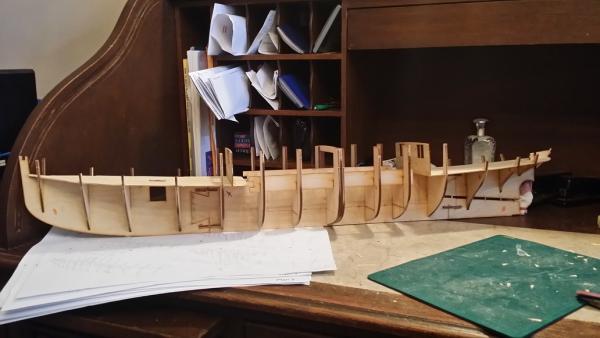
Quick update. The keel, frames, fore and aft decks and main cabin front and back walls are together. Everything has fit perfectly so far with almost no sanding needed with one big exception. One lesson is that you do not want to follow the directions exactly as they are ordered. Both fore and aft are 3 frames on each side that are used to help align the decks and form the bulwarks. After setting the bulwarks, the frames need to be cut off. I have already cut through them 2/3 of the way through to make removing them easier. The deck is planked after they and the bulwarks are installed. To make this easier, I began the deck planking. This also made opening the various holes and mounting points on the deck easier than if planked after installation. The only part remaining on the decks that needs planking is where the frames extend through the decks. This is where the one exception in excellent fit arose. The deck planking is supposed to be 4mm x 0.5mm. The planks 'averaged' 4mm. They ranged from 3.5mm to 4.5mm in width, sometimes on the same plank. I got through it though. I was going to per-paint some of this in white. After further review, I decided not to pre-paint as most of the parts have tabs and such that would have to be filled. Keeping her square has been fairly easy through the initial part of the build. This is fun, so far. It does not appear that this is going to be a long build. My CFO (wife) has already approved purchase of her sister ship, Bohuslan.

- 50 replies
-
- 6
-
-
- mariefred
- nordic class boats
- (and 1 more)
-
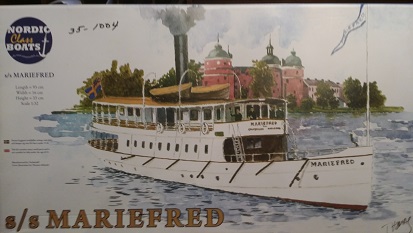
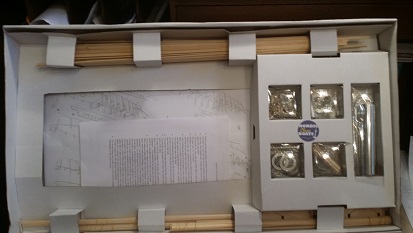
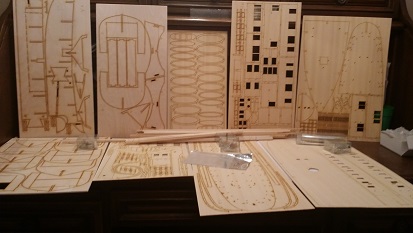
I got this from Ages of Sail. Great service, by the way. Ordered the ship and had it in a week, during Christmas shipping time. I sent them some emails with kit questions and received very prompt responses. I chose this because it is something a bit different and my CFO (wife) liked it, which helped convince her that the price is not do bad. This is a large, heavy box. Everything came well packed and packaged to minimized damage. The build diagrams are large, clear and well organized. There are, for all purpose, no written instructions. The only written page contains directions such as use wood glue for wood-to-wood joints and super glue for all others. The quality of the wood is top notch. All pipes/tubes, such as the smoke stack, are different metals. The prop shaft is brass, for example. There is very little plastic/plexiglass in the kit. Almost everything is white metal with very little flash. Below are some pictures. I will update as work progresses. This looks like a fun build and an interesting subject from a manufacturer that I have not seen previously.

- 50 replies
-
- 6
-
-
- mariefred
- nordic class boats
- (and 1 more)
-
Vivian, where did you buy the kit. I have been looking for this and cannot find it.
-
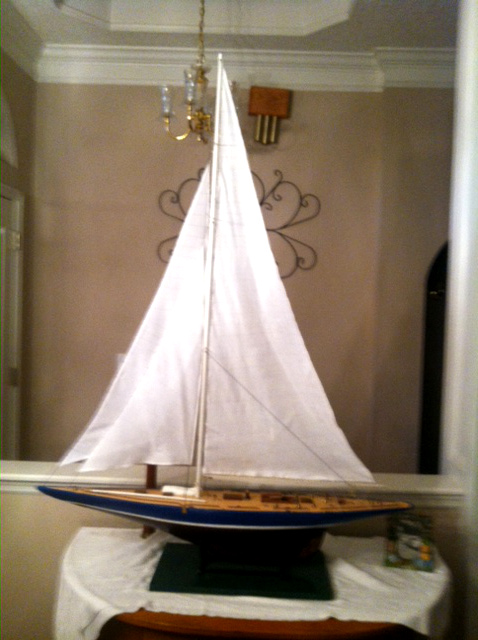
I completed my build of this kit a few months ago. Great build, but I found myself getting very bored when planking and decking her due to the size of the hull and deck. I tapered the mast, by the way, with a spoke shaver. Went very smoothly and required little cleanup sanding. Enjoy her. Everyone who comes in my house comments about her.
-
I just bought this kit at a garage sale. It has the text instructions and the large sheet illustrations. It is missing the photo booklet. Do you have this that could be scanned and emailed to me?