HOLIDAY DONATION DRIVE - SUPPORT MSW - DO YOUR PART TO KEEP THIS GREAT FORUM GOING! (Only 24 donations so far out of 49,000 members - C'mon guys!)
×

Boccherini
-
Posts
380 -
Joined
-
Last visited
Content Type
Profiles
Forums
Gallery
Events
Everything posted by Boccherini
-
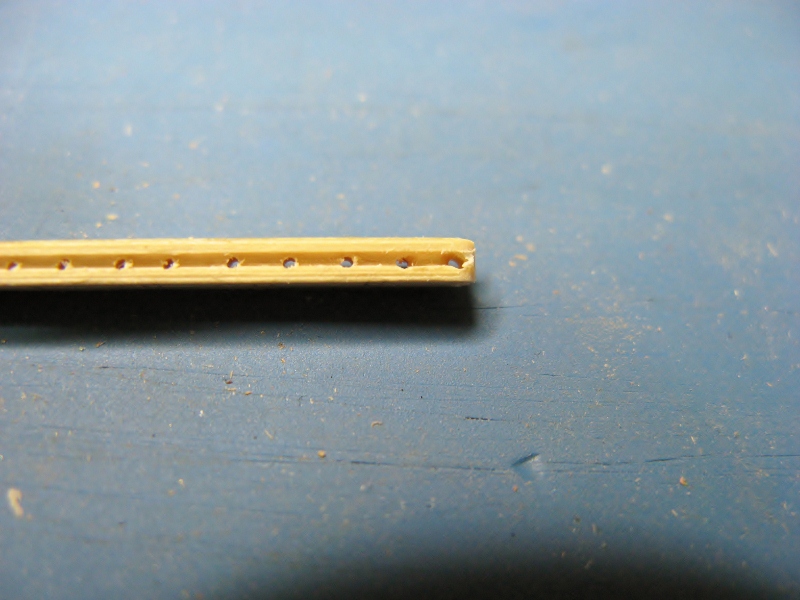
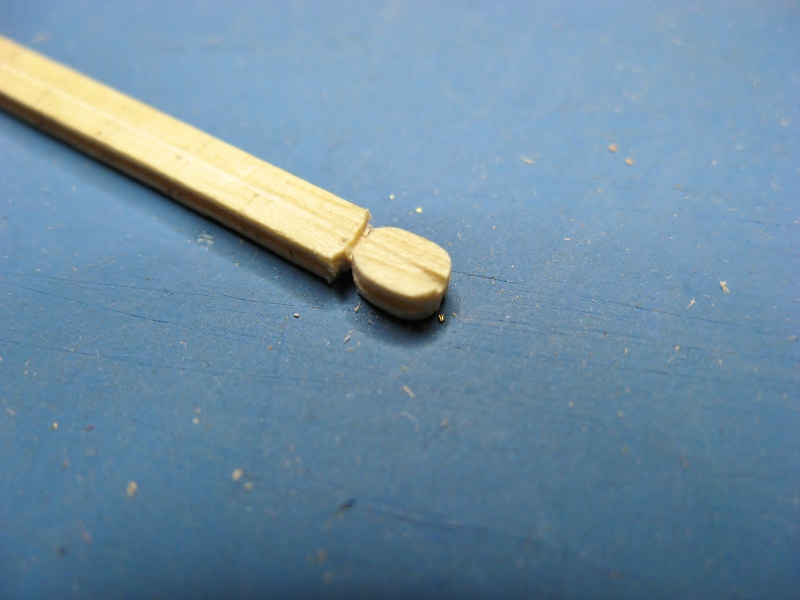
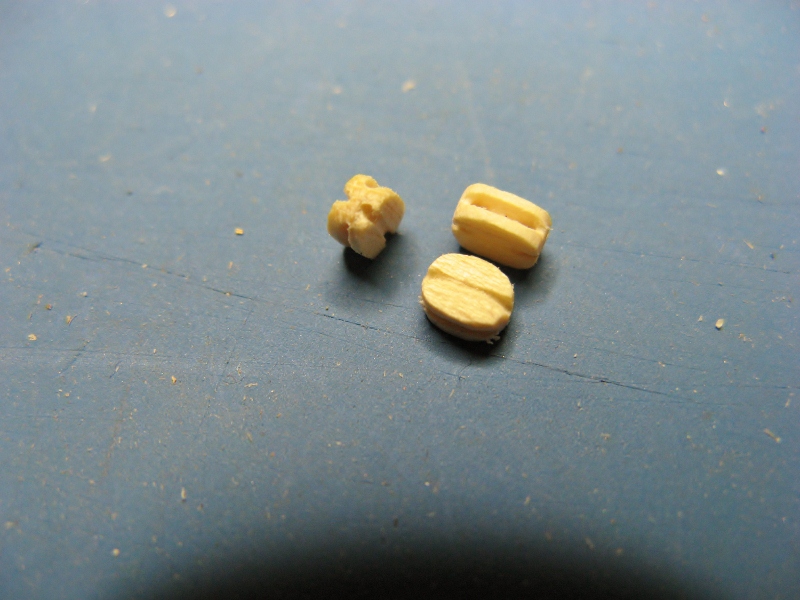
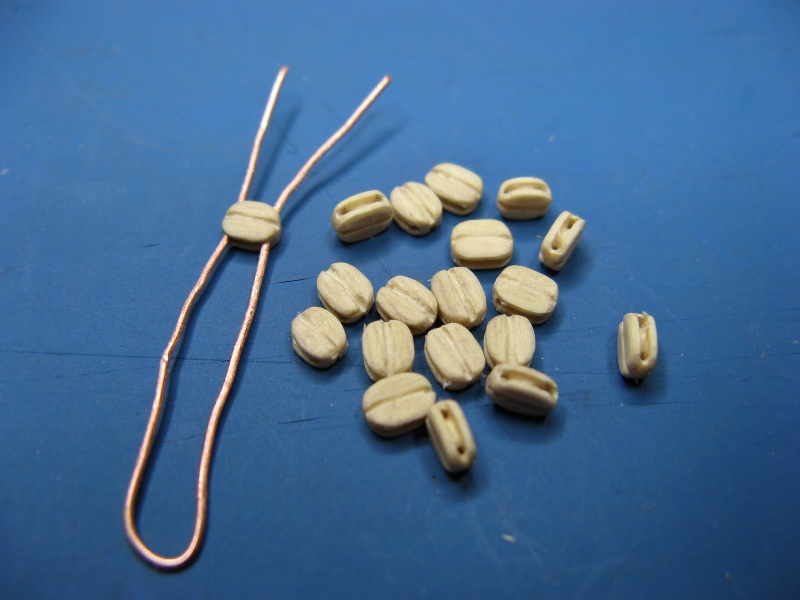
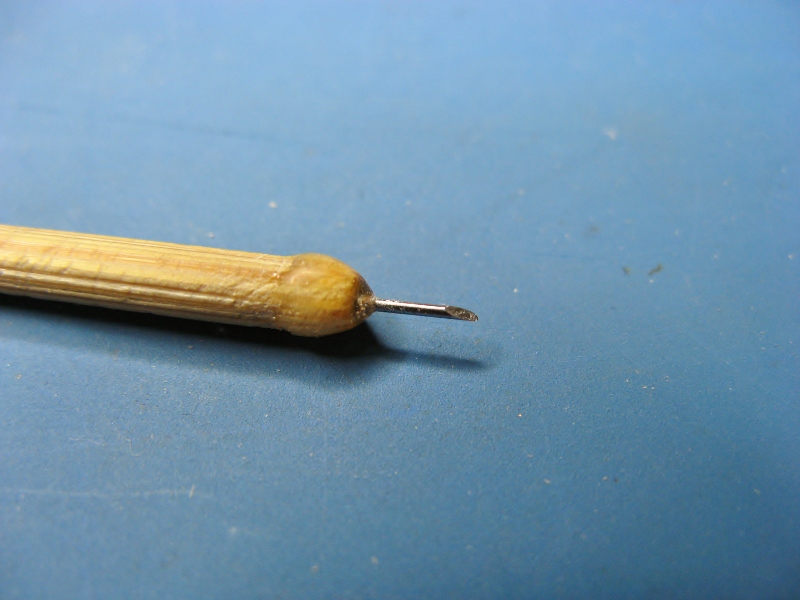
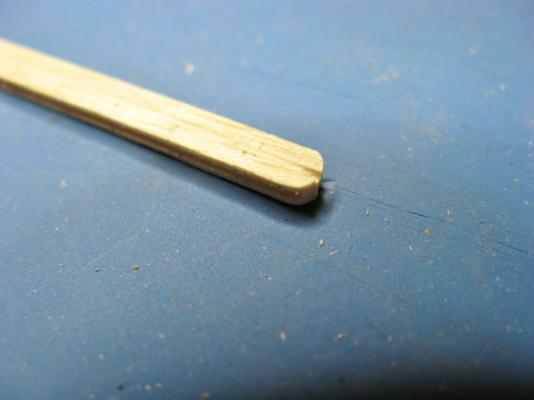
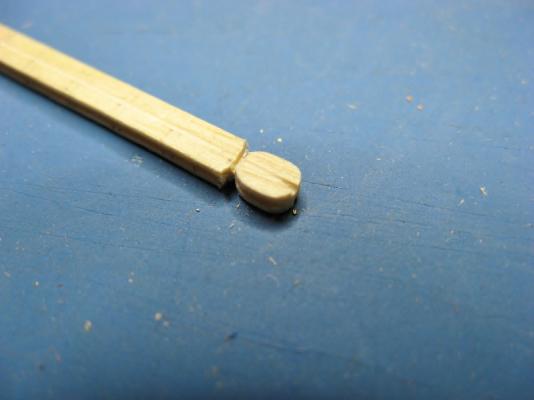
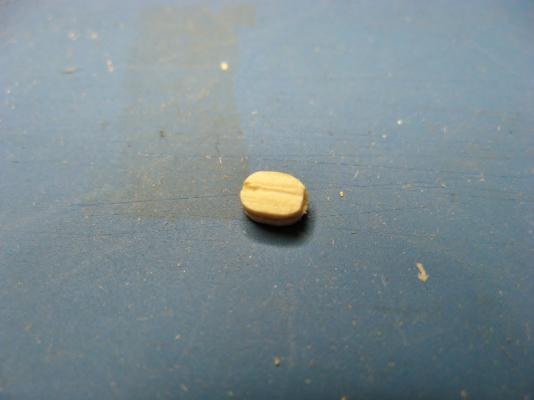
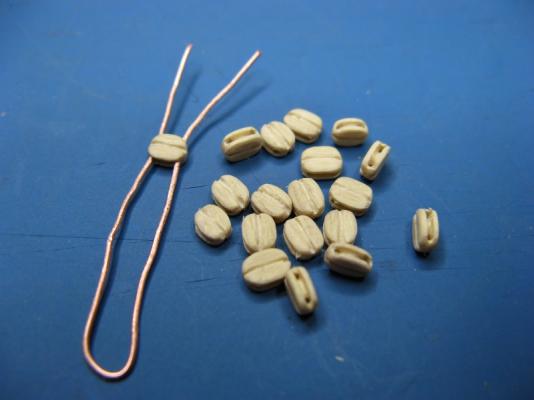
 Finally finished off the blocks for the gun tackle using the traditional manual technique. The copper wire jig made rounding off the blocks a lot easier. The little gouge is made from a broken 0.5mm drill bit epoxied into a piece of dowel, then a chisel end ground onto it. It was used to make the grooves in the ends of the blocks and to round off the holes to give the appearance of a sheave. I tried the hypodermic needle approach suggested in TFFM books, but kept bending them. The blocks are not all identical, but for a first attempt at this, I'm more than happy with the results. They look a lot better than kit supplied blocks. Regards, Grant.
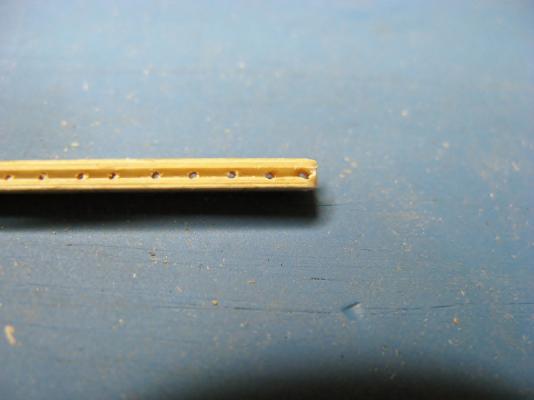


-
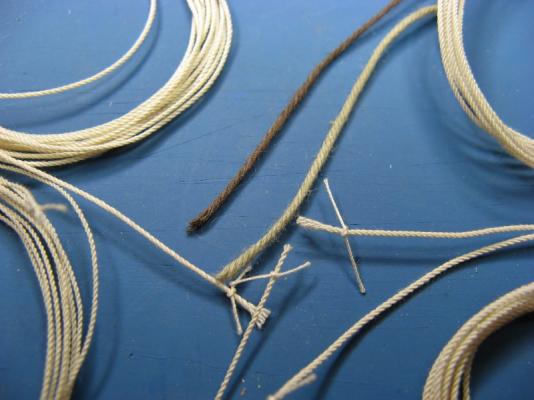
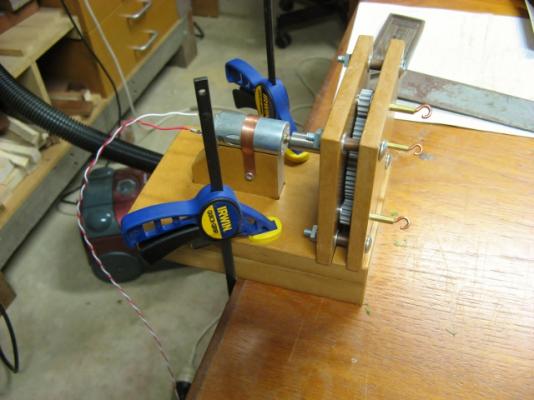
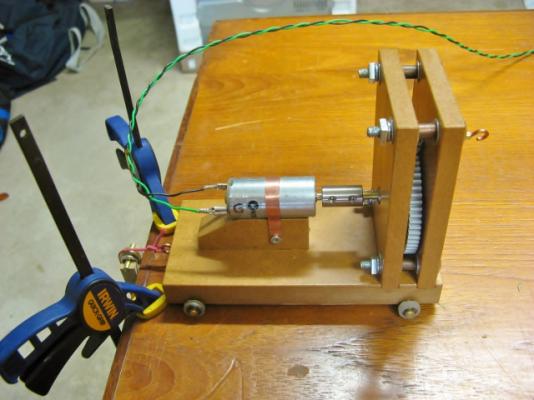
42rocker, thanks for the interest. What information are you interested in? Paddy, thanks for the comments. The design is just a hybrid of the ropewalk modellers have been using for a long time, and it's not my design. The original model was by Keith (Jack Nastyface). His was a nice piece of machinery from aluminium plate, even had a counter for the revolutions if my memory is right. I picked his brain several years ago (he also had the design in the original MSW database). It's taken this long to get around to finishing it. Yeah, the counterweight allows handsfree operation. This is handy as the thread sometimes starts to twist together whilst unwinding in the initial phase, I just run a skewer between the threads back to the traveller to separate them. Can't see why the train controller shouldn't work. The motor is the important bit though, it needs to be reversible and low rpm, Keith reckoned the ropewalk should have a top speed of somewhere around 400rpm, mine gets to about 290rpm. I had a lot of trouble finding a suitable 12v motor and reasonably priced gears, slightly faster would've been better, but I can live with the end result. It works. The two short pieces in the picture are commercially available model rope for comparison. The coil on the bottom left is made up of two threads not three.
-
Thanks guys for the interest. It's an interesting diversion, and now the procedure is sorted out, it is possible to produce good looking scale rope 100% of the time. The DMC thread has arrived, I'll post some pictures of real rope (not the practice 'eco' rope) in the next few days. Joss, I don't know how relevant this ropewalk is to the Byrnes one, they are different designs from the brief look I've had at the Byrnes model. If you think it may be useful, I can tidy it up for the database. Regards, Grant.
-
Bob, you have done a fine job so far, it's looking great. Christian has it right, get your deck beam clamps accurately in place first, then adjust the width of the planks (if neccessary), to fit the space between them and the lower planking already installed. Regards, Grant.
-
You have my sympathy, hope it all works out well with the operation. Btw, are the pictures of your lacerated fingers or the cross section? Regards, Grant.
-
Jay, thanks for the links/information. Regards, Grant.
-
Thanks for the responses. Garward, what skills are neccessary to get a uniform colouring on the rope? Regards, Grant.
-
What is the best sort of stain for ropes, water or spirit based? Does it matter? Grant.
-
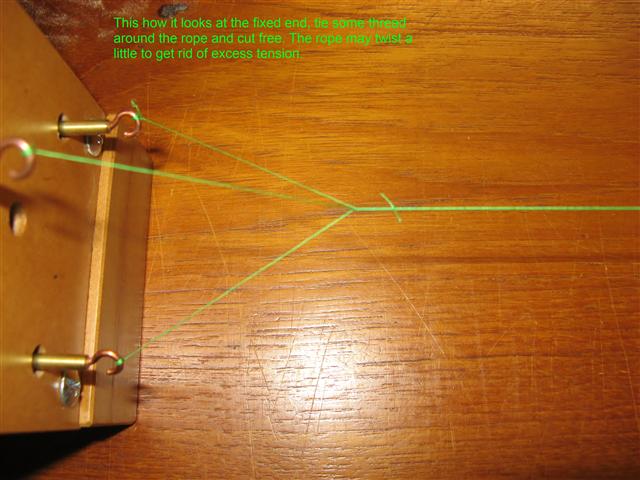
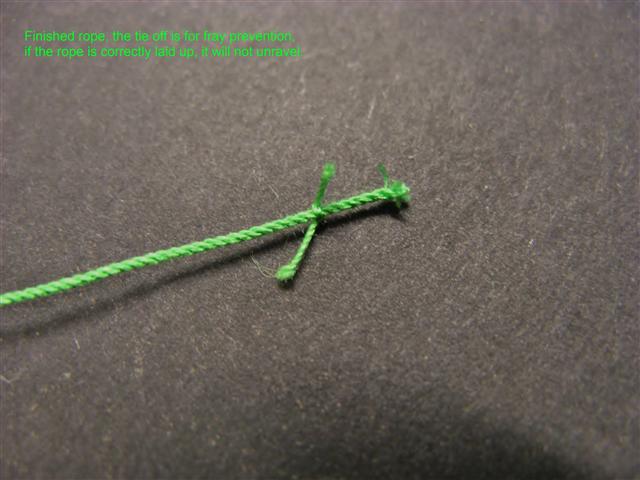
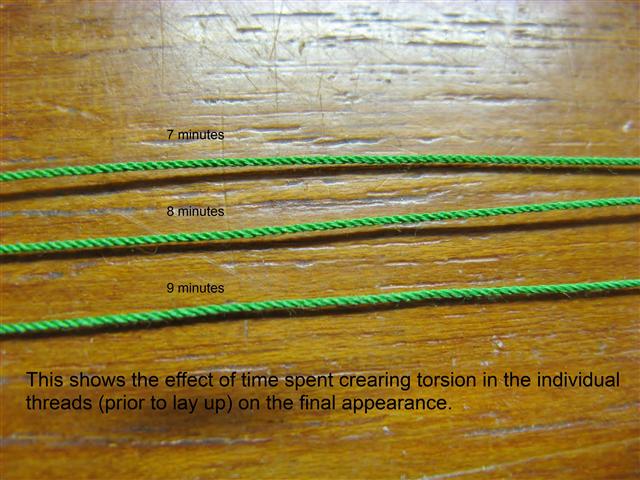
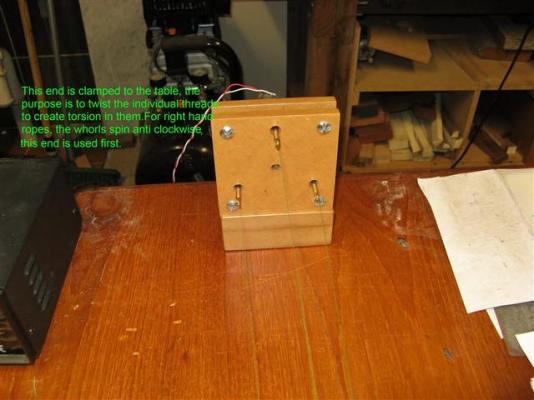
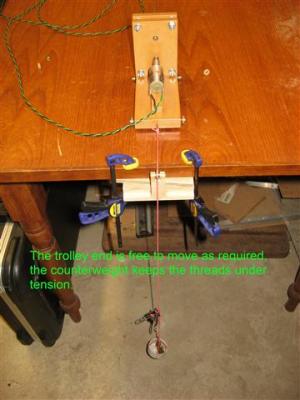
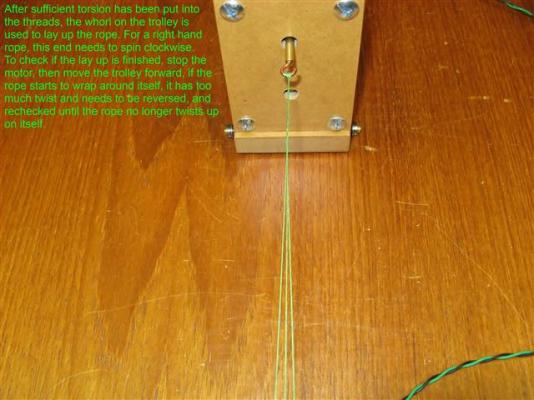
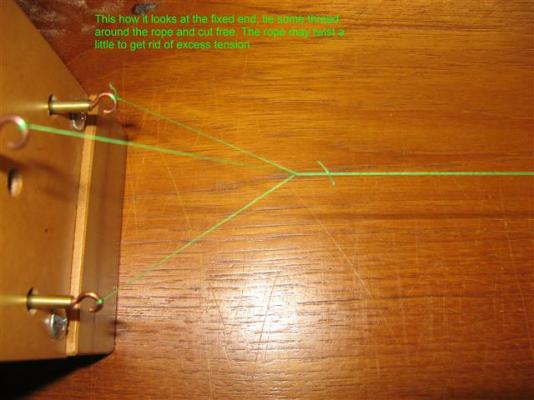
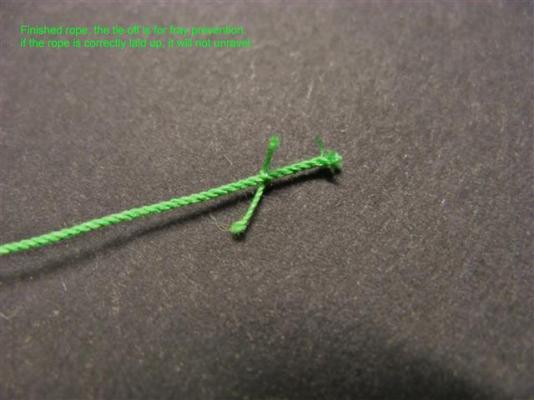
Daniel, my drawing skills are little off, I've tried a photo tutorial instead. If you need any clarification, just ask. Please bear in mind I'm a novice ropemaker, still learning as I go. The motors are reversible 12v DC type, rotating @ 70rpm. The gearing speeds this up to about 290 rpm. I apologise for the clarity of the inserted text, it looked great on the originals, but has not worked out very well here. If you can't make out what's been written, please let me know, I'll translate. Regards, Grant.
-
I went with the larger ones. I assumed they others would be too thin and likely to break during manufacture with the timber I used. Regards, Grant.
-
Rusty, great work on the hatch coamings. Is the wood really as red as it seems, or were the pictures edited a little to bring the colour out? Looking forward to seeing your hatch grating. Regards, Grant.
-
Daniel, it's not the cost, it's the quality. Commercially available ropes do not look quite right. If you put them side by side, there is large difference. As to the second part of your question, please bear with me, I'll get to it as soon as I can. Regards, Grant.
-
Thanks Edwin, I'm glad the information is useful to you. Regards, Grant.
-
Bob, nice work, congratulations on reaching the next stage. To pick up on the comment by Russ, have you checked the fairing with a plank to see if they are properly faired? I was a little sloppy with mine, which created some problems getting the planks to sit right.....which led to more work to rectify and fudge things to get it to look right. I was forced to conclude that it is easier to fix things before they compound into larger problems. Regards, Grant.
-
Thanks for the comments. Bob, when I first started this hobby, I never considered where it would lead. Just went along for the ride. You may yet surprise yourself. Regards, Grant.
-
Bob, that was sweetly done. Regards, Grant
-
Paddy, great to see the first frame up, nice work. Regards, Grant.
-
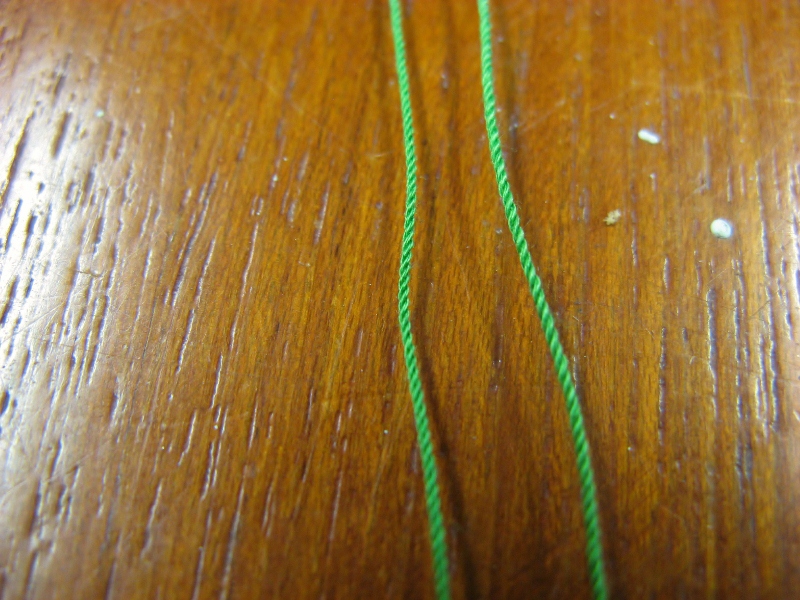
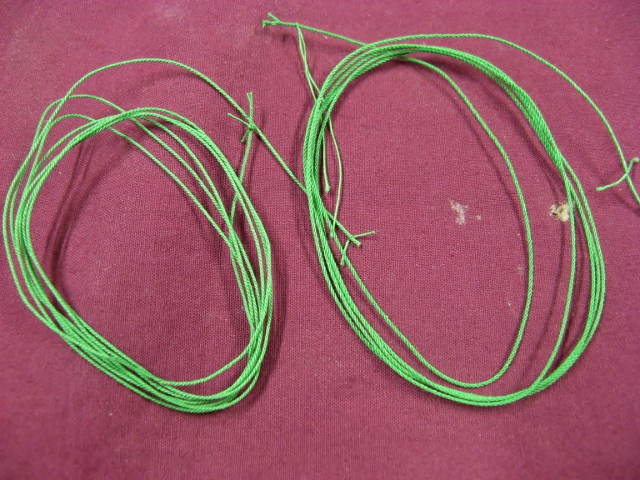
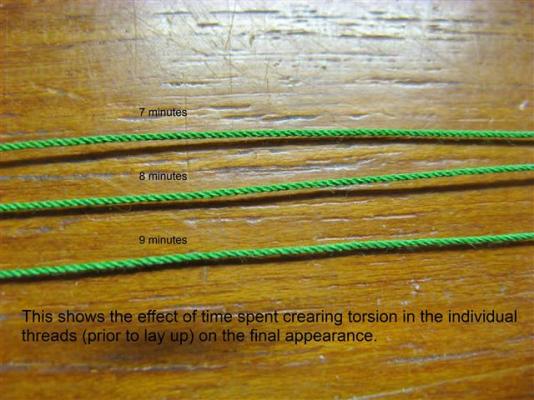
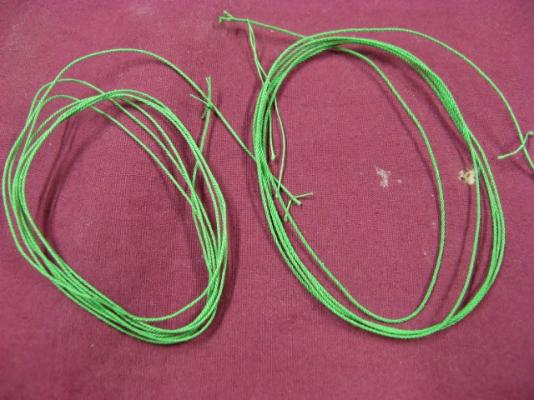
Thanks Paddy. I have just about got the hang of the ropewalk, no more tangled messes. Trials are over, now just waiting for the DMC thread to arrive before making the rope for the gun rigging. Here are some better pictures of the finished rope, the one on the left had a little more tension on it during lay up.

-
Rusty, good, clear tutorial on the mortices. You plan on planking half the gundeck as well? Regards, Grant.
-
Silver Soldering Tools
Boccherini replied to bundybear1981's topic in Metal Work, Soldering and Metal Fittings
Cleanliness, and importantly, (you may already know this having done some copper pipe work), the metal parts to be joined should be hot enough to melt the solder and make it flow. Melting the solder with the flame will not give a strong joint. You'll be ok with a bit of practice. Regards, Grant. -
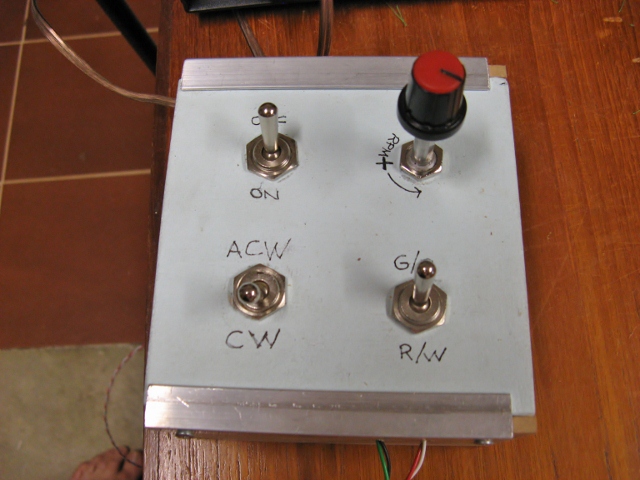
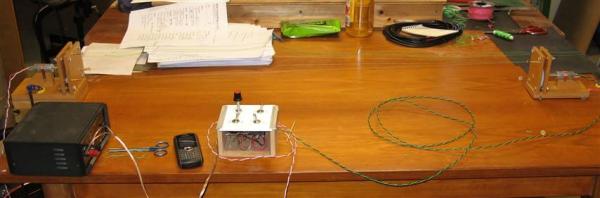
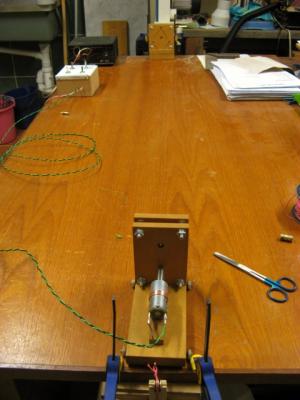
The couplings for the motors arrived, everything is assembled. The two parts are separated by about 1.4m. I plan on making them about 2.5 - 3m apart after working out how to make rope of a consistent quality. The control box circuitry was designed by one of the MSW members (cristikc, I think) several years ago. I have misplaced the diagram, which almost had a disastrous impact. Being an electronic illiterate, I connected the power supply back to front, resulting in a vile smell and wisps of smoke from the original control box. Fortunately, there was no apparent damage, everything still functions. All the reading I've done on ropewalks make it seem a relatively simple exercise to produce good quality rope. It took 4 attempts to get the desired result, only to realise the rope was wound in the wrong direction. Getting the next length with the right twist took another 5 attempts. I don't know if it's me, or if all the articles were a little optimistic. Anyway, I think I'm starting to get the hang of this set up, and should have it worked out over the weekend. Pictures of the rope are not as good as hoped. Thanks to cristikc(?) for the control circuitry design and Keith (Jack Nastyface), for his input and experience with the mechanical side of things. Grant.

-
You're making quite rapid progress considering the labour intensive methods used. The frames are looking good. Regards, Grant.
-
Paddy, that treenail is almost invisible, even with the pencil pointing at it, I'm struggling to make it out. Looking forward to seeing your assembled frames. Regards, Grant.
-
Silver Soldering Tools
Boccherini replied to bundybear1981's topic in Metal Work, Soldering and Metal Fittings
Jason, this is the torch I have been using for several years, it is works well for me. The flame is quite tight, so you have good control over what you are heating. They are also cheap, and readily available online. You just need a propane/butane refill can from Bunnies. It doesn't have auto ignition. Smith Little Torch is probably the best set up, but pricey. I cant justify the expense for the amount of use it would get. Silver solder paste is available from online jewllery suppliers, there are several in Oz. I 2nd Janos opinion of Mytool store, I'm another satisfied customer. Regards, Grant.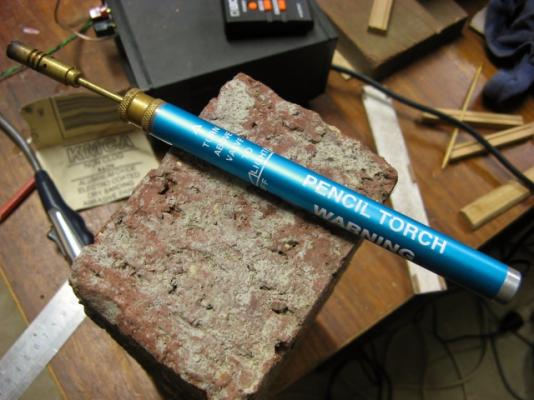
-
Thanks for re posting your work, it is very well done. The colour of the timber used for the deck beams/carlings/ledges/bitts looks great. What sort of pear is it? Regards, Grant.