HOLIDAY DONATION DRIVE - SUPPORT MSW - DO YOUR PART TO KEEP THIS GREAT FORUM GOING! (Only 24 donations so far out of 49,000 members - C'mon guys!)
×

Boccherini
-
Posts
380 -
Joined
-
Last visited
Content Type
Profiles
Forums
Gallery
Events
Everything posted by Boccherini
-

Which company has the best rigging ropes?
Boccherini replied to lamarvalley's topic in Masting, rigging and sails
Randy, I'm onside with Russ, Brian & Mark, if you plan on ship modelling being a long term pastime, you might as well build or purchase a ropewalk. Anything you produce will be far superior to the commercially available rope. Regards, Grant. -
Sorry to hear about the kids, I hope it is a short lived problem. Having a young family demands a lot of time, savour it. They grow up fast, before you know it, it'll just be you and the wife. All the best, Grant.
-
Thanks for the comments gentlemen. Regards, Grant.
-
Bob, the planking is looking good. I'm no great fan of treenailing either, maybe the rigging fairies have some 2nd cousins that do treenailing. I normally just sit down & do it, the sooner it's finished the sooner I can move on to something more interesting. Regards, Grant.
-
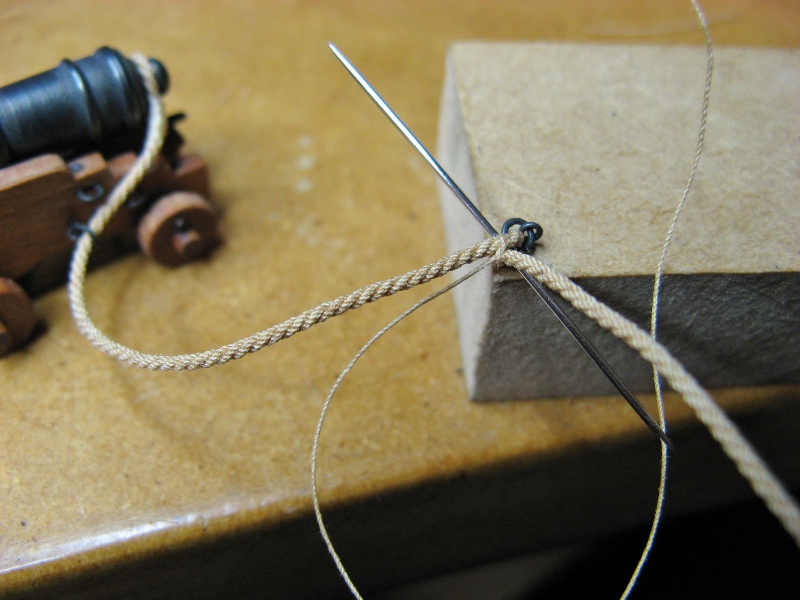
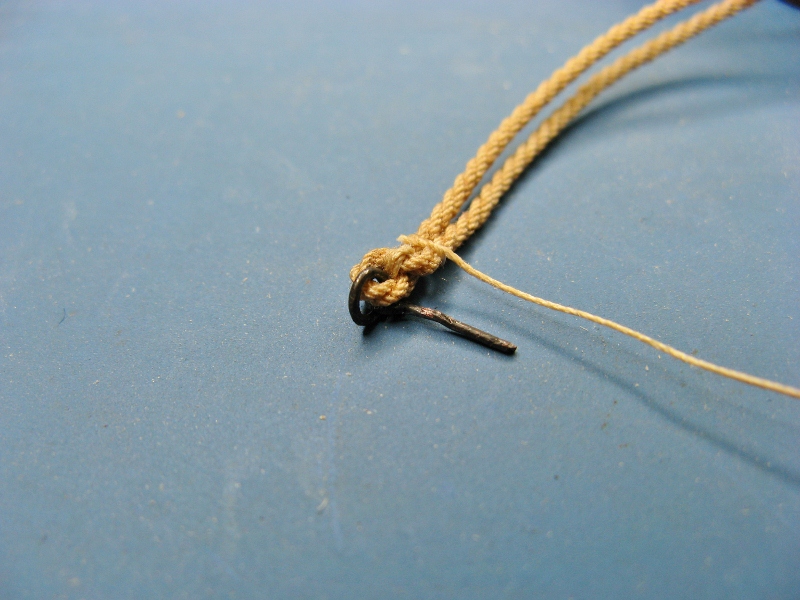
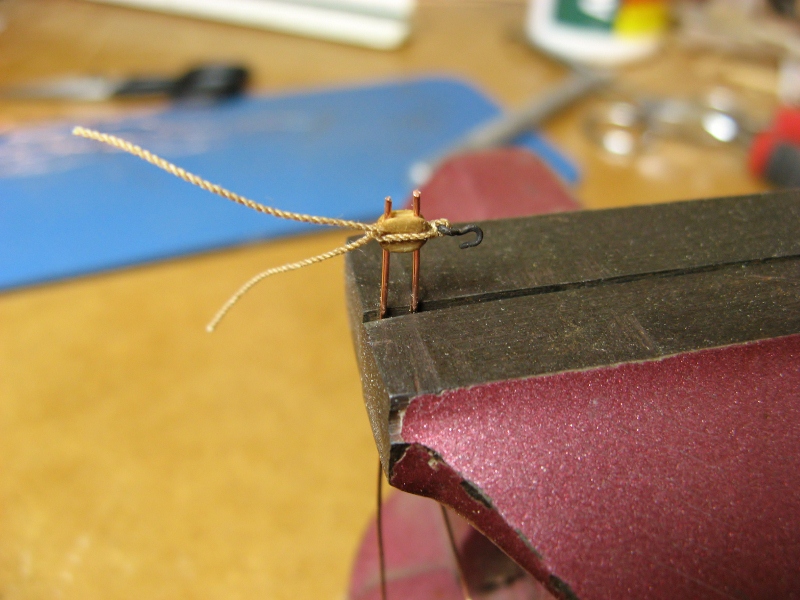
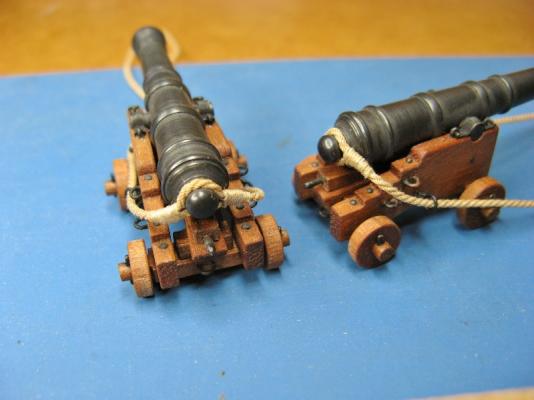
Paddy, 42Rocker and Pete thanks, I appreciate the interest and comments. Paddy, I spent some time today attaching the ring bolts to the breech ropes according to a diagram from "Historic Ship Models" By Monfeld. The eye bolt was held in a hole drilled into a block clamped to the table. At this point I would like to acknowledge the material assistance provided by the nice lady in the 'sail makers' shop, couldn't have done it without you. All the siezings were knotted, glued and allowed to set as before, prior to wrapping them around the rope. One thing to note, always keep the end of the thread to be whipped around the rope on the side of the knot in the direction of whip, that way you will not have to cross over the thread to start the whipping. It will sit better this way.This may sound like gibberish, but you will see what I mean when doing it. The rest is self explanatory. Grant.


-
Your new limber boards look good and the clamps are nicely done. Bit easier to use than the bent bits of wire and wedges I employed. Did you use end grain timber for the stain samples? Regards, Grant.
-
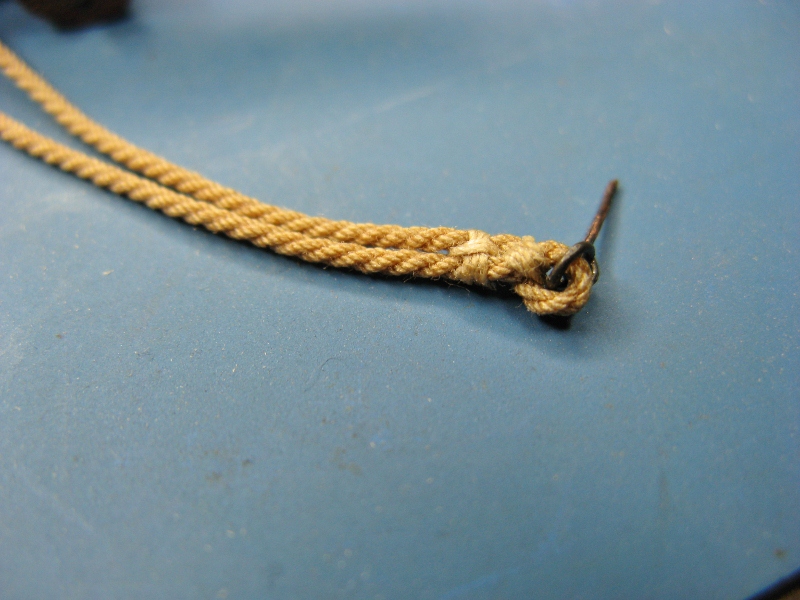
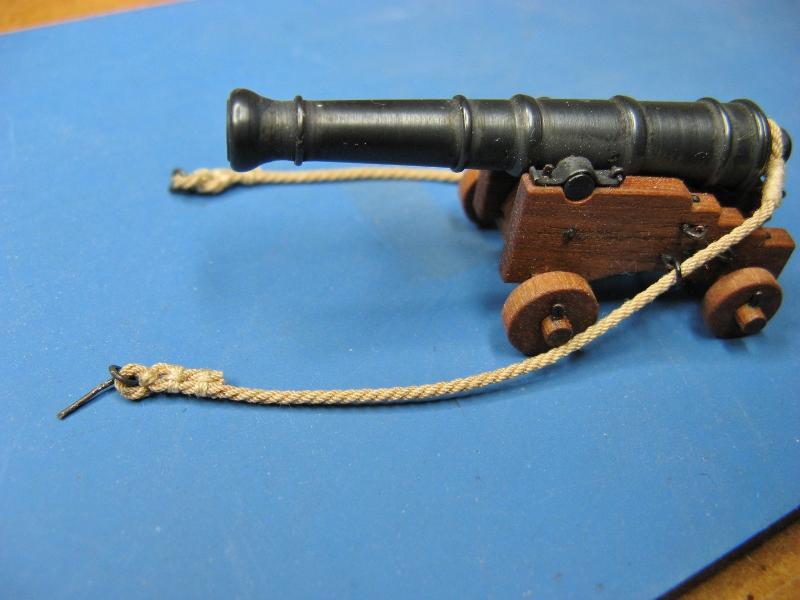
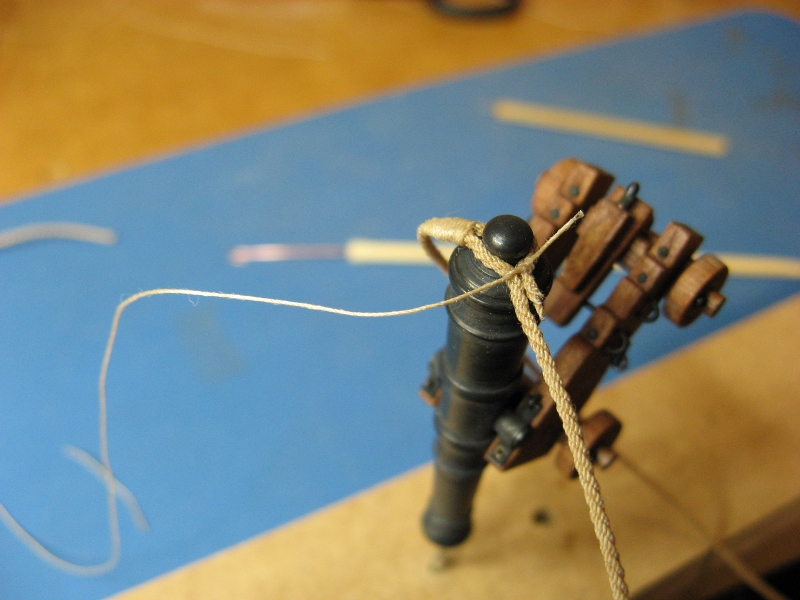
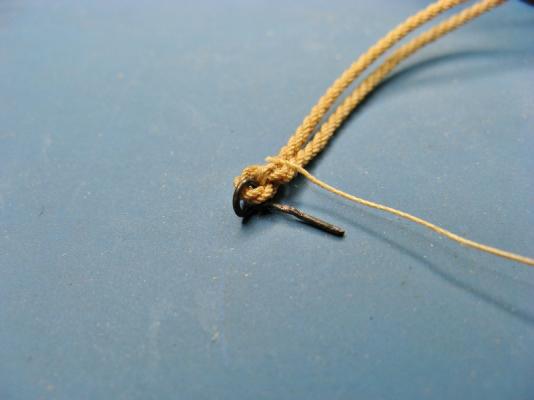
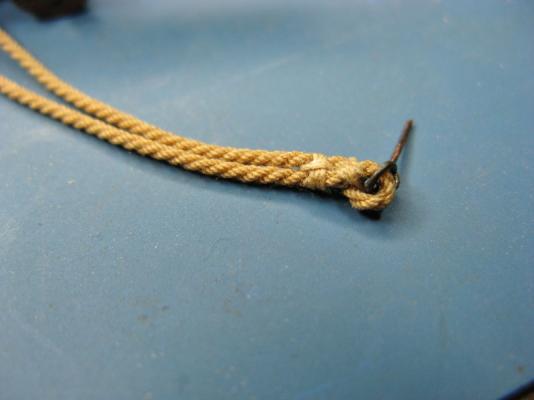
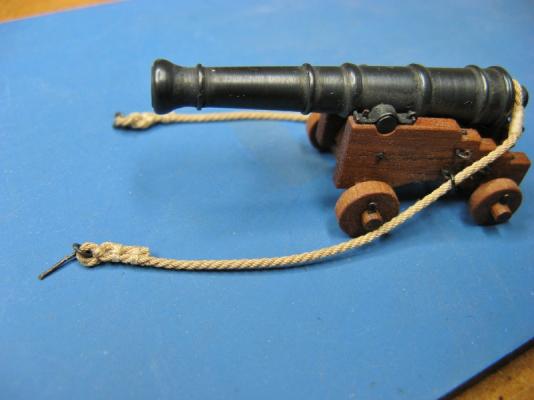
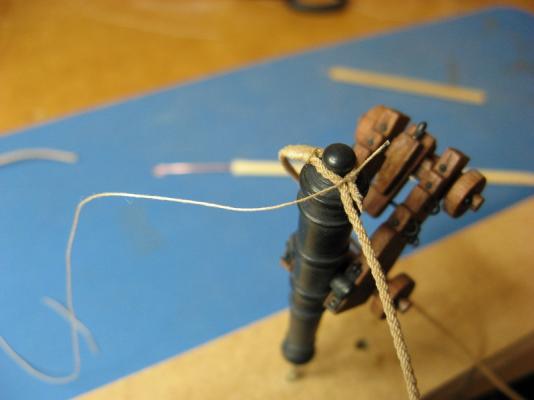
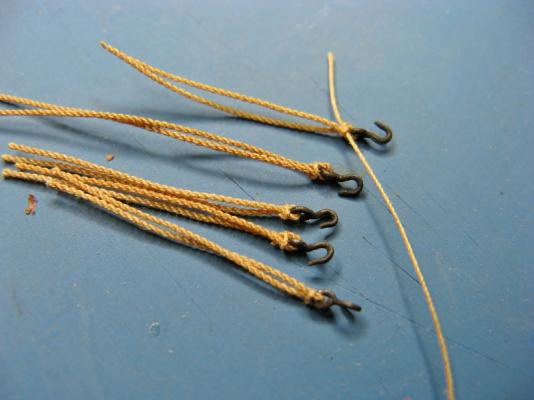
The breech rope is made up of 3 x 3 thread ropes from the DMC Cordonnet size 100 thread, I tried 3 x 2 thread ropes, but it looked a little under sized. The loop around the cascabel is made with a simulated cut splice. The splice ends were touched up with some dilute pva glue, and slight taper cut on them. One end was tied on and whipping wrapped around it and tied off. A dab of dilute glue was used, then the end trimmed. The barrel is held by a drill bit the same size as the cannon bore. The breech rope is siezed as close to the cascabel as possible, a bit of dilute glue applied which is allowed to dry before continuing. I didn't want the siezing to slip whilst finishing the whipping. The job so far. Tieing the ring bolts on will be the next task. Regards, Grant.

-
I have stopped having problems with the glue affecting finishes when I started using a wet cotton bud to wipe off the excess immediately after the treenail was inserted/cut flush. Regards, Grant.
-
Thanks guys. Paddy, the treenails are all drawn from bamboo satay skewers. Regards, Grant.
-
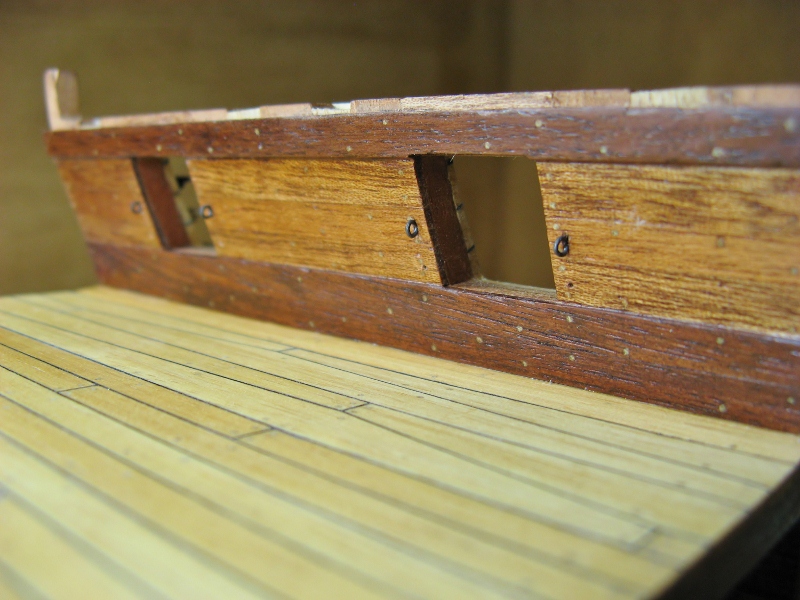
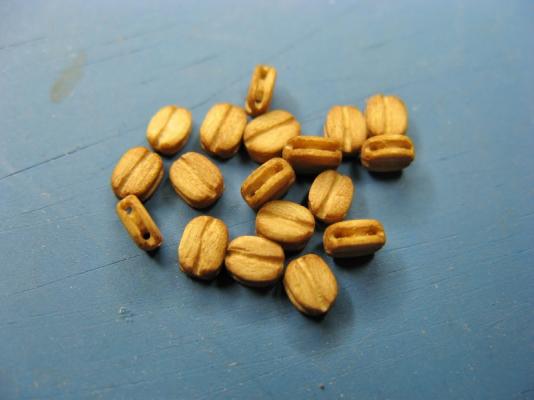
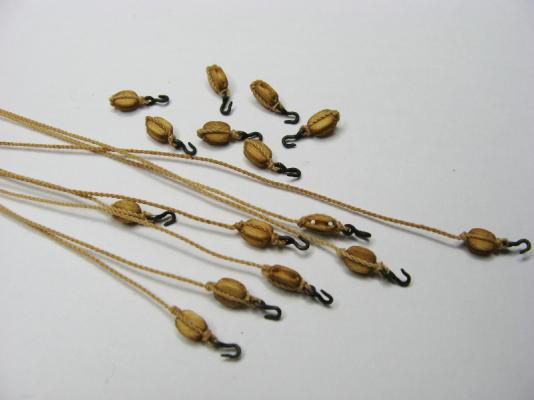
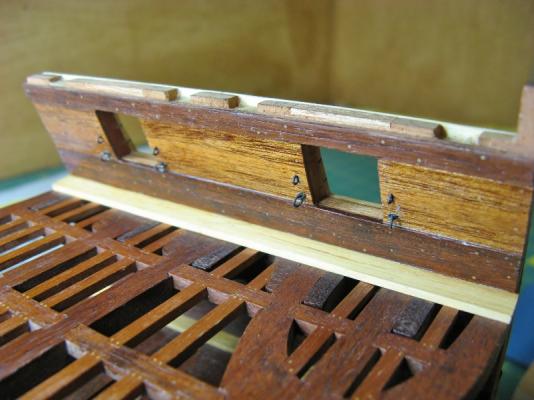
I didn't like the raw colour for the blocks, so they were stained with a spirit based Feast Watson stain (Old Baltic). The hooks were tied on with one turn of thread, knotted, then dilute pva glue applied to the knot, The taills were cut off with a scalpel after the glue dried. This jig was again useful for tying the blocks, Dilute glue was applied and the tails cut off as before. All the completed blocks ready for rigging. The ring bolts and eye bolts have been set up prior to doing the gangway while there is easy access. I am only having cannons on the planked side, which is why the ring bolts have been left off on that side, the holes have been pre drilled. It will be easier to push them in later with the line attached. Tieing off lines under the gangway is bound to be an incredibly frustrating exercise. Grant.

-
Pete, nice work, looks like you have a good "foundation" for the rest of the build. Regards, Grant.
-
Thank you, gentlemen, for the advice/opinions. I have stained the lemon wood (which is very white in its natural state) slightly darker. It looks ok. Druxey, maybe not snowstorm in the rigging, but a ship with dandruff? Regards, Grant.
-
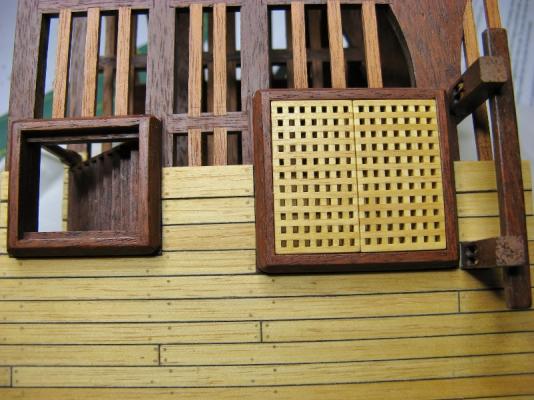
Thanks, gentlemen, for the interest and comments. Paddy, I think the two are the same, except the grain on the hatch timber is finer with none of the dark marks. Though I'm not really sure (I'm no timber expert), as both are recycled from old cabinet carcases out of different kitchens. I saved them from the bin at the time as the timber looked like it might've been useful for modelling purposes. Regards, Grant.
-
Kester, thanks for the information. Fortunately, the blocks I'm using are hand made from lemon wood, they don't have any bothersome coatings in need of removing. Regards, Grant.
-
Mark, could you please give me the shank dimension for the end mill you are using, and where it may be obtained. Thanks, Grant.
-
Gary & Russ, thanks for your opinions. Regards, Grant.
-
Thanks for taking the time to show your grating technique. I can't get over how white the holly is, it's a really strong contrast to the red heart. Keep up the good work. Regards, Grant.
-
Martin, the vacuum drum sander box is a brilliant idea. Your framing doesn't look like there's much wrong with it from the shot provided, but having redone things that I wasn't happy with, the extra effort is worth it. Second attempts are invariably better than the first. I hope you have a complete and speedy recovery from the surgery. Regards, Grant.
-
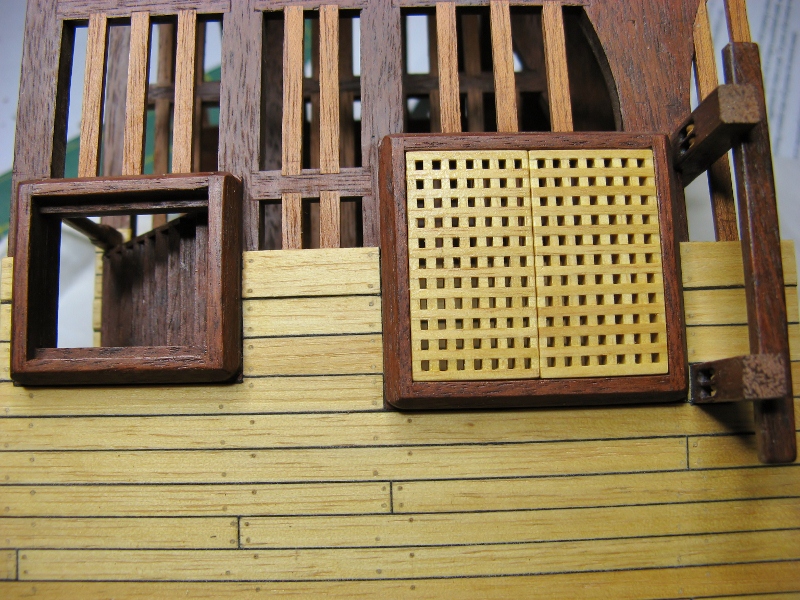
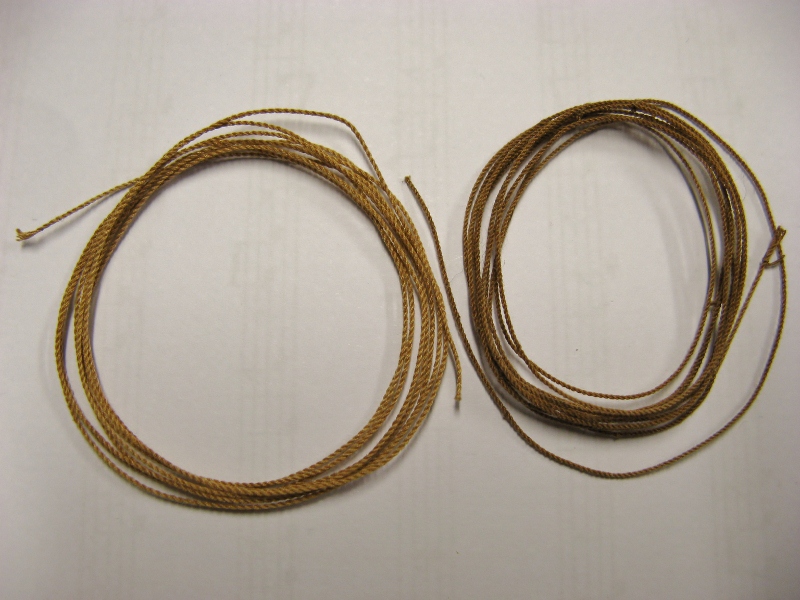
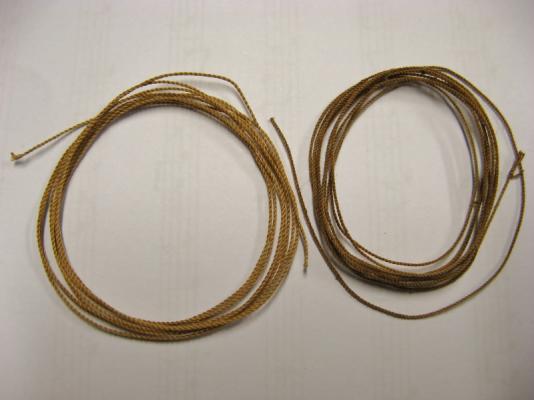
Bob, Paddy & Pete, thanks for the comments. Due to my excessive rounding on the edges of the hatch gratings, I decided to redo them. The second attempt is much better. Started to experiment with a stain colour for the rope, and eventually arrived at a dilution ratio that I'm happy with. Regards, Grant.

-
Is there a right colour for blocks? All the pictures I've seen provide no consensus, the colours range from light coloured natural wood all the way to black. Thanks, Grant.
-
I'm glad you're ok. Sounds like a reasonably "cheap" lesson on the safe operation of power tools though, at least everything is still attached and functioning. You can drown your sorrows and compare lacerations with Martin down in the Triton cross section. Regards, Grant.
-
I tried this recently. there were only 16 blocks to do. Sandpaper lining didn't work (insufficient blocks), so I tumbled the blocks with salt for several hours. The results were almost imperceptible, might need to be tumbled for a day or two to work. Constantly having to change batteries on the drill made this a waste of time. I do plan to make a tumbler conected to a motor that can run for several days uninterupted, but that's not needed for a year or so. Regards, Grant.
-
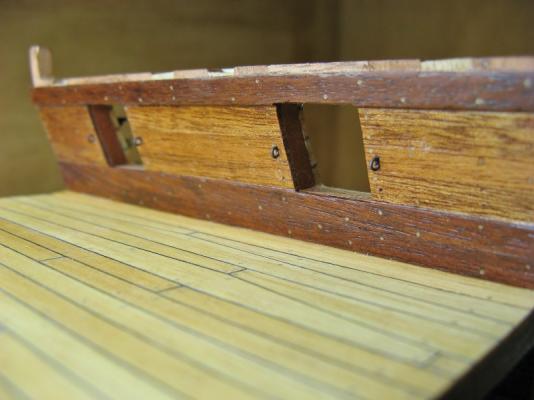
I went with a water based stain by Cabots, their interior maple stain. The full strength seems a little too dark. After some experimenting, I settled on a mix of 3 parts stain to 4 parts water. The picture shows the ropes slightly darker than they actually appear. Thanks for the comments and opinions gentlemen. Regards, Grant.
-
Marius, that is looking really good. The embuia you used for the wales looks a lot like our jarrah. Is it a local Sth African timber? Regards, Grant.
-
Nice looking work Snowmans. I love the warm colour of the timber. It has come up beautifully after sealing. Regards, Grant.