HOLIDAY DONATION DRIVE - SUPPORT MSW - DO YOUR PART TO KEEP THIS GREAT FORUM GOING! (Only 24 donations so far out of 49,000 members - C'mon guys!)
×


Boccherini
-
Posts
380 -
Joined
-
Last visited
Content Type
Profiles
Forums
Gallery
Events
Everything posted by Boccherini
-
 Paddy, nice job on the fairing from where I'm sitting.The raw colour of the timber frames looks good. As Rusty said "Only one?", you are doing a great job. Regards, Grant.
 -
Rusty, congratulations on a fine looking model. Regards, Grant.
- 332 replies
-
- 1
-

-
- Triton
- cross-section
- (and 1 more)
-
Thanks for the comments gentlemen. I wouldn't worry about your pencil torch Paddy, mine worked well for several years. It started playing up earlier this year, giving me some frustrating moments. Considering it's meagre cost, I definately got good value out of it. Regards, Grant.
-
Bob, nice work on the bitts, particularly like the work on the hatch coamings. Regards, Grant.
-
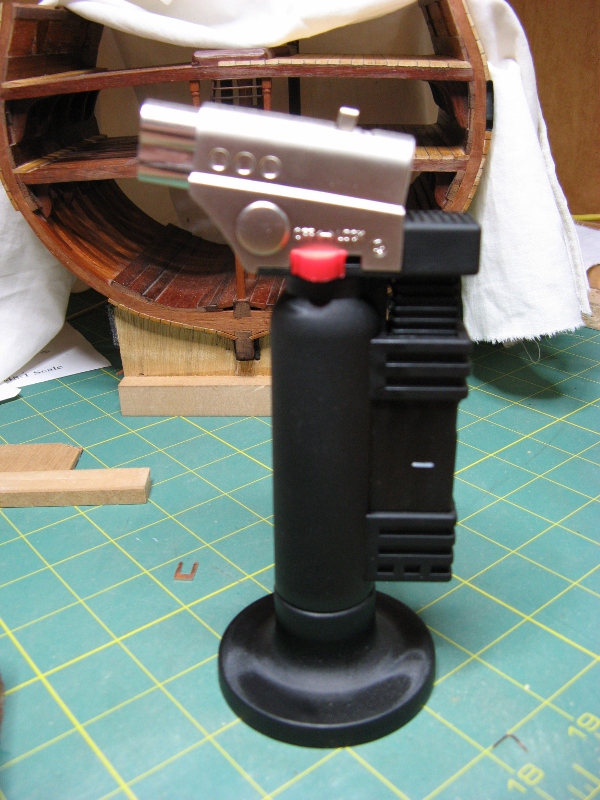
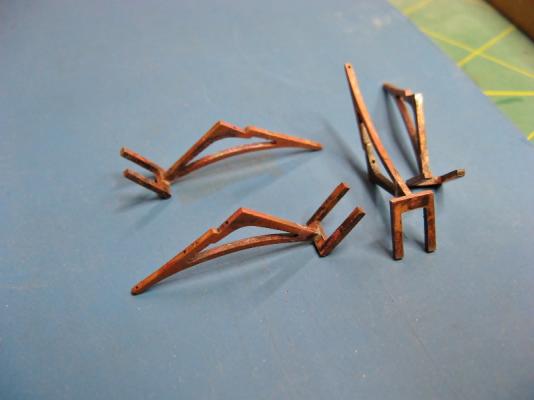
Just went through one of those periods where the desire to work on this project evaporated, didn't even look at it for 2 weeks. I'm over that now, the inspiration has returned . I have upgraded my gas torch, this one has built in ignition and aeration adjustment for the flame. A great improvement over the pencil torch. The brackets have all been trimmed back to the correct length, and the ends soldered on for the skid beams. These are still oversize, but will be trimmed back in the next step. I have started making everything slightly longer or thicker than required, having discovered it is easier to remove excess than add material or re make a piece. Grant.


-
Marius, it's good to see you are still with us. The model is looking good. As Joss said, turning some barrels will provide a nice finishing detail, I'm looking forward to see how you go about it. Regards, Grant.
-
Paddy, that is looking very good. Looking forward to seeing the planking installed. One thing I did learn the hard way about the filler/spacer blocks, it is better to use a softer wood than the frames, this makes fairing easier. Regards, Grant.
-
Accompanied by the sound of teeth grinding and muttering under the breath. On a positive note......practice makes perfect. I developed the habit of measuring or making templates directly from the model, because of the previously mentioned difference between it and the plans. Saved some frustration. Regards, Grant.
-
Rusty, the cross secton has finished up very well, congratulations on a great job. Regards, Grant.
-
Paddy, congratulations, that's looking great. The extra care you're taking setting the frames up will make everything else a lot easier. Regards, Grant.
-
Dick, good to see some progress with your new project, the 'rough' framing looks great. Regards, Grant
-
Bob, neat job on the gun port lining, the planking is looking very professional. The top plank on the bulwarks needs to be rebated the thickness of the gangway planks, which are supposed to sit flush with the top of the frames. I made the same mistake, and spent a nervous hour carefully trimming the offending planks (on both sides) down to accomodate the gangways. Regards, Grant.
-
Ron, that's looking good. You might find it easier/faster by clamping 6 or 8 planks together, level them, glue the paper on, then slice them apart with a thin blade (like the old style double edged razor blades). Regards, Grant.
-
Glad you caught that one in quick time. As to proceeding slowly, the motto Russ has near the bottom of his posts is very appropriate....."T'aint a hobby if you hurry". Regards, Grant.
-
Thanks for the comments gentlemen. Regards, Grant.
-
Rusty, good start with the brackets. My cross section and the plans don't always exactly agree, so I used a piece of timber across the deck resting on the gangway ledges to provide a guide for the underside of the gangway planking. This helped to get the correct angle for the brackets and eliminated the possibilty of them getting out of alignment. Regards, Grant.
-
Paddy, are the Nina & Pinta full size replicas? I remember seeing the dimensions of these vessels several years ago. Once you realise the actual size of the vessels, the fact they survived the voyage at all is amazing. Regards, Grant.
-
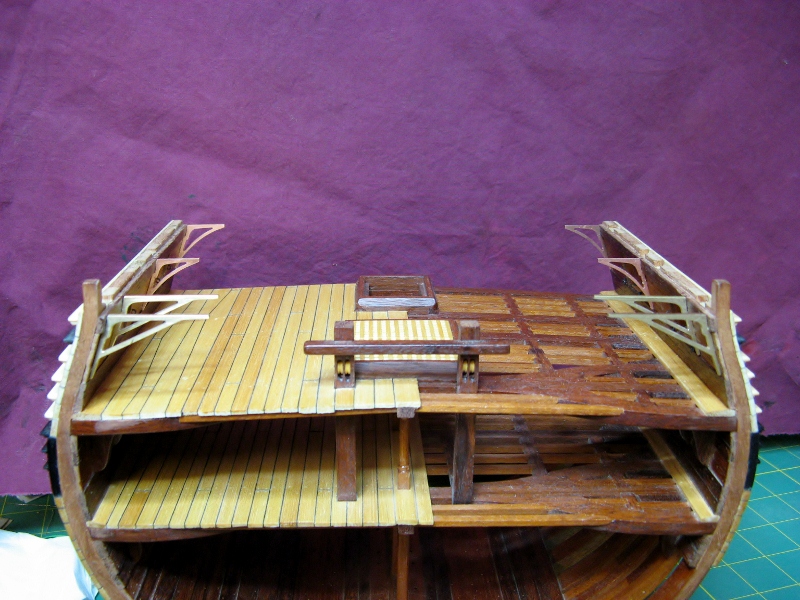
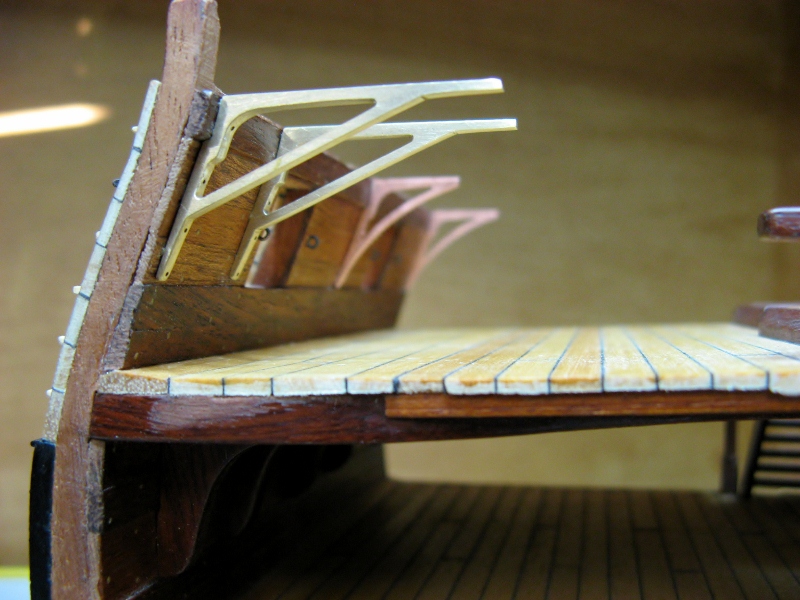
The gangways are complete, I decided it would be easier to make them off the model, then install them complete. The construction sequence is pretty self explanatory (in spite of the fuzzy pictures, apologies). Clamping the first three planks was done in a jig, the rest of the joints were made by clamping to the table of the Byrnes saw (versatile piece of machinery). Grant.


-
Meredith, I have had a 10" Carbatec band saw for 10 or so years. It was originally purchased to cut deck planking, which worked out ok. The planks just needed a bit of finishing off on a thicknesser. It is now only used/set up for cutting larger pieces of timber down to a size the Byrnes saw can handle. I am using a coarse blade (4 tpi), which cuts hard wood easily. The cut marks are either hand planed off or removed with the thicknesser, or a combination of both. For what it's worth, I also have a scroll saw. Regards, Grant.
-
Re the "oops moment", this project has taught me to always make several more of everything that is required. The times I didn't, meant having to set up heights and jigs etc., all over again. It's a valuable lesson. Good to see you're on top of it. Regards, Grant.
- 332 replies
-
- 1
-
-
- Triton
- cross-section
- (and 1 more)
-
Rusty, the gun carriage components are looking very nice. Were the sides shaped individualy, or did you shape a block then cut the sides from it? Regards, Grant.
-
Thanks Bob. Grant.
-
Bob, you've done a good job on both the knees and pillars. The extra detail in rounding the centre section of the pillars looks a lot better than the plain square alternative. Regards, Grant.
-
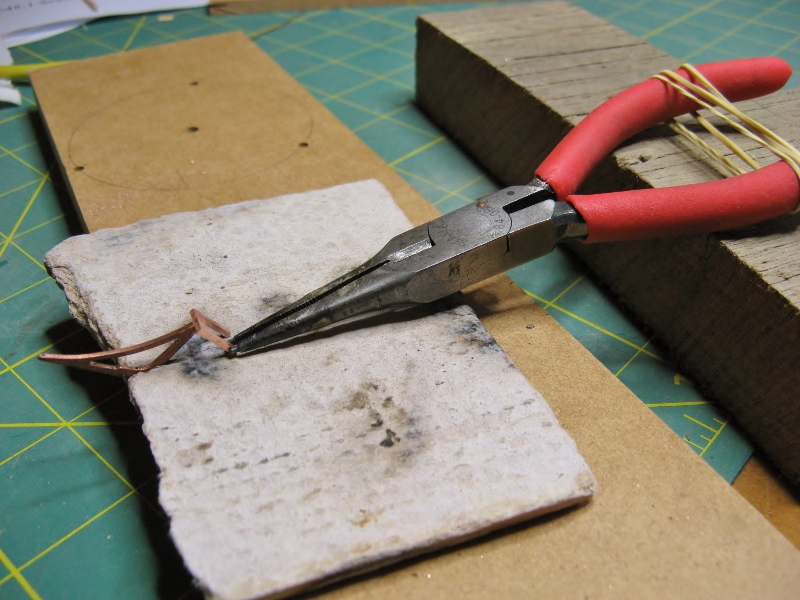
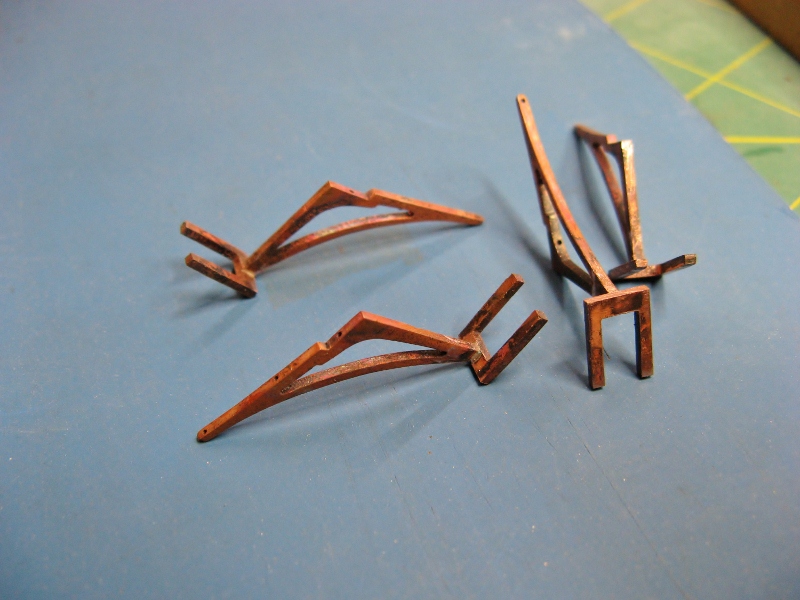
Not quite as much progress has been made as hoped for, the Admiral desired a "galley" renovation, which has taken a bit longer than anticipated. All the brackets are tacked into place with contact cement to allow the marking of fixing holes and to make a template for the gangways. This will also allow me to accurately trim the lengths of the brackets so everything looks symetrical. Grant.


-
Paddy, the rope is looking great, you seem to have mastered the process. Regards, Grant.