HOLIDAY DONATION DRIVE - SUPPORT MSW - DO YOUR PART TO KEEP THIS GREAT FORUM GOING! (Only 13 donations so far - C'mon guys!)
×


maggsl_01
-
Posts
767 -
Joined
-
Last visited
Content Type
Profiles
Forums
Gallery
Events
Everything posted by maggsl_01
-
 Hi Denis, really looks great. I like the shine of the deck and the accuracy of the planks. The kit seems to be a neat piece of fun As I don't know Amati so far can you please tell me something about the instructions? On pic shows a booklet - but are there "real" plans too? Looking forward to your next update Cheerio Max
 -
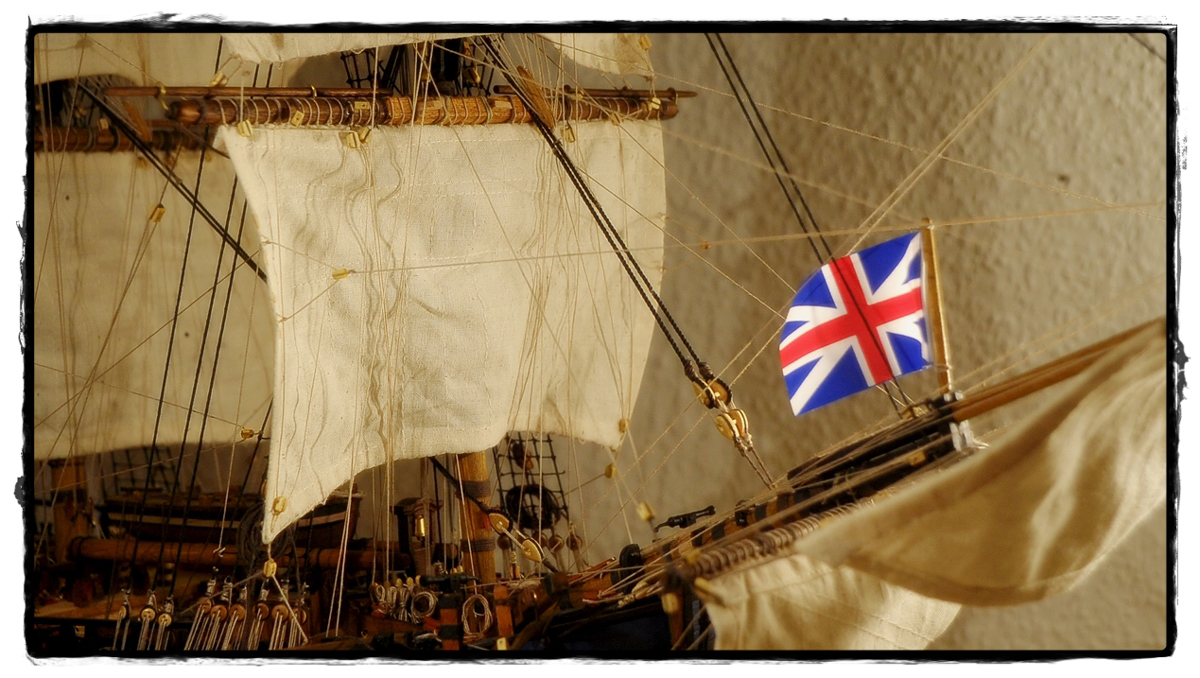
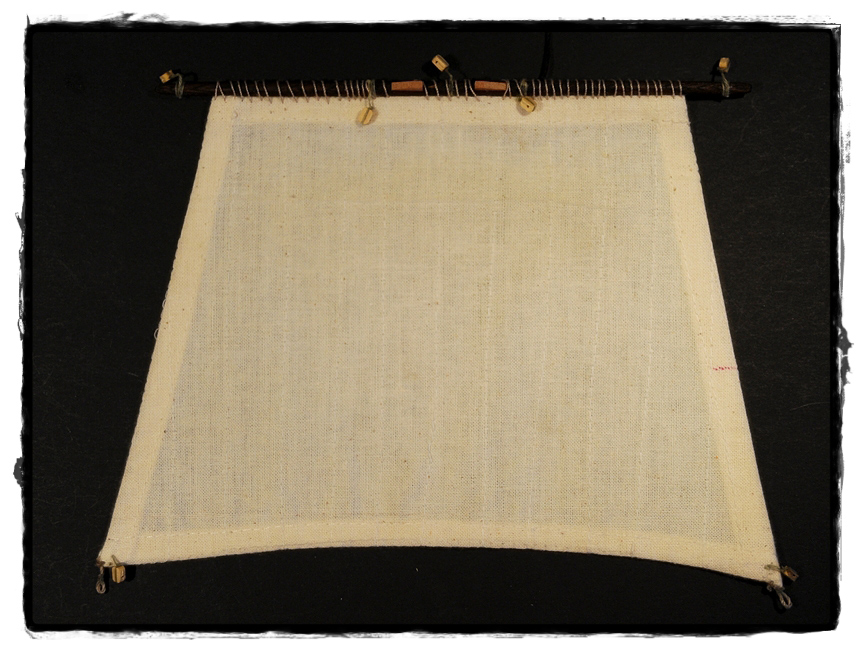
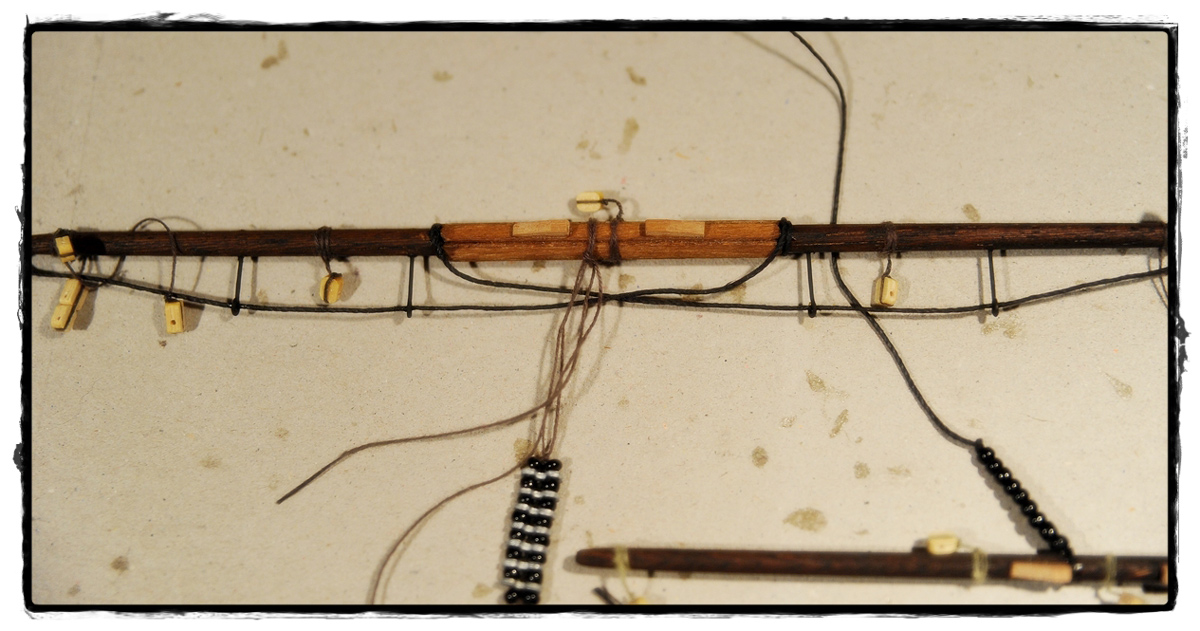
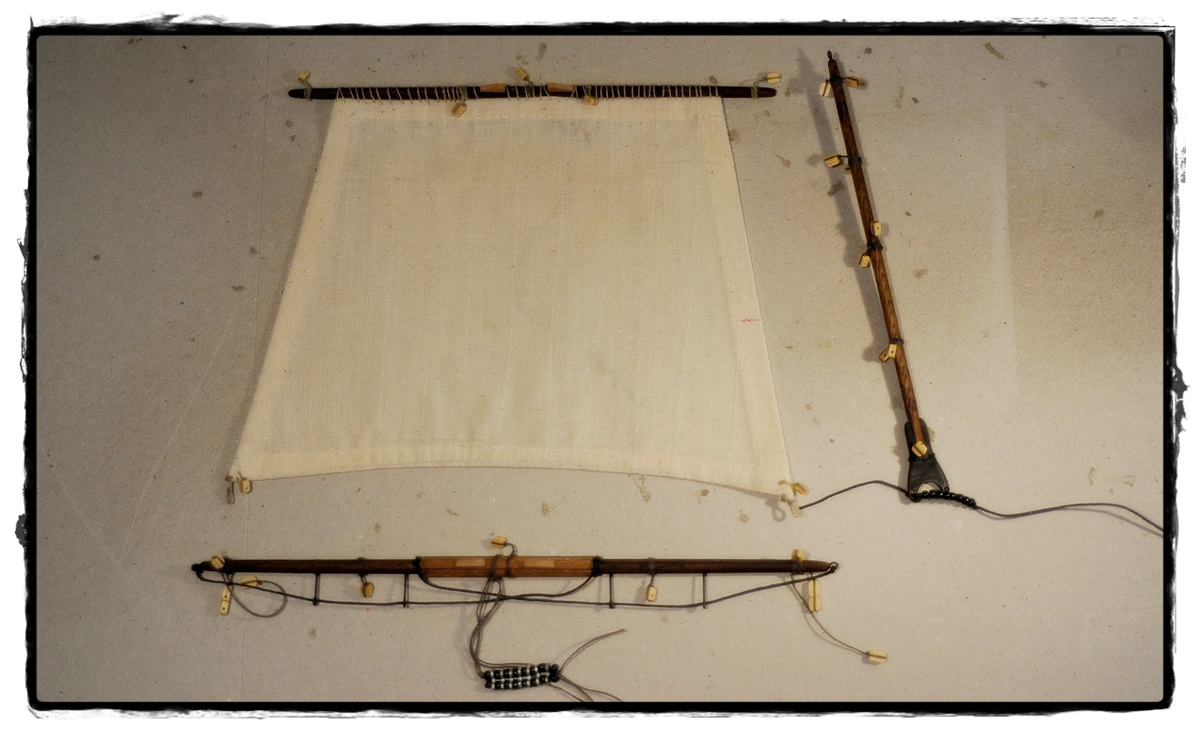
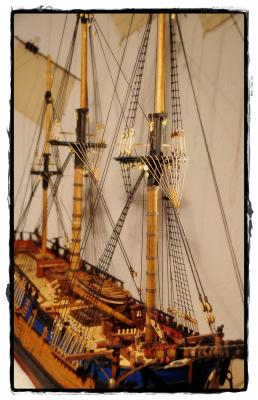
Hello my mates... thank you all for your kind words. I am not so happy with the sails and will probably not use sails anymore. But I wanted to try and see. Both I did, and now I can decide in a considered manner. As mentioned I am quite content with the kit. In every kit there are more or less things to improve - so the effort for this kit was average. I like to have real plans and drawings more than the photo-booklets as plans give more Information about size and shape. So you can better handle with improvements or changes. The book AOTS Endeavour by Mr Marquardt is an enormous treasure-box. The descriptions and drawings there gave me some inspiration on my way through the build. Nevertheless this model is just one Interpretation and I see so much stunning models and logs around. Every modeller has his own sight and his own Level to create a almost perfect model. I always compare my doing with the progress I see in other logs. It is so satisfying to learn from others and to give the own knowledge to others. I hope the parts for the stand will be delivered this week so I can complete the model and take some more pics (esp details) Best wishes to all my friends and followers Cheerio Max
-
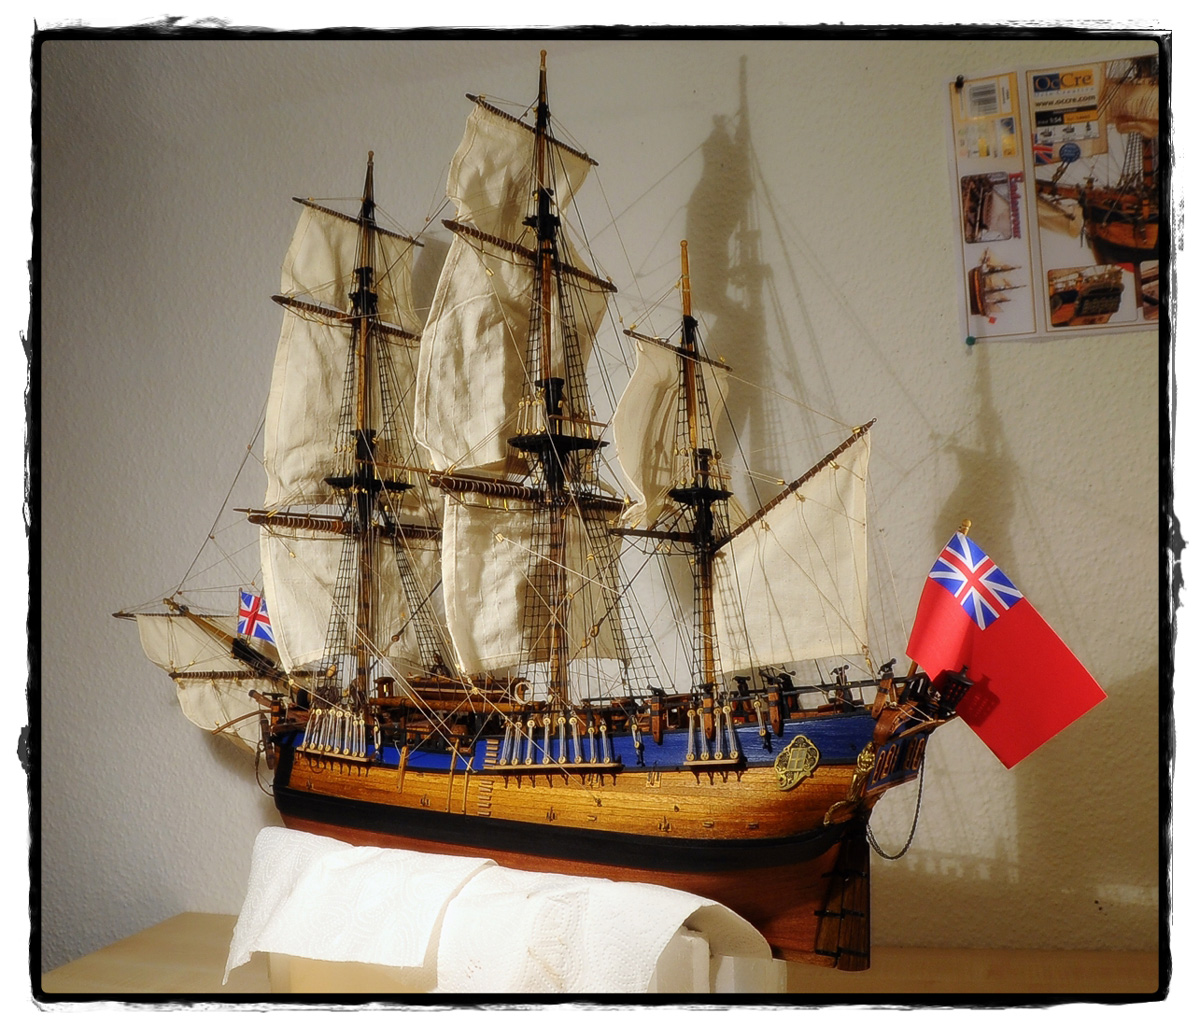
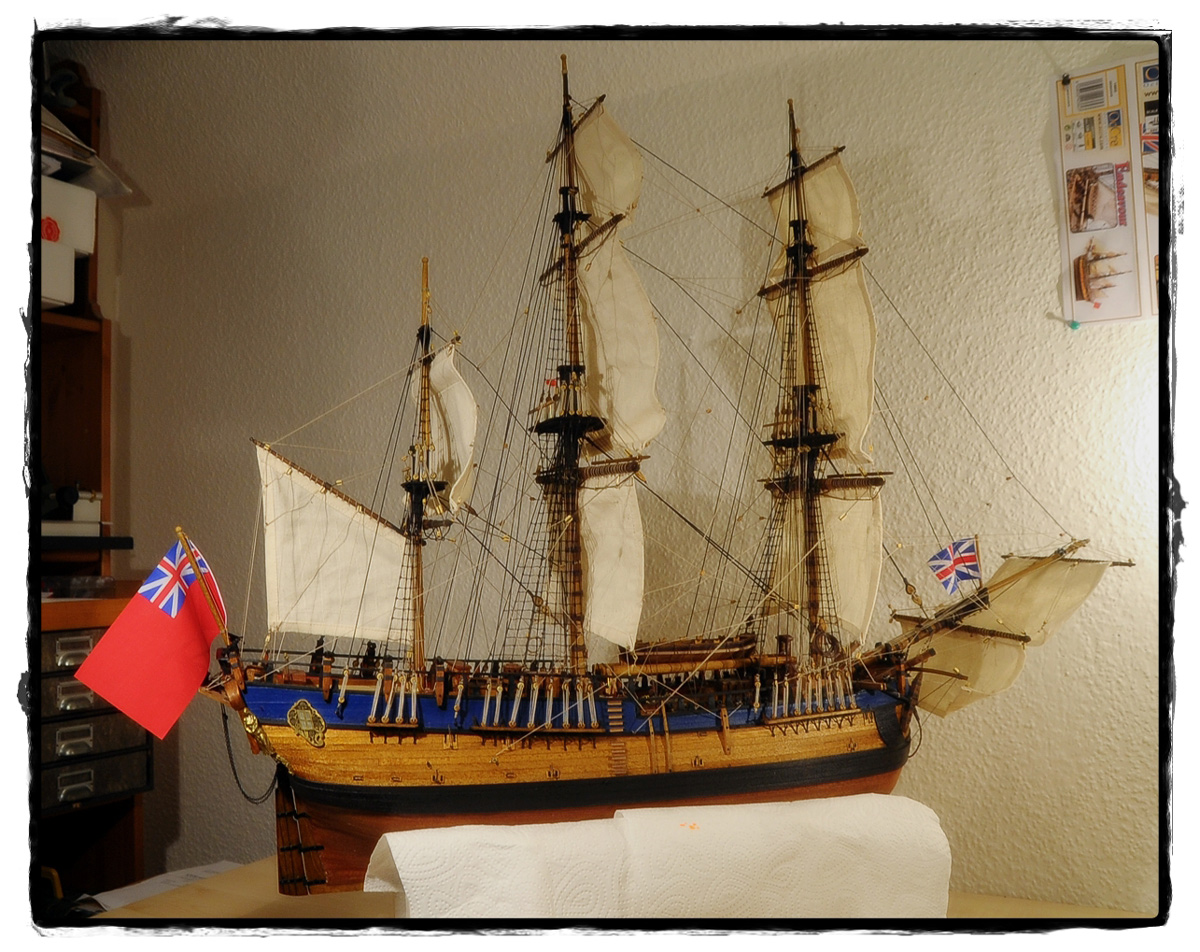
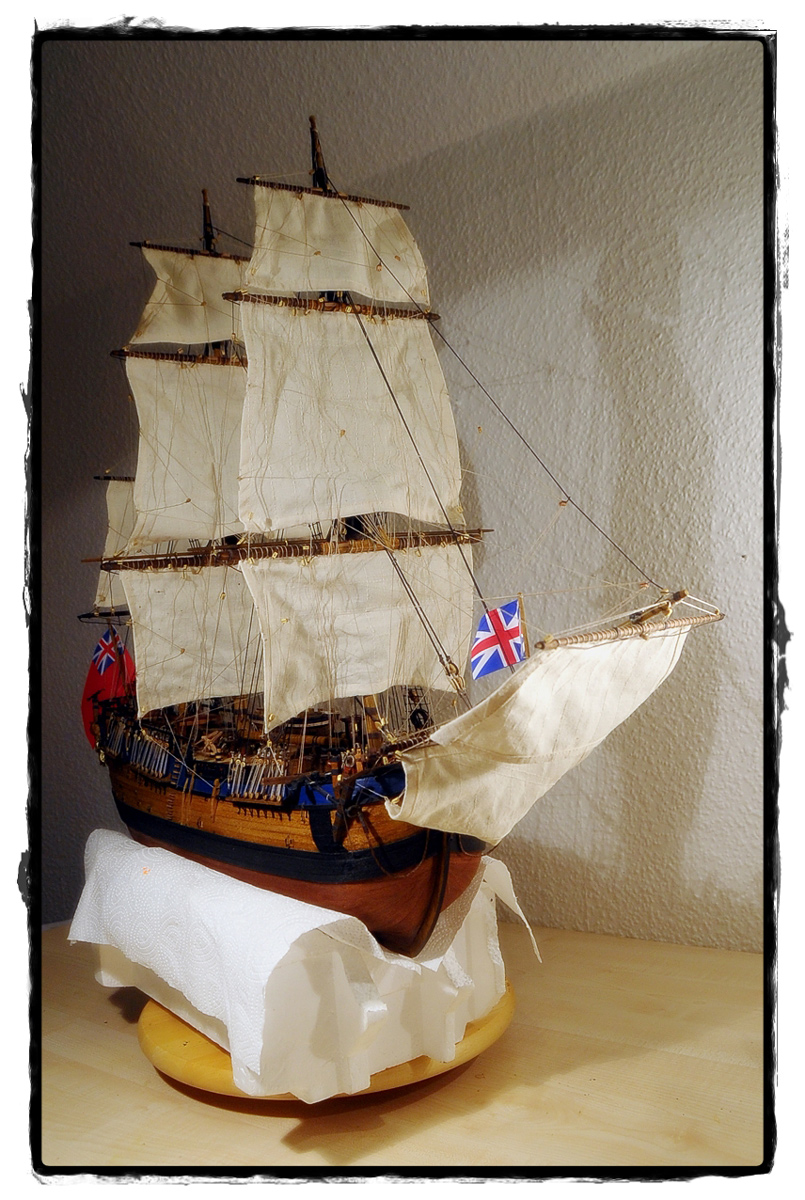
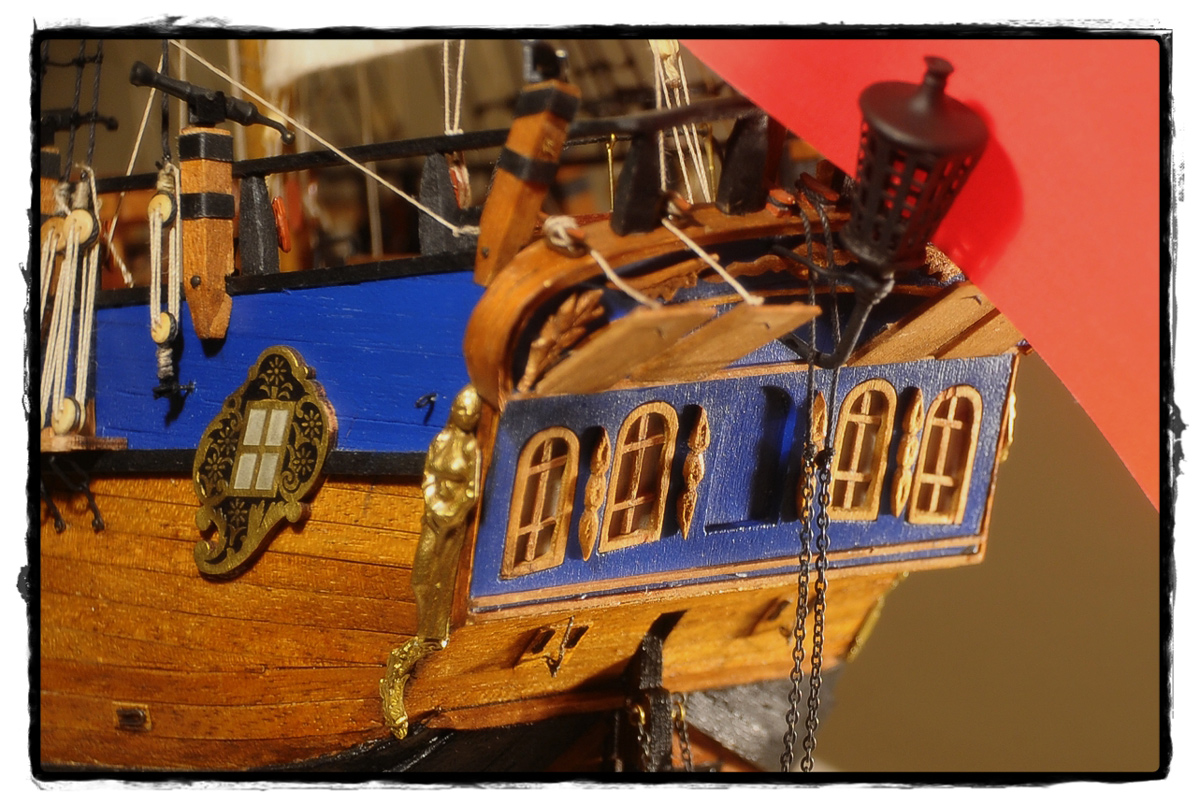
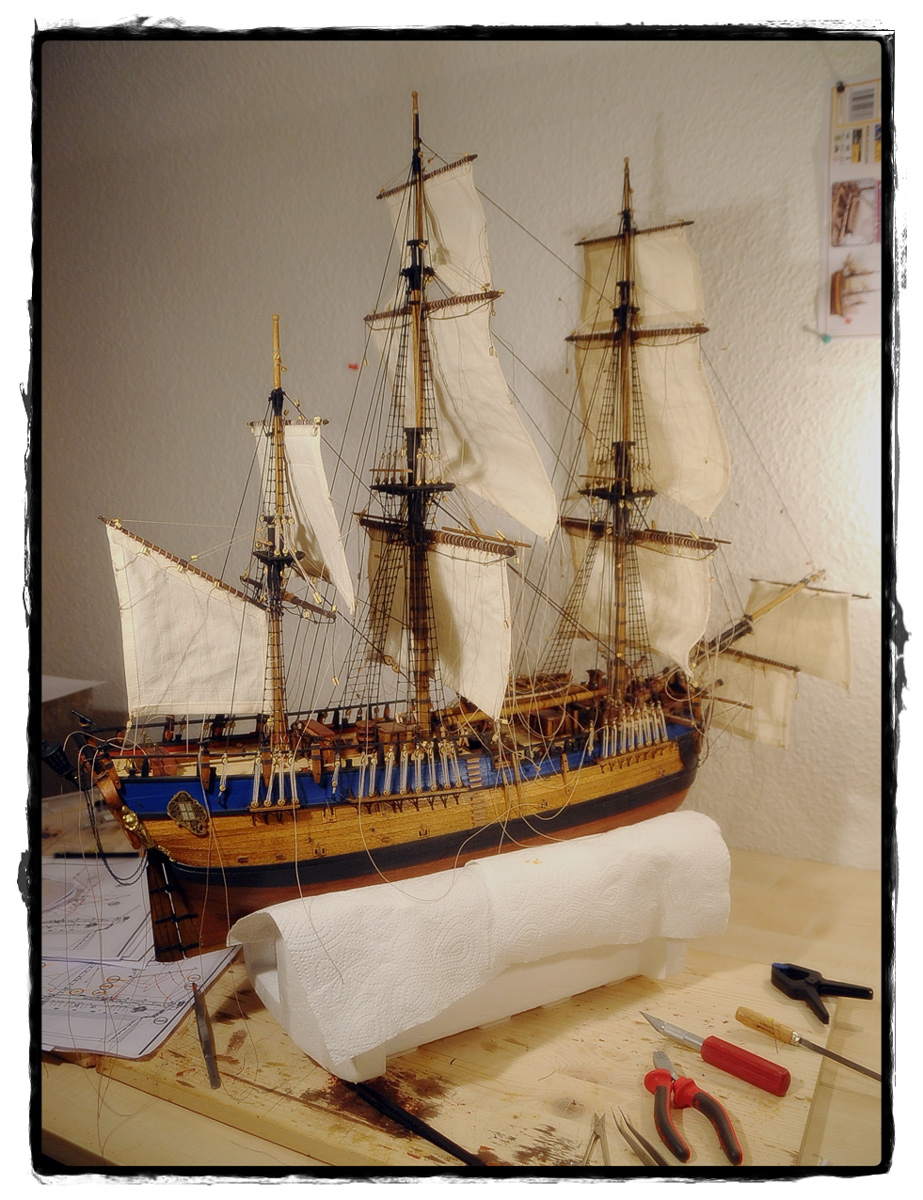
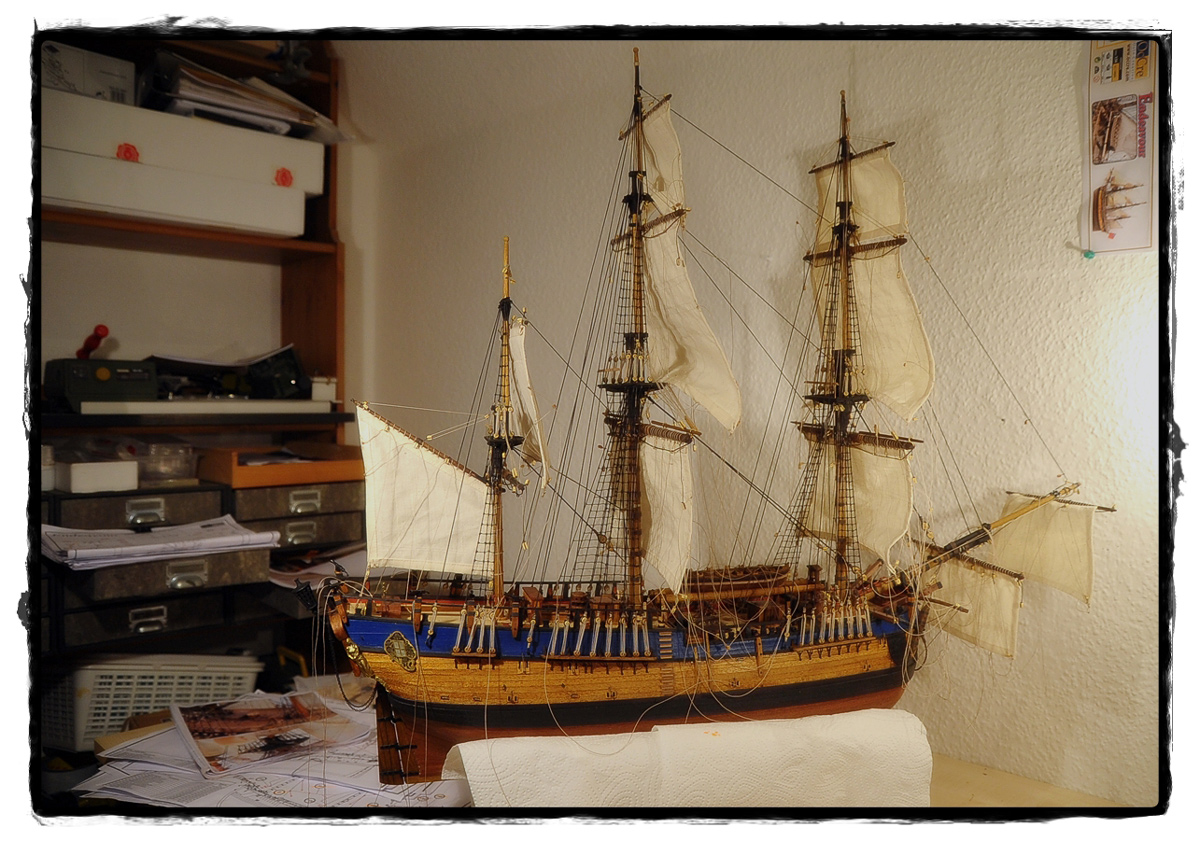
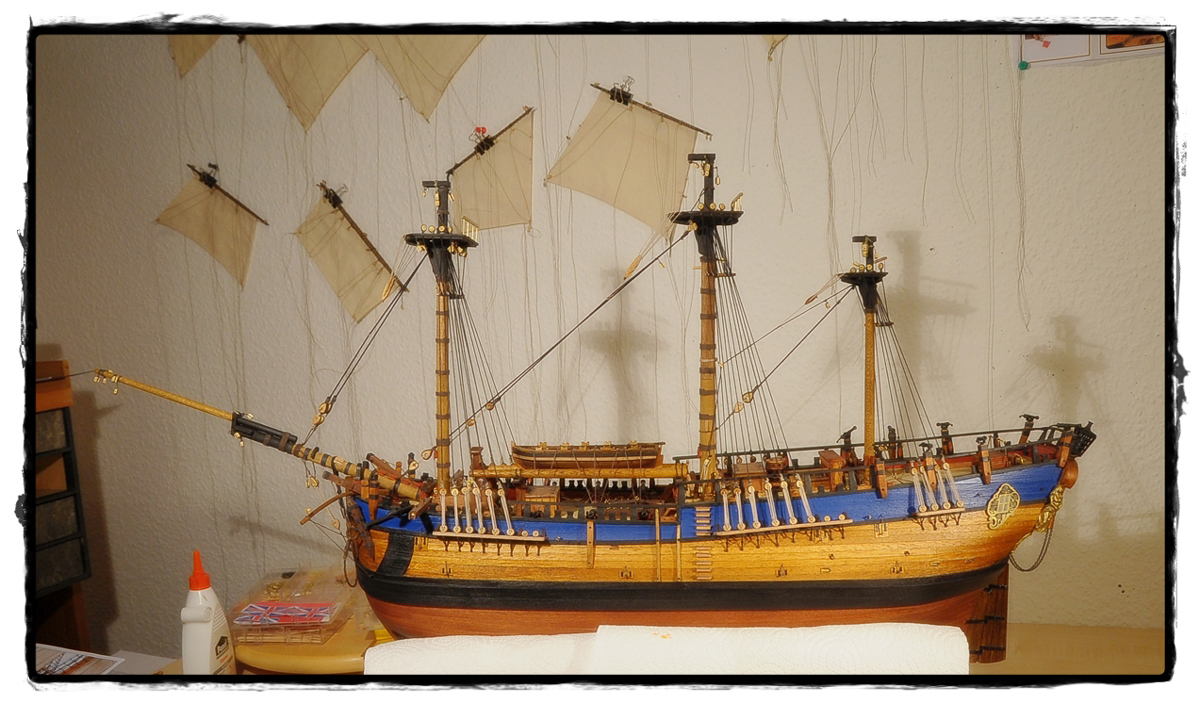
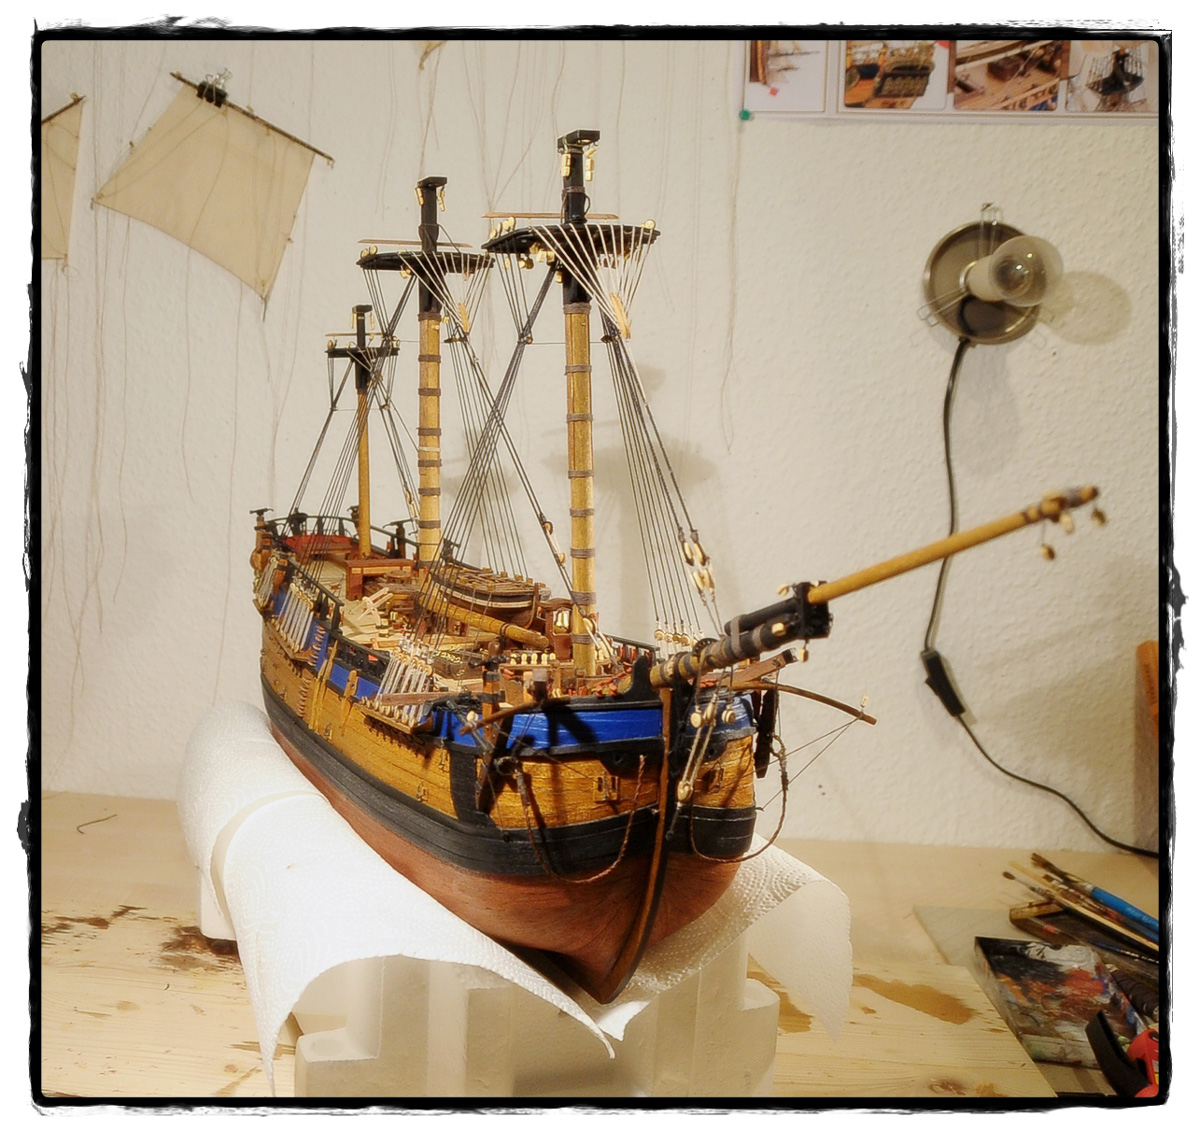
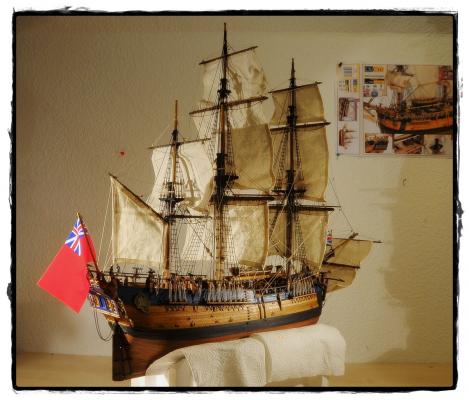
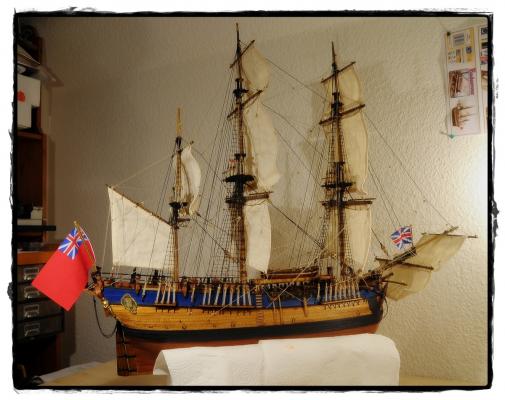
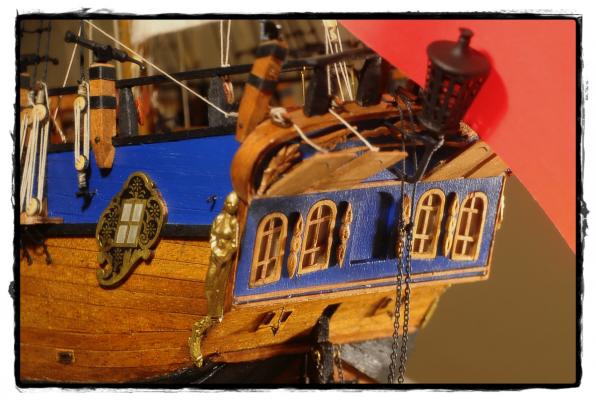
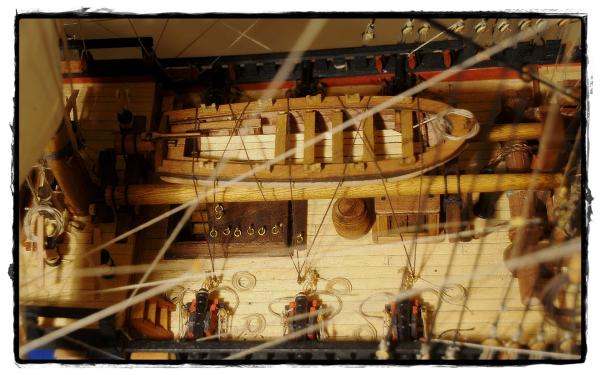
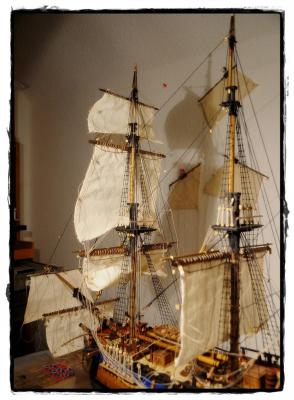
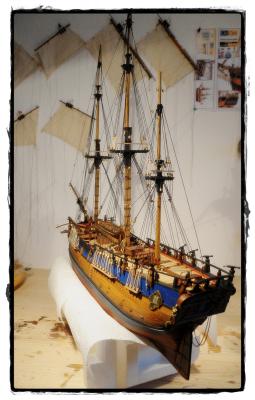
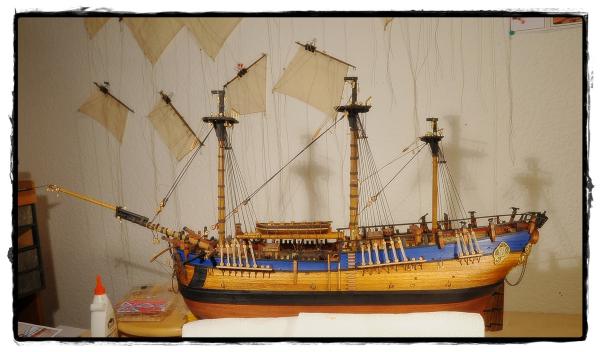
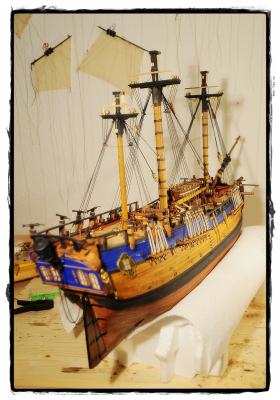
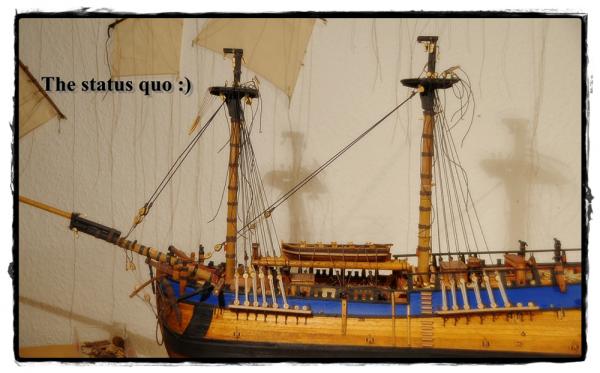
Hello my friends yes - it is done. My interpretation of Mr Cooks famous Endeavour is ready. I finished the build, only a stand (ordered) and a hood will be necessary. But this is just a final moment. It is almost one year that I spent with the Occre kit. The building was always a fun to do although there were some tricky steps to take. Especially the instructions are something to criticize - and here indeed the instructions for rigging and the sails. They are too superficial and do not show the details for many things. Nevertheless - all at all I would recommend this kit with good conscience to a modeller with some expierence. You can improve the model with additional items like the buoys for the anchors, the covers for the windows or additional rigging like the backstays for the topgallants. Therefore it's good to take a look at the AOTS Endeavour. I will later take pics when the stand is done and create a gallery. The next time I will take a break until the next model will be on the desk. I am not sure if I start with the Friedrich Wilhelm zu Pferde by Euro Model orf the Fregatte Berlin by Corel. Well, let's see CU Cheerio Max


- 147 replies
-
- 12
-

-
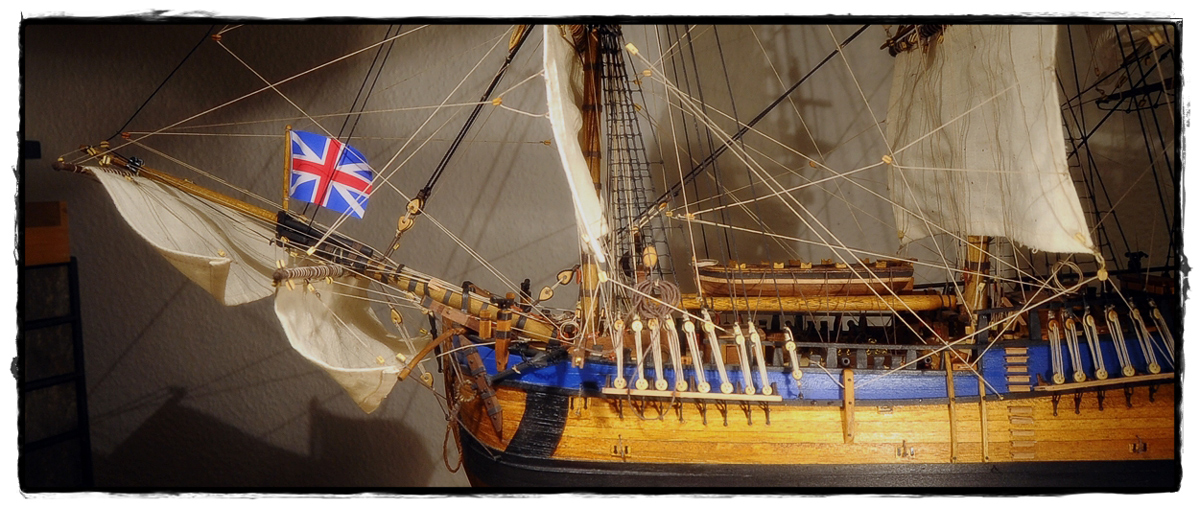
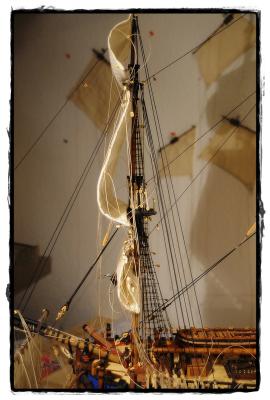
Hello my freinds thank you all for your feedback. I decided not to attach any more sails at the stays. I tried to furl them - but that did not look any good. So the best will be to renounce any further sails. I like the look with the sails quite much - but I think next time (Fregatte Berlin) I will not work with sails. If you give so much attention to the yards and all the fixing of the yards to the masts then it is a pity to hide this work under the sails. Also the view to the deck is restricted. BTW - does anyone know from which time on the crawfeed were used? Thx alot my mates Cheerio Max
-
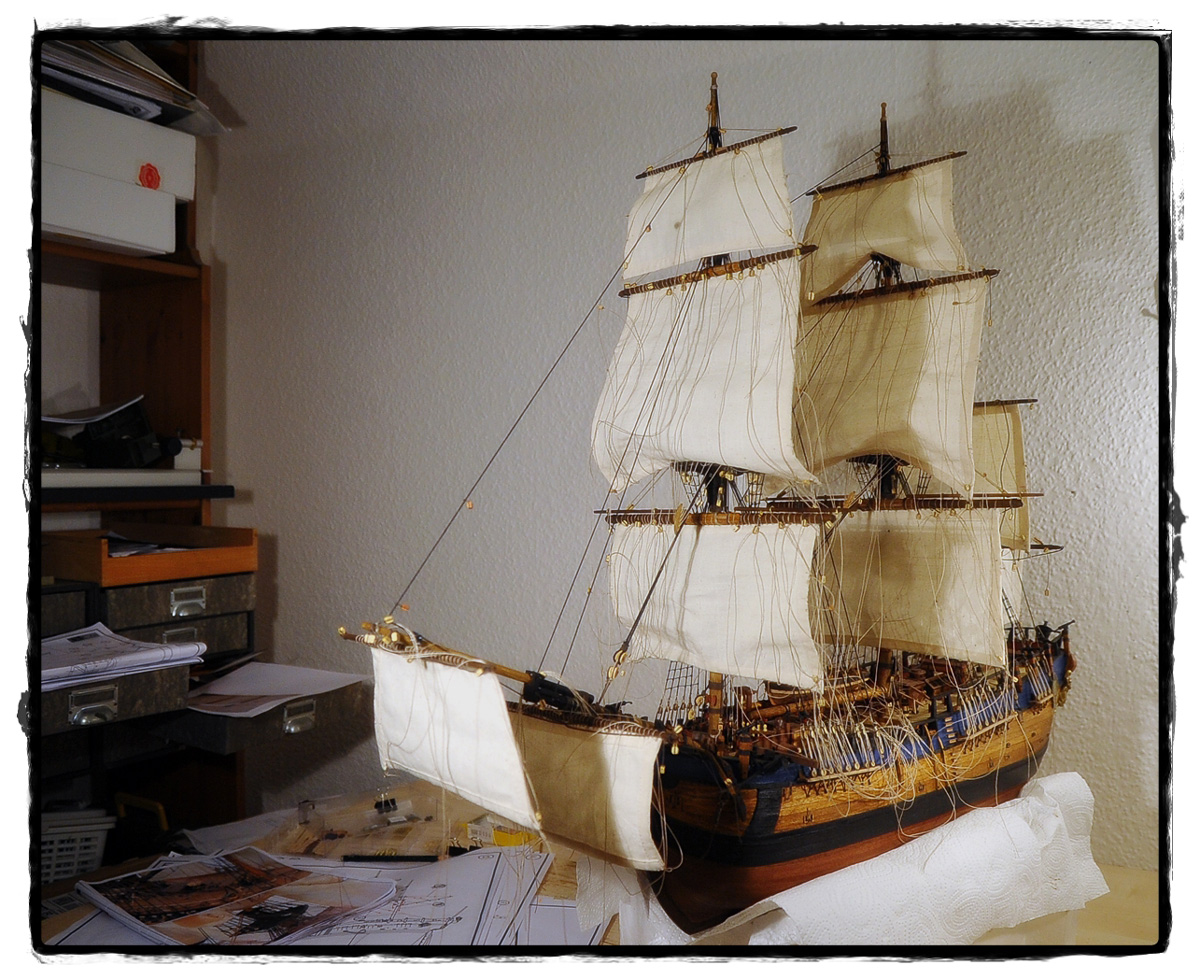
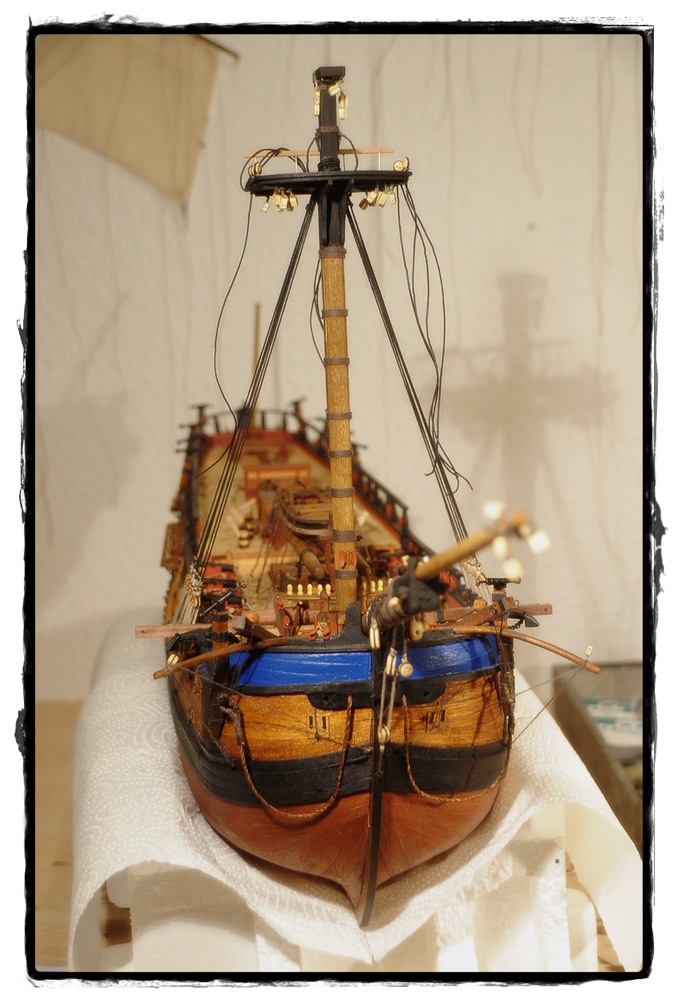
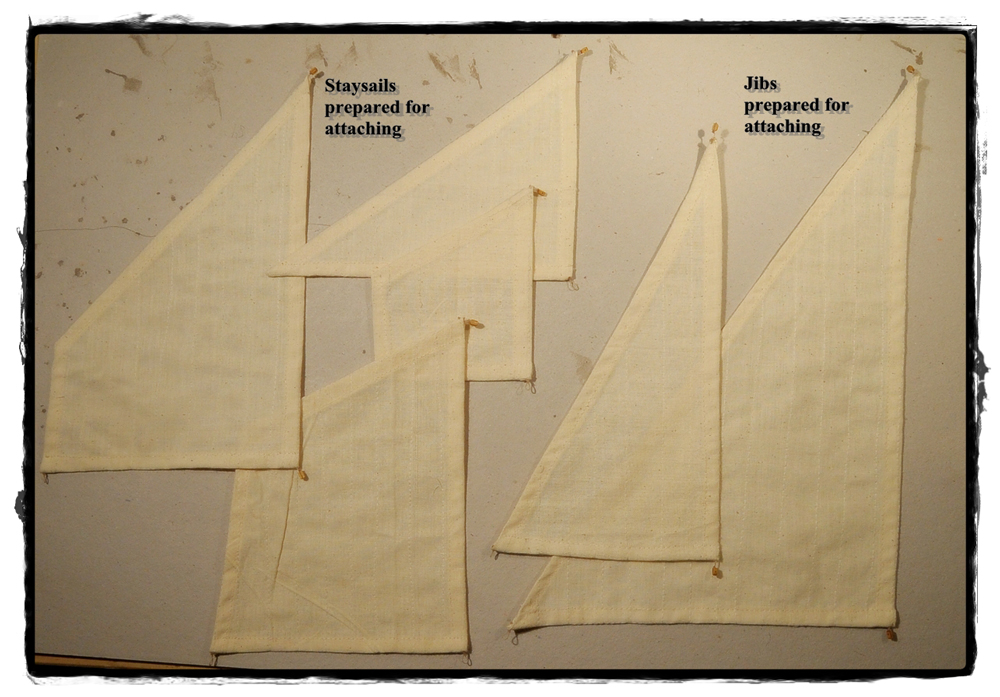
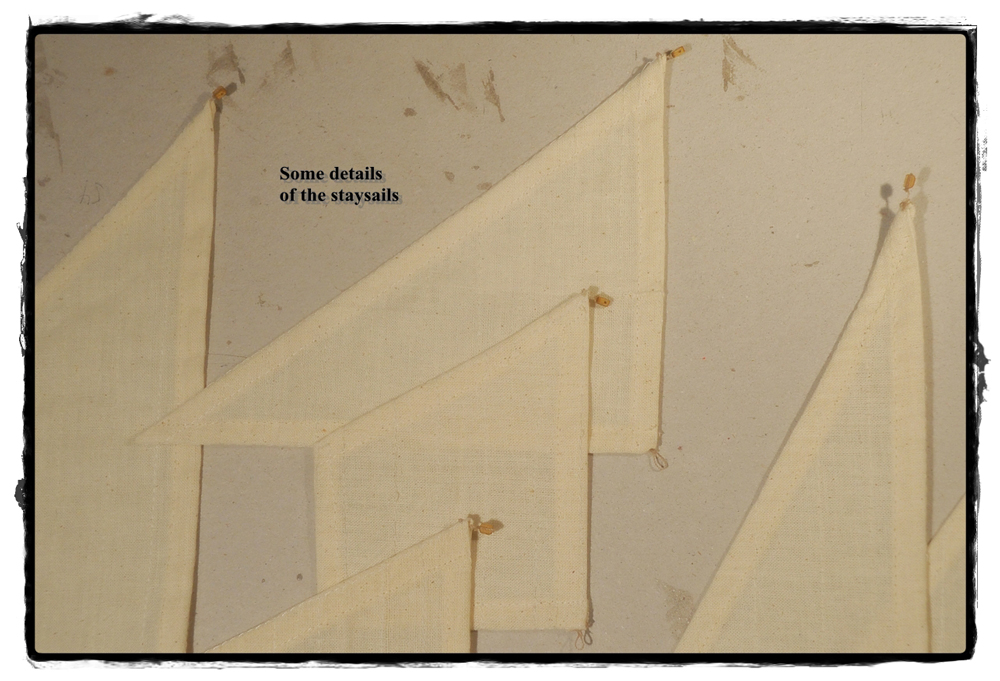
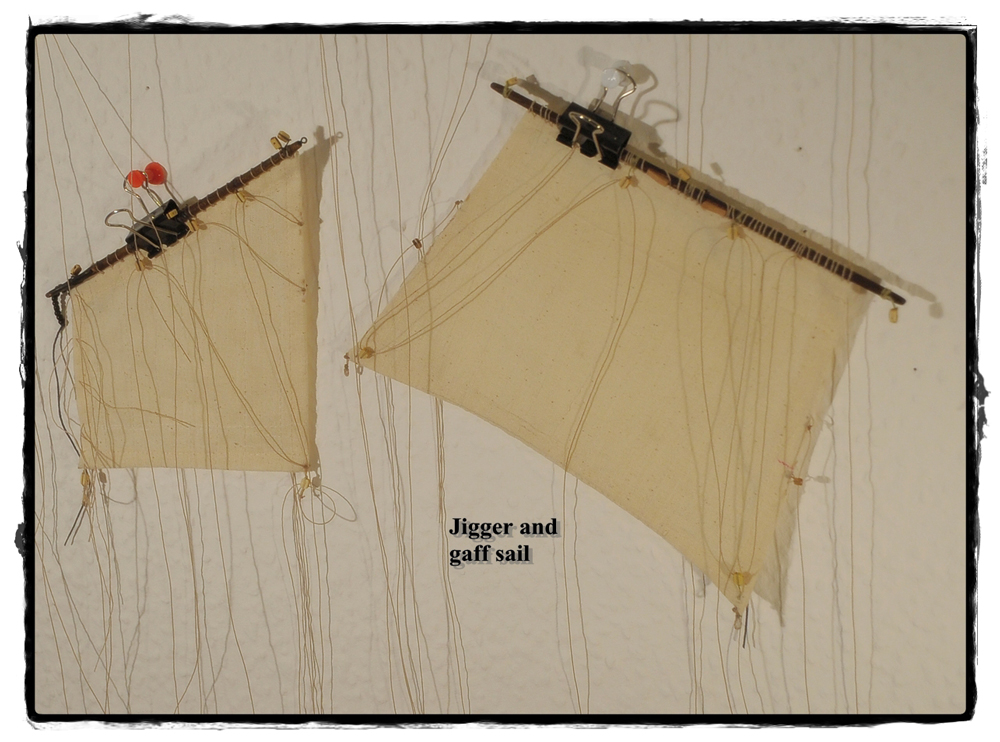
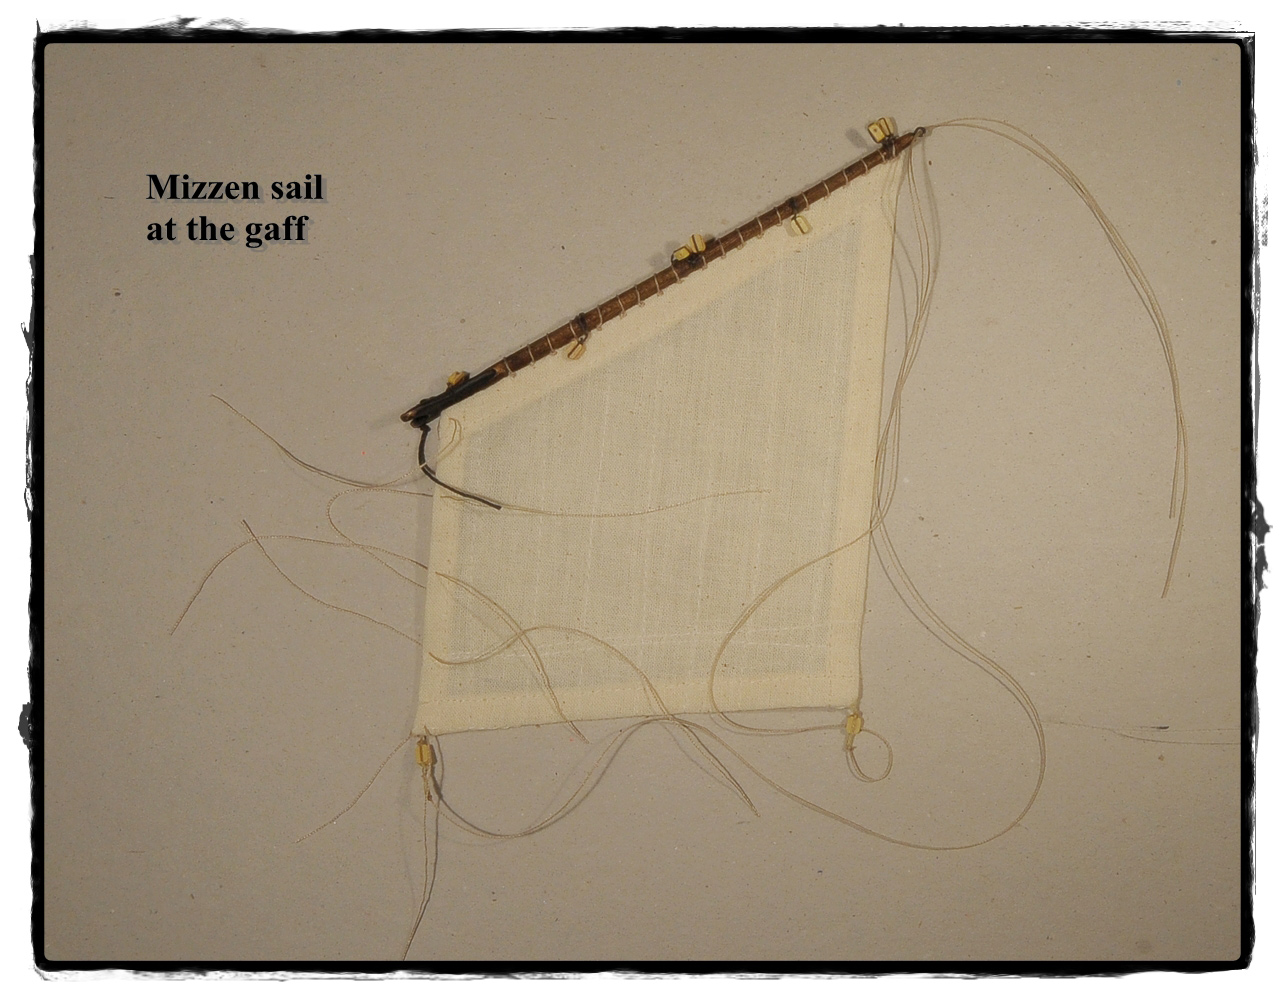
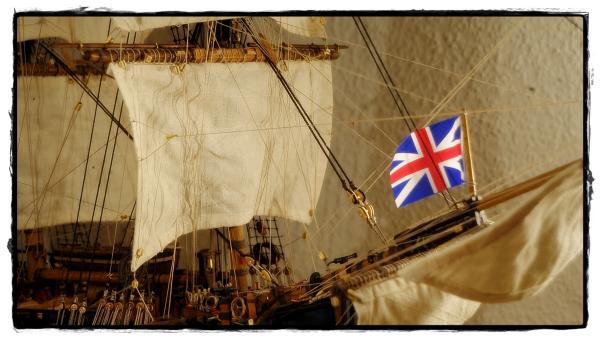
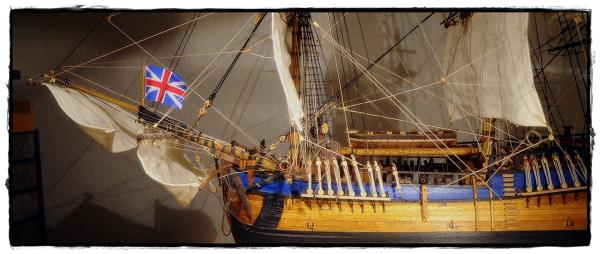
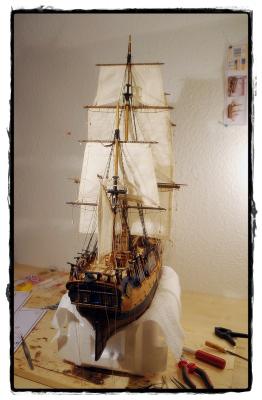
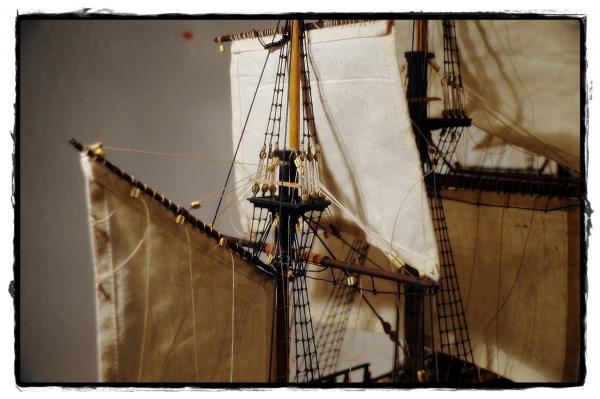
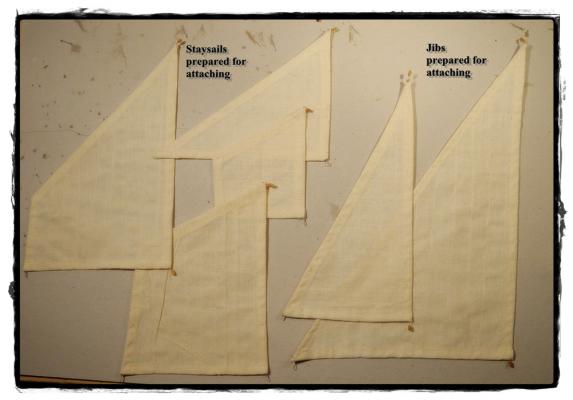
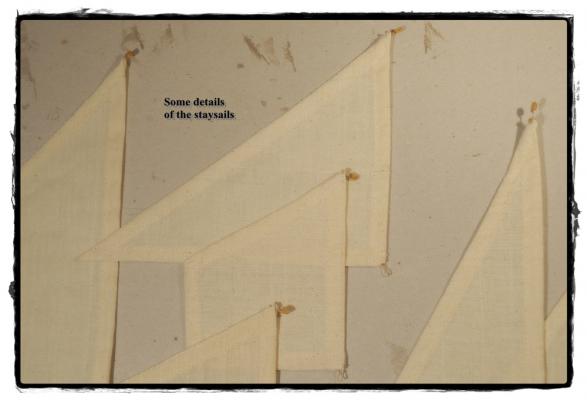
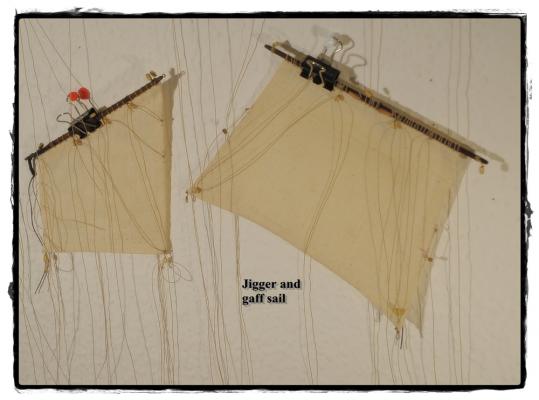
Hello again... may I ask you for opinion? As you can see on the pics I have reached the point for a final decision. I attached the sails on the yards and the gaff sail boom. In my view this should be all to be attached. If the staysails are used too there will be almost no way to look at the deck and the rigging... at the model as the whole thing. But of course there will be something missing. Now my merry men around: What's your sight? My heart says No to more sails, but what shall I do? Thank you all Cheerio Max


-
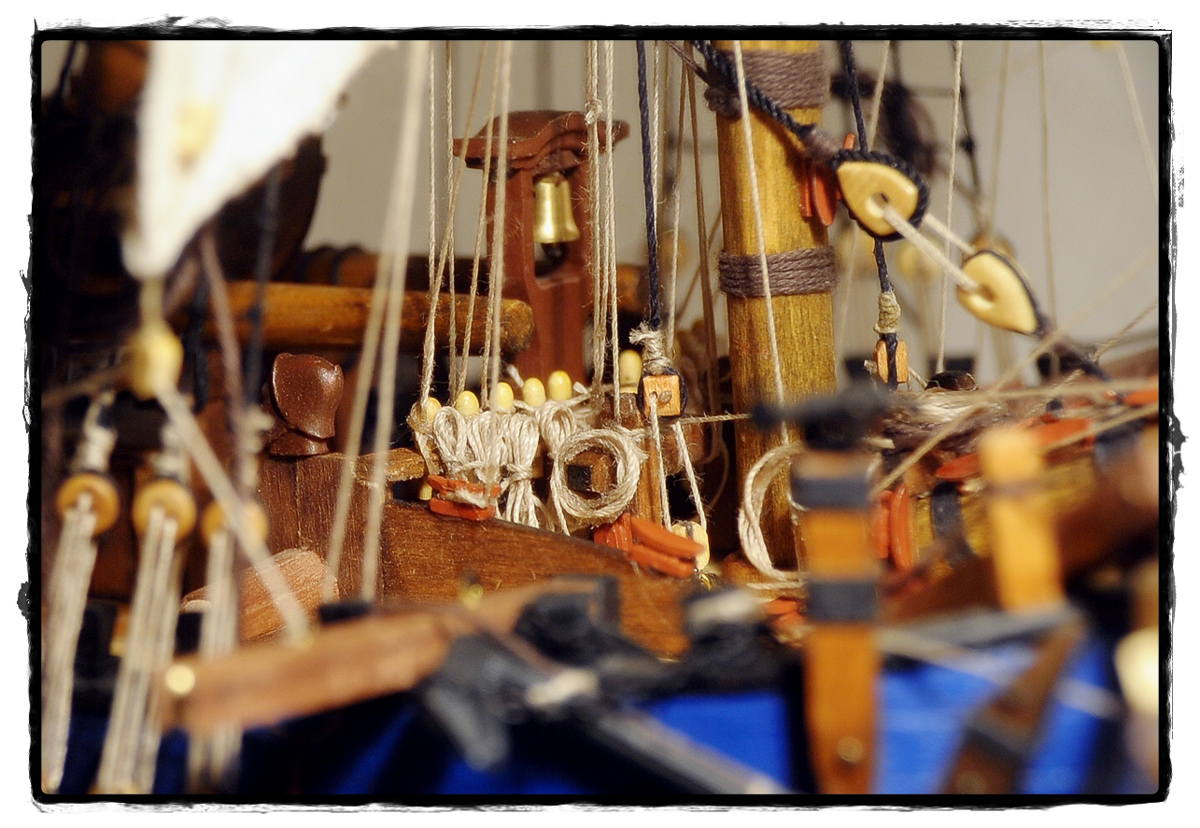
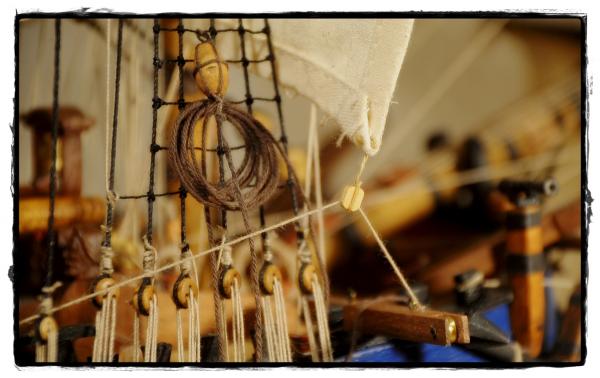
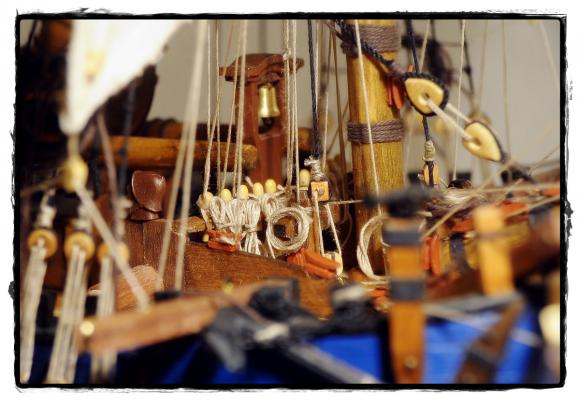
Hi my friends, step by step the Endeavour grows and becomes a real ship. After finishing the standing rigging (with a few additions) I have started to fix the yards and the running rigging. It is a pity that the instructions do not show exactly how the thread is to be fixed on the blocks. So I have to redo a lot of blocks and tie a loop to them to fix the lines. This should be marked in the plans so you can do it at the first time. Nevertheless - after studying the belaying plan I understood the procedure. Some pics as always Cheerio Max


-
Hi Vince you are doing an extraordinary job on the RW. Every update gives an great amount of tips and hints to me. I am looking Forward to build the Friedrich Wilhelm zu Pferde from EuroModel in the future. I got the kit and I am studying the plans all the time. They are scary somehow Good luck with your RW - Cheerio Max
- 593 replies
-
- 3
-
-
- royal william
- euromodels
- (and 1 more)
-
Hi Paul, well - 4 weeks or 6? That doesn't matter - you are right. At least I prepared all sails so far and it is just the running rigging for the yards and the sails, that has to be done. I think there will be some kind of emptiness when I am thru with my Endeavour. So it is not so important to bring this wonderful build to an end :D. It is almost one year now that I have started and the year will be reached when I am ready. Time goes by so fast - you almost don't realize that you spent so much time on this model. Cheerio my friend Max
-
Hello folks around just another update.I am doing the ratlines... I think you know... knots...knots...knots. Not too tight, not too soft, and a lot of pain in neck and shoulder Good progress... I am sure less than four weeks to complete my Endeavour - as long as nothing happens to stop me Have a look at the pics. Cheerio Max

-
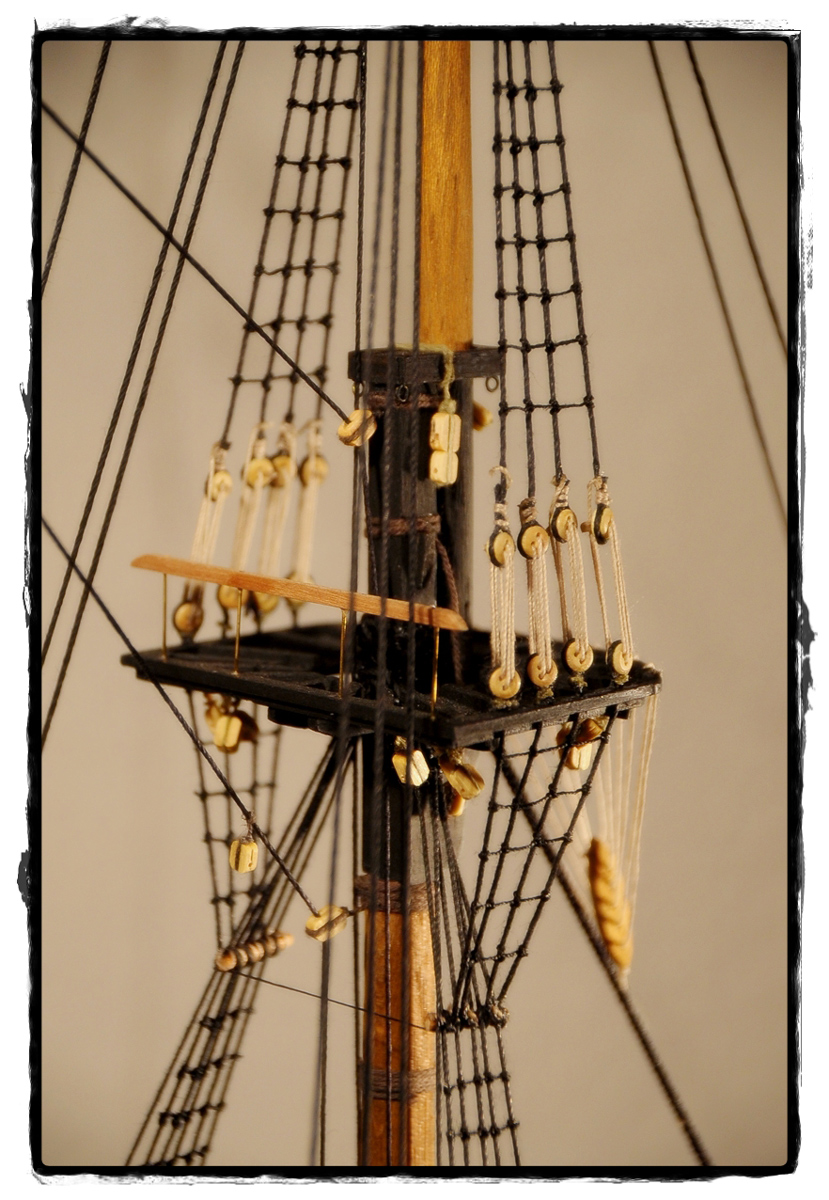
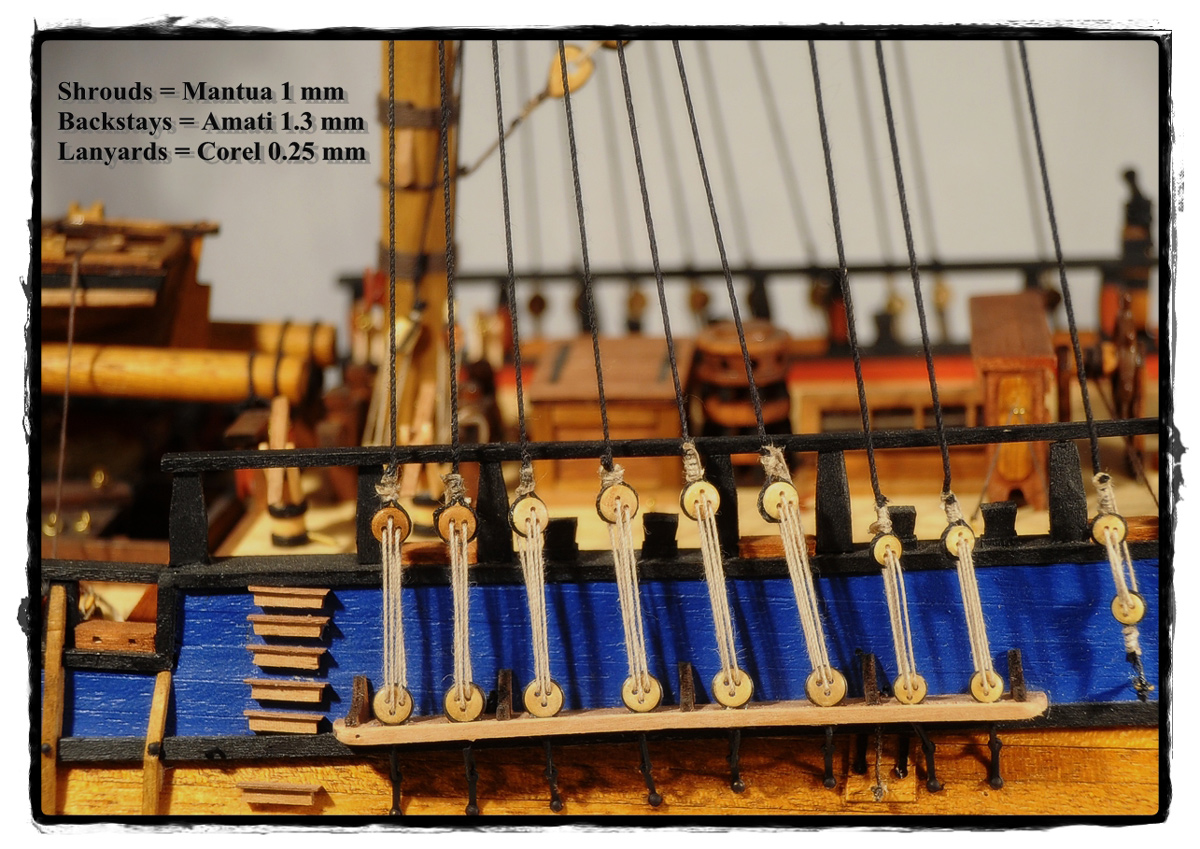
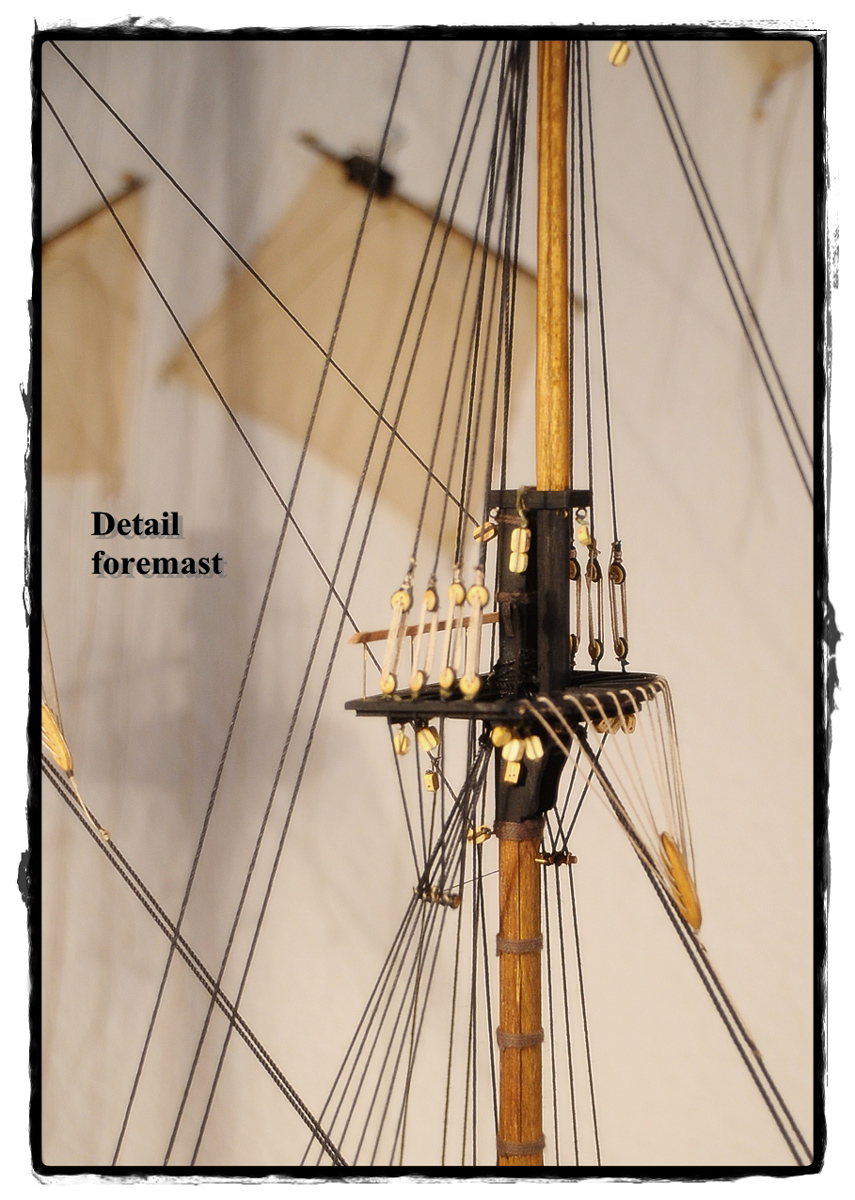
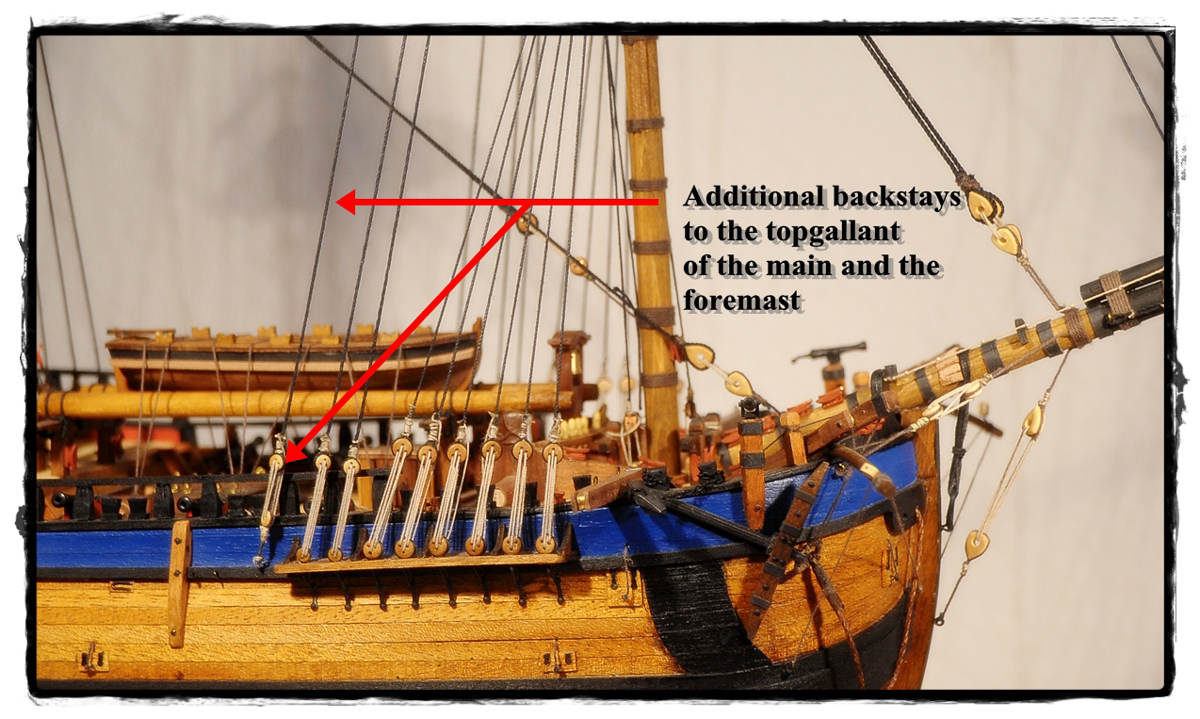
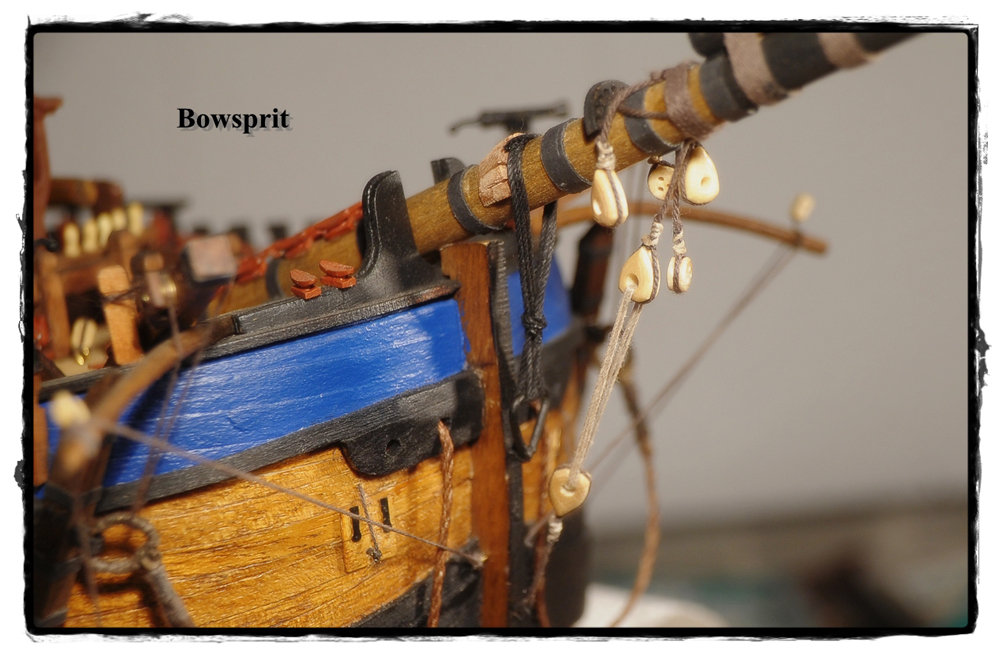
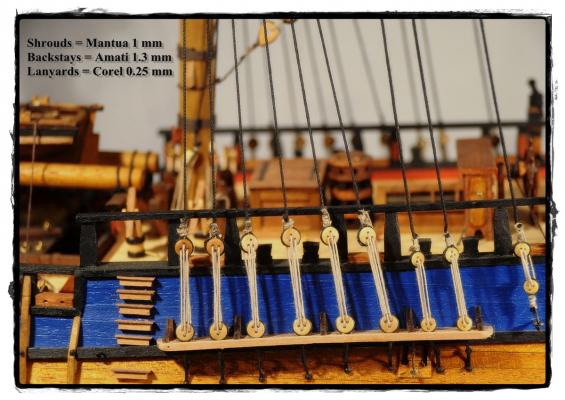
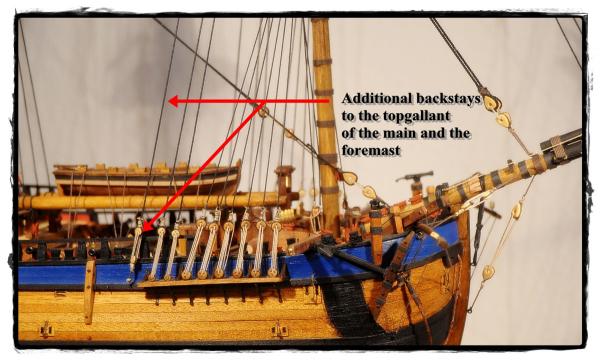
Hello again... I have finished the standing rigging so far - except the ratlines. This funny duty will be the next step, before yards and sails will be fixed an the running rigging will be completed. I was in the houseware shop today and purchased some ordinary sewing thread for the ratlines. It is polyester and I am sure it will do a perfect job. The Standing rigging provided with the Occre kit is very close to the AOTS. Just some details on the bowsprit and additional backstays to the topgallants of the main and the foremast are to amend. Just take a look at the pics to see the progress. I was wrong - as mentioned - with the size of the lanyards. But this is my very own interpretation :D - I won't change it and start new. Cheerio Max


-
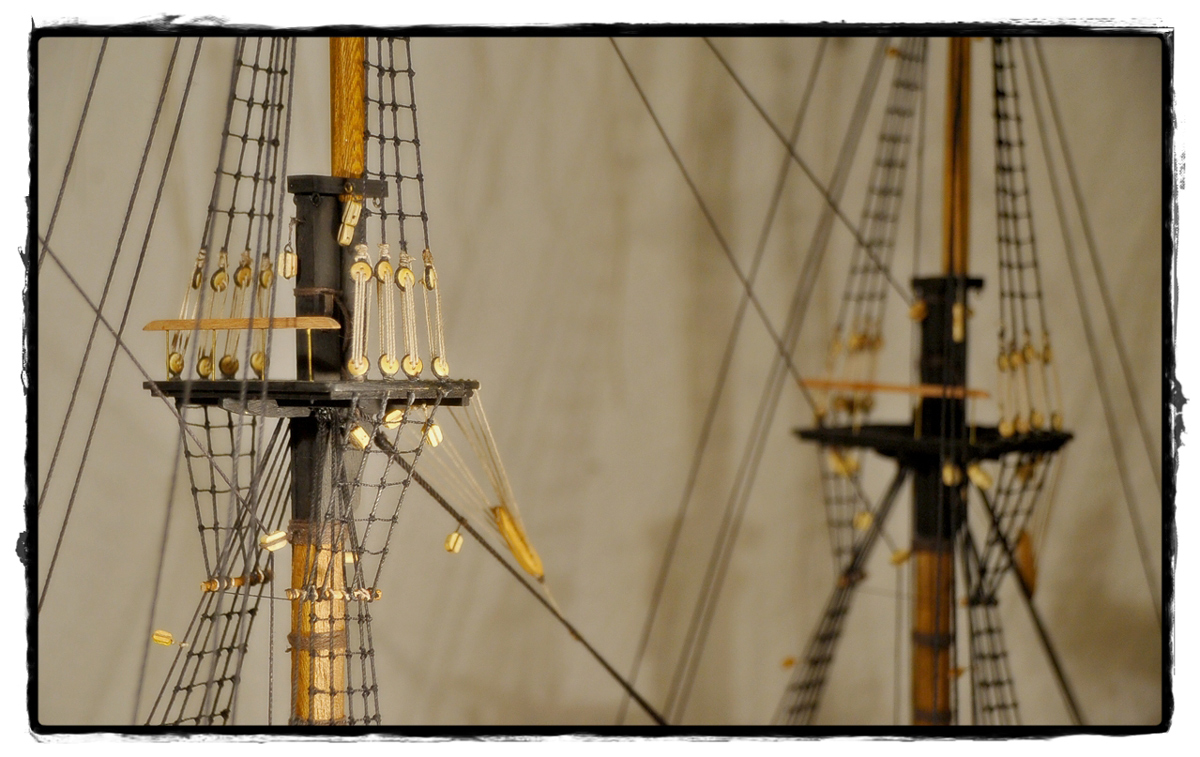
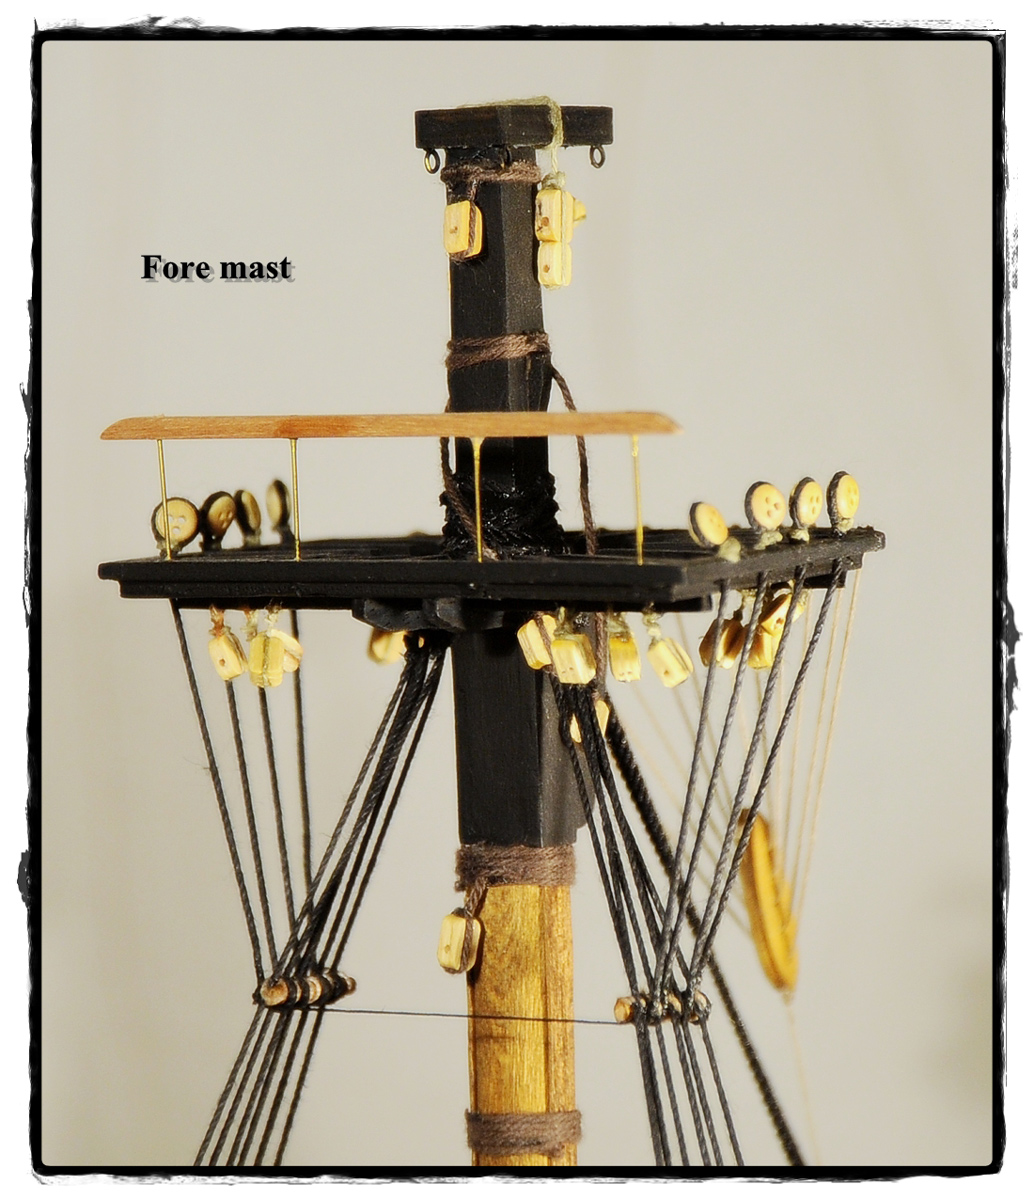
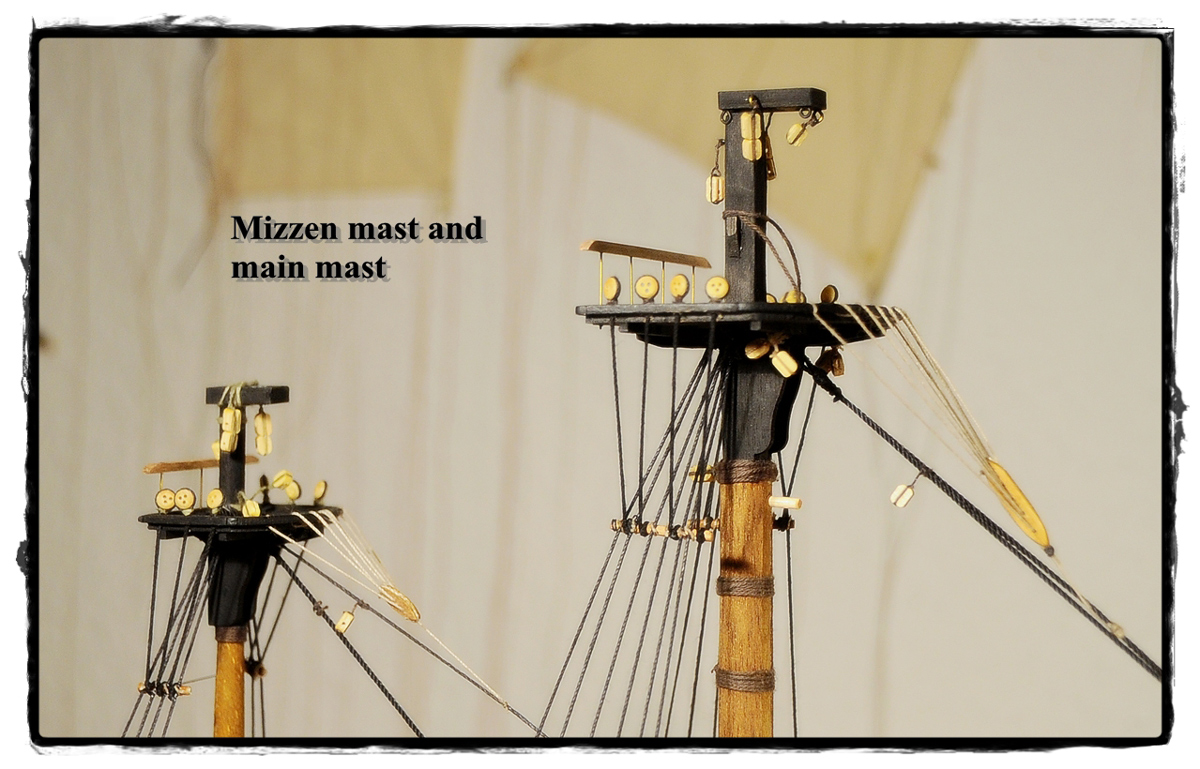
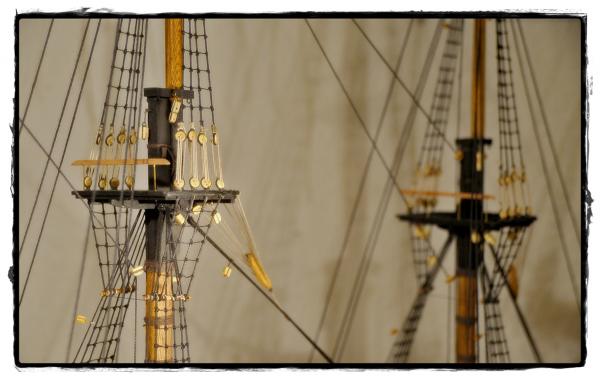
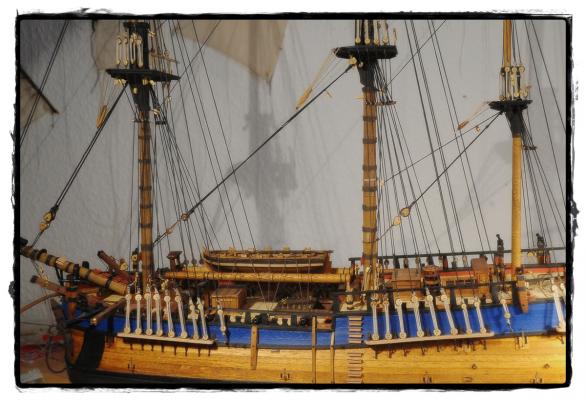
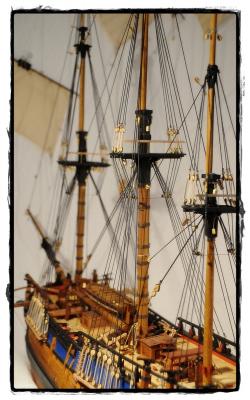
Hello my friends not much words, just some pics. The work takes good progess. I finished the "first floor", next will be the mounting of the topmasts and the shrouds and stays of the "second floor", before I will do the topgallant masts in the "attic". At last will follow the backstays and the rest of the Standing rigging - and the ratlines... so much knots will to be tied. But I love the rigging :D CU Cheerio Max


- 147 replies
-
- 10
-
-
Really outstanding - like the look very much Cheerio Max
- 593 replies
-
- 2
-
-
- royal william
- euromodels
- (and 1 more)
-
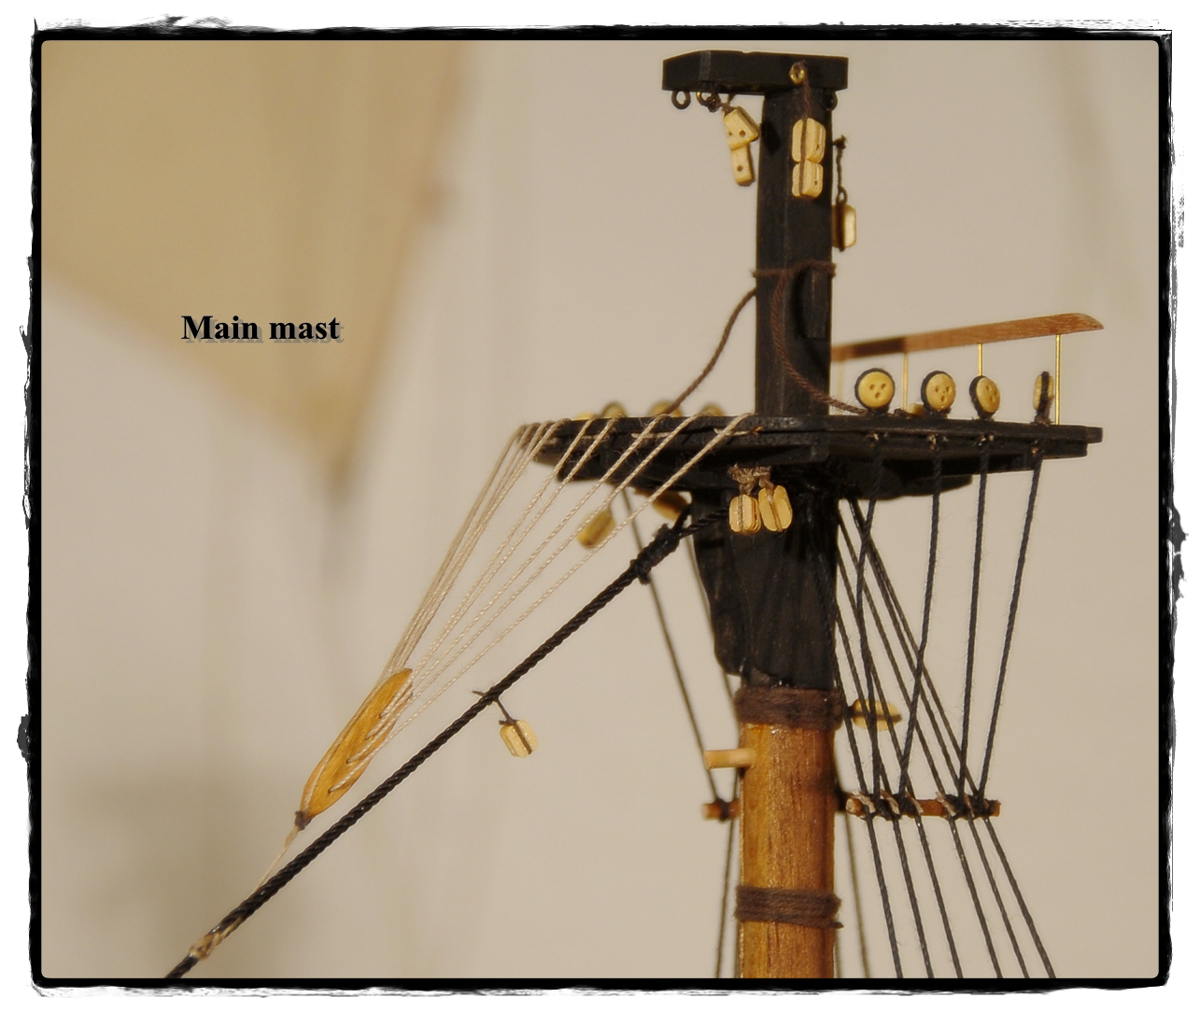
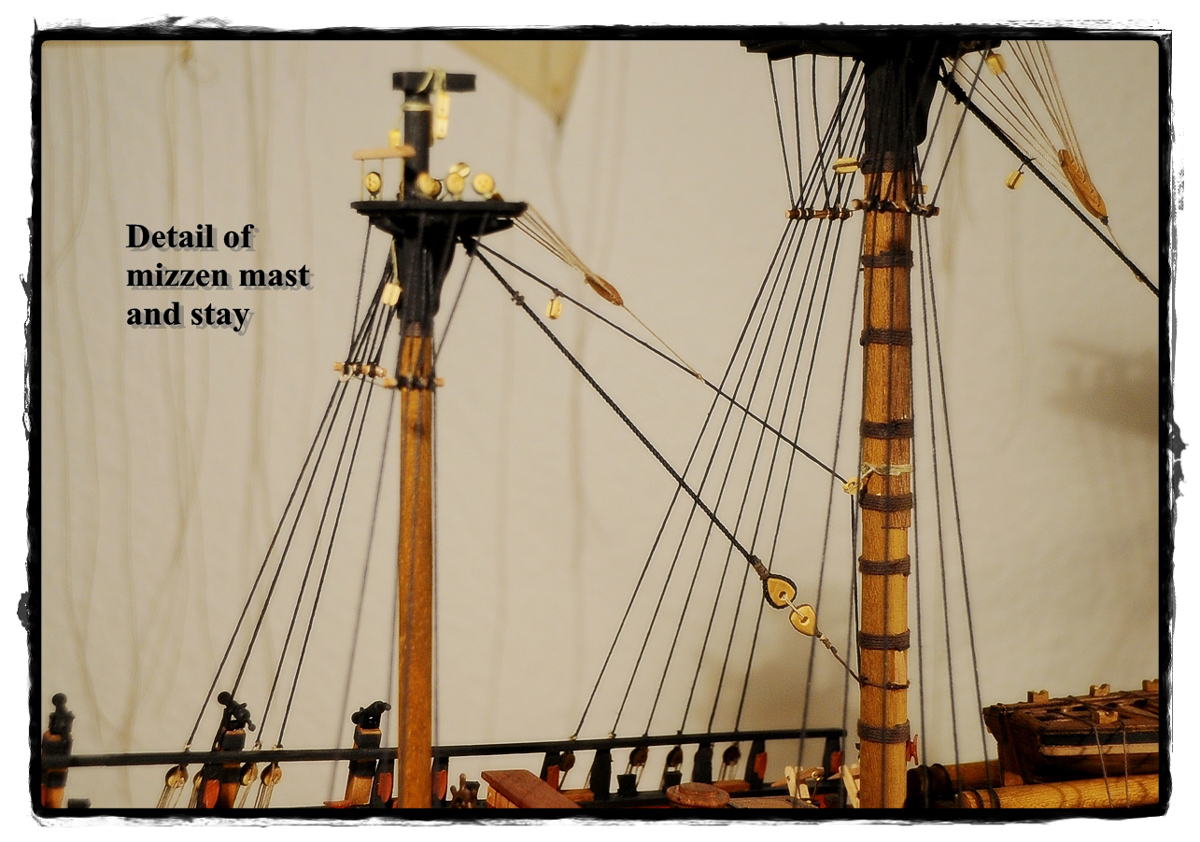
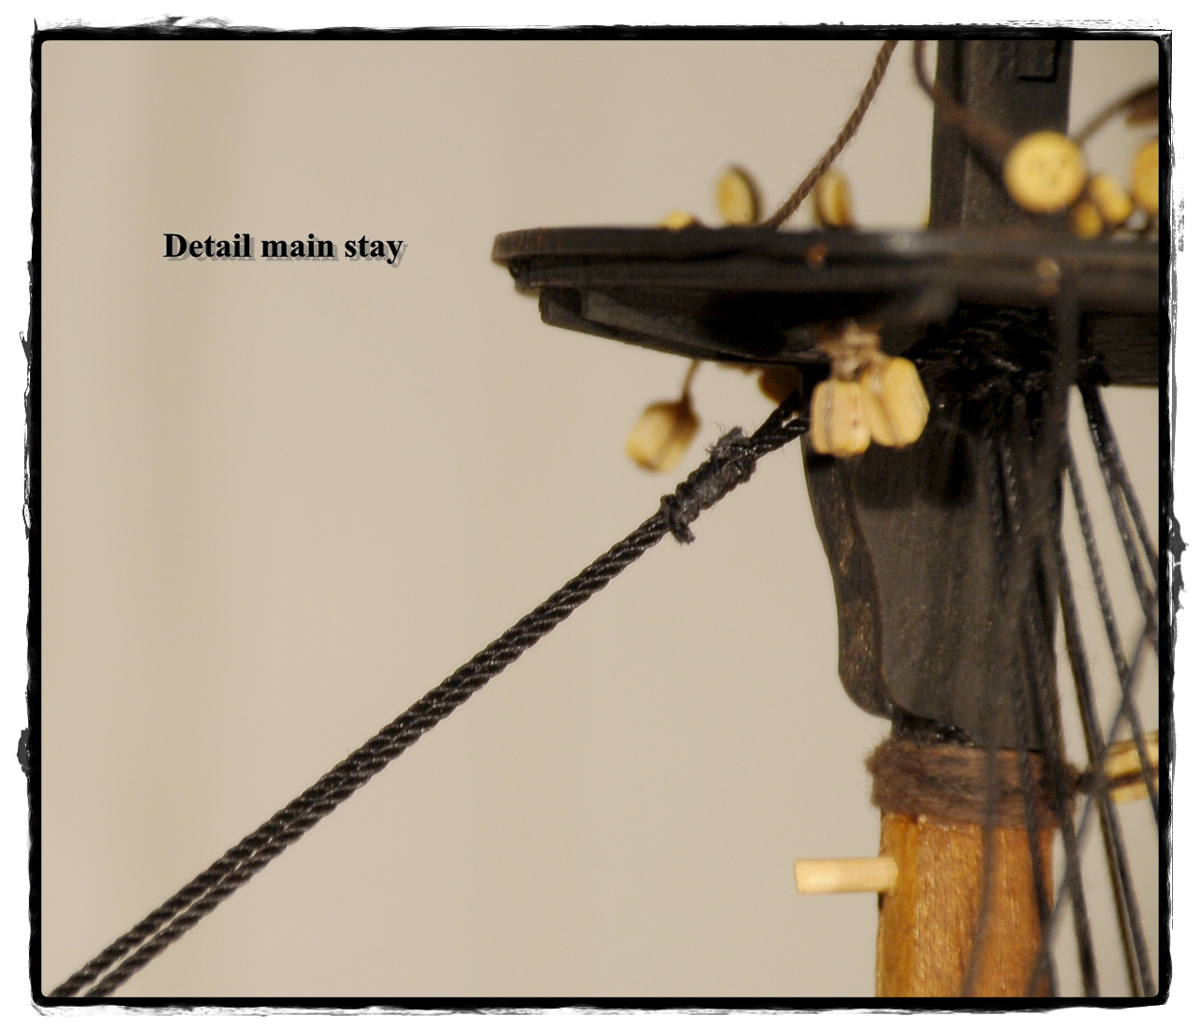
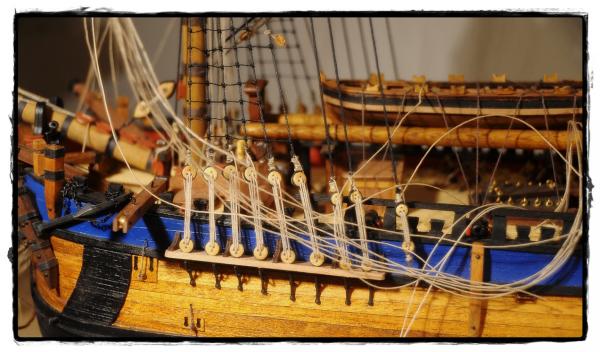
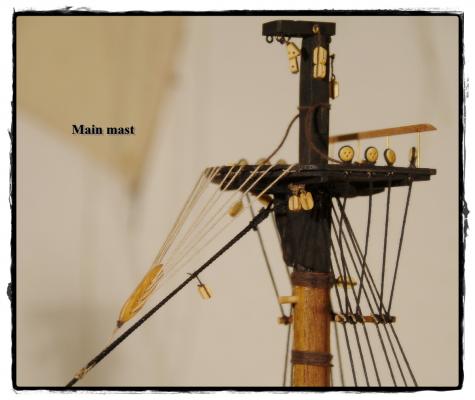
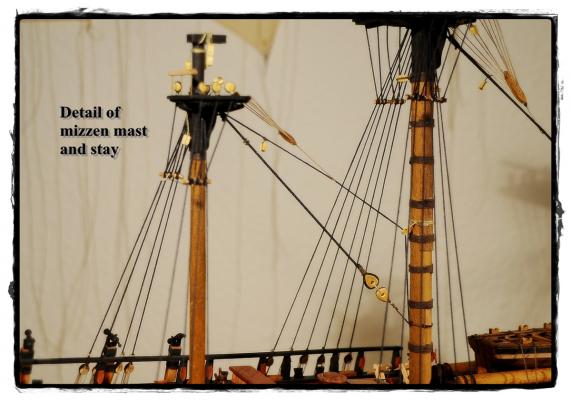
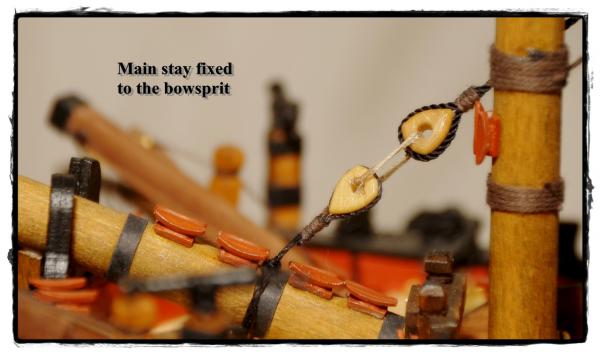
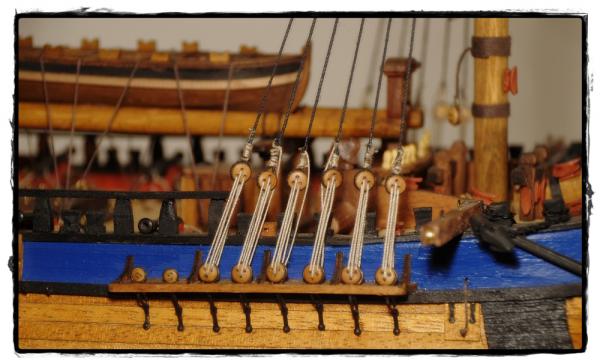
Hi Paul, thank you so much. Yes, you are right - there should be a mouse at the stay - and there should be two single stays and not just one rope tied around the masttop. This is the consequence of the not so detailled instructions. They do neither show such details nor do they exactly show where they rigging has to be fixed. Of course there is a belaying plan for the decks etc but no details according to the blocks and clamps. It's an overview but the drawings are very confusing and not always a real help. I know better instructions e.g. from Corel or Mantua. This is one of the very few weak points of the Occre kit. One other are the missing detail plans for the model like hull, decks furniture with exact indications of size etc. The photo-booklet is ok so far - but in my opinion it should only be a additional help and not the main instructions. My next model will be the Fregatte Berlin by Corel. I think I will give much more attention to such matters of detail espc for rigging. The crow foot is made of only one piece of thread. I fixed the holder to the thread and then startewd with the middle-hole on the mars. Then I pulled the Thread alternating left and right through the holes of the holder. After aligning and straining I tied the holder to the stay. Now that is is done I think I would have been better to use a small block for the holder's rope (also a task for the next model). I hope you can understand my pidging english so far Best wishes for the next year Max
-
Hi Cristi I am impressed - I sure have an old PC - but absolutely NO idea how that thing "electricity" works. All that I know is: Get the plug in and turn the power on :D But you show a very good way to recycle electronic devices and make something very reasonable out of computer scrap. Happy new year 2016 to you and your familiy - and many good ideas Cheerio Max
-
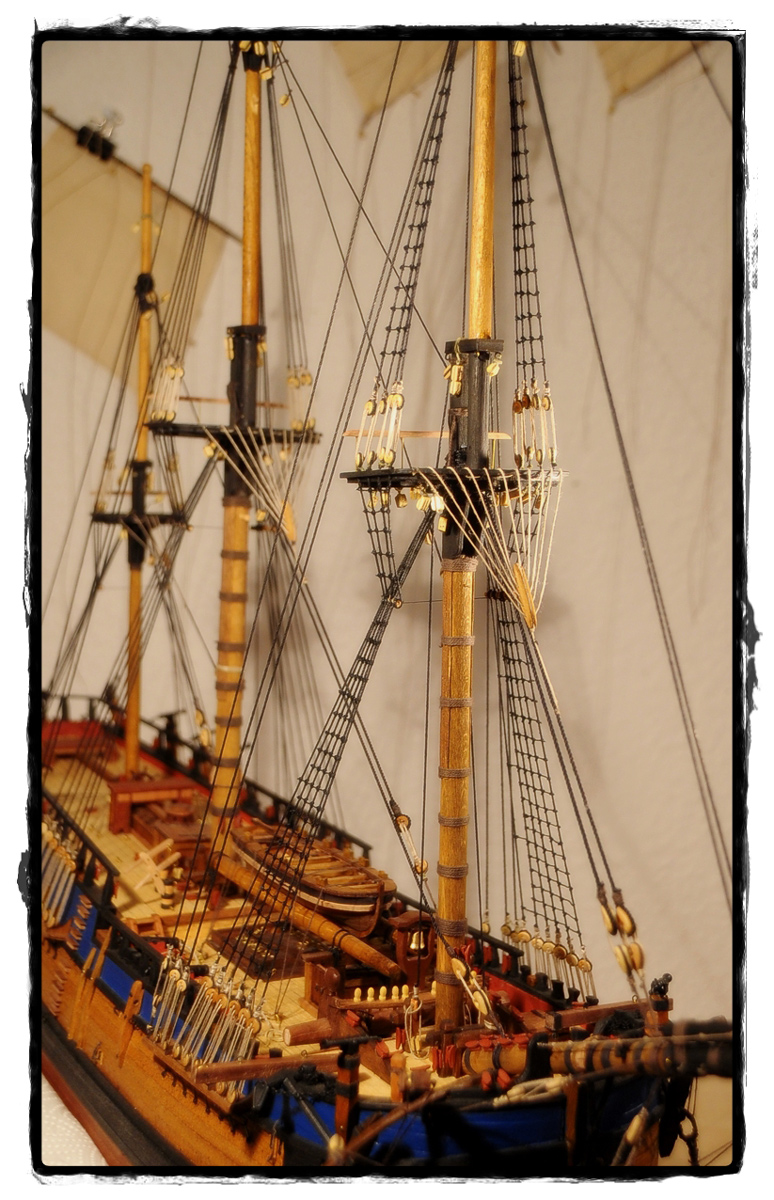
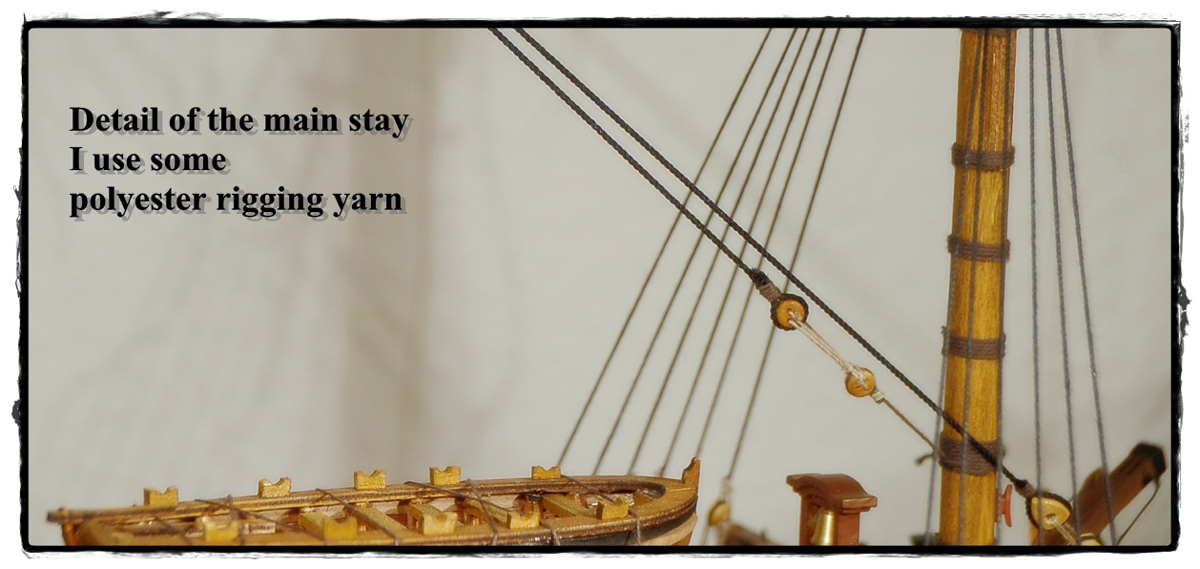
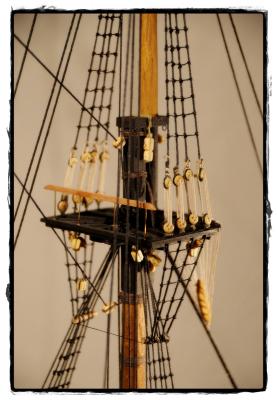
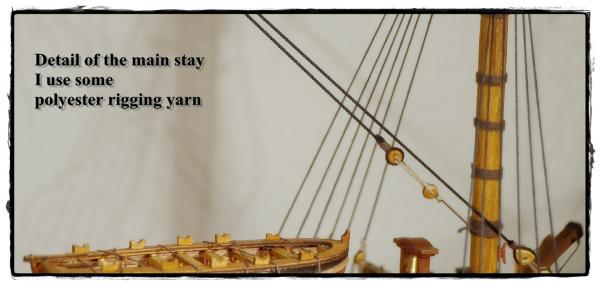
Hello again I was quite busy the past few days, so I can offer another update. I love the rigging job and I find that no trouble. So the Standing rigging grows from day to day. With the Éndeavour I follow exactly the order of the historic books to tie up the shrouds- it looks marvellous. The only Thing that is probably not right could be the lanyards. They seem to be too long. For the stays I use polyester yarn that is not fringy. I know a dealer/producer of this kind of rigging yarn. I will probably use only his yarn for my further models. Enjoy the pics - and: Cheerio Max


- 147 replies
-
- 12
-
-
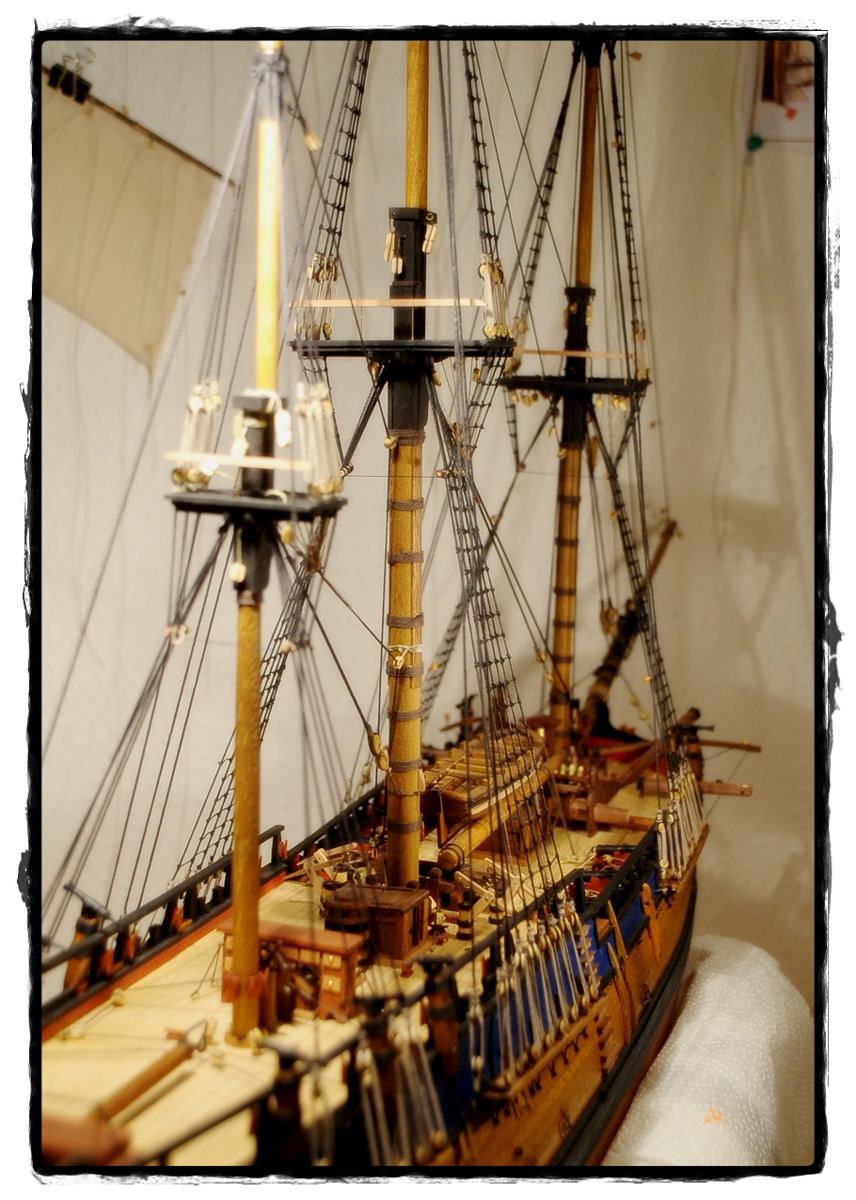
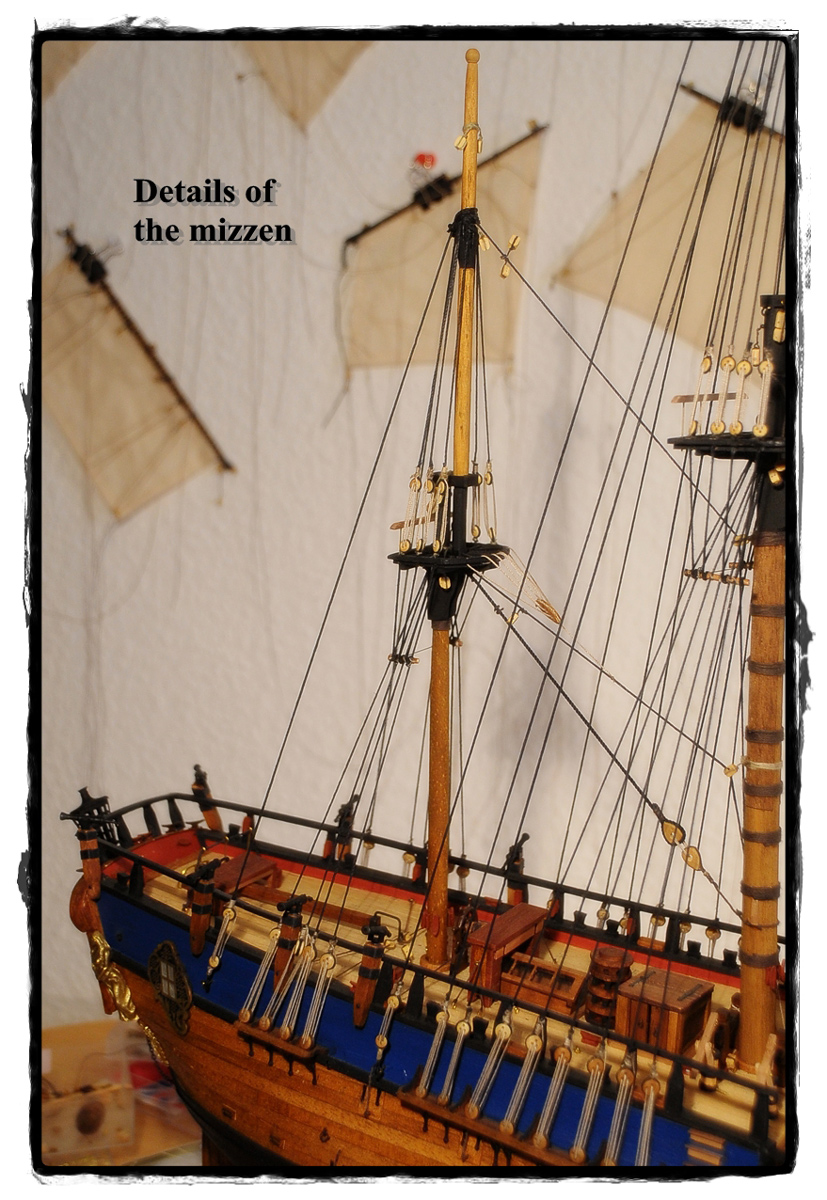
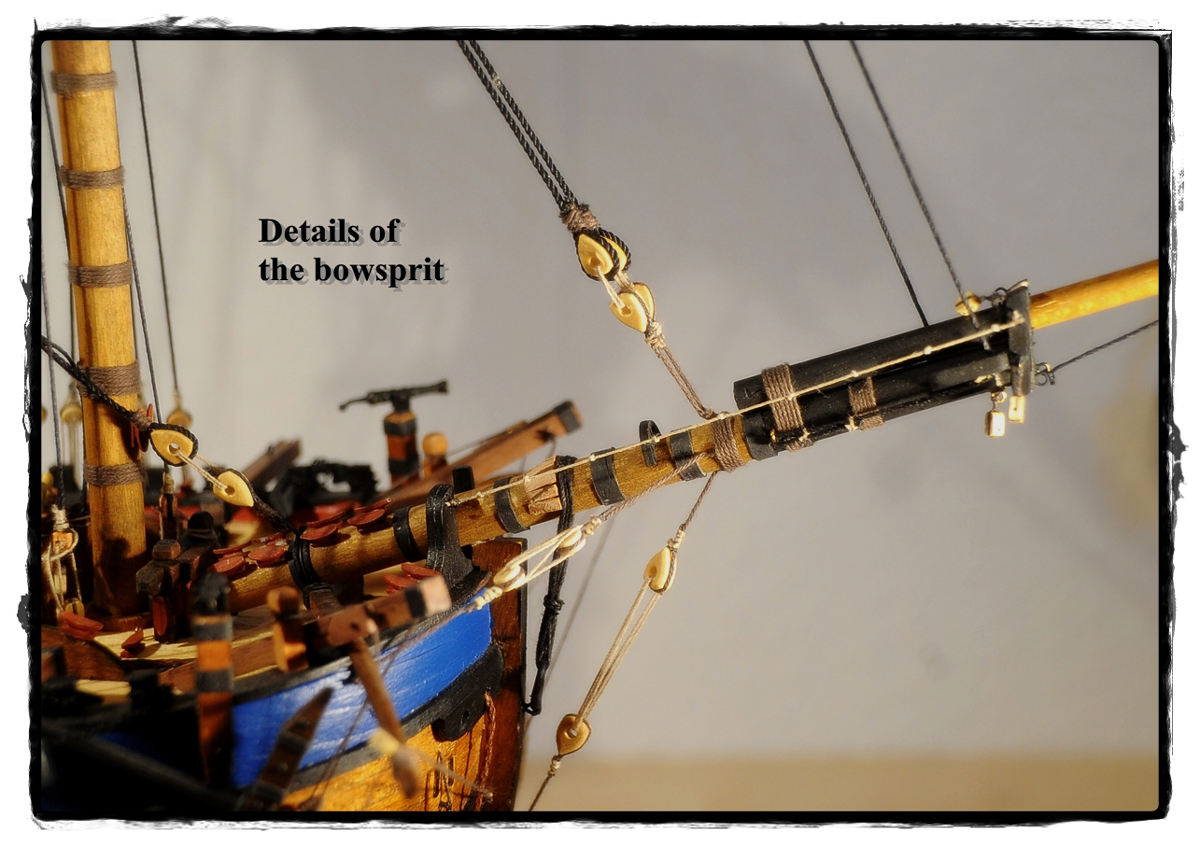
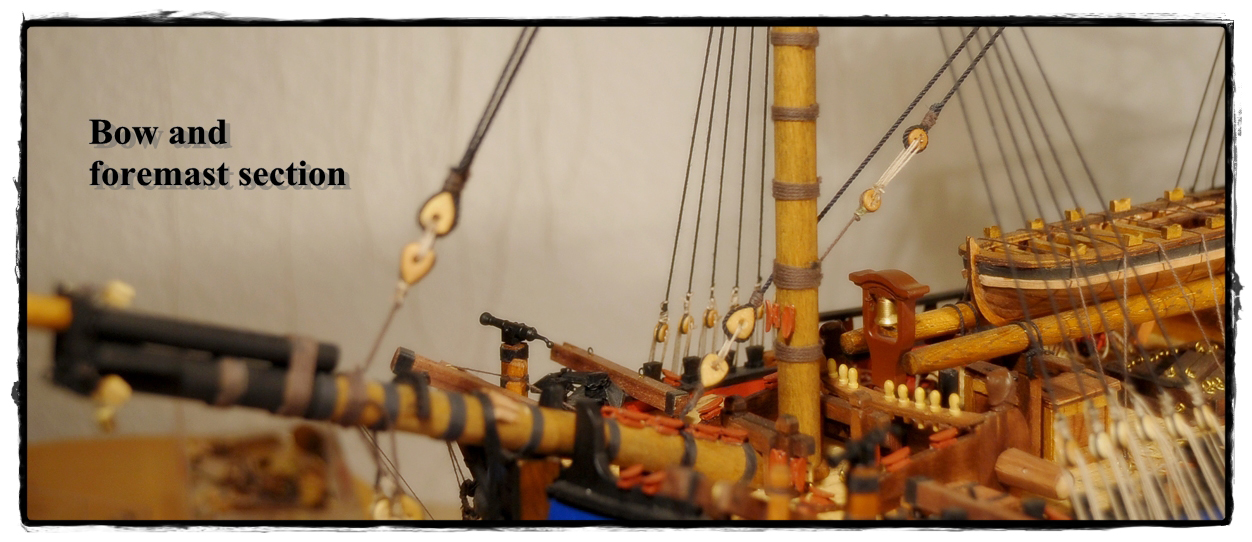
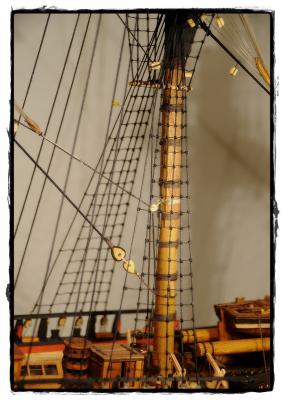
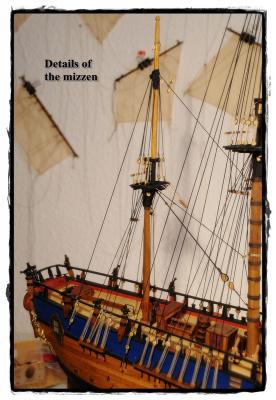
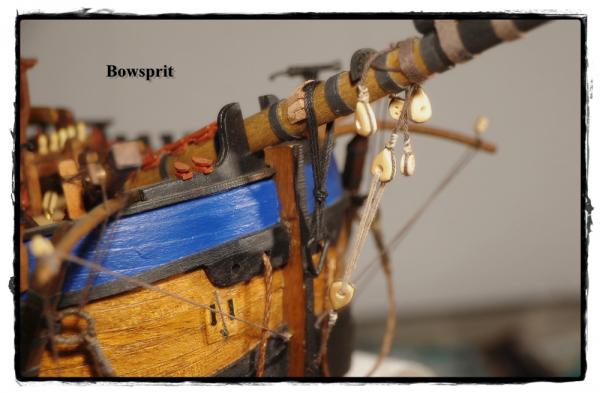
Hello my friends, as promised before - I will update more from my build. I started the standing rigging. First I fixed the bowsprit and made the woolding and the bobstay. All worked fine. The foremast is also fixed and the shrouds are fixed. Next will be the main mast. Then the mizzen, followed by the topmasts and so on. Just a few pics Merry Christmas and a happy New Year Cheerio Max


-
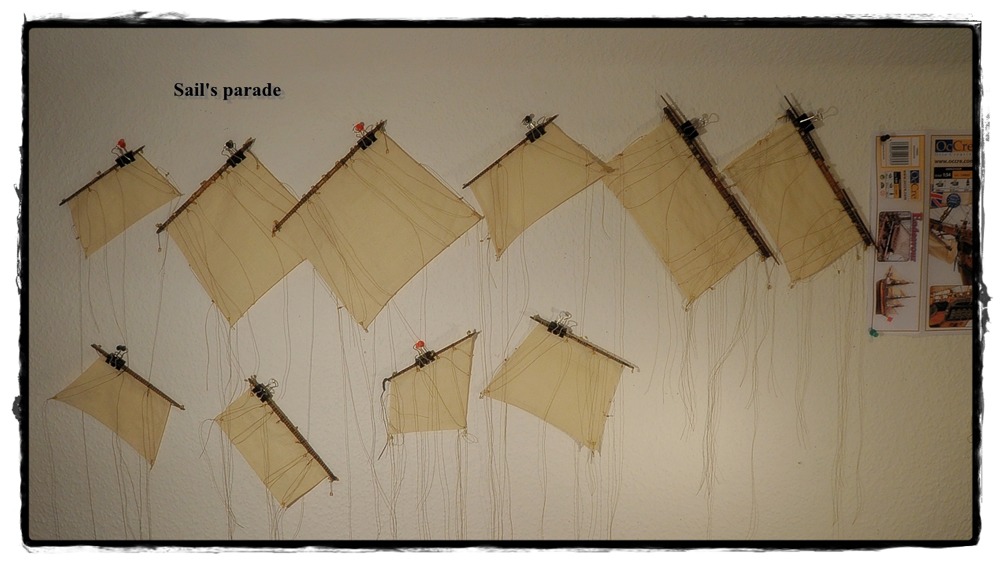
Hello my friends... a long time has passed by since my last update. I was preparing all the sails in the last weeks - an this was really really challenging. Just all the knots to fix the sails to the yards took a long time. But as always... this hobby is nothing for people who want a quick result. Well - more or less I feel like a sailmaker from the past. And coming along with the build I was reading in Mr Cooks logbook and learned a lot about rigging and sails (and of course about Otaheite and New Zealand :D ). But now the second step is done and the final step will be done: Starting the rigging. I like this challenge and I will try to improve the instructions result according to AOTS (as long as this makes any sense). The pics show some impressions of the work of the past four weeks. The next updates will be in more frequent intervals. Xmas is coming around - so I wish all of you some nice days, a lot of gifts under the tree and most of all some calm and relaxing days with the people you love around you. Cheerio Max


-
Sovereign of the Seas kit (was there ever more than one)
maggsl_01 replied to mtdoramike's topic in Wood ship model kits
Hi Mike, I only can remeber several kits from *plastic* in different scales (Airfix, Revell, Aurora) an the subscription kit from De Agostini in 1:84. Even an intense search with Google did not give any more solution... Cheerio Max -
Hi Bigboris, I am working on my Endeavour by Occre. Well... my opinion is quite mixed. The kit is full of nice stuff - but as always you will find a lot of not so fine things. I replaced all cannon barrels and svivel guns, I replaced almost all rigging yarn as the supplied material is not suitable, I do not like the photo-instructions so much - wish there would be some real plans as other manufacturers like Corel, Mantua or Euro Model have. But on the other hand: The scale is 1:54 (so they say) and that means you can work on details quite good - eg I rigged all cannons. Try to get the book Anatomy of the Ship and you will have a almost never running up source of ideas and real help to improve the build. I have done the masts so far and will now make the yards and sails. All in all I am satisfied with the Occre kit so far. You will never get a kit that is 100 %, so the compromize you will get from Occre is a good equivalent to the price (about 300 Euro in Germany). I have started to build the Endeavour 11 months ago and it will last approx about 2 month till I will finish. So you see - you get a very nice and challenging kit that fullfills all demands. I would not hesitate to recommend this kit although I do NOT know the other kits. But it will help you quite a lot to take a look at the build logs around. Have a good time Cheerio Max
-
Thank you all for your comments and appreciation It is a lot of work - but ... haste makes waste... and I do not want to make any waste with my build... Cheerio Max
-
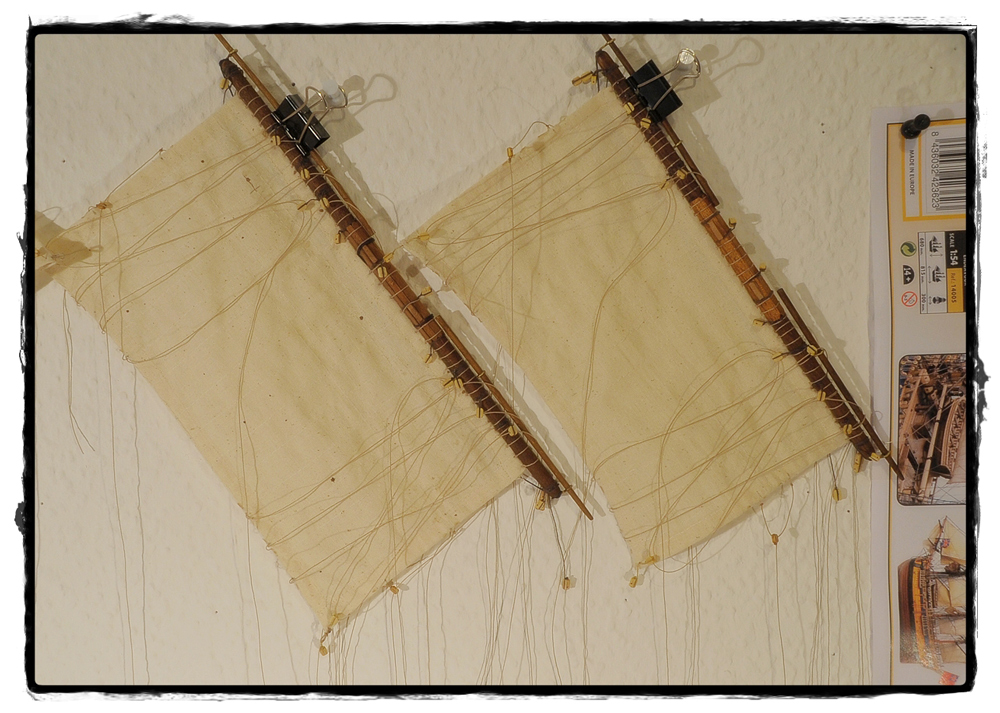
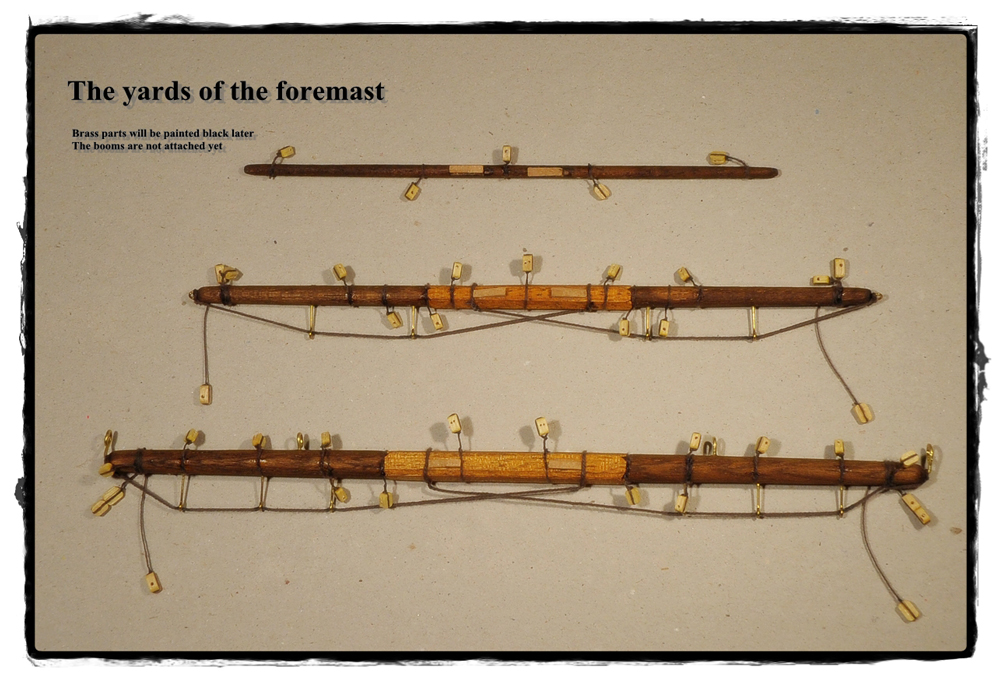
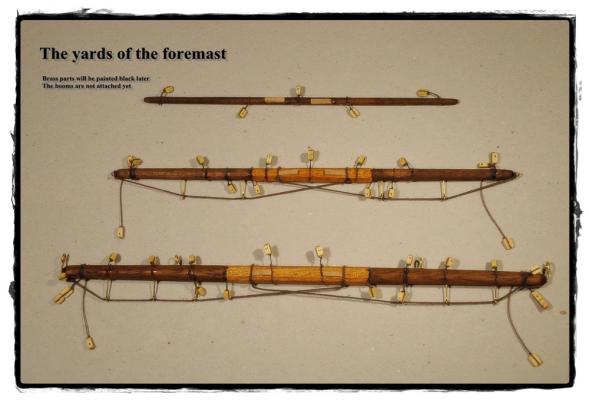
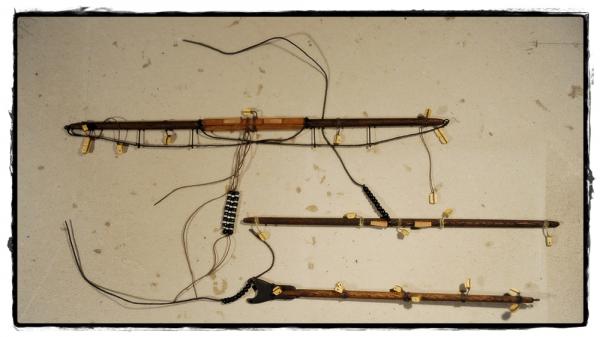
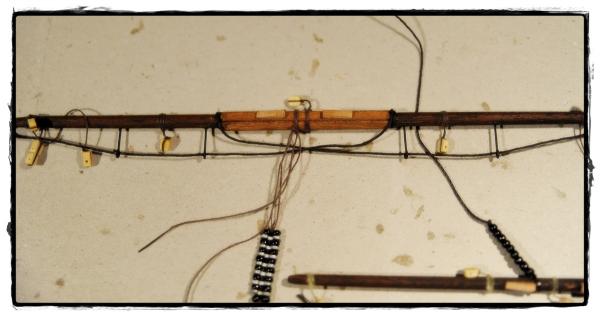
Hello my friends and fellow followers There was no time for a update the past few days as my dad (he is 84 yrs old) had some bad days with a stay in the hospital. So I had not so much time to build - but on the other hand the build is a chance to get away a little bit from the sorrows and sad thoughts. Now my old Buddy is home again and on his way to feel better. I am still working on the yards and attaching the sails. I do not use a lathe anymore as the old-fashioned way of cutting the spars into octagonal shape and then sand it down with rasp, file and paper is much more intense and emotional. And it does not take so much longer... It is a long way until I reach the goal with all yards and sails but it still I am very satisfied with it. The pics just show you a few samples how the work goes on; still there are left the yards for the bowsprit including the sails and all sails for the foremast. Cheerio so far ! Max
-
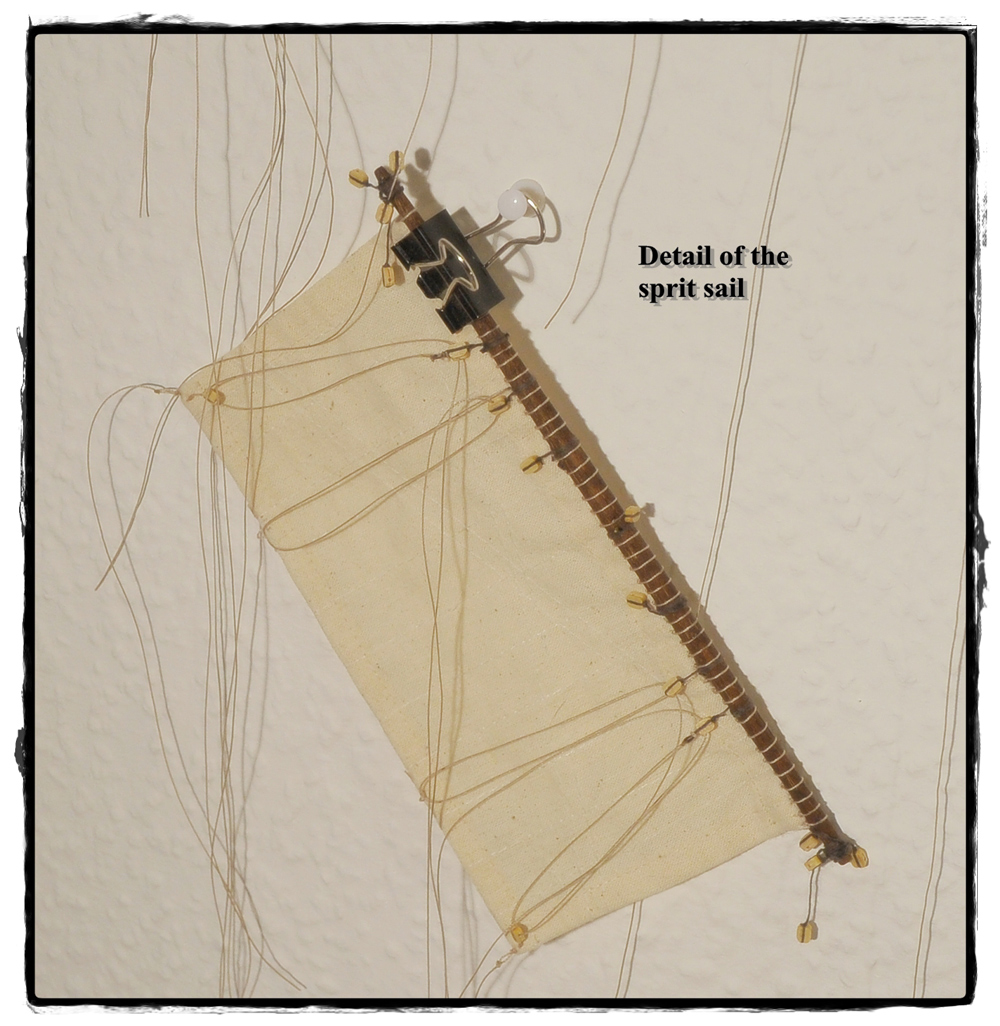
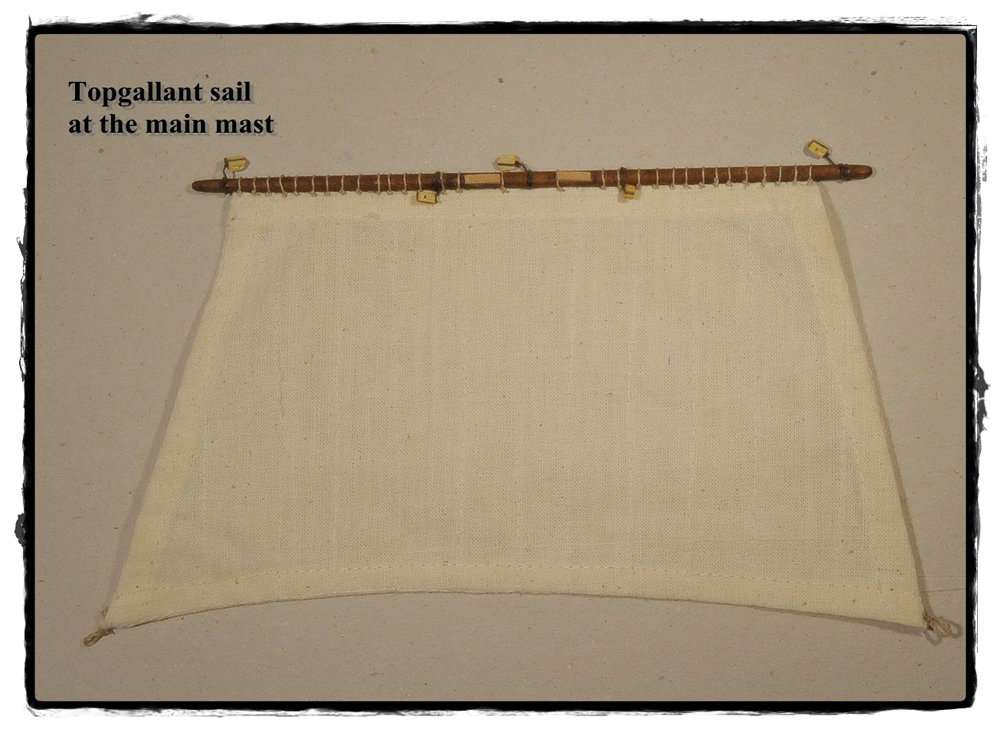
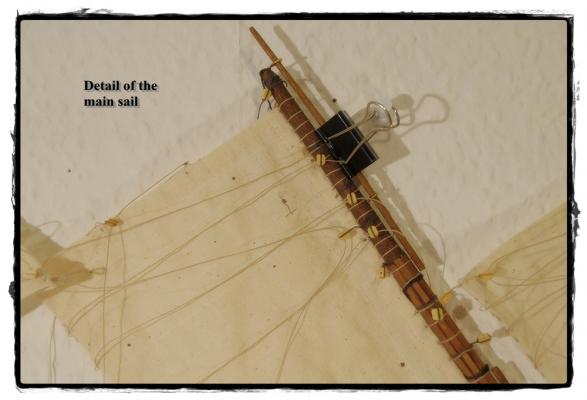
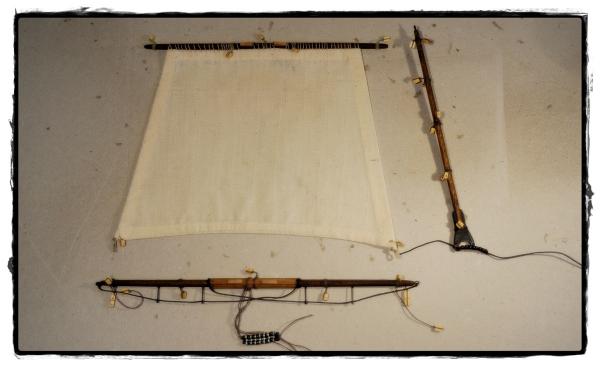
Hello again... I prepared the mainsail now in the way I told before. Takes patience and time - but both I have enough It is very satisfying to see the result when you go along the way the elder went too... they did never use just one rope to fix he sails... And... when you go as close as possible to the ship building in the 17th/ 18th century you understand the function of every rope, of every part... that is so amazing and so great with this hobby But to whom do I tell this ... I attached a few pics to show the result, all the other sails will be managed the same way. Cheerio Max
-
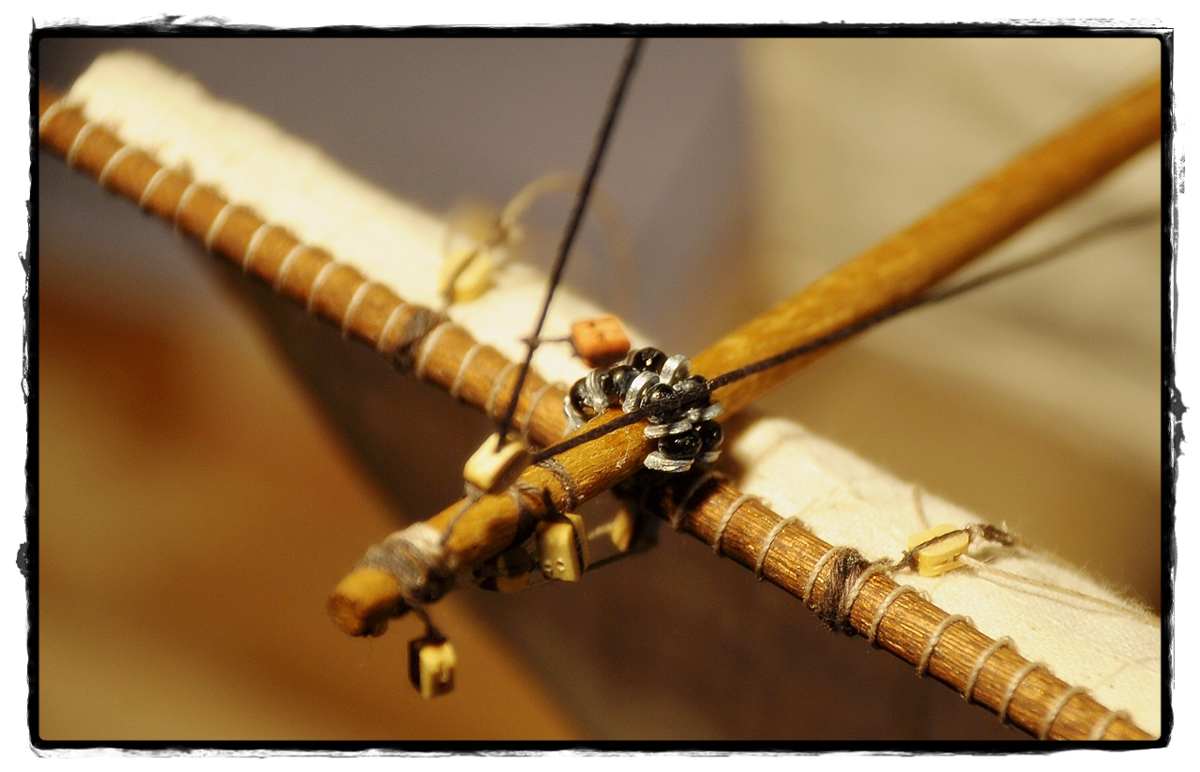
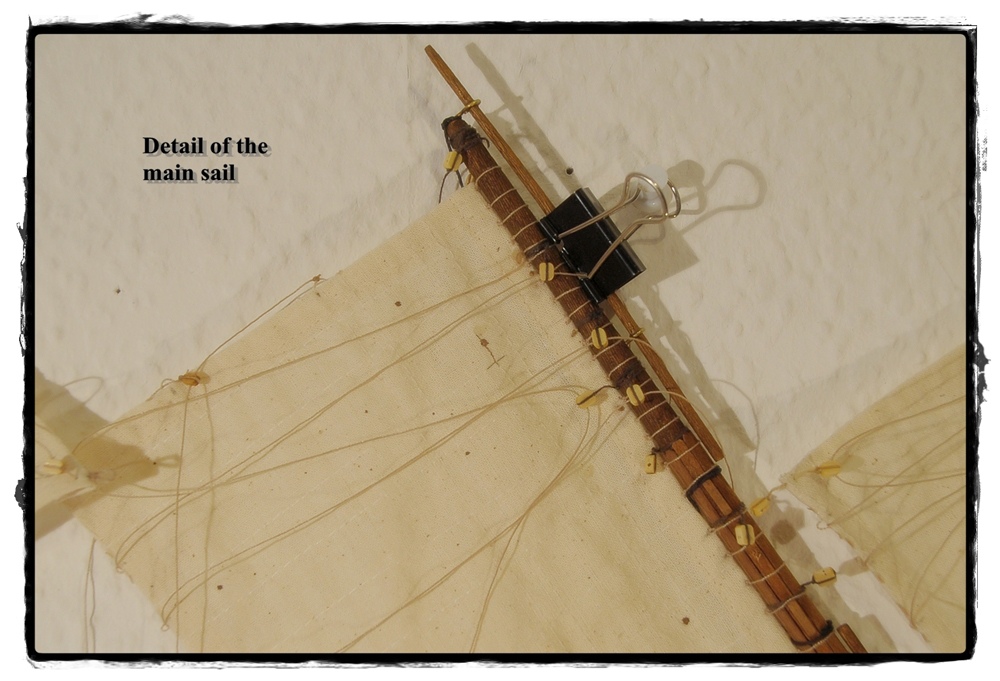
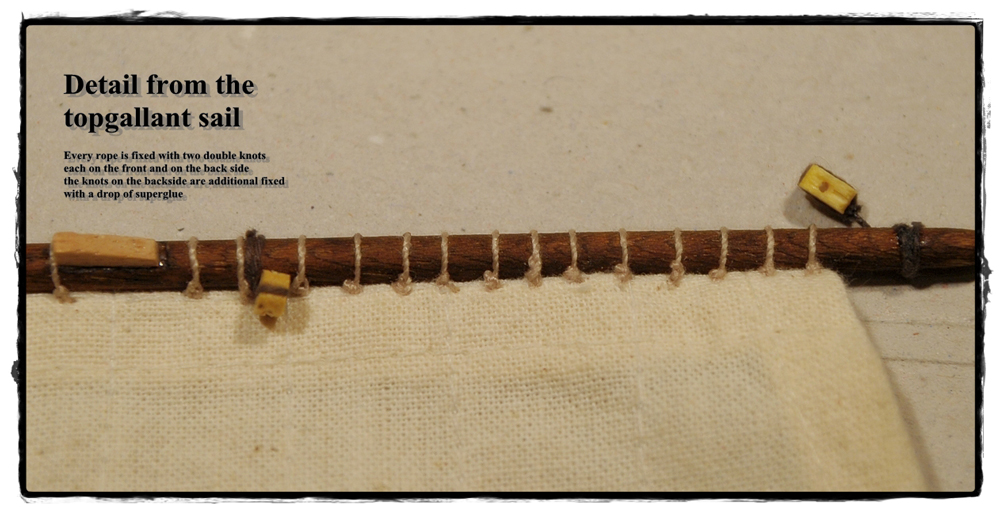
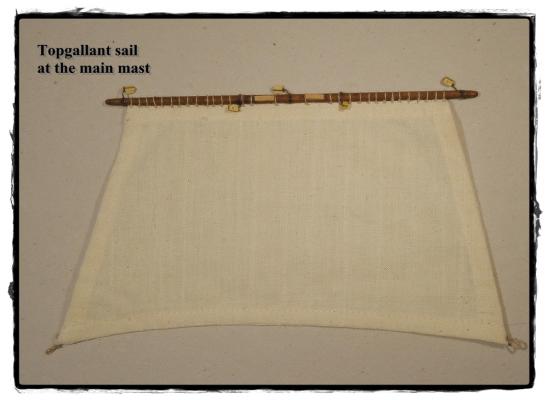
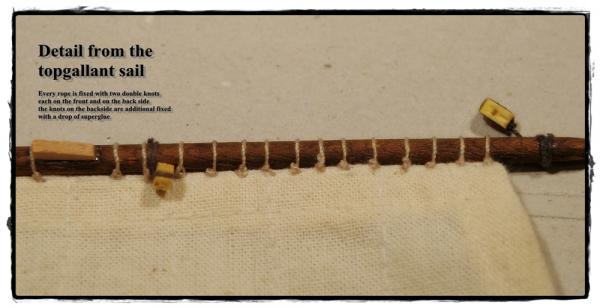
Hello again it's me and I came to a decision: I will NOT follow the instructions for fixing the sails on to the yards. The instructions say that you use one piece of thread for this job and it should be wrapped around the yard like a spiral. This does not look as realistic as it should. I visited Mr Marquardt once more and take a look at the drawings there. Now I will do it similar to this: I will fix the sails hole by hole with one thread each. You can see the difference at the mainsail on the pics. First one shows the result as the instructions say, but I am sure the other way is the better way. It takes much more effort, time and patience - but it is not my goal to set any new record for building this at least marvelous ship (and kit) but better a record-breaking qualitiy of a model :D CU soon Cheerio Max
-
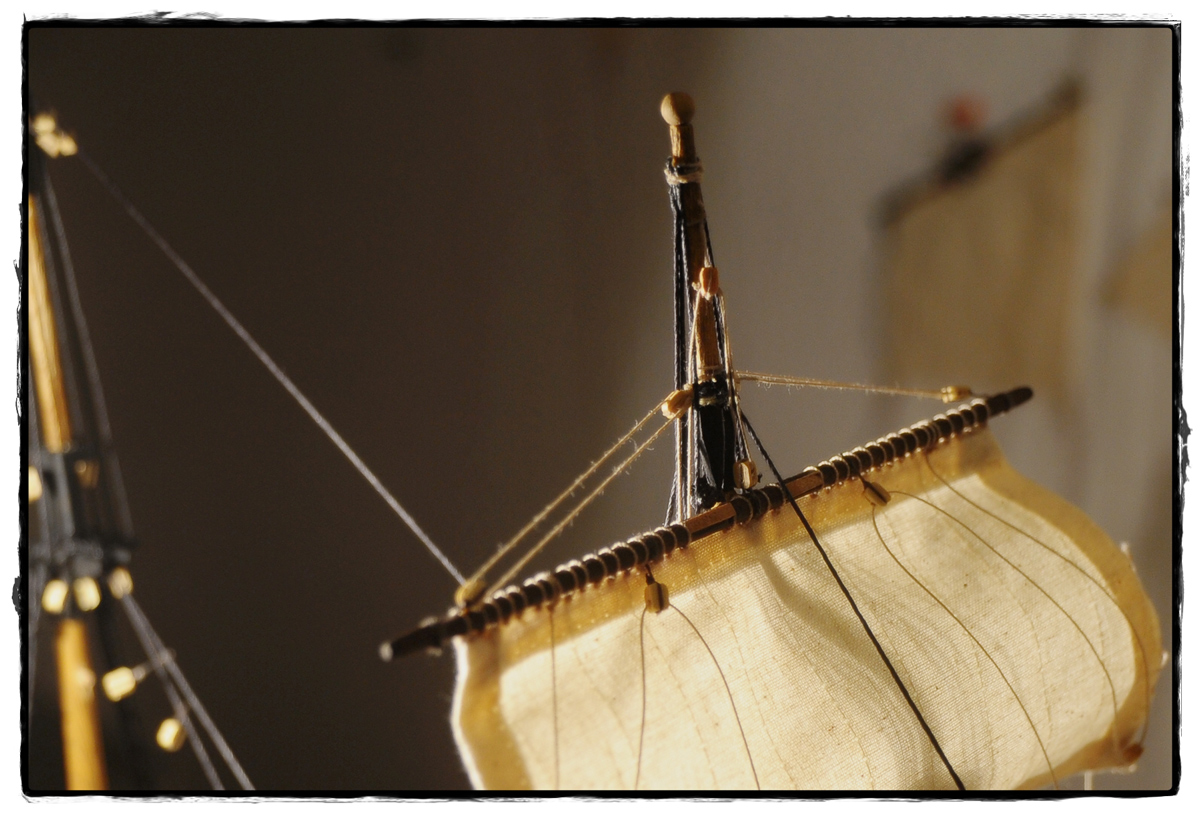
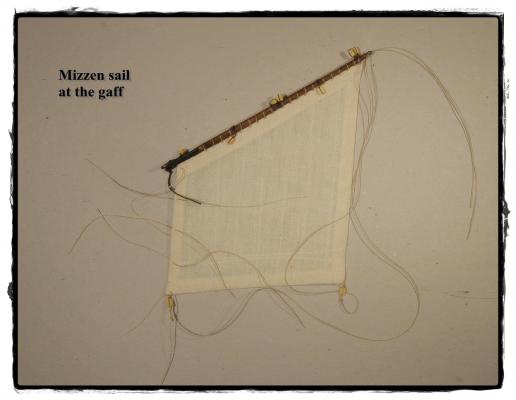
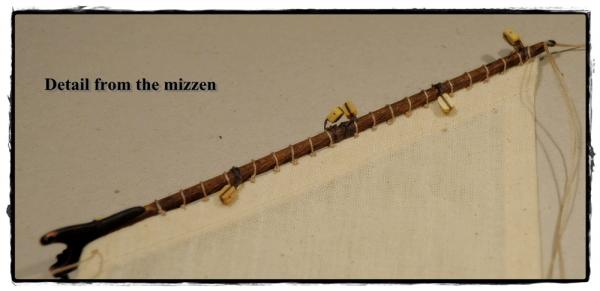
Hi all just a little update. I am working on the yards at the moment. I finished the yards for the mizzen mast. I've never done anything with sails so the fixing of the first sail on the upper yard is my first attempt. I hope this looks ok... The rope should be even around the yard. I am not used in needle and yarn but it worked much more easy than I thought. Next will be the yrads for the main mast. Here there are some stunsail booms to fix. The instructions are very good and there is no reason to be discontent. The preparation of the yards and the sails takes a lot of time, but every moment is full of fun. CU soon again Cheerio Max
- 147 replies
-
- 11
-
-
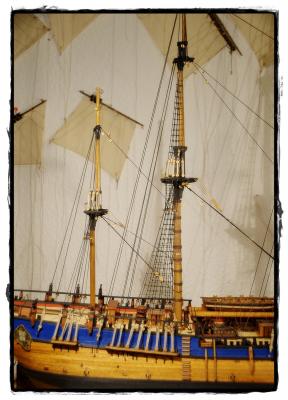
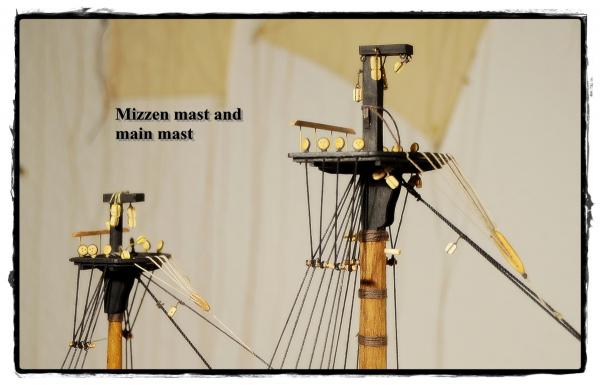
Hi Ron, thx for your kind words.. I think the foremast and even the mizzen mast (no change made) have the correct size now. As you can see on the pic I made a comparison. The difference is almot not visible anymore. So I will fix all three masts the way its dry-done at the Moment. The spacer or the foremast is 2 cm, no one at the mizzen mast. Cheerio Max