HOLIDAY DONATION DRIVE - SUPPORT MSW - DO YOUR PART TO KEEP THIS GREAT FORUM GOING! (Only 13 donations so far - C'mon guys!)
×


maggsl_01
-
Posts
767 -
Joined
-
Last visited
Content Type
Profiles
Forums
Gallery
Events
Everything posted by maggsl_01
-
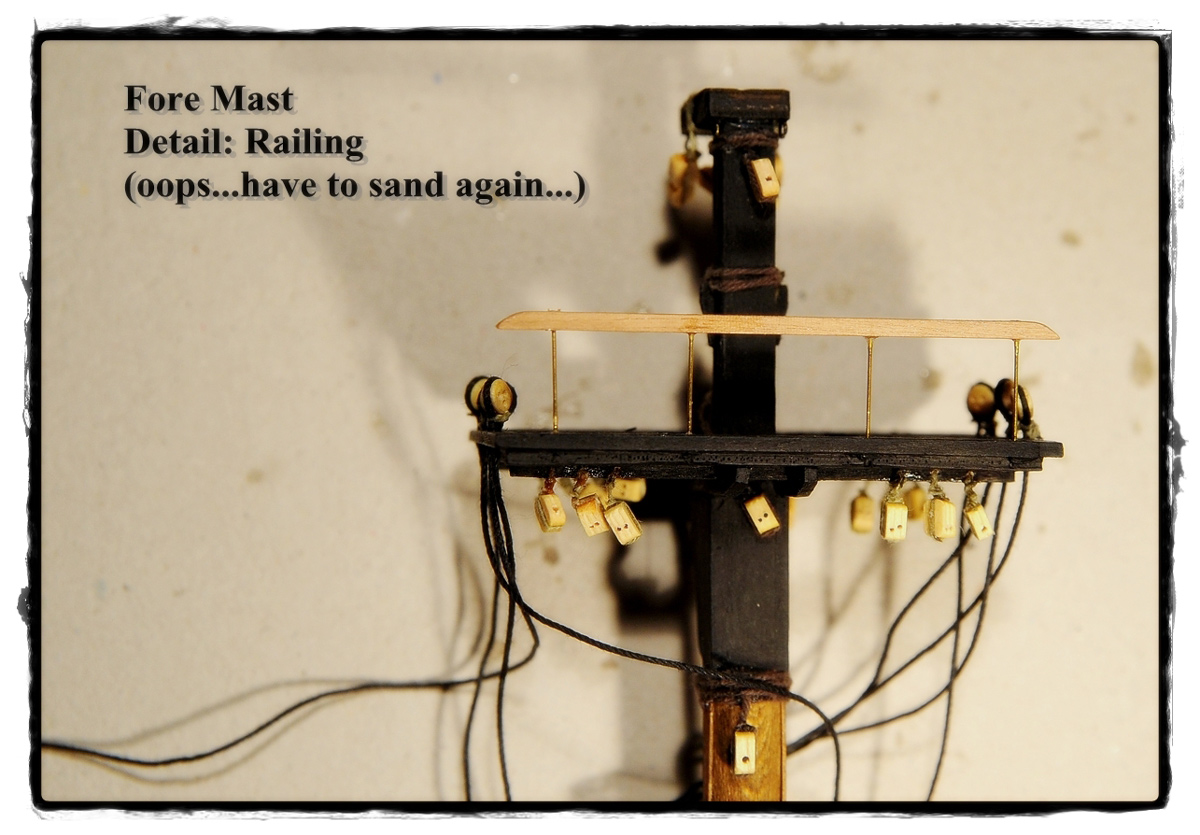
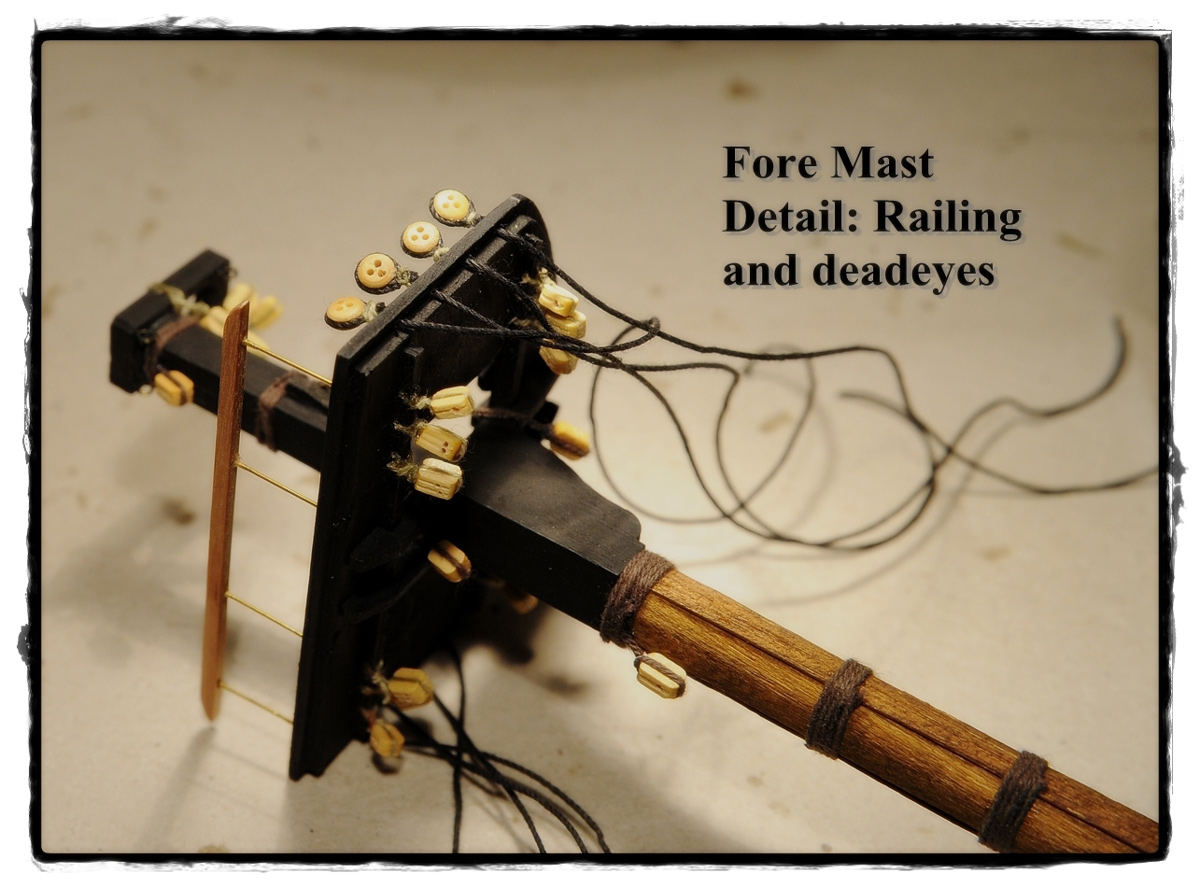
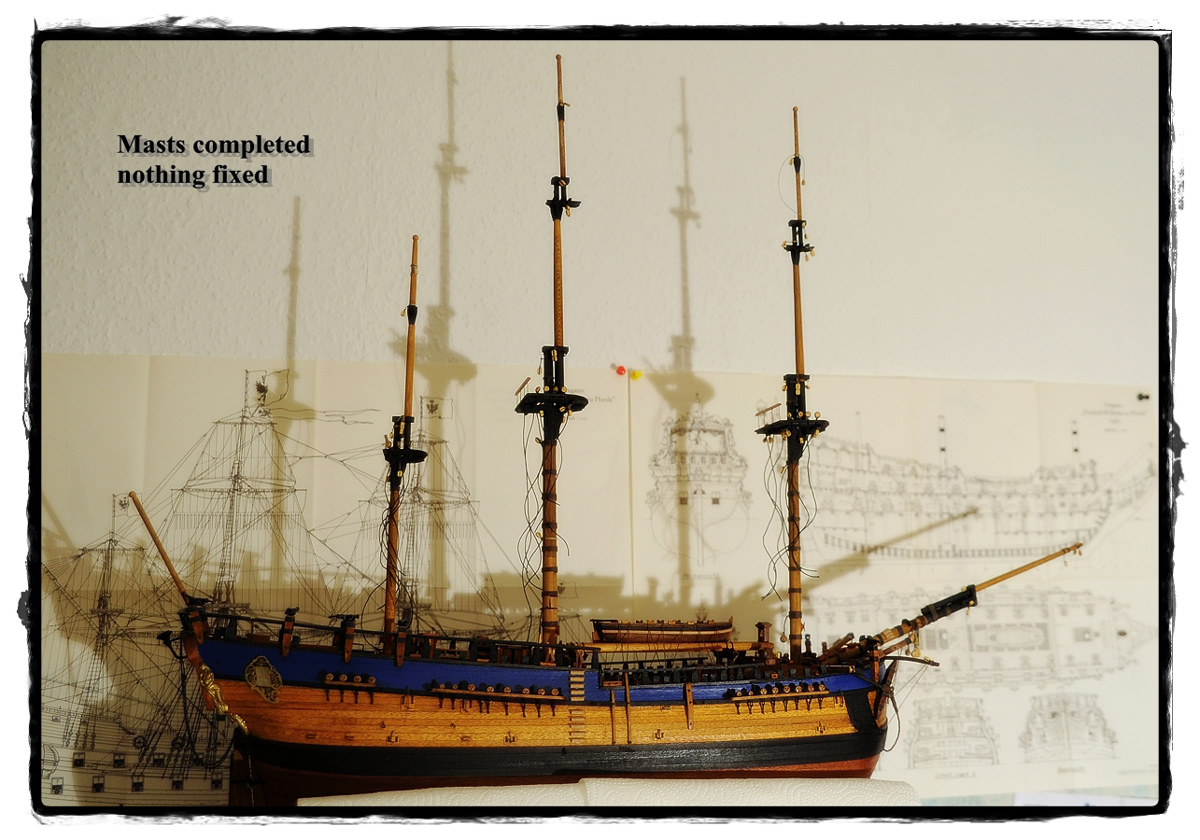
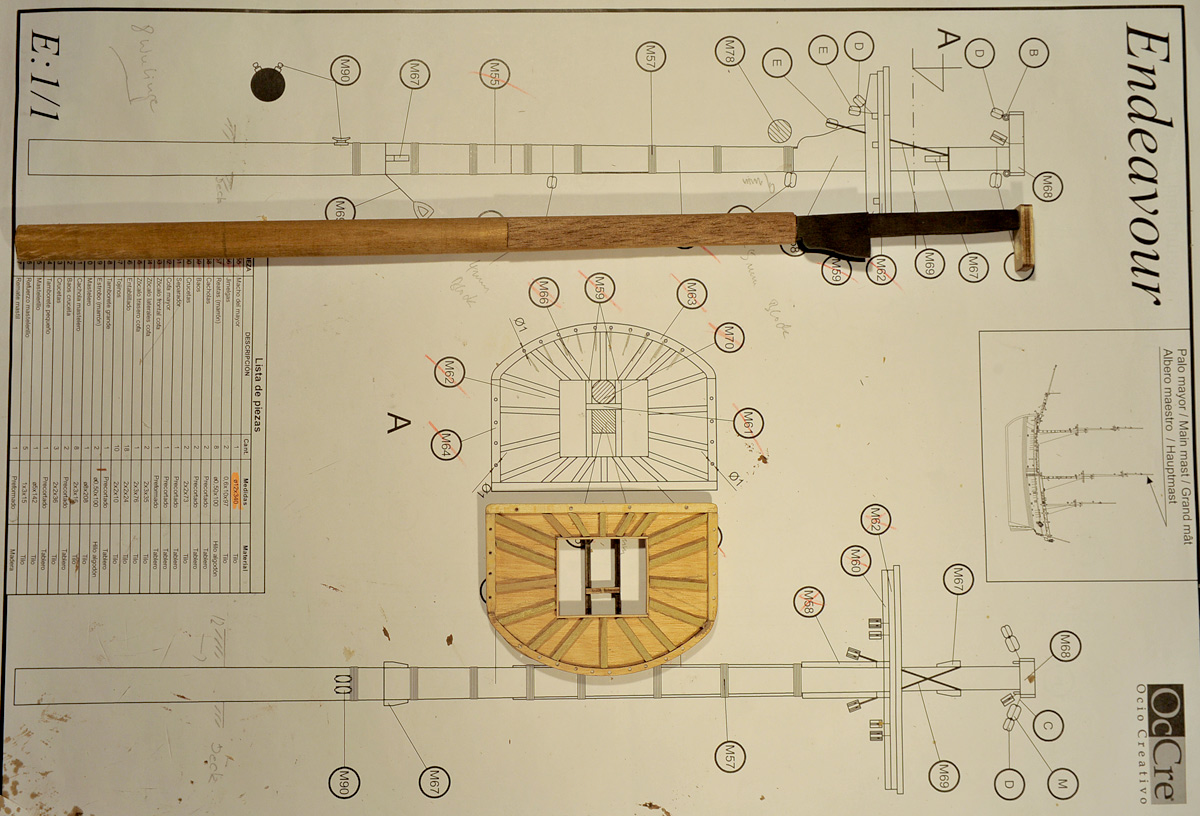
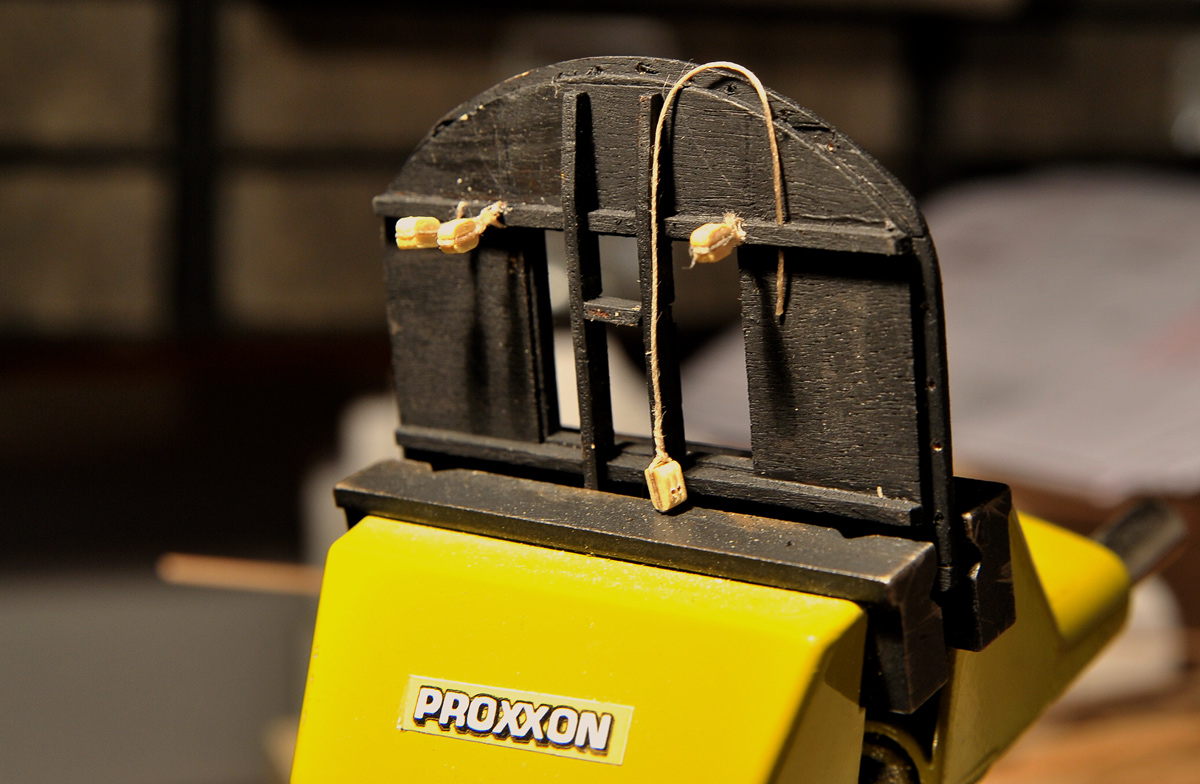
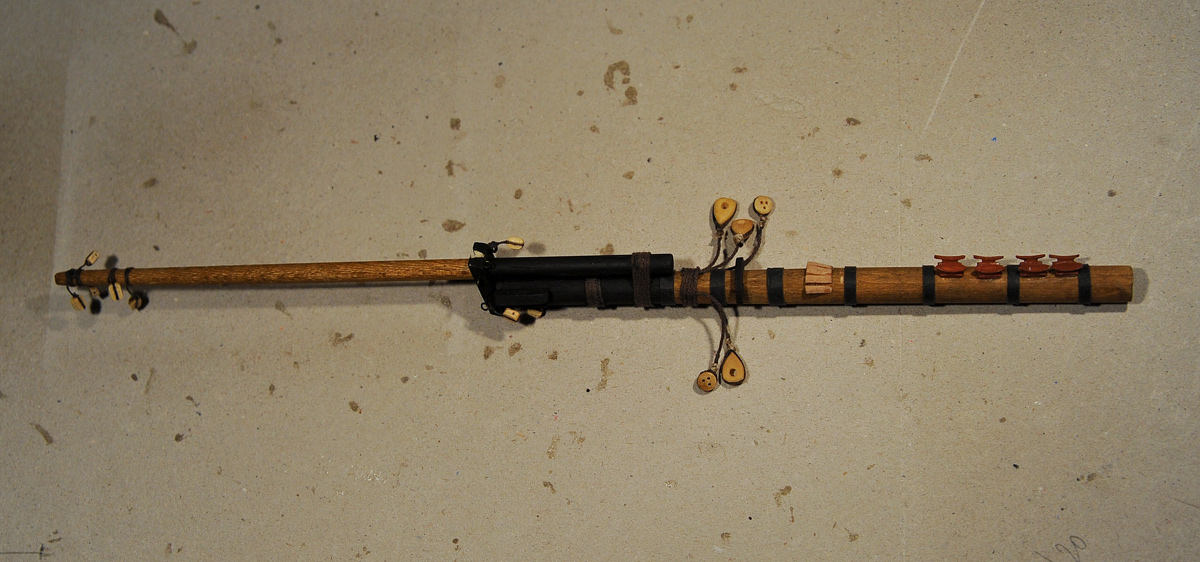
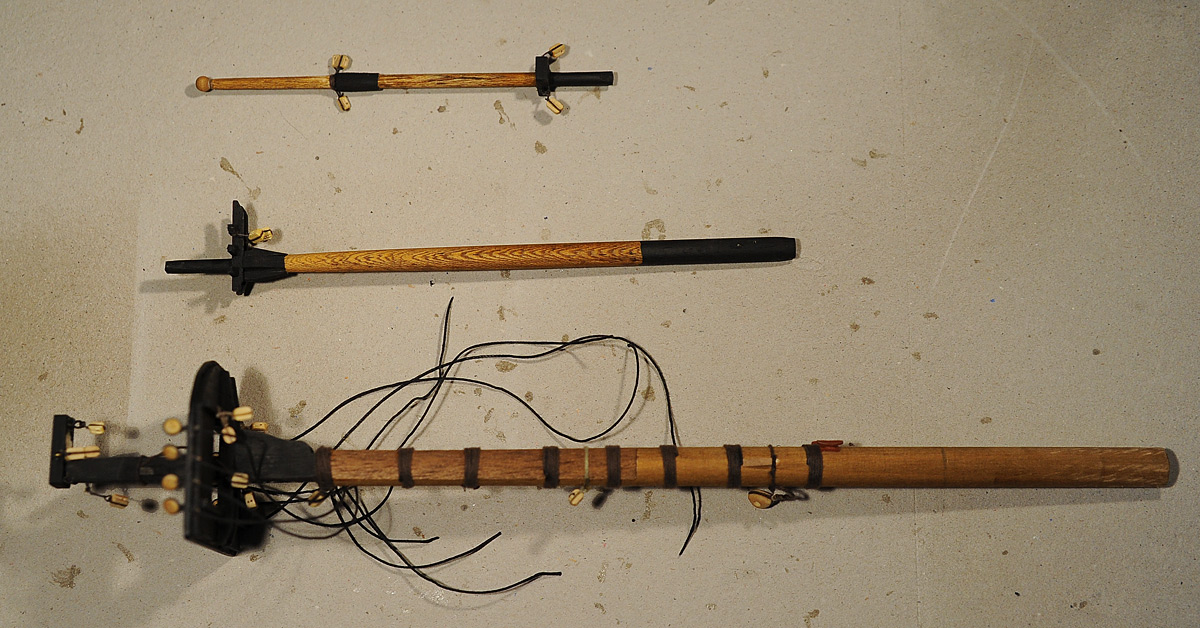
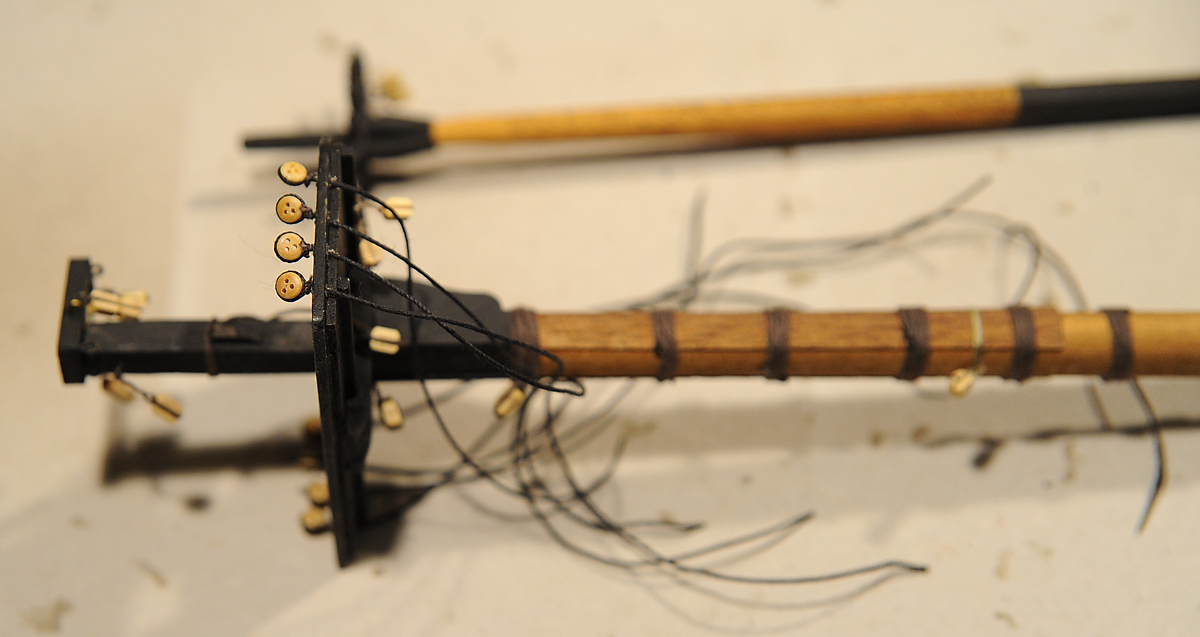
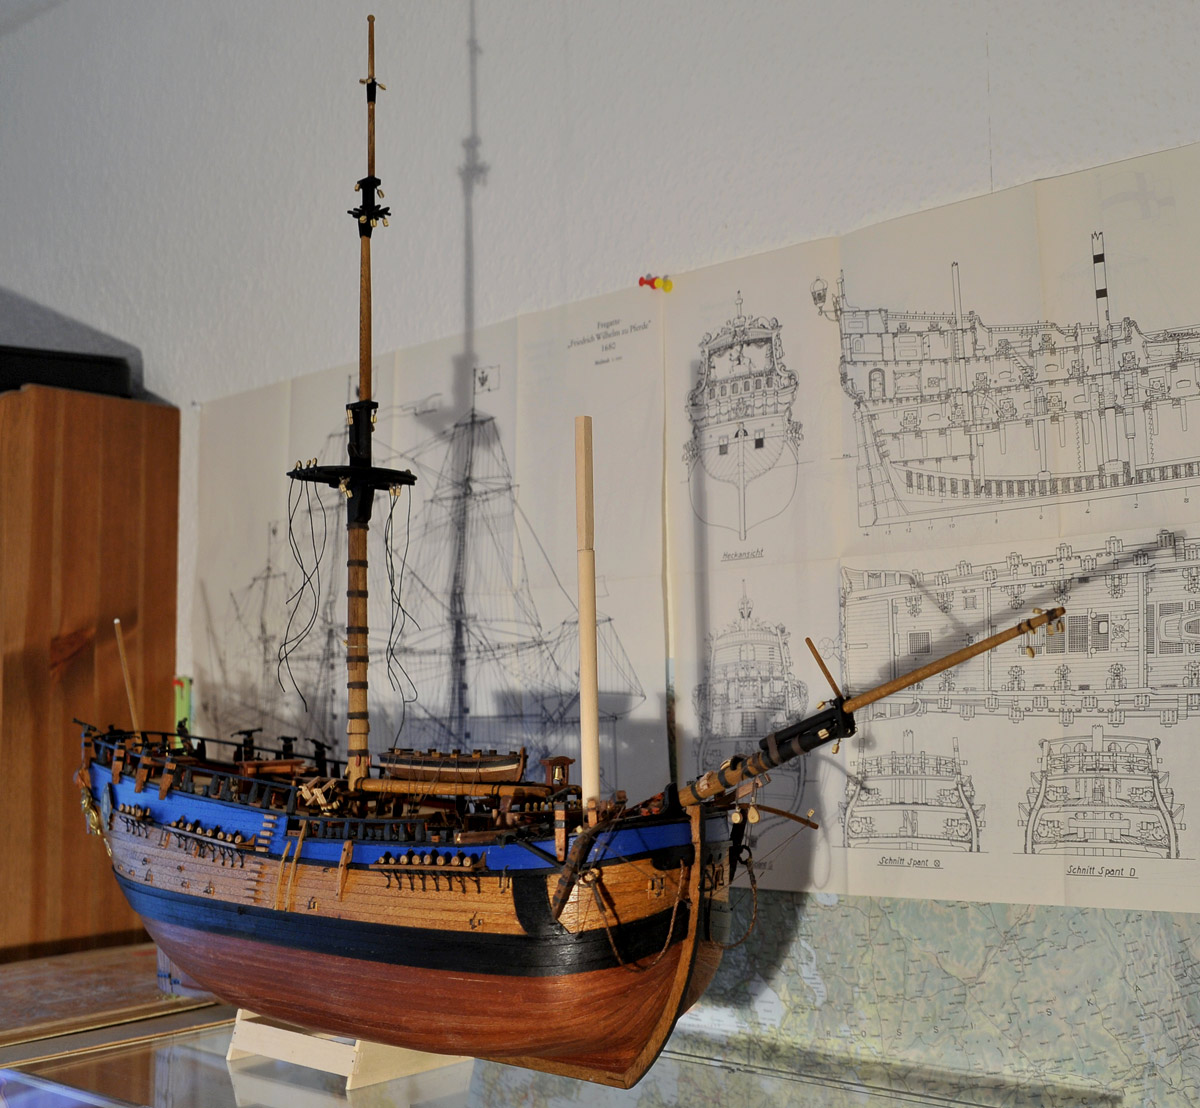
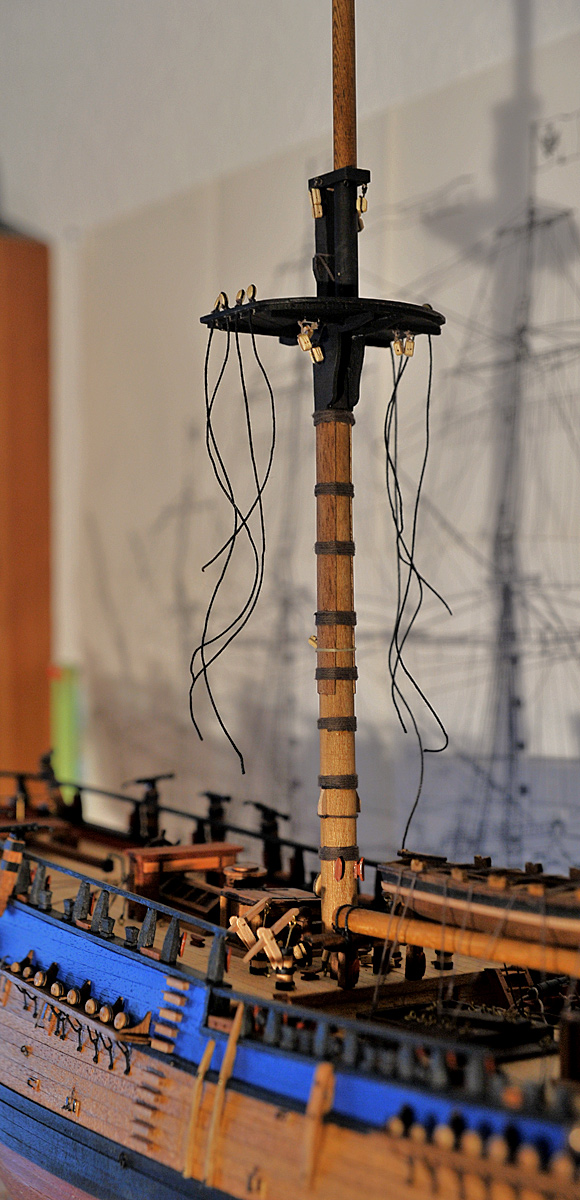
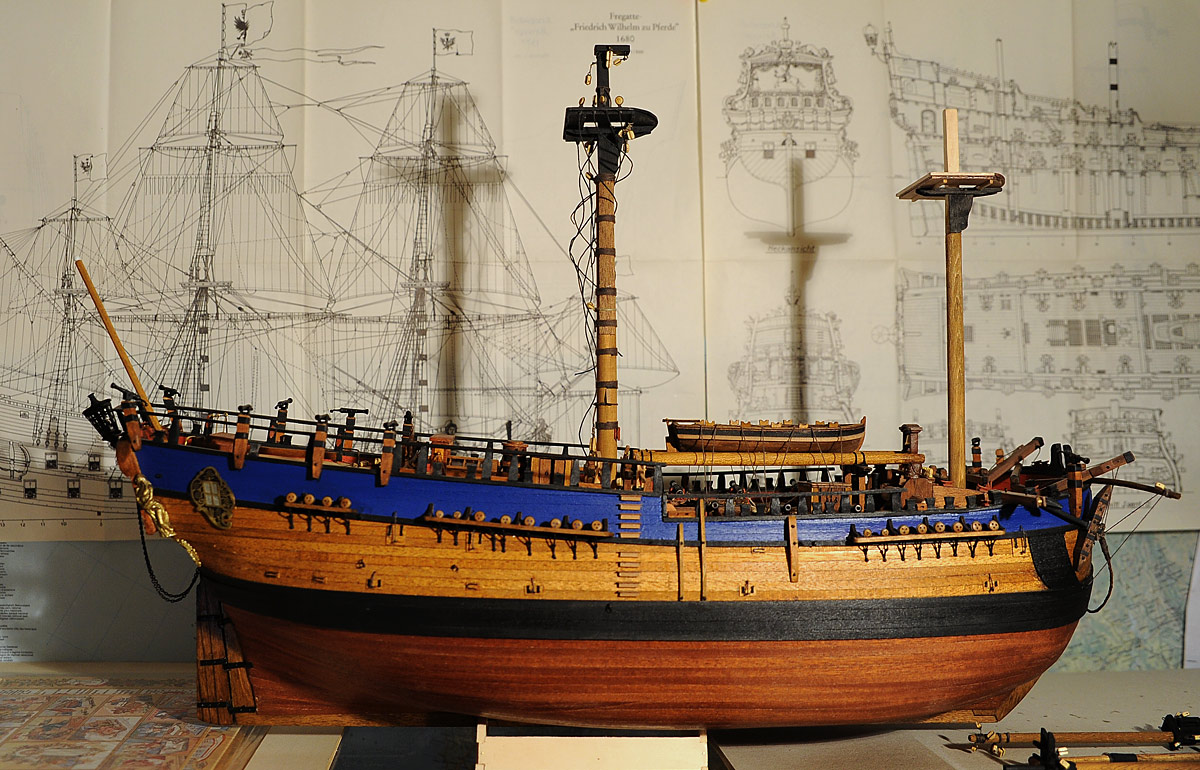
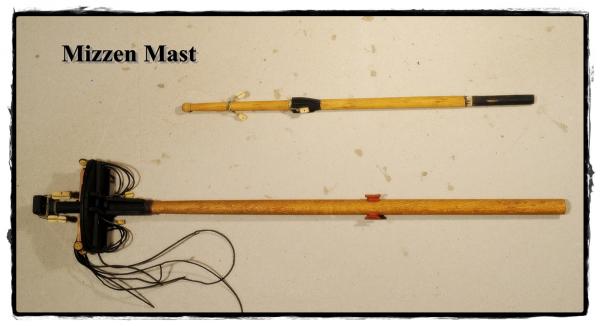
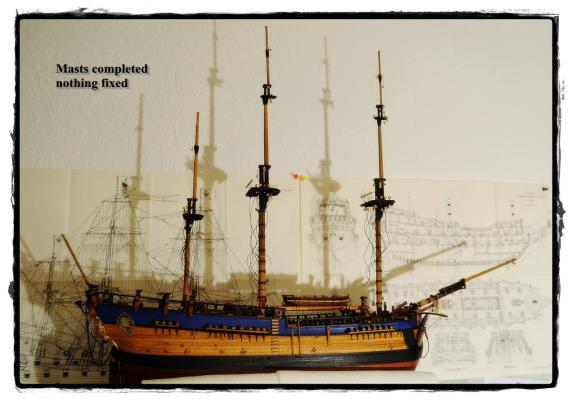
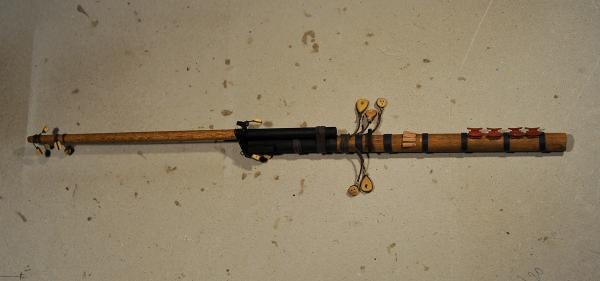
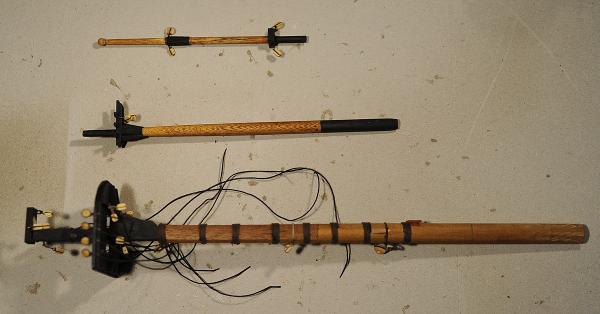
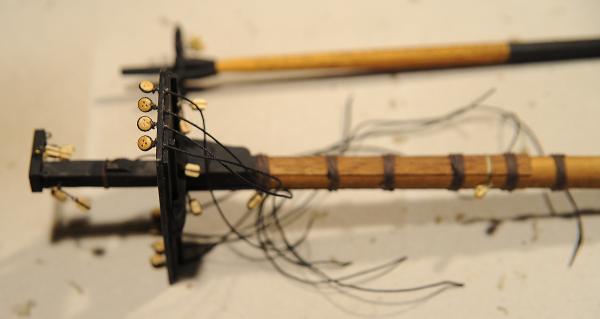
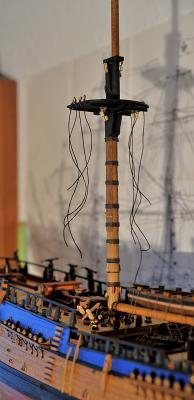
 Hello my friends I completed building the masts. They seem to be quite ok, although the construction was a little bit tricky on some parts. But the 1:1 instructions help you very well. Still not sure about the height... Next will be to build the yards. As I will use the sails I will have to think about the wright order to fix the sails on the yards... We will see... Some pics will Show the actual state of the HMB Endeavour Cheerio Max
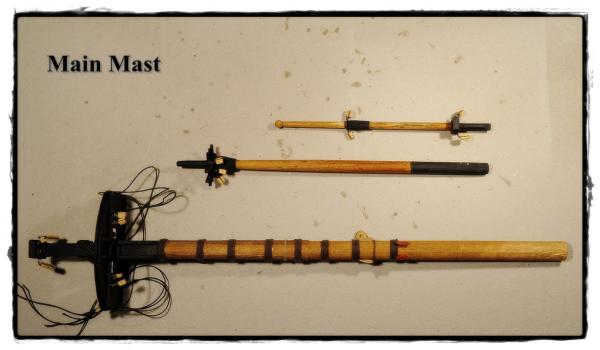


- 147 replies
-
- 12
-

-
Hi Denis I am looking forward to follow your log. The Revenge is a quite new kit, isn't it? Go on - and impress us as usual Cheerio Max
-
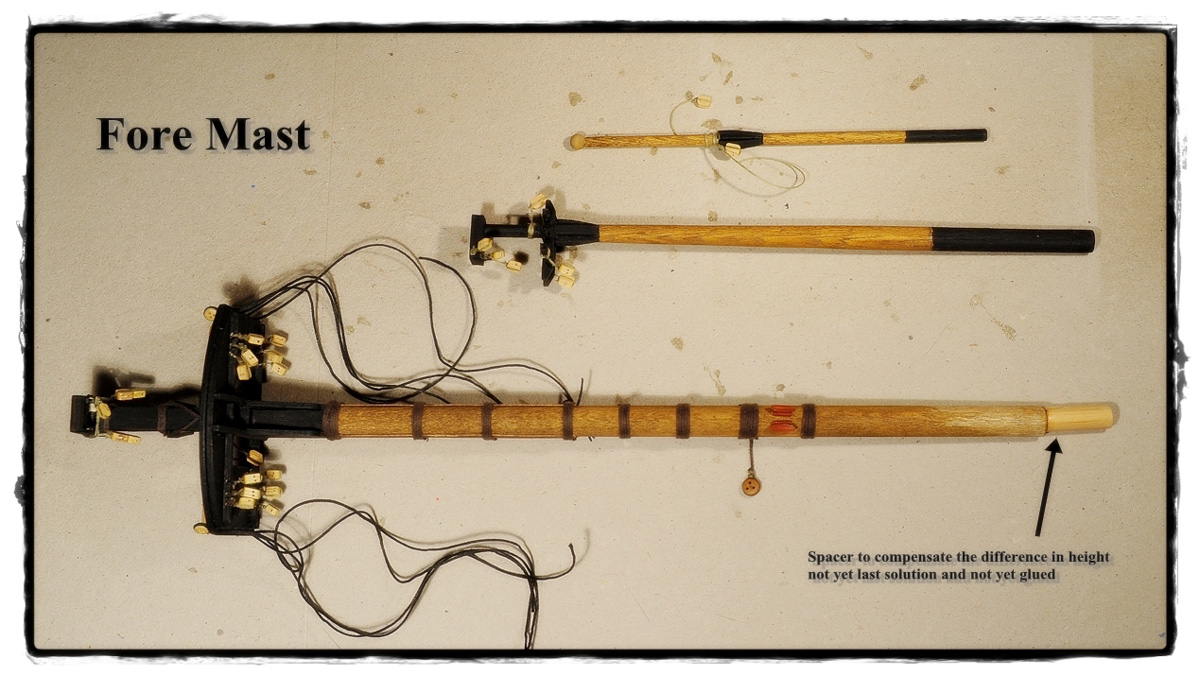
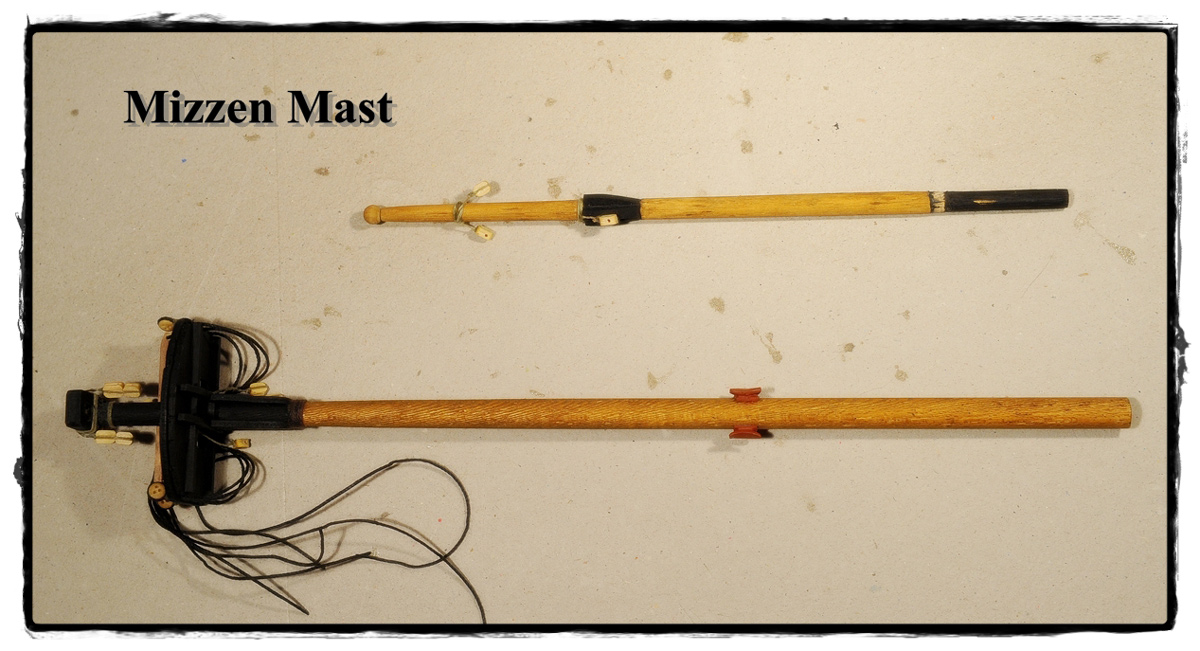
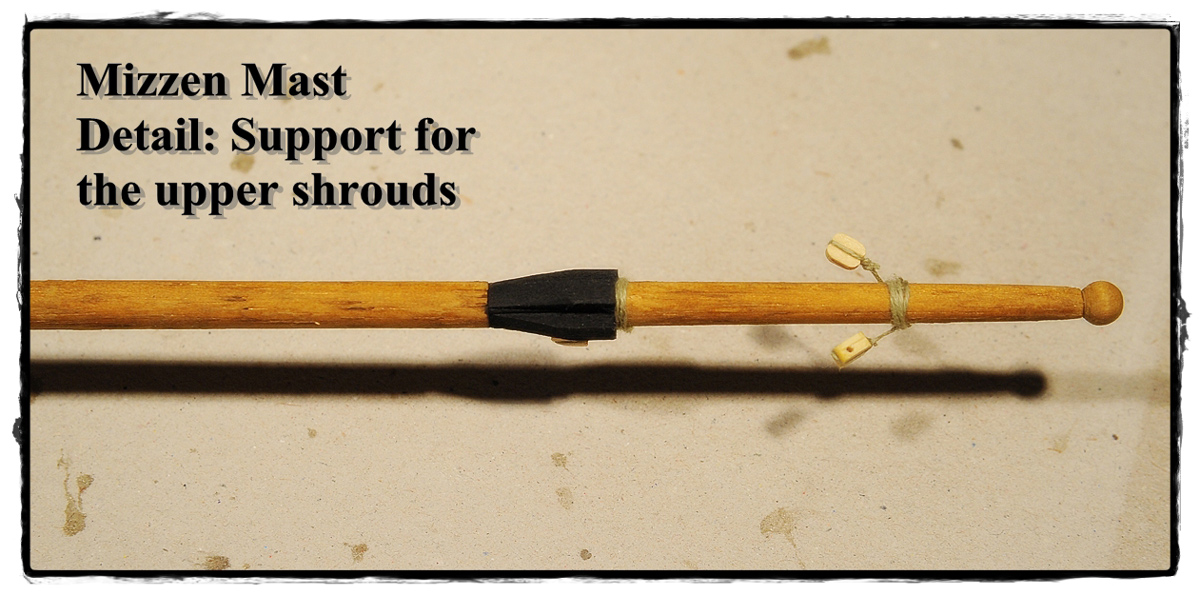
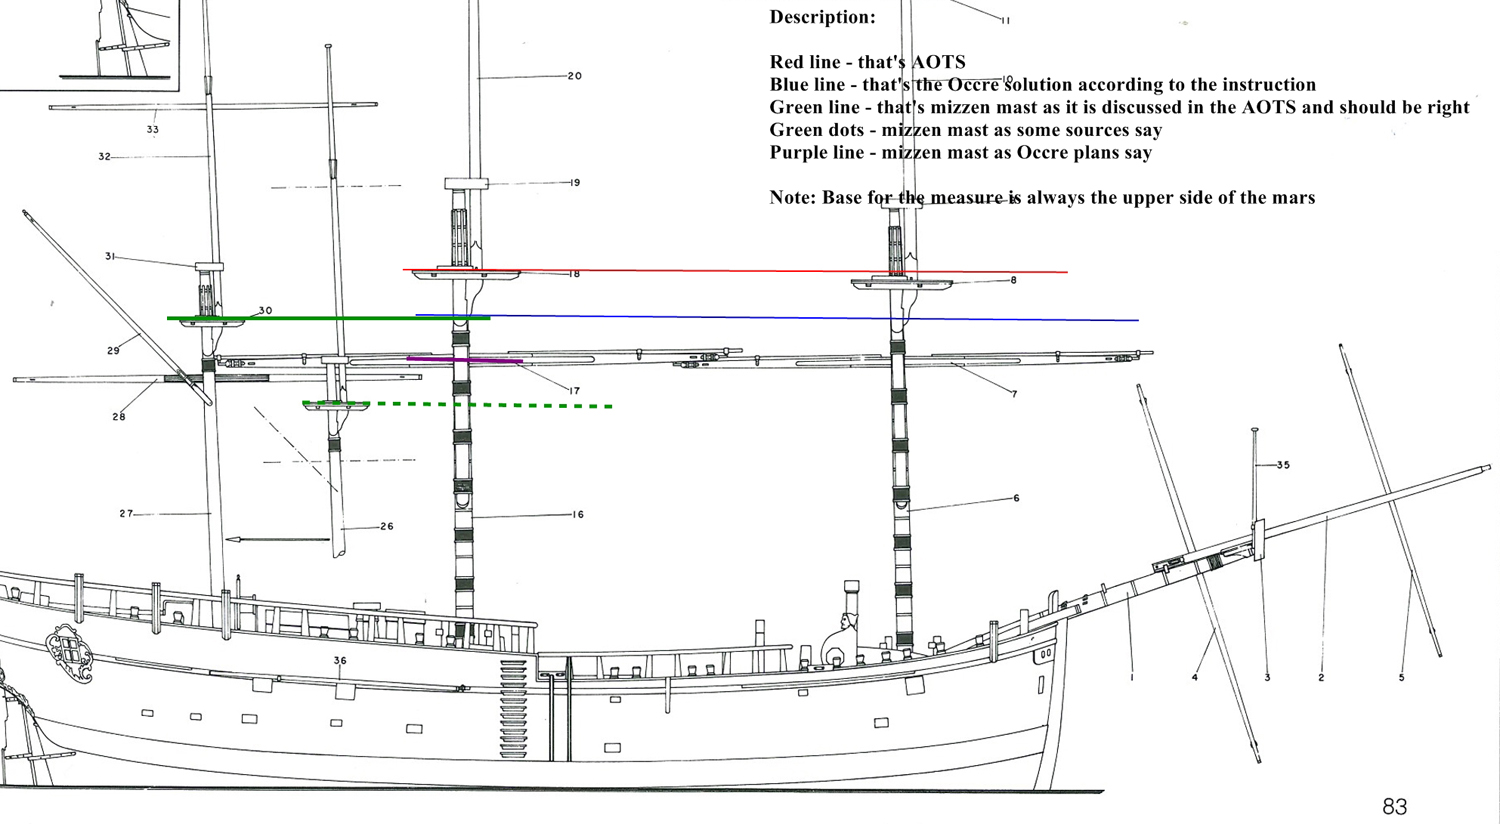
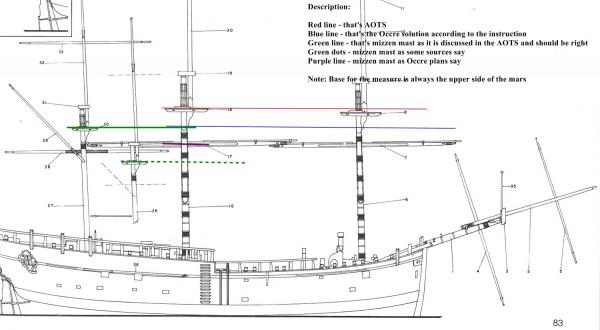
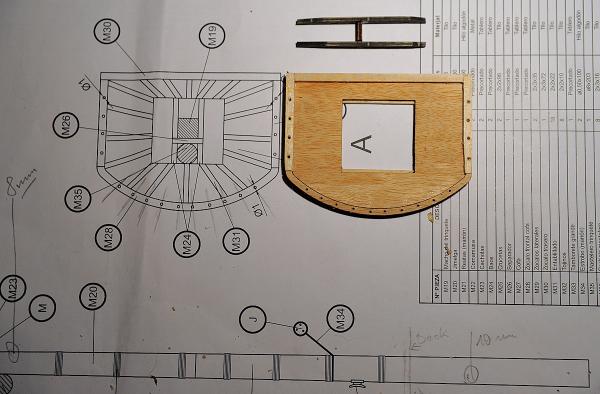
Hello folks, the size of the masts is still something to move me... I was looking at the AOTS again and the plans. There is a difference between the foremast and the mizzen mast that both can be built with the Occre kit, and the specifications available in certain sources - plans of other manufacturers, AOTS and other literature. What will be right?`I use a spacer on the foremast to raise it to the correct height. So I should do this for the mizzen mast too. But will the sails still fit when I change the dimensions? What would you do? Thx for your attention Cheerio Max
-
Hi Ron, different sources say that the distance between two ratlines was about 40 cm with a certain variance (some say it was more than 50 cm esp with spanish or german ships). So our Occres should have about 7.5mm/ 8mm for the ratlines. In my opinion it is also important to have a good appearance so I think about 1 cm. Shrouds and ratlines then make almost a quadratic "field" But this is of course an individual point of view. I am looking forward to see your progress... BTW what do you think about a Change in the order: Would it be usefull to wait with the ratlines until the Yards and the running rigging for the sails are fixed? Perhaps one can work easier with no ratlines... don't know yet... Cheerio Max
-
Hi Steve (again) I had a look at Mr Marquardts fabulous book... Indeed... the foremast of the Occre Endeavour is about 2 cm shorter than the drawings in the AOTS show. I did control the plans to be sure that I have not made that mistake... But I did everything as the plans show, so the plans have to be inaccurate somehow. But it is not a Problem to compensate this fault - I just will glue a spacer onto the lower foremast - and all will be good. I hope this will work. The result will be shown soon Thanks for your hint. Cheerio Max
-
Hi Steve, thx for your comment - indeed the foremast is remarkable lower than the mainmast - at least at the level of the mars. But I followed all the instructions in the plans. So probably it may be an error in the plans. If you look at kiwiron's Endeavour by Occre http://modelshipworld.com/index.php/topic/4314-hmb-endeavour-by-kiwiron-occre-154/page-19# you will also see this difference between fore- and mainmast. I Think I will take a look at the AOTS an then decide what to do. As the masts are not glued yet I can repair this fault. I will Report about this... Cheerio Max
-
Hi Denis, Ron... I also tried wax on the Occre stuff - and made the same expierence as Ron: The thread was looking bad. Maybe for fixing the blocks etc it is ok, but not for shrouds, stays, backstays etc or for the running rigging. I purchased thread from a manufacturer here who uses polyester for the thick stays and very good Cotton ropes for the shrouds. For the running rigging I will use Corel thread and also some special thin stuff from that manufacturer - .15mm. I think Occre could do a better Job with high-quality thraed as the kits are not always a "Special offer"... I like to get good stuff für good money... I did not yet take a look at the thread included with my Friedrich Wilhelm zu Pferde by Euro Model... Hope it will be ok so far. Cheerio Max
-
Hi Dimitris you have my full Attention - as I also have built the RC (as you probably know). It is getting closelx packed in the first row as I will place my chair there too Best wishes and a lot of fun - you will have... I enjoyed building this kit very much Cheerio Max
-
Hello my friends it is time for a little update now... As mentioned before I started to build the masts. I have done the main mast and the bowsprit, actually I am on the foremast. Well... what shall I say? Everything goes very well, there are almost no problems... The plans are very good in scale 1:1 and very clear and easy to follow. At least you almost CAN NOT do anything wrong. But nevertheless it takes its time to go through. I estimate to have used about 20 hrs for the main mast to complete it with all the blocks, painting an so on... The AOTS is a real help to understand the rigging and the need to fix blocks, deadeyes etc on the masts. Some pics will show you the progress I have done so far. Don't hesitate to tell me what you do not like (and if... what you like ) Cheerio Max


- 147 replies
-
- 11
-
-
Hello Michael, I also say just Welcome to the Club. I will come by time after time and have a look. I build the Occre Version of the Endeavour. They use balsawood blocks to fill the bow. I found this cery usefull. Cheerio Max
-
Hi Paul, thank you so much for your post. I agree that building the masts and yards is 1. very satisfying and 2. very time-consuming. I also loved to build the masts as you say. When I build the Royal Caroline it was really enjoyable. But I learned that a good mast will need its time... Still I am studying the plans esp for the rigging. But as you say the drawings are very helpful. Just in case I made a copy of every plan in double-size. So I can see and follow the instructions more precise. I will see what has to be done and sure follow the instructions. I think the belaying points are described quite exactly - but I also have the AOTS and can take a look there in any case of doubt. I will probalbly replace most of the thread provided with the kit. I found a manufacturer for model-rigging-thread here in Germany. He offers very much different threads and it looks fine - as far as I can see on the pics in the net. But not sure about it at least - the Admiral always has an eye on the strongbox... I will start with the masts at the weekend - typical European fall has been announced: rain, fog, wind. Perfect weather conditions for the shipyard. Let me thank you again - your words were an inspiration to me. Best wishes - and Cheerio Max
-
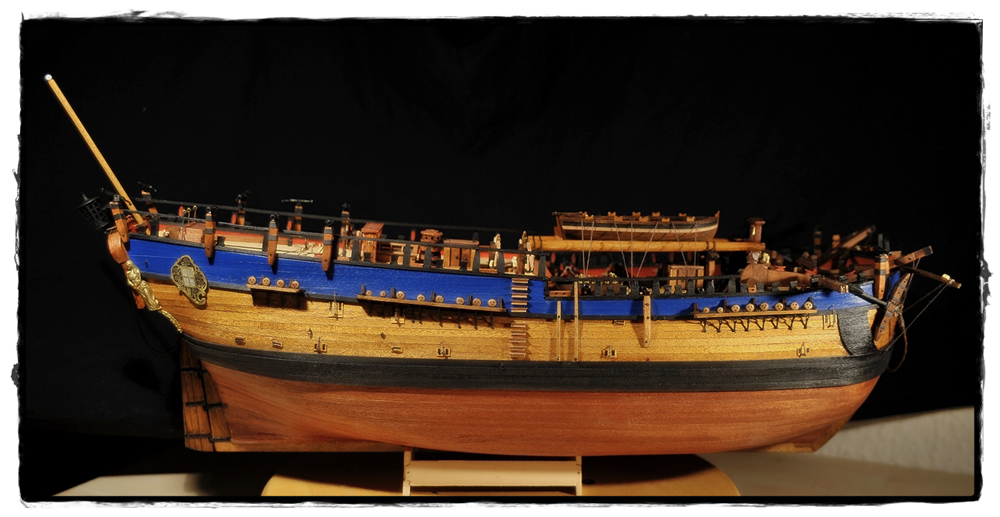
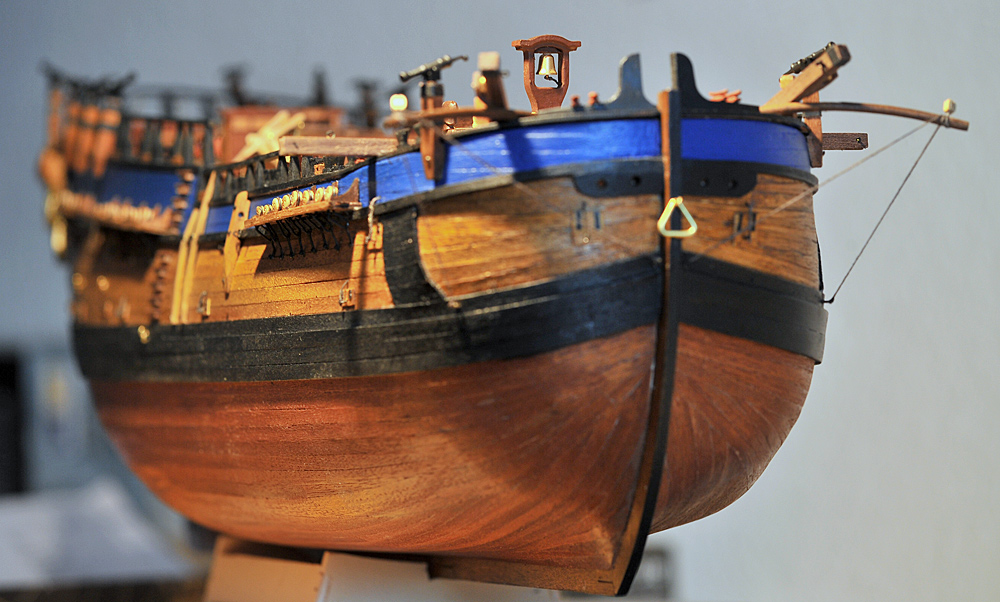
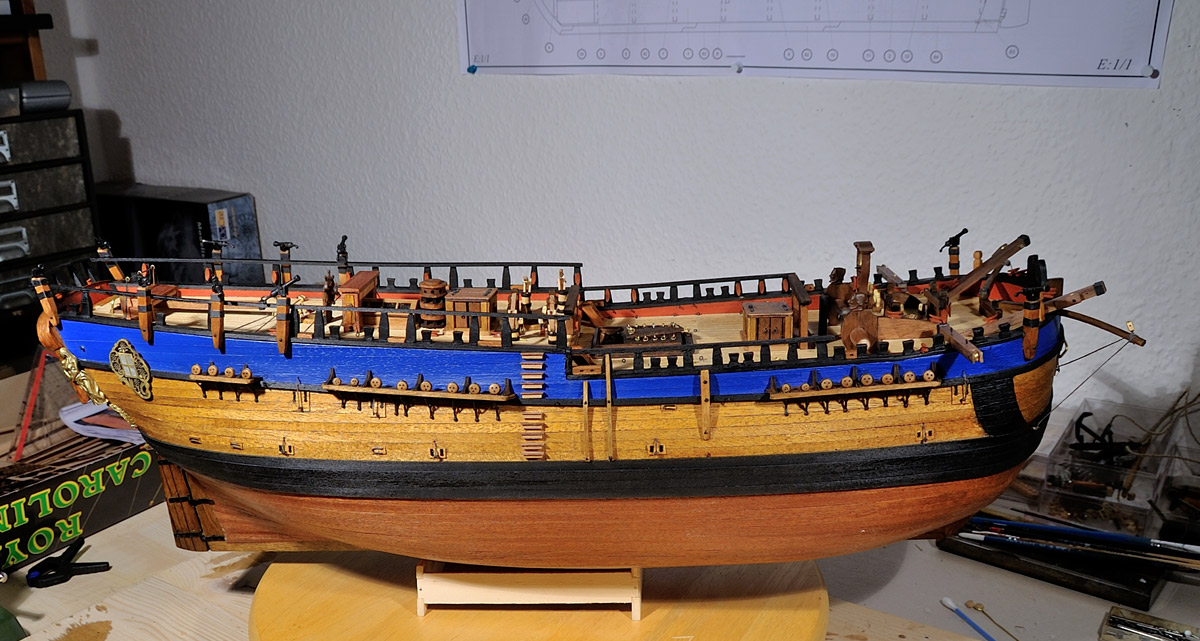
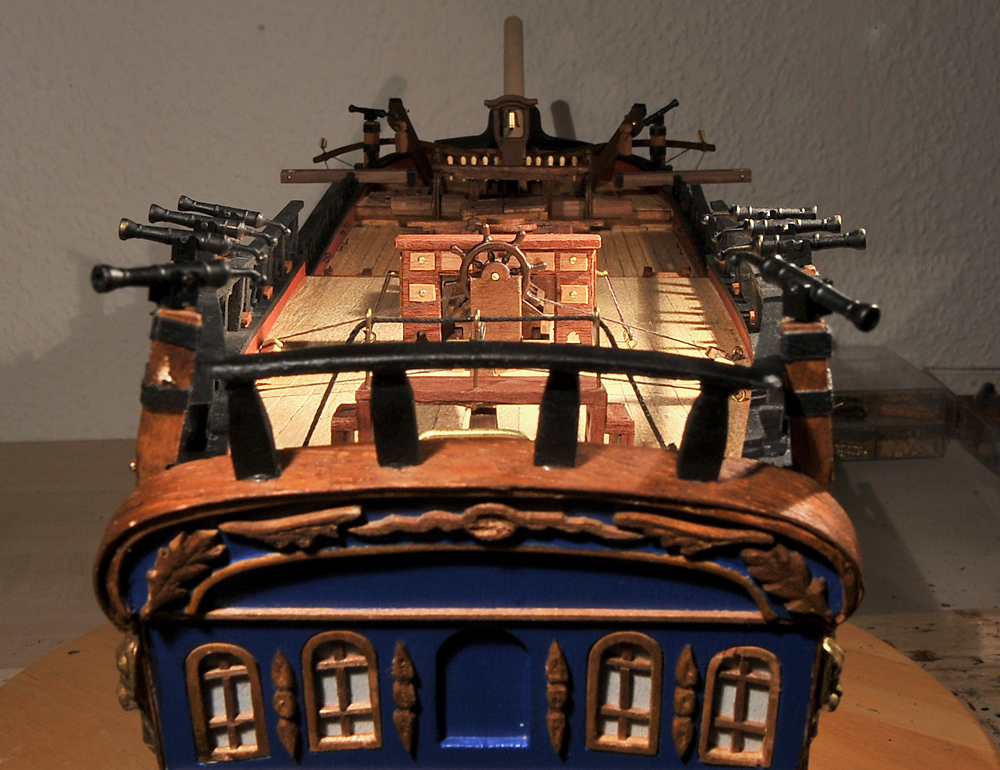
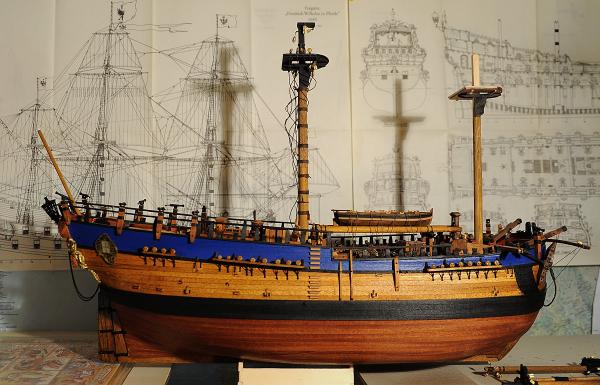
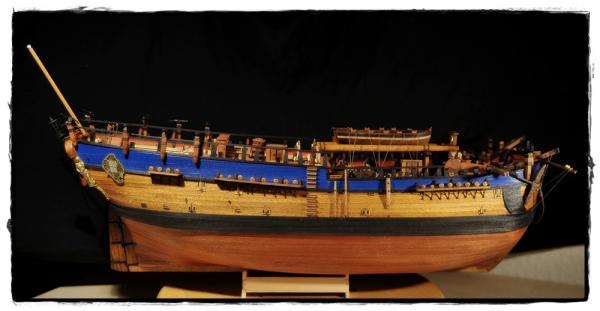
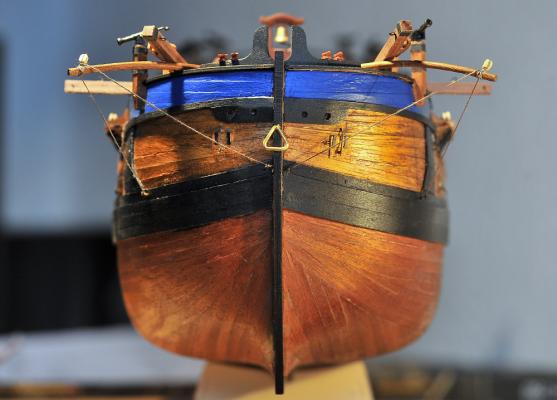
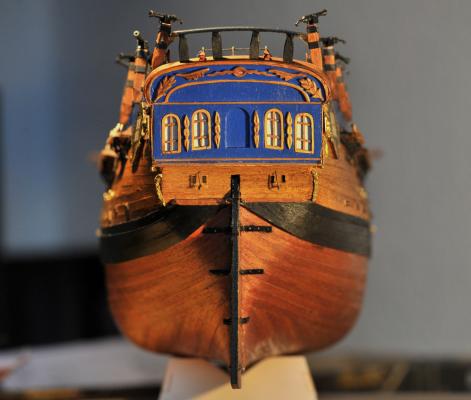
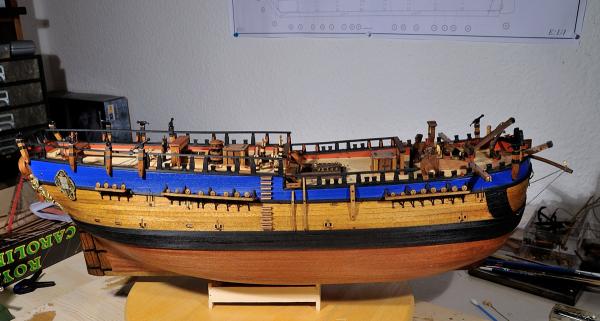
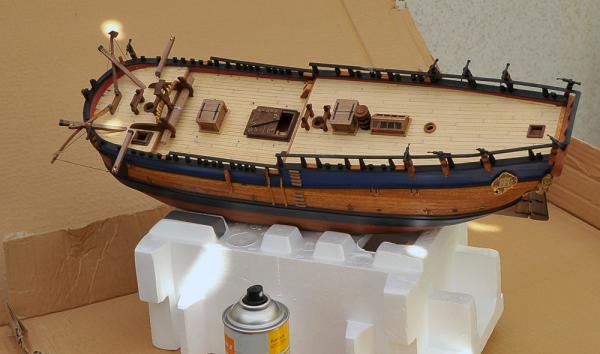
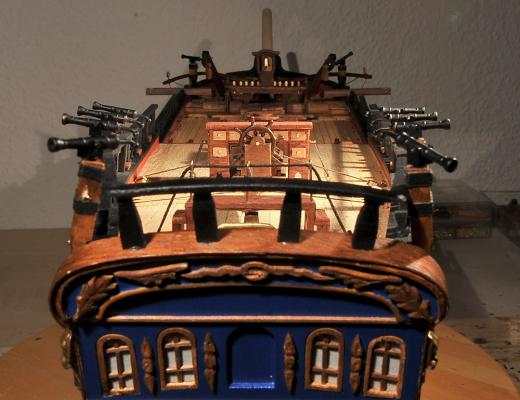
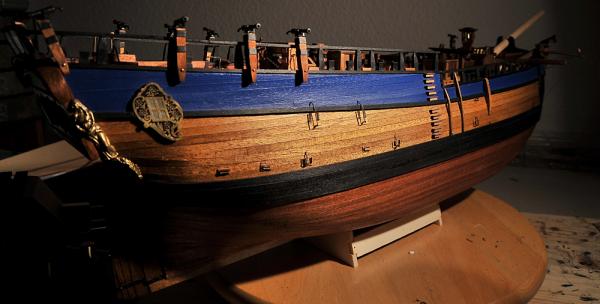
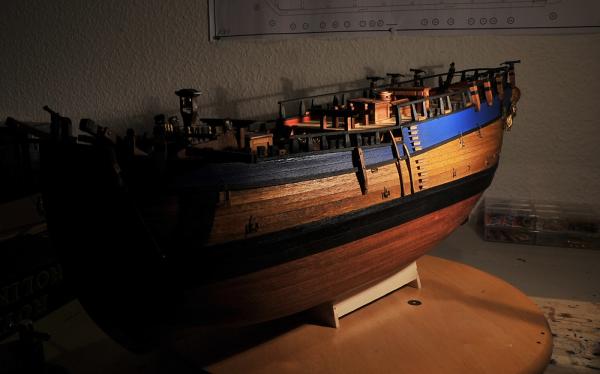
Hello my friends, the first part of building the Endeavour is done: The hull and the deck fittings are ready. The pics give a impression of the result. It was really a satisfying and enjoyable way to this point. As mentioned before I made a few modifications, but most of the build is according to the instructions. Next will be to prepare the masts and yards. As it will be the premiere for me to use sails I will have to get a lot of informations about the procedure. What is the right order to fix the rigging and the sails on the yards? I hope I will find some help At least the drawings provided with the kit seem to be excellent and very detailled. So I hope I get along with this challenge - but I am also very excited how the sails will look... Enjoy the pics and - as always - comments are welcome Cheerio Max


- 147 replies
-
- 12
-
-
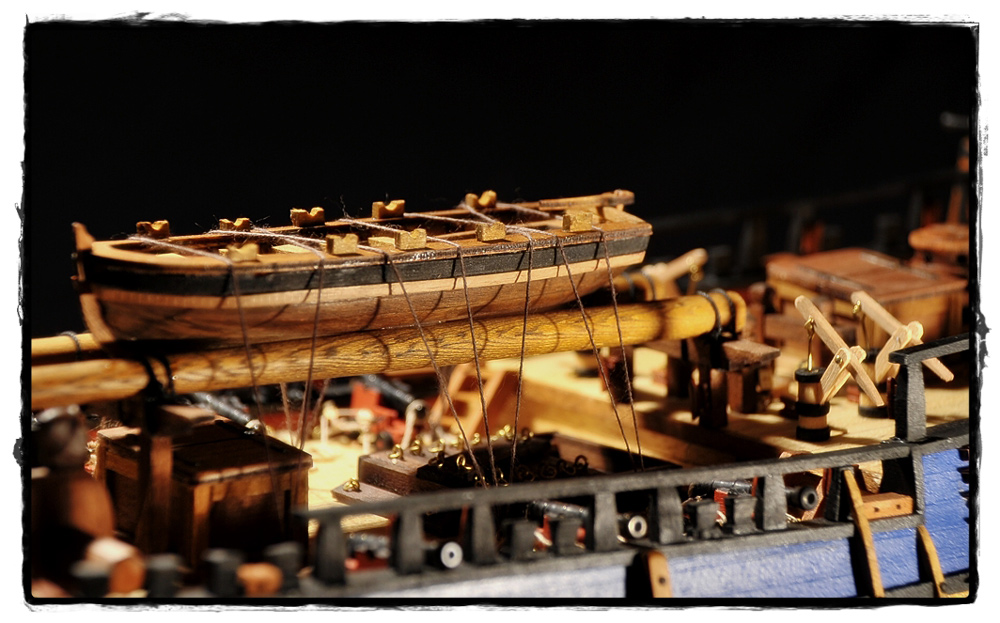
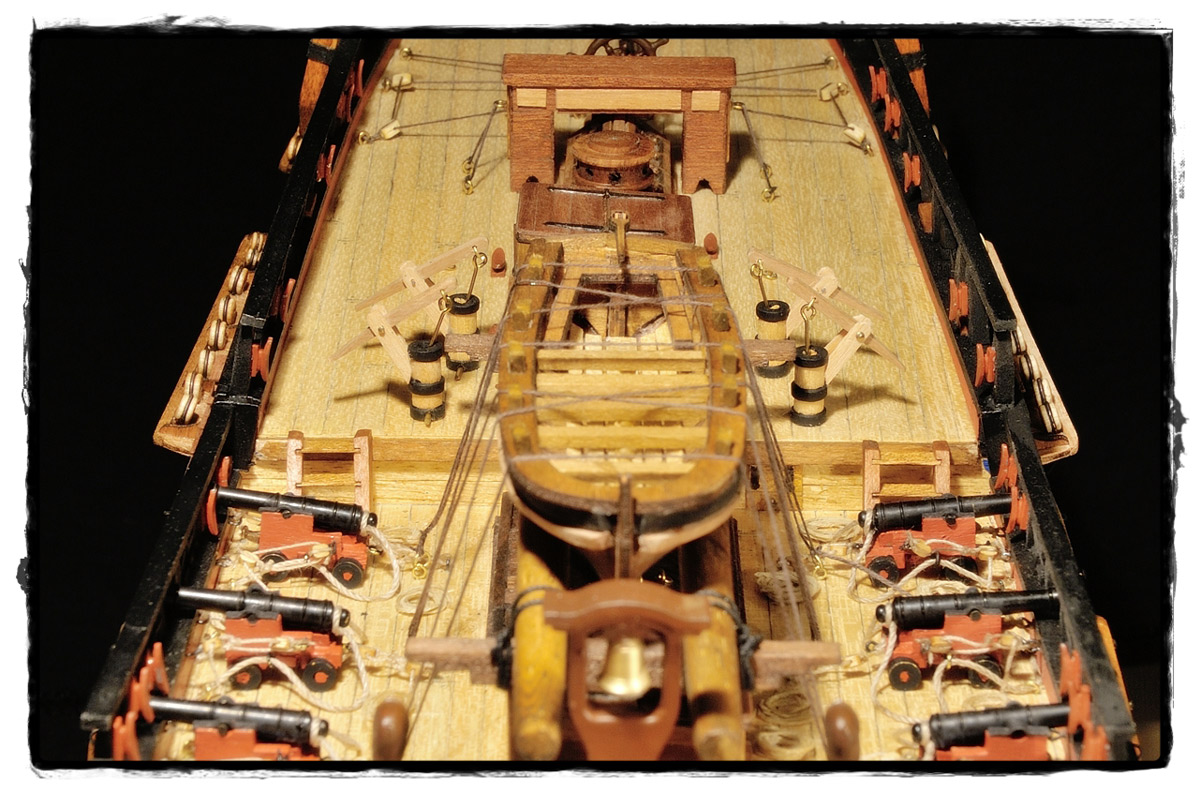
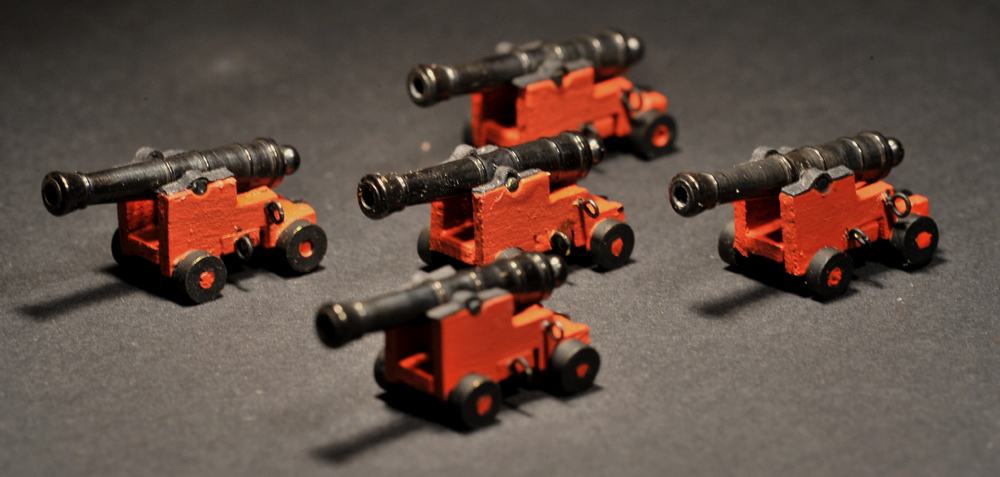
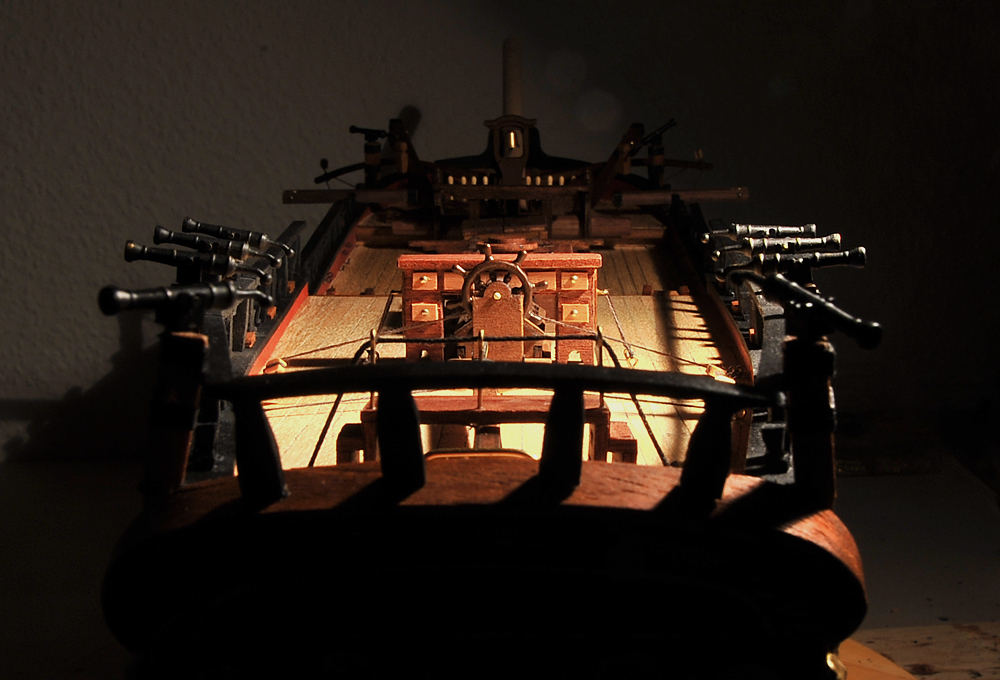
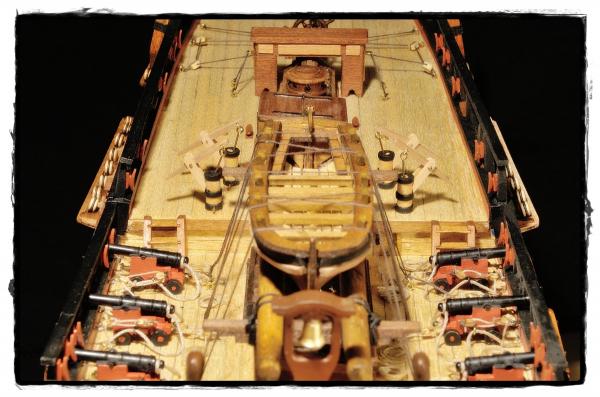
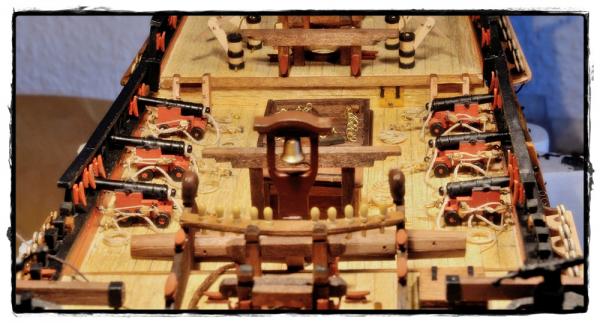
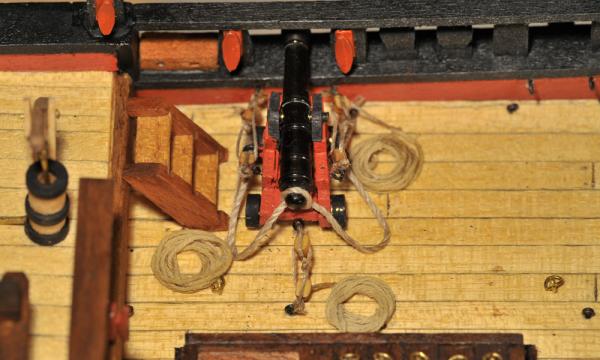
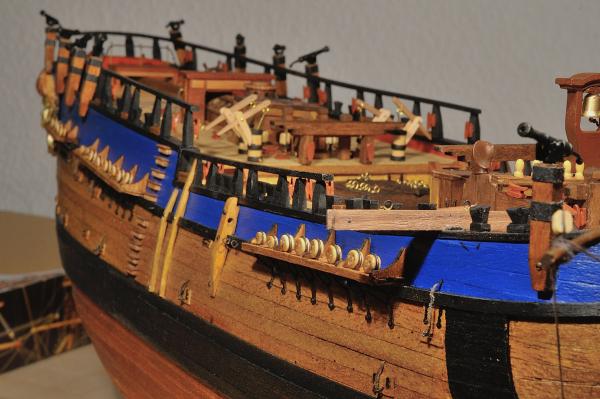
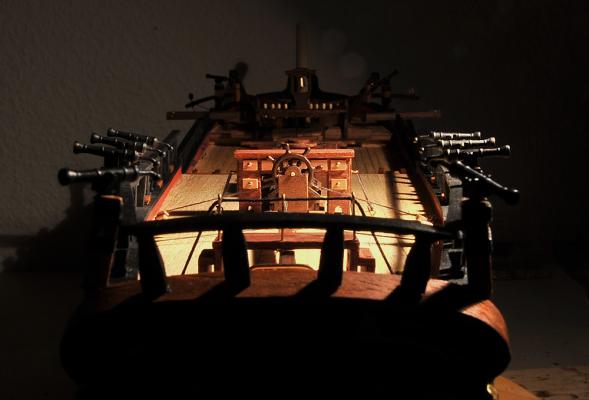
Hello together, step by step the first section of construction will be completed. The hull and the deck fittings are almost done, the guns are rigged and in place. Only the reserve topmasts and the boat have to be prepared, built and at least fixed. I think it will last another two or three days. Everything works fine so far, I added some parts to the model as the buoys for the anchors or the rigging for the guns. For the guns I needed about 2.5 hrs per each for building, rigging and fixing. But it is worth every minute - otherwise the guns would not look so authentic. I hope you do not dislike the coils but I did not want to show them in a perfect "Naval Academy"-Style. I am not sure if the rope is not a bit too long - but anyway: I like it See you soon with the next update Cheerio Max
- 147 replies
-
- 11
-
-
Hi Denis, there is absolute NOTHING wrong with the painting... It is really great... Compliments! Cheerio Max
-
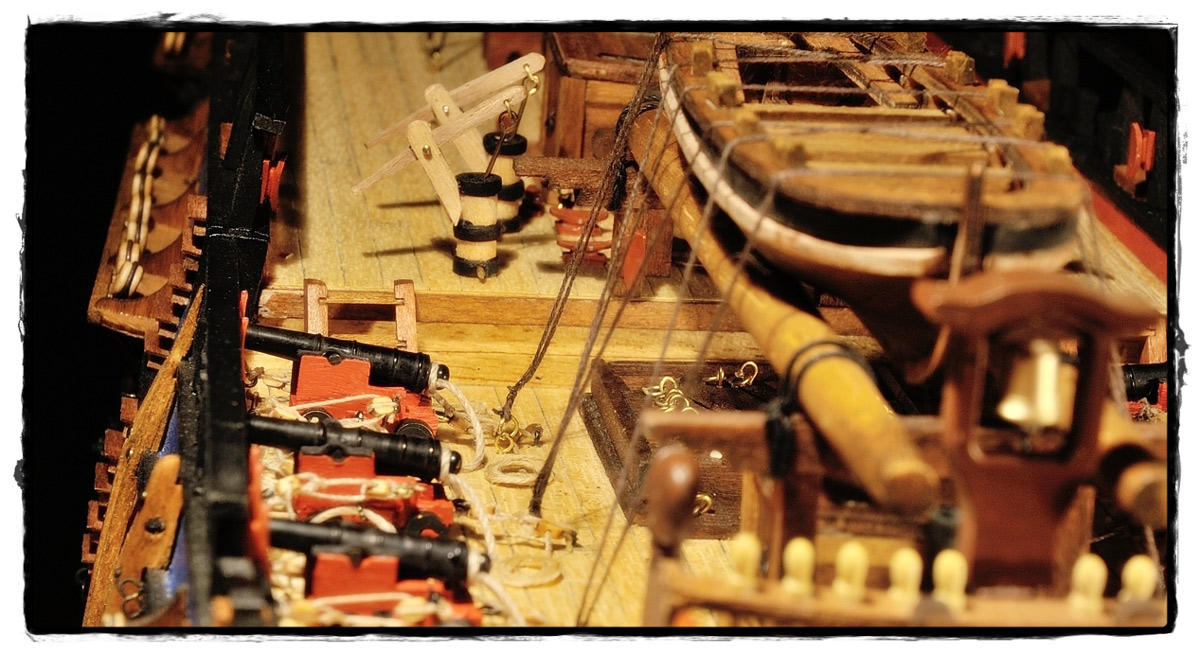
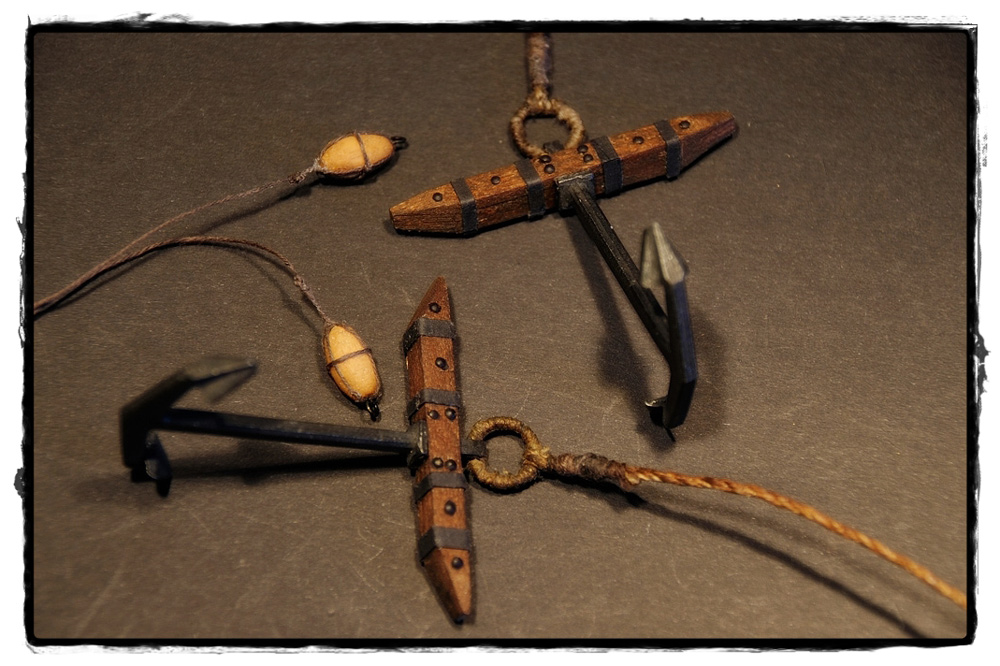
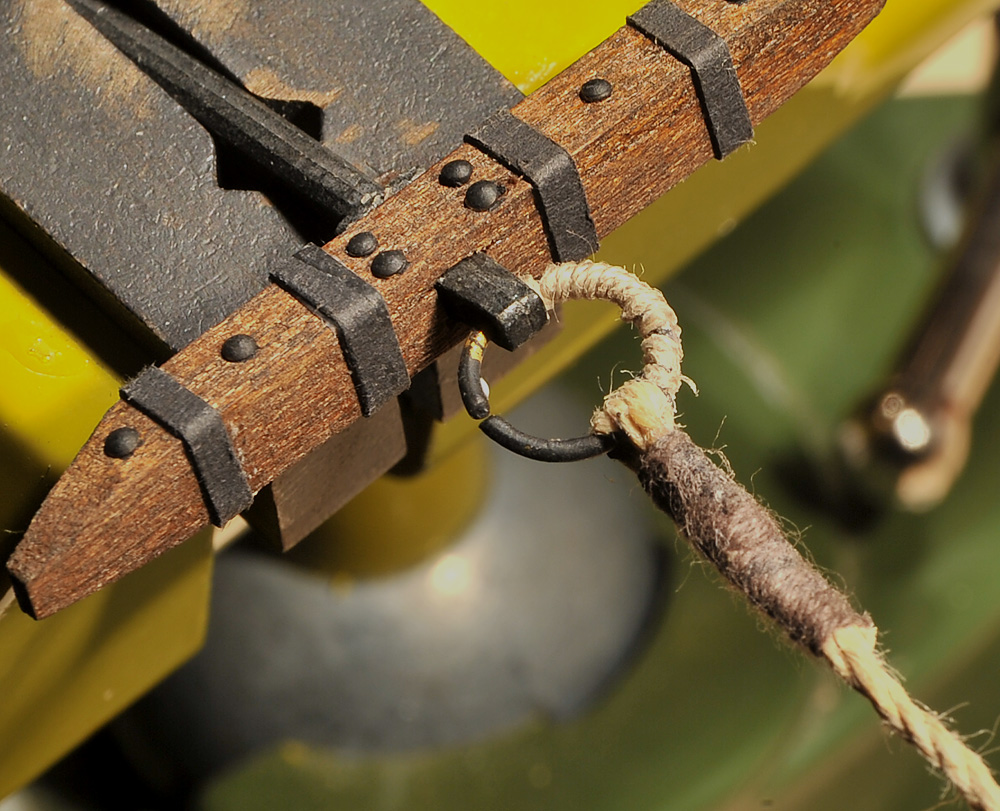
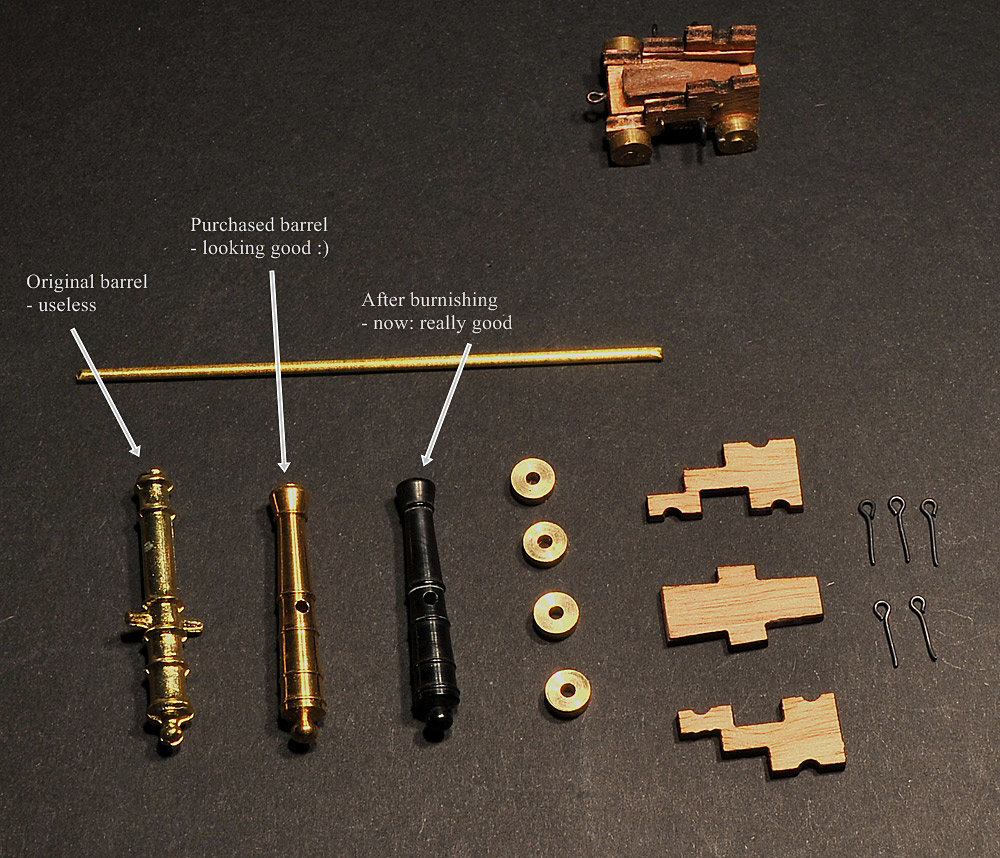
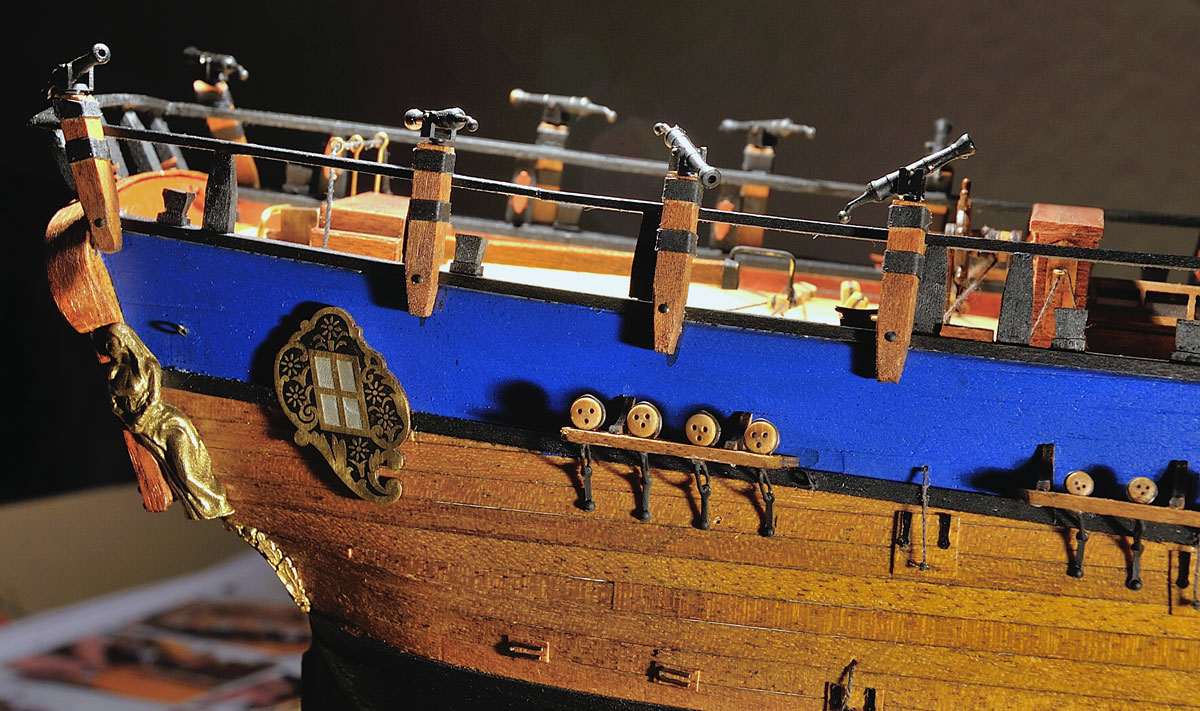
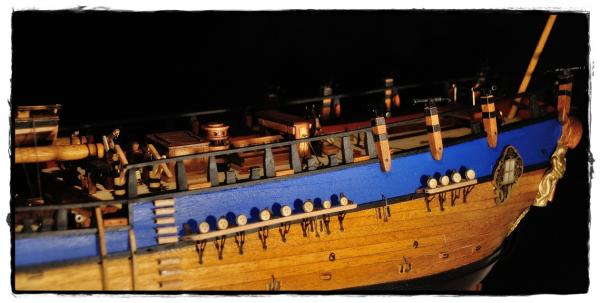
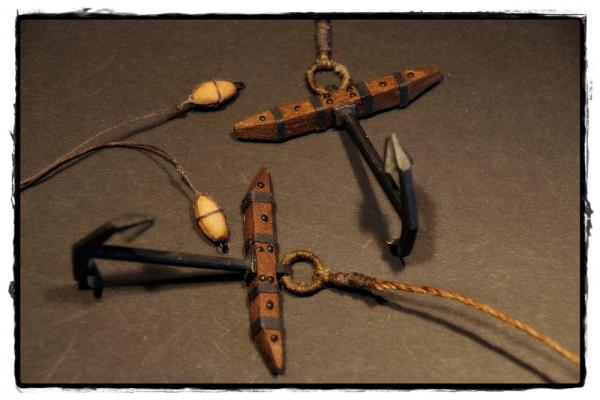
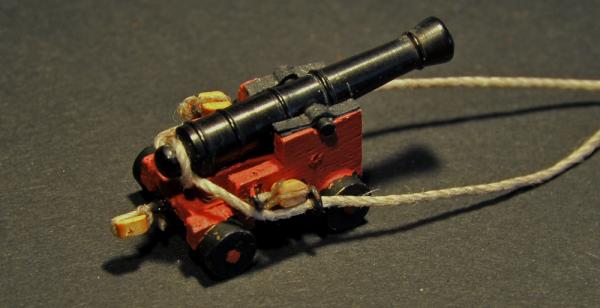
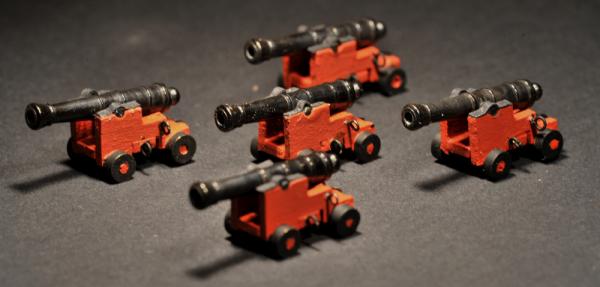
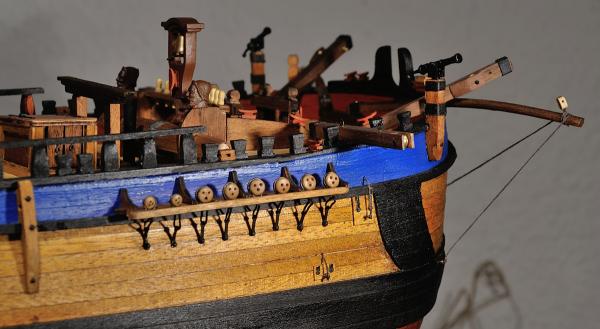
Hello my friends, I am working on the guns at the time. The barrels provided with the kit are terrible - not to use in any way. So I got some new from my dealer. They are turned brass, very worthy and a perfect look-and-feel. But there is almost nothing that could not be made a little bit more perfect So I brunished the barrels - and now they are really perfect. According to the instructions there is no cannon rigging planned. But I do so and therefore I got some eyebolts to the gun-carriages and 2mm-blocks (woooo... very tricky ) But at least it works and as I think: it looks good. The color is red ochre by Caldercraft, the thread is .25mm by Corel and 1mm for the thick rope. Additional I made a coating for the anchor rings as this is mentioned in every sorce I read before. For the best tension I fixed the anchor and the anchor rope in two vices. So it was no problem to coat the ring. I am still learning to reach a high level for my project of the Friedrich Wilhelm zu Pferde (Euro Model) and this all together is ONE step on this way As always - comments are welcome Cheerio Max

- 147 replies
-
- 11
-
-

-
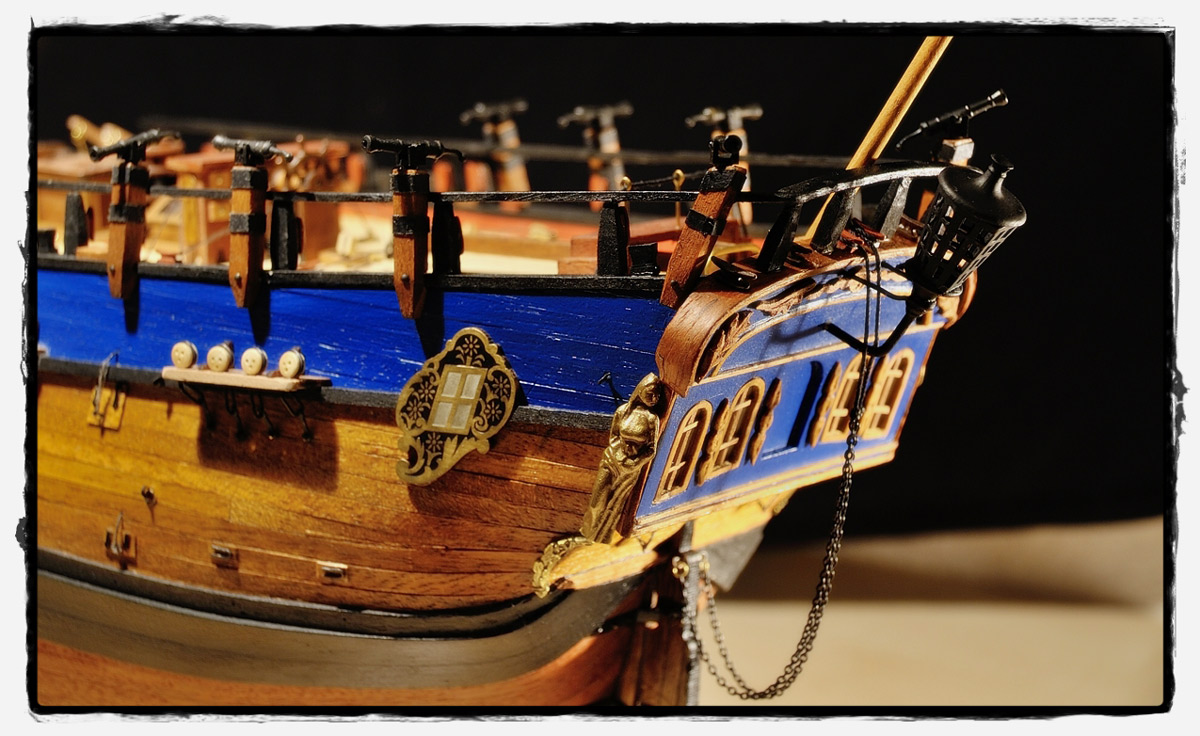
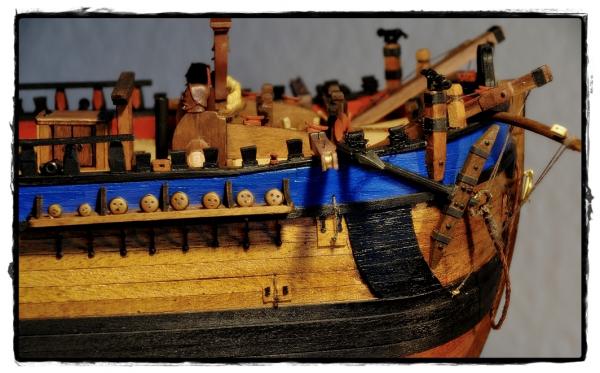
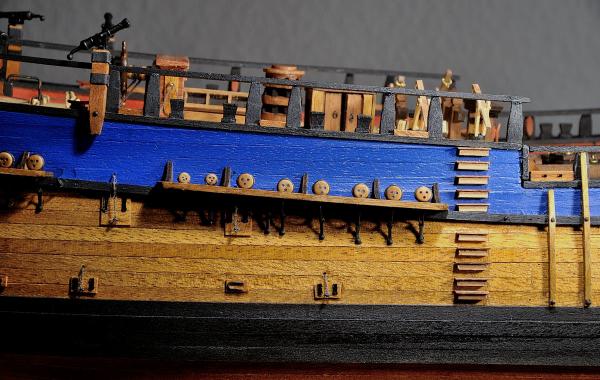
Hi all just a little update. I am doing the deadeyes and the chain plates at the moment. The instructions want to bend a 1mm strong brass wire... I did not like this - and the result of a test was not nice. So I bought some chain plates and accessoires and replaced the original planned with them. In the pics you can see the result. It is not perfect but much better than the kits parts. I like this kit very much - I am working on the Endeavour for almost seven months now. And I have not yet reached the stadium of masts At first I thought this kit would be a fast-to-build one. But there is so much more satisfying work... I can only recommend the Occre product... Enjoy the pics, some more will come soon. Cheerio Max

- 147 replies
-
- 10
-
-
Hi Ron, so I do... the bgrass is so hard to bend and mostly the stripes are too wide... card is a very good alternative; an other one would be lead, but there is nothing wrong with card. cheerio Max
-
Hi Denis, nothing wrong with this photo - and even less wrong with the chimney top. Perfect work on such a small detail... Seems you are some kind of artist I am getting mad with all the rings and clamps to fasten the rigging later with my Endeavour. The plans dont help in a way I would expect... So its difficult to find the right place to fix the clamps. Cheerio Max
-
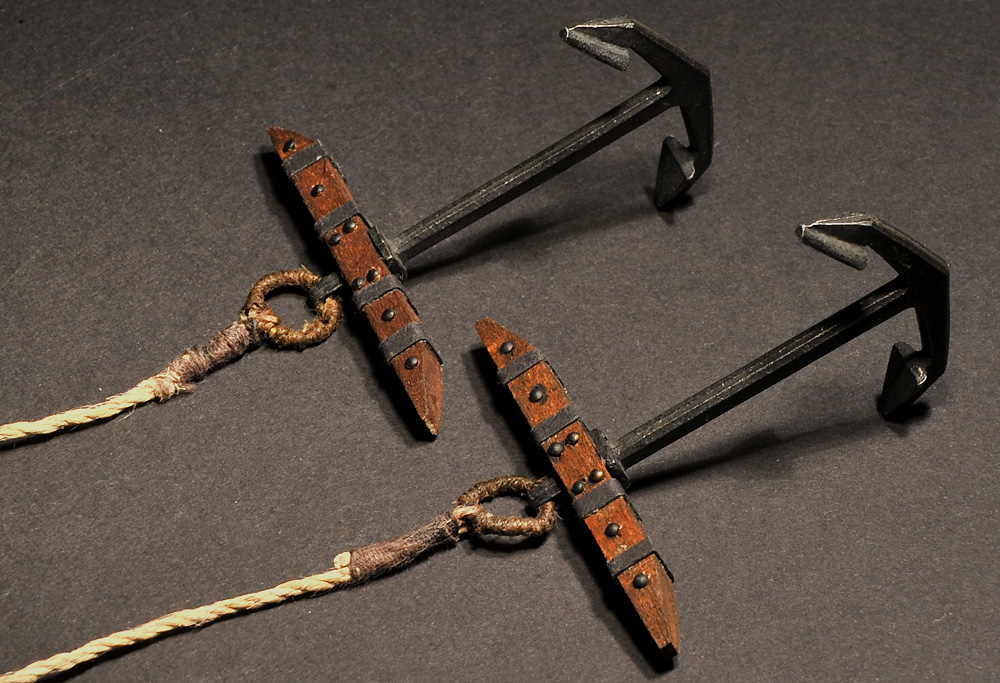
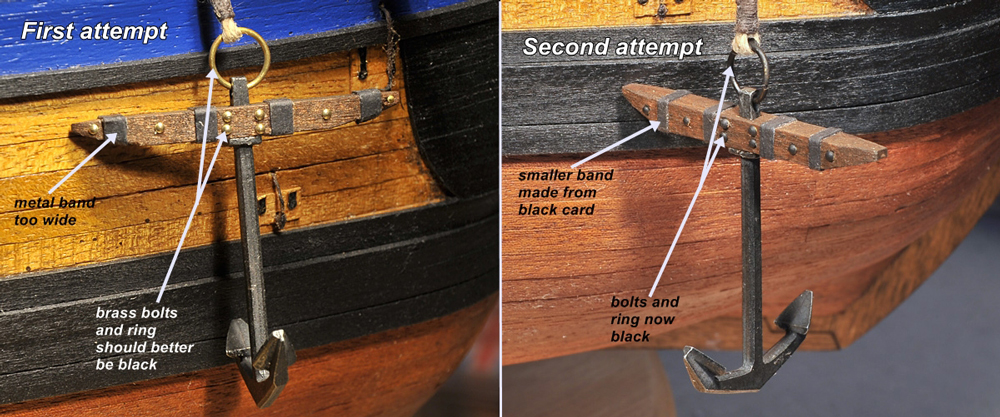
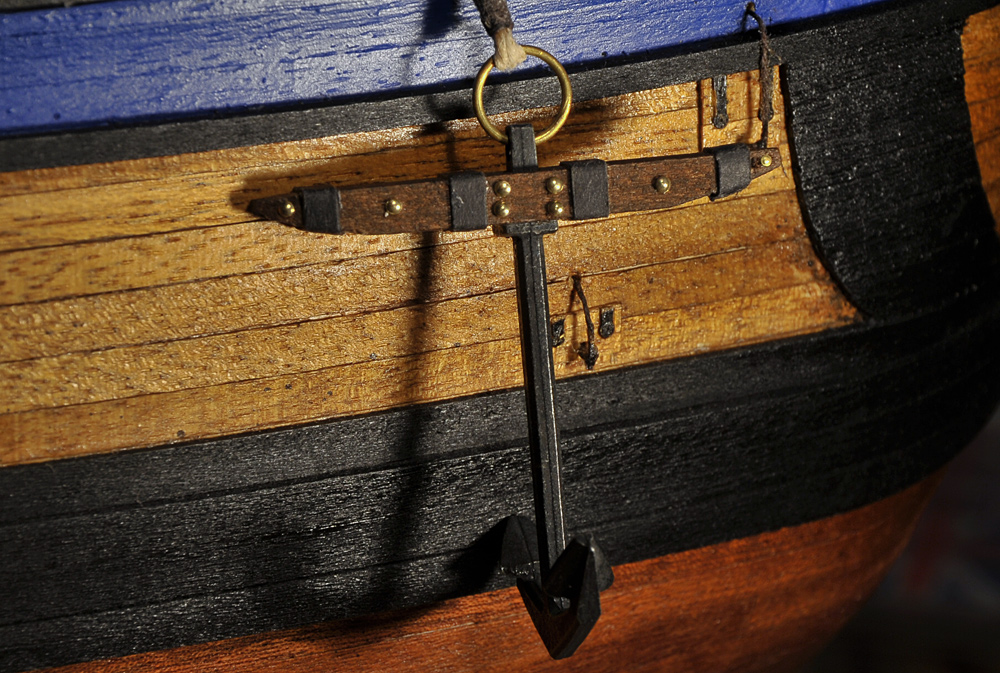
Hi folks, I made a little change on the anchors. According to the instructions the bands around the anchor stock should be made from the brass provided with the kit. It is 5mm wide. But this is much to much... so I changed it. I used some black thick card for modelling. This card I can cut very exactly and so I can make much smaller bands according to original photos. In the book from Wolfram zu Mondfeld it is said that all metal items on a seaship should be painted black. So I colored the bolts and the ring; the bolts are too big but I do not know at the moment how to make it in an other way than to cut off the nailheads and use them. All in all I like the second attempt more than the first CU Cheerio my friends Max

- 147 replies
-
- 11
-
-
Hi Ron, will you use the sails too? I sure want but never done this before. So I am very excited to watch someone doing this probably nerve-racking job. I am sure the instruction will help quite good as they seem to be very complete and clear. But I am not a tailor - and needles are not my world So I am really curious about to see you working on the sails. Cheerio from Germany - the fall is coming now, my favorite time to sit in teh shipyard and hear the storms outside... Max
-
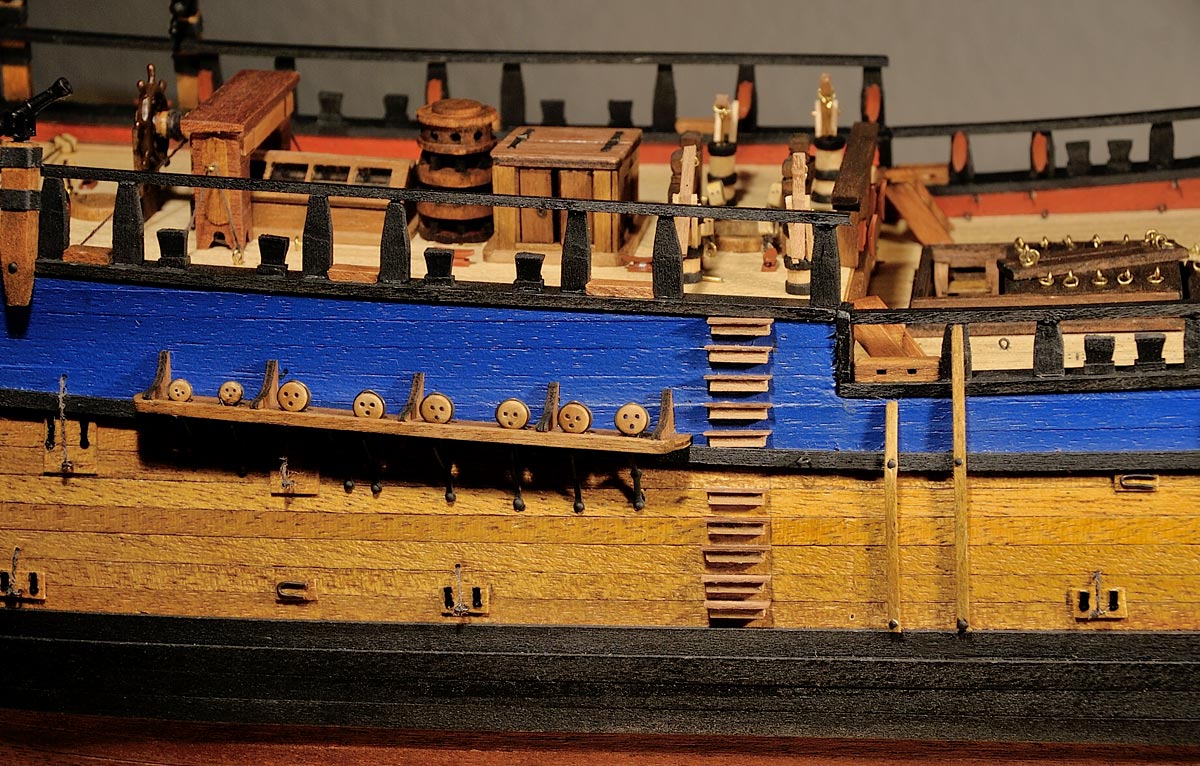
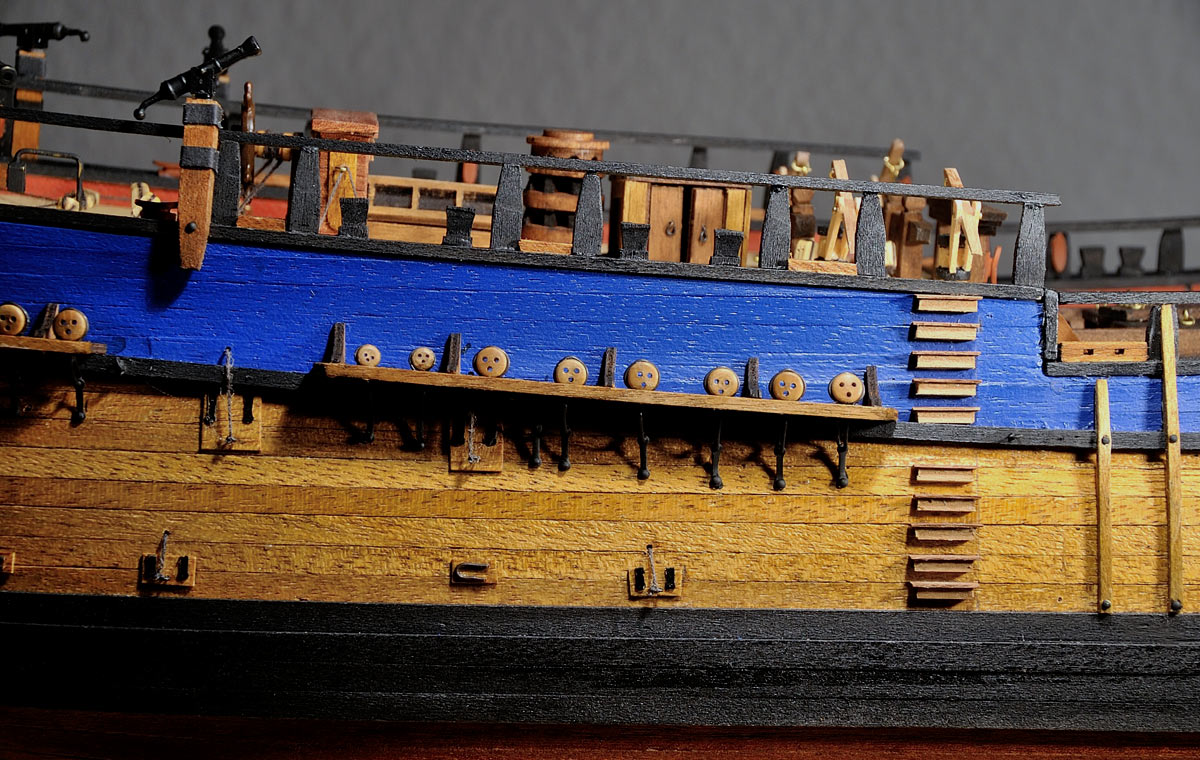
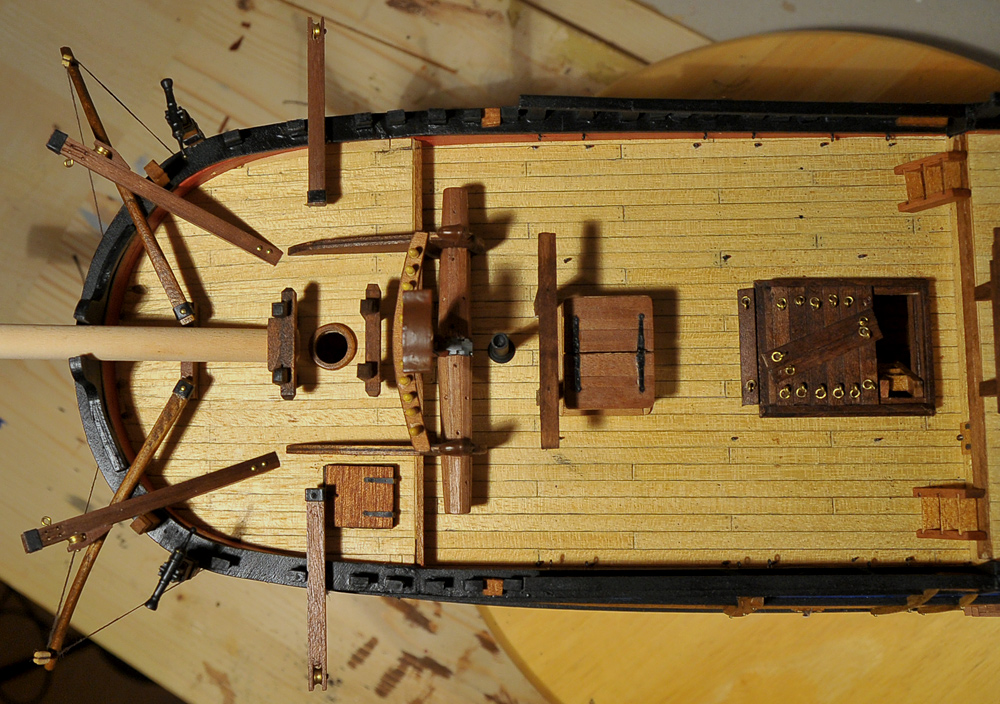
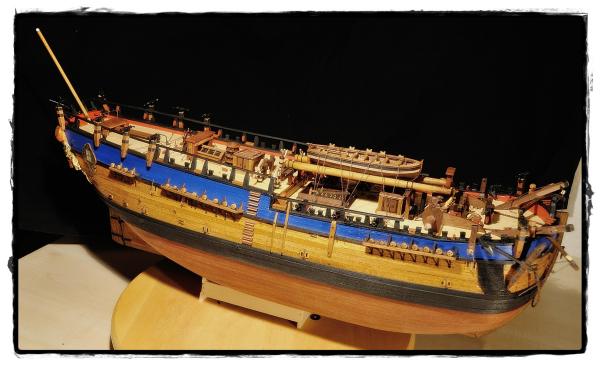
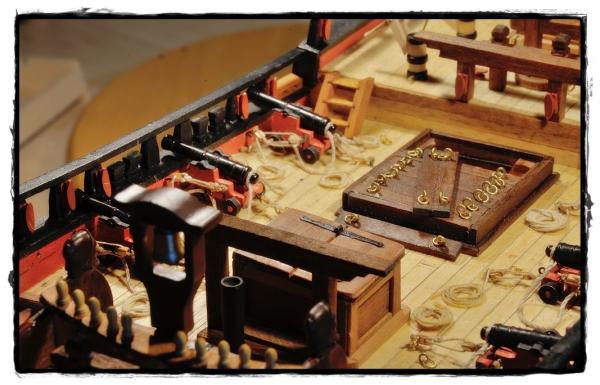
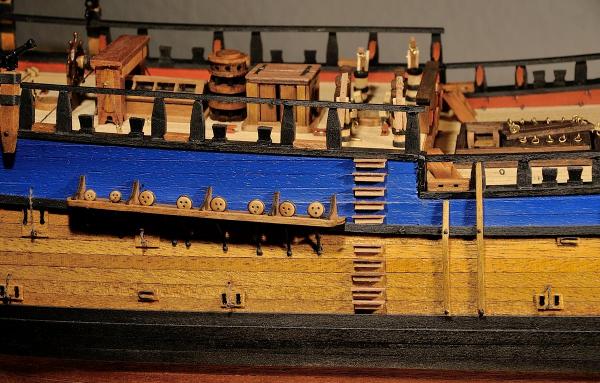
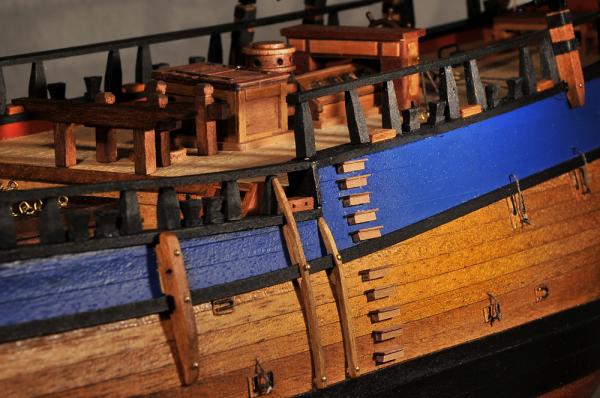
Hello my friends, here is just another update. The Endeavour takes good progress. It is really a fun to build the deck furniture so far. The kit offers a lot of prefabricated and precut parts for some of the quite difficult items like the stepway across the rudder or the nighthouse for the compass. But I decided not only to build the parts but also to improve them. In the plans they use ordinary light timber. I didnt like this and changed it into walnut.The anchor is just built not fixed yet. I varnished the hull with clear semigloss laquer - the color of the timber darkened a little bit - the pice only give some kind of imagination, in real its quite more intense. I hope you like the pics - and as always any comment is welcome. CU Cheerio Max


- 147 replies
-
- 14
-
-
-
Hi I totally agree with Jan... I will save all the pics and the log for the work with the sails. I will sail up the Endeavour that I build at the moment. So it is a enormous help to see the work done step by step... Thank you so much Cheerio Max
-
Hi Vince and Greg I totally agree with Greg - thats the exciting aspect with building this kind of models. If you glue a plastic model (what I did for years) you won't get the kick to change so much. My most important change and own expression was the finish with colors and dust etc... some kind of very realistic finish. But as you say, Greg: I am doing the Occre Endeavour and of course I have the AOTS and compare the plans and the possible changes. So the number of changes is not as big as yours, but I use some other timber, some different Colors, I will add some things etc. So the kit is just a suggestion (a very great one of course) but you can make much more out of it. And I understand this as the "challenge": To improve my craftmanship, my knowledge, my creativity. And every kit has ist own challenge. I look so much forward to the day when I start with my Friedrich Wilhelm zu Pferde from Euro Model. After looking at the plans I am sure, this is nothing more than just ONE CHALLENGE, perhaps a project for several years. I wish you both a pleasant time Cheerio Max
- 593 replies
-
- 2
-
-
- royal william
- euromodels
- (and 1 more)
-
Hi, I agree with visi - very well done... I like the very silky surface of the deck... Cheerio Max