HOLIDAY DONATION DRIVE - SUPPORT MSW - DO YOUR PART TO KEEP THIS GREAT FORUM GOING! (Only 75 donations so far out of 49,000 members - C'mon guys!)
×


olliechristo
-
Posts
412 -
Joined
-
Last visited
Content Type
Profiles
Forums
Gallery
Events
Everything posted by olliechristo
-
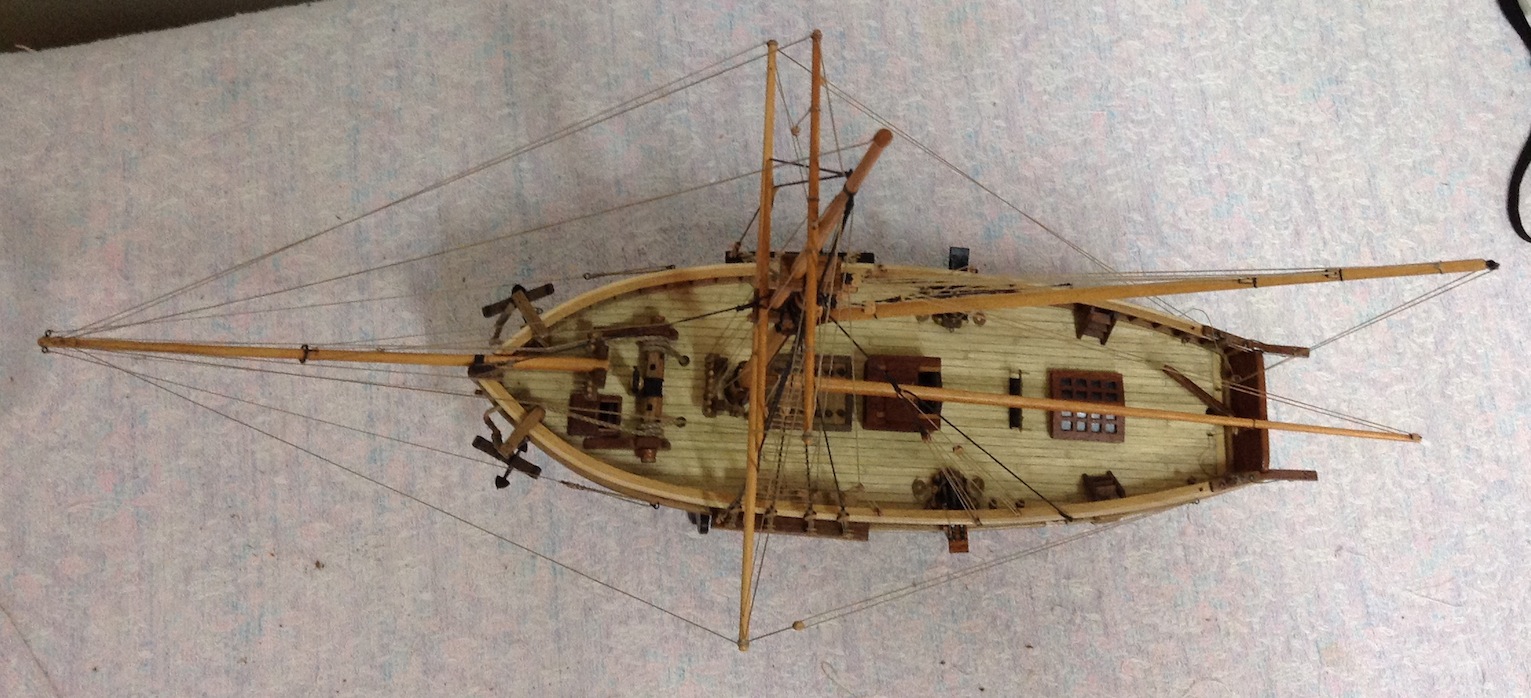
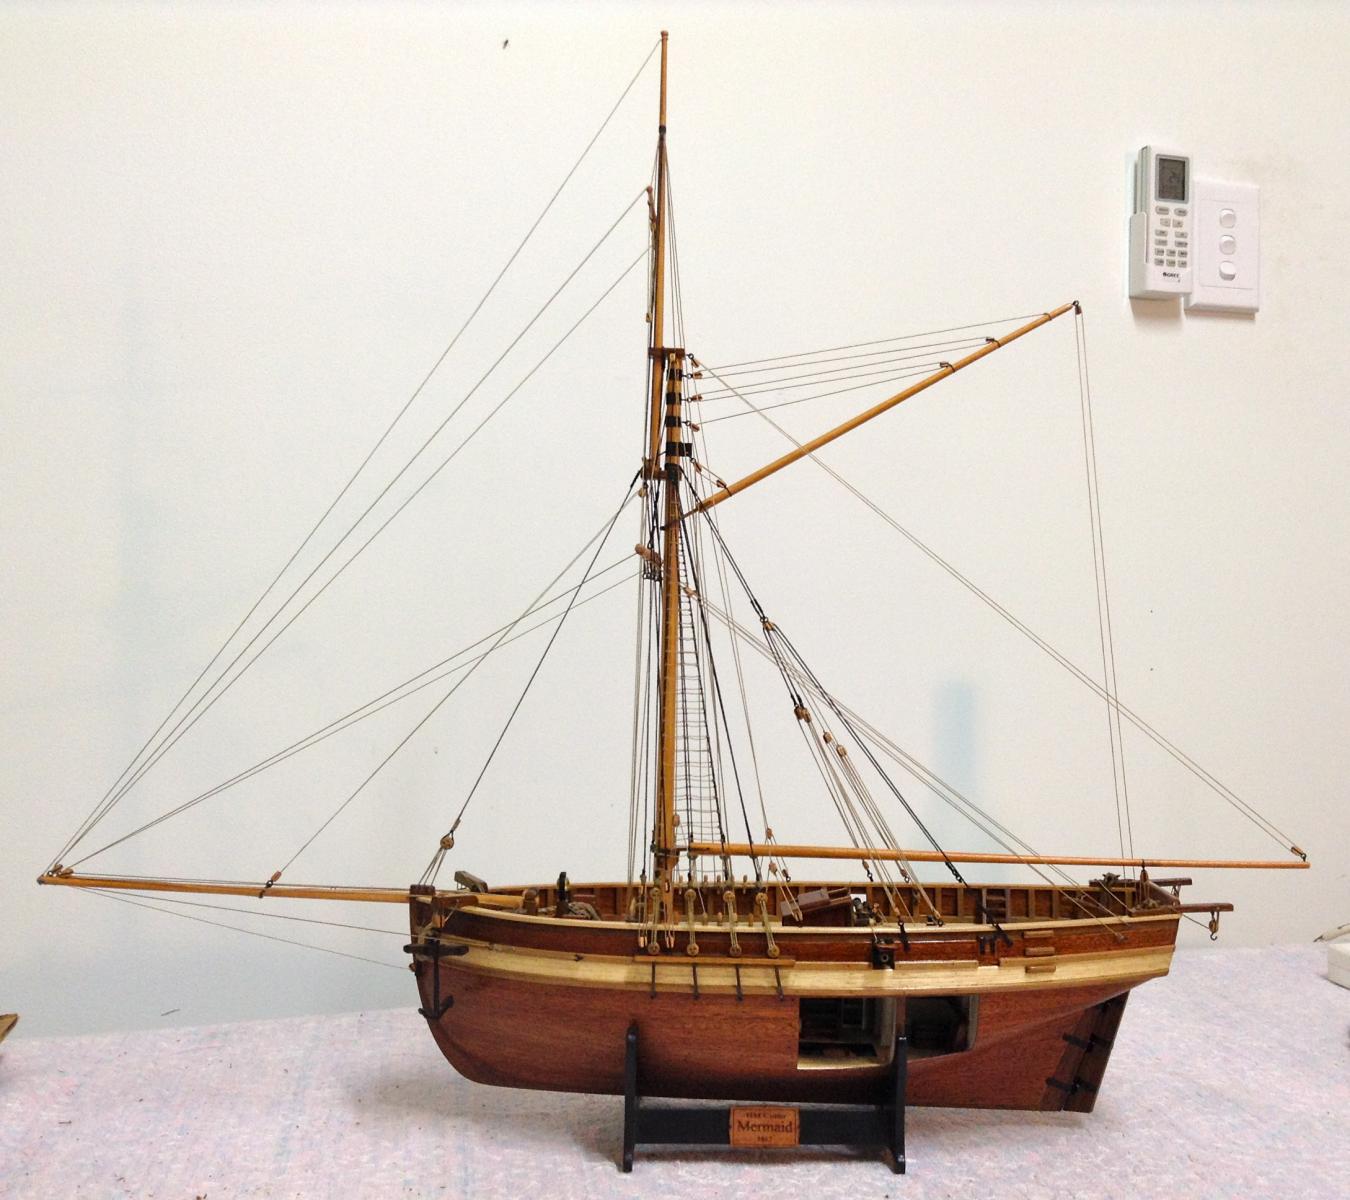
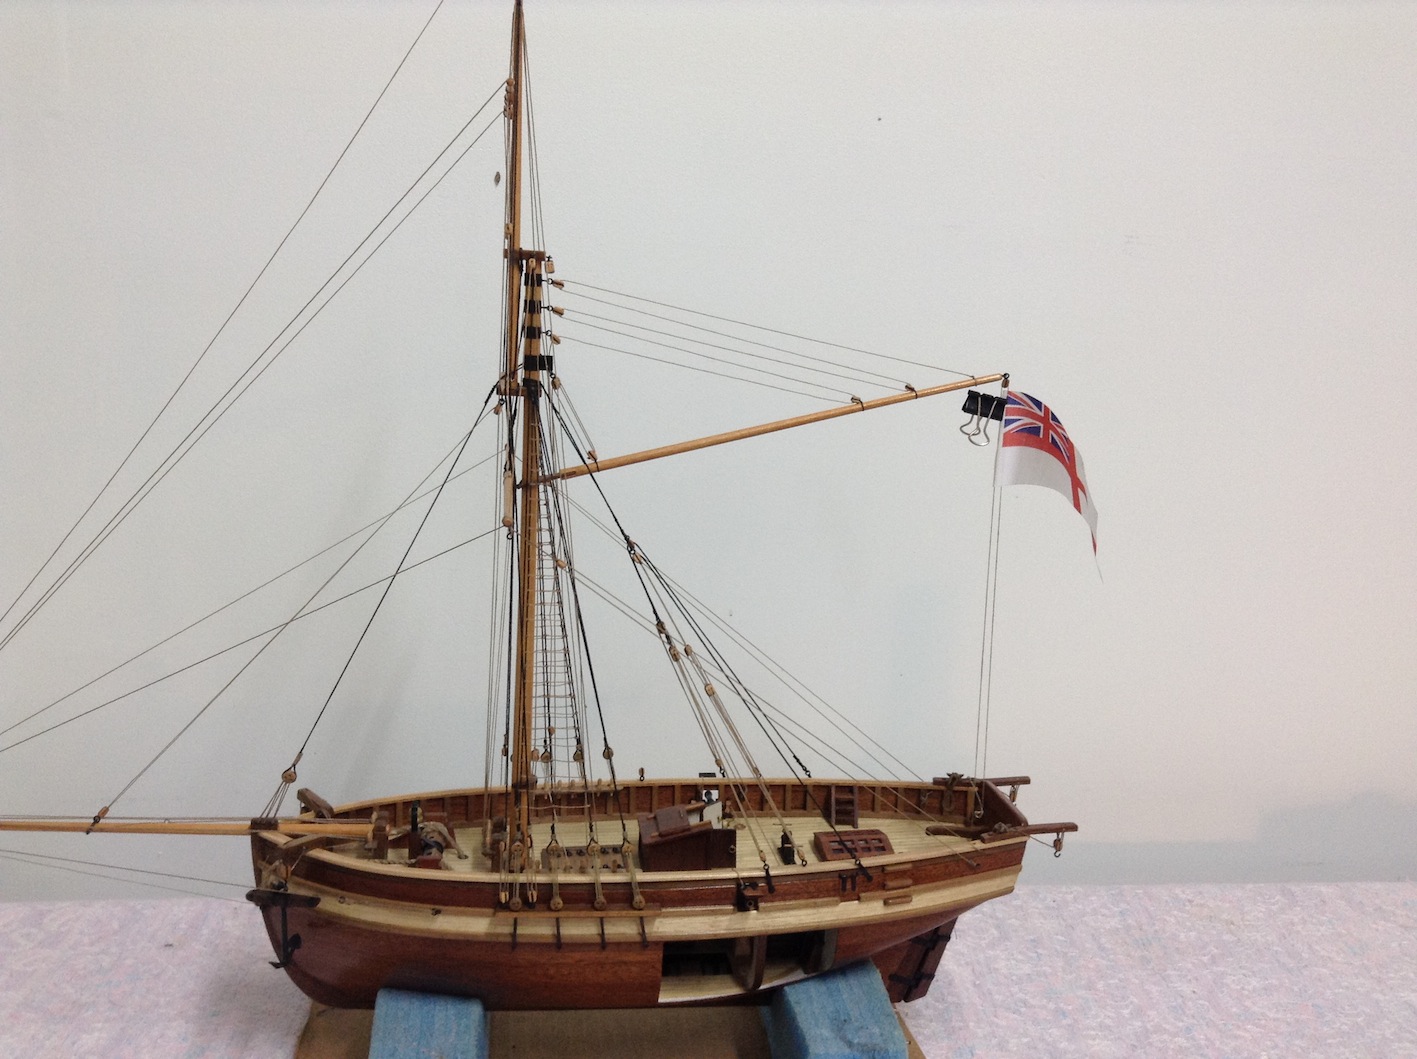
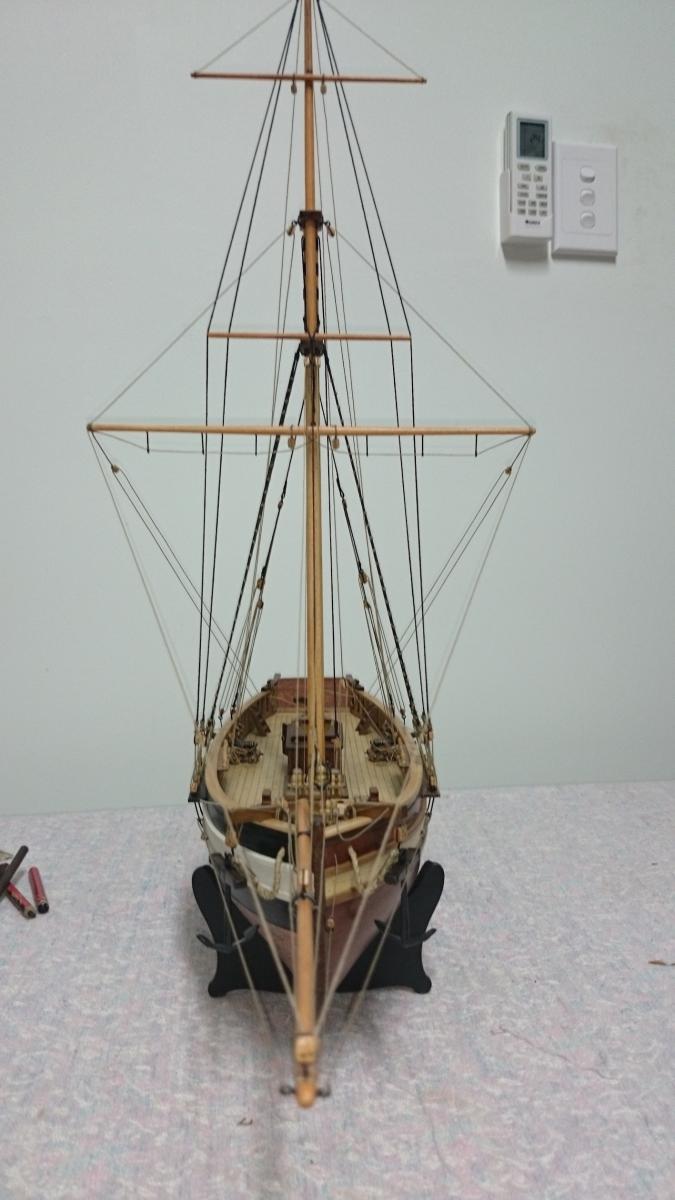
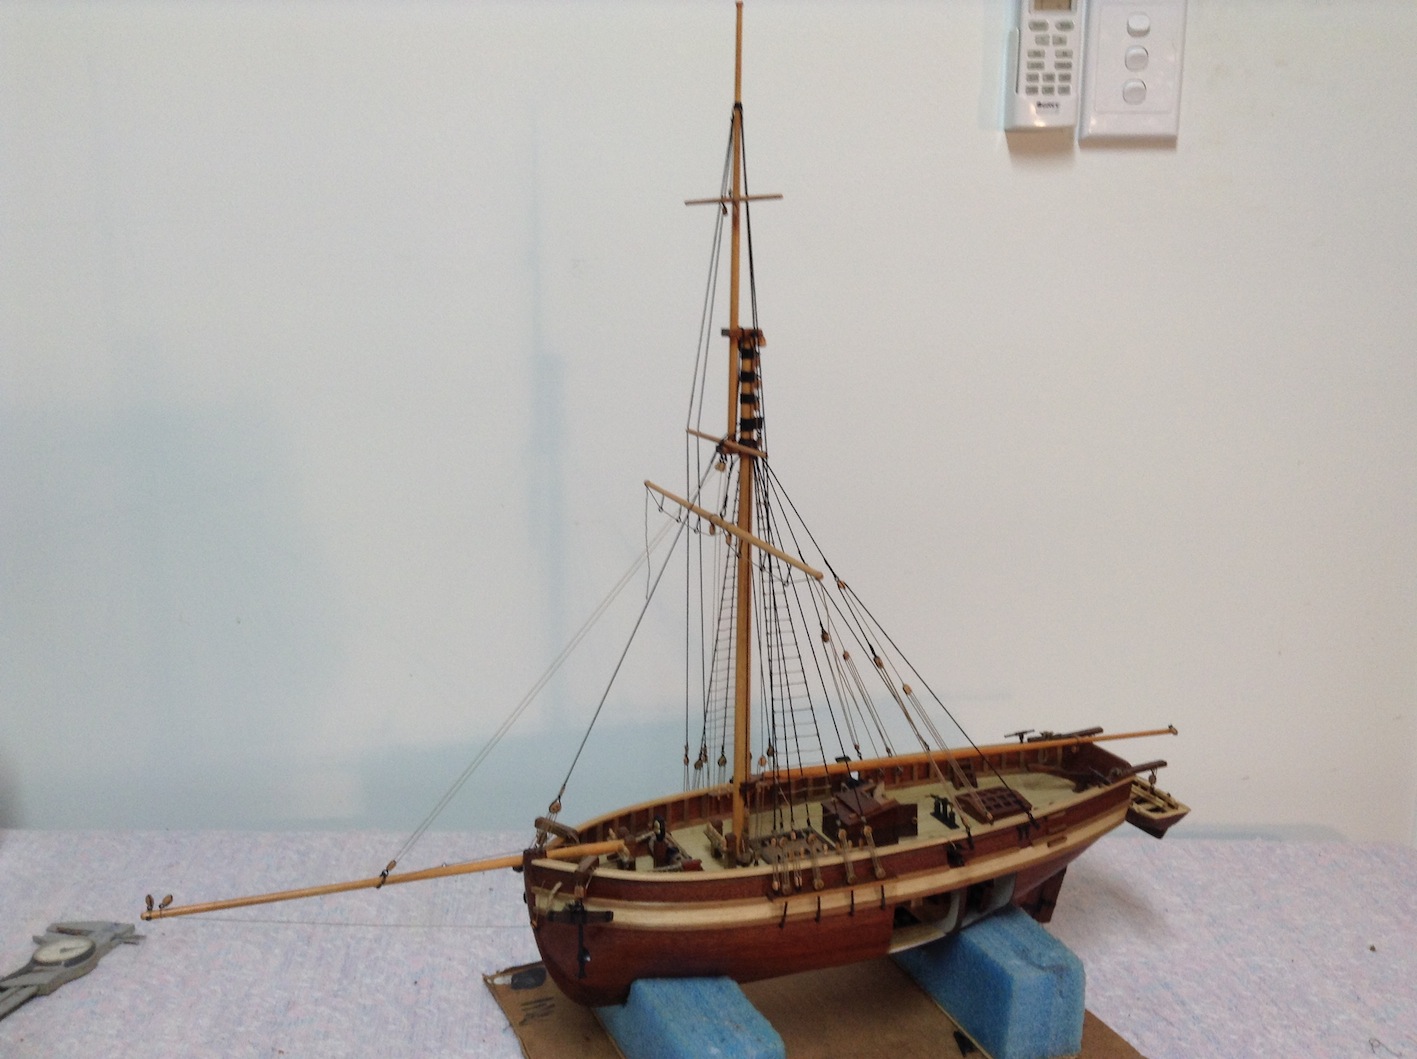
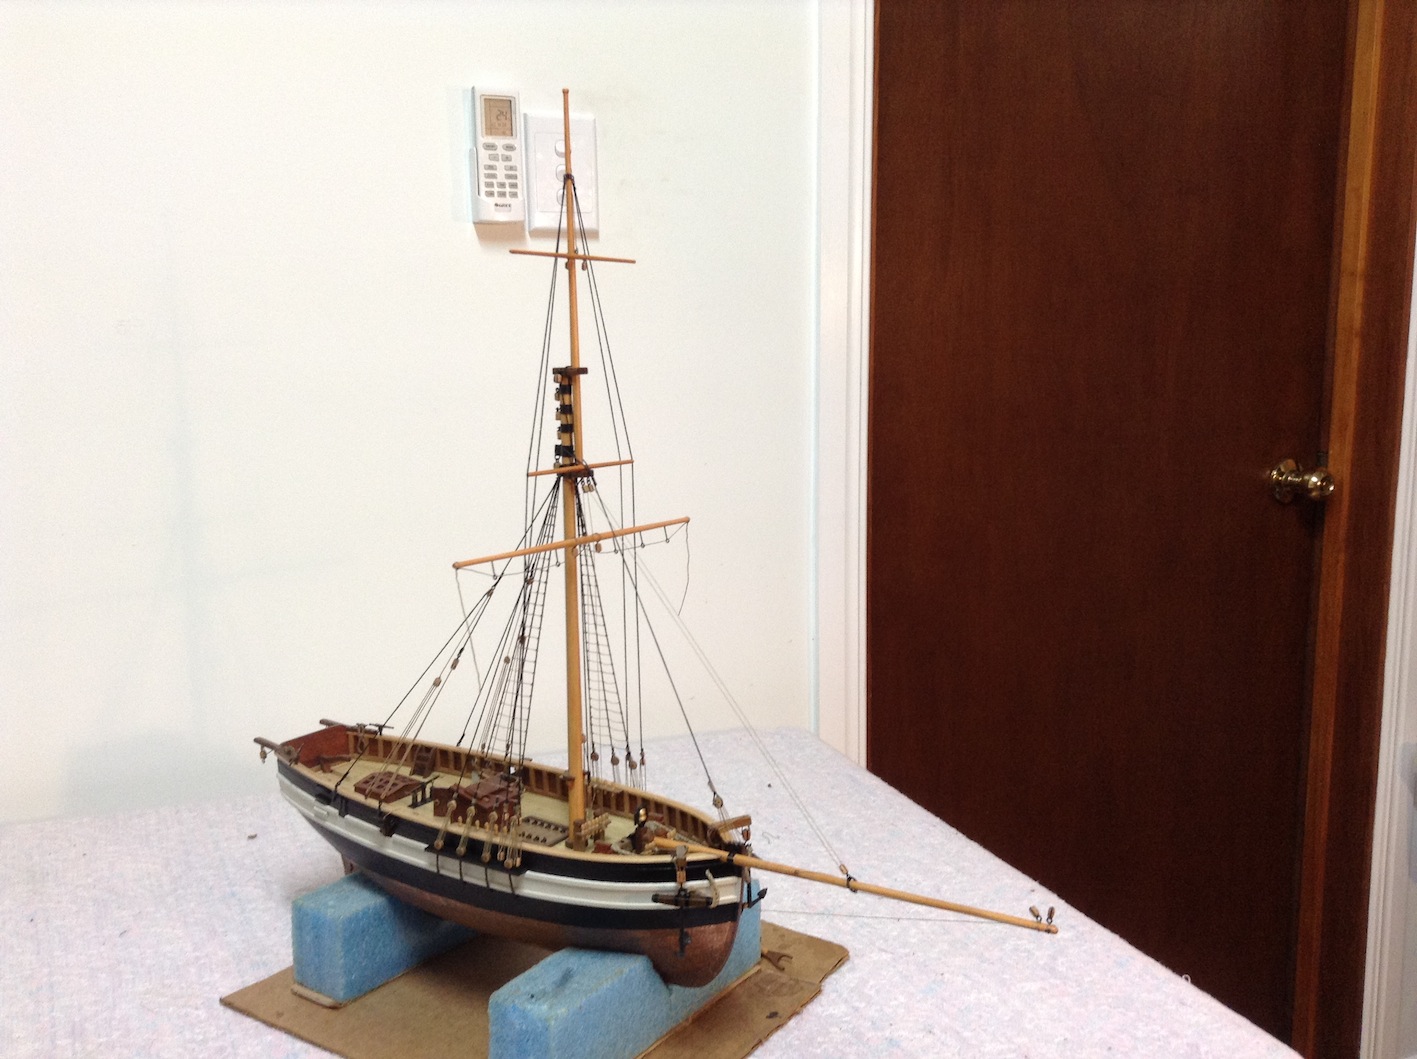
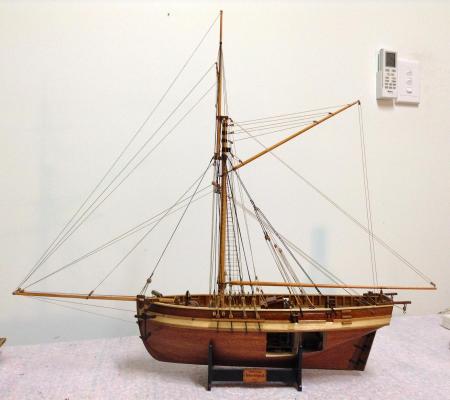
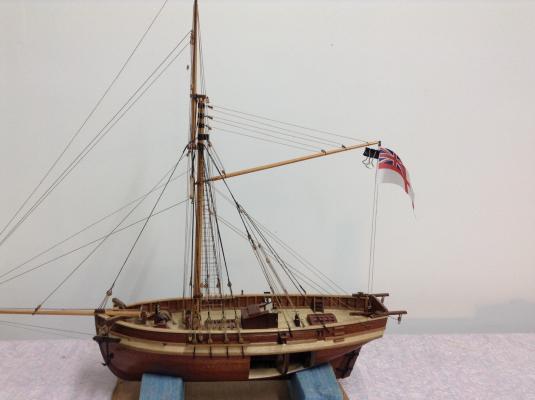
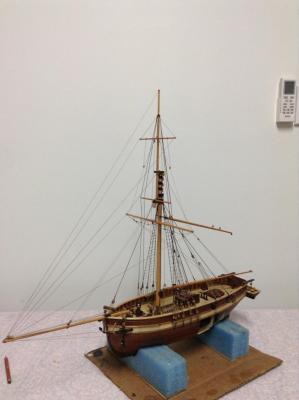
 Okay I think im with you guys on the flag... I will prefer it without.. Enough said.. Part of me wanted to use it because i bought it... Well o well, i cant believe it! no more blocks, rings eyebolts etc etc.. Not that i havn't enjoyed it.. At first i was like what is all this stuff ruining my build, it all just looked a bit funny. Until ALL the rigging was in place, now i think it really makes the model.. I might have to adjust boom up just a bit and do all the rope coils on belaying points and cleats and i am almost done... I had this wild idea that things would kind of get easier towards the end! No sir.. It's difficult right to the end o frigging, oh i mean rigging I'm sure these last coils will test me, it just gets so scary and tricky having to work amongst tight spaces and im glad i dont have huge wide hands.. I also kept feeling i was close to the end of the build and it keeps going! Yes It still is.. For those who have started more than one ship without finishing their first, I think you really should follow one through first to know all the aspects. The build changes dramatically throughout... There are stages that feel and are totally different to each other. Towards the end it becomes a whole new game with the rigging and the risks of damaging your previous many months or years of work is very. You dont need amny tools towards to the end but lots of patience... At times i bumped rigging lines and scared myself, the strength of the whole thing has surprised me at times.. Anyway, I'm on a bit of a high and the pictures are not doing it justice, I really need to get outside and do some natural light shots. perhaps down the creek... Will take some detailed shots soon... Ollie

- 803 replies
-
- 6
-

-
- colonial cutter
- modellers shipyard
- (and 1 more)
-
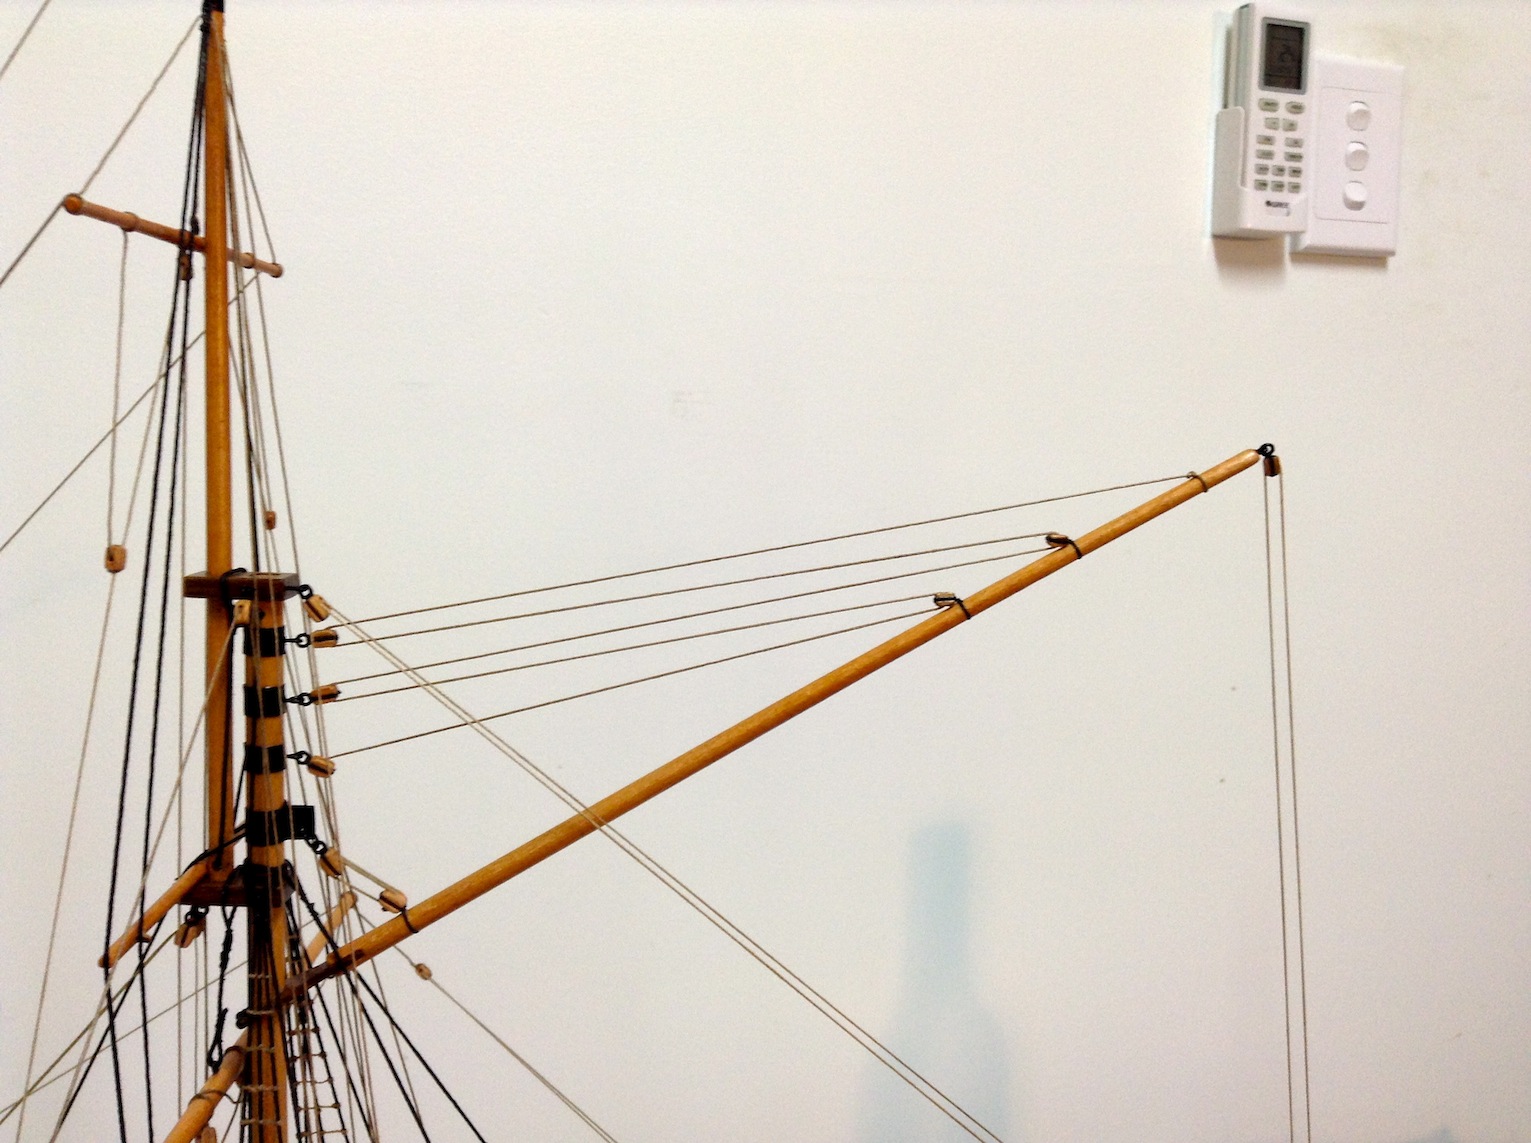
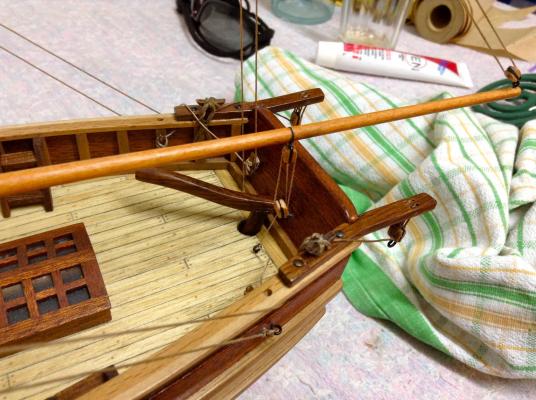
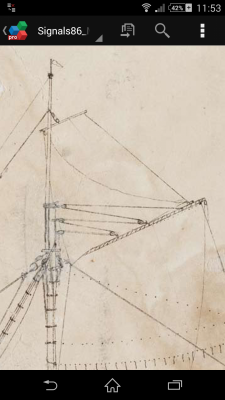
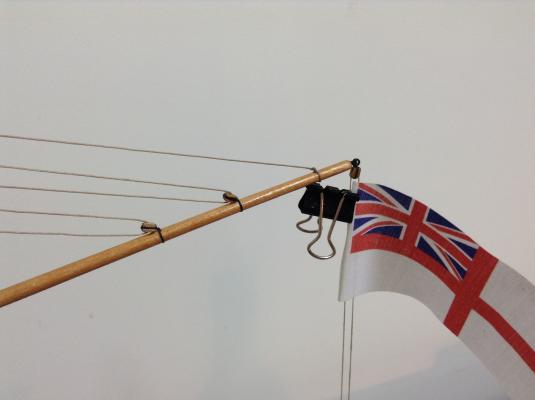
Well actually from the sketch it shows about 25 to 30 degrees, so that will be about right! :-)
- 803 replies
-
- 2
-
-
- colonial cutter
- modellers shipyard
- (and 1 more)
-
Thanks so much for the heads up Eamm and Tom.. Tightened up the throat and is now sitting at about 30 degrees. Will take it up a little higher.
- 803 replies
-
- 2
-
-
- colonial cutter
- modellers shipyard
- (and 1 more)
-
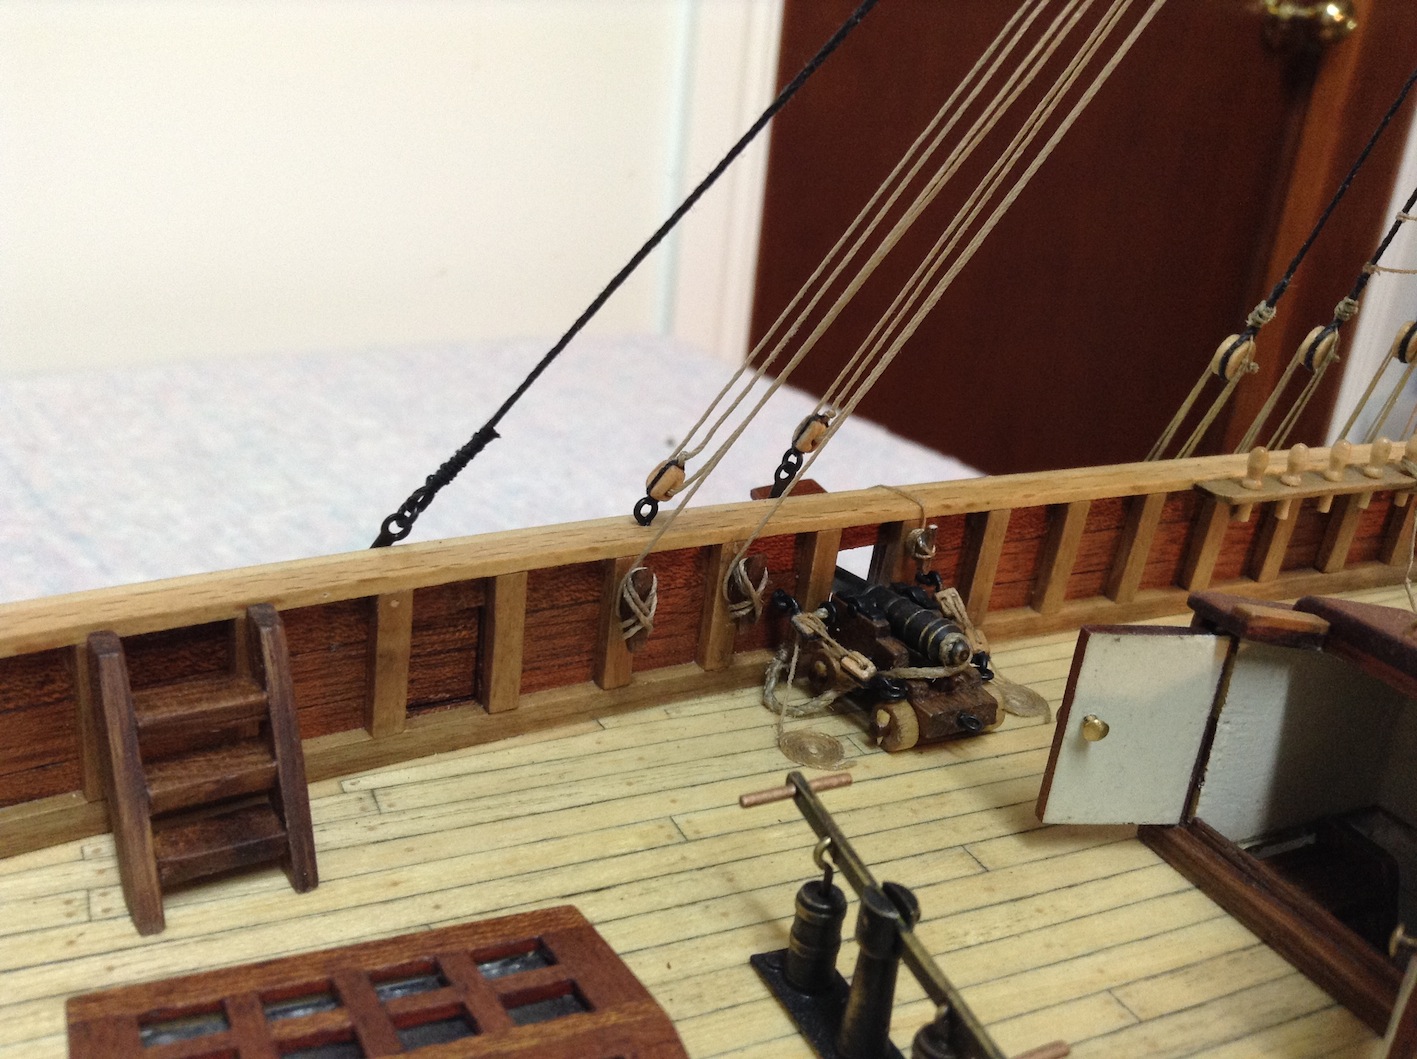
That is all looking mustard mate. Really taking shape now... They look well... Grate!! I have been known to sand off half my finger. The things we have to go through buddy
- 1,039 replies
-
- 1
-
-
- ballahoo
- caldercraft
- (and 2 more)
-
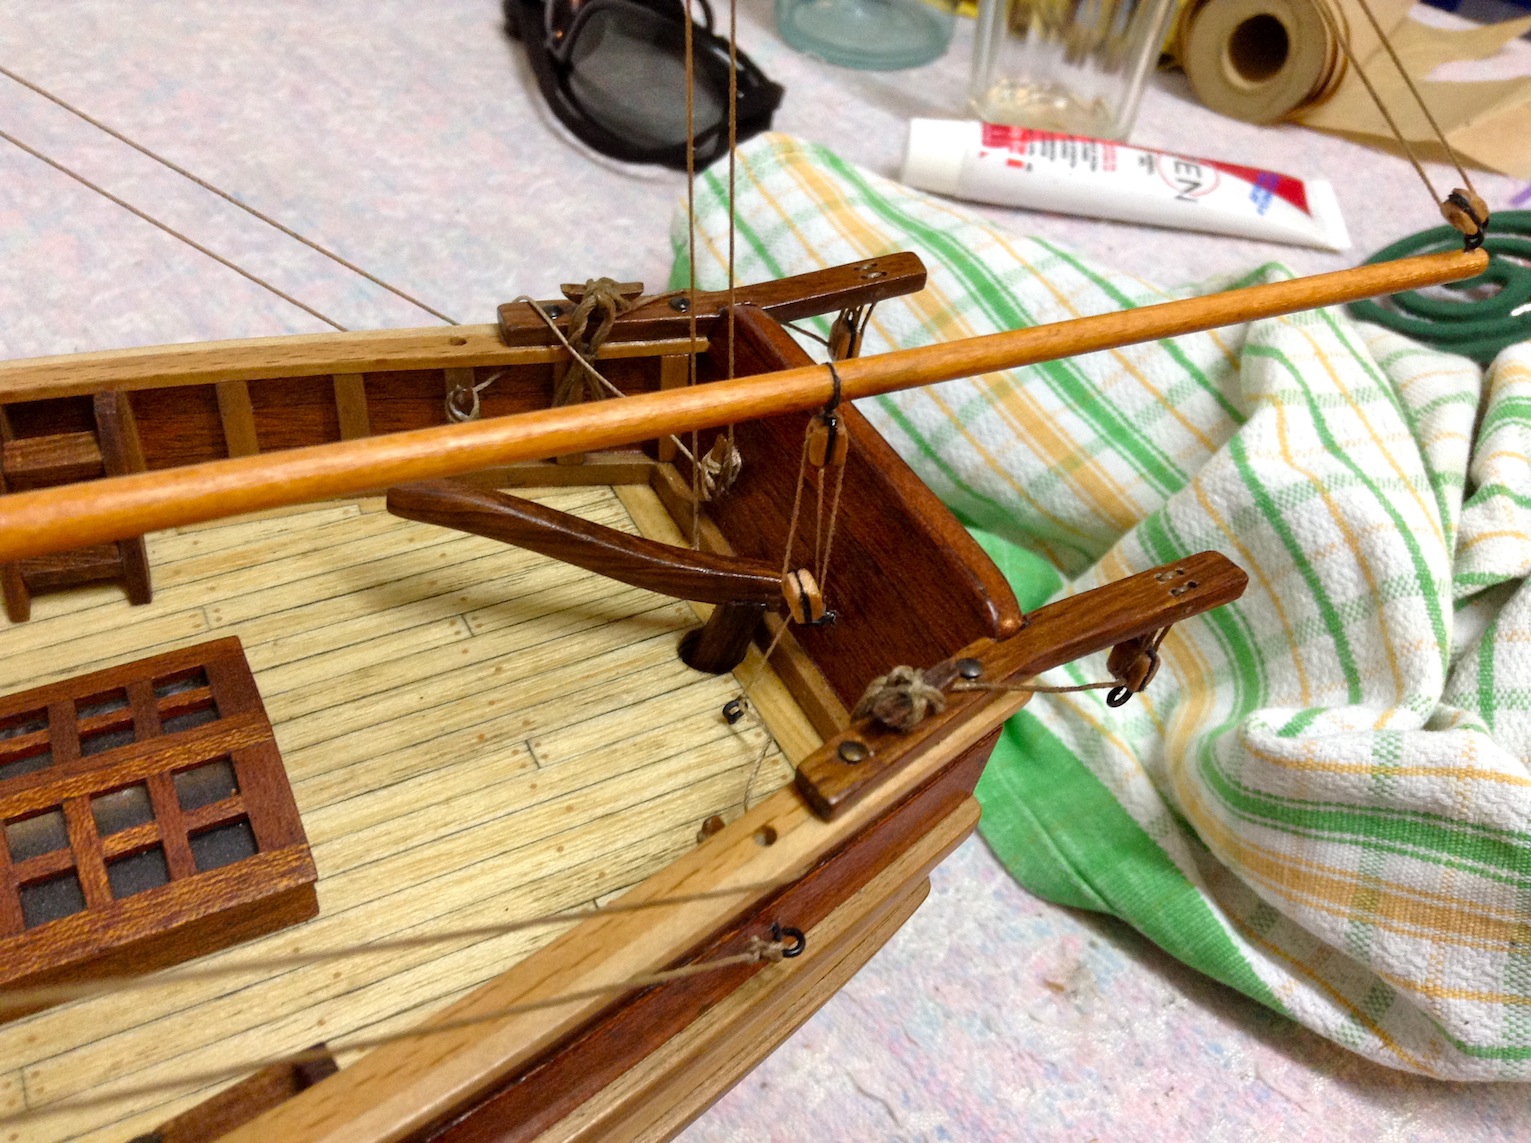
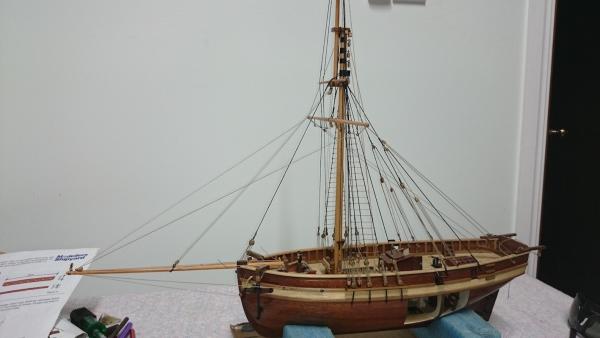
The kit supplied a paper flag, not very good... Also i rigged my peak halliard different to kit instructions and with using Parker King's sketch as reference of course... The differecnce is the termination on gaff at top end instead of back down to belaying pin.. Olllie
- 803 replies
-
- 2
-
-
- colonial cutter
- modellers shipyard
- (and 1 more)
-
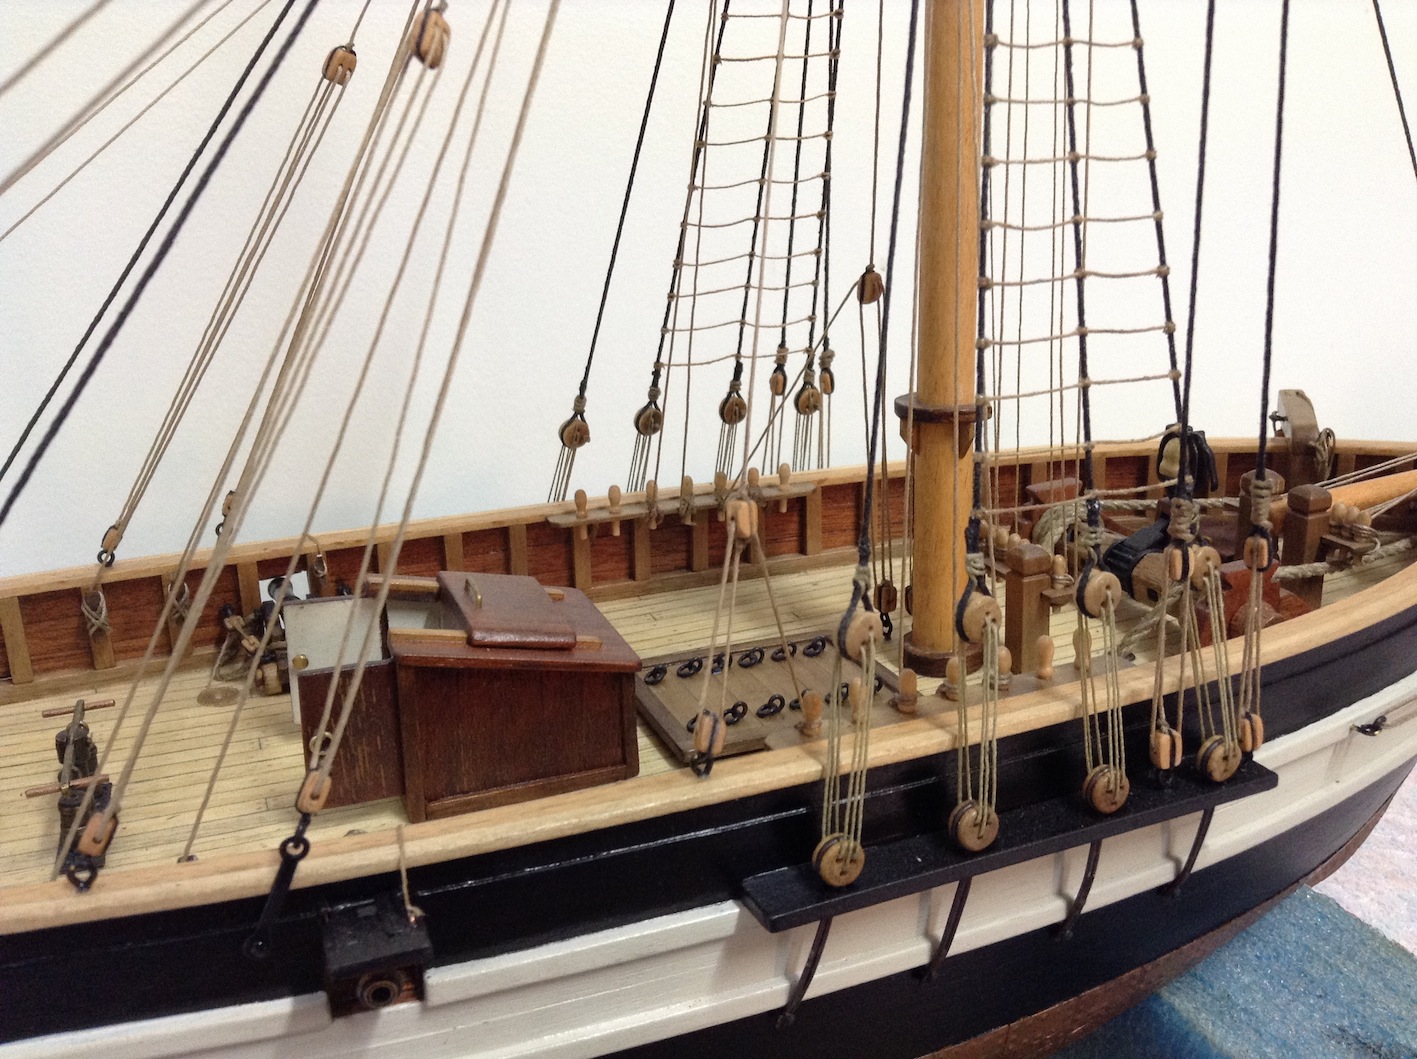
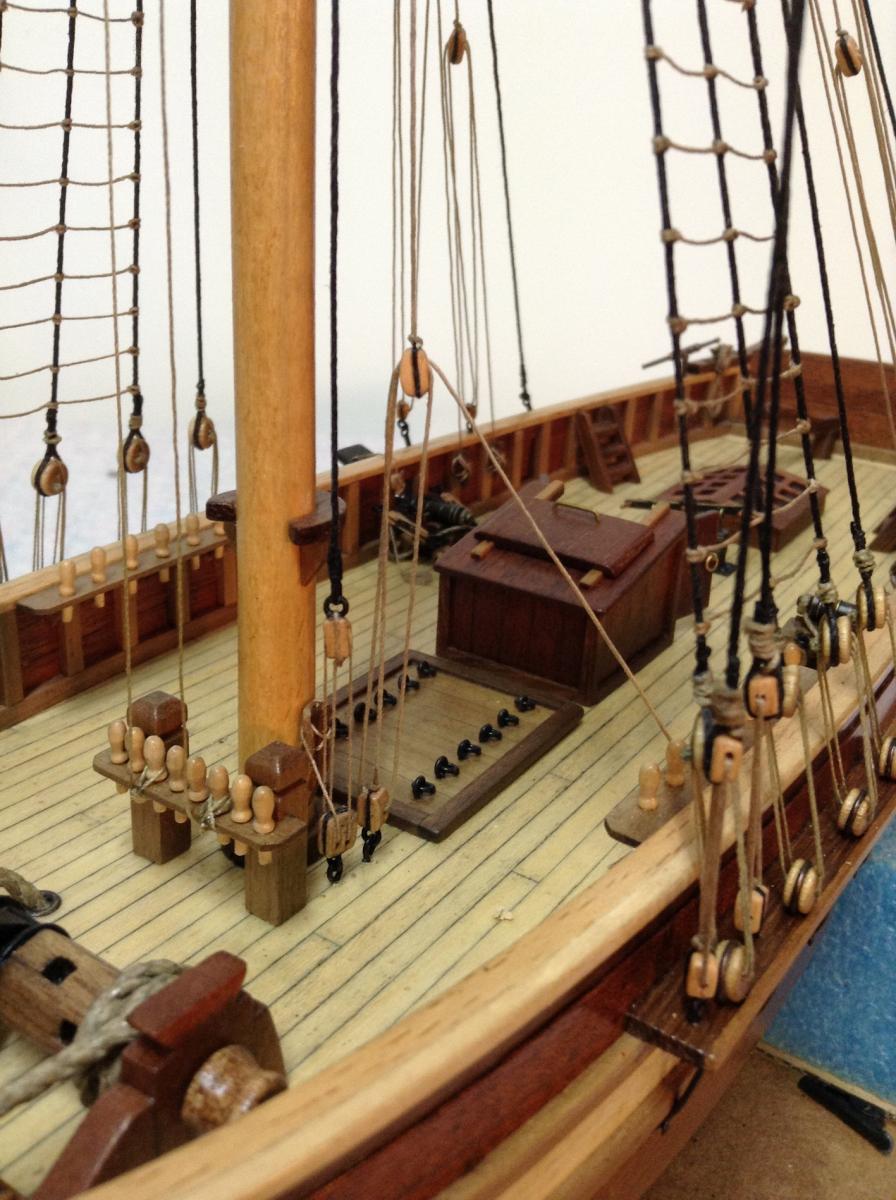
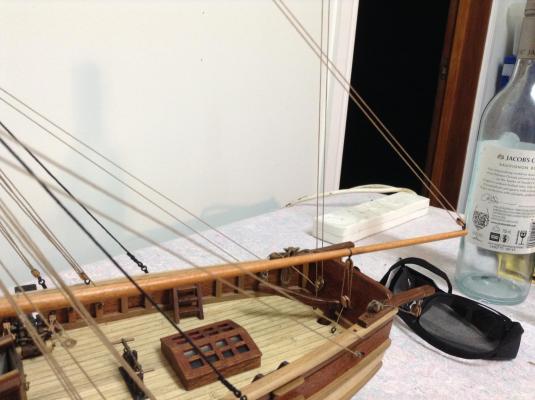
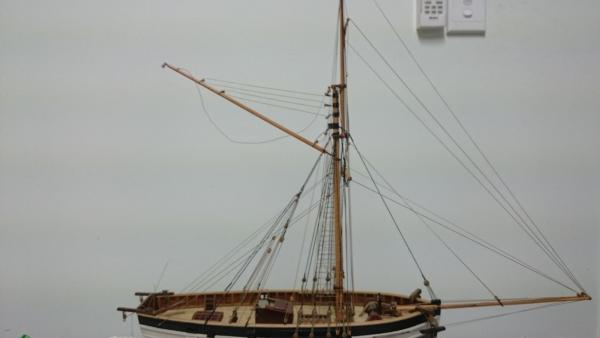
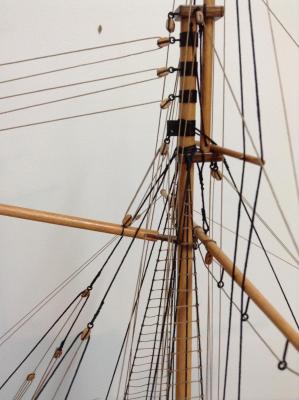
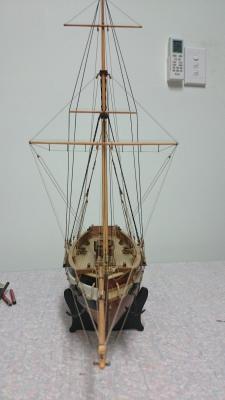
Hi crew... I have added the throat halliard, parrell beads to gaff, peak halliard and flag hoist.. I bought a flag from Becc's site many months ago... I am asking opinions on... Should i even add a flag? Does this look okay size wise? Does anyone have any tips for fixing to hoist to be more realistic than just wrapping around rope like instructions say... Thanks for looking in.. Ollie

- 803 replies
-
- 5
-
-
- colonial cutter
- modellers shipyard
- (and 1 more)
-
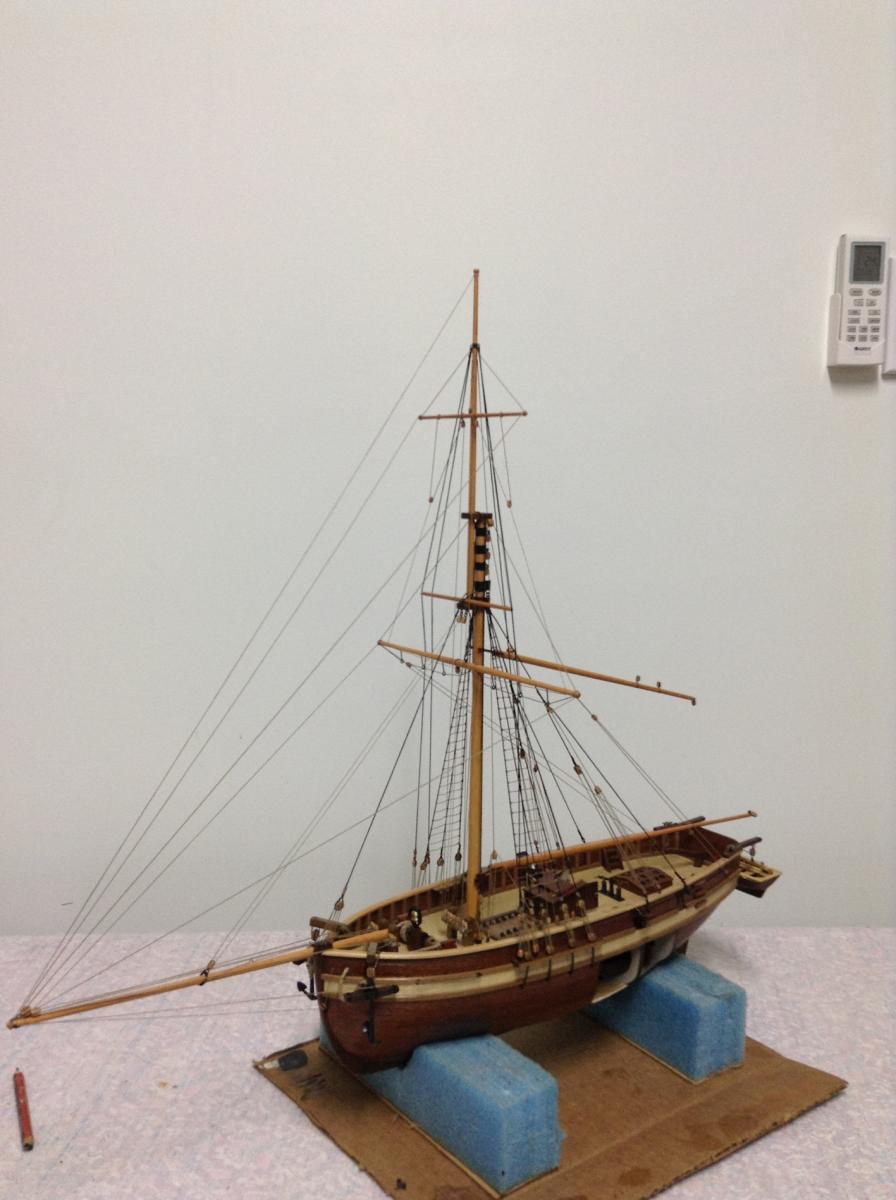
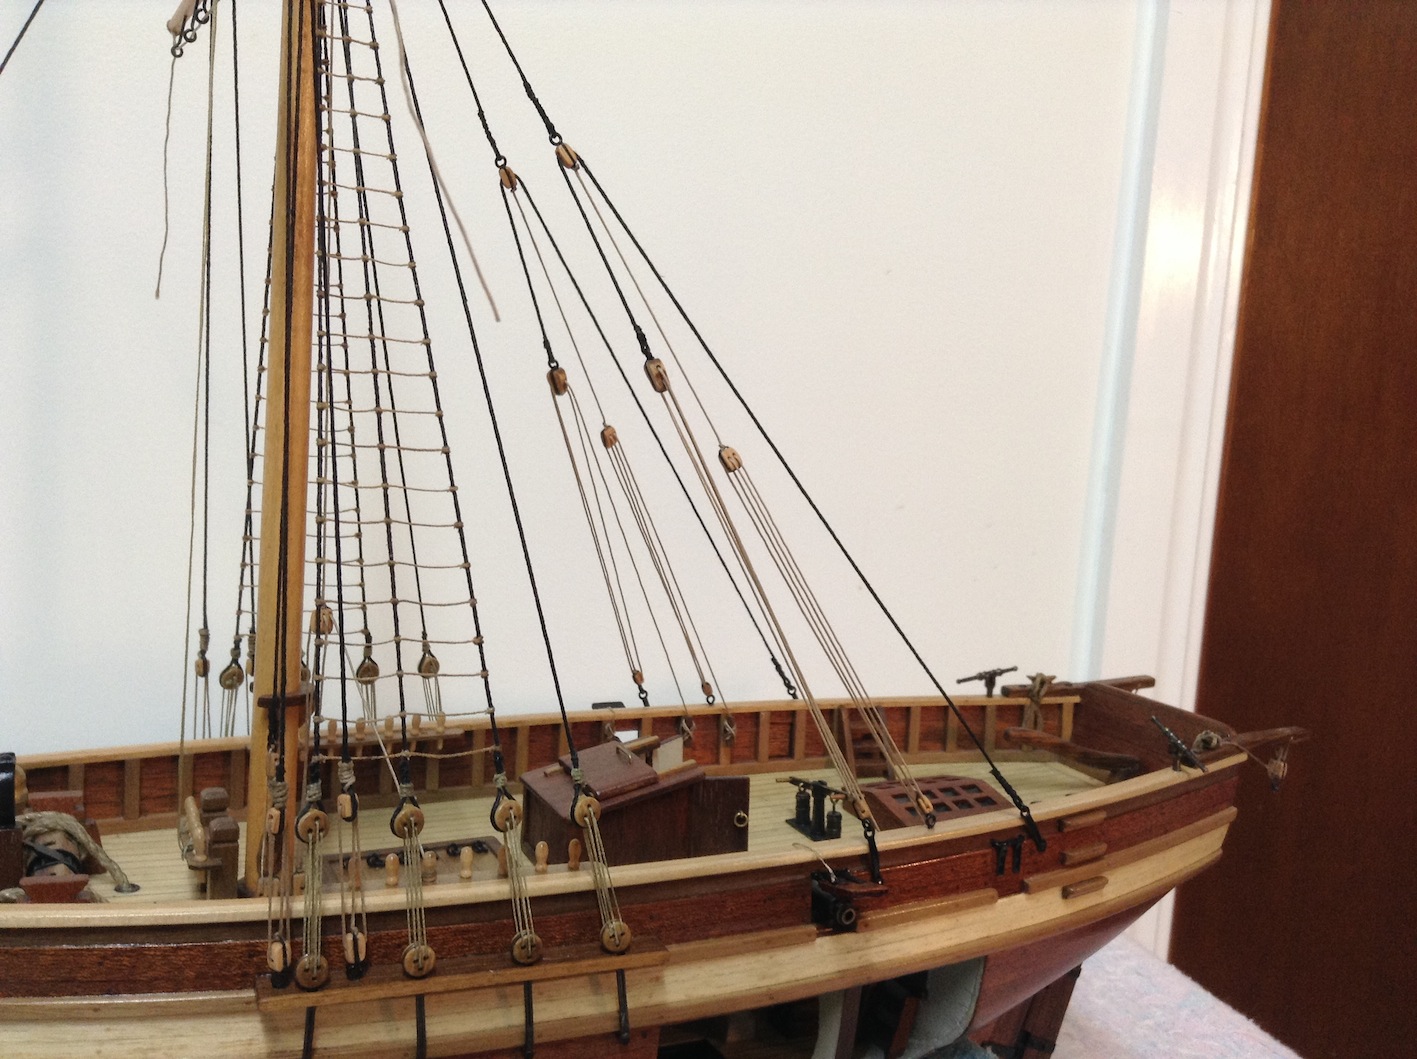
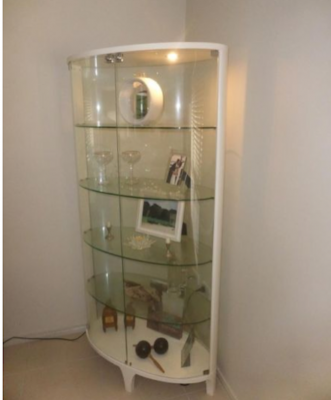
Hi gang.. It may not look much but i have added my top yard braces, cluelines and sheets and jib stay.. She's looking pretty busy up top now! i have added a picture of the cabinet i have my eye on.. I like that it is not sharp and square or rectangular, has room for a few models, i already have some from years gone by that need shelter (plastics).. Should fit my Endeavour also hopefully... I also like the built in lighting and the fact you can see all the way around.. lighting shouldn't be necessary .. Anyway see what happens... Thanks for looking in... Ollie

- 803 replies
-
- 7
-
-
- colonial cutter
- modellers shipyard
- (and 1 more)
-
I understand what you are saying Alistair , but here in the tropical rainforest, dust is only one concern,, spiders webs and even worse, spider poo! and gecko poo and mould and mildew... Um its great here.. haha I will be adding a humidity sensor inside case and probably some silica gel etc.. I want to be able to access model though for close up viewing, its not going to be locked away untouchable,,just to certain people ! Ollie
- 803 replies
-
- 2
-
-
- colonial cutter
- modellers shipyard
- (and 1 more)
-
Thanks Geoff. Tom, display has been on my mind for a few weeks now. Just made one for my metal detecting relics... I'm.thinking of getting a big standing timber case/cupboard. It has two glass doors on.front.. Or I may make one.. But yes it has to happen.. Eamm buddy, cheers. Next is top yard braces, cluelines and sheets, then booms.. Regards Oliver and
- 803 replies
-
- 1
-
-
- colonial cutter
- modellers shipyard
- (and 1 more)
-
Cheers buddy.. I lined it with acoustic felt. I have considered other options. Still may, but if you say it looks the goods, I might have to trust you. Ollie
- 803 replies
-
- 3
-
-
- colonial cutter
- modellers shipyard
- (and 1 more)
-
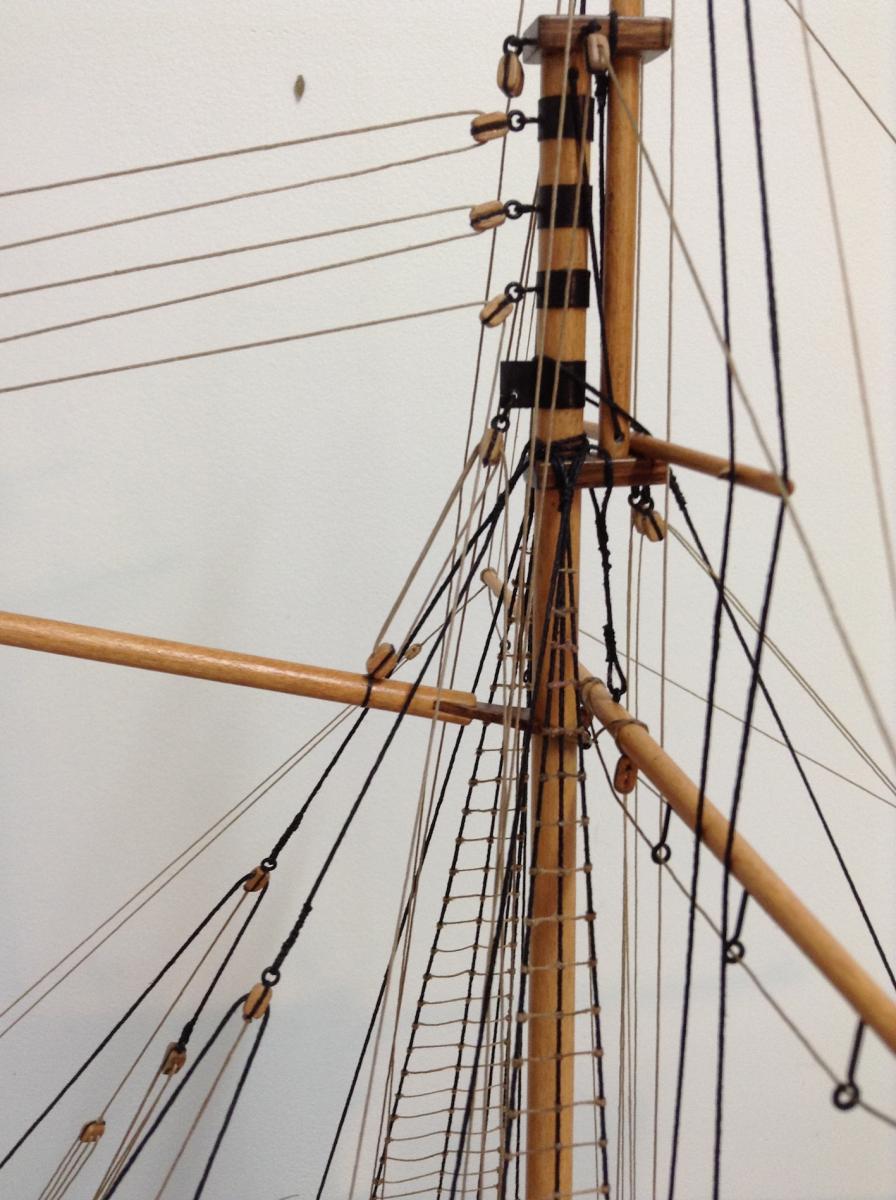
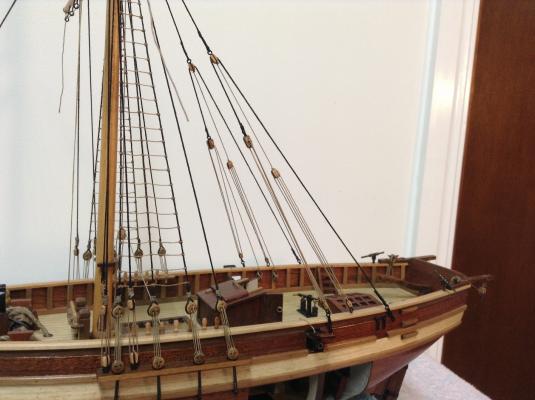
I have rigged my braces to main yard. went well, just need to finish them to belaying pins etc.. top braces next and onto other bits such as cluelines and sheets.. new members - click on images for large versions.. Later, Ollie

- 803 replies
-
- 5
-
-
- colonial cutter
- modellers shipyard
- (and 1 more)
-
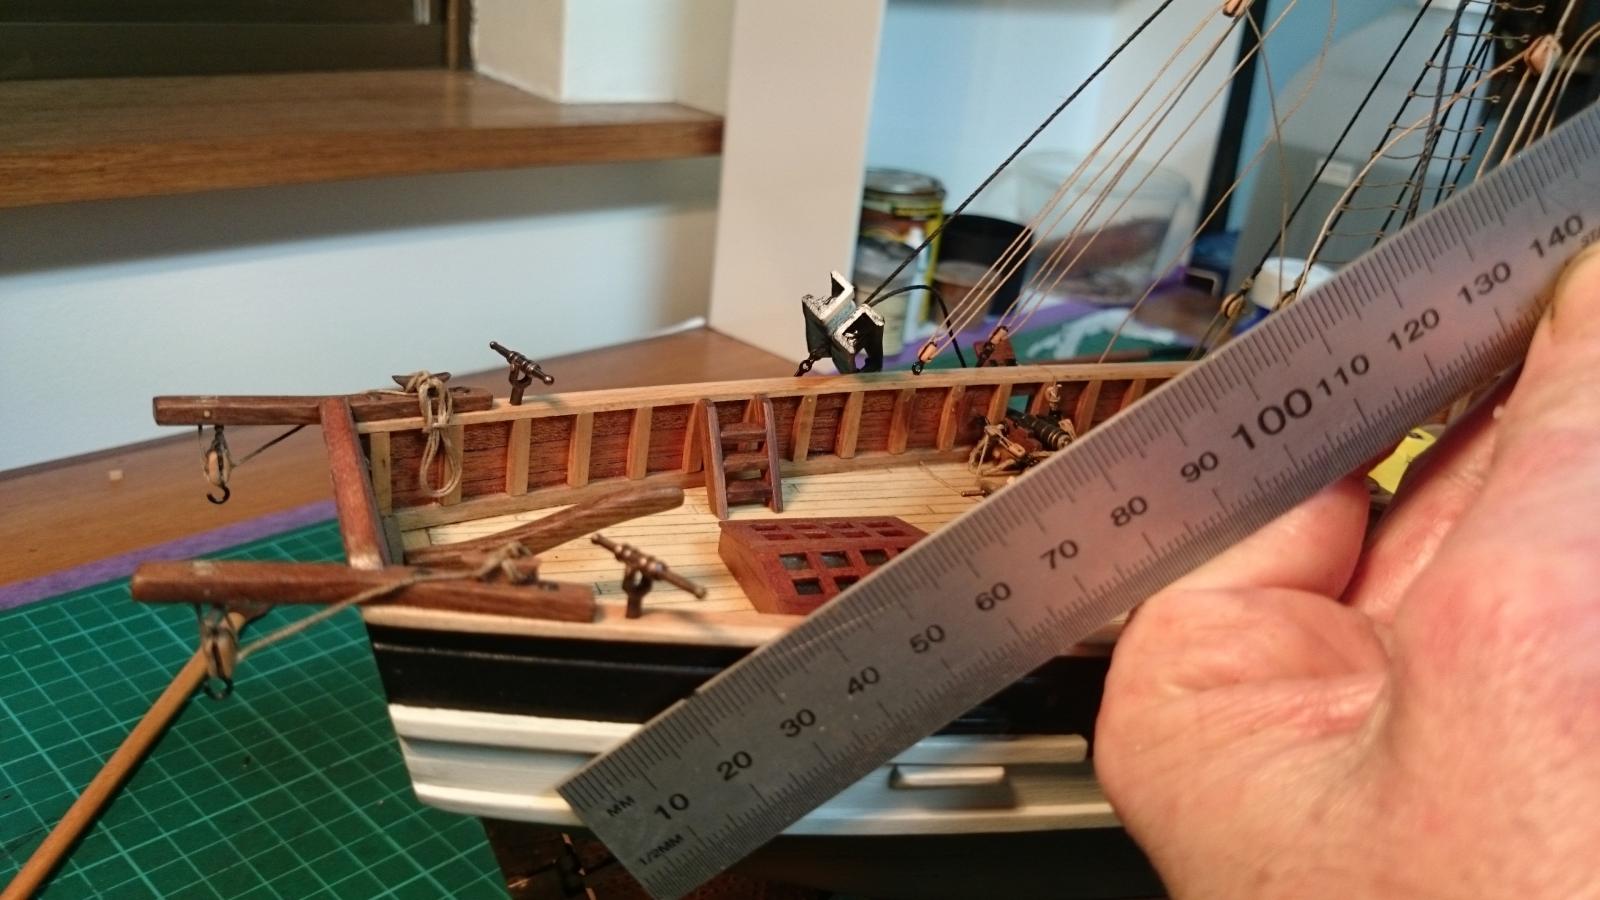
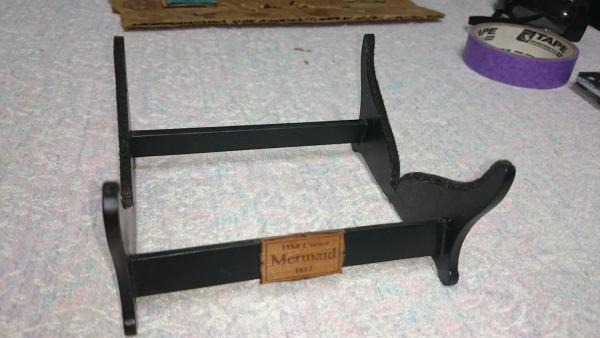
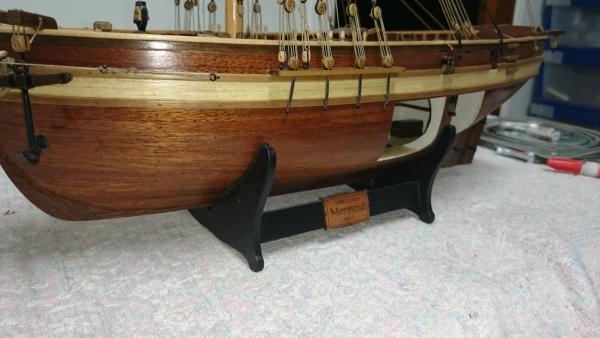
HI gang, Yes Alistair i have thought about pedestals, I have no fear of achieving it with my solid keel epoxied in place it is very strong... Im not sure if i will do it, i think i prefer having the hull "unfixtured" Is that a word, i think not but anyway i think i will go with the cradle... I have spent some time making the cradle look okay and it looks okay i think.. a clear perspex one would be nice..
- 803 replies
-
- 3
-
-
- colonial cutter
- modellers shipyard
- (and 1 more)
-
John that looks much tidier than the picture above.. just a tip... i would advise in investing in some very sharp craft blades for intricate cut out jobs.. really sharp is the key... i use a 9mm stanely knife and snap and change blades often.. looking good even though i know nothing of this ship.. Ollie
-
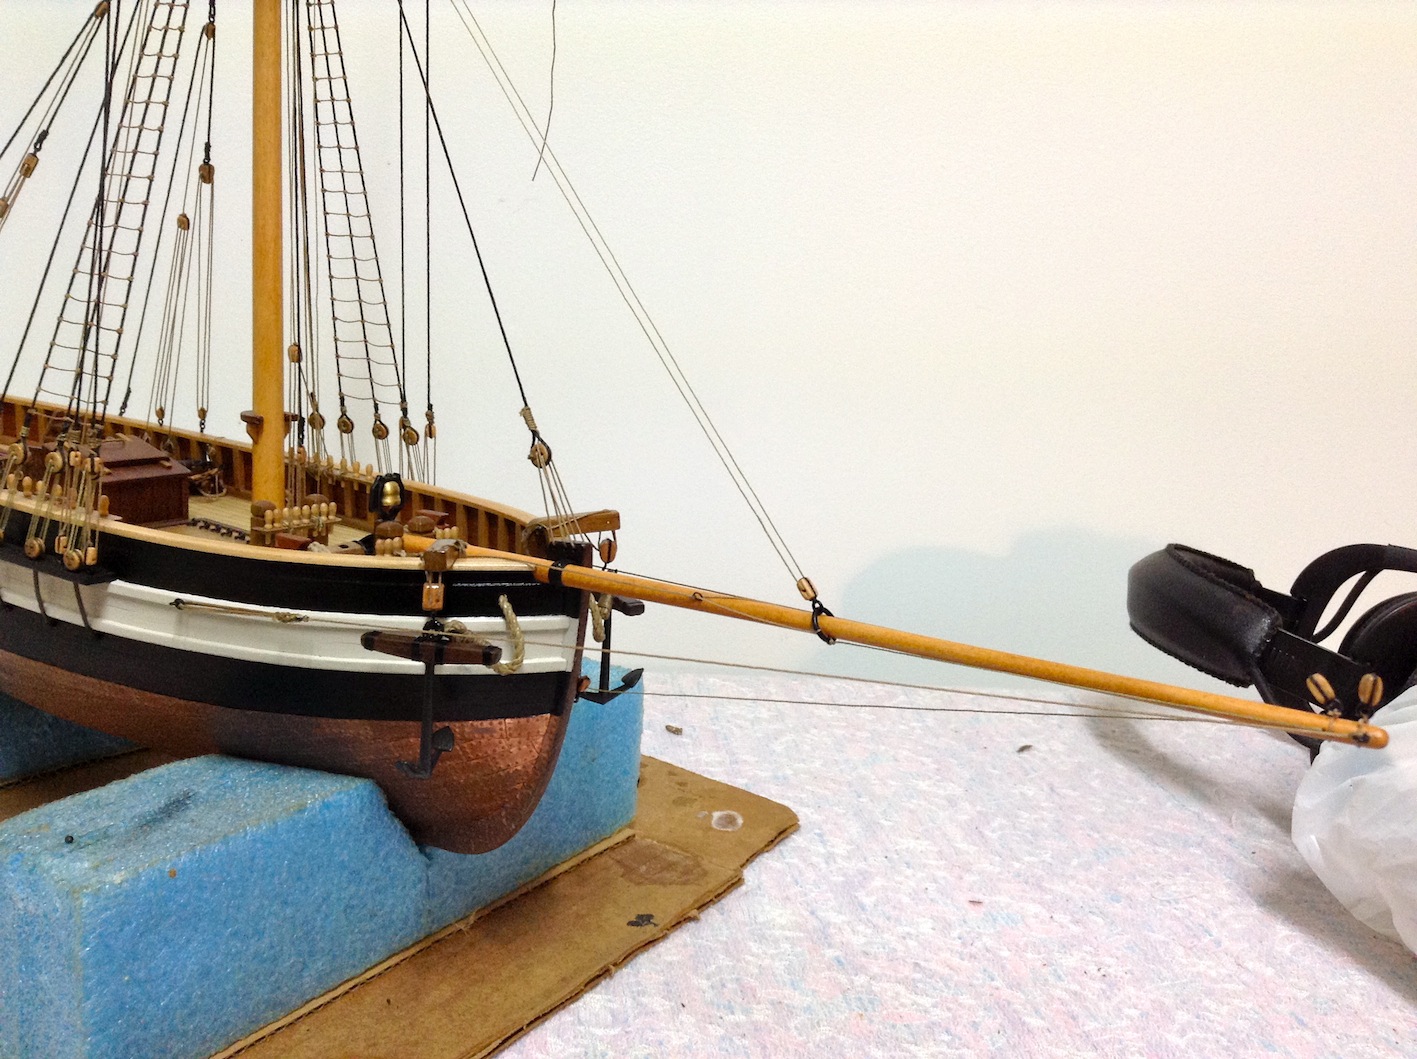
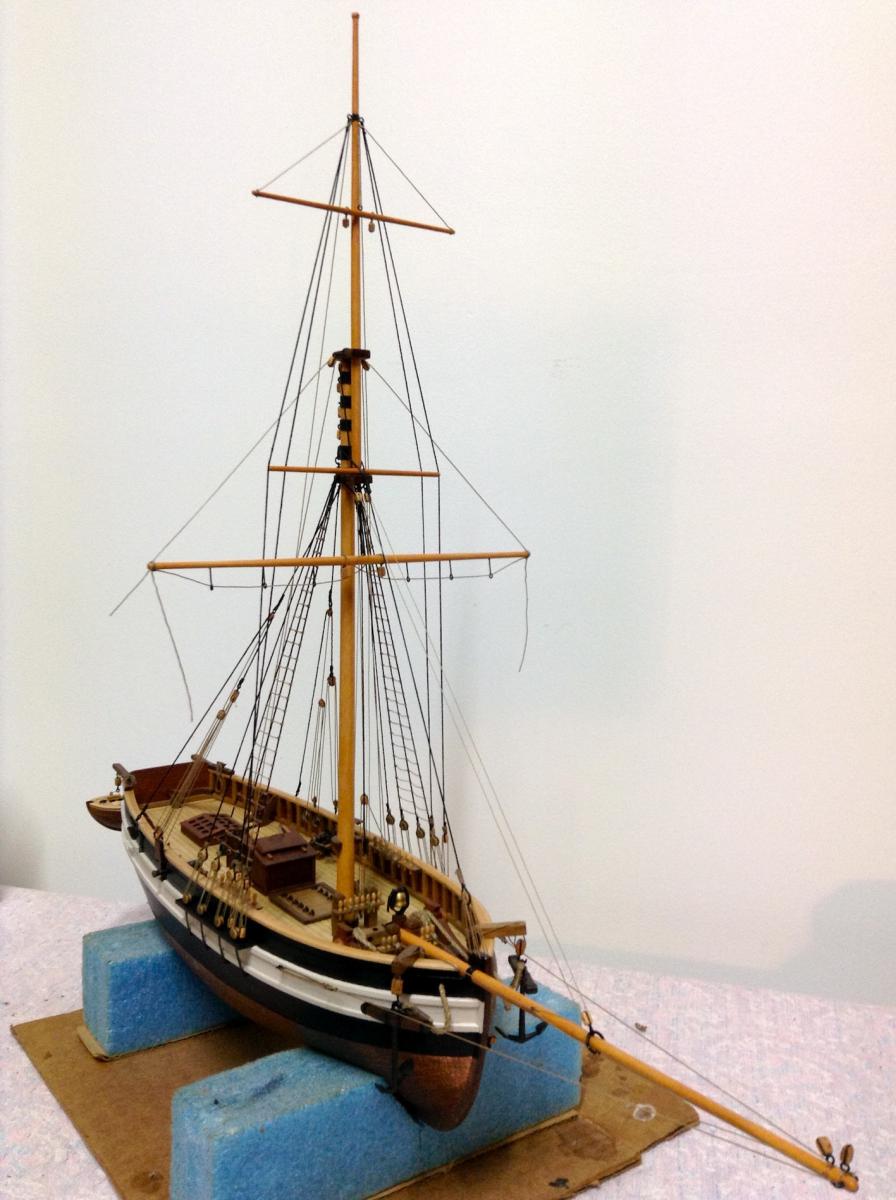
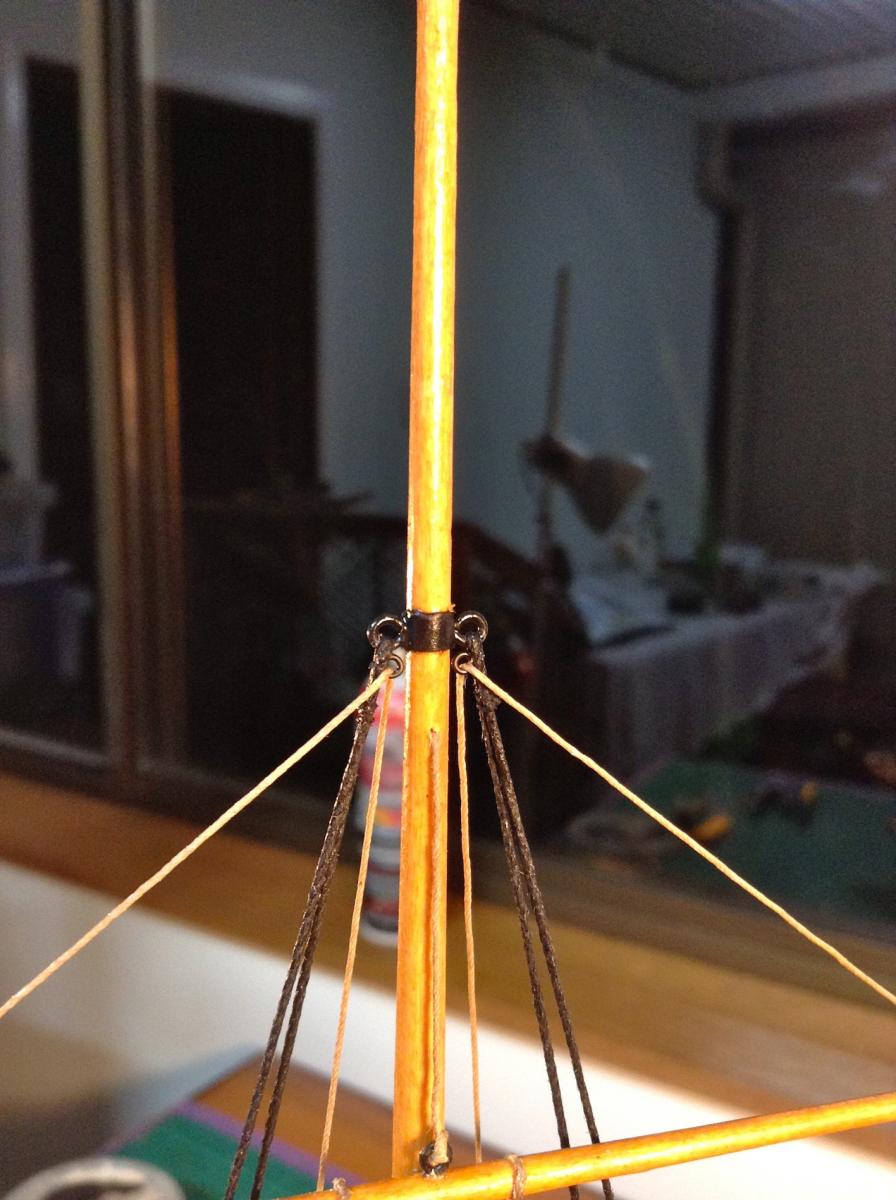
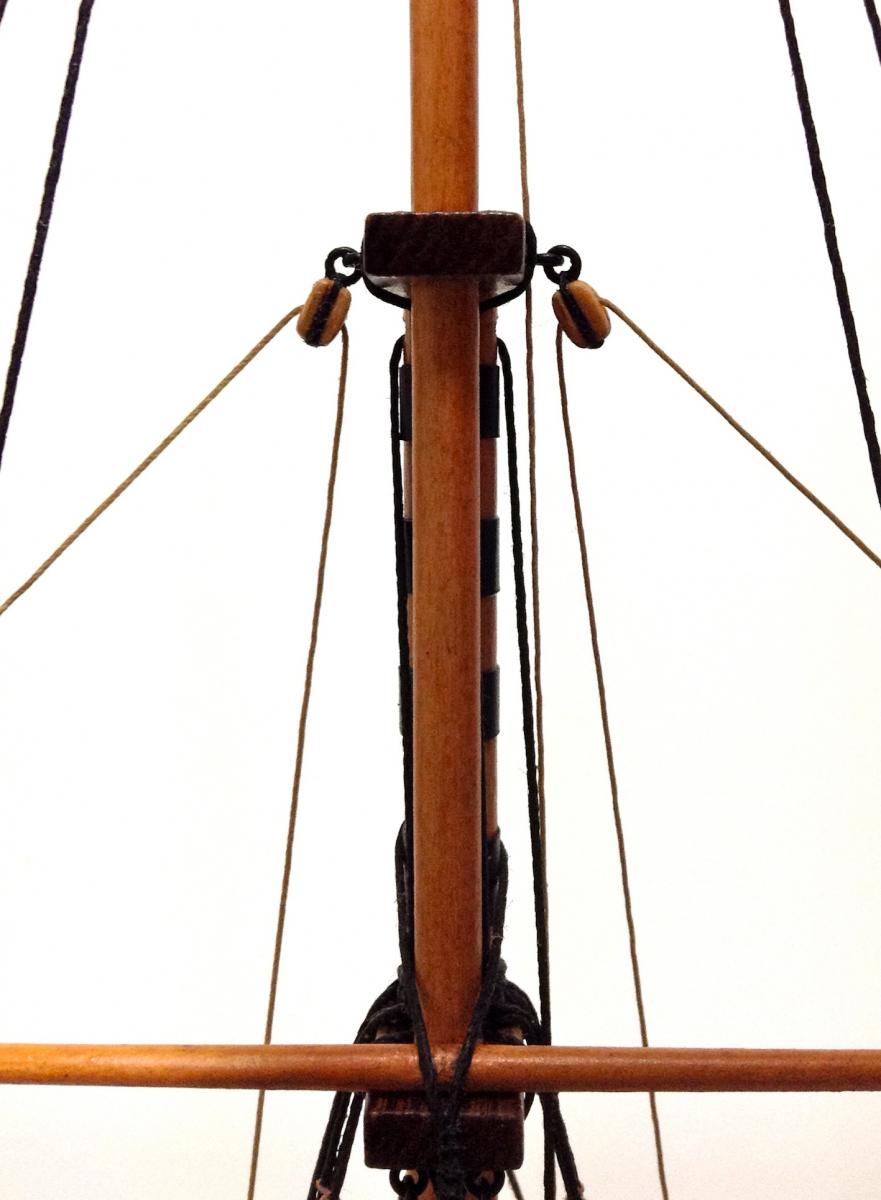
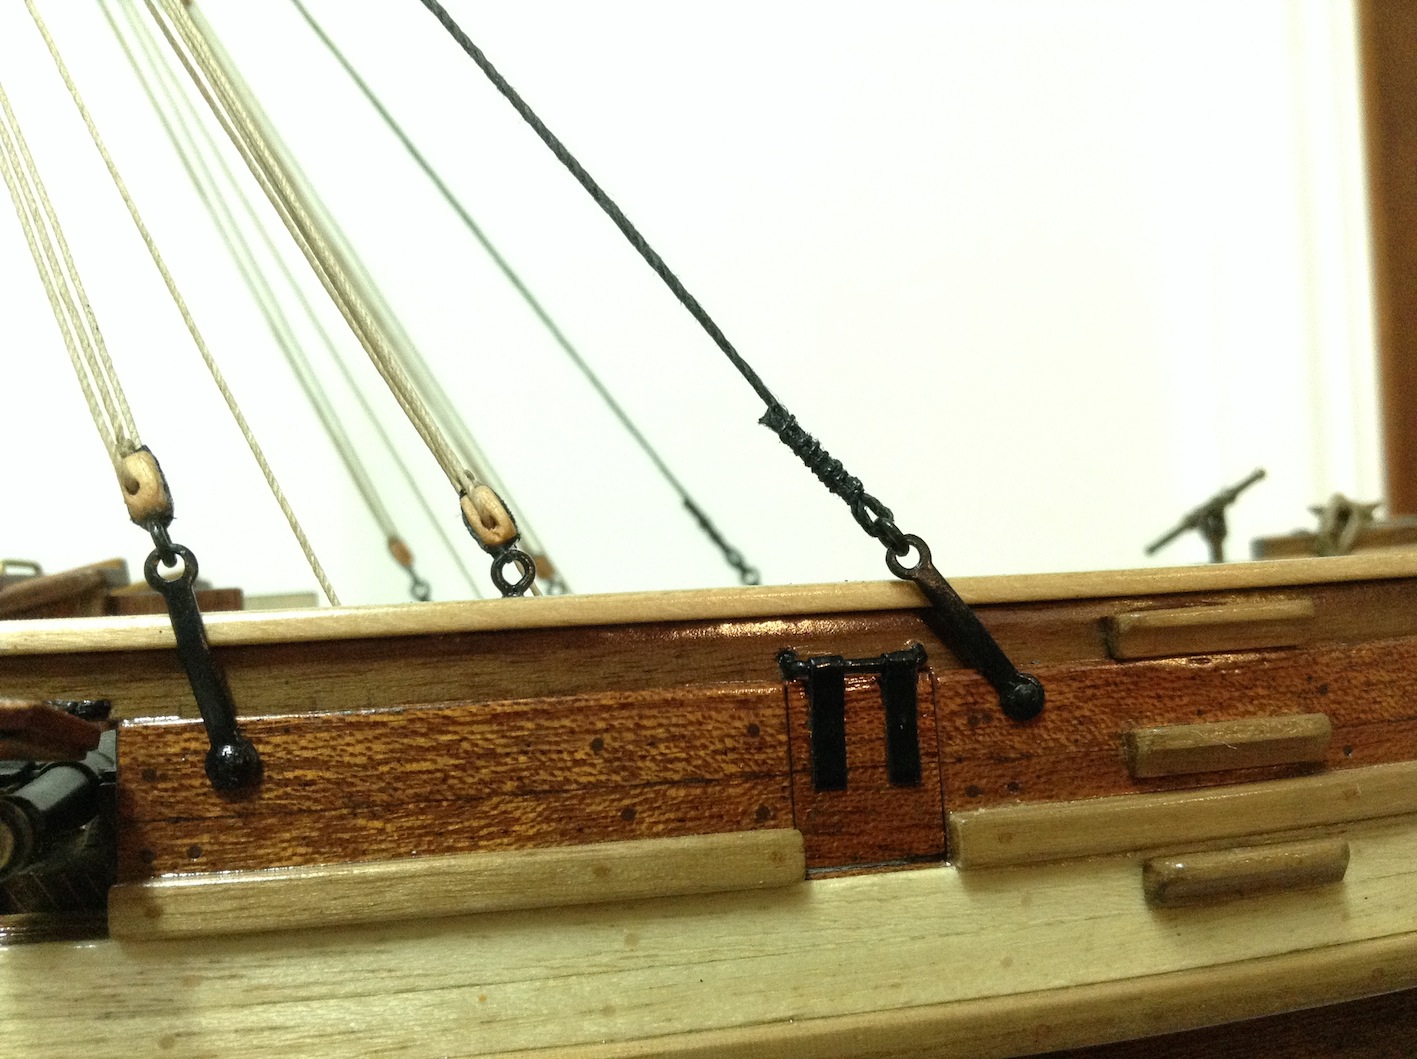
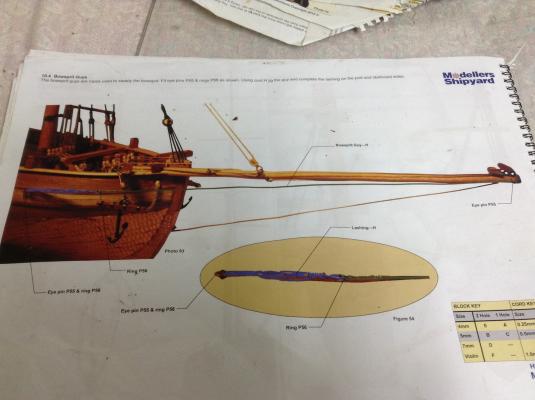
Also got the bowsprit guys done.. went ok but i think my lashing could have been better.... Looks ok i think, rope just clears anchors within a reasonable distance at their most raised position.. Regards Ollie

- 803 replies
-
- 5
-
-
- colonial cutter
- modellers shipyard
- (and 1 more)
-
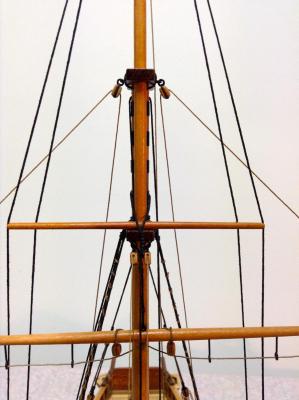
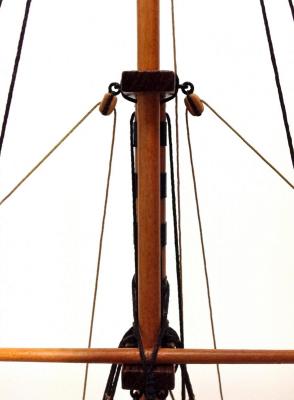
Excellent John... So I have completed lifts. main yard required some weight to give rope tension (used pegs).. otherwise it just pulled the yard upwards.. It still needs some tension from fore and aft braces which are next on agenda. Top sail was no worries as it is fixed.. I spliced tiny eyebolts into top shrouds to run top lifts through as if they were grommets of some description.

- 803 replies
-
- 4
-
-
- colonial cutter
- modellers shipyard
- (and 1 more)
-
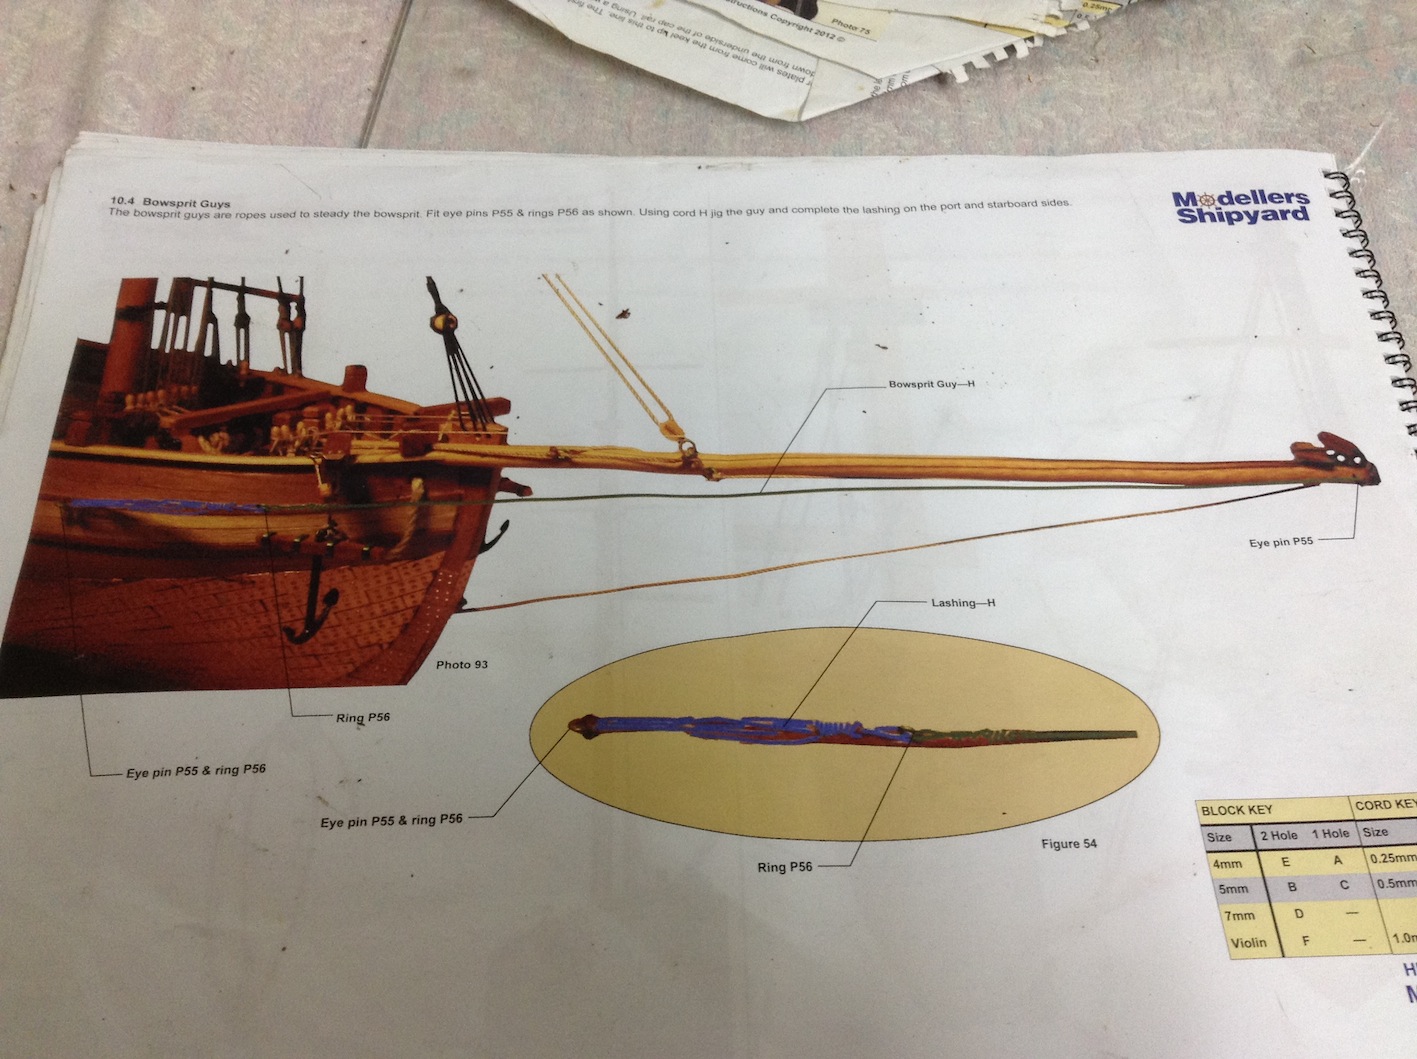
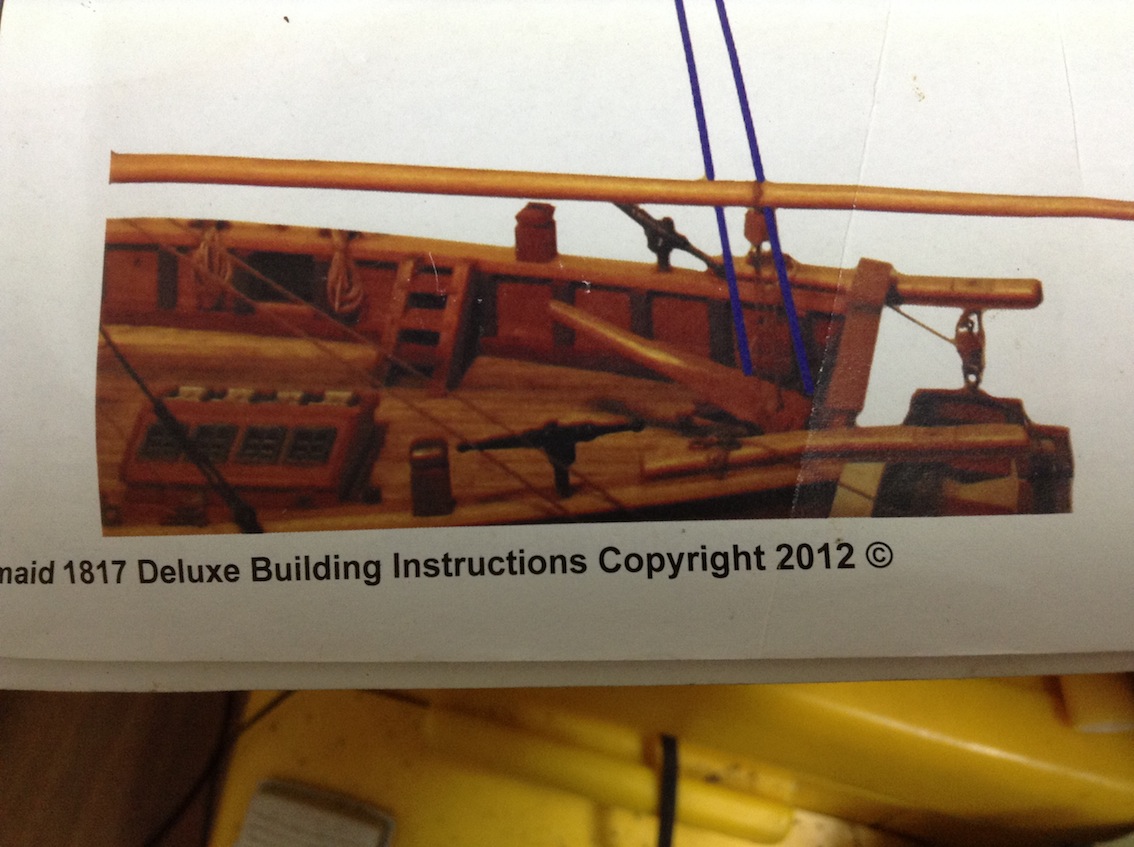
Nice... i have another query... I want to do bowsprit guy ropes tonight... Just wondering how this lashing is done? Im sure its simple.. I figure it just doubles back from ring to ring..but unsure .. Plans dont really explain it and picture is rough... Any help/tips much appreciated... thanks Ollie

- 803 replies
-
- 1
-
-
- colonial cutter
- modellers shipyard
- (and 1 more)
-
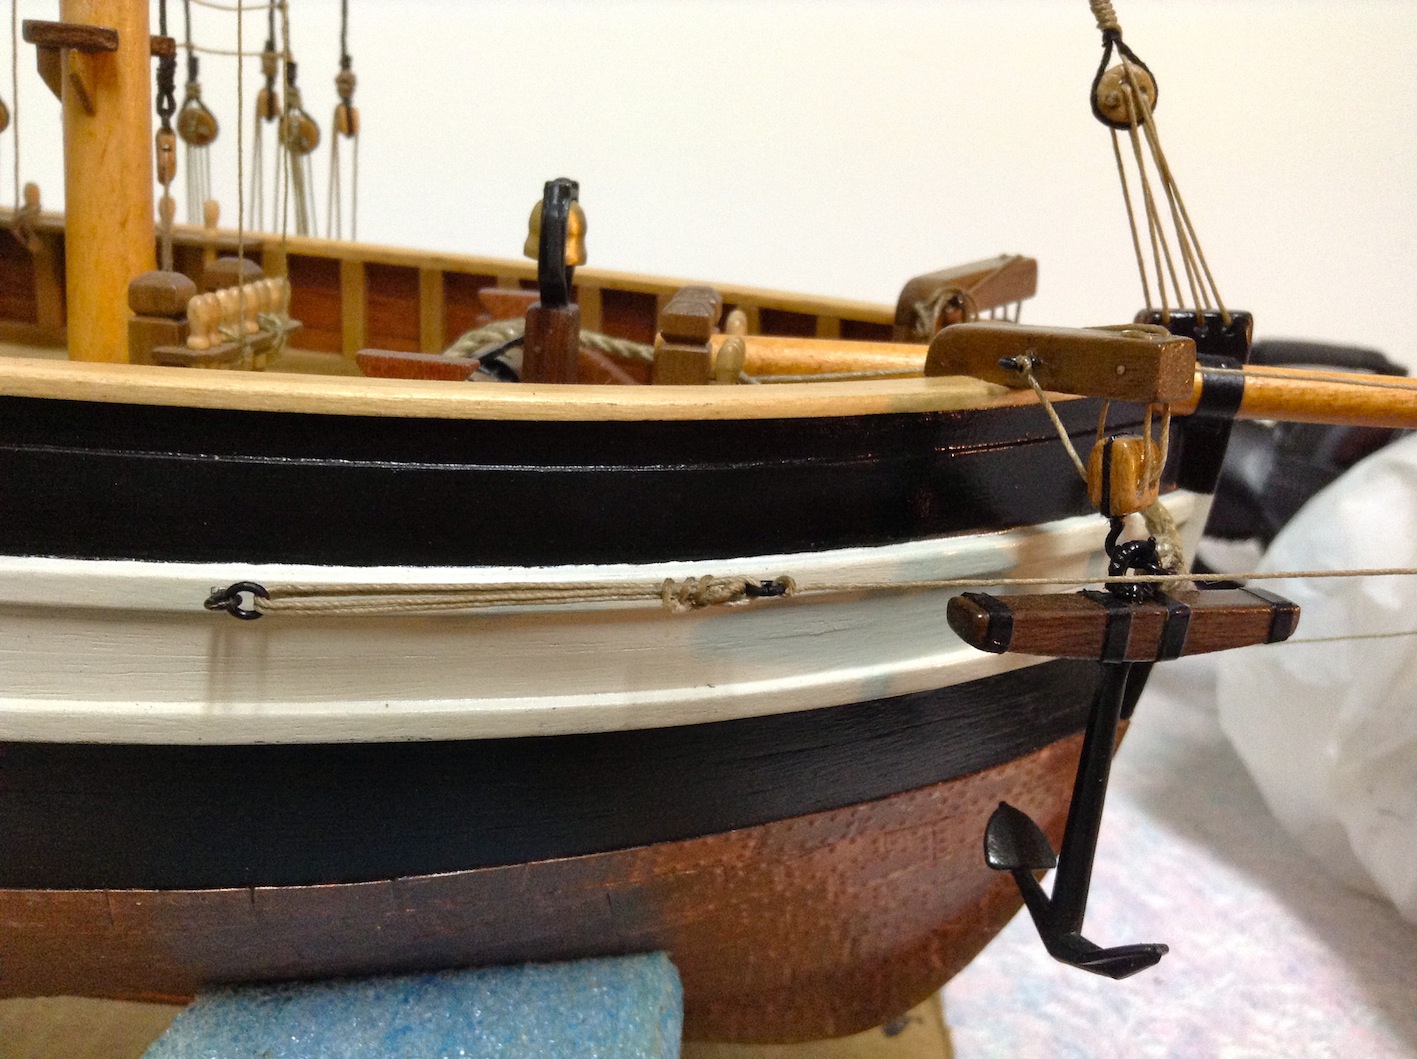
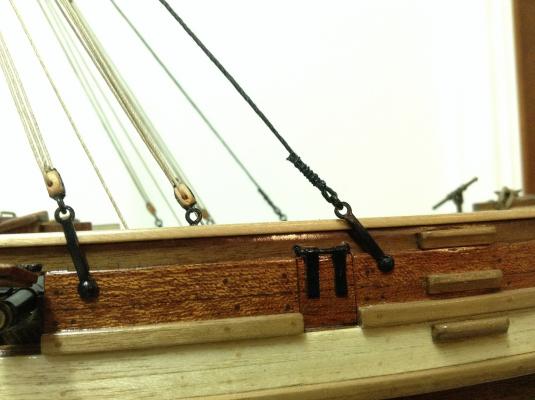
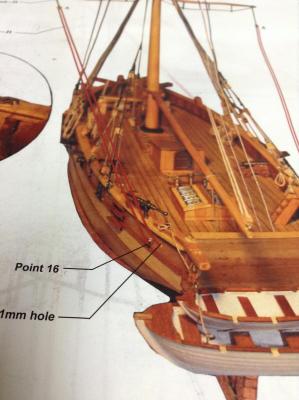
Wondering what was used for docking against wharfs etc..? Cleats? :-)
- 803 replies
-
- 1
-
-
- colonial cutter
- modellers shipyard
- (and 1 more)
-
Thinking what I could do for a cover up? Like a cleat over the hole for example... .. Or maybe just leave the holes.. Thanks as always everyone on board... :-)
- 803 replies
-
- 2
-
-
- colonial cutter
- modellers shipyard
- (and 1 more)
-
Ok some pictures.. I have finished backstays now the missing part arrived a few days ago and had it prepared.... And of course....... I did a clean up and the part turned up, i knew that was on the cards!!!! Any way, top sail halliard fitted also, preparing parts for bowsprit guys...

- 803 replies
-
- 6
-
-
- colonial cutter
- modellers shipyard
- (and 1 more)
-
Thanks guys.. John, I hadn't deviated from the kit much back at the rail stage.. I suppose they are not shown anywhere. I wonder how much detail is left off because it's a painting.. Sketch doesn't show these kinds of details either.. Which does make me wonder how the kit designer came up with it.. So the holes are drilled and don't really want to patch them.. pic shows acceptable angle I think without intruding on culverins.. Hmm decisions.. More posts on their way...

- 803 replies
-
- 3
-
-
- colonial cutter
- modellers shipyard
- (and 1 more)
-
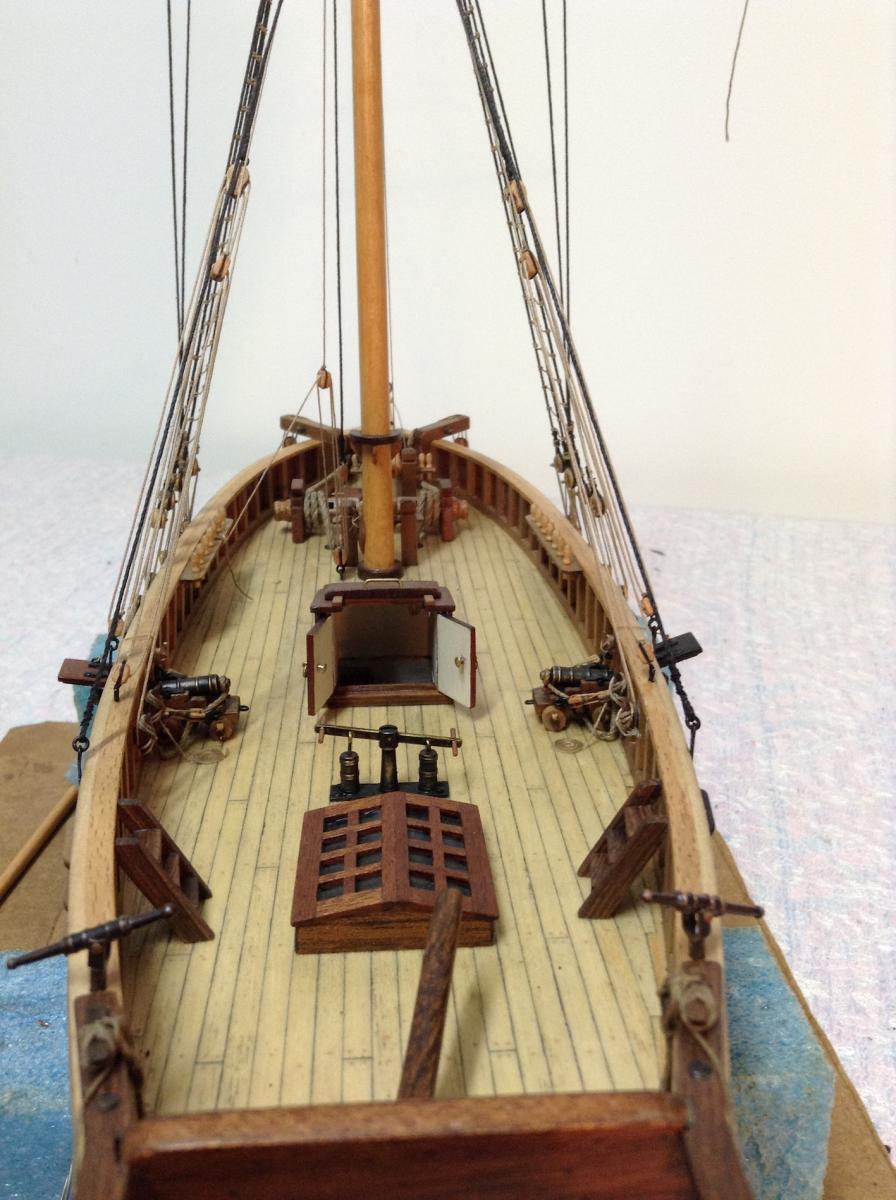
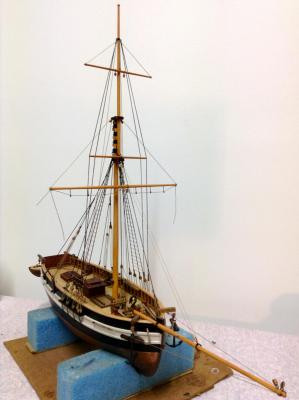
this pic might show better what im concerned with, not great lighting... Also. Notice the board i have the ship on.. I cant believe i dint rig this up sooner.. I can spin her around and pick her up so much easier now.. Over and out,, Ollie

- 803 replies
-
- 2
-
-
- colonial cutter
- modellers shipyard
- (and 1 more)
-
Looking at the plans for main yard backstays and i see a clash... It appears the stays interfere with culverins.. Surely this is not right..? Warm regards and thanks again all.. Ollie
- 803 replies
-
- 2
-
-
- colonial cutter
- modellers shipyard
- (and 1 more)