Glenn-UK
-
Posts
3,169 -
Joined
-
Last visited
Content Type
Profiles
Forums
Gallery
Events
Everything posted by Glenn-UK
-
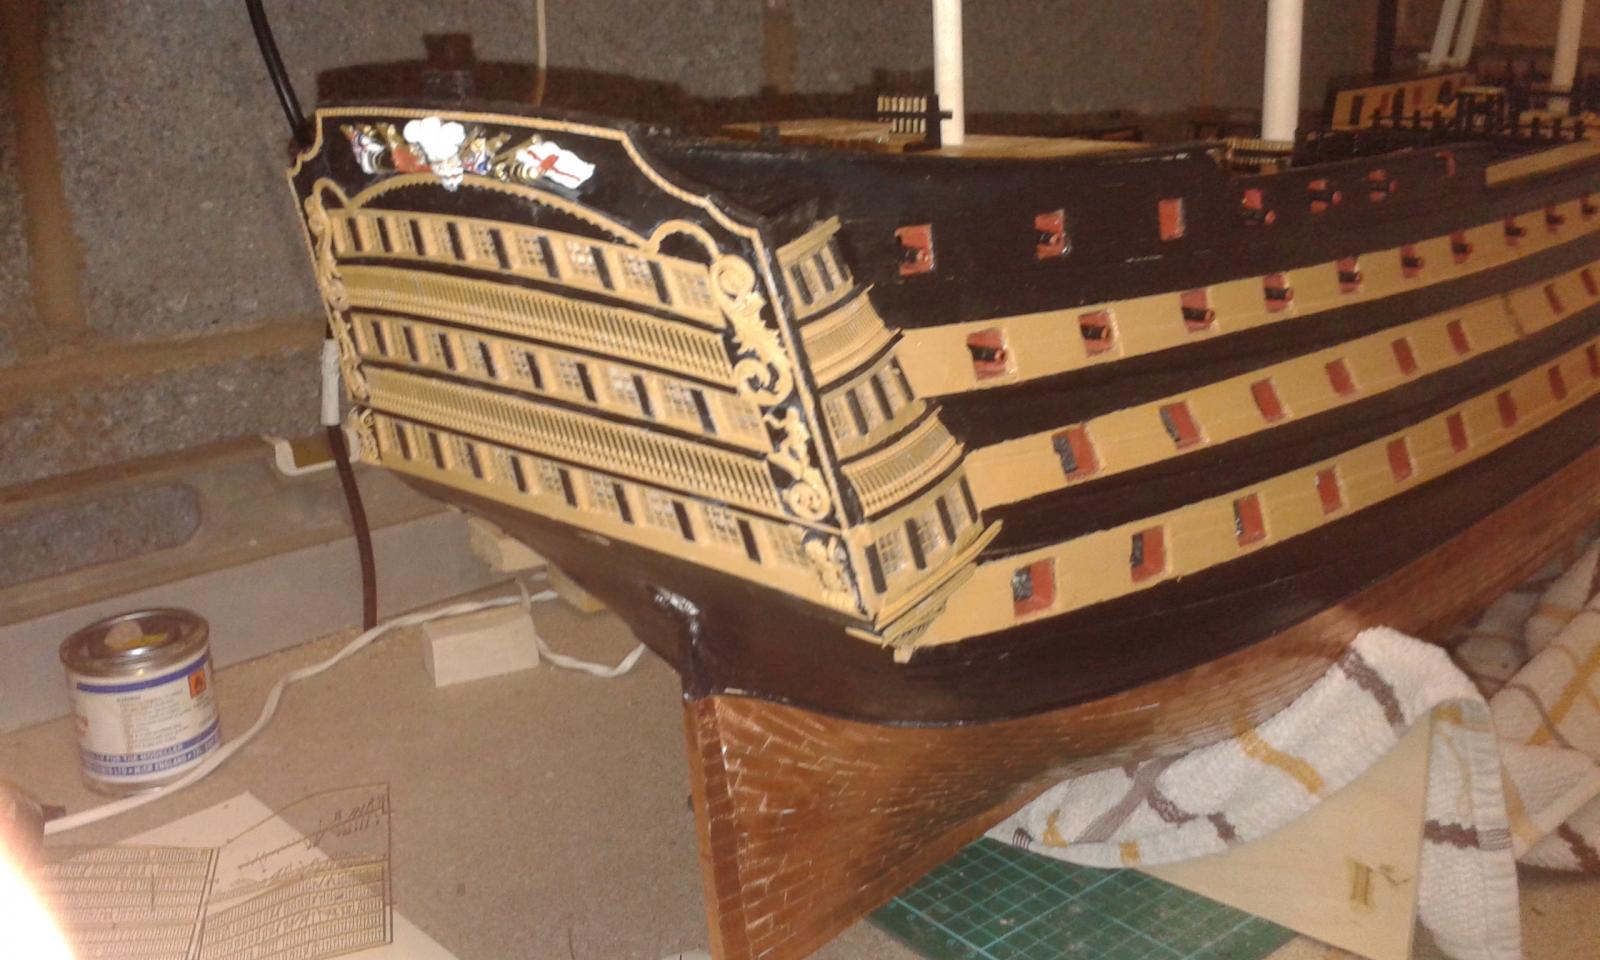
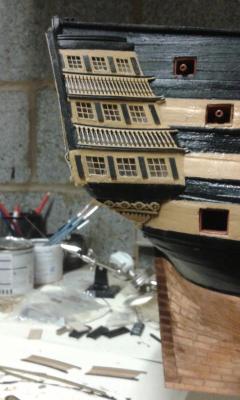
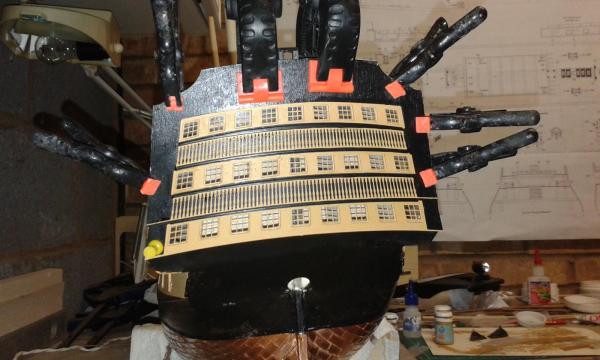
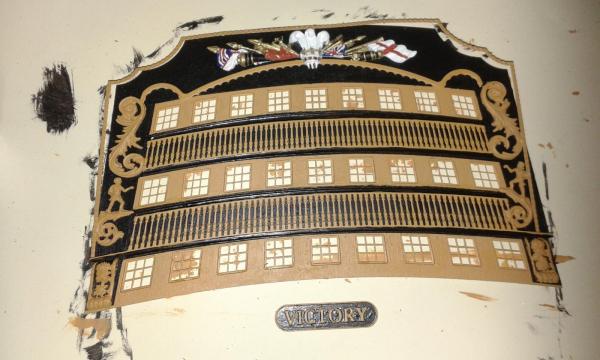
 More work on the quarter galleries tonight. Starboard side completed. Port side only requires the lower two brass profiles to be fitted and black inserts between windows. Will be glad when this task is complete. When fitting the quarter gallery profiles I did fit the stern brass profiles (held with tape) to try to get them correctly positioned. The joints has been mitred in readiness and I have plenty of filler available to hide any bad joints. Work also progressing well on the two poop deck ladder assemblies. Ladders have been assemblied. assemblied. Steps and planking fitted to the ladder platform.
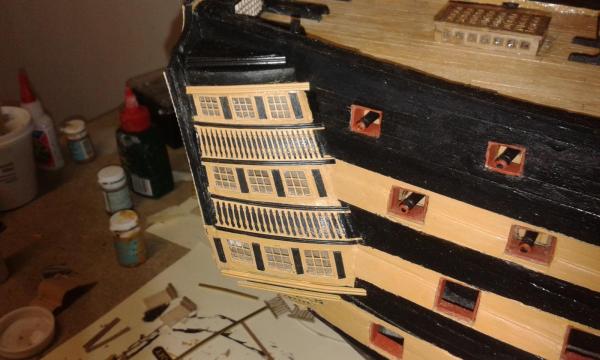

-
Hello Peter The gratings look fine. I too had trouble with bleeding with the paint. I'm using tamiya masking tape (from CMB). I was advised to press the tape edge to the hull to get a really tight fit, I found using a finger nail does the trick, and then when the paint is dry to remove the tape toward the painted edge. I have tended to fix my hull bleed problems by fitting small sections of tape to the affected areas a bit at a time. I too have been pondering the dummy gun fixings. I think I'm inclined making a guide out of balsa through which I can pass the micro drill. I'm a few weeks / months away before I have to give it some serious thought however.
-
Hi Jerry I know I'm hard on myself, but I also know I can do so much better. I always have been and always will be a bish bash bosh builder. There are two sets of ladder sides in the kit, as I found out last week, speaking with JoTika. Using my special ladder jig, the first poop ladder has already been assembled. The second ladder will be glued tonight
-
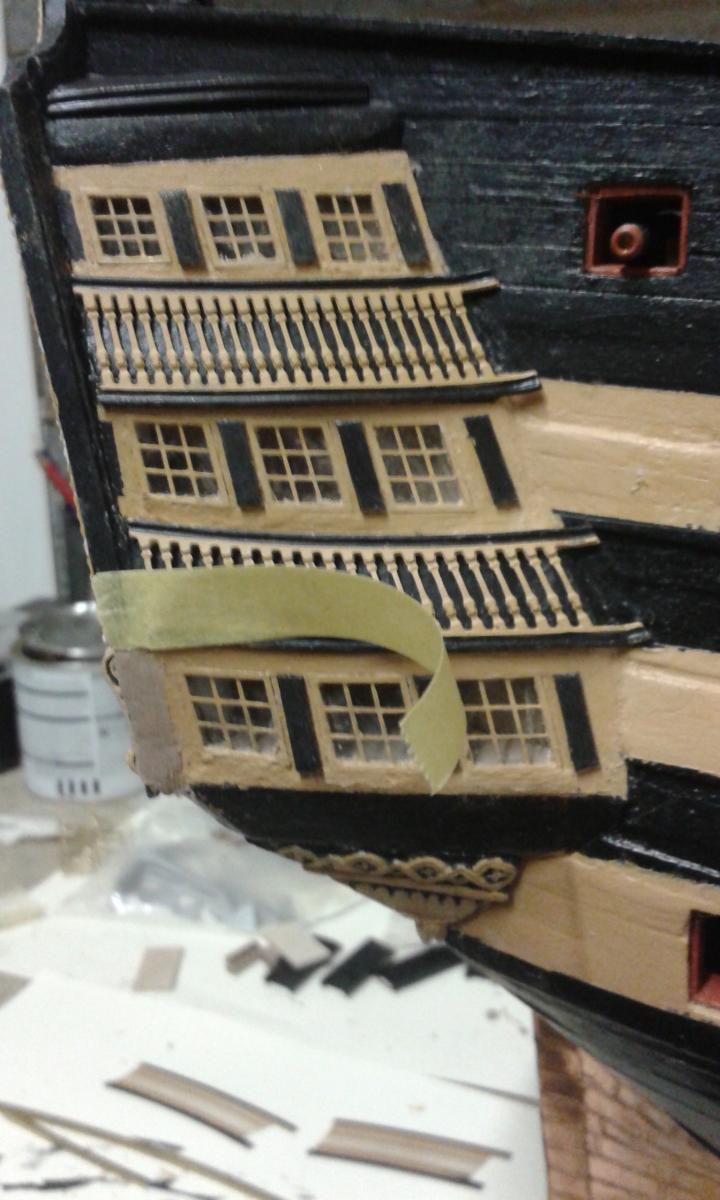
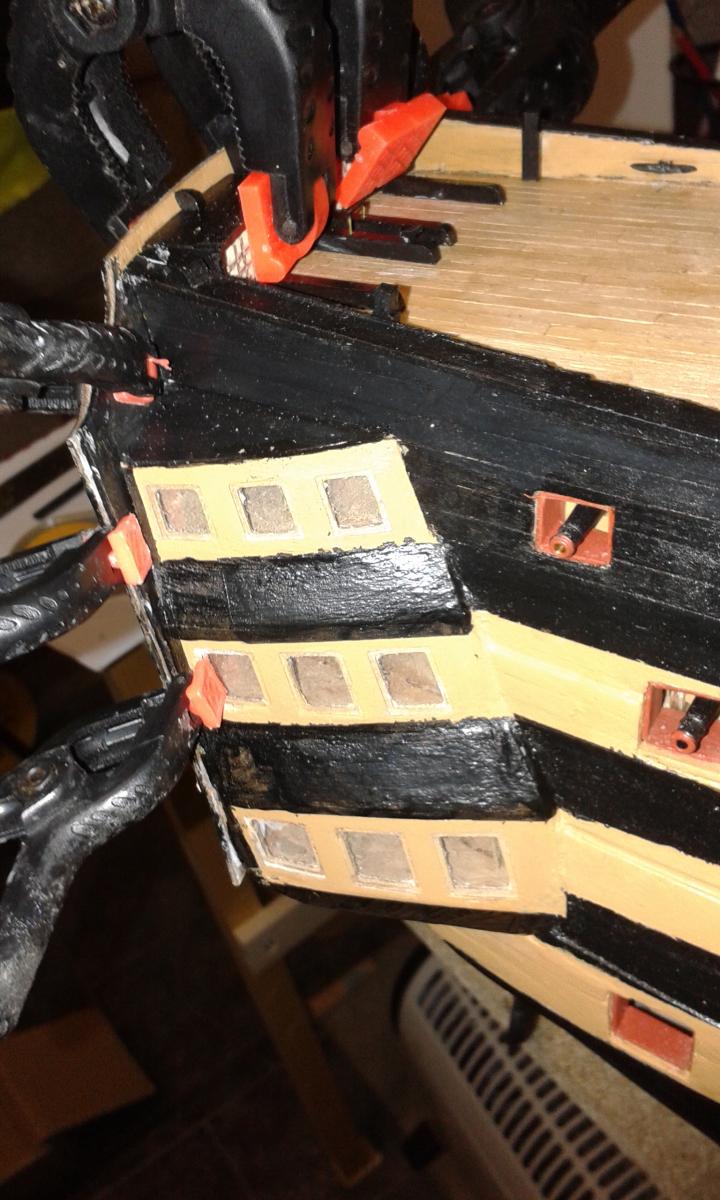
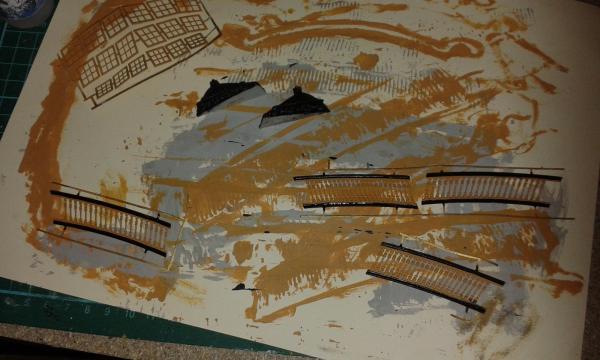
I've been thinking about the build, and if I were to start over again I would certainly tackle some of the construction tasks in a different order, the quarter galleries build being once such item. I'm not overly impressed with what I have achieved so far with the quarter galleries but to the untrained eye it may look passable. These two picture demonstrate what I mean. The first one shows the application of wood filler to fill a gap, the second shows the finished result. Having looked at the after photo, a bit more touch up required on the painting front. I expect to complete the work on the quarter galleries by the end of the week, all being well as I only have to finish fitting the brass profiles. I'm also working on the poop / quarterdeck ladder assemblies and will hope to complete also be the end of the week.

-
All moving along very nicely indeed. You seem to have it all under control. I wish I could say the same thing. I've nearly completed the quarter galleries, probably have stern and quarter galleries completed by next weekend.
-
Hello David, Looks look a bad accident, thankfully your finish ship didn't seem to show the scars of battle. In the book I'm reading it does state the internal wood fittings below the waterline were rotting due to the time it took to build these great ships and the lack of using any preventative measure to guard water; there was no methods available except for tarring and copper plating
-
Thanks Jerry I have already noted that there is plenty of time required for rework, repairs, etc. Working on Quarter galleries now.
-
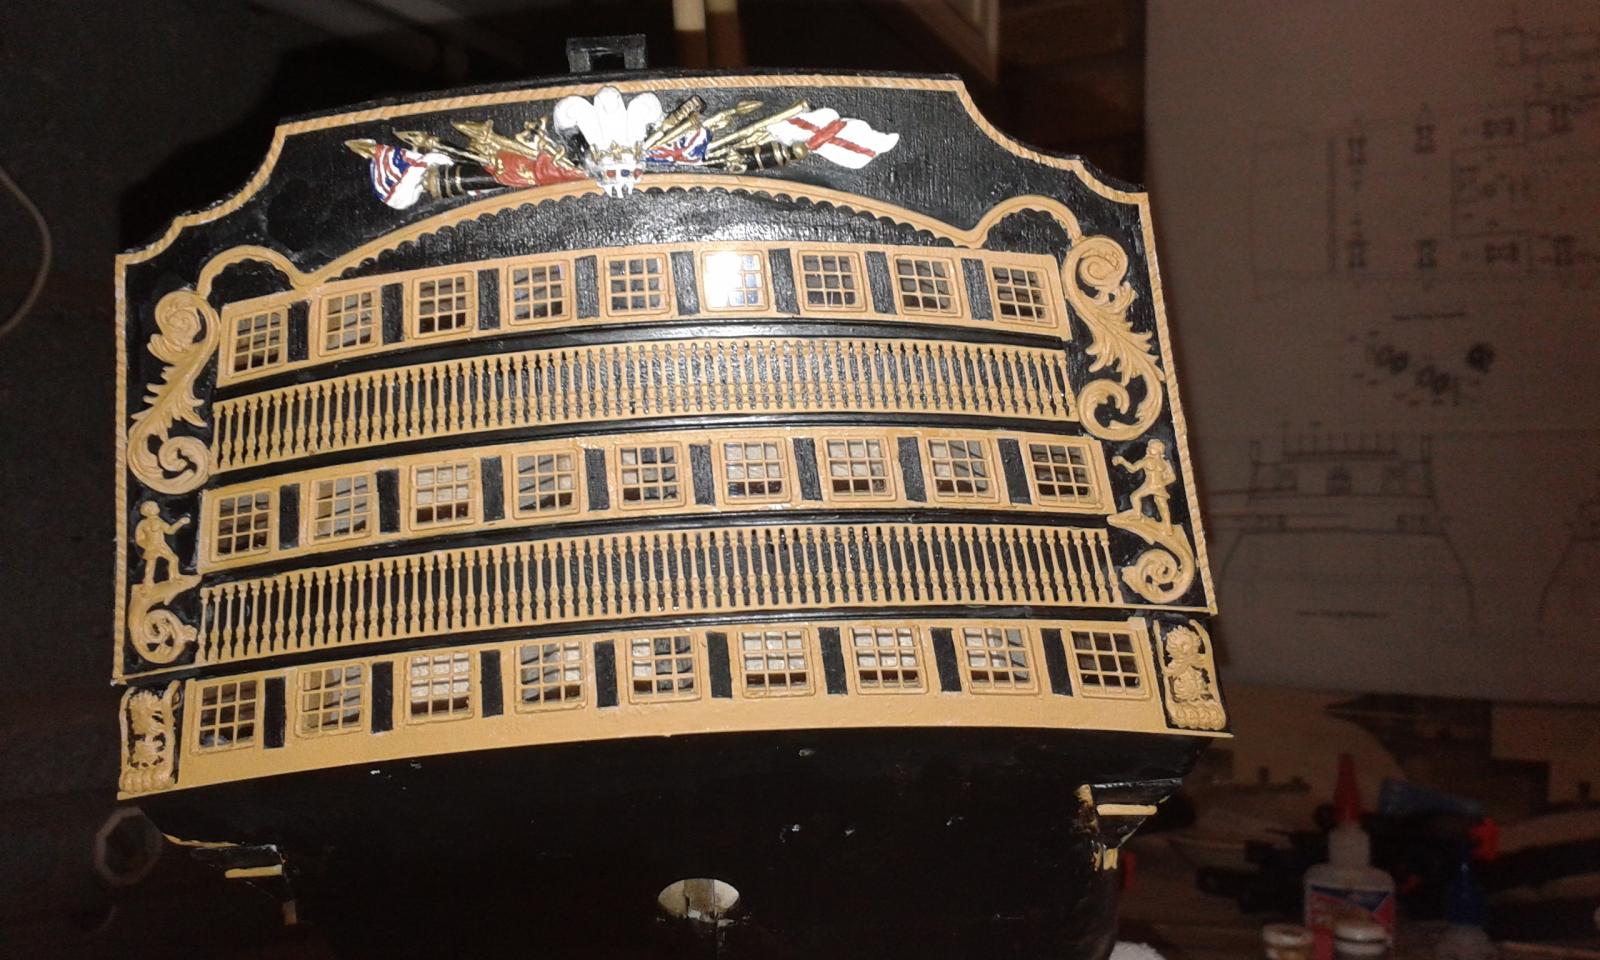
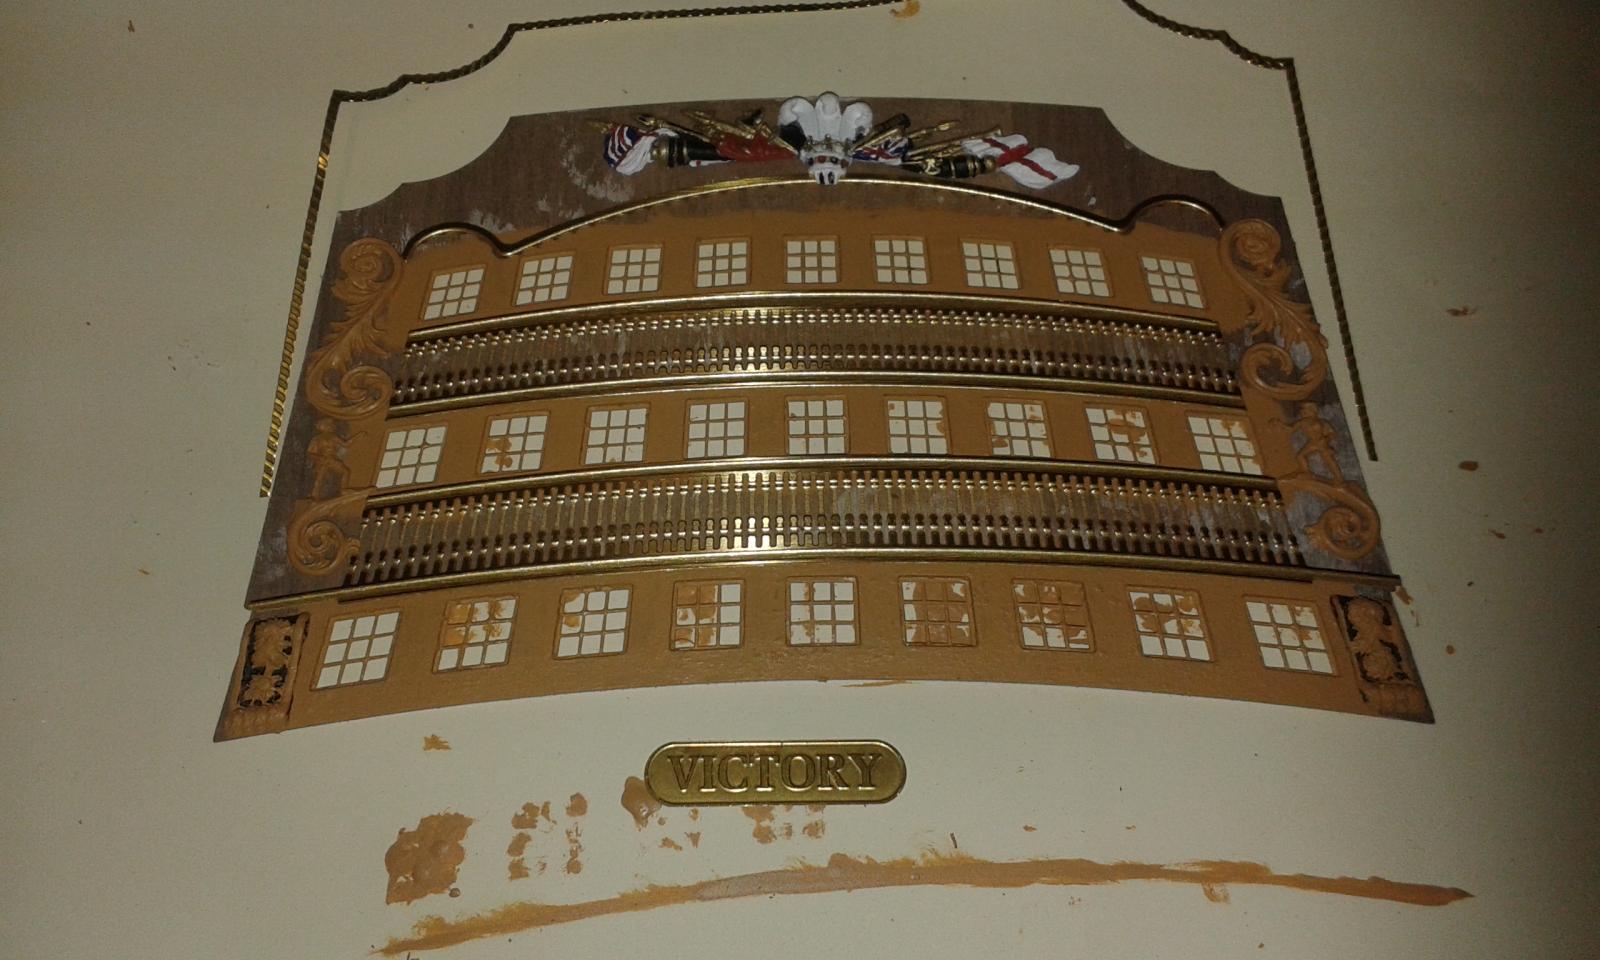
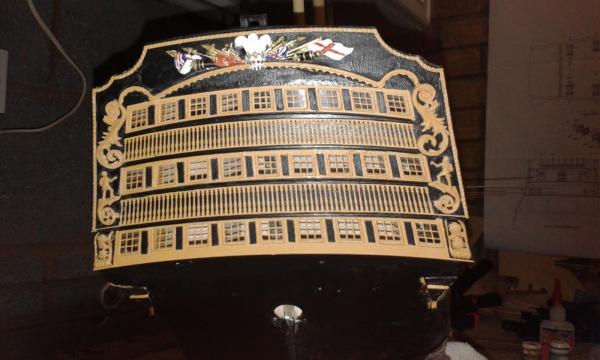
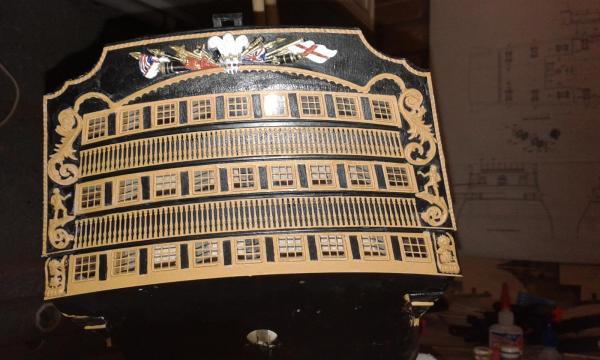
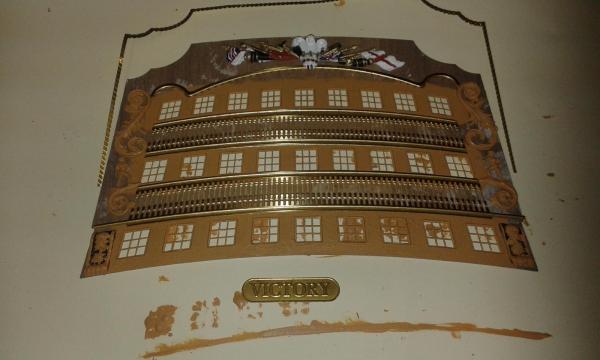
Finally completed the Stern Fascia panel. It turned out to be quite a tricky task, and I'm not totally happy with end result (the capping and outer yellow surround could be much better) but its not too bad. I did remove and refit the outer yellow surround to try to get a better fit, without too much luck. You can't tell from the picture but the stern crest did split in two and it took some work to make good. As can seen from the pictures I will need to touch up some of the black paint. Picture quality not great. I have shown two almost identical pictures, I added the second on as it shows the light reflecting back off one of the stern windows.
-
Great job Jerry, and you seemed to have made fabulous progress. I completed the stern fascia panel tonight, and will be posting some pictures over the weekend. Poop ladder assembly and quarter galleries next.
-
Hello Mort Thanks for that, it does look a very good book!. I'm currently reading Roy Adkins book Trafalgar: A Biography of a Battle which tells the story using eye witness accounts. It is difficult to comprehend just how bad conditions must have been during such a close force battle with the noise, destruction and loss of life. One account told of dead gun crews been thrown out of a gun ports to keep the gun deck clear.
-
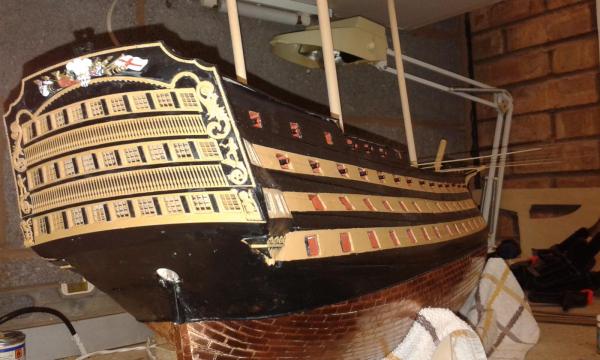
I've started reading a book about the Battle of Trafalgar. I did find it quite amusing that from the sighting of the French & Spanish Combined fleet leaving the harbour it took over 4 hours for Nelson's ships to close the relatively short distance before they could engage in battle due to the light winds; the comment in the book was the ships were moving slower than a swimmer in the water. It was also very interesting to read how many of the fittings & animals were throw overboard prior to the battle, when they were clearing the decks ready for action. I finally fitted the stern panel to the hull tonight, even with the clamps its made a big difference to the hull. Slight bit of touch up required on the painting front. Also I have prepared the stern galleries and their fittings ready for the next stage, even though there is still a bit more work to complete on stern panel before I can move on.
-
Can't offer advice on staining but it looks very good so a good sanding and varnish would be a good way to go.
-
Hi Jerry I think anyone would be hard pressed to spot the slight size difference, she's coming along nicely, keep up the good work.
-
Hello Jerry & David Many thanks for you kind comments, I agree there is a lot of hull work ahead. I want to finish the poop deck but still waiting for new ladder sides from Jotika as the ones supplied in kit were damaged. Not sure if I'll watch MOTD tonight but will be watching ManU tomorrow and have tickets for the two home games in February.
-
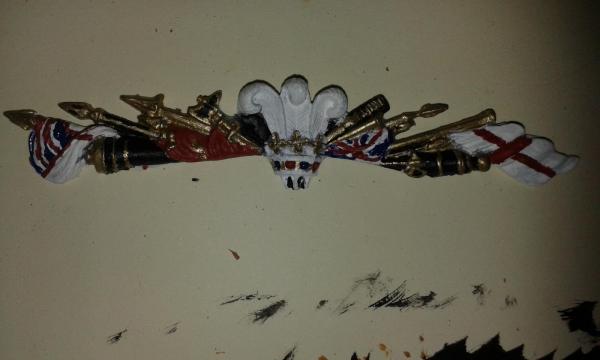
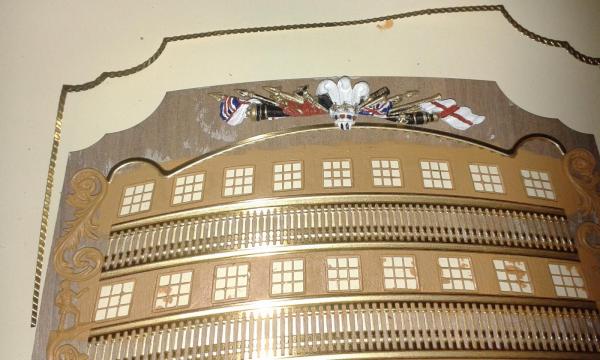
Continued with painting of Stern panel, managed to complete. Close up of Stern Crest I like the full effect with the stern fittings dry fitted, I do have same black strips to add between each window.
-
Hi Jerry It was good to get back to work. The stern windows were inserted from the back, may not be that clear from the photos. I took my time with the stern centre piece using a detailed high quality image from the HMS Victory as my painting guide and I'm very pleased with the end result.
-
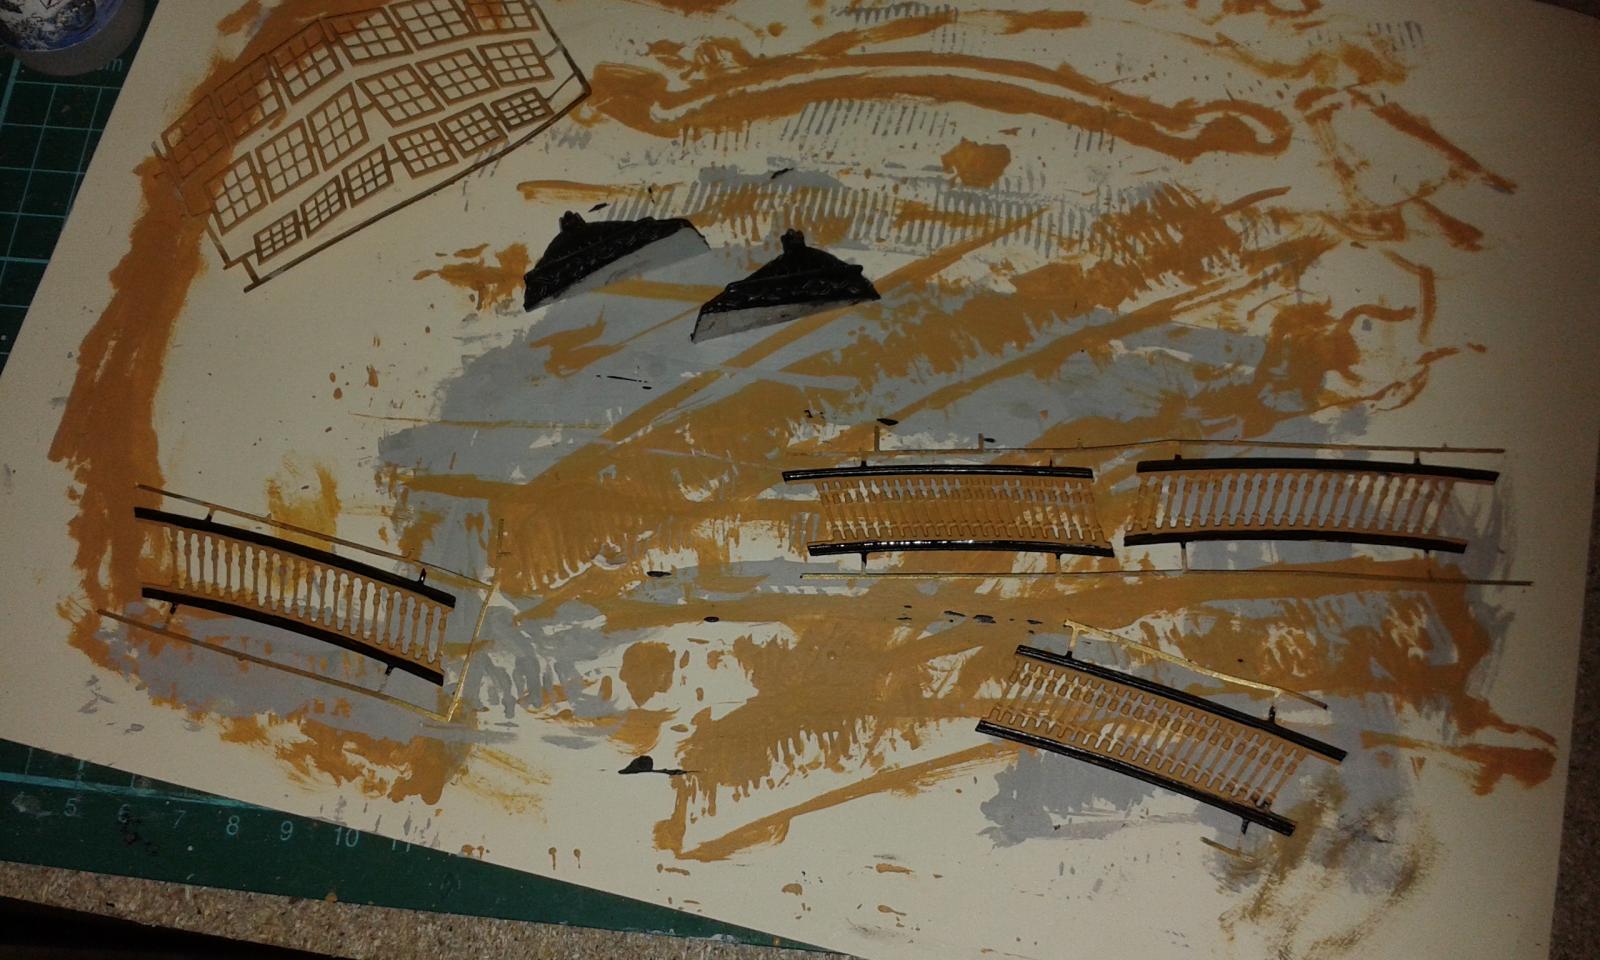
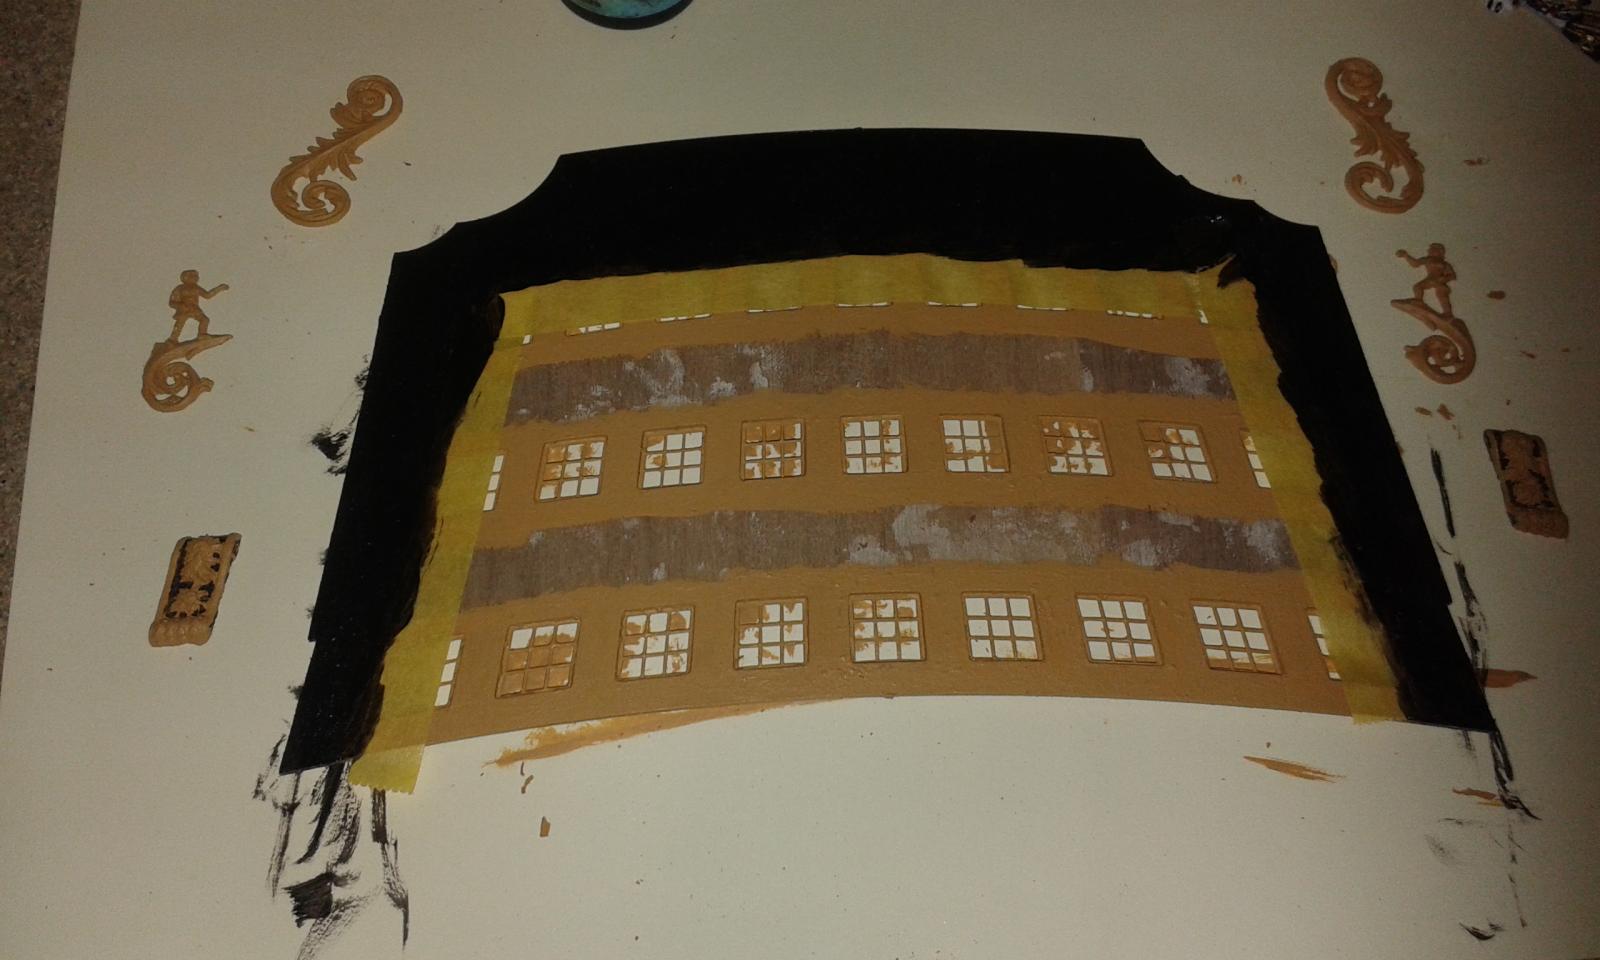
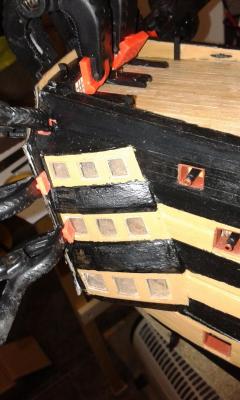
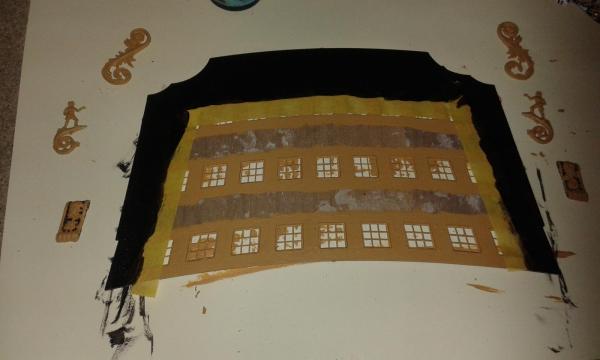
Material arrived from CMB (paint and brushes) so I was able to continue with work on stern. Still waiting for replacement parts from Jotika to complete poop to quarter deck ladder assembly. Current Status of Build Stern windows added and painted yellow, other main features have also been painted and dry fitted to panel to show full effect. Close up of some of the stern features. Added some taping before I started to add the black surround. Primer added to other brass stern fitting prior to painting yellow

-
You seem to be in full flow again Jerry - well done. I'm remember the ease I had with working on the Scottish Maid compared with the Victory. Parts arrived from CMB so I can get back in the shipyard tonight, except they did send me a wrong part which is not essential at the moment. I hope to be able to post some new pictures over the weekend.
-
Nice neat progress and I like you variation. And a nice picture of Lawrence as well.
-
Thanks Jerry
-
I have managed to solve the 3 clues (Heston Blumenthal, High Fulham & Tom Kilburn) Work has stalled on boat building. The damaged parts in the kit should arrive later this week from JoTika so I can complete the poop deck ladder assemblies. Materials to enable to complete the painting of the stern are in the post from CMB so should arrive tomorrow. I could start rigging the cannons, but for some reason I have been putting that task off. Can anyone suggest a good tip to stop paint bleeding. I use Tamiya masking tape but when I remove the tape it seems to have bled under the tape. I always paint away from the tape edge. I had had bled problems either removing the tape as paint is drying or after paint had dried. I think the answer lies in how the tape is removed, i.e. lift away or toward the painted tape edge.
-
Keep up the good work, I'm really impressed with the progress your have made. When searching in the cupboard earlier today above the HMS Victory workbench a heavy metal object fell out and landed on the quarterdeck smashing the companionway assembly. After much swearing I examined the damage and was able to effect a repair. Work slowing down at moment as urgently needed supplies are currently out of stock from CMB and Caldercraft are on an Xmas shutdown.
-
Nice work. Have a great new year celebration. I've had to stop work as I need a replacement part from Jotika as the part provided in the kit was damaged (not by me, it's a manufacturing defect). I would like to press on with the stern but I need to order some additional paint and other materials from CMB.
-
If you're not happy with the varnished wood finish then the next best option is the white paint.
-
I looking for a different type of help. Every year I undertake the Blue Coats Quiz. There are a 100 questions and I have three clues left so any help greatly appreciated. The quiz always has a theme and this years theme will include names, nicknames of real or fictional people, creatures, organisations, objects, places and events, the title and subtitles of literary and artistic works, songs films and radio/ TV programs, phrases, sayings and quotations. Each answer work include a Borough, district, street, railway station, famous buildings, geographic features and landmarks which all lie within the boundary of Greater London. For example: Number Two For The Kinks in 1967 (8,6) = Waterloo Sunset (Waterloo is a London Station) Obama's Workplace (4,6) = Oval Office (Oval is a well known sporting venue) The 3 questions I'm looking for answers are Dinner Patron (6,10) Throw This If You 4 Or More (4,6) One Of The Fathers Of The Baby (3,7)