Glenn-UK
-
Posts
3,168 -
Joined
-
Last visited
Content Type
Profiles
Forums
Gallery
Events
Everything posted by Glenn-UK
-
 Bravo, an excellent build. I have been copper plating my rudder, which I have to say has been my least favourite task to date.
 -
Maybe you need to ask Charlene to check your work before you cut lines? Look good though
-
You can always buy more tiles from CMB if necessary. Good luck with the plating, nice looking start. What is the black / red colour tool in you previous post?
-
Still thinking about the lathe, and yes the grandkids toys make a very nice backdrop.
-
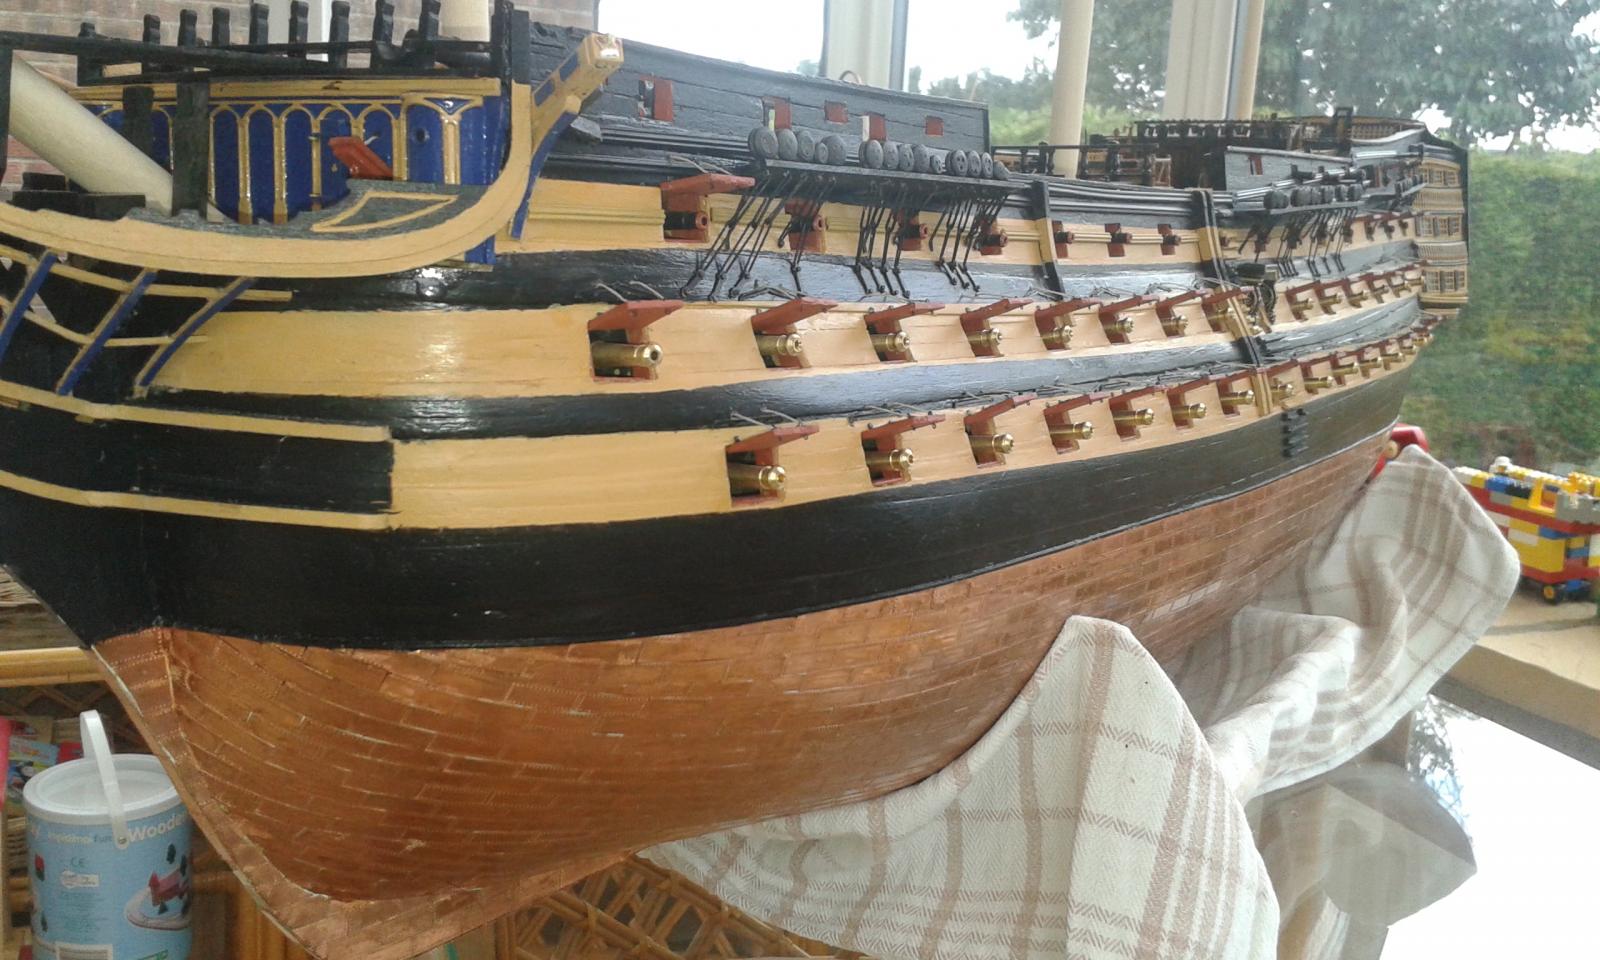
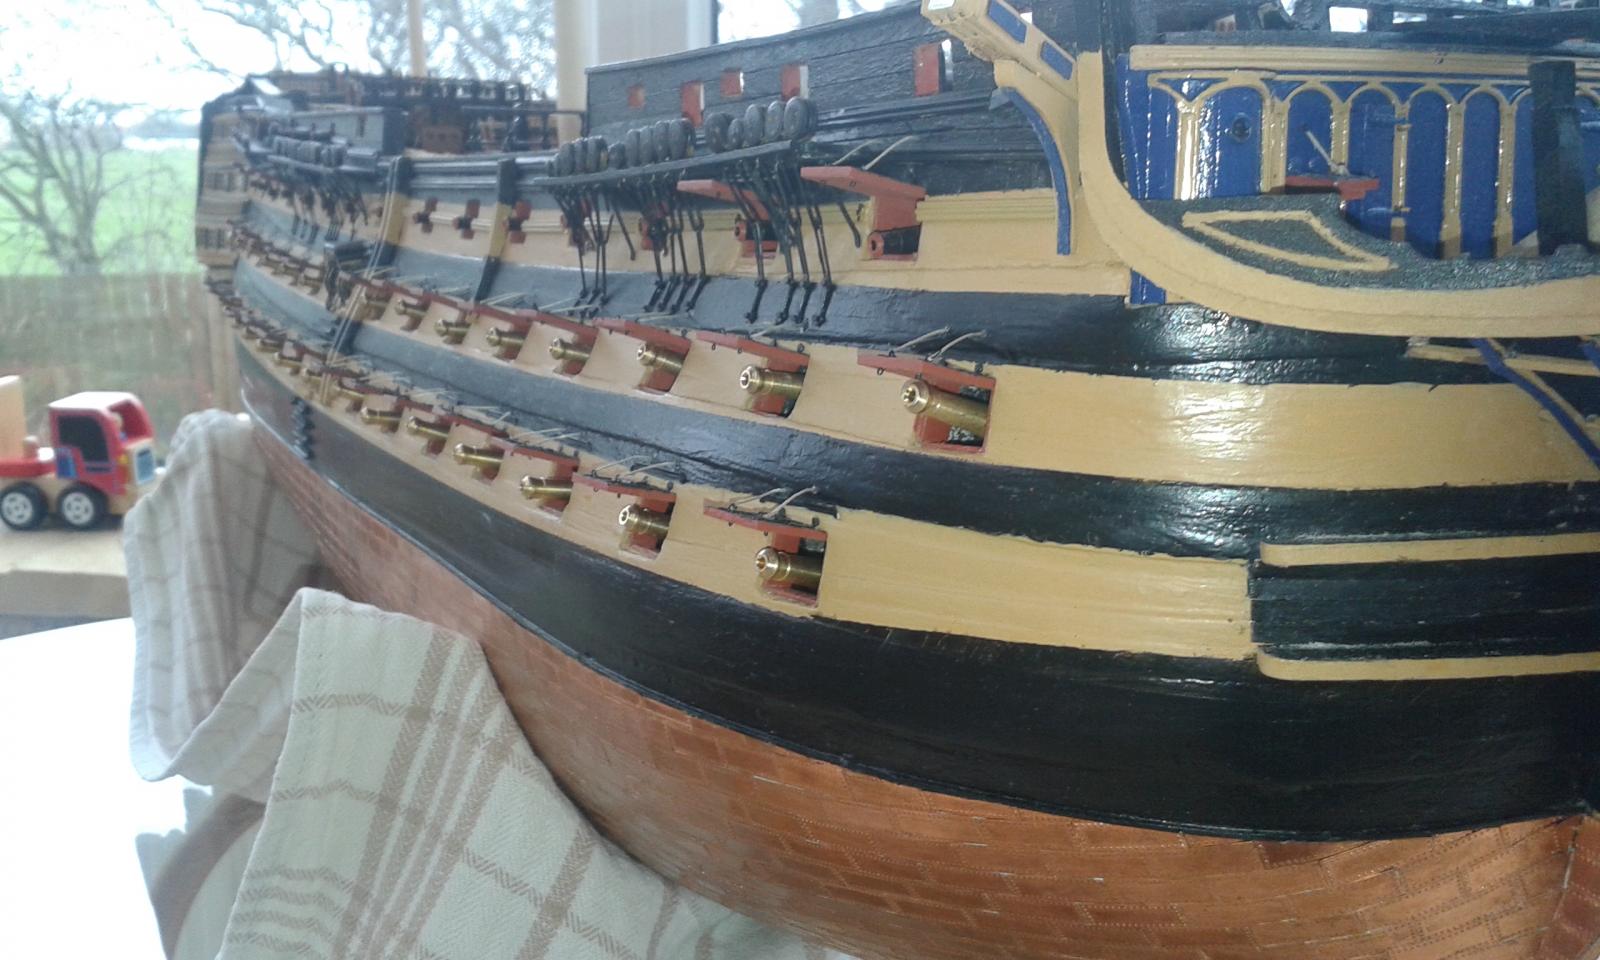
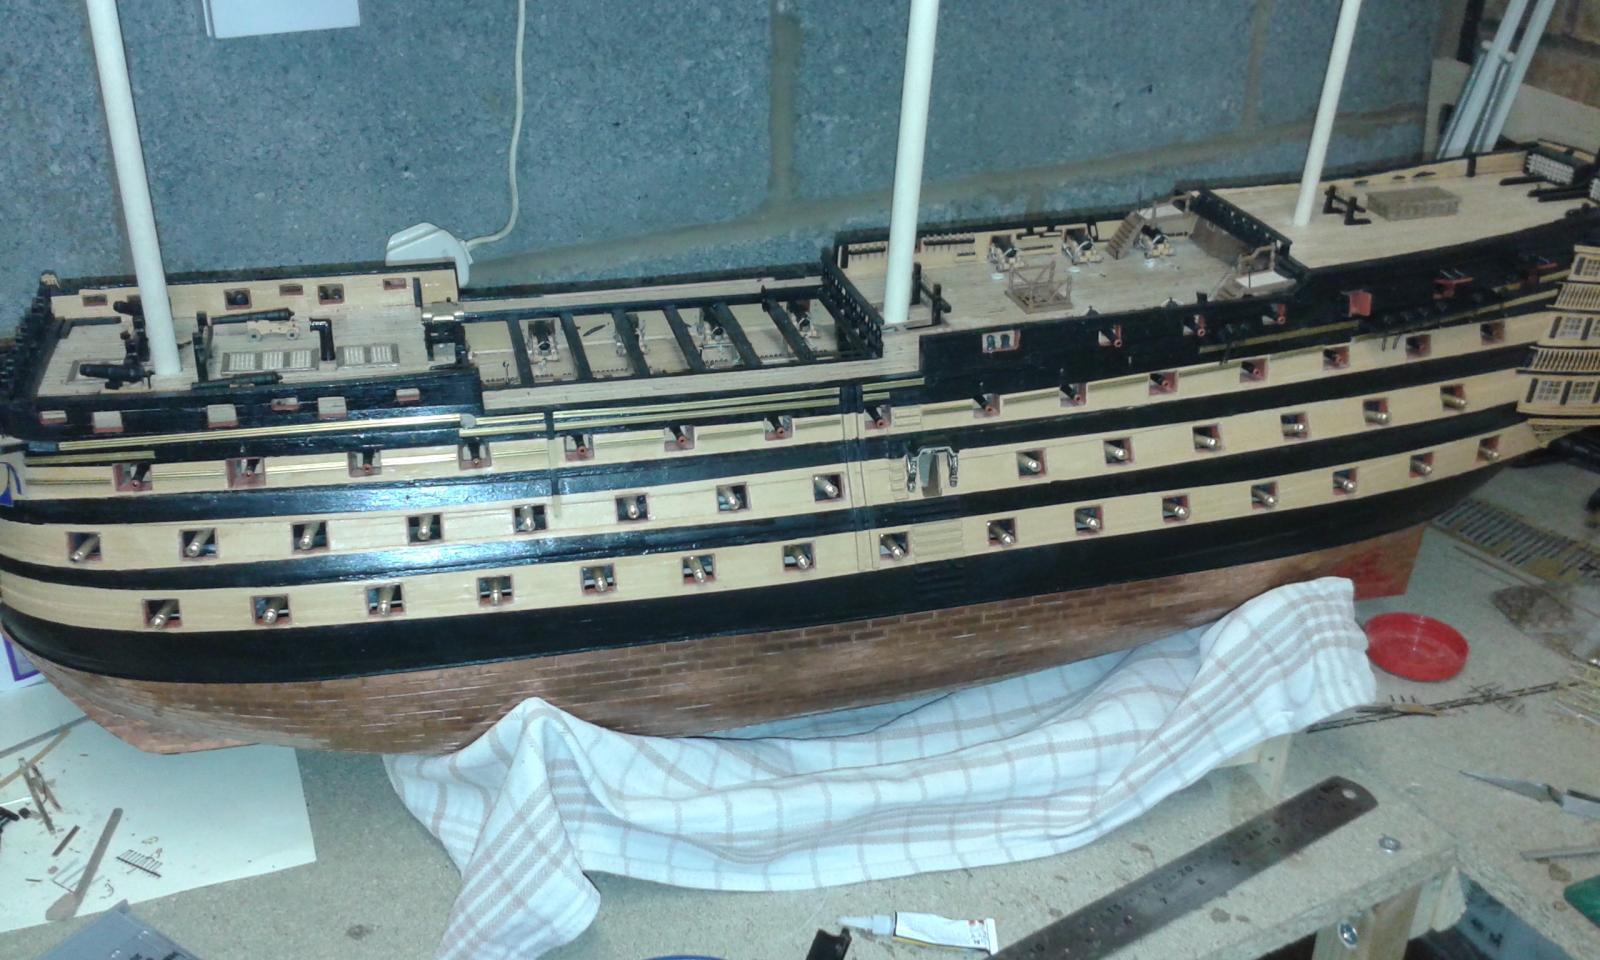
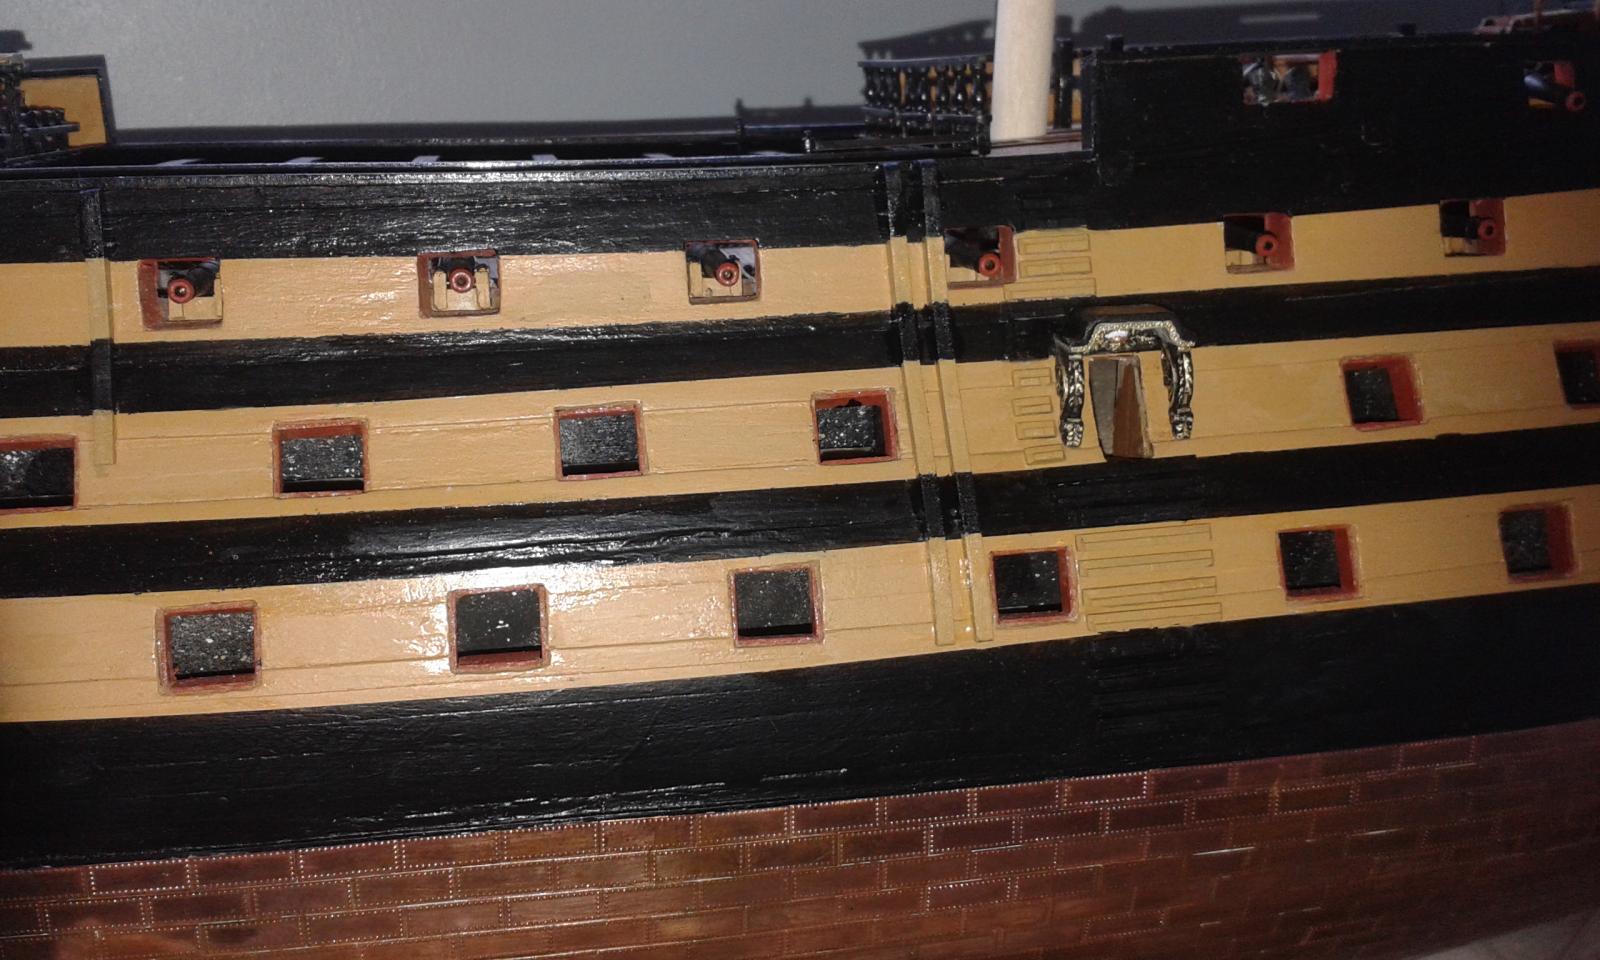
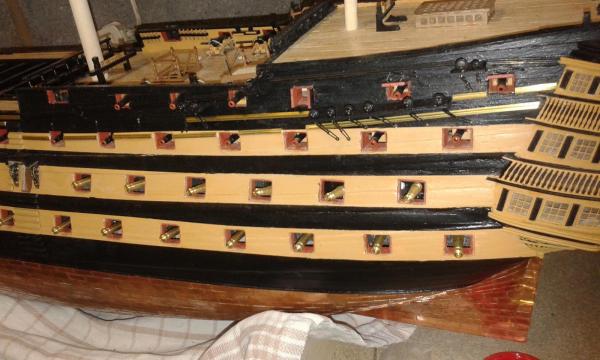
Had a good session yesterday in the shipyard, and a couple of hours today and I have now finally completed the gun port lids on the port side. I will paint and fit the dummy cannon barrels in slow time, as I plan to move on to the rudder assembly. View of Port Side View of Starboard Side


-
Looking good, I'm amazed at your build pace, it rivals Jerry' s speed and that's saying something!
-
See your were able to obtain a self healing mat, enjoy your new hobby, it does become very addictive.
-
Hello Jerry Look on CMB or Amazon for Self Healing Mats, I was able to buy mine from my local hobby shop. http://www.cornwallmodelboats.co.uk/cgi-bin/sh000001.pl?REFPAGE=http%3a%2f%2fwww%2ecornwallmodelboats%2eco%2euk%2facatalog%2fhand_power_tools%2ehtml&WD=healing%20self&PN=cutting%2dmats%2ehtml%23aT_2dPKN6004#aT_2dPKN6004 http://www.amazon.co.uk/s/ref=nb_sb_ss_i_0_7?url=search-alias%3Ddiy&field-keywords=self%20healing%20cutting%20mat&sprefix=self+he%2Cdiy%2C294
-
Soon be time to crack open the champagne looking at the progress your are making. Good job.
-
Looks like Charlene is having fun
-
Hello David I have not bought a lathe so far still thinking about it. I'm considering the "Proxxon Micromot DB250". I can also get a 3 jaw chuck to go with it. I could simply use my variable speed drill and make a lathe jig to go with it. Knowing me I will probably end up buying the lathe in the next few weeks.
-
Hi Jerry I used brass blackener C83999 from CMB. I found the process takes longed than the instructions indicated, I normally leave them in the solution for 2 or 3 days for the best results. I do clean before insertion using white vinegar and soaping water.
-
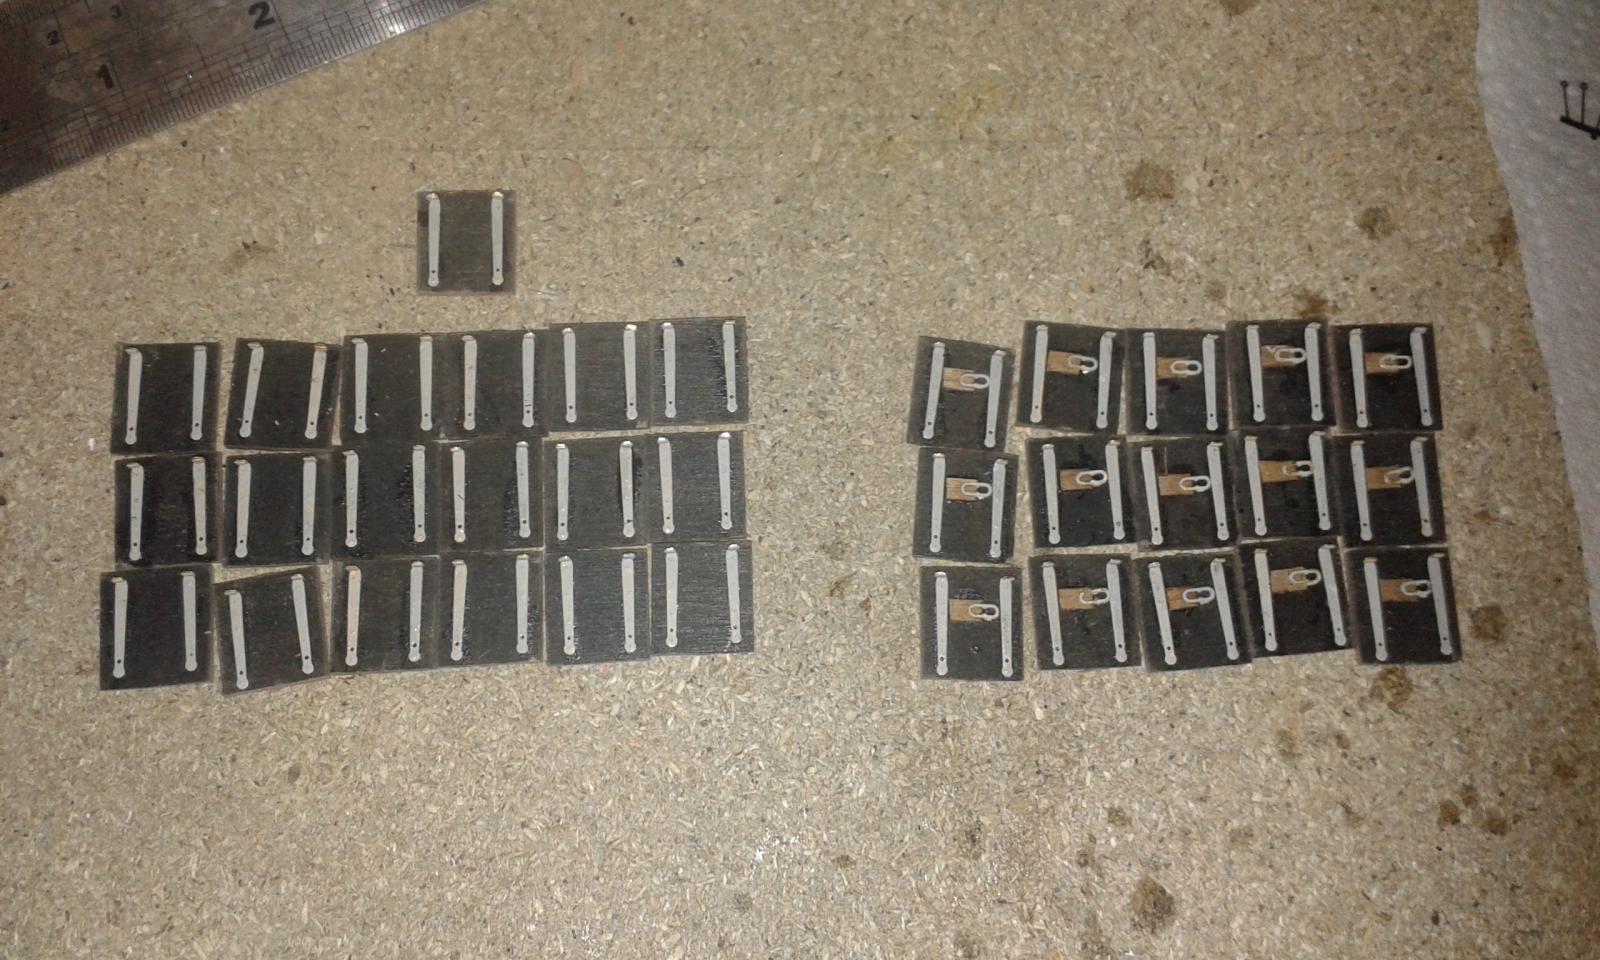
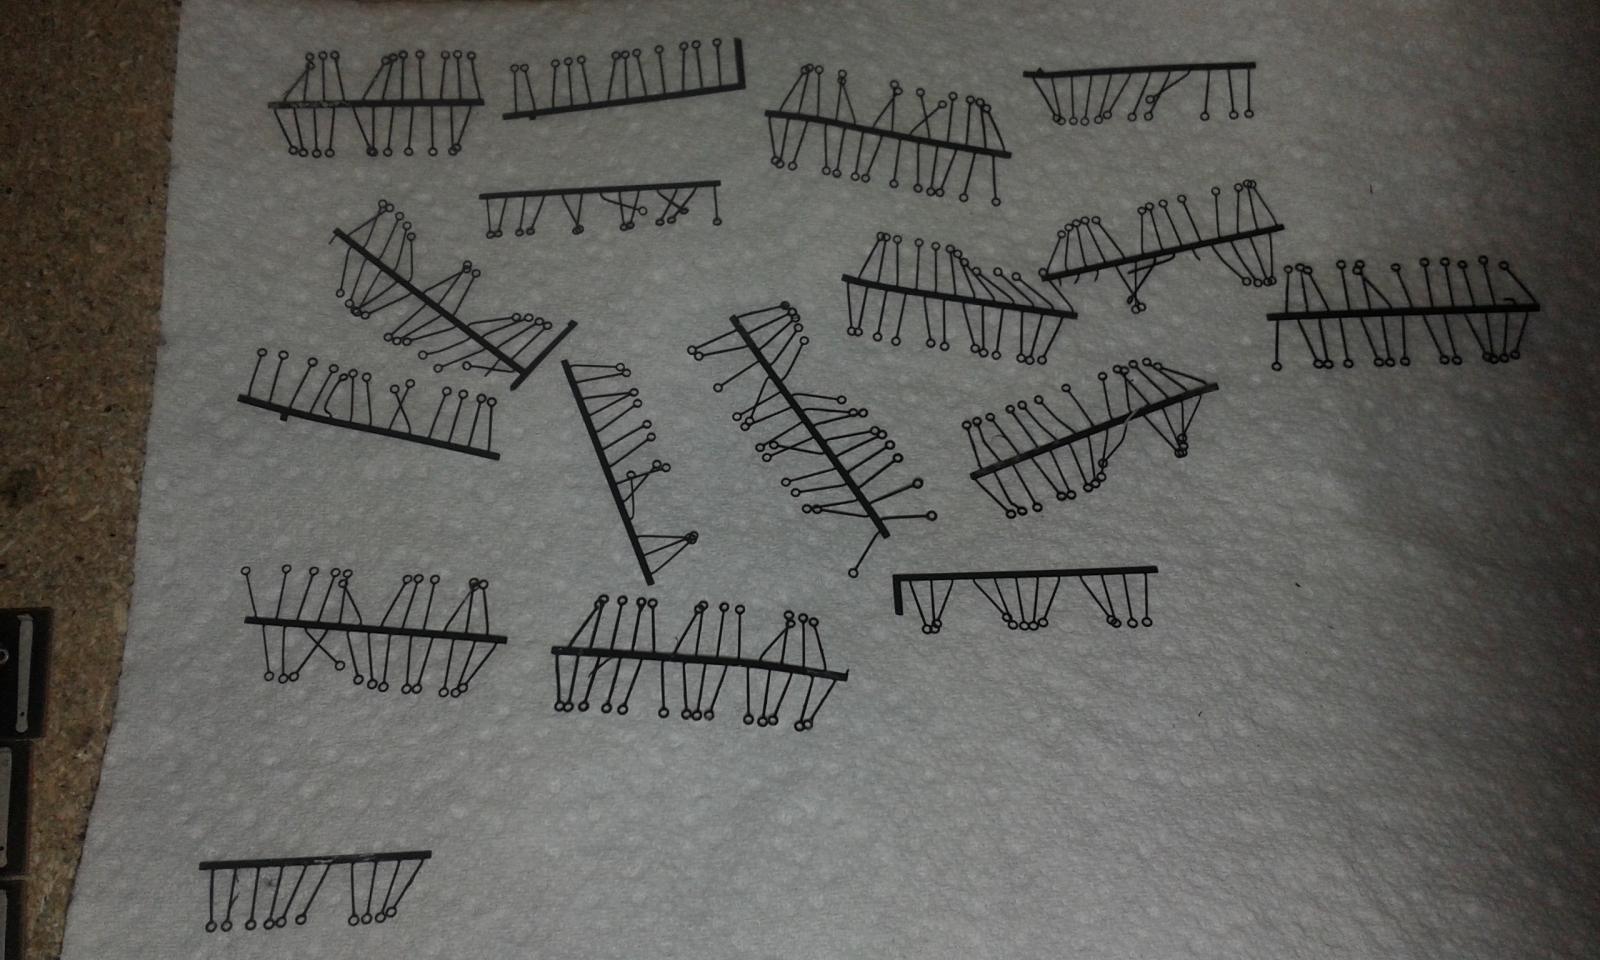
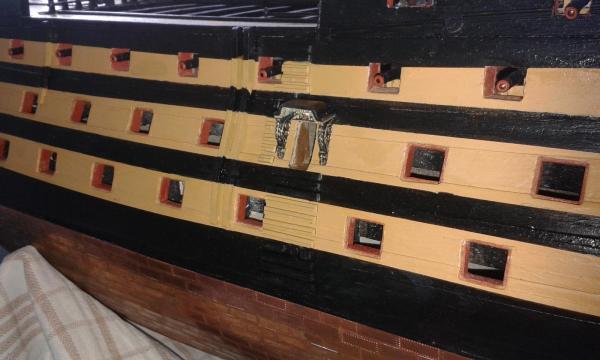
Assembled 34 gun port lids tonight, just got to drill the lids and fit 136 eyelets, 4 per gun port lid which will be 2 or 3 nights work, then 2 or 3 nights work to fit and rig the gun port lids to the port side of the hull. I have chemically blackened the eyelets which I find much better than painting for these small pieces. All being well I aim to have all this work completed sometime by weekend after next and will move on to the rudder assembly.


-
All seems to be going smoothly, a very nice set of photos, as always. You'll have the running rigging completed in no time.
-
Look forward to seeing your results, an interesting art form. I agree some modellers have enhanced their builds in this manner.
-
Been a good weekend, back at work tomorrow, after a few days off with my glass back which seems to be on the mend but going for a MRI scan in a few weeks time. I will look out for the Bounty build log. I'll start work on completing and fitting 34 gun port lids on Tuesday as tomorrow I'll be babysitting the grandkids.
-
Hi Jerry. I'm using a pencil on the edges, but only a light colouring. According to Chris Watton adding effects for caulking and treenails is not necessary for this build based on scale. Hopefully once complete, smoothed with razor blade and varnished it will look more appealing. Trust your model boat social event was a great night out.
-
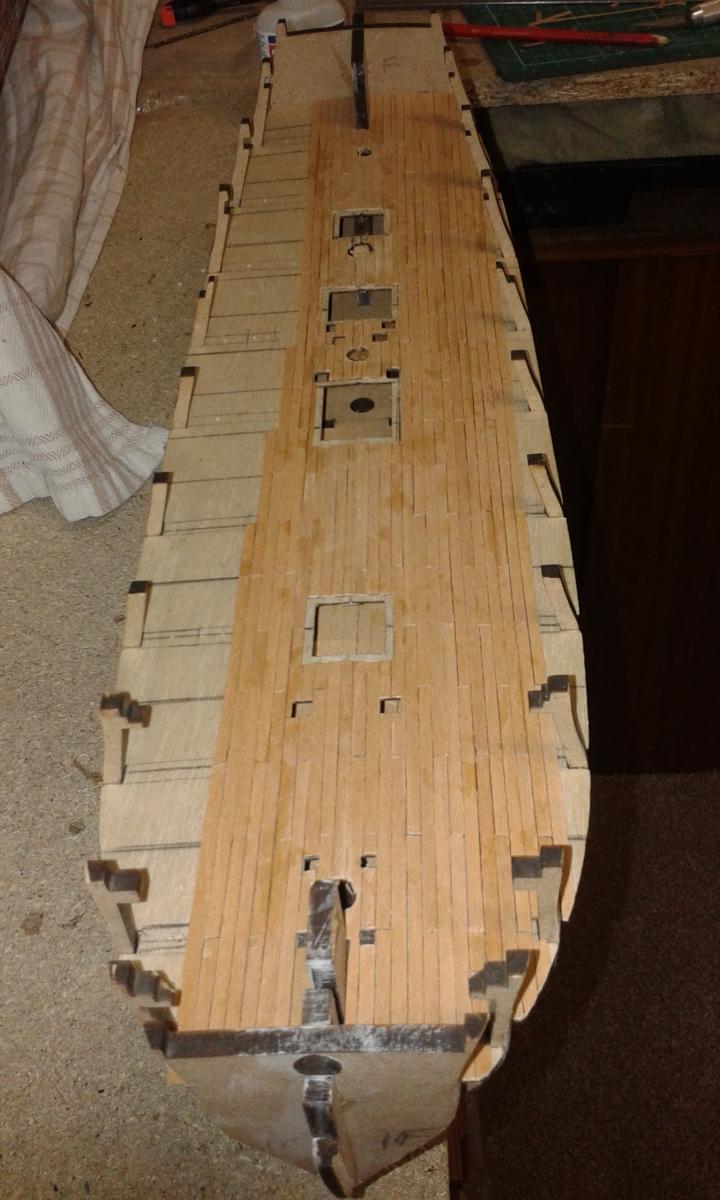
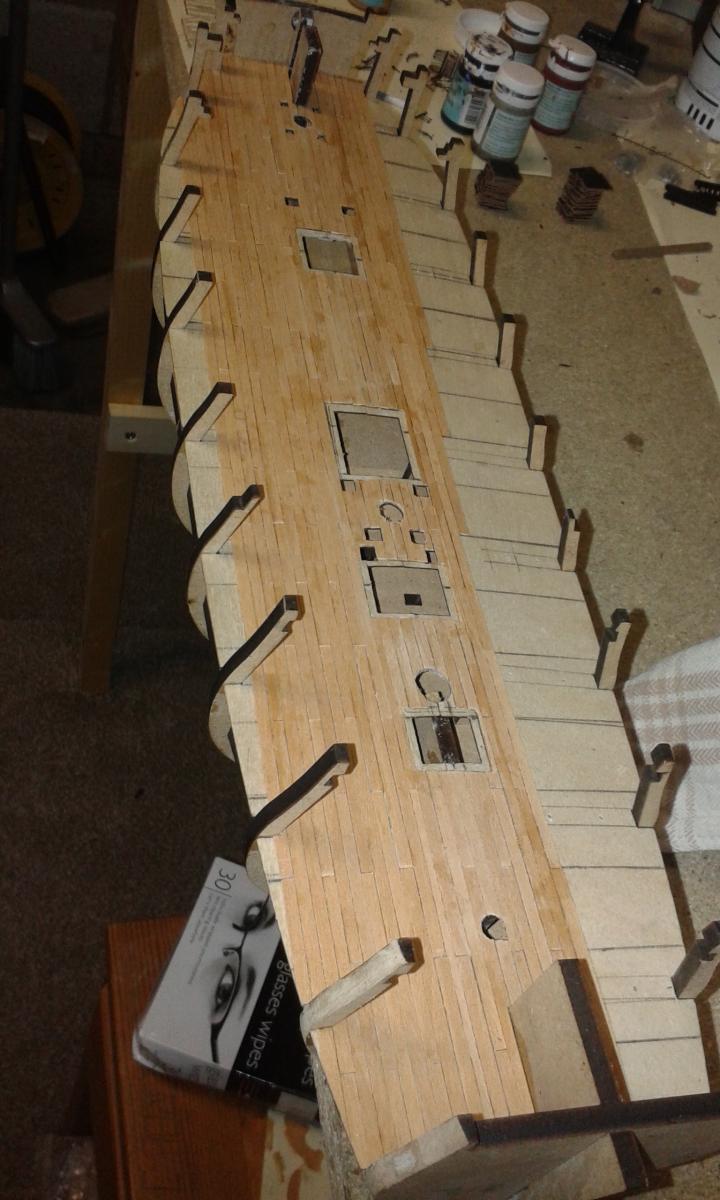
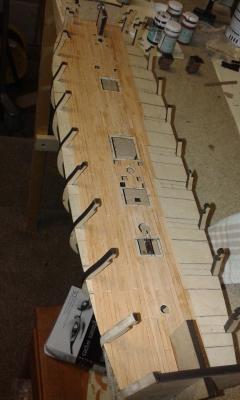
Time for a progress update, as I continue on with the gun deck planking. I have made good progress today and have broken the back of this task and I would expect to complete next weekend, noting the planking near the bulkheads that have to removed will be completed once the gun ports patterns have been fitted. Pictures of progress to date. Build Index - hyperlinks 1. Prework - dry fitting bulkheads 2. Beading Line and Rabbet 3. Lower Gun Deck Fittings 4. Grating Assembly 5. Dry Fit Main Gun Deck and Fitting 6. Gun Deck Fitting Prework 7. Lower Gun Deck Glued and Pinned 8. Pre Gun Deck Planking Work 9. Start of Gun Deck Planking 10. Gun Deck Opening Cleared During Planking 11. Gun Deck Planking Work In Progress


-
Congratulations on completing the clove hitch marathon, it's a major milestone in any build. I plan to split my free time this weekend so I can complete Pegasus gun deck planning and Victory's channels, just waiting for the epoxy to set on the foreword channel before attaching the chain plates.
-
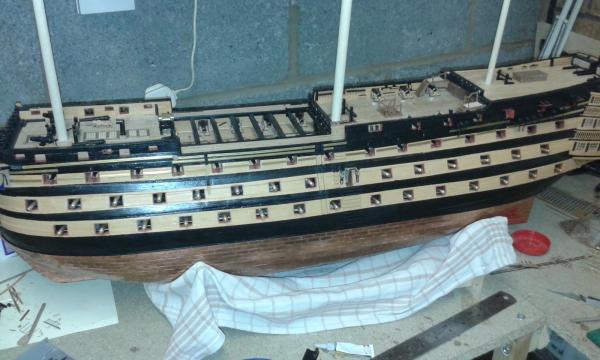
Made good progress, all the brass profiles have now been fitted and holes drilled for the cannons. I just have the fit the dead eyes and chain plates to forward channel before I move on to fitting the rigols and gun port lids (which still need to have the hinges and eyelet fitted). Final task will be to paint and glue the cannons in position. The light at the end of the tunnel has finally been turned on with this phase of the build
-
Hello David I simply moved the Victory to the Utility Room for natural light for the pictures, but it will be returned back to the garagefor my next session.
-
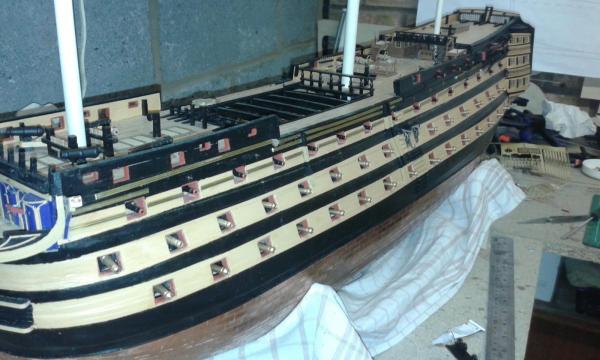
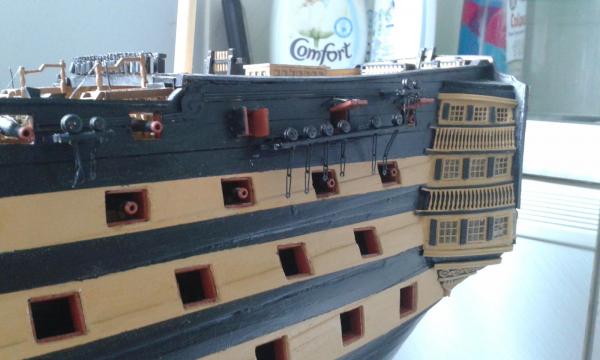
Just a quick update. Work is progressing well on the port side hull fittings. Picture of status I have completed work on the side entry port, fenders and cheesetree. The 3 rear channel assemblies have been fitted, together with the brass profiles. I hope to have the port side completed within the next 2 or 3 weeks, then I plan to turn my attention to the rudder assembly and hammock cranes.


-
No just me being stupid and I have corrected the post.
-
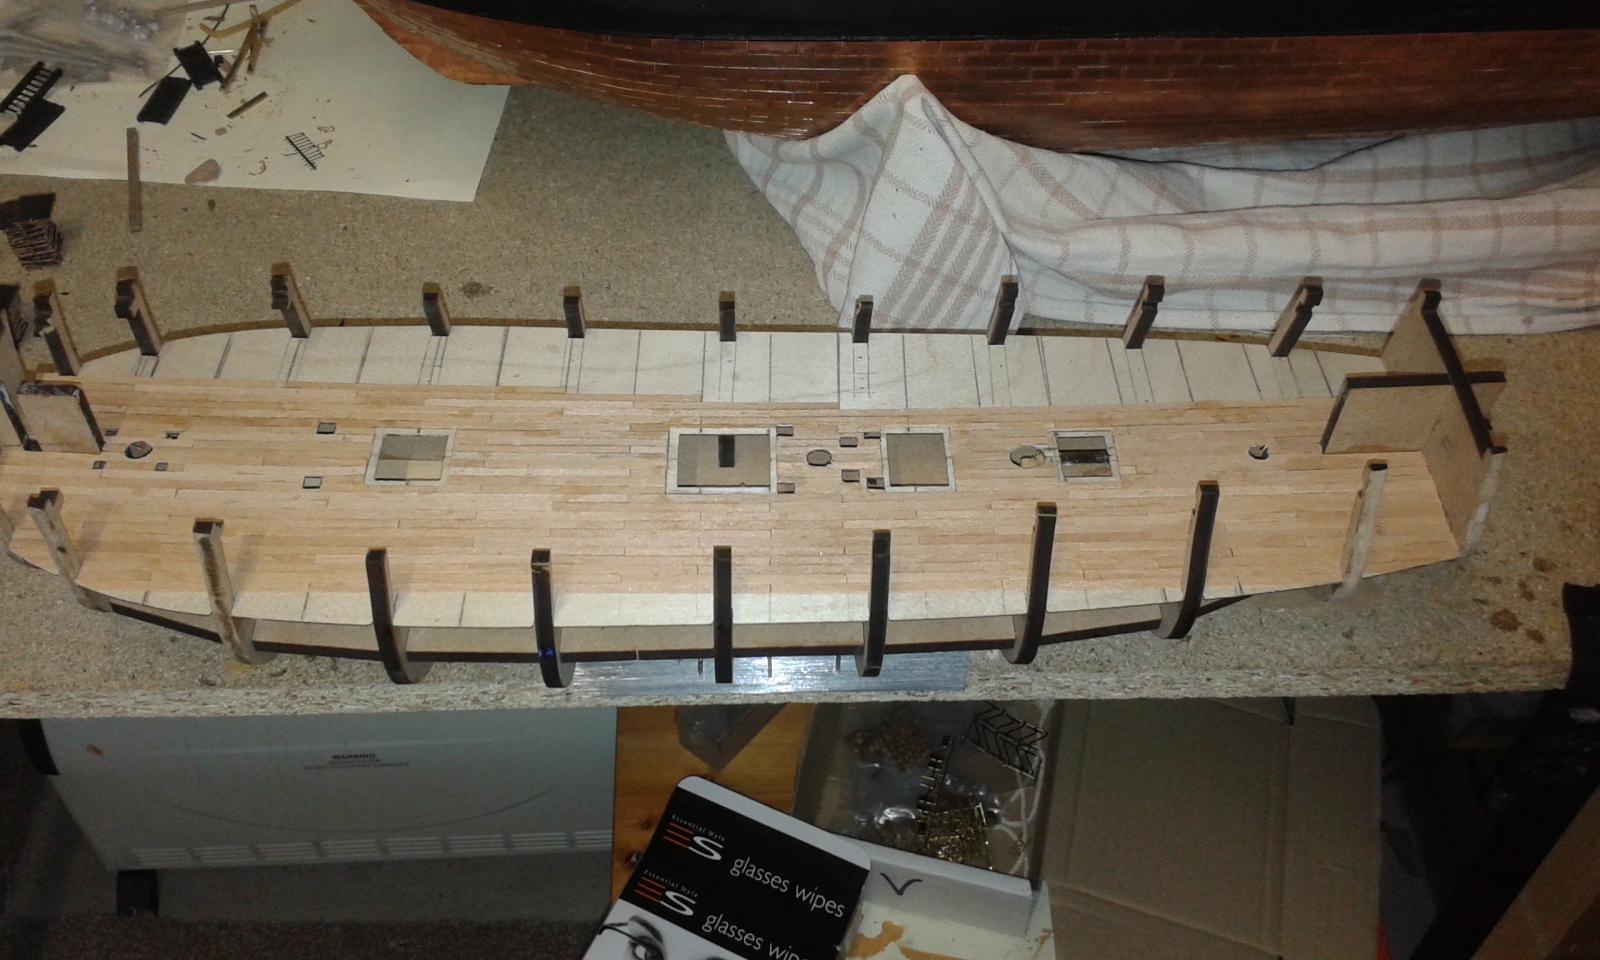
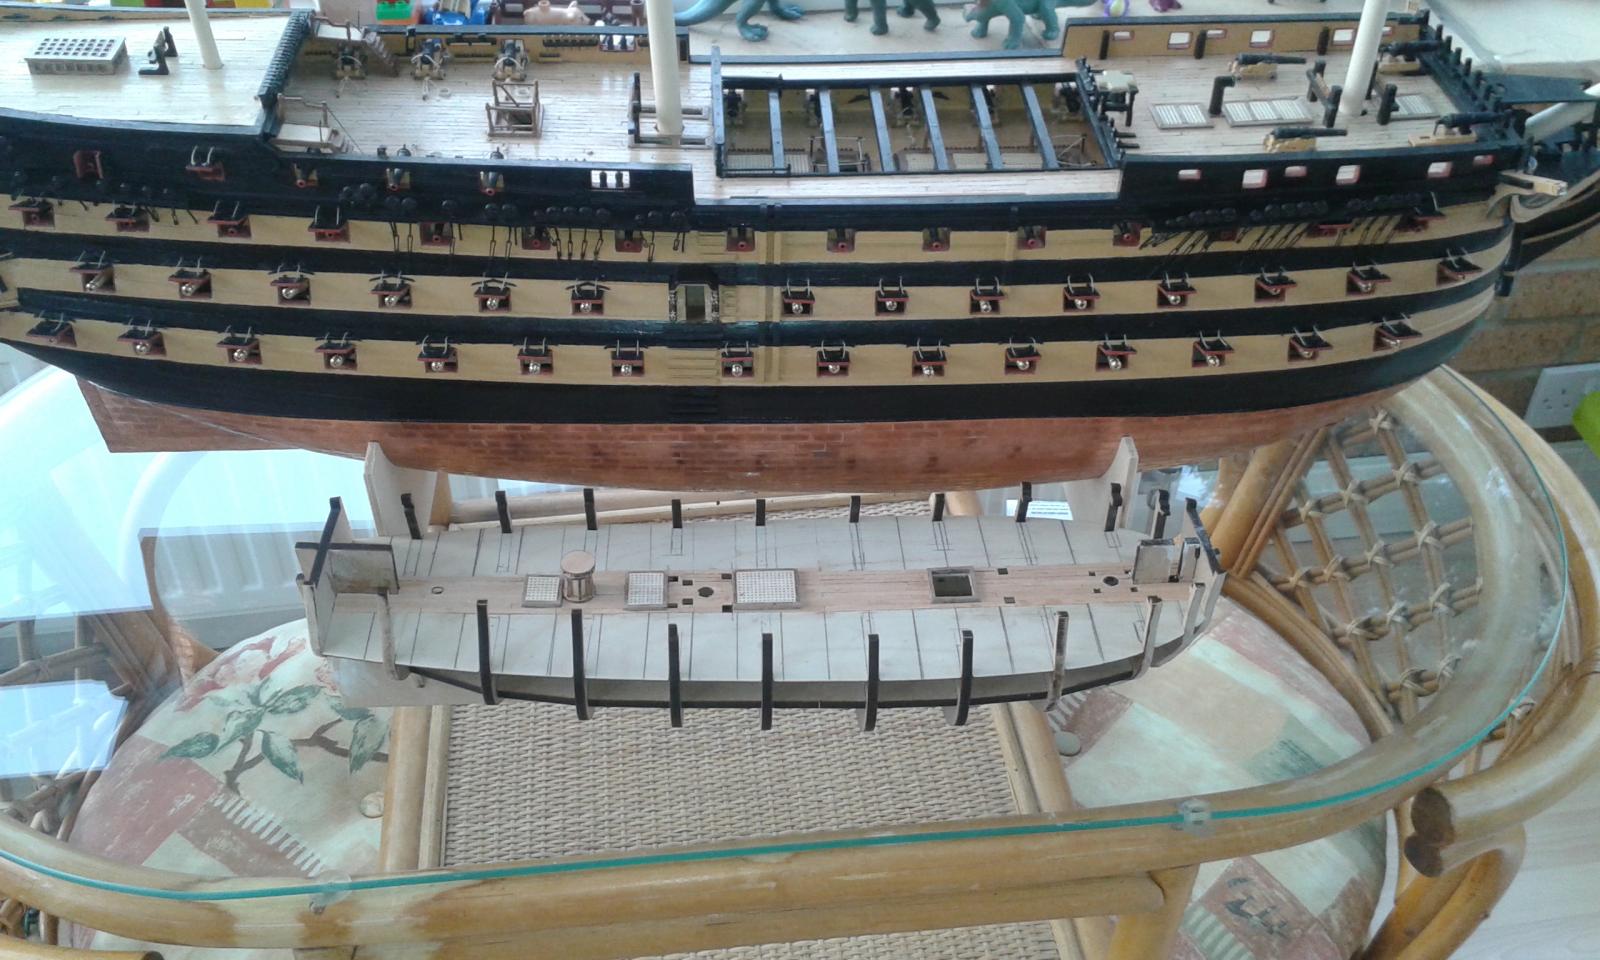
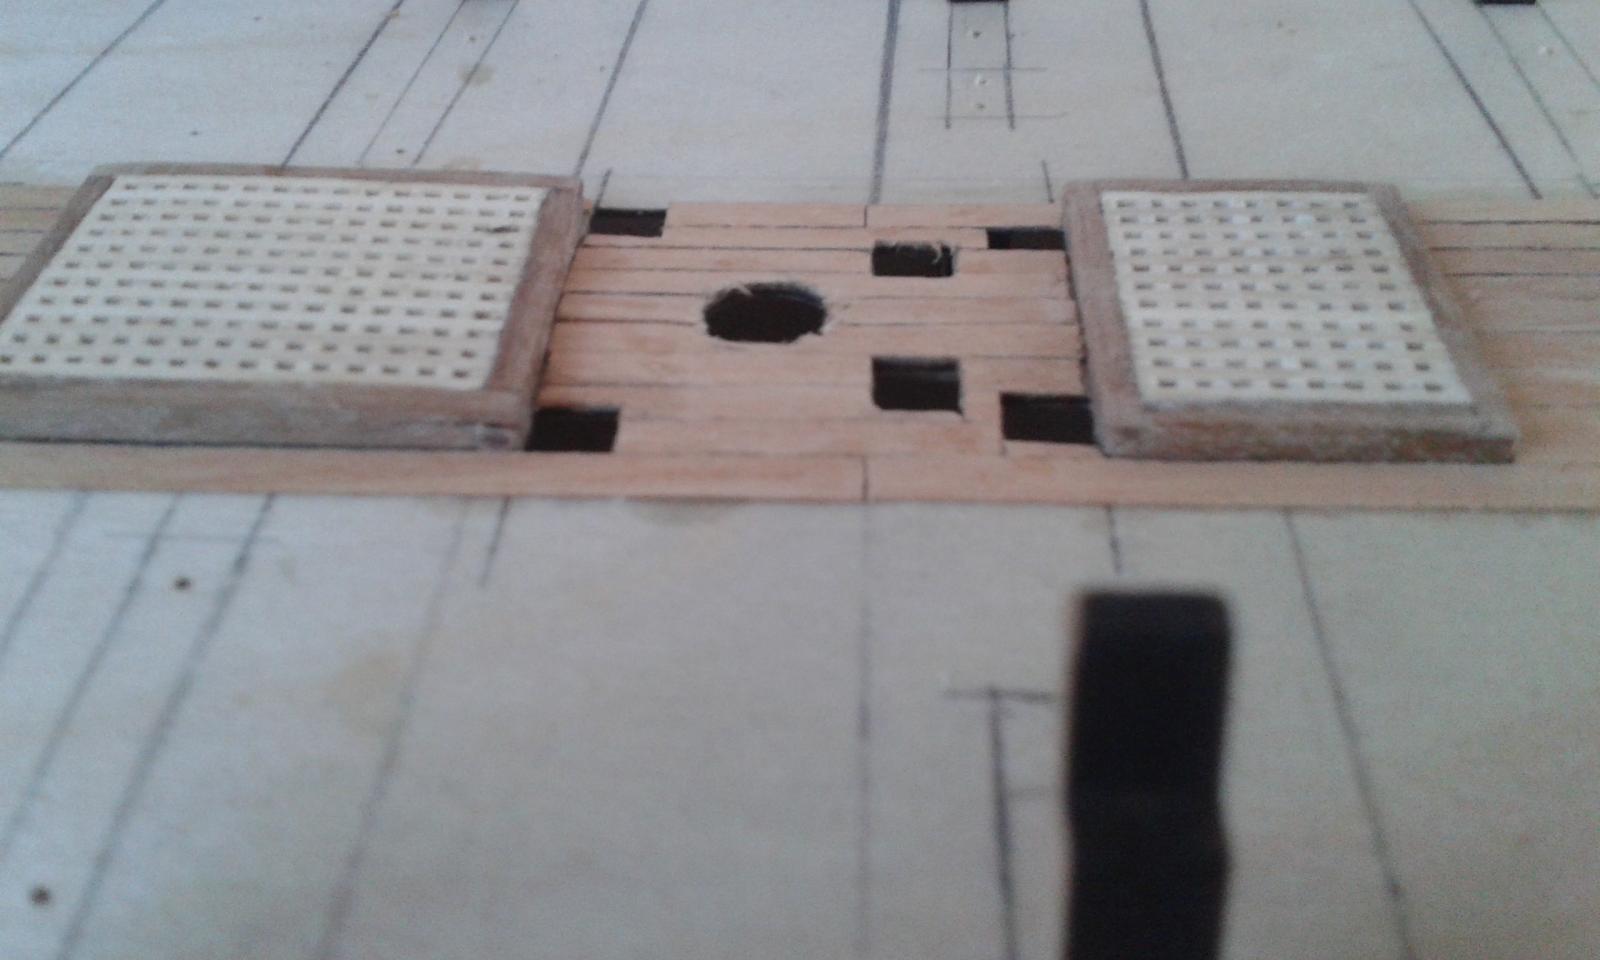
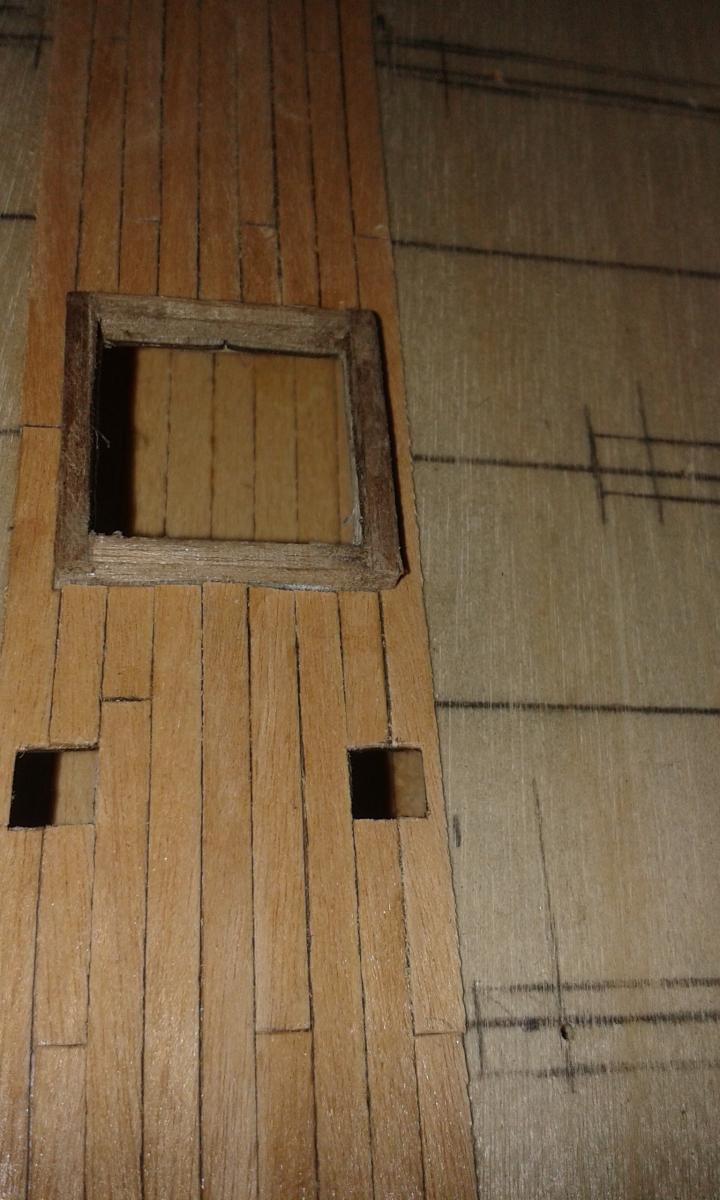
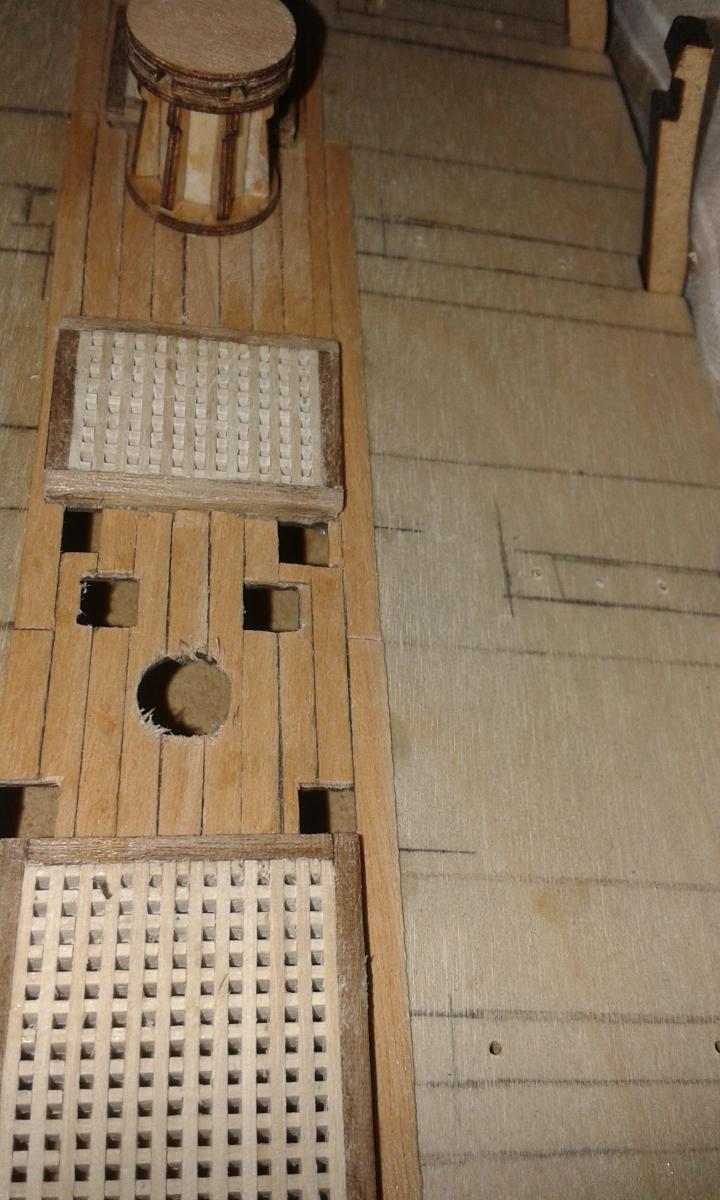
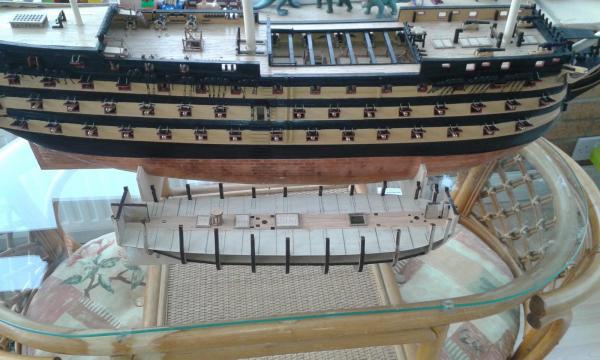
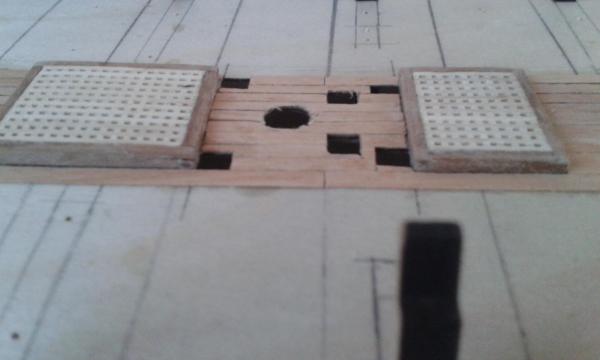
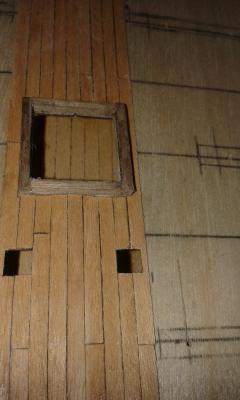
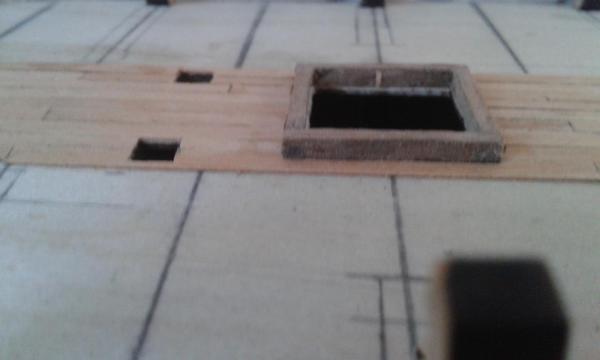
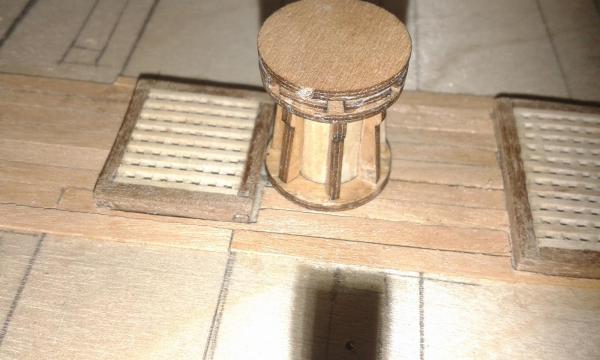
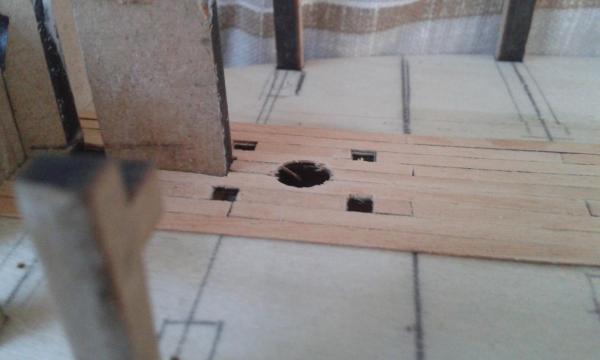
Spent more time working on the the deck planking today, I have now completed the real hard work, i.e. clearing the gun deck openings for the gratings, companionway, masks and bitts. Given Pegasus is a 64th scale model, you can appreciate just how big HMS Victory is in comparison, as this a 72th scale model: Main Mast Gun Deck Openings, with gratings dry fitted Companionway opening with coaming dry fitted and bitt holes cleared Capstan and rear grating, not properly dry fitted. Foremast area with bitt holes cleared Build hyperlinks 1. Prework - dry fitting bulkheads 2. Beading Line and Rabbet 3. Lower Gun Deck Fittings 4. Grating Assembly 5. Dry Fit Main Gun Deck and Fitting 6. Gun Deck Fitting Prework 7. Lower Gun Deck Glued and Pinned 8. Pre Gun Deck Planking Work 9. Start of Gun Deck Planking 10. Gun Deck Opening Cleared During Planking

-
As you find out there is a lot of repetitive tasks with the HMS Victory. Nice cannon jig also.