Glenn-UK
-
Posts
3,168 -
Joined
-
Last visited
Content Type
Profiles
Forums
Gallery
Events
Everything posted by Glenn-UK
-
 Look forward to watching the progress of HMS Bounty. It was one of the ships I have contemplated building
 -
I had laser eye surgery a few years ago which was great. I'm tempted to have lens replacement to avoid glasses for reading and for better defined long vision but can't justify the expense to the admiral.
-
I notice the difference with my eyes when I've been working at close quarters with my reading glasses or head magnifier, seems my distance vision takes time to readjust. It's a time consuming task, but you're well on the way, it will not be long before you start the running rigging. Has you wife selected a boat to build?
-
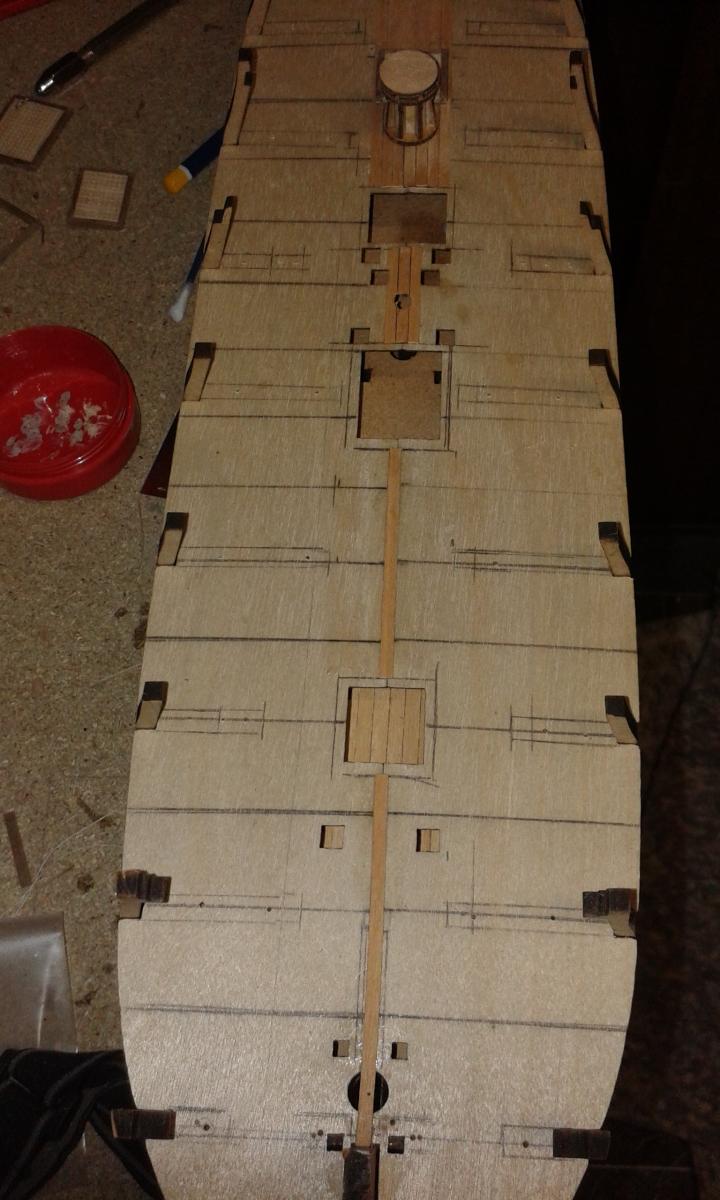
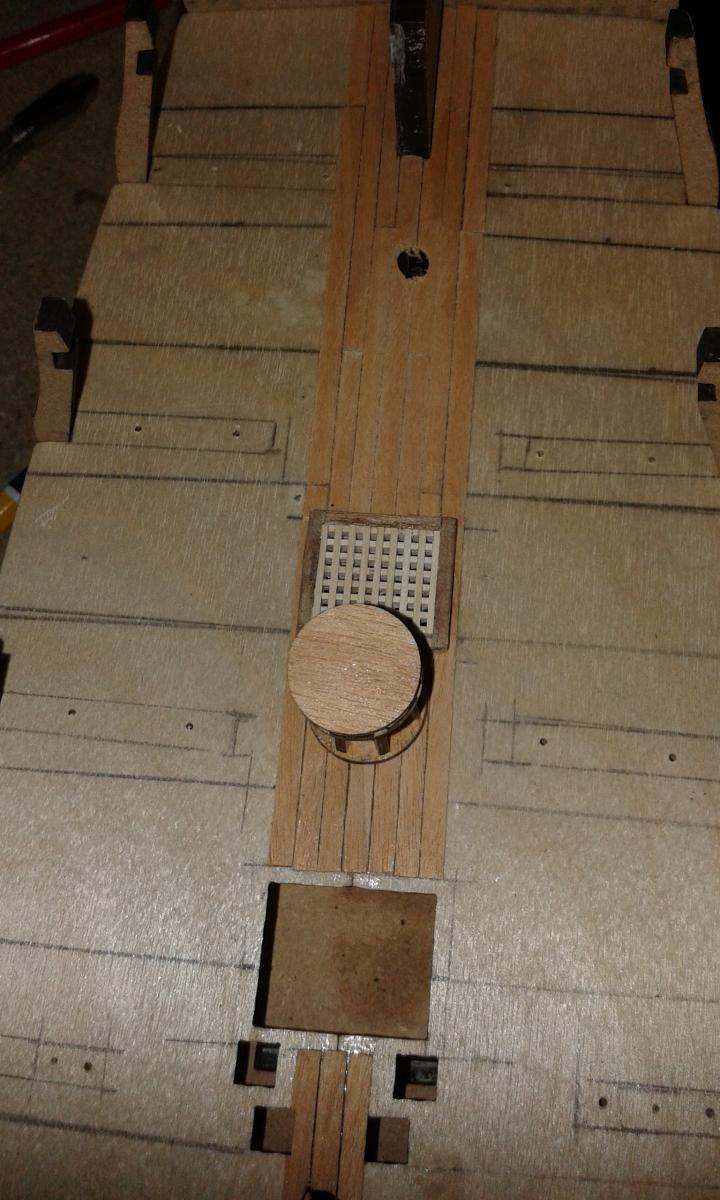
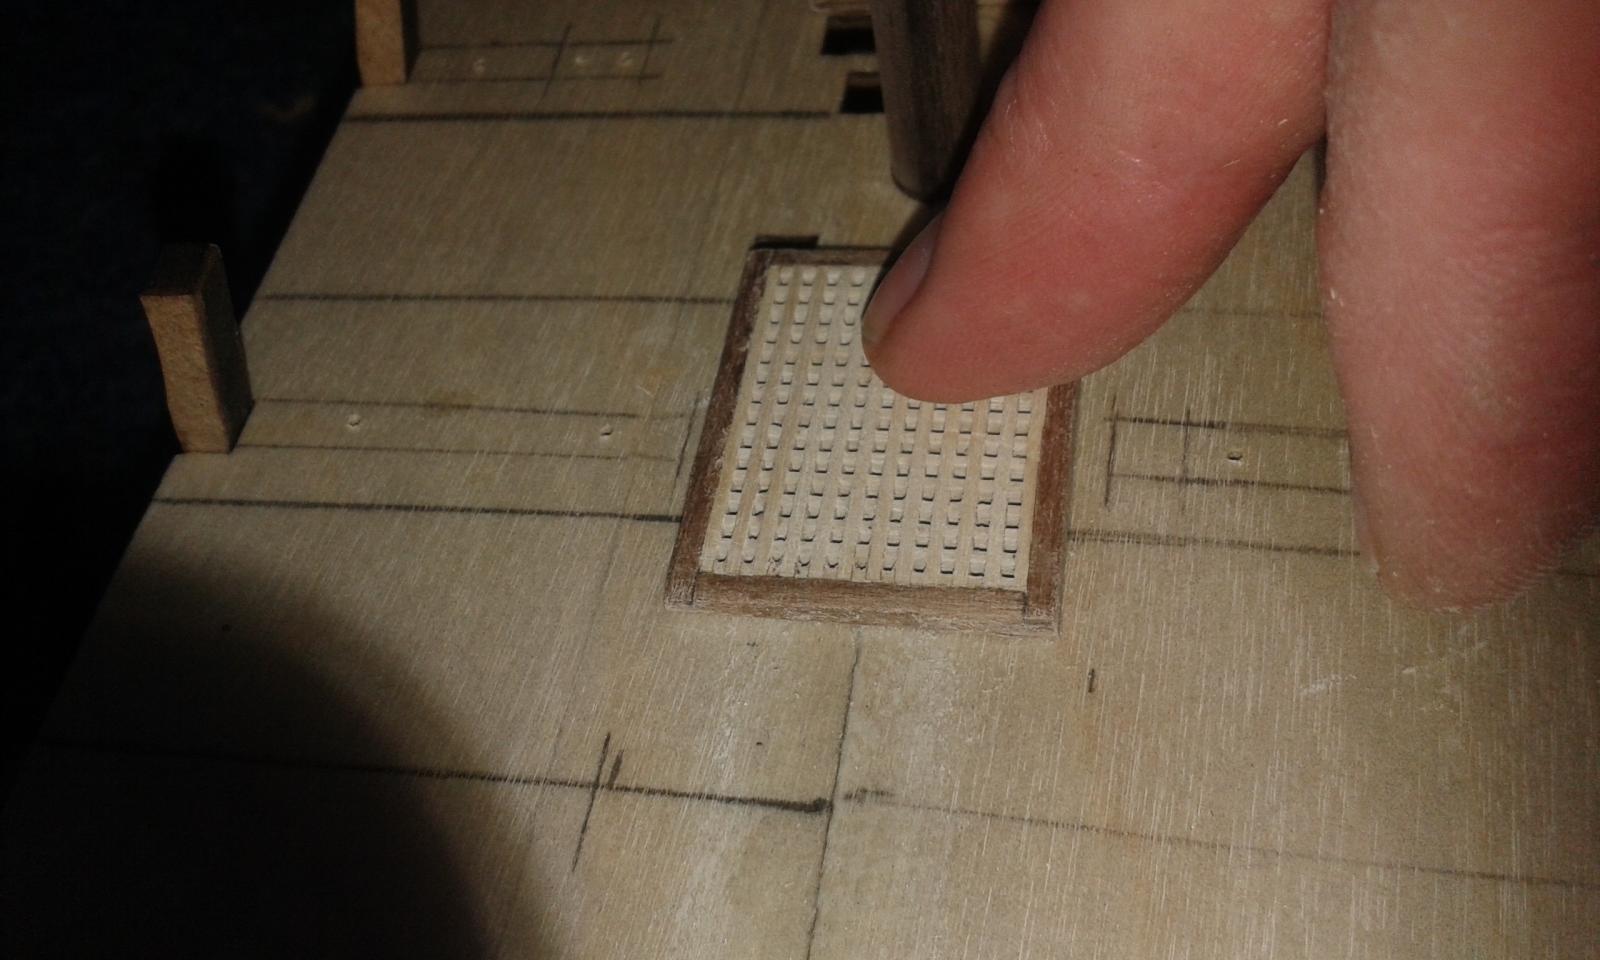
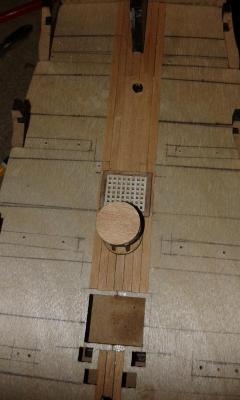
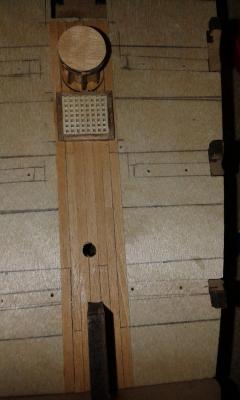
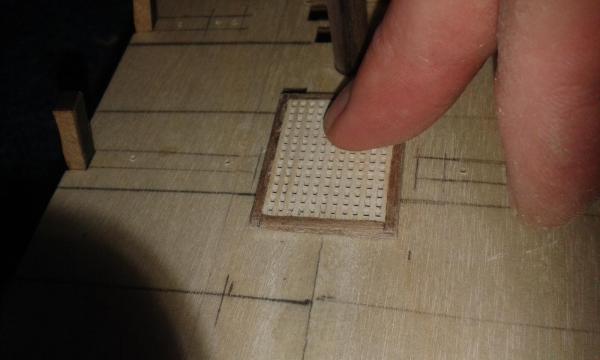
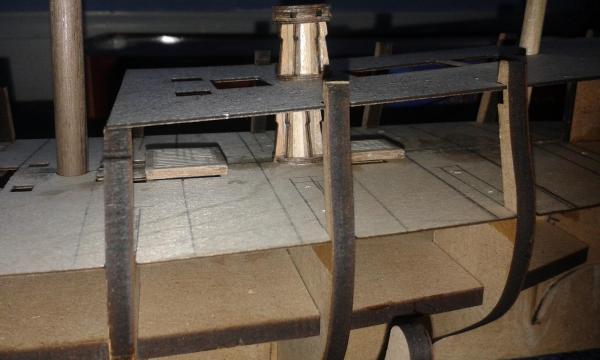
Started the planking of the gun deck. First off I fitted a king plank along the deck joint. After that I started planking from the stern around up to the first grating and capstan. The gratings will be glued to the deck with the planking butted up to the grating coaming. In the following two pictures the grating and capstan are dry fitted. I will be using a 3 butt pattern, however not being too strict with the bit of I done as this planking will hidden by the quarterdeck. Build Index Hyperlinks 1. Prework - dry fitting bulkheads 2. Beading Line and Rabbet 3. Lower Gun Deck Fittings 4. Grating Assembly 5. Dry Fit Main Gun Deck and Fitting 6. Gun Deck Fitting Prework 7. Lower Gun Deck Glued and Pinned 8. Pre Gun Deck Planking Work 9. Start of Gun Deck Planking

-
Thanks Robert and Jerry for your visit and kind comments. I plan to paint the cannons once I have completed the port side.
-
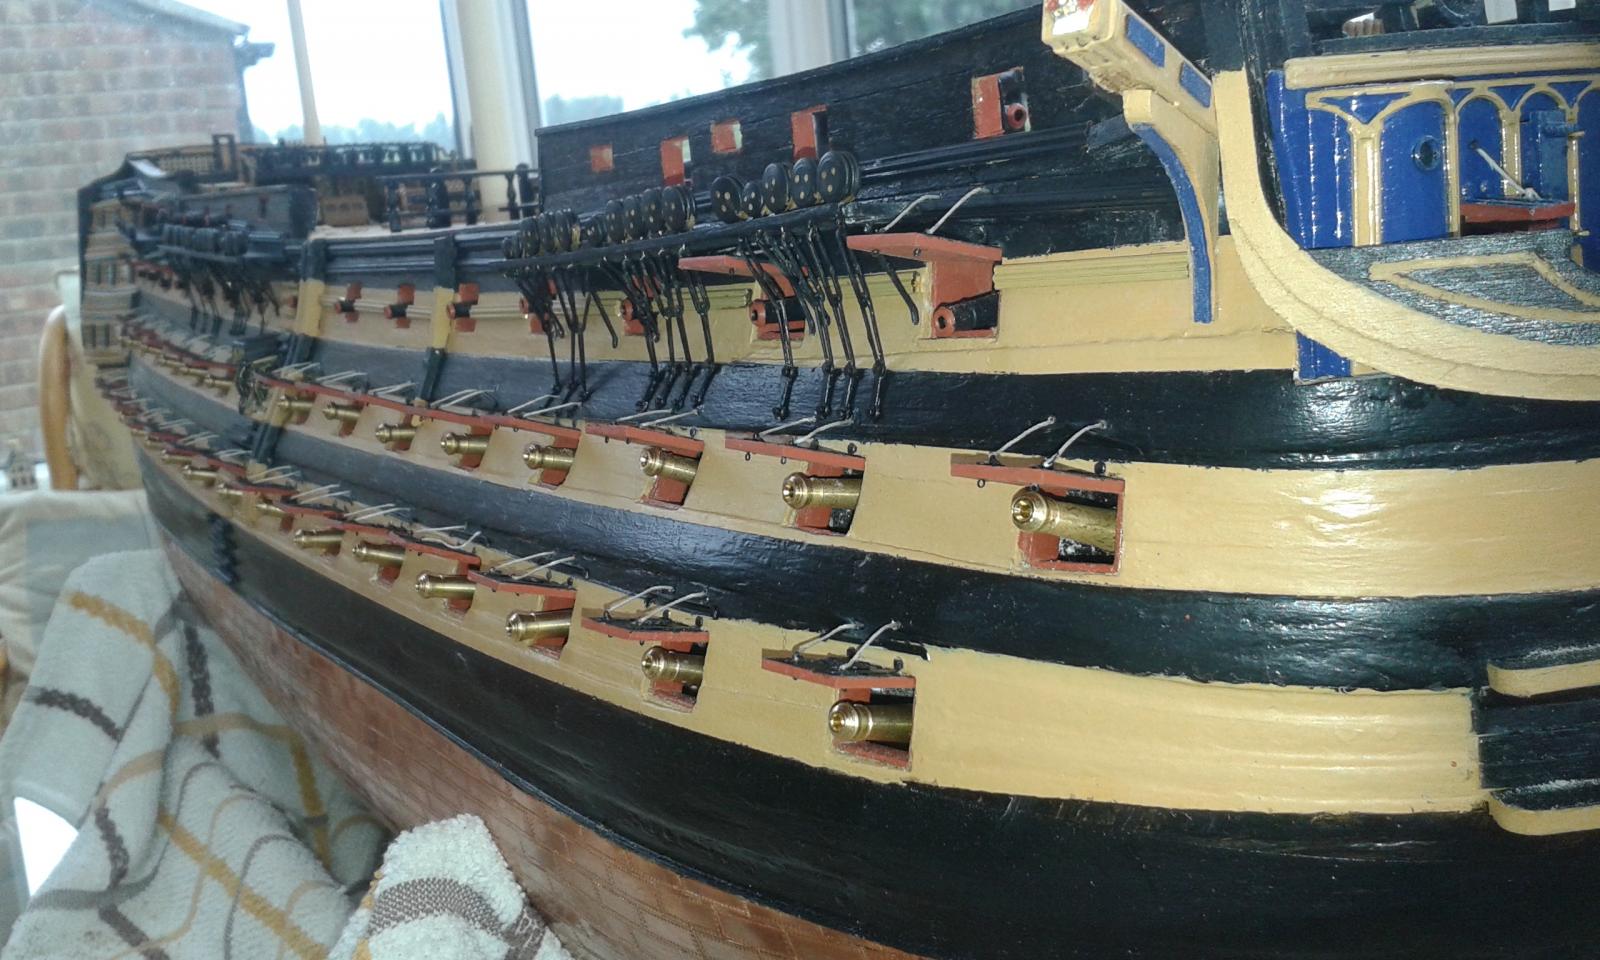
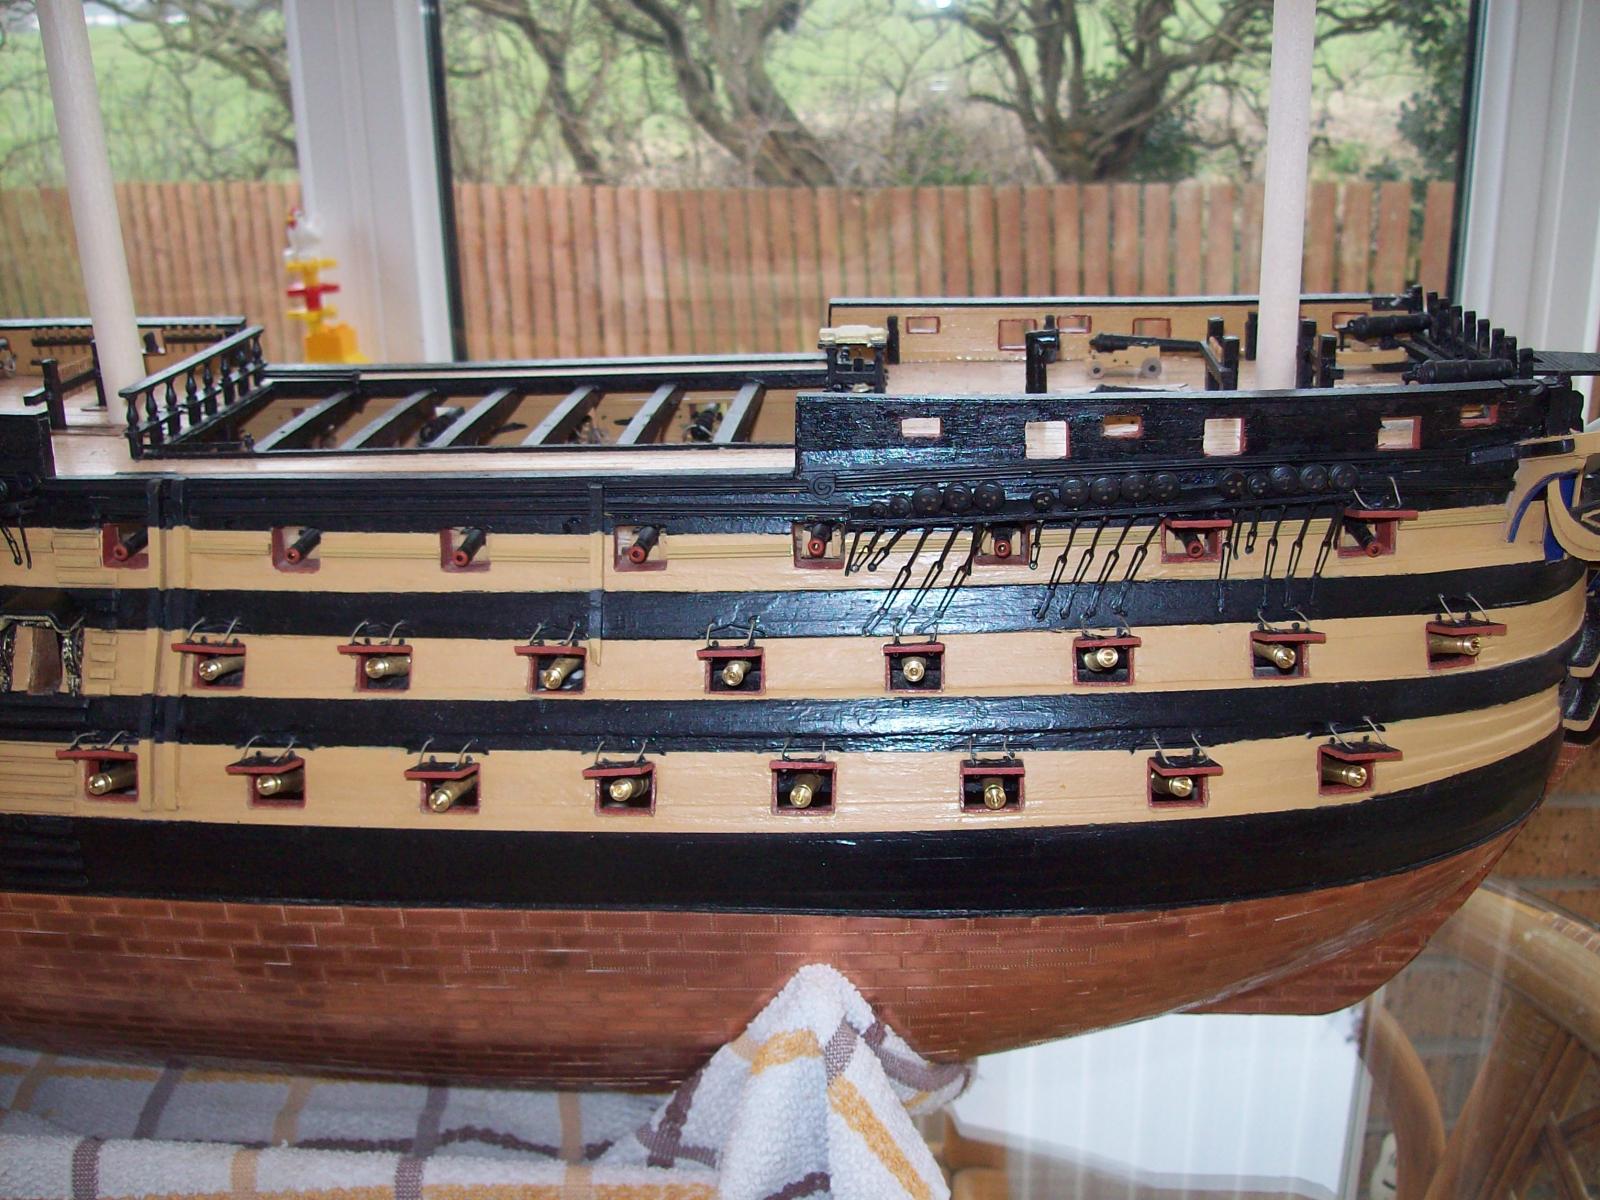
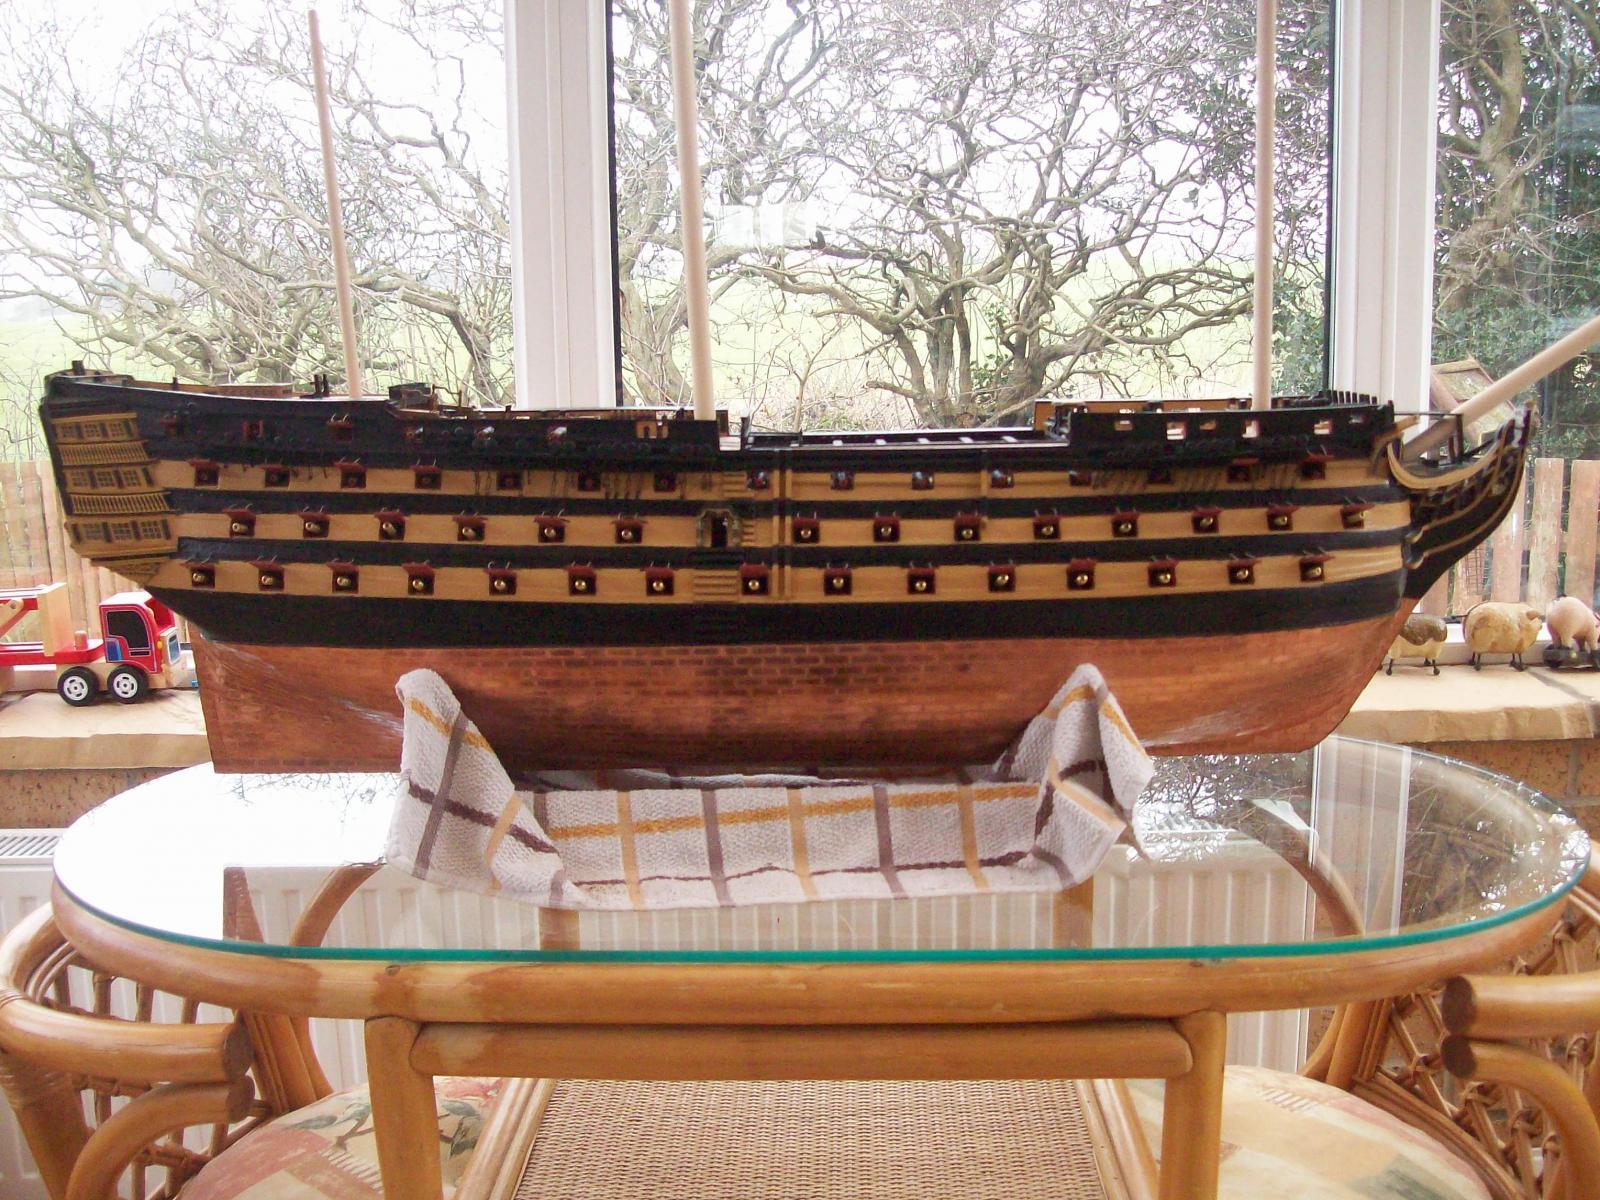
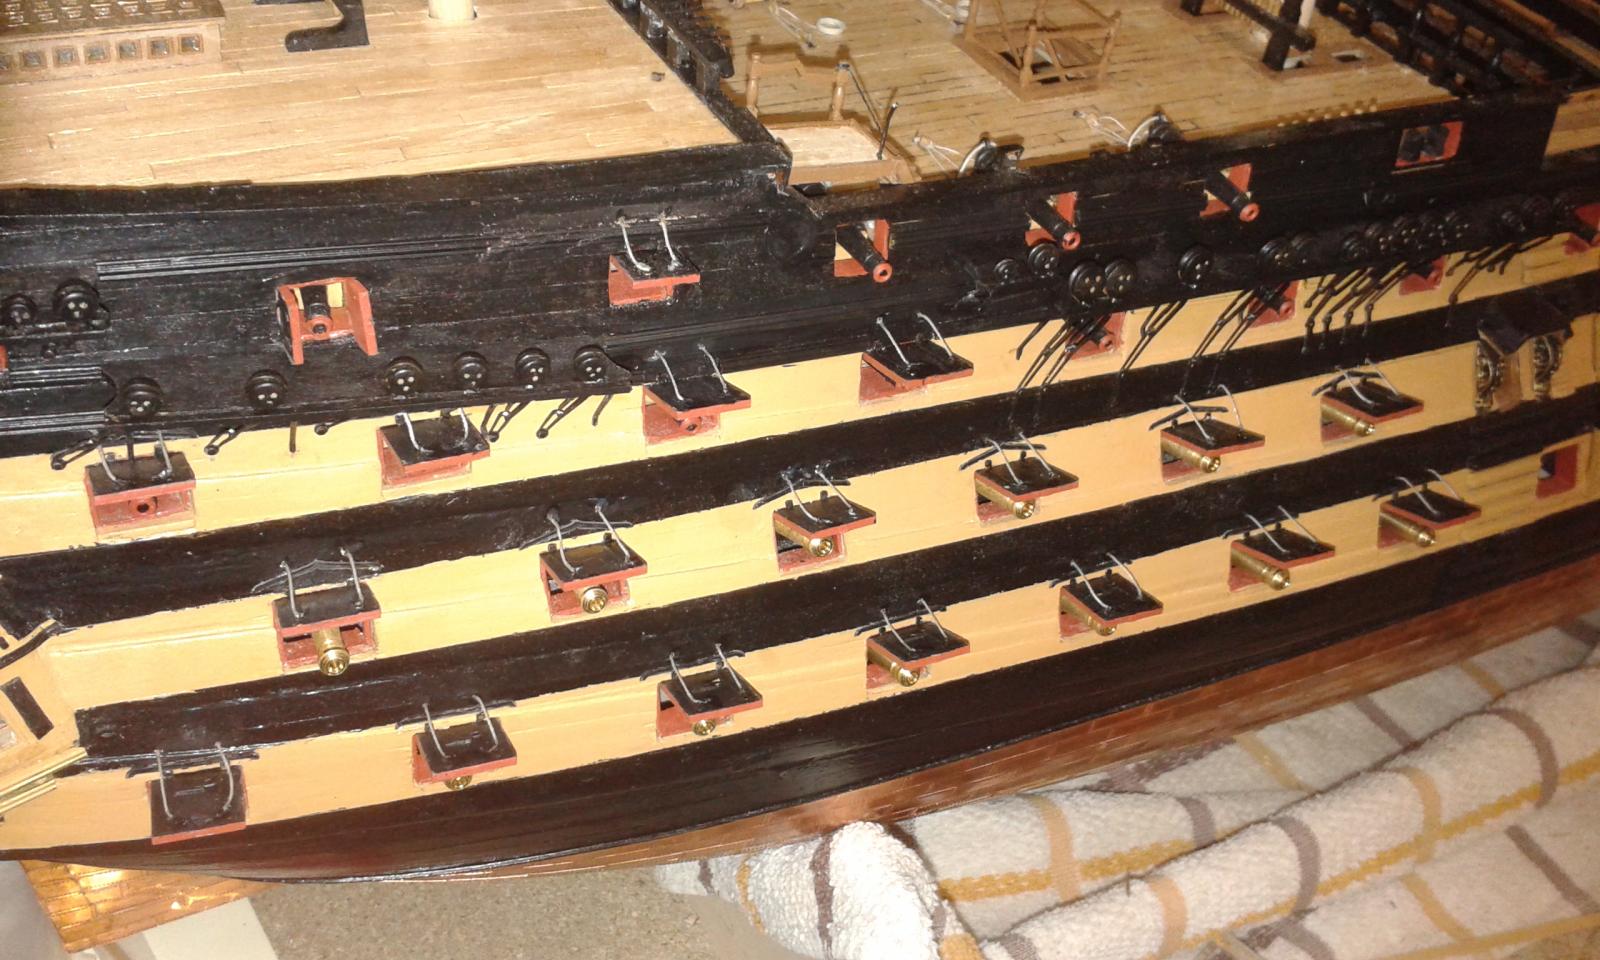
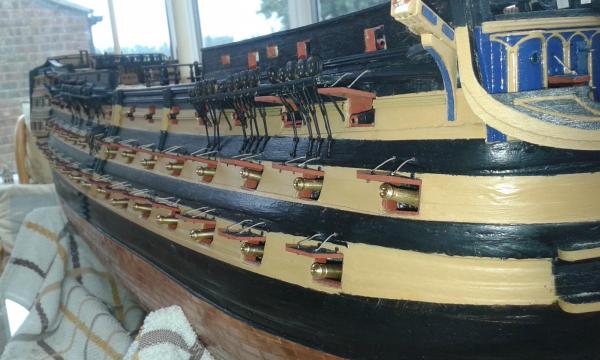
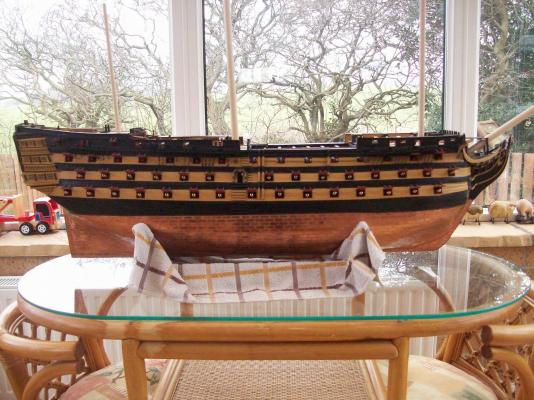
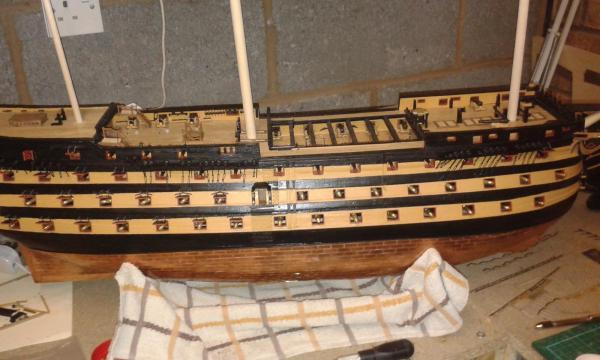
Finally completed the gun port lid installation and rigging on the starboard side. I moved HMS Victory from the dark dry dock to daylight for these pictures. That's the starboard side completed, hopefully the port side will not take as long to complete.


-
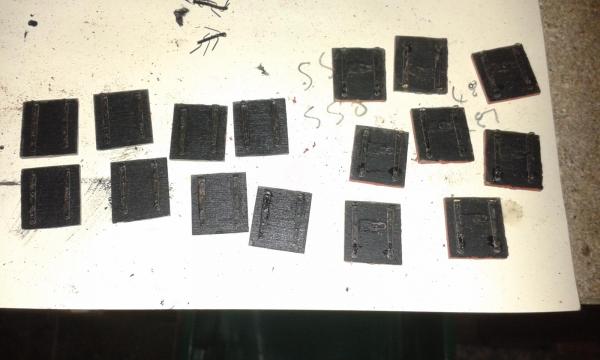
Added the eyelets to the gun port lids, touched up the gun lid paint work and added the rigging thread and finally glued the lids to the gun ports. Will now leave the glue to fully cure for 24 hours. Probably 2 or 3 work sessions required to complete the rigging and install the rigols
-
Atleast there are not as many ratlines compared with your last build.
-
All I did after the deck was planked was add a strip of wood to the front wheels of the gun carriages which centralised the cannon nicely. The strips I added are not visible as I made the same dimensions as each wheel. I think some other builder simply added an additional planking strip along the bulwark edge that did the same thing.
-
Hello Lawrence Many thanks for your visit and very kind comments
-
Hello Jerry I was aware of David's hidden gun port, glad to have followed suit with you both. I will try to pay more attention on the port side.
-
Following a two day AWOL from the shipyard, I was able to spend 6 hours in the shipyard today, as I took a day off work as we had new carpets fitted. I was amazed how much work I got done today. I completed fitting the brass profile to the forward section of the starboard side of the hull and then installed the forward channel and chain plates. I then drilled the gun ports with a 2mm drill and dry fitted all the unpainted cannons. With time still on my side I was also able to complete the assembly for gun port lids, noting I still have to fit eyelets 8 of these lids before I can fit and rig. All being well I can turn my attention to the port side next week where I have it all to do again. When looking at the main mast channel I noted I may have a slightly hidden gun port when I rig the lanyard. I'm hoping the angle of the lanyard will not obscure the cannon too much.

-
Looking good David, look forward to seeing it all lit up, just like Blackpool illumination.
-
I'm looking forward to starting my rigging phase but that is going to be a few more months as yet before I get to that stage. Nice work on the stays and a great set of photos.
-
Hello Robert I followed Shipyard Sid's advice and used Evostick for the Copper Plating which I found was better then ca. I did use ca for some tiles with a more complex bend, shape.
-
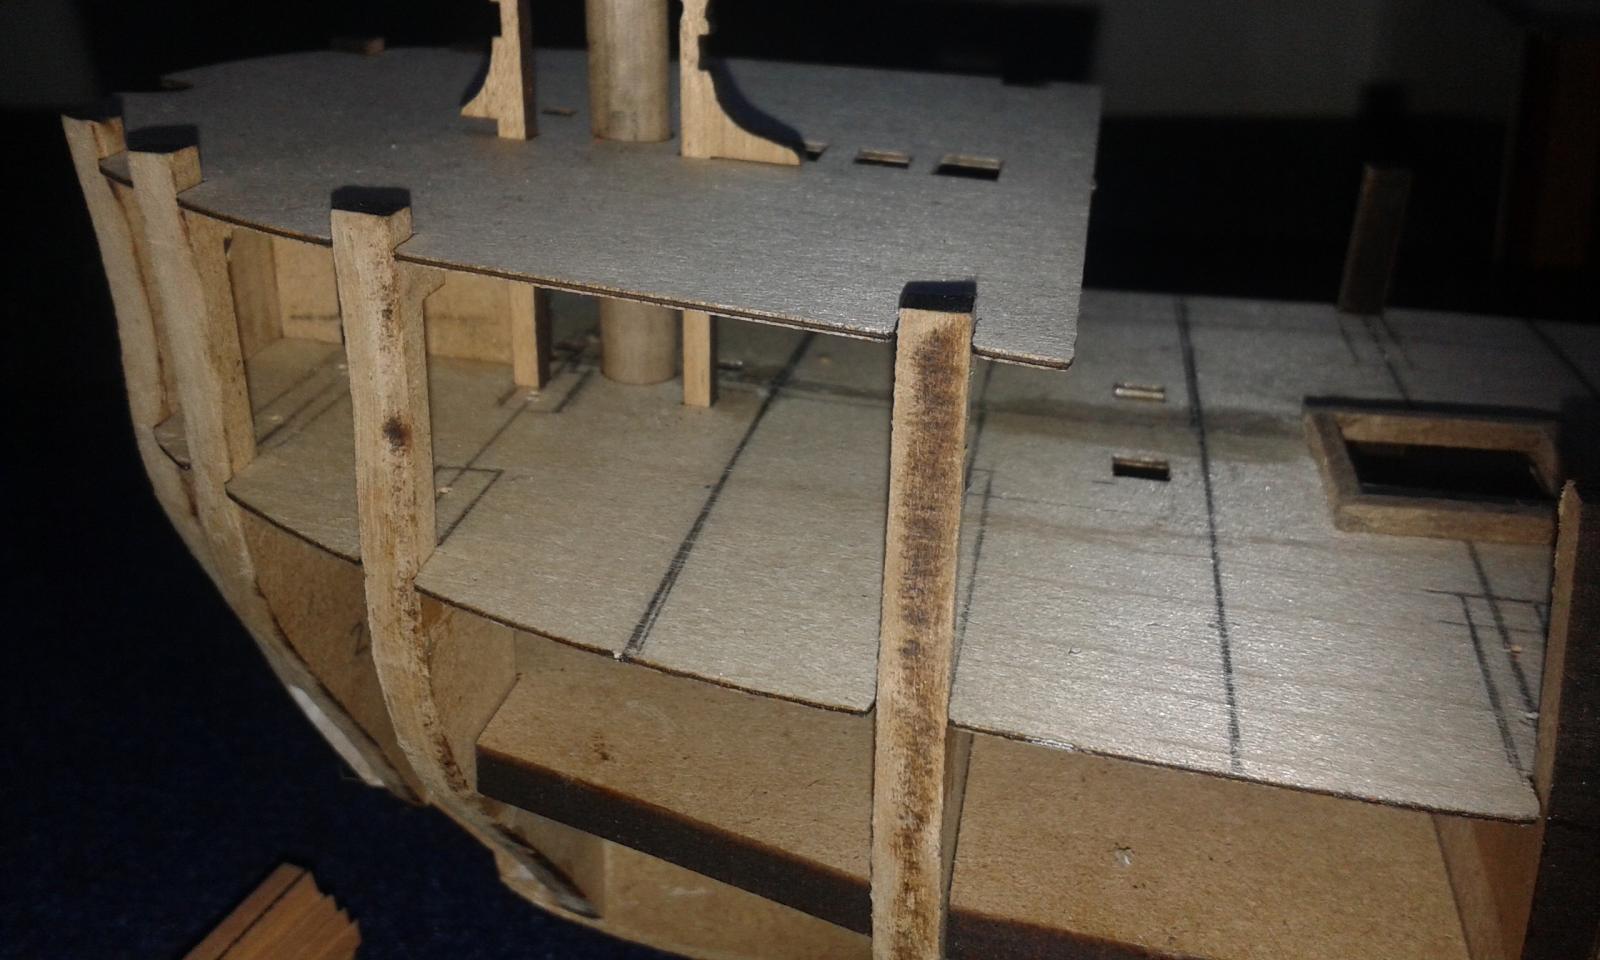
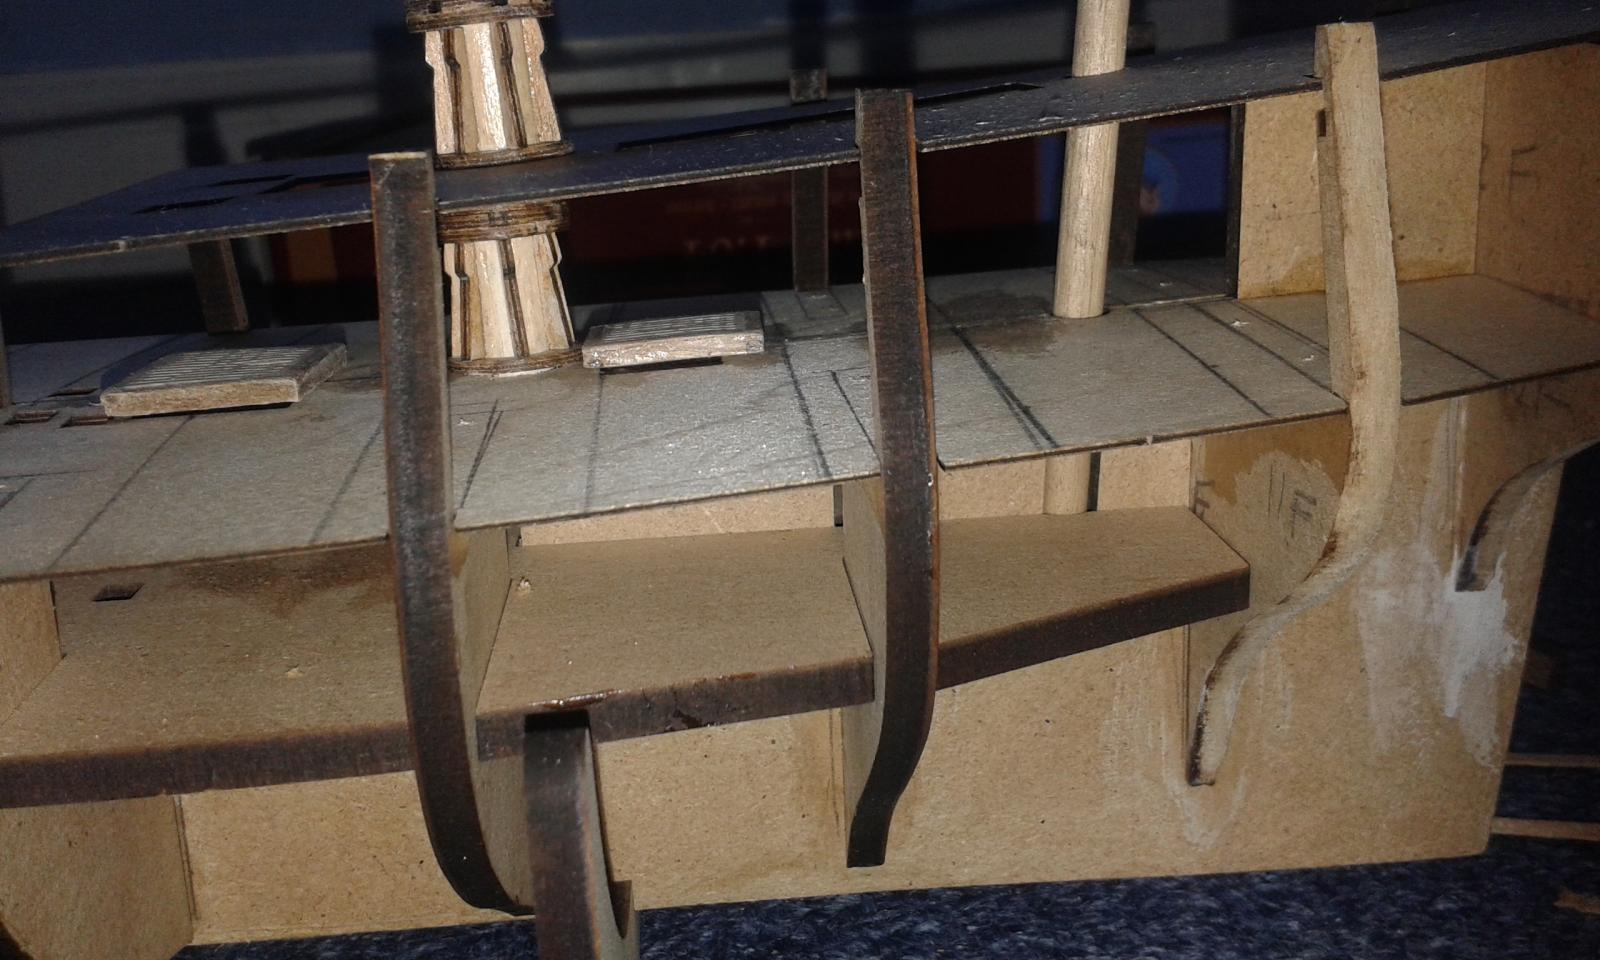
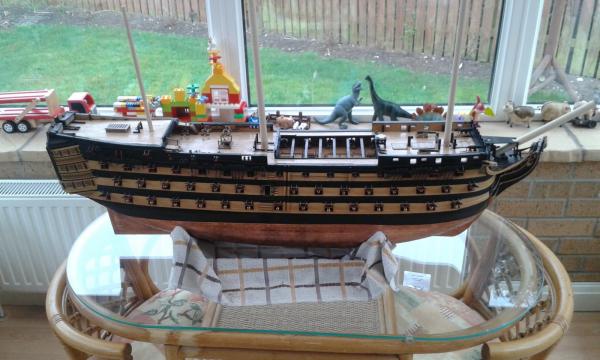
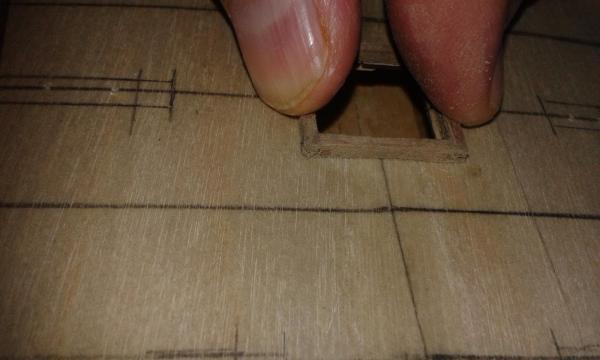
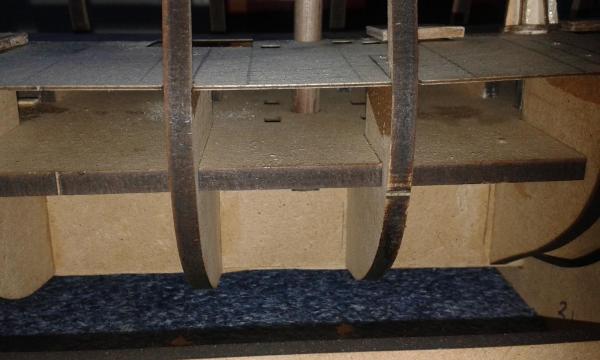
Not going to be able to spend much time of Pegasus this weekend, as we're having to get house ready for new carpets due to be fitted early next week, plus yesterday I won two tickets from Epson to see the Man Utd v Spurs home game tomorrow, Epson are one of Man Utd main sponsors. I was planning to start planking the gun deck today, but the first task was to check the fit of the various deck items. The companionway hatch bottom edge had to be curved to follow the camber of the gun deck, picture showing all is OK following a bit of filing and sanding. Also I had to curve the bottom edge of the three grating assemblies. I then checked the fore mast bitts alignment There was a bit of work to enable the lower capstan to sit nicely in the gun deck opening, dry fitted the quarterdeck to check to overall alignment of both capstan assemblies. With both the upper decks dry fitted I decided to check the fitting and alignment of the three masts. Main Mast Mizzen Mast Fore Mast


-
She's coming along very nicely indeed. Its makes such a difference to the boat when the rigging gets added.
-
I'm sure both ships will look splendid side by side, you did a great job with your Victory
-
Very informative, you certainly know what you're doing, many thanks for sharing.
-
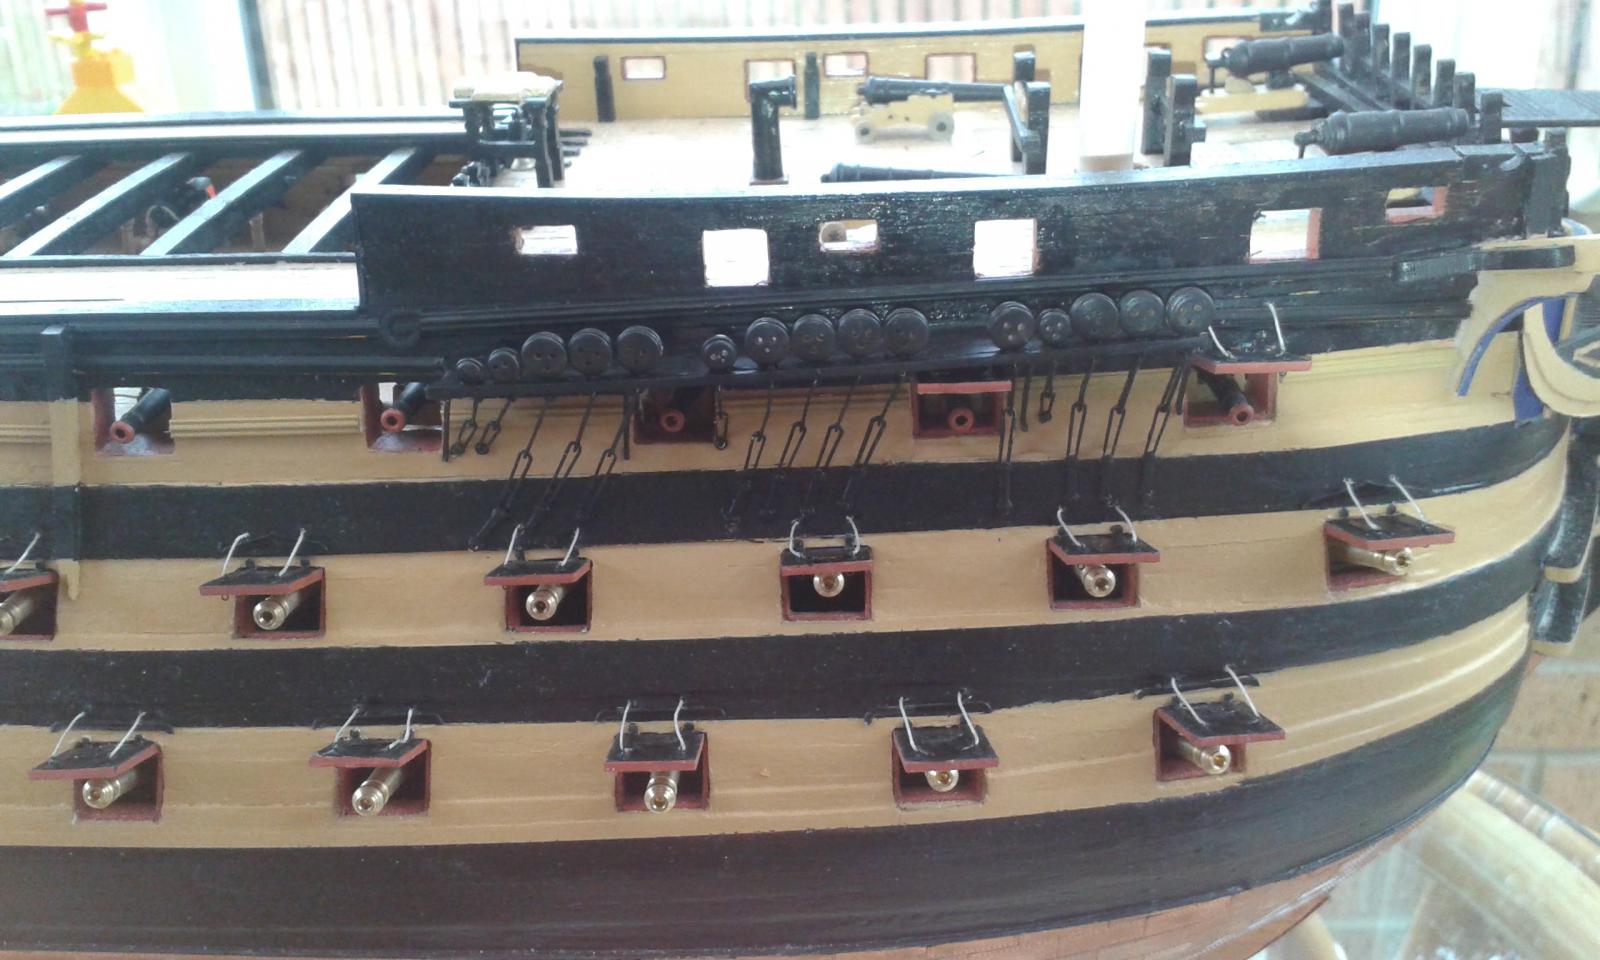
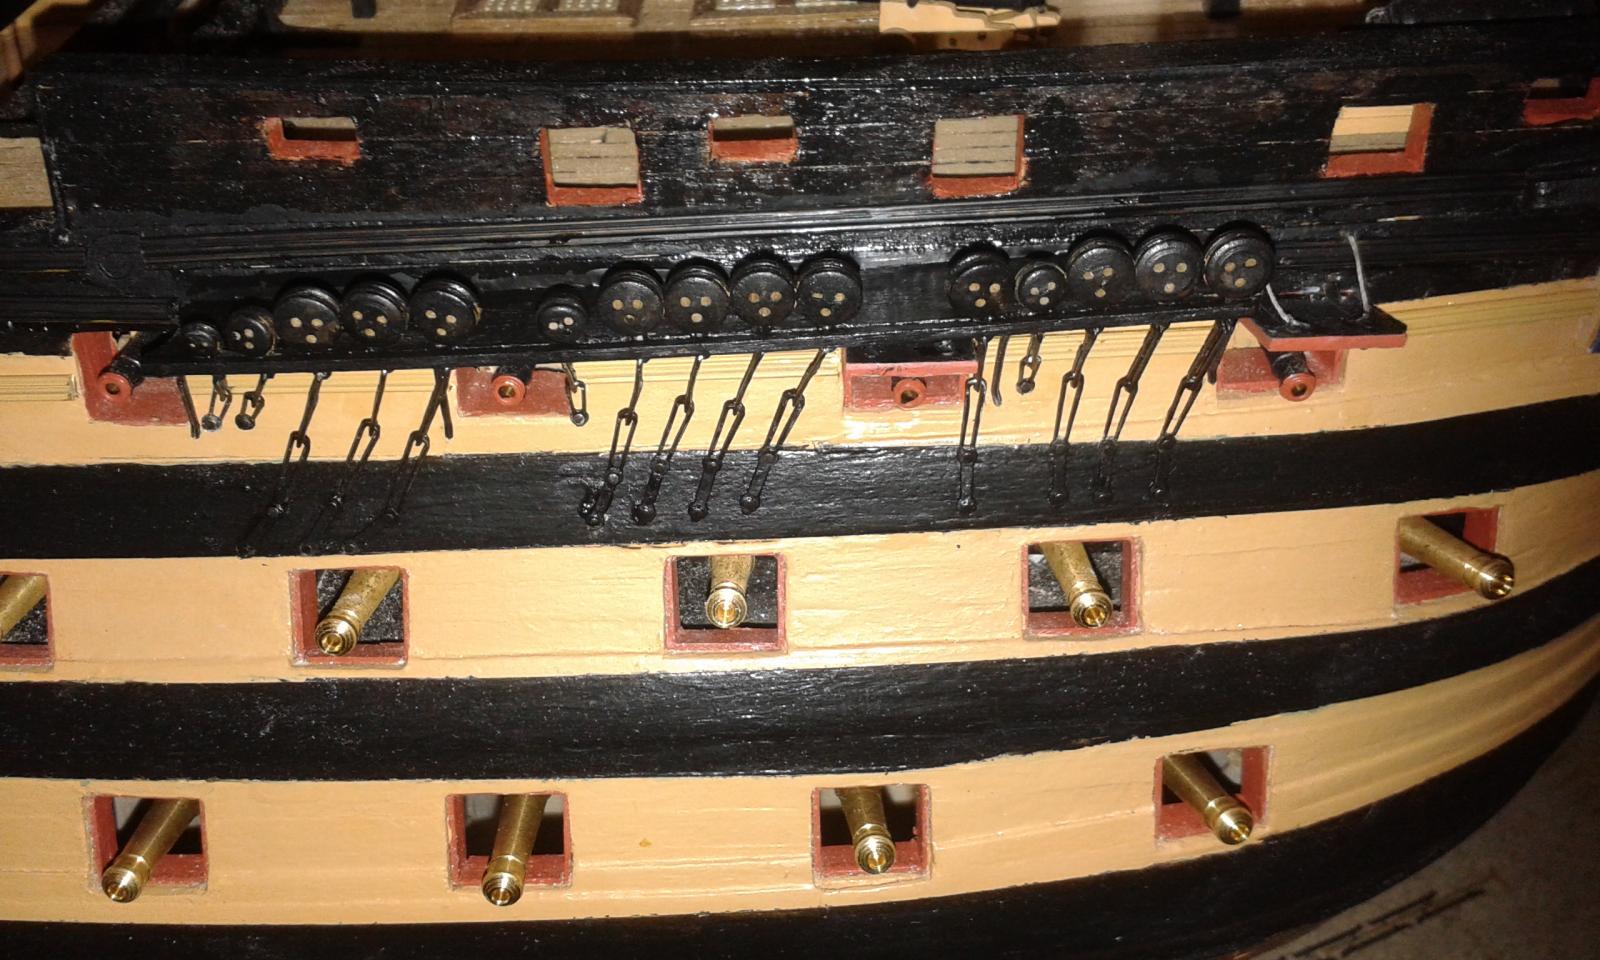
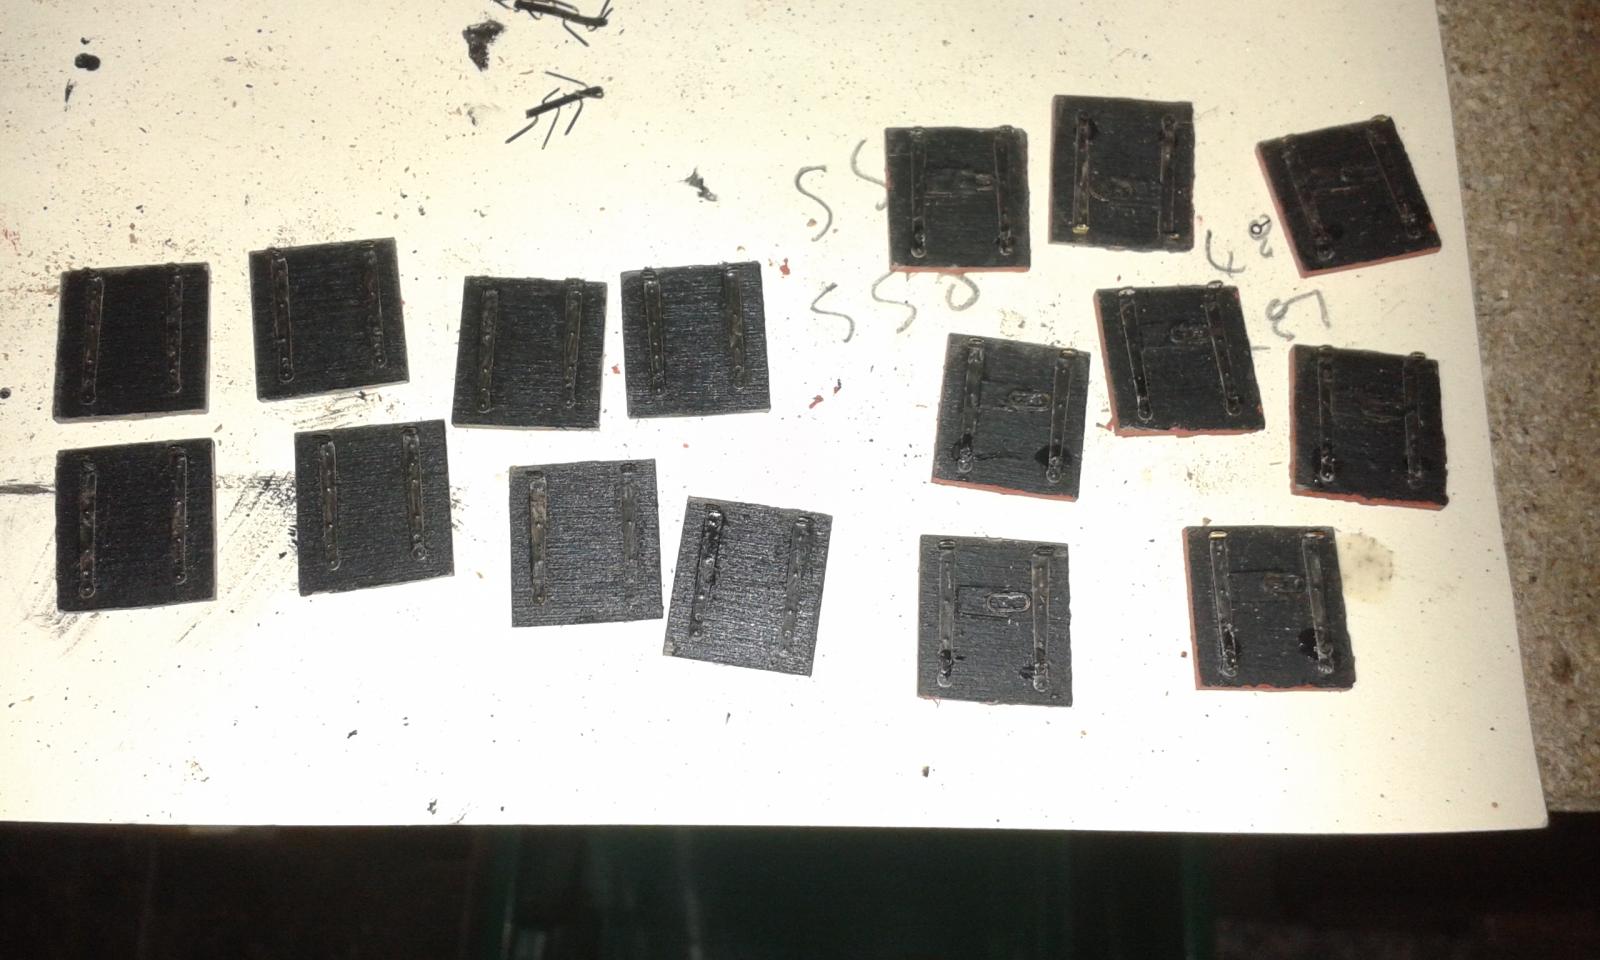
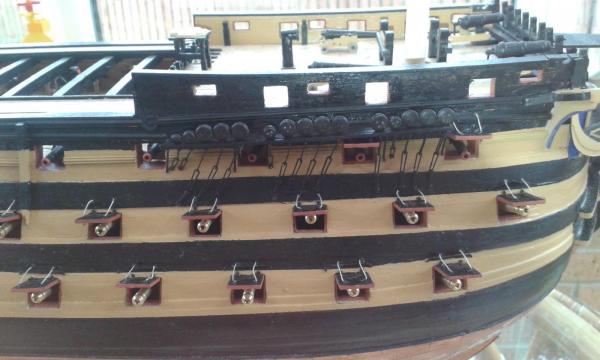
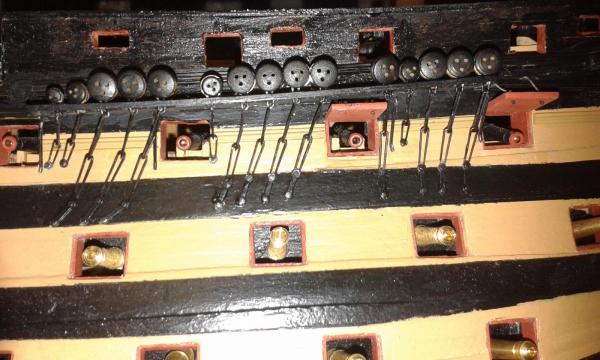
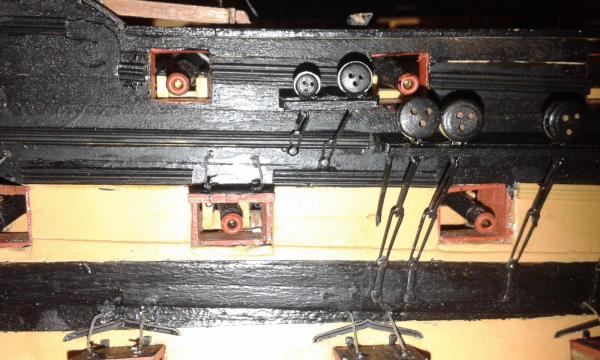
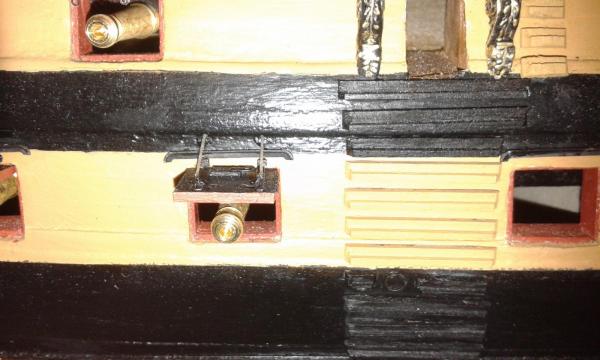
I have completed the gun port rigging on the Starboard side from stern to midships. Here is a close up of one Gun Port And here is a picture of the completed gun port lids

-
I'm amazed on how quickly you have progressed so far, you must be working long hours on the build. You seem to have it all under control at the moment and the build looks good.
-
Hello David I am tending to work from left to right top row first, then mid row and finally bottom row. I just have 4 middle row gun port lids to fit, which I forgot were not fully prepared. I am going to complete all the starboard lids from stern to midships, I then have the foremast channel and chain plate to fit plus the brass profiles from mid ship to bow before I install the remaining gun port lids. I then have it all to do again on the port side. and hope to have it completed toward of end of next month when I can start with the production of the masts and yard assemblies
-
Hello Jerry I'm using a method suggested by Shipyard Sid. Before the gun port lid is fitted to hull a length of thread is fed through the two eyelets, free of ca glue I then apply ca to the back edge of the lid and hinge and position the gun port lid and hold for a few seconds whilst the glue grabs. I then leave alone for 24 hours to ensure the glue is fully cured. Next I drill the two holes in the hull and feed each end of the thread into these holes and secure with a dab of ca. The thread is then cut in two, between the eyelets and each thread is then tensioned in turn against the eyelet and held firm with a small dab of ca, no knots or splices are used!!!!, The excess thread is then trimmed and I move on to the next lid. Once the gun port lids have been assembled it doesn't take very long to install and rig.
-
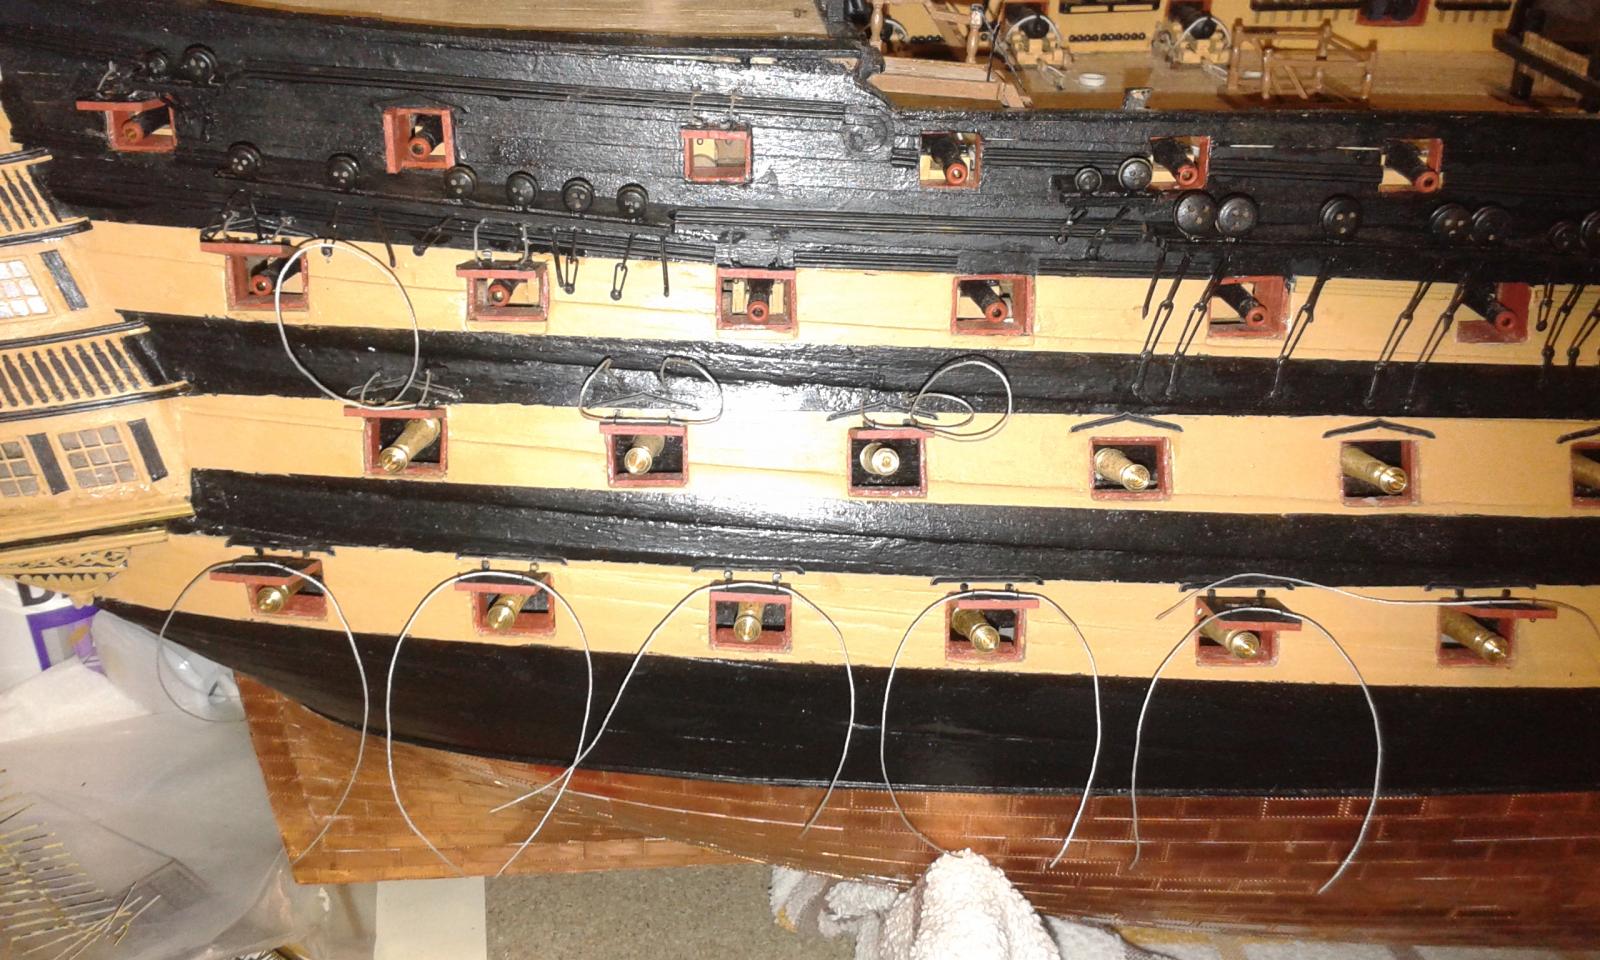
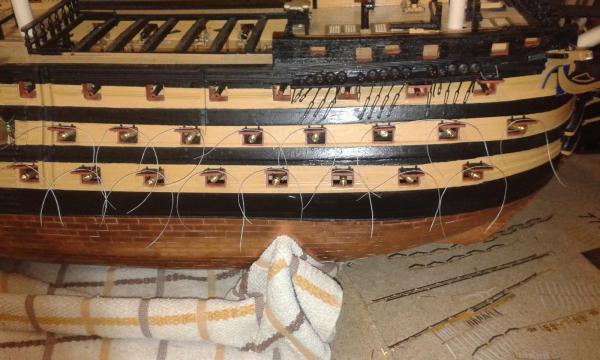
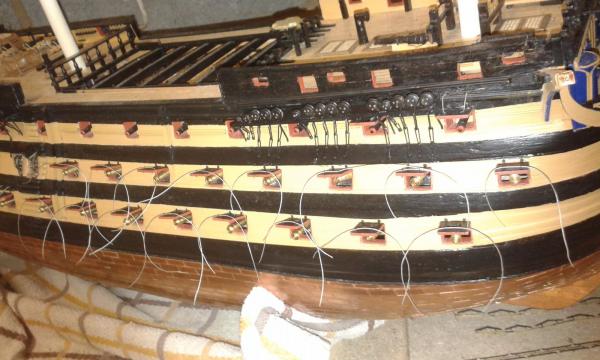
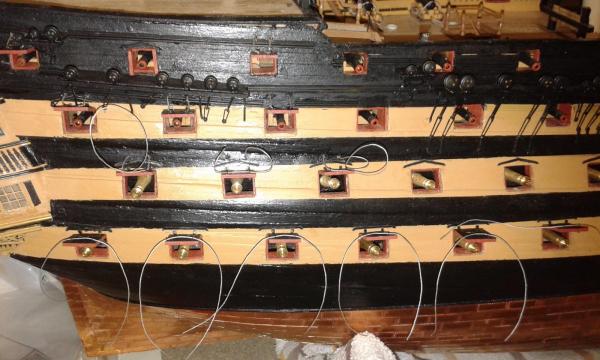
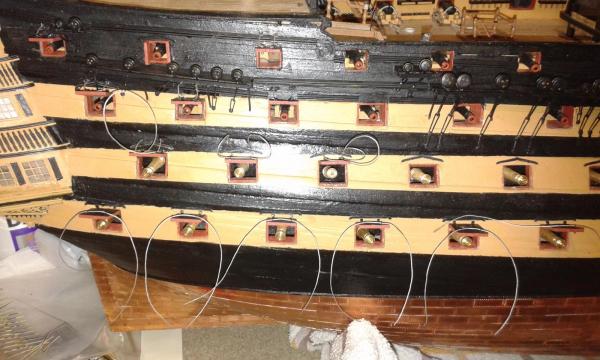
I have been installing and rigging the gun port lids. The actual installation and rigging is not too bad, what seems the most time time is fitting the eyelets to the gun port lids prior to the installation I have also been fitting the rigols to the hull as well. Pictures of current state of play, I'm waiting 24 hours to allow the glue to dry before i complete the rigging.
-
Good to see you're on the rigging phase and having completed the Victory rigging this should be a cakewalk for you.