Glenn-UK
-
Posts
3,175 -
Joined
-
Last visited
Content Type
Profiles
Forums
Gallery
Events
Everything posted by Glenn-UK
-
 Thanks Jerry
 -
I have managed to solve the 3 clues (Heston Blumenthal, High Fulham & Tom Kilburn) Work has stalled on boat building. The damaged parts in the kit should arrive later this week from JoTika so I can complete the poop deck ladder assemblies. Materials to enable to complete the painting of the stern are in the post from CMB so should arrive tomorrow. I could start rigging the cannons, but for some reason I have been putting that task off. Can anyone suggest a good tip to stop paint bleeding. I use Tamiya masking tape but when I remove the tape it seems to have bled under the tape. I always paint away from the tape edge. I had had bled problems either removing the tape as paint is drying or after paint had dried. I think the answer lies in how the tape is removed, i.e. lift away or toward the painted tape edge.
-
Keep up the good work, I'm really impressed with the progress your have made. When searching in the cupboard earlier today above the HMS Victory workbench a heavy metal object fell out and landed on the quarterdeck smashing the companionway assembly. After much swearing I examined the damage and was able to effect a repair. Work slowing down at moment as urgently needed supplies are currently out of stock from CMB and Caldercraft are on an Xmas shutdown.
-
Nice work. Have a great new year celebration. I've had to stop work as I need a replacement part from Jotika as the part provided in the kit was damaged (not by me, it's a manufacturing defect). I would like to press on with the stern but I need to order some additional paint and other materials from CMB.
-
If you're not happy with the varnished wood finish then the next best option is the white paint.
-
I looking for a different type of help. Every year I undertake the Blue Coats Quiz. There are a 100 questions and I have three clues left so any help greatly appreciated. The quiz always has a theme and this years theme will include names, nicknames of real or fictional people, creatures, organisations, objects, places and events, the title and subtitles of literary and artistic works, songs films and radio/ TV programs, phrases, sayings and quotations. Each answer work include a Borough, district, street, railway station, famous buildings, geographic features and landmarks which all lie within the boundary of Greater London. For example: Number Two For The Kinks in 1967 (8,6) = Waterloo Sunset (Waterloo is a London Station) Obama's Workplace (4,6) = Oval Office (Oval is a well known sporting venue) The 3 questions I'm looking for answers are Dinner Patron (6,10) Throw This If You 4 Or More (4,6) One Of The Fathers Of The Baby (3,7)
-
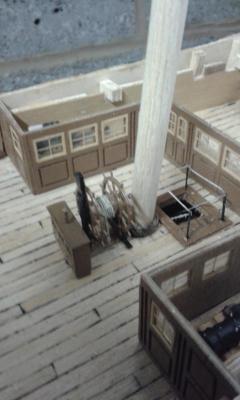
Trust you've had a very festive day. Look forward to your next progress update. I managed 20 minutes today as I wanted to fit the completed flag locker assemblies to the poop deck and micro glazed the skylight assembly windows
-
I'm sure once filled and sanded it will be the perfect base for the second planking. Have a very Merry Xmas and happy New Year.
-
I'm very tempted to buy HMS Pegasus as a very slow side project, as I'm keen to attempt a Chris Watton design
-
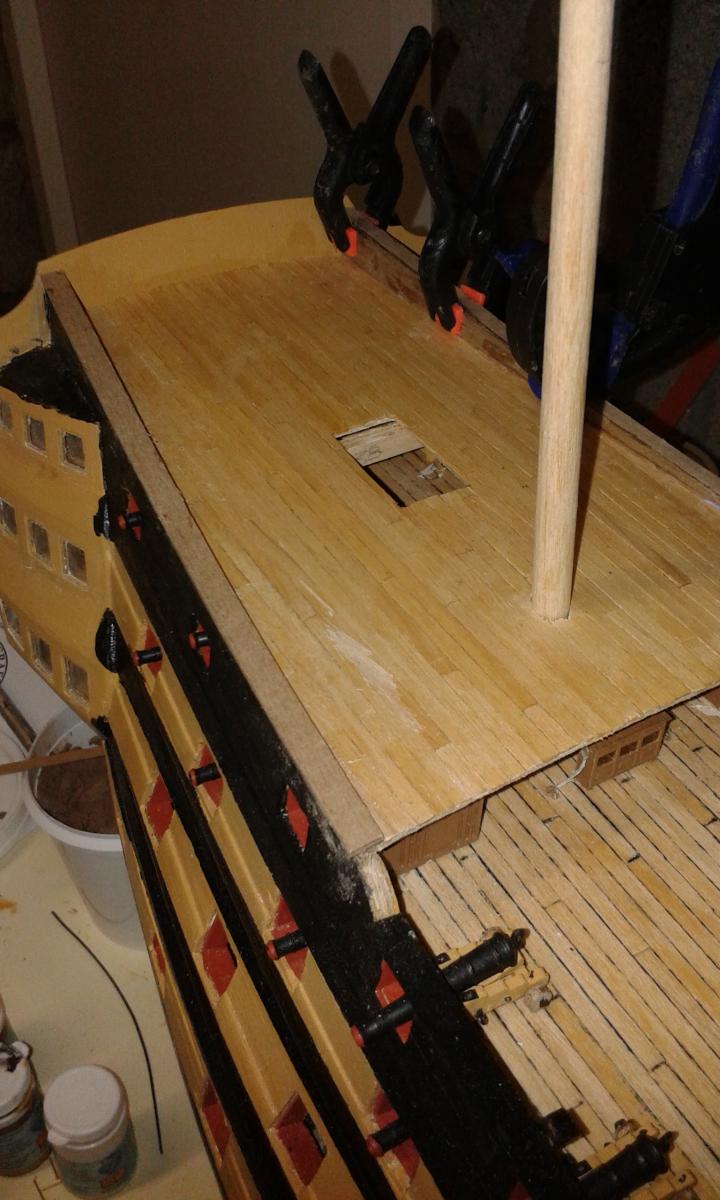
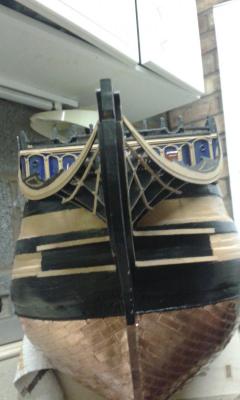
Not made much progress over the last few days. The poop deck has been planked and the inner bulwarks lined and capping fitted. A bit of black paint and the job will be complete and I can move on to building and fitting the poop deck fittings.


-
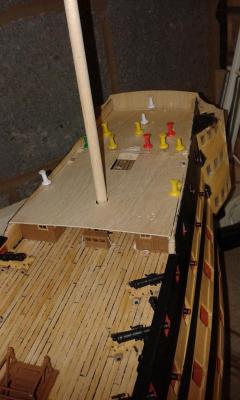
I think the map pins make a very nice colourful addition to your build, you may consider leaving them in situ. I have had limited time over the last couple of days in the shipyard, but I hope to be able to crack on over the xmas break later in the week.
-
She looks resplendent in her new home, I think the pointy end will be relieved as well.
-
Good luck with your new build, you have made a great start and I will follow with interest
-
Hello Jerry. Great to hear from you. I'm looking forward to completing the poop deck assembly so I can move on to the stern fascia task.
-
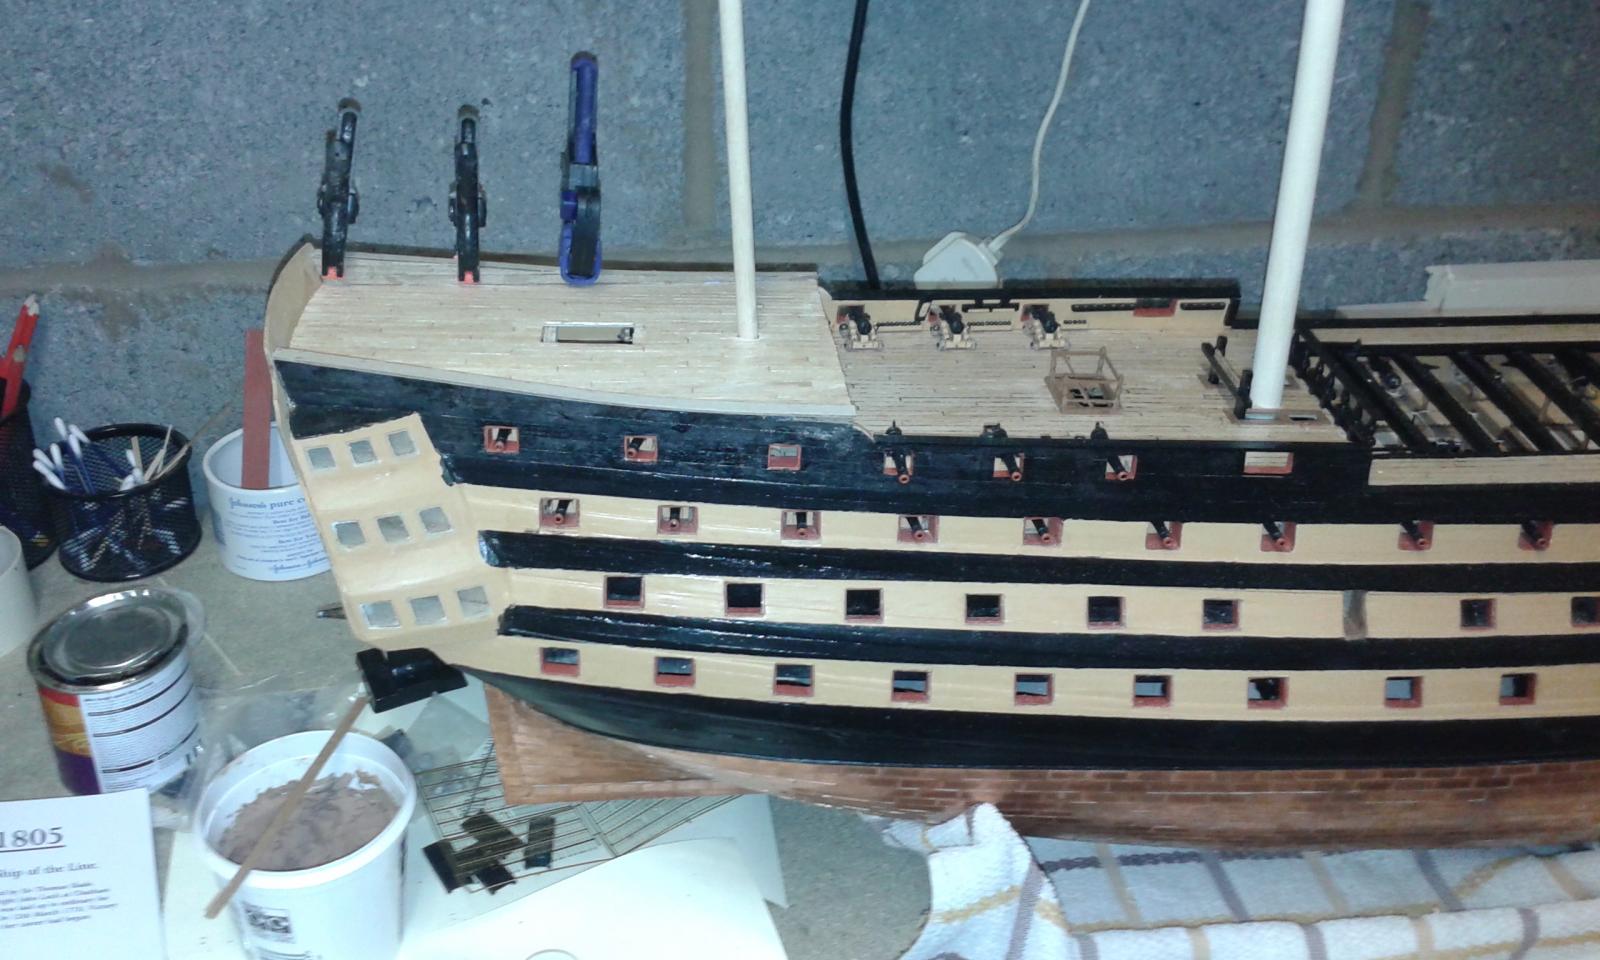
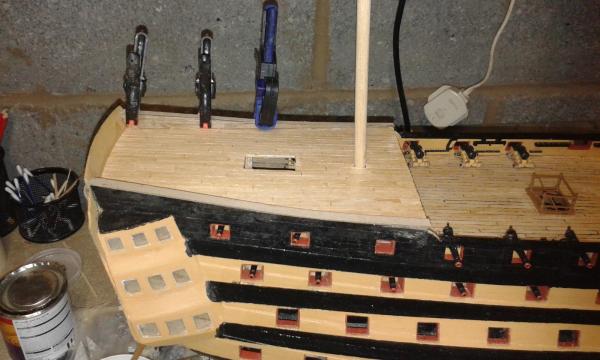
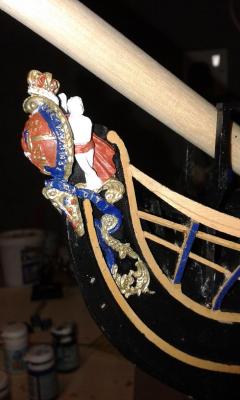
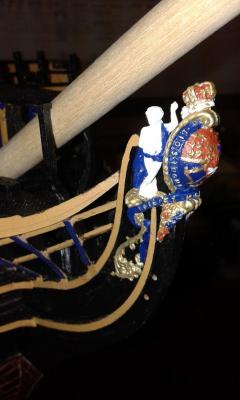
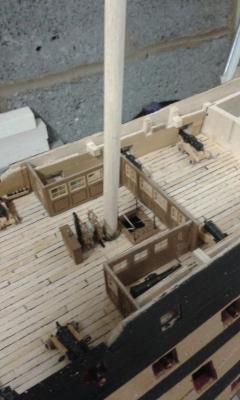
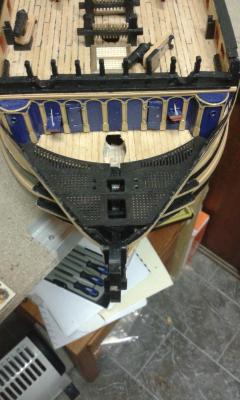
Quick update of recent progress. Spent some time painting and fitting the figurehead. I quite enjoyed undertaking the fine painting task. Catheads have also been fitted. Finally I have installed the poop deck. A bit of cleaning up on the quaterdeck is now required.
-
Looks like a job well done.
-
Good morning David. Good looking progress. I do like the look of a white painted hull, which I have seen in some photo's for this boat build. Keep the pictures coming.
-
Many thanks Lawrence. Men and their tools, I'm getting just like my Dad!
-
Hello Jerry I can see the benefit of a drill press, I could always buy a drill press and a lathe! There are quite a few other tool I have my eye on as well. Hello David My next task is to complete the last 6 off 10mm aft gun port linings before I can install the poop deck. I then hope to be in a position to start work on the galleries in the new year.
-
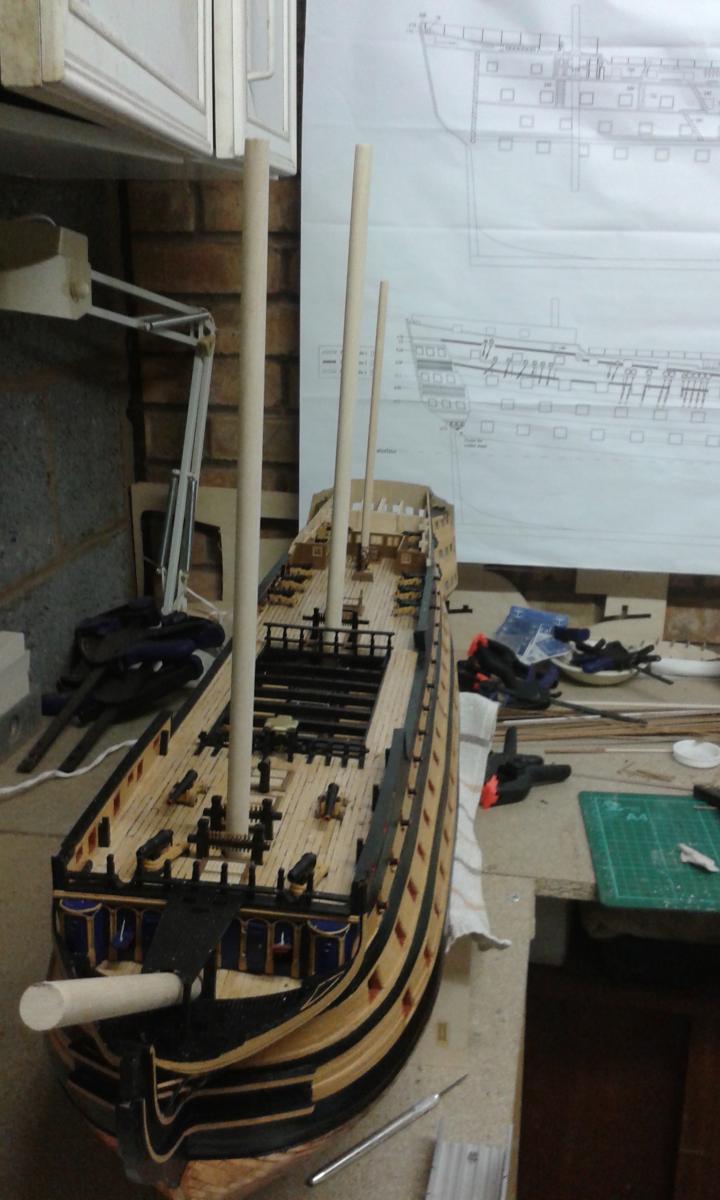
Not been in the shipyard for the last few days, as i was struck down with a bad case of Man Flu. Tonight I bravely overcome the odds and returned to the yard but I didn't do of work. I have now fitted the Marines walk, and I'm finalising the cat head assembly before fitting to the hull. For no other reason than I really wanted to see them in place I decided to precut (slightly longer than needed), the lower mast sections. The difference to the whole build with the simple task of fitting these masts is amazing. I will be buying a mini lathe in the new year to help with the tapering of the mast and yard sections.

-
Hello Gundorph Many thanks for your visit and very kind d comments. Enjoy your build and perhaps you can make the Victory your next project
-
Hello David I was at Old Trafford last night so I was one very happy bunny! I love the goons so will certainly tune in on Friday
-
Well done Jerry. I'm currently working on the cat heads which I hope to install in the next couple of days.
-
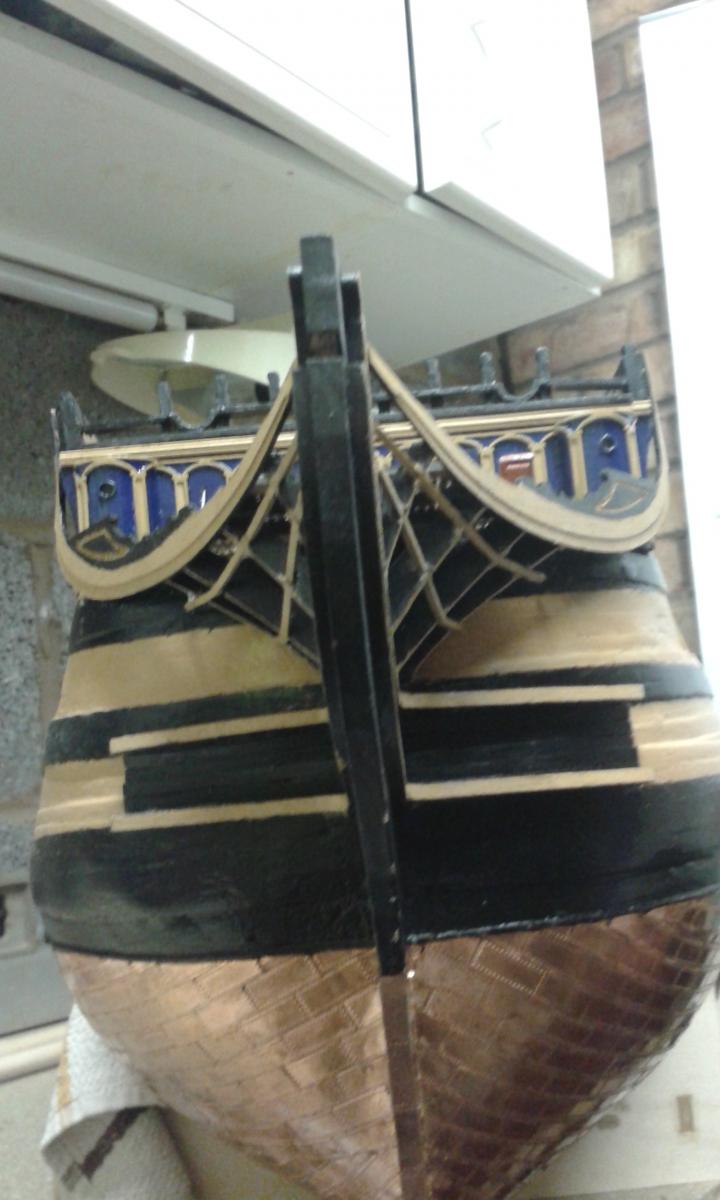
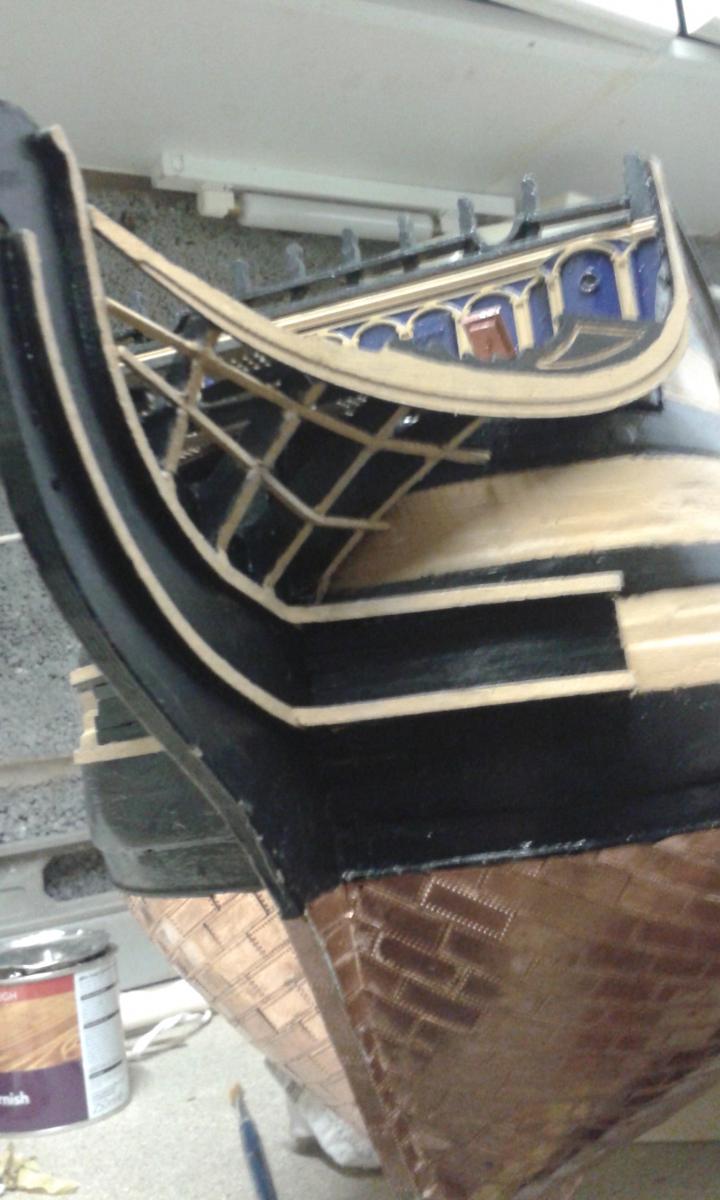
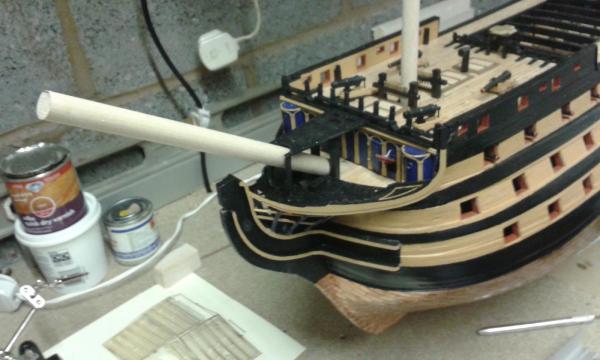
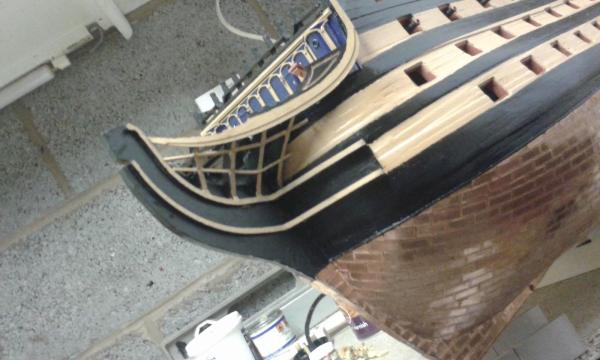
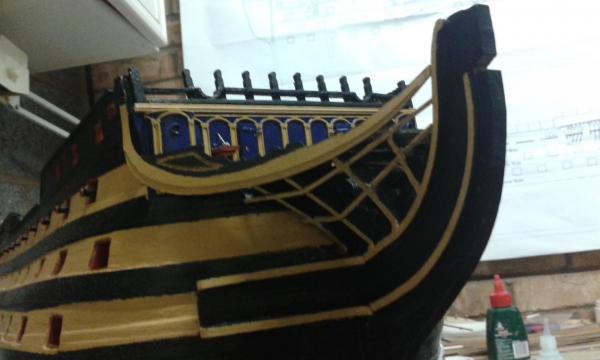
First part of the bow assembly is now complete with exception of the blue 2mm strips on the tiberhead side edges which will be tomorrow nights task. Turned out to be quite a tricky task, and if I had my time again I would do it differently, but hindsight is a wonderful ability which I do not have! In the end its not turned out too bad.


-
A very nice plate to commemorate your build. I to miss your posts but I will continue to ask you questions as my build progresses.
- 900 replies
-
- 2
-

-
- victory
- caldercraft
- (and 1 more)