Glenn-UK
-
Posts
3,170 -
Joined
-
Last visited
Content Type
Profiles
Forums
Gallery
Events
Everything posted by Glenn-UK
-
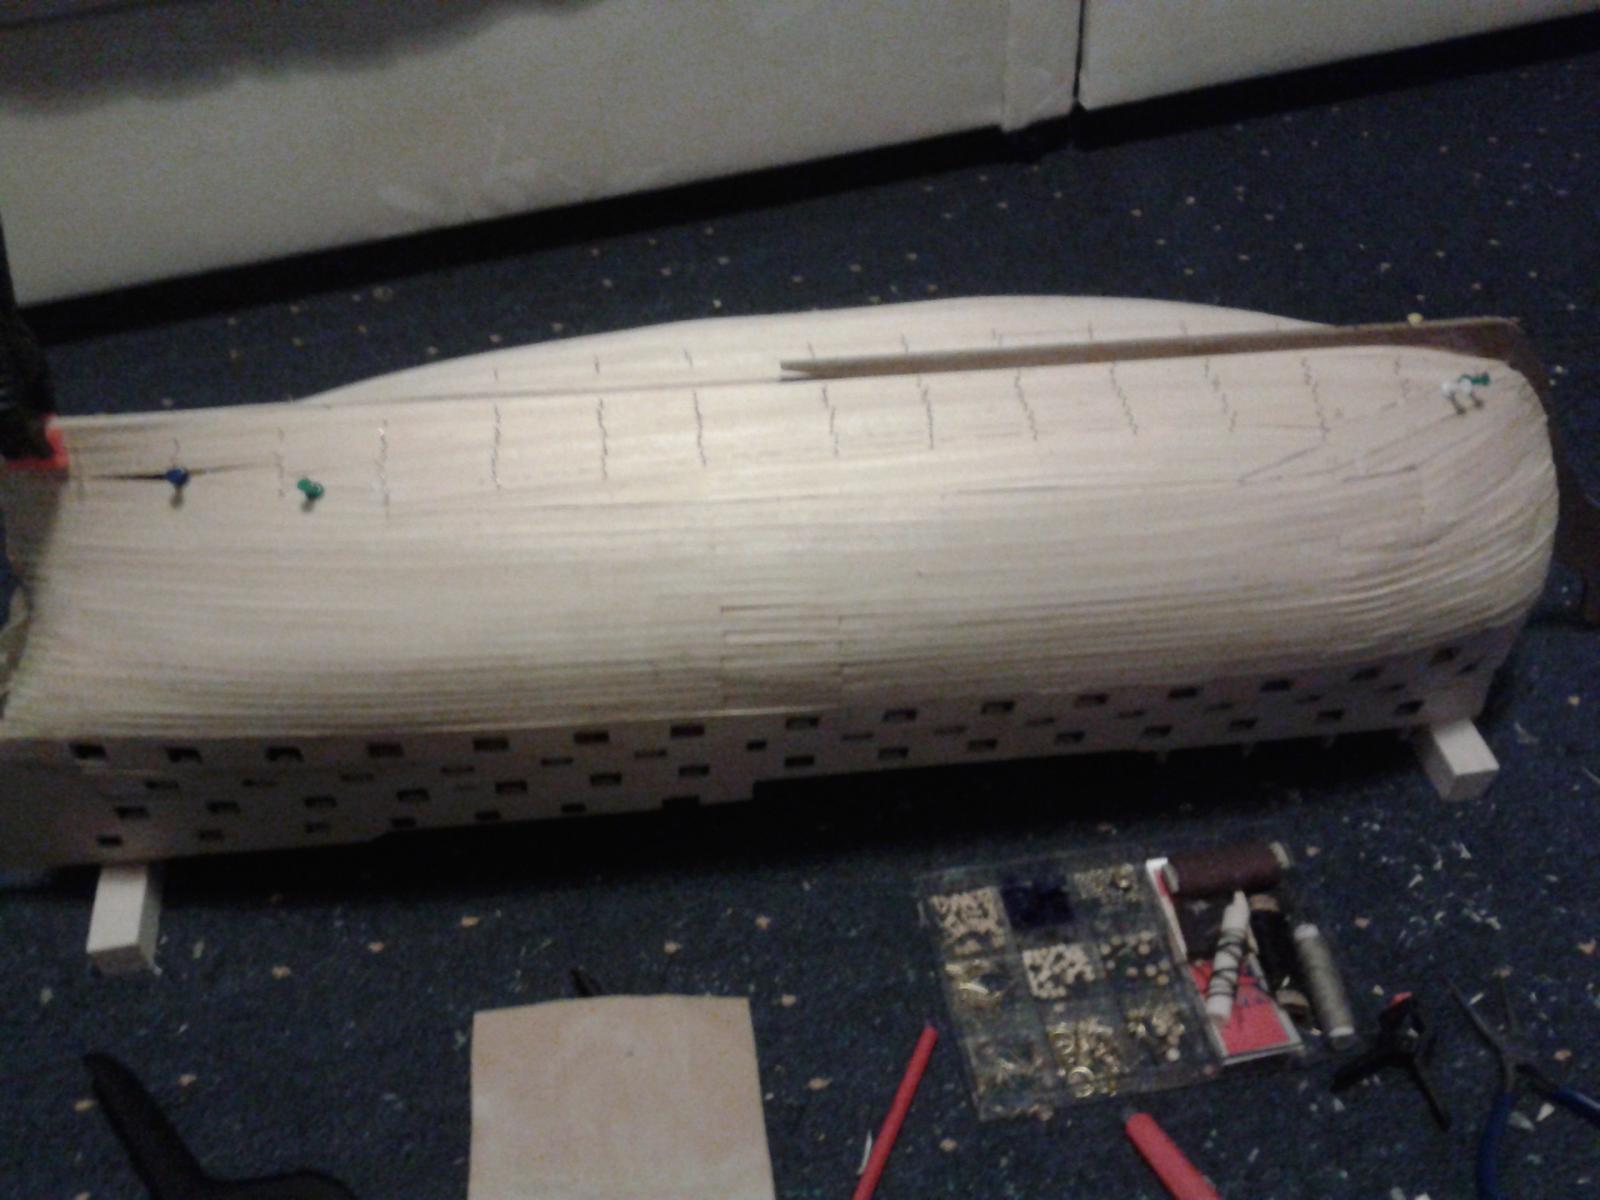
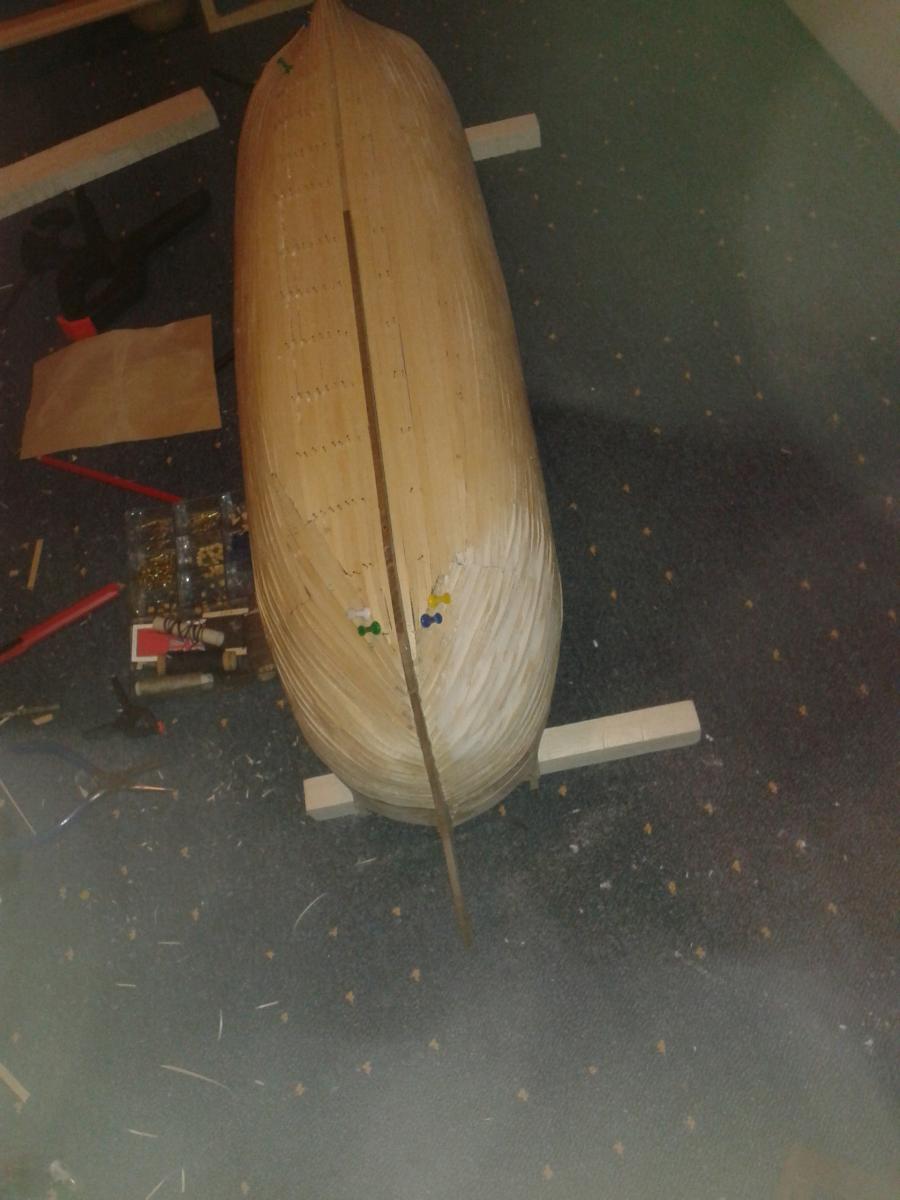
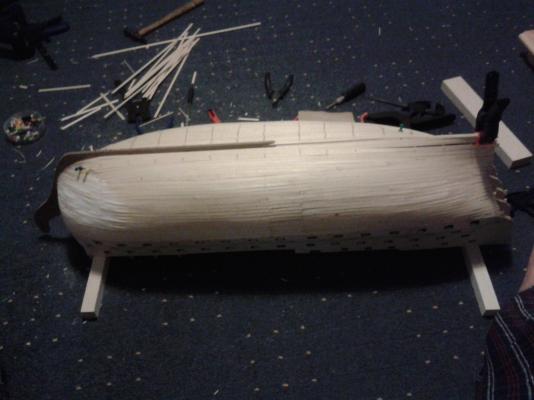
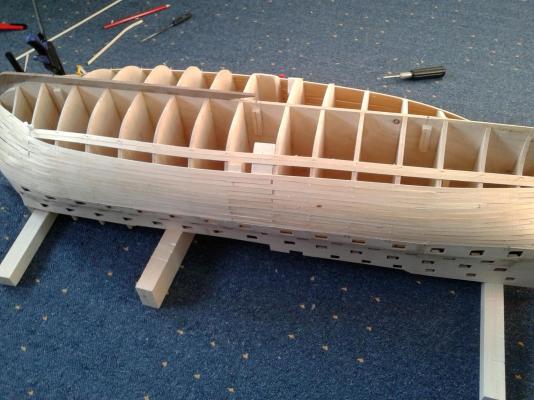
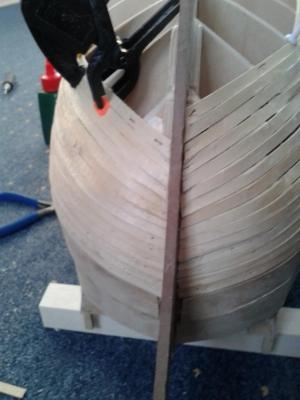
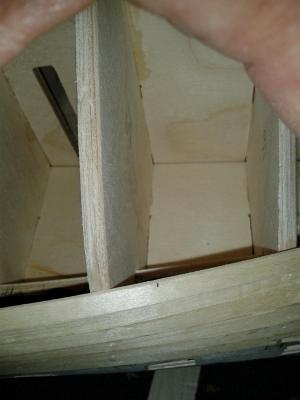
 Had a good evening working on the ship tonight and finished the first planking, except for two very small filler bits; now comes many hours of sanding and filling to get a really smooth surface ready for 2nd planking. As I got about 10 planks from keelson I found it better to start working back up from keelson. Starboard side, you can see the very small gap near stern by blue pin to be filled. Port side, small filler piece needed near clamp at stern. Bow, you can see I have put a bit of filler on the port side already. Stern I have enjoyed this task which has taken two weeks to complete, but I'm glad its time to move on from gluing and pinning the planks. Not sure when I will be able to start the sanding as I have a busy weekend with family, but will hopefully get a couple of hours ship time, fingers crossed.

-
Hello Jerry Nice looking anchors, it's good to keep busy. I've just about finished the first planking. 2 or 3 good sessions in workshop should see the job done. I'll post some pictures when complete. Hope your serving machine arrives soon as I'm really looking forward to watching your progress with the rigging. Keep up the good work. Glenn
-
You have done an amazing job with the rigging so far, a very impressive looking model.
- 439 replies
-
- 1
-

-
- victory
- caldercraft
- (and 1 more)
-
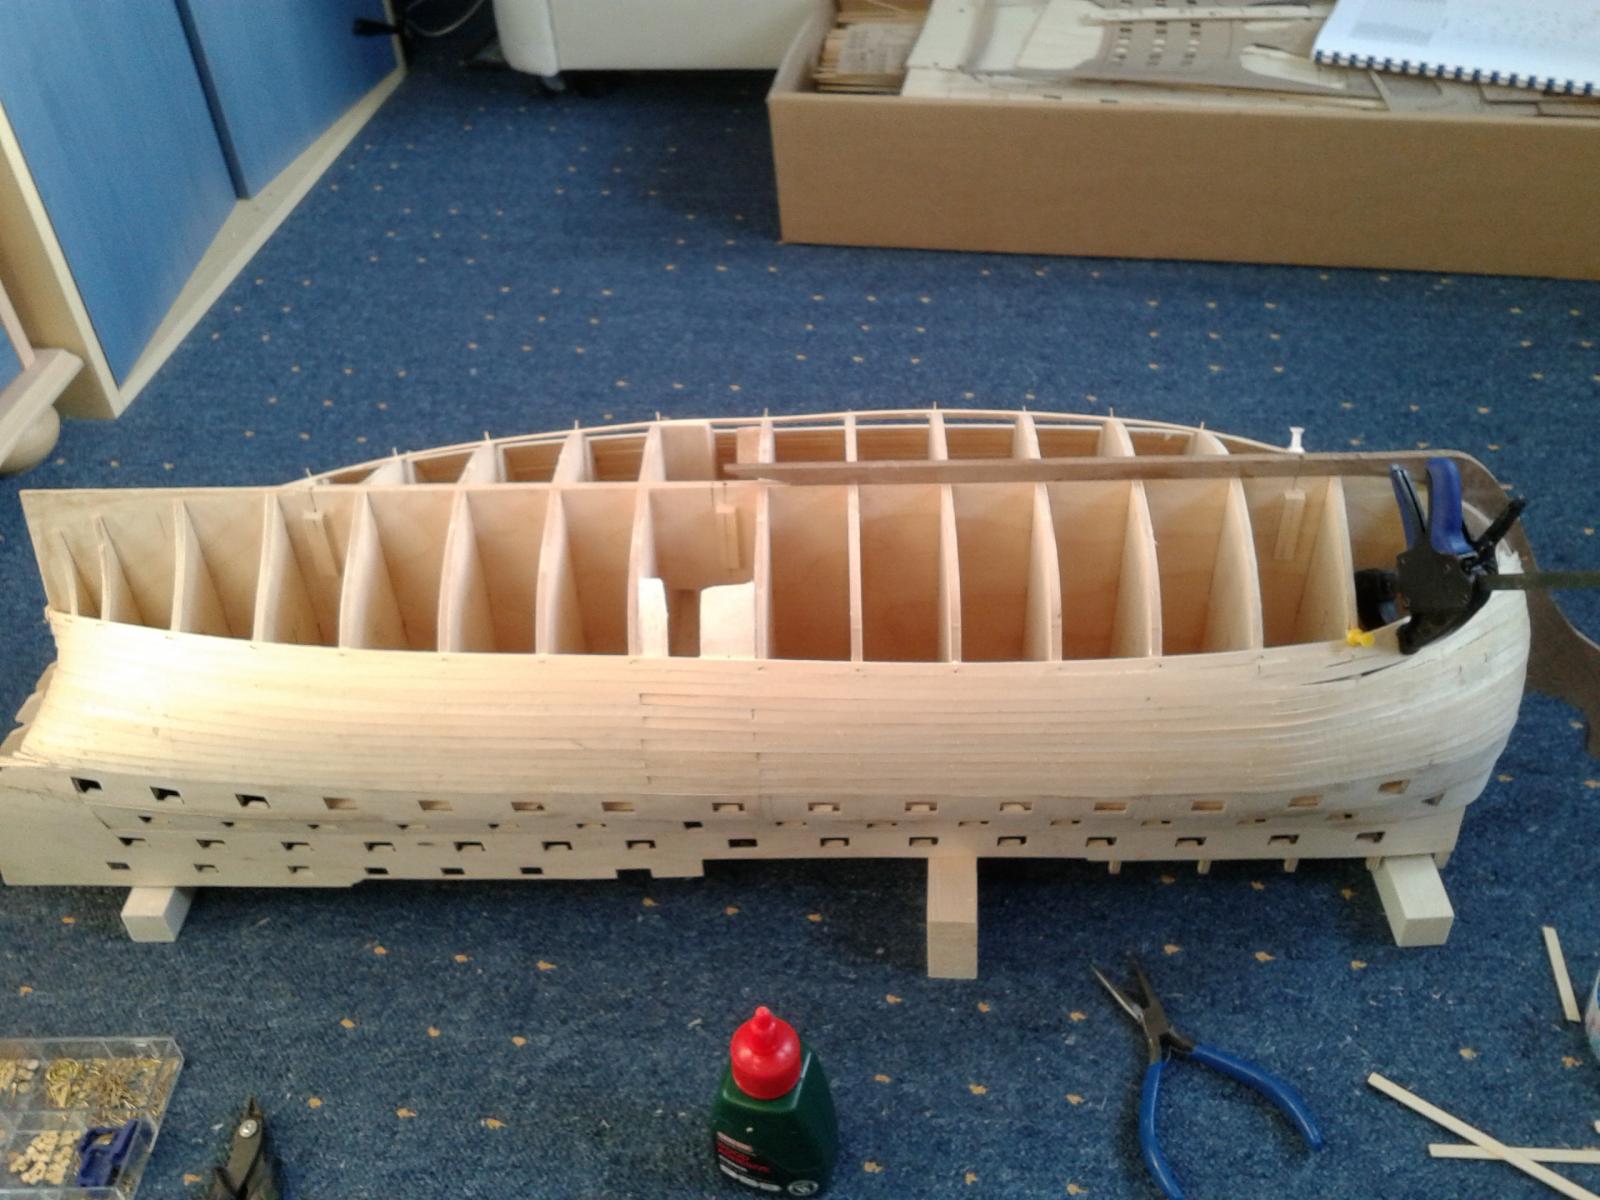
Yesterday with another day looking after the grandkids so only managed an 1 hour build time, hope to spend more time working on ship today. I estimate I'm about halfway through the first planking, and hopefully should be getting the near the end by next weekend. It's not my finest piece of work but given its primary function to provide a firm base for the 2nd planking I'm not too worried, and as has been said by others, no one can see the imperfections, use of wood fill, etc. On the positive side I've have learnt a lot from this task and now I'm actually enjoying the repetitive nature of this task. Stern end to date Picture taking of starboard side, I have moved away from but joint and mid point, and I'm now shaping and joining near the bow end Port side - You will note I have an area to fill, the gap at the widest will take two planks, and it is quiet an easy infill Bow end to date


-
1st Planking still progressing well, just reached rudder point at stern end working down from gun port strip 272 The question I have been pondering is: is there any benefit in starting the planking at the keel and work up to some point in the middle? At the moment I’m more inclined to continue working down toward the keel.
-
I too had problems with working out the correct fitting of the waterways, I made a mess of the stern end, over cut the boards, but thankfully I was able to add some fillers which when planked all looked fine. I'm not sure I got it 100% correct but looks OK.
-
I think the Victory is the more interesting build, so I would keep on with the Victory.
-
Hi Jerry Thanks for your comments, it is repetitive. I find it best to do 1 or 2 bow to stern lengths each side and then take a break. I have the ship resting on two supports on the floor which gives me plenty if room to work and position the ship for each plank, but is not so good for the back!
-
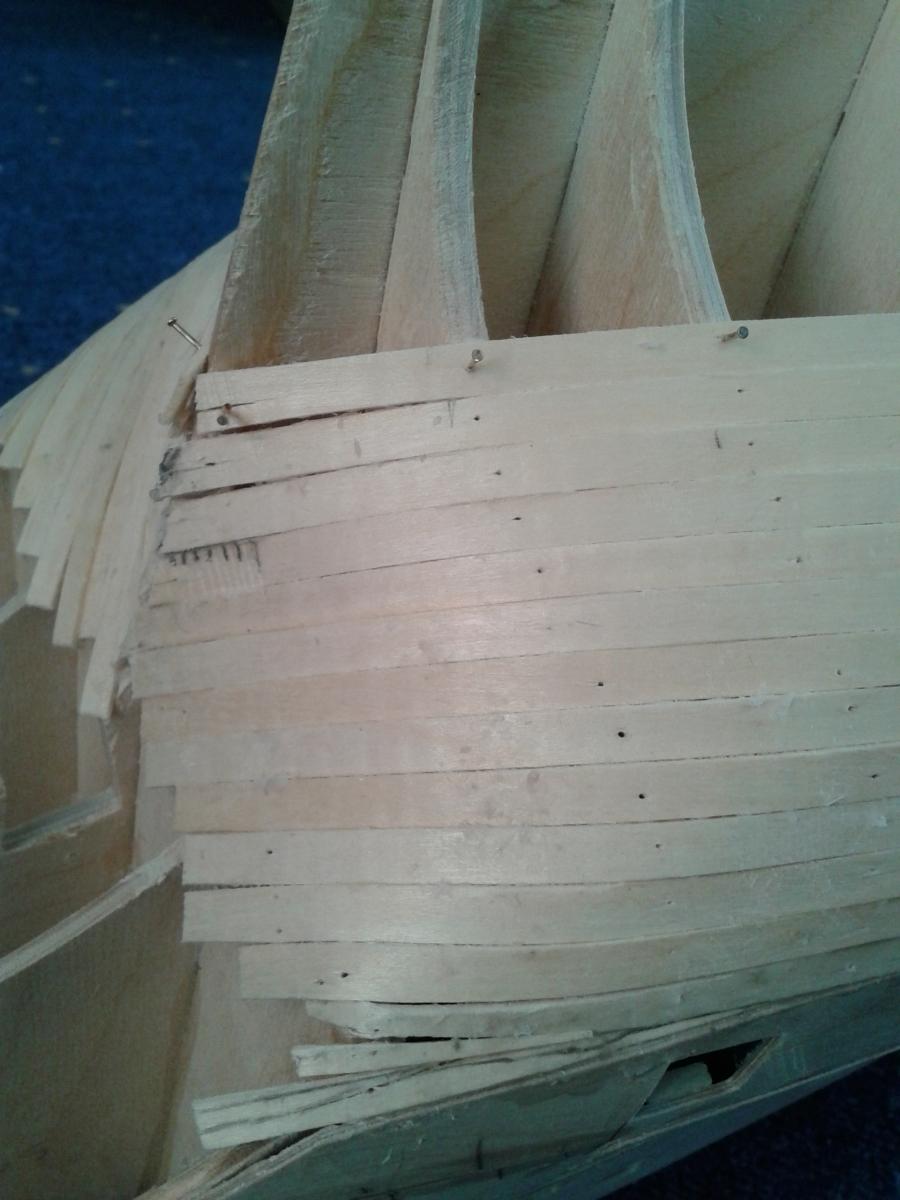
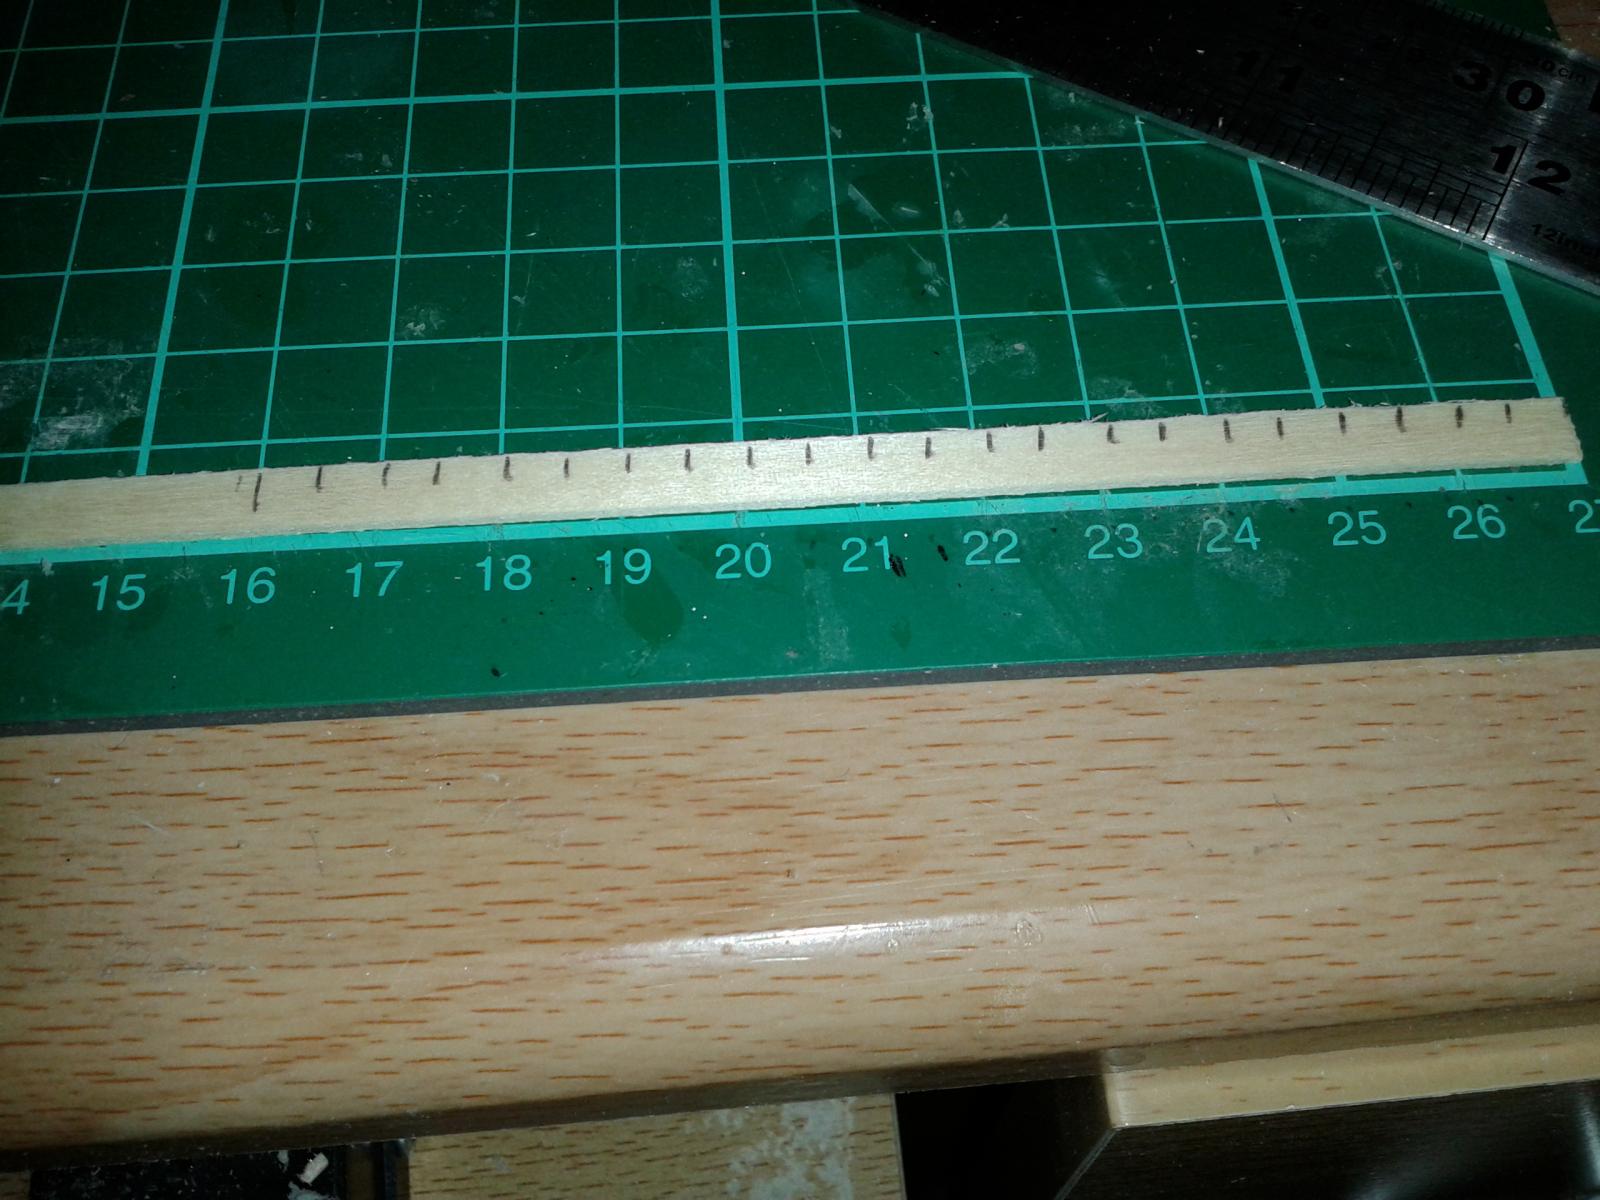
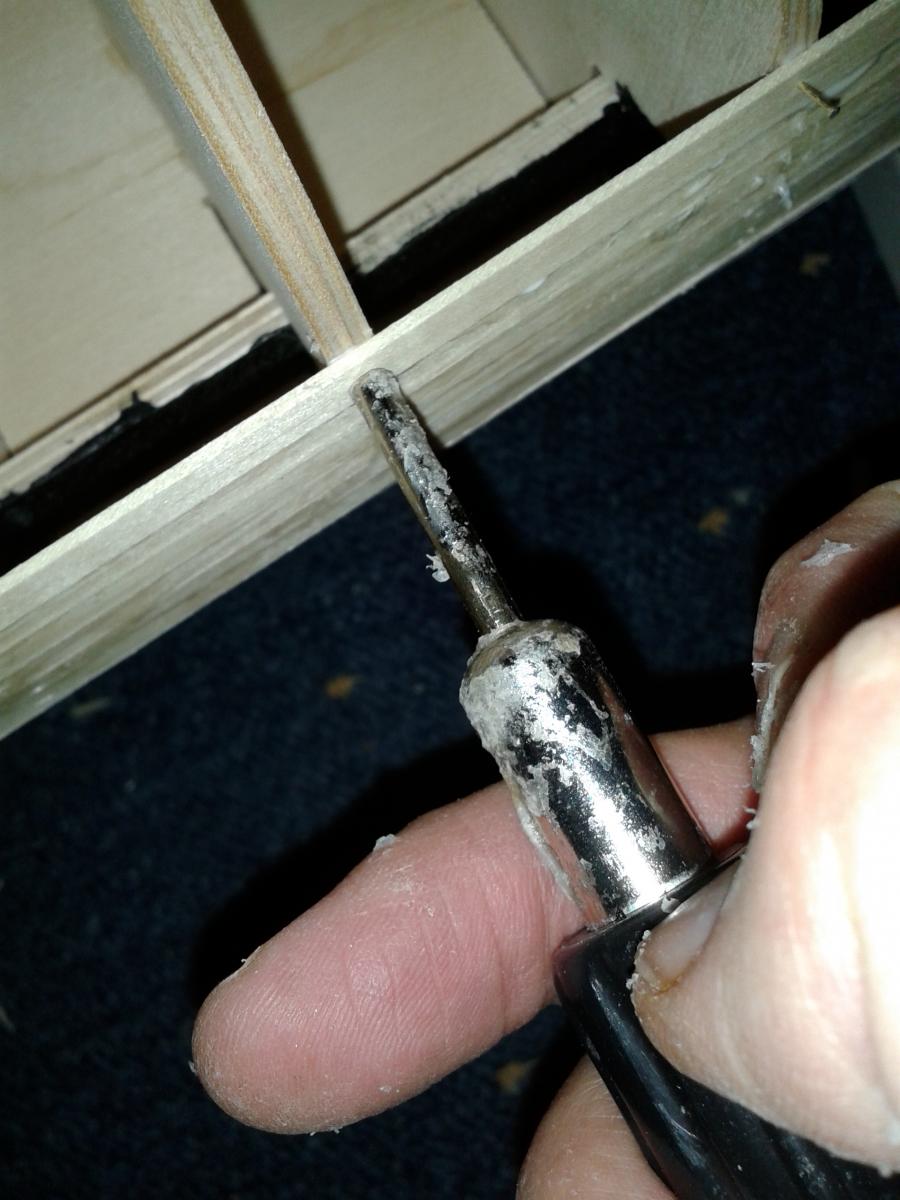
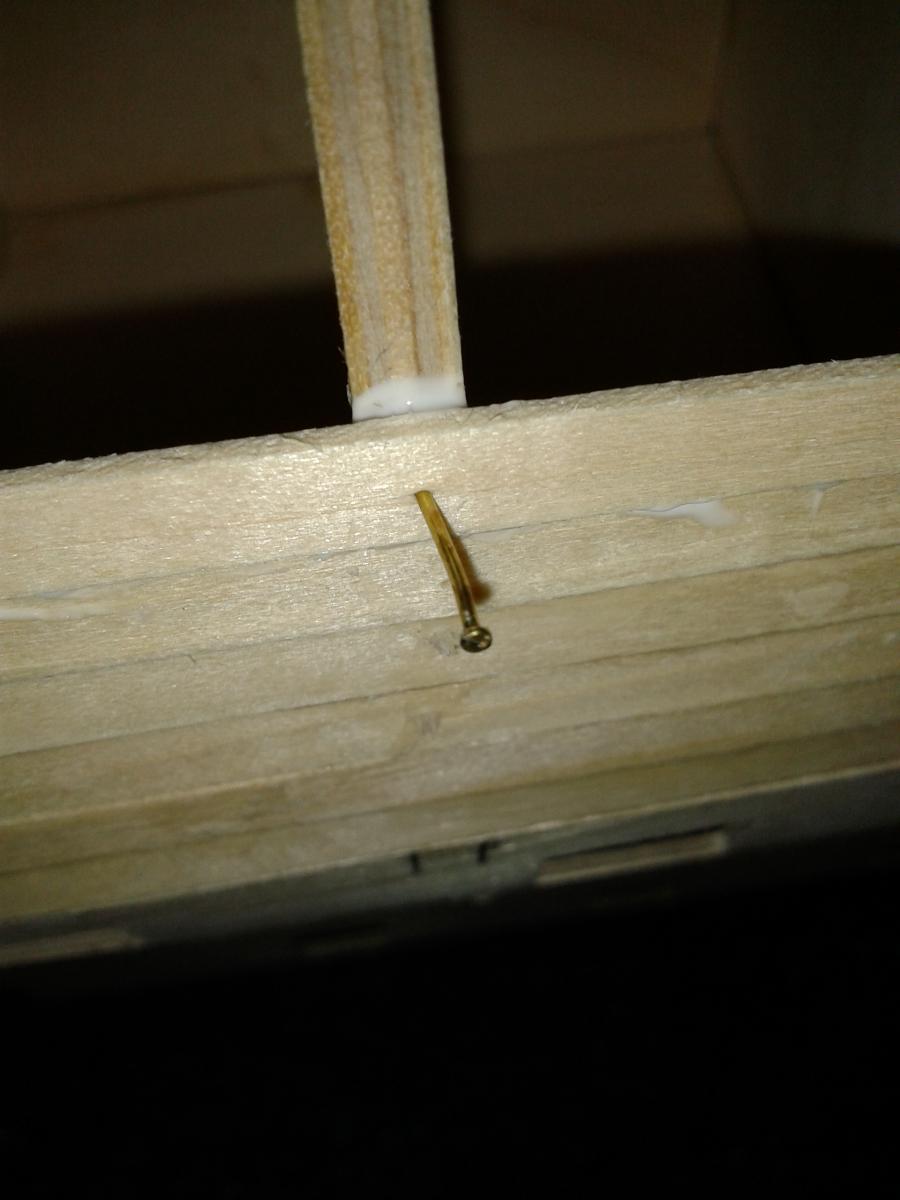
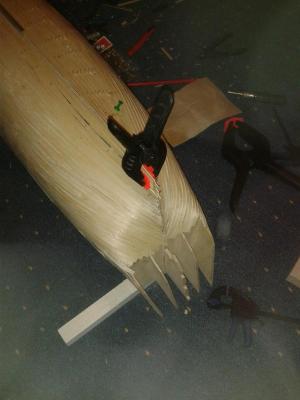
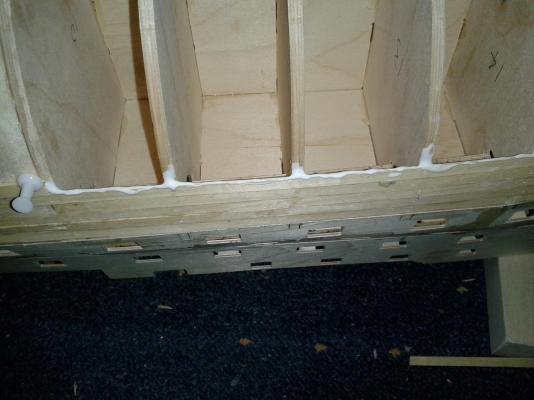
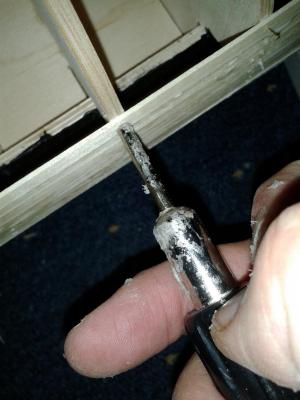
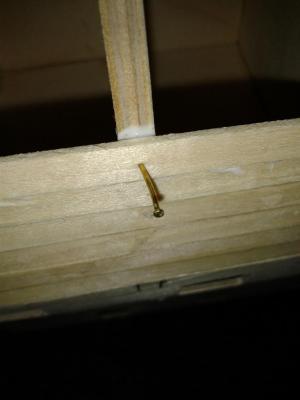
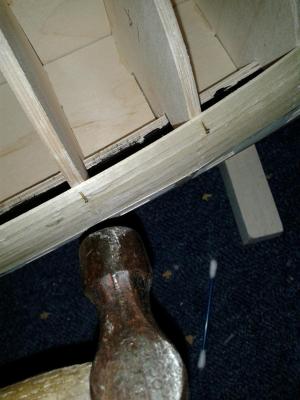
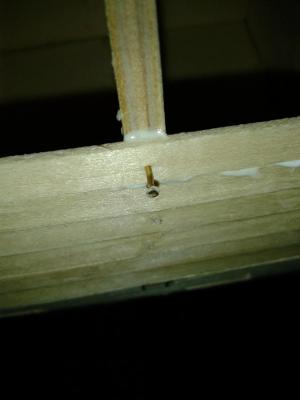
Hi Mick For the first planking I'm more than happy for the planks to run along the natural line and I'm not worried if the port and starboard sides don't match 100%. The main aim is to get a smooth surface in readiness for the 2nd planking. This may mean plenty of application of sanding and wood filler once the planking is complete. For the complex bend at the bow end I have found the plank bender is working without any problems. At the moment my bend length is 210mm, and I use the plank bend tool every 5mm, this gives a nice 90' bend. I have found using the map pins direct into the balsa support works best for holding plank in position around the bend. I took a few pictures as I installed one of the stern planks which may help. First I identify when the bend starts and mark with the pencil I then make a mark ever 5mm to indicate where to use the plank bend tool I then apply glue to the bulkheads and top of plank Using the pin pusher to get the pin started Tap the pin further in using the pin hammer, ensuring there is plenty left for an easy extraction of the pin once the glue has dried.

-
First planking going well; completed 6 plank section from bow to stern on both sides of hull. I calculate there are a further 22 plank layers to fit at the widest point. Given it is currently taking about 20 minutes to fit for one side bow to stern it take approx another 880 minutes to complete the first planking! Given my available build time, the addition effort required for shaping, etc. the first planking will be completed some time next week, probably towards the end of the week then another day for sanding and filling as necessary. I've had no problems using the pin pusher to get the pin started and the tapped in a bit further using a pin hammer.
-
No time in shipwrights office yesterday as the Admiral and I were tasked with looking after the grandkids (3 years and 6 months) all day, which was nice but hard work! Managed to get 2.5 hours in office today and started first planking. I decided to use the plank bending tool which is working like a dream. I also decided to butt joint each plank around mid point. I am very impressed that Jerry did the first planking as 1 strip, well done! It is taking about 20 minutes to cut, bend, glue and pin two planks that will go from bow to stern. I'm using standard wood glue for this stage. Here are some pictures of the start. On the starboard side I let the first plank follow it natural path, which resulted in fitting a filler piece, as you can see I have followed the traditional advise with maximum depth of cut to only 1/2 plank width But joint, and additional filler pieces fitted On the port side it was not necessary to fit a filler piece as the plank natural flow did stay true with gun port strip 272! 2nd plank row also followed the same natural path on port side. Butt joint for adjacent planks terminate on different bulkheads Also found it necessary to fit an additional filler plank at stern, so plank could follow it natural path.


-
Hello Mick With my last boat build I bent planks by soaking which was fine and Jerry' s plank soaking device is a great idea and is worthy of consideration by all boat builders. That's what I like about this forum the tips and tricks you can pick up from the other modellers plus plenty of free advice on specific topics related to your own build. I bought the plank bending tool last year and tried on a few test strips to see how much pressure would be required and I'm happy with the results. The pin pusher with an adjustable stop is currently out of stock from CMB. I have found with care and patience I can usually get the pin in OK for easy removal later. Sometimes I use a pin hammer to get the pin in deeper and sometimes I need to ease the pin back a tad.
-
Whilst waiting for port gun strip 272 strip glue to cure, I decided to test plank bending with tool. First I marked the length of the bend and marked every 10mm to identify when I wanted to use the tool. This gave a reasonable bend but I felt it need more so added a second set crimps between the first set of crimps. This seemed to do the trick. I also trimmed plank so it would sit on bulkhead near centre of hull. As per Dave's (Shipyard Sid) advice I also added some additional support strips on the butt joint contact area. I think I will need to make one more adjust to starboard strip 272 as I have just noted the strip is sitting a bit proud on a couple of the bottom bulkheads around bulkhead 2 & 3. A spot of glue and use of clamp should do the trick.


-
Hi Kevin Thanks for the message, I'm at a very earlier stage, only 30 hours into the build, due to start first planking tomorrow! I have enjoyed looking at your build log, it nice to see what everyone else has done.
-
Hi Mick I think you will find you need to remove the pins before you sand the hull. Glenn
-
Dave I'm very impressed with your work, you are an inspiration to us fellow HMS Victory builders who follow in your wake. And I'm sure you will have the shrouds and ratlines restored to good order in next to no time. Glenn ps look forward to your next batch of photos.
- 439 replies
-
- 1
-
-
- victory
- caldercraft
- (and 1 more)
-
Next section glued and clamped, will have to let dry until morning, I may clamp next section first thing in morning before work so I can then finish when I get home from work - well it sounds like a plan! Here is a couple of new photos.


-
I have started gluing the port side gun port strip 272 tonight, which like the starboard side, will be done in 3 or 4 steps, so I can use my available clamps to the full. Should be completed tomorrow evening so I can start with the 1st planking at weekend Not sure how much time I will get as eldest son moves house tomorrow so I may be on house DIY tasks, or looking after the Grandkids. The eldest grandson is 3 years old and loves sneaking in to the shipwrights office, I'm told he was very impressive on Wednesday, with his wonderful comment WOW!, what more can I ask! Whilst I wait for the glue to dry here are some pictures of the gun strip 272 assembly from start to current status. Starboard gun strip 272 Stern Starboard gun strip 272 Stern close up, showing alignment is correct Starboard gun strip 271 / 272 slight bump on bow, but this will sand out without to much effort. Starboard gun strip 272 completed Start of port side gun port strip 272 Gun ports are all clear of the bulkheads which is good news, gun port support strips installed on all gun ports to aid the lining process later on in the build, which can be seen in some of the above photos.


-
Hi Gil I've a long way to go on my HMS Victory build before I can even think about what you are now doing with the coiling, but what fantastic work and great detail and advice to help us mere mortals along the way. Many thanks Glenn
- 755 replies
-
- 1
-
-
- finished
- caldercraft
- (and 1 more)
-
Hi David Thanks I was looking at adding stealers, half stealers, drops etc. as necessary, as the planks will run along the natural path. I do think staggered butt joints is the better way to go at the moment. I know all about leaving pin heads free, as I didn't on my first boat build and it took an age to remove them all. My pin pusher does have an present depth adjustment, its just a matter of feel. I tend to get the pin started with the pusher, and then use my trusty pin hammer to finish off. Glenn
-
Look forward to more pictures as your planking processes.
-
Thanks Jerry and Gary. I would think starting at bow end makes most sense. The butt joints would not show as they are hidden by the second layer of planking. I plan to use wood glue and pins. I have a pin pusher which I used to aid the gun port strips installation. I also have 2 boxes of the colour headed pins. I will try both and see which one is easier to use, I'm more inclined to use pin pusher at moment. Not sure if I will soak planks or use my plank bender, again I will experiment with both to see which is easier. I would like to think the plank bender will be best for this ship.
-
Just a quick update, no pictures as I have left my phone at work - dooh Anyway starboard gun port strip 272 has now been installed, glued and clamped in sections. Will start with port side tomorrow night so should be ready to start first planking at weekend. In Keith Julier's New Period Ship Handbook he suggested planking in two section with butt joints around the central bulkheads so you were only having to bend one end when fitting to hull. Did anyone follow this advice? If not what is best approach to fit as one piece, start centrally and work forward to bow and the aft to stern, shaping and bending as necessary before installation.
-
Slow progress as I wait for glue to dry as each of the gun port strips are attached to the hull assembly, here is a couple of pictures for first part of gun port strip 271 starboard. After this was clamped I decided to remove the quarter gallery pieces as I can start to dry assembly and adjust pieces as necessary.


-
Hi Patrick I have only fitted the additional fillers to the bow section. I didn't think it would be necessary for the stern.