Glenn-UK
-
Posts
3,168 -
Joined
-
Last visited
Content Type
Profiles
Forums
Gallery
Events
Everything posted by Glenn-UK
-
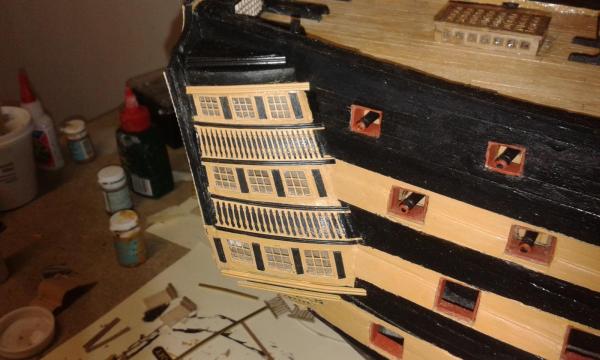
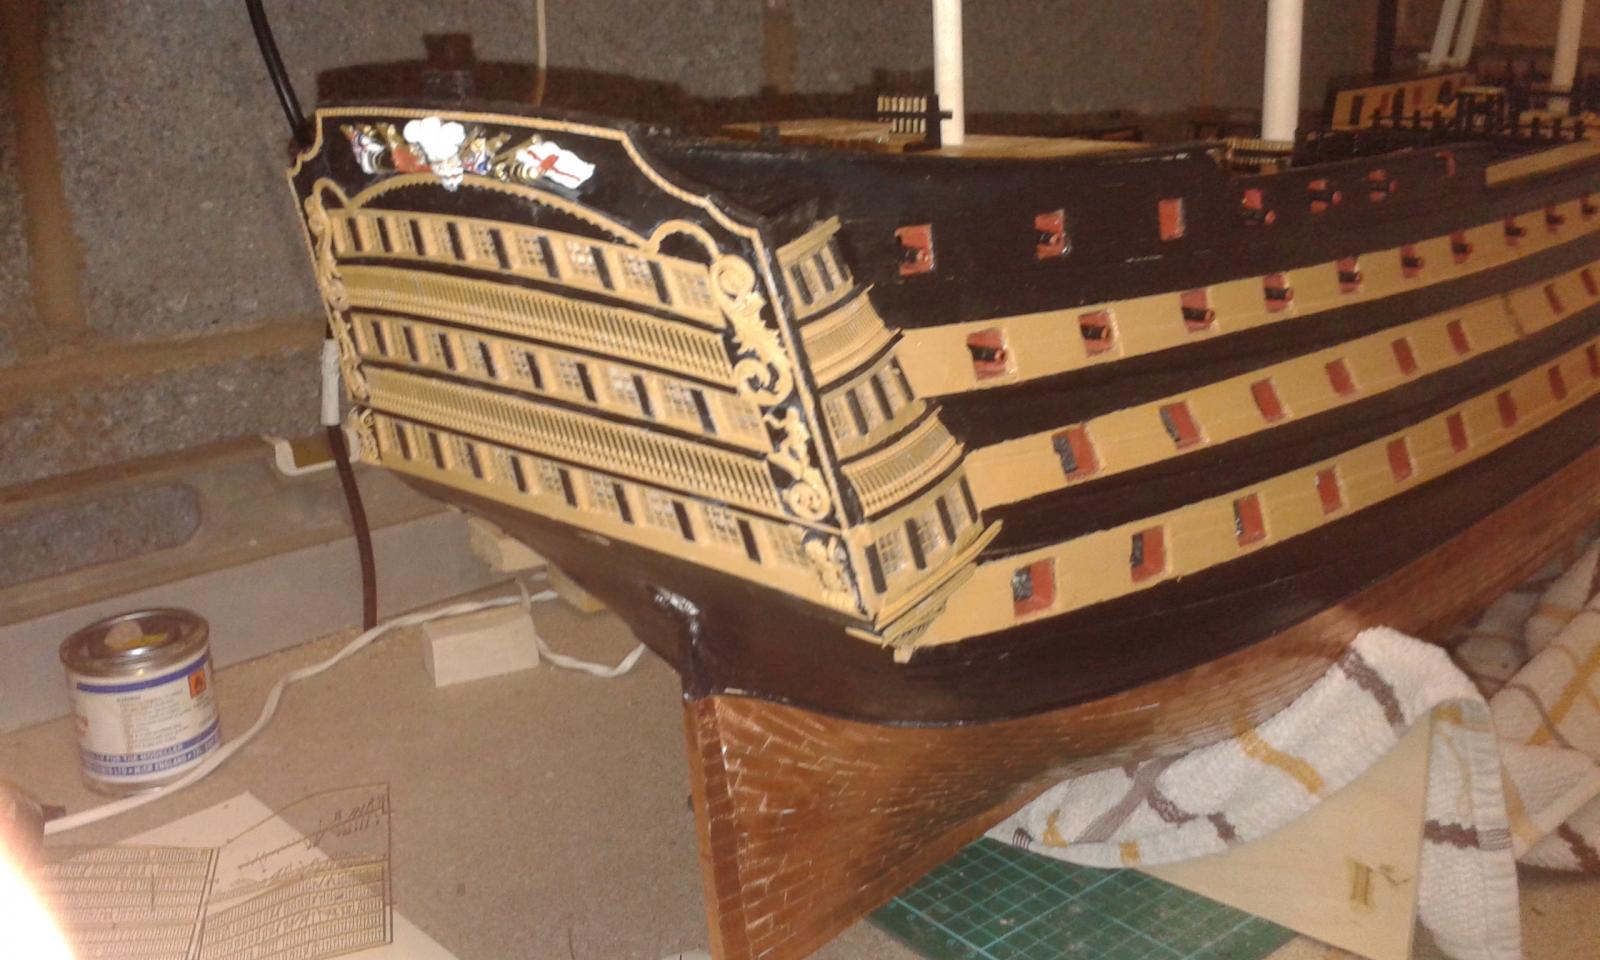
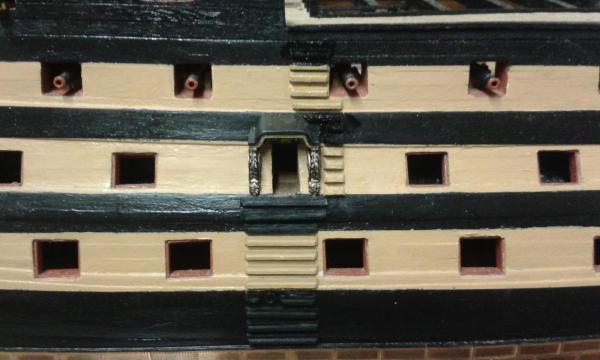
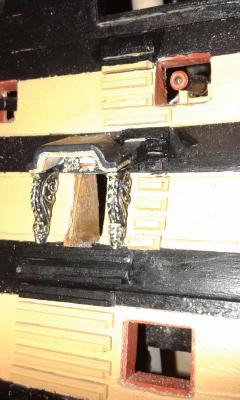
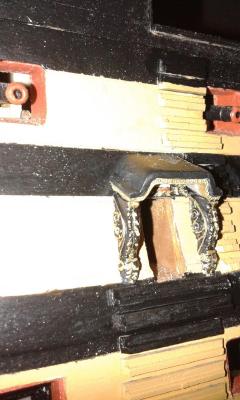
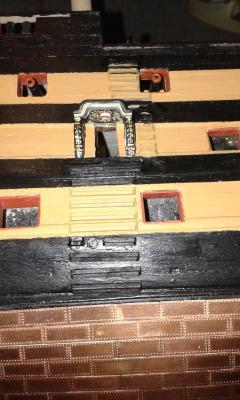
 I had a real treat yesterday as I paid Shipyard Sid a visit, a really nice and very helpful man as is his good friend Glenn who I had the pleasure meeting yesterday as well. His completed Victory build is very impressive and all I can say is WOW. This picture doesn't do it justice. Anyway back to shipyard tonight and the first side enrty port and steps have now been installed. Same again tomorrow night on the other side. Trying to show some of the detailed painting of the entry port.
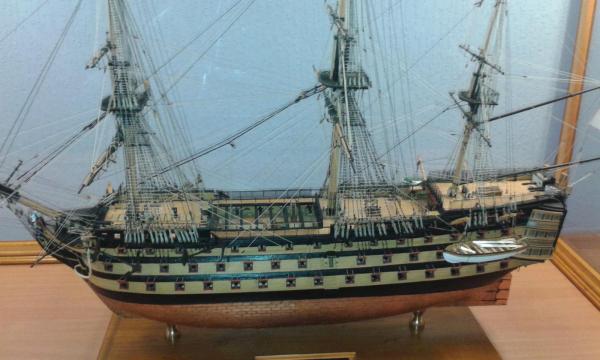
-
I'm now in procession of the HMS Pegasus kit, and I'm now going to spend some time reading through the instructions and plans. My first impression is it all looks very good and I'm looking forward to making start in the next few days. I cant make any comment of the quality of the material at the moment, but generally what I have seen looks very good, certainly compared with the Victory kit.
-
Now you're just showing off, and why not it's an impressive bit of woodworking.
-
Nice work, The key is finding a method that works well for you. I found rigging the gun deck cannons really hard work and I didn't do it to well. I had the same sort of problems, big hands, small cannons, lack of proper tools and poor eyesight. I found a method that worked well for me for the quarterdeck cannons. I also invested in small additional tools, such as a helping hand tools and magnifying glass which are a godsend for the blocks. I also tried and added coiled ropes which I was pleased with.
-
Build Index - hyperlinks to different sections of build will be added as the work progress on this build. I will probably reformat the index as the build progress as well to reflect the build tasks. 1. Prework - dry fitting bulkheads 2. Beading Line and Rabbet 3. Lower Gun Deck Fittings 4. Grating Assembly 5. Dry Fit Main Gun Deck and Fitting 6. Gun Deck Fitting Prework 7. Lower Gun Deck Glued and Pinned 8. Pre Gun Deck Planking Work 9. Start of Gun Deck Planking 10. Gun Deck Opening Cleared During Planking 11. Gun Deck Planking Work In Progress 12. Gun Deck Planking & Fairing 13. Main Deck Fitting Painting 14. Fitting Basla Inserts Bow 15. Fitting Gun Port Strips 16. First Planking 17. Second Planking 18. Bulwalks
-
NIce cleat work, enjoy the game. I'm guessing your routing for the Sea Hawks.
-
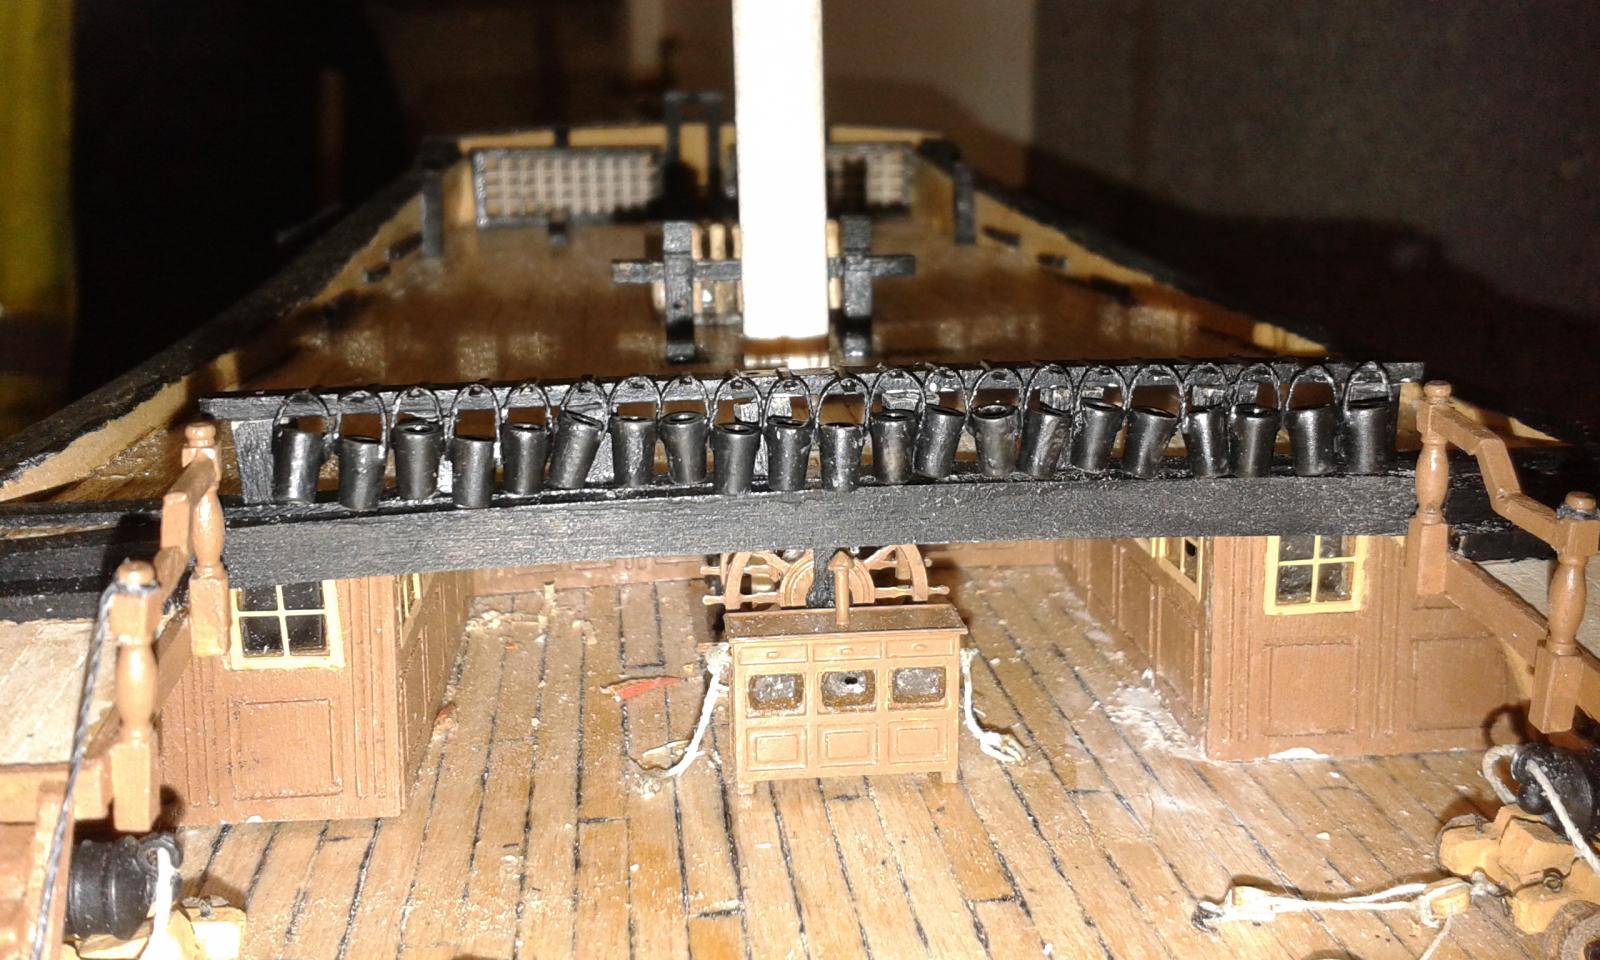
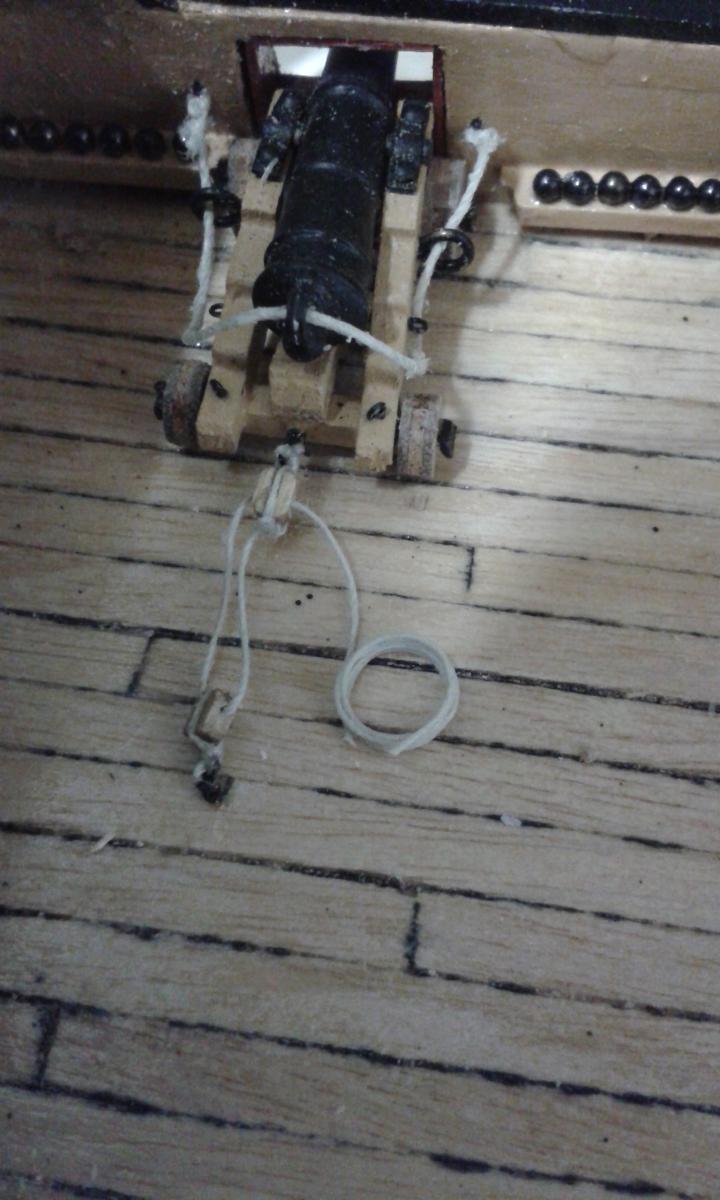
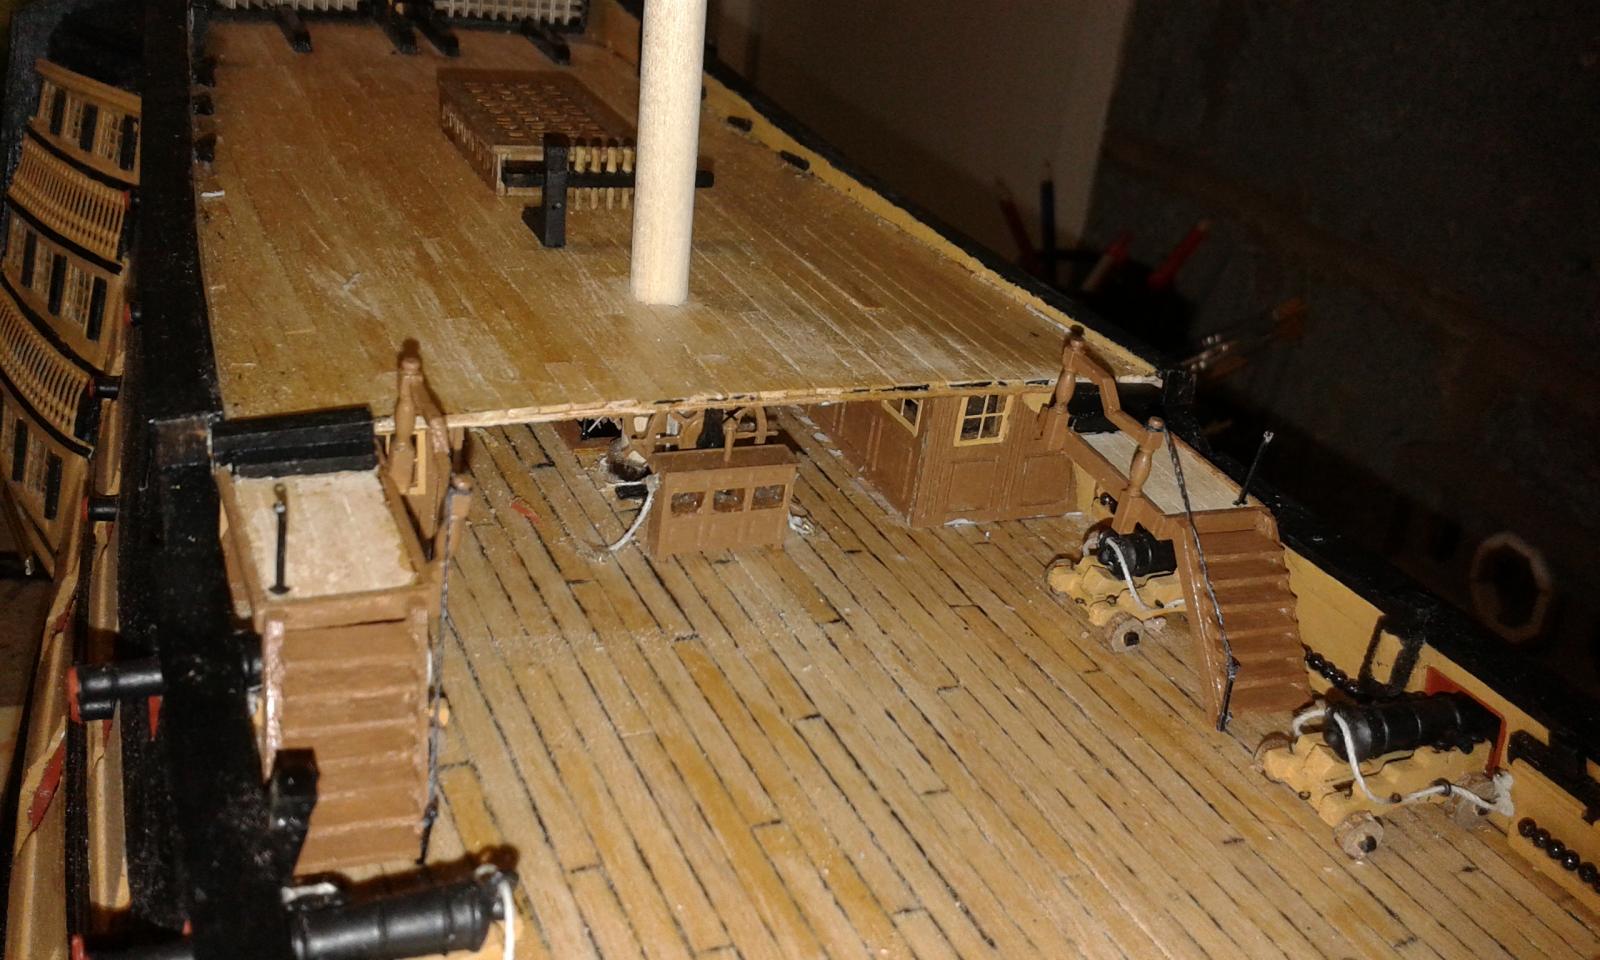
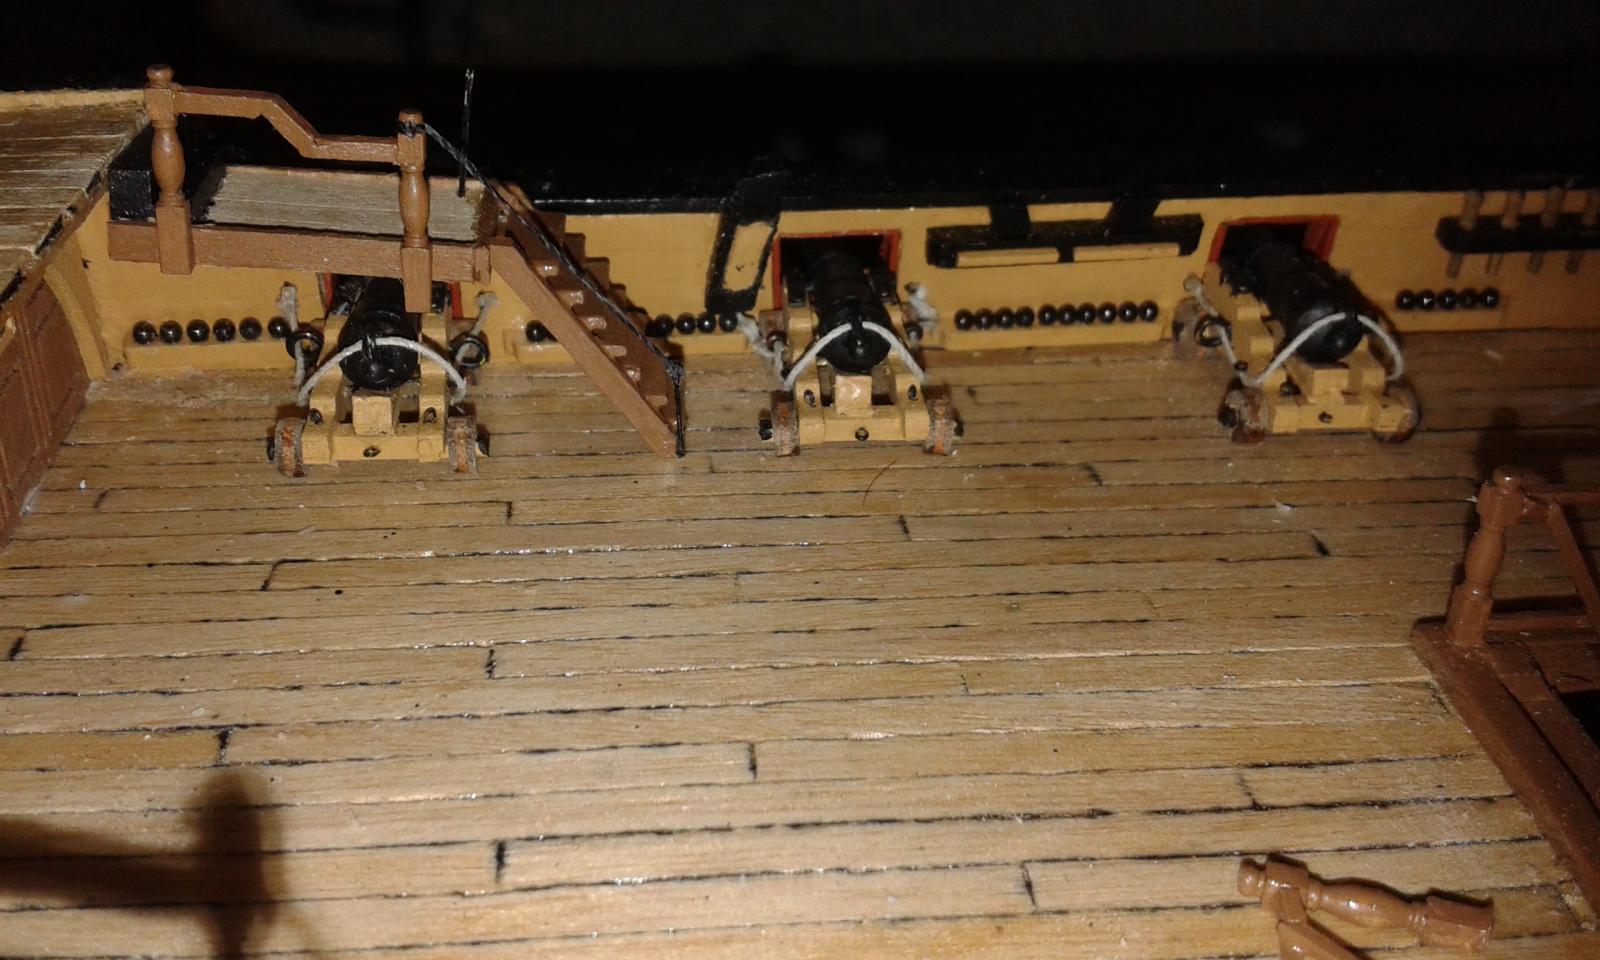
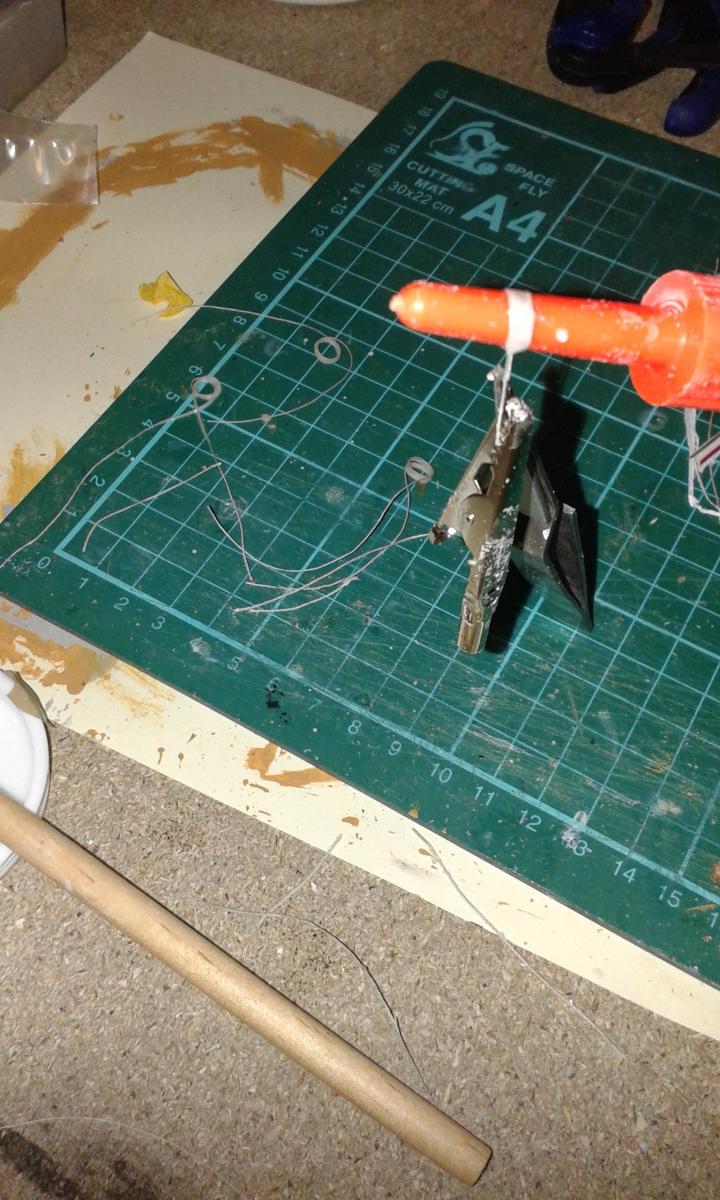
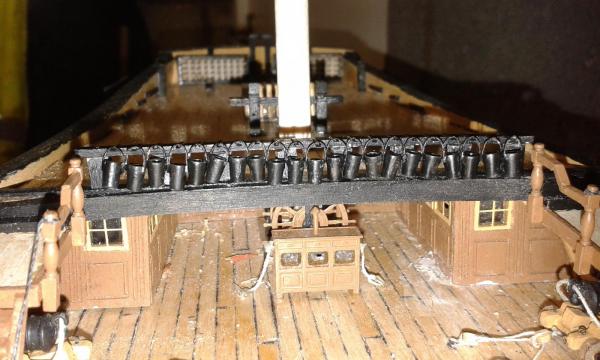
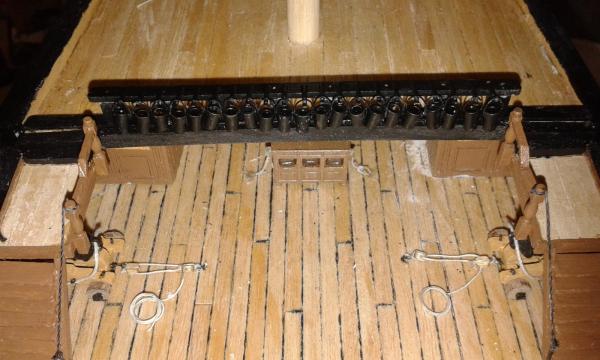
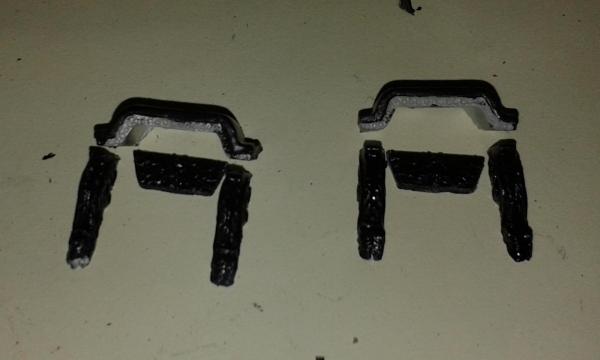
Finally completed fitting the fire buckets.I did come up with an alternative build method after I had rigged 15 of the buckets which would have resulted in a much more uniform build, but decided I would leave as is. They are not straight, neat or tidy looking, but when the ship is fully rigged it will not be too noticable, well thats the theory. I may add a brass profile strip under the fire buckets after looking at pictures of the real ship. Deck hands need to clean under the poop deck. Can you spot the mistake I made with the cannon rigging. I only noticed this afternoon! Next task is to fit the side entry port and steps, which will take a 2 or 3 day to complete as the entry port castings requires some detailed painting. The actual casting were not that good a quality but will look ok when painted and fitted to hull. I have already added the black background colour, and will add the other colours over the next 2 or 3 days. It will probably take a nights work to remove the steps from the walnut sheet and file off the rough edges. The next big task after that will be the assembly and rigging of the gun port lids. I'm not sure if I should pre drill the gun ports first in readiness for fitting the cannons (which will be fitted later on) before I fix the gun port lids
-
I may stay up late and catch some of the super bowl. Lets hope they have enough air for the balls this week! Next week the 6 nations rugby union competition starts and I'm hoping England can win the Grand Slam this year and then do well in the world cup later in the year, but I think the All Blacks will lift that trophy again.
-
Happy February Jerry I can't believe the progress you've made over the last 6 weeks or so and built to such a good standard. I thoroughly enjoyed my full English breakfast yesterday but didn't get any time in the shipyard. I will commencing on a parallel build project, HMS Pegasus very soon. This will be done in slow time, perfecting build methods, such as a rabbet, prior to installation. There are some great build logs to follow by Blue Ensign, Spyglass, etc.
-
I'm toying with the idea of buying HMS Pegasus from victory models as a side project, one where I can take my time to fill in time when stuck on some of the repeativite tasks. I'm also reconsidering doing another Caldercraft Victory build once I have completed my current build trying to reduce many of my build errors second time around. I say go for it David
-
The deck work seems never-ending. I should have followed Gil's build method for the fire buckets with a strip as you suggested. But, as Frank said, I did it my way. I hope to have all the deck work done within the next week or two. It's a Morrison's Big Breakfast as its only a 5 minute drive, a nice treat as I follow a srtict diet during the week so I can eat what I please on Saturdays. This has resulted in a 3 stone weight loss.
-
She a very nice looking build and now looks ready for the deck fittings. You must be very pleased with the build so far, and I look forward to watching your continued progress. Keep up the good work. I've been rigging 21 fire buckets, 6 failed the quality test as they didn't hang at same height as the other fire buckets. I think they have been the first few before I refined the rigging process. I will redo them redo them tomorrow morning but first I will go out first thing for my weekly treat of a full cooked English Breakfast.
-
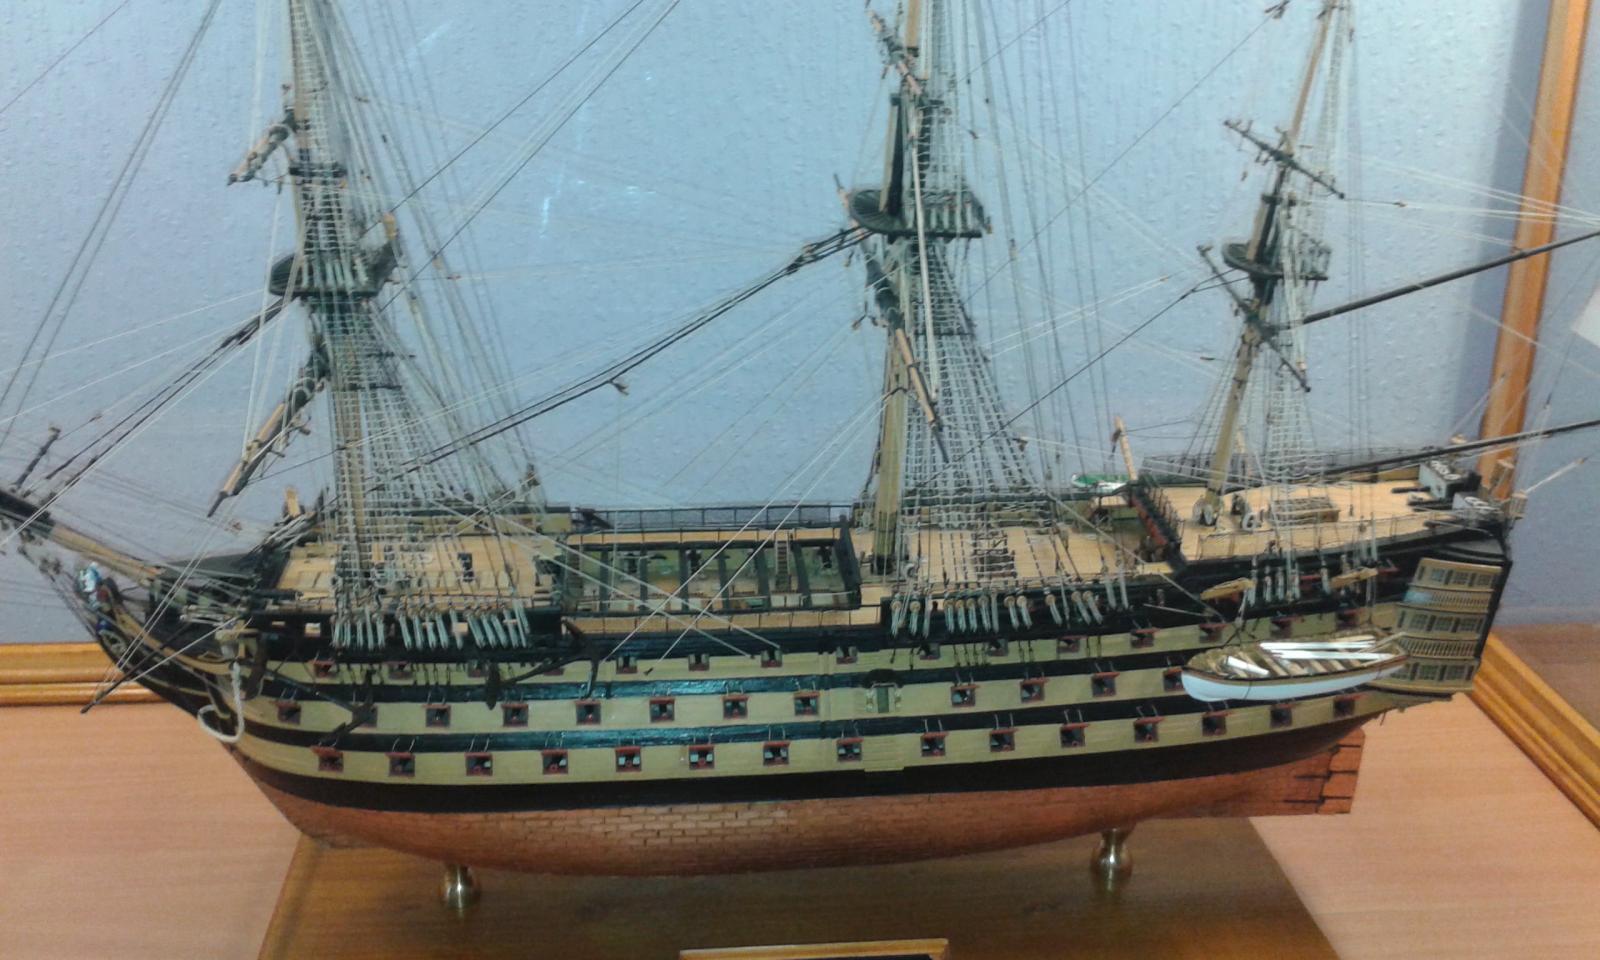
Stunning set of photos showing the amazing build you have completed. I refer to you build log all the time as I continue to plough my way through my HMS Victory build. Thank you for sharing.
- 755 replies
-
- 2
-

-
- finished
- caldercraft
- (and 1 more)
-
Nice steady progress as always, and you will soon move on to the next phase. I'm currently working on fixing 21 fire buckets to my build and its going easier and better than I first expected and should be completed by the weekend.
-
Your bow area work looks first rate. It's amazing how long what seems to be a simple task can take. I spent two hours working tonight and not a lot to show for my endeavours.
-
When looking at ways to rig, the lines are coated with wax (Normally beeswax) to enable the builder to shape the rigging, for example around a dead eye so the line stays in place prior to stropping. I bought a block of beeswax and have run the rigging lines several times (up to 50 times through the block) through the wax but seem unable to get the same level of shaping. I have tried warming the wax before I run the thread through it. Has anyone else had this problem?
-
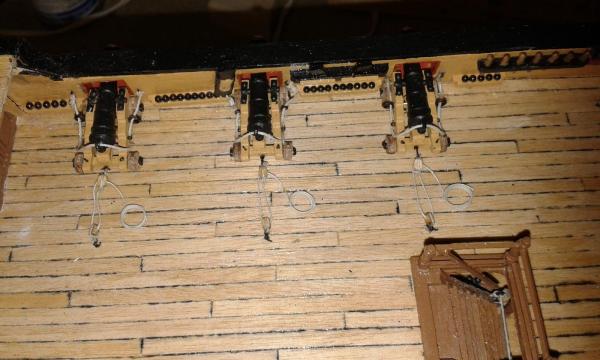
Was able to spend a bit more time in the shipyard today and completed the rigging of the first three quarterdeck cannons. Coils were made separately, as per my previous post and with careful placement looks OK.

-
Hello David I agree not much deck work left, but plenty of hull work left to complete. I will try not to damage the pointy thing
-
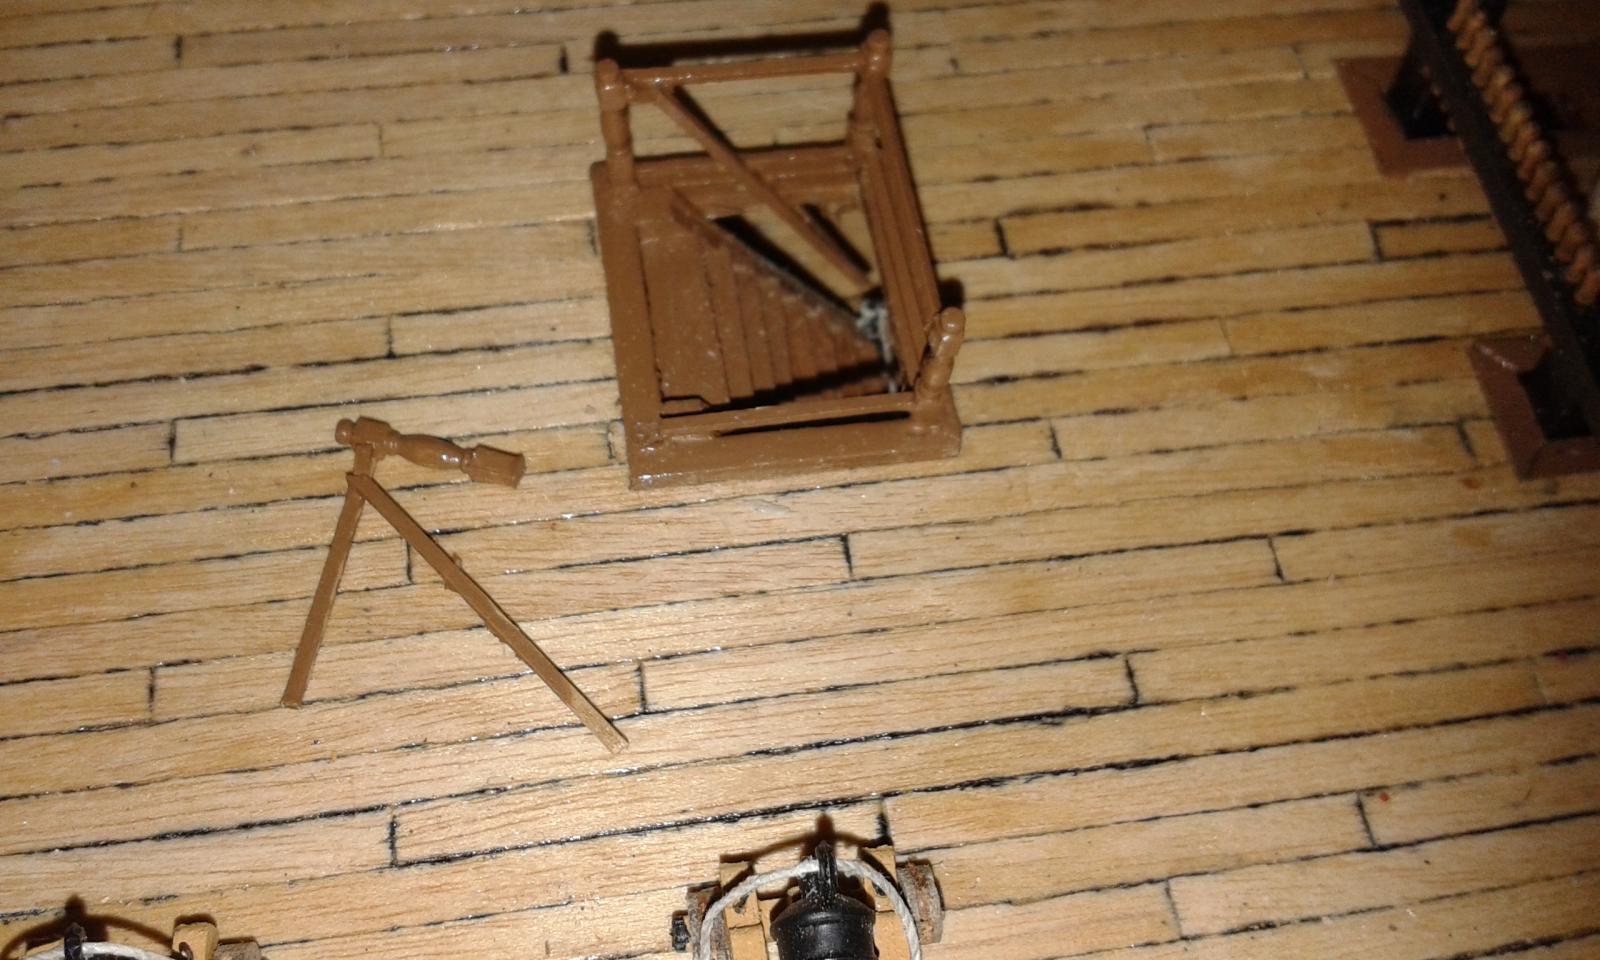
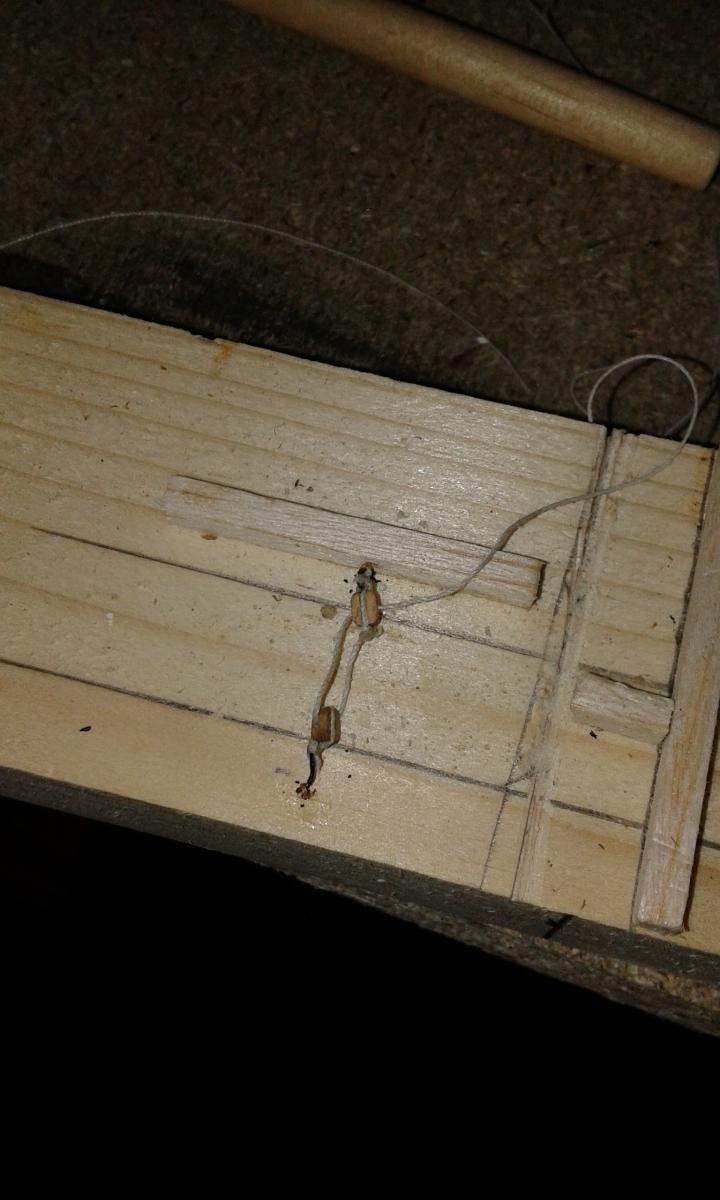
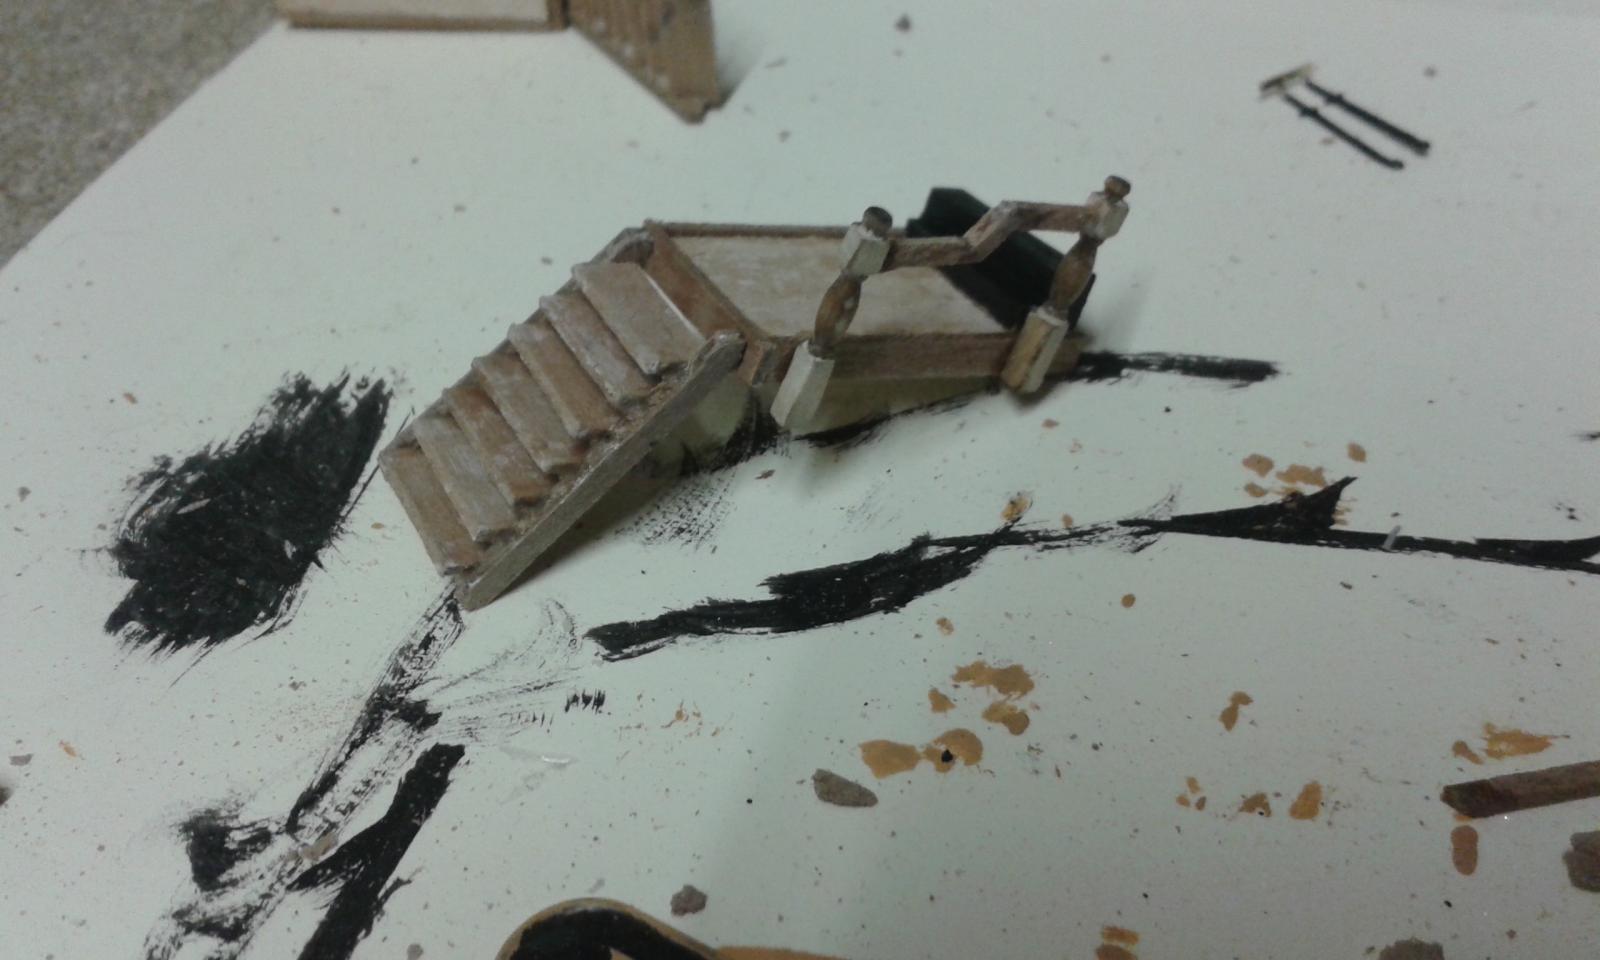
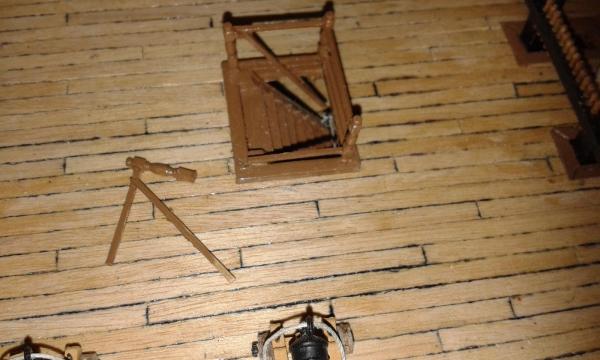
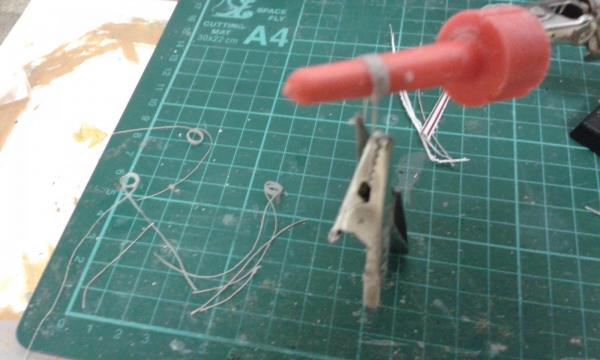
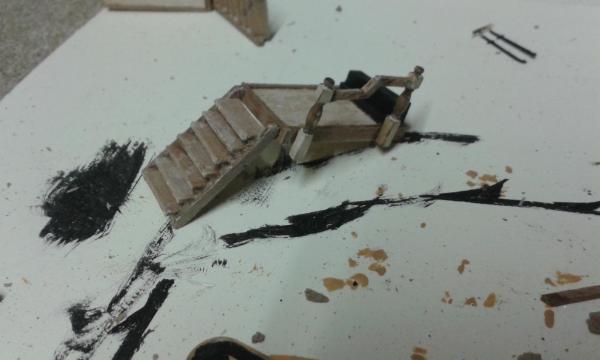
Poop ladder assembly has now been completed. I have dry fitted in place to show the effect. Once the rigging of the quarterdeck cannons is complete will I glue the poop deck ladder assemblies in place. The breach rope rigging of the quarterdeck cannon has now been completed and I'm now working on the other cannon rigging. Managed to damage the main compainionway ladder assembly (again) whilst fiiting the breach rope eyelets. With the first rigging assembly I did include an integral rope coil, but I think I will simply add preformed coils as this seems to be much easier to manufacture and the coils can be positioned to look like part of the actual rigging without distracting from the build. I used a simple method to make the rope coils, based on advise provided by Jerry and Shipyard Sid, and with reference to Gil's rope coild method. I coated the thread with a dulute PVA solution and then wrapped it around a plastic tube, using weights to keep the lines straight. After waiting for approx 5 minutes I removed the coil from the tube and put to one side to dry. Drying time should be 24 to 48 hours whilst I continue with making the rigging block assemblies. I made a little jig so I can preset the width between the rigging blocks before final installation.


-
Both you and Shipyard Sid both like to rework the pointy thing, fingers crossed you will keep it in tact this time around.
-
Good to see you still have a full compliment of fingers. The rail does does look good. Have a great weekend.
-
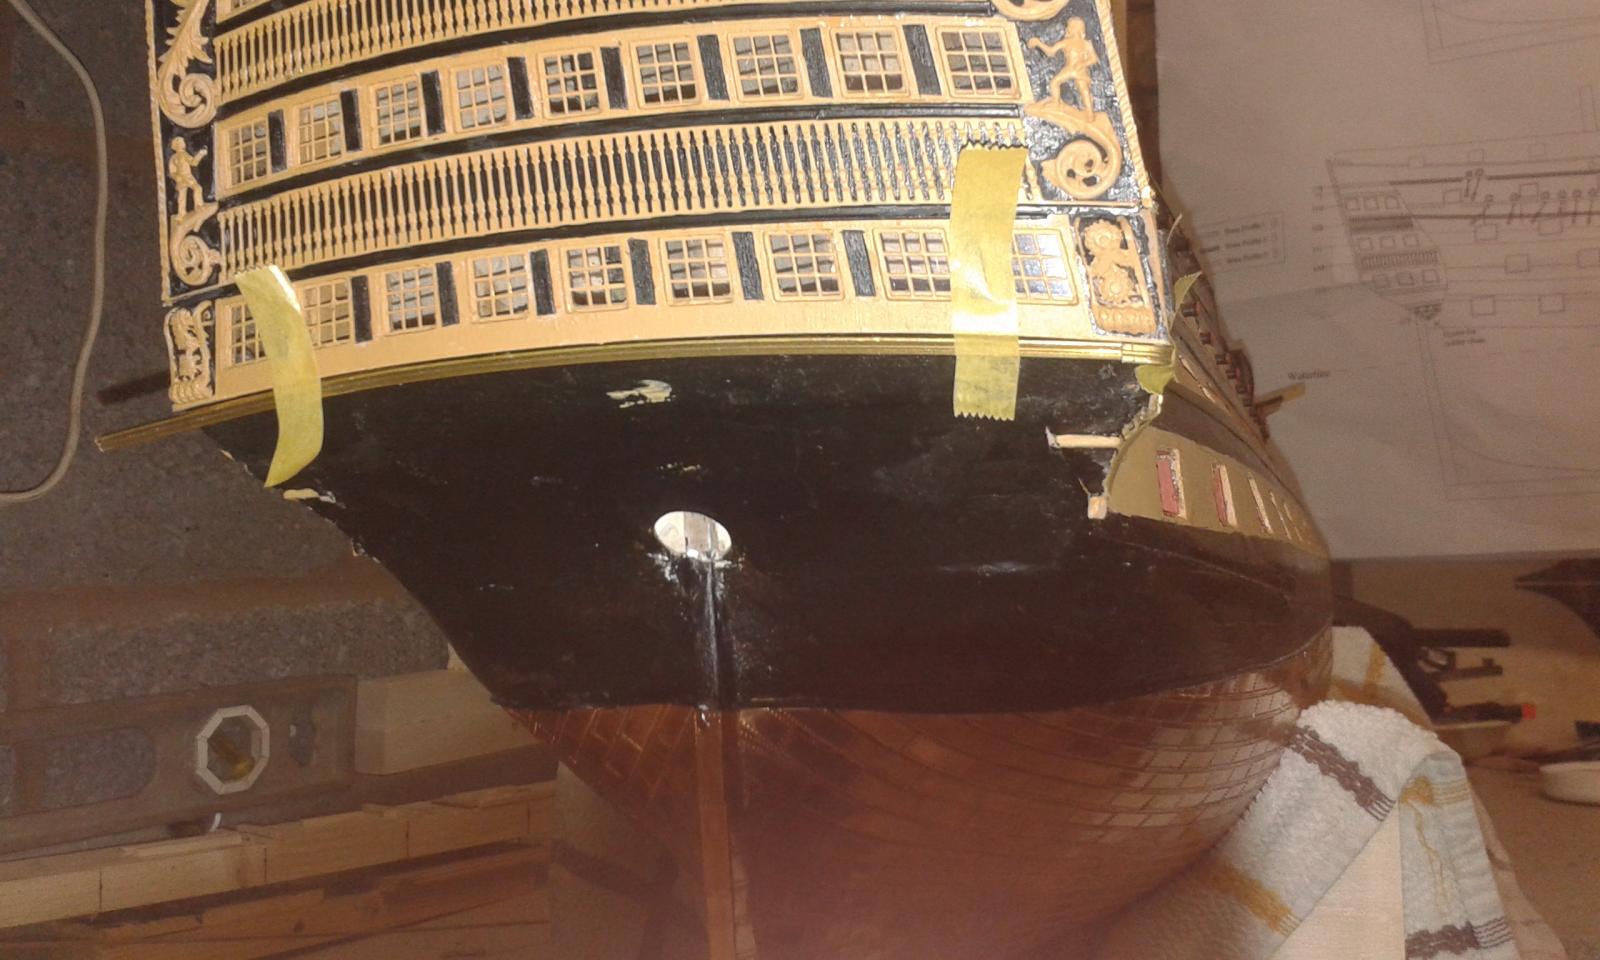
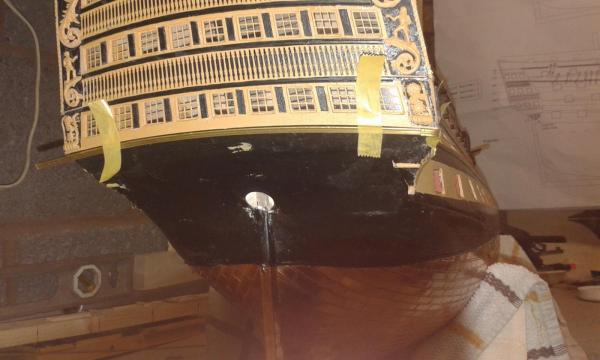
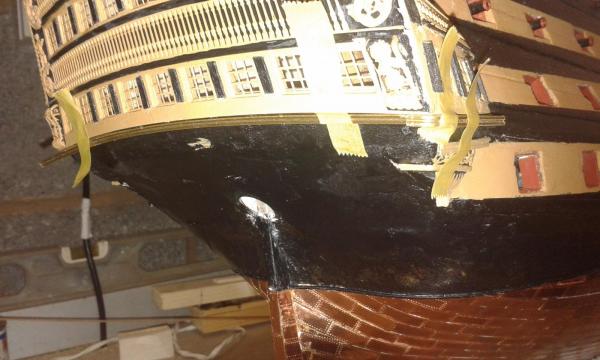
Good morning ship mates, brief status update. Poop ladder assembly progressing very well, one complete, the second one just requires the wooden rail adding. I was pondering (again) the lower two brass profiles fitted to quater galleries and stern. Initially I was working with a mitred joint, but had a concern with ensuring everything would line up. I then thought I might be able to make one piece with 90 degree bends. Following some discussion and advice provided by Jerry (Thanks again Jerry) I moved back toward fitting three pieces with 90 degree bends on the quater gallery sections. I think this is the way I will go, the pictures below show the trial fitting. (
-
Good morning David You certainly have a think against the point thing, but you are a master repairer, so I'm sure it will all be OK. The build is looking very good, great work as always.
-
Looking good Jerry, there are always some parts of the build which become a chore, as you will no doubt be aware from your Victory Build. But the end results does justify the time and effort taken to complete each task.
-
More work on the quarter galleries tonight. Starboard side completed. Port side only requires the lower two brass profiles to be fitted and black inserts between windows. Will be glad when this task is complete. When fitting the quarter gallery profiles I did fit the stern brass profiles (held with tape) to try to get them correctly positioned. The joints has been mitred in readiness and I have plenty of filler available to hide any bad joints. Work also progressing well on the two poop deck ladder assemblies. Ladders have been assemblied. assemblied. Steps and planking fitted to the ladder platform.